
:max_bytes(150000):strip_icc():format(webp)/ps6-concept-trailer-64aac5b7323041ad93d7535eccf7df40.png)
New 8 Tips to Apply Cinematic Color Grading to Your Videos
8 Tips to Apply Cinematic Color Grading to Your Videos
Create High-Quality Video - Wondershare Filmora
An easy and powerful YouTube video editor
Numerous video and audio effects to choose from
Detailed tutorials are provided by the official channel
After a successful video shoot, video editing tends to wrap up the video production process. However, a video cannot be enlivened by using simple video editing tools, i.e., cut, crop, and trim, but rather tools such as cinematic color grading. Usually, directors want their video to evoke their intended ambiance and appear more realistic – This can only be achieved through cinematic color grading.
Color grading is the alteration and enhancement of color in a video, motion picture, or still image. Color grading is an essential tool for videographers since it enables them to enhance the mood or tone. Stick to this article and learn about the eight tips to apply cinematic color grading to your video.
In this article
02 8 Tips to Apply Cinematic Color Grading to Your Video
Don’t Make These Mistakes
Even though to err is human, there are some mistakes that colorists and video editors need to avoid at all costs. It is not only because they will make them look amateurish but also undermines the message and impact of the video.
Some people assume color grading is as simple as adding filters to their Instagram photos which they are absolutely wrong. Color grading is a long and frustrating process, and it only requires “persons with a thick skin.”
Some mistakes are not only committed by amateurs alone but also professional colorists who are in a rush to complete their projects on due time. Usually, these mistakes degrade the quality output. Some of the mistakes that one needs not make include:
1. Using a Poorly Calibrated Monitor
Almost every videographer and colorist’s goal is to design footages that distinctively display their primary colors and decipher the intended message. And this can only be achieved using a properly calibrated monitor.
Before working on a project, you ought to crosscheck your monitor calibration. Most people assume that the calibration is accurate since they possess a new, out-of-the-box monitor. It is utterly wrong since retailer shops usually adjust the monitor settings to overblown saturation and contrast to attract customers.
Furthermore, if you opt to edit your videos without adjusting your monitor calibration, you will have a poor footage.
2. Poor Prepping of the Video Footage
One major mistake that videographers often make is not prepping their video correctly. A poorly prepped footage is one that has a bad color space conversion. Usually, the outcome result of poorly prepped footage is an imbalanced image.
Prepping footage is not as easy as an apple pie. Besides, most videographers tend to follow a shortcut by starting messing with the gains and individual nodes, forgetting that a shortcut is often a wrong cut.
The best way of prepping a video is to start by making separate nodes and labeling them differently.
3. Imbalancing the Shadow
Have you ever seen video footage with partially opaque shadows? And when you look keenly, you see tinted greens and reds. Usually, this is a result of an imbalanced shadow.
This mistake is not only carried out by beginner videographers but also professionals who are always in a hurry to complete a project. When you look at your scope, you see the shadows are lifted or down in other scenarios – This is also a result of shadow imbalance.
4. Overusing LUTs
A mistake that beginner editors often make is overusing LUTs. Footages with overly used LUTs often appear to be dull. A thing that videographers need to observe when using LUTs is consistency.
When using LUTs, you need to ensure that your project has similar saturation, colors, and contrast throughout your video project. Moreover, it would be best to choose your LUTs based on the film color palette and your story.
5. Having Limited break
Having enough break enables one’s eyes to recalibrate. As a colorist, your eyes are often considered the main asset. Sitting for long periods in your workstation and staring for long hours at your monitor may cause one to add more saturation and contrast, thus making the video dull. Therefore the best remedy is to take a break from your monitor.
Besides, coming from a break enables one to have another different perspective about the color grading of the project.
8 Tips to Apply Cinematic Color Grading to Your Video
When it comes to creating cinematic looks in video footage, the camera type is usually non-essential. What matters is that you capture quality videos with the right angles then leave the rest to color grading.
For a video clip to look more cinematic, a couple of elements are put together. Here, we will look at those elements and create stunning videos.
1. Use Lumetri Color to adjust brightness, contrast, and saturation
The Lumeri color is an essential color grading functionality in most premiere software, including Wondershare Filmora, Adobe After Effects, and Davinci Resolve 17. With this functionality tool, you can carry out a wide range of customizable settings such as hue, saturation, contrasts, brightness, and tone.
The lumetri panel contains a histogram, vectorscope, parade scope, and waveform monitor. In your lumetri panel, you can measure the brightness and tonal values using a histogram, the light intensity with a waveform monitor, saturation and hue using vectorscope, and color channel using parade scope.
Adjusting the brightness, contrast, hue, saturation, and tone to moderate levels will give your video clip that cinematic look.

2. Use Cosmo functionality to adjust skin tones
Due to the light effect, shots taken during the day will have inconsistent color matches, especially skin tone. In the post-production process, one needs to make uniformity in skin tone and the clip. To rectify this, you need to involve a professional color grading functionality, Cosmo.
With cosmo, you can adjust the skin color, squeeze the skin, and soften the skin. Generally, Cosmo makes people in video clips look their best.

3. Use Highlights and Shadows adjustment
A clip will look more cinematic when the shadows and highlights are brought out as separate entities. The shadows become more vivid when adjusted to either teal, purple or blue. You can go a mile and adjust the highlights to become crystal clear by making the footage become yellow, red, or orange.
When carrying out color grading, you need to know the various video demands, such as the horror clips demand more of the dark shadow.

4. Use Vectorscope to get the accurate adjustment
Naked eyes cannot effectively see all the errors in a video project, which is the essence of having a vectorscope. A vectorscope provides all the quantitative information about a video image – This lessens work for video editors.
Vectorscope provides extensive details, such as how intense a given color is – This will help you make necessary adjustments to your footage.

5. Use the black and white functionality to change the opacity
Even though you can change your footage to black and white using the hue and saturation functionality, the black and white tool gives you more control.
This functionality feature can make your footage blend with the soft light part. Besides, it is best to first lower the contrast of your image or video to black and white to be able to highlight the unclear parts.

6. Use levels to unveil the whites, blacks, and mids of an image
Levels is a functionality feature that displays the blacks, whites, and mids of footage. With this functionality, you can make the highlight parts lighter and the shadows appear darker, which is essential in making cinematic videos.
In the levels histogram, the left slider defines the darkest part, the right defines the brightest part, and the top defines distributions.
In software such as Adobe After Effects, you can set this functionality to automatic or customize it based on your preference.

7. Use Vibrance to control other levels of saturation
The saturation of video footage or a clip can be regulated using vibrance functionality. With vibrance, you can alter the saturation levels of your clip while simultaneously minimizing clippings for the colors to approach complete saturation.
When you want to use this functionality in After Effects, you drag and drop it right on top of your footage – The exact part you want to apply it.

8. Use a Vignette to fade edges
To increase the point of focus, you need to fade your edges. In color grading, you can only fade your edges with a vignette.
This functionality allows you to center images or certain video parts and make the edges unclear. Your emphasis will be more on the central region.

Bottom line
● Color grading is not a piece of cake. Besides, you should not use it as an excuse for making simple mistakes such as the ones highlighted above. You need to pay close attention when color grading your films, and you will have your video project mapping out its intended meaning.
● Moreover, you need not be a pro to carry out cinematic color grading. You need to follow the above eight tips altogether to apply color grading to your video. You will create stunning video files that leave your viewers’ eyes gorged out.
After a successful video shoot, video editing tends to wrap up the video production process. However, a video cannot be enlivened by using simple video editing tools, i.e., cut, crop, and trim, but rather tools such as cinematic color grading. Usually, directors want their video to evoke their intended ambiance and appear more realistic – This can only be achieved through cinematic color grading.
Color grading is the alteration and enhancement of color in a video, motion picture, or still image. Color grading is an essential tool for videographers since it enables them to enhance the mood or tone. Stick to this article and learn about the eight tips to apply cinematic color grading to your video.
In this article
02 8 Tips to Apply Cinematic Color Grading to Your Video
Don’t Make These Mistakes
Even though to err is human, there are some mistakes that colorists and video editors need to avoid at all costs. It is not only because they will make them look amateurish but also undermines the message and impact of the video.
Some people assume color grading is as simple as adding filters to their Instagram photos which they are absolutely wrong. Color grading is a long and frustrating process, and it only requires “persons with a thick skin.”
Some mistakes are not only committed by amateurs alone but also professional colorists who are in a rush to complete their projects on due time. Usually, these mistakes degrade the quality output. Some of the mistakes that one needs not make include:
1. Using a Poorly Calibrated Monitor
Almost every videographer and colorist’s goal is to design footages that distinctively display their primary colors and decipher the intended message. And this can only be achieved using a properly calibrated monitor.
Before working on a project, you ought to crosscheck your monitor calibration. Most people assume that the calibration is accurate since they possess a new, out-of-the-box monitor. It is utterly wrong since retailer shops usually adjust the monitor settings to overblown saturation and contrast to attract customers.
Furthermore, if you opt to edit your videos without adjusting your monitor calibration, you will have a poor footage.
2. Poor Prepping of the Video Footage
One major mistake that videographers often make is not prepping their video correctly. A poorly prepped footage is one that has a bad color space conversion. Usually, the outcome result of poorly prepped footage is an imbalanced image.
Prepping footage is not as easy as an apple pie. Besides, most videographers tend to follow a shortcut by starting messing with the gains and individual nodes, forgetting that a shortcut is often a wrong cut.
The best way of prepping a video is to start by making separate nodes and labeling them differently.
3. Imbalancing the Shadow
Have you ever seen video footage with partially opaque shadows? And when you look keenly, you see tinted greens and reds. Usually, this is a result of an imbalanced shadow.
This mistake is not only carried out by beginner videographers but also professionals who are always in a hurry to complete a project. When you look at your scope, you see the shadows are lifted or down in other scenarios – This is also a result of shadow imbalance.
4. Overusing LUTs
A mistake that beginner editors often make is overusing LUTs. Footages with overly used LUTs often appear to be dull. A thing that videographers need to observe when using LUTs is consistency.
When using LUTs, you need to ensure that your project has similar saturation, colors, and contrast throughout your video project. Moreover, it would be best to choose your LUTs based on the film color palette and your story.
5. Having Limited break
Having enough break enables one’s eyes to recalibrate. As a colorist, your eyes are often considered the main asset. Sitting for long periods in your workstation and staring for long hours at your monitor may cause one to add more saturation and contrast, thus making the video dull. Therefore the best remedy is to take a break from your monitor.
Besides, coming from a break enables one to have another different perspective about the color grading of the project.
8 Tips to Apply Cinematic Color Grading to Your Video
When it comes to creating cinematic looks in video footage, the camera type is usually non-essential. What matters is that you capture quality videos with the right angles then leave the rest to color grading.
For a video clip to look more cinematic, a couple of elements are put together. Here, we will look at those elements and create stunning videos.
1. Use Lumetri Color to adjust brightness, contrast, and saturation
The Lumeri color is an essential color grading functionality in most premiere software, including Wondershare Filmora, Adobe After Effects, and Davinci Resolve 17. With this functionality tool, you can carry out a wide range of customizable settings such as hue, saturation, contrasts, brightness, and tone.
The lumetri panel contains a histogram, vectorscope, parade scope, and waveform monitor. In your lumetri panel, you can measure the brightness and tonal values using a histogram, the light intensity with a waveform monitor, saturation and hue using vectorscope, and color channel using parade scope.
Adjusting the brightness, contrast, hue, saturation, and tone to moderate levels will give your video clip that cinematic look.
2. Use Cosmo functionality to adjust skin tones
Due to the light effect, shots taken during the day will have inconsistent color matches, especially skin tone. In the post-production process, one needs to make uniformity in skin tone and the clip. To rectify this, you need to involve a professional color grading functionality, Cosmo.
With cosmo, you can adjust the skin color, squeeze the skin, and soften the skin. Generally, Cosmo makes people in video clips look their best.
3. Use Highlights and Shadows adjustment
A clip will look more cinematic when the shadows and highlights are brought out as separate entities. The shadows become more vivid when adjusted to either teal, purple or blue. You can go a mile and adjust the highlights to become crystal clear by making the footage become yellow, red, or orange.
When carrying out color grading, you need to know the various video demands, such as the horror clips demand more of the dark shadow.
4. Use Vectorscope to get the accurate adjustment
Naked eyes cannot effectively see all the errors in a video project, which is the essence of having a vectorscope. A vectorscope provides all the quantitative information about a video image – This lessens work for video editors.
Vectorscope provides extensive details, such as how intense a given color is – This will help you make necessary adjustments to your footage.
5. Use the black and white functionality to change the opacity
Even though you can change your footage to black and white using the hue and saturation functionality, the black and white tool gives you more control.
This functionality feature can make your footage blend with the soft light part. Besides, it is best to first lower the contrast of your image or video to black and white to be able to highlight the unclear parts.
6. Use levels to unveil the whites, blacks, and mids of an image
Levels is a functionality feature that displays the blacks, whites, and mids of footage. With this functionality, you can make the highlight parts lighter and the shadows appear darker, which is essential in making cinematic videos.
In the levels histogram, the left slider defines the darkest part, the right defines the brightest part, and the top defines distributions.
In software such as Adobe After Effects, you can set this functionality to automatic or customize it based on your preference.
7. Use Vibrance to control other levels of saturation
The saturation of video footage or a clip can be regulated using vibrance functionality. With vibrance, you can alter the saturation levels of your clip while simultaneously minimizing clippings for the colors to approach complete saturation.
When you want to use this functionality in After Effects, you drag and drop it right on top of your footage – The exact part you want to apply it.
8. Use a Vignette to fade edges
To increase the point of focus, you need to fade your edges. In color grading, you can only fade your edges with a vignette.
This functionality allows you to center images or certain video parts and make the edges unclear. Your emphasis will be more on the central region.
Bottom line
● Color grading is not a piece of cake. Besides, you should not use it as an excuse for making simple mistakes such as the ones highlighted above. You need to pay close attention when color grading your films, and you will have your video project mapping out its intended meaning.
● Moreover, you need not be a pro to carry out cinematic color grading. You need to follow the above eight tips altogether to apply color grading to your video. You will create stunning video files that leave your viewers’ eyes gorged out.
15 Must-Use Gifs Editors
15 Must-Use Gifs Editors in 2024
An easy yet powerful editor
Numerous effects to choose from
Detailed tutorials provided by the official channel
Several websites and companies use the graphics interchange format that is the GIF. It can be seen to be used by a wide number of people on the internet and its format is supported by all platforms. The common goal of all the users can be satisfied.
Are you looking to create and edit gifs online or on your laptop but cannot find a suitable way out?
Finding the best and most user friendly GIF maker is not very hard, especially considering that free gif editor software is offered by so many providers. But if you’re only starting your journey with apps to make GIFs, it can be a difficult choice.
In this article
01 [How to Make GIF Interesting?](#Part 1)
02 [Top 5 Editors for Windows](#Part 2)
03 [Top 5 Editors for iPhone/Android](#Part 3)
04 [Top 5 Editors for Animated GIF Editing](#Part 4)
Part 1 How to Make GIF Interesting?
There are several ways by which a GIF can be made interesting. You can use colorful graphics and drop duplicate frames. Using fewer colors lets you make longer and more involved gifs.
Part 2 Top 5 Editors for Windows
Below are the top 5 editors which will help you to form GIFs for Windows: -
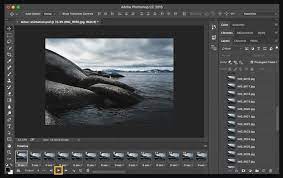
01Adobe Photoshop
Adobe Photoshop could be a useful device for making videos, image redaction, and GIF editing. This GIF code for Windows can allow you to import a GIF file so begin with the modification process.
Therefore, GIF editing is a breeze as you’ll alter the effects, modification the frame animation within the Timeline section, and do plenty a lot with this tool. You’ll simply utilize the free trial version to urge accustomed to the tool initial and then opt for the premium version to try to a lot more.
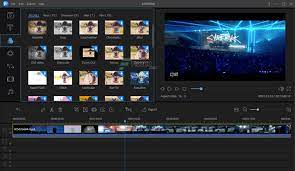
02EaseUS Video Editor
In the context of GIF makers, EaseUS Video Editor can also be said as one of the best. Free templates of texts, filters, elements, overlays, transitions, and music are available here which its users create GIF images with easily. You can also create lively and fully animated images, convert MP4 to GIFs and share it on YouTube, or other social media platforms.
The capabilities of this animated GIF maker for Windows are not restrained to this alone, as it can be used to edit all kinds of images, audio, and videos.
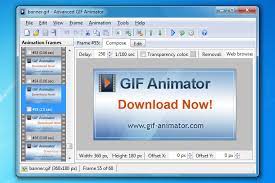
03GIF Animator
GIF animator editor is one of the first-rate GIF makers and is an awesome device for you if you desire to create GIF images, banners, buttons, and GIF videos. The device is very convenient to use and is a favorite of animators and designers.
The measurement of the photo can be modified and alongside that, it is feasible to control the frames, hastily cross texts, and enhance. Corrections to the movies can be brought and the built-in photograph editor can be used to rectify photographs and pictures, you can draw on them and you can convert movies to GIFs by the usage of the fragmented section of the video files.
04**Wondershare Filmora Video Editor **
If you are searching for nice animated GIF makers for Windows computers, then Wondershare Filmora’s animated movies and GIF editor device may want to be a brilliant choice. That’s due to the fact with this GIF maker Windows device lets you add a video, convert it to the GIF structure and then edit it later with its super features.
The interactive UI helps customers manner greater than one hundred fifty file codecs easily. With this device, you can crop, pace up a video, alter the body size, and caption it. Additionally, you add texts, add animation consequences to the images, and alter the pictures and movies in a few steps.

Wondershare Filmora - Best Video Editor for Mac/Windows
5,481,435 people have downloaded it.
Build unique custom animations without breaking a sweat.
Focus on creating epic stories and leave the details to Filmora’s auto features.
Start a creative adventure with drag & drop effects and endless possibilities.
Filmora simplifies advanced features to save you time and effort.
Filmora cuts out repetition so you can move on to your next creative breakthrough.
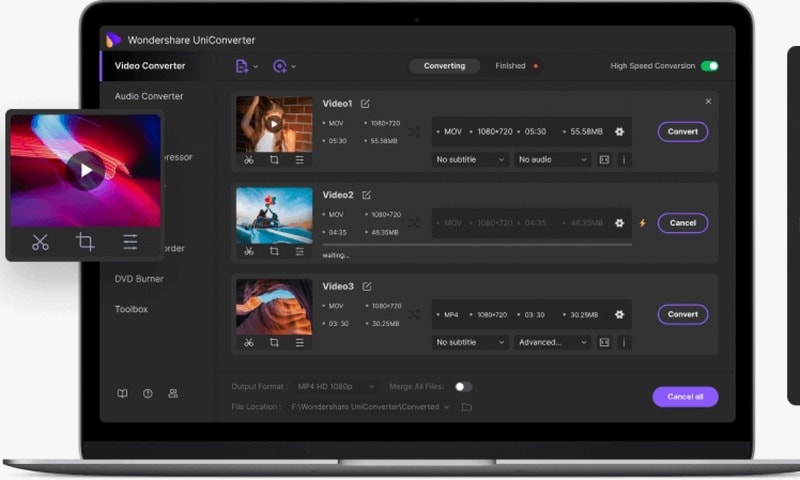
05Wondershare UniConverter
Wondershare UniConverter is one of the fine image, audio, and video editor and converter out there, and ranked the excellent GIF maker here. This GIF editor app is easy for customers and will furnish a pleasant platform for novices to operate their tasks. And when performed to create and edit GIF files, a person can export the GIF archives to both Android or iPhone barring having to use iTunes.
Part 3 Top 5 Editors for iPhone/Android
01PixelStudio
Pixel Studio is an animation app for pixel artwork fans. You can draw your little creations with pixel art. It additionally comes with a textual content tool, aid for matters like Samsung S-Pen, and it auto-saves so you don’t lose work. You can export your creations to GIF as nicely and that makes Pixel Studio one of the quality apps for customized GIFs. It’s normally an artwork app so meme lords may additionally want to put in a little greater effort than usual, however, the consequences are normally well worth it.
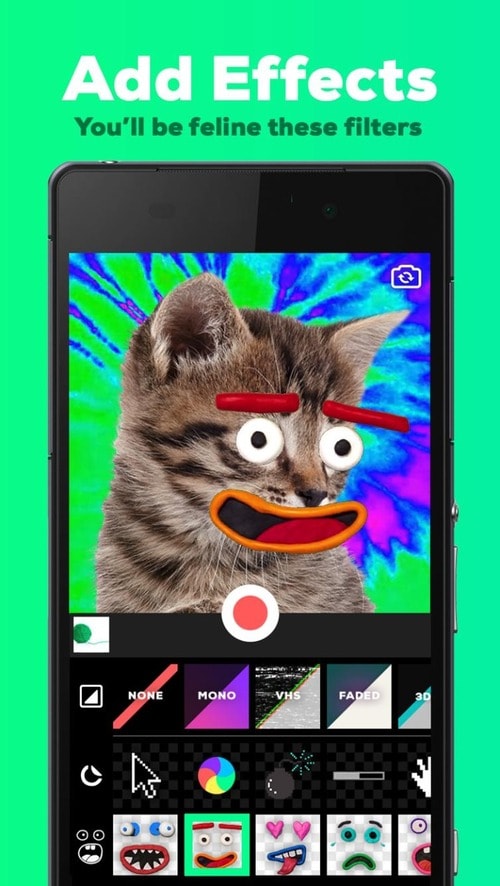
02Giphy Cam
Giphy Cam is one of the more recent gif editing apps. The digicam data is a brief phase of video. You can alter that video with lots of filters, different effects, stickers, text, and more. It additionally has a five-shot burst mode alongside its video mode. This is likely the excellent GIF/camera app hybrid. It doesn’t have any digital camera features; however, it does GIFs higher than the others by way of a large margin. It’s free with no in-app purchases.
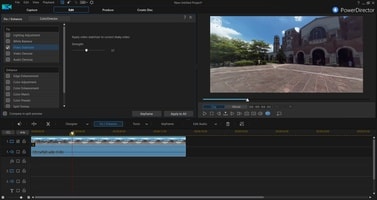
03PowerDirector
PowerDirector is one of many videos modifying apps with GIF support. This one simply takes place to be higher than most of the different ones. It’s a video editor app. Thus, it’ll have comparable features. However, two of the export codecs encompass GIF nonetheless pix and animated GIFs. This will work first-class for turning a video into a shorter GIF. The app is free to download and play with. You may additionally want to buy extra aspects by using in-app purchases.
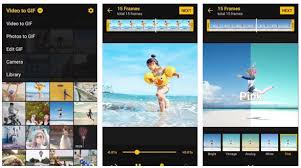
04ImgPlay – GIF Maker
ImgPlay is a popular GIF editing app that is available for Android and iOS. You have the option of using an existing video or shooting one using your phone’s camera. In GIFs, you can apply 30 effects, crop a portion of your choice, and modify the frame rate.
05Motion Stills
Motion Stills is a Google app that allows you to record short films and turn them into looping GIFs. You can use the app to take a short 3s clip with a single tap or utilize the Fast Forward feature to condense an existing video into a short one. To make yips GIFs even better, you may add motion text and emoticons. After that, save it as a GIF and send it to your friends.
Part 4 Top 5 Editors for Animated GIF Editing
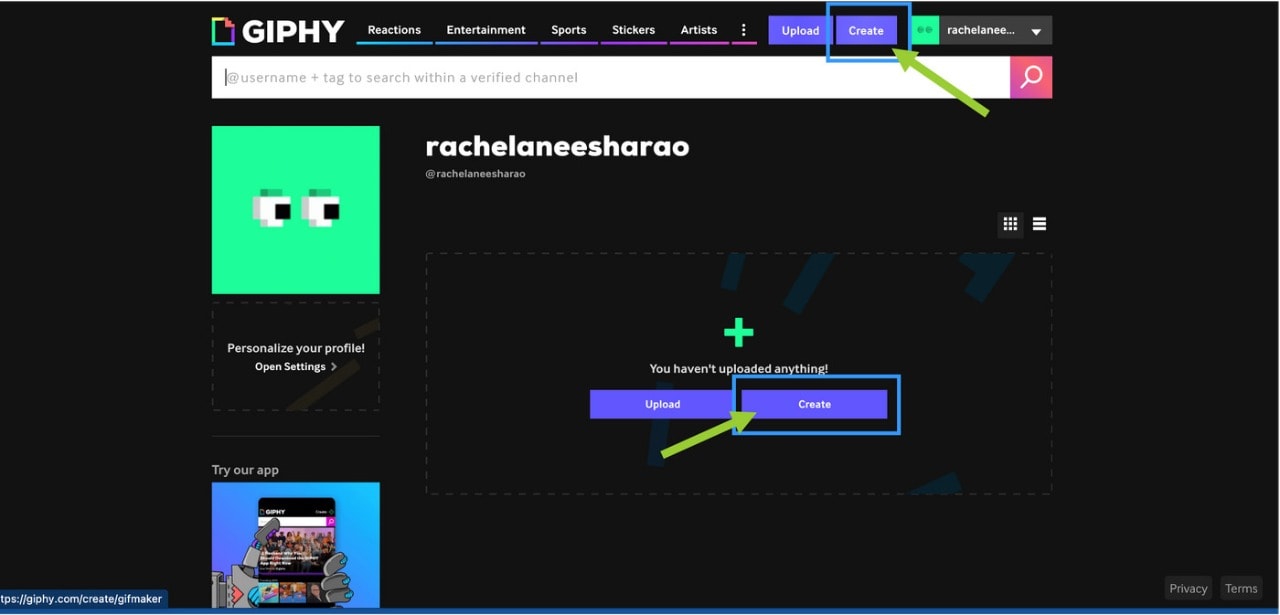
01Giphy
GIPHY is a designing tool that helps customers to create extraordinary GIFs, stickers, and backdrops. You can edit your plan with filters, captions, stickers, and different plan elements. The popular codecs for GIF uploads are JPG, PNG, GIF, MP4, or MOV, whilst the conventional file codecs to convert to stickers are JPG or PNG.
GIPHY permits you to paste URLs from specific sources such as Vimeo, YouTube, GIPHY, and others. The animated GIF maker software program makes it convenient for customers to edit and organize the uploaded archives in the favored order.
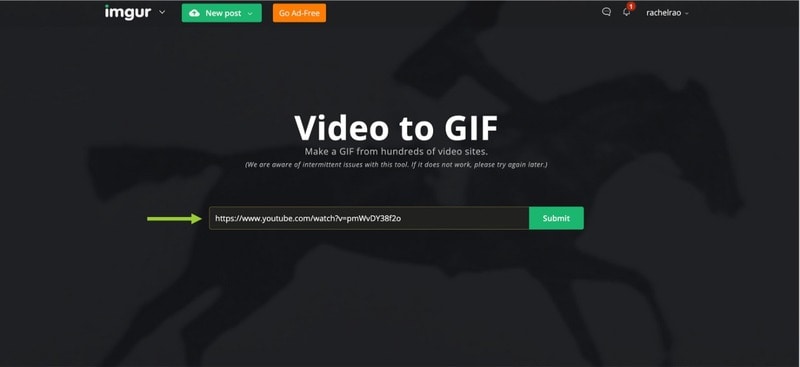
02Imgur
It’s a website that makes it simple to make GIFs. Simply paste the video URL into the web app and wait for it to process. After that, all you must do now is set the start time and duration of your GIF.
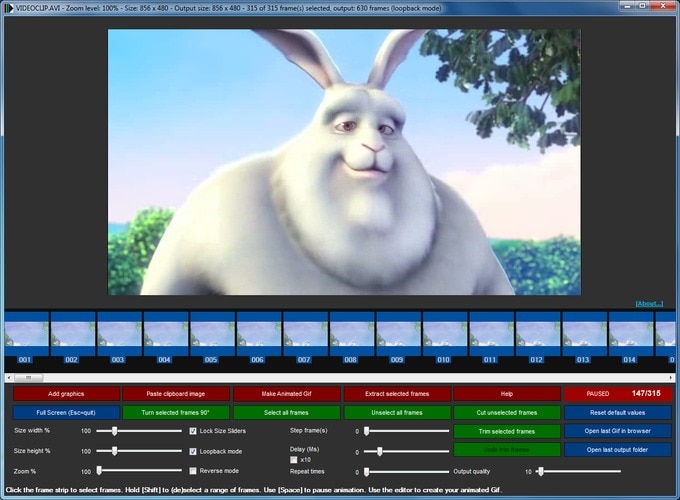
03KickMyGraphics
The utility comes with a humble person interface and it approves you to create animated GIFs from neighborhood images. In addition, you can additionally paste snapshots from your clipboard at once to the application. The utility additionally helps video files; however, you want to convert the video earlier than you can edit it. The utility affords a stay preview so you can see how your animation appears at any time. You can additionally see all handy frames and dispose of useless frames with ease.
As for editing, you can’t add your textual content or alter the brightness of your frames, however, you can trade their width, peak, and zoom level. You can additionally allow Loopback or Reverse mode and set delay, step frames, and a variety of repeats. You can additionally configure output first-class right from the application.
04Instagiffer
Instagiffer is some other easy software that lets you create animated GIFs on your PC. This utility affords a humble consumer interface; however, it makes up for it with an extensive variety of features. The software approves you to convert nearby movies to GIFs, however, you can additionally paste a YouTube URL and convert an online video to GIF with ease. According to the developer, the software additionally works with different video web hosting websites.
05GIMP
The software is free, so you can download and use it except for any restrictions. GIMP is best for picture designers and it comes with all preferences that an image editor needs. You can without problems edit your images, exchange their color, hue, saturation, or brightness, and add exceptional outcomes to them.
In addition, you can create special creations thanks to the built-in layer system. It’s worth citing that the software additionally helps programming algorithms so you can effortlessly edit your photos with the use of scripts.

● Key Takeaways from This Episode →
● If you are typically worried about how you can be able to come up with fascinating GIFs, you ought to hold in thought that you don’t have to create them from scratch.
● You can be capable to advance inspiring GIFs from current movies and photos eight after GIF editor software program free download.
● Hopefully, you are now capable to pick out a perfect GIF creator to use for your modifying tasks.
Several websites and companies use the graphics interchange format that is the GIF. It can be seen to be used by a wide number of people on the internet and its format is supported by all platforms. The common goal of all the users can be satisfied.
Are you looking to create and edit gifs online or on your laptop but cannot find a suitable way out?
Finding the best and most user friendly GIF maker is not very hard, especially considering that free gif editor software is offered by so many providers. But if you’re only starting your journey with apps to make GIFs, it can be a difficult choice.
In this article
01 [How to Make GIF Interesting?](#Part 1)
02 [Top 5 Editors for Windows](#Part 2)
03 [Top 5 Editors for iPhone/Android](#Part 3)
04 [Top 5 Editors for Animated GIF Editing](#Part 4)
Part 1 How to Make GIF Interesting?
There are several ways by which a GIF can be made interesting. You can use colorful graphics and drop duplicate frames. Using fewer colors lets you make longer and more involved gifs.
Part 2 Top 5 Editors for Windows
Below are the top 5 editors which will help you to form GIFs for Windows: -
01Adobe Photoshop
Adobe Photoshop could be a useful device for making videos, image redaction, and GIF editing. This GIF code for Windows can allow you to import a GIF file so begin with the modification process.
Therefore, GIF editing is a breeze as you’ll alter the effects, modification the frame animation within the Timeline section, and do plenty a lot with this tool. You’ll simply utilize the free trial version to urge accustomed to the tool initial and then opt for the premium version to try to a lot more.
02EaseUS Video Editor
In the context of GIF makers, EaseUS Video Editor can also be said as one of the best. Free templates of texts, filters, elements, overlays, transitions, and music are available here which its users create GIF images with easily. You can also create lively and fully animated images, convert MP4 to GIFs and share it on YouTube, or other social media platforms.
The capabilities of this animated GIF maker for Windows are not restrained to this alone, as it can be used to edit all kinds of images, audio, and videos.
03GIF Animator
GIF animator editor is one of the first-rate GIF makers and is an awesome device for you if you desire to create GIF images, banners, buttons, and GIF videos. The device is very convenient to use and is a favorite of animators and designers.
The measurement of the photo can be modified and alongside that, it is feasible to control the frames, hastily cross texts, and enhance. Corrections to the movies can be brought and the built-in photograph editor can be used to rectify photographs and pictures, you can draw on them and you can convert movies to GIFs by the usage of the fragmented section of the video files.
04**Wondershare Filmora Video Editor **
If you are searching for nice animated GIF makers for Windows computers, then Wondershare Filmora’s animated movies and GIF editor device may want to be a brilliant choice. That’s due to the fact with this GIF maker Windows device lets you add a video, convert it to the GIF structure and then edit it later with its super features.
The interactive UI helps customers manner greater than one hundred fifty file codecs easily. With this device, you can crop, pace up a video, alter the body size, and caption it. Additionally, you add texts, add animation consequences to the images, and alter the pictures and movies in a few steps.
Wondershare Filmora - Best Video Editor for Mac/Windows
5,481,435 people have downloaded it.
Build unique custom animations without breaking a sweat.
Focus on creating epic stories and leave the details to Filmora’s auto features.
Start a creative adventure with drag & drop effects and endless possibilities.
Filmora simplifies advanced features to save you time and effort.
Filmora cuts out repetition so you can move on to your next creative breakthrough.
05Wondershare UniConverter
Wondershare UniConverter is one of the fine image, audio, and video editor and converter out there, and ranked the excellent GIF maker here. This GIF editor app is easy for customers and will furnish a pleasant platform for novices to operate their tasks. And when performed to create and edit GIF files, a person can export the GIF archives to both Android or iPhone barring having to use iTunes.
Part 3 Top 5 Editors for iPhone/Android
01PixelStudio
Pixel Studio is an animation app for pixel artwork fans. You can draw your little creations with pixel art. It additionally comes with a textual content tool, aid for matters like Samsung S-Pen, and it auto-saves so you don’t lose work. You can export your creations to GIF as nicely and that makes Pixel Studio one of the quality apps for customized GIFs. It’s normally an artwork app so meme lords may additionally want to put in a little greater effort than usual, however, the consequences are normally well worth it.
02Giphy Cam
Giphy Cam is one of the more recent gif editing apps. The digicam data is a brief phase of video. You can alter that video with lots of filters, different effects, stickers, text, and more. It additionally has a five-shot burst mode alongside its video mode. This is likely the excellent GIF/camera app hybrid. It doesn’t have any digital camera features; however, it does GIFs higher than the others by way of a large margin. It’s free with no in-app purchases.
03PowerDirector
PowerDirector is one of many videos modifying apps with GIF support. This one simply takes place to be higher than most of the different ones. It’s a video editor app. Thus, it’ll have comparable features. However, two of the export codecs encompass GIF nonetheless pix and animated GIFs. This will work first-class for turning a video into a shorter GIF. The app is free to download and play with. You may additionally want to buy extra aspects by using in-app purchases.
04ImgPlay – GIF Maker
ImgPlay is a popular GIF editing app that is available for Android and iOS. You have the option of using an existing video or shooting one using your phone’s camera. In GIFs, you can apply 30 effects, crop a portion of your choice, and modify the frame rate.
05Motion Stills
Motion Stills is a Google app that allows you to record short films and turn them into looping GIFs. You can use the app to take a short 3s clip with a single tap or utilize the Fast Forward feature to condense an existing video into a short one. To make yips GIFs even better, you may add motion text and emoticons. After that, save it as a GIF and send it to your friends.
Part 4 Top 5 Editors for Animated GIF Editing
01Giphy
GIPHY is a designing tool that helps customers to create extraordinary GIFs, stickers, and backdrops. You can edit your plan with filters, captions, stickers, and different plan elements. The popular codecs for GIF uploads are JPG, PNG, GIF, MP4, or MOV, whilst the conventional file codecs to convert to stickers are JPG or PNG.
GIPHY permits you to paste URLs from specific sources such as Vimeo, YouTube, GIPHY, and others. The animated GIF maker software program makes it convenient for customers to edit and organize the uploaded archives in the favored order.
02Imgur
It’s a website that makes it simple to make GIFs. Simply paste the video URL into the web app and wait for it to process. After that, all you must do now is set the start time and duration of your GIF.
03KickMyGraphics
The utility comes with a humble person interface and it approves you to create animated GIFs from neighborhood images. In addition, you can additionally paste snapshots from your clipboard at once to the application. The utility additionally helps video files; however, you want to convert the video earlier than you can edit it. The utility affords a stay preview so you can see how your animation appears at any time. You can additionally see all handy frames and dispose of useless frames with ease.
As for editing, you can’t add your textual content or alter the brightness of your frames, however, you can trade their width, peak, and zoom level. You can additionally allow Loopback or Reverse mode and set delay, step frames, and a variety of repeats. You can additionally configure output first-class right from the application.
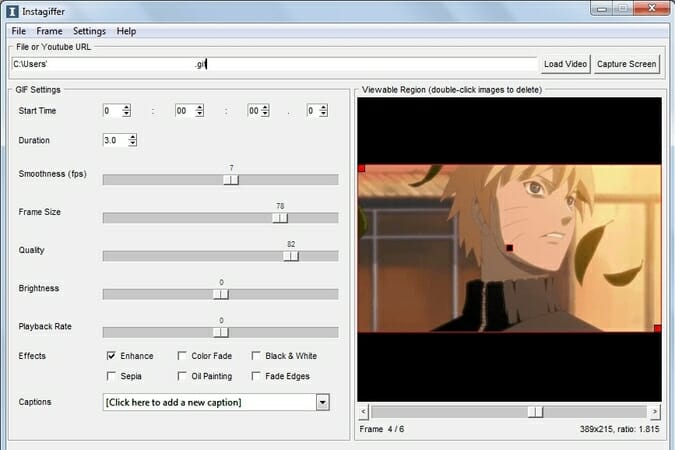
04Instagiffer
Instagiffer is some other easy software that lets you create animated GIFs on your PC. This utility affords a humble consumer interface; however, it makes up for it with an extensive variety of features. The software approves you to convert nearby movies to GIFs, however, you can additionally paste a YouTube URL and convert an online video to GIF with ease. According to the developer, the software additionally works with different video web hosting websites.
05GIMP
The software is free, so you can download and use it except for any restrictions. GIMP is best for picture designers and it comes with all preferences that an image editor needs. You can without problems edit your images, exchange their color, hue, saturation, or brightness, and add exceptional outcomes to them.
In addition, you can create special creations thanks to the built-in layer system. It’s worth citing that the software additionally helps programming algorithms so you can effortlessly edit your photos with the use of scripts.
● Key Takeaways from This Episode →
● If you are typically worried about how you can be able to come up with fascinating GIFs, you ought to hold in thought that you don’t have to create them from scratch.
● You can be capable to advance inspiring GIFs from current movies and photos eight after GIF editor software program free download.
● Hopefully, you are now capable to pick out a perfect GIF creator to use for your modifying tasks.
Several websites and companies use the graphics interchange format that is the GIF. It can be seen to be used by a wide number of people on the internet and its format is supported by all platforms. The common goal of all the users can be satisfied.
Are you looking to create and edit gifs online or on your laptop but cannot find a suitable way out?
Finding the best and most user friendly GIF maker is not very hard, especially considering that free gif editor software is offered by so many providers. But if you’re only starting your journey with apps to make GIFs, it can be a difficult choice.
In this article
01 [How to Make GIF Interesting?](#Part 1)
02 [Top 5 Editors for Windows](#Part 2)
03 [Top 5 Editors for iPhone/Android](#Part 3)
04 [Top 5 Editors for Animated GIF Editing](#Part 4)
Part 1 How to Make GIF Interesting?
There are several ways by which a GIF can be made interesting. You can use colorful graphics and drop duplicate frames. Using fewer colors lets you make longer and more involved gifs.
Part 2 Top 5 Editors for Windows
Below are the top 5 editors which will help you to form GIFs for Windows: -
01Adobe Photoshop
Adobe Photoshop could be a useful device for making videos, image redaction, and GIF editing. This GIF code for Windows can allow you to import a GIF file so begin with the modification process.
Therefore, GIF editing is a breeze as you’ll alter the effects, modification the frame animation within the Timeline section, and do plenty a lot with this tool. You’ll simply utilize the free trial version to urge accustomed to the tool initial and then opt for the premium version to try to a lot more.
02EaseUS Video Editor
In the context of GIF makers, EaseUS Video Editor can also be said as one of the best. Free templates of texts, filters, elements, overlays, transitions, and music are available here which its users create GIF images with easily. You can also create lively and fully animated images, convert MP4 to GIFs and share it on YouTube, or other social media platforms.
The capabilities of this animated GIF maker for Windows are not restrained to this alone, as it can be used to edit all kinds of images, audio, and videos.
03GIF Animator
GIF animator editor is one of the first-rate GIF makers and is an awesome device for you if you desire to create GIF images, banners, buttons, and GIF videos. The device is very convenient to use and is a favorite of animators and designers.
The measurement of the photo can be modified and alongside that, it is feasible to control the frames, hastily cross texts, and enhance. Corrections to the movies can be brought and the built-in photograph editor can be used to rectify photographs and pictures, you can draw on them and you can convert movies to GIFs by the usage of the fragmented section of the video files.
04**Wondershare Filmora Video Editor **
If you are searching for nice animated GIF makers for Windows computers, then Wondershare Filmora’s animated movies and GIF editor device may want to be a brilliant choice. That’s due to the fact with this GIF maker Windows device lets you add a video, convert it to the GIF structure and then edit it later with its super features.
The interactive UI helps customers manner greater than one hundred fifty file codecs easily. With this device, you can crop, pace up a video, alter the body size, and caption it. Additionally, you add texts, add animation consequences to the images, and alter the pictures and movies in a few steps.
Wondershare Filmora - Best Video Editor for Mac/Windows
5,481,435 people have downloaded it.
Build unique custom animations without breaking a sweat.
Focus on creating epic stories and leave the details to Filmora’s auto features.
Start a creative adventure with drag & drop effects and endless possibilities.
Filmora simplifies advanced features to save you time and effort.
Filmora cuts out repetition so you can move on to your next creative breakthrough.
05Wondershare UniConverter
Wondershare UniConverter is one of the fine image, audio, and video editor and converter out there, and ranked the excellent GIF maker here. This GIF editor app is easy for customers and will furnish a pleasant platform for novices to operate their tasks. And when performed to create and edit GIF files, a person can export the GIF archives to both Android or iPhone barring having to use iTunes.
Part 3 Top 5 Editors for iPhone/Android
01PixelStudio
Pixel Studio is an animation app for pixel artwork fans. You can draw your little creations with pixel art. It additionally comes with a textual content tool, aid for matters like Samsung S-Pen, and it auto-saves so you don’t lose work. You can export your creations to GIF as nicely and that makes Pixel Studio one of the quality apps for customized GIFs. It’s normally an artwork app so meme lords may additionally want to put in a little greater effort than usual, however, the consequences are normally well worth it.
02Giphy Cam
Giphy Cam is one of the more recent gif editing apps. The digicam data is a brief phase of video. You can alter that video with lots of filters, different effects, stickers, text, and more. It additionally has a five-shot burst mode alongside its video mode. This is likely the excellent GIF/camera app hybrid. It doesn’t have any digital camera features; however, it does GIFs higher than the others by way of a large margin. It’s free with no in-app purchases.
03PowerDirector
PowerDirector is one of many videos modifying apps with GIF support. This one simply takes place to be higher than most of the different ones. It’s a video editor app. Thus, it’ll have comparable features. However, two of the export codecs encompass GIF nonetheless pix and animated GIFs. This will work first-class for turning a video into a shorter GIF. The app is free to download and play with. You may additionally want to buy extra aspects by using in-app purchases.
04ImgPlay – GIF Maker
ImgPlay is a popular GIF editing app that is available for Android and iOS. You have the option of using an existing video or shooting one using your phone’s camera. In GIFs, you can apply 30 effects, crop a portion of your choice, and modify the frame rate.
05Motion Stills
Motion Stills is a Google app that allows you to record short films and turn them into looping GIFs. You can use the app to take a short 3s clip with a single tap or utilize the Fast Forward feature to condense an existing video into a short one. To make yips GIFs even better, you may add motion text and emoticons. After that, save it as a GIF and send it to your friends.
Part 4 Top 5 Editors for Animated GIF Editing
01Giphy
GIPHY is a designing tool that helps customers to create extraordinary GIFs, stickers, and backdrops. You can edit your plan with filters, captions, stickers, and different plan elements. The popular codecs for GIF uploads are JPG, PNG, GIF, MP4, or MOV, whilst the conventional file codecs to convert to stickers are JPG or PNG.
GIPHY permits you to paste URLs from specific sources such as Vimeo, YouTube, GIPHY, and others. The animated GIF maker software program makes it convenient for customers to edit and organize the uploaded archives in the favored order.
02Imgur
It’s a website that makes it simple to make GIFs. Simply paste the video URL into the web app and wait for it to process. After that, all you must do now is set the start time and duration of your GIF.
03KickMyGraphics
The utility comes with a humble person interface and it approves you to create animated GIFs from neighborhood images. In addition, you can additionally paste snapshots from your clipboard at once to the application. The utility additionally helps video files; however, you want to convert the video earlier than you can edit it. The utility affords a stay preview so you can see how your animation appears at any time. You can additionally see all handy frames and dispose of useless frames with ease.
As for editing, you can’t add your textual content or alter the brightness of your frames, however, you can trade their width, peak, and zoom level. You can additionally allow Loopback or Reverse mode and set delay, step frames, and a variety of repeats. You can additionally configure output first-class right from the application.
04Instagiffer
Instagiffer is some other easy software that lets you create animated GIFs on your PC. This utility affords a humble consumer interface; however, it makes up for it with an extensive variety of features. The software approves you to convert nearby movies to GIFs, however, you can additionally paste a YouTube URL and convert an online video to GIF with ease. According to the developer, the software additionally works with different video web hosting websites.
05GIMP
The software is free, so you can download and use it except for any restrictions. GIMP is best for picture designers and it comes with all preferences that an image editor needs. You can without problems edit your images, exchange their color, hue, saturation, or brightness, and add exceptional outcomes to them.
In addition, you can create special creations thanks to the built-in layer system. It’s worth citing that the software additionally helps programming algorithms so you can effortlessly edit your photos with the use of scripts.
● Key Takeaways from This Episode →
● If you are typically worried about how you can be able to come up with fascinating GIFs, you ought to hold in thought that you don’t have to create them from scratch.
● You can be capable to advance inspiring GIFs from current movies and photos eight after GIF editor software program free download.
● Hopefully, you are now capable to pick out a perfect GIF creator to use for your modifying tasks.
Best Online MPEG to GIF Converters
Powerful Video Editor - Wondershare Filmora
Provide abundant video effects - A creative video editor
Powerful color correction and grading
Detailed tutorials provided by the official channel
GIFs are known to be quite effective in displaying a video portrayal. Many people save special moments across GIFs to make sharing easy and simple. However, when you own different forms of video formats and are looking to convert them to a GIF, you may need a proper tool for its execution. In this article, we shall be working on converting MPEG to GIF without any difficulty.
To make sure that you successfully convert a MPEG to GIF, this article will introduce a set of offline and online converters for effective execution.
In this article
Part 1: Best 3 MPEG to GIF Converter Software
Part 2: Top Online 5 MPEG to GIF Converters
Part 3: How to Convert MPEG to GIF Using Wondershare Filmora?
Part 1: Best 3 MPEG to GIF Converter Software
This part will focus on the offline software that can be considered for converting MPEG to GIF. Follow through these tools to understand more details about them:
1. Wondershare Filmora
| Compatibility | Pricing |
|---|---|
| Windows/Mac | $28.98/Monthly $68.98/Annual $98.98/Perpetual |
This offline software stands among the premium software of the market that provides efficient services in video management. From basic video editing to diverse features such as adding effects and transitions across it, Wondershare Filmora provides enthusiast-level features to its users. The advanced and modern features, combined with simple interfaces, bring a competitive environment for users.
As you create a video across Wondershare Filmora, multiple advanced tools can be consumed easily. You can find examples like motion tracking and overlays across the tool. However, if you consider converting a MPEG video to a GIF, Filmora is definitely a great option in the market.

Advantages
- Provides a wide variety of effects and overlays.
- Quick rendering of video while converting or editing.
- A cost-effective tool with a vast set of elements.
- Offers intuitive guidelines and custom animation tools.
Disadvantage
- Adds watermark across the exported video in the free version.
2. Adobe Premiere Pro
| Compatibility | Pricing |
|---|---|
| Windows/Mac | $20.99/Monthly |
Adobe has developed industry-standard tools in this developing age of digital software. Adobe Premiere Pro is an efficient example of good video editing and management software. The ecosystem of tools offered across Premiere Pro is extensive and prolific; however, the user needs to have a basic knowledge of video editing before coming across it.
The conversion opportunities across this MPEG to GIF converter software are extensive. Its execution, alongside the wide variety of conversion options, is responsive. This makes it a great choice for your organization that is in search of a perfect tool for this purpose.

Pros
The interface is quite clear and flexible for video editors.
The stabilization tool of Filmora is commendable for users.
Collaborate with other editors on different projects through Creative Cloud.
Can perform color correction and audio tweaking on videos before having them exported.
Cons
This tool is not designed for beginners and people who do not understand video editing.
3. VLC
| Compatibility | Windows/Mac/Linux |
|---|---|
| Windows/Mac | Free |
VLC is a free and open-source media player that provides an inspiring variety of tools across its platform. Unlike other free tools, VLC does not work across simple features and characteristics. It offers options for converting, streaming, video editing, and enhancing. This makes it an exceptional offer for users looking to convert their MPEG to GIF.
The tool is highly customizable and is supported with extensive file format support. Looking across the different features required in the process, you can add different plugins to expand your work across VLC.

Benefits
- Offers easy conversion of video files without loss in quality.
- Encode outbound streams without any issues.
- Works perfectly for Linux, Windows, and Mac devices. Also available across Android and iPhone devices.
- It can be expanded through plugins for better functionality.
Drawback
- You cannot edit the video using the VLC Media Player.
Part 2: Top Online 5 MPEG to GIF Converters
For this part, we shall work across a few impressive online converters that can be essentially used for converting a MPEG to GIF. Go through the functions of these tools to understand how you can convert your required video with ease.
1. Aconvert
The first option among the premium online converters for MPEG to GIF is Aconvert. This tool can be quite charismatic in providing you with a proper platform to work on your video conversion. While being a simple tool, you can make changes in the video in the best possible manner. Not only does this tool provide the conversion of the specific format, but it also covers an immense amount of conversion options.

Benefits
- Set the duration of the GIF as per your desire.
- Change the video settings, such as bitrate, frame rate, and size.
- A simple and effective user interface.
- Contains a proper description of the file formats for the user’s knowledge.
Con
- Does not keep up with the quality of the video while converting.
2. EZGIF.com
As the name suggests, this online converter is a very simple and effective tool to try. As it converts a MPEG video into a GIF with ease, you can surely look for this tool for quick results. With the option of multiple tools to work with, you can add this tool to your daily life for quick functions. EZGIF.com returns you with an animated GIF, which is quite effective compared to other online platforms.

Advantages
You can paste a URL of a video directly for conversion.
Provides a variety of file formats to its users.
Covers videos of variating frame rates, which makes it diverse.
Get an accurate start and end of the GIF with proper setting tools.
Bad
Users can only upload file sizes of 100MB.
3. CloudConvert
You may find this online platform to be the most effective for converting your MPEG files. While offering various options for converting videos, you can easily manage more than 200+ formats across the tool. Along with that, Cloudconvert ensures the security of all shared data across the platform. It does not allow anyone else to access your data.

Goods
You can ensure high-quality conversion with the online converter tool.
It offers you the option of setting the resolution of the video that you wish to convert.
Helps in changing the aspect ratio of the tool with ease.
You can also change the frame rate of the video that is to be converted.
Bad
Allows converting 25 videos in a day.
4. OnlineConvertFree
Another great website that you can consider to convert your MPEG to GIF is OnlineConvertFree. With a wide variety of conversion options available across the format, you can make quality GIFs. Along with that, the platform allows its users to upload videos through the computer and Dropbox or Google Drive. Its fast conversion makes it a premium option among users.

Pros
It is a completely free tool to use.
Provides users with support across more than 250 file formats.
Do not keep any data across the website for security reasons.
You can also save your converted data across the cloud.
Cons
The website contains a lot of ads throughout.
5. Convertio
This platform is another exceptional option in file conversion that can be considered in the online software. Convertio supports more than 25600 different file conversion options, which shows that the file format support is extremely elaborate in the platform. The process of conversion is the simplest you can find in the market. Along with that, the tool ensures that the shared files are kept secure from unauthorized access.

Pros
Provides exceptional features for free.
The interface is quite straightforward.
Allows batch conversion of multiple MPEG files into GIFs.
Ensures the quality of the converted file.
Cons
Users are bound to buy a plan for Convertio to use its full features without any file size limits.
Part 3: How to Convert MPEG to GIF Using Wondershare Filmora?
Filmora can be a great option to convert MPEG to GIF without any problems. You need to go through the steps to figure out the complete procedure with ease.
Step 1: Launch Filmora and Open Project
Download and install the latest version of Wondershare Filmora on your computer. Once done, launch the tool and click on “New Project” to open a new window.

Step 2: Import MPEG Video File
Once a new window opens up, you need to click on the “Import” icon displayed in the “Media” section. Add the MPEG video that is to be converted to a GIF. Once added, drag it across the timeline.

Step 3: Export as GIF
Click on the “Export” icon to open the export options. You need to select the option of “GIF” displayed on the left-hand column of the screen. Once done, set up a name and location for the video. Along with that, you can also change the resolution, frame rate, and size by clicking on “Settings.” Once done, click on the “Export” button to conclude the process.

Conclusion
Have you learned about the variety of software that is available to convert MPEG to GIF? You can consider any tools for making quick changes across your video. Along with that, for perfect execution with quality, you can definitely consider using Wondershare Filmora to convert your video files. Go through the article to make the perfect selection for your tasks.
GIFs are known to be quite effective in displaying a video portrayal. Many people save special moments across GIFs to make sharing easy and simple. However, when you own different forms of video formats and are looking to convert them to a GIF, you may need a proper tool for its execution. In this article, we shall be working on converting MPEG to GIF without any difficulty.
To make sure that you successfully convert a MPEG to GIF, this article will introduce a set of offline and online converters for effective execution.
In this article
Part 1: Best 3 MPEG to GIF Converter Software
Part 2: Top Online 5 MPEG to GIF Converters
Part 3: How to Convert MPEG to GIF Using Wondershare Filmora?
Part 1: Best 3 MPEG to GIF Converter Software
This part will focus on the offline software that can be considered for converting MPEG to GIF. Follow through these tools to understand more details about them:
1. Wondershare Filmora
| Compatibility | Pricing |
|---|---|
| Windows/Mac | $28.98/Monthly $68.98/Annual $98.98/Perpetual |
This offline software stands among the premium software of the market that provides efficient services in video management. From basic video editing to diverse features such as adding effects and transitions across it, Wondershare Filmora provides enthusiast-level features to its users. The advanced and modern features, combined with simple interfaces, bring a competitive environment for users.
As you create a video across Wondershare Filmora, multiple advanced tools can be consumed easily. You can find examples like motion tracking and overlays across the tool. However, if you consider converting a MPEG video to a GIF, Filmora is definitely a great option in the market.
Advantages
- Provides a wide variety of effects and overlays.
- Quick rendering of video while converting or editing.
- A cost-effective tool with a vast set of elements.
- Offers intuitive guidelines and custom animation tools.
Disadvantage
- Adds watermark across the exported video in the free version.
2. Adobe Premiere Pro
| Compatibility | Pricing |
|---|---|
| Windows/Mac | $20.99/Monthly |
Adobe has developed industry-standard tools in this developing age of digital software. Adobe Premiere Pro is an efficient example of good video editing and management software. The ecosystem of tools offered across Premiere Pro is extensive and prolific; however, the user needs to have a basic knowledge of video editing before coming across it.
The conversion opportunities across this MPEG to GIF converter software are extensive. Its execution, alongside the wide variety of conversion options, is responsive. This makes it a great choice for your organization that is in search of a perfect tool for this purpose.
Pros
The interface is quite clear and flexible for video editors.
The stabilization tool of Filmora is commendable for users.
Collaborate with other editors on different projects through Creative Cloud.
Can perform color correction and audio tweaking on videos before having them exported.
Cons
This tool is not designed for beginners and people who do not understand video editing.
3. VLC
| Compatibility | Windows/Mac/Linux |
|---|---|
| Windows/Mac | Free |
VLC is a free and open-source media player that provides an inspiring variety of tools across its platform. Unlike other free tools, VLC does not work across simple features and characteristics. It offers options for converting, streaming, video editing, and enhancing. This makes it an exceptional offer for users looking to convert their MPEG to GIF.
The tool is highly customizable and is supported with extensive file format support. Looking across the different features required in the process, you can add different plugins to expand your work across VLC.
Benefits
- Offers easy conversion of video files without loss in quality.
- Encode outbound streams without any issues.
- Works perfectly for Linux, Windows, and Mac devices. Also available across Android and iPhone devices.
- It can be expanded through plugins for better functionality.
Drawback
- You cannot edit the video using the VLC Media Player.
Part 2: Top Online 5 MPEG to GIF Converters
For this part, we shall work across a few impressive online converters that can be essentially used for converting a MPEG to GIF. Go through the functions of these tools to understand how you can convert your required video with ease.
1. Aconvert
The first option among the premium online converters for MPEG to GIF is Aconvert. This tool can be quite charismatic in providing you with a proper platform to work on your video conversion. While being a simple tool, you can make changes in the video in the best possible manner. Not only does this tool provide the conversion of the specific format, but it also covers an immense amount of conversion options.
Benefits
- Set the duration of the GIF as per your desire.
- Change the video settings, such as bitrate, frame rate, and size.
- A simple and effective user interface.
- Contains a proper description of the file formats for the user’s knowledge.
Con
- Does not keep up with the quality of the video while converting.
2. EZGIF.com
As the name suggests, this online converter is a very simple and effective tool to try. As it converts a MPEG video into a GIF with ease, you can surely look for this tool for quick results. With the option of multiple tools to work with, you can add this tool to your daily life for quick functions. EZGIF.com returns you with an animated GIF, which is quite effective compared to other online platforms.
Advantages
You can paste a URL of a video directly for conversion.
Provides a variety of file formats to its users.
Covers videos of variating frame rates, which makes it diverse.
Get an accurate start and end of the GIF with proper setting tools.
Bad
Users can only upload file sizes of 100MB.
3. CloudConvert
You may find this online platform to be the most effective for converting your MPEG files. While offering various options for converting videos, you can easily manage more than 200+ formats across the tool. Along with that, Cloudconvert ensures the security of all shared data across the platform. It does not allow anyone else to access your data.
Goods
You can ensure high-quality conversion with the online converter tool.
It offers you the option of setting the resolution of the video that you wish to convert.
Helps in changing the aspect ratio of the tool with ease.
You can also change the frame rate of the video that is to be converted.
Bad
Allows converting 25 videos in a day.
4. OnlineConvertFree
Another great website that you can consider to convert your MPEG to GIF is OnlineConvertFree. With a wide variety of conversion options available across the format, you can make quality GIFs. Along with that, the platform allows its users to upload videos through the computer and Dropbox or Google Drive. Its fast conversion makes it a premium option among users.
Pros
It is a completely free tool to use.
Provides users with support across more than 250 file formats.
Do not keep any data across the website for security reasons.
You can also save your converted data across the cloud.
Cons
The website contains a lot of ads throughout.
5. Convertio
This platform is another exceptional option in file conversion that can be considered in the online software. Convertio supports more than 25600 different file conversion options, which shows that the file format support is extremely elaborate in the platform. The process of conversion is the simplest you can find in the market. Along with that, the tool ensures that the shared files are kept secure from unauthorized access.
Pros
Provides exceptional features for free.
The interface is quite straightforward.
Allows batch conversion of multiple MPEG files into GIFs.
Ensures the quality of the converted file.
Cons
Users are bound to buy a plan for Convertio to use its full features without any file size limits.
Part 3: How to Convert MPEG to GIF Using Wondershare Filmora?
Filmora can be a great option to convert MPEG to GIF without any problems. You need to go through the steps to figure out the complete procedure with ease.
Step 1: Launch Filmora and Open Project
Download and install the latest version of Wondershare Filmora on your computer. Once done, launch the tool and click on “New Project” to open a new window.
Step 2: Import MPEG Video File
Once a new window opens up, you need to click on the “Import” icon displayed in the “Media” section. Add the MPEG video that is to be converted to a GIF. Once added, drag it across the timeline.
Step 3: Export as GIF
Click on the “Export” icon to open the export options. You need to select the option of “GIF” displayed on the left-hand column of the screen. Once done, set up a name and location for the video. Along with that, you can also change the resolution, frame rate, and size by clicking on “Settings.” Once done, click on the “Export” button to conclude the process.
Conclusion
Have you learned about the variety of software that is available to convert MPEG to GIF? You can consider any tools for making quick changes across your video. Along with that, for perfect execution with quality, you can definitely consider using Wondershare Filmora to convert your video files. Go through the article to make the perfect selection for your tasks.
An Introduction to LUTs | Their Overview and Benefits
In video editing, you mainly face problems related to color grading and lower attractiveness of video. To cater to these issues, you can use the LUTs because they can upscale the performance of your video in no time. Yet, if you are not familiar with the concept of LUTs, this article is for you. Here, we will discuss the meaning of having LUTs in editing and other metrics of this exceptional element.
By the end of this article, you will also discover a tool that will help you with LUTs video editing. Thus, let’s get below to learn more about LUTs.
Part 1: What Do You Know About LUTs?
LUTs are data files that stand for Look-Up Tables. These are used in video editing because they have mathematical algorithms that can color-transform both videos and photos. LUTs can also upscale the contrast and color grading of simple videos and make them color-friendly. If you are a filmmaker or a videographer, you should be familiar with the concept of LUTs.

LUTs video editing also ensures that white balance and all the color metrics in your videos are consistent so they can be used for professional purposes. Moreover, you can also implement your creativity in the video with them. There are several formats of LUTs, such as 3DL, CUBE, DAT, CSP, and more, that you can discover in various editing tools. You can find them across several platforms, such as Adobe Photoshop, DaVinci Resolve, and more.
Empower your videos with a new mood using different LUTs. Filmora now offers 100+ top-quality 3D LUTs cover a broad range of scenarios. Transform your videos with Filmora’s powerful 3D LUTs.
Apply LUT on Videos Apply LUT on Videos Learn More


Part 2: What Are the Different Types of LUTs Available for Utility?
To fully understand LUT editing, you need to be aware of the types of LUTs. In this section, we will discuss the types of LUTs. Have a look below to find out more about them:
Technical LUTs
You can use technical LUTs for postproduction editing. It can help with gamma correction, white balance adjustments, and color grading. Moreover, the main purpose of using this LUT is to ensure consistency in the videos.
Creative LUTs
If you are an artist and want to work on art photos and videos, you can use creative LUTs. With this, you can adjust colors and contrast to customize the outlook of your media. Moreover, it can also create cozy and environment-friendly looks in your videos.
Camera Specific LUTs
As the name indicates, you can use camera-specific LUTs to work with different camera brands. The camera can lead to several color dysfunctionality, but you can correct them with camera-specific LUTs. It never compromises the quality of the video, so you can use it without any issues.
Display LUTs
If you wish to customize the colors of videos or photos for a specific display device, this is your best option. It can modify the video as per the computer or television specifications. Above all, you can match the output look of your video with your intentional look with this.
Input LUTs
With this, you can manage the colors of your video from the beginning. It can help you to apply a consistent starting point to your video in an optimized manner.
Part 3: Why Are LUTs Beneficial in the Current Video Editing Fraternity?
There are several reasons that show that LUTs are beneficial for the current video editing fraternity. While you have learned some important points explaining what are LUTs, here are some of the reasons explaining their importance:
Improved Color Grading
By using LUTs, you can apply predesigned colors to the videos and photos. It can save you both time and effort and fasten the procedure of working. Thus, if you are working on tight deadlines, this can be your savior.
Highest Consistency
If you don’t have consistency in your videos, no one will watch them for a long time. To solve this issue, you can use LUTs because they can add a sense of consistency to any type of video.
Creativity Ratio
There is a wide array of creative options in LUTs. From adding vibrant colors to modifying styles, LUTs can help you with everything. Thus, it is an optimized solution to add creativity to videos.
Compatibility of LUTs
LUTs are compatible with a considerable number of video editing software. So, you can also streamline your workflow efficiency with the help of LUTs while editing your favorite videos.
Part 4: What Do You Believe About The Future of LUTs in the Video Industry?
In this digital world, you need to work with the most modernized solutions to solve your digital problems. We all make videos and photos, but bad colors can degrade their performance and attractiveness. For this reason, you can use LUTs editing. However, to import or apply LUTs, you need to know the best video editing platform.
The best and most optimized platform that can be used for this purpose is Wondershare Filmora . With this tool, you can apply LUTs to the videos and can also preview them before actually downloading the video. Other than this, it also has an effect mask by which you can apply special effect filters to the videos. It also offers video cover and export process optimization.
Add LUTs on Video For Win 7 or later(64-bit)
Add LUTs on Video For macOS 10.14 or later

Key Features of Wondershare Filmora
Wondershare Filmora has built much in LUTs video editing over time. From changing its existence from a category to a dedicated section, Filmora has come a long way. Find out some important features about Filmora and its exceptional functionality:
- With Filmora, you can optimize the cache file management along with using the feedback channels.
- You can make the interface adjustments and can also customize the intensity of LUTs from 0 to 100%.
- There are several adjustment filters in it, and you can also work on several types of videos with it, including travel and more.
Conclusion
In the following article, you have learned what are LUTs in video editing. From the definition to the compatible video editing software, you can find everything about LUTs above. Moreover, there are several types of LUTs, and you can use them as per your need. If you are looking for a platform to apply LUTs to the video, the answer is Wondershare Filmora.
Apply LUT on Videos Apply LUT on Videos Learn More
Part 2: What Are the Different Types of LUTs Available for Utility?
To fully understand LUT editing, you need to be aware of the types of LUTs. In this section, we will discuss the types of LUTs. Have a look below to find out more about them:
Technical LUTs
You can use technical LUTs for postproduction editing. It can help with gamma correction, white balance adjustments, and color grading. Moreover, the main purpose of using this LUT is to ensure consistency in the videos.
Creative LUTs
If you are an artist and want to work on art photos and videos, you can use creative LUTs. With this, you can adjust colors and contrast to customize the outlook of your media. Moreover, it can also create cozy and environment-friendly looks in your videos.
Camera Specific LUTs
As the name indicates, you can use camera-specific LUTs to work with different camera brands. The camera can lead to several color dysfunctionality, but you can correct them with camera-specific LUTs. It never compromises the quality of the video, so you can use it without any issues.
Display LUTs
If you wish to customize the colors of videos or photos for a specific display device, this is your best option. It can modify the video as per the computer or television specifications. Above all, you can match the output look of your video with your intentional look with this.
Input LUTs
With this, you can manage the colors of your video from the beginning. It can help you to apply a consistent starting point to your video in an optimized manner.
Part 3: Why Are LUTs Beneficial in the Current Video Editing Fraternity?
There are several reasons that show that LUTs are beneficial for the current video editing fraternity. While you have learned some important points explaining what are LUTs, here are some of the reasons explaining their importance:
Improved Color Grading
By using LUTs, you can apply predesigned colors to the videos and photos. It can save you both time and effort and fasten the procedure of working. Thus, if you are working on tight deadlines, this can be your savior.
Highest Consistency
If you don’t have consistency in your videos, no one will watch them for a long time. To solve this issue, you can use LUTs because they can add a sense of consistency to any type of video.
Creativity Ratio
There is a wide array of creative options in LUTs. From adding vibrant colors to modifying styles, LUTs can help you with everything. Thus, it is an optimized solution to add creativity to videos.
Compatibility of LUTs
LUTs are compatible with a considerable number of video editing software. So, you can also streamline your workflow efficiency with the help of LUTs while editing your favorite videos.
Part 4: What Do You Believe About The Future of LUTs in the Video Industry?
In this digital world, you need to work with the most modernized solutions to solve your digital problems. We all make videos and photos, but bad colors can degrade their performance and attractiveness. For this reason, you can use LUTs editing. However, to import or apply LUTs, you need to know the best video editing platform.
The best and most optimized platform that can be used for this purpose is Wondershare Filmora . With this tool, you can apply LUTs to the videos and can also preview them before actually downloading the video. Other than this, it also has an effect mask by which you can apply special effect filters to the videos. It also offers video cover and export process optimization.
Add LUTs on Video For Win 7 or later(64-bit)
Add LUTs on Video For macOS 10.14 or later
Key Features of Wondershare Filmora
Wondershare Filmora has built much in LUTs video editing over time. From changing its existence from a category to a dedicated section, Filmora has come a long way. Find out some important features about Filmora and its exceptional functionality:
- With Filmora, you can optimize the cache file management along with using the feedback channels.
- You can make the interface adjustments and can also customize the intensity of LUTs from 0 to 100%.
- There are several adjustment filters in it, and you can also work on several types of videos with it, including travel and more.
Conclusion
In the following article, you have learned what are LUTs in video editing. From the definition to the compatible video editing software, you can find everything about LUTs above. Moreover, there are several types of LUTs, and you can use them as per your need. If you are looking for a platform to apply LUTs to the video, the answer is Wondershare Filmora.
Also read:
- Updated In 2024, What Slideshow Templates Can Teach You About Aesthetic
- New Are You Eager to Discover All About Dynamic Videos? You Are in the Right Place because This Article Provides Insight Into Dynamic Video Collages
- New In 2024, How to Edit Recorded Video
- Updated Ll About GIF Keyboard That You Want to Know for 2024
- Updated In 2024, Exploring the Best Slow-Motion App
- New Adding Slow Motion in DaVinci Resolve A Comprehensive Overview for 2024
- Updated 2024 Approved How to Create LUTs with LUTs Generator
- We Can Say that the Horror Movies of the 90S Laid the Foundation for Current Horror Movies. So, without Wasting Time, Lets Create a 1990S Horror Movie Similar to The Blair Witch Project for 2024
- 8 Ways To Live Stream Pre-Recorded Video for 2024
- In 2024, Add Flesh to Your Video Content Before Posting Them for Your Audience to See Using Meme Texts. Use the Tutorial Guide Shared in This Post
- New 2024 Approved Top 8 Memoji Makers to Make a Memoji on PC, Android & iPhone
- In 2024, How to Slow Down Time-Lapse Videos on iPhone
- In 2024, GIF Splitting Into Frames Is an Interesting Activity to Do with the Right Tools. Convert GIFs Into Frames Easily with Tools and Use Them as Needed
- Best Tools To Create Blend Image Collage for 2024
- New Practical Ways to Resize Video in Handbrake
- In 2024, 6 Instant Mp4 to GIF Online Tools
- Detailed Tutorial to Crop Video in KineMaster for 2024
- Would You Like to Know How to Change the Ratio of the Video or Which Is the Correct Aspect Ratio for Uploading to the Online Platform? Then, Go Through the Article to Get Complete Details About the Video Aspect Ratio
- Updated In 2024, Cropping Videos in Final Cut Pro Step by Step
- Updated In 2024, Best Guide of 8 Photo Collage Apps for PC
- Updated Easy Way to Combine Several Xvid Files Into One Windows, Mac,Android for 2024
- New 2024 Approved Finest Approach to Slow Down a Video CapCut All-in-One Video Editor
- New 2024 Approved Guide To Make a YouTube Intro by Filmora
- Updated 10 Best Free Spanish Text To Speech Converter Websites for 2024
- In 2024, This Article Will Show You How to Clone Yourslef in Videos with Filmora
- Top Tips on How to Design Travel Slideshow for 2024
- In 2024, What Is the Selective Color Effect, and How Can You Add This Effect to Your Videos Using Wondershare Filmora? A Complete Guide for Beginners
- Finding The Best Filmic Pro LUTs For Video Editing for 2024
- New 2024 Approved How to Create Discord Emoji GIF
- New Are You Looking to Make Transparent Background in Canva Then You Can Learn About It in This Article
- Updated How to Create Cooking Video Intro and Outro for YouTube Channel, In 2024
- Updated How To Add Motion Blur Effect To Photos in GIMP for 2024
- Do You Know How Boring a Video Can Be with Silent Moments? Some Tools with Silent Detection Features Help You Delete Those Moments for 2024
- New How to Apply Video Filters Mobile and Desktop
- Updated Best 10 Options Slow Down Video Online with Perfection for 2024
- New 2024 Approved How to Uue Adobe Lightroom Color Grading
- Add VHS Effects to Videos for Free A 2024 Guide
- 2024 Approved The Craziest 10 AI Editors Youve Ever Seen
- Updated Step-by-Step Guide | Control Playback Speed in Premiere Pro
- New Best Guide for Setting TikTok Countdown Timer
- New 6 Tips for Your First Facebook Ads
- How To Simulate GPS Movement With Location Spoofer On Infinix Smart 8 Plus? | Dr.fone
- How To Transfer WhatsApp From Apple iPhone 14 Pro Max to other iPhone 12 Pro devices? | Dr.fone
- 5 Best Route Generator Apps You Should Try On Tecno Phantom V Flip | Dr.fone
- In 2024, Recommended Best Applications for Mirroring Your Oppo Reno 10 Pro+ 5G Screen | Dr.fone
- How to Flash Dead Vivo Y100 5G Safely | Dr.fone
- How To Fix Unresponsive Phone Touchscreen Of Nokia C02 | Dr.fone
- Fix Cant Take Screenshot Due to Security Policy on Samsung Galaxy A54 5G | Dr.fone
- You must know how to Configure MT4 and MT5 Accounts for Running a Local Trade Copier™ Together With Any Other Forex EA
- Super Easy Ways To Deal with Samsung Galaxy A14 4G Unresponsive Screen | Dr.fone
- In 2024, Pokemon Go No GPS Signal? Heres Every Possible Solution On OnePlus Ace 3 | Dr.fone
- In 2024, Does find my friends work on Nokia C300 | Dr.fone
- How to Factory Reset Huawei Nova Y71 If I Forgot Security Code or Password? | Dr.fone
- Fake Android Location without Rooting For Your Realme 10T 5G | Dr.fone
- Change Location on Yik Yak For your Lava Blaze 2 to Enjoy More Fun | Dr.fone
- How To Restore a Bricked Infinix Smart 8 Pro Back to Operation | Dr.fone
- Full Solutions to Fix Error Code 920 In Google Play on Samsung Galaxy F54 5G | Dr.fone
- Android Unlock Code Sim Unlock Your Tecno Spark 20C Phone and Remove Locked Screen
- 9 Solutions to Fix Process System Isnt Responding Error on Nokia C110 | Dr.fone
- In 2024, How to Fix Pokemon Go Route Not Working On Apple iPhone 11? | Dr.fone
- Title: New 8 Tips to Apply Cinematic Color Grading to Your Videos
- Author: Chloe
- Created at : 2024-05-20 03:37:45
- Updated at : 2024-05-21 03:37:45
- Link: https://ai-editing-video.techidaily.com/new-8-tips-to-apply-cinematic-color-grading-to-your-videos/
- License: This work is licensed under CC BY-NC-SA 4.0.
