
:max_bytes(150000):strip_icc():format(webp)/SetaLiveWallpaperinWindows11-b8ca3913592d4a5790808131bf8f34e1.jpg)
New Add Zoom Blur Effect In Photoshop Step by Step for 2024
Add Zoom Blur Effect In Photoshop [Step by Step]
People add blurry effects to their photos to add a sense of focus effortlessly. It helps to grasp the viewers’ attention as blurry effects add a depth of field. There are various kinds of blurry effects, such as motion blur, zoom blur, etc.
One of the commonly used blurry effects is zoom blur which helps to highlight a specific area of the image. This article will help you to add zoom blur Photoshop through simple means.
Part 1: What is Zoom Blur?
Zoom blur is a creative effect that adds a new dimension to your captured photos. It creates an illusion where the captured shot appears to blur from the center direction. It gives an abstract feel and adds a certain movement to the picture. You can quickly draw attention to your subject by adding a zoom motion blur.

To create a zoom blur effect while capturing the photo, you should consider some conditions. For example, you can successfully create this effect by taking a picture in low-light conditions. Moreover, you should use a tripod to acquire the best results.
Part 2: How to Add Zoom Blur Effect to Photos in Photoshop?
Photoshop is widely used to alter images with distinct features. It can easily handle diverse file types with great efficiency. It gives complete control to the user as it comprises a friendly user interface. Moreover, you can utilize its color grading tools to adjust the saturation, hue, contrast, and brightness of the photo.
You can also discover AI-supported neural filters that can be a game-changer for you. It also provides a sky replacement tool that you can use to replace the sky in your captured photos effortlessly. For zoom blur Photoshop, you can manually create this effect with a few clicks. For this purpose, you can take help from the following guidelines:
Step1 Navigate to your Photoshop tool and import your desired photo. Go to the “Layers” section on your screen and press “Ctrl + J” to duplicate the first layer. If you are a MacBook user, you can press “Command + J.”

Step2 To proceed, go to the “Filter” option given above and select the “Blur” option. From its drop-down menu, select “Radial Blur .”Now you would be able to see a new window of Radial Blur on your screen. Here, change the amount to 10, and under the “Blur Method” section, select “Zoom .”Also, choose “Best” in the “Quality” section.

Step3 By staying on the Radial Blur window, adjust the “Blur Center” according to your desire. It will add focus to the central point while blurring the surroundings of your image. Once done, hit the “OK” button. To add further modifications, you can open the Radial Blur window again and modify the “Blur Center” easily.

Part 3: Add the Motion Blur with an Alternative to Photoshop
Are you searching the alternatives to Photoshop? It may be possible that you don’t get desired final results using zoom blur Photoshop. For this, you can check the following tools to achieve the best results.
1. GIFGIT.com
This online tool is an easy-to-use platform through which you can edit your images without any complications. It contains different tools through which you can add modifications instantly. For instance, you can utilize its advanced features such as Color Picker, Background Eraser, Gradient Tool, Magic Eraser, etc. Through its Blur Tool, you can defocus an image precisely in the desired manner.
To use this tool, navigate to the website of GIFGIT through your web browser. From its various tools, select the “Blur” tool. Afterward, click the “Choose File” button and upload your image. From the above editing toolbar, access the “Zoom Blur” slider to use the blur option. Adjust the ratio of the blur by increasing or decreasing the value through the slider or by entering the number inside the box.

2. Luxa.org
Do you want a professional tool to add a zoom blur effect? Luxa.org has a friendly user interface that comprises different options, such as PDF tools and image tools. For the image tools, you can find various options to execute the editing. For instance, you can add colored borders to your images and text in the desired font. You can also modify the brightness level of your pictures through this tool.
To add a zoom motion blur effect, this tool provides a special online blur tool. To utilize it, access the website of Luxa.org and go to its image tools. From there, navigate to the zoom blur feature. Now upload your image on this tool and set the horizontal and vertical strengths. Also, adjust the blur strength accordingly. Once the zoom blur effect gets added to your photo, click on the “Download” button.

3. Wondershare Filmora
Have you ever tried Wondershare Filmora before? Filmora is a complete toolbox through which you can execute basic and advanced image editing without complications. It contains different kinds of built-in presets that can help you express your creativity. Moreover, it provides stock images that you use without any restrictions.
Free Download For Win 7 or later(64-bit)
Free Download For macOS 10.14 or later
To enhance your images, Filmora provides you with tons of professional effects. Using these effects, you can also add a zoom blur effect to your photos along with modification options. Furthermore, you can also export the edited image in the desired file format and resolution on this platform. To use this platform for adding a zoom blur effect, check the following instructions:
Step1 Import the Particular Image
After launching Filmora, select the “Create New Project” option to begin. Afterward, import the image from your computer to which you want to add the zoom blur effect. Once done, drag and drop the picture into the timeline.

Step2 Add the Zoom Blur Effect
Go to the Effect section and select “Utility” under the “Video Effects” section. From there, search “Tilt-Shift Circle” effect. Select and drop this effect to the timeline to proceed. Also, make sure to adjust the duration of the added effect according to your clip.

Step3 Adjust the Blur Settings
Now, double-click the added effect to adjust the intensity of the effect. Through the circle, you can apply the zoom blur effect to the photo precisely. You can adjust the intensity and size of the zoom motion blur effect.

Last Words
The zoom blur effect can instantly add focus to the subject in a dramatic manner. It can also highlight a specific point of the image effortlessly. In this article, we have addressed how to add zoom motion blur using Photoshop. To use the best alternative to Photoshop, we highly recommend using Wondershare Filmora. This tool has an easy-to-use interface and enables you to add a zoom blur effect easily.
Part 1: What is Zoom Blur?
Zoom blur is a creative effect that adds a new dimension to your captured photos. It creates an illusion where the captured shot appears to blur from the center direction. It gives an abstract feel and adds a certain movement to the picture. You can quickly draw attention to your subject by adding a zoom motion blur.
To create a zoom blur effect while capturing the photo, you should consider some conditions. For example, you can successfully create this effect by taking a picture in low-light conditions. Moreover, you should use a tripod to acquire the best results.
Part 2: How to Add Zoom Blur Effect to Photos in Photoshop?
Photoshop is widely used to alter images with distinct features. It can easily handle diverse file types with great efficiency. It gives complete control to the user as it comprises a friendly user interface. Moreover, you can utilize its color grading tools to adjust the saturation, hue, contrast, and brightness of the photo.
You can also discover AI-supported neural filters that can be a game-changer for you. It also provides a sky replacement tool that you can use to replace the sky in your captured photos effortlessly. For zoom blur Photoshop, you can manually create this effect with a few clicks. For this purpose, you can take help from the following guidelines:
Step1 Navigate to your Photoshop tool and import your desired photo. Go to the “Layers” section on your screen and press “Ctrl + J” to duplicate the first layer. If you are a MacBook user, you can press “Command + J.”
Step2 To proceed, go to the “Filter” option given above and select the “Blur” option. From its drop-down menu, select “Radial Blur .”Now you would be able to see a new window of Radial Blur on your screen. Here, change the amount to 10, and under the “Blur Method” section, select “Zoom .”Also, choose “Best” in the “Quality” section.
Step3 By staying on the Radial Blur window, adjust the “Blur Center” according to your desire. It will add focus to the central point while blurring the surroundings of your image. Once done, hit the “OK” button. To add further modifications, you can open the Radial Blur window again and modify the “Blur Center” easily.
Part 3: Add the Motion Blur with an Alternative to Photoshop
Are you searching the alternatives to Photoshop? It may be possible that you don’t get desired final results using zoom blur Photoshop. For this, you can check the following tools to achieve the best results.
1. GIFGIT.com
This online tool is an easy-to-use platform through which you can edit your images without any complications. It contains different tools through which you can add modifications instantly. For instance, you can utilize its advanced features such as Color Picker, Background Eraser, Gradient Tool, Magic Eraser, etc. Through its Blur Tool, you can defocus an image precisely in the desired manner.
To use this tool, navigate to the website of GIFGIT through your web browser. From its various tools, select the “Blur” tool. Afterward, click the “Choose File” button and upload your image. From the above editing toolbar, access the “Zoom Blur” slider to use the blur option. Adjust the ratio of the blur by increasing or decreasing the value through the slider or by entering the number inside the box.
2. Luxa.org
Do you want a professional tool to add a zoom blur effect? Luxa.org has a friendly user interface that comprises different options, such as PDF tools and image tools. For the image tools, you can find various options to execute the editing. For instance, you can add colored borders to your images and text in the desired font. You can also modify the brightness level of your pictures through this tool.
To add a zoom motion blur effect, this tool provides a special online blur tool. To utilize it, access the website of Luxa.org and go to its image tools. From there, navigate to the zoom blur feature. Now upload your image on this tool and set the horizontal and vertical strengths. Also, adjust the blur strength accordingly. Once the zoom blur effect gets added to your photo, click on the “Download” button.
3. Wondershare Filmora
Have you ever tried Wondershare Filmora before? Filmora is a complete toolbox through which you can execute basic and advanced image editing without complications. It contains different kinds of built-in presets that can help you express your creativity. Moreover, it provides stock images that you use without any restrictions.
Free Download For Win 7 or later(64-bit)
Free Download For macOS 10.14 or later
To enhance your images, Filmora provides you with tons of professional effects. Using these effects, you can also add a zoom blur effect to your photos along with modification options. Furthermore, you can also export the edited image in the desired file format and resolution on this platform. To use this platform for adding a zoom blur effect, check the following instructions:
Step1 Import the Particular Image
After launching Filmora, select the “Create New Project” option to begin. Afterward, import the image from your computer to which you want to add the zoom blur effect. Once done, drag and drop the picture into the timeline.
Step2 Add the Zoom Blur Effect
Go to the Effect section and select “Utility” under the “Video Effects” section. From there, search “Tilt-Shift Circle” effect. Select and drop this effect to the timeline to proceed. Also, make sure to adjust the duration of the added effect according to your clip.
Step3 Adjust the Blur Settings
Now, double-click the added effect to adjust the intensity of the effect. Through the circle, you can apply the zoom blur effect to the photo precisely. You can adjust the intensity and size of the zoom motion blur effect.
Last Words
The zoom blur effect can instantly add focus to the subject in a dramatic manner. It can also highlight a specific point of the image effortlessly. In this article, we have addressed how to add zoom motion blur using Photoshop. To use the best alternative to Photoshop, we highly recommend using Wondershare Filmora. This tool has an easy-to-use interface and enables you to add a zoom blur effect easily.
Turn Your Text Into a Podcast Made Possible (+ EASY Editing Tips)
Being a content creator, either writing or generating videos, requires podcast text-to-speech knowledge. The impact of content depends on how many people see it. It means finding new ways to get it into real and virtual places where customers and users might be.
Depending on the context, podcasting can be a perfect alternative for sharing content.
This article will address your questions about the easiest way to turn a blog into a podcast. Let’s begin with the reasons why you should do a podcast.
Part 1. Why You Should Podcast
Podcasts are one of the simplest and most cost-effective ways. It helps to advertise yourself and your products to a highly targeted audience. Podcasts are also excellent for engaging with potential clients interested in your content. In your field, you can achieve fame and expertise.

Repurposing of Content
Podcasters can maximize their potential for successful episodes and repurposing their podcast into multiple content pieces.
This podcasting strategy can help you reach more people by putting your podcasts on more channels and engaging more people who might be interested.
More Fulfilling than Articles
Unlike music, news, TV, and social media, podcast listeners don’t have to watch the screen like they do with YouTube videos or TV shows. This means they can listen while walking or driving home from work.
Podcasts are the best way to get people to pay attention and make fundamental societal changes. They can keep people interested for a long time, so you can go into detail and get personal without turning off your audience.
Minimal Start-Up Costs
To start a podcast, you can spend a little money. Even some of the most famous podcasts use a microphone, a computer, and software for recording. But it’s common to spend more money on advertising and better hosting.
Starting a podcast doesn’t cost much, as you can get everything you need for about $145.
Expansion of Search Potential
In the past few years, many big brands and small to medium-sized businesses have started using podcasts as a marketing strategy. This is because podcasts are becoming more and more popular and can help raise your company’s profile.
Podcasting is another way to disseminate your study to a broader audience, whether that audience consists of policymakers or interested citizens.
Potential to Monetize
Using an affiliate program podcast, you can earn money. Businesses can increase their income by offering paid advertising sponsorships to monetize podcasts. Suppose you accept an affiliate offer to sell ads. In that case, you become the company’s voice and put recorded ads in your podcast episodes.
The most common way to make money from a podcast is through sponsorship. It’s also the easiest way to make money because you don’t have to make or sell anything. You just have to make a deal with a sponsor.
Part 2. Why Are Writers Hesitant to Start a Podcast?
Even after knowing all these benefits, writers are still hesitant to start a podcast. One of the main reasons a writer may be reluctant to launch a podcast is the cost of the necessary equipment. You will need at least $80 to $500 for this unpromissing business.
However, let me tell you a secret that many podcastors didn’t buy any audio equipment for the launch of their podcast channel on Spotify.
Moreover, many writers don’t want to show their voice through recordings. This is because they couldn’t just make a recording and hand it off to a sound specialist. Besides, finding their voice through the stories they write is the routine.
But we all need to get the truth that many podcastors don’t record a single word of the podcast with their own voice. Due to a solution: text-to-speech, technology like this has been around for a while and continues to improve.
The two important issues have been solved, so what are you waiting for? Platform building has always relied heavily on content marketing. With blog posts and social media, additional support was provided, and now podcasts are becoming more commonplace.
Part 3. How to Turn a Text Into a Podcast?
Text To Speech
To turn your text into audible content, Text-to-speech (TTS) is an assistive technology. With a single click, TTS reads your written text aloud. Many people also use it for writing and editing to maintain audience concentration.
Text-to-speech technology is compatible with all digital devices, including computers, tablets, and smartphones. Increasing numbers of websites and products now have developed this function. For example, you can find it within the trusted video editing software like Filmora. With Filmora’s Text to Speech (TTS) feature , you may add extra aspects to your video by turning your text files into voiceovers.
Why we regard text to speech as a good
For writers, imagination is the only tool to construct their stories. To bring our stories to life, all we need is a laptop. The same holds for text-to-speech technologies, which can significantly assist writing and editing by allowing the author to hear their words without using their voice.
- Text-to-speech applications can assist you in repurposing your material.
Your written work can be converted into spoken language or a podcast. A podcast can be converted into a YouTube video with a few alterations. All of these factors can help you reach new audiences.
Repurposing material permits your audience to consume it in a variety of ways. The audience can read, listen to, or view your content.
- Text-to-speech systems enable authors to create information that is accessible.
As per World Health Organization, there are almost 285 million visually impaired persons and 39 million blind people. We writers can create a more inclusive world by constantly keeping accessibility in mind.
The limitations of text to speech
Text-to-speech software is becoming increasingly lifelike thanks to technological advancements. However, it cannot still express genuine human emotions. However, this should allow you to utilize these tools. The positives significantly exceed the disadvantages, and technology is continually improving.
Easiest Fix: Turn Texts Into Podcasts With TTS in Filmora
So how can you use text-to-speech? Andhow you can turn your texts into audio podcasts in a daily routine? Filmora , a all-in-one video editor, gets you the solution.
Free Download For Win 7 or later(64-bit)
Free Download For macOS 10.14 or later
Step1 Download and install Filmora on your PC or Mac.

Step2 Open Filmora and select the video on which you wish to add audio.

Step3 After adding your selected video, select the option “Titles” to add text to your video.

Step4 Select your favorite position for text in the video, like “lower third,” which is used the most in video titles.

Step5 Add text to the timeline and click “Ok.” You can move the red timeline marker if you want your text in a certain spot.

Click the “+” button marked in the picture below to add text.

You can also edit the text by changing its style, color, and font or by animating it.

Step6 Press the “Text-to-Speech” button in the lower right side and choose your preferred voice. For example, Lilly’s voice resembles Siri.

You can also choose another language other than English.

Click “Ok” once you’ve selected everything according to your requirements.
Step7 Once the transcription is completed, go ahead and test the video and audio to see if it’s synching.

And that’s done. This is how easy it is to turn your texts into speech using Filmora.
Part 4. Hot FAQs on Podcast Text to Speech
How do I convert podcasts to text?
With the help of the smartphone app Google Recorder you can easily convert podcasts to texts for free.
- Open the app on your phone, start recording to it, and start recording your podcast simultaneously.
- The words will be automatically recorded and entered into the application as you talk into your phone’s microphone.
- After you click stop on the app, you can store and share the files once you finish your recording.
You have an option of sharing the text, the audio, or both. Alternatively, you can save them to your Google Drive if you don’t want to share them.
How to turn my podcast into a sound?
To convert your video podcasts into audio through Filmora. Follow these steps:
- Drag the imported video from the media library into the video timeline.
- To extract the audio from the video, right-click the video clip and select “Audio Detach.”
- After a while, audio and video will be seen on separate tracks.
Can I save the sound after converting text to speech?
Once the text has been converted to speech, you can save the sound. Select your preferred format after clicking the “export” option in Filmora.
Conclusion
Many of us wish to launch a podcast and blog. A productive podcast’s essence is turning writing into audio using various podcasting techniques. AI-powered text-to-speech softwares can quickly convert articles into podcasts. Or, you can invite significant people to your podcast to personalize it. Podcasting can give outdated content a new life.
Free Download For macOS 10.14 or later
Step1 Download and install Filmora on your PC or Mac.
Step2 Open Filmora and select the video on which you wish to add audio.
Step3 After adding your selected video, select the option “Titles” to add text to your video.
Step4 Select your favorite position for text in the video, like “lower third,” which is used the most in video titles.
Step5 Add text to the timeline and click “Ok.” You can move the red timeline marker if you want your text in a certain spot.
Click the “+” button marked in the picture below to add text.
You can also edit the text by changing its style, color, and font or by animating it.
Step6 Press the “Text-to-Speech” button in the lower right side and choose your preferred voice. For example, Lilly’s voice resembles Siri.
You can also choose another language other than English.
Click “Ok” once you’ve selected everything according to your requirements.
Step7 Once the transcription is completed, go ahead and test the video and audio to see if it’s synching.
And that’s done. This is how easy it is to turn your texts into speech using Filmora.
Part 4. Hot FAQs on Podcast Text to Speech
How do I convert podcasts to text?
With the help of the smartphone app Google Recorder you can easily convert podcasts to texts for free.
- Open the app on your phone, start recording to it, and start recording your podcast simultaneously.
- The words will be automatically recorded and entered into the application as you talk into your phone’s microphone.
- After you click stop on the app, you can store and share the files once you finish your recording.
You have an option of sharing the text, the audio, or both. Alternatively, you can save them to your Google Drive if you don’t want to share them.
How to turn my podcast into a sound?
To convert your video podcasts into audio through Filmora. Follow these steps:
- Drag the imported video from the media library into the video timeline.
- To extract the audio from the video, right-click the video clip and select “Audio Detach.”
- After a while, audio and video will be seen on separate tracks.
Can I save the sound after converting text to speech?
Once the text has been converted to speech, you can save the sound. Select your preferred format after clicking the “export” option in Filmora.
Conclusion
Many of us wish to launch a podcast and blog. A productive podcast’s essence is turning writing into audio using various podcasting techniques. AI-powered text-to-speech softwares can quickly convert articles into podcasts. Or, you can invite significant people to your podcast to personalize it. Podcasting can give outdated content a new life.
How to Convert Images Into Video - Kapwing Tutorial
There are effortless ways to turn images into a video with stylish text and transitions, plus licensed music for any occasion. Simply add your photos to our online video creation software and quickly rearrange your pictures to tell your story. Drag and drop your way to a stunning video in minutes. Which software can help you? Find it in this article.
Part 1. What is Kapwing?
Kapwing is a collaborative video editing solution designed to help users create creative content online. With Kawing, users can upload, edit and share files with other team members in one place. Just share the link with other users and work on the content together in real-time.
Kapwing allows users to create videos from scratch with Kapwing’s extensive library of pre-made templates, stock content, and assets. Users can add layers of images, videos, and audio to create the desired video. Because Kapwing is a cloud-based solution, all projects and work are automatically saved to the cloud. However, Kapwing only allows the first 3 projects to be free, after that the image or video will be automatically watermarked, and you need to purchase kapwing premium access for the best image or video quality.
Part 2. How to convert image to video with Kapwing?

Easily convert images and GIFs to videos with music and stop scrolling with Kapwing’s image-to-video tool. With kapwing, you can turn your photos into a dynamic slideshow for a presentation or an engaging video for social media and YouTube. Even with minimal editing experience, you can turn a single image into a professional video.
Kapwing supports turning a single image into a video, as well as joining multiple images one by one into a slideshow-style video. With an intuitive timeline and the ability to specify the duration of each image, you won’t need to read a long tutorial to convert an image to a video with this easy online tool. Follow the steps below to convert your images to videos using kapwing.
Step1Upload your image or images
Upload an image or set of images directly to Kapwing. You can also embed a link to a .png or .jpg on the web. Once uploaded, your images will appear on the canvas as a collage.
Step2Select time and size
Select the image and find the duration dropdown in the right edit menu. Use the “adjust duration“ dropdown to choose how long you want your output video to be. You can also resize the image to a different aspect ratio. Crop, add music, set the background color, and more with Kapwing’s simple editor. If you have uploaded multiple images, arrange the photos in the correct order to make the presentation perfect.
Step3Export and share
Just click Export and your final video will be created. The output file is MP4. Kapwing is completely free and requires no downloads. Enjoy the new video you created with your image or images.
Part 3. Other 3 ways to convert image to video online
Even though an online image-to-video maker is not as powerful as photo and video editing software products like Filmora , you can still use this online image-to-video maker to create videos effortlessly. However, to save time, you should prepare all the material you want to use in your video in advance so that you can upload it to the platform of your choice and have your video ready in minutes. Let’s take a look at the image-to-video maker that you can use to create captivating social media videos.
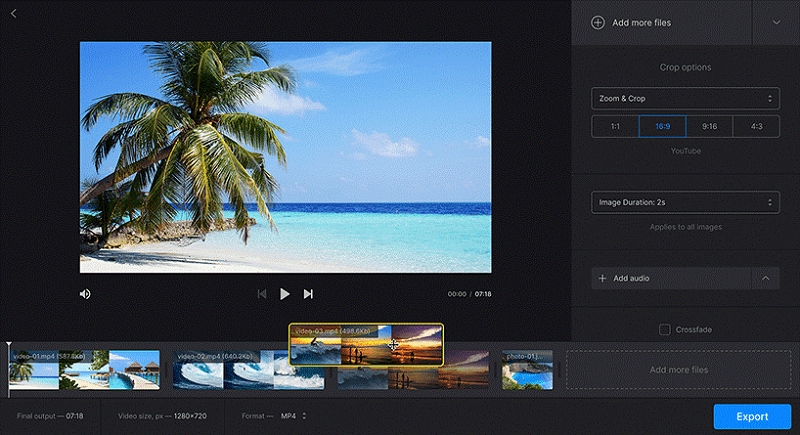
2. Image to video

This website offers a lot of different tools that you can use to create videos from your photos, crop videos, or add 3D transitions between frames. Keep in mind that the maximum number of photos you can use in one video is limited to thirty. Once you get to the home page of this platform, just upload your photos and arrange them in any way you want.
You can also add text, music, or your company logo to the video, then follow the on-screen instructions to complete the process. You can preview the video after the platform has generated it and decide whether you want to download it or start over if you didn’t like the result.
3. Mp3Care

This web application makes converting JPEG files to MP4 video files a simple two-step process that only requires uploading photos and then selecting the time between the two images. The maximum number of photos you can use in a video is limited to just twenty, with the maximum duration of each image in the video not exceeding the 20-second mark. Adding transitions between images is also on the list of options this platform provides, but Mp3 Care Photo to Video lacks any other video editing features. Despite some obvious drawbacks, this online photo-to-video maker is still a great choice if you want to convert your photos to videos quickly and for free.
How to convert image to video on desktop using Filmora
Free Download For Win 7 or later(64-bit)
Free Download For macOS 10.14 or later
First, download and install Filmora on your Windows or Mac computer. In the following section, I will cover how to add photos to a video using Filmora on Windows. The procedure for adding photos to a video on Mac is similar.
Step1Import both photos and video files into Filmora

Launch Filmora Video Editor and click “New Project“ to get started. Click “Import“ and then “Import media files“ or click “Import media files here“ to find your video and photos on your computer. Double-click the files and they will be imported into the program. You can also directly drag and drop photo and video files into the video editing program. Then you need to set up the project such as aspect ratio and resolution.
Step2Add a photo to the video and apply some effects
After importing the files into the program, drag the video clip to the video editor timeline at the bottom of the screen. Then drag the photo to the track above the video. Click the “Play“ icon to preview the video. Move the photo on the track to the point where you want to view it and drag the end to shorten or increase the duration of the photo.

After that, edit your photo as you choose. Place the image anywhere you want, then drag its edge to change the size of the playing windows. The picture-in-picture track can also be customized using a variety of customizable settings provided by Filmora. To access the picture, color, and motion panel, double-click the additional image on the track. Here, you can select from more than 30 motion effects to animate the added photo, alter its saturation and hue, perform some color correction, or alter its transformation.

Then click the “Effects“ button for more mask and effect options. Go to the Utility option under Filters and then drag the image mask onto the photo on the timeline. Double click on the photo and then you can change the shape, height, width, and blending of the image mask. On the mask tab, you can shape the photo with a single click. You can also invert the mask to create a new shape. Choose one of the effects according to your wish to make your video more unique.
Step3Save the new video file

After adding a photo to a video and making basic adjustments, you can export it in various ways by pressing the “Export“ button. You can save it in different formats in the Format tab. If you want to play the video creation on iPod, iPhone, or iPad, click “Device“ and select the device from the list. You can also upload your video directly to YouTube or burn it to DVDs for playback on your TV using a DVD player. You can also share the video directly on social networks.
Conclusion
The above article talks about different software that can convert images to videos, hope it is helpful if you were wondering how to do that. As we can see above, using Filmora video editor, you will be more creative in making videos with fun or using Kapwing online software to convert your images to videos.
Free Download For Win 7 or later(64-bit)
Free Download For macOS 10.14 or later
Free Download For macOS 10.14 or later
First, download and install Filmora on your Windows or Mac computer. In the following section, I will cover how to add photos to a video using Filmora on Windows. The procedure for adding photos to a video on Mac is similar.
Step1Import both photos and video files into Filmora
Launch Filmora Video Editor and click “New Project“ to get started. Click “Import“ and then “Import media files“ or click “Import media files here“ to find your video and photos on your computer. Double-click the files and they will be imported into the program. You can also directly drag and drop photo and video files into the video editing program. Then you need to set up the project such as aspect ratio and resolution.
Step2Add a photo to the video and apply some effects
After importing the files into the program, drag the video clip to the video editor timeline at the bottom of the screen. Then drag the photo to the track above the video. Click the “Play“ icon to preview the video. Move the photo on the track to the point where you want to view it and drag the end to shorten or increase the duration of the photo.
After that, edit your photo as you choose. Place the image anywhere you want, then drag its edge to change the size of the playing windows. The picture-in-picture track can also be customized using a variety of customizable settings provided by Filmora. To access the picture, color, and motion panel, double-click the additional image on the track. Here, you can select from more than 30 motion effects to animate the added photo, alter its saturation and hue, perform some color correction, or alter its transformation.
Then click the “Effects“ button for more mask and effect options. Go to the Utility option under Filters and then drag the image mask onto the photo on the timeline. Double click on the photo and then you can change the shape, height, width, and blending of the image mask. On the mask tab, you can shape the photo with a single click. You can also invert the mask to create a new shape. Choose one of the effects according to your wish to make your video more unique.
Step3Save the new video file
After adding a photo to a video and making basic adjustments, you can export it in various ways by pressing the “Export“ button. You can save it in different formats in the Format tab. If you want to play the video creation on iPod, iPhone, or iPad, click “Device“ and select the device from the list. You can also upload your video directly to YouTube or burn it to DVDs for playback on your TV using a DVD player. You can also share the video directly on social networks.
Conclusion
The above article talks about different software that can convert images to videos, hope it is helpful if you were wondering how to do that. As we can see above, using Filmora video editor, you will be more creative in making videos with fun or using Kapwing online software to convert your images to videos.
Free Download For Win 7 or later(64-bit)
Free Download For macOS 10.14 or later
How to Split Videos - 33 Best Video Splitter Recommend
A video splitter is necessary when you need to extract a crucial or particular portion of a video file. Many users trim or reduce video segments by deleting superfluous or undesired elements. While splitting a video into smaller clips is a challenging task in and of itself, don’t overlook the importance of keeping the quality of the video clip you plan to obtain. While there are various online video splitter software available today, most of them do not achieve what they claim. We’ve put together a compelling list of the best video splitters in this post, including full-featured software and lightweight editing solutions. Continue reading to learn more about them and choose the one that most appeals to you.
- Filmora
- Boilsoft Video Splitter
- Solveigmm Video Splitter
- BandiCut
- Free Video Cutter
- Easy Video Splitter
- Avidemux
- Ultra Video Splitter
- VideoPad Video Editor
- Windows Movie Maker
- Windows Photos
- VLC
- iMovie
- Format Factory
- 7 Best Free Video Splitter Online
- 10 Best Video Splitter for Mobile Phone
- Filmora
- AndroVid Video Editor
- Easy Video Cutter
- Video Editor
- VideoShow – Video Editor
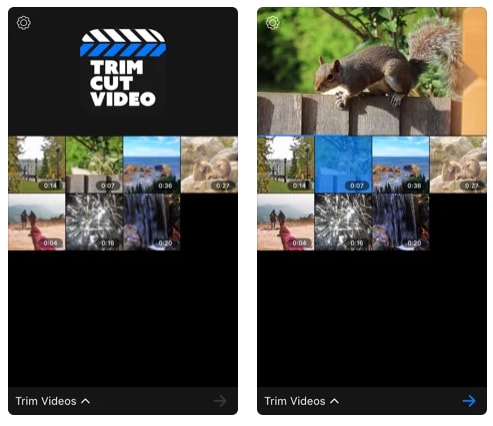
- Trim Video
- Video Splitter
- Crop video
- Video Crop
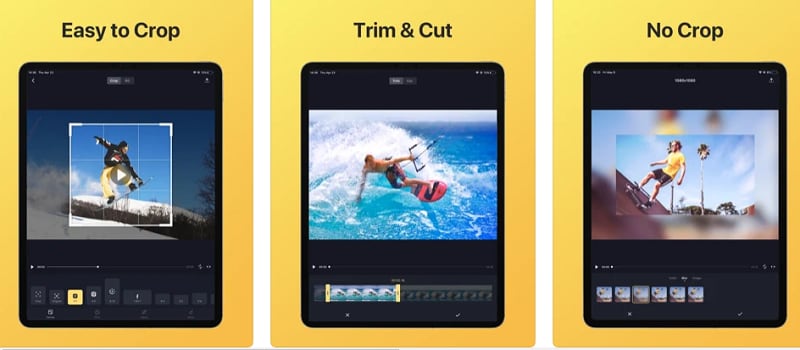
- Video Trim & Cut
Part 1: Backup Your Original Video
Making several backups is perhaps the most critical thing you can do for your project. Whether your computer dies suddenly or your editing application crashes, you’ll have a point to fall back on if you have a backup. Making this a habit will save you a lot of time and work in the long term. How many copies of your data should you make? You should create at least three project duplicates in the best-case scenario. Also, make sure they’re preserved in various formats and places—one on an SD card, another on a hard drive, or a USB drive.
14 Best Video Splitter for Windows/Mac
1. Filmora
Wondershare Filmora Video Editor is a superb video editor for those seeking software that can split videos and has a lot of functions. It was originally only accessible for Windows, but thanks to the developers, Mac users may now use this high-quality video splitter. Using this program to split and join videos is pretty basic and straightforward. It’s an intriguing tool since it allows users to produce high-quality films using filters, effects, and other features in an easier method than employing professional editors. This program also lets you export video at a breakneck speed, up to 4k quality.
![]()
Platform: Windows/Mac
Price: Free Trial
Features
- Editing is intuitive and quick.
- Export video in 4k quality.
- There are several graphic effects and transitions.
- Footage from the internet.
- Regularly upgraded features.
Pros
- Large films can be easily cut, trimmed, and combined without compromising quality.
- On the exported video, there is no watermark.
- Both Windows and Mac computers are supported.
- Splitting a video is such a breeze.
- For novices, it has a lot of handy options that will help you create a stunning film.
Cons
- Large-scale content editing might be slow at times.
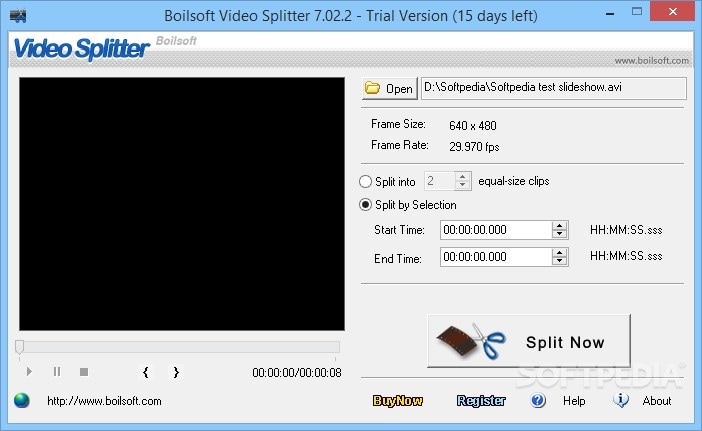
2. Boilsoft Video Splitter
Boilsoft Video Splitter can divide, edit, or trim a big AVI, MPEG, RM, ASF, WMV, 3GP, MKV, FLV, or MP4 video file without re-encoding smaller video segments. It has a built-in player that allows you to effortlessly split/cut video files according to time or selection.
Platform: Windows/Mac
Price:$34.95 one-time payment
Features
- Split Video
- Cut video
- Built-in player
Pros
- It supports lots of video format.
- User-friendly software.
Cons
- Because you can’t adjust the program window, using the slider for selection becomes increasingly difficult as your video becomes longer.
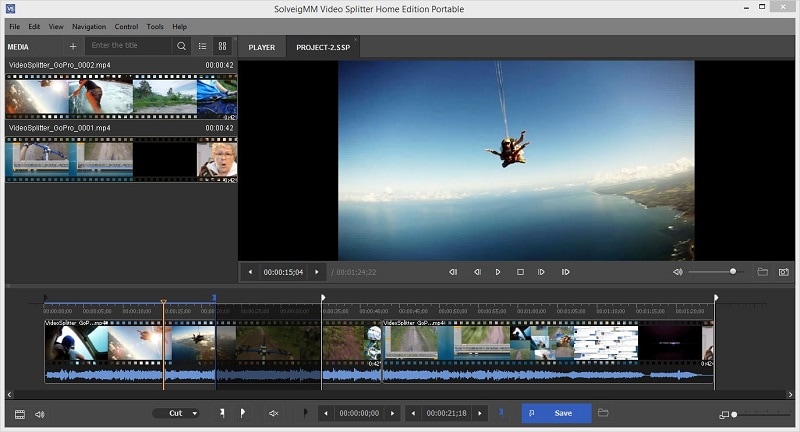
3. Solveigmm Video Splitter
SolveigMM Video Splitter is suitable for simple editing processes such as removing an extra section from a video, removing an advertisement from a movie, muting the sound on a selected video fragment, saving only a video or audio track from a file, cutting a video into parts, saving segments into separate files, and so on. The editing procedure takes just a few seconds.
Platform: Windows/Mac
Price:$7.99 per month
Features
- Video cutter
- Video editor
- Video Joiner
Pros
- No previous training or knowledge is necessary to understand how to use the software.
- All major file formats are supported.
- The output file quality is unaffected.
Cons
- It sometimes crashes depending on the file size.
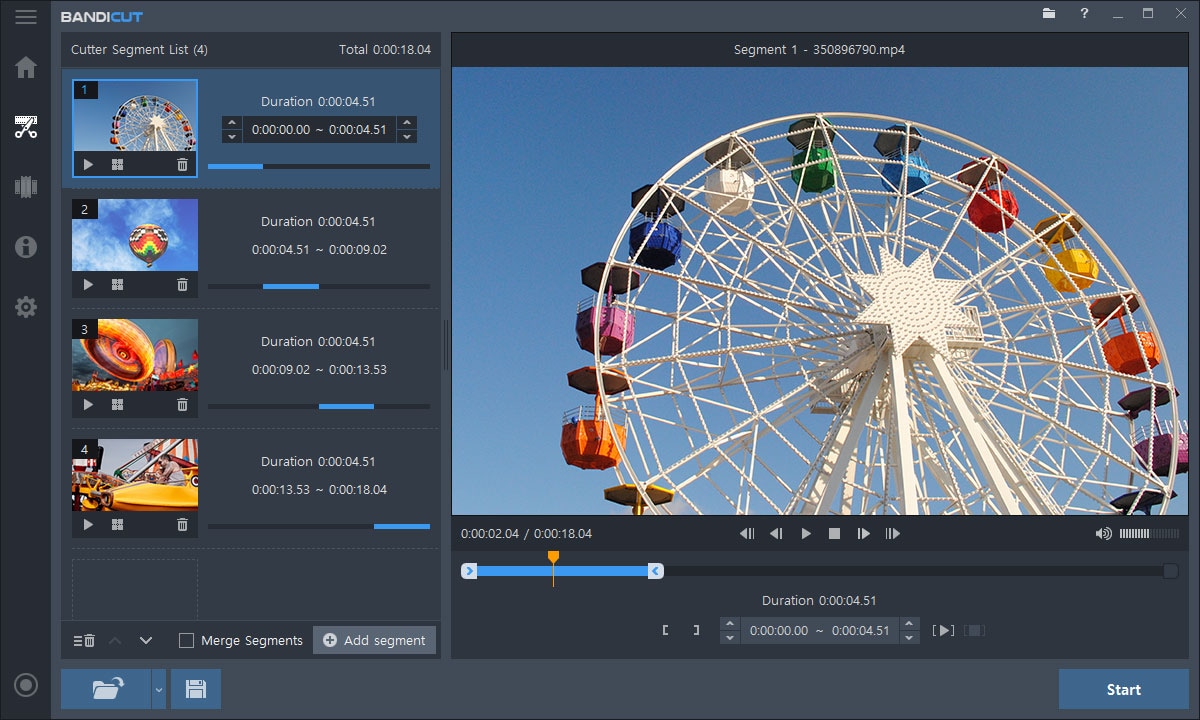
4. BandiCut
Bandicut is a video splitting and joining program for Windows systems only. It has a straightforward UI and simple settings. It may also be used as a video converter, allowing you to modify the format of the output clips. The tool is useful for both newcomers and seasoned users.
Platform: Windows
Price:$29.95 per user per month
Features
- Easy and fast video cutter
- Video splitter
Pros
- The interface is pleasing to the eye, and the functions are simple.
- High-capacity mode
Cons
- There isn’t a fully working free version available.
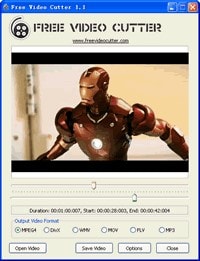
5. Free Video Cutter
This is a basic tool for reducing the size of large video files. It allows you to cut a clip from a movie or video in various formats and save it in four other formats. The hand-drawn interface, by the way, is incredibly charming.
Platform: Windows
**Price:**a free version and premium version ($17.99 per month)
Features
- An irregularly shaped hand-drawn art style interface.
- Videos in a variety of formats are accepted.
- The control panel is small, with just three major buttons.
Pros
- Save as new videos in a variety of formats without compromising quality.
- It may be used to trim lengthy movies, mobile videos, and camera recordings, among other things.
Cons
- For huge files, there are a lot of crashes.
- For Mac users, this tool is not accessible.
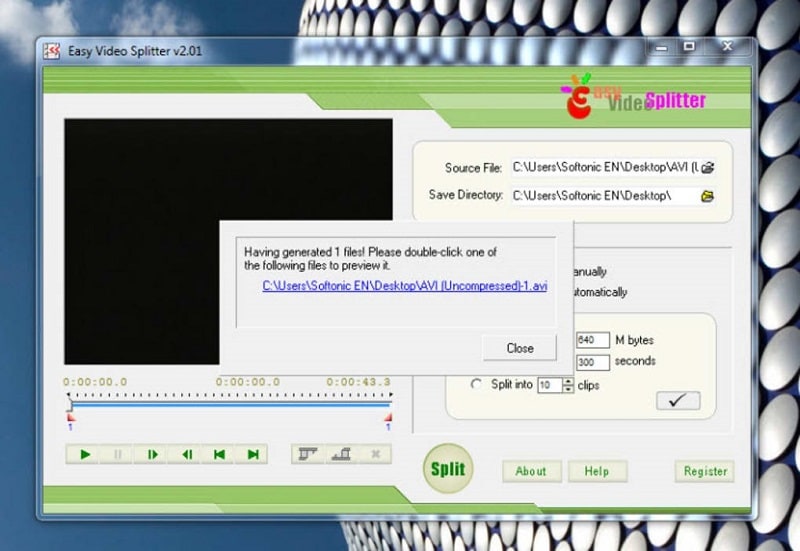
6. Easy Video Splitter
Easy Video Splitter is a simple video editing application that allows you to divide your video into many segments. It can play AVI, MPEG, WMV, and ASF files. The scroll bats may be used to cut the movie precisely where you want it to be cut or to divide the film at certain intervals.
**Platform:**Windows/Mac
**Price:**free with ads
Features
- Has a batch processor
- Multiple file support
- Easy to use
Pros
- Batch processing is supported.
Cons
- Only one frame at a time may be fine-tuned.
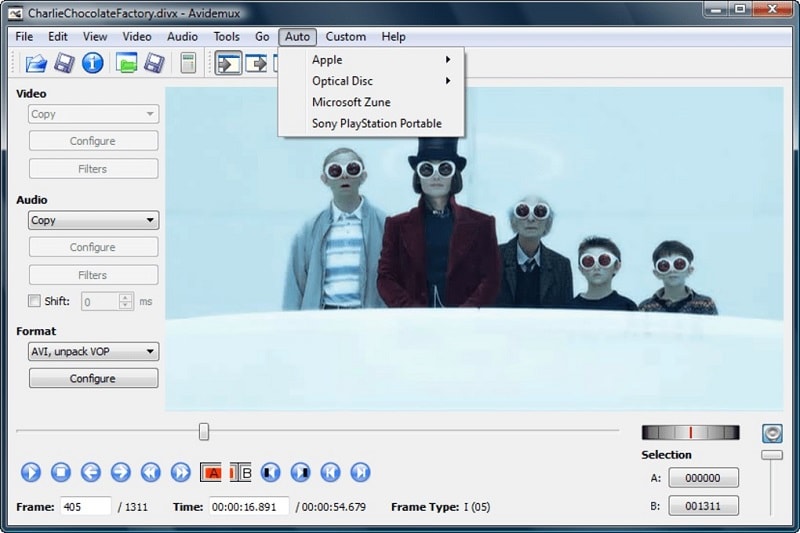
7. Avidemux
Avidemux is perfect if you have a video to encode or arrange for a certain speaker system. It’s also an ideal choice if you just require a basic video editor, although there are many more extensive applications available that may be better appropriate.
**Platform:**Windows/Mac
**Price:**free
Features
- This program can handle a variety of subtitle formats, including SUB and SRT.
- They also provide a variety of filtering options.
- You may export videos in various formats, including MKV, MPEG, and MP4.
Pros
- A user-friendly interface
- Excellent alternatives for encoding
- Filters for sharpening and de-noising
Cons
- There is no timeline.
- There are no innovative transitions or effects.
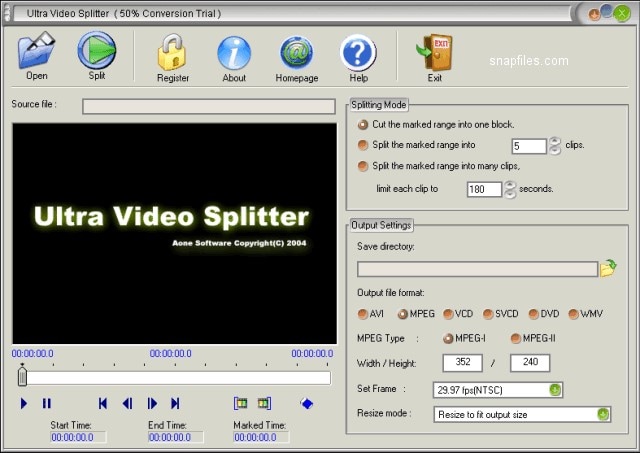
8. Ultra Video Splitter
Ultra Video Splitter is an excellent solution for people who just need to complete this one operation and hence do not need the usage of sophisticated video editing software. The tool enables you to choose from a variety of parameters for the final file or files, such as file size, final format, and bitrate.
**Platform:**Windows/Mac
Price:$25.00 one-time payment
Features
- Supports videos in WMV, XviD, MPEG, ASF, AVI, RM, MOV, 3GP, Divx, and MP4 format.
- Can export the final video in VCD, SVCD, DVD, AVI, DivX, MPEG, or WMV format.
Pros
- Video trimming and exporting are both quick.
- Multiple video formats are supported.
Cons
- Has just a few video editing options.
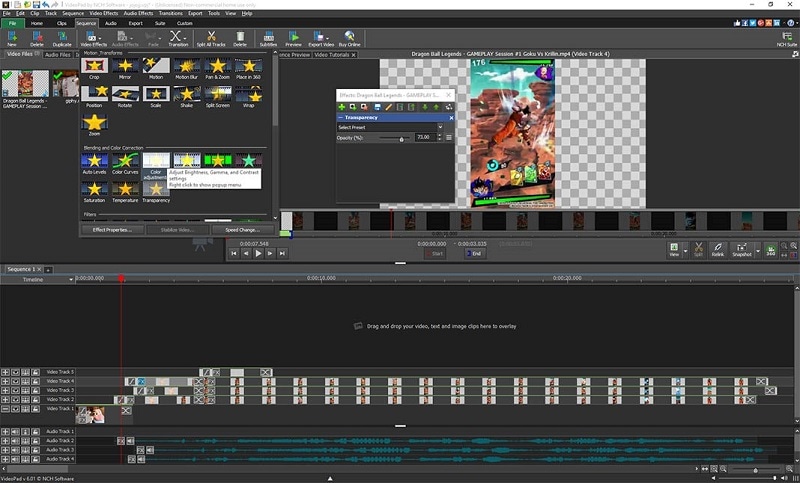
9. VideoPad Video Editor
On Mac and Windows, the VideoPad video editor allows you to edit clips and produce professional-quality films. Its divide and merge functions are also straightforward to utilize. VideoPad editing software can be used to create visually appealing videos. As a result, the video splitter software for Mac can rapidly and efficiently manipulate video streams.
**Platform:**Windows/Mac
Price:$60.00 one-time payment
Features
- It supports a variety of file formats, offering users additional choices for how to utilize the tool with different file kinds.
Pros
- The cost of a professional business video is surprisingly low.
- Importing video is as simple as dragging and dropping.
Cons
- The free edition offers a restricted number of functions.
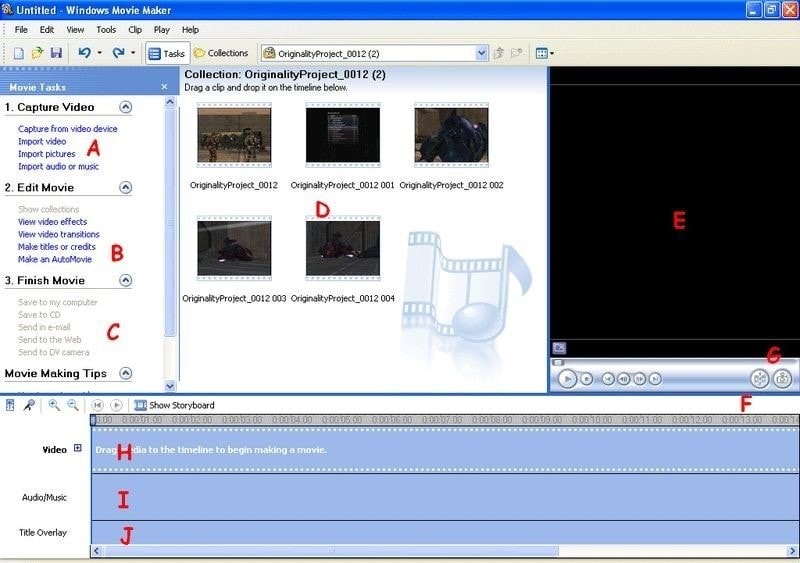
10. Windows Movie Maker
This video editing software comes with Windows OS and is focused on simplicity: There’s no easier method to split videos and save into lossless codecs with titles, transitions, background music, and effects than this. Earlier versions of the application were so basic that they couldn’t accomplish what most people required. Still, over time, features like voiceover recording and even anti-shake have crept into what is today a highly useful free video splitter.
**Platform:**Windows
**Price:**free
Features
- Cool transitions
- Effects on video
- Voiceovers are some of the audio features
Pros
- Effects are automatically previewed.
- Audio features such as voiceovers and other audio enhancements.
- Excellent choices for sharing.
- Simple to use
- Stabilization.
Cons
- There are no modifications to the contrast or saturation.
- The effects aren’t flexible.
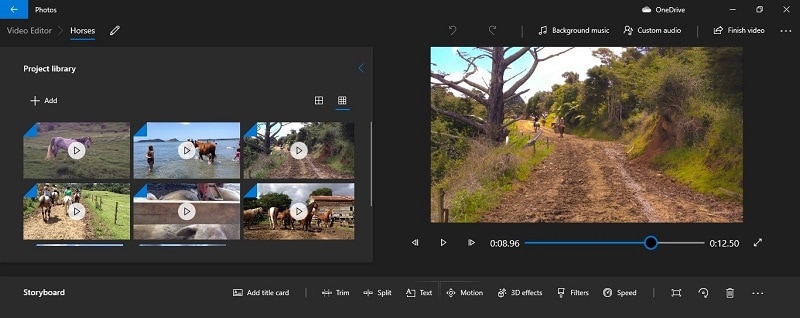
11. Windows Photos
Many users will never require more than Windows 10’s built-in picture and video editor . It is an automatic video splitter with sophisticated effects like 3D overlays and animated titles are among the extras.
**Platform:**Windows
**Price:**free
Features
- Face recognition
- Video cutter
- 3D overlays
Pros
- A simple interface.
- Detecting faces and objects.
- Album creation is done automatically.
- It works with OneDrive.
- Soundtracks, text, and transitions are all used in video editing.
Cons
- There isn’t a before-and-after comparison.
- Panorama stitching and selective focus are not supported.
- There is no geometry correction or chromatic aberration correction.
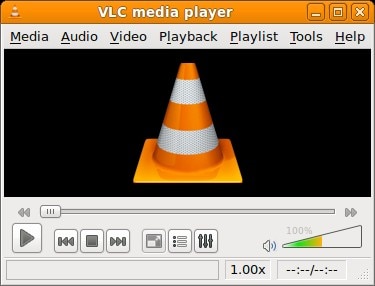
12. VLC
VLC Media Player , for good reasons, is a hugely popular video splitter. It is completely free, supports almost everything without the need to download additional codecs, supports streaming, can enhance video and audio playback for your chosen device, and can be extended almost infinitely with plugins downloadable from the internet.
**Platform:**Windows/Mac
**Price:**free
Features
- Allows streaming of MPEG and DivX files
- Excellent video and audio playback modifying tools
Pros
- It can play all kinds of music and video formats, even compressed ones.
Cons
- It is GPU-dependent and may crash at random moments.
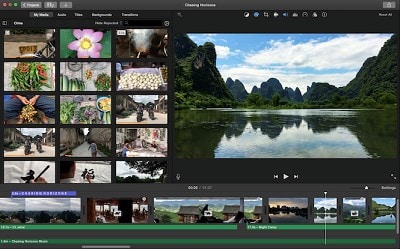
13. iMovie
If you’re using a Mac,iMovie video editing program can help you split videos. Mac users will find this to be one of the finest video splitters available. It contains a wide range of capabilities that may improve the quality of your video in a variety of ways. The video may be trimmed and enhanced with many features, such as text, special effects, and audio. Video quality may be improved with this software’s special effects and video upgrades. In addition, the interface is so user-friendly that even novices may generate stunning results. On the other hand, iMovie is capable of storing 4K films.
**Platform:**Mac
**Price:**free
Features
- An easy-to-use video splitter that is already built-in
- It’s simple to use
Pros
- An easy-to-use video splitter that is already built-in
- It’s simple to use
Cons
- Uploading and exporting videos takes a long time.
14. Format Factory
Multifunctional document and multimedia processing software -Format Factory - is only available for Windows. It’s meticulously designed to keep you from getting lost in the weeds when working on any project. It is designed to be a stand-alone file management application, and judging by the wealth of options available, it has done an excellent job.

**Platform:**Windows
**Price:**free
Features
- Video joining and muxing are available.
- It has a screen recorder built right in.
- A built-in video player and downloader are included.
- Allows for hardware acceleration.
- Disk ripping options are provided.
- Processing may be done in a batch.
Pros
- Removes watermarks and logos.
- File formats supported include video, audio, images, and documents.
Cons
- Unnecessary software is installed when installing the program.
7 Best Free Video Splitter Online
2. VEED.IO
Veed.io is a free online video editing tool that allows anybody to make powerful movies and expand their audiences. It has several useful features, such as cutting and filtering films based on their appearance. Users may cut, add text, and draw on the videos. Veed may also be used to generate videos on social media channels.

**Price:**free
Features
- Video splitter and joiner
Pros
- Simple and quick.
- A preview of the cutting result is available.
Cons
- The maximum file size is 50 MB.
3. Flixier
Flixier is a web-based video editor that offers 1-minute exports to any device, easy collaboration, and lots of cloud storage. Flixier enables customers to export whatever video they want, independent of their technology. It keeps all stakeholders in the loop by allowing each team member and contributor to remain in sync across all platforms. Teams may interact in real time without fear of losing track of the project. Cloud storage, version history, feedback comments, sophisticated exports, and email alerts are all available. The tool supports Windows, Mac, Linux, and Chromebooks.
**Price:**free
Features
- Video splitter and joiner
Pros
- iPhone version is available.
- Automatic sound amplification.
Cons
- May seem too overloaded with functions.
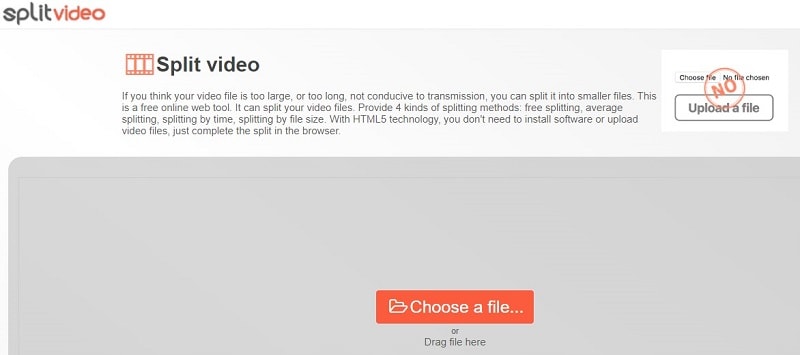
4. Split Video
Split Video program may also be used to edit and split huge videos into smaller segments. It’s quite simple to work with. All you have to do now is choose the video to divide. Tell the app how you’d want the video to be divided. Choose how many parts you want in your video. You may watch the app-split clips before sharing them.
**Price:**free
Features
- Video splitter and joiner
Pros
- Interface that is easy to use.
Cons
- The maximum file size is 200 MB.
5. Kapwing
This application primarily advertises itself as a video trimmer. It lets you edit films by removing unwanted bits and trimming them to the appropriate length. It also has some basic settings, such as utilizing it as a free online MP4 splitter. The user interface is simple, and uploading a movie takes just a few moments. The primary drawback is that your film may only be 300 MB in size and must be under 30 minutes in length.

**Price:**free
Features
- Video splitter and joiner
Pros
- Interface that is simple to use.
Cons
- A little watermark appears in the corner of your video with the free version.
- Only supports films up to 300 MB in size and up to half an hour in length.
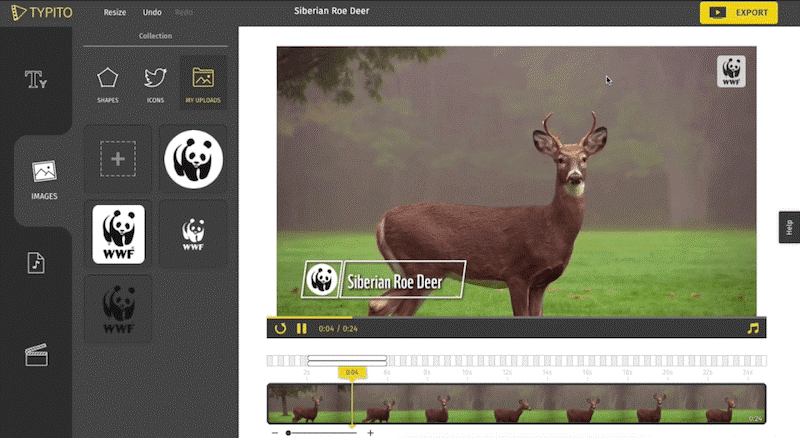
6. Typito
Typito is a video collaboration tool that allows you and your team to work together to make better films for your business. Typito allows you to make and utilize professionally created graphic overlays for free, as well as generate full-length HR movies in both square and portrait formats. It enables you to produce movies consistent with your brand, allowing you to change and customize elements like font, color, and logo with a few mouse clicks. You may save time for your organization by producing videos quicker and working with your team to publish professional-looking films while previewing them on the move. Inviting team members to the project and assigning responsibilities for editing and reviewing videos are just a few collaboration tools.
**Price:**free
Features
- Video splitter and joiner
Pros
- Simple features to use
Cons
- Few transition templates.
7. Clideo
Clideo is a one-of-a-kind platform that allows you to easily produce and modify any video, GIFS, and picture files in one spot. Merging, compressing, resizing, slideshow, cropping, rotation, and other video editing tools are included in the program. Users may add music or text to videos to help them stand out and draw in the right audience. The video editing platform supports various video formats such as MP4, AVI, MPG, VOB, WMV, MOV, and others. There is no need to download or install any applications since everything may be done entirely online. The premium security encryption that comes with it ensures that all video files are always well-protected.
**Price:**free
Features
- Video splitter and joiner
Pros
- Much easier to use than other video editing software.
- Projects are stored on the cloud, so they don’t take up any computer resources.
- There is no need to download any program.
Cons
- The feature set is limited in comparison to other video editing suites.
- Visual artistry is required.
- Some undertakings need a significant amount of time to complete.
10 Best Video Splitter for Mobile Phone
1. Filmora
A good video editor is required to split a video qualitatively.Filmora Video Editor & Maker might be the answer. It works with high-definition videos. It comes with all of the necessary editing tools. As a result, you will not be sorry for installing this software. Not only will you be able to edit and divide films effortlessly, but you’ll also be able to add fun filters.
The sticker library in Filmora Video Editor & Maker is extensive. The number is in the thousands. You’ll be able to apply both realistic and humorous animated stickers. Use video transitions such as Flash, Page Cut, Cross Zoom, Blurry Roll, and Cube. You have complete control over the speed of your edited video.
**Price:**free
Features
- Video splitter and joiner
- Video editor
Pros
- Files may be readily exported and imported.
Cons
- Compatibility of exported videos is limited.
2. AndroVid Video Editor
AndroVid is a video-splitting program with all the tools you’ll ever need. This program is jam-packed with editing tools, allowing you to create a polished video quickly. The program is also quite user-friendly, so even if this is your first time splitting a video, you will be able to handle it.
**Platform:**Android
**Price:**free
Features
- Video splitter and joiner
- Video editor
Pros
- Simple video cutting tool; can extract single-frame pictures from videos.
Cons
- There are no sophisticated editing choices, and the audio options are quite restricted.
- There is no tool for full-screen graphics, and the user interface is a little complicated.
- The ad-free version is nearly as expensive as KineMaster Pro, which is more sophisticated.
3. Easy Video Cutter
Becausethis program is only devoted to video editing, it can handle a wide range of tasks. The program, for example, may clip videos, combine them, rotate them, and so on. You may also adjust the pace of the videos as needed. It should be noted that trimming the video in this program is quite simple — just pick the range with the slider instrument, and that’s it. Because this program is only devoted to video editing, it can handle a wide range of tasks. The program, for example, may clip videos, combine them, rotate them, and so on. You may also adjust the pace of the videos as needed. It should be noted that trimming the video in this program is quite simple — just pick the range with the slider instrument and that’s it.

**Platform:**Android
**Price:**free
Features
- Video splitter and joiner
- Video editor
Pros
- It’s quite simple to use.
- It’s ideal for simple video cutting tasks.
Cons
- There are no additional editing options available.
4. Video Editor
Video Editor is a fantastic app for Android users who want to edit and enhance their videos. It can break a video into segments, combine several films, crop videos, and adjust the video’s size. You may also add audio to the video of your choosing.
**Platform:**Android
**Price:**free
Features
- Video splitter and joiner
- Video editor
Pros
- You may rearrange your clips in any order you choose.
- Many older file types are supported by the program.
Cons
- The video scroll bar might be a little tricky to use.
- It’s quite basic.
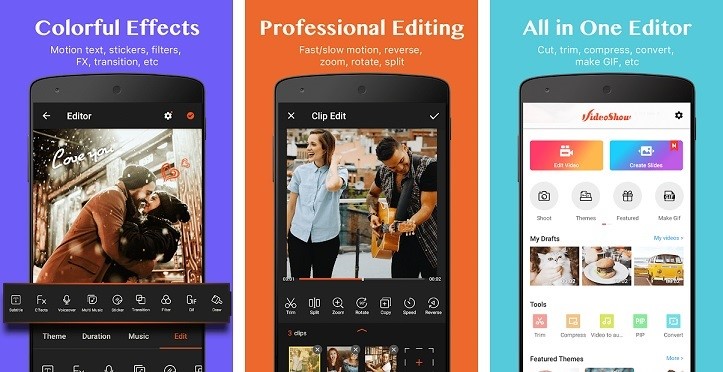
5. VideoShow – Video Editor
On the Google Play market,VideoShow is one of the most popular video editing applications. There are several themes, filters, music, and audio to choose from while creating great videos. It’s a fantastic video trimming software.
**Platform:**Android/iPhone
**Price:**free
Features
- Video splitter and joiner
- Video editor
Pros
- It has the ability to both connect and cut clips.
- It’ll run on almost any android phone.
Cons
- Video Scissors has taken the place of the iPhone version.
- Cutting is fast, but re-encoding might take a long time.
6. Trim Video
Trim Video is the greatest app for iPhone video editing and cutting of huge videos. From the huge file, you may easily crop a video clip. Although the program is highly useful and entertaining for video makers, it is not free and costs $0.99.
**Platform:**iPhone
Price:$0.99 per month
Features
- Video splitter
Pros
- All major video and audio formats are supported.
- When you’re finished, there’s no need to re-render the video.
- There are no watermarks.
Cons
- This software does not include video joining; it must be downloaded separately.
- This app’s main purpose is to cut.
7. Video Splitter
Video Splitter is an iPhone software that allows you to edit and divide videos into segments. It’s a free program that combines all of your editing tools into one application. The tool successfully splits a huge video into little chunks, which can be quickly texted or uploaded to social media.
**Platform:**iPhone
**Price:**free
Features
- Video splitter and joiner
- Video editor
Pros
- A broad number of formats, including audio, are supported.
- It’s a breeze to use.
Cons
- There are no choices for video converting.
- It’s been a long time since it’s been updated.
8. Crop video
Crop Video is another handy iPhone app if you wish to cut your movie to a lesser size. It is one of the most popular tools for cutting videos and altering them for a better impact. It contains several features that boost the app’s versatility. It’ll set you back $2.99.
**Platform:**iPhone
Price:$2.99 per month
Features
- Video splitter and joiner
- Video editor
Pros
- The video cutter is helpful for novices.
- It works with every iPhone version.
Cons
- The free version has a lot of limitations.
- The videos of free users are watermarked.
9. Video Crop
Video Crop is a free iPhone software that allows you to crop videos. There are many more options in the software that may be used to modify and improve a video. This program has a lot of flexibility when it comes to video editing and other video settings. This program may also be used to split videos.
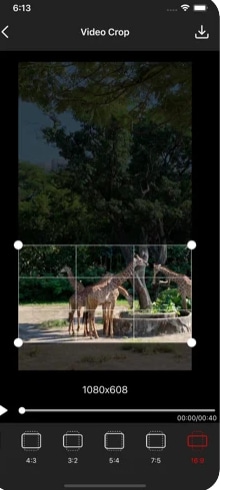
**Platform:**iPhone
**Price:**free
Features
- Video splitter and joiner
- Video editor
Pros
- Splitting and joining MP4 files is simple and effective.
Cons
- It’s only compatible with MP4 files.
- The UI is really sluggish.
10. Video Trim & Cut
Video Trim & Cut is an iPhone software that allows you to divide or trim videos. Adding effects, cropping, altering color, and changing themes are just a few things you can do with the app.
**Platform:**iPhone
**Price:**free
Features
- Video splitter and joiner
- Video editor
Pros
- Excellent templates.
- It has the appearance and functionality of a more costly app.
Cons
- It’s only available on iPhone.
- It might take a long time for a video to render.
Part 5: How to Split Video with Filmora
Step1Import your videos to Filmora Video Cutter
Launch the video cutter once it has been installed and click New Project to access the video editing interface. Now you must import the video, which must be divided into numerous portions.
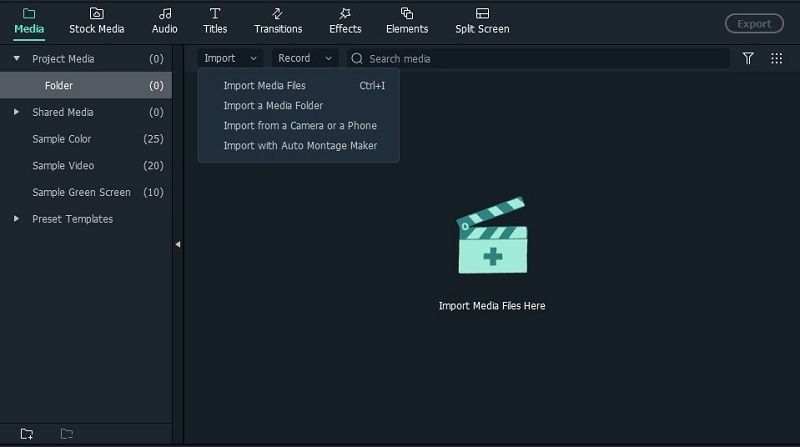
Upload files
You can either drag and drop files to the media library before adding them to the timeline for editing, or you can click “Import” on the main interface and choose files from your computer.
VOB, 3GP, 3G2, MP4, FLV, AVI, MOV, F4V, M4V, TRP, M2TS, MTS, TP, DAT, WMV, MPG, MPEG, TS, MKV, ASF, DV, EVO, MOD, NSV, and TOD files are all supported by Filmora video cutter.
If your video contains a lot of distinct sequences, Filmora can help you discover the clip you want to trim. The “Scene Detection” tool will assist you in rapidly locating the part you wish to clip. To open the Scene Detection window, choose the video in the media library (not the timeline), right-click it, and select “Scene Detection.”

Detect video
When you click Detect, Filmora will automatically split your films into multiple segments depending on scene changes.
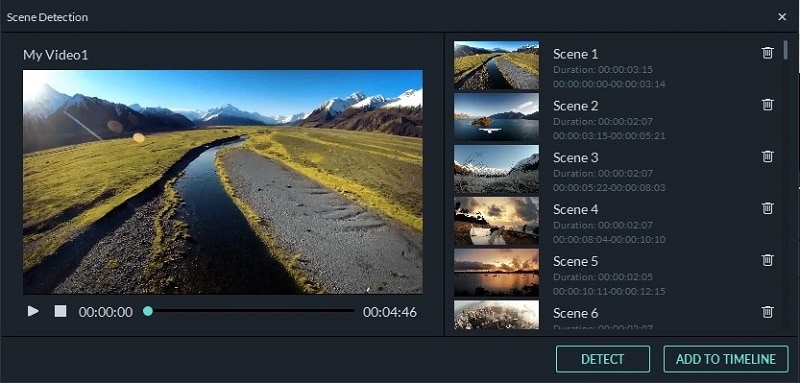
Scenes detected automatically
By clicking the Delete symbol next to the clip, you may delete the undesired sequences and quickly get to the section you want. When you click the Add to Timeline button, all of the segmented video sections will be instantly imported into the timeline, which you can then modify.
Step2Manually trim/split/cut/delete videos
To trim video files, drag clips from the media library to the video track on the timeline and follow these steps. You may use the trim option to chop off the beginning or conclusion of a video swiftly.
Trim video using filmora
- i.Zoom in on the frames you wish to remove from the timeline. Drag the trim symbol to the right to remove the video’s beginning segments from the timeline or to the left to remove the video’s undesired ending segments. You may use the trim tool to cut the beginning and end parts of a sentence with a single drag.
- ii.You may edit a movie into portions, eliminate unnecessary aspects, and combine them into a new film, in addition to chopping off segments at the beginning or conclusion.
- iii.Move the play head to the beginning of the video part you want to cut, then click the Split icon (scissor icon) on the toolbar or the Split button on the play head to split the video. You will get the starting frame, then move the play head to the ending frame and click the Split button again to get the ending part.
- iv.To cut a video into many sections, repeat the procedure. You will get multiple clipped portions, which you may either remove or re-order and alter further.
- v.You may edit out an undesirable cut video by hitting the Delete symbol on the toolbar.
Add trim start and end
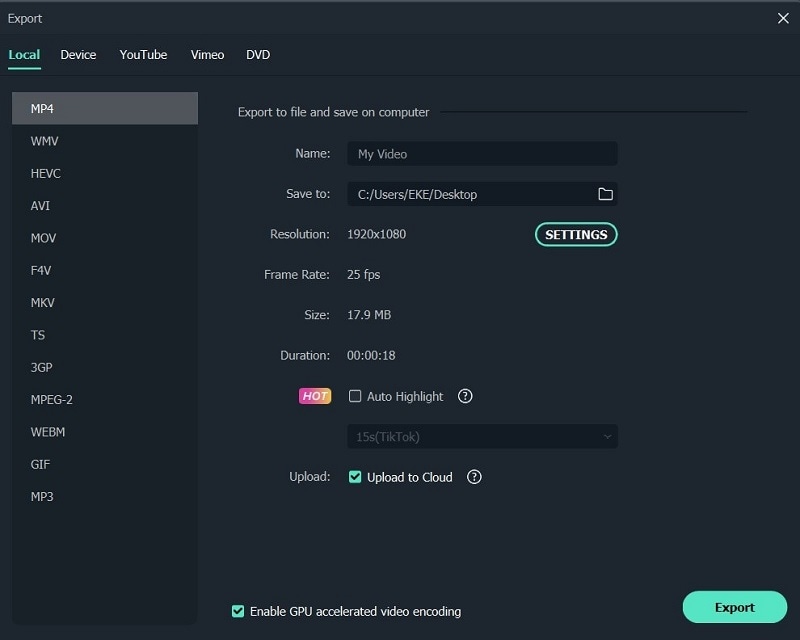
Step3Export your video
Click the Export button on the screen after you’ve completed cutting and basic editing. By choosing “Format” and specifying the essential options such as frame rate and resolution, you may save the video in different formats on your local computer.
If you wish to see your video production on your iPod, iPhone, or iPad, go to “Device” and choose your device’s thumbnail. You may also instantly post your films on YouTube or Vimeo, or burn them to DVDs for long-term storage.
Export video after splitting
Bottom Line
Video splitting can be a daunting task when you don’t have the right tools to help you. If you are a Windows or a Mac user then Wondershare Filmora will help you split videos in just few clicks. The software is completely free with an option to go pro for a cheaper price compared to other premium apps. If you prefer splitting your video online then still Filmora online editor will help you in this. Moreover, some good news for android and iPhone users as Filmora comes with all features to split and join videos. With all these tools you can take your video creation process to the next level.
- Filmora
- AndroVid Video Editor
- Easy Video Cutter
- Video Editor
- VideoShow – Video Editor
- Trim Video
- Video Splitter
- Crop video
- Video Crop
- Video Trim & Cut
Part 1: Backup Your Original Video
Making several backups is perhaps the most critical thing you can do for your project. Whether your computer dies suddenly or your editing application crashes, you’ll have a point to fall back on if you have a backup. Making this a habit will save you a lot of time and work in the long term. How many copies of your data should you make? You should create at least three project duplicates in the best-case scenario. Also, make sure they’re preserved in various formats and places—one on an SD card, another on a hard drive, or a USB drive.
14 Best Video Splitter for Windows/Mac
1. Filmora
Wondershare Filmora Video Editor is a superb video editor for those seeking software that can split videos and has a lot of functions. It was originally only accessible for Windows, but thanks to the developers, Mac users may now use this high-quality video splitter. Using this program to split and join videos is pretty basic and straightforward. It’s an intriguing tool since it allows users to produce high-quality films using filters, effects, and other features in an easier method than employing professional editors. This program also lets you export video at a breakneck speed, up to 4k quality.
![]()
Platform: Windows/Mac
Price: Free Trial
Features
- Editing is intuitive and quick.
- Export video in 4k quality.
- There are several graphic effects and transitions.
- Footage from the internet.
- Regularly upgraded features.
Pros
- Large films can be easily cut, trimmed, and combined without compromising quality.
- On the exported video, there is no watermark.
- Both Windows and Mac computers are supported.
- Splitting a video is such a breeze.
- For novices, it has a lot of handy options that will help you create a stunning film.
Cons
- Large-scale content editing might be slow at times.
2. Boilsoft Video Splitter
Boilsoft Video Splitter can divide, edit, or trim a big AVI, MPEG, RM, ASF, WMV, 3GP, MKV, FLV, or MP4 video file without re-encoding smaller video segments. It has a built-in player that allows you to effortlessly split/cut video files according to time or selection.
Platform: Windows/Mac
Price:$34.95 one-time payment
Features
- Split Video
- Cut video
- Built-in player
Pros
- It supports lots of video format.
- User-friendly software.
Cons
- Because you can’t adjust the program window, using the slider for selection becomes increasingly difficult as your video becomes longer.
3. Solveigmm Video Splitter
SolveigMM Video Splitter is suitable for simple editing processes such as removing an extra section from a video, removing an advertisement from a movie, muting the sound on a selected video fragment, saving only a video or audio track from a file, cutting a video into parts, saving segments into separate files, and so on. The editing procedure takes just a few seconds.
Platform: Windows/Mac
Price:$7.99 per month
Features
- Video cutter
- Video editor
- Video Joiner
Pros
- No previous training or knowledge is necessary to understand how to use the software.
- All major file formats are supported.
- The output file quality is unaffected.
Cons
- It sometimes crashes depending on the file size.
4. BandiCut
Bandicut is a video splitting and joining program for Windows systems only. It has a straightforward UI and simple settings. It may also be used as a video converter, allowing you to modify the format of the output clips. The tool is useful for both newcomers and seasoned users.
Platform: Windows
Price:$29.95 per user per month
Features
- Easy and fast video cutter
- Video splitter
Pros
- The interface is pleasing to the eye, and the functions are simple.
- High-capacity mode
Cons
- There isn’t a fully working free version available.
5. Free Video Cutter
This is a basic tool for reducing the size of large video files. It allows you to cut a clip from a movie or video in various formats and save it in four other formats. The hand-drawn interface, by the way, is incredibly charming.
Platform: Windows
**Price:**a free version and premium version ($17.99 per month)
Features
- An irregularly shaped hand-drawn art style interface.
- Videos in a variety of formats are accepted.
- The control panel is small, with just three major buttons.
Pros
- Save as new videos in a variety of formats without compromising quality.
- It may be used to trim lengthy movies, mobile videos, and camera recordings, among other things.
Cons
- For huge files, there are a lot of crashes.
- For Mac users, this tool is not accessible.
6. Easy Video Splitter
Easy Video Splitter is a simple video editing application that allows you to divide your video into many segments. It can play AVI, MPEG, WMV, and ASF files. The scroll bats may be used to cut the movie precisely where you want it to be cut or to divide the film at certain intervals.
**Platform:**Windows/Mac
**Price:**free with ads
Features
- Has a batch processor
- Multiple file support
- Easy to use
Pros
- Batch processing is supported.
Cons
- Only one frame at a time may be fine-tuned.
7. Avidemux
Avidemux is perfect if you have a video to encode or arrange for a certain speaker system. It’s also an ideal choice if you just require a basic video editor, although there are many more extensive applications available that may be better appropriate.
**Platform:**Windows/Mac
**Price:**free
Features
- This program can handle a variety of subtitle formats, including SUB and SRT.
- They also provide a variety of filtering options.
- You may export videos in various formats, including MKV, MPEG, and MP4.
Pros
- A user-friendly interface
- Excellent alternatives for encoding
- Filters for sharpening and de-noising
Cons
- There is no timeline.
- There are no innovative transitions or effects.
8. Ultra Video Splitter
Ultra Video Splitter is an excellent solution for people who just need to complete this one operation and hence do not need the usage of sophisticated video editing software. The tool enables you to choose from a variety of parameters for the final file or files, such as file size, final format, and bitrate.
**Platform:**Windows/Mac
Price:$25.00 one-time payment
Features
- Supports videos in WMV, XviD, MPEG, ASF, AVI, RM, MOV, 3GP, Divx, and MP4 format.
- Can export the final video in VCD, SVCD, DVD, AVI, DivX, MPEG, or WMV format.
Pros
- Video trimming and exporting are both quick.
- Multiple video formats are supported.
Cons
- Has just a few video editing options.
9. VideoPad Video Editor
On Mac and Windows, the VideoPad video editor allows you to edit clips and produce professional-quality films. Its divide and merge functions are also straightforward to utilize. VideoPad editing software can be used to create visually appealing videos. As a result, the video splitter software for Mac can rapidly and efficiently manipulate video streams.
**Platform:**Windows/Mac
Price:$60.00 one-time payment
Features
- It supports a variety of file formats, offering users additional choices for how to utilize the tool with different file kinds.
Pros
- The cost of a professional business video is surprisingly low.
- Importing video is as simple as dragging and dropping.
Cons
- The free edition offers a restricted number of functions.
10. Windows Movie Maker
This video editing software comes with Windows OS and is focused on simplicity: There’s no easier method to split videos and save into lossless codecs with titles, transitions, background music, and effects than this. Earlier versions of the application were so basic that they couldn’t accomplish what most people required. Still, over time, features like voiceover recording and even anti-shake have crept into what is today a highly useful free video splitter.
**Platform:**Windows
**Price:**free
Features
- Cool transitions
- Effects on video
- Voiceovers are some of the audio features
Pros
- Effects are automatically previewed.
- Audio features such as voiceovers and other audio enhancements.
- Excellent choices for sharing.
- Simple to use
- Stabilization.
Cons
- There are no modifications to the contrast or saturation.
- The effects aren’t flexible.
11. Windows Photos
Many users will never require more than Windows 10’s built-in picture and video editor . It is an automatic video splitter with sophisticated effects like 3D overlays and animated titles are among the extras.
**Platform:**Windows
**Price:**free
Features
- Face recognition
- Video cutter
- 3D overlays
Pros
- A simple interface.
- Detecting faces and objects.
- Album creation is done automatically.
- It works with OneDrive.
- Soundtracks, text, and transitions are all used in video editing.
Cons
- There isn’t a before-and-after comparison.
- Panorama stitching and selective focus are not supported.
- There is no geometry correction or chromatic aberration correction.
12. VLC
VLC Media Player , for good reasons, is a hugely popular video splitter. It is completely free, supports almost everything without the need to download additional codecs, supports streaming, can enhance video and audio playback for your chosen device, and can be extended almost infinitely with plugins downloadable from the internet.
**Platform:**Windows/Mac
**Price:**free
Features
- Allows streaming of MPEG and DivX files
- Excellent video and audio playback modifying tools
Pros
- It can play all kinds of music and video formats, even compressed ones.
Cons
- It is GPU-dependent and may crash at random moments.
13. iMovie
If you’re using a Mac,iMovie video editing program can help you split videos. Mac users will find this to be one of the finest video splitters available. It contains a wide range of capabilities that may improve the quality of your video in a variety of ways. The video may be trimmed and enhanced with many features, such as text, special effects, and audio. Video quality may be improved with this software’s special effects and video upgrades. In addition, the interface is so user-friendly that even novices may generate stunning results. On the other hand, iMovie is capable of storing 4K films.
**Platform:**Mac
**Price:**free
Features
- An easy-to-use video splitter that is already built-in
- It’s simple to use
Pros
- An easy-to-use video splitter that is already built-in
- It’s simple to use
Cons
- Uploading and exporting videos takes a long time.
14. Format Factory
Multifunctional document and multimedia processing software -Format Factory - is only available for Windows. It’s meticulously designed to keep you from getting lost in the weeds when working on any project. It is designed to be a stand-alone file management application, and judging by the wealth of options available, it has done an excellent job.
**Platform:**Windows
**Price:**free
Features
- Video joining and muxing are available.
- It has a screen recorder built right in.
- A built-in video player and downloader are included.
- Allows for hardware acceleration.
- Disk ripping options are provided.
- Processing may be done in a batch.
Pros
- Removes watermarks and logos.
- File formats supported include video, audio, images, and documents.
Cons
- Unnecessary software is installed when installing the program.
7 Best Free Video Splitter Online
2. VEED.IO
Veed.io is a free online video editing tool that allows anybody to make powerful movies and expand their audiences. It has several useful features, such as cutting and filtering films based on their appearance. Users may cut, add text, and draw on the videos. Veed may also be used to generate videos on social media channels.
**Price:**free
Features
- Video splitter and joiner
Pros
- Simple and quick.
- A preview of the cutting result is available.
Cons
- The maximum file size is 50 MB.
3. Flixier
Flixier is a web-based video editor that offers 1-minute exports to any device, easy collaboration, and lots of cloud storage. Flixier enables customers to export whatever video they want, independent of their technology. It keeps all stakeholders in the loop by allowing each team member and contributor to remain in sync across all platforms. Teams may interact in real time without fear of losing track of the project. Cloud storage, version history, feedback comments, sophisticated exports, and email alerts are all available. The tool supports Windows, Mac, Linux, and Chromebooks.
**Price:**free
Features
- Video splitter and joiner
Pros
- iPhone version is available.
- Automatic sound amplification.
Cons
- May seem too overloaded with functions.
4. Split Video
Split Video program may also be used to edit and split huge videos into smaller segments. It’s quite simple to work with. All you have to do now is choose the video to divide. Tell the app how you’d want the video to be divided. Choose how many parts you want in your video. You may watch the app-split clips before sharing them.
**Price:**free
Features
- Video splitter and joiner
Pros
- Interface that is easy to use.
Cons
- The maximum file size is 200 MB.
5. Kapwing
This application primarily advertises itself as a video trimmer. It lets you edit films by removing unwanted bits and trimming them to the appropriate length. It also has some basic settings, such as utilizing it as a free online MP4 splitter. The user interface is simple, and uploading a movie takes just a few moments. The primary drawback is that your film may only be 300 MB in size and must be under 30 minutes in length.
**Price:**free
Features
- Video splitter and joiner
Pros
- Interface that is simple to use.
Cons
- A little watermark appears in the corner of your video with the free version.
- Only supports films up to 300 MB in size and up to half an hour in length.
6. Typito
Typito is a video collaboration tool that allows you and your team to work together to make better films for your business. Typito allows you to make and utilize professionally created graphic overlays for free, as well as generate full-length HR movies in both square and portrait formats. It enables you to produce movies consistent with your brand, allowing you to change and customize elements like font, color, and logo with a few mouse clicks. You may save time for your organization by producing videos quicker and working with your team to publish professional-looking films while previewing them on the move. Inviting team members to the project and assigning responsibilities for editing and reviewing videos are just a few collaboration tools.
**Price:**free
Features
- Video splitter and joiner
Pros
- Simple features to use
Cons
- Few transition templates.
7. Clideo
Clideo is a one-of-a-kind platform that allows you to easily produce and modify any video, GIFS, and picture files in one spot. Merging, compressing, resizing, slideshow, cropping, rotation, and other video editing tools are included in the program. Users may add music or text to videos to help them stand out and draw in the right audience. The video editing platform supports various video formats such as MP4, AVI, MPG, VOB, WMV, MOV, and others. There is no need to download or install any applications since everything may be done entirely online. The premium security encryption that comes with it ensures that all video files are always well-protected.
**Price:**free
Features
- Video splitter and joiner
Pros
- Much easier to use than other video editing software.
- Projects are stored on the cloud, so they don’t take up any computer resources.
- There is no need to download any program.
Cons
- The feature set is limited in comparison to other video editing suites.
- Visual artistry is required.
- Some undertakings need a significant amount of time to complete.
10 Best Video Splitter for Mobile Phone
1. Filmora
A good video editor is required to split a video qualitatively.Filmora Video Editor & Maker might be the answer. It works with high-definition videos. It comes with all of the necessary editing tools. As a result, you will not be sorry for installing this software. Not only will you be able to edit and divide films effortlessly, but you’ll also be able to add fun filters.
The sticker library in Filmora Video Editor & Maker is extensive. The number is in the thousands. You’ll be able to apply both realistic and humorous animated stickers. Use video transitions such as Flash, Page Cut, Cross Zoom, Blurry Roll, and Cube. You have complete control over the speed of your edited video.
**Price:**free
Features
- Video splitter and joiner
- Video editor
Pros
- Files may be readily exported and imported.
Cons
- Compatibility of exported videos is limited.
2. AndroVid Video Editor
AndroVid is a video-splitting program with all the tools you’ll ever need. This program is jam-packed with editing tools, allowing you to create a polished video quickly. The program is also quite user-friendly, so even if this is your first time splitting a video, you will be able to handle it.
**Platform:**Android
**Price:**free
Features
- Video splitter and joiner
- Video editor
Pros
- Simple video cutting tool; can extract single-frame pictures from videos.
Cons
- There are no sophisticated editing choices, and the audio options are quite restricted.
- There is no tool for full-screen graphics, and the user interface is a little complicated.
- The ad-free version is nearly as expensive as KineMaster Pro, which is more sophisticated.
3. Easy Video Cutter
Becausethis program is only devoted to video editing, it can handle a wide range of tasks. The program, for example, may clip videos, combine them, rotate them, and so on. You may also adjust the pace of the videos as needed. It should be noted that trimming the video in this program is quite simple — just pick the range with the slider instrument, and that’s it. Because this program is only devoted to video editing, it can handle a wide range of tasks. The program, for example, may clip videos, combine them, rotate them, and so on. You may also adjust the pace of the videos as needed. It should be noted that trimming the video in this program is quite simple — just pick the range with the slider instrument and that’s it.
**Platform:**Android
**Price:**free
Features
- Video splitter and joiner
- Video editor
Pros
- It’s quite simple to use.
- It’s ideal for simple video cutting tasks.
Cons
- There are no additional editing options available.
4. Video Editor
Video Editor is a fantastic app for Android users who want to edit and enhance their videos. It can break a video into segments, combine several films, crop videos, and adjust the video’s size. You may also add audio to the video of your choosing.
**Platform:**Android
**Price:**free
Features
- Video splitter and joiner
- Video editor
Pros
- You may rearrange your clips in any order you choose.
- Many older file types are supported by the program.
Cons
- The video scroll bar might be a little tricky to use.
- It’s quite basic.
5. VideoShow – Video Editor
On the Google Play market,VideoShow is one of the most popular video editing applications. There are several themes, filters, music, and audio to choose from while creating great videos. It’s a fantastic video trimming software.
**Platform:**Android/iPhone
**Price:**free
Features
- Video splitter and joiner
- Video editor
Pros
- It has the ability to both connect and cut clips.
- It’ll run on almost any android phone.
Cons
- Video Scissors has taken the place of the iPhone version.
- Cutting is fast, but re-encoding might take a long time.
6. Trim Video
Trim Video is the greatest app for iPhone video editing and cutting of huge videos. From the huge file, you may easily crop a video clip. Although the program is highly useful and entertaining for video makers, it is not free and costs $0.99.
**Platform:**iPhone
Price:$0.99 per month
Features
- Video splitter
Pros
- All major video and audio formats are supported.
- When you’re finished, there’s no need to re-render the video.
- There are no watermarks.
Cons
- This software does not include video joining; it must be downloaded separately.
- This app’s main purpose is to cut.
7. Video Splitter
Video Splitter is an iPhone software that allows you to edit and divide videos into segments. It’s a free program that combines all of your editing tools into one application. The tool successfully splits a huge video into little chunks, which can be quickly texted or uploaded to social media.
**Platform:**iPhone
**Price:**free
Features
- Video splitter and joiner
- Video editor
Pros
- A broad number of formats, including audio, are supported.
- It’s a breeze to use.
Cons
- There are no choices for video converting.
- It’s been a long time since it’s been updated.
8. Crop video
Crop Video is another handy iPhone app if you wish to cut your movie to a lesser size. It is one of the most popular tools for cutting videos and altering them for a better impact. It contains several features that boost the app’s versatility. It’ll set you back $2.99.
**Platform:**iPhone
Price:$2.99 per month
Features
- Video splitter and joiner
- Video editor
Pros
- The video cutter is helpful for novices.
- It works with every iPhone version.
Cons
- The free version has a lot of limitations.
- The videos of free users are watermarked.
9. Video Crop
Video Crop is a free iPhone software that allows you to crop videos. There are many more options in the software that may be used to modify and improve a video. This program has a lot of flexibility when it comes to video editing and other video settings. This program may also be used to split videos.
**Platform:**iPhone
**Price:**free
Features
- Video splitter and joiner
- Video editor
Pros
- Splitting and joining MP4 files is simple and effective.
Cons
- It’s only compatible with MP4 files.
- The UI is really sluggish.
10. Video Trim & Cut
Video Trim & Cut is an iPhone software that allows you to divide or trim videos. Adding effects, cropping, altering color, and changing themes are just a few things you can do with the app.
**Platform:**iPhone
**Price:**free
Features
- Video splitter and joiner
- Video editor
Pros
- Excellent templates.
- It has the appearance and functionality of a more costly app.
Cons
- It’s only available on iPhone.
- It might take a long time for a video to render.
Part 5: How to Split Video with Filmora
Step1Import your videos to Filmora Video Cutter
Launch the video cutter once it has been installed and click New Project to access the video editing interface. Now you must import the video, which must be divided into numerous portions.
Upload files
You can either drag and drop files to the media library before adding them to the timeline for editing, or you can click “Import” on the main interface and choose files from your computer.
VOB, 3GP, 3G2, MP4, FLV, AVI, MOV, F4V, M4V, TRP, M2TS, MTS, TP, DAT, WMV, MPG, MPEG, TS, MKV, ASF, DV, EVO, MOD, NSV, and TOD files are all supported by Filmora video cutter.
If your video contains a lot of distinct sequences, Filmora can help you discover the clip you want to trim. The “Scene Detection” tool will assist you in rapidly locating the part you wish to clip. To open the Scene Detection window, choose the video in the media library (not the timeline), right-click it, and select “Scene Detection.”
Detect video
When you click Detect, Filmora will automatically split your films into multiple segments depending on scene changes.
Scenes detected automatically
By clicking the Delete symbol next to the clip, you may delete the undesired sequences and quickly get to the section you want. When you click the Add to Timeline button, all of the segmented video sections will be instantly imported into the timeline, which you can then modify.
Step2Manually trim/split/cut/delete videos
To trim video files, drag clips from the media library to the video track on the timeline and follow these steps. You may use the trim option to chop off the beginning or conclusion of a video swiftly.
Trim video using filmora
- i.Zoom in on the frames you wish to remove from the timeline. Drag the trim symbol to the right to remove the video’s beginning segments from the timeline or to the left to remove the video’s undesired ending segments. You may use the trim tool to cut the beginning and end parts of a sentence with a single drag.
- ii.You may edit a movie into portions, eliminate unnecessary aspects, and combine them into a new film, in addition to chopping off segments at the beginning or conclusion.
- iii.Move the play head to the beginning of the video part you want to cut, then click the Split icon (scissor icon) on the toolbar or the Split button on the play head to split the video. You will get the starting frame, then move the play head to the ending frame and click the Split button again to get the ending part.
- iv.To cut a video into many sections, repeat the procedure. You will get multiple clipped portions, which you may either remove or re-order and alter further.
- v.You may edit out an undesirable cut video by hitting the Delete symbol on the toolbar.
Add trim start and end
Step3Export your video
Click the Export button on the screen after you’ve completed cutting and basic editing. By choosing “Format” and specifying the essential options such as frame rate and resolution, you may save the video in different formats on your local computer.
If you wish to see your video production on your iPod, iPhone, or iPad, go to “Device” and choose your device’s thumbnail. You may also instantly post your films on YouTube or Vimeo, or burn them to DVDs for long-term storage.
Export video after splitting
Bottom Line
Video splitting can be a daunting task when you don’t have the right tools to help you. If you are a Windows or a Mac user then Wondershare Filmora will help you split videos in just few clicks. The software is completely free with an option to go pro for a cheaper price compared to other premium apps. If you prefer splitting your video online then still Filmora online editor will help you in this. Moreover, some good news for android and iPhone users as Filmora comes with all features to split and join videos. With all these tools you can take your video creation process to the next level.
Also read:
- Updated Hard to Remove Black Background in After Effects for 2024
- Updated 2024 Approved Best Video Format Converter for PC and Online
- In 2024, How to Record Super Slow Motion Videos on Your Huawei/Samsung/iPhone?
- New 2024 Approved Best Phantom Slow-Mo Camera For Recording Slow Motion Videos
- Updated Do You Want to Know Which Are the Best Wondershare Filmora LUTs to Use? There Are Many LUTs that You Can Download, Each with a Different Tone and Style
- Top 10 Secret Tips & Tricks to Use in Wondershare Filmora
- Updated 2024 Approved A Guide to Use Distortion Effect in Premeiere Pro
- New Best PDF to GIF Converters
- New How to Get VHS Filter and Glitch Filter to Your Images or Videos?
- Updated In 2024, How to Add Freeze Frame to Your Video From Any Device?
- Updated 2024 Approved Splitting Video in VSDC Step by Step
- New Best 10 Crazy-Cool Examples of AR Video
- New 2024 Approved How to Add Miniature Effect in Video with Filmora
- In 2024, Best Video Editors to Add Text to a Video
- DaVinci Resolve Scopes Have Undergone Significant Improvements. Find Out How to Use These Scopes and Improve Your Video Editing Skills
- In 2024, How To Add Motion Blur Effect To Photos in GIMP
- New The Availability of the Slow-Motion Feature on the iPhone Is Often Debated. This Article Will Guide You on How to Slow Down a Video on iPhone
- Expolring Top 6 Best Alternatives to Clownfish Voice Changer for 2024
- New 2024 Approved How to Add Freeze Frame to Your Video From Any Device?
- This Guide Is to Help You Select the Ways that Meet Your Needs, and It Is Easy for You to Combine 2 or More Videos Into One Video for 2024
- New In 2024, Top List Best VHS Sound Effect That You Can Use in Video Making
- A Complete Guideline To Better Use QuickTime Player for 2024
- New How to Time-Lapse a Video on iMovie
- Want to Immediately Know All About Discord GIF, In 2024
- How to Got Free After Effects Templates Slideshow with Simple Trick for 2024
- How to Color Grading in Final Cut Pro for 2024
- Boost Your Spirit Creating Motivational Status Videos
- 2 Solutions to Crop a Video Using After Effects
- New Modern Silence Detection Tools Are Changing the Face of Video Editing. Use Them to Improve the Quality of Your Video Clips. Learn How These Tools Let You Detect Silence with Pinpoint Accuracy
- Updated Zoom In and Zoom Out on YouTube for 2024
- In 2024, Do You Want to Learn How to Film a TikTok with Multiple Clips? Worry No More because You Can Do This by Following the Methods Instructed in This Article
- This Article Will Help You Understand How to Create Video Contents that Convert Sales for 2024
- New Best Text Animations In After Effects
- New 2024 Approved A Review On 3D LUT Creator
- Updated 3GP Video Format What Is 3GP Format And How To Open It?
- Updated How to Use Twixtor Effect to Create Super Slow-Motion Video for 2024
- When It Comes to Video Editing, There Are Countless Software Options Available on the Market. However, Not All of Them Come with Useful Masking Tools. In This Article, We Will Be Discussing the Top 8 Video Editor with Useful Masking Tools for 2024
- Updated 2024 Approved Adobe Premiere Pro Download and Use Guide In Depth
- New How to Make Hand Shake Effect with Final Cut Pro
- Updated Add Some Shake to Videos with Alight Motion
- How to Upload Videos to Twitch? Heres a Guide for Beginner
- 2024 Approved Trailer Guide for Creators and Developers
- Updated 15 Best Video Editing Courses Online with Certificate Free $ Paid
- Apply These Techniques to Improve How to Detect Fake GPS Location On Tecno Spark 10 4G | Dr.fone
- Set Your Preferred Job Location on LinkedIn App of your Motorola Moto G84 5G | Dr.fone
- In 2024, How to Transfer Contacts from Nokia C32 to Outlook | Dr.fone
- Easily Unlock Your Realme 11 5G Device SIM
- Updated 2024 Approved Top 15 Greatest Claymation Movies of All Time
- Unlock Your Honor X9bs Potential The Top 20 Lock Screen Apps You Need to Try
- In 2024, Why is iPogo not working On Vivo S18 Pro? Fixed | Dr.fone
- Solved How To Transfer From Apple iPhone SE to iPhone 15 | Dr.fone
- In 2024, How to Get and Use Pokemon Go Promo Codes On Oppo Find X7 | Dr.fone
- Top 5 Tracking Apps to Track Vivo V30 Pro without Them Knowing | Dr.fone
- How to Factory Reset Tecno Spark 10 4G without Losing Data | Dr.fone
- How to recover deleted contacts from Oppo Find X7 Ultra.
- In 2024, Here are Some of the Best Pokemon Discord Servers to Join On Vivo Y02T | Dr.fone
- How To Fix Unresponsive Touch Screen on Samsung Galaxy A14 5G | Dr.fone
- How to Transfer Videos from Lava Blaze Curve 5G to iPad | Dr.fone
- In 2024, 3 Effective Ways to Unlock iCloud Account Without Password From Apple iPhone 7
- In 2024, Best Ways on How to Unlock/Bypass/Swipe/Remove Samsung Galaxy A14 4G Fingerprint Lock
- Title: New Add Zoom Blur Effect In Photoshop Step by Step for 2024
- Author: Chloe
- Created at : 2024-04-24 07:08:30
- Updated at : 2024-04-25 07:08:30
- Link: https://ai-editing-video.techidaily.com/new-add-zoom-blur-effect-in-photoshop-step-by-step-for-2024/
- License: This work is licensed under CC BY-NC-SA 4.0.
