
:max_bytes(150000):strip_icc():format(webp)/Rearviewofboywithlaptoponsofa-31ba45dfa7fb4553a257c133b352ef64.jpg)
New Best 22 Video Editing Tips to Know for 2024
Best 22 Video Editing Tips to Know
Whether your video is short or long, you may want to make it better and appealing. Video editing involves the manipulation of your videos through which the desired transformation is achieved and you can flaunt every move of your video in a more preferable way. Video editing involves cutting the video short, changing the speed, organizing the video in a seamless flow. In short, the better the cuts of your videos, the better your message/story is conveyed.
Part 1: Things to Learn Before Editing First Draft
You have shot your video and now you’re stuck on the post-processing of that video. Don’t worry! We got you covered through this article which will guide you through the different things which you must learn before editing the first draft of your video.
Start a video project
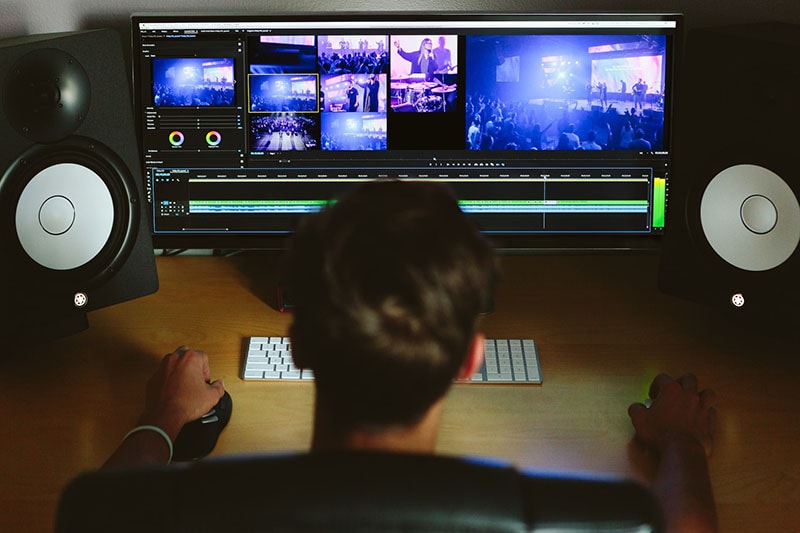
Your smartphone and digital camera can let you record multiple videos but what now? You head out to edit your first draft by choosing a suitable platform or software and then you can surely lay back and see the software doing wonders to your raw videos. By starting off with editing, you choose your video editing preferences and then you just let the video editing tools do the magic.
Get to know the video editing software workspace
Video editing software offer customizable workspaces for different editing tasks. The software workspace streamlines routine actions you take with clips, like editing clips, making DVD and Blu-ray menus, and sharing movies. By placing panels in the layout that best matches your working style, you can personalize your workspace. The additional panels adjust automatically to fit the window as you rearrange them. For various jobs, such as one for editing and one for preview, you can build and store multiple workspaces.
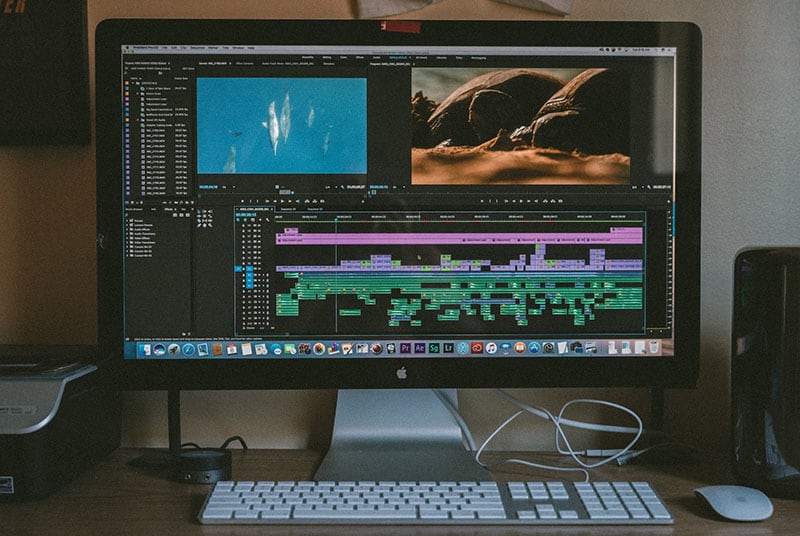
Understand the timeline
The timeline of your video is the backbone of your digital video editing process. It’s called a timeline because the various pieces of video will be lined up horizontally. In a video editing software, the timeline is where you arrange your video clips and plan out all the modifications you want to do. As you work, you will see every single one of your video and audio clips, effects, and transitions sorted chronologically from beginning to end. All the fundamentals of video editing, including reordering, trimming, and enhancing your footage, are available. To preview how your adjustments will turn out, you can also play your project at any point in the timeline.
Add clips to timeline
When you have grasped the idea behind a timeline, the next step you need to follow is to add clips into your timeline. Before adding clips to your timeline, it is suggested that you label each clip. Although it does seem like a lot of work, it will be easier to locate all of the clips later on if you’re working on a large project. after the footages are gathered and named, add important clips in the beginning of the timeline to begin establishing the video’s overall structure and order.
Editing tools
Besides basic cutting, trimming and cropping, video editing software offer multiple professional editing tools which enhance the outlook your videos and make them 10x better. For example, instead of cutting up a clip into a bunch of small clips and unwanted gaps, use the Ripple Edit tool keep your timeline clean. This means when a clip is trimmed, it causes a ripple effect throughout the rest of your timeline, shifting all other clips into a new timeline position.
Similarly, when working with lengthy timelines, the Razor tool is also really helpful because you can select the clip you wish to cut by dragging your razor over it. So, the Razor cut is the tool to use if you need to make a lot of cuts in your videos quickly.
Syncing audio and video
You already know how annoying it can be if audio and video don’t sync while you’re listening to a podcast or viewing a YouTube vlog. The video editing software offer helpful manual and auto sync tools. It can be though a bit of hard work for beginners, but the ‘Lights, Camera, Action’ approach works best in syncing your audio with your video. To sync audio, you need to record audio first and then through matching the wavelengths displayed on your timeline, you can sync the audio with your video.
Edit download talking head/interview footage
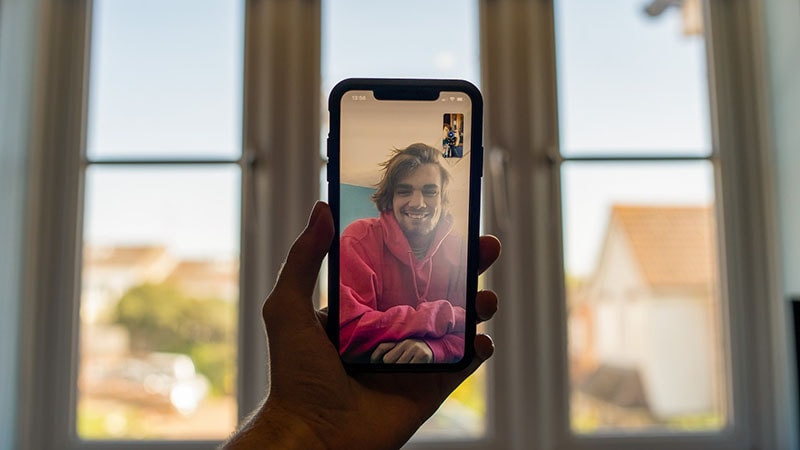
Now with professional video editing tools, you can make ‘talking head videos’ if you want to share your expertise as a YouTube vlogger or if you want to do employee training. Talking head films are a fantastic way to stimulate the mind and the heart while increasing learner retention in this digital age.
Additionally, with other video editing tools, you can edit your interview footages and for that, you don’t have to mess with timestamps, cutting or splicing videos, or creating transitions between clips, you just edit the transcript of the video and the video edits itself to match.
Video properties: Scale, position, opacity
Any screen recording, camera-based video, imported video clips, and text picture clips can have their visuals altered using video properties. In video editing software, multiple video properties are offered which include scaling, positioning, rotating, changing the opacity, changing level of reflection and shadow. Additionally, Video properties also include editing the video as a whole or just altering a clip from the video.
Types of cuts: Straight, J-Cut, L-Cut etc
The different types of cuts used in the video editing process is an effective way to make the transitions in your video pop. Basically, these cuts join two or more clips together via audio. Professional editors call these cuts as ‘split edits. The most common cuts are called J-Cut and L-Cut. They help to mix the content’s flow and keep the on-screen narrative in motion. In essence, these edits are necessary to make your scenes feel warm and more authentic.
Part 2: Practical Video Editing Tips
Choose right software
The push start of video editing for beginners is based on one common step: know your software or workspace. Selecting the appropriate software for editing your video is the first step in streamlining your video editing process. Although all software often includes the tools that you need to make ordinary video edits, you could favor one over the others based on its usefulness, digital interface, and features. Instead of just using the latest and trending video editing software available, the key is to choose what functions for you and your editing style.
Use a fast computer
Slow rendering hinders video editing process and other commands given to a computer. From a practical point of view, it is recommended that irrespective of the model of the computer or version of your software; your computer must be efficient to help you to access your files and software easily and to speed up your export time. With a slow computer, you will definitely feel stuck and the video editing complications will haunt you in your dreams.
Watch video editing tutorials
None of us is a pro until we’ve practiced something enough to know everything about it. Video editing requires both; technical knowledge as well as your creativity, so it is better not to do try things on your own. A little guidance can surely help you get through the basics of the video editing process. There are tons of helpful tutorials for making excellent videos on YouTube, vlogs, and educational websites. The majority of tutorials you’ll discover online are free, making the readily available at the tip of your fingers.
Get the project files
Most of the beginner video editors prefer to use the same project files as the tutorial instructors when they are following along. Your work will exactly resemble the demo’s sample, which will aid in your understanding of the steps. For precisely this reason, many tutorials let you download the project files. You can repeat a process with your own video files once you’ve mastered this technique.
Edit for a story
Remembering your creative objective to create a wonderful story or message through your edited video is one of the most crucial lessons you should learn from this article. It is critically important that you make your film visually appealing and dramatically engaging to effectively evoke the right emotions and to communicate your desired message. Instead of merely adding a huge amount of effects to wow your audience, use your practical and technical skills to do this.
Maintain an efficient workflow
You’ll need to be systematic and organized in addition to having an editing software if you want to become a more competent editor. Putting your projects and files in folders that you may use repeatedly is one method to streamline your process. Besides this, organizing your projects and files into an external hard drive or USB is recommended in case of losing access to your intricately designed projects.
Utilize keyboard shortcuts
Keyboard shortcuts speed up the process of video editing and save you ample time. Different keyboard shortcuts are compatible with different video editing software; leaving a few which are mutual in every software. Don’t attempt to put all of these shortcuts into action at once. Pick a small number to begin with, and as they become instinctive, add more. You’ll progress more quickly if you use less mouse while editing your video.
Learn important terms
As a beginner, you may not want to feel a lump in the throat caused by the complicated dictionary of video editing software. There are some broad video editing terms that refer to videography as a whole as well as video editing terms specific to the process of editing footage. You must first learn what these terms means for example you may want to know what the terms like ‘aspect ratio, B-roll, bit rate, close up, compression, crop and compositing’ mean.
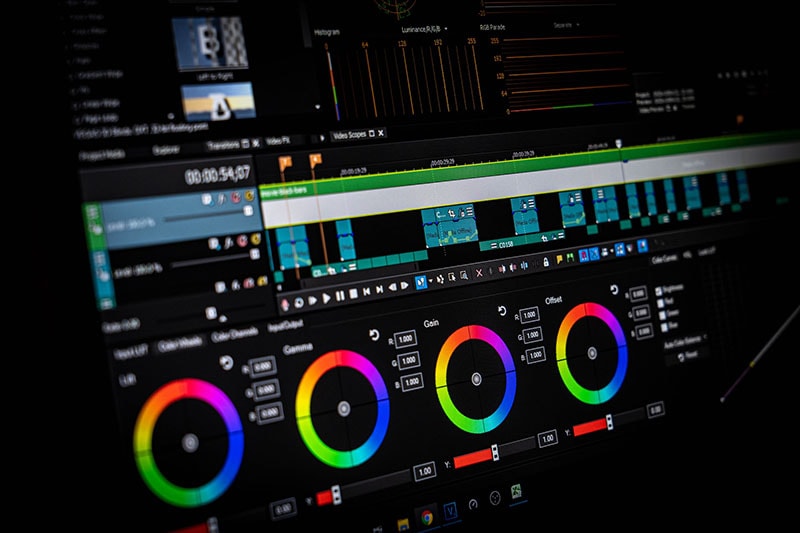
Color correct your clips
Do you own a rather boring video? Perhaps it’s a little too dull or the colors don’t stand out as much as they should? A crucial step is to modify the video’s color. This will assist in reducing the saturation and revive your video. Yet, there are some color correcting presets which can be easily accessed in different video editing apps.
Select good music
You ever saw an ad on YouTube or other social media platforms without an audio background. You may just want to skip it because the video, which may apparently be appealing, fails to strike you. Coordinating and complimenting your video with a music in the background is like cherry on top. It’s a huge plus to attract viewers’ attention. Though it is necessary that the music you choose must be relevant to your video file and should target the majority. So, choose good music to adorn your videos and trigger emotions in your target audience.
Add text and graphics
Some people are attracted more towards textual descriptions rather visual representation of content. It is crucial that considering the preferences of majority, you add significant details to your video which can target your audience in a multidimension. You might need to include more text in addition to the title, opening/closing billboards (for broadcasting), and film credits, depending on the type of film you’re making. However, you can make dazzling visuals using your editing program if you feel the urge to do so.
Export web versions
When your film is finished and is ready to be exported, you would have a natural urge to export it at the highest video resolution possible. If it’s going to be shown in theatres and on ultra-HD screens, this is unquestionably the best course of action. However, you should also export smaller, higher-quality versions for simpler viewing in the modern day where video projects are typically promoted online and on social media.
The objective of creating a file for the web is to keep its high quality while not making it too large for upload and online viewing. Don’t worry if you’re unsure of the export settings to utilize. Websites like Facebook, YouTube, and Vimeo all provide suggested export settings to assist you in correctly resizing your content.
Part 3: 10 Advanced Editing Tips for Professionals
We all definitely have experimented with video editing tools to some extent. But now, it is definitely time to become a pro. Don’t worry, the process isn’t as scary as we imagine it to be. This article is your best stop to grab some fine guidelines about how to become a video editor, in fact, a Pro video editor.
- Make titles stand out
You’re skilled in video editing, but do your titles seem a little…unfinished? Do those lower thirds strike you as being monotonous and boring? Is your typography competing for attention against your pictures? It appears that you would benefit from some basic title design advice, and lucky for you, we have some. Your title must be readable by majority and always choose your safe way in selecting texts for example, a sans-serif typeface is usually going to be a safe choice for video. You can also animate text to highlight it so that it is more captivating.
- Put video inside text or logos effects
Videos resonate with your brand and content if you add a specific logo or text effects to it. Almost all the video editors allow this featuring so that the identification of your work is maintained and copyright claim can be imposed if you see your content being copied or manipulated.
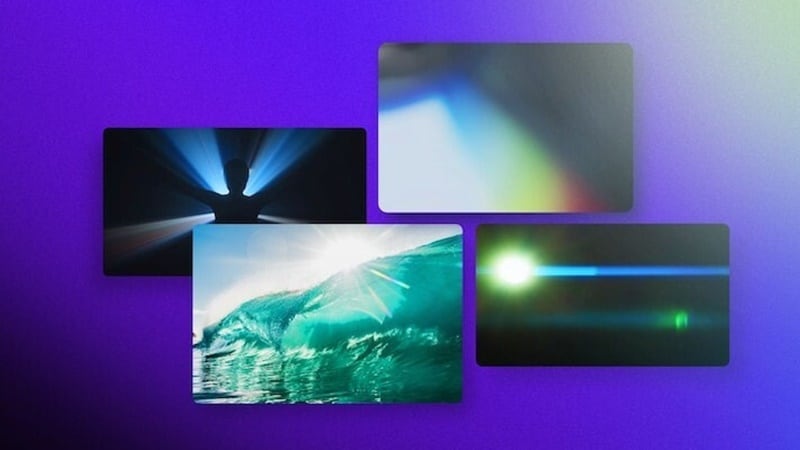
- Add light leaks, film burns and lens flares
Incorporating unique transitions into your monotonous videos can get you your viewer’s attention in a go. Lens flares, light leaks, and film burns can result in a unique look, but are not always easy to add naturally in-camera. Some of the best video editing software which allow access to adding lens flares, light leaks and film burns include: Free 4K Light Leaks – RocketStock, Motion Array Free Light Leaks, WZZLY Free Light Leaks, LIGHT LEAK FILM OVERLAY and many more.
- Add the vintage old film look
The quick Instagram-category of filters are common today but what makes your videos more natural and appealing is the addition of some presets which almost every video editor offers. These presets add a classic vintage old film look to your videos by manipulating color correction effects, framerate settings, overlays, and aspect ratio hacks. Some popular vintage old film effects are found in software namely VSDC, VEED, Adobe Premium Pro and many others in list.
- Add type-on effect
A type-on effect added to your videos comprehend your content more firmly. Simply by tabbing on ‘Add text effect’ in any video editor, you can add type-on effect to your videos and to add ravishing component to the overall structure of your video.
- Zoom in or out effect
The zoom-in or out feature (if available) in your video editing software can allow you to magnify any part of your video quickly and easily. Some of the best video editors featuring this specification include: Wondershare DemoCreator Zoom in Video Effect, DaVinci Resolve, Wondershare Filmora , Windows Movie Maker and Apowersoft Screen Recorder.
- Custom wipe on/off reveal effect
The wipe on/off reveal transition or effect is one of the earliest ways of transitioning from one scene to another. An object (usually a line) moves across the screen, revealing the next scene, while simultaneously removing (or wiping) the previous scene and when used properly, they can create a very powerful effect. It involves creative fading in and out transitions to give a more dramatic look.
- 4k, 8k, HD resolution
The latest video editing software offer the export your edited video in multiple formats, out of which 4k, 8k and HD resolution formats are preferable for majority of the professional video editors. It is necessary that even after the video is uploaded to a platform, the pixels do not decrease and the quality of the video is maintained. Although attractive to the viewers, the higher the resolution, the more the data with which you must deal. It is suggested that a standard or default resolution is chosen to play and replay the video in different computers.
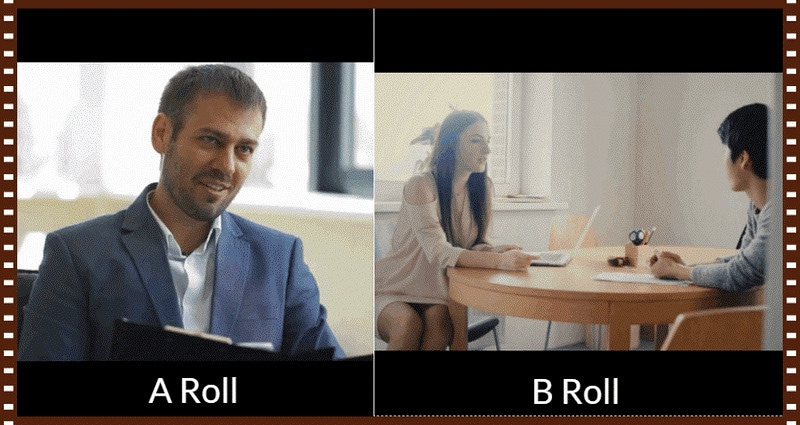
- B-roll
B-roll is secondary video that is frequently used as cutaway video to add context and visual interest to your story. The term is originated from the early days of Hollywood when there used to be an A-roll which was the primary video and B-roll which served as a secondary video footage. This can help you visualize your video from different dimensions, giving it a more realistic look for captivating viewers.
- Compression rate, bit depth, bit
The amount of data the camera records each second is referred to as bit rate. Every single second of a video is subject to significant data processing by cameras. The higher the quality of the video, the more is the bit rate. Bit depth refers to the number of colors your camera can read per pixel. Common bit depths are 8-bit and 10-bit, which enable a camera to read 256 million or 1.07 billion colors respectively. To upload your edited video, a compression is usually required to convert your resolution to internet quality so that the upload can be made simpler, without distorting the video resolution.
Whether your video is short or long, you may want to make it better and appealing. Video editing involves the manipulation of your videos through which the desired transformation is achieved and you can flaunt every move of your video in a more preferable way. Video editing involves cutting the video short, changing the speed, organizing the video in a seamless flow. In short, the better the cuts of your videos, the better your message/story is conveyed.
Part 1: Things to Learn Before Editing First Draft
You have shot your video and now you’re stuck on the post-processing of that video. Don’t worry! We got you covered through this article which will guide you through the different things which you must learn before editing the first draft of your video.
Start a video project
Your smartphone and digital camera can let you record multiple videos but what now? You head out to edit your first draft by choosing a suitable platform or software and then you can surely lay back and see the software doing wonders to your raw videos. By starting off with editing, you choose your video editing preferences and then you just let the video editing tools do the magic.
Get to know the video editing software workspace
Video editing software offer customizable workspaces for different editing tasks. The software workspace streamlines routine actions you take with clips, like editing clips, making DVD and Blu-ray menus, and sharing movies. By placing panels in the layout that best matches your working style, you can personalize your workspace. The additional panels adjust automatically to fit the window as you rearrange them. For various jobs, such as one for editing and one for preview, you can build and store multiple workspaces.
Understand the timeline
The timeline of your video is the backbone of your digital video editing process. It’s called a timeline because the various pieces of video will be lined up horizontally. In a video editing software, the timeline is where you arrange your video clips and plan out all the modifications you want to do. As you work, you will see every single one of your video and audio clips, effects, and transitions sorted chronologically from beginning to end. All the fundamentals of video editing, including reordering, trimming, and enhancing your footage, are available. To preview how your adjustments will turn out, you can also play your project at any point in the timeline.
Add clips to timeline
When you have grasped the idea behind a timeline, the next step you need to follow is to add clips into your timeline. Before adding clips to your timeline, it is suggested that you label each clip. Although it does seem like a lot of work, it will be easier to locate all of the clips later on if you’re working on a large project. after the footages are gathered and named, add important clips in the beginning of the timeline to begin establishing the video’s overall structure and order.
Editing tools
Besides basic cutting, trimming and cropping, video editing software offer multiple professional editing tools which enhance the outlook your videos and make them 10x better. For example, instead of cutting up a clip into a bunch of small clips and unwanted gaps, use the Ripple Edit tool keep your timeline clean. This means when a clip is trimmed, it causes a ripple effect throughout the rest of your timeline, shifting all other clips into a new timeline position.
Similarly, when working with lengthy timelines, the Razor tool is also really helpful because you can select the clip you wish to cut by dragging your razor over it. So, the Razor cut is the tool to use if you need to make a lot of cuts in your videos quickly.
Syncing audio and video
You already know how annoying it can be if audio and video don’t sync while you’re listening to a podcast or viewing a YouTube vlog. The video editing software offer helpful manual and auto sync tools. It can be though a bit of hard work for beginners, but the ‘Lights, Camera, Action’ approach works best in syncing your audio with your video. To sync audio, you need to record audio first and then through matching the wavelengths displayed on your timeline, you can sync the audio with your video.
Edit download talking head/interview footage
Now with professional video editing tools, you can make ‘talking head videos’ if you want to share your expertise as a YouTube vlogger or if you want to do employee training. Talking head films are a fantastic way to stimulate the mind and the heart while increasing learner retention in this digital age.
Additionally, with other video editing tools, you can edit your interview footages and for that, you don’t have to mess with timestamps, cutting or splicing videos, or creating transitions between clips, you just edit the transcript of the video and the video edits itself to match.
Video properties: Scale, position, opacity
Any screen recording, camera-based video, imported video clips, and text picture clips can have their visuals altered using video properties. In video editing software, multiple video properties are offered which include scaling, positioning, rotating, changing the opacity, changing level of reflection and shadow. Additionally, Video properties also include editing the video as a whole or just altering a clip from the video.
Types of cuts: Straight, J-Cut, L-Cut etc
The different types of cuts used in the video editing process is an effective way to make the transitions in your video pop. Basically, these cuts join two or more clips together via audio. Professional editors call these cuts as ‘split edits. The most common cuts are called J-Cut and L-Cut. They help to mix the content’s flow and keep the on-screen narrative in motion. In essence, these edits are necessary to make your scenes feel warm and more authentic.
Part 2: Practical Video Editing Tips
Choose right software
The push start of video editing for beginners is based on one common step: know your software or workspace. Selecting the appropriate software for editing your video is the first step in streamlining your video editing process. Although all software often includes the tools that you need to make ordinary video edits, you could favor one over the others based on its usefulness, digital interface, and features. Instead of just using the latest and trending video editing software available, the key is to choose what functions for you and your editing style.
Use a fast computer
Slow rendering hinders video editing process and other commands given to a computer. From a practical point of view, it is recommended that irrespective of the model of the computer or version of your software; your computer must be efficient to help you to access your files and software easily and to speed up your export time. With a slow computer, you will definitely feel stuck and the video editing complications will haunt you in your dreams.
Watch video editing tutorials
None of us is a pro until we’ve practiced something enough to know everything about it. Video editing requires both; technical knowledge as well as your creativity, so it is better not to do try things on your own. A little guidance can surely help you get through the basics of the video editing process. There are tons of helpful tutorials for making excellent videos on YouTube, vlogs, and educational websites. The majority of tutorials you’ll discover online are free, making the readily available at the tip of your fingers.
Get the project files
Most of the beginner video editors prefer to use the same project files as the tutorial instructors when they are following along. Your work will exactly resemble the demo’s sample, which will aid in your understanding of the steps. For precisely this reason, many tutorials let you download the project files. You can repeat a process with your own video files once you’ve mastered this technique.
Edit for a story
Remembering your creative objective to create a wonderful story or message through your edited video is one of the most crucial lessons you should learn from this article. It is critically important that you make your film visually appealing and dramatically engaging to effectively evoke the right emotions and to communicate your desired message. Instead of merely adding a huge amount of effects to wow your audience, use your practical and technical skills to do this.
Maintain an efficient workflow
You’ll need to be systematic and organized in addition to having an editing software if you want to become a more competent editor. Putting your projects and files in folders that you may use repeatedly is one method to streamline your process. Besides this, organizing your projects and files into an external hard drive or USB is recommended in case of losing access to your intricately designed projects.
Utilize keyboard shortcuts
Keyboard shortcuts speed up the process of video editing and save you ample time. Different keyboard shortcuts are compatible with different video editing software; leaving a few which are mutual in every software. Don’t attempt to put all of these shortcuts into action at once. Pick a small number to begin with, and as they become instinctive, add more. You’ll progress more quickly if you use less mouse while editing your video.
Learn important terms
As a beginner, you may not want to feel a lump in the throat caused by the complicated dictionary of video editing software. There are some broad video editing terms that refer to videography as a whole as well as video editing terms specific to the process of editing footage. You must first learn what these terms means for example you may want to know what the terms like ‘aspect ratio, B-roll, bit rate, close up, compression, crop and compositing’ mean.
Color correct your clips
Do you own a rather boring video? Perhaps it’s a little too dull or the colors don’t stand out as much as they should? A crucial step is to modify the video’s color. This will assist in reducing the saturation and revive your video. Yet, there are some color correcting presets which can be easily accessed in different video editing apps.
Select good music
You ever saw an ad on YouTube or other social media platforms without an audio background. You may just want to skip it because the video, which may apparently be appealing, fails to strike you. Coordinating and complimenting your video with a music in the background is like cherry on top. It’s a huge plus to attract viewers’ attention. Though it is necessary that the music you choose must be relevant to your video file and should target the majority. So, choose good music to adorn your videos and trigger emotions in your target audience.
Add text and graphics
Some people are attracted more towards textual descriptions rather visual representation of content. It is crucial that considering the preferences of majority, you add significant details to your video which can target your audience in a multidimension. You might need to include more text in addition to the title, opening/closing billboards (for broadcasting), and film credits, depending on the type of film you’re making. However, you can make dazzling visuals using your editing program if you feel the urge to do so.
Export web versions
When your film is finished and is ready to be exported, you would have a natural urge to export it at the highest video resolution possible. If it’s going to be shown in theatres and on ultra-HD screens, this is unquestionably the best course of action. However, you should also export smaller, higher-quality versions for simpler viewing in the modern day where video projects are typically promoted online and on social media.
The objective of creating a file for the web is to keep its high quality while not making it too large for upload and online viewing. Don’t worry if you’re unsure of the export settings to utilize. Websites like Facebook, YouTube, and Vimeo all provide suggested export settings to assist you in correctly resizing your content.
Part 3: 10 Advanced Editing Tips for Professionals
We all definitely have experimented with video editing tools to some extent. But now, it is definitely time to become a pro. Don’t worry, the process isn’t as scary as we imagine it to be. This article is your best stop to grab some fine guidelines about how to become a video editor, in fact, a Pro video editor.
- Make titles stand out
You’re skilled in video editing, but do your titles seem a little…unfinished? Do those lower thirds strike you as being monotonous and boring? Is your typography competing for attention against your pictures? It appears that you would benefit from some basic title design advice, and lucky for you, we have some. Your title must be readable by majority and always choose your safe way in selecting texts for example, a sans-serif typeface is usually going to be a safe choice for video. You can also animate text to highlight it so that it is more captivating.
- Put video inside text or logos effects
Videos resonate with your brand and content if you add a specific logo or text effects to it. Almost all the video editors allow this featuring so that the identification of your work is maintained and copyright claim can be imposed if you see your content being copied or manipulated.
- Add light leaks, film burns and lens flares
Incorporating unique transitions into your monotonous videos can get you your viewer’s attention in a go. Lens flares, light leaks, and film burns can result in a unique look, but are not always easy to add naturally in-camera. Some of the best video editing software which allow access to adding lens flares, light leaks and film burns include: Free 4K Light Leaks – RocketStock, Motion Array Free Light Leaks, WZZLY Free Light Leaks, LIGHT LEAK FILM OVERLAY and many more.
- Add the vintage old film look
The quick Instagram-category of filters are common today but what makes your videos more natural and appealing is the addition of some presets which almost every video editor offers. These presets add a classic vintage old film look to your videos by manipulating color correction effects, framerate settings, overlays, and aspect ratio hacks. Some popular vintage old film effects are found in software namely VSDC, VEED, Adobe Premium Pro and many others in list.
- Add type-on effect
A type-on effect added to your videos comprehend your content more firmly. Simply by tabbing on ‘Add text effect’ in any video editor, you can add type-on effect to your videos and to add ravishing component to the overall structure of your video.
- Zoom in or out effect
The zoom-in or out feature (if available) in your video editing software can allow you to magnify any part of your video quickly and easily. Some of the best video editors featuring this specification include: Wondershare DemoCreator Zoom in Video Effect, DaVinci Resolve, Wondershare Filmora , Windows Movie Maker and Apowersoft Screen Recorder.
- Custom wipe on/off reveal effect
The wipe on/off reveal transition or effect is one of the earliest ways of transitioning from one scene to another. An object (usually a line) moves across the screen, revealing the next scene, while simultaneously removing (or wiping) the previous scene and when used properly, they can create a very powerful effect. It involves creative fading in and out transitions to give a more dramatic look.
- 4k, 8k, HD resolution
The latest video editing software offer the export your edited video in multiple formats, out of which 4k, 8k and HD resolution formats are preferable for majority of the professional video editors. It is necessary that even after the video is uploaded to a platform, the pixels do not decrease and the quality of the video is maintained. Although attractive to the viewers, the higher the resolution, the more the data with which you must deal. It is suggested that a standard or default resolution is chosen to play and replay the video in different computers.
- B-roll
B-roll is secondary video that is frequently used as cutaway video to add context and visual interest to your story. The term is originated from the early days of Hollywood when there used to be an A-roll which was the primary video and B-roll which served as a secondary video footage. This can help you visualize your video from different dimensions, giving it a more realistic look for captivating viewers.
- Compression rate, bit depth, bit
The amount of data the camera records each second is referred to as bit rate. Every single second of a video is subject to significant data processing by cameras. The higher the quality of the video, the more is the bit rate. Bit depth refers to the number of colors your camera can read per pixel. Common bit depths are 8-bit and 10-bit, which enable a camera to read 256 million or 1.07 billion colors respectively. To upload your edited video, a compression is usually required to convert your resolution to internet quality so that the upload can be made simpler, without distorting the video resolution.
20 Best LUTs for Music Videos
Have you ever wondered how music videos look so good and professional? One of the secrets lies in using LUTs, or Lookup Tables. With LUTs, music videos can match the song’s mood and create a unique atmosphere for each track. Every music video has a different color grading, which helps convey the song’s emotions and feelings.
Furthermore, using LUTs, music video creators can apply a consistent color grading to their videos. And the best part? You can also use music video LUTs to make your videos look more cinematic and professional, regardless of your level of expertise.
Part 1: What Should One Know About LUTs?
LUTs are “Lookup Tables,” which are small files containing color grading presets. In video editing or color-grading software, you can apply them to images or videos. Moreover, you can use LUTs for music video color grading, but first, learn more about LUTs.
Lookup Tables are often used in the film and video industry to give footage a particular look or feel. For instance, a vintage or retro LUT creates a more old-style feel with warmth and muddiness. They can help ensure that footage has a consistent color grading throughout a project. Moreover, they map the original footage’s colors to new ones based on a predetermined color grading preset.
It makes applying a specific look to footage easy without manually adjusting individual colors or settings. There are different types of LUTs, like basic LUTs for overall color and contrast adjustments. Additionally, there are creative LUTs for specific looks and technical LUTs to correct color or exposure issues. You can create LUTs using software or purchase them from online marketplaces.
Empower your videos with a new mood using different LUTs. Filmora now offers 100+ top-quality 3D LUTs cover a broad range of scenarios. Transform your videos with Filmora’s powerful 3D LUTs.
Apply LUT on Videos Apply LUT on Videos Learn More


Part 2: Best Cinematic LUTs for Music Videos in 2024
Music enthusiasts who kept themselves busy from recording to video editing, LUTs are for you. You can download paid or free music video LUTs to give your videos a cinematic feel. For this purpose, here are some of the best cinematic LUTs for music videos you can download.
1. Blue Tone Cinematic LUTs
Blue Tone Cinematic LUTs is an excellent option to give your music video a dramatic and moody look. This LUT pack adds a blue hue to your footage and enhances the shadows, giving your video a more cinematic feel. It has five cinematic-style LUTs that you can use for your videos. Use it for music videos with a sad theme or to convey a sense of mystery.

2. CINEMATIC LUTS: VINTAGE
Another perfect for creating a vintage look for your music video is Cinematic LUTs: Vintage. This pack has 12 fantastic old-style 60s cinematic LUTs. It gives your footage a warm and nostalgic feel with its sepia tone and soft contrast. You can use it for music videos with a retro vibe or to create a feeling of nostalgia and longing. Furthermore, it creates a desaturated warm tone to give an old cinematic feel.

3. Cinematic Color LUTs
Cinematic Color LUTs is yet another great choice to give your music video a vibrant and energetic look. It adds a punchy and rich color to your footage, making it perfect for music videos with a lively beat. This LUT pack has 16 LUTs, giving you more saturated and brighter colors for your media. Similarly, you can use these LUTs to bring out the energy and excitement in your music.

4. Cinema LUTs Sci-Fi
If you want to give your music video a futuristic color tone, then Cinema LUTs Sci-Fi is a great option. This pack has 20 LUTs with different opacity. Using these LUTs, you can create a cinematic look with a modern and futuristic feel. It gives your footage a high-contrast look with cool blue tones. It creates a perfect ambiance for music videos with a sci-fi or futuristic theme.

5. Cinematic DJI D-Log and Standard LUTs
Lastly, Cinematic DJI D-Log and Standard LUTs is a versatile LUT pack. You can use this pack for a variety of music video themes. It gives your footage a warm and cozy feel with its soft and natural colors. Similarly, you can use it for music videos focusing on emotions and feelings like love, friendship, or family. It’s perfect for creating a warm and intimate atmosphere.

6. VIBRANT HUE VIDEO LUTS | PIXMELLOW
Vibrant Hue LUT pack is a pack of 15 that increases the vibrancy of colors in music videos. Moreover, it is a perfect pack for making music videos look more captivating and livelier. With this LUT, your music video will come to life with intensified reds, blues, and greens. Furthermore, using this pack, you will be able to add a burst of energy to every frame.

7. Vintage Faded
If you’re looking to add a nostalgic and timeless feel to your music video, this is the perfect pack. This LUT pack creates a vintage aesthetic for your music footage. Additionally, it gives your footage a warm and slightly desaturated look. With a touch of softness and subtle color shifts, it enhances the overall atmosphere of your video. Moreover, this pack gives you 10 old-style LUTs for music videos.

8. MOODY LUTS
For music videos that aim to create an air of mystery and intrigue, Moody LUTs is the ideal companion. This pack adds depth and shadows, creating a moody ambiance in your music video. It highlights contrasting tones and shadows, allowing for dramatic lighting effects. Furthermore, this is a pack of over 50 .cube LUTs, perfect for giving a moody look to your music videos.

9. Soft and Dreamy LUTs
If you want your music video to be soft and dreamlike, this pack is the way to go. This pack lets your music video bathes in pastel tones. Moreover, the colors appear gentle and delicate, creating a feeling of calmness. Besides this, you’ll get 11 dreamy LUTs with a soft touch of colors. Furthermore, using this pack, you can give your music video a soft and dreamlike feel.

10. +CINE MONOCHROME LUTS
The +Cine monochrome LUTs pack is the best bet for a bold and striking visual statement. It turns your music video into a monochromatic masterpiece. In addition, this pack uses shades of a single color to give your music footage a more artistic feel. Additionally, the using hue of a single tone will create a bold and modern cinematic look. You can add different monochromatic shades with this LUT pack.

11. 20 Clean and Crisp Lightroom Presets & LUTs
Clean and Crisp is a music video LUT pack that gives your video a polished and pristine look. Moreover, this pack enhances the clarity and sharpness of your footage. Furthermore, it brightens colors to make every detail stand out. Additionally, adding a touch of brightness to the colors will make your music videos appear vivid and well-defined.

12. CL-Sunset
CL-Sunset is a fantastic choice for music videos that embrace the warmth and beauty of a sunset. This LUT adds a golden glow to your footage. Furthermore, it highlights the magical yellow hues that appear during twilight. Moreover, it enhances the oranges, yellows, and reds, creating a warm and inviting atmosphere. With this 32 LUTs pack, your music video will shine like the rays of the sun.

13. Neon City LUTs
Neon City LUTs is a pack that captures the essence of vibrant nightlife with its color grading. This pack of 25 LUTs intensifies the neon colors, making your videos appear electrifying. It adds a futuristic flair to your video, enhancing the blues, pinks, and purples. Furthermore, your music video will transport viewers to a neon-lit world filled with excitement and energy.

14. FCPX LUT Nature
It is a great pack for music videos that embrace the beauty of nature and the great outdoors. PCPX LUT Nature has over 60 landscape LUTs that you can use. Additionally, it enhances the natural colors, saturating the greens, blues, and browns. Moreover, by highlighting certain hues in your video, this pack creates a vibrant and earthy look. It brings out the richness of landscapes and the textures of natural elements.

15. 50 Mystical LUTs and Presets Pack
If you want to transport your viewers to a realm of fantasy and enchantment, it is the right pack. Mystical LUT pack offers more than 50 LUTS. Moreover, it adds a touch of magic to your footage, creating a fantasy work like color grading. It introduces subtle color shifts, creating a magical palette of purples, blues, and pinks. Furthermore, using this pack, your music video will unfold like a fairy tale.

16. 100 Contrast LUTs
For music videos that demand a bold and dynamic visual style, this contrast LUT pack is a perfect choice. This high-contrast LUT pack has over 100 LUTs, each with its own uniqueness. Furthermore, it enhances the contrast between lights and darks to create an impactful look. It highlights the blacks and whites to give your music video depth and dimension.

17. 6 SOFT PASTEL LUTS
If you’re aiming for a gentle and soothing visual tone in your music video, this pack is the ideal option. This LUT saturates your footage with soft pastel colors, which creates a dreamy atmosphere. It enhances pinks, lavenders, and light blues and creates a romantic look. Moreover, your music video will have a soft and inviting feel when using any of the 6 LUTs.

18. Urban Moods LUT Pack
Urban Moods LUT pack is for music videos that embrace the raw and gritty essence of urban environments. This pack adds a touch of desaturation and a hint of coolness to give your footage a raw urban look. It enhances the grays, blues, and muted tones to create a city-life feel. Additionally, your music video will give a faded urban vibe. It is one of the best packs of LUTs for music videos.

19. Pop Movie Look LUTs
Pop Movie Look is the perfect pack to infuse your music video with a vibrant and playful visual style. This LUT enhances the primary colors and introduces bold and vivid tones. Furthermore, it adds a touch of saturation and contrast, creating a visually striking and energetic look. Moreover, you can create a 90s pop music color tone for your video.

20. OLD SCHOOL MOBILE & DESKTOP VIDEO LUTS | PIXMELLOW
It is a pack of LUTs for music videos that draw inspiration from retro aesthetics and a laid-back vibe. This pack creates a vintage and nostalgic look, adding warmth and a hint of sepia tones to your footage. Furthermore, this pack has 18 high-quality LUTs to create a retro look for your music videos. Moreover, you can impress your viewers with your music video color grading.

Part 3: Wondershare Filmora: An Exquisite Video Editor for Using LUTs
Wondershare Filmora is the right choice for you to make your music video edits stand out from others. You can create an amazing music video with its perfect blend of color adjustments, effects, and filters. Filmora has over 200+ LUTs that can help you achieve the feel and mood you want for your music video. You can apply some of the best LUTs for music videos to your footage to add a professional touch.
Add LUTs on Video For Win 7 or later(64-bit)
Add LUTs on Video For macOS 10.14 or later
Additionally, with its unique transitions, you can take your video to the next level and give it a more creative feel. You can even change the speed of your video at any point to add more visual interest. Furthermore, Filmora has an AI denoiser that removes distortion and background noises. It ensures that the music video has a crisp and clear sound.

Key Features of Wondershare Filmora
- With Wondershare Filmora, you can save your music videos in up to 4K resolution. You can save your videos with an ultra-high resolution with more sharpness and details.
- Filmora also gives you access to over 10 billion free stock media resources that you can use. It makes it easy to find the perfect media file for your video.
- Furthermore, this tool has an audio visualizer that automatically matches the sound of your video. You can choose from over 25 different audio visualizers using this tool.
Conclusion
To conclude, it’s always welcoming to try a new project from scratch and then wait to see it become successful. Music is a passion; you need talent and some tools to take this passion to a new level. If you’re a passionate musician doing all the work from recording to editing, try to use some professional tools. Use LUTs for music videos and create professional-looking music videos for the world to see.
Add LUTs on Video For Win 7 or later(64-bit)
Add LUTs on Video For macOS 10.14 or later
Apply LUT on Videos Apply LUT on Videos Learn More
Part 2: Best Cinematic LUTs for Music Videos in 2024
Music enthusiasts who kept themselves busy from recording to video editing, LUTs are for you. You can download paid or free music video LUTs to give your videos a cinematic feel. For this purpose, here are some of the best cinematic LUTs for music videos you can download.
1. Blue Tone Cinematic LUTs
Blue Tone Cinematic LUTs is an excellent option to give your music video a dramatic and moody look. This LUT pack adds a blue hue to your footage and enhances the shadows, giving your video a more cinematic feel. It has five cinematic-style LUTs that you can use for your videos. Use it for music videos with a sad theme or to convey a sense of mystery.
2. CINEMATIC LUTS: VINTAGE
Another perfect for creating a vintage look for your music video is Cinematic LUTs: Vintage. This pack has 12 fantastic old-style 60s cinematic LUTs. It gives your footage a warm and nostalgic feel with its sepia tone and soft contrast. You can use it for music videos with a retro vibe or to create a feeling of nostalgia and longing. Furthermore, it creates a desaturated warm tone to give an old cinematic feel.
3. Cinematic Color LUTs
Cinematic Color LUTs is yet another great choice to give your music video a vibrant and energetic look. It adds a punchy and rich color to your footage, making it perfect for music videos with a lively beat. This LUT pack has 16 LUTs, giving you more saturated and brighter colors for your media. Similarly, you can use these LUTs to bring out the energy and excitement in your music.
4. Cinema LUTs Sci-Fi
If you want to give your music video a futuristic color tone, then Cinema LUTs Sci-Fi is a great option. This pack has 20 LUTs with different opacity. Using these LUTs, you can create a cinematic look with a modern and futuristic feel. It gives your footage a high-contrast look with cool blue tones. It creates a perfect ambiance for music videos with a sci-fi or futuristic theme.
5. Cinematic DJI D-Log and Standard LUTs
Lastly, Cinematic DJI D-Log and Standard LUTs is a versatile LUT pack. You can use this pack for a variety of music video themes. It gives your footage a warm and cozy feel with its soft and natural colors. Similarly, you can use it for music videos focusing on emotions and feelings like love, friendship, or family. It’s perfect for creating a warm and intimate atmosphere.
6. VIBRANT HUE VIDEO LUTS | PIXMELLOW
Vibrant Hue LUT pack is a pack of 15 that increases the vibrancy of colors in music videos. Moreover, it is a perfect pack for making music videos look more captivating and livelier. With this LUT, your music video will come to life with intensified reds, blues, and greens. Furthermore, using this pack, you will be able to add a burst of energy to every frame.
7. Vintage Faded
If you’re looking to add a nostalgic and timeless feel to your music video, this is the perfect pack. This LUT pack creates a vintage aesthetic for your music footage. Additionally, it gives your footage a warm and slightly desaturated look. With a touch of softness and subtle color shifts, it enhances the overall atmosphere of your video. Moreover, this pack gives you 10 old-style LUTs for music videos.
8. MOODY LUTS
For music videos that aim to create an air of mystery and intrigue, Moody LUTs is the ideal companion. This pack adds depth and shadows, creating a moody ambiance in your music video. It highlights contrasting tones and shadows, allowing for dramatic lighting effects. Furthermore, this is a pack of over 50 .cube LUTs, perfect for giving a moody look to your music videos.
9. Soft and Dreamy LUTs
If you want your music video to be soft and dreamlike, this pack is the way to go. This pack lets your music video bathes in pastel tones. Moreover, the colors appear gentle and delicate, creating a feeling of calmness. Besides this, you’ll get 11 dreamy LUTs with a soft touch of colors. Furthermore, using this pack, you can give your music video a soft and dreamlike feel.
10. +CINE MONOCHROME LUTS
The +Cine monochrome LUTs pack is the best bet for a bold and striking visual statement. It turns your music video into a monochromatic masterpiece. In addition, this pack uses shades of a single color to give your music footage a more artistic feel. Additionally, the using hue of a single tone will create a bold and modern cinematic look. You can add different monochromatic shades with this LUT pack.
11. 20 Clean and Crisp Lightroom Presets & LUTs
Clean and Crisp is a music video LUT pack that gives your video a polished and pristine look. Moreover, this pack enhances the clarity and sharpness of your footage. Furthermore, it brightens colors to make every detail stand out. Additionally, adding a touch of brightness to the colors will make your music videos appear vivid and well-defined.
12. CL-Sunset
CL-Sunset is a fantastic choice for music videos that embrace the warmth and beauty of a sunset. This LUT adds a golden glow to your footage. Furthermore, it highlights the magical yellow hues that appear during twilight. Moreover, it enhances the oranges, yellows, and reds, creating a warm and inviting atmosphere. With this 32 LUTs pack, your music video will shine like the rays of the sun.
13. Neon City LUTs
Neon City LUTs is a pack that captures the essence of vibrant nightlife with its color grading. This pack of 25 LUTs intensifies the neon colors, making your videos appear electrifying. It adds a futuristic flair to your video, enhancing the blues, pinks, and purples. Furthermore, your music video will transport viewers to a neon-lit world filled with excitement and energy.
14. FCPX LUT Nature
It is a great pack for music videos that embrace the beauty of nature and the great outdoors. PCPX LUT Nature has over 60 landscape LUTs that you can use. Additionally, it enhances the natural colors, saturating the greens, blues, and browns. Moreover, by highlighting certain hues in your video, this pack creates a vibrant and earthy look. It brings out the richness of landscapes and the textures of natural elements.
15. 50 Mystical LUTs and Presets Pack
If you want to transport your viewers to a realm of fantasy and enchantment, it is the right pack. Mystical LUT pack offers more than 50 LUTS. Moreover, it adds a touch of magic to your footage, creating a fantasy work like color grading. It introduces subtle color shifts, creating a magical palette of purples, blues, and pinks. Furthermore, using this pack, your music video will unfold like a fairy tale.
16. 100 Contrast LUTs
For music videos that demand a bold and dynamic visual style, this contrast LUT pack is a perfect choice. This high-contrast LUT pack has over 100 LUTs, each with its own uniqueness. Furthermore, it enhances the contrast between lights and darks to create an impactful look. It highlights the blacks and whites to give your music video depth and dimension.
17. 6 SOFT PASTEL LUTS
If you’re aiming for a gentle and soothing visual tone in your music video, this pack is the ideal option. This LUT saturates your footage with soft pastel colors, which creates a dreamy atmosphere. It enhances pinks, lavenders, and light blues and creates a romantic look. Moreover, your music video will have a soft and inviting feel when using any of the 6 LUTs.
18. Urban Moods LUT Pack
Urban Moods LUT pack is for music videos that embrace the raw and gritty essence of urban environments. This pack adds a touch of desaturation and a hint of coolness to give your footage a raw urban look. It enhances the grays, blues, and muted tones to create a city-life feel. Additionally, your music video will give a faded urban vibe. It is one of the best packs of LUTs for music videos.
19. Pop Movie Look LUTs
Pop Movie Look is the perfect pack to infuse your music video with a vibrant and playful visual style. This LUT enhances the primary colors and introduces bold and vivid tones. Furthermore, it adds a touch of saturation and contrast, creating a visually striking and energetic look. Moreover, you can create a 90s pop music color tone for your video.
20. OLD SCHOOL MOBILE & DESKTOP VIDEO LUTS | PIXMELLOW
It is a pack of LUTs for music videos that draw inspiration from retro aesthetics and a laid-back vibe. This pack creates a vintage and nostalgic look, adding warmth and a hint of sepia tones to your footage. Furthermore, this pack has 18 high-quality LUTs to create a retro look for your music videos. Moreover, you can impress your viewers with your music video color grading.
Part 3: Wondershare Filmora: An Exquisite Video Editor for Using LUTs
Wondershare Filmora is the right choice for you to make your music video edits stand out from others. You can create an amazing music video with its perfect blend of color adjustments, effects, and filters. Filmora has over 200+ LUTs that can help you achieve the feel and mood you want for your music video. You can apply some of the best LUTs for music videos to your footage to add a professional touch.
Add LUTs on Video For Win 7 or later(64-bit)
Add LUTs on Video For macOS 10.14 or later
Additionally, with its unique transitions, you can take your video to the next level and give it a more creative feel. You can even change the speed of your video at any point to add more visual interest. Furthermore, Filmora has an AI denoiser that removes distortion and background noises. It ensures that the music video has a crisp and clear sound.
Key Features of Wondershare Filmora
- With Wondershare Filmora, you can save your music videos in up to 4K resolution. You can save your videos with an ultra-high resolution with more sharpness and details.
- Filmora also gives you access to over 10 billion free stock media resources that you can use. It makes it easy to find the perfect media file for your video.
- Furthermore, this tool has an audio visualizer that automatically matches the sound of your video. You can choose from over 25 different audio visualizers using this tool.
Conclusion
To conclude, it’s always welcoming to try a new project from scratch and then wait to see it become successful. Music is a passion; you need talent and some tools to take this passion to a new level. If you’re a passionate musician doing all the work from recording to editing, try to use some professional tools. Use LUTs for music videos and create professional-looking music videos for the world to see.
Add LUTs on Video For Win 7 or later(64-bit)
Add LUTs on Video For macOS 10.14 or later
Best Audio Plug-Ins For Video Editors
When it comes to improving the sound of the audio in your video editing projects, you have a variety of options to choose from when approaching the editing. Most plugins that we will cover today will be helpful for many different effects instead of only one particular one.
Let’s get started!
1. Synchro Arts Revoice Pro
Let’s talk about Revoice Pro 4. This is an awesome plugin for when you are finishing complex editing projects when you work with dialogues and need to synchronize other lines to fit the shot. Revoice Pro 4 combines timing and pitch alignment technology, together with as a pair of cutting-edge tuning tools and a natural-sounding vocal doubler for people working on the narrator voice.

For the video editors working in audio post-production, the stand out new feature added to Revoice Pro is Smart Align combined with a fast workflow, meaning that you don’t need to leave Pro Tools to synchronize ADR to the location audio. Although Version 4.3 presented an ARA version of the Revoice Pro link plug-in for Logic Pro users, so providing immediate transfers back and forth between Logic Pro or higher Synchro Arts haven’t counted out Pro Tools users by preparing a new set of AudioSuite plugins.
The APT procedures, used to align the pitch and timing of multiple vocal tracks, now includes SmartAlign. When this is turned on, it can align audio with significant gaps in the guide or even dub the audio. This feature enables you to align much longer performances, which in the past had to be divided into smaller sections.
As Revoice Pro has improved over the years, the latest version is giving you the ultimate workflow it should always have had in the past. Synchro Arts have been able to create the perfect workflow with an AudioSuite plugin, that runs Revoice Pro in the background without having to have to switch back between Revoice Pro and Pro Tools. Select your audio and the desiredRevoice Pro preset, process the audio in Revoice Pro and place it directly into the timeline without having to leave Pro Tools.
Smart Align and the Quick APT AudioSuite plugin made this fairly easy, yet powerful, workflow. Synchro Arts has also been able to fix the tasks of how to handle gaps. Before V4.3, you had to make sure there weren’t any unexpected empty spots, or it was not able to work out what to do. Using Smart Align, it handles the gaps without any problems.
Whether you need to tighten any kind of pitch or timings on a vocal recording, Revoice Pro is the one for you. Revoice Pro is great for working with vocal recordings, but it’s perfectly suitable for instruments like guitars and strings too.
Synchro Arts Revoice Pro is available for $599.
2. Red Giant Magic Bullet Colorista
This is a very interesting plugin. Colorista tries to cancel out the need for a separate color-specific program by increasing more color correction options. This plugin allows you to have more color control with tools for tints, temperatures, vignetting, RGB curving, and so forth. Colorista contains a three-way color function and support for LOG clips and LUT filters. Colorista is not a stand-alone program. It’s designed to integrate into existing software and offer better functionality. Plugins let you design something that wasn’t there originally. You don’t have to load a certain project to activate them.

For years, Red Giant has been one of the biggest developers of plugins designed for video editing software. Among the other ones is the Magic bullet suite, which contains quite some plugins to solve video noise problems and do some color grading. We believe the versatility of Red Giant allow content creators and movie producers to let their ideas come to life, create dynamic art and create better content overall.
Even though Red Giant’s Magic Bullet Suite is a plugin suite created for Adobe After Effects and Premiere Pro, it also works with other video editing software such as VEGAS Pro. The suite focuses on color correction and color grading improvements. VEGAS Pro is my software of choice, but one aspect of Premiere that I’ve always thought inadequate were the color correction tools. Looks is completely customizable, and a “preset” can be built up from zero. The Colorista suite comes with a lot of other plugins that have crucial roles in the color grading aspect of video editing. Denoiser II is ideal for clearing up scratchy footage.
Red Giant Magic Bullet Colorista is available for $199.
3. Boris FX Continuum 2022
The thriving film industry’s filmmakers choose Boris FX Continuum. This package contains super strong, timesaving plugins for a smoother workflow with seventeen effects and quick fix plug-in options. Continuum Includes over 200 effects and more than 3500 presets. Each pair will be suitable for each project. Continuum 2022 is the latest biggest release of the post-production plugin collection. The release includes 6 transitions, 4 effects and nearly 100 professionally developed templates. It’s definitely worth checking it out!

This 2022 release brings 50+ film and TV-inspired color grades to assist you in transforming the clips into amazing looks. Included presets like The Wizard of Oz, E.T., Euphoria, and The Grand Budapest Hotel. BCC+Light adds 50+ digital gobos templates to have the overall number of gobos ready to over 700 options.
Boris FX Continuum is available for $495 and $2,195 depending on your payment plan.
Free Download For Win 7 or later(64-bit)
Free Download For macOS 10.14 or later
Best Animated Video Makers
Animations can be a great way to get your work to stand out and the best animated video maker can help you get this effect very easily. Here, we will be helping you find the best way to create animated videos for your particular project.
It is important to point out that there are very many animation programs in the market and choosing the best one will depend on your needs, your style, the feature and tools you need, the cost of the program, and even the export options that each tool gives you.
Before we look at the best ways to create animated videos, let’s start by examining why you would need to use an animated video maker in the first place.
When to Use an Animated Video Maker
There are several reasons why you would want to create an animated video, rather than use traditional video solutions. The following are the most important from a digital marketing standpoint;
Improve Conversion and Sales
Animated videos are engaging enough to improve your conversion and sales. Studies have shown that an animated video can increase both conversion and sales by up to 80%. It may therefore be a good idea to use an animated explainer video to show your potential customers how to purchase a product or service on your website.
Increase Brand Awareness
Because they can be very entertaining and engaging, animated videos can also be a great way to increase brand awareness. And since they can be created very easily and cheaply, they can be a good way to reach potential customers.
Generate Online Leads
Because of the engaging nature of animated videos, you can use them to introduce yourself to potential customers and generate online leads. They have a very high conversion rate, as we have seen before, making them one of the best ways to reach people who would otherwise have never heard of you and your brand.
Explain Complex Processes
It can be very difficult to try to explain very complex ideas such as the mechanical aspect of a certain tool using words. But a well-crafted animated video gives you the chance to explain complex ideas in a fun and engaging way, making it easier for your customers to understand and engage with your brand.
Best Animated Video Makers
The following are the best animated video makers in the market to choose from;
1. Filmora
Created by Wondershare, one of the most popular software companies in the world, you can be certain that Filmora will deliver one of the best video creation and animation experiences you can find anywhere. It is a very easy-to-use, very effective way of creating animated videos that will intrigue your audiences and engage with them in ways traditional video cannot.

To accomplish this, Filmora has numerous features and effects that are not just meant to help you create the perfect video, but also make the process simple, allowing you to create stunning videos in just a few minutes.
For Win 7 or later (64-bit)
For macOS 10.12 or later
The following are some of the key features you can expect when using Filmora;
- Motion Tracking is a feature that you can use to attach an element to a moving object. The auto motion tracking feature ensures that the elements you attach move smoothly as the object moves.
- You can also use Filmora to customize an animation by adding keyframes to change various aspects including the positions, scale, rotations, and even the opacity of a clip.
- The color match feature allows you to match a selected clip’s color to a separate clip from another clip.
- The auto-ducking feature allows you to choose to fade away background music and make foreground narration or dialogue clearer.
- You can also add plain text to any section of the video
- The advanced title editing feature allows you to change the position, rotation, and scale of the video’s title while it is playing.
- You can also create and edit keyboard shortcut keys that you can then use to edit the video more easily.
2. Animaker
Price: Free with limited features. Paid plans from $10 a month
Best For: marketers, presenters, and freelancers
Link: https://www.animaker.com/
If you are looking for a simple way to create interactive presentations and videos, Animaker is a simple solution to choose. It is a particularly simple solution to use as it comes with numerous ways to create and edit the video, including a huge library of templates and elements that include illustrations, gestures, and characters.

The fact that you don’t have to create these animations from scratch makes it an ideal solution even if you have never used this kind of software before. It also comes with more than 200 music tracks and sound effects that you can add to the video.
Pros
- It can be used to create all kinds of animations for all kinds of use including business and personal uses
- It supports the creation of a variety of video styles
- It can be used to create whiteboard videos
- It has numerous animation options to choose from including illustrations, characters, and gestures
- It comes with a free plan
Cons
- You can only create 5 watermarked videos with the free plan
- It is only ideal for creating videos and not animated images
3. Visme
Price: Free plan with limited features. Paid plans start from $15 per month
Best For: Marketers, corporate teams, trainers, teachers, and personal use
Link: https://www.visme.co/
Visme is a cloud-based solution that can be used to create all sorts of animated media including animated videos, animated images, presentations, ads, banners, and more. It has numerous interactive features that are aimed at allowing you to create the perfect designs in a matter of minutes.

Since it is a cloud-based solution, you don’t need to download any software on your computer to use it. it also comes with thousands of premade templates and lots of stock-free images and videos that you can use to create your design.
Pros
- It is an all-in-one solution to create both animated images and videos
- It is a simple soliton even for beginner users
- You get thousands of different resources that can be used to create unique designs limited only by your imagination
- You don’t need to download any software to use it
Cons
- The numerous resources can make it a confusing solution for beginners
- The free plan is very limited
4. Adobe Animate
Price: Starts at $20.99 per month
Best For: Cartoon makers, YouTubers, and game designers
Link: https://www.adobe.com/africa/products/animate.html
Adobe Animate is an improvement on Adobe Flash Professional in every way. It is one of the best ways to create interactive graphics a 2D animations that can then be added to whatever project you are working on.

You can use the numerous tools in Adobe Animate to animate various aspects of your design including characters, shapes, avatars, and other assets. The animations can then be exported in various formats including Flash, HTML5, WebGL, SVG, and more.
Pros
- You have a lot of options when it comes to exporting and sharing the animations you create.
- It allows you to animate elements in numerous ways
- It has an extensive library of tools that can be used to create unique animations
Cons
- Like most Adobe tools, it can be very difficult to use, especially for beginner users
- There is no free trial version
5. Crello
Price: Free plan with limited features. Paid plan starts at $10 a month
Best For: Marketers, freelancers, and business owners
Link: https://create.vista.com/
Also known as VistaCreate, this is a simple solution for creating both animated videos and images. It makes this animation process quick and easy by providing you with a veritable library of templates and thousands of pre-animated characters and objects. It is therefore one of the best solutions to choose even if you don’t have the necessary technical skills to create a credible animated video.

One of the things VistaCreate can do so well is combining videos and animated GIFs with images to create short animated videos that you can share on social media.
Pros
- Create animated videos and export them in various formats, ideal for all devices
- It is one of the best ways to create animated social media posts
- It has a mobile app that allows you to create designs on your device
Cons
- The free version is very limited in creative assets and storage capacity
6. Biteable
Price: Free plan with limited features: Paid plans start from $49 a month
Best For: Marketers, Educators, and Trainers
Link: https://biteable.com/
Biteable is the best option when you want to create simple small animated videos that can be used as Ads or videos that you post to social media. It has numerous premade templates that make creating these simple videos a matter of simply editing one of the templates.

If you feel uninspired, it has thousands of stock footage clips and scenes that you can put together to create a complete. It also has collaborative features that can allow a team to work on the same project.
Pros
- It can be used to make all kinds of marketing videos
- It is an ideal choice for explainer and demo videos
- It provides a wealth of resources to create your videos including stock footage
- It has a free plan
Cons
- The free plan places a watermark on the video
- You can only export the videos in MP4 format.
- At $49 a month, it is a very expensive option.
7. PixTeller
Price: Basic free plan with no animation features. Paid plans start at $12 per month
Best For: Freelancers, marketers, and bloggers
Link: https://pixteller.com/
PixTeller is a great way to animate videos and images for both professional and personal use. if you don’t want the complications that come with a dedicated video editing software, PixTeller is a good option to consider as it is very simple to use.

You can use it to create simple animated short videos by setting frame-by-frame motions and then editing the attributes in each frame. Some of the attributes that you can use PixTeller to edit include colors, opacity, rotation, and more.
Pros
- Editing frame by frame on a timeline makes video creation very easy
- The free version has various editing features
- It can be used to create both animated videos and images
Cons
- It lacks the advanced editing features that you will find on some of the other options on this list
- You can only download the videos in MP4 format
- The free plan doesn’t have animation features
8. Blender
Price: Free
Best For: Scientists, Students, Engineers, Animators, and Artists
Link: https://www.blender.org/download/
If you want to create stunning animations for free, Blender is the open-source software to use. This free program allows users to use the command line to create, render and model 3D animations. It can be used on all platforms including Linux, Windows, and Mac.

Even though it is free, it comes with numerous features including the ability to draw and edit in 3D mode, advanced video editing in VFX, motion tracking, masking, and compositing. But because it uses command-line programming, it may not be an ideal solution for most users.
Pros
- It is a completely free solution
- It has pretty advanced animation and rendering features to create all kinds of videos
Cons
- It may not be the most ideal solution for beginner users even though there are hours of video tutorials to refer to.
Related FAQs
1. How Do I Turn my Video into Animation?
The best way to turn a video into animation is to use one of the animation software solutions that we have outlined above. Each tool has its features and you should choose one that has the necessary features to fit into your video project.
2. How Do I Make an Animated Video for Free?
The only way to make an animated video is to use animation software. And although most programs are not free, there are some open-source solutions like Blender that may be able to help you make an animated video for free.
3. How Do You Animate in PowerPoint?
PowerPoint allows you to add animation to objects and text. To do that, select the object or text that you want to animate and select “Animations.” From the options presented, select the animation that you would like to use and it will be added to the selected object or text. If you would like to add an effect, choose “Effect Options.”
For macOS 10.12 or later
The following are some of the key features you can expect when using Filmora;
- Motion Tracking is a feature that you can use to attach an element to a moving object. The auto motion tracking feature ensures that the elements you attach move smoothly as the object moves.
- You can also use Filmora to customize an animation by adding keyframes to change various aspects including the positions, scale, rotations, and even the opacity of a clip.
- The color match feature allows you to match a selected clip’s color to a separate clip from another clip.
- The auto-ducking feature allows you to choose to fade away background music and make foreground narration or dialogue clearer.
- You can also add plain text to any section of the video
- The advanced title editing feature allows you to change the position, rotation, and scale of the video’s title while it is playing.
- You can also create and edit keyboard shortcut keys that you can then use to edit the video more easily.
2. Animaker
Price: Free with limited features. Paid plans from $10 a month
Best For: marketers, presenters, and freelancers
Link: https://www.animaker.com/
If you are looking for a simple way to create interactive presentations and videos, Animaker is a simple solution to choose. It is a particularly simple solution to use as it comes with numerous ways to create and edit the video, including a huge library of templates and elements that include illustrations, gestures, and characters.
The fact that you don’t have to create these animations from scratch makes it an ideal solution even if you have never used this kind of software before. It also comes with more than 200 music tracks and sound effects that you can add to the video.
Pros
- It can be used to create all kinds of animations for all kinds of use including business and personal uses
- It supports the creation of a variety of video styles
- It can be used to create whiteboard videos
- It has numerous animation options to choose from including illustrations, characters, and gestures
- It comes with a free plan
Cons
- You can only create 5 watermarked videos with the free plan
- It is only ideal for creating videos and not animated images
3. Visme
Price: Free plan with limited features. Paid plans start from $15 per month
Best For: Marketers, corporate teams, trainers, teachers, and personal use
Link: https://www.visme.co/
Visme is a cloud-based solution that can be used to create all sorts of animated media including animated videos, animated images, presentations, ads, banners, and more. It has numerous interactive features that are aimed at allowing you to create the perfect designs in a matter of minutes.
Since it is a cloud-based solution, you don’t need to download any software on your computer to use it. it also comes with thousands of premade templates and lots of stock-free images and videos that you can use to create your design.
Pros
- It is an all-in-one solution to create both animated images and videos
- It is a simple soliton even for beginner users
- You get thousands of different resources that can be used to create unique designs limited only by your imagination
- You don’t need to download any software to use it
Cons
- The numerous resources can make it a confusing solution for beginners
- The free plan is very limited
4. Adobe Animate
Price: Starts at $20.99 per month
Best For: Cartoon makers, YouTubers, and game designers
Link: https://www.adobe.com/africa/products/animate.html
Adobe Animate is an improvement on Adobe Flash Professional in every way. It is one of the best ways to create interactive graphics a 2D animations that can then be added to whatever project you are working on.
You can use the numerous tools in Adobe Animate to animate various aspects of your design including characters, shapes, avatars, and other assets. The animations can then be exported in various formats including Flash, HTML5, WebGL, SVG, and more.
Pros
- You have a lot of options when it comes to exporting and sharing the animations you create.
- It allows you to animate elements in numerous ways
- It has an extensive library of tools that can be used to create unique animations
Cons
- Like most Adobe tools, it can be very difficult to use, especially for beginner users
- There is no free trial version
5. Crello
Price: Free plan with limited features. Paid plan starts at $10 a month
Best For: Marketers, freelancers, and business owners
Link: https://create.vista.com/
Also known as VistaCreate, this is a simple solution for creating both animated videos and images. It makes this animation process quick and easy by providing you with a veritable library of templates and thousands of pre-animated characters and objects. It is therefore one of the best solutions to choose even if you don’t have the necessary technical skills to create a credible animated video.
One of the things VistaCreate can do so well is combining videos and animated GIFs with images to create short animated videos that you can share on social media.
Pros
- Create animated videos and export them in various formats, ideal for all devices
- It is one of the best ways to create animated social media posts
- It has a mobile app that allows you to create designs on your device
Cons
- The free version is very limited in creative assets and storage capacity
6. Biteable
Price: Free plan with limited features: Paid plans start from $49 a month
Best For: Marketers, Educators, and Trainers
Link: https://biteable.com/
Biteable is the best option when you want to create simple small animated videos that can be used as Ads or videos that you post to social media. It has numerous premade templates that make creating these simple videos a matter of simply editing one of the templates.
If you feel uninspired, it has thousands of stock footage clips and scenes that you can put together to create a complete. It also has collaborative features that can allow a team to work on the same project.
Pros
- It can be used to make all kinds of marketing videos
- It is an ideal choice for explainer and demo videos
- It provides a wealth of resources to create your videos including stock footage
- It has a free plan
Cons
- The free plan places a watermark on the video
- You can only export the videos in MP4 format.
- At $49 a month, it is a very expensive option.
7. PixTeller
Price: Basic free plan with no animation features. Paid plans start at $12 per month
Best For: Freelancers, marketers, and bloggers
Link: https://pixteller.com/
PixTeller is a great way to animate videos and images for both professional and personal use. if you don’t want the complications that come with a dedicated video editing software, PixTeller is a good option to consider as it is very simple to use.
You can use it to create simple animated short videos by setting frame-by-frame motions and then editing the attributes in each frame. Some of the attributes that you can use PixTeller to edit include colors, opacity, rotation, and more.
Pros
- Editing frame by frame on a timeline makes video creation very easy
- The free version has various editing features
- It can be used to create both animated videos and images
Cons
- It lacks the advanced editing features that you will find on some of the other options on this list
- You can only download the videos in MP4 format
- The free plan doesn’t have animation features
8. Blender
Price: Free
Best For: Scientists, Students, Engineers, Animators, and Artists
Link: https://www.blender.org/download/
If you want to create stunning animations for free, Blender is the open-source software to use. This free program allows users to use the command line to create, render and model 3D animations. It can be used on all platforms including Linux, Windows, and Mac.
Even though it is free, it comes with numerous features including the ability to draw and edit in 3D mode, advanced video editing in VFX, motion tracking, masking, and compositing. But because it uses command-line programming, it may not be an ideal solution for most users.
Pros
- It is a completely free solution
- It has pretty advanced animation and rendering features to create all kinds of videos
Cons
- It may not be the most ideal solution for beginner users even though there are hours of video tutorials to refer to.
Related FAQs
1. How Do I Turn my Video into Animation?
The best way to turn a video into animation is to use one of the animation software solutions that we have outlined above. Each tool has its features and you should choose one that has the necessary features to fit into your video project.
2. How Do I Make an Animated Video for Free?
The only way to make an animated video is to use animation software. And although most programs are not free, there are some open-source solutions like Blender that may be able to help you make an animated video for free.
3. How Do You Animate in PowerPoint?
PowerPoint allows you to add animation to objects and text. To do that, select the object or text that you want to animate and select “Animations.” From the options presented, select the animation that you would like to use and it will be added to the selected object or text. If you would like to add an effect, choose “Effect Options.”
Also read:
- New In 2024, Ideas That Will Help You Out in Converting AVI to GIF
- New Every Compositor Should Know The Trick of Color Match in After Effects
- Updated Best Ever Ways Make Tiktok Slideshow Solved
- New In 2024, Easy Ways to Edit Recorded Video
- Why You Should Master Slideshows In Lightroom?
- New Camtasia Vs. Final Cut Pro for 2024
- Updated Little Tricks to Create Canva Slideshow No One Is Telling You
- 2024 Approved Here Are the Steps to Crop a Video in Sony Vegas Pro Step 1 Click on Import and Import the Video to Be Edited. Click on It and Drag-Drop to Timeline
- In 2024, Read and Learn How to Convert a Slow-Motion Video to Normal in This Guide. Besides, Find the Best Desktop Solution to Adjust Video Speed Quickly and Easily
- Updated After Reading This Article, You Can Add a B-Roll Feature From Filmora and Captivate More Audience. Explanation Video B-Roll and Story-Telling B-Roll Are Well Illustrated for 2024
- Updated Convert Time-Lapse to Normal Video for 2024
- In 2024, Tactics to Make Transparent Image in Minimal Steps
- In 2024, How to Create a Vacation Slideshow in 5 Minutes
- New In 2024, How to Create Video Contents That Convert Sales
- In 2024, Creating a Slideshow Is Necessity of the Modern Time. Whether You Plan a Business Meeting or You Are Going to Do some Family Event with Slideshow Presentation, a Good Slideshow Maker Will Help You in This Direction
- New How to Apply Gaussian Blur Effect to Videos In Premiere Pro, In 2024
- Do You Know How to Create AI Thumbnails for Videos? This Article Will Mention some of the Best Tools to Generate Attractive Thumbnails for Videos with AI for 2024
- New What Do You Prefer More, MKV File Format or MOV? Increase Your Knowledge and Learn More About MKV Format by Ready the Detailed Article Below
- This Article Is Actually the Guide Regarding Editing the Videos Through VEED. As a Substitute, Wondershare Filmora Is Also Under Discussion that Is Also Available for the Same Purpose
- Updated How To Add Motion Blur Effect To Photos in GIMP for 2024
- In 2024, 10 Best Suggestions for AI Video Interviews
- In 2024, Do You Want to Know About Efficient Motion Blur Plugins for Adobe Effects? Read This Article to Find Out How to Use Motion Blur Plugins for Enhanced Results
- Updated 2024 Approved What You Should Know About Speech-to-Text Technology
- 2024 Approved Have You Tried Using a Craig Bot on Discord to Record Audio? Do You Have an Idea of Using a Discord Craig Bot Is Safe? Get Answers to These Questions and More From This Article as You Continue Reading
- In 2024, Best 12 Sony Vegas Slideshow Templates for Free Download
- New Speed Control Is Frequently Used in Video Editing. By Speed up or Slow Down the Video Speed, You Can Achieve Different Visual Results. This Article Will Show You How to Control the Speed of a Video
- New 2024 Approved 5 Ways to Make a Fake Facetime Call Video
- 2024 Approved Thousands Already Know Ezgif and So Can You
- Updated 2024 Approved 8 Apps to Custom Your GIF Stickers
- Updated Best Movie Title Maker for 2024
- Repair damaged, unplayable video files of Xiaomi 14 on Mac
- How to retrieve erased videos from Honor
- In 2024, 4 Ways to Transfer Music from OnePlus 12 to iPhone | Dr.fone
- How to use iSpoofer on Gionee F3 Pro? | Dr.fone
- Guide to Mirror Your Oppo Find X6 Pro to Other Android devices | Dr.fone
- In 2024, Unlocking Made Easy The Best 10 Apps for Unlocking Your Nubia Red Magic 9 Pro Device
- New 2024 Approved Add Emojis to Videos on YouTube/Facebook/Snapchat Step by Step Guide
- How To Recover Lost Data from iPhone 7 Plus? | Dr.fone
- In 2024, How to Make the Most of Your iPhone 13 Pro Max Lock Screen with Notifications? | Dr.fone
- How to Fix the Soft Bricked Motorola Defy 2? | Dr.fone
- 8 Best Apps for Screen Mirroring Lenovo ThinkPhone PC | Dr.fone
- In 2024, Does find my friends work on Realme V30 | Dr.fone
- Pokemon Go Error 12 Failed to Detect Location On OnePlus Ace 2 Pro? | Dr.fone
- Title: New Best 22 Video Editing Tips to Know for 2024
- Author: Chloe
- Created at : 2024-04-24 07:08:40
- Updated at : 2024-04-25 07:08:40
- Link: https://ai-editing-video.techidaily.com/new-best-22-video-editing-tips-to-know-for-2024/
- License: This work is licensed under CC BY-NC-SA 4.0.
