
:max_bytes(150000):strip_icc():format(webp)/young-muslim-woman-using-phone-1137305438-75947aa7fb484506bf9da8c38fc68a03.jpg)
New Best Video Editors to Add Text to a Video
Best Video Editors to Add Text to a Video
While it can be very easy to add text to an image, the same cannot be said when it comes to adding even the simplest text to a video. You will need video editing software that is designed with the necessary features to help you add text to your video.
There are very many programs in the market that can technically be used to add text to a video. But the ones we will look at are video editors that make the process easy, but also give you a wide range of options to customize your text in numerous ways.
Filmora
Filmora by Wondershare is one of the best video editors in the market. Its user interface is so easy to use that adding text to the video is a simple 3-step process. Aside from adding text to the video, Filmora also allows you to edit other aspects of the video including adding transitions, overlays, and animations to any section of the video.

Key Features:
- You can use Filmora to add text to any section of the video
- It gives you the freedom to move the text to any section of the video
- Customizing the text, you add to the video can be done in numerous ways including changing the color, and font and adding animations to the text.
- It offers numerous templates to choose from and different font styles that you can use
- It has a simple user interface that makes the video editing process very easy
- It has numerous other video editing capabilities that allow you to create and edit videos in different ways including splitting videos, trimming videos, and even merging videos clips into one
- You can upload the videos directly to YouTube after editing.
After Effects
Adobe After Effects is a motion picture editing program that you can also use to add text and other animations to your video. While you can use it to add simple text to the video, it is an ideal solution when your goal is to add advanced text animations. It is however by no means a simple solution, especially for beginners who may find it hard to get going with After Effects.

Key Features:
- You can add simple lines of text to any section of the video
- Text is easily customizable by changing the color, font, and size of the text
- You can also choose to change the entire text layer and add advanced animations and effects
- There are a lot of text, animations, and effects templates to choose from
- You can easily copy text from other Adobe applications to use in After Effects
Movavi Editor
Movavi video editor is another great video editor that you can use to add and edit text on a video. Like most similar tools it is designed to simplify the process, allowing you to add text to any section of the document, move the text to any location on the video and even add text effects to customize the text. It has a very simple user interface that allows you to do that quickly and easily.

Key Features:
- You can add text to any section of the video
- Customizing the text by changing the font, color and size is also very easy
- The user interface is very easy to use, allowing you to add even blocks of text very quickly
- You also have additional options to edit the video including splitting and merging the video or adjusting the brightness, saturation, and color.
iMovie
This is a built-in video editor that you will find on macOS and iOS devices. Even though it is free, iMovie has a lot of features that come in handy when you want to add and edit text on a video. The fact that it can be used on iOS devices is an added advantage when you want to edit videos on the go.

Key Features:
- It allows users to add transitions and effects to the text you add to the video
- It comes with a lot of title templates to choose from
- Adding animated text is also very simple including Sideways Drift, Lens Flare, and more
- You can customize the text in very many ways including adding fonts, drop shadows, changing the color, and even resizing or repositioning the text.
Camtasia
TechSmith Camtasia is one of the most popular tools to create and edit videos. Of the numerous features that you get when you choose to use Camtasia is adding and editing text to the video. It has numerous templates that can be used to customize the text you add in various ways.

Key Features:
- It gives you numerous options to add text to the images including text boxes, templates, and effects
- It has a speech-to-text feature that is perfect for adding captions and subtitles to the video
- You can easily customize the text by adding transitions and effects or even by simply changing the font, color, and size of the text
- The text can be moved to any section of the video
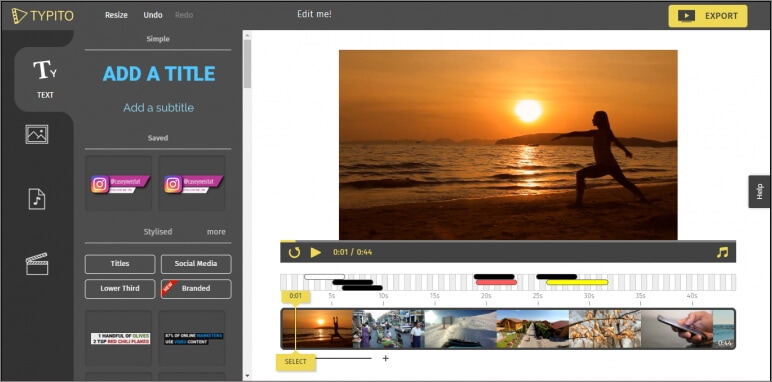
Typito
Typito is an online video editor with simple tools that can help you make changes to any video. designed to help YouTube content creators and video editors, Typito can be used to add all kinds of text and text effects to any video. It is accessible on all browsers and it is also very easy to use.
Key Features:
- It is very easy to use, allowing you to add text to any video in a few simple steps
- It has numerous templates to choose from
- Changing the font size, color, and style of the text is very easy
- You can publish videos directly to numerous video-sharing sites after editing
- It allows users to add animations, transitions, and effects to the text
Splice
Splice is an iOS app designed to help you add text to videos on iOS devices. Adding text to any video using Splice can be easily done using the overlay feature. It also has numerous other video editing features including allowing you to easily synchronize your videos and music, adding filters and transitions, and more.

Key Features:
- it has a simple user interface that makes adding text very easy
- You can customize the text in various ways including changing the font size, color and style or even adding various text effects
- Videos can be saved on the device or shared directly on social media apps like Facebook, Instagram, and YouTube
- It has numerous other video editing features including filters and animations
Clipomatic
If the text you want to add to the video is in the form of captions or subtitles, then Clipomatic is perhaps the best choice. It supports various languages including German, French, Portuguese, and even Chinese. You can also use it to add regular text to any video, reposition the text on any section of the video and customize the text in various ways.

Key Features:
- It is available for both Android and iOS
- Adding text to the video is very easy
- You can easily customize the text by changing the font color, and size and adding transitions and text effects
- It supports various languages, making it ideal for captions and subtitles
MySubtitle
MySubtitle is a simple but highly effective app that you can use to add text to your video. As the name suggests, this tool is ideal for adding subtitles and you can do that very easily by simply typing in the text and syncing the text to the video’s content.

Key Features:
- It is available for both iOS and Android devices
- You can type in your subtitles directly on the video
- Subtitles can then be paced to suit the video’s playback speed
- It is completely free to use
- You can share the videos you edit directly on various social media platforms
Free Download For Win 7 or later(64-bit)
Free Download For macOS 10.14 or later
Free Download For macOS 10.14 or later
Ideas That Help You Out in Making Transparent Image
Ideas That Will Help You Out in Making Transparent Image
An easy yet powerful editor
Numerous effects to choose from
Detailed tutorials provided by the official channel
Want to explore your graphic creativity with transparent images? Stay tuned for the most trending ideas to fill in your social media handles with unlimited likes!
In this article
01 [What Is a Transparent PNG Background?](#Part 1)
02 [Differences Among PNG vs JPG vs GIF](#Part 2)
03 [How to Make an Image Background Transparent](#Part 3)
04 [How to Convert JPG to Transparent PNG](#Part 4)
Part 1 What Is a Transparent PNG Background?
Transparent backgrounds are essentially faded overlays to any graphic content, like, an image or a video, that are useful in emphasizing the main element in the substance. Compatible to a variety of image and video formats, these are the talk of the trend, owing to their excellent content promotion utility. These are the latest and creative examples of information presentation, along with being among the best branding tools that can potentially make your content fresh and unique.
Using a transparent background as a brand promotion tool helps to project forward the major highlights of your product with a supportive background image, like the brand logo. This helps the audience to have a general idea of your brand. Apart from this, you can also assure the authenticity and quality of your brand by using a watermark in the background image.
Images with transparent backgrounds are the current promotion trends, owing to their convenient compatibility with any web design and the flexibility to mix with the most diverse color palettes and different elements on the product webpage. These can further be easily rendered in 3D to present realistic product images.
Part 2 Differences Among PNG vs JPG vs GIF
Diversity in requirement and usage has led to the advent of a variety of image formats, each suited to a specific purpose. On account of this variation, it becomes a confusing task to select the best image format that can fetch the most affordable images results in cohesion with exact user needs.
It is recommenced to use the JPG image format for natural stills that have a smooth variations in intensity and color. If your content requires image transparency, or contains texts and elements that have a sharp contrast image, like a brand logo, you should ideally prefer the PNG image format, while the GIF format is best suited for presenting animated content. As an explanation to the above usage constraints, here’s a comparison of the popular PNG, JPG and GIF image formats in the light of some common credibility parameters.
01Compression
Image compression facilitates a quick data transmission across different web based platforms, owing to the reduced file size. While compression can be either lossy or lossless, choose an image format that maintains the size credibility in resonance with your data needs. A lossless compression guarantees the retrieval of original image, but a lossy compression fails to do so.
JPG
The JPG format is a lossy compressor that plays on your ability to perceive. The format has the credibility of a 1:10 compression ratio, without comprising with the original image quality. However, a further increased compression ratio may generate perceivable differences in image quality.
The JPG compression utilizes the concept of Discrete Cosine Transform, i.e., a color averaging of the image pixels in close proximity. Hence, it is suitable to use this format for natural and scenic stills, having a smooth color and intensity transition. Preferring this image format for a transmission of high contrast and sharpened images is however, not advisable.
PNG
This format supports the Deflate Compression technique and neither introduces artefacts, nor cuts down on the image quality. Choose the PNG image format for a lossless and high quality compression in comparison to JPG. This one is a more effective format with higher image quality, sharper image presentation and occupies a larger memory space on your device.
You can rely on PNG images for presenting data with text, shapes and logos with high contrast pixelation. It is however, not a good choice for transferring digital images that have a high resolution.
GIF
Working on the LZW Compression Algorithm, this image format was originally used to showcase simple website graphics, when the PNG format was still at a developing stage. However, with the advancement of PNG as a more effective compression format, the use of GIF is now restricted to animated content sharing.
02Transparency
Transparency is tern used to describe some invisible content. This is suitable to use in image backgrounds when you need to lay extra stress on the main content, like the logo of your product with a cohesive brand text, etc. the transparent background used here facilitates the use of a particular image with a series of background and color variations.
JPG
The JPG format has a limitation of not being compatible with image transparency, and hence is not suitable for related applications.
PNG
The PNG format gives you the liberty to use image transparency in two selective ways. You can either choose to make your image partially transparent by an alpha channel insertion for a smooth edge-background blend, or use index transparency to make the pixels of any particular color as transparent. PNG8 AND PNG24 versions of the format are supportive of index and alpha channel transparencies respectively.
GIF
This format inherently supports index transparency and declares a chosen color on the palette as transparent. Owing to the absence of alpha channel transparency, there is an unsatisfactory blend of edges with the image background. The unevenness becomes more prominent in case of highly detailed and rounded images.
While it is possible to mitigate this loss to some extent with the use of image dithering, the GIF format is still not a preferred choice for creating images with transparent backgrounds. The PNG format is instead, more credible on that aspect.
03Color
Color is a visibly strong parameter of difference among the JPG, PNG and GIF image formats, with each one supporting as specific number of colors on the palette.
JPG
The color palette of JPG images is a huge inventory of 16 million colors, rendering them suitable for storing natural stills having a smooth color transition.
PNG
The two versions of PNG format differ on color variance. While PNG8 permits 256 colors, the PNG24 format supports 16 million colors, similar to the JPG format. Consider using the PNG8 format for an image with simple shapes and lesser variations in color. It is, on the other hand better to use the PNG24 format for images with transparent backgrounds, high image quality and complex shapes with detailed edges.
GIF
The GIF format is a host to 256 colors, one of which becomes transparent on using index transparency and the other 255 support different color variations.
04Animation
Animation here, is not necessarily restricted to having frame rates, but refers to a certain periodic movement of specific image sections with time. Out of JPG, PNG and GIF, only the last one is compatible with GIFs. You can use this utility to crate and share eye catching banners and advertisements. The advent of GIF specific content platforms, such as, GIPHY, Tumblr, etc., has further uplifted GIF reach and usage.
A variety of image formats are available to choose from for catering to specific content requirements. However, you can always optimize the format selection in cohesion with the current need.
Part 3 How to Make an Image Background Transparent
Having known enough about the credibility of transparent background images, it sounds quite interesting to try your hands at creating these of your own. The software market offers some over the top tools for creating stunning examples of images with transparent backgrounds. When looking for alternatives on how to make an image with a transparent background, some of your best choices are discussed below:
01Canva
This one is a top class image creator and editor tool, which you can use to add that extra tint to your website design material, watermark images or even display your image creativity for fun and entertainment purposes. The tool comes with a simple and quick process to make transparent background images.
This tool grants you the liberty to choose from various s transparency levels, image layers and effects to give the perfect professional look to your creation. The tool further promises you of a clean and subtle transparent background image that is bound to attract viewer attention.
This graphic design tool is available for a free usage, if you limit yourself within image design and effect play. However, if you want to experience the fun of creating transparent background images with this tool, you need to take its paid subscription.
How to Make Canva Transparent Background
Here’s the know how to add transparent background in still images with this tool:
Step 1: Account Creation
In order to use this graphic tool for image design, you need to have its official account. Visit the tool’s official site, launch the same on your system, create a Canva account and log in.

Step 2: Image Selection
Consider browsing through your device to choose an image for creating a transparent background artwork.

Step 3: Background Removal
You now need to remove the background color of the selected image. In the tool’s welcome interface, navigate to ‘Effects’ in the top toolbar and select ‘Background Remover’ from the available options to remove the background layer and make a transparent design.

Step 4: Save Your Image
After removing the image background, download it into your system. To do this, navigate to the ‘Download’ icon at the top right and click on it.

Step 5: File Format Selection
Here, you need to select the PNG file format to get a transparent background image.

Step 6: Transparency
It is now time to make your image background transparent. You can do this by clicking the ‘Transparency’ checkbox below the ‘File Format‘selection dialog box.

Step 7: Download Your Creation
When you are happy with setting the above parameters, hit the ‘Download’ tab to import your artwork to your device gallery.

02Photoshop
This one is excellent image editor and graphic designer tool that allows you to add diversification and class to your brand images. You can play with a variety of display features to enhance and objectify your image to your heart’s content.
Using Photoshop allows a presentation of your content against a dynamic color background, thus favoring a background interaction selective to the viewer’s serene size. Photoshop can create transparent logos for the products on your site, that are suitable to be placed anywhere on the webpage, regardless of the latter’s background color.
How to Make Photoshop Transparent Background
See through the following section of this article for a guided tutorial to create a transparent background image in Photoshop:

Step 1: Download Adobe Photoshop
Navigate to Adobe’s official website and download the Photoshop application in your device. Install and launch the same to reach the app’s welcome interface.

Step 2: Make a Layered Image File
In the main interface, open a selected image and navigate to the ‘Layers Panel’ in the right of the image window. However, if the ‘Layers Panel’ does not show up by default, reach to the top toolbar and hit the ‘Window’ tab. From the drop sown menu that follows, select ‘Layers’.

In this panel, double tap the ‘Background‘layer. This causes the ‘Rename Layer’ dialog box to appear. You can either enter a suitable name or continue with the default ‘Layer 0’ name. When you are done, click on ‘OK’.

Step 3: Let’s Get Creating!
In the application interface, navigate to the toolbar at the left and choose the ‘Magic Wand’ tool. Again, reach to the ‘Options’ bar at the top and choose ‘Select Subject’. This will facilitate the selection of the min object of the image, irrespective of its background and the selection will be visible as ‘marching ants’ around the object.

If you find the selection to be improper, use the ‘Magic Wand’ to ward off excessive background portions by choosing the ’Subtract From Selection’ option, or even add some extra product portions, suited to your requirement. While making your selection, take care to include any holes in the product image.

Step 4: Background Deletion
When you are left with only the selected product, navigate to the top toolbar and hit the ’Select’ tab and choose ‘Inverse’ from the drop down menu that follows. You can alternatively use the ‘Shift+Ctrl+I’ command for a Windows device, or enter ‘Shift+Command+I’ command, in case you are using a Mac supported device.

Make a selection of the inverse background and tap ‘Backspace’ or ‘Delete’ in your Windows and Mac devices respectively. This will cause your background to get transparent. In the Photoshop application, a gray-white checkerboard represents a transparent background.
In case you require deselecting any selection, enter ‘Ctrl+D’ in Windows or ‘Command+D’ in a Mac device.

Step 5: Save Your Creation in a Web Compatible Format
When you are done creating the transparent background artwork, it becomes equally important to save your creation in a web compatible format to export them on different media platforms and product websites.
Talking of the preferable image format, it is highly recommended to use the PNG24 one, owing to its flexibility of alpha channel transparency, which permits partially transparent image backgrounds along with layered transparency. This in turn makes it possible to integrate the image with varying color backgrounds on different sites and platforms without hollow pixelation.
To save your artwork in the PNG24 file format, navigate to the application toolbar bat the top and hit the ‘File’ tab and choose the ‘Export’ option from the drop sown menu that appears. Select the ‘Export As’ option from the ‘Export’ popup menu.
For an older Photoshop version, hit the ‘Export’ tab and choose ‘Save for Web’ from the dropdown menu, followed by selecting the PNG24 option. A format dialog box appears where you can set the transparency settings. To do this, navigate to ‘File Settings’ at the right, choose the PNG file format and check the ‘Transparency’ box. Avoid checking the ‘Smaller Size’ box, else the image will get saved in the PNG8 format.

In the left of the screen, the image file size is displayed. Maintain an affordable file size, preferably within 200 KB, to avoid slower image loading on the sharing platform. You can adjust this in the ‘Image Size’ option at the right.

Set a conveniently reduced dimension, while taking care not to set an extremely small size, else it will produce a pixelated output on the site. It is preferable to set a 50-100% larger image size for a convenient display across different devices.
Step 6: Final Save
Once you are satisfied with all the image settings, tap ‘Export All’ to save your artwork locally in your device. In the ‘File Save’ dialog box, choose a preferred device location, enter a suitable file name and choose the .png extension. At last, click on ‘Save’.
03Filmora
Launched by Wondershare, this is excellent image editor and creator software that you can rely on to make stunning artworks in a variety of file formats. Talking of background transparency in particular, the software comes with a unique ‘Green Screen’ feature to create high quality, transparent background images in a matter of a few clicks. You can further, give a professional touch to your creation with a storehouse of classic video and image editing effects that are just perfect to stand out in the crowd.
How to Make Filmora Transparent Background
A stepwise tutorial on how to create image with transparent background images using Filmora is discussed below:
Step 1: Download the Software
Visit the official website of Wondershare Filmora Video Editor to download and install the software in any of your Windows or Mac devices.
For Win 7 or later (64-bit)
For macOS 10.12 or later
Step 2: Import Media File
Launch the app to reach the main interface, where you will find the ‘Import’ tab. Hit it and choose ‘Import Media File’ from the drop down menu that follows. This will upload your selected image to the software’s media library.

Step 2: Timeline Dragging
You now need to insert the selected image from Filmora’s media library to the software’s editing timeline. You can do this either by right clicking the selected image, followed by choosing the ‘Insert’ option, or a simple ’Drag and Drop’ method.

Step 3: Transparency Adjustments
In the editor timeline, double click your selected image to open the ‘Settings’ tab. Scroll down the tab options to locate ‘Chroma Key Settings’. Make a right toggle to enable the ‘Chroma Key’ and you will see the image get transparent with the default ’Green’ background color.
You can alternatively, navigate to the ‘Select Color’ option and choose ‘Color Picker’ at its right, reach the image section you wish to make transparent and make a single click.

In case you get a partially transparent background, you can make further adjustments in the ‘Chroma Key’ settings, such as, tolerance, edge thickness, offset, edge feather, etc., to ascertain complete background transparency. When you are satisfied with your work, click on ‘OK’.

Step 4: Media Export
You can now try adding the transparent image to any video or export the same to any media platform. To do this, hit the ‘Export’ tab at the top right corner in the editor timeline.

Part 4 How to Convert JPG to Transparent PNG
Taking into account the diverse information sharing and content specification requirements, an obvious need to switch between different file formats may arise at a number of instants. One such example is the conversion of images in JPG format into that of a transparent PNG image. When looking through convenient alternatives to set the issue straight, the software market has a pouring flood of choices.
Discussed below are some of the best JPG to transparent PNG converter solutions you can pick to convert color background JPG stills into transparent PNG background images, while sorting the concern of how to save PNG with transparent background:
Filmora JPG to Transparent PNG Converter
Filmora is top rated and highly preferred graphic design software that caters to all of your video and image design and conversion needs in the most convenient manner. Developed by Wondershare, this is the worthiest pick for all graphic editing. While the software is packed with extensive and over the top features to provide a professional elegance to almost and design artwork, the transparent image backgrounds created by Filmora are simply remarkable.
If you are done with those usual and commonplace captures, try hands at creating transparent background images with this software, which promises you of a stand out result on account of the following features:
● Filmora comes with a distinguished ‘Green Screen’ feature that is known to create transparent background images in time instants shorter than an eye blink. You just need to upload an image in the software timeline and adjust a few chroma settings, and that’s really the end!
● Apart from this, you can play with a diverse inventory of results and image filters, like, graphic and text overlays, subtitles and tons of audio-visual upshots to create an absolute graphic masterpiece.
● The software further, is free to use and welcomes you with a clean, cohesive and responsive user interface, guiding you at each step of the design task.
● Ending Thoughts →
● Transparent image backgrounds are the current in house trends of content branding and product promotion alternatives. While there are varieties of requirement specific image file formats, the PNG format is best suited for creating a transparent background image.
● The software market is an in depth pool of choices for graphic and image editing tools, Wondershare Filmora happens to be a distinguished name among all to create and convert images with transparent backgrounds.
Want to explore your graphic creativity with transparent images? Stay tuned for the most trending ideas to fill in your social media handles with unlimited likes!
In this article
01 [What Is a Transparent PNG Background?](#Part 1)
02 [Differences Among PNG vs JPG vs GIF](#Part 2)
03 [How to Make an Image Background Transparent](#Part 3)
04 [How to Convert JPG to Transparent PNG](#Part 4)
Part 1 What Is a Transparent PNG Background?
Transparent backgrounds are essentially faded overlays to any graphic content, like, an image or a video, that are useful in emphasizing the main element in the substance. Compatible to a variety of image and video formats, these are the talk of the trend, owing to their excellent content promotion utility. These are the latest and creative examples of information presentation, along with being among the best branding tools that can potentially make your content fresh and unique.
Using a transparent background as a brand promotion tool helps to project forward the major highlights of your product with a supportive background image, like the brand logo. This helps the audience to have a general idea of your brand. Apart from this, you can also assure the authenticity and quality of your brand by using a watermark in the background image.
Images with transparent backgrounds are the current promotion trends, owing to their convenient compatibility with any web design and the flexibility to mix with the most diverse color palettes and different elements on the product webpage. These can further be easily rendered in 3D to present realistic product images.
Part 2 Differences Among PNG vs JPG vs GIF
Diversity in requirement and usage has led to the advent of a variety of image formats, each suited to a specific purpose. On account of this variation, it becomes a confusing task to select the best image format that can fetch the most affordable images results in cohesion with exact user needs.
It is recommenced to use the JPG image format for natural stills that have a smooth variations in intensity and color. If your content requires image transparency, or contains texts and elements that have a sharp contrast image, like a brand logo, you should ideally prefer the PNG image format, while the GIF format is best suited for presenting animated content. As an explanation to the above usage constraints, here’s a comparison of the popular PNG, JPG and GIF image formats in the light of some common credibility parameters.
01Compression
Image compression facilitates a quick data transmission across different web based platforms, owing to the reduced file size. While compression can be either lossy or lossless, choose an image format that maintains the size credibility in resonance with your data needs. A lossless compression guarantees the retrieval of original image, but a lossy compression fails to do so.
JPG
The JPG format is a lossy compressor that plays on your ability to perceive. The format has the credibility of a 1:10 compression ratio, without comprising with the original image quality. However, a further increased compression ratio may generate perceivable differences in image quality.
The JPG compression utilizes the concept of Discrete Cosine Transform, i.e., a color averaging of the image pixels in close proximity. Hence, it is suitable to use this format for natural and scenic stills, having a smooth color and intensity transition. Preferring this image format for a transmission of high contrast and sharpened images is however, not advisable.
PNG
This format supports the Deflate Compression technique and neither introduces artefacts, nor cuts down on the image quality. Choose the PNG image format for a lossless and high quality compression in comparison to JPG. This one is a more effective format with higher image quality, sharper image presentation and occupies a larger memory space on your device.
You can rely on PNG images for presenting data with text, shapes and logos with high contrast pixelation. It is however, not a good choice for transferring digital images that have a high resolution.
GIF
Working on the LZW Compression Algorithm, this image format was originally used to showcase simple website graphics, when the PNG format was still at a developing stage. However, with the advancement of PNG as a more effective compression format, the use of GIF is now restricted to animated content sharing.
02Transparency
Transparency is tern used to describe some invisible content. This is suitable to use in image backgrounds when you need to lay extra stress on the main content, like the logo of your product with a cohesive brand text, etc. the transparent background used here facilitates the use of a particular image with a series of background and color variations.
JPG
The JPG format has a limitation of not being compatible with image transparency, and hence is not suitable for related applications.
PNG
The PNG format gives you the liberty to use image transparency in two selective ways. You can either choose to make your image partially transparent by an alpha channel insertion for a smooth edge-background blend, or use index transparency to make the pixels of any particular color as transparent. PNG8 AND PNG24 versions of the format are supportive of index and alpha channel transparencies respectively.
GIF
This format inherently supports index transparency and declares a chosen color on the palette as transparent. Owing to the absence of alpha channel transparency, there is an unsatisfactory blend of edges with the image background. The unevenness becomes more prominent in case of highly detailed and rounded images.
While it is possible to mitigate this loss to some extent with the use of image dithering, the GIF format is still not a preferred choice for creating images with transparent backgrounds. The PNG format is instead, more credible on that aspect.
03Color
Color is a visibly strong parameter of difference among the JPG, PNG and GIF image formats, with each one supporting as specific number of colors on the palette.
JPG
The color palette of JPG images is a huge inventory of 16 million colors, rendering them suitable for storing natural stills having a smooth color transition.
PNG
The two versions of PNG format differ on color variance. While PNG8 permits 256 colors, the PNG24 format supports 16 million colors, similar to the JPG format. Consider using the PNG8 format for an image with simple shapes and lesser variations in color. It is, on the other hand better to use the PNG24 format for images with transparent backgrounds, high image quality and complex shapes with detailed edges.
GIF
The GIF format is a host to 256 colors, one of which becomes transparent on using index transparency and the other 255 support different color variations.
04Animation
Animation here, is not necessarily restricted to having frame rates, but refers to a certain periodic movement of specific image sections with time. Out of JPG, PNG and GIF, only the last one is compatible with GIFs. You can use this utility to crate and share eye catching banners and advertisements. The advent of GIF specific content platforms, such as, GIPHY, Tumblr, etc., has further uplifted GIF reach and usage.
A variety of image formats are available to choose from for catering to specific content requirements. However, you can always optimize the format selection in cohesion with the current need.
Part 3 How to Make an Image Background Transparent
Having known enough about the credibility of transparent background images, it sounds quite interesting to try your hands at creating these of your own. The software market offers some over the top tools for creating stunning examples of images with transparent backgrounds. When looking for alternatives on how to make an image with a transparent background, some of your best choices are discussed below:
01Canva
This one is a top class image creator and editor tool, which you can use to add that extra tint to your website design material, watermark images or even display your image creativity for fun and entertainment purposes. The tool comes with a simple and quick process to make transparent background images.
This tool grants you the liberty to choose from various s transparency levels, image layers and effects to give the perfect professional look to your creation. The tool further promises you of a clean and subtle transparent background image that is bound to attract viewer attention.
This graphic design tool is available for a free usage, if you limit yourself within image design and effect play. However, if you want to experience the fun of creating transparent background images with this tool, you need to take its paid subscription.
How to Make Canva Transparent Background
Here’s the know how to add transparent background in still images with this tool:
Step 1: Account Creation
In order to use this graphic tool for image design, you need to have its official account. Visit the tool’s official site, launch the same on your system, create a Canva account and log in.
Step 2: Image Selection
Consider browsing through your device to choose an image for creating a transparent background artwork.
Step 3: Background Removal
You now need to remove the background color of the selected image. In the tool’s welcome interface, navigate to ‘Effects’ in the top toolbar and select ‘Background Remover’ from the available options to remove the background layer and make a transparent design.
Step 4: Save Your Image
After removing the image background, download it into your system. To do this, navigate to the ‘Download’ icon at the top right and click on it.
Step 5: File Format Selection
Here, you need to select the PNG file format to get a transparent background image.
Step 6: Transparency
It is now time to make your image background transparent. You can do this by clicking the ‘Transparency’ checkbox below the ‘File Format‘selection dialog box.
Step 7: Download Your Creation
When you are happy with setting the above parameters, hit the ‘Download’ tab to import your artwork to your device gallery.
02Photoshop
This one is excellent image editor and graphic designer tool that allows you to add diversification and class to your brand images. You can play with a variety of display features to enhance and objectify your image to your heart’s content.
Using Photoshop allows a presentation of your content against a dynamic color background, thus favoring a background interaction selective to the viewer’s serene size. Photoshop can create transparent logos for the products on your site, that are suitable to be placed anywhere on the webpage, regardless of the latter’s background color.
How to Make Photoshop Transparent Background
See through the following section of this article for a guided tutorial to create a transparent background image in Photoshop:
Step 1: Download Adobe Photoshop
Navigate to Adobe’s official website and download the Photoshop application in your device. Install and launch the same to reach the app’s welcome interface.
Step 2: Make a Layered Image File
In the main interface, open a selected image and navigate to the ‘Layers Panel’ in the right of the image window. However, if the ‘Layers Panel’ does not show up by default, reach to the top toolbar and hit the ‘Window’ tab. From the drop sown menu that follows, select ‘Layers’.
In this panel, double tap the ‘Background‘layer. This causes the ‘Rename Layer’ dialog box to appear. You can either enter a suitable name or continue with the default ‘Layer 0’ name. When you are done, click on ‘OK’.
Step 3: Let’s Get Creating!
In the application interface, navigate to the toolbar at the left and choose the ‘Magic Wand’ tool. Again, reach to the ‘Options’ bar at the top and choose ‘Select Subject’. This will facilitate the selection of the min object of the image, irrespective of its background and the selection will be visible as ‘marching ants’ around the object.
If you find the selection to be improper, use the ‘Magic Wand’ to ward off excessive background portions by choosing the ’Subtract From Selection’ option, or even add some extra product portions, suited to your requirement. While making your selection, take care to include any holes in the product image.
Step 4: Background Deletion
When you are left with only the selected product, navigate to the top toolbar and hit the ’Select’ tab and choose ‘Inverse’ from the drop down menu that follows. You can alternatively use the ‘Shift+Ctrl+I’ command for a Windows device, or enter ‘Shift+Command+I’ command, in case you are using a Mac supported device.
Make a selection of the inverse background and tap ‘Backspace’ or ‘Delete’ in your Windows and Mac devices respectively. This will cause your background to get transparent. In the Photoshop application, a gray-white checkerboard represents a transparent background.
In case you require deselecting any selection, enter ‘Ctrl+D’ in Windows or ‘Command+D’ in a Mac device.
Step 5: Save Your Creation in a Web Compatible Format
When you are done creating the transparent background artwork, it becomes equally important to save your creation in a web compatible format to export them on different media platforms and product websites.
Talking of the preferable image format, it is highly recommended to use the PNG24 one, owing to its flexibility of alpha channel transparency, which permits partially transparent image backgrounds along with layered transparency. This in turn makes it possible to integrate the image with varying color backgrounds on different sites and platforms without hollow pixelation.
To save your artwork in the PNG24 file format, navigate to the application toolbar bat the top and hit the ‘File’ tab and choose the ‘Export’ option from the drop sown menu that appears. Select the ‘Export As’ option from the ‘Export’ popup menu.
For an older Photoshop version, hit the ‘Export’ tab and choose ‘Save for Web’ from the dropdown menu, followed by selecting the PNG24 option. A format dialog box appears where you can set the transparency settings. To do this, navigate to ‘File Settings’ at the right, choose the PNG file format and check the ‘Transparency’ box. Avoid checking the ‘Smaller Size’ box, else the image will get saved in the PNG8 format.
In the left of the screen, the image file size is displayed. Maintain an affordable file size, preferably within 200 KB, to avoid slower image loading on the sharing platform. You can adjust this in the ‘Image Size’ option at the right.
Set a conveniently reduced dimension, while taking care not to set an extremely small size, else it will produce a pixelated output on the site. It is preferable to set a 50-100% larger image size for a convenient display across different devices.
Step 6: Final Save
Once you are satisfied with all the image settings, tap ‘Export All’ to save your artwork locally in your device. In the ‘File Save’ dialog box, choose a preferred device location, enter a suitable file name and choose the .png extension. At last, click on ‘Save’.
03Filmora
Launched by Wondershare, this is excellent image editor and creator software that you can rely on to make stunning artworks in a variety of file formats. Talking of background transparency in particular, the software comes with a unique ‘Green Screen’ feature to create high quality, transparent background images in a matter of a few clicks. You can further, give a professional touch to your creation with a storehouse of classic video and image editing effects that are just perfect to stand out in the crowd.
How to Make Filmora Transparent Background
A stepwise tutorial on how to create image with transparent background images using Filmora is discussed below:
Step 1: Download the Software
Visit the official website of Wondershare Filmora Video Editor to download and install the software in any of your Windows or Mac devices.
For Win 7 or later (64-bit)
For macOS 10.12 or later
Step 2: Import Media File
Launch the app to reach the main interface, where you will find the ‘Import’ tab. Hit it and choose ‘Import Media File’ from the drop down menu that follows. This will upload your selected image to the software’s media library.
Step 2: Timeline Dragging
You now need to insert the selected image from Filmora’s media library to the software’s editing timeline. You can do this either by right clicking the selected image, followed by choosing the ‘Insert’ option, or a simple ’Drag and Drop’ method.
Step 3: Transparency Adjustments
In the editor timeline, double click your selected image to open the ‘Settings’ tab. Scroll down the tab options to locate ‘Chroma Key Settings’. Make a right toggle to enable the ‘Chroma Key’ and you will see the image get transparent with the default ’Green’ background color.
You can alternatively, navigate to the ‘Select Color’ option and choose ‘Color Picker’ at its right, reach the image section you wish to make transparent and make a single click.
In case you get a partially transparent background, you can make further adjustments in the ‘Chroma Key’ settings, such as, tolerance, edge thickness, offset, edge feather, etc., to ascertain complete background transparency. When you are satisfied with your work, click on ‘OK’.
Step 4: Media Export
You can now try adding the transparent image to any video or export the same to any media platform. To do this, hit the ‘Export’ tab at the top right corner in the editor timeline.
Part 4 How to Convert JPG to Transparent PNG
Taking into account the diverse information sharing and content specification requirements, an obvious need to switch between different file formats may arise at a number of instants. One such example is the conversion of images in JPG format into that of a transparent PNG image. When looking through convenient alternatives to set the issue straight, the software market has a pouring flood of choices.
Discussed below are some of the best JPG to transparent PNG converter solutions you can pick to convert color background JPG stills into transparent PNG background images, while sorting the concern of how to save PNG with transparent background:
Filmora JPG to Transparent PNG Converter
Filmora is top rated and highly preferred graphic design software that caters to all of your video and image design and conversion needs in the most convenient manner. Developed by Wondershare, this is the worthiest pick for all graphic editing. While the software is packed with extensive and over the top features to provide a professional elegance to almost and design artwork, the transparent image backgrounds created by Filmora are simply remarkable.
If you are done with those usual and commonplace captures, try hands at creating transparent background images with this software, which promises you of a stand out result on account of the following features:
● Filmora comes with a distinguished ‘Green Screen’ feature that is known to create transparent background images in time instants shorter than an eye blink. You just need to upload an image in the software timeline and adjust a few chroma settings, and that’s really the end!
● Apart from this, you can play with a diverse inventory of results and image filters, like, graphic and text overlays, subtitles and tons of audio-visual upshots to create an absolute graphic masterpiece.
● The software further, is free to use and welcomes you with a clean, cohesive and responsive user interface, guiding you at each step of the design task.
● Ending Thoughts →
● Transparent image backgrounds are the current in house trends of content branding and product promotion alternatives. While there are varieties of requirement specific image file formats, the PNG format is best suited for creating a transparent background image.
● The software market is an in depth pool of choices for graphic and image editing tools, Wondershare Filmora happens to be a distinguished name among all to create and convert images with transparent backgrounds.
Top 10 Movie Trailer Voice Generators [Windows, Mac, Android, iPhone
Many computer voice generators have become available on the market due to the advancement of advanced AI and voice synthesis technology. These rapid developments have also rendered the usage of large amounts of speech samples or high-end equipment obsolete.
You can replicate every voice style possible in today’s AI environment, and it’s a straightforward procedure. There are various commercial uses for AI voice generators, and any size firm may start leveraging the technology with these ten best AI voice generators.
1. Narrator’s Voice

Supported System: Android/iOS
Introduction:
The Narrator’s Voice app allows you to write and send hilarious messages using the voice of your choice for the narrator. With a diverse selection of languages and consistent, pleasant voices. Speak or type a message, then select the app’s language, voice, and special effects. The end product is a personalized narration of your original message that you may share however you want.
Videos are one of Narrator’s Voice’s most popular projects because they allow the narrator to explain or remark on whatever is happening on the screen. Many users have been utilizing the Narrator’s Voice app to add audio to their YouTube and TikTok videos, giving them a distinct voice that adds to the overall atmosphere of the video.
Features:
- Convert text to an MP3 or MP4 audio or video file and publish on social media.
- Open or create a text file, read it aloud, or export/share the text as an audio or video file.
- What you input will be spoken on your phone.
- With several voices and effects in multiple languages.
- Provides expressive and realistic voices.
Price: Free to use, but in-app purchases for Android range from $0.99-299.99, and iPhone range from $4.99-189.99.
Cons:
- Too many ads.
- Lagging in typing or loading the app
2. LiSTNR

Supported System: Android/iOS
Introduction:
Listnr, an AI text-to-speech voice generator application that converts text-to-speech in many formats, such as genre selection, pauses, accent selection, and more, is at the top of our list of best AI voice generators. One of the best advantages of Listnr is that it allows you to create your own customized audio player embed, which you can use to add an audio version to your blog.
Listnr is tailored to the habits and preferences of each listener. It’s also helpful in producing, maintaining, and distributing podcasts. Listnr can help you monetize your material through advertising, whether you’re a commercial or freelance podcaster. You can use the AI voice generation tool to distribute and convert audio with commercial broadcasting rights on the world’s top platforms, including Spotify, Apple, and Google Podcasts. Listnr supports more than 17 languages for podcasts, and AI technology can transform scripts into various languages and dialects.
Listnr also assists you in increasing conversion rates by allowing users to read-listen and watch-listen.
Features:
- Incorporate a programmable audio player
- Tailored to each listener
- Increases conversions
- Artificial intelligence (AI) voiceovers for YouTube, blog posts, and audiobooks
- Analysis of audio
Price: Free
Cons:
- Some conversions are complex to function.
- Limited options.
3. Speechelo

Supported System: Windows/Android
Introduction:
Speechelo can create a human-sounding voiceover from any text. It has both male and female voices. Its text-to-speech technology can give voice inflections. It is compatible with all video editing software. It speaks English as well as 23 other languages. You can choose the tone for reading the text with Speechelo.
Features:
- Speechelo has over 30 voices that sound human.
- It provides three different ways to read the text: standard, joyous, and profound.
- It includes characteristics like breathing noises and lengthier pauses between phrases.
- The text is checked, and the online text editor adds punctuation marks as needed.
- It allows you to adjust the pitch and tempo.
Price: For $47, you can get Speechelo. There will be no monthly installments. A 60-day money-back guarantee is included.
Cons:
- It does not offer a refund.
4. Murf.AI

Supported System: Windows/Mac
Introduction:
Murf.AI is a flexible text-to-speech voice generator that provides studio-quality voiceovers for many professional applications. The tool has an extensive voice library with over 115 distinct voices in 15 languages. Its AI can produce your speech in the appropriate tone, picking up every punctuation and exclamation mark you feed it.
It also has a grammatical assistant, so you can create proofread scripts that will only improve your voiceover work. You can also use the program to add your video, audio, and graphics synced with your produced voice. With its enterprise plan, the tool also has a powerful collaboration capability.
Features:
Price: The Basic Plan costs $13/month, the Pro plan costs $26/month, and the Enterprise plan is $83/month.
Cons:
- Few AI voices in the Murf’s library.
- Fewer languages compared to competitors.
5. Synthesys.io

Supported System: Windows/Online/Android
Introduction:
Synthesys can turn any text into incredible natural-sounding speech that may be used for commercial and personal applications. Synthesys can create AI talks in various tones, accents, and languages, from voiceovers to polite greetings.
There is no limit on how much Synthesys can be used. It can generate a limitless amount of texts at any time.
Features:
- A cloud-based application that may be accessed from any computer or mobile device.
- There are over 35 female voices and 30 male voices.
- Change the reading speed and length of the pauses.
- Before recording, listen to all demo voices.
Price: Monthly fees for Audio Synthesys are $29, Human Studio Synthesys is $39, and Audio and Human Studio Synthesys are $59 per month.
Cons:
- Less diversity in editing tools
- Speed might slow down.
6. Play. ht

Supported System: Online/Android
Introduction:
Play. ht is a web-based voice generator that allows you to generate high-quality text-to-speech. Because of its primary user interface, the platform is straightforward to use. It has a text box on the homepage where you may input your text, choose the language, gender, and voice style, and choose the conversion speed.
The platform has 570 distinct AI voices, supports more than 60 languages, and may be used for business and personal reasons. It is available in both free and paid editions. The free version is adequate, but the number of voice styles available is limited. You can also download your created speech in MP3 or WAV files from the platform.
Features:
- Use voice inflections to fine-tune the tone of your speech.
- Make Speech Pronunciations Your Own.
- Listen to all of the voice styles before applying.
- Experiment with various speaking styles.
Price: There is a free version available. Personal: $19 per month, Professional: $39 per month, Growth: $99 per month, and Business: $199 per month.
Cons:
- Voices generated in languages except European and English are low in quality.
- It does not offer a video editor to add voiceovers.
7. Lovo.ai

Supported System: Online
Introduction:
Lovo.ai’s user-friendly platform enables casual users and developers to produce speech from text and create human-sounding voiceovers. Over 180 voice styles in 33 languages are available on the platform. The site is also regularly updated with new voices every day, giving consumers a wide range of options.
In just 15 minutes, the tool can generate personalized voices. On this platform, converting text to speech requires only three simple steps. Users can also use the API to produce entirely natural voices and can be fine-tuned to express human emotions.
Features:
- Listening, conversion and sharing are all unlimited.
- Use of a significant voice collection
- Quickly convert up to 15000 characters.
- Do-it-yourself voice cloning
Price: There is a free version available. The personal Plan is $17.99, while the Freelancer costs $49.99.
Cons:
- Some voice skin does not provide complete customization options.
- No built-in video editing tools.
8. Sonantic

Supported System: Online
Introduction:
The Sonantic AI voice generator is used for films and games to create human-like voiceovers. The application uses artificial intelligence to convert scripts into audio, and it’s great for customers who want to cut down on production time.
Sonantic analyzes an uploaded script using machine learning before producing natural voiceovers and dictations that may be downloaded as MP3 and WAV files. Amazon Studios, Embark, and Obsidian are among the companies that use the AI voice generator to create human-like audio.
Features:
- Complete command over voice parameters
- Incorporates feelings into stories
- Improves user engagement with high-quality speech content
- Shortens production times
Price: Free Basic Plan, $9/month for Creator, $19/month for business, and $39/month for Business Ultimate.
Cons:
- Hard to learn
- Slightly overpriced.
9. Clipchamp

Supported System: Windows/Android
Introduction:
Clipchamp is a sophisticated text-to-speech generator that uses AI to turn words into voiceovers for professional videos and advertising. In a couple of seconds, the tool can convert an imported script into speech.
Because of its simplicity, Clipchamp is another excellent choice for beginners. Simply select your voice, language, and speed before uploading a script to generate a preview. The AI technology in the tool examines the script to identify sections that need to be updated.
Features:
- There are almost 170 distinct voices.
- Emotional communication styles
- Use emphasis and pitch in your vocal tone.
- Easy to use
Price: Custom Pricing Plan
Cons:
- Slow export rendering
- Access to more stocks requires a subscription.
10. Replica

Supported System: Windows/macOS
Introduction:
The Replica has an extensive library of AI voices recorded by industry professionals. This platform has many demo voices that you can try for free before paying for the premium service.
The Replica will turn your given text into a natural-sounding voice on-demand, with all the essential range and emotions intact, based on your chosen voice style.
You may adjust the pitch and volume and fine-tune the voice to sound sad, pleased, shocked, and so on once you’ve entered your content. The synthesized voice is available in 22 kHz MP3, WAC, OGG, or FLAC formats. The site offers 30 minutes of free voice credit, giving you plenty of time to try out all different voice types.
Features:
- Listen to samples from Replica’s vast voice library.
- Change the tempo, pitch, tone, and loudness of your speech.
- Include sound effects.
- Writing the script
- Prototyping of voice lines
Price: Try 30 minutes for free, 4 hours for $24, 100 hours for $300, and a custom enterprise plan is also available.
Cons:
- It does not offer an add-in voice line tool.
Supported System: Android/iOS
Introduction:
The Narrator’s Voice app allows you to write and send hilarious messages using the voice of your choice for the narrator. With a diverse selection of languages and consistent, pleasant voices. Speak or type a message, then select the app’s language, voice, and special effects. The end product is a personalized narration of your original message that you may share however you want.
Videos are one of Narrator’s Voice’s most popular projects because they allow the narrator to explain or remark on whatever is happening on the screen. Many users have been utilizing the Narrator’s Voice app to add audio to their YouTube and TikTok videos, giving them a distinct voice that adds to the overall atmosphere of the video.
Features:
- Convert text to an MP3 or MP4 audio or video file and publish on social media.
- Open or create a text file, read it aloud, or export/share the text as an audio or video file.
- What you input will be spoken on your phone.
- With several voices and effects in multiple languages.
- Provides expressive and realistic voices.
Price: Free to use, but in-app purchases for Android range from $0.99-299.99, and iPhone range from $4.99-189.99.
Cons:
- Too many ads.
- Lagging in typing or loading the app
2. LiSTNR
Supported System: Android/iOS
Introduction:
Listnr, an AI text-to-speech voice generator application that converts text-to-speech in many formats, such as genre selection, pauses, accent selection, and more, is at the top of our list of best AI voice generators. One of the best advantages of Listnr is that it allows you to create your own customized audio player embed, which you can use to add an audio version to your blog.
Listnr is tailored to the habits and preferences of each listener. It’s also helpful in producing, maintaining, and distributing podcasts. Listnr can help you monetize your material through advertising, whether you’re a commercial or freelance podcaster. You can use the AI voice generation tool to distribute and convert audio with commercial broadcasting rights on the world’s top platforms, including Spotify, Apple, and Google Podcasts. Listnr supports more than 17 languages for podcasts, and AI technology can transform scripts into various languages and dialects.
Listnr also assists you in increasing conversion rates by allowing users to read-listen and watch-listen.
Features:
- Incorporate a programmable audio player
- Tailored to each listener
- Increases conversions
- Artificial intelligence (AI) voiceovers for YouTube, blog posts, and audiobooks
- Analysis of audio
Price: Free
Cons:
- Some conversions are complex to function.
- Limited options.
3. Speechelo
Supported System: Windows/Android
Introduction:
Speechelo can create a human-sounding voiceover from any text. It has both male and female voices. Its text-to-speech technology can give voice inflections. It is compatible with all video editing software. It speaks English as well as 23 other languages. You can choose the tone for reading the text with Speechelo.
Features:
- Speechelo has over 30 voices that sound human.
- It provides three different ways to read the text: standard, joyous, and profound.
- It includes characteristics like breathing noises and lengthier pauses between phrases.
- The text is checked, and the online text editor adds punctuation marks as needed.
- It allows you to adjust the pitch and tempo.
Price: For $47, you can get Speechelo. There will be no monthly installments. A 60-day money-back guarantee is included.
Cons:
- It does not offer a refund.
4. Murf.AI
Supported System: Windows/Mac
Introduction:
Murf.AI is a flexible text-to-speech voice generator that provides studio-quality voiceovers for many professional applications. The tool has an extensive voice library with over 115 distinct voices in 15 languages. Its AI can produce your speech in the appropriate tone, picking up every punctuation and exclamation mark you feed it.
It also has a grammatical assistant, so you can create proofread scripts that will only improve your voiceover work. You can also use the program to add your video, audio, and graphics synced with your produced voice. With its enterprise plan, the tool also has a powerful collaboration capability.
Features:
Price: The Basic Plan costs $13/month, the Pro plan costs $26/month, and the Enterprise plan is $83/month.
Cons:
- Few AI voices in the Murf’s library.
- Fewer languages compared to competitors.
5. Synthesys.io
Supported System: Windows/Online/Android
Introduction:
Synthesys can turn any text into incredible natural-sounding speech that may be used for commercial and personal applications. Synthesys can create AI talks in various tones, accents, and languages, from voiceovers to polite greetings.
There is no limit on how much Synthesys can be used. It can generate a limitless amount of texts at any time.
Features:
- A cloud-based application that may be accessed from any computer or mobile device.
- There are over 35 female voices and 30 male voices.
- Change the reading speed and length of the pauses.
- Before recording, listen to all demo voices.
Price: Monthly fees for Audio Synthesys are $29, Human Studio Synthesys is $39, and Audio and Human Studio Synthesys are $59 per month.
Cons:
- Less diversity in editing tools
- Speed might slow down.
6. Play. ht
Supported System: Online/Android
Introduction:
Play. ht is a web-based voice generator that allows you to generate high-quality text-to-speech. Because of its primary user interface, the platform is straightforward to use. It has a text box on the homepage where you may input your text, choose the language, gender, and voice style, and choose the conversion speed.
The platform has 570 distinct AI voices, supports more than 60 languages, and may be used for business and personal reasons. It is available in both free and paid editions. The free version is adequate, but the number of voice styles available is limited. You can also download your created speech in MP3 or WAV files from the platform.
Features:
- Use voice inflections to fine-tune the tone of your speech.
- Make Speech Pronunciations Your Own.
- Listen to all of the voice styles before applying.
- Experiment with various speaking styles.
Price: There is a free version available. Personal: $19 per month, Professional: $39 per month, Growth: $99 per month, and Business: $199 per month.
Cons:
- Voices generated in languages except European and English are low in quality.
- It does not offer a video editor to add voiceovers.
7. Lovo.ai
Supported System: Online
Introduction:
Lovo.ai’s user-friendly platform enables casual users and developers to produce speech from text and create human-sounding voiceovers. Over 180 voice styles in 33 languages are available on the platform. The site is also regularly updated with new voices every day, giving consumers a wide range of options.
In just 15 minutes, the tool can generate personalized voices. On this platform, converting text to speech requires only three simple steps. Users can also use the API to produce entirely natural voices and can be fine-tuned to express human emotions.
Features:
- Listening, conversion and sharing are all unlimited.
- Use of a significant voice collection
- Quickly convert up to 15000 characters.
- Do-it-yourself voice cloning
Price: There is a free version available. The personal Plan is $17.99, while the Freelancer costs $49.99.
Cons:
- Some voice skin does not provide complete customization options.
- No built-in video editing tools.
8. Sonantic
Supported System: Online
Introduction:
The Sonantic AI voice generator is used for films and games to create human-like voiceovers. The application uses artificial intelligence to convert scripts into audio, and it’s great for customers who want to cut down on production time.
Sonantic analyzes an uploaded script using machine learning before producing natural voiceovers and dictations that may be downloaded as MP3 and WAV files. Amazon Studios, Embark, and Obsidian are among the companies that use the AI voice generator to create human-like audio.
Features:
- Complete command over voice parameters
- Incorporates feelings into stories
- Improves user engagement with high-quality speech content
- Shortens production times
Price: Free Basic Plan, $9/month for Creator, $19/month for business, and $39/month for Business Ultimate.
Cons:
- Hard to learn
- Slightly overpriced.
9. Clipchamp
Supported System: Windows/Android
Introduction:
Clipchamp is a sophisticated text-to-speech generator that uses AI to turn words into voiceovers for professional videos and advertising. In a couple of seconds, the tool can convert an imported script into speech.
Because of its simplicity, Clipchamp is another excellent choice for beginners. Simply select your voice, language, and speed before uploading a script to generate a preview. The AI technology in the tool examines the script to identify sections that need to be updated.
Features:
- There are almost 170 distinct voices.
- Emotional communication styles
- Use emphasis and pitch in your vocal tone.
- Easy to use
Price: Custom Pricing Plan
Cons:
- Slow export rendering
- Access to more stocks requires a subscription.
10. Replica
Supported System: Windows/macOS
Introduction:
The Replica has an extensive library of AI voices recorded by industry professionals. This platform has many demo voices that you can try for free before paying for the premium service.
The Replica will turn your given text into a natural-sounding voice on-demand, with all the essential range and emotions intact, based on your chosen voice style.
You may adjust the pitch and volume and fine-tune the voice to sound sad, pleased, shocked, and so on once you’ve entered your content. The synthesized voice is available in 22 kHz MP3, WAC, OGG, or FLAC formats. The site offers 30 minutes of free voice credit, giving you plenty of time to try out all different voice types.
Features:
- Listen to samples from Replica’s vast voice library.
- Change the tempo, pitch, tone, and loudness of your speech.
- Include sound effects.
- Writing the script
- Prototyping of voice lines
Price: Try 30 minutes for free, 4 hours for $24, 100 hours for $300, and a custom enterprise plan is also available.
Cons:
- It does not offer an add-in voice line tool.
How to Make Audio Visualizer in Filmora [Easy]
While editing videos, the ability to edit the audio in the background is one of the key ingredients of successful video making. For this purpose, the Audio Visualizer as a resource on Wondershare Filmora is a high-quality option. With this feature, users can typically add audio effects to their video soundtrack with AI technology, aligning the sound properly with the video.
It is possible to choose out of 25 different effects for audio visualization on this software for customized audio effects. You can also drag visual-based effects to the file, which the software mechanism will automatically configure with the sound cohesively.
While this is useful as a functionality, users naturally have concerns about how to handle the Audio Visualization effect to work on video projects and podcasts. Let’s learn the main steps for this process in this post, explained stage by stage in detail.
Launch the App
The first step is downloading and installing the software into your device. For this, go to the official website of Wondershare Filmora 11 and click on the Free Download button at the top of the screen. Depending on your device’s operating system, i.e., macOS or Windows, the relevant software installer will download automatically into your device.
Free Download For Win 7 or later(64-bit)
Free Download For macOS 10.14 or later

You must click on the installed APK file and double-click the Agree button for the process to continue. After you carry out the instructions that appear, the software will begin installing into your device. Wait for the software to install completely, and then the main homepage will open automatically on your screen.

Make sure that the software is in the 11.3.0 or higher version. Because the feature for audio visualization will not work on any of the older software versions. So, if you have the Filmora9 software, upgrade it to the Wondershare Filmora 11.

Add the music file
Next, you should click on the “Create New Project” button from the homepage. Then, tap on the “Click here to import media” section when it opens and add the file to the software window from your internal storage.
You can also click on the My Media tab and choose Project Media. Go to All Templates and download the audio track you will make changes to. Then, drag the audio file you have imported down to the editor timeline. Add a stock image from your Stock Media section.

You can also add another pre-made background cover image that you created beforehand from the device, if available. Drag that to the editor timeline as well above the song clip you moved there and tap on the slider. Pull the slider to fit the full size of the audio length for the background alignment. Right-click on the file, and the editing window will open for basic video editing. Make changes like adjusting the Scale, Position, Opacity, etc. Press OK.

Add the Audio Visualizer Effects
Next, you should go to the Effects tab. When this window opens, you should tap on the Filmstock tab beside the Default one for advanced features like Audio Visualizer. Click on it next.
When you tap on it, you see a list of different visualizer effects in a collection. Please choose one of them that you prefer and download it.

After that, you must drag the visualizer effect selected from the collection to the editing timeline above the background image you added previously. Again, use the slider on the clip to drag it forward and fit the size of both the music clip and the image.
Edit the Audio Visualiser
The next step of the process that you must focus on is editing the audio visualizer properly for the song and its background cover. For this, you must double-click on the audio visualizer effect you dropped in the timeline- this will open the editing window for the clip.
Here, make some changes to the quality of the audio visualizer as you prefer. Adjustment options available here include position, scale, Opacity, and Intensity. Drag the sliders for them to adjust the visualizer effect as needed. Change the color of the visualizer as well from here, and then use the slider on the visualizer effect on the timeline to see the effect change. Press the OK button after you are done.

Add the Portrait Image
Go to the My Media tab next to get the Portrait image into the project. If you previously imported the image to Filmora, drag it to the timeline. Or, you can add it later by clicking on the Import Media button and adding the Portrait photo from your device.
When it is available on the media window, hold, drag, and then drop it above the visualizer. Like in the case of the previous parts, use the slider end of this image in the timeline to drag it and fit the size of the other clips.

Next, the editing window for that will open. Make changes to the size and placement of the portrait photo, with elements like scale, position, rotation, opacity, etc. Move the photo in the preview window to the section where you want the image to appear. Then, tap the OK button under the window.

Add the overlapping visualizer effect
After adding the portrait, you can add another audio visualizer effect to the project. For this, again, tap on the Effects tab and choose the Filmstock option. Select Audio Visualizer and click on the circular visualizer effect from the list. Repeat the dragging and dropping step for this effect as well.
On the timeline, you have to adjust the visualizer effect over the portrait photo to match the length of the previous clips. Then, please tap on the portrait photo in the timeline again and adjust its appearance, like reducing the image size to fit the second visualizer effect size.

After fitting the image within the visualizer, click on the Mask tab in the same editor window. Choose the circular shape preset and scroll down to find the adjustment parameters like position, scaling, horizontal/vertical lining, etc. Keep making the changes per your needs, like fitting the image to the same size as the circular visualizer.
Move it to place the image inside the visualizer. After you are done, press the OK button.
Add a Title
An attractive title is the next element you should add to the project. You have to click on the Titles tab from the top toolbar. Choose the titles option from the drop-down list and move it to the timeline below. As you did with the previous elements you added to the timeline, move the slider onward and fit it with the previous one’s length.
Next, you should click on the Title in the timeline you added for the Title editing window to open. Here, you have to tap on the Advanced button.

In the next window that opens, tap on the Customize tab and add the song name in the title area. Make other font-related changes as you see fit, like the font size, font style, indentation, color, etc. Tap on the add text icon in this window to get another text field in which you can add the artist’s name. Make sure to reduce the size of it to lower than that of the main song title text.

Following that, you can tap on the shape icon to add a shape to the project by adding the name of the streaming service provider, like Apple Music or Spotify. Choose the Rectangle option, for example, and move it to the side of the screen. Click on the shape editing option and adjust the border size of it to three.
If you want to create a rounded-off edge look to the rectangle shape, tap on the small yellow icon that you will see at its edge. Move it slightly to adjust. Then, type the information into the shape text field, like “Listen on Spotify,” and make font and shape size adjustments. After you have completed this step, press the OK button below.
Check and Export
After making the changes, you will return to the main editor timeline. Press the play button under the preview window to see how the final project looks, and tap on the Export button to download it offline. Make changes to the exporting file after clicking on the Local tab and choosing the file format you will download it as. Then, press Export again.

Conclusion
Indeed, Filmora is a high-quality editing software for video editors with effects and sound clips to optimize the project. Advanced functions like the Audio Visualizer system are available for high-quality project optimization since it instantly handles most of the heavy editing load.
You should follow the sequence mentioned accurately to make the right effects at the end. Plus, more editing features are available, so creating an interesting video project or podcast that attracts audiences is easy. So go ahead and give it a try first.
Free Download For macOS 10.14 or later
You must click on the installed APK file and double-click the Agree button for the process to continue. After you carry out the instructions that appear, the software will begin installing into your device. Wait for the software to install completely, and then the main homepage will open automatically on your screen.
Make sure that the software is in the 11.3.0 or higher version. Because the feature for audio visualization will not work on any of the older software versions. So, if you have the Filmora9 software, upgrade it to the Wondershare Filmora 11.
Add the music file
Next, you should click on the “Create New Project” button from the homepage. Then, tap on the “Click here to import media” section when it opens and add the file to the software window from your internal storage.
You can also click on the My Media tab and choose Project Media. Go to All Templates and download the audio track you will make changes to. Then, drag the audio file you have imported down to the editor timeline. Add a stock image from your Stock Media section.
You can also add another pre-made background cover image that you created beforehand from the device, if available. Drag that to the editor timeline as well above the song clip you moved there and tap on the slider. Pull the slider to fit the full size of the audio length for the background alignment. Right-click on the file, and the editing window will open for basic video editing. Make changes like adjusting the Scale, Position, Opacity, etc. Press OK.
Add the Audio Visualizer Effects
Next, you should go to the Effects tab. When this window opens, you should tap on the Filmstock tab beside the Default one for advanced features like Audio Visualizer. Click on it next.
When you tap on it, you see a list of different visualizer effects in a collection. Please choose one of them that you prefer and download it.
After that, you must drag the visualizer effect selected from the collection to the editing timeline above the background image you added previously. Again, use the slider on the clip to drag it forward and fit the size of both the music clip and the image.
Edit the Audio Visualiser
The next step of the process that you must focus on is editing the audio visualizer properly for the song and its background cover. For this, you must double-click on the audio visualizer effect you dropped in the timeline- this will open the editing window for the clip.
Here, make some changes to the quality of the audio visualizer as you prefer. Adjustment options available here include position, scale, Opacity, and Intensity. Drag the sliders for them to adjust the visualizer effect as needed. Change the color of the visualizer as well from here, and then use the slider on the visualizer effect on the timeline to see the effect change. Press the OK button after you are done.
Add the Portrait Image
Go to the My Media tab next to get the Portrait image into the project. If you previously imported the image to Filmora, drag it to the timeline. Or, you can add it later by clicking on the Import Media button and adding the Portrait photo from your device.
When it is available on the media window, hold, drag, and then drop it above the visualizer. Like in the case of the previous parts, use the slider end of this image in the timeline to drag it and fit the size of the other clips.
Next, the editing window for that will open. Make changes to the size and placement of the portrait photo, with elements like scale, position, rotation, opacity, etc. Move the photo in the preview window to the section where you want the image to appear. Then, tap the OK button under the window.
Add the overlapping visualizer effect
After adding the portrait, you can add another audio visualizer effect to the project. For this, again, tap on the Effects tab and choose the Filmstock option. Select Audio Visualizer and click on the circular visualizer effect from the list. Repeat the dragging and dropping step for this effect as well.
On the timeline, you have to adjust the visualizer effect over the portrait photo to match the length of the previous clips. Then, please tap on the portrait photo in the timeline again and adjust its appearance, like reducing the image size to fit the second visualizer effect size.
After fitting the image within the visualizer, click on the Mask tab in the same editor window. Choose the circular shape preset and scroll down to find the adjustment parameters like position, scaling, horizontal/vertical lining, etc. Keep making the changes per your needs, like fitting the image to the same size as the circular visualizer.
Move it to place the image inside the visualizer. After you are done, press the OK button.
Add a Title
An attractive title is the next element you should add to the project. You have to click on the Titles tab from the top toolbar. Choose the titles option from the drop-down list and move it to the timeline below. As you did with the previous elements you added to the timeline, move the slider onward and fit it with the previous one’s length.
Next, you should click on the Title in the timeline you added for the Title editing window to open. Here, you have to tap on the Advanced button.
In the next window that opens, tap on the Customize tab and add the song name in the title area. Make other font-related changes as you see fit, like the font size, font style, indentation, color, etc. Tap on the add text icon in this window to get another text field in which you can add the artist’s name. Make sure to reduce the size of it to lower than that of the main song title text.
Following that, you can tap on the shape icon to add a shape to the project by adding the name of the streaming service provider, like Apple Music or Spotify. Choose the Rectangle option, for example, and move it to the side of the screen. Click on the shape editing option and adjust the border size of it to three.
If you want to create a rounded-off edge look to the rectangle shape, tap on the small yellow icon that you will see at its edge. Move it slightly to adjust. Then, type the information into the shape text field, like “Listen on Spotify,” and make font and shape size adjustments. After you have completed this step, press the OK button below.
Check and Export
After making the changes, you will return to the main editor timeline. Press the play button under the preview window to see how the final project looks, and tap on the Export button to download it offline. Make changes to the exporting file after clicking on the Local tab and choosing the file format you will download it as. Then, press Export again.
Conclusion
Indeed, Filmora is a high-quality editing software for video editors with effects and sound clips to optimize the project. Advanced functions like the Audio Visualizer system are available for high-quality project optimization since it instantly handles most of the heavy editing load.
You should follow the sequence mentioned accurately to make the right effects at the end. Plus, more editing features are available, so creating an interesting video project or podcast that attracts audiences is easy. So go ahead and give it a try first.
Also read:
- Top Applications That Can Help Apply The Best VHS Camera Effect for 2024
- Updated In 2024, Finding Best GIF Websites Is Easy as Pie — Heres What You Should Know
- Updated In 2024, Top 5 Tips to Freeze-Frame in After Effects
- 2024 Approved How To Create Transparent Background On Picsart
- Do You Know Everything Related to Wondershare Filmoras Video Editing Interface? If You Are Unaware of It, Read and Learn About Filmoras Interface for 2024
- In 2024, Doable Ways to Create Transparent Background in Procreate
- How to Crop Videos in Windows Media Player for 2024
- Updated Movavi Slideshow Maker Is a Powerful Video Editing Tool that Can Be Used to Add Rich Effects to Videos Easily. This Guide Will Introduce the Features and Show You How to Apply Effects to Videos with This Tool
- New How to Create Your Own LUTs for Your Video with Filmora
- New In 2024, 10 Best Vloggers on YouTube
- Updated 2024 Approved How to Add Motion Titles
- New Speed Up/Down Videos in VLC for 2024
- 2024 Approved Top 7 MP4 Video Editors on Mac Edit MP4 Videos Easily
- 6 Top Online MP4 Croppers for 2024
- Top Animated Title Makers for 2024
- New Converting Files Is Easy with the Right Tools, and Likewise, GIF to JPG Conversion Is. Choose the Best Tool and Get the Expected Results Within the Blink of an Eye
- New 2024 Approved Create Dynamic Text Animation in Filmora
- Best Software or Website to Convert Video Format
- Updated End This Problem! Make Transparent Background Video Today for 2024
- New Is Augmented Reality Conferencing the Future of Workplace Collaboration?
- New Change Background Color in After Effects for 2024
- In 2024, How To Use Face Tracking In After Effects To Make Your Videos Pop
- Want Make a Slide Show Video? Heres How
- Updated Want to Skip the Typing Hustle with a Convenient and Instant Conversion of Your Words Into Text? Stay Here to Learn About some Irresistible Software Solutions to Address the Concern
- 2024 Approved End Screen Makers
- New In 2024, Learn to Use Montage with These Movies
- New Camera Shake Effects in Videos Helps to Showcase Aesthetics and Vibes. Do You Wish to Add a Camera Shake in Videos? Consider Using the Video Editor Discussed Here for This
- Updated In 2024, How to Add a Slideshow in PowerPoint
- Updated 2024 Approved Effective 10 Ways to Convert YouTube to MOV at Ease PC & Online
- 2024 Approved Here, You Will Learn How to Add a Realistic Fire Effect Using Wondershare Filmora. That Will Help to Boost Your Channel and Decorate Your YouTube Channel with Creative and Unique Effects
- New In 2024, How to Convert SRT to DOCX
- New How to Make Tutorial Video with Filmora
- Advance Repair for Bad and Corrupt Video Files of Itel P55 5G
- In 2024, A Step-by-Step Guide on Using ADB and Fastboot to Remove FRP Lock on your Infinix Smart 7 HD
- The Best Methods to Unlock the iPhone Locked to Owner for iPhone 7 Plus
- Remove Lock Screen without Password(Find X7 Ultra)
- Hide location on Apple iPhone 15 Pro and Android without others knowing | Dr.fone
- In 2024, Unova Stone Pokémon Go Evolution List and How Catch Them For Apple iPhone 6s Plus | Dr.fone
- In 2024, AddROM Bypass An Android Tool to Unlock FRP Lock Screen For your Motorola Moto G13
- How to Recover Deleted iPhone 15 Pro Camera Roll Photos and Photo Stream Pictures? | Stellar
- Simple Solutions to Fix Android SystemUI Has Stopped Error For Motorola Edge 40 Neo | Dr.fone
- In 2024, How to Unlock Oppo A79 5G Pattern Lock if Forgotten? 6 Ways
- In 2024, How to Get and Use Pokemon Go Promo Codes On Nubia Red Magic 8S Pro | Dr.fone
- Fix Cant Take Screenshot Due to Security Policy on Motorola Edge 2023 | Dr.fone
- In 2024, Where Is the Best Place to Catch Dratini On Honor Play 40C | Dr.fone
- How To Remove Flashlight From iPhone 6s Plus Lock Screen
- In 2024, Unlock Your Nokia C12 Pros Potential The Top 20 Lock Screen Apps You Need to Try
- In 2024, Fixing Foneazy MockGo Not Working On Realme C55 | Dr.fone
- Title: New Best Video Editors to Add Text to a Video
- Author: Chloe
- Created at : 2024-05-20 03:38:26
- Updated at : 2024-05-21 03:38:26
- Link: https://ai-editing-video.techidaily.com/new-best-video-editors-to-add-text-to-a-video/
- License: This work is licensed under CC BY-NC-SA 4.0.
