
:max_bytes(150000):strip_icc():format(webp)/before-you-buy-a-video-projector-1847845-v3-ED-8a08e03f2cfc4835a13872618bd4ad00.png)
New Best Video Editors to Add Text to a Video for 2024
Best Video Editors to Add Text to a Video
While it can be very easy to add text to an image, the same cannot be said when it comes to adding even the simplest text to a video. You will need video editing software that is designed with the necessary features to help you add text to your video.
There are very many programs in the market that can technically be used to add text to a video. But the ones we will look at are video editors that make the process easy, but also give you a wide range of options to customize your text in numerous ways.
Filmora
Filmora by Wondershare is one of the best video editors in the market. Its user interface is so easy to use that adding text to the video is a simple 3-step process. Aside from adding text to the video, Filmora also allows you to edit other aspects of the video including adding transitions, overlays, and animations to any section of the video.

Key Features:
- You can use Filmora to add text to any section of the video
- It gives you the freedom to move the text to any section of the video
- Customizing the text, you add to the video can be done in numerous ways including changing the color, and font and adding animations to the text.
- It offers numerous templates to choose from and different font styles that you can use
- It has a simple user interface that makes the video editing process very easy
- It has numerous other video editing capabilities that allow you to create and edit videos in different ways including splitting videos, trimming videos, and even merging videos clips into one
- You can upload the videos directly to YouTube after editing.
After Effects
Adobe After Effects is a motion picture editing program that you can also use to add text and other animations to your video. While you can use it to add simple text to the video, it is an ideal solution when your goal is to add advanced text animations. It is however by no means a simple solution, especially for beginners who may find it hard to get going with After Effects.

Key Features:
- You can add simple lines of text to any section of the video
- Text is easily customizable by changing the color, font, and size of the text
- You can also choose to change the entire text layer and add advanced animations and effects
- There are a lot of text, animations, and effects templates to choose from
- You can easily copy text from other Adobe applications to use in After Effects
Movavi Editor
Movavi video editor is another great video editor that you can use to add and edit text on a video. Like most similar tools it is designed to simplify the process, allowing you to add text to any section of the document, move the text to any location on the video and even add text effects to customize the text. It has a very simple user interface that allows you to do that quickly and easily.

Key Features:
- You can add text to any section of the video
- Customizing the text by changing the font, color and size is also very easy
- The user interface is very easy to use, allowing you to add even blocks of text very quickly
- You also have additional options to edit the video including splitting and merging the video or adjusting the brightness, saturation, and color.
iMovie
This is a built-in video editor that you will find on macOS and iOS devices. Even though it is free, iMovie has a lot of features that come in handy when you want to add and edit text on a video. The fact that it can be used on iOS devices is an added advantage when you want to edit videos on the go.

Key Features:
- It allows users to add transitions and effects to the text you add to the video
- It comes with a lot of title templates to choose from
- Adding animated text is also very simple including Sideways Drift, Lens Flare, and more
- You can customize the text in very many ways including adding fonts, drop shadows, changing the color, and even resizing or repositioning the text.
Camtasia
TechSmith Camtasia is one of the most popular tools to create and edit videos. Of the numerous features that you get when you choose to use Camtasia is adding and editing text to the video. It has numerous templates that can be used to customize the text you add in various ways.

Key Features:
- It gives you numerous options to add text to the images including text boxes, templates, and effects
- It has a speech-to-text feature that is perfect for adding captions and subtitles to the video
- You can easily customize the text by adding transitions and effects or even by simply changing the font, color, and size of the text
- The text can be moved to any section of the video
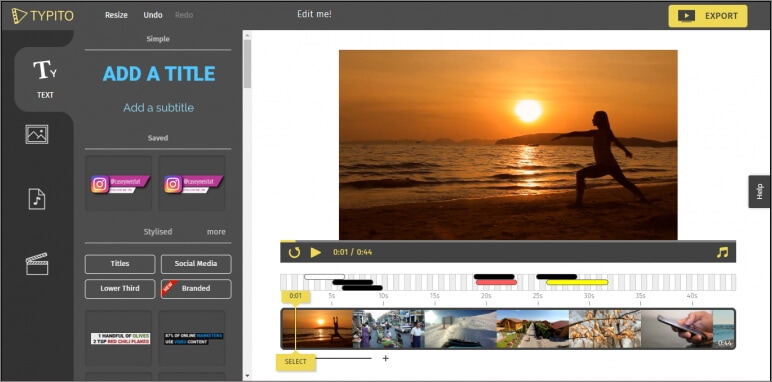
Typito
Typito is an online video editor with simple tools that can help you make changes to any video. designed to help YouTube content creators and video editors, Typito can be used to add all kinds of text and text effects to any video. It is accessible on all browsers and it is also very easy to use.
Key Features:
- It is very easy to use, allowing you to add text to any video in a few simple steps
- It has numerous templates to choose from
- Changing the font size, color, and style of the text is very easy
- You can publish videos directly to numerous video-sharing sites after editing
- It allows users to add animations, transitions, and effects to the text
Splice
Splice is an iOS app designed to help you add text to videos on iOS devices. Adding text to any video using Splice can be easily done using the overlay feature. It also has numerous other video editing features including allowing you to easily synchronize your videos and music, adding filters and transitions, and more.

Key Features:
- it has a simple user interface that makes adding text very easy
- You can customize the text in various ways including changing the font size, color and style or even adding various text effects
- Videos can be saved on the device or shared directly on social media apps like Facebook, Instagram, and YouTube
- It has numerous other video editing features including filters and animations
Clipomatic
If the text you want to add to the video is in the form of captions or subtitles, then Clipomatic is perhaps the best choice. It supports various languages including German, French, Portuguese, and even Chinese. You can also use it to add regular text to any video, reposition the text on any section of the video and customize the text in various ways.

Key Features:
- It is available for both Android and iOS
- Adding text to the video is very easy
- You can easily customize the text by changing the font color, and size and adding transitions and text effects
- It supports various languages, making it ideal for captions and subtitles
MySubtitle
MySubtitle is a simple but highly effective app that you can use to add text to your video. As the name suggests, this tool is ideal for adding subtitles and you can do that very easily by simply typing in the text and syncing the text to the video’s content.

Key Features:
- It is available for both iOS and Android devices
- You can type in your subtitles directly on the video
- Subtitles can then be paced to suit the video’s playback speed
- It is completely free to use
- You can share the videos you edit directly on various social media platforms
Free Download For Win 7 or later(64-bit)
Free Download For macOS 10.14 or later
Free Download For macOS 10.14 or later
Do You Know How You Can Trim or Merge Using Wondershare Filmora? Trimming and Merging Using This Tool Is an Easy Task; Learn How
Video editing is one of the most essential tasks in a video project. It plays a role in creating videos that leave a lasting impression on your audience. From the initial raw footage to the final product, a video goes through several processes. One vital aspect of video editing is trimming and merging, which holds great importance for any video project.
The editing process changes the whole narrative of a video by adding more depth and feel to it. Through editing, you can remove unwanted segments, rearrange clips, and much more. Capturing and recording video is one thing, but bringing the best out of the raw files is another. To make your raw footage somewhat stunning, you have to sit in the editing room.
Part 1: How Does Trimming or Merging Videos Help Users?
Merging and trimming videos is an editing technique that offers many benefits. Here’s how these actions can help you in so many ways. Find out how it helps the users when they merge or trim a video:
Trimming Videos
- Trimming allows users to remove unwanted portions of a video. You can eliminate mistakes, irrelevant footage, or unnecessary pauses in the video. It also helps streamline the content and improve its overall quality.
- It can help adjust the pacing of a video by removing or shortening sections that may be too slow or lengthy. This ensures a more engaging and dynamic viewing experience.
- By trimming, you can select the best moments from a longer video. You can also create highlight reels that showcase the most important or exciting parts.
- Many social media platforms have specific time limitations for videos. It allows you to meet these requirements and share their content without compromising its essence.
Merging Videos
- The merging of videos enables you to combine multiple clips or segments into a single video. This technique is useful when users want to compile footage from different sources. It also creates a uniform narrative from separate scenes.
- Merging allows you to create montages or collages that showcase various moments or perspectives. This is often used in music videos, compilations, or video presentations.
- Doing this can make seamless transitions between different shots or scenes. This further creates a visually fluid experience for the viewer.
- It also helps you create a coherent storyline by combining different clips. You can use this technique to communicate ideas, emotions, or messages effectively.
Part 2: Wondershare Filmora: An Introduction to A Great Video Editor
Wondershare Filmora is a video editing tool that is created for almost everyone. This tool has it all, from simple edit options to more complicated ones. You can apply various kinds of filters and effects to your video. Additionally, you can change the color tone of your video project by making a few adjustments. However, this is not it, as you can even do trimming and merging in your project.
Trimming or Merging Videos Editor A cross-platform for making videos anywhere for all creators, providing trimming and merging videos functions.
Free Download Free Download Learn More

Besides all this, the tool offers more than you’re expectations. It exists for professionals, enthusiasts, and even those who have started learning how to edit. Moreover, you can import and export videos up to 4K resolution using Wondershare Filmora. Choose a suitable template, import your media files, and start editing your videos with this tool.
Key Features
- Almost all tools provide effects and filters, but Wondershare Filmora offers more. The tool provides free media assets, overlays, transitions, stickers, and more.
- Filmora enables you to add keyframes to your video. This feature will allow you to make changes and add effects to the particular frame.
- Moreover, you can add a virtual green screen in Wondershare Filmora. By using this feature, you can add VFX and other motion effects to your video.
Part 3: Guide to Cropping and Trimming Videos on Wondershare Filmora
You’re in luck if you want to learn about trimming and cropping videos using Wondershare Filmora. This portion will let you know how to crop a video and trim parts of it using this tool.
Filmora Tutorial - Basic Editing in Filmora
Free Download For Win 7 or later(64-bit)
Free Download For macOS 10.14 or later
Step 1Guide to Cropping Videos
To start cropping your video, open Wondershare Filmora and select “New Project” to create a new editing project. Import your video file by dragging and dropping it into the tool. Further, locate your video file in the tool and drag it into the timeline.

Step 2Proceed To Crop and Zoom Window
In the timeline window, look for the “Crop” button and select it, which is located right next to the “Split” option. However, you can press “Alt + C” as a shortcut to access the next screen. This will help you lead into the “Crop and Zoom” window.

Step 3Adjust the Crop
Crop the video by moving the edges accordingly using your mouse. Click and drag the edges inward or outward to define the new frame of your video. If desired, you can also change the “Ratio” by entering the dimensions in the given boxes. This allows you to set specific dimensions for your cropped video.

Step 4Apply the Crop and Save
When done with the cropping adjustments, click “Apply.” This will save the changes, and your video will be cropped based on your preferences. Lastly, make sure to save your file by selecting the “Export” option.

Trimming Methods and Guide
Free Download For Win 7 or later(64-bit)
Free Download For macOS 10.14 or later
01of 05Method 1: Trim Using Video Layer Edges
Step 1: First, import your video into Wondershare Filmora. Then, drag and drop the video onto the timeline and locate the edge of your video layer.

Step 2: Slide the left or right edge to trim the video according to your requirement. Release the edge when you are satisfied with the trimmed portion. Moreover, save your file by pressing the “Export” button.

02of 05Method 2: Trim Using Playhead Slider
Step 1: After importing your media file into the timeline, place the Playhead slider on your video layer at the desired trimming point. Click the “Scissor” icon displayed on the Playhead. The video will be trimmed at the Playhead position.

Step 2: Delete the unwanted portion of the video by selecting it and pressing the “Delete” key on your keyboard. Don’t forget to save your file by exporting it to your system.

03of 05Method 3: Trim Using Option Menu
Step 1: Once your video is in the timeline, move the Playhead slider to the point where you want to trim the video. Right-click on the video layer in the timeline to open a menu.
Step 2: Select “Trim Start to Playhead” to trim the video from the start to the Playback slider.
Step 3: Alternatively, you can select “Trim End to Playhead” to trim the video from the Playhead slider to the end.

04of 05Method 4: Trim Using Shortcut Keys
Step 1: Move the Playhead slider to the desired trimming point after bringing your video into the timeline.
Step 2: Press “Alt + [“ to trim the video from the beginning to the Playhead position.
Step 3: Contrary, you can press the shortcut keys “Alt + ]“ to trim the video from the Playhead position to the end.
05of 05Method 5: Trim Using Instant Cutter Tool
Step 1: Open Wondershare Filmora and select the “Media” button. Go to the “Import” drop-down menu and choose “Import with Instant Cutter Tool.” A new window will appear.

Step 2: Select “Open File” to import your media file into the new window. Once imported, use the sliders at the edges of the video to trim it. Adjust the sliders as needed to define the trimmed portion. Lastly, press “Export” to add a trimmed video to your project.

Part 4: Manual and Automated Techniques of Merging Content on Wondershare Filmora
Wondershare Filmora is an editing platform that makes editing simple for everyone. If you’re an enthusiast looking to learn basics like merging videos and cropping YouTube videos, you’re at the right place. In the part below, you will learn two methods to merge video in Filmora.
Free Download For Win 7 or later(64-bit)
Free Download For macOS 10.14 or later
Methods to merge video in Filmora
Manual Method To Merge Video Clips in Wondershare Filmora
Step 1Launch Wondershare Filmora
To merge two or more video clips using Wondershare Filmora, start by launching the software on your computer. In the editing window of Filmora, locate the “Click here to import” option and import the video clips you want to merge. This will bring the video to the preview window.

Step 2Arrange Clips in Timeline
Proceed to drag and drop each video clip, one by one, onto the timeline. Ensure that you place each clip layer right next to each other in the desired merging order.

Step 3Adjust and Export
Adjust the timeframe of your videos, if needed, by trimming or extending them on the timeline. Once you are satisfied with the arrangement, proceed to export the project. By exporting, your multiple video clips will be merged into a single video file.

Automated Method for Merging Videos in Wondershare Filmora
Step 1Importing Videos
Start by going to the import section and clicking the “Import” drop-down menu. As this opens a menu, select the option of “Import with Instant Cutter Tool.”

Step 2Merging Videos
Within the new window, locate the “Merge” option and click on it. Select the video clips you want to merge by accessing “Open.” Filmora will now import your video clips and merge them.

Step 3Exporting the Merged File
After your video clips have been successfully merged, it’s time to export the final result. In the same window, find the “Export” option and click on it. This will export the merged file directly to the editing window of Wondershare Filmora.

Conclusion
To conclude, video editing and post-production are tasks that polish your project. Editing fine-tunes your project, and the result is always better than the raw footage. Wondershare Filmora is a tool that makes it easy to edit your raw footage into an exceptional video. This tool has everything from trimming and merging to more advanced, like an AI-powered edit option.
For those who are in search to crop YouTube videos, they can surely stop by Filmora. They will get their required results in no time in a highly professional environment.
Free Download Free Download Learn More
Besides all this, the tool offers more than you’re expectations. It exists for professionals, enthusiasts, and even those who have started learning how to edit. Moreover, you can import and export videos up to 4K resolution using Wondershare Filmora. Choose a suitable template, import your media files, and start editing your videos with this tool.
Key Features
- Almost all tools provide effects and filters, but Wondershare Filmora offers more. The tool provides free media assets, overlays, transitions, stickers, and more.
- Filmora enables you to add keyframes to your video. This feature will allow you to make changes and add effects to the particular frame.
- Moreover, you can add a virtual green screen in Wondershare Filmora. By using this feature, you can add VFX and other motion effects to your video.
Part 3: Guide to Cropping and Trimming Videos on Wondershare Filmora
You’re in luck if you want to learn about trimming and cropping videos using Wondershare Filmora. This portion will let you know how to crop a video and trim parts of it using this tool.
Filmora Tutorial - Basic Editing in Filmora
Free Download For Win 7 or later(64-bit)
Free Download For macOS 10.14 or later
Step 1Guide to Cropping Videos
To start cropping your video, open Wondershare Filmora and select “New Project” to create a new editing project. Import your video file by dragging and dropping it into the tool. Further, locate your video file in the tool and drag it into the timeline.
Step 2Proceed To Crop and Zoom Window
In the timeline window, look for the “Crop” button and select it, which is located right next to the “Split” option. However, you can press “Alt + C” as a shortcut to access the next screen. This will help you lead into the “Crop and Zoom” window.
Step 3Adjust the Crop
Crop the video by moving the edges accordingly using your mouse. Click and drag the edges inward or outward to define the new frame of your video. If desired, you can also change the “Ratio” by entering the dimensions in the given boxes. This allows you to set specific dimensions for your cropped video.
Step 4Apply the Crop and Save
When done with the cropping adjustments, click “Apply.” This will save the changes, and your video will be cropped based on your preferences. Lastly, make sure to save your file by selecting the “Export” option.
Trimming Methods and Guide
Free Download For Win 7 or later(64-bit)
Free Download For macOS 10.14 or later
01of 05Method 1: Trim Using Video Layer Edges
Step 1: First, import your video into Wondershare Filmora. Then, drag and drop the video onto the timeline and locate the edge of your video layer.
Step 2: Slide the left or right edge to trim the video according to your requirement. Release the edge when you are satisfied with the trimmed portion. Moreover, save your file by pressing the “Export” button.
02of 05Method 2: Trim Using Playhead Slider
Step 1: After importing your media file into the timeline, place the Playhead slider on your video layer at the desired trimming point. Click the “Scissor” icon displayed on the Playhead. The video will be trimmed at the Playhead position.
Step 2: Delete the unwanted portion of the video by selecting it and pressing the “Delete” key on your keyboard. Don’t forget to save your file by exporting it to your system.
03of 05Method 3: Trim Using Option Menu
Step 1: Once your video is in the timeline, move the Playhead slider to the point where you want to trim the video. Right-click on the video layer in the timeline to open a menu.
Step 2: Select “Trim Start to Playhead” to trim the video from the start to the Playback slider.
Step 3: Alternatively, you can select “Trim End to Playhead” to trim the video from the Playhead slider to the end.
04of 05Method 4: Trim Using Shortcut Keys
Step 1: Move the Playhead slider to the desired trimming point after bringing your video into the timeline.
Step 2: Press “Alt + [“ to trim the video from the beginning to the Playhead position.
Step 3: Contrary, you can press the shortcut keys “Alt + ]“ to trim the video from the Playhead position to the end.
05of 05Method 5: Trim Using Instant Cutter Tool
Step 1: Open Wondershare Filmora and select the “Media” button. Go to the “Import” drop-down menu and choose “Import with Instant Cutter Tool.” A new window will appear.
Step 2: Select “Open File” to import your media file into the new window. Once imported, use the sliders at the edges of the video to trim it. Adjust the sliders as needed to define the trimmed portion. Lastly, press “Export” to add a trimmed video to your project.
Part 4: Manual and Automated Techniques of Merging Content on Wondershare Filmora
Wondershare Filmora is an editing platform that makes editing simple for everyone. If you’re an enthusiast looking to learn basics like merging videos and cropping YouTube videos, you’re at the right place. In the part below, you will learn two methods to merge video in Filmora.
Free Download For Win 7 or later(64-bit)
Free Download For macOS 10.14 or later
Methods to merge video in Filmora
Manual Method To Merge Video Clips in Wondershare Filmora
Step 1Launch Wondershare Filmora
To merge two or more video clips using Wondershare Filmora, start by launching the software on your computer. In the editing window of Filmora, locate the “Click here to import” option and import the video clips you want to merge. This will bring the video to the preview window.
Step 2Arrange Clips in Timeline
Proceed to drag and drop each video clip, one by one, onto the timeline. Ensure that you place each clip layer right next to each other in the desired merging order.
Step 3Adjust and Export
Adjust the timeframe of your videos, if needed, by trimming or extending them on the timeline. Once you are satisfied with the arrangement, proceed to export the project. By exporting, your multiple video clips will be merged into a single video file.
Automated Method for Merging Videos in Wondershare Filmora
Step 1Importing Videos
Start by going to the import section and clicking the “Import” drop-down menu. As this opens a menu, select the option of “Import with Instant Cutter Tool.”
Step 2Merging Videos
Within the new window, locate the “Merge” option and click on it. Select the video clips you want to merge by accessing “Open.” Filmora will now import your video clips and merge them.
Step 3Exporting the Merged File
After your video clips have been successfully merged, it’s time to export the final result. In the same window, find the “Export” option and click on it. This will export the merged file directly to the editing window of Wondershare Filmora.
Conclusion
To conclude, video editing and post-production are tasks that polish your project. Editing fine-tunes your project, and the result is always better than the raw footage. Wondershare Filmora is a tool that makes it easy to edit your raw footage into an exceptional video. This tool has everything from trimming and merging to more advanced, like an AI-powered edit option.
For those who are in search to crop YouTube videos, they can surely stop by Filmora. They will get their required results in no time in a highly professional environment.
How to Create a Vacation Slideshow in 5 Minutes
How to Make a Vocation Slideshow in Minutes
An easy yet powerful editor
Numerous effects to choose from
Detailed tutorials provided by the official channel
Who does not love vacations, but the saddest part of it is getting over? So, to relive your vacation memories and also share them with your dear ones is by creating a slideshow. With an interesting slideshow, you can present all your special vacation moments in an interesting and creative manner.

To create a vacation slideshow quickly and easily there are several factors that can be considered. Keep reading below to learn about these.
In this article
01 Tips for Creating a Vacation Slideshow in 5 Minutes
02 [Best Software for Creating a Vacation Slideshow in 5 Minutes- Wondershare Filmora](#Part 2)
Part 1 Tips For Creating A Vacation Slideshow In 5 Minutes
There are several useful tips that can help you create a vacation slideshow in just a few minutes. Check them below.

01Choose A Theme And Select Relevant Pictures
First of all, select a story or a theme for your holiday slideshow, and then choose the most relevant images and videos that can be included in the slideshow. With hundreds of images and videos for any particular trip selecting a few is the most cumbersome task and once you have a story in mind, picking up a few images becomes easy.
01Use Templates
Use a template for creating a slideshow as the readymade design will already help you get half the task done. Once you have the desired template, you simply need to add the pictures and other elements. There are several sites and tools where you can get travel, vacation, and holiday templates in different styles.
01Use A Professional Software For Editing And Creating A Software
To create a traveling sideshow that is eye-catchy, interesting, and also can be created in no time, a professional tool works as the best option. These programs have built-in features for image and video editing and in just a few simple clicks, you can create a professional-looking slideshow of your choice.
Part 2 Best Software For Creating A Vacation Slideshow In 5 Minutes- Wondershare Filmora
Creating a slideshow may sound like a simple task of adding a few pictures and videos, but in actual when you sit and start with the process it becomes quite hassled and time-consuming. As discussed above, the use of professional software will make the task simpler and quicker. One such software that we recommend here for creating a slideshow, editing videos, and other similar tasks is Wondershare Filmora Video Editor .
This Windows and Mac-based software can edit your videos like a pro and can help you create a slideshow with interesting elements like overlays, effects, templates, and more. The interface is user-friendly, which makes the software apt for all users.
You can add interesting transitions, and effects, edit images and videos and also share your created slideshow on YouTube and other sites.
For Win 7 or later (64-bit)
For macOS 10.12 or later
Steps for creating a vacation slideshow using Wondershare Filmora
Step 1. Download, install and launch the software on your system. Choose the New Project option from the main interface of the software.
Step 2. The images and the videos that have to be added to the slideshow have to be imported and added to the software Media Library. These files can be edited using the features like rotate, crop, and others. If needed you can even change the order of the files.
Step 3. Next, move the images and videos to the timeline by simply dragging them.
Step 4. Now add the transitions from the available designs, effects, filters, and also the music. You can add a local audio file or can also use it from the built-in library at the site.
Step 5. Finally, export and save the created slideshow to the local system or a DVD. There is also an option to share the slideshow directly to Vimeo or YouTube.
● Ending Thoughts →
● A vacation slideshow is a great way to bring together memorable pictures of your trip in a creative manner.
● To create an impressive slideshow quickly use a template, pick up a story, and make use of professional software.
● Wondershare Filmora is an excellent tool for creating a slideshow in just 5 minutes and in a hassle-free manner.
Who does not love vacations, but the saddest part of it is getting over? So, to relive your vacation memories and also share them with your dear ones is by creating a slideshow. With an interesting slideshow, you can present all your special vacation moments in an interesting and creative manner.
To create a vacation slideshow quickly and easily there are several factors that can be considered. Keep reading below to learn about these.
In this article
01 Tips for Creating a Vacation Slideshow in 5 Minutes
02 [Best Software for Creating a Vacation Slideshow in 5 Minutes- Wondershare Filmora](#Part 2)
Part 1 Tips For Creating A Vacation Slideshow In 5 Minutes
There are several useful tips that can help you create a vacation slideshow in just a few minutes. Check them below.
01Choose A Theme And Select Relevant Pictures
First of all, select a story or a theme for your holiday slideshow, and then choose the most relevant images and videos that can be included in the slideshow. With hundreds of images and videos for any particular trip selecting a few is the most cumbersome task and once you have a story in mind, picking up a few images becomes easy.
01Use Templates
Use a template for creating a slideshow as the readymade design will already help you get half the task done. Once you have the desired template, you simply need to add the pictures and other elements. There are several sites and tools where you can get travel, vacation, and holiday templates in different styles.
01Use A Professional Software For Editing And Creating A Software
To create a traveling sideshow that is eye-catchy, interesting, and also can be created in no time, a professional tool works as the best option. These programs have built-in features for image and video editing and in just a few simple clicks, you can create a professional-looking slideshow of your choice.
Part 2 Best Software For Creating A Vacation Slideshow In 5 Minutes- Wondershare Filmora
Creating a slideshow may sound like a simple task of adding a few pictures and videos, but in actual when you sit and start with the process it becomes quite hassled and time-consuming. As discussed above, the use of professional software will make the task simpler and quicker. One such software that we recommend here for creating a slideshow, editing videos, and other similar tasks is Wondershare Filmora Video Editor .
This Windows and Mac-based software can edit your videos like a pro and can help you create a slideshow with interesting elements like overlays, effects, templates, and more. The interface is user-friendly, which makes the software apt for all users.
You can add interesting transitions, and effects, edit images and videos and also share your created slideshow on YouTube and other sites.
For Win 7 or later (64-bit)
For macOS 10.12 or later
Steps for creating a vacation slideshow using Wondershare Filmora
Step 1. Download, install and launch the software on your system. Choose the New Project option from the main interface of the software.
Step 2. The images and the videos that have to be added to the slideshow have to be imported and added to the software Media Library. These files can be edited using the features like rotate, crop, and others. If needed you can even change the order of the files.
Step 3. Next, move the images and videos to the timeline by simply dragging them.
Step 4. Now add the transitions from the available designs, effects, filters, and also the music. You can add a local audio file or can also use it from the built-in library at the site.
Step 5. Finally, export and save the created slideshow to the local system or a DVD. There is also an option to share the slideshow directly to Vimeo or YouTube.
● Ending Thoughts →
● A vacation slideshow is a great way to bring together memorable pictures of your trip in a creative manner.
● To create an impressive slideshow quickly use a template, pick up a story, and make use of professional software.
● Wondershare Filmora is an excellent tool for creating a slideshow in just 5 minutes and in a hassle-free manner.
Leading Applications to Create Fast Motion in iPhone
Fast motion has always been a time saver since it covers the unnecessary details in seconds. Acquiring this skill is important if you are a content creator or videographer. You might already be aware of how to make fast-motion videos on iPhone.
However, if this is unheard of or you are new to video editing, we’ve got you covered. This article covers the ins and outs of how to make a video fast-motion iPhone. In addition, users can gain insights into some applications and their guides. Moreover, we’ll discuss an AI alternative to those applications.
Slow Motion Video Maker Slow your video’s speed with better control of your keyframes to create unique cinematic effects!
Make A Slow Motion Video Make A Slow Motion Video More Features
Part 1: What are the Different Use Cases of Fast-Motion Videos?
The fast motion effect covers multiple creative ways of speed increase that you can incorporate. All these ways apply to different genres of videos. This section diverts your focus on different use cases of fast-motion videos. Here is how to make video fast motion on iPhone for different purposes:
1. Construction and Development Videos
Fast-motion videos help in video creation where development is happening. Such videos show the before and after results of an area, location, or building. The construction or manufacturing process is shown in fast motion in engineering videos. It also helps in showing the transformation of a non-populated or undeveloped city.
2. Nature Photography or Documentaries
Natural phenomenon like the blooming of a flower usually occurs at a slower rate. Capturing them takes a long time, but the audience may not like such a long duration. Hence, editors can increase the speed of such videos to speed up the phenomenon. In addition, if you watch wildlife or nature documentaries, they also use this effect.
3. Aesthetic Expression
Fast-paced videos bring a sense of creativity to your videos as they are an artistic expression of time. To indicate the passing of time in movies or to show a scene at a railway station or airport. It also indicates that the filmmakers and editors have put in an effort.
Part 2: Different Tools to Help You Make Fast Motion Video on iPhone
Fast-motion tools are important in video editing since they offer a chance at creativity. They have a wide range of applications in the filmmaking and media industry. Do you know how to make a video fast-motion iPhone using a third-party application? If not, here is a detailed guide on some of them:
1. iMovie
If you are looking for an accessible application with an easy-to-use interface, this is for you. The process of speed manipulation consists of a slider for control. After editing, you can integrate multiple soundtracks from 130 pre-assembled tracks. The application is compatible with iPhone X and newer versions.
Steps to Create a Fast Motion Video Using iMovie
Do you want to learn how to make fast-motion videos on your iPhone with this application? Given Below is your perfect guide to crafting a fast-paced video:
Step 1: After downloading the application on your iPhone, access it and “Start New Project.” Then, select a video from your media library to edit.

Step 2: After importing the video, click the “Pen” icon to access editing options. Then, click the “Edit Clip” option to do so.

Step 3: Move to the bottom of the screen and slide the given option to access “Speed.” Click it and drag the speed slider towards the right side to increase the speed of the video.

Step 4: Hit the “Play” button to see the speed of the video and re-adjust if required. Go to the top right corner of the screen, locate the “Export” icon, and click it.

2. Video Speed Changer – Editor
Want to learn how to make video fast motion on iPhone without additional technicalities? This application ensures a comprehensive narrative just for speed change. Users can formulate 3 fast motion effects with it at specific frames. For pre-recorded or new videos, it offers Time Wrap, Time Lapse, and Hyper-lapse. The application has been found to support iOS 12.3 and later versions.
Steps to Create a Fast Motion Video Using Video Speed Changer
Multiple applications provide similar services, but none can compare to its UI. Here is how to make a video fast motion iPhone using this
Step 1: Access this application from the App Store and launch it after installation. Click on the “Select Video” button and import a clip.

Step 2: Once you have selected a video, it will take you straight to the speed change option. Change the position of the given slider. Finally, preview the video and click the “Save Video” button to save it on your device.

3. Slow Motion Video FX Edit
Although the name indicates otherwise, this video editor is capable of high-speed change. It comes with an intuitive user interface and is easy for anyone to employ. In addition to speed alteration, you can insert 40 different filters into your video. You can also commence its freeze frame action to add an extra layer of creativity. The tool is compatible with iOS 13.0 and higher versions.
Steps to Create Fast Motion Using Slow Motion Video FX
This is another editor to gain insights on how to make fast-motion videos on an iPhone. We have given the verified step-by-step guide to using this app:
Step 1: After launching this application, click the “Choose From Library” option. Then, select a clip from your device’s gallery.

Step 2: Once the video is compressed, you’ll be taken to the speed change screen. From there, you can alter the speed of different clip sections. Move the slider of the relevant section upward to increase the speed.

Step 3: Once you have altered the speed, navigate towards the top right corner and click the “Export” icon.

Part 3: Desktop Solution: Remedy for Those Who Want to Speed Up Video on Their Computer
If you have gone through the above applications, you know the fast-motion effect. Do you want to know how to make a video fast motion on an iPhone using a computer? Wondershare Filmora is the best alternative to the above applications for creating this effect. The software is compatible with all the macOS and iOS devices and allows seamless editing.
With this editor, you get multiple options to create a fast-motion video. In this article, we will use the Uniform Speed feature. The operating process is very accessible and designed to assist both professionals and beginners. You can also apply the AI Frame Interpolation option to apply “Frame Bending.”
Free Download For Win 7 or later(64-bit)
Free Download For macOS 10.14 or later
Step-by-Step Guide to Speed Up Video with Filmora
After reading the article till now, you have gained knowledge of Filmora’s speeding options. How to make fast motion video on iPhone now seems like an easy option. Even though the process is easy, we want you to stay ahead. Hence, here is a step-by-step procedure for creating fast motion in Filmora:
Step 1Create a New Project and Import Media
First, connect your iOS device to your Wondershare Filmora device. After that, launch Filmora to access the main menu. From there, click on the “New Project” tab fashioned in the center. Expand the “Import” option in the Project Media section and select the suitable option. In this case, choose the “Import from Phone or Camera” option.

Step 2Access the Uniform Speed Section
After bringing the imported media to the timeline, select it to access the settings panel. Select the “Speed > Uniform Speed” tab from the appeared panel. Then, drag the Speed slider on the right side to increase speed. Afterward, click the “Play” button on the preview screen to see the results.

Step 3Apply Frame Bending and Export
This part is optional, but if you find an irregularity or roughness to the video, apply this. Go to the “AI Frame Interpolation” section at the bottom and expand the options. From the dropdown menu, select the “Frame Bending” option and do the rendering from the timeline. After everything is set, select the “Export” button at the top right corner.

Trending Video Editing Features of Wondershare Filmora
Filmora is a versatile tool that is not confined to speed manipulation or fast motion only. This editor offers audio, text, AI editing options, and video. Here are some prominent key features of Wondershare Filmora to help you in editing:
1. Speed Ramping
The other option for speed modification mentioned previously is speed ramping. This option comes with 6 editable speed change presets for automated editing. However, you can also employ the custom preset to create your own way. Moreover, it allows the audio pitch option to enable automated maintenance of audio.
2. AI Smart Cutout
There is more than one way of removing and replacing a background in Filmora. Smart Cutout offers an AI-integrated masking option to cut out the selected parts. You can also set preferences for Edge Thickness or Edge Feather for accuracy. Afterward, you can introduce three background options: color, grid, or more.
3. AI Text-to-Video
Bring your imagination to visuals with this amazing generative AI video creator. It creates videos from text and covers the voice and graphical elements. Users can customize the AI voice and ratio before generating a video. The prompt section offers up to 1000 characters for adding a script or giving directions.
4. AI Smart Masking
Are there any effects or filters you want to introduce to only a specific part of the video? Use Filmora’s AI mask for automated masking of an object or background. The mask brush selects the relevant area on its own. Besides AI masks, there is a manual masking option or mask shapes to apply. You can also customize the Brush size according to the video.
Conclusion
The article highlighted the importance of increasing video speed in many industries. In addition, we discussed some tools that make fast motion with ease. We also provided step-by-step guides on how to make fast motion video on iPhone. Wondershare Filmora stands amongst all those applications to create fast motion. We recommend this software due to its multiple functionalities and detailed editing abilities.
Make A Slow Motion Video Make A Slow Motion Video More Features
Part 1: What are the Different Use Cases of Fast-Motion Videos?
The fast motion effect covers multiple creative ways of speed increase that you can incorporate. All these ways apply to different genres of videos. This section diverts your focus on different use cases of fast-motion videos. Here is how to make video fast motion on iPhone for different purposes:
1. Construction and Development Videos
Fast-motion videos help in video creation where development is happening. Such videos show the before and after results of an area, location, or building. The construction or manufacturing process is shown in fast motion in engineering videos. It also helps in showing the transformation of a non-populated or undeveloped city.
2. Nature Photography or Documentaries
Natural phenomenon like the blooming of a flower usually occurs at a slower rate. Capturing them takes a long time, but the audience may not like such a long duration. Hence, editors can increase the speed of such videos to speed up the phenomenon. In addition, if you watch wildlife or nature documentaries, they also use this effect.
3. Aesthetic Expression
Fast-paced videos bring a sense of creativity to your videos as they are an artistic expression of time. To indicate the passing of time in movies or to show a scene at a railway station or airport. It also indicates that the filmmakers and editors have put in an effort.
Part 2: Different Tools to Help You Make Fast Motion Video on iPhone
Fast-motion tools are important in video editing since they offer a chance at creativity. They have a wide range of applications in the filmmaking and media industry. Do you know how to make a video fast-motion iPhone using a third-party application? If not, here is a detailed guide on some of them:
1. iMovie
If you are looking for an accessible application with an easy-to-use interface, this is for you. The process of speed manipulation consists of a slider for control. After editing, you can integrate multiple soundtracks from 130 pre-assembled tracks. The application is compatible with iPhone X and newer versions.
Steps to Create a Fast Motion Video Using iMovie
Do you want to learn how to make fast-motion videos on your iPhone with this application? Given Below is your perfect guide to crafting a fast-paced video:
Step 1: After downloading the application on your iPhone, access it and “Start New Project.” Then, select a video from your media library to edit.
Step 2: After importing the video, click the “Pen” icon to access editing options. Then, click the “Edit Clip” option to do so.
Step 3: Move to the bottom of the screen and slide the given option to access “Speed.” Click it and drag the speed slider towards the right side to increase the speed of the video.
Step 4: Hit the “Play” button to see the speed of the video and re-adjust if required. Go to the top right corner of the screen, locate the “Export” icon, and click it.
2. Video Speed Changer – Editor
Want to learn how to make video fast motion on iPhone without additional technicalities? This application ensures a comprehensive narrative just for speed change. Users can formulate 3 fast motion effects with it at specific frames. For pre-recorded or new videos, it offers Time Wrap, Time Lapse, and Hyper-lapse. The application has been found to support iOS 12.3 and later versions.
Steps to Create a Fast Motion Video Using Video Speed Changer
Multiple applications provide similar services, but none can compare to its UI. Here is how to make a video fast motion iPhone using this
Step 1: Access this application from the App Store and launch it after installation. Click on the “Select Video” button and import a clip.
Step 2: Once you have selected a video, it will take you straight to the speed change option. Change the position of the given slider. Finally, preview the video and click the “Save Video” button to save it on your device.
3. Slow Motion Video FX Edit
Although the name indicates otherwise, this video editor is capable of high-speed change. It comes with an intuitive user interface and is easy for anyone to employ. In addition to speed alteration, you can insert 40 different filters into your video. You can also commence its freeze frame action to add an extra layer of creativity. The tool is compatible with iOS 13.0 and higher versions.
Steps to Create Fast Motion Using Slow Motion Video FX
This is another editor to gain insights on how to make fast-motion videos on an iPhone. We have given the verified step-by-step guide to using this app:
Step 1: After launching this application, click the “Choose From Library” option. Then, select a clip from your device’s gallery.
Step 2: Once the video is compressed, you’ll be taken to the speed change screen. From there, you can alter the speed of different clip sections. Move the slider of the relevant section upward to increase the speed.
Step 3: Once you have altered the speed, navigate towards the top right corner and click the “Export” icon.
Part 3: Desktop Solution: Remedy for Those Who Want to Speed Up Video on Their Computer
If you have gone through the above applications, you know the fast-motion effect. Do you want to know how to make a video fast motion on an iPhone using a computer? Wondershare Filmora is the best alternative to the above applications for creating this effect. The software is compatible with all the macOS and iOS devices and allows seamless editing.
With this editor, you get multiple options to create a fast-motion video. In this article, we will use the Uniform Speed feature. The operating process is very accessible and designed to assist both professionals and beginners. You can also apply the AI Frame Interpolation option to apply “Frame Bending.”
Free Download For Win 7 or later(64-bit)
Free Download For macOS 10.14 or later
Step-by-Step Guide to Speed Up Video with Filmora
After reading the article till now, you have gained knowledge of Filmora’s speeding options. How to make fast motion video on iPhone now seems like an easy option. Even though the process is easy, we want you to stay ahead. Hence, here is a step-by-step procedure for creating fast motion in Filmora:
Step 1Create a New Project and Import Media
First, connect your iOS device to your Wondershare Filmora device. After that, launch Filmora to access the main menu. From there, click on the “New Project” tab fashioned in the center. Expand the “Import” option in the Project Media section and select the suitable option. In this case, choose the “Import from Phone or Camera” option.
Step 2Access the Uniform Speed Section
After bringing the imported media to the timeline, select it to access the settings panel. Select the “Speed > Uniform Speed” tab from the appeared panel. Then, drag the Speed slider on the right side to increase speed. Afterward, click the “Play” button on the preview screen to see the results.
Step 3Apply Frame Bending and Export
This part is optional, but if you find an irregularity or roughness to the video, apply this. Go to the “AI Frame Interpolation” section at the bottom and expand the options. From the dropdown menu, select the “Frame Bending” option and do the rendering from the timeline. After everything is set, select the “Export” button at the top right corner.
Trending Video Editing Features of Wondershare Filmora
Filmora is a versatile tool that is not confined to speed manipulation or fast motion only. This editor offers audio, text, AI editing options, and video. Here are some prominent key features of Wondershare Filmora to help you in editing:
1. Speed Ramping
The other option for speed modification mentioned previously is speed ramping. This option comes with 6 editable speed change presets for automated editing. However, you can also employ the custom preset to create your own way. Moreover, it allows the audio pitch option to enable automated maintenance of audio.
2. AI Smart Cutout
There is more than one way of removing and replacing a background in Filmora. Smart Cutout offers an AI-integrated masking option to cut out the selected parts. You can also set preferences for Edge Thickness or Edge Feather for accuracy. Afterward, you can introduce three background options: color, grid, or more.
3. AI Text-to-Video
Bring your imagination to visuals with this amazing generative AI video creator. It creates videos from text and covers the voice and graphical elements. Users can customize the AI voice and ratio before generating a video. The prompt section offers up to 1000 characters for adding a script or giving directions.
4. AI Smart Masking
Are there any effects or filters you want to introduce to only a specific part of the video? Use Filmora’s AI mask for automated masking of an object or background. The mask brush selects the relevant area on its own. Besides AI masks, there is a manual masking option or mask shapes to apply. You can also customize the Brush size according to the video.
Conclusion
The article highlighted the importance of increasing video speed in many industries. In addition, we discussed some tools that make fast motion with ease. We also provided step-by-step guides on how to make fast motion video on iPhone. Wondershare Filmora stands amongst all those applications to create fast motion. We recommend this software due to its multiple functionalities and detailed editing abilities.
Also read:
- Updated Are You Looking to Make a Thumbnail for Your Fortnite Video? This Article Features a Guide Explaining Creating a Fortnite Motion Blur Thumbnail
- New This Article Will Reveal the Secrets of Choosing a Location to Shoot Your Viral Music Video. As Well as Tips to Make an Energetic Schedule for Shooting Days
- New In 2024, 5 Tried-And-True Methods to GIF Making
- Updated In 2024, Blender - A Video Editor for Every Professional
- New Recording Slow-Motion Videos Is Not More Difficult Using a Smartphone. Learn Everything From How to Record Slow-Motion Video and Edit a Video to Slow Down It
- In 2024, Splitting a Video in VSDC Step by Step
- New 4 Solutions to Resize a WebM File
- New In 2024, Best Animated Text Generator
- New How to Create After Effects Gifs for 2024
- 8 Excellent Video and Photo Mergers on Desktop/Mobile/Online
- Spooky Halloween Best 15+ Halloween Countdown Video Clips for 2024
- 2024 Approved Video Inspiration for Birthday Slideshow
- Updated 2024 Approved How To Add Text In After Effects
- Updated How to Share YouTube Video on Zoom for 2024
- Useful Tips for Tiktok Video Aspect Ratio Included
- In 2024, CatchEmAll Celebrate National Pokémon Day with Virtual Location On Realme Note 50 | Dr.fone
- How to Reset Apple ID and Apple Password On iPhone 13
- In 2024, Detailed Review of doctorSIM Unlock Service For iPhone 8 Plus
- Complete guide for recovering video files on Oppo Reno 10 Pro+ 5G
- How to Transfer Data from Huawei P60 to BlackBerry | Dr.fone
- Filter Not Working Error in Excel 2007 Fix 2024
- In 2024, How To Remove the Two Factor Authentication From iPhone 13 mini
- In 2024, How to Transfer Everything from Apple iPhone 6s Plus to iPhone 8/X/11 | Dr.fone
- 10 Best Fake GPS Location Spoofers for Vivo S18 | Dr.fone
- 6 Solutions to Fix Error 505 in Google Play Store on Xiaomi 13 Ultra | Dr.fone
- In 2024, Why Apple Account Disabled From your iPhone SE? How to Fix
- In 2024, How to fix iCloud lock on your iPhone 12 Pro and iPad
- Title: New Best Video Editors to Add Text to a Video for 2024
- Author: Chloe
- Created at : 2024-04-24 07:08:41
- Updated at : 2024-04-25 07:08:41
- Link: https://ai-editing-video.techidaily.com/new-best-video-editors-to-add-text-to-a-video-for-2024/
- License: This work is licensed under CC BY-NC-SA 4.0.
