
:max_bytes(150000):strip_icc():format(webp)/trends_MontyRakusen_Getty-5a4aa079482c5200362b0987.jpg)
New Do You Want to Know How to Convert YouTube SBV Subtitles to SRT Format? Here Is an Ultimate Guide About It
Do You Want to Know How to Convert YouTube SBV Subtitles to SRT Format? Here Is an Ultimate Guide About It
SBV to SRT: How to Convert YouTube SBV Subtitle to SRT Format
YouTube subtitles are becoming increasingly common, and business people mainly use subtitles for those who are hard to listen to. So everyone can understand the content.
Luckily, we’ve happened upon a relatively simple process by which SBV files can be converted to the commonly-used (and compatible with YouTube) SubRip (SRT) format, which we’ll discuss here.
In this article, we will discuss the converters that can convert SBV format to SRT files within just a few clicks. Sounds interesting? Keep reading the article to understand the context better. Let’s get started.
What is an SBV file?
It is an extension of a plain text file used for video subtitles. It is used to add subtitles and closed captions to the YouTube video.
It includes three sets of data:
- Start and end times for subtitle timings
- The actual content of the subtitle
- Its ID, which is just plain text that
- consists of additional information such as font size, etc.
Furthermore, SBV subtitles are saved in plain text format to be opened and edited efficiently. They also work on systems where notepad might be the only word processor available.
SBV files are similar to SRT files. YouTube recommends that caption creators create caption files using the SBV or SRT formats because those formats are pretty basic.
You’ll be thinking, can you convert the SBV files to SRT? Yes, you can. Now we know what an SBV file is, let’s find out why we need to convert SBV files to SRT.
Why do we need to convert SBV files to SRT?
Subtitles are necessary for accessibility and SEO. There are multiple file formats for subtitles. One of the most common is the SubRip (.srt) file format. But there are various cases when you have subtitles in SBV format, which your standard media player fails to identify.
That’s why the convenient thing to do is to convert SBV to SRT.
Let’s find out how to perform a such activity using online SBV to SRT converters.
Convert SBV to SRT with an Online Converter
Many users want to convert their SBV caption or subtitle into other formats for all devices.
Following, we have mentioned the top 4 SB- to-SRT converters capable of completing the file conversion in no time.
1. SBV to SRT converter for subtitles

This online converter takes the subtitles created by YouTube or other resources and then converts them into the SRT file format. This SRT file can be imported into any video editing software. It has a simple user interface. Its entire conversion process is instant.
Supported Platform: Browser-based
To convert the SBV format into SRT,
- It would help if you opened the online tool on your browser.
- Then click Select File to upload the SBV file.
- In the end, the service will automatically download the SRT file to your device.
2. Subtitles Converter

It is a tool that can be converted between subtitles. If the subtitle file is not reversed or truncated, change the subtitle extension in Explorer to any desired format.
Supported platforms: Browser-based.
Following the guides below, you can convert your SBV file into an SRT file.
- Go to Subtitles converters website .
- Upload your SBV file.
- Select the targeted format; SRT.
- Select sync control.
- Select a subtitle language.
- Then click on “Download after conversion.”
3. GoTranscript Subtitle Converter

GoTranscript is an online converter specializing in converting your subtitle files in SBV to your preferred format. Moreover, it is compatible with almost every subtitle file type, including SRT, SCC, VTT, RT, and more. Furthermore, the product has a high success rate for video transcription services.
GoTranscript is easy to use, offering a streamlined ordering process, affordable pricing, and customization options.
GoTranscript has a global team of 20,000 language experts ready to convert your content into text, including
- Medical files (reports, records)
- Legal documents (hearings, proceedings, interrogations)
- Academic materials (lectures, interviews)
- Enterprise recordings (focus groups, corporate meetings)
- Entertainment industry content (film, TV, news) and more!
Supported Platform: Browser-based
Services offers:
- Transcription, translation, subtitling, and caption
To convert the SBV format to SRT format by GoTrancscript, you need to follow the steps below.
Step1 Go to the Website
Click on Upload and add the SBV subtitle file after opening the online converter.

Step2 Select format
Then, head to the Select Format section and click on the SubRip(.srt) option.

Step3 Click on convert
Finally, click on convert to start the process and download the subtitles.

Convert SBV to SRT with desktop Software
As we’ve mentioned about the online converters, you can use them without wasting money and time. All you need is an internet connection, though it causes problems sometimes when you run out of the internet.
Many desktop converters have been introduced to help you with this problem. For this reason, We’ll tell you about top desktop software through which you can convert SBV format to SRT format.
We’ll also explain how to use one of the best file converters, FFmpeg, as an example to show you how to convert SBV to SRT. Let’s move on.
1. Jubler

It is another free open source SBV to SRT converter software. It allows you to edit subtitle files of SBV, SUB, TXT, SRT, etc. As soon as you upload a subtle file in it, you can view all the subtitle text and their times’ side by side. You can select and edit both subtitle text and time.
Platforms supported: Windows, Linux, and macOS.
After editing subtitles, start the conversion process. Now, follow the below steps to convert SBV to SRT using a jubler.
- Run this converter and upload an SBV file.
- Then, you can select and edit the subtitle text and its timings.
- After making the changes to the subtitle text and time, go to the file> Save As option.
- Ultimately, choose SubRip as the output format and press the Save button.
2. Subtitle Edit

If you are looking for desktop-based software that can carefully convert or edit subtitles files in SBV, we suggest using Subtitle Edit. This software allows you to edit timings/speed and change subtitle font type. Moreover, it supports a simple interface and runs smoothly on low-end PCs.
Supported Platform: Windows
Follow the steps to convert the SBV file to SRT
- Open Subtitle Edit on your Windows system.
- Then, open the subtitle file under the General tab.
- After adding the SBV file, select the SRT format as the new file type.
- Then, click on the “Save button” to export the converted subtitles.
3. FFmpeg

You might think that FFmpeg is only used for video file conversion. Although, it is not the case, as you can utilize this Platform to convert SBV subtitles to SRT using a single command line.
It is a free, open-source software project comprising a suite of libraries and programs which handles video, audio, streams, and other multimedia files.
There is an excellent library in your video processing and compression toolbox. It has endless capabilities, and being open-source, you are more than welcome to modify the source and extend its capabilities
Features of FFmpeg:
- It supports multiple formats conversion, not only subtitle conversion, like txt to srt, srt to sbv, word to srt, etc., but also aduio, video conversion.
- Basic video editing is also enabled by FFmpeg, post-production effects and scaling for video can be used at ease.
Supported Platform: macOS and Windows
YouTube supports the basic features of SBV (SuBView), and SRT (SubRipText) closed captions. You can download existing closed captions (including auto-generated subtitles) as SBV, convert them to SRT and edit the subtitles in a text editor such as vim or notepad. You can also upload the fixed version to YouTube and overwrite the old subtitles for the given language.
To convert SBV format to SRT through FFmpeg, you need to follow the steps given below.
The steps to convert SBV to SRT:
Step1 Visit the official website of FFmpeg. Download the software. After downloading, install it.
Step2 Run FFmpeg using Terminal or Command Prompt on your Mac or Windows computer.
Step3 Enter the following command to convert SBV to SRT instantly.
Pros
- FFmpeg is safe and easy to use
- You can convert any file in your desired format through command lines
Cons
- Interface is a little bit out of date. Except for this, everything seems good for now
How to Edit SRT Subtitles for Videos After Converting from SBV
Now that you know how to convert the SBV file to SRT format, the next step you may want to take is to learn how to hardcode them into your videos. We recommend the Wondershare Filmora Subtitle Editor feature to perform the task proficiently.
The software is available on Windows and macOS. It offers an intuitive user interface that will make beginners feel right at home.
Wondershare Filmora:
It is an easy free video editing software for a beginner that allows you to edit the created content. It also Supports 50 above formats, 4k editing, Filmstock effects store, and all basic and advanced editing tools in the most easily accessible and used manner.
However, the majority of video editors are limited to Windows 10. It works perfectly with Win 10, Win 8, Win 7, and Mac. After downloading this software, you will have plenty of features for free and produce videos with no watermarks.
Let’s have a look at its unique features.
Features:
SRT files Editing
You don’t need to waste your time creating a data backup. Auto synchronization ensures that data is backed up to another device.
Speech to Text (STT)
You can convert your speech into text.
Text to Speech (TTS)
It also allows you to convert your text into speech.
Also, it has various video editing functions, like green screen, split screen, motion tracking, etc., to help you make a video like a pro.
How to edit the SRT file with Filmora :
To edit the converted file, you’ll need to follow the steps
Free Download For Win 7 or later(64-bit)
Free Download For macOS 10.14 or later
Step1 Open Filmora. If you don’t have this software, go to its website and download it. Click on “New Project.”
Step2 Import the video and SRT file to the media library.
Step3 Drag the video and SRT file to the timeline. Then double-click on the SRT file, or you can right-click and choose “Advanced Edit” for the further subtitles editing.
Step4 From there, you can edit the subtitles the way you want.
Click on “PRESET” to select the font style. From custom, you can adjust the following settings
- Fade in/out
- Opacity
- Color gradient
- Effect
- Blur
Step5 You can delete the unwanted part and split and merge more clips. Once the editing is over, click on the “Export” option and save it.
Hot FAQs on converting SBV to SRT
1. How do I download SRT files from YouTube?
You can download the DRT files from YouTube by using the transcription option included below the video player: For this, press the small dot icon below the video, Then choose “open the transcription,” where you can copy and paste a complete transcript, in SRT format, of any video!
2. Can you download auto-generated subtitles from YouTube?
Yes, you can download auto-generated subtitles from YouTube. DownSub is a web-based application that can download automatically generated subtitles directly from YouTube, VIU, Viki, Vlive, and more. It supports downloading all subtitles/captions formats such as SRT, TXT, and VTT.
It doesn’t force our users to download or install any extensions or third-party software. It provides an online method to download subtitles by just entering the URL of the video and clicking Download.
3. What program opens an SBV file?
You can open the SBV file using any text editor, such as Notepad (Windows), TextEdit (Mac), or Atom. You can also see an SBV file’s contents by dragging the file into any web browser. Plus, it also allows you to edit.
Final words
By default, YouTube allows those files created in various formats such as SRT, SBV, MPSUB, etc. But the drawback is that the site automatically converts the SBV format once uploaded.
We’ve explained above the variety of online video converters and desktop software. You can convert the SBV files to SRT in no time.
After converting, editing, or merging the .srt file is necessary. For this, a variety of software is available, but Wondershare Filmora is one of the best video editing software.
Download Filmora and edit the content the way you want.
What is an SBV file?
It is an extension of a plain text file used for video subtitles. It is used to add subtitles and closed captions to the YouTube video.
It includes three sets of data:
- Start and end times for subtitle timings
- The actual content of the subtitle
- Its ID, which is just plain text that
- consists of additional information such as font size, etc.
Furthermore, SBV subtitles are saved in plain text format to be opened and edited efficiently. They also work on systems where notepad might be the only word processor available.
SBV files are similar to SRT files. YouTube recommends that caption creators create caption files using the SBV or SRT formats because those formats are pretty basic.
You’ll be thinking, can you convert the SBV files to SRT? Yes, you can. Now we know what an SBV file is, let’s find out why we need to convert SBV files to SRT.
Why do we need to convert SBV files to SRT?
Subtitles are necessary for accessibility and SEO. There are multiple file formats for subtitles. One of the most common is the SubRip (.srt) file format. But there are various cases when you have subtitles in SBV format, which your standard media player fails to identify.
That’s why the convenient thing to do is to convert SBV to SRT.
Let’s find out how to perform a such activity using online SBV to SRT converters.
Convert SBV to SRT with an Online Converter
Many users want to convert their SBV caption or subtitle into other formats for all devices.
Following, we have mentioned the top 4 SB- to-SRT converters capable of completing the file conversion in no time.
1. SBV to SRT converter for subtitles
This online converter takes the subtitles created by YouTube or other resources and then converts them into the SRT file format. This SRT file can be imported into any video editing software. It has a simple user interface. Its entire conversion process is instant.
Supported Platform: Browser-based
To convert the SBV format into SRT,
- It would help if you opened the online tool on your browser.
- Then click Select File to upload the SBV file.
- In the end, the service will automatically download the SRT file to your device.
2. Subtitles Converter
It is a tool that can be converted between subtitles. If the subtitle file is not reversed or truncated, change the subtitle extension in Explorer to any desired format.
Supported platforms: Browser-based.
Following the guides below, you can convert your SBV file into an SRT file.
- Go to Subtitles converters website .
- Upload your SBV file.
- Select the targeted format; SRT.
- Select sync control.
- Select a subtitle language.
- Then click on “Download after conversion.”
3. GoTranscript Subtitle Converter
GoTranscript is an online converter specializing in converting your subtitle files in SBV to your preferred format. Moreover, it is compatible with almost every subtitle file type, including SRT, SCC, VTT, RT, and more. Furthermore, the product has a high success rate for video transcription services.
GoTranscript is easy to use, offering a streamlined ordering process, affordable pricing, and customization options.
GoTranscript has a global team of 20,000 language experts ready to convert your content into text, including
- Medical files (reports, records)
- Legal documents (hearings, proceedings, interrogations)
- Academic materials (lectures, interviews)
- Enterprise recordings (focus groups, corporate meetings)
- Entertainment industry content (film, TV, news) and more!
Supported Platform: Browser-based
Services offers:
- Transcription, translation, subtitling, and caption
To convert the SBV format to SRT format by GoTrancscript, you need to follow the steps below.
Step1 Go to the Website
Click on Upload and add the SBV subtitle file after opening the online converter.
Step2 Select format
Then, head to the Select Format section and click on the SubRip(.srt) option.
Step3 Click on convert
Finally, click on convert to start the process and download the subtitles.
Convert SBV to SRT with desktop Software
As we’ve mentioned about the online converters, you can use them without wasting money and time. All you need is an internet connection, though it causes problems sometimes when you run out of the internet.
Many desktop converters have been introduced to help you with this problem. For this reason, We’ll tell you about top desktop software through which you can convert SBV format to SRT format.
We’ll also explain how to use one of the best file converters, FFmpeg, as an example to show you how to convert SBV to SRT. Let’s move on.
1. Jubler
It is another free open source SBV to SRT converter software. It allows you to edit subtitle files of SBV, SUB, TXT, SRT, etc. As soon as you upload a subtle file in it, you can view all the subtitle text and their times’ side by side. You can select and edit both subtitle text and time.
Platforms supported: Windows, Linux, and macOS.
After editing subtitles, start the conversion process. Now, follow the below steps to convert SBV to SRT using a jubler.
- Run this converter and upload an SBV file.
- Then, you can select and edit the subtitle text and its timings.
- After making the changes to the subtitle text and time, go to the file> Save As option.
- Ultimately, choose SubRip as the output format and press the Save button.
2. Subtitle Edit
If you are looking for desktop-based software that can carefully convert or edit subtitles files in SBV, we suggest using Subtitle Edit. This software allows you to edit timings/speed and change subtitle font type. Moreover, it supports a simple interface and runs smoothly on low-end PCs.
Supported Platform: Windows
Follow the steps to convert the SBV file to SRT
- Open Subtitle Edit on your Windows system.
- Then, open the subtitle file under the General tab.
- After adding the SBV file, select the SRT format as the new file type.
- Then, click on the “Save button” to export the converted subtitles.
3. FFmpeg
You might think that FFmpeg is only used for video file conversion. Although, it is not the case, as you can utilize this Platform to convert SBV subtitles to SRT using a single command line.
It is a free, open-source software project comprising a suite of libraries and programs which handles video, audio, streams, and other multimedia files.
There is an excellent library in your video processing and compression toolbox. It has endless capabilities, and being open-source, you are more than welcome to modify the source and extend its capabilities
Features of FFmpeg:
- It supports multiple formats conversion, not only subtitle conversion, like txt to srt, srt to sbv, word to srt, etc., but also aduio, video conversion.
- Basic video editing is also enabled by FFmpeg, post-production effects and scaling for video can be used at ease.
Supported Platform: macOS and Windows
YouTube supports the basic features of SBV (SuBView), and SRT (SubRipText) closed captions. You can download existing closed captions (including auto-generated subtitles) as SBV, convert them to SRT and edit the subtitles in a text editor such as vim or notepad. You can also upload the fixed version to YouTube and overwrite the old subtitles for the given language.
To convert SBV format to SRT through FFmpeg, you need to follow the steps given below.
The steps to convert SBV to SRT:
Step1 Visit the official website of FFmpeg. Download the software. After downloading, install it.
Step2 Run FFmpeg using Terminal or Command Prompt on your Mac or Windows computer.
Step3 Enter the following command to convert SBV to SRT instantly.
Pros
- FFmpeg is safe and easy to use
- You can convert any file in your desired format through command lines
Cons
- Interface is a little bit out of date. Except for this, everything seems good for now
How to Edit SRT Subtitles for Videos After Converting from SBV
Now that you know how to convert the SBV file to SRT format, the next step you may want to take is to learn how to hardcode them into your videos. We recommend the Wondershare Filmora Subtitle Editor feature to perform the task proficiently.
The software is available on Windows and macOS. It offers an intuitive user interface that will make beginners feel right at home.
Wondershare Filmora:
It is an easy free video editing software for a beginner that allows you to edit the created content. It also Supports 50 above formats, 4k editing, Filmstock effects store, and all basic and advanced editing tools in the most easily accessible and used manner.
However, the majority of video editors are limited to Windows 10. It works perfectly with Win 10, Win 8, Win 7, and Mac. After downloading this software, you will have plenty of features for free and produce videos with no watermarks.
Let’s have a look at its unique features.
Features:
SRT files Editing
You don’t need to waste your time creating a data backup. Auto synchronization ensures that data is backed up to another device.
Speech to Text (STT)
You can convert your speech into text.
Text to Speech (TTS)
It also allows you to convert your text into speech.
Also, it has various video editing functions, like green screen, split screen, motion tracking, etc., to help you make a video like a pro.
How to edit the SRT file with Filmora :
To edit the converted file, you’ll need to follow the steps
Free Download For Win 7 or later(64-bit)
Free Download For macOS 10.14 or later
Step1 Open Filmora. If you don’t have this software, go to its website and download it. Click on “New Project.”
Step2 Import the video and SRT file to the media library.
Step3 Drag the video and SRT file to the timeline. Then double-click on the SRT file, or you can right-click and choose “Advanced Edit” for the further subtitles editing.
Step4 From there, you can edit the subtitles the way you want.
Click on “PRESET” to select the font style. From custom, you can adjust the following settings
- Fade in/out
- Opacity
- Color gradient
- Effect
- Blur
Step5 You can delete the unwanted part and split and merge more clips. Once the editing is over, click on the “Export” option and save it.
Hot FAQs on converting SBV to SRT
1. How do I download SRT files from YouTube?
You can download the DRT files from YouTube by using the transcription option included below the video player: For this, press the small dot icon below the video, Then choose “open the transcription,” where you can copy and paste a complete transcript, in SRT format, of any video!
2. Can you download auto-generated subtitles from YouTube?
Yes, you can download auto-generated subtitles from YouTube. DownSub is a web-based application that can download automatically generated subtitles directly from YouTube, VIU, Viki, Vlive, and more. It supports downloading all subtitles/captions formats such as SRT, TXT, and VTT.
It doesn’t force our users to download or install any extensions or third-party software. It provides an online method to download subtitles by just entering the URL of the video and clicking Download.
3. What program opens an SBV file?
You can open the SBV file using any text editor, such as Notepad (Windows), TextEdit (Mac), or Atom. You can also see an SBV file’s contents by dragging the file into any web browser. Plus, it also allows you to edit.
Final words
By default, YouTube allows those files created in various formats such as SRT, SBV, MPSUB, etc. But the drawback is that the site automatically converts the SBV format once uploaded.
We’ve explained above the variety of online video converters and desktop software. You can convert the SBV files to SRT in no time.
After converting, editing, or merging the .srt file is necessary. For this, a variety of software is available, but Wondershare Filmora is one of the best video editing software.
Download Filmora and edit the content the way you want.
How to Add Motion Titles
Do you want to make your videos eye-catching instantly? Looking for some cool title animations to make your texts stand out? You should definitely opt for motion title templates that are widely available in popular video editors. Motion title templates come preloaded with animated texts, engaging graphic elements, and even background effects.
You can add them directly to your video and customize them as per you requirements so that your video looks exactly the way you desire. Different video editors have different motion titles, and therefore, you should check them out one by one to find out the templates you are looking for. We will illustrate title motion graphics in all the leading video editors.
Part 1. Add Motion Title with Filmora
The easiest way to add motion title to your video on your computer is through Wondershare Filmora . Filmora is a professional video editor that is available for Windows and Mac users. Filmora has the best collection of motion title templates, and the user interface is super intuitive and anyone can use without any prior experience. Here are the steps to add motion title with Filmora.
Step1Install and launch Wondershare Filmora on your computer. Click on New Project option on the welcome screen or go to File menu and click on New Project option.

Step2Go to File menu and Import Media option to import your video file. Otherwise, you can simply drop the video file into Project Media folder.
Step3Drag the video file from Project Media folder and drop it into the Timeline.

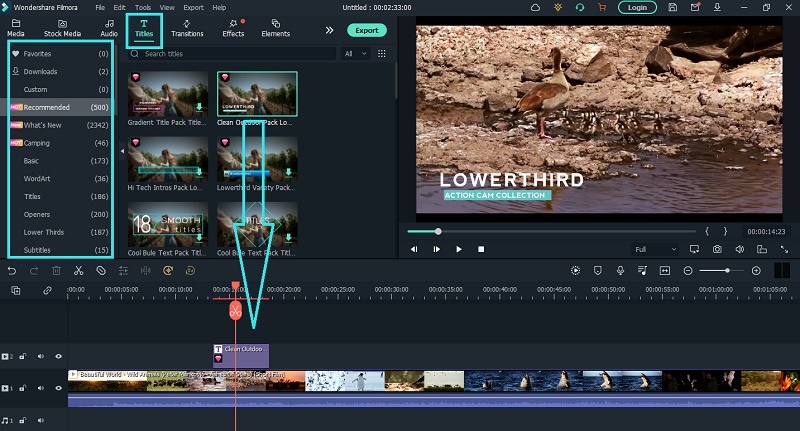
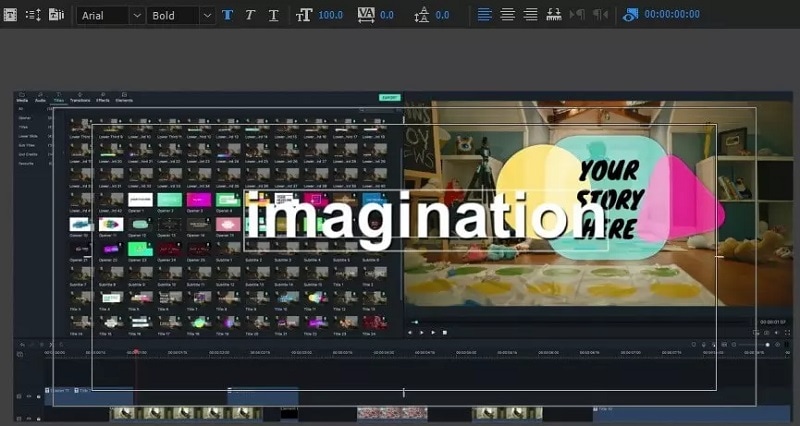
Step4Go to Titles at the top and go to the left panel. You can different categories of motion title templates. Select any desired text effect and drop into the Timeline above the video layer wherever you want.
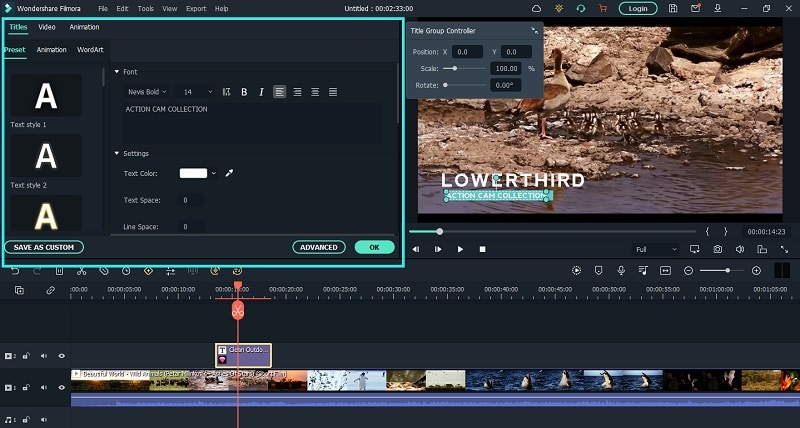
Step5Double clicking on the text layer on Timeline to edit the text and change the styles. Under Preset tab, you can change font, size, and color. Finally, click on OK button to save the edits done.
Part 2. Add Motion Title with Premiere Pro
Adobe Premiere Pro is a renowned video editor that is mostly used by professionals to edit videos and add effects and animations. Even though Premiere Pro has a steep learning curve, you can create motion title in simple steps. You can write any text on the video and select from different effects and animations to create motion title graphics. Here are the steps to add title motion graphics Premiere Pro free.
Step1Launch Premiere Pro and go to New> Project option. Import the video file and drop it into Timeline.
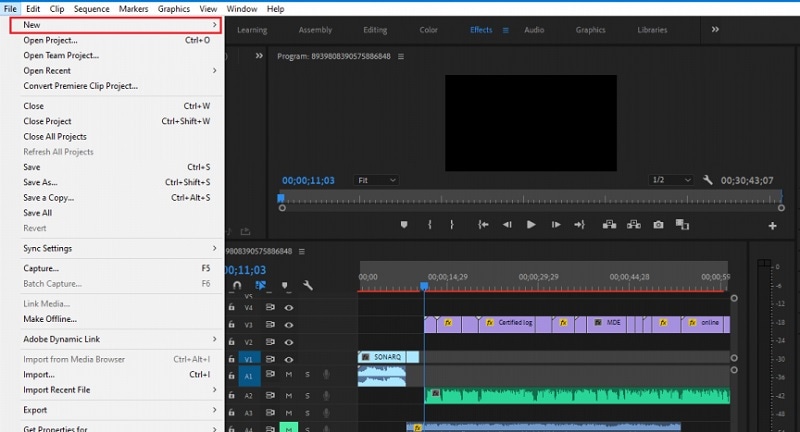
Step2Go to Title> New Title> Default Still option and follow the on-screen instructions.

Step3You will see different types of title styles and designs to choose from as you feel.

Step4Click on Type Tool option and click on the area on the video where you want the text to appear. You can customize them from the right panel from Title Styles, Title Properties, Tools and Title Actions.
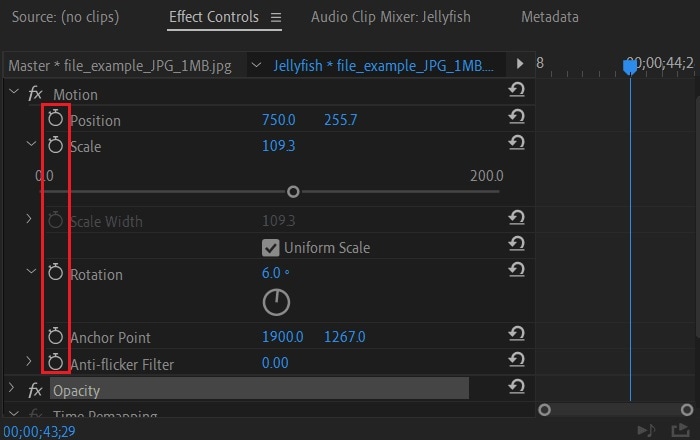
Step5To add motion to the title, click on Effects Control window. Click on any desired animation and turn to Stopwatch icon to apply the effect to the text. There is a dedicated Motion option available.
Part 3. Make motion title with Studio
Studio is a popular video editing software where you can not only apply motion title presets but also create motion title presets from scratch. The reason why video editors choose Studio is because it allows users to customize everything and create different templates and animations for personalization. Here are the steps to create title motion graphics in Studio as per your requirements.
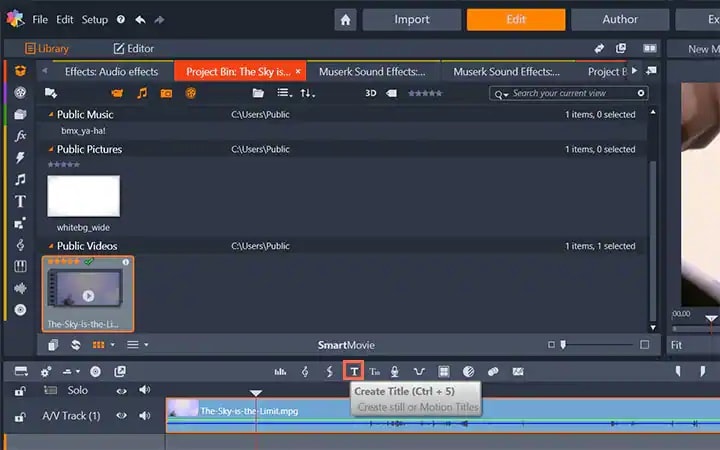
Step1Launch Studio. Import your video file, and you can import single frames such as images from a live video for stop motion titles. Once you have imported, go to the header bar above the Timeline. Click on Create Title option to open Title Editor to create title motion.
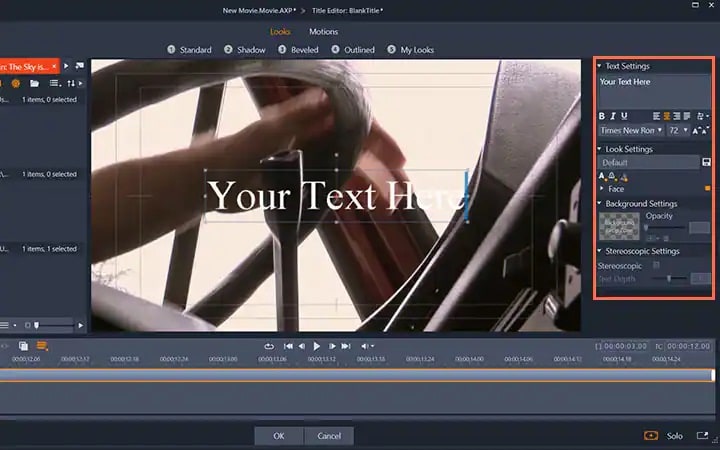
Step2Add your preferred text under Title Editor and adjust font, size, and style as you feel. Go to the right side to make changes to Look, Background, and Stereoscopic Settings to get the perfect text style from the wide range of choices available.
Step3Click on Motion option at the top to add motion to the text. Choose from the different motion title templates as per your preference.
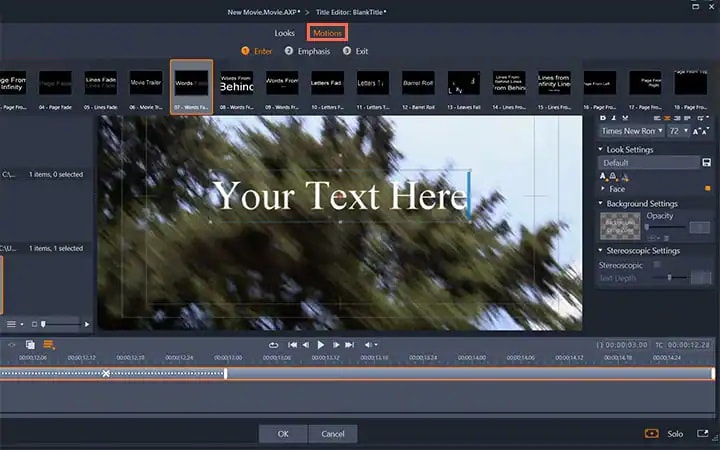
Step4You can adjust the duration of the motion effect from the right panel and click on Ok button.

Part 4. Add Motion Title with WeVideo
WeVideo is a popular online video editor that you can use to add title motion graphics Premiere Pro free. You can find many motion titles on WeVideo for free like you get in Premiere Pro and there are many exclusive motion text templates available. You need to create a free account with WeVideo to get started. You can create your video from scratch by selecting from the available video templates. You can even import your recorded video and add motion texts and animations as per your preference. Here are the steps to add motion title with WeVideo.
Step1Open your web browser and visit “wevideo.com”. Click on Try For Free button. Sign up for free and go to WeVideo video editor.
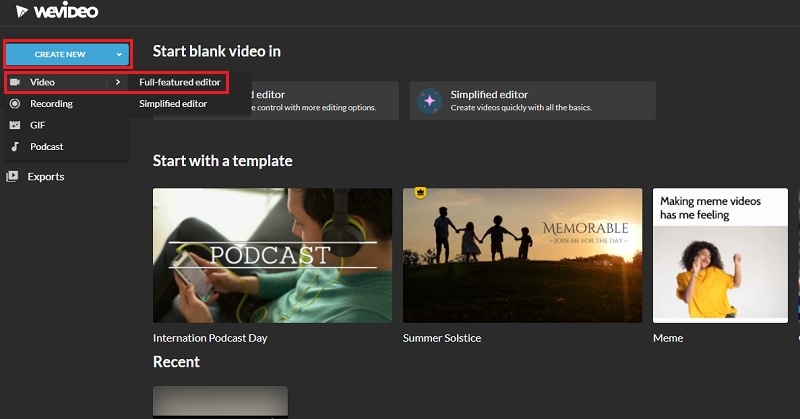
Step2Click on Create New button and select Video option. Click on Full-featured editor option.
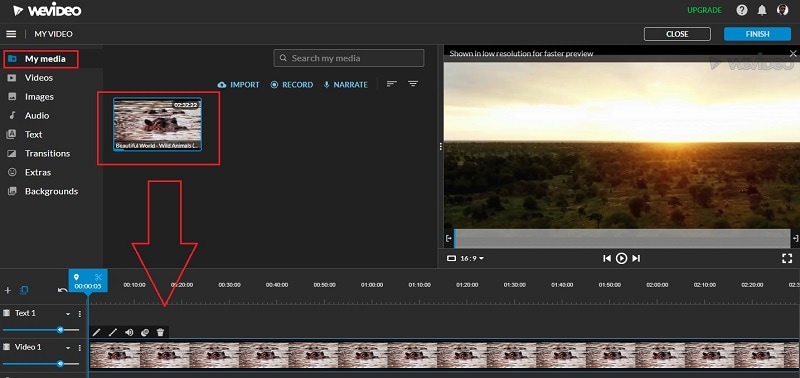
Step3Drag and drop your video file into My Media folder and bring it to Timeline.
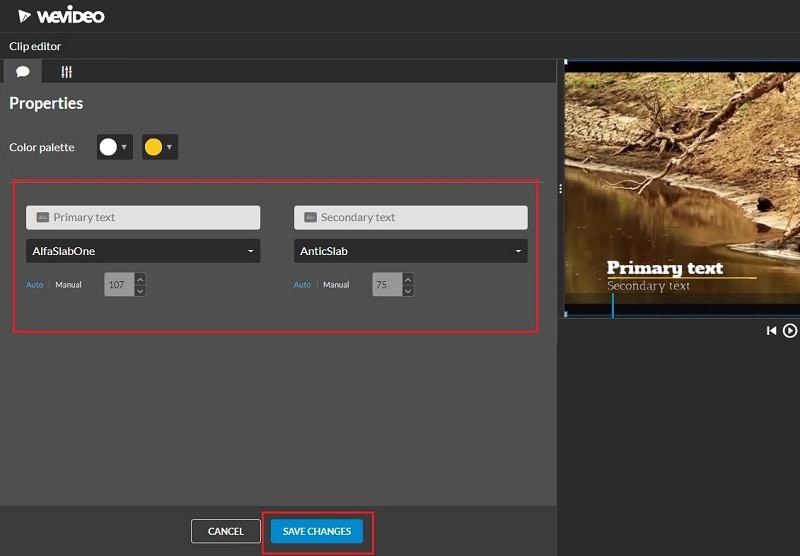
Step4Go to Text tab and you will see all the motion animated titles under Titles section. Click on them to check out their previews in Viewer. If you have selected anyone, drag and drop it into Timeline.
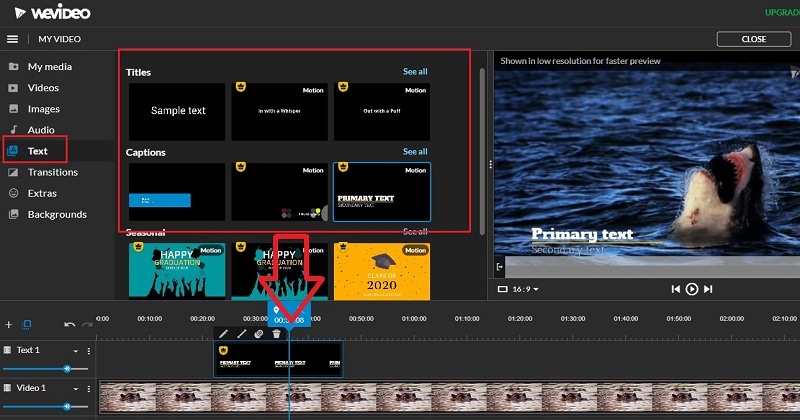
Step5Adjust the position where you want the title to appear on the video and stretch the duration as required. Double-click on the title to edit and customize it as per your preference. Finally, click on Save Changes button.
The Bottom Line
Motion titles are extremely important for any video because they bring in a variety to your video. They make the video eye-catching and help in getting the message across by grabbing the attention of the viewers. We have illustrated how to add motion titles Premiere Pro and Studio. You can also use WeVideo online video editor. We recommend Wondershare Filmora for its extensive collection of motion title templates to choose from and apply to your text.
Free Download For Win 7 or later(64-bit)
Free Download For macOS 10.14 or later
A Full Review of Leeming LUT Pro
Create High-Quality Video - Wondershare Filmora
An easy and powerful YouTube video editor
Numerous video and audio effects to choose from
Detailed tutorials are provided by the official channel
Color grading can be a tedious process, especially if you don’t have the technical skills required to achieve the desired result. That’s where a LUT can come in handy. So, what is a LUT?
LUT stands for “look up table.” Simply put, a LUT is a color preset that you can apply to your video footage to speed up the color grading process. While LUTs are commonly used to speed up the color grading process, they can also be used for other tasks, such as color transfer between software, monitor calibration, and more.
In this article, we’ll explore a particular LUT – Leeming LUT Pro™ and how you can use it in various video editors.

In this article
02 Supported Cameras of Leeming LUT Pro™
03 How to Import and Use Leeming LUT Pro™ in Different Video Editors
What is Leeming LUT Pro™?
Leeming LUT Pro™ is the world’s first unified, corrective Look Up Table (LUT) system for supported cameras. It’s designed to maximize dynamic range, fix skin tones, remove unwanted color casts and provide an accurate Rec709 starting point for further creative color grading.
The Pro LUTs are designed for perfect Rec709 colorimetry and have a linear luma curve, with an average measured dE(2000) of less than 1. As a result, they are visually indistinguishable from reality to the human eye.
Athena LUTs are a brighter version of Pro. They are designed around how the eye sees while retaining the same perfect colorimetry as Pro.
Supported Cameras of Leeming LUT Pro™
- Panasonic G Series: All G series cameras with Cine-D, V-LogL, and HLG for Rec709
- Panasonic S Series: All S series cameras with V-Log, V-Log BRAW, V-Log ProRes RAW, Cine-D, Cine-D2, and HLG for Rec709
- Fujifilm X Series: All X Series cameras with F-Log, Eterna Cinema, Pro Neg Std, and HLG for Rec709
- Canon R Series: All R series cameras with the Faithful Picture Style, C-Log, C-Log3, and CanonRAW
- Canon C Series: All C series cameras with BT.709, C-Log2, C-Log3, HDR-PQ for Rec709, and HLG for Rec709
- Blackmagic Pocket 4K/6K/6K Pro: All cameras with Gen 4 or Gen5 Film
- Blackmagic Pocket/Micro: Older cameras with Gen1 Film
- Nikon Z Series: All cameras with N-Log, Flat
- Sony A Series: All cameras with Picture profile menus, like the A7, with Cine2, S-Log2, S-Log3, HLG/3 for Rec709, and S-Cinetone
- JVC: GY-LS300 with J-Log1
- RunCam: 5 Orange Normal, Flat
- GoPro: 6,7 8, 9 & 10 ProTune, 4 & 5 ProTune, Session ProTune
- DJI: Mavic3, Phantom 4 Pro, Air 2S, Mavic 2 Pro, Mavic Air 2, Mini Series, Mavic Air, Mavic Pro, Pocket 2, Osmo Pocket, Osmo Action, X5 Series
How to Import and Use Leeming LUT Pro™ in Different Video Editors
Leeming LUT Pro™ is supported by various video editors, coloring software, and motion graphics programs, such as:
- Final Cut Pro X
- Avid Media Composer
- DaVinci Resolve
- Adobe Premiere Pro
- Adobe After Effects
- Magix Vegas
- Grass Valley Edius
- Lightworks
- Cyberlink PowerDirector
- LumaFusion
Next, we’ll explore how you can use Leeming LUT in some popular video editors.
1. How to Use Leeming LUT in FCPX
Follow these steps to use Leeming LUT in Final Cut Pro:
Step 1. Import Footage
Launch Final Cut Pro and import your footage. To import your footage, navigate to the top left corner and click on the import icon (the arrow pointing downwards).
In the window that opens, your camera or device name should appear in the left column under devices.
Click on your camera or device to display the media you want to import. Then select the media you want to import and click on the import selected button in the bottom right corner to import your footage.

Step 2. Highlight the Footage
Highlight all the footage by clicking and dragging your pointer over the footage or press Command + A to select all the footage.

Step 3. Open the Inspector
After highlighting all the footage, open the Inspector menu and click the little i icon. Then go down to the bottom of the Inspector and switch from Basic to General.
Step 4. Select the Camera LUT Option
Select Camera LUT from the options under General and click on the Add Custom Camera LUT option.
Step 5. Import Leeming LUTs into FCPX
Find the folder where your Leeming LUTs are stored and import them into Final Cut Pro by clicking on Open.
Step 6. Select the LUT
Once imported, go back to the Camera LUT option under General and click on it. Then scroll down the available options and select your Leeming LUT under the Custom Camera options.
Finally, click the profile you used to apply it to your footage.
2. How to Use Leeming LUT in PowerDirector
Follow these steps to use a LUT in PowerDirector:
Step 1. Launch PowerDirector
Open PowerDirector and select Full Mode.
Step 2. Import Media
Click the import button and then select Import Media Folder to import the video footage you want to apply the Leeming LUT to.
Step 3. Add Footage to Timeline
Drag and drop the imported video footage into your project’s timeline.
Step 4. Select the Fix/Enhance Option
Click on the video clip on the timeline and choose the Fix/Enhance option.
Step 5. Select the Color Presets & CLUTs Option
In the top left window that opens above the timeline, select the Color Presets & CLUTs option under Enhance.
Step 6. Apply the Leeming LUT to the Footage
Click on the import button in the panel to import the Leeming LUT file. Once imported, apply it to give your video a more vibrant look.
Part 5: Bonus! Use Filmora – Easy to Use Video Editor for Color LUTs
Besides Final Cut Pro and PowerDirector, Filmora is another excellent video editing software that you can use to apply LUTs to your video.
Designed for beginners and intermediate users, Filmora is an intuitive yet powerful video editing software.
For instance, you can apply 3D LUTs to your video using Filmora. Unlike 1D LUTs, which can only control one value setting, 3D LUTs can allow you to control various value settings. As a result, 3D LUTs can give you more control over specific color values in your video.
Here’s how you can apply LUTs using Filmora:
Step 1. Import the Footage
Launch Filmora and choose New Project. In the New Project window that opens, import the video you want to apply the LUT to by clicking on Import and selecting one of the drop-down options.
Step 2. Add the Video to the Timeline
Drag and drop the video into your project’s timeline.
Step 3. Open the Color Tab
Double click the video on the timeline to select it. Once it’s selected, go to the top left panel and click on the color tab.

Step 4. Apply a LUT to the Video
Under the color tab, navigate to the 3D LUT option and select one of the available options in the 3D LUT drop-down menu to apply a LUT.
Many LUTs are named after popular TV shows and series whose visual styles they mimic, such as Batman, House of Cards, Game of Thrones, Mission Impossible, Harry Potter, Star Wars, and more.
Once you apply a LUT, you can see your changes in the Preview Window. Besides using the preset LUTs, Filmora also allows you to use custom LUTs. Instead of choosing one of the presets, click on the Load New LUT option to import your custom LUT into Filmora.
Step 5. Make Fine Adjustments
Once you apply a LUT, Filmora can allow you to make further modifications to the video. Click on the Advanced button at the bottom of the color tab to view advanced color correction options.
In the new window that opens, you can adjust several things, such as color, light, HSL, and more. You can also choose from a variety of other available presets.

Step 6. Save the Changes
Once you’re satisfied with the changes you’ve applied, click on the OK button in the lower right corner to save the changes.
For Win 7 or later (64-bit)
For macOS 10.12 or later
Conclusion
LUTs are a fast way to color grade your footage after color correction. However, to ensure your LUTs work effectively, here are some important guidelines you should observe when using LUTs:
- Ensure your footage matches from shot to shot, especially if you’re applying LUTs to multiple clips.
- Ensure your exposure is correct before using LUTs. You can use a histogram to help you set the exposure.
- Ensure you apply LUTs to a video that’s been properly color corrected.
- Make small adjustments to things, such as brightness, saturation, contrast, exposure, color temperature, and tint for best results.
- Test out various LUTs before settling for one because shooting conditions can drastically affect how different LUTs look.
Ultimately, LUTs are an excellent way to make your video more cinematic. If you don’t have advanced video editing skills or prior experience working with LUTs, don’t worry. Filmora is a user-friendly video editing software that allows you to quickly apply LUTs with no video editing experience. Just download Filmora for free to get started.
Color grading can be a tedious process, especially if you don’t have the technical skills required to achieve the desired result. That’s where a LUT can come in handy. So, what is a LUT?
LUT stands for “look up table.” Simply put, a LUT is a color preset that you can apply to your video footage to speed up the color grading process. While LUTs are commonly used to speed up the color grading process, they can also be used for other tasks, such as color transfer between software, monitor calibration, and more.
In this article, we’ll explore a particular LUT – Leeming LUT Pro™ and how you can use it in various video editors.
In this article
02 Supported Cameras of Leeming LUT Pro™
03 How to Import and Use Leeming LUT Pro™ in Different Video Editors
What is Leeming LUT Pro™?
Leeming LUT Pro™ is the world’s first unified, corrective Look Up Table (LUT) system for supported cameras. It’s designed to maximize dynamic range, fix skin tones, remove unwanted color casts and provide an accurate Rec709 starting point for further creative color grading.
The Pro LUTs are designed for perfect Rec709 colorimetry and have a linear luma curve, with an average measured dE(2000) of less than 1. As a result, they are visually indistinguishable from reality to the human eye.
Athena LUTs are a brighter version of Pro. They are designed around how the eye sees while retaining the same perfect colorimetry as Pro.
Supported Cameras of Leeming LUT Pro™
- Panasonic G Series: All G series cameras with Cine-D, V-LogL, and HLG for Rec709
- Panasonic S Series: All S series cameras with V-Log, V-Log BRAW, V-Log ProRes RAW, Cine-D, Cine-D2, and HLG for Rec709
- Fujifilm X Series: All X Series cameras with F-Log, Eterna Cinema, Pro Neg Std, and HLG for Rec709
- Canon R Series: All R series cameras with the Faithful Picture Style, C-Log, C-Log3, and CanonRAW
- Canon C Series: All C series cameras with BT.709, C-Log2, C-Log3, HDR-PQ for Rec709, and HLG for Rec709
- Blackmagic Pocket 4K/6K/6K Pro: All cameras with Gen 4 or Gen5 Film
- Blackmagic Pocket/Micro: Older cameras with Gen1 Film
- Nikon Z Series: All cameras with N-Log, Flat
- Sony A Series: All cameras with Picture profile menus, like the A7, with Cine2, S-Log2, S-Log3, HLG/3 for Rec709, and S-Cinetone
- JVC: GY-LS300 with J-Log1
- RunCam: 5 Orange Normal, Flat
- GoPro: 6,7 8, 9 & 10 ProTune, 4 & 5 ProTune, Session ProTune
- DJI: Mavic3, Phantom 4 Pro, Air 2S, Mavic 2 Pro, Mavic Air 2, Mini Series, Mavic Air, Mavic Pro, Pocket 2, Osmo Pocket, Osmo Action, X5 Series
How to Import and Use Leeming LUT Pro™ in Different Video Editors
Leeming LUT Pro™ is supported by various video editors, coloring software, and motion graphics programs, such as:
- Final Cut Pro X
- Avid Media Composer
- DaVinci Resolve
- Adobe Premiere Pro
- Adobe After Effects
- Magix Vegas
- Grass Valley Edius
- Lightworks
- Cyberlink PowerDirector
- LumaFusion
Next, we’ll explore how you can use Leeming LUT in some popular video editors.
1. How to Use Leeming LUT in FCPX
Follow these steps to use Leeming LUT in Final Cut Pro:
Step 1. Import Footage
Launch Final Cut Pro and import your footage. To import your footage, navigate to the top left corner and click on the import icon (the arrow pointing downwards).
In the window that opens, your camera or device name should appear in the left column under devices.
Click on your camera or device to display the media you want to import. Then select the media you want to import and click on the import selected button in the bottom right corner to import your footage.
Step 2. Highlight the Footage
Highlight all the footage by clicking and dragging your pointer over the footage or press Command + A to select all the footage.
Step 3. Open the Inspector
After highlighting all the footage, open the Inspector menu and click the little i icon. Then go down to the bottom of the Inspector and switch from Basic to General.
Step 4. Select the Camera LUT Option
Select Camera LUT from the options under General and click on the Add Custom Camera LUT option.
Step 5. Import Leeming LUTs into FCPX
Find the folder where your Leeming LUTs are stored and import them into Final Cut Pro by clicking on Open.
Step 6. Select the LUT
Once imported, go back to the Camera LUT option under General and click on it. Then scroll down the available options and select your Leeming LUT under the Custom Camera options.
Finally, click the profile you used to apply it to your footage.
2. How to Use Leeming LUT in PowerDirector
Follow these steps to use a LUT in PowerDirector:
Step 1. Launch PowerDirector
Open PowerDirector and select Full Mode.
Step 2. Import Media
Click the import button and then select Import Media Folder to import the video footage you want to apply the Leeming LUT to.
Step 3. Add Footage to Timeline
Drag and drop the imported video footage into your project’s timeline.
Step 4. Select the Fix/Enhance Option
Click on the video clip on the timeline and choose the Fix/Enhance option.
Step 5. Select the Color Presets & CLUTs Option
In the top left window that opens above the timeline, select the Color Presets & CLUTs option under Enhance.
Step 6. Apply the Leeming LUT to the Footage
Click on the import button in the panel to import the Leeming LUT file. Once imported, apply it to give your video a more vibrant look.
Part 5: Bonus! Use Filmora – Easy to Use Video Editor for Color LUTs
Besides Final Cut Pro and PowerDirector, Filmora is another excellent video editing software that you can use to apply LUTs to your video.
Designed for beginners and intermediate users, Filmora is an intuitive yet powerful video editing software.
For instance, you can apply 3D LUTs to your video using Filmora. Unlike 1D LUTs, which can only control one value setting, 3D LUTs can allow you to control various value settings. As a result, 3D LUTs can give you more control over specific color values in your video.
Here’s how you can apply LUTs using Filmora:
Step 1. Import the Footage
Launch Filmora and choose New Project. In the New Project window that opens, import the video you want to apply the LUT to by clicking on Import and selecting one of the drop-down options.
Step 2. Add the Video to the Timeline
Drag and drop the video into your project’s timeline.
Step 3. Open the Color Tab
Double click the video on the timeline to select it. Once it’s selected, go to the top left panel and click on the color tab.
Step 4. Apply a LUT to the Video
Under the color tab, navigate to the 3D LUT option and select one of the available options in the 3D LUT drop-down menu to apply a LUT.
Many LUTs are named after popular TV shows and series whose visual styles they mimic, such as Batman, House of Cards, Game of Thrones, Mission Impossible, Harry Potter, Star Wars, and more.
Once you apply a LUT, you can see your changes in the Preview Window. Besides using the preset LUTs, Filmora also allows you to use custom LUTs. Instead of choosing one of the presets, click on the Load New LUT option to import your custom LUT into Filmora.
Step 5. Make Fine Adjustments
Once you apply a LUT, Filmora can allow you to make further modifications to the video. Click on the Advanced button at the bottom of the color tab to view advanced color correction options.
In the new window that opens, you can adjust several things, such as color, light, HSL, and more. You can also choose from a variety of other available presets.
Step 6. Save the Changes
Once you’re satisfied with the changes you’ve applied, click on the OK button in the lower right corner to save the changes.
For Win 7 or later (64-bit)
For macOS 10.12 or later
Conclusion
LUTs are a fast way to color grade your footage after color correction. However, to ensure your LUTs work effectively, here are some important guidelines you should observe when using LUTs:
- Ensure your footage matches from shot to shot, especially if you’re applying LUTs to multiple clips.
- Ensure your exposure is correct before using LUTs. You can use a histogram to help you set the exposure.
- Ensure you apply LUTs to a video that’s been properly color corrected.
- Make small adjustments to things, such as brightness, saturation, contrast, exposure, color temperature, and tint for best results.
- Test out various LUTs before settling for one because shooting conditions can drastically affect how different LUTs look.
Ultimately, LUTs are an excellent way to make your video more cinematic. If you don’t have advanced video editing skills or prior experience working with LUTs, don’t worry. Filmora is a user-friendly video editing software that allows you to quickly apply LUTs with no video editing experience. Just download Filmora for free to get started.
How To Cut Videos For Instagram On Mac
More video content is being created than before. Unfortunately, some social media platforms like Instagram require your video to be short. Therefore, many people wonder how to cut a video to make it easier to share. If you’re wondering how to cut video for Instagram on Mac, you’re in luck. This article shares the best tools to use for this purpose.
What You Should Know About Instagram Video

Instagram is a social media site owned by Facebook. However, its main focus is on sharing videos and photos. It also allows users to put up stories that only last 24 hours. Stories allow you to highlight some crucial aspects of your life. These stories could be made up of photos, texts, and videos. However, each story slide can only take up to 15 seconds of video.
Most times, your video would be longer than that. If you upload a video longer than the accepted 15 seconds, Instagram automatically trims it to 15 seconds. However, the resulting video might not be the parts you want to show to your audience. Maybe there’s a particular section you would like your followers to see. That’s why video cutters enter the picture.
A good video splitter to cut video for Instagram on Mac is necessary when you’re creating video content for your Instagram page. In addition, the video editing tool you choose must maintain the quality and the safety of the file. Therefore, we’ve selected the best tools to cut videos for Instagram on Mac. Next, we’ll explore these tools, highlighting their best features, cons, and how you can use them. On that note, let’s dive in.
Best Instagram Video Cutter for Mac - Filmroa Video Editor

Supported System: Windows and Mac
Splitting your Instagram video before sharing them makes it easier to highlight your best parts. If you’re wondering what the best tool to do that is, you’re in luck. Filmora Video Editor is the best video cutter for Mac for many reasons. Apart from cutting videos, it offers several editing tools to enhance your video. It provides video processing features like cropping, splitting, rotating, trimming, speed increase, and color correction. However, it also offers features for professional editing of videos.
Filmora supports all video formats, even the high-definition video formats for your editing. In addition, Wondershare Filmora offers you an intuitive and user-friendly interface compared to other video cutters out there. This makes it a fantastic choice for experts and novices alike. The steps to split your video and use other in-built features are pretty straightforward, and if you need tutorials, Wondershare Filmora makes them available.
For Win 7 or later (64-bit)
For macOS 10.14 or later
Steps to Cut Video for Instagram on Mac
Filmora makes it relatively easy to use its extensive features. You don’t need previous editing experience to use Wondershare Filmora. If you’re wondering how to cut video for Instagram on Mac, below are the steps to follow.
Step 1: Download Wondershare Filmore
First, you have to download the Filmora app on your Mac. You can get it on the App Store or the official website. After installation, launch Filmora to get started.
Step 2: Import Video

Once you install the app, you can import the video you would like to cut for Instagram on the app. Click ‘import media files here’ to choose a video file from your PC storage. Alternatively, you can drag and drop the Instagram video on the software’s timeline.
Step 3: Cut the Video

You can cut your video from any end you prefer. First, move the cursor where you would like to cut the video until the clip changes to the ‘I’ pointer. Then, you can move the cursor within the video length to cut to your preference.
Step 4: Split Instagram Video

You can also split the video into specific portions by dragging the slider to each endpoint and picking the scissors. Additionally, you can carry out more editing like adding transitions, sound effects, and more to beautify your video.
Step 5: Save Instagram Video

Now that the video is to your liking, hit the ‘export’ button and choose the output format you would prefer. Next, click ‘export’ to confirm your choice.
More Free Instagram Video Cutter for Mac to Cut Video For Instagram
Although Wondershare Filmore is the best option when you want to cut video for Instagram on Mac, other options are available. In this section, we’ll explore the free Instagram video cutters for Mac that you can use.
Lightworks

Supported System: Windows and Mac
Lightworks is one of the best video splitting tools you can use if you’re learning how to cut video for Instagram on Mac. It is best for both novices and professionals and allows you seamlessly cut the video to your desired part. With Lightworks software, you can easily get results.
Apart from cutting Instagram videos on Mac, there are several more editing features you can utilize to take your Insta video to the next level. It also allows you to combine several cut clips. Size isn’t an issue with Lightworks as it effortlessly handles large file sizes. It offers users all the features of a high-quality video processing video editor. The best part is that it allows you directly export your cut video to Instagram or any other social media platform you would prefer.
Pros
- It supports different audio, video, and image format
- It allows users to share projects to encourage collaborative workflow
- Easy to use by beginners and professionals
- Allows exporting of video to Instagram directly
Cons
- It doesn’t support 3D video editing
- You have to register before using the application
- No video stabilization feature
Step to Cut Video for Instagram on Mac Using Lightworks
The steps to using this software are pretty easy to follow. Below, we’ve outlined the steps to make it easier to use.
- Step 1: Download the Lightworks software on your Mac from the official software. Once you do this, install the app and launch the software to begin the video-cutting process.
- Step 2: Import the video into the software. You can do this by clicking ‘import video’ or simply dragging the clip into the timeline.

- Step 3: After uploading the clip on your timeline, you can start cutting the video to your preference. Simply slide the cursor to the point you want to cut from and press the ‘c’ key on your keyboard.

- Step 4: After cutting the part you want, erase the rest by using the deleting button.

- Step 5: Click the ‘all’ option and then choose ‘export’ from the menu that appears to save your newly-cut video. You can also export directly to Instagram to save space and time.

Avidemux

Supported System: Windows and Mac
Another free video cutter that you can use when learning how to cut video for Instagram on Mac is Avidemux. This app is simple and offers simple filtering, cutting, and encoding features. As a result, it makes it relatively easy for beginners to split, cut, and trim videos. In addition, Avidemux offers users an intuitive user interface that makes it easy to know the next step to take.
Avidemux supports the most common formats like AVI, MP4, and more. It also offers different filters to spice up your Instagram videos. You can resize your video and also color correct your video. It is not an advanced tool for professionals because it doesn’t offer advanced tools. However, if you simply want to cut video for Instagram for Mac, this free software helps you achieve that.
Pros
- It supports common video formats
- It’s easy to cut videos for Instagram using keyboard shortcuts
- Offers various filters for enhancing video
- It is free to use
- Easy for beginners to use
Cons
- It crashes sometimes
- There are limited features in the editing software
Steps to Cut Video for Instagram on Mac Using Avidemux
Avidemux has a user-friendly interface that makes it easy to cut and save your Instagram video within minutes. Below are the simple steps to cut Instagram videos you should follow.
- Step 1: Download Avidemux on your Mac and install it. After installation, launch Avidemus to begin cutting your Instagram video.
- Step 2: Next, load the file you would like to work with

- Step 3: Next, navigate to the portion of the video you would like to cut and check its ‘frame type.’ At the beginning, where you would like to cut the video from, click the ‘A’ button. It automatically records it as the start of the clip.

- Start 4: Move to where you would like the clip to end and click the ‘B’ button. This will automatically cut the Instagram video to your preference.

- Step 5: Save the video by going to file and choosing ‘save’ from the available options. Next, click ‘save video’ and name the file.

You’re now ready to use your new video on Instagram or any other video-sharing platform you would prefer.
iMovie

Supported System: Mac
Apple first released this software in 1999, but it has continually updated it to offer more features to users. IMovie is available on all iOS devices, including your MacBook. Due to the frequent upgrades, this software makes editing relatively easy for beginners. The user interface is user-friendly, and it is entirely free to use. It is also an excellent choice for cutting your Instagram videos.
One of the reasons Mac users love this app is that there’s no need for installation and downloading. There are different effects available to enhance your video. You can also use ready-made templates on the software that offers popular music and stunning graphics. In addition, you can also add transitions, change speed, and many more with this software.
Pros
- It puts your content in different media libraries to help you stay organized
- It offers access to various video and audio filters
- It provides a stability feature that’s not available with many Instagram video cutting tools
- It allows you to share directly on Instagram
- It is easy for beginners to use
Cons
- It lacks some useful controls
- It doesn’t allow tagging when you share directly to Instagram
- It only supports two video tracks
Steps to Cut Video for Instagram on Mac Using IMovie
If you want to cut your video for Instagram using IMovie, below are the steps you need to follow.
- Step 1: Open iMovie on your Macbook to get started
- Step 2: Now, create a new project and name the project with a name you prefer

- Step 3: Import your video to IMovie by granting the software access to your computer’s video library.

- Step 4: Start cutting out any part you don’t want; you can also trim the video in-between if there are parts within the clip you don’t want.

- Step 5: You can add filters, transitions, or any other effect you would like to enhance your video.

- Step 6: Finally, you can save your file on your Mac or upload it directly to Instagram.
More Paid Instagram Video Cutter for Mac to Cut Video For Instagram
Now that you know the top three free video cutters for Instagram on Mac, this section explores the best paid Instagram video cutter you can use to cut videos for Instagram on Mac. Without further ado, let’s take a look.
Movavi Video Editor

Supported System: Windows and Mac
This video editor is relatively easy to use and powerful. It offers many features that go beyond cutting video for Instagram. You can also utilize this video editing software to enhance your video and make it look professional. Movavi offers transitions, filters, titles, and many more features for your videos. It is easy for both novices and professionals to use this platform.
Movavi Video Editor supports all types of video formats for easy editing. It also allows you to set your video to full HD and 4K resolution so that the images are clean and clear. You can also convert to a new format without compromising the quality of your video. In addition, Movavi offers you a trial period you can use to check out the software to ensure it is the ideal option for you. With Movavi, you can also share directly to Instagram if you’re looking to save space on Mac.
Ros
- It allows you to cut videos and export them quickly
- It offers several other features to enhance your videos
- It supports all video formats
- It enables you to convert video to the new format without compromising the quality
- It is ideal for beginners and experts
Cons
- Subscription fees are pretty high
- Some of the settings can be quite complex for beginners
Steps to Cut Video for Instagram on Mac Using Movavi Video Editor
If you would like to try Movavi video editor but don’t know how to go about it, the steps below make it relatively easy.
- Firstly, Install Movavi Video Editor on your Mac and install the app following the instructions. After installation, launch the app to begin.
- Next, choose the video file you would like to cut by clicking ‘add files’ and selecting your media library.

- It will appear on the ‘media bin,’ and you’ll have to drag it to the timeline.
- Now, you can start cutting the video for Instagram. Click on the video and move the market to the point in the video you would like to cut. Next, click the split button.

- You can easily remove the unwanted segments by clicking delete after selecting it.

- After cutting your video, you can choose the output format you prefer and then click ‘export.’ Choose the folder on your Mac you would like to save to and click ‘start’ to begin the saving process.

Final Cut Pro

Supported System: Mac
Next on our list, we have Final Cut Pro, an excellent video cutter for Mac. It is software developed by Apple for professional video editing. This app is primarily for MacOS users, and it offers several cutting-edge editing features to ensure a smooth and high-resolution video. It supports different video formats and allows you to enhance audio, add effects, trim, and carry out 360-degree video editing if you want to improve your video.
This tool doesn’t offer a monthly subscription. Instead, users can simply make a one-time payment and have lifetime access to this editing tool. It is not an excellent choice for beginners as its advanced features and interface can be pretty complicated. However, if you want to give this video cutter ago, we’ll provide the steps to cut the video for Instagram below.
Pros
- It supports 360-video editing
- Performance is relatively fast and ensures an easy video-cutting process
- It supports different video formats
- It offers various editing tools to enhance your video for Instagram
Cons
- It isn’t ideal for beginners
- One-time payment is relatively high
- The interface can be quite confusing
Steps to Cut Video for Instagram on Mac Using Final Cut Pro
If you want to cut video for Instagram in Final Cut Pro, the blade tool is the best option. However, it can be pretty confusing to use Final Cut Pro if you’ve never used the software before. Follow the steps below to cut Instagram video using Final Cut Pro.
- First, you have to download the app; you can download it on the App Store or the official website.
- Next, install the video cutter on your Mac and launch it to begin cutting Instagram videos.
- Import the video you would like to cut by visiting the ‘file’ type and choosing ‘import.’ Next, choose media and select the video from the media library. Alternatively, you can simply press Command + I on your Mac keyboard to go straight to your PC storage.

- Next, move the imported clip to the timeline to begin the cutting process.
- Select the Tools menu and choose ‘Blade’ from the dropdown menu. You can also press the B key on your keyword to select this tool.

- Now, you’re ready to start cutting the video file. Move the selected blade tool to the frame you would like to cut from the clip and click.

- Next, move to where you would like the cut to the end and click again.

- That’s all you have to do. Once you cut the clip and you’re satisfied with your result, simply save your clip by hitting the ‘export’ button and choosing the location you prefer and your preferred output format.
Adobe Premiere Rush

Supported System: Windows and Mac
Premier Rush was designed for social media videos and to help vloggers make the most of their videos. Although it started as a mobile-only app, it now has a desktop option for Mac and Windows. The idea behind Rush is an editing tool that helps you edit your video and share it to your preferred social media platform fast. This editing tool offers a simple user interface, and the workflow is seamless to ensure speedy performance.
As long as you want a video cutter created for cutting video for Instagram on Mac, this software delivers. It offers different editing features to enhance your video. You can link your Instagram account and upload directly to the platform. It also allows you to save all edited video files on Cloud to save space on your MacBook.
Pros
- It allows you to transfer videos from Adobe Premiere Pro directly for editing
- Allows you to link your social media accounts for direct uploads
- It offers transitions, filters, and more editing tools to enhance your Instagram video
- You can save directly to the Cloud to save space and ensure easy access
- It is an excellent option for beginners
Cons
- You can’t change the output format
- It doesn’t offer ample audio tools
Steps to Cut Video for Instagram on Mac Using Adobe Premiere Rush
This section will cover all the crucial steps to get the most from Adobe Premier Rush. Keep reading to learn how to cut video for Instagram on Mac using Adobe Rush.
- Firstly, download and install the app on your Mac. Launch the software after installation to start editing
- Now, create a new project on the app and import the video you would like to cut for Instagram.

- Afterward, select the video you would like to cut, click ‘create,’ and you’re ready to begin.

- When the video appears on the timeline, select the video and click the ‘scissors’ icon on the left corner. This tool helps to cut your video to your preference.
- To use the scissors tool, simply go to the beginning of the video and drag the handle to where you would like the video to start. You can also do the same to the end by dragging the handle at the end to where you would prefer.

- After cutting your video, you can also utilize other editing features to enhance your video.

- Now, you’re ready to export your video. Simply click ‘share’ located at the top of the editing software and choose from the options whether you want to share directly to Instagram or save on Mac.
Which Should I Choose, Free or Paid Instagram Video Cutter?
Now that you know the best free and paid video cutters to cut Instagram videos, you’re probably wondering what the ideal option is. With so many options, you must make the right decision for your project. You need to consider several factors before you decide if a paid or free Instagram video cutter is the best option for you.
- Budget
When deciding between a paid or free Instagram cutter, one crucial factor is how much you’re willing to pay. If your budget is really low and doesn’t fit into any paid options, you can simply go for a free option. However, if the price isn’t an issue for you, going for a paid option is best because it offers you more editing features to enhance your video.
- Ease of Use
You should also consider how easy it is to use the video cutter. Some paid options are for professionals and can be challenging to understand. However, most free options offer poor performance times. The last thing Instagram users want is to devote hours to figure out where each tool is on the software. However, there are paid options with an intuitive interface that makes it easy to cut your Instagram video.
- Customer Support
You also need to consider whether customer support will be available when you need it. Some free options have no customer support to turn to. Instead, consider a video cutter that will offer helpful and responsive customer support when picking.
- Video Format Support
Before choosing a paid or free option, you need to consider if it would support the video format you prefer. You might be using different video formats, and you want to ensure you’re not limited to select options. You also want a video cutter that offers various output formats.
FAQs about Cut Video For Instagram
- How do you post long videos on Instagram without splitting? Instagram allows users to post long videos on the app, as long as 60 seconds. Alternatively, you can use the IGTV to upload long clips on Instagram without splitting.
- What is multi-capture on Instagram: This tool allows you to create and share multiple photos on your stories.
- How do I split the video into two parts for Instagram on Mac? The paid and free video cutters shared above will help you split a video into two parts for Instagram on Mac. Simply pick the option that fits your preference.
- Why can’t I split a video on iMovie? Maybe your iMovie software is experiencing a glitch; you can simply restart the software. Alternately, move the clip to the center row if you find the option greyed out. Moving the clip should help fix the issue.
Conclusion
Various tools are available to help you cut a video for Instagram on Mac. Therefore, just refer to the paid and free tools listed above whenever you need a video cutter. These video cutters are highly recommended and ensure the quality isn’t affected while cutting the video. When deciding which is the best option for you, free or paid, the factors listed will help you decide. Suppose you’re looking specifically for a video cutter that offers you all the features you need to enhance your video while providing an intuitive user interface. In that case, Wondershare Filmora is the ideal choice.
Instagram is a social media site owned by Facebook. However, its main focus is on sharing videos and photos. It also allows users to put up stories that only last 24 hours. Stories allow you to highlight some crucial aspects of your life. These stories could be made up of photos, texts, and videos. However, each story slide can only take up to 15 seconds of video.
Most times, your video would be longer than that. If you upload a video longer than the accepted 15 seconds, Instagram automatically trims it to 15 seconds. However, the resulting video might not be the parts you want to show to your audience. Maybe there’s a particular section you would like your followers to see. That’s why video cutters enter the picture.
A good video splitter to cut video for Instagram on Mac is necessary when you’re creating video content for your Instagram page. In addition, the video editing tool you choose must maintain the quality and the safety of the file. Therefore, we’ve selected the best tools to cut videos for Instagram on Mac. Next, we’ll explore these tools, highlighting their best features, cons, and how you can use them. On that note, let’s dive in.
Best Instagram Video Cutter for Mac - Filmroa Video Editor
Supported System: Windows and Mac
Splitting your Instagram video before sharing them makes it easier to highlight your best parts. If you’re wondering what the best tool to do that is, you’re in luck. Filmora Video Editor is the best video cutter for Mac for many reasons. Apart from cutting videos, it offers several editing tools to enhance your video. It provides video processing features like cropping, splitting, rotating, trimming, speed increase, and color correction. However, it also offers features for professional editing of videos.
Filmora supports all video formats, even the high-definition video formats for your editing. In addition, Wondershare Filmora offers you an intuitive and user-friendly interface compared to other video cutters out there. This makes it a fantastic choice for experts and novices alike. The steps to split your video and use other in-built features are pretty straightforward, and if you need tutorials, Wondershare Filmora makes them available.
For Win 7 or later (64-bit)
For macOS 10.14 or later
Steps to Cut Video for Instagram on Mac
Filmora makes it relatively easy to use its extensive features. You don’t need previous editing experience to use Wondershare Filmora. If you’re wondering how to cut video for Instagram on Mac, below are the steps to follow.
Step 1: Download Wondershare Filmore
First, you have to download the Filmora app on your Mac. You can get it on the App Store or the official website. After installation, launch Filmora to get started.
Step 2: Import Video
Once you install the app, you can import the video you would like to cut for Instagram on the app. Click ‘import media files here’ to choose a video file from your PC storage. Alternatively, you can drag and drop the Instagram video on the software’s timeline.
Step 3: Cut the Video
You can cut your video from any end you prefer. First, move the cursor where you would like to cut the video until the clip changes to the ‘I’ pointer. Then, you can move the cursor within the video length to cut to your preference.
Step 4: Split Instagram Video
You can also split the video into specific portions by dragging the slider to each endpoint and picking the scissors. Additionally, you can carry out more editing like adding transitions, sound effects, and more to beautify your video.
Step 5: Save Instagram Video
Now that the video is to your liking, hit the ‘export’ button and choose the output format you would prefer. Next, click ‘export’ to confirm your choice.
More Free Instagram Video Cutter for Mac to Cut Video For Instagram
Although Wondershare Filmore is the best option when you want to cut video for Instagram on Mac, other options are available. In this section, we’ll explore the free Instagram video cutters for Mac that you can use.
Lightworks
Supported System: Windows and Mac
Lightworks is one of the best video splitting tools you can use if you’re learning how to cut video for Instagram on Mac. It is best for both novices and professionals and allows you seamlessly cut the video to your desired part. With Lightworks software, you can easily get results.
Apart from cutting Instagram videos on Mac, there are several more editing features you can utilize to take your Insta video to the next level. It also allows you to combine several cut clips. Size isn’t an issue with Lightworks as it effortlessly handles large file sizes. It offers users all the features of a high-quality video processing video editor. The best part is that it allows you directly export your cut video to Instagram or any other social media platform you would prefer.
Pros
- It supports different audio, video, and image format
- It allows users to share projects to encourage collaborative workflow
- Easy to use by beginners and professionals
- Allows exporting of video to Instagram directly
Cons
- It doesn’t support 3D video editing
- You have to register before using the application
- No video stabilization feature
Step to Cut Video for Instagram on Mac Using Lightworks
The steps to using this software are pretty easy to follow. Below, we’ve outlined the steps to make it easier to use.
- Step 1: Download the Lightworks software on your Mac from the official software. Once you do this, install the app and launch the software to begin the video-cutting process.
- Step 2: Import the video into the software. You can do this by clicking ‘import video’ or simply dragging the clip into the timeline.
- Step 3: After uploading the clip on your timeline, you can start cutting the video to your preference. Simply slide the cursor to the point you want to cut from and press the ‘c’ key on your keyboard.
- Step 4: After cutting the part you want, erase the rest by using the deleting button.
- Step 5: Click the ‘all’ option and then choose ‘export’ from the menu that appears to save your newly-cut video. You can also export directly to Instagram to save space and time.
Avidemux
Supported System: Windows and Mac
Another free video cutter that you can use when learning how to cut video for Instagram on Mac is Avidemux. This app is simple and offers simple filtering, cutting, and encoding features. As a result, it makes it relatively easy for beginners to split, cut, and trim videos. In addition, Avidemux offers users an intuitive user interface that makes it easy to know the next step to take.
Avidemux supports the most common formats like AVI, MP4, and more. It also offers different filters to spice up your Instagram videos. You can resize your video and also color correct your video. It is not an advanced tool for professionals because it doesn’t offer advanced tools. However, if you simply want to cut video for Instagram for Mac, this free software helps you achieve that.
Pros
- It supports common video formats
- It’s easy to cut videos for Instagram using keyboard shortcuts
- Offers various filters for enhancing video
- It is free to use
- Easy for beginners to use
Cons
- It crashes sometimes
- There are limited features in the editing software
Steps to Cut Video for Instagram on Mac Using Avidemux
Avidemux has a user-friendly interface that makes it easy to cut and save your Instagram video within minutes. Below are the simple steps to cut Instagram videos you should follow.
- Step 1: Download Avidemux on your Mac and install it. After installation, launch Avidemus to begin cutting your Instagram video.
- Step 2: Next, load the file you would like to work with
- Step 3: Next, navigate to the portion of the video you would like to cut and check its ‘frame type.’ At the beginning, where you would like to cut the video from, click the ‘A’ button. It automatically records it as the start of the clip.
- Start 4: Move to where you would like the clip to end and click the ‘B’ button. This will automatically cut the Instagram video to your preference.
- Step 5: Save the video by going to file and choosing ‘save’ from the available options. Next, click ‘save video’ and name the file.
You’re now ready to use your new video on Instagram or any other video-sharing platform you would prefer.
iMovie
Supported System: Mac
Apple first released this software in 1999, but it has continually updated it to offer more features to users. IMovie is available on all iOS devices, including your MacBook. Due to the frequent upgrades, this software makes editing relatively easy for beginners. The user interface is user-friendly, and it is entirely free to use. It is also an excellent choice for cutting your Instagram videos.
One of the reasons Mac users love this app is that there’s no need for installation and downloading. There are different effects available to enhance your video. You can also use ready-made templates on the software that offers popular music and stunning graphics. In addition, you can also add transitions, change speed, and many more with this software.
Pros
- It puts your content in different media libraries to help you stay organized
- It offers access to various video and audio filters
- It provides a stability feature that’s not available with many Instagram video cutting tools
- It allows you to share directly on Instagram
- It is easy for beginners to use
Cons
- It lacks some useful controls
- It doesn’t allow tagging when you share directly to Instagram
- It only supports two video tracks
Steps to Cut Video for Instagram on Mac Using IMovie
If you want to cut your video for Instagram using IMovie, below are the steps you need to follow.
- Step 1: Open iMovie on your Macbook to get started
- Step 2: Now, create a new project and name the project with a name you prefer
- Step 3: Import your video to IMovie by granting the software access to your computer’s video library.
- Step 4: Start cutting out any part you don’t want; you can also trim the video in-between if there are parts within the clip you don’t want.
- Step 5: You can add filters, transitions, or any other effect you would like to enhance your video.
- Step 6: Finally, you can save your file on your Mac or upload it directly to Instagram.
More Paid Instagram Video Cutter for Mac to Cut Video For Instagram
Now that you know the top three free video cutters for Instagram on Mac, this section explores the best paid Instagram video cutter you can use to cut videos for Instagram on Mac. Without further ado, let’s take a look.
Movavi Video Editor
Supported System: Windows and Mac
This video editor is relatively easy to use and powerful. It offers many features that go beyond cutting video for Instagram. You can also utilize this video editing software to enhance your video and make it look professional. Movavi offers transitions, filters, titles, and many more features for your videos. It is easy for both novices and professionals to use this platform.
Movavi Video Editor supports all types of video formats for easy editing. It also allows you to set your video to full HD and 4K resolution so that the images are clean and clear. You can also convert to a new format without compromising the quality of your video. In addition, Movavi offers you a trial period you can use to check out the software to ensure it is the ideal option for you. With Movavi, you can also share directly to Instagram if you’re looking to save space on Mac.
Ros
- It allows you to cut videos and export them quickly
- It offers several other features to enhance your videos
- It supports all video formats
- It enables you to convert video to the new format without compromising the quality
- It is ideal for beginners and experts
Cons
- Subscription fees are pretty high
- Some of the settings can be quite complex for beginners
Steps to Cut Video for Instagram on Mac Using Movavi Video Editor
If you would like to try Movavi video editor but don’t know how to go about it, the steps below make it relatively easy.
- Firstly, Install Movavi Video Editor on your Mac and install the app following the instructions. After installation, launch the app to begin.
- Next, choose the video file you would like to cut by clicking ‘add files’ and selecting your media library.
- It will appear on the ‘media bin,’ and you’ll have to drag it to the timeline.
- Now, you can start cutting the video for Instagram. Click on the video and move the market to the point in the video you would like to cut. Next, click the split button.
- You can easily remove the unwanted segments by clicking delete after selecting it.
- After cutting your video, you can choose the output format you prefer and then click ‘export.’ Choose the folder on your Mac you would like to save to and click ‘start’ to begin the saving process.
Final Cut Pro
Supported System: Mac
Next on our list, we have Final Cut Pro, an excellent video cutter for Mac. It is software developed by Apple for professional video editing. This app is primarily for MacOS users, and it offers several cutting-edge editing features to ensure a smooth and high-resolution video. It supports different video formats and allows you to enhance audio, add effects, trim, and carry out 360-degree video editing if you want to improve your video.
This tool doesn’t offer a monthly subscription. Instead, users can simply make a one-time payment and have lifetime access to this editing tool. It is not an excellent choice for beginners as its advanced features and interface can be pretty complicated. However, if you want to give this video cutter ago, we’ll provide the steps to cut the video for Instagram below.
Pros
- It supports 360-video editing
- Performance is relatively fast and ensures an easy video-cutting process
- It supports different video formats
- It offers various editing tools to enhance your video for Instagram
Cons
- It isn’t ideal for beginners
- One-time payment is relatively high
- The interface can be quite confusing
Steps to Cut Video for Instagram on Mac Using Final Cut Pro
If you want to cut video for Instagram in Final Cut Pro, the blade tool is the best option. However, it can be pretty confusing to use Final Cut Pro if you’ve never used the software before. Follow the steps below to cut Instagram video using Final Cut Pro.
- First, you have to download the app; you can download it on the App Store or the official website.
- Next, install the video cutter on your Mac and launch it to begin cutting Instagram videos.
- Import the video you would like to cut by visiting the ‘file’ type and choosing ‘import.’ Next, choose media and select the video from the media library. Alternatively, you can simply press Command + I on your Mac keyboard to go straight to your PC storage.
- Next, move the imported clip to the timeline to begin the cutting process.
- Select the Tools menu and choose ‘Blade’ from the dropdown menu. You can also press the B key on your keyword to select this tool.
- Now, you’re ready to start cutting the video file. Move the selected blade tool to the frame you would like to cut from the clip and click.
- Next, move to where you would like the cut to the end and click again.
- That’s all you have to do. Once you cut the clip and you’re satisfied with your result, simply save your clip by hitting the ‘export’ button and choosing the location you prefer and your preferred output format.
Adobe Premiere Rush
Supported System: Windows and Mac
Premier Rush was designed for social media videos and to help vloggers make the most of their videos. Although it started as a mobile-only app, it now has a desktop option for Mac and Windows. The idea behind Rush is an editing tool that helps you edit your video and share it to your preferred social media platform fast. This editing tool offers a simple user interface, and the workflow is seamless to ensure speedy performance.
As long as you want a video cutter created for cutting video for Instagram on Mac, this software delivers. It offers different editing features to enhance your video. You can link your Instagram account and upload directly to the platform. It also allows you to save all edited video files on Cloud to save space on your MacBook.
Pros
- It allows you to transfer videos from Adobe Premiere Pro directly for editing
- Allows you to link your social media accounts for direct uploads
- It offers transitions, filters, and more editing tools to enhance your Instagram video
- You can save directly to the Cloud to save space and ensure easy access
- It is an excellent option for beginners
Cons
- You can’t change the output format
- It doesn’t offer ample audio tools
Steps to Cut Video for Instagram on Mac Using Adobe Premiere Rush
This section will cover all the crucial steps to get the most from Adobe Premier Rush. Keep reading to learn how to cut video for Instagram on Mac using Adobe Rush.
- Firstly, download and install the app on your Mac. Launch the software after installation to start editing
- Now, create a new project on the app and import the video you would like to cut for Instagram.
- Afterward, select the video you would like to cut, click ‘create,’ and you’re ready to begin.
- When the video appears on the timeline, select the video and click the ‘scissors’ icon on the left corner. This tool helps to cut your video to your preference.
- To use the scissors tool, simply go to the beginning of the video and drag the handle to where you would like the video to start. You can also do the same to the end by dragging the handle at the end to where you would prefer.
- After cutting your video, you can also utilize other editing features to enhance your video.
- Now, you’re ready to export your video. Simply click ‘share’ located at the top of the editing software and choose from the options whether you want to share directly to Instagram or save on Mac.
Which Should I Choose, Free or Paid Instagram Video Cutter?
Now that you know the best free and paid video cutters to cut Instagram videos, you’re probably wondering what the ideal option is. With so many options, you must make the right decision for your project. You need to consider several factors before you decide if a paid or free Instagram video cutter is the best option for you.
- Budget
When deciding between a paid or free Instagram cutter, one crucial factor is how much you’re willing to pay. If your budget is really low and doesn’t fit into any paid options, you can simply go for a free option. However, if the price isn’t an issue for you, going for a paid option is best because it offers you more editing features to enhance your video.
- Ease of Use
You should also consider how easy it is to use the video cutter. Some paid options are for professionals and can be challenging to understand. However, most free options offer poor performance times. The last thing Instagram users want is to devote hours to figure out where each tool is on the software. However, there are paid options with an intuitive interface that makes it easy to cut your Instagram video.
- Customer Support
You also need to consider whether customer support will be available when you need it. Some free options have no customer support to turn to. Instead, consider a video cutter that will offer helpful and responsive customer support when picking.
- Video Format Support
Before choosing a paid or free option, you need to consider if it would support the video format you prefer. You might be using different video formats, and you want to ensure you’re not limited to select options. You also want a video cutter that offers various output formats.
FAQs about Cut Video For Instagram
- How do you post long videos on Instagram without splitting? Instagram allows users to post long videos on the app, as long as 60 seconds. Alternatively, you can use the IGTV to upload long clips on Instagram without splitting.
- What is multi-capture on Instagram: This tool allows you to create and share multiple photos on your stories.
- How do I split the video into two parts for Instagram on Mac? The paid and free video cutters shared above will help you split a video into two parts for Instagram on Mac. Simply pick the option that fits your preference.
- Why can’t I split a video on iMovie? Maybe your iMovie software is experiencing a glitch; you can simply restart the software. Alternately, move the clip to the center row if you find the option greyed out. Moving the clip should help fix the issue.
Conclusion
Various tools are available to help you cut a video for Instagram on Mac. Therefore, just refer to the paid and free tools listed above whenever you need a video cutter. These video cutters are highly recommended and ensure the quality isn’t affected while cutting the video. When deciding which is the best option for you, free or paid, the factors listed will help you decide. Suppose you’re looking specifically for a video cutter that offers you all the features you need to enhance your video while providing an intuitive user interface. In that case, Wondershare Filmora is the ideal choice.
Also read:
- With an SRT Editor Online, You Can Synchronize the Subtitles with the Video, Change the Font, and Make Them More Readable. Read on to Know Your Options
- Updated The Top Tips for Becoming a Good Podcast Host Are Presented in This Article. How to Start and End the Podcast Show Is All Set Below. You Can Also Learn About the Ways to Call Guests to Your Show
- Updated Top 20 Slideshow Makers for Win/Mac/Online Review
- How to Add Background to Video With/Without a Green Screen
- 2024 Approved Best Online YouTube Video Trimmer
- Updated 2024 Approved Top 9 Sparkle Effects Photo and Video Editors You Should Know
- Detailed Guide to Rotate Videos in Blender
- Updated Top Shortcut Towards Timeline Template
- In 2024, How to Make Video Slow Motion?
- New Basic Knowledge About WMV Format and Best WMV Video Editor for 2024
- New In 2024, Add some Sci-Fi Touch to Your Next Video Content Using Wondershare Filmora Editing Tools to Create an Alternate Reality Effect
- New 3 Effective Methods to Correct Color Distortion in Videos
- 2024 Approved Top Way to Freeze-Frame in Final Cut Pro
- New 4 Ways to Add White Borders on Mobile and Desktop for 2024
- Updated Find Out What Track Mattes Are in After Effects and Learn How to Find and Use It with Simple and Easy-to-Follow Instructions
- Updated Top List The Best Slow Motion Video Editors Available
- In 2024, Do You Want to Make Your Photos and Videos Look Different From Others? There Are Many Lightroom LUTs Free, and They Make Your Media Content Stand Out From Others
- Updated Adobe Premiere Pro Rec 709 LUTs Finding The Best Options for 2024
- In 2024, 8 Excellent Video and Photo Mergers on Desktop/Mobile/Online
- Discover the Top 6 Online Video Speed Controllers Compatible with Chrome, Safari, Firefox for Enhanced Video Playback and Viewing Experience for 2024
- New How to Add Filter to Video in Premiere Pro for 2024
- Updated In 2024, Hitfilm Express Video Editor Review
- New 8 Ways To Live Stream Pre-Recorded Video for 2024
- New Benefits of Live Streaming on YouTube
- Learn More About the Video Editing Interface of Wondershare Filmora
- How To Zoom In On TikTok Videos, In 2024
- Updated Learning Some Perfect Ways to Convert a Slow-Motion Video to Normal
- Updated How to Apply Gaussian Blur Effect to Videos In Premiere Pro?
- 4 Methods to Merge MP4 and MP3
- New How to Add VHS Green Screen to Your Video for 2024
- New Best Android Apps For Creating Slow Motion Videos
- Updated 8 Tips to Apply Cinematic Color Grading to Your Video
- How Much Wedding Videographer Cost for 2024
- Updated 2024 Approved How To Change Text Color In Premiere Pro
- New Best 9 Amv Makers for Computer
- Updated How to Add Subtitles to Videos With Kapwing
- In 2024, How To Create an Apple Developer Account From iPhone 12 Pro Max
- In 2024, How I Transferred Messages from Vivo Y28 5G to iPhone 12/XS (Max) in Seconds | Dr.fone
- In 2024, 4 Ways to Transfer Music from Motorola G24 Power to iPhone | Dr.fone
- Full Guide to Catch 100 IV Pokémon Using a Map On Vivo Y27 4G | Dr.fone
- 9 Solutions to Fix Motorola G24 Power System Crash Issue | Dr.fone
- In 2024, Is Fake GPS Location Spoofer a Good Choice On Vivo T2 5G? | Dr.fone
- For People Wanting to Mock GPS on Nubia Z50S Pro Devices | Dr.fone
- How to Change Location on TikTok to See More Content On your Vivo Y78+ | Dr.fone
- How to Retrieve deleted photos on Xiaomi Redmi Note 12 Pro 4G
- In 2024, How to Bypass FRP on Vivo Y78+ (T1) Edition?
- Your Complete Guide To Reset Realme Note 50 | Dr.fone
- 6 Ways to Change Spotify Location On Your Oppo Find N3 | Dr.fone
- In 2024, Where Is the Best Place to Catch Dratini On Apple iPhone 14 | Dr.fone
- In 2024, Full Guide to Fix iToolab AnyGO Not Working On Tecno Spark Go (2023) | Dr.fone
- Updated 2024 Approved Translate Any Hindi Video Into English With AI
- Can I Do Animated Logo Design Without Design Skills for 2024
- A Step-by-Step Guide on Using ADB and Fastboot to Remove FRP Lock from your Google Pixel 7a
- Stuck at Android System Recovery Of Vivo X Flip ? Fix It Easily | Dr.fone
- 4 Ways to Fix Android Blue Screen of Death On Infinix Smart 8 HD | Dr.fone
- Removing Device From Apple ID For your iPhone X
- How To Restore Missing Call Logs from OnePlus
- Best Free Apple iPhone SE IMEI Checker
- New How to Make GIF Instagram for 2024
- In 2024, How to Fix when Apple Account Locked From iPhone 13 Pro?
- 10 Easy-to-Use FRP Bypass Tools for Unlocking Google Accounts On Vivo X100
- 3 Best Tools to Hard Reset OnePlus Open | Dr.fone
- What Pokémon Evolve with A Dawn Stone For Realme C51? | Dr.fone
- In 2024, How Do You Unlock your Apple iPhone SE? Learn All 4 Methods | Dr.fone
- 9 Solutions to Fix Process System Isnt Responding Error on Xiaomi Civi 3 Disney 100th Anniversary Edition | Dr.fone
- Want to Uninstall Google Play Service from Realme Note 50? Here is How | Dr.fone
- In 2024, How to Mirror Your Vivo Y17s Screen to PC with Chromecast | Dr.fone
- Title: New Do You Want to Know How to Convert YouTube SBV Subtitles to SRT Format? Here Is an Ultimate Guide About It
- Author: Chloe
- Created at : 2024-04-24 07:08:18
- Updated at : 2024-04-25 07:08:18
- Link: https://ai-editing-video.techidaily.com/new-do-you-want-to-know-how-to-convert-youtube-sbv-subtitles-to-srt-format-here-is-an-ultimate-guide-about-it/
- License: This work is licensed under CC BY-NC-SA 4.0.
