
New Finding the Best Game Recorder for PC for 2024
Finding the Best Game Recorder for PC
You’re likely familiar with recording gameplays if you’re involved in the gaming community. The desire to share our gameplay adventures has never been more widely spread. YouTube and Twitch serve as popular hubs for gamers to showcase their skills and build communities.
However, with various game recorders, finding the perfect fit for your next gameplay recording can be challenging. We’ve tested many options to ease your search and made a list to enhance your gaming experience.
In this article
- Part 1. Discussing the Advancements in Game Recording in the Digital Realm
- Part 2. Top Best Game Recorders To Consider for Efficient Recording
- Part 3. Make Screen Recording Simple and Easy: Wondershare Filmora
- Conclusion
Part 1: Discussing the Advancements in Game Recording in the Digital Realm
Game recording has evolved from basic methods to sophisticated tools. In the past, gamers used VHS recorders connected to consoles. Moreover, screen capture software like Fraps became popular in the early 2000s. Afterward, built-in recording features within PlayStation 4 and Xbox One simplified the process.
Platforms like Twitch emerged for live streaming in the late 2010s. Cloud gaming services have revolutionized recording by allowing gameplay on remote servers. Finally, modern game recorders emerged to provide instant replay and webcam integration.
Chronological Understanding of the Advancements in Game Recordings
- Users can now capture gameplay in stunning 4K resolution for top-notch visual quality.
- Frame rate settings ensure smooth playback of recorded videos.
- Bitrate settings let you control recording quality and file size.
- Players can use GPU power for faster and more efficient video encoding.
- Multi-channel audio recording lets you record gameplay audio, microphone input, and other sources. Also, it separates tracks for easy editing and control.
- An infusion of overlays in the webcam adds a personalized touch to gameplay videos, building competition in quality offering.
- Network switching within software is possible without any cross-platform shift, from recording to live streaming.
Example
PewDiePie is one of the leading stars in YouTube stardom. His game screen recording is proof of how online entertainment has changed. He earned his initial fame by playing horror games with funny commentary. People loved his infectious personality and unique style. Furthermore, he expanded his content to include games, vlogs, and entertaining stuff. Now, he has a fan base of 111M, positioning him as the most influential figure in online gaming.
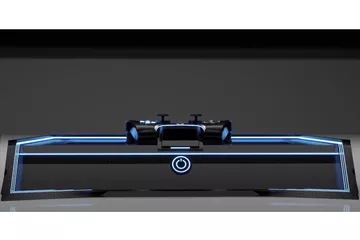
Part 2: Top Best Game Recorders To Consider for Efficient Recording
Most of us play games for fun while wanting to share the gameplay with friends. The game screen recorder helps you share the screen with others to enjoy with them. Let’s go through the options of tools that can record gameplay screens efficiently:
Best Game Recorders for PC
1.Movavi
2.OBS
3.Bandicam
4.XSplit
5.Aqua Demo
6.GoPlay
7.Action! Game Recorder
8.Wondershare DemoCreator
1. Movavi
Movavi lets you do full-screen or custom area recording with various functionalities. Using this tool, you can annotate the screen while recording for real-time experience. For improving viewer’s attention, you can also illuminate mouse cursor and keystrokes within the recording screen. It also features a noise reduction feature to get rid of intrusive voices. Movavi can take scrolling screenshots to capture content that doesn’t fit on one screen.

Pros
- This game screen recording tool has a user-friendly interface and is easy to use without the need for training.
- The tool allows you to capture audio and video simultaneously and separately.
Con
- It offers limited features when it comes to video manipulation while recording games.
2. OBS Studio
Open Broadcaster Software is the best screen recorder for games when it comes to finding open-source recorders. This recorder enables you to record multiple scenes at a time. It offers seamless transitions to switch between the scenes. Users can use the audio mixer feature of the tool for noise suppression and gain. The tool also provides the configuration option to add new sources and replace existing ones.

Pros
- You can capture multiple windows simultaneously with the help of this tool, giving diversified opportunities.
- This screen recorder allows you to preview sources and scenes before live streaming.
Con
- OBS is challenging for beginners due to its steep learning curve.
3. Bandicam
Gamers can record high-resolution gameplay in 4K UHD and 480FPS with Bandicam. Upon utilizing this tool, they record gameplay and voice to share with friends on YouTube. This Lolio game recorder uses a webcam and mic to record gameplay with the player’s live face and voice. Plus, you can also save the audio track of the gameplay record in separate WAV files.

Pros
- This game recorder compresses high-quality video to save space.
- Bandicam supports the latest hardware acceleration from AMD, Intel, and NVIDIA.
Con
- It only works on Windows and does not support Mac, Android, or Linux.
4. XSplit
Content creators and game players can use this all-in-one streaming and recording tool. This video game recorder allows you to switch from a solo camera to a podcast easily. You can start streaming to any broadcast platform with the native plugin of the tool. XSplit Broadcaster enables you to add multiple animation and broadcast effects to your scenes.

Pros
- Users can record multiple scenes at the same time with this screen recorder. This helps you in covering more content in similar timeframes.
- You can do custom transitions of various scenes with the help of this tool.
Con
- Installing XSplit Broadcaster in your system slows down the running of the PC dramatically.
5. Aqua Demo
Aqua Demo is the best way to record gameplay on a PC to produce high-quality video. You can easily record gameplay as the interface of the tool is intuitive and easy to use. It supports various video formats, including AVI, MP4, and MOV, to save the recordings. Users can do editing while recording to make it engaging and interactive.

Image Name: best-game-recorder-for-pc-2024-5.jpg
Image Alt:
Pros
- This tool allows you to record video using the sound of a PC, microphone, or both.
- You can easily schedule when video recording should take place with this tool.
Con
- AceThinker Aqua Demo offers a limited trial version to its users for screen recording.
6. GoPlay
GoPlay is the best software to record gameplay as it allows you to record yourself while gaming. With the help of this software, users can do basic editing of the video before live streaming. Plus, it allows you to record fast-paced games up to 60fps for smooth results. The software offers the feature to remove unwanted noise in the video.

Pros
- This screen recorder offers you the option to dub your own voice within the video recording.
- It helps to adjust the audio of each track on the timeline.
Con
- Unlike other screen recorders, it has a small number of transitions and effects.
7. Action! – Game Recorder
Action! stands out as one of the best screen recorder for games, as it uses low CPU space. Gamers can record smooth HD video of gameplay up to 120fps. You can make 20 times smaller video recordings with the help of this tool. Also, users are able to apply different editing effects to the recorder clips. This tool even enables you to control video recording with a smartphone.

Image Name: best-game-recorder-for-pc-2024-7.jpg
Image Alt:
Pros
- Action supports the webcam and microphone commentary during recording.
- It displays current and average FPS while playing games and saves benchmark results.
Con
- People face usability issues like problems with frame rate drops while recording.
8. Wondershare DemoCreator
Users can use DemoCreator on Windows and Mac to record the screen of gameplay. No doubt, it is a cool game recording software available to users. It also offers lag-free recording for uninterrupted gameplay records. You can plan and automate recording sessions with the help of this software. This game recorder provides a dynamic cursor effect for a visual guide of your audience.

Pros
- Wondershare DemoCreator offers dual monitor recording for an expanded view.
- User can create their own virtual avatars for presenting the content through video.
Con
- The tool has limited functionality in the free version, so you have to buy its premium subscription.
10+ Screen Recorder without Watermark
https://www.youtube.com/watch?v=CVmVxhxfnlU
Part 3: Make Screen Recording Simple and Easy: Wondershare Filmora
Gaming has made a significant impact on people as the associated industry keep producing new games with the latest technology. Moreover, the popularity of streaming games online has also increased. In this case, gamers need an effective game recorder software. Wondershare Filmora is the most efficient solution to effective screen recording. This video game recorder tool can capture any area of your selection.
Filmora also has various built-in editing tools and recording effects. You can also customize the ratio and size of your recording screen by changing the height and width. This tool records the screen and captures the audio from your microphone at the same time. Gamers can schedule their recording with the Record Timer feature. Moreover, you can customize your keystrokes and make hotkey combinations.
Other Features of Wondershare Filmora
- Split Screen: The Split Screen feature has up to 250+ pre-made templates that help you create animated video collages. You can have up to 6 screens for gameplaying or live chat channels on your screen. There are thousands of effects and filters you add to each of the screens.

- AI Thumbnail Creator: Filmora provides a Thumbnail feature that can generate exclusive thumbnails for your videos. It supports advanced text and image editing tools with 58+ templates. You can get stunning thumbnails for your gameplay in seconds with the help of AI.

- AI Vocal Remover: If you are having trouble with unnecessary background noise, remove it with the AI vocal remover feature. Streamers can separate the vocals from their microphone and gameplay. Also, you can dub videos freely without losing audio quality.

Steps-by-Step Guide to Screen Record With Wondershare Filmora
Wondershare Filmora provides the best way to record gameplay on your PC, as it gives you the necessary features. So, let’s discuss the steps on how to record a professional gameplay recording. The following are the steps to record gameplay with Filmora:
Step 1 Launch and Create a New Project on Filmora
After downloading Filmora on your PC and launching the software, go to the “Create Project” tab on the left-side panel. Here, you can click the “New Project” option to open the main editing interface.

Step 2 Record Gameplay on Your PC
On the main interface, click the “Record” option above the media panel. From the drop-down panel, select the “Record PC Screen” option. After that, a small panel screen with the name “Wondershare Screen Recorder” will appear on your PC.

Step 3 Adjust Recording Settings for Gaming
Now, adjust the screen recording settings according to your preference. You can change the screen’s dimensions from full screen to target window. Also, choose to turn on the microphone, audio, and camera by clicking on their icons. Now, hit the dropdown menu of “Settings,” and change the frame rate and other video options. Once you are satisfied with the settings, hit the “Start Recording” button to start.

Conclusion
Gamers need to find the best tool to share their gaming moments in 2024. Filmora is a standout choice among the game recording software for PCs. The software is reliable and enriched with features that are easy to use. You can record, edit, and share your exciting gameplay adventures with the audience. If you’re on the lookout for the best game recorder for your PC, Filmora is a solid recommendation.
- Part 2. Top Best Game Recorders To Consider for Efficient Recording
- Part 3. Make Screen Recording Simple and Easy: Wondershare Filmora
- Conclusion
Part 1: Discussing the Advancements in Game Recording in the Digital Realm
Game recording has evolved from basic methods to sophisticated tools. In the past, gamers used VHS recorders connected to consoles. Moreover, screen capture software like Fraps became popular in the early 2000s. Afterward, built-in recording features within PlayStation 4 and Xbox One simplified the process.
Platforms like Twitch emerged for live streaming in the late 2010s. Cloud gaming services have revolutionized recording by allowing gameplay on remote servers. Finally, modern game recorders emerged to provide instant replay and webcam integration.
Chronological Understanding of the Advancements in Game Recordings
- Users can now capture gameplay in stunning 4K resolution for top-notch visual quality.
- Frame rate settings ensure smooth playback of recorded videos.
- Bitrate settings let you control recording quality and file size.
- Players can use GPU power for faster and more efficient video encoding.
- Multi-channel audio recording lets you record gameplay audio, microphone input, and other sources. Also, it separates tracks for easy editing and control.
- An infusion of overlays in the webcam adds a personalized touch to gameplay videos, building competition in quality offering.
- Network switching within software is possible without any cross-platform shift, from recording to live streaming.
Example
PewDiePie is one of the leading stars in YouTube stardom. His game screen recording is proof of how online entertainment has changed. He earned his initial fame by playing horror games with funny commentary. People loved his infectious personality and unique style. Furthermore, he expanded his content to include games, vlogs, and entertaining stuff. Now, he has a fan base of 111M, positioning him as the most influential figure in online gaming.
Part 2: Top Best Game Recorders To Consider for Efficient Recording
Most of us play games for fun while wanting to share the gameplay with friends. The game screen recorder helps you share the screen with others to enjoy with them. Let’s go through the options of tools that can record gameplay screens efficiently:
Best Game Recorders for PC
1.Movavi
2.OBS
3.Bandicam
4.XSplit
5.Aqua Demo
6.GoPlay
7.Action! Game Recorder
8.Wondershare DemoCreator
1. Movavi
Movavi lets you do full-screen or custom area recording with various functionalities. Using this tool, you can annotate the screen while recording for real-time experience. For improving viewer’s attention, you can also illuminate mouse cursor and keystrokes within the recording screen. It also features a noise reduction feature to get rid of intrusive voices. Movavi can take scrolling screenshots to capture content that doesn’t fit on one screen.
Pros
- This game screen recording tool has a user-friendly interface and is easy to use without the need for training.
- The tool allows you to capture audio and video simultaneously and separately.
Con
- It offers limited features when it comes to video manipulation while recording games.
2. OBS Studio
Open Broadcaster Software is the best screen recorder for games when it comes to finding open-source recorders. This recorder enables you to record multiple scenes at a time. It offers seamless transitions to switch between the scenes. Users can use the audio mixer feature of the tool for noise suppression and gain. The tool also provides the configuration option to add new sources and replace existing ones.
Pros
- You can capture multiple windows simultaneously with the help of this tool, giving diversified opportunities.
- This screen recorder allows you to preview sources and scenes before live streaming.
Con
- OBS is challenging for beginners due to its steep learning curve.
3. Bandicam
Gamers can record high-resolution gameplay in 4K UHD and 480FPS with Bandicam. Upon utilizing this tool, they record gameplay and voice to share with friends on YouTube. This Lolio game recorder uses a webcam and mic to record gameplay with the player’s live face and voice. Plus, you can also save the audio track of the gameplay record in separate WAV files.
Pros
- This game recorder compresses high-quality video to save space.
- Bandicam supports the latest hardware acceleration from AMD, Intel, and NVIDIA.
Con
- It only works on Windows and does not support Mac, Android, or Linux.
4. XSplit
Content creators and game players can use this all-in-one streaming and recording tool. This video game recorder allows you to switch from a solo camera to a podcast easily. You can start streaming to any broadcast platform with the native plugin of the tool. XSplit Broadcaster enables you to add multiple animation and broadcast effects to your scenes.
Pros
- Users can record multiple scenes at the same time with this screen recorder. This helps you in covering more content in similar timeframes.
- You can do custom transitions of various scenes with the help of this tool.
Con
- Installing XSplit Broadcaster in your system slows down the running of the PC dramatically.
5. Aqua Demo
Aqua Demo is the best way to record gameplay on a PC to produce high-quality video. You can easily record gameplay as the interface of the tool is intuitive and easy to use. It supports various video formats, including AVI, MP4, and MOV, to save the recordings. Users can do editing while recording to make it engaging and interactive.
Image Name: best-game-recorder-for-pc-2024-5.jpg
Image Alt:
Pros
- This tool allows you to record video using the sound of a PC, microphone, or both.
- You can easily schedule when video recording should take place with this tool.
Con
- AceThinker Aqua Demo offers a limited trial version to its users for screen recording.
6. GoPlay
GoPlay is the best software to record gameplay as it allows you to record yourself while gaming. With the help of this software, users can do basic editing of the video before live streaming. Plus, it allows you to record fast-paced games up to 60fps for smooth results. The software offers the feature to remove unwanted noise in the video.
Pros
- This screen recorder offers you the option to dub your own voice within the video recording.
- It helps to adjust the audio of each track on the timeline.
Con
- Unlike other screen recorders, it has a small number of transitions and effects.
7. Action! – Game Recorder
Action! stands out as one of the best screen recorder for games, as it uses low CPU space. Gamers can record smooth HD video of gameplay up to 120fps. You can make 20 times smaller video recordings with the help of this tool. Also, users are able to apply different editing effects to the recorder clips. This tool even enables you to control video recording with a smartphone.
Image Name: best-game-recorder-for-pc-2024-7.jpg
Image Alt:
Pros
- Action supports the webcam and microphone commentary during recording.
- It displays current and average FPS while playing games and saves benchmark results.
Con
- People face usability issues like problems with frame rate drops while recording.
8. Wondershare DemoCreator
Users can use DemoCreator on Windows and Mac to record the screen of gameplay. No doubt, it is a cool game recording software available to users. It also offers lag-free recording for uninterrupted gameplay records. You can plan and automate recording sessions with the help of this software. This game recorder provides a dynamic cursor effect for a visual guide of your audience.
Pros
- Wondershare DemoCreator offers dual monitor recording for an expanded view.
- User can create their own virtual avatars for presenting the content through video.
Con
- The tool has limited functionality in the free version, so you have to buy its premium subscription.
10+ Screen Recorder without Watermark
https://www.youtube.com/watch?v=CVmVxhxfnlU
Part 3: Make Screen Recording Simple and Easy: Wondershare Filmora
Gaming has made a significant impact on people as the associated industry keep producing new games with the latest technology. Moreover, the popularity of streaming games online has also increased. In this case, gamers need an effective game recorder software. Wondershare Filmora is the most efficient solution to effective screen recording. This video game recorder tool can capture any area of your selection.
Filmora also has various built-in editing tools and recording effects. You can also customize the ratio and size of your recording screen by changing the height and width. This tool records the screen and captures the audio from your microphone at the same time. Gamers can schedule their recording with the Record Timer feature. Moreover, you can customize your keystrokes and make hotkey combinations.
Other Features of Wondershare Filmora
- Split Screen: The Split Screen feature has up to 250+ pre-made templates that help you create animated video collages. You can have up to 6 screens for gameplaying or live chat channels on your screen. There are thousands of effects and filters you add to each of the screens.
- AI Thumbnail Creator: Filmora provides a Thumbnail feature that can generate exclusive thumbnails for your videos. It supports advanced text and image editing tools with 58+ templates. You can get stunning thumbnails for your gameplay in seconds with the help of AI.
- AI Vocal Remover: If you are having trouble with unnecessary background noise, remove it with the AI vocal remover feature. Streamers can separate the vocals from their microphone and gameplay. Also, you can dub videos freely without losing audio quality.
Steps-by-Step Guide to Screen Record With Wondershare Filmora
Wondershare Filmora provides the best way to record gameplay on your PC, as it gives you the necessary features. So, let’s discuss the steps on how to record a professional gameplay recording. The following are the steps to record gameplay with Filmora:
Step 1 Launch and Create a New Project on Filmora
After downloading Filmora on your PC and launching the software, go to the “Create Project” tab on the left-side panel. Here, you can click the “New Project” option to open the main editing interface.
Step 2 Record Gameplay on Your PC
On the main interface, click the “Record” option above the media panel. From the drop-down panel, select the “Record PC Screen” option. After that, a small panel screen with the name “Wondershare Screen Recorder” will appear on your PC.
Step 3 Adjust Recording Settings for Gaming
Now, adjust the screen recording settings according to your preference. You can change the screen’s dimensions from full screen to target window. Also, choose to turn on the microphone, audio, and camera by clicking on their icons. Now, hit the dropdown menu of “Settings,” and change the frame rate and other video options. Once you are satisfied with the settings, hit the “Start Recording” button to start.
Conclusion
Gamers need to find the best tool to share their gaming moments in 2024. Filmora is a standout choice among the game recording software for PCs. The software is reliable and enriched with features that are easy to use. You can record, edit, and share your exciting gameplay adventures with the audience. If you’re on the lookout for the best game recorder for your PC, Filmora is a solid recommendation.
What Are the Best 15 Slideshow Presentation Examples Your Audience Will Love
What’s the Best 15 Slideshow Presentation Examples Your Audience Will Love
An easy yet powerful editor
Numerous effects to choose from
Detailed tutorials provided by the official channel
No matter what type of industry or business you are in, slideshow presentations have become an important tool for several tasks like showcasing your products, and services, engaging with the clients and prospective buyers, changing their perceptions, leading to sales, and much more. Great presentations are a combination of style, content, effects, text, media files, and much more. There are several tools and software available these days that can help you create a slideshow presentation of your choice.

More in detail about these presentations, best powerpoint slideshow examples, and more are discussed in the following parts of the topic.
In this article
01 [Tips for creating an impressive slideshow presentation](#Part 1)
02 [Best 15 slideshow presentation examples](#Part 2)
03 [The best tool to edit your videos for slideshow presentations- Wondershare Filmora](#Part 3)
Part 1 Tips For Creating An Impressive Slideshow Presentation
To create a unique and engaging slideshow presentation, we have shortlisted some tips that will surely work. Check them as below.
● Have a theme
First of all, have a theme for a slideshow based on which the other elements can be selected. The theme or the story you want to portray can be based on the target audience and the purpose of creating a slideshow. For instance, if you want to generate sales from your products, create a slideshow that shows the benefits of your products and compares them with others in the same category.
● Keep it simple
The real purpose of a slideshow presentation is to convey your data or message in a simple manner that can be easily related. Since the slides move one after the other in a slideshow, they should be created in a manner so that the viewer can quickly understand them.
● Keep minimum text
Though text can be included in a slideshow, keep them to a minimum. A slideshow is a creative presentation having pictures, videos, graphs, and several other elements. So, keep the text whenever necessary and don’t include too much-written content. Moreover, a viewer can relate to and recall the product, brand, or service more through a message rather than a text.
● Include compelling visuals
Include relevant visuals like videos and images into your slideshow. Make sure that the files are in high resolution and clear and support the theme or the message you are trying to convey through the presentation.
● Add effects, filters, overlays, and other elements
Instead of adding the raw image and video footage, edit and customize them to make them more interesting and engaging. There are several professional video editing tools like Wondershare Filmora and others that can help you add effects, transitions, overlays, filters, and customize files as needed. Additional elements like graphs, charts, and more can also be added to the presentation.
● Use Templates
Templates are ready-made design that helps you create a slideshow presentation quickly and easily. The templates in a variety of designs in different categories are available for you to choose the most suitable one. You can check the collection of templates from various online sites and tools.
Part 2 Best 15 Slideshow Presentation Examples
A wide range of presentations in different categories is created by people. To help you check what a unique and engaging presentation looks like, below listed are the top slideshow examples.
What would Steve Do? 10 Lessons from the World’s most captivating presenters by HubSpot

Powerful Body Language Tips for your next presentation

Fix your bad PowerPoint by Seth Godin

How I got 2.5 million views on SlideShare by Nick Demey

Killer ways to design the same slide

How to Produce Better Content Ideas by Mark Johnstone

How Google Works by Eric Schmid

Why Content Marketing Fails by Rand Fishkin

Digital Strategy 101 By Bud Caddell

The History of SEO by HubSpot

How to really get into marketing by Inbound.org

Search for meaning in B2B Marketing by Velocity Partners

The What If techniques by Motivate Design

Ways to Win the Internets by Upworthy

Crap: The Content Marketing Deluge by Velocity Partners

Part 3 The Best Tool To Edit Your Videos For Slideshow Presentations - Wondershare Filmora
As discussed in the above parts of the article, images and videos play a very crucial role in creating an impressive slideshow presentation. To further make these media files bright, clear, and relevant to your theme editing and customization can be done for this task, several software and programs are available. One such excellent tool is Wondershare Filmora Video Editor which works as a complete video editing software with advanced features.
Your files can be edited like a professional and that too in a hassle-free manner using the program. Some of the key editing features of the software include cropping, cutting, adding effects, transitions, overlays, green screen, split screen, AI portrait, masking, and more.
For Win 7 or later (64-bit)
For macOS 10.12 or later
Additionally, the tool also supports making a slideshow with music files and also has a built-in media library. Templates in different categories are also present.

● Ending Thoughts →
● Slideshow presentations are used for creating awareness about products and services, sending a message, presenting data, and several other tasks.
● To create a slideshow, several factors like media files, theme, colors, text, effects and other factors have to be considered.
● Several popular great slideshow presentation examples can be referred to as what a unique presentation looks like.
● Wondershare Filmora is an excellent tool for editing slideshow videos and also for creating a slideshow.
No matter what type of industry or business you are in, slideshow presentations have become an important tool for several tasks like showcasing your products, and services, engaging with the clients and prospective buyers, changing their perceptions, leading to sales, and much more. Great presentations are a combination of style, content, effects, text, media files, and much more. There are several tools and software available these days that can help you create a slideshow presentation of your choice.
More in detail about these presentations, best powerpoint slideshow examples, and more are discussed in the following parts of the topic.
In this article
01 [Tips for creating an impressive slideshow presentation](#Part 1)
02 [Best 15 slideshow presentation examples](#Part 2)
03 [The best tool to edit your videos for slideshow presentations- Wondershare Filmora](#Part 3)
Part 1 Tips For Creating An Impressive Slideshow Presentation
To create a unique and engaging slideshow presentation, we have shortlisted some tips that will surely work. Check them as below.
● Have a theme
First of all, have a theme for a slideshow based on which the other elements can be selected. The theme or the story you want to portray can be based on the target audience and the purpose of creating a slideshow. For instance, if you want to generate sales from your products, create a slideshow that shows the benefits of your products and compares them with others in the same category.
● Keep it simple
The real purpose of a slideshow presentation is to convey your data or message in a simple manner that can be easily related. Since the slides move one after the other in a slideshow, they should be created in a manner so that the viewer can quickly understand them.
● Keep minimum text
Though text can be included in a slideshow, keep them to a minimum. A slideshow is a creative presentation having pictures, videos, graphs, and several other elements. So, keep the text whenever necessary and don’t include too much-written content. Moreover, a viewer can relate to and recall the product, brand, or service more through a message rather than a text.
● Include compelling visuals
Include relevant visuals like videos and images into your slideshow. Make sure that the files are in high resolution and clear and support the theme or the message you are trying to convey through the presentation.
● Add effects, filters, overlays, and other elements
Instead of adding the raw image and video footage, edit and customize them to make them more interesting and engaging. There are several professional video editing tools like Wondershare Filmora and others that can help you add effects, transitions, overlays, filters, and customize files as needed. Additional elements like graphs, charts, and more can also be added to the presentation.
● Use Templates
Templates are ready-made design that helps you create a slideshow presentation quickly and easily. The templates in a variety of designs in different categories are available for you to choose the most suitable one. You can check the collection of templates from various online sites and tools.
Part 2 Best 15 Slideshow Presentation Examples
A wide range of presentations in different categories is created by people. To help you check what a unique and engaging presentation looks like, below listed are the top slideshow examples.
What would Steve Do? 10 Lessons from the World’s most captivating presenters by HubSpot
Powerful Body Language Tips for your next presentation
Fix your bad PowerPoint by Seth Godin
How I got 2.5 million views on SlideShare by Nick Demey
Killer ways to design the same slide
How to Produce Better Content Ideas by Mark Johnstone
How Google Works by Eric Schmid
Why Content Marketing Fails by Rand Fishkin
Digital Strategy 101 By Bud Caddell
The History of SEO by HubSpot
How to really get into marketing by Inbound.org
Search for meaning in B2B Marketing by Velocity Partners
The What If techniques by Motivate Design
Ways to Win the Internets by Upworthy
Crap: The Content Marketing Deluge by Velocity Partners
Part 3 The Best Tool To Edit Your Videos For Slideshow Presentations - Wondershare Filmora
As discussed in the above parts of the article, images and videos play a very crucial role in creating an impressive slideshow presentation. To further make these media files bright, clear, and relevant to your theme editing and customization can be done for this task, several software and programs are available. One such excellent tool is Wondershare Filmora Video Editor which works as a complete video editing software with advanced features.
Your files can be edited like a professional and that too in a hassle-free manner using the program. Some of the key editing features of the software include cropping, cutting, adding effects, transitions, overlays, green screen, split screen, AI portrait, masking, and more.
For Win 7 or later (64-bit)
For macOS 10.12 or later
Additionally, the tool also supports making a slideshow with music files and also has a built-in media library. Templates in different categories are also present.
● Ending Thoughts →
● Slideshow presentations are used for creating awareness about products and services, sending a message, presenting data, and several other tasks.
● To create a slideshow, several factors like media files, theme, colors, text, effects and other factors have to be considered.
● Several popular great slideshow presentation examples can be referred to as what a unique presentation looks like.
● Wondershare Filmora is an excellent tool for editing slideshow videos and also for creating a slideshow.
LumaFusion Color Grading: Achieving It Through LUTs
LumaFusion is one of the best-known apps to enhance video quality without impacting the overlays. With this app, you can modify the video in several ways, such as applying LUTs to videos and synchronizing MultiCam clips. Yet, many users find it challenging to use LumaFusion to color grade the clips.
In this discussion, we will discuss color grading in LumaFusion and the procedure to use it. Moreover, we will also introduce an app that can streamline your workflow efficiency. The name of this app is Wondershare Filmora, and it will also help you to apply LUTs on computers.
Part 1: How Do LUTs Make Work Operation Easy?
Before getting into the free LUTs for LumaFusion, it is important to know the higher functionality of LUTs. If you are new to the field of video editing, you may have no idea how LUTs can improve your work operation. This section will help you to understand it without complications:
- Modern Styles and Looks: LUTs offers predefined and modernized styles and look that are created by specialists. As these LUTs have prebuilt color grading techniques along with file emulation, you can use them to increase the attractiveness of videos.
- Higher Workflow Efficiency: The prebuilt LUTs can make your work easier than ever. You can apply the LUTs to the videos in the simplest manner, along with saving time and effort.
- Compatibility of LUTs: There are no such device restrictions in LUTs, as you can use them on computers or mobile devices. Above all, LUTs are also compatible with several video editing software.
- Customization and Experimentation: While using the LUTs, you can customize them as per your needs without any problem. Other than this, you can also experiment the creativity and visual styles with LUTs.
Empower your videos with a new mood using different LUTs. Filmora now offers 100+ top-quality 3D LUTs cover a broad range of scenarios. Transform your videos with Filmora’s powerful 3D LUTs.
Apply LUT on Videos Apply LUT on Videos Learn More


Part 2: What Are the Potential Ways to Apply LUTs for LumaFusion?
There are considerable ways to apply LUTs in LumaFusion, but we plan to introduce the most straightforward ways. Don’t fret if you have no video editing skills. By following the below-given steps, you can experience the LumaFusion color grading:
Way 1: Apply LUTs Through Sharing
Step 1: Initially, import the video to LumaFusion and double-tap on a video in “Timeline.” Select the “Color and Effect” icon from the bottom and redirect to the “Cube” icon on the top.

Step 2: Next, tap on the “Import” button, and once you are on the “Thank You” page, select the “Download Link” button. Following this, hit “Copy to ZIP,” and after this, the ZIP folders will be loaded in the app.

Step 3: To proceed, you have to “Unzip the Folder” and locate the LUTs of your choice. Once you find the LUT, press the “Share” icon and tap “Open in LumaFusion.” Following this, the LUT will be added in LumaFusion.

Way 2: Apply LUTs Through LUT Name
Step 1: Open the video with LumaFusion and select “Timeline.” Tap on the “Color and Effect” sign and select the “Import” button. Following this, you need to select a tool for importing LUTs from the options of Box, Dropbox, Google Drive, Files, or Add/Edit Source.

Step 2: After selecting the source, tap on “LUT name” to add it to LumaFusion. To proceed, press the “Share” button and wait a few moments. Once the LUT is added, you can manage its intensity from the “Blend” sliders.

Part 3: Some Best LUTs To Discover For Using in LumaFusion
Now that you know the higher functionality of LUTs and their application procedure, you must be wondering what LUTs are best for LumaFusion. There is no need to be anxious, as this part will introduce some of the free LUTs for LumaFusion. Look below to learn more about these exceptional video editing elements:
1. Color Grading Central Free LUTs
If you want to add the best color grading LumaFusion LUTs, you need to seek help from the color specialist. Thus, you can use the Color Grading free LUTs designed by CGC. Their site is enriched with high definition and optimized color combinate LUTs. You will never get disappointed by using these LUTs as they never impact the content of the videos.

2. Frank Glencairn Free LUT
If you are still a fan of vintage films in this modernized and vibrant-colored world, this LUT is for you. With this, you can add a fantastic and realistic vintage look to any video. Other than this, it is very popular among filmmakers for introducing a backstory scene in films. Not only professional, but you can also use it to give a retro look to your videos.

3. Reverse Tree Media Free LUTs
With this absolutely free LUT, you can upgrade the quality of your videos with little effort. It also has very modernized LUTs utility, such as the Black Bar layer. You can use this to enhance the video quality of several types of videos, such as TV series or movies. It is quite a perfect pick for sad or backstory scenes. In addition to this, it also has 8mm, 16mm, and 35mm overlays.

4. Kodachrome-K-Tone LUT
With the help of this LUT, you can feel yourself in the era of the early 90s. It has mass-marketed colors along with a subtractive method, which makes it a better option. Moreover, this LUT can also escalate the captivity of promotional videos. You can also use it for magazine photo editing. If you are working on a video captured in low light, this can also fix all the coloring issues for you.

5. SmallHD Free LUTs
Another frequently used LumaFusion LUTs is SmallHD-free LUTs which can maximize your video productivity effectively. It can enhance the classical appearance of the videos. You can use it for both pre and postproduction enhancements. These LUTs give you both dramatic and cinematic vibes. You can apply it to action, thriller, melodramatic or other videos.

Part 4: Wondershare Filmora: Apply LUTs Easily on the Computer
Wondershare Filmora is a tool that gives you freedom of creativity without any complications. With this tool, you can modify your videos in several ways on Mac, Windows, or mobile devices. Filmora also has versatile video editing software to help new video editors in their professional journey. The AI tools present in Filmora have stunning effects on every user, as they can make your work easier than ever.
Add LUTs on Video For Win 7 or later(64-bit)
Add LUTs on Video For macOS 10.14 or later
For example, by using its AI Image, you can turn simple words into images. You can also split the screen and manage the keyframes of your video. One of the best things about Filmora is it lets you edit videos with full customization.

Key Features of Wondershare Filmora
- If you want to track the moments of the objects in the video, the Motion Tracking feature of Filmora got you covered. You can also add Mosaic effects to moving characters or objects in a video.
- There are diversified preset templates in Filmora through which you can make the video with a few taps. You are also free to create your own video template and share it with the world.
- With Filmora, you can edit multiple videos at once, as it supports the batch edit feature. Moreover, you can also add adjustment layers in the video to make non-destructive edits.
Conclusion
As this article states, you can turn simple videos into attractive ones with color-grading LumaFusion LUTs. There are several things that define the higher functionality of LUTs, and you can see the points above. Moreover, the instructions to apply LUTs with LumaFusion are also discussed above for the ease of users.
There are two ways available to achieve color grading, out of which you can select any one of your preferences. The other tool that can help you to apply LUTs on the computer is Wondershare Filmora . You can learn more about this from the above discussion.
Add LUTs on Video For Win 7 or later(64-bit)
Add LUTs on Video For macOS 10.14 or later
Apply LUT on Videos Apply LUT on Videos Learn More
Part 2: What Are the Potential Ways to Apply LUTs for LumaFusion?
There are considerable ways to apply LUTs in LumaFusion, but we plan to introduce the most straightforward ways. Don’t fret if you have no video editing skills. By following the below-given steps, you can experience the LumaFusion color grading:
Way 1: Apply LUTs Through Sharing
Step 1: Initially, import the video to LumaFusion and double-tap on a video in “Timeline.” Select the “Color and Effect” icon from the bottom and redirect to the “Cube” icon on the top.
Step 2: Next, tap on the “Import” button, and once you are on the “Thank You” page, select the “Download Link” button. Following this, hit “Copy to ZIP,” and after this, the ZIP folders will be loaded in the app.
Step 3: To proceed, you have to “Unzip the Folder” and locate the LUTs of your choice. Once you find the LUT, press the “Share” icon and tap “Open in LumaFusion.” Following this, the LUT will be added in LumaFusion.
Way 2: Apply LUTs Through LUT Name
Step 1: Open the video with LumaFusion and select “Timeline.” Tap on the “Color and Effect” sign and select the “Import” button. Following this, you need to select a tool for importing LUTs from the options of Box, Dropbox, Google Drive, Files, or Add/Edit Source.
Step 2: After selecting the source, tap on “LUT name” to add it to LumaFusion. To proceed, press the “Share” button and wait a few moments. Once the LUT is added, you can manage its intensity from the “Blend” sliders.
Part 3: Some Best LUTs To Discover For Using in LumaFusion
Now that you know the higher functionality of LUTs and their application procedure, you must be wondering what LUTs are best for LumaFusion. There is no need to be anxious, as this part will introduce some of the free LUTs for LumaFusion. Look below to learn more about these exceptional video editing elements:
1. Color Grading Central Free LUTs
If you want to add the best color grading LumaFusion LUTs, you need to seek help from the color specialist. Thus, you can use the Color Grading free LUTs designed by CGC. Their site is enriched with high definition and optimized color combinate LUTs. You will never get disappointed by using these LUTs as they never impact the content of the videos.
2. Frank Glencairn Free LUT
If you are still a fan of vintage films in this modernized and vibrant-colored world, this LUT is for you. With this, you can add a fantastic and realistic vintage look to any video. Other than this, it is very popular among filmmakers for introducing a backstory scene in films. Not only professional, but you can also use it to give a retro look to your videos.
3. Reverse Tree Media Free LUTs
With this absolutely free LUT, you can upgrade the quality of your videos with little effort. It also has very modernized LUTs utility, such as the Black Bar layer. You can use this to enhance the video quality of several types of videos, such as TV series or movies. It is quite a perfect pick for sad or backstory scenes. In addition to this, it also has 8mm, 16mm, and 35mm overlays.
4. Kodachrome-K-Tone LUT
With the help of this LUT, you can feel yourself in the era of the early 90s. It has mass-marketed colors along with a subtractive method, which makes it a better option. Moreover, this LUT can also escalate the captivity of promotional videos. You can also use it for magazine photo editing. If you are working on a video captured in low light, this can also fix all the coloring issues for you.
5. SmallHD Free LUTs
Another frequently used LumaFusion LUTs is SmallHD-free LUTs which can maximize your video productivity effectively. It can enhance the classical appearance of the videos. You can use it for both pre and postproduction enhancements. These LUTs give you both dramatic and cinematic vibes. You can apply it to action, thriller, melodramatic or other videos.
Part 4: Wondershare Filmora: Apply LUTs Easily on the Computer
Wondershare Filmora is a tool that gives you freedom of creativity without any complications. With this tool, you can modify your videos in several ways on Mac, Windows, or mobile devices. Filmora also has versatile video editing software to help new video editors in their professional journey. The AI tools present in Filmora have stunning effects on every user, as they can make your work easier than ever.
Add LUTs on Video For Win 7 or later(64-bit)
Add LUTs on Video For macOS 10.14 or later
For example, by using its AI Image, you can turn simple words into images. You can also split the screen and manage the keyframes of your video. One of the best things about Filmora is it lets you edit videos with full customization.
Key Features of Wondershare Filmora
- If you want to track the moments of the objects in the video, the Motion Tracking feature of Filmora got you covered. You can also add Mosaic effects to moving characters or objects in a video.
- There are diversified preset templates in Filmora through which you can make the video with a few taps. You are also free to create your own video template and share it with the world.
- With Filmora, you can edit multiple videos at once, as it supports the batch edit feature. Moreover, you can also add adjustment layers in the video to make non-destructive edits.
Conclusion
As this article states, you can turn simple videos into attractive ones with color-grading LumaFusion LUTs. There are several things that define the higher functionality of LUTs, and you can see the points above. Moreover, the instructions to apply LUTs with LumaFusion are also discussed above for the ease of users.
There are two ways available to achieve color grading, out of which you can select any one of your preferences. The other tool that can help you to apply LUTs on the computer is Wondershare Filmora . You can learn more about this from the above discussion.
Add LUTs on Video For Win 7 or later(64-bit)
Add LUTs on Video For macOS 10.14 or later
Add Subtitles To Videos With Kapwing [Step by Step]
Content creators always prefer to add subtitles to their videos for better comprehension. The reason is that some people cannot understand your language and needs subtitles to understand the content. Moreover, if your viewer is facing an audio problem and won’t be able to hear your voice, subtitles can help there. In this article, we will introduce the Kapwing subtitle maker, through which you can add subtitles in many ways.
There are some drawbacks to using online tools, such as file size restrictions or internet availability. Yet, with the Kapwing tool, you won’t get disappointed. Kapwing is an online tool that offers various options to edit videos. One of the great features of Kapwing is its subtitle maker, which can help you in adding subtitles to your videos easily. To learn how to use the Kapwing subtitles feature, continue reading this article.
Part 1: Upload the Subtitle File to Kapwing
If you have a subtitle file for your video, Kapwing can help you. If you have a subtitle file for your video, Kapwing can help you. Without creating a user account, you can upload the subtitle file on this tool. With this subtitle editor, you can upload video files from your computer or cloud storage platforms. Moreover, it supports the subtitle files of SRT and VVT format. To use Kapwing subtitle maker for uploading a subtitle file, read the below steps:
Step 1 Navigate to the official site of Kapwing and select its “Subtitles” tool. Afterward, click on “Choose a video,” which will open a new window on your screen.

Step 2 Click on the “Upload” button given on top to import your video file on this tool. Once done, click on the “Subtitle” option displayed on the left side. On the subtitles window, click on the “Upload SRT/VVT” button to import your subtitle file.

Step 3 After uploading the file, your subtitles will sync with your video. To edit your subtitles, navigate to the right panel. From that, you can select text position, background color, opacity, font, and alignment.

Step 4 Once done with making the changes on added subtitles, you can click on the “Export Project” button to save or share the file.

Part 2: Automatically Generate your Subtitle on Kapwing
Do you want to generate subtitles for your video instantly? Kapwing subtitle maker offers an Auto-Subtitle Generator that converts your voice into subtitles. This feature supports many languages so that anyone across the world can utilize this tool. Moreover, it also offers a translating feature that can help you in converting your subtitles into another language.
However, to use this feature, you must create your user account. Also, you should upgrade your account to fully use this feature without any restrictions. If you don’t have an upgraded account, you can only auto-generate subtitles for the 7 minutes video. To use the auto-subtitle generator of Kapwing, check the below steps:
Step 1 Begin by accessing the website of the Kapwing tool. Click on “Subtitles” from the “Tools” tab and then tap on the “Choose a video” button. Upload the video file on which you want to add subtitles from your PC.

Step 2 Once done with importing the video, click on “Subtitles” from the left section. From the new window, click on “Auto-generate.” The tool will automatically create subtitles for your video by detecting the language.

Step 3 Once you created the subtitles through this feature, go to the “Translate” tab to translate subtitles into your preferred language. You can also edit the subtitles to change their background, opacity, text font, and size. Once done, click on the “Export Project” button.

Part 3: Manually Add Subtitles to the Video on Kapwing
If you don’t want to use the auto-generator and do not have a subtitle file, you can use the manual option. Kapwing allows you to add subtitles manually in its friendly user interface. After adding Kapwing captions, you can choose your preferred font and style for further enhancement.
Step 1 After accessing the website of Kapwing, select the “Subtitles” tool to proceed. Now select the “Choose a video” button to open the Kapwing editor window.

Step 2 Import your video file by tapping on the “Upload” button. Afterward, go to the “Subtitles” section and click on the “Add Subtitle” button. On the typing space, enter your subtitles. You can also choose the duration for your subtitles from the same window. To add subtitles further, you can click on the “Add Subtitles” button again.

Step 3 After adding the complete subtitles, you can choose their font, style, color, and opacity from the right panel. Once done, hit the “Export Project” button.

Part 4: How to Add Subtitles to Videos with the Best Alternative of Kapwing
If you are not satisfied with the performance of the Kapwing subtitle maker, you can try the Wondershare Filmora tool. As Kapwing is an online tool, it does come with certain restrictions. For example, the time to upload video files on this tool can be time-consuming. Moreover, you would need a strong internet connection throughout. But, with Filmora, you can add subtitles to your video files without facing file size restrictions.
Free Download For Win 7 or later(64-bit)
Free Download For macOS 10.14 or later
Filmora has an easy-to-use interface that offers multiple options to edit and alter video files. This platform is compatible with a mainstream operating system such as Windows. It provides a “Speech to Text” feature that enables you to create subtitles for your video automatically. With a single tap, you can add subtitles to your video without any hassle. To use the Speech to Text feature, check the below steps:
Step 1 Import Video File from the PC
Launch Filmora on your PC and click on the “Create New Project” button to open the Filmora editor on your device. To import your video file from your PC, tap on the “Arrow” icon. After uploading the file, drag it to the timeline.

Step 2 Enable Speech to Text Feature
From the timeline, locate the feature of “Speech to Text.” Now choose the language in which you want to create the subtitles and specify the other settings as well. Afterward, tap on the “OK” button to begin the process.

Step 3 Customize Subtitles and Save the Changes
After the conversion, you can double-click the added subtitles to make modifications. After making the adjustments, hit the “OK” button. Now go to the “Export” button and select the video format in which you want to export the video, or you can also share it on social media platforms.

Conclusion
By adding subtitles to your video, you can enhance your targeted audience and can also engage with them. It also helps in making your video content diverse for people across the globe. There are various online subtitle generators like Kapwing that can help you in adding subtitles, as described in this article. However, there are some drawbacks to using the Kapwing subtitle maker that can disrupt your work. If you want to use a proficient subtitle maker, you can use Wondershare Filmora to get the best results.
Free Download For macOS 10.14 or later
Filmora has an easy-to-use interface that offers multiple options to edit and alter video files. This platform is compatible with a mainstream operating system such as Windows. It provides a “Speech to Text” feature that enables you to create subtitles for your video automatically. With a single tap, you can add subtitles to your video without any hassle. To use the Speech to Text feature, check the below steps:
Step 1 Import Video File from the PC
Launch Filmora on your PC and click on the “Create New Project” button to open the Filmora editor on your device. To import your video file from your PC, tap on the “Arrow” icon. After uploading the file, drag it to the timeline.
Step 2 Enable Speech to Text Feature
From the timeline, locate the feature of “Speech to Text.” Now choose the language in which you want to create the subtitles and specify the other settings as well. Afterward, tap on the “OK” button to begin the process.
Step 3 Customize Subtitles and Save the Changes
After the conversion, you can double-click the added subtitles to make modifications. After making the adjustments, hit the “OK” button. Now go to the “Export” button and select the video format in which you want to export the video, or you can also share it on social media platforms.
Conclusion
By adding subtitles to your video, you can enhance your targeted audience and can also engage with them. It also helps in making your video content diverse for people across the globe. There are various online subtitle generators like Kapwing that can help you in adding subtitles, as described in this article. However, there are some drawbacks to using the Kapwing subtitle maker that can disrupt your work. If you want to use a proficient subtitle maker, you can use Wondershare Filmora to get the best results.
Also read:
- Tutorial How To Add Motion Blur in Blender?
- In 2024, Thousands Already Know Ezgif and So Can You
- In 2024, How to Make a Countdown Video
- You Must Be Wondering Which the Best Online Transparent Image-Maker Is! Well, There Is No Need to Get Confused as Here; You Will Get a Curated List for the Same
- How to Make an Instant Slideshow on Mac for 2024
- Updated Tips That Show Anybody How To Make Youtube Slideshow – Guaranteed
- How to Make a Slideshow GIF, In 2024
- Updated Do You Want to Add an Adjustment Layer to Your Video for Easier Editing? Read This Article to Find Out How to Efficiently Add an Adjustment Layer in After Effects
- New 2024 Approved How To Make A Video Longer
- New 2024 Approved Guide To Selecting and Using the Best Braw Luts
- Updated In 2024, How to Make an Adobe Slideshow the Easy Way
- In 2024, How To Fade Audio With Movavi Editor
- New Zoom In and Out on Discord
- In 2024, Let Us Talk About the Famous Photoshop and Most Commonly Used Glitch Effect. The Article Understudy Will Discuss in Detail About Photo Glitch Effect
- Can You Enhance Your Drone Footage with Cinematic Drone LUTs? This Article Discusses Top Drone LUTs Recommendations to Simplify Video Editing for 2024
- Updated 8 Apps to Custom GIF Stickers
- Spooky Halloween with the Best 15+ Halloween Countdown Video Clips for 2024
- Updated 4 Ways to Rotate Videos on Windows PC for 2024
- 2024 Approved Different Ways To Trim Video In Premiere Pro
- 2024 Approved Best 5 Udemy Subtitle Translator (Auto Translation)
- How does the stardust trade cost In pokemon go On Apple iPhone X? | Dr.fone
- In 2024, How to Mirror PC Screen to Lava Yuva 3 Pro Phones? | Dr.fone
- How to Change Google Play Location On Honor 90 Pro | Dr.fone
- How to Exit Android Factory Mode On Xiaomi Mix Fold 3? | Dr.fone
- In 2024, Mastering Android Device Manager The Ultimate Guide to Unlocking Your Oppo A59 5G Device
- How To Use Allshare Cast To Turn On Screen Mirroring On Realme C53 | Dr.fone
- My Videos Arent Playing on Motorola Moto G23 – What Can I Do? | Dr.fone
- Preparation to Beat Giovani in Pokemon Go For Vivo Y100i | Dr.fone
- In 2024, 6 Solutions to Unlock Infinix Phones If You Forgot Password, PIN, Pattern
- In 2024, How to Come up With the Best Pokemon Team On Oppo Find X7? | Dr.fone
- About Vivo S17e FRP Bypass
- In 2024, Your Account Has Been Disabled in the App Store and iTunes From Apple iPhone XS?
- Title: New Finding the Best Game Recorder for PC for 2024
- Author: Chloe
- Created at : 2024-06-26 06:23:52
- Updated at : 2024-06-27 06:23:52
- Link: https://ai-editing-video.techidaily.com/new-finding-the-best-game-recorder-for-pc-for-2024/
- License: This work is licensed under CC BY-NC-SA 4.0.
