
:max_bytes(150000):strip_icc():format(webp)/GettyImages-917461864-7141ebd3ec944ce6a431b8d485cc9cdb.jpg)
New Guide of 8 Photo Collage Apps for PC for 2024
Guide of 8 Photo Collage Apps for PC
2024 Guide of 8 Photo Collage Apps for PC
An easy yet powerful editor
Numerous effects to choose from
Detailed tutorials provided by the official channel
There are plenty of photo collage makers for PC that you can try Some, you’ll have to download. Some, you can use directly online through a browser. We’ll be introducing several below that you might want to try out before you end up picking out one that you think will work best for the kind of projects that you have in mind.
As a bonus, we’ve also included a beginning ‘guide’ of sorts for pic collage PC apps that you can use in order to figure out what the benefits of using a pic collage for PC.
In this article
01 [What Are the Benefits of Using Collage Software?](#Part 1)
02 [The Best 8 Free Collage Makers at a Glance](#Part 2)
Part 1 What Are the Benefits of Using Collage Software?
We start this off with the short guide we promised for using a photo collage app for PC What are the benefits? Well, the main benefit is that you can get something fun and interest out of it, of course.
And, unlike with traditional collages — which are messy and require lots of prep-work and glue — you can go create pic collages with a photo collage app for PC relatively easily. All you have to do most of the time is to choose a layout that you like and then fill it with the photographs, videos, GIFs, etc. that you want. Most programs also give you the choice to add things like text (for making the collage more meaningful), stickers, frames, and so on, so that you can fully deck out your photo collages exactly how you want to.

Part 2 The Best 8 Free Collage Makers at a Glance
Now onto our recommended list for all the different photo collage makers FREE for PC that you can try. This list will include a variety of different free collage makers for PC with different benefits. So, make sure to give each one some careful consideration We’ve added not only the specifications of each photo collage for PC but also a debrief description on why you might want to buy one over the other.
01**Wondershare Filmora Video Editor **
Specifications: Windows 7 | 8.1 | 10 | 11 (64 bit OS only)
Filmora is primarily a video editor. One that is actually used by a lot of the more popular content creators on the internet (it’s especially popular with people on YouTube, as an example, but also for corporations and entrepreneurs that need a reliable way of creating high-quality videos for every occasion.)
We included it here on our list of the best photo collages for PC because it comes with something called ‘Stock Media’ where you source images, videos, music, etc. directly — for your photo collages, video projects, etc. It also comes with a lot of fun layouts, themes, filters, and so on. So, if you’re not up for creating a custom collage, you can always depend on those to make a quick and easy one
Reasons to Buy:
● Stock Media Library for direct source of images, videos, etc.
● Layouts and templates available for quick content creation
● Lots of fun Fonts, Stickers, etc. for decorating photo collages
● Advanced Video editing tools (can be used to create video collages)

For Win 7 or later (64-bit)
For macOS 10.12 or later
02Express It
Specifications: ONLINE
Express It is an online tool that you can use as a photo collage maker (FREE) for PC. It was made by Adobe, so from that alone, you can certain of its reliability. But, even more than this, it’s generally just incredibly useful. The tool comes with a resource library that you can tap into for your projects, and it takes ‘Free Style’ Collage making to the next level with all the different customizations that it provides
Reasons to Buy:
● Large resource library with lots of stickers, clipart, images, etc.
● Photo collage templates are available for designing quick pic collages
● ‘Free-style’ mode available for creating fully unique collage

03Fotojet
Specifications: ONLINE
FotoJet, much like Express It, is an online photo collage tool that you use for your PC It’s primarily a photo editor, but it has ‘collage maker’ functionalities that will allow you to easily create pic collages on your laptop to be shared on social media or used for whatever projects you might have in mind.
Reasons to Buy:
● No download needed for use (FREE trial available)
● Tons of collage layouts for quick collage-making
● Photo editing functions for adding text, clipart, etc.

04Canva
Specifications: ONLINE
We continue our recommendations for the best tools for creating pic collage for PC with Canva Pro This online program is great because it comes with a very reliable resources library (which has just about everything that you need.) There are also tons of templates that you can use — not even just for creating collages (of which there are plenty of stylish templates, if that’s all you’re looking for), but just about everything from posters, infographics, ads, etc.
Reasons to Buy:
● Canva Pro has lots of premium resources for decorating Pic Collages
● The premium version unlocks some of the photo editing tools that are not available with the FREE version
● Templates are available for just about any project you can think of (with plenty for collages of all variety)

05Fotor
Specifications: ONLINE
Fotor is a great online editor that comes with a lot of ‘collage-making’ tools. That includes grid layouts for creating quick photo collages This, along with the tool’s established advanced photo editing functionalities, makes it very easy to create photo collages of all kinds — whether you’re creating them for the sake of creating something to remember an event by or for some special project for work.
Reasons to Buy:
● The advanced version unlocks some of the functions unavailable in the FREE version (both layouts and photo editing tools)
● Comes with lots of easy-to-use layouts for creating collages
● No download or installation required; just a quick Sign-Up

06PiZap
Specifications: ONLINE
PiZap is the last of the online photo collage apps for PC that we have on this list. It’s quite a bit more basic than some of the other online photo editors that we’ve introduced thus far, but that may be all you need It comes with the usual collage grids as well as some handy photo editing functions so that you can be sure to get the end-product to look how you want it to
Reasons to Buy:
● Lots of photo collage grits for your to try
● Easy-to-use photo editing functions
● UI is intuitive and lots of the features are set for beginners

07Phototastic Collage
Specifications: Windows 10
Phototastic Collage is a photo collage app for PC that you can download and used for quick collage projects. It’s quite simplistic, but it can get the job done As a collage maker, it comes with a selection of layouts that you can use from in order to create your photo collages. Adding to this, the usual customization features are also available (i.e., frames, text, etc.)
Reasons to Buy:
● Microsoft App with a very simple UI
● Lots of layouts for grid making
● Customizable layouts (i.e., adjust borders, frames, etc.)

08PhotoPad
Specifications: Windows XP|Vista|7|8|8.1|10|11
PhotoPad is an old-school photo collage editor for PC that’s been around for a while. It’s a particularly good choice for those who choose to stick to the older versions of Windows (like XP or Vista), as you don’t see a lot of the newer software supporting those anymore.
Much like many of the other software that we included in this list, this one is more of a general photo editor than one strictly made for collages. However, it does come with functionalities for that, so you shouldn’t miss out on anything
Reasons to Buy:
● Supports older Windows OS Systems
● Advanced photo editing functions
● Collage Feature for creating quick and easy collages

● Final Words: 2024 Guide of 8 Photo Collage Apps for PC →
● What’s the benefit of using a photo collage? What can it actually do for you? We answered these questions in the first section of this article
● As for the recommendations that we promised for the best photo collage apps, software, etc. for 2024, we chose to include a wide variety so that you can have plenty to choose form.
● If you want a general recommendation from the list that we included, we recommend using something like Filmora, Canva Pro, Express It, etc. that comes with a built-in resource library that you can take advantage of for filling up your future collage projects.
There are plenty of photo collage makers for PC that you can try Some, you’ll have to download. Some, you can use directly online through a browser. We’ll be introducing several below that you might want to try out before you end up picking out one that you think will work best for the kind of projects that you have in mind.
As a bonus, we’ve also included a beginning ‘guide’ of sorts for pic collage PC apps that you can use in order to figure out what the benefits of using a pic collage for PC.
In this article
01 [What Are the Benefits of Using Collage Software?](#Part 1)
02 [The Best 8 Free Collage Makers at a Glance](#Part 2)
Part 1 What Are the Benefits of Using Collage Software?
We start this off with the short guide we promised for using a photo collage app for PC What are the benefits? Well, the main benefit is that you can get something fun and interest out of it, of course.
And, unlike with traditional collages — which are messy and require lots of prep-work and glue — you can go create pic collages with a photo collage app for PC relatively easily. All you have to do most of the time is to choose a layout that you like and then fill it with the photographs, videos, GIFs, etc. that you want. Most programs also give you the choice to add things like text (for making the collage more meaningful), stickers, frames, and so on, so that you can fully deck out your photo collages exactly how you want to.
Part 2 The Best 8 Free Collage Makers at a Glance
Now onto our recommended list for all the different photo collage makers FREE for PC that you can try. This list will include a variety of different free collage makers for PC with different benefits. So, make sure to give each one some careful consideration We’ve added not only the specifications of each photo collage for PC but also a debrief description on why you might want to buy one over the other.
01**Wondershare Filmora Video Editor **
Specifications: Windows 7 | 8.1 | 10 | 11 (64 bit OS only)
Filmora is primarily a video editor. One that is actually used by a lot of the more popular content creators on the internet (it’s especially popular with people on YouTube, as an example, but also for corporations and entrepreneurs that need a reliable way of creating high-quality videos for every occasion.)
We included it here on our list of the best photo collages for PC because it comes with something called ‘Stock Media’ where you source images, videos, music, etc. directly — for your photo collages, video projects, etc. It also comes with a lot of fun layouts, themes, filters, and so on. So, if you’re not up for creating a custom collage, you can always depend on those to make a quick and easy one
Reasons to Buy:
● Stock Media Library for direct source of images, videos, etc.
● Layouts and templates available for quick content creation
● Lots of fun Fonts, Stickers, etc. for decorating photo collages
● Advanced Video editing tools (can be used to create video collages)
For Win 7 or later (64-bit)
For macOS 10.12 or later
02Express It
Specifications: ONLINE
Express It is an online tool that you can use as a photo collage maker (FREE) for PC. It was made by Adobe, so from that alone, you can certain of its reliability. But, even more than this, it’s generally just incredibly useful. The tool comes with a resource library that you can tap into for your projects, and it takes ‘Free Style’ Collage making to the next level with all the different customizations that it provides
Reasons to Buy:
● Large resource library with lots of stickers, clipart, images, etc.
● Photo collage templates are available for designing quick pic collages
● ‘Free-style’ mode available for creating fully unique collage
03Fotojet
Specifications: ONLINE
FotoJet, much like Express It, is an online photo collage tool that you use for your PC It’s primarily a photo editor, but it has ‘collage maker’ functionalities that will allow you to easily create pic collages on your laptop to be shared on social media or used for whatever projects you might have in mind.
Reasons to Buy:
● No download needed for use (FREE trial available)
● Tons of collage layouts for quick collage-making
● Photo editing functions for adding text, clipart, etc.
04Canva
Specifications: ONLINE
We continue our recommendations for the best tools for creating pic collage for PC with Canva Pro This online program is great because it comes with a very reliable resources library (which has just about everything that you need.) There are also tons of templates that you can use — not even just for creating collages (of which there are plenty of stylish templates, if that’s all you’re looking for), but just about everything from posters, infographics, ads, etc.
Reasons to Buy:
● Canva Pro has lots of premium resources for decorating Pic Collages
● The premium version unlocks some of the photo editing tools that are not available with the FREE version
● Templates are available for just about any project you can think of (with plenty for collages of all variety)
05Fotor
Specifications: ONLINE
Fotor is a great online editor that comes with a lot of ‘collage-making’ tools. That includes grid layouts for creating quick photo collages This, along with the tool’s established advanced photo editing functionalities, makes it very easy to create photo collages of all kinds — whether you’re creating them for the sake of creating something to remember an event by or for some special project for work.
Reasons to Buy:
● The advanced version unlocks some of the functions unavailable in the FREE version (both layouts and photo editing tools)
● Comes with lots of easy-to-use layouts for creating collages
● No download or installation required; just a quick Sign-Up
06PiZap
Specifications: ONLINE
PiZap is the last of the online photo collage apps for PC that we have on this list. It’s quite a bit more basic than some of the other online photo editors that we’ve introduced thus far, but that may be all you need It comes with the usual collage grids as well as some handy photo editing functions so that you can be sure to get the end-product to look how you want it to
Reasons to Buy:
● Lots of photo collage grits for your to try
● Easy-to-use photo editing functions
● UI is intuitive and lots of the features are set for beginners
07Phototastic Collage
Specifications: Windows 10
Phototastic Collage is a photo collage app for PC that you can download and used for quick collage projects. It’s quite simplistic, but it can get the job done As a collage maker, it comes with a selection of layouts that you can use from in order to create your photo collages. Adding to this, the usual customization features are also available (i.e., frames, text, etc.)
Reasons to Buy:
● Microsoft App with a very simple UI
● Lots of layouts for grid making
● Customizable layouts (i.e., adjust borders, frames, etc.)
08PhotoPad
Specifications: Windows XP|Vista|7|8|8.1|10|11
PhotoPad is an old-school photo collage editor for PC that’s been around for a while. It’s a particularly good choice for those who choose to stick to the older versions of Windows (like XP or Vista), as you don’t see a lot of the newer software supporting those anymore.
Much like many of the other software that we included in this list, this one is more of a general photo editor than one strictly made for collages. However, it does come with functionalities for that, so you shouldn’t miss out on anything
Reasons to Buy:
● Supports older Windows OS Systems
● Advanced photo editing functions
● Collage Feature for creating quick and easy collages
● Final Words: 2024 Guide of 8 Photo Collage Apps for PC →
● What’s the benefit of using a photo collage? What can it actually do for you? We answered these questions in the first section of this article
● As for the recommendations that we promised for the best photo collage apps, software, etc. for 2024, we chose to include a wide variety so that you can have plenty to choose form.
● If you want a general recommendation from the list that we included, we recommend using something like Filmora, Canva Pro, Express It, etc. that comes with a built-in resource library that you can take advantage of for filling up your future collage projects.
How to Add the Popular Video Text Effects to Your Video?
If your video needs to have texts and titles, instead of static text effects, you should opt for video text effects. Basically, you will be showing eye-catching animated texts instead of unappealing still texts. You can get the attention of the audience towards your texts instantly and get the messages across swiftly. There are literally unlimited types of video editing text effects available but a handful of them are widely used by video creators.
If you want to add those popular text effects to your video, you will need a professional video editor. Wondershare Filmora is the best video editor to add all the popular and amazing video text effects. Filmora is equally popular among professionals and amateurs due to its wide range of text effects and intuitive user interface. We will list down the popular text effects in Filmora and illustrate how to add them to your video using Filmora.
Part 1. Popular text effects in Filmora
There are unlimited text effects available in Filmora but some of them are extremely popular that video creators regularly use in their videos. Here is the list of the popular Filmora video editor text effects that you should be aware of.
1. Text Swipe Effect
Text swipe effects are the most commonly used in today’s videos on social media and video streaming platforms. In this effect, the text slides into the video frame from a particular direction. The entire text can swipe in if it is a one-liner and it can even swipe in word by word or sentence by sentence.
If you want to show short texts and you do not want to experiment with text animations, the text swipe effect is the safest option. For example, if you want to display your social media handles, your location, a coupon code, or a correction phrase that you have uttered wrongly, text swipe effects should be on your video.
2. Type Text Effect
The type text effect in Filmora is referred to as the typewriter text effect in Premiere Pro and After Effects. The effect displays the text as if it is being typed in real-time as it is done in a typewriter. The characters will appear on the screen with a cursor on the screen and therefore, it takes more duration than most other text effects.
The type text effect is particularly useful when you are displaying a large size of text on the screen. It is also widely used when showing a paragraph of text instead of a simple line. This helps in drawing the attention of the audience to the paragraph and retaining the attention for a longer duration of time.
3. WordArt Effect
WordArt is synonymous with MS Word where large words have 3D effects and highlighted background. Apart from 3D effect, text can have a thick stroke or outline as well as a gradient color style when WordArt effect is applied. In Filmora, you will find a plethora of WordArt effects and some are them are modern while others have a retro feel to them.
The WordArt effect is particularly popular while displaying titles and funny texts on the entire screen or covering a large part of the video. These are mostly used in the opening or ending scenes of the video. Besides, some video creators use them while making transitions from one scene to another.
4. Keyframe
If you want to create text animations as per your requirements, you have to use keyframes in any video editor. You can always apply the ready-made video editing text effects but if you want to customize and personalize, you can add keyframes in between two timestamps. Thereafter, you need to change text styles and parameters for each frame so that it looks like an animation.
If you want to add uniqueness to text animations so that you can make the audience wonder and appreciate, keyframes are the way. Adding keyframes in the text layer on Filmora is super easy and you can get effects like texts slowly scaling up, dancing randomly, changing fonts, and much more.
5. Color Text Effect
The color text effect is becoming extremely popular and it is widely used for opening and ending credits. Flashing different colors through your texts and titles against a darker background can act as a feast for the human eyes. There are different types of color text effects available that can make your text stand out.
When you are using color text effect, you need to maintain a large font size for your text so that it is widely visible. Even if your background is not dark, you can use a darker box in the background of the text or a darker frame around the text to amplify the effect.
6. Bounce to Zoom Effect
The bounce to zoom effect is widely used during a transition from one scene to another. It is regarded as a funny text effect where the text can swipe in and bounce and enlarge in size. Alternatively, the characters can bounce individually and zoom in and out with the motion as if they are dancing.
Apart from transitions, you can use the bounce to zoom effect to showcase a few important texts at the bottom of the video so that the viewers notice your text. Generally, the effect lasts for a few seconds before the text disappears. When you are using it for a larger text, you can use it for promotions and advertisements as well.
Part 2. How to Add Text Effects with Filmora
When it comes to adding text effects and animations, there is no better alternative to Filmora . Thanks to its super intuitive user interface, adding and customizing text effects in videos is as simple as text effect video online. Apart from the popular text effects we have discussed, there are so many categories of text effect and animation templates available on Filmora. Here are the steps on how to create text effect video in Filmora.
Free Download For Win 7 or later(64-bit)
Free Download For macOS 10.14 or later
Step1 Download and install Wondershare Filmora as per your operating system. Filmora is available for Windows and Mac users. Launch Filmora and click on New Project on the welcome screen.

Step2 Import your video clips under Project Media folder and drop them onto the timeline. Go to Titles menu option and you will see different categories and templates of text effects and templates from the left panel.

Step3 Search for a popular text effect from the search box. Select a text effect template and drop it on the timeline. Adjust its place on the timeline depending on where you want the text to appear. Double-click on the text layer and edit the text as per your requirements.

You can edit the style from fonts and settings section. You can also go to Advanced section available for more minute editing and get the desired text effect.
Conclusion
If texts are an essential part of your video, you should apply amazing video editing text effects to the texts and titles present in your video. You can use the common and the popular video text effects as well as use unique text effects to make your video stand out easily. There is no better video editor to add text effects to your video other than Wondershare Filmora for its unlimited text effect and animation templates.
Part 1. Popular text effects in Filmora
There are unlimited text effects available in Filmora but some of them are extremely popular that video creators regularly use in their videos. Here is the list of the popular Filmora video editor text effects that you should be aware of.
1. Text Swipe Effect
Text swipe effects are the most commonly used in today’s videos on social media and video streaming platforms. In this effect, the text slides into the video frame from a particular direction. The entire text can swipe in if it is a one-liner and it can even swipe in word by word or sentence by sentence.
If you want to show short texts and you do not want to experiment with text animations, the text swipe effect is the safest option. For example, if you want to display your social media handles, your location, a coupon code, or a correction phrase that you have uttered wrongly, text swipe effects should be on your video.
2. Type Text Effect
The type text effect in Filmora is referred to as the typewriter text effect in Premiere Pro and After Effects. The effect displays the text as if it is being typed in real-time as it is done in a typewriter. The characters will appear on the screen with a cursor on the screen and therefore, it takes more duration than most other text effects.
The type text effect is particularly useful when you are displaying a large size of text on the screen. It is also widely used when showing a paragraph of text instead of a simple line. This helps in drawing the attention of the audience to the paragraph and retaining the attention for a longer duration of time.
3. WordArt Effect
WordArt is synonymous with MS Word where large words have 3D effects and highlighted background. Apart from 3D effect, text can have a thick stroke or outline as well as a gradient color style when WordArt effect is applied. In Filmora, you will find a plethora of WordArt effects and some are them are modern while others have a retro feel to them.
The WordArt effect is particularly popular while displaying titles and funny texts on the entire screen or covering a large part of the video. These are mostly used in the opening or ending scenes of the video. Besides, some video creators use them while making transitions from one scene to another.
4. Keyframe
If you want to create text animations as per your requirements, you have to use keyframes in any video editor. You can always apply the ready-made video editing text effects but if you want to customize and personalize, you can add keyframes in between two timestamps. Thereafter, you need to change text styles and parameters for each frame so that it looks like an animation.
If you want to add uniqueness to text animations so that you can make the audience wonder and appreciate, keyframes are the way. Adding keyframes in the text layer on Filmora is super easy and you can get effects like texts slowly scaling up, dancing randomly, changing fonts, and much more.
5. Color Text Effect
The color text effect is becoming extremely popular and it is widely used for opening and ending credits. Flashing different colors through your texts and titles against a darker background can act as a feast for the human eyes. There are different types of color text effects available that can make your text stand out.
When you are using color text effect, you need to maintain a large font size for your text so that it is widely visible. Even if your background is not dark, you can use a darker box in the background of the text or a darker frame around the text to amplify the effect.
6. Bounce to Zoom Effect
The bounce to zoom effect is widely used during a transition from one scene to another. It is regarded as a funny text effect where the text can swipe in and bounce and enlarge in size. Alternatively, the characters can bounce individually and zoom in and out with the motion as if they are dancing.
Apart from transitions, you can use the bounce to zoom effect to showcase a few important texts at the bottom of the video so that the viewers notice your text. Generally, the effect lasts for a few seconds before the text disappears. When you are using it for a larger text, you can use it for promotions and advertisements as well.
Part 2. How to Add Text Effects with Filmora
When it comes to adding text effects and animations, there is no better alternative to Filmora . Thanks to its super intuitive user interface, adding and customizing text effects in videos is as simple as text effect video online. Apart from the popular text effects we have discussed, there are so many categories of text effect and animation templates available on Filmora. Here are the steps on how to create text effect video in Filmora.
Free Download For Win 7 or later(64-bit)
Free Download For macOS 10.14 or later
Step1 Download and install Wondershare Filmora as per your operating system. Filmora is available for Windows and Mac users. Launch Filmora and click on New Project on the welcome screen.
Step2 Import your video clips under Project Media folder and drop them onto the timeline. Go to Titles menu option and you will see different categories and templates of text effects and templates from the left panel.
Step3 Search for a popular text effect from the search box. Select a text effect template and drop it on the timeline. Adjust its place on the timeline depending on where you want the text to appear. Double-click on the text layer and edit the text as per your requirements.
You can edit the style from fonts and settings section. You can also go to Advanced section available for more minute editing and get the desired text effect.
Conclusion
If texts are an essential part of your video, you should apply amazing video editing text effects to the texts and titles present in your video. You can use the common and the popular video text effects as well as use unique text effects to make your video stand out easily. There is no better video editor to add text effects to your video other than Wondershare Filmora for its unlimited text effect and animation templates.
The Only Guide You’ll Ever Need to Learn GIF Design That Get Shared Like Crazy
The Only Guide You’ll Ever Need to Learn GIF Design That Get Shared Like Crazy
An easy yet powerful editor
Numerous effects to choose from
Detailed tutorials provided by the official channel
The Only Guide You’ll Ever Need to Learn GIF Design That Get Shared Like Crazy
In this article
01 [8 Principles for Great GIF Design](#Part 1)
02 [6 Amazing Examples of Animated Gifs in Web Design](#Part 2)
03 [Learn How to Create and Add Gifs to Interactive Layouts in Filmora](#Part 3)
Part 1 Principles for Great GIF Design
Creating GIFs for infotainment or casual information sharing is the current talk of the trend. You might have visibly landed across a heap of tantalizing GIFs in blogs, social media posts, product promotion websites and almost every other domain you can possibly think of. Using GIFs for any type of content promotion is bound to captivate the target audience in impressive multiplicities. Ever wondered what’s the cue behind the mass appeal that GIFs create? Well, an obvious answer is the stunning GIF design.
When going for GIF creation and selection, design plays the key role in creating considerable buzz about the information being transmitted. To add impact to your creation, you need to pay considerable attention to its design implications, thus ensuring that the right things get presented in the right way. Outlined below are some amazing principles you can use to enhance your GIF design to the next level:
01Ensure Accuracy and Preciseness
The primary concern you need to be attentive about while designing a GIF is its preciseness. Ensure ban exactness of information and confine your creation to the theme and requirement of your creation, like, the message you want to deliver or the impact you want to create through the GIF. Balance your creativity within specific content parameters and avoid getting carried away or overdoing on the beautifying aspect.
As an example, it is visibly not appealing to add a wholesome mix of 15 shades and 20 different elements in a nature-based GIF. You will end up getting too harsh on the viewers’ eyes, confusing them with a hoard of speeding elements and banging colors. You can instead stick to 2 or 3 frames with an intelligent mix of 2 complementary shades.
02Maintain Visual Identity
An important aspect to keep in mind while attempting to design GIF is, it should visually relate to the underlying content. For instance, if you are intending a brand promotion through your GIF, lay stress on adding elements like, brand definition, product specifications, know-how of your work patterns, etc. ensure that your content flows naturally and has exactness.
Other alternatives are, using your product logo as the GIF background, character representation of your brand or using some explicit product oriented themes. While, you are free to pick anything that suits your preferences and needs, just make sure that using it in your GIF adds value to your brand instead of giving an out of the box feel.
Image Name: The-only-guide-you’ll-ever-need-to-learn-gif-design-that-get-shared-like-crazy-1

03Cut Down on Unnecessary Frames
Have you ever encountered a halt in the natural loop of your GIF out of nowhere? While pondering over the underlying cause, it is a common assumption to take this as an animation fallacy, but that’s evidently not the case. The actual culprits behind this glitch are those extra frames that contribute towards nothing but adding weight to an already heavy file.
To set this straight, you should switch to removing any extra frames, while saving a particular one which you may stretch to a desired duration according to the break point of your contents in the GIF. However, take caution to maintain the visual quality of your GIF while you remove those extra frames.
04Make Your GIF Accessible
You should always adhere to the concern of accessibility while creating a GIF. The reason being, your content is visibly going to get mass attention across the web and you cannot filter out visitors, make sure your GIF is easily accessible to all kind of users, particularly those with vision limitations, like, epileptic patients or the ones using screen readers.
Focus on describing your GIF content with alt text and using a limited blinking and flashing rate. In case your GIF content is primarily text based, take care to limit the effective color and image movement and adjust the frames rates to avoid constant and quick movement of image frames when adding many clips on a single page.
Pay additional heed to the auto play feature of your GIFs. It can be visibly annoying to be welcomed on a site homepage with GIFs enjoying an auto play session of their own. You can alternatively, incorporate a ‘Click to Play’ option or grant your site visitors the liberty to decide on what is to be played when.

05Use Storyboards
When aiming to create visibly appealing GIFs, you need to lay considerable stress on choosing an apt background story. Don’t get misled by the wrong assumption of using any random background, owing to the short play duration of GIFs. An impressive solution to this concern is taking the help of a storyboard to keep track of your GIF’s content flow.
Using a storyboard is quite effective means of being in line with the direction of content movement, rescuing you from the hustle of going off the track. This comes explicitly handy when you are working with a team of creators. The storyboard is there to keep everything at the exact place, thus improving member communications and boosting up the design process.

06Focus on Creating Loops
Consider creating an animated motion loop for your GIF allowing a repeated and comprehensive view of your content. Looping projects a deeper observation of the clip and its contents in a seamless transition. However, creating an infinite motion loop in GIFs is quite tricky, as you need to pay utmost concern to ensure a smooth content flow and chances of even the slightest errors are not entertained.
Any loopholes in placement of your GIF elements will get noticed within a blink and lead to an unsatisfactory user experience. Hence, you need to check each of your content frames separately to eliminate chances of possible errors. If you are a beginner, try working with geometrical animations to get the initial pickup. This will be advantageous in deciding the exact element positions at the start and end of the GIF.
07Make Use of Motion Blur
Using the concept of motion blur is pivotal in providing a natural flow and feel to your GIF, which, in an otherwise case would ordinarily appear as a mere collection of static images clubbed together. This would give a wobbling feel with unsteady frame movements to your viewers. The motion blur effect potentially ensures a smooth content flow, and your GIF looks like a short video captured from a camera.
08Stick to a Reduced File Size
Creating GIF of within a standard size range is quite difficult, owing to the fact that these are shared across a variety of media platforms, each having a different file size constraint. It is, however, recommended to stick to a file size as low as possible to escape the notch of modifying the same, ener5y time you need to work with the GIF on a different platform.
Listed below are a few ways to limit your GIF to a lower file size:
● Restrict your GIF to a frame count under 150, exceeding which, it will get difficult to export the GIF to most of the commonly visited social media and content sharing platforms.
● When your GIF is ready to export, adjust its lossy parameter between 5 and 10 to boost the file compression rate. Look for a setting that decreases the effective file size without compromising with the overall GIF design.
● Restrict to a minimum possible color usage. This will not only intensify the GIF design, but also contribute in maintaining a decreased file size. You can instead, focus on playing with animations or adjusting your image frames to longer play durations.
● Don’t experiment with multiple background gradients in your GIF. You can select from either a completely opaque, or a totally transparent background. Adding unnecessary gradients will end up giving your GIF a hazy look, along with a visibly large file that will be difficult to export non any platform.
Part 2 Amazing Examples of Animated Gifs in Web Design
GIFs are an effective means of adding appeal to brand promotions and achieving improved market buildup by delivering just the right content in the most captivating and interesting ways. You can use them as creative web design tools to add spark to your product sites, which can potentially boost the market value and reach of your product by multiplying the number of visitors to your site.
Discussed below are some stunning examples of using animated GIFs to enhance commercial web design, which you can use to create a significant buzz about your product among a target audience:
01Marie Weber
This is a shoe designer company in France, famous for its classy, handmade shoes. On visiting the company’s site, you are welcomed by a simple and subtle, animated product logo on each page. This animated logo is a masterpiece in itself, telling you the about the lavishness of the associated product.
On navigating further, you will find animated elements, like; shoe images and collection names, which appear on the screen before a zoom out. There are underlined links that pop up to animate beneath the name, indicating the link you are going to visit.
02Wonderful Weekends Festival
This is an absolute animation delight, where the welcome page of the site greets you with vibrant pieces in motion, and a pop up box informs you of the festival’s arrival time and asks you to select one from the options of ‘Play Now’ or ‘Show Me the Festival’.
As you click to make a choice, the Google brand shines with associated colors. As you continue to browse through the site, pages open up with brand color animations, along with colored active links flashing on the pages.

03Google
This is a brand name that needs no introduction. Google has launched its ‘Your Plan, Your Planet’ site to infuse awareness about environment conservation and eco friendly lifestyles, guiding visitors on ways and means of introducing related changes. The site greets you with a simple layout, with a short text moving in and getting still. Click on ‘Let’s Get Started’ and you will see 4 amazingly animated icons that open up to more vibrant animations.
Tap any one of the swinging refrigerator door, the illuminated light bulb, the running faucet or the teddy bear waving at you, to land on a schema that informs you about effective means of improving on conservation in within your selected section. This is a perfect example of using animations as a marketing strategy to captivate people’s attention on a subject that evidently turns them off.
04Pete Nottage
Designed explicitly as a hiring site for voice presenter Pete Nottage, this website tells you everything about the actor and the credibility of hiring him. The site lands among the best examples of web animation usage. The welcome page of the site greets you with the brand logo. Tap on the red swipe and you will get to know that the brand infuses vibrancy to something that’s originally dull.
Next, you will find a plethora of dynamic and elegant animations in a plying plane, cityscape, flowing sea and sailing boats, moving cars and excusive motion graphics on each building. Visiting the animated site links provides you an insight of the actor’s personality. In the ‘About’ section, you can find a headshot animation, that disappears on clicking, and is followed by a more dynamic motion snippet.
05Zamzar
This one is an online file conversion site and lives up to its tagline ‘File Conversion Made Easy’ through a concrete animation on the welcome page. The file conversion on this site is quick, 3-step process, with a blinking animation indicating the current conversion stage.
For instance, when you are at the first step of selecting a file to convert, the animation shoes a blinking glow on number 1. This continues for the rest of the steps, till your file is finally converted into the desired file format.
06Blizzard: Warcraft III Reforged
Warcraft was one complete heaven of adventure and thrill for console gamers. While the enticing cutscenes with stunning motion graphics were an absolute favorite, the game had a plenty of other exciting elements.
The relaunched game (Warcraft III Reforged) website has a mix of gaming adventures and cutscenes running in the site’s background with the game title and pitch appearing as an overlaid animation. On navigating through the site, you will find classy animated elements that take you on a nostalgic trip of the original game.
Part 3 Learn How to Create and Add Gifs to Interactive Layouts in Filmora
Now that you are quite familiar with the utility of GIFs in almost every market field, and have seen stunning examples of GIF design and usage for an impressive brand promotion, let’s take a dive into creating and using these motion clips to make interactive graphic layouts for websites, social media blogs and posts, and a variety of other applications that require some brilliant imagery for market promotion.
When looking for the perfect GIF designer software, Wondershare Filmora Video Editor is the most affordable pick. This is a free and an enhanced GIF design tool, packed with world class and premium quality features that are most suitable for giving the much appreciated professional touch to your graphic artwork. Here’s how you can work with Filmora to make alluring graphic layouts:
Step 1: Launch Filmora
The software is readily compatible to your Windows and MacOS devices and you don’t even require a signup to use the application. Just download and install the software in your preferred device and launch the same to reach the software’s welcome interface.
Filmora Free Download Link:
Step 2: Upload Media Files
Select and import the desired media files from your device to upload them to the Filmora timeline. You can either pick a video or choose a series of static images.
Step 3: Add to Timeline
Once imported, you need to add the selected files to the software’s editor timeline. You can use the ‘Drag and Drop’ method to get this done.

Wondershare Filmora - Best Video Editor for Mac/Windows
5,481,435 people have downloaded it.
Build unique custom animations without breaking a sweat.
Focus on creating epic stories and leave the details to Filmora’s auto features.
Start a creative adventure with drag & drop effects and endless possibilities.
Filmora simplifies advanced features to save you time and effort.
Filmora cuts out repetition so you can move on to your next creative breakthrough.
Step 4: Explore Your Editing Skills
As already stated, the Filmora effects library is an extensive inventory of stunning features to compliment your artwork with matchless class. You are free to choose from tons of image and video editing effects and filters suited to your GIF content to create excellent pieces of graphic art.
When starting to customize your GIF in Filmora, you can begin with cropping and trimming your images or video to the perfect part, or even cut and split them to ward off unwanted portions, or rotate and flip the images to set them in the perfect orientation.
You can further add elements like, graphic transitions, overlays, animations and texts, and etc., to customize your artwork to your heart’s content. The software’s audio-visual library facilitates you with around 300 audio-visual effects and music choices to supplement your creation with a conducive sound feel. You can also make adjustments in frame speed and play durations to get the best most snippet ever!
You are granted the liberty to choose almost any common file format to create and customize GIFs in Filmora. A more convincing feature is, the software does not leave a watermark on your artwork and you can easily share your creation across media platforms.

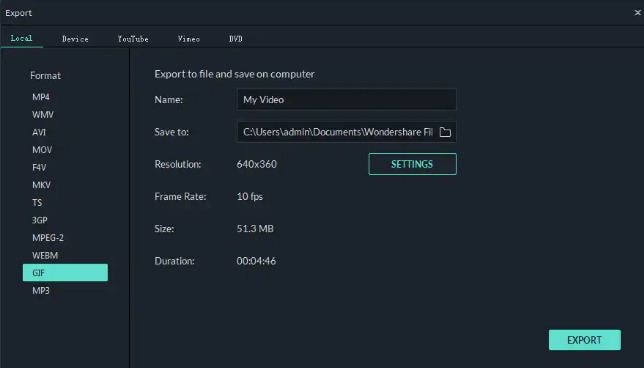
Step 5: Save and Export
Once your creation satisfies you, save it to your device with a .gif extension, from where it can be exported to various media sharing platforms with ease.
● Key Takeaways from This Episode →
● When planning a perfect and appealing product marketing strategy, you can consider using GIFs to enhance the feel. Complement your product site with suitable GIF design and graphic transitions can prove pivotal to target and hold your related audience.
● Looking for the best GIF creator and customization software, you can rely on Filmora to create and customize professional quality GIFs with utmost convenience.
The Only Guide You’ll Ever Need to Learn GIF Design That Get Shared Like Crazy
In this article
01 [8 Principles for Great GIF Design](#Part 1)
02 [6 Amazing Examples of Animated Gifs in Web Design](#Part 2)
03 [Learn How to Create and Add Gifs to Interactive Layouts in Filmora](#Part 3)
Part 1 Principles for Great GIF Design
Creating GIFs for infotainment or casual information sharing is the current talk of the trend. You might have visibly landed across a heap of tantalizing GIFs in blogs, social media posts, product promotion websites and almost every other domain you can possibly think of. Using GIFs for any type of content promotion is bound to captivate the target audience in impressive multiplicities. Ever wondered what’s the cue behind the mass appeal that GIFs create? Well, an obvious answer is the stunning GIF design.
When going for GIF creation and selection, design plays the key role in creating considerable buzz about the information being transmitted. To add impact to your creation, you need to pay considerable attention to its design implications, thus ensuring that the right things get presented in the right way. Outlined below are some amazing principles you can use to enhance your GIF design to the next level:
01Ensure Accuracy and Preciseness
The primary concern you need to be attentive about while designing a GIF is its preciseness. Ensure ban exactness of information and confine your creation to the theme and requirement of your creation, like, the message you want to deliver or the impact you want to create through the GIF. Balance your creativity within specific content parameters and avoid getting carried away or overdoing on the beautifying aspect.
As an example, it is visibly not appealing to add a wholesome mix of 15 shades and 20 different elements in a nature-based GIF. You will end up getting too harsh on the viewers’ eyes, confusing them with a hoard of speeding elements and banging colors. You can instead stick to 2 or 3 frames with an intelligent mix of 2 complementary shades.
02Maintain Visual Identity
An important aspect to keep in mind while attempting to design GIF is, it should visually relate to the underlying content. For instance, if you are intending a brand promotion through your GIF, lay stress on adding elements like, brand definition, product specifications, know-how of your work patterns, etc. ensure that your content flows naturally and has exactness.
Other alternatives are, using your product logo as the GIF background, character representation of your brand or using some explicit product oriented themes. While, you are free to pick anything that suits your preferences and needs, just make sure that using it in your GIF adds value to your brand instead of giving an out of the box feel.
Image Name: The-only-guide-you’ll-ever-need-to-learn-gif-design-that-get-shared-like-crazy-1
03Cut Down on Unnecessary Frames
Have you ever encountered a halt in the natural loop of your GIF out of nowhere? While pondering over the underlying cause, it is a common assumption to take this as an animation fallacy, but that’s evidently not the case. The actual culprits behind this glitch are those extra frames that contribute towards nothing but adding weight to an already heavy file.
To set this straight, you should switch to removing any extra frames, while saving a particular one which you may stretch to a desired duration according to the break point of your contents in the GIF. However, take caution to maintain the visual quality of your GIF while you remove those extra frames.
04Make Your GIF Accessible
You should always adhere to the concern of accessibility while creating a GIF. The reason being, your content is visibly going to get mass attention across the web and you cannot filter out visitors, make sure your GIF is easily accessible to all kind of users, particularly those with vision limitations, like, epileptic patients or the ones using screen readers.
Focus on describing your GIF content with alt text and using a limited blinking and flashing rate. In case your GIF content is primarily text based, take care to limit the effective color and image movement and adjust the frames rates to avoid constant and quick movement of image frames when adding many clips on a single page.
Pay additional heed to the auto play feature of your GIFs. It can be visibly annoying to be welcomed on a site homepage with GIFs enjoying an auto play session of their own. You can alternatively, incorporate a ‘Click to Play’ option or grant your site visitors the liberty to decide on what is to be played when.
05Use Storyboards
When aiming to create visibly appealing GIFs, you need to lay considerable stress on choosing an apt background story. Don’t get misled by the wrong assumption of using any random background, owing to the short play duration of GIFs. An impressive solution to this concern is taking the help of a storyboard to keep track of your GIF’s content flow.
Using a storyboard is quite effective means of being in line with the direction of content movement, rescuing you from the hustle of going off the track. This comes explicitly handy when you are working with a team of creators. The storyboard is there to keep everything at the exact place, thus improving member communications and boosting up the design process.
06Focus on Creating Loops
Consider creating an animated motion loop for your GIF allowing a repeated and comprehensive view of your content. Looping projects a deeper observation of the clip and its contents in a seamless transition. However, creating an infinite motion loop in GIFs is quite tricky, as you need to pay utmost concern to ensure a smooth content flow and chances of even the slightest errors are not entertained.
Any loopholes in placement of your GIF elements will get noticed within a blink and lead to an unsatisfactory user experience. Hence, you need to check each of your content frames separately to eliminate chances of possible errors. If you are a beginner, try working with geometrical animations to get the initial pickup. This will be advantageous in deciding the exact element positions at the start and end of the GIF.
07Make Use of Motion Blur
Using the concept of motion blur is pivotal in providing a natural flow and feel to your GIF, which, in an otherwise case would ordinarily appear as a mere collection of static images clubbed together. This would give a wobbling feel with unsteady frame movements to your viewers. The motion blur effect potentially ensures a smooth content flow, and your GIF looks like a short video captured from a camera.
08Stick to a Reduced File Size
Creating GIF of within a standard size range is quite difficult, owing to the fact that these are shared across a variety of media platforms, each having a different file size constraint. It is, however, recommended to stick to a file size as low as possible to escape the notch of modifying the same, ener5y time you need to work with the GIF on a different platform.
Listed below are a few ways to limit your GIF to a lower file size:
● Restrict your GIF to a frame count under 150, exceeding which, it will get difficult to export the GIF to most of the commonly visited social media and content sharing platforms.
● When your GIF is ready to export, adjust its lossy parameter between 5 and 10 to boost the file compression rate. Look for a setting that decreases the effective file size without compromising with the overall GIF design.
● Restrict to a minimum possible color usage. This will not only intensify the GIF design, but also contribute in maintaining a decreased file size. You can instead, focus on playing with animations or adjusting your image frames to longer play durations.
● Don’t experiment with multiple background gradients in your GIF. You can select from either a completely opaque, or a totally transparent background. Adding unnecessary gradients will end up giving your GIF a hazy look, along with a visibly large file that will be difficult to export non any platform.
Part 2 Amazing Examples of Animated Gifs in Web Design
GIFs are an effective means of adding appeal to brand promotions and achieving improved market buildup by delivering just the right content in the most captivating and interesting ways. You can use them as creative web design tools to add spark to your product sites, which can potentially boost the market value and reach of your product by multiplying the number of visitors to your site.
Discussed below are some stunning examples of using animated GIFs to enhance commercial web design, which you can use to create a significant buzz about your product among a target audience:
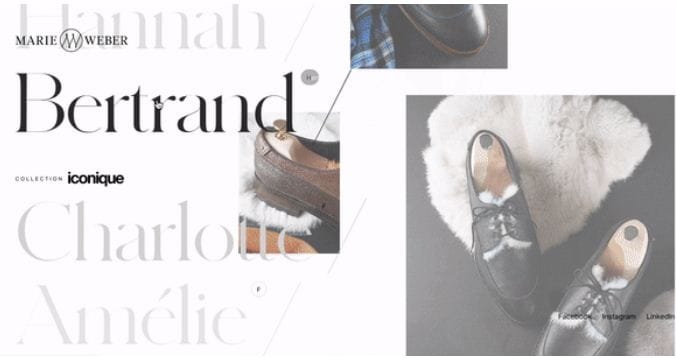
01Marie Weber
This is a shoe designer company in France, famous for its classy, handmade shoes. On visiting the company’s site, you are welcomed by a simple and subtle, animated product logo on each page. This animated logo is a masterpiece in itself, telling you the about the lavishness of the associated product.
On navigating further, you will find animated elements, like; shoe images and collection names, which appear on the screen before a zoom out. There are underlined links that pop up to animate beneath the name, indicating the link you are going to visit.
02Wonderful Weekends Festival
This is an absolute animation delight, where the welcome page of the site greets you with vibrant pieces in motion, and a pop up box informs you of the festival’s arrival time and asks you to select one from the options of ‘Play Now’ or ‘Show Me the Festival’.
As you click to make a choice, the Google brand shines with associated colors. As you continue to browse through the site, pages open up with brand color animations, along with colored active links flashing on the pages.
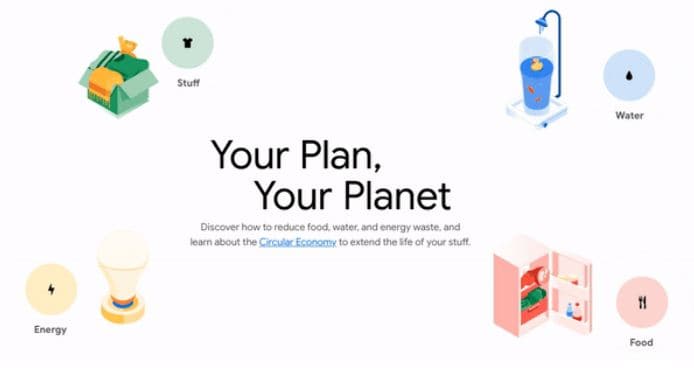
03Google
This is a brand name that needs no introduction. Google has launched its ‘Your Plan, Your Planet’ site to infuse awareness about environment conservation and eco friendly lifestyles, guiding visitors on ways and means of introducing related changes. The site greets you with a simple layout, with a short text moving in and getting still. Click on ‘Let’s Get Started’ and you will see 4 amazingly animated icons that open up to more vibrant animations.
Tap any one of the swinging refrigerator door, the illuminated light bulb, the running faucet or the teddy bear waving at you, to land on a schema that informs you about effective means of improving on conservation in within your selected section. This is a perfect example of using animations as a marketing strategy to captivate people’s attention on a subject that evidently turns them off.
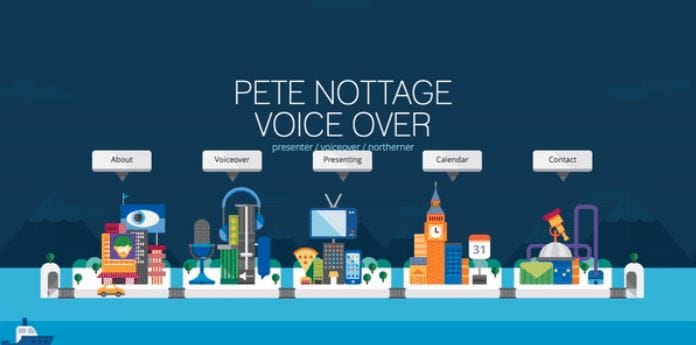
04Pete Nottage
Designed explicitly as a hiring site for voice presenter Pete Nottage, this website tells you everything about the actor and the credibility of hiring him. The site lands among the best examples of web animation usage. The welcome page of the site greets you with the brand logo. Tap on the red swipe and you will get to know that the brand infuses vibrancy to something that’s originally dull.
Next, you will find a plethora of dynamic and elegant animations in a plying plane, cityscape, flowing sea and sailing boats, moving cars and excusive motion graphics on each building. Visiting the animated site links provides you an insight of the actor’s personality. In the ‘About’ section, you can find a headshot animation, that disappears on clicking, and is followed by a more dynamic motion snippet.
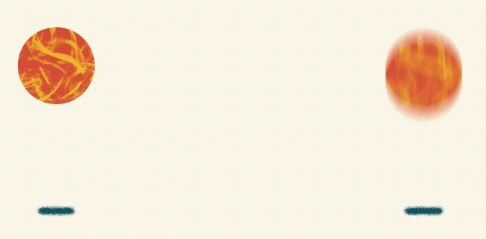
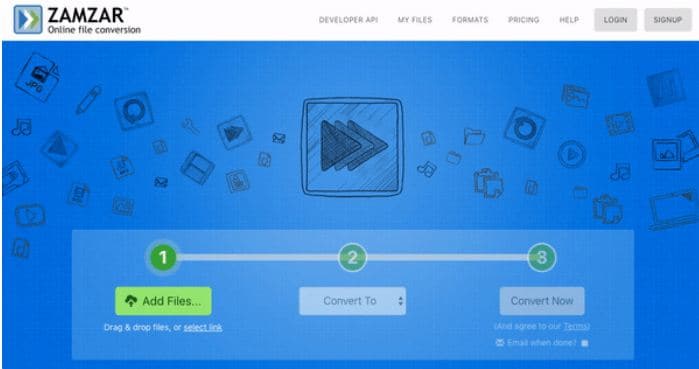
05Zamzar
This one is an online file conversion site and lives up to its tagline ‘File Conversion Made Easy’ through a concrete animation on the welcome page. The file conversion on this site is quick, 3-step process, with a blinking animation indicating the current conversion stage.
For instance, when you are at the first step of selecting a file to convert, the animation shoes a blinking glow on number 1. This continues for the rest of the steps, till your file is finally converted into the desired file format.
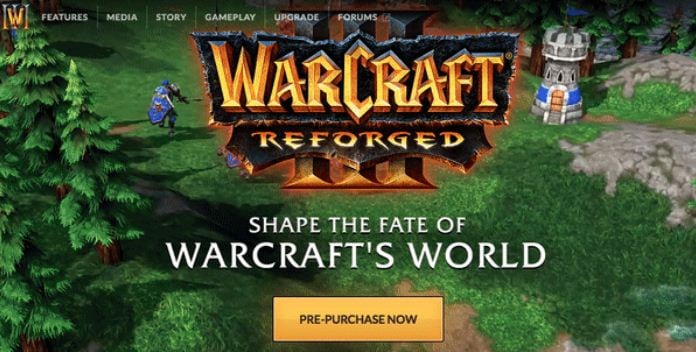
06Blizzard: Warcraft III Reforged
Warcraft was one complete heaven of adventure and thrill for console gamers. While the enticing cutscenes with stunning motion graphics were an absolute favorite, the game had a plenty of other exciting elements.
The relaunched game (Warcraft III Reforged) website has a mix of gaming adventures and cutscenes running in the site’s background with the game title and pitch appearing as an overlaid animation. On navigating through the site, you will find classy animated elements that take you on a nostalgic trip of the original game.
Part 3 Learn How to Create and Add Gifs to Interactive Layouts in Filmora
Now that you are quite familiar with the utility of GIFs in almost every market field, and have seen stunning examples of GIF design and usage for an impressive brand promotion, let’s take a dive into creating and using these motion clips to make interactive graphic layouts for websites, social media blogs and posts, and a variety of other applications that require some brilliant imagery for market promotion.
When looking for the perfect GIF designer software, Wondershare Filmora Video Editor is the most affordable pick. This is a free and an enhanced GIF design tool, packed with world class and premium quality features that are most suitable for giving the much appreciated professional touch to your graphic artwork. Here’s how you can work with Filmora to make alluring graphic layouts:
Step 1: Launch Filmora
The software is readily compatible to your Windows and MacOS devices and you don’t even require a signup to use the application. Just download and install the software in your preferred device and launch the same to reach the software’s welcome interface.
Filmora Free Download Link:
Step 2: Upload Media Files
Select and import the desired media files from your device to upload them to the Filmora timeline. You can either pick a video or choose a series of static images.
Step 3: Add to Timeline
Once imported, you need to add the selected files to the software’s editor timeline. You can use the ‘Drag and Drop’ method to get this done.
Wondershare Filmora - Best Video Editor for Mac/Windows
5,481,435 people have downloaded it.
Build unique custom animations without breaking a sweat.
Focus on creating epic stories and leave the details to Filmora’s auto features.
Start a creative adventure with drag & drop effects and endless possibilities.
Filmora simplifies advanced features to save you time and effort.
Filmora cuts out repetition so you can move on to your next creative breakthrough.
Step 4: Explore Your Editing Skills
As already stated, the Filmora effects library is an extensive inventory of stunning features to compliment your artwork with matchless class. You are free to choose from tons of image and video editing effects and filters suited to your GIF content to create excellent pieces of graphic art.
When starting to customize your GIF in Filmora, you can begin with cropping and trimming your images or video to the perfect part, or even cut and split them to ward off unwanted portions, or rotate and flip the images to set them in the perfect orientation.
You can further add elements like, graphic transitions, overlays, animations and texts, and etc., to customize your artwork to your heart’s content. The software’s audio-visual library facilitates you with around 300 audio-visual effects and music choices to supplement your creation with a conducive sound feel. You can also make adjustments in frame speed and play durations to get the best most snippet ever!
You are granted the liberty to choose almost any common file format to create and customize GIFs in Filmora. A more convincing feature is, the software does not leave a watermark on your artwork and you can easily share your creation across media platforms.
Step 5: Save and Export
Once your creation satisfies you, save it to your device with a .gif extension, from where it can be exported to various media sharing platforms with ease.
● Key Takeaways from This Episode →
● When planning a perfect and appealing product marketing strategy, you can consider using GIFs to enhance the feel. Complement your product site with suitable GIF design and graphic transitions can prove pivotal to target and hold your related audience.
● Looking for the best GIF creator and customization software, you can rely on Filmora to create and customize professional quality GIFs with utmost convenience.
The Only Guide You’ll Ever Need to Learn GIF Design That Get Shared Like Crazy
In this article
01 [8 Principles for Great GIF Design](#Part 1)
02 [6 Amazing Examples of Animated Gifs in Web Design](#Part 2)
03 [Learn How to Create and Add Gifs to Interactive Layouts in Filmora](#Part 3)
Part 1 Principles for Great GIF Design
Creating GIFs for infotainment or casual information sharing is the current talk of the trend. You might have visibly landed across a heap of tantalizing GIFs in blogs, social media posts, product promotion websites and almost every other domain you can possibly think of. Using GIFs for any type of content promotion is bound to captivate the target audience in impressive multiplicities. Ever wondered what’s the cue behind the mass appeal that GIFs create? Well, an obvious answer is the stunning GIF design.
When going for GIF creation and selection, design plays the key role in creating considerable buzz about the information being transmitted. To add impact to your creation, you need to pay considerable attention to its design implications, thus ensuring that the right things get presented in the right way. Outlined below are some amazing principles you can use to enhance your GIF design to the next level:
01Ensure Accuracy and Preciseness
The primary concern you need to be attentive about while designing a GIF is its preciseness. Ensure ban exactness of information and confine your creation to the theme and requirement of your creation, like, the message you want to deliver or the impact you want to create through the GIF. Balance your creativity within specific content parameters and avoid getting carried away or overdoing on the beautifying aspect.
As an example, it is visibly not appealing to add a wholesome mix of 15 shades and 20 different elements in a nature-based GIF. You will end up getting too harsh on the viewers’ eyes, confusing them with a hoard of speeding elements and banging colors. You can instead stick to 2 or 3 frames with an intelligent mix of 2 complementary shades.
02Maintain Visual Identity
An important aspect to keep in mind while attempting to design GIF is, it should visually relate to the underlying content. For instance, if you are intending a brand promotion through your GIF, lay stress on adding elements like, brand definition, product specifications, know-how of your work patterns, etc. ensure that your content flows naturally and has exactness.
Other alternatives are, using your product logo as the GIF background, character representation of your brand or using some explicit product oriented themes. While, you are free to pick anything that suits your preferences and needs, just make sure that using it in your GIF adds value to your brand instead of giving an out of the box feel.
Image Name: The-only-guide-you’ll-ever-need-to-learn-gif-design-that-get-shared-like-crazy-1
03Cut Down on Unnecessary Frames
Have you ever encountered a halt in the natural loop of your GIF out of nowhere? While pondering over the underlying cause, it is a common assumption to take this as an animation fallacy, but that’s evidently not the case. The actual culprits behind this glitch are those extra frames that contribute towards nothing but adding weight to an already heavy file.
To set this straight, you should switch to removing any extra frames, while saving a particular one which you may stretch to a desired duration according to the break point of your contents in the GIF. However, take caution to maintain the visual quality of your GIF while you remove those extra frames.
04Make Your GIF Accessible
You should always adhere to the concern of accessibility while creating a GIF. The reason being, your content is visibly going to get mass attention across the web and you cannot filter out visitors, make sure your GIF is easily accessible to all kind of users, particularly those with vision limitations, like, epileptic patients or the ones using screen readers.
Focus on describing your GIF content with alt text and using a limited blinking and flashing rate. In case your GIF content is primarily text based, take care to limit the effective color and image movement and adjust the frames rates to avoid constant and quick movement of image frames when adding many clips on a single page.
Pay additional heed to the auto play feature of your GIFs. It can be visibly annoying to be welcomed on a site homepage with GIFs enjoying an auto play session of their own. You can alternatively, incorporate a ‘Click to Play’ option or grant your site visitors the liberty to decide on what is to be played when.
05Use Storyboards
When aiming to create visibly appealing GIFs, you need to lay considerable stress on choosing an apt background story. Don’t get misled by the wrong assumption of using any random background, owing to the short play duration of GIFs. An impressive solution to this concern is taking the help of a storyboard to keep track of your GIF’s content flow.
Using a storyboard is quite effective means of being in line with the direction of content movement, rescuing you from the hustle of going off the track. This comes explicitly handy when you are working with a team of creators. The storyboard is there to keep everything at the exact place, thus improving member communications and boosting up the design process.
06Focus on Creating Loops
Consider creating an animated motion loop for your GIF allowing a repeated and comprehensive view of your content. Looping projects a deeper observation of the clip and its contents in a seamless transition. However, creating an infinite motion loop in GIFs is quite tricky, as you need to pay utmost concern to ensure a smooth content flow and chances of even the slightest errors are not entertained.
Any loopholes in placement of your GIF elements will get noticed within a blink and lead to an unsatisfactory user experience. Hence, you need to check each of your content frames separately to eliminate chances of possible errors. If you are a beginner, try working with geometrical animations to get the initial pickup. This will be advantageous in deciding the exact element positions at the start and end of the GIF.
07Make Use of Motion Blur
Using the concept of motion blur is pivotal in providing a natural flow and feel to your GIF, which, in an otherwise case would ordinarily appear as a mere collection of static images clubbed together. This would give a wobbling feel with unsteady frame movements to your viewers. The motion blur effect potentially ensures a smooth content flow, and your GIF looks like a short video captured from a camera.
08Stick to a Reduced File Size
Creating GIF of within a standard size range is quite difficult, owing to the fact that these are shared across a variety of media platforms, each having a different file size constraint. It is, however, recommended to stick to a file size as low as possible to escape the notch of modifying the same, ener5y time you need to work with the GIF on a different platform.
Listed below are a few ways to limit your GIF to a lower file size:
● Restrict your GIF to a frame count under 150, exceeding which, it will get difficult to export the GIF to most of the commonly visited social media and content sharing platforms.
● When your GIF is ready to export, adjust its lossy parameter between 5 and 10 to boost the file compression rate. Look for a setting that decreases the effective file size without compromising with the overall GIF design.
● Restrict to a minimum possible color usage. This will not only intensify the GIF design, but also contribute in maintaining a decreased file size. You can instead, focus on playing with animations or adjusting your image frames to longer play durations.
● Don’t experiment with multiple background gradients in your GIF. You can select from either a completely opaque, or a totally transparent background. Adding unnecessary gradients will end up giving your GIF a hazy look, along with a visibly large file that will be difficult to export non any platform.
Part 2 Amazing Examples of Animated Gifs in Web Design
GIFs are an effective means of adding appeal to brand promotions and achieving improved market buildup by delivering just the right content in the most captivating and interesting ways. You can use them as creative web design tools to add spark to your product sites, which can potentially boost the market value and reach of your product by multiplying the number of visitors to your site.
Discussed below are some stunning examples of using animated GIFs to enhance commercial web design, which you can use to create a significant buzz about your product among a target audience:
01Marie Weber
This is a shoe designer company in France, famous for its classy, handmade shoes. On visiting the company’s site, you are welcomed by a simple and subtle, animated product logo on each page. This animated logo is a masterpiece in itself, telling you the about the lavishness of the associated product.
On navigating further, you will find animated elements, like; shoe images and collection names, which appear on the screen before a zoom out. There are underlined links that pop up to animate beneath the name, indicating the link you are going to visit.
02Wonderful Weekends Festival
This is an absolute animation delight, where the welcome page of the site greets you with vibrant pieces in motion, and a pop up box informs you of the festival’s arrival time and asks you to select one from the options of ‘Play Now’ or ‘Show Me the Festival’.
As you click to make a choice, the Google brand shines with associated colors. As you continue to browse through the site, pages open up with brand color animations, along with colored active links flashing on the pages.
03Google
This is a brand name that needs no introduction. Google has launched its ‘Your Plan, Your Planet’ site to infuse awareness about environment conservation and eco friendly lifestyles, guiding visitors on ways and means of introducing related changes. The site greets you with a simple layout, with a short text moving in and getting still. Click on ‘Let’s Get Started’ and you will see 4 amazingly animated icons that open up to more vibrant animations.
Tap any one of the swinging refrigerator door, the illuminated light bulb, the running faucet or the teddy bear waving at you, to land on a schema that informs you about effective means of improving on conservation in within your selected section. This is a perfect example of using animations as a marketing strategy to captivate people’s attention on a subject that evidently turns them off.
04Pete Nottage
Designed explicitly as a hiring site for voice presenter Pete Nottage, this website tells you everything about the actor and the credibility of hiring him. The site lands among the best examples of web animation usage. The welcome page of the site greets you with the brand logo. Tap on the red swipe and you will get to know that the brand infuses vibrancy to something that’s originally dull.
Next, you will find a plethora of dynamic and elegant animations in a plying plane, cityscape, flowing sea and sailing boats, moving cars and excusive motion graphics on each building. Visiting the animated site links provides you an insight of the actor’s personality. In the ‘About’ section, you can find a headshot animation, that disappears on clicking, and is followed by a more dynamic motion snippet.
05Zamzar
This one is an online file conversion site and lives up to its tagline ‘File Conversion Made Easy’ through a concrete animation on the welcome page. The file conversion on this site is quick, 3-step process, with a blinking animation indicating the current conversion stage.
For instance, when you are at the first step of selecting a file to convert, the animation shoes a blinking glow on number 1. This continues for the rest of the steps, till your file is finally converted into the desired file format.
06Blizzard: Warcraft III Reforged
Warcraft was one complete heaven of adventure and thrill for console gamers. While the enticing cutscenes with stunning motion graphics were an absolute favorite, the game had a plenty of other exciting elements.
The relaunched game (Warcraft III Reforged) website has a mix of gaming adventures and cutscenes running in the site’s background with the game title and pitch appearing as an overlaid animation. On navigating through the site, you will find classy animated elements that take you on a nostalgic trip of the original game.
Part 3 Learn How to Create and Add Gifs to Interactive Layouts in Filmora
Now that you are quite familiar with the utility of GIFs in almost every market field, and have seen stunning examples of GIF design and usage for an impressive brand promotion, let’s take a dive into creating and using these motion clips to make interactive graphic layouts for websites, social media blogs and posts, and a variety of other applications that require some brilliant imagery for market promotion.
When looking for the perfect GIF designer software, Wondershare Filmora Video Editor is the most affordable pick. This is a free and an enhanced GIF design tool, packed with world class and premium quality features that are most suitable for giving the much appreciated professional touch to your graphic artwork. Here’s how you can work with Filmora to make alluring graphic layouts:
Step 1: Launch Filmora
The software is readily compatible to your Windows and MacOS devices and you don’t even require a signup to use the application. Just download and install the software in your preferred device and launch the same to reach the software’s welcome interface.
Filmora Free Download Link:
Step 2: Upload Media Files
Select and import the desired media files from your device to upload them to the Filmora timeline. You can either pick a video or choose a series of static images.
Step 3: Add to Timeline
Once imported, you need to add the selected files to the software’s editor timeline. You can use the ‘Drag and Drop’ method to get this done.
Wondershare Filmora - Best Video Editor for Mac/Windows
5,481,435 people have downloaded it.
Build unique custom animations without breaking a sweat.
Focus on creating epic stories and leave the details to Filmora’s auto features.
Start a creative adventure with drag & drop effects and endless possibilities.
Filmora simplifies advanced features to save you time and effort.
Filmora cuts out repetition so you can move on to your next creative breakthrough.
Step 4: Explore Your Editing Skills
As already stated, the Filmora effects library is an extensive inventory of stunning features to compliment your artwork with matchless class. You are free to choose from tons of image and video editing effects and filters suited to your GIF content to create excellent pieces of graphic art.
When starting to customize your GIF in Filmora, you can begin with cropping and trimming your images or video to the perfect part, or even cut and split them to ward off unwanted portions, or rotate and flip the images to set them in the perfect orientation.
You can further add elements like, graphic transitions, overlays, animations and texts, and etc., to customize your artwork to your heart’s content. The software’s audio-visual library facilitates you with around 300 audio-visual effects and music choices to supplement your creation with a conducive sound feel. You can also make adjustments in frame speed and play durations to get the best most snippet ever!
You are granted the liberty to choose almost any common file format to create and customize GIFs in Filmora. A more convincing feature is, the software does not leave a watermark on your artwork and you can easily share your creation across media platforms.
Step 5: Save and Export
Once your creation satisfies you, save it to your device with a .gif extension, from where it can be exported to various media sharing platforms with ease.
● Key Takeaways from This Episode →
● When planning a perfect and appealing product marketing strategy, you can consider using GIFs to enhance the feel. Complement your product site with suitable GIF design and graphic transitions can prove pivotal to target and hold your related audience.
● Looking for the best GIF creator and customization software, you can rely on Filmora to create and customize professional quality GIFs with utmost convenience.
Discover a Quick Guide to Add Personalized Video Filters in VN App. Learn How to Use Built-In Filters and Import External Ones for Creative Video Editing
In the colorful world of video editing, the ability to personalize and enhance your clips with unique looks is what stands your work out. Enter the VN app, the game-changer in mobile video editing, bursting with user-friendly features.
If you’ve been searching for a simple way to dive into the realm of video filters, you’re in luck. Today, we’ll decode how to jazz up your videos using the VN app’s built-in and custom video filter features. Ready to elevate your video content game? Let’s get started!
- Step 2: Save the Filter Preset and Use It Directly Next Time
- Part 3: Best Alternatives
- Part 4: Summary
Part 1: Use VN App Built-in Video Filters (LUTs)
Step 1: Locate the Filters Feature
You must know where the magic happens before you go Spielberg on your videos. Upon launching the VN app, you’ll see a range of editing tools. Look for an icon resembling a magic wand or palette – your gateway to the wonderful world of video filters.
Step 2: Preview and Apply Effects
This step is all about experimenting and having fun. Tap on the filter icon, and voilà! You’re greeted with various preset looks, waiting for your videos to don them. Glide through the options; VN has got it all from vintage vibes to futuristic glow. Found one that catches your eye?
Tap on it and watch your video transform instantly. Not sure about your pick? No worries; simply swipe left or right to preview other effects. Once you’re satisfied, tap ‘apply.’
Step 3: Adjust Details with Color Settings
Okay, young director, you’ve chosen your filter. But what if you want to tweak it just a bit? VN’s got your back.
Once a filter is applied, you’ll notice sliders or dials – these are your video filter editor tools. Play around with them! You can adjust the filter’s intensity, making it as subtle or dramatic as you like. Tweak the brightness, contrast, and saturation until your video looks like you envisioned.
Part 2: Download External Filter Installation Package
Step 1: Locate the My Filters Feature
The VN app is awesome, but can you add even more flair to your videos with custom filters? Yup! These aren’t just your regular video presets – they’re unique styles you can download and add to your VN arsenal.
To begin, tap on the “My Filters” section within the app. If you’re wondering where this is, it’s usually nestled beside the built-in filter options, represented by a ‘+’ or ‘Add’ icon. This personal space is ready to be filled with your downloaded filter goodies.
Step 2: Import the Downloaded VN Filter APK
Here comes the cool part! To get new custom filters:
- Visit the website or store where the VN filters are available for download. (Hint: Search for “vn filter download APK” or “vn iPhone filter download” based on your device.)
- Once downloaded, head back to the VN app and click the ‘Add’ or ‘+’ icon in the “My Filters”
- Navigate to your device’s download folder or wherever the vn filter apk is saved.
- Select the filter file (it should have a .apk or similar extension for Android users and a different format for iPhone users).
- Tap on ‘Import’ and wait for the magic to happen. Your brand-new filter will now be housed in “My Filters”!
Step 2: Save the Filter Preset and Use It Directly Next Time
After importing your snazzy new filter, the next step is super easy. Simply apply it to your video, and if you love how it looks, save it as a preset. This way, the next time you’re editing, you can head straight to “My Filters,” find your favorite custom filter and slap it onto your video without a hitch. Talk about convenience!
Part 3: Best Alternatives
Though VN offers many fantastic filter options, it’s always nice to have alternatives, right? Meet Filmora, another stellar video editing tool known for its expansive video filter collection.
Filmora is more than just an editor; it’s a canvas for videographers. One of its most raved-about features is its extensive range of video filters. With Filmora, you can transport your audience from a sun-kissed beach to a moody, rain-soaked alley in just a tap. Whether you’re going for a documentary feel, a Hollywood movie vibe, or something out of a dream, Filmora’s filters have covered you.
Getting started is a breeze:
- Launch Filmora and import your video.
- Head to the “Effects” tab and immerse yourself in the filter options.
- Preview, select, and apply – it’s that simple!
- Like VN, Filmora allows you to tweak the filter settings for that perfect look.
While Filmora is a great tool, the best fit depends on personal preferences and specific project needs. However, it’s always good to have choices in your editing toolkit. Variety is, after all, the spice of life (and video editing)!
Part 4: Summary
The beauty of video editing lies in the limitless possibilities it offers. With every video filter, editor tweak, and custom preset, you’re not just editing – you’re storytelling. And with tools like VN and Filmora at your fingertips, you have everything you need to tell your story your way.
Remember, whether you’re a seasoned videographer or someone just starting, there’s no ‘right’ or ‘wrong’ regarding creativity. Play around, experiment, and, most importantly, have fun with the process. In the vast universe of video editing, every filter is a star waiting to shine on your masterpiece.
Also read:
- Best Method to Split the Video Into Parts Online
- Updated Montage Makes It Easy to Create and Share Videos. This Article Will Explain What It Can Do and Show You Examples of Movies that Use Montage
- In 2024, Steps to Create Makeup Videos
- Updated 6 Best Methods to Make a Video Longer for 2024
- New In 2024, OBS Green Screen Guide
- New In 2024, Exploring the Top Professional Tools to Perform Mask Tracking
- Updated 2024 Approved How to Edit Recorded Video
- Updated 2024 Approved Top 10 3D Slideshow Software Review
- 2024 Approved Convert Slow Motion Videos to Regular Videos in Your iOS Device |A How
- 2024 Approved Top 10 Video Editing Online Makers Is Worth Your Attention
- Intro Videos Have the Potential to Make a First Impression on Viewers, and You Know How They Say that the First Impression Is the Last Impression
- Updated 2024 Approved How to Create Your Own LUTs for Your Video
- 2024 Approved Top 9 Sparkle Effects Photo and Video Editors You Should Know
- Updated How to Remove Audio From Videos with FFmpeg, In 2024
- New How to Remove Echo From Videos with Adobe Audition
- New In 2024, Want to Immediately Know All About Discord GIF?
- Updated 2024 Approved What Is TS Format and How To Play TS Files?
- New Are You Finding It Challenging to Upload and Create a Link for Your Video? Well, This Detailed Upload Video to Link Guide Will Help You with This. Check It Out Now
- What Is TS Format and How To Play TS Files, In 2024
- Updated A Guide to Effective Video Marketing
- 2024 Approved How to Create Sports Intro and YouTube Endscreen?
- New 2024 Approved Use Path Blur In Photoshop To Create Motion Effect
- New 2024 Approved All Things About Adding Effects In Kinemaster
- TikTok Velocity Dance Tutorial| Filmora for 2024
- New Best 6 WMV to GIF Converters
- Updated A Wedding Is One of the Exciting Parts that Will Happen in Your Life. Its Not that Easy to Plan a Wedding, Theres a Lot to Be Consider Like Wedding Dress, Food, Venue, Videographer Etc for 2024
- 2024 Approved 7 Best MP4 Video Editors on Mac Edit MP4 Videos Easily
- In 2024, What Is the Best MP4 Cutter for YouTuber on Mac?
- New Speed Up/Down Videos in VLC for 2024
- Updated 2024 Approved How to Create a Smooth Cut Transition Effect?
- 2024 Approved Are You Facing Trouble in Playing a TS File? We Got You! Read the Article Below to Learn the Most About TS Format, Pros and Cons, and More
- New In 2024, The Best Peter McKinnon LUTs for Perfect Video Editing
- 2024 Approved Top 15 Slow Motion CapCut Templates to Work With
- New 2024 Approved A Review On 3D LUT Creator
- 2024 Approved Progressive Solutions to Add VHS Effects to Video with Ease
- In 2024, Convert Slow Motion Videos to Regular Videos in Your iOS Device |A How
- Does find my friends work on Motorola Moto G24 | Dr.fone
- In 2024, Top 10 Motorola Edge 40 Android SIM Unlock APK
- 3 Ways for Android Pokemon Go Spoofing On Sony Xperia 10 V | Dr.fone
- How to Infinix Note 30 VIP Get Deleted photos Back with Ease and Safety?
- Becoming a Pro in TikTok Live Shopping Your Complete Guide for 2024
- In 2024, How to Turn Off Find My iPhone 15 Plus when Phone is Broken?
- How to Resolve Infinix Smart 8 Pro Screen Not Working | Dr.fone
- Complete guide for recovering video files on Lava Blaze Pro 5G
- Fix the Error of Unfortunately the Process.com.android.phone Has Stopped on Samsung Galaxy A54 5G | Dr.fone
- Top 7 Phone Number Locators To Track Samsung Galaxy A25 5G Location | Dr.fone
- How and Where to Find a Shiny Stone Pokémon For Realme GT 5 Pro? | Dr.fone
- Looking For A Location Changer On OnePlus Nord 3 5G? Look No Further | Dr.fone
- How To Update or Downgrade iPhone 7 Without Losing Anything? | Dr.fone
- Top 10 Password Cracking Tools For ZTE
- 2024 Approved Translate Instagram Videos Easily A Step-by-Step Guide
- Two Ways to Track My Boyfriends Xiaomi Redmi K70E without Him Knowing | Dr.fone
- Top 11 Free Apps to Check IMEI on Vivo X Fold 2 Phones
- Did Your Apple iPhone SE (2020) Passcode Change Itself? Unlock It Now
- In 2024, Which Pokémon can Evolve with a Moon Stone For Realme Narzo 60 5G? | Dr.fone
- How to Mirror Tecno Pova 5 to Mac? | Dr.fone
- Ultimate Guide on Vivo V27 FRP Bypass
- Issues playing MKV video on Moto G34 5G
- How To Leave a Life360 Group On Nokia 130 Music Without Anyone Knowing? | Dr.fone
- How to Change/Add Location Filters on Snapchat For your Samsung Galaxy F14 5G | Dr.fone
- Read This Guide to Find a Reliable Alternative to Fake GPS On Honor 100 | Dr.fone
- How To Get Out of Recovery or DFU Mode on iPhone 8? | Dr.fone
- Spotify Keeps Crashing A Complete List of Fixes You Can Use on Xiaomi Mix Fold 3 | Dr.fone
- In 2024, Still Using Pattern Locks with Oppo A18? Tips, Tricks and Helpful Advice
- Unlock Xiaomi 13 Ultra Phone Password Without Factory Reset Full Guide Here
- How To Remove iCloud On Apple iPhone 14 Pro Max Smoothly
- Full Guide to Catch 100 IV Pokémon Using a Map On Vivo T2x 5G | Dr.fone
- Apply These Techniques to Improve How to Detect Fake GPS Location On Vivo Y02T | Dr.fone
- Possible solutions to restore deleted contacts from Infinix Zero 30 5G.
- Title: New Guide of 8 Photo Collage Apps for PC for 2024
- Author: Chloe
- Created at : 2024-04-24 07:08:33
- Updated at : 2024-04-25 07:08:33
- Link: https://ai-editing-video.techidaily.com/new-guide-of-8-photo-collage-apps-for-pc-for-2024/
- License: This work is licensed under CC BY-NC-SA 4.0.
