
:max_bytes(150000):strip_icc():format(webp)/GettyImages-1139232374-700d343900854115ad26acf3f1dd80b3.jpg)
New How to Add a Slideshow in PowerPoint
How to Add a Slideshow in PowerPoint
How to Add a Slideshow in PowerPoint
An easy yet powerful editor
Numerous effects to choose from
Detailed tutorials provided by the official channel
A slideshow view fills the entire computer screen, much like a real slide show. The presentation is exhibited in full-screen mode, as the audience will see it. Graphics, timings, videos, animated elements, and transition effects get displayed in the same way they appear on stage. PowerPoint is an excellent tool for preparing presentations on the fly, whether for a seminar, classroom, lecture hall, conference, or even a contract pitch. With PowerPoint software, you can never go wrong. We’ll show you how to do a slideshow presentation in this post, even if you’re a complete novice who has never used it before.
In this article
01 How to Add Slideshow in PowerPoint
02 [How to Prepare a slideshow in PowerPoint](#Part 2)
03 [How to Play Slideshow in PowerPoint Automatically](#Part 3)
04 [How to Add Sound to a PowerPoint Slideshow](#Part 4)
05 [How to View Slideshow PowerPoint](#Part 5)
05 [How to Add Audio to the Slideshow](#Part 5)
Part 1 How to Add Slideshow in PowerPoint
Below are the steps on how to prepare a slideshow in PowerPoint
Step 1: Open New
Click on open new presentation in Microsoft PowerPoint.

Step 2: Add Photo
Add a new photo album to your presentation.

Step 3: Add Transition
Customize your presentation by adding transitions and effects to your slideshow.

Step 4: Advanced Settings
Set the slides to advance automatically.

Step 5: Set Slideshow Loop
To make the slideshow loop continuously, go to the “ set up” group on the “slide show” tap and check the box next to “Loop continuously until Esc .”Then click OK. The slide will start from the beginning after displaying the last slide.

Now, your slideshow has been created and is ready for viewing.
Part 2 How to Prepare Slideshows in PowerPoint
Learning how to do a slideshow in PowerPoint is a relatively simple process that anyone can accomplish.
Ready to make aslideshow? Let us get you started.
Step 1: Create New Presentation
To do so:
● Go to your browser and click on the PowerPoint icon.
● When PowerPoint opens, go to the upper left-hand corner and choose “File,” then “New,” listed under “File.”
● Choose “New Presentation” from the drop-down menu, which will create a new slide show for you to begin uploading photos to.

Step 2: Save PowerPoint
Go to the top right-hand side of the presentation screen and click on the flash drive icon. After that, you’ll be able to name your presentation and pick where to save it.
Remember to save your presentation after something that will remind you of the images in the File. This act will make it easier for you to find them later.

Step 3: Name the Page
Consider a title and type it in the box. Your title page can include a name, date, or image.
Choose an image-friendly arrangement, such as a slide with a title box and an image box, a slide with only an image box, or even a blank slide.

Step 4: Add Slides
You can choose from a variety of slide layouts and visuals. You can select “New Slide” from either “Home” or “Insert.” You may also right-click any slide in the left-hand panel and select “New Slide.” [1]

Step 5: Import Images
You have the option add one or multiple pictures to each slide. It’s all up to you. Double-click inside the picture box (or select Insert > Picture > From File from the Insert menu) and click OK.

Step 6: Rearrange the Photo
You will find it easier to decide the optimum order for the slides if you use the slide sorter.
Bear the bottom of the image pane, and look for the “Slide Sorter” button. Then, using your mouse, drag the slides to their preferred locations.

Step 7: Add Transitions
Transitions are essential for tying the presentation together and allowing it to flow smoothly from one image to the next. Go to the “Transitions” tab at the top of the bar and experiment with the various possibilities.

Step 8: Add a Background.
If the white space around the edges of your photographs bothers you, right-click on any slide, choose “Format Background,” and then adjust the background fill. You may change the hue, direction, and transparency of a solid fill, a gradient fill, etc. To make your slides look more professional,

Step 9: Save your PowerPoint
Before exiting, save your show once you’ve finished adding photos and graphics. If you named and saved your presentation at the start, all you have to do now is click the flash drive icon in the upper left corner.

Now your Powerpoint is ready to be displayed, and you can also view your slideshow automatically. Read the next part for details.
Part 3 How to Play Slideshow in PowerPoint Automatically
Before you can play a slideshow automatically**,** you have to make sure to save the presentation.
This is how to play a slideshow automatically in PowerPoint. Follow these simple steps, and your slideshow will auto-play when you double-click it.
Step 1: Save File and Visit More Option
After creating your slideshow, select file,” save as,” or “save as a copy.” Click on More options.
Step 2: Save in Desired Folder
Reach the folder where you want to save your presentation.
Step 3: Name your Presentation
Type a name for your presentation in the file name box
Step 4: Select Format
Select PowerPoint slideshow under the Save as type. This indicates what format you want to save your presentation as.
Save the File as a .ppsx file. After saving, double click the File, and it will open up as a slideshow.

Now, you can automatically play your slideshow on PowerPoint.
Part 4 How to Add Sound to a PowerPoint Slideshow
Sounds make your PowerPoint presentation more lively. Sound helps to widen your audience’s attention span. If you want your presentation to have sound:
Open your presentation and click the slide to which you want to add a sound. Then, visit the Insert tab, click on the Media group, and select the arrow under Audio.
Now, from the list displayed, click Audio from File. Locate the Audio you want to use and then select the audio clip you want.
Finally, click Insert.
Your audio icon and controls will appear on the slide.

Part 5 How to View Slide Show in PowerPoint
Viewing an already created slideshow in PowerPoint is easy. Following these steps below, you will be able to do it without stress.
Step 1: Open your PowerPoint presentation.
Open and go to the bottom of the PowerPoint window and click on the view slideshow command.
Step 2: Visit the More Options Tab
Navigate to the slideshow tab on the ribbon to access even more options.
Step 3: Start your Presentation
You can start the presentation from here and view the current slide.

Thus, that is how you can video slideshow in Microsoft PowerPoint
Now, we will move on to adding sound to your Slideshow to make it more attractive.
Part 6 How to Add Audio to a Slideshow
You can add audio, music, narration, and soundbites to your PowerPoint presentation. But to record and hear any audio, the computer you are using must have a sound card, microphone, and speakers.
To add audio from your computer:
Step 1: Select insert
Select audio on your computer.

Step 2: Select Desired Audio
An insert audio dialog box will pop up. Select the desired audio file and click insert.

To record audio
Step 1: Select Record Audio
Select insert>Audio> record audio

Step 2: Name Audio
Type in the name you want your audio file to be saved as.

Step 3: Start Recording
Select the record and start speaking.

Step 4: Review Recordings
Select a stop and then play to listen to and review your recording.

If you arent satisfied, you can select a record to re-record your audio or click OK if you are satisfied.
To place the audio at your desired location in the slide, select and drag the audio icon to where you want it. If you’re going to use numerous audio per slide, it is better to put the voice icon in the same place on the slide to be easily discoverable.
Note that you must enable a microphone on your device to start recording audio.
● Bonus Tip with Wondershare Filmora Video Editor

If you are looking to present your message to a large audience using slideshows, Filmora software has covered you. Whether you’re a professional at making slideshows or a beginner who wants to try it out for the first time, it has an easy-to-use interface.
For Win 7 or later (64-bit)
For macOS 10.12 or later
● Filmora software also creates photo and video slideshows and can add music, texts, filters, different transition effects, and even animation to your slideshow.
● Many tools can help you create these kinds of videos, and Filmora is one of the best in them with its latest upgrade.
● Its ready-to-use templates and unique features, like split-screen, freeze-frame, etc., make it one of the best slideshow makers.
● The Filmora software has the flexibility to suit whatever kind of slideshow you want to make, whether it is a photo slideshow or video slideshow.
● Ending Thoughts →
● Many people use PowerPoint cause of its simplicity, flexible function, easy sharing and conversion, reliability, and vast template library. So, after going through this, you would know how to add slides in PowerPoint and many more.
● Thus, we believe creating a slideshow in PowerPoint is now a bit easier with this guide to walk you through it.
A slideshow view fills the entire computer screen, much like a real slide show. The presentation is exhibited in full-screen mode, as the audience will see it. Graphics, timings, videos, animated elements, and transition effects get displayed in the same way they appear on stage. PowerPoint is an excellent tool for preparing presentations on the fly, whether for a seminar, classroom, lecture hall, conference, or even a contract pitch. With PowerPoint software, you can never go wrong. We’ll show you how to do a slideshow presentation in this post, even if you’re a complete novice who has never used it before.
In this article
01 How to Add Slideshow in PowerPoint
02 [How to Prepare a slideshow in PowerPoint](#Part 2)
03 [How to Play Slideshow in PowerPoint Automatically](#Part 3)
04 [How to Add Sound to a PowerPoint Slideshow](#Part 4)
05 [How to View Slideshow PowerPoint](#Part 5)
05 [How to Add Audio to the Slideshow](#Part 5)
Part 1 How to Add Slideshow in PowerPoint
Below are the steps on how to prepare a slideshow in PowerPoint
Step 1: Open New
Click on open new presentation in Microsoft PowerPoint.
Step 2: Add Photo
Add a new photo album to your presentation.
Step 3: Add Transition
Customize your presentation by adding transitions and effects to your slideshow.
Step 4: Advanced Settings
Set the slides to advance automatically.
Step 5: Set Slideshow Loop
To make the slideshow loop continuously, go to the “ set up” group on the “slide show” tap and check the box next to “Loop continuously until Esc .”Then click OK. The slide will start from the beginning after displaying the last slide.
Now, your slideshow has been created and is ready for viewing.
Part 2 How to Prepare Slideshows in PowerPoint
Learning how to do a slideshow in PowerPoint is a relatively simple process that anyone can accomplish.
Ready to make aslideshow? Let us get you started.
Step 1: Create New Presentation
To do so:
● Go to your browser and click on the PowerPoint icon.
● When PowerPoint opens, go to the upper left-hand corner and choose “File,” then “New,” listed under “File.”
● Choose “New Presentation” from the drop-down menu, which will create a new slide show for you to begin uploading photos to.
Step 2: Save PowerPoint
Go to the top right-hand side of the presentation screen and click on the flash drive icon. After that, you’ll be able to name your presentation and pick where to save it.
Remember to save your presentation after something that will remind you of the images in the File. This act will make it easier for you to find them later.
Step 3: Name the Page
Consider a title and type it in the box. Your title page can include a name, date, or image.
Choose an image-friendly arrangement, such as a slide with a title box and an image box, a slide with only an image box, or even a blank slide.
Step 4: Add Slides
You can choose from a variety of slide layouts and visuals. You can select “New Slide” from either “Home” or “Insert.” You may also right-click any slide in the left-hand panel and select “New Slide.” [1]
Step 5: Import Images
You have the option add one or multiple pictures to each slide. It’s all up to you. Double-click inside the picture box (or select Insert > Picture > From File from the Insert menu) and click OK.
Step 6: Rearrange the Photo
You will find it easier to decide the optimum order for the slides if you use the slide sorter.
Bear the bottom of the image pane, and look for the “Slide Sorter” button. Then, using your mouse, drag the slides to their preferred locations.
Step 7: Add Transitions
Transitions are essential for tying the presentation together and allowing it to flow smoothly from one image to the next. Go to the “Transitions” tab at the top of the bar and experiment with the various possibilities.
Step 8: Add a Background.
If the white space around the edges of your photographs bothers you, right-click on any slide, choose “Format Background,” and then adjust the background fill. You may change the hue, direction, and transparency of a solid fill, a gradient fill, etc. To make your slides look more professional,
Step 9: Save your PowerPoint
Before exiting, save your show once you’ve finished adding photos and graphics. If you named and saved your presentation at the start, all you have to do now is click the flash drive icon in the upper left corner.
Now your Powerpoint is ready to be displayed, and you can also view your slideshow automatically. Read the next part for details.
Part 3 How to Play Slideshow in PowerPoint Automatically
Before you can play a slideshow automatically**,** you have to make sure to save the presentation.
This is how to play a slideshow automatically in PowerPoint. Follow these simple steps, and your slideshow will auto-play when you double-click it.
Step 1: Save File and Visit More Option
After creating your slideshow, select file,” save as,” or “save as a copy.” Click on More options.
Step 2: Save in Desired Folder
Reach the folder where you want to save your presentation.
Step 3: Name your Presentation
Type a name for your presentation in the file name box
Step 4: Select Format
Select PowerPoint slideshow under the Save as type. This indicates what format you want to save your presentation as.
Save the File as a .ppsx file. After saving, double click the File, and it will open up as a slideshow.
Now, you can automatically play your slideshow on PowerPoint.
Part 4 How to Add Sound to a PowerPoint Slideshow
Sounds make your PowerPoint presentation more lively. Sound helps to widen your audience’s attention span. If you want your presentation to have sound:
Open your presentation and click the slide to which you want to add a sound. Then, visit the Insert tab, click on the Media group, and select the arrow under Audio.
Now, from the list displayed, click Audio from File. Locate the Audio you want to use and then select the audio clip you want.
Finally, click Insert.
Your audio icon and controls will appear on the slide.
Part 5 How to View Slide Show in PowerPoint
Viewing an already created slideshow in PowerPoint is easy. Following these steps below, you will be able to do it without stress.
Step 1: Open your PowerPoint presentation.
Open and go to the bottom of the PowerPoint window and click on the view slideshow command.
Step 2: Visit the More Options Tab
Navigate to the slideshow tab on the ribbon to access even more options.
Step 3: Start your Presentation
You can start the presentation from here and view the current slide.
Thus, that is how you can video slideshow in Microsoft PowerPoint
Now, we will move on to adding sound to your Slideshow to make it more attractive.
Part 6 How to Add Audio to a Slideshow
You can add audio, music, narration, and soundbites to your PowerPoint presentation. But to record and hear any audio, the computer you are using must have a sound card, microphone, and speakers.
To add audio from your computer:
Step 1: Select insert
Select audio on your computer.
Step 2: Select Desired Audio
An insert audio dialog box will pop up. Select the desired audio file and click insert.
To record audio
Step 1: Select Record Audio
Select insert>Audio> record audio
Step 2: Name Audio
Type in the name you want your audio file to be saved as.
Step 3: Start Recording
Select the record and start speaking.
Step 4: Review Recordings
Select a stop and then play to listen to and review your recording.
If you arent satisfied, you can select a record to re-record your audio or click OK if you are satisfied.
To place the audio at your desired location in the slide, select and drag the audio icon to where you want it. If you’re going to use numerous audio per slide, it is better to put the voice icon in the same place on the slide to be easily discoverable.
Note that you must enable a microphone on your device to start recording audio.
● Bonus Tip with Wondershare Filmora Video Editor
If you are looking to present your message to a large audience using slideshows, Filmora software has covered you. Whether you’re a professional at making slideshows or a beginner who wants to try it out for the first time, it has an easy-to-use interface.
For Win 7 or later (64-bit)
For macOS 10.12 or later
● Filmora software also creates photo and video slideshows and can add music, texts, filters, different transition effects, and even animation to your slideshow.
● Many tools can help you create these kinds of videos, and Filmora is one of the best in them with its latest upgrade.
● Its ready-to-use templates and unique features, like split-screen, freeze-frame, etc., make it one of the best slideshow makers.
● The Filmora software has the flexibility to suit whatever kind of slideshow you want to make, whether it is a photo slideshow or video slideshow.
● Ending Thoughts →
● Many people use PowerPoint cause of its simplicity, flexible function, easy sharing and conversion, reliability, and vast template library. So, after going through this, you would know how to add slides in PowerPoint and many more.
● Thus, we believe creating a slideshow in PowerPoint is now a bit easier with this guide to walk you through it.
Techniques You Never Heard of for Learning AI Marketing YouTube
Techniques You Never Heard of for Learning AI Marketing YouTube
An easy yet powerful editor
Numerous effects to choose from
Detailed tutorials provided by the official channel
YouTube is one of the largest entertainment websites, where you can watch, share, and create videos. Millions of active users on YouTube have taken premium subscriptions on YouTube to enjoy hassle-free entertainment. YouTube was launched back in 2005. With the passage of time and advancements in technology, YouTube has also evolved.

Artificial intelligence is one of the recent and most famous advancements in technology. The introduction of artificial intelligence in the industry has proved to be a boon. The introduction of artificial intelligence has made things easy to manage in every industry. AI can easily be applied in any industry be it manufacturing or the IT sector. Artificial intelligence has made work easier and increased the efficiency of people working in different areas. Even YouTube has started using AI techniques for many tasks. In this article, we have listed some of the applications of AI on YouTube.
In this article
01 [How Is YouTube Using Artificial Intelligence?](#Part 1)
02 [How Is YouTube Using AI to Recommend Videos?](#Part 2)
Part 1 How Is YouTube Using Artificial Intelligence?
Tools like artificial intelligence and machine learning have made things easier to manage. Even the introduction of Artificial Intelligence on YouTube has helped a lot to smoothen its procedure. YouTube being one of the most engaging websites has applied YouTube Intelligence to manage all its activities smoothly. Read further to know how YouTube is using artificial intelligence currently!

01Automatic Removal of Inappropriate Content
One of the main applications of AI on YouTube is to remove inappropriate content automatically. YouTube uses artificial intelligence and machine learning to remove the violative and inappropriate content from the platform. As this content was one of the main reasons for the rise in racism and terrorism. To avoid all these harmful after effects, YouTube introduced the “Trashy Video Classifier” to scan and examine the feedback.
Although these algorithms might not be 100% accurate, they can perform the task more easily and efficiently than the manual examination of the content. Due to these algorithms, it has become easier to automatically remove the controversial content from the platform immediately. AI aided feature helps in determining the inappropriate content faster. However, it doesn’t provide 100% accurate results. This is the reason why YouTube has a large team of human specialists to check the accuracy of determining violative content.
02Add New Video Effects
The introduction of artificial intelligence and machine learning in the market has made it easier to add new video effects without the use of any external equipment. You can now swap out backgrounds from videos with just one click due to the in-built AI features on YouTube. This AI neural feature is prepared by Google’s AI YouTube researchers to make it easier for the AI algorithms to understand video patterns. This feature makes it easier for the system to maintain the correct pace with the video.
03Maintain Age Restrictions
Being an online platform, YouTube is open to everyone. There are many creators and viewers on the platform with different interests. Moreover, it is accessible to all age groups, which makes it necessary to optimize the content according to the age groups. YouTube has always been very particular about the age-restricted content. A lot of content is published on the platform that can be harmful to the children’s minds and growth. YouTube uses different AI tools and algorithms to maintain the age restrictions of adult content.
YouTube has guaranteed that the mature content will not be accessible to the kids and youngsters aged below 13 years. It has also created a separate application for the kids to maintain the age restrictions from the matured content.
Earlier, the YouTubers used to flag their content as mature themselves, but now the platform is planning to flag the content using machine learning technology. YouTube had also used machine learning technology to thwart the age-restricted content automatically in 2017.
04”Up Next” Feature
The “Up Next” feature of YouTube is also a result of artificial intelligence. With many creators uploading a large number of videos every minute, it was becoming difficult for the platform to manage the suggestion engine properly. So, YouTube has introduced the AI technique to streamline the recommendation process to maintain the real-time and latest suggestion.
This feature is a mix of two algorithms, one is used to optimize the suggestion engine according to the search history and watch history of the user, and the other is to determine according to the ranking. As the main aim is to provide the content so that the user can spend his/her maximum time watching YouTube videos. This helps in creating a better sidebar full of user-specific recommendations. YouTube’s special recommendation feature ensures to recommend different videos to the different viewers as per their interests.
05Training on Depth Prediction
YouTube has a lot of data stored that provides easy knowledge of AI algorithms. According to the recent data and announcement, it is now clear that Google’s AI YouTube researchers used the “mannequin challenge” to understand depth predictions.
In this challenge, they researched around 2000 groups, with 1 group in each video. Video had many people standing still like they have been frozen and one person was going through the scene to shoot the video. A better understanding of depth prediction can further help in generating the development of Augmented Reality (AR).
06Tackle Fake News
Among the different features of the most engaging online platform comes the ability to detect and tackle fake news and misleading content. YouTube can understand and detect fake news. With so many users on different social media platforms, it has now become common to spread fake and false news. Unlike other platforms, YouTube is using artificial intelligence to detect and remove misleading content that is against YouTube’s privacy policy.
YouTube understands that this type of content can be harmful to the audience and can be the reason for disputes among different communities. Hence, giving rise to racism and terrorism. To reduce its wrong impact on society, YouTube is using AI technology and removing this type of fake and misleading content. Around 11 million videos were removed from the platform within a single quarter. The introduction of AI has also proved that the technology works more effectively and efficiently rather than the manual removal of such content.
Part 2 How Is YouTube Using AI to Recommend Videos?

YouTube aims at finding the perfect video for each user separately and anticipating the users to spend more time on the platform. Keeping both these things in mind, it decided to use AI technology to recommend videos and optimize the suggestion panel. Just like Netflix, AI technology makes it easier for the platform to determine the best suggestions for different viewers. It recommends the videos after researching the user’s age, interests, watch time, etc.
YouTube generally focuses on increasing the watch time of the viewer, that’s why it recommends the videos keeping the user’s interests on priority. The goal is to watch more rather than watch the best.
YouTube uses different AI algorithms to understand things and recommend optimized videos to stand out from the crowd. First of all, it uses AI algorithms to understand the user’s interest by scanning his/her search history and watching history. It creates a list based on the findings and then ranks the videos as per the google rankings. Each video on YouTube has a different ranking.
YouTube has been changing its algorithms over time. Earlier, it used to rank videos according to view counts. But soon people understood the technique and started using the eye-catchy title and thumbnail to gain a large number of views. Due to this, viewers even started complaining about the content and YouTube changed its algorithms to resolve this issue.
YouTube introduced AI and ML technology to customize the recommendations in 2016. This introduction has made things easier for YouTube as well as its viewers. It has now announced to ban the “borderline content”.
For Win 7 or later (64-bit)
For macOS 10.12 or later
● Ending Thoughts →
● Applying AI on YouTube has made it easier for the platform to manage activities more effectively and efficiently. As a result, many new features are added to enhance the convenience and maintain the quality of the user experience.
● Moreover, YouTube is now experimenting with AI and ML for automatically adding video chapters. This feature will be beneficial for the content creators.
● It will assist them in creating and uploading, resulting in the elimination of the time used in adding timestamps manually. Even the creators are uploading AI-generated YouTube videos that are created with the help of an AI YouTube video maker.
● You can even learn about the different applications of AI and ML from different YouTube channels. Many accessible YouTube channels for machine learning are available on the platform.
● YouTube intelligence can also be seen on the homepage, recommendations, notifications, and subscriptions. The latest trending videos are also ranked with the help of artificial intelligence and machine learning.
YouTube is one of the largest entertainment websites, where you can watch, share, and create videos. Millions of active users on YouTube have taken premium subscriptions on YouTube to enjoy hassle-free entertainment. YouTube was launched back in 2005. With the passage of time and advancements in technology, YouTube has also evolved.
Artificial intelligence is one of the recent and most famous advancements in technology. The introduction of artificial intelligence in the industry has proved to be a boon. The introduction of artificial intelligence has made things easy to manage in every industry. AI can easily be applied in any industry be it manufacturing or the IT sector. Artificial intelligence has made work easier and increased the efficiency of people working in different areas. Even YouTube has started using AI techniques for many tasks. In this article, we have listed some of the applications of AI on YouTube.
In this article
01 [How Is YouTube Using Artificial Intelligence?](#Part 1)
02 [How Is YouTube Using AI to Recommend Videos?](#Part 2)
Part 1 How Is YouTube Using Artificial Intelligence?
Tools like artificial intelligence and machine learning have made things easier to manage. Even the introduction of Artificial Intelligence on YouTube has helped a lot to smoothen its procedure. YouTube being one of the most engaging websites has applied YouTube Intelligence to manage all its activities smoothly. Read further to know how YouTube is using artificial intelligence currently!
01Automatic Removal of Inappropriate Content
One of the main applications of AI on YouTube is to remove inappropriate content automatically. YouTube uses artificial intelligence and machine learning to remove the violative and inappropriate content from the platform. As this content was one of the main reasons for the rise in racism and terrorism. To avoid all these harmful after effects, YouTube introduced the “Trashy Video Classifier” to scan and examine the feedback.
Although these algorithms might not be 100% accurate, they can perform the task more easily and efficiently than the manual examination of the content. Due to these algorithms, it has become easier to automatically remove the controversial content from the platform immediately. AI aided feature helps in determining the inappropriate content faster. However, it doesn’t provide 100% accurate results. This is the reason why YouTube has a large team of human specialists to check the accuracy of determining violative content.
02Add New Video Effects
The introduction of artificial intelligence and machine learning in the market has made it easier to add new video effects without the use of any external equipment. You can now swap out backgrounds from videos with just one click due to the in-built AI features on YouTube. This AI neural feature is prepared by Google’s AI YouTube researchers to make it easier for the AI algorithms to understand video patterns. This feature makes it easier for the system to maintain the correct pace with the video.
03Maintain Age Restrictions
Being an online platform, YouTube is open to everyone. There are many creators and viewers on the platform with different interests. Moreover, it is accessible to all age groups, which makes it necessary to optimize the content according to the age groups. YouTube has always been very particular about the age-restricted content. A lot of content is published on the platform that can be harmful to the children’s minds and growth. YouTube uses different AI tools and algorithms to maintain the age restrictions of adult content.
YouTube has guaranteed that the mature content will not be accessible to the kids and youngsters aged below 13 years. It has also created a separate application for the kids to maintain the age restrictions from the matured content.
Earlier, the YouTubers used to flag their content as mature themselves, but now the platform is planning to flag the content using machine learning technology. YouTube had also used machine learning technology to thwart the age-restricted content automatically in 2017.
04”Up Next” Feature
The “Up Next” feature of YouTube is also a result of artificial intelligence. With many creators uploading a large number of videos every minute, it was becoming difficult for the platform to manage the suggestion engine properly. So, YouTube has introduced the AI technique to streamline the recommendation process to maintain the real-time and latest suggestion.
This feature is a mix of two algorithms, one is used to optimize the suggestion engine according to the search history and watch history of the user, and the other is to determine according to the ranking. As the main aim is to provide the content so that the user can spend his/her maximum time watching YouTube videos. This helps in creating a better sidebar full of user-specific recommendations. YouTube’s special recommendation feature ensures to recommend different videos to the different viewers as per their interests.
05Training on Depth Prediction
YouTube has a lot of data stored that provides easy knowledge of AI algorithms. According to the recent data and announcement, it is now clear that Google’s AI YouTube researchers used the “mannequin challenge” to understand depth predictions.
In this challenge, they researched around 2000 groups, with 1 group in each video. Video had many people standing still like they have been frozen and one person was going through the scene to shoot the video. A better understanding of depth prediction can further help in generating the development of Augmented Reality (AR).
06Tackle Fake News
Among the different features of the most engaging online platform comes the ability to detect and tackle fake news and misleading content. YouTube can understand and detect fake news. With so many users on different social media platforms, it has now become common to spread fake and false news. Unlike other platforms, YouTube is using artificial intelligence to detect and remove misleading content that is against YouTube’s privacy policy.
YouTube understands that this type of content can be harmful to the audience and can be the reason for disputes among different communities. Hence, giving rise to racism and terrorism. To reduce its wrong impact on society, YouTube is using AI technology and removing this type of fake and misleading content. Around 11 million videos were removed from the platform within a single quarter. The introduction of AI has also proved that the technology works more effectively and efficiently rather than the manual removal of such content.
Part 2 How Is YouTube Using AI to Recommend Videos?
YouTube aims at finding the perfect video for each user separately and anticipating the users to spend more time on the platform. Keeping both these things in mind, it decided to use AI technology to recommend videos and optimize the suggestion panel. Just like Netflix, AI technology makes it easier for the platform to determine the best suggestions for different viewers. It recommends the videos after researching the user’s age, interests, watch time, etc.
YouTube generally focuses on increasing the watch time of the viewer, that’s why it recommends the videos keeping the user’s interests on priority. The goal is to watch more rather than watch the best.
YouTube uses different AI algorithms to understand things and recommend optimized videos to stand out from the crowd. First of all, it uses AI algorithms to understand the user’s interest by scanning his/her search history and watching history. It creates a list based on the findings and then ranks the videos as per the google rankings. Each video on YouTube has a different ranking.
YouTube has been changing its algorithms over time. Earlier, it used to rank videos according to view counts. But soon people understood the technique and started using the eye-catchy title and thumbnail to gain a large number of views. Due to this, viewers even started complaining about the content and YouTube changed its algorithms to resolve this issue.
YouTube introduced AI and ML technology to customize the recommendations in 2016. This introduction has made things easier for YouTube as well as its viewers. It has now announced to ban the “borderline content”.
For Win 7 or later (64-bit)
For macOS 10.12 or later
● Ending Thoughts →
● Applying AI on YouTube has made it easier for the platform to manage activities more effectively and efficiently. As a result, many new features are added to enhance the convenience and maintain the quality of the user experience.
● Moreover, YouTube is now experimenting with AI and ML for automatically adding video chapters. This feature will be beneficial for the content creators.
● It will assist them in creating and uploading, resulting in the elimination of the time used in adding timestamps manually. Even the creators are uploading AI-generated YouTube videos that are created with the help of an AI YouTube video maker.
● You can even learn about the different applications of AI and ML from different YouTube channels. Many accessible YouTube channels for machine learning are available on the platform.
● YouTube intelligence can also be seen on the homepage, recommendations, notifications, and subscriptions. The latest trending videos are also ranked with the help of artificial intelligence and machine learning.
Best Video Editors to Add Text to a Video
While it can be very easy to add text to an image, the same cannot be said when it comes to adding even the simplest text to a video. You will need video editing software that is designed with the necessary features to help you add text to your video.
There are very many programs in the market that can technically be used to add text to a video. But the ones we will look at are video editors that make the process easy, but also give you a wide range of options to customize your text in numerous ways.
Filmora
Filmora by Wondershare is one of the best video editors in the market. Its user interface is so easy to use that adding text to the video is a simple 3-step process. Aside from adding text to the video, Filmora also allows you to edit other aspects of the video including adding transitions, overlays, and animations to any section of the video.

Key Features:
- You can use Filmora to add text to any section of the video
- It gives you the freedom to move the text to any section of the video
- Customizing the text, you add to the video can be done in numerous ways including changing the color, and font and adding animations to the text.
- It offers numerous templates to choose from and different font styles that you can use
- It has a simple user interface that makes the video editing process very easy
- It has numerous other video editing capabilities that allow you to create and edit videos in different ways including splitting videos, trimming videos, and even merging videos clips into one
- You can upload the videos directly to YouTube after editing.
After Effects
Adobe After Effects is a motion picture editing program that you can also use to add text and other animations to your video. While you can use it to add simple text to the video, it is an ideal solution when your goal is to add advanced text animations. It is however by no means a simple solution, especially for beginners who may find it hard to get going with After Effects.

Key Features:
- You can add simple lines of text to any section of the video
- Text is easily customizable by changing the color, font, and size of the text
- You can also choose to change the entire text layer and add advanced animations and effects
- There are a lot of text, animations, and effects templates to choose from
- You can easily copy text from other Adobe applications to use in After Effects
Movavi Editor
Movavi video editor is another great video editor that you can use to add and edit text on a video. Like most similar tools it is designed to simplify the process, allowing you to add text to any section of the document, move the text to any location on the video and even add text effects to customize the text. It has a very simple user interface that allows you to do that quickly and easily.

Key Features:
- You can add text to any section of the video
- Customizing the text by changing the font, color and size is also very easy
- The user interface is very easy to use, allowing you to add even blocks of text very quickly
- You also have additional options to edit the video including splitting and merging the video or adjusting the brightness, saturation, and color.
iMovie
This is a built-in video editor that you will find on macOS and iOS devices. Even though it is free, iMovie has a lot of features that come in handy when you want to add and edit text on a video. The fact that it can be used on iOS devices is an added advantage when you want to edit videos on the go.

Key Features:
- It allows users to add transitions and effects to the text you add to the video
- It comes with a lot of title templates to choose from
- Adding animated text is also very simple including Sideways Drift, Lens Flare, and more
- You can customize the text in very many ways including adding fonts, drop shadows, changing the color, and even resizing or repositioning the text.
Camtasia
TechSmith Camtasia is one of the most popular tools to create and edit videos. Of the numerous features that you get when you choose to use Camtasia is adding and editing text to the video. It has numerous templates that can be used to customize the text you add in various ways.

Key Features:
- It gives you numerous options to add text to the images including text boxes, templates, and effects
- It has a speech-to-text feature that is perfect for adding captions and subtitles to the video
- You can easily customize the text by adding transitions and effects or even by simply changing the font, color, and size of the text
- The text can be moved to any section of the video
Typito
Typito is an online video editor with simple tools that can help you make changes to any video. designed to help YouTube content creators and video editors, Typito can be used to add all kinds of text and text effects to any video. It is accessible on all browsers and it is also very easy to use.
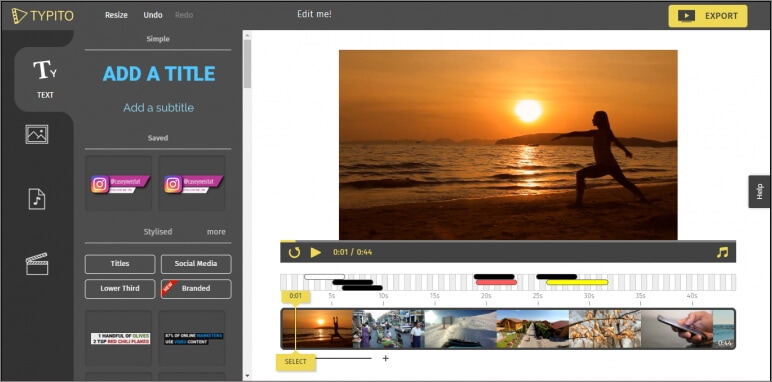
Key Features:
- It is very easy to use, allowing you to add text to any video in a few simple steps
- It has numerous templates to choose from
- Changing the font size, color, and style of the text is very easy
- You can publish videos directly to numerous video-sharing sites after editing
- It allows users to add animations, transitions, and effects to the text
Splice
Splice is an iOS app designed to help you add text to videos on iOS devices. Adding text to any video using Splice can be easily done using the overlay feature. It also has numerous other video editing features including allowing you to easily synchronize your videos and music, adding filters and transitions, and more.

Key Features:
- it has a simple user interface that makes adding text very easy
- You can customize the text in various ways including changing the font size, color and style or even adding various text effects
- Videos can be saved on the device or shared directly on social media apps like Facebook, Instagram, and YouTube
- It has numerous other video editing features including filters and animations
Clipomatic
If the text you want to add to the video is in the form of captions or subtitles, then Clipomatic is perhaps the best choice. It supports various languages including German, French, Portuguese, and even Chinese. You can also use it to add regular text to any video, reposition the text on any section of the video and customize the text in various ways.

Key Features:
- It is available for both Android and iOS
- Adding text to the video is very easy
- You can easily customize the text by changing the font color, and size and adding transitions and text effects
- It supports various languages, making it ideal for captions and subtitles
MySubtitle
MySubtitle is a simple but highly effective app that you can use to add text to your video. As the name suggests, this tool is ideal for adding subtitles and you can do that very easily by simply typing in the text and syncing the text to the video’s content.

Key Features:
- It is available for both iOS and Android devices
- You can type in your subtitles directly on the video
- Subtitles can then be paced to suit the video’s playback speed
- It is completely free to use
- You can share the videos you edit directly on various social media platforms
Free Download For Win 7 or later(64-bit)
Free Download For macOS 10.14 or later
Free Download For macOS 10.14 or later
Best AR Video Apps
Best AR Video App - Top 10 Picks
An easy yet powerful editor
Numerous effects to choose from
Detailed tutorials provided by the official channel
AR i.e. Augmented reality is a unique approach that is trendy for its variety of applications. It is a technology that provides the composite view to the user’s perception of real world images and videos.
It is a great development in the direction of technological advancement. AR is the concept that combines real-life objects with simulated 3D objects. Businesses use this approach to make their products more presentable and lively for the customers. Whereas, it is also very helpful for the users to experiment and have fun. With the evolution of this approach, now there are many applications available in the market that offers AR functionaltiy. Here, we are listing down the top 10 AR video apps which are worth using to experience something unique.
In this article
01 [What Is the Difference Between VR and AR?](#Part 1)
02 [10 Top AR Apps Worth Trying](#Part 2)
03 [What New AR Effects Could Be Found in Filmora](#Part 3)
Part 1 What Is the Difference Between VR and AR?
Both AR and VR use a distinctive approach and consider different use cases. They work on the concept of bringing a simulated environment to the user. Both VR i.e. the virtual reality and AR i.e. augmented reality are technologies used to replace or enhance the real-life environment with the simulated one. Virtual reality is the replacement of real-life environments with simulated ones. Whereas, Augmented reality is the procedure of augmenting the real-life environment with the addition of digital elements to a live view. This can be done by the camera on a smartphone.
The main aim of designing AR is to provide detailed information to the user about the real world. Its whole design is done by considering and adding the elements of the real world. Whereas, virtual reality is an entirely different simulation. It completely replaces the real-world environment with the virtual world.
Even Though both technologies are the simulation of the real world, they use different components of design and also have distinct targeted audiences. The concept behind VR is to distance the user from the real world as much as possible. Whereas, the concept of AR works with the real world to create a simulated environment.
The use of an eye-covering headset and headphones is very common to make an illusion of the real world, in the case of VR. Whereas, AR is usually accomplished with a smartphone or tablet screen. Here, the camera of the phone is focused at a point to capture the live-streaming of a moment on the screen. The captured data is then prepared by adding some useful information.
The applications of VR are architecture and retail, training, product design, etc. Whereas, the applications of AR are diagnostic data, navigation information, repair instructions, etc. The availability of ar video maker also eases the task of the industries for the mentioned purposes.
Part 2 10 Top AR Apps Worth Trying
Here, you can run down the list of top 10 augmented video apps which are best and are worth trying. This list is prepared based on user ratings, reviews, and experiences.
01IKEA Place
The Swedish furniture giant has made a great mark in the AR world with the development of a high-tech app. Ikea Place is a great app that lets the shoppers visualize the placements of products at home before buying. You just need to scan the floor from your mobile phone. Then, the easy drag and drop feature enables you to select the best match. The app makes the selection of furniture and home decors fun.

02YouCam Makeup
YouCam Makeup is an AR assisted app that provides a variety of filters for photos. It also acts as a fashion and makeup assistant. This app allows you to preview a variety of beauty products in real-time. Some top makeup brands such as Urban Decay, Maybelline, and Loreal offer their products in the app for the user to test. The app also has the features of sharing the look, following other users and shopping and reviewing featured products.

03GIPHY World
GIPHY World is a 3D coloring app. It lets the colored picture turn into 3D animated graphics. This app can also be used for social media marketing. With its use, you can make your product more appealing to the audience. The tool is just fun, as it lets you convert the images into a variety of other fun characters.

04Google Lens
Google Lens works on the concept of Google Goggles. It is a very useful AR app widely used by users for various purposes. With standard Google, you can search for anything only by typing in the search bar. But, this tool enables searching by opening the camera of a smartphone. You only need to focus the camera lens on the object or text. The app will then identify it and show the top results. It also shows the link to read details about your object or text. If you are searching for a product, then the tool will also help with the location to buy it.

05Augment
Augment is another best-rated AR video editor app. It secured top ratings just within a short period after launch. The app allows users to create videos by considering the characters of both real and fictional worlds. With this app, the users can use augmented reality for the placement of animated 3D models on the surroundings. It can be used by business owners to create appealing videos of their products.

06Roar
Roar is also a powerful AR weapon for business owners. It generates AR content in addition to video, audio, and 3D content. There are lots of options available for business owners to use this app: creating an AR-powered online store, incorporating AR into print ads, experiencing the most popular categories and products, etc. Also, the shoppers can experience the more detailed content about the product, with pricing, reviews, and also the option of purchasing.

07Amikasa
Amikasa is amongst the best home-furnishing AR apps accessible by iPhone users. Anyone can measure the land areas and create floor plans like professionals, with this app. Also, the professionals can use this tool to generate appealing floor and design plans. For this, they can use AR applications along with their measuring tools. The app has listed down the products from the whole web, rather than focusing on any single brand.

08Snapchat
Snapchat is one of the most popular Augmented reality social media apps. There are a variety of features available in the app which is winning millions of hearts all around the world. The app provides features in the form of lenses to add special effects, filters, and real-time transformations to the video messages. This tool also can be used by businesses for marketing purposes.

09Wanna Kicks
Wanna kicks is the perfect app for sneaker lovers. Online shopping is a more demanded and convenient option these days, but the app allows you to visualize the look of footwear before buying. You can visualize the look of footwear on the foot from any desired angle. You just need to focus the phone’s camera on your feet and use the drag and drop option to select from varied categories.

10Houzz
Houzz is also the best AR video creator in the home goods and furniture category. The app allows you to match the furniture with the layout of your house just by sitting at home. The feature, “View in My Room” lets the user place the products on the picture of shoppers’ homes with AR technology. You can also check the product’s look in different lighting.

Part 3 What New AR Effects Could Be Found in Filmora
Filmora is a wonderful AR video editing app that lets the user create appealing videos with less effort. The tool also has some useful AR features and effects which allow the user to give AR touch to their creation.
01Stock Media
A great addition to the Filmora 11 library is stock media. Stock media got integrated with GIPHY, Unsplash, and Pixabay. It is a unique and interesting feature available in Filmora. With this, you can get royalty-free images, GIFs, and videos inside the video editing tool only.
02AI Portrait
The AI portrait feature of Filmora 11 allows the user to remove the background around the human face. The feature also has several AR stickers such as Cute cat, Zombie teeth, etc and effects such as Human glitch, Human Pixelate, etc to play with.
03Auto Beat Sync
This brand new feature will allow you to sync your video with the rhythm and tempo automatically. You just need to upload a video and music, you wish to sync. Then, the app allows you to specify the video effect such as RGB, glow, video wall, blur, etc to be applied. Now, just click on the “Analyze” button to see the magic. The tool will run an algorithm to create an interesting video.
04Boris FX
Boris FX is a feature containing an array of advanced post-production effects. This feature is only available in some professional video editors like VEGAS Pro. Filmora is also proud to be on the list now. The Boris FX Continuum pack includes great post-production video effects such as Art Looks, Blur, Image Restoration, Lights, Stylize, Particles, etc. To use this high-end feature, you will need a paid version and a high-end workstation.
05NewBlue FX
NewBlue FX is also one of the powerful ar features of Filmora. It is a unique collection of Video Essentials, Video Filters, Video Elements, Video Stylizer, and Title Pro 7. This feature allows you to perform advanced titling, stylizing, color enhancement, composition, color correction, etc, professionally.
06Preset Templates
The Preset Templates feature of Filmora allows users to create professional-looking videos in just hours. This feature enables you to access preset templates such as “Business Outro”, “Game Endscreen”, “How to Paint Intro”, “Birthday Openers”, etc. To provide the desired modifications to your video, just drag and drop the templates and have fun.
Some of the new AR effects found in the latest version of Wondershare Filmora Video Editor are: WordArt Font, Modern Birthday Pack, Broken Effect Pack, 3D Like and Subscribe Sticker, Comic Texts Stickers, Vintage Memories, Hi-Tech Intros Pack, Abstract Bubble Intro, Smooth Big Titles, Cinematic Digital Slideshow, Cinematic Dissolve Effect, 3D Fun Emoji, Illustration VR World Pack, Makeups Pack, Trendy Gaming Endscreen Pack, Birthday Pack Vol 02, Blingbling Pack Vol 02, Raindrop Pack, Pixel Game Transition, The Awakening of Magic, Dynamic Lines Title Pack, Fancy Atmosphere Pack, Basic Sunshine Effects, Old Paper Opener, Qte Gaming Effects, Neon Titles Pack.
For Win 7 or later (64-bit)
For macOS 10.12 or later
● Ending Thoughts →
● Augmented reality is an approach that has never-ending scope. The concept is used in a variety of applications these days. And its applications and uses are increasing with each passing day.
● So, here we have shared the list of the best AR video apps. There are many more apps available. But, these are some highly popular applications for business, consumer as well as entertainment purposes.
● If you are also wishing to contribute a little to the world of AR with your unique creativity and skills, then you should try Filmora. The variety of newly added features allows you to create AR-enabled videos with so much ease.
AR i.e. Augmented reality is a unique approach that is trendy for its variety of applications. It is a technology that provides the composite view to the user’s perception of real world images and videos.
It is a great development in the direction of technological advancement. AR is the concept that combines real-life objects with simulated 3D objects. Businesses use this approach to make their products more presentable and lively for the customers. Whereas, it is also very helpful for the users to experiment and have fun. With the evolution of this approach, now there are many applications available in the market that offers AR functionaltiy. Here, we are listing down the top 10 AR video apps which are worth using to experience something unique.
In this article
01 [What Is the Difference Between VR and AR?](#Part 1)
02 [10 Top AR Apps Worth Trying](#Part 2)
03 [What New AR Effects Could Be Found in Filmora](#Part 3)
Part 1 What Is the Difference Between VR and AR?
Both AR and VR use a distinctive approach and consider different use cases. They work on the concept of bringing a simulated environment to the user. Both VR i.e. the virtual reality and AR i.e. augmented reality are technologies used to replace or enhance the real-life environment with the simulated one. Virtual reality is the replacement of real-life environments with simulated ones. Whereas, Augmented reality is the procedure of augmenting the real-life environment with the addition of digital elements to a live view. This can be done by the camera on a smartphone.
The main aim of designing AR is to provide detailed information to the user about the real world. Its whole design is done by considering and adding the elements of the real world. Whereas, virtual reality is an entirely different simulation. It completely replaces the real-world environment with the virtual world.
Even Though both technologies are the simulation of the real world, they use different components of design and also have distinct targeted audiences. The concept behind VR is to distance the user from the real world as much as possible. Whereas, the concept of AR works with the real world to create a simulated environment.
The use of an eye-covering headset and headphones is very common to make an illusion of the real world, in the case of VR. Whereas, AR is usually accomplished with a smartphone or tablet screen. Here, the camera of the phone is focused at a point to capture the live-streaming of a moment on the screen. The captured data is then prepared by adding some useful information.
The applications of VR are architecture and retail, training, product design, etc. Whereas, the applications of AR are diagnostic data, navigation information, repair instructions, etc. The availability of ar video maker also eases the task of the industries for the mentioned purposes.
Part 2 10 Top AR Apps Worth Trying
Here, you can run down the list of top 10 augmented video apps which are best and are worth trying. This list is prepared based on user ratings, reviews, and experiences.
01IKEA Place
The Swedish furniture giant has made a great mark in the AR world with the development of a high-tech app. Ikea Place is a great app that lets the shoppers visualize the placements of products at home before buying. You just need to scan the floor from your mobile phone. Then, the easy drag and drop feature enables you to select the best match. The app makes the selection of furniture and home decors fun.
02YouCam Makeup
YouCam Makeup is an AR assisted app that provides a variety of filters for photos. It also acts as a fashion and makeup assistant. This app allows you to preview a variety of beauty products in real-time. Some top makeup brands such as Urban Decay, Maybelline, and Loreal offer their products in the app for the user to test. The app also has the features of sharing the look, following other users and shopping and reviewing featured products.
03GIPHY World
GIPHY World is a 3D coloring app. It lets the colored picture turn into 3D animated graphics. This app can also be used for social media marketing. With its use, you can make your product more appealing to the audience. The tool is just fun, as it lets you convert the images into a variety of other fun characters.
04Google Lens
Google Lens works on the concept of Google Goggles. It is a very useful AR app widely used by users for various purposes. With standard Google, you can search for anything only by typing in the search bar. But, this tool enables searching by opening the camera of a smartphone. You only need to focus the camera lens on the object or text. The app will then identify it and show the top results. It also shows the link to read details about your object or text. If you are searching for a product, then the tool will also help with the location to buy it.
05Augment
Augment is another best-rated AR video editor app. It secured top ratings just within a short period after launch. The app allows users to create videos by considering the characters of both real and fictional worlds. With this app, the users can use augmented reality for the placement of animated 3D models on the surroundings. It can be used by business owners to create appealing videos of their products.
06Roar
Roar is also a powerful AR weapon for business owners. It generates AR content in addition to video, audio, and 3D content. There are lots of options available for business owners to use this app: creating an AR-powered online store, incorporating AR into print ads, experiencing the most popular categories and products, etc. Also, the shoppers can experience the more detailed content about the product, with pricing, reviews, and also the option of purchasing.
07Amikasa
Amikasa is amongst the best home-furnishing AR apps accessible by iPhone users. Anyone can measure the land areas and create floor plans like professionals, with this app. Also, the professionals can use this tool to generate appealing floor and design plans. For this, they can use AR applications along with their measuring tools. The app has listed down the products from the whole web, rather than focusing on any single brand.
08Snapchat
Snapchat is one of the most popular Augmented reality social media apps. There are a variety of features available in the app which is winning millions of hearts all around the world. The app provides features in the form of lenses to add special effects, filters, and real-time transformations to the video messages. This tool also can be used by businesses for marketing purposes.
09Wanna Kicks
Wanna kicks is the perfect app for sneaker lovers. Online shopping is a more demanded and convenient option these days, but the app allows you to visualize the look of footwear before buying. You can visualize the look of footwear on the foot from any desired angle. You just need to focus the phone’s camera on your feet and use the drag and drop option to select from varied categories.
10Houzz
Houzz is also the best AR video creator in the home goods and furniture category. The app allows you to match the furniture with the layout of your house just by sitting at home. The feature, “View in My Room” lets the user place the products on the picture of shoppers’ homes with AR technology. You can also check the product’s look in different lighting.
Part 3 What New AR Effects Could Be Found in Filmora
Filmora is a wonderful AR video editing app that lets the user create appealing videos with less effort. The tool also has some useful AR features and effects which allow the user to give AR touch to their creation.
01Stock Media
A great addition to the Filmora 11 library is stock media. Stock media got integrated with GIPHY, Unsplash, and Pixabay. It is a unique and interesting feature available in Filmora. With this, you can get royalty-free images, GIFs, and videos inside the video editing tool only.
02AI Portrait
The AI portrait feature of Filmora 11 allows the user to remove the background around the human face. The feature also has several AR stickers such as Cute cat, Zombie teeth, etc and effects such as Human glitch, Human Pixelate, etc to play with.
03Auto Beat Sync
This brand new feature will allow you to sync your video with the rhythm and tempo automatically. You just need to upload a video and music, you wish to sync. Then, the app allows you to specify the video effect such as RGB, glow, video wall, blur, etc to be applied. Now, just click on the “Analyze” button to see the magic. The tool will run an algorithm to create an interesting video.
04Boris FX
Boris FX is a feature containing an array of advanced post-production effects. This feature is only available in some professional video editors like VEGAS Pro. Filmora is also proud to be on the list now. The Boris FX Continuum pack includes great post-production video effects such as Art Looks, Blur, Image Restoration, Lights, Stylize, Particles, etc. To use this high-end feature, you will need a paid version and a high-end workstation.
05NewBlue FX
NewBlue FX is also one of the powerful ar features of Filmora. It is a unique collection of Video Essentials, Video Filters, Video Elements, Video Stylizer, and Title Pro 7. This feature allows you to perform advanced titling, stylizing, color enhancement, composition, color correction, etc, professionally.
06Preset Templates
The Preset Templates feature of Filmora allows users to create professional-looking videos in just hours. This feature enables you to access preset templates such as “Business Outro”, “Game Endscreen”, “How to Paint Intro”, “Birthday Openers”, etc. To provide the desired modifications to your video, just drag and drop the templates and have fun.
Some of the new AR effects found in the latest version of Wondershare Filmora Video Editor are: WordArt Font, Modern Birthday Pack, Broken Effect Pack, 3D Like and Subscribe Sticker, Comic Texts Stickers, Vintage Memories, Hi-Tech Intros Pack, Abstract Bubble Intro, Smooth Big Titles, Cinematic Digital Slideshow, Cinematic Dissolve Effect, 3D Fun Emoji, Illustration VR World Pack, Makeups Pack, Trendy Gaming Endscreen Pack, Birthday Pack Vol 02, Blingbling Pack Vol 02, Raindrop Pack, Pixel Game Transition, The Awakening of Magic, Dynamic Lines Title Pack, Fancy Atmosphere Pack, Basic Sunshine Effects, Old Paper Opener, Qte Gaming Effects, Neon Titles Pack.
For Win 7 or later (64-bit)
For macOS 10.12 or later
● Ending Thoughts →
● Augmented reality is an approach that has never-ending scope. The concept is used in a variety of applications these days. And its applications and uses are increasing with each passing day.
● So, here we have shared the list of the best AR video apps. There are many more apps available. But, these are some highly popular applications for business, consumer as well as entertainment purposes.
● If you are also wishing to contribute a little to the world of AR with your unique creativity and skills, then you should try Filmora. The variety of newly added features allows you to create AR-enabled videos with so much ease.
Also read:
- Updated Easy Guide to Overlay Videos in Premiere Pro
- Updated 10 Best Audio Visualizers Windows, Mac, Android, iPhone & Online for 2024
- In 2024, Split Audio From a Video in Adobe Premiere Pro Step by Step
- 2024 Approved List of Whatsapp Video Format That You May Need to Know
- Easy Ways to Make Procreate GIFs for 2024
- 2024 Approved How to Make Fortnite Thumbnail with Motion Blur?
- New Best Tips for Better Event Videography for 2024
- Updated 2024 Approved 10 Best Meme Text to Speech Tools Windows, Mac, Android, iPhone
- Updated You Can Learn How to Color Grade Your Picture in Lightroom Effectively. By Understanding the Process of Color Grading in Lightroom, You Can Create Unique Works, and Improve Your Abilities
- 2024 Approved Best Options to Replace Sky of Any Photo Online + Offline
- Updated Want Make a Slide Show Video? Heres How for 2024
- Updated In 2024, A Vacation Slideshow Is a Great Way to Relive the Vacation Memories and Also Share Them with Your Loved Ones. If You Are Looking for Ways to Create a Slideshow in Just a Few Minutes, We Will Help You with the Best Tool
- Updated In 2024, How to Customize Your Loading Text Effect?
- New In 2024, IMovie Review – Is It The Best Video Editor for Mac Users?
- Updated Best AR Video App - Top 10 Picks
- Change Speed of a Video on iPhone
- Updated How to Make Split Screen Videos in Filmora for 2024
- Best Method to Split the Video Into Parts Online
- Updated Funny Content Ideas for YouTube Videos and Funny Music Background
- How to Make Fortnite Thumbnail with Motion Blur for 2024
- How To Create a Polaroid Collage?
- Updated Splitting the Clips in Adobe After Effects Step by Step for 2024
- Learn How to Create Your Own Custom Animated Text Intro in the Filmora Video Editor. Follow a Few Simple Steps to Create Something that Looks Incredible for 2024
- The Best Peter McKinnon LUTs Recommendation
- New How to Change Aspect Ratio of Video for 2024
- In 2024, How to Use Lumetri Color in Adobe After Effects
- Video Maker with Song
- Guide Cropping and Combining Content in Wondershare Filmora Latest
- How To Make Ninja Jump Effect with Filmora for 2024
- Updated How to Start a Vlog
- New In 2024, 10 Best Vlogging Cameras for Beginners
- New Final Cut Pro for iPad
- Updated Are You Looking to Create some Impressive Slow-Motion Video Content? Get This Done with some Impressive Android Slow Motion Video Apps
- In 2024, Want to Imbibe Your Graphic Expertise with Designing Classic iMovie Presentations? Be Here to Work Through the Process Within the Quickest Possible Time Span
- In 2024, Use The Best LUTs for Lightroom
- How to Make A Fantastic Café Vlog for 2024
- In 2024, Ways To Find Unlocking Codes For Xiaomi Redmi Note 12 5G Phones
- In 2024, How to Transfer Data After Switching From Google Pixel 8 to Latest Samsung | Dr.fone
- In 2024, 3 Facts You Need to Know about Screen Mirroring Vivo Y200 | Dr.fone
- How To Create an Apple Developer Account From Apple iPhone 6s Plus
- Effective Ways To Fix Checkra1n Error 31 On Apple iPhone XS
- Process of Screen Sharing Lava Yuva 3 to PC- Detailed Steps | Dr.fone
- Recover your messages after Vivo S18 has been deleted
- Troubleshooting Guide How to Fix an Unresponsive Vivo S18e Screen | Dr.fone
- Reasons for Lava Agni 2 5G Stuck on Boot Screen and Ways To Fix Them | Dr.fone
- How to Track a Lost Vivo Y100 5G for Free? | Dr.fone
- Can Life360 Track Or See Text Messages? What Can You Do with Life360 On Motorola Defy 2? | Dr.fone
- How to Reset a Vivo Y78 5G Phone that is Locked?
- How to get the dragon scale and evolution-enabled pokemon On OnePlus Nord 3 5G? | Dr.fone
- In 2024, How to Transfer/Sync Notes from Apple iPhone 12 mini to iPad | Dr.fone
- Title: New How to Add a Slideshow in PowerPoint
- Author: Chloe
- Created at : 2024-05-20 03:38:04
- Updated at : 2024-05-21 03:38:04
- Link: https://ai-editing-video.techidaily.com/new-how-to-add-a-slideshow-in-powerpoint/
- License: This work is licensed under CC BY-NC-SA 4.0.
