
:max_bytes(150000):strip_icc():format(webp)/mixed-race-woman-buying-christmas-presents-online-with-credit-card-84527986-582352235f9b58d5b1ea09cc.jpg)
New How to Brighten Video in Premiere Pro for 2024
How to Brighten Video in Premiere Pro
Create High-Quality Video - Wondershare Filmora
An easy and powerful YouTube video editor
Numerous video and audio effects to choose from
Detailed tutorials provided by the official channel
Brighter videos always attract more attention. Indeed, a well-lit video can make your content shine and bring out the best in your story. But what if you forgot to turn on the lights or the camera just couldn’t handle the situation? We’ve all been there: you’re shooting a video, but there aren’t enough light sources. You end up with dark footage. It’s impossible to share this on your social media accounts or with your friends and family.
There are many reasons why people want to brighten a dark video. Maybe you recorded a video with your phone, but the lighting was too dim in the room. Or maybe you were outside, and the sun was behind you, casting shadows on your face while recording. In these cases, it can be helpful to know how to make a dark video brighter.
There is a way to apply simple corrections using Premiere Pro, no matter the reason. In this article, I’ll show you how to brighten your video in Premiere Pro so you can keep all the details in the highlights. This can be very useful if you’re working with a lot of footage that has been underexposed, and sometimes your shot might look too dark or even black.
In this article
01 Can I Brighten A Dark Video?
02 How to Brighten Video in Adobe Premiere Pro?
03 How To Lighten Up A Dark Video In Adobe Premiere Pro?
04 Enhancing Your Video In Premiere Pro
Can I Brighten A Dark Video?
This is a common question that comes up among video editors, so I thought I’d answer it here. The quick answer is yes. There are many online tools that can help you brighten a dark video or adjust the brightness of your video. A lot of times, you’ll get a video file that was shot in low light, and it will make your subject look dark and underexposed. Video brightness is an important feature that is easy to adjust. However, if your video is too dark to start off with, it may be difficult to brighten it in a way that doesn’t look unnatural.
There are several ways you can brighten a dark video. For example, you can use color correction or add more light to the scene before you film. If you already have a dark video, then you’ll need to adjust the contrast and brightness of your video during post-production. You can easily do this by using video editing software but keep in mind that too much brightness or too much contrast can result in poor video quality. So, you have to keep everything in balance.
How to Brighten Video in Adobe Premiere Pro?
Adobe Premiere Pro is your one-stop solution for editing videos, whether you’re editing a film or a TV ad. It gives you the flexibility to edit videos of any format. Adobe Premium makes brightening videos easy. Follow the steps below.
Step 1
Launch Adobe Premiere Pro, open a project, and then import the video file you want to brighten. Make sure that the video file has been imported into the media library before you start editing it.
Step 2
Next, click on the brightness and contrast option in the Effects panel, located at the bottom left of the software to adjust the brightness and contrast of your video.

Step 3
Bring the brightness and contrast option to the center area below the uploaded video. You can do this by simply dragging it and dropping it beneath the video.
Step 4
You can now easily increase the brightness by changing the brightness number in the effects control panel located to the right of the uploaded video.

Step 5
Adjust the brightness according to your needs and save the video with your preferred settings so you can watch it later or share it with your friends across different platforms.
How To Lighten Up A Dark Video In Adobe Premiere Pro?
The first method that we used was quite simple. All you needed to do was to increase the brightness of the video, and you were good to go. But this method is a bit different. Although it is a little more complicated than the first method, it can do wonders for you. Suppose you have a video shot in very dim light, and it has a lot of dark sections. There is a chance that Increasing the brightness won’t do much. So, you can use this method to brighten your video and improve its visibility. Just follow the steps mentioned below:
Step 1
If you haven’t already opened your video in Adobe Premiere Pro, launch the program and import your footage. Then drag it onto the timeline so that it appears at the top.
Step 2
Effects tab can be found in the left-most panel of adobe premiere pro. Click the Effects tab and search for Lightning effects in the search bar and click on it.

Step 3
Use the drag-and-drop method to add the lighting effects to the clip. Once you have done that, you will feel like your video is having a distorted flash-like effect. But don’t worry as we are not going for that.
Step 4
Now go to the effects control tab present at the top of the screen, and from there, you have to click on the lighting effects.

Step 5
Once you click on the lighting effects, you will see many options on your screen. Click on the “Light 1” button to open its dropdown menu. There you will see the spotlight selected by default.

Step 6
Click on the dropdown icon adjacent to the spotlight to open up the menu. You need to select “Directional” instead of Spotlight, and you will notice that the dark sections have been brightened significantly.

Step 7
The brightness intensity can even be increased by changing the value for the intensity option within the effect control panel.

Enhancing Your Video In Premiere Pro
Once you have done all the steps above, you can also use the video enhancing feature of adobe premiere pro to improve the quality of your videos. When you brighten a video, there is a chance that you might lose quality a little bit. So, to overcome that deficiency, this method might be helpful. Enhancing your videos with Premiere Pro is easy once you know the proper steps to do so. Just follow the steps described below:
Step 1
In the effects panel, search for “unsharp Mask” and drag it to the video clip.

Step 2
In the effect control panel under the Unsharp mask, set the amounts, radius, and threshold to enhance the video.

Keep in mind that you can increase the values of these parameters too high, but you will end up with a distorted video. Try increasing the values by small increments and see what happens. Avoid increasing the “amount” and radius value beyond 100% and ten, respectively.
Conclusion
● Brightening in Premiere Pro is a simple process that can benefit some video projects. Whether you want to brighten the video by increasing exposure, increasing luminance, or adding a vignette effect altogether, there are several ways to do so in Premiere Pro.
● However, you should know that neither option is necessarily better than the other. Video editing in general does take a bit of practice to master, but in this article, we have provided you with the basics and helped you on your way. All methods can be helpful in different situations, and even with similar circumstances, you might find advantages to all practices. Try out these methods for yourself and see which one best suits your needs.
Brighter videos always attract more attention. Indeed, a well-lit video can make your content shine and bring out the best in your story. But what if you forgot to turn on the lights or the camera just couldn’t handle the situation? We’ve all been there: you’re shooting a video, but there aren’t enough light sources. You end up with dark footage. It’s impossible to share this on your social media accounts or with your friends and family.
There are many reasons why people want to brighten a dark video. Maybe you recorded a video with your phone, but the lighting was too dim in the room. Or maybe you were outside, and the sun was behind you, casting shadows on your face while recording. In these cases, it can be helpful to know how to make a dark video brighter.
There is a way to apply simple corrections using Premiere Pro, no matter the reason. In this article, I’ll show you how to brighten your video in Premiere Pro so you can keep all the details in the highlights. This can be very useful if you’re working with a lot of footage that has been underexposed, and sometimes your shot might look too dark or even black.
In this article
01 Can I Brighten A Dark Video?
02 How to Brighten Video in Adobe Premiere Pro?
03 How To Lighten Up A Dark Video In Adobe Premiere Pro?
04 Enhancing Your Video In Premiere Pro
Can I Brighten A Dark Video?
This is a common question that comes up among video editors, so I thought I’d answer it here. The quick answer is yes. There are many online tools that can help you brighten a dark video or adjust the brightness of your video. A lot of times, you’ll get a video file that was shot in low light, and it will make your subject look dark and underexposed. Video brightness is an important feature that is easy to adjust. However, if your video is too dark to start off with, it may be difficult to brighten it in a way that doesn’t look unnatural.
There are several ways you can brighten a dark video. For example, you can use color correction or add more light to the scene before you film. If you already have a dark video, then you’ll need to adjust the contrast and brightness of your video during post-production. You can easily do this by using video editing software but keep in mind that too much brightness or too much contrast can result in poor video quality. So, you have to keep everything in balance.
How to Brighten Video in Adobe Premiere Pro?
Adobe Premiere Pro is your one-stop solution for editing videos, whether you’re editing a film or a TV ad. It gives you the flexibility to edit videos of any format. Adobe Premium makes brightening videos easy. Follow the steps below.
Step 1
Launch Adobe Premiere Pro, open a project, and then import the video file you want to brighten. Make sure that the video file has been imported into the media library before you start editing it.
Step 2
Next, click on the brightness and contrast option in the Effects panel, located at the bottom left of the software to adjust the brightness and contrast of your video.
Step 3
Bring the brightness and contrast option to the center area below the uploaded video. You can do this by simply dragging it and dropping it beneath the video.
Step 4
You can now easily increase the brightness by changing the brightness number in the effects control panel located to the right of the uploaded video.
Step 5
Adjust the brightness according to your needs and save the video with your preferred settings so you can watch it later or share it with your friends across different platforms.
How To Lighten Up A Dark Video In Adobe Premiere Pro?
The first method that we used was quite simple. All you needed to do was to increase the brightness of the video, and you were good to go. But this method is a bit different. Although it is a little more complicated than the first method, it can do wonders for you. Suppose you have a video shot in very dim light, and it has a lot of dark sections. There is a chance that Increasing the brightness won’t do much. So, you can use this method to brighten your video and improve its visibility. Just follow the steps mentioned below:
Step 1
If you haven’t already opened your video in Adobe Premiere Pro, launch the program and import your footage. Then drag it onto the timeline so that it appears at the top.
Step 2
Effects tab can be found in the left-most panel of adobe premiere pro. Click the Effects tab and search for Lightning effects in the search bar and click on it.
Step 3
Use the drag-and-drop method to add the lighting effects to the clip. Once you have done that, you will feel like your video is having a distorted flash-like effect. But don’t worry as we are not going for that.
Step 4
Now go to the effects control tab present at the top of the screen, and from there, you have to click on the lighting effects.
Step 5
Once you click on the lighting effects, you will see many options on your screen. Click on the “Light 1” button to open its dropdown menu. There you will see the spotlight selected by default.
Step 6
Click on the dropdown icon adjacent to the spotlight to open up the menu. You need to select “Directional” instead of Spotlight, and you will notice that the dark sections have been brightened significantly.
Step 7
The brightness intensity can even be increased by changing the value for the intensity option within the effect control panel.
Enhancing Your Video In Premiere Pro
Once you have done all the steps above, you can also use the video enhancing feature of adobe premiere pro to improve the quality of your videos. When you brighten a video, there is a chance that you might lose quality a little bit. So, to overcome that deficiency, this method might be helpful. Enhancing your videos with Premiere Pro is easy once you know the proper steps to do so. Just follow the steps described below:
Step 1
In the effects panel, search for “unsharp Mask” and drag it to the video clip.
Step 2
In the effect control panel under the Unsharp mask, set the amounts, radius, and threshold to enhance the video.
Keep in mind that you can increase the values of these parameters too high, but you will end up with a distorted video. Try increasing the values by small increments and see what happens. Avoid increasing the “amount” and radius value beyond 100% and ten, respectively.
Conclusion
● Brightening in Premiere Pro is a simple process that can benefit some video projects. Whether you want to brighten the video by increasing exposure, increasing luminance, or adding a vignette effect altogether, there are several ways to do so in Premiere Pro.
● However, you should know that neither option is necessarily better than the other. Video editing in general does take a bit of practice to master, but in this article, we have provided you with the basics and helped you on your way. All methods can be helpful in different situations, and even with similar circumstances, you might find advantages to all practices. Try out these methods for yourself and see which one best suits your needs.
Best 22 Video Editing Tips to Know
Whether your video is short or long, you may want to make it better and appealing. Video editing involves the manipulation of your videos through which the desired transformation is achieved and you can flaunt every move of your video in a more preferable way. Video editing involves cutting the video short, changing the speed, organizing the video in a seamless flow. In short, the better the cuts of your videos, the better your message/story is conveyed.
Part 1: Things to Learn Before Editing First Draft
You have shot your video and now you’re stuck on the post-processing of that video. Don’t worry! We got you covered through this article which will guide you through the different things which you must learn before editing the first draft of your video.
Start a video project
Your smartphone and digital camera can let you record multiple videos but what now? You head out to edit your first draft by choosing a suitable platform or software and then you can surely lay back and see the software doing wonders to your raw videos. By starting off with editing, you choose your video editing preferences and then you just let the video editing tools do the magic.
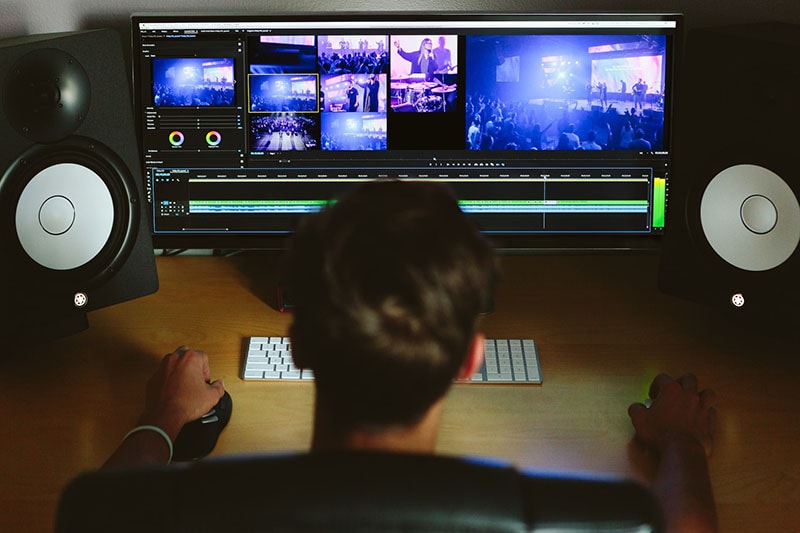
Get to know the video editing software workspace
Video editing software offer customizable workspaces for different editing tasks. The software workspace streamlines routine actions you take with clips, like editing clips, making DVD and Blu-ray menus, and sharing movies. By placing panels in the layout that best matches your working style, you can personalize your workspace. The additional panels adjust automatically to fit the window as you rearrange them. For various jobs, such as one for editing and one for preview, you can build and store multiple workspaces.
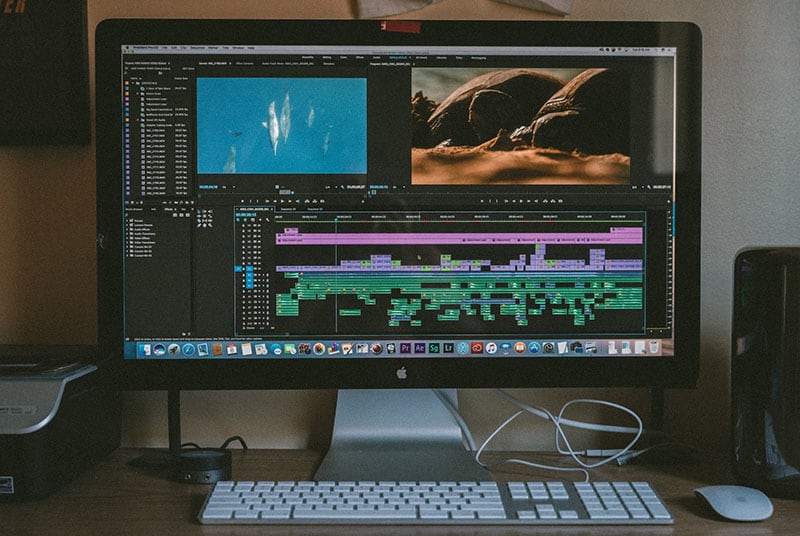
Understand the timeline
The timeline of your video is the backbone of your digital video editing process. It’s called a timeline because the various pieces of video will be lined up horizontally. In a video editing software, the timeline is where you arrange your video clips and plan out all the modifications you want to do. As you work, you will see every single one of your video and audio clips, effects, and transitions sorted chronologically from beginning to end. All the fundamentals of video editing, including reordering, trimming, and enhancing your footage, are available. To preview how your adjustments will turn out, you can also play your project at any point in the timeline.
Add clips to timeline
When you have grasped the idea behind a timeline, the next step you need to follow is to add clips into your timeline. Before adding clips to your timeline, it is suggested that you label each clip. Although it does seem like a lot of work, it will be easier to locate all of the clips later on if you’re working on a large project. after the footages are gathered and named, add important clips in the beginning of the timeline to begin establishing the video’s overall structure and order.
Editing tools
Besides basic cutting, trimming and cropping, video editing software offer multiple professional editing tools which enhance the outlook your videos and make them 10x better. For example, instead of cutting up a clip into a bunch of small clips and unwanted gaps, use the Ripple Edit tool keep your timeline clean. This means when a clip is trimmed, it causes a ripple effect throughout the rest of your timeline, shifting all other clips into a new timeline position.
Similarly, when working with lengthy timelines, the Razor tool is also really helpful because you can select the clip you wish to cut by dragging your razor over it. So, the Razor cut is the tool to use if you need to make a lot of cuts in your videos quickly.
Syncing audio and video
You already know how annoying it can be if audio and video don’t sync while you’re listening to a podcast or viewing a YouTube vlog. The video editing software offer helpful manual and auto sync tools. It can be though a bit of hard work for beginners, but the ‘Lights, Camera, Action’ approach works best in syncing your audio with your video. To sync audio, you need to record audio first and then through matching the wavelengths displayed on your timeline, you can sync the audio with your video.
Edit download talking head/interview footage
Now with professional video editing tools, you can make ‘talking head videos’ if you want to share your expertise as a YouTube vlogger or if you want to do employee training. Talking head films are a fantastic way to stimulate the mind and the heart while increasing learner retention in this digital age.
Additionally, with other video editing tools, you can edit your interview footages and for that, you don’t have to mess with timestamps, cutting or splicing videos, or creating transitions between clips, you just edit the transcript of the video and the video edits itself to match.
Video properties: Scale, position, opacity
Any screen recording, camera-based video, imported video clips, and text picture clips can have their visuals altered using video properties. In video editing software, multiple video properties are offered which include scaling, positioning, rotating, changing the opacity, changing level of reflection and shadow. Additionally, Video properties also include editing the video as a whole or just altering a clip from the video.
Types of cuts: Straight, J-Cut, L-Cut etc
The different types of cuts used in the video editing process is an effective way to make the transitions in your video pop. Basically, these cuts join two or more clips together via audio. Professional editors call these cuts as ‘split edits. The most common cuts are called J-Cut and L-Cut. They help to mix the content’s flow and keep the on-screen narrative in motion. In essence, these edits are necessary to make your scenes feel warm and more authentic.
Part 2: Practical Video Editing Tips
Choose right software
The push start of video editing for beginners is based on one common step: know your software or workspace. Selecting the appropriate software for editing your video is the first step in streamlining your video editing process. Although all software often includes the tools that you need to make ordinary video edits, you could favor one over the others based on its usefulness, digital interface, and features. Instead of just using the latest and trending video editing software available, the key is to choose what functions for you and your editing style.
Use a fast computer
Slow rendering hinders video editing process and other commands given to a computer. From a practical point of view, it is recommended that irrespective of the model of the computer or version of your software; your computer must be efficient to help you to access your files and software easily and to speed up your export time. With a slow computer, you will definitely feel stuck and the video editing complications will haunt you in your dreams.
Watch video editing tutorials
None of us is a pro until we’ve practiced something enough to know everything about it. Video editing requires both; technical knowledge as well as your creativity, so it is better not to do try things on your own. A little guidance can surely help you get through the basics of the video editing process. There are tons of helpful tutorials for making excellent videos on YouTube, vlogs, and educational websites. The majority of tutorials you’ll discover online are free, making the readily available at the tip of your fingers.
Get the project files
Most of the beginner video editors prefer to use the same project files as the tutorial instructors when they are following along. Your work will exactly resemble the demo’s sample, which will aid in your understanding of the steps. For precisely this reason, many tutorials let you download the project files. You can repeat a process with your own video files once you’ve mastered this technique.
Edit for a story
Remembering your creative objective to create a wonderful story or message through your edited video is one of the most crucial lessons you should learn from this article. It is critically important that you make your film visually appealing and dramatically engaging to effectively evoke the right emotions and to communicate your desired message. Instead of merely adding a huge amount of effects to wow your audience, use your practical and technical skills to do this.
Maintain an efficient workflow
You’ll need to be systematic and organized in addition to having an editing software if you want to become a more competent editor. Putting your projects and files in folders that you may use repeatedly is one method to streamline your process. Besides this, organizing your projects and files into an external hard drive or USB is recommended in case of losing access to your intricately designed projects.
Utilize keyboard shortcuts
Keyboard shortcuts speed up the process of video editing and save you ample time. Different keyboard shortcuts are compatible with different video editing software; leaving a few which are mutual in every software. Don’t attempt to put all of these shortcuts into action at once. Pick a small number to begin with, and as they become instinctive, add more. You’ll progress more quickly if you use less mouse while editing your video.
Learn important terms
As a beginner, you may not want to feel a lump in the throat caused by the complicated dictionary of video editing software. There are some broad video editing terms that refer to videography as a whole as well as video editing terms specific to the process of editing footage. You must first learn what these terms means for example you may want to know what the terms like ‘aspect ratio, B-roll, bit rate, close up, compression, crop and compositing’ mean.
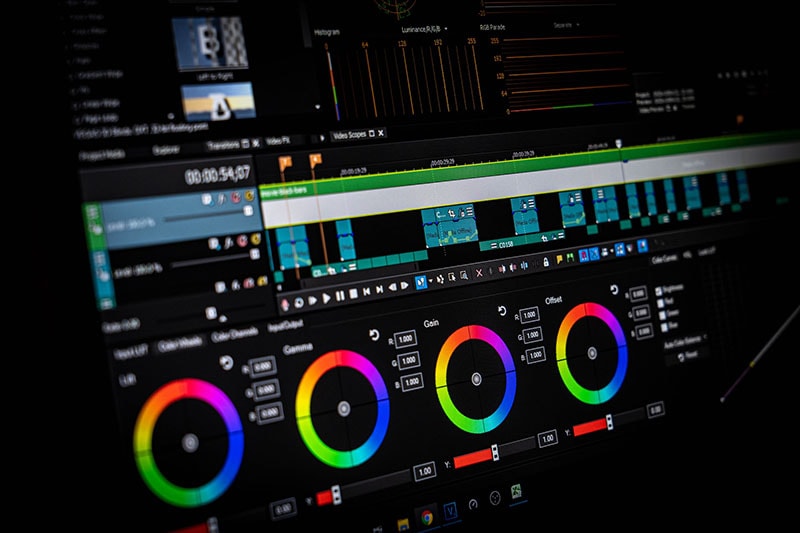
Color correct your clips
Do you own a rather boring video? Perhaps it’s a little too dull or the colors don’t stand out as much as they should? A crucial step is to modify the video’s color. This will assist in reducing the saturation and revive your video. Yet, there are some color correcting presets which can be easily accessed in different video editing apps.
Select good music
You ever saw an ad on YouTube or other social media platforms without an audio background. You may just want to skip it because the video, which may apparently be appealing, fails to strike you. Coordinating and complimenting your video with a music in the background is like cherry on top. It’s a huge plus to attract viewers’ attention. Though it is necessary that the music you choose must be relevant to your video file and should target the majority. So, choose good music to adorn your videos and trigger emotions in your target audience.
Add text and graphics
Some people are attracted more towards textual descriptions rather visual representation of content. It is crucial that considering the preferences of majority, you add significant details to your video which can target your audience in a multidimension. You might need to include more text in addition to the title, opening/closing billboards (for broadcasting), and film credits, depending on the type of film you’re making. However, you can make dazzling visuals using your editing program if you feel the urge to do so.
Export web versions
When your film is finished and is ready to be exported, you would have a natural urge to export it at the highest video resolution possible. If it’s going to be shown in theatres and on ultra-HD screens, this is unquestionably the best course of action. However, you should also export smaller, higher-quality versions for simpler viewing in the modern day where video projects are typically promoted online and on social media.
The objective of creating a file for the web is to keep its high quality while not making it too large for upload and online viewing. Don’t worry if you’re unsure of the export settings to utilize. Websites like Facebook, YouTube, and Vimeo all provide suggested export settings to assist you in correctly resizing your content.
Part 3: 10 Advanced Editing Tips for Professionals
We all definitely have experimented with video editing tools to some extent. But now, it is definitely time to become a pro. Don’t worry, the process isn’t as scary as we imagine it to be. This article is your best stop to grab some fine guidelines about how to become a video editor, in fact, a Pro video editor.
- Make titles stand out
You’re skilled in video editing, but do your titles seem a little…unfinished? Do those lower thirds strike you as being monotonous and boring? Is your typography competing for attention against your pictures? It appears that you would benefit from some basic title design advice, and lucky for you, we have some. Your title must be readable by majority and always choose your safe way in selecting texts for example, a sans-serif typeface is usually going to be a safe choice for video. You can also animate text to highlight it so that it is more captivating.
- Put video inside text or logos effects
Videos resonate with your brand and content if you add a specific logo or text effects to it. Almost all the video editors allow this featuring so that the identification of your work is maintained and copyright claim can be imposed if you see your content being copied or manipulated.
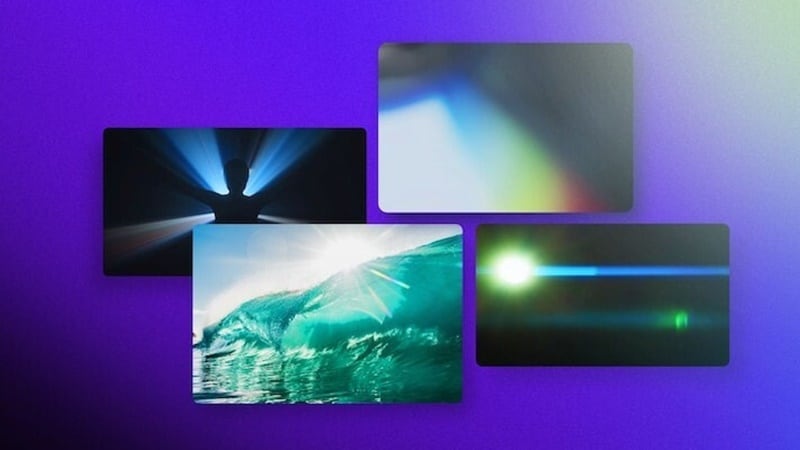
- Add light leaks, film burns and lens flares
Incorporating unique transitions into your monotonous videos can get you your viewer’s attention in a go. Lens flares, light leaks, and film burns can result in a unique look, but are not always easy to add naturally in-camera. Some of the best video editing software which allow access to adding lens flares, light leaks and film burns include: Free 4K Light Leaks – RocketStock, Motion Array Free Light Leaks, WZZLY Free Light Leaks, LIGHT LEAK FILM OVERLAY and many more.
- Add the vintage old film look
The quick Instagram-category of filters are common today but what makes your videos more natural and appealing is the addition of some presets which almost every video editor offers. These presets add a classic vintage old film look to your videos by manipulating color correction effects, framerate settings, overlays, and aspect ratio hacks. Some popular vintage old film effects are found in software namely VSDC, VEED, Adobe Premium Pro and many others in list.
- Add type-on effect
A type-on effect added to your videos comprehend your content more firmly. Simply by tabbing on ‘Add text effect’ in any video editor, you can add type-on effect to your videos and to add ravishing component to the overall structure of your video.
- Zoom in or out effect
The zoom-in or out feature (if available) in your video editing software can allow you to magnify any part of your video quickly and easily. Some of the best video editors featuring this specification include: Wondershare DemoCreator Zoom in Video Effect, DaVinci Resolve, Wondershare Filmora , Windows Movie Maker and Apowersoft Screen Recorder.
- Custom wipe on/off reveal effect
The wipe on/off reveal transition or effect is one of the earliest ways of transitioning from one scene to another. An object (usually a line) moves across the screen, revealing the next scene, while simultaneously removing (or wiping) the previous scene and when used properly, they can create a very powerful effect. It involves creative fading in and out transitions to give a more dramatic look.
- 4k, 8k, HD resolution
The latest video editing software offer the export your edited video in multiple formats, out of which 4k, 8k and HD resolution formats are preferable for majority of the professional video editors. It is necessary that even after the video is uploaded to a platform, the pixels do not decrease and the quality of the video is maintained. Although attractive to the viewers, the higher the resolution, the more the data with which you must deal. It is suggested that a standard or default resolution is chosen to play and replay the video in different computers.
- B-roll
B-roll is secondary video that is frequently used as cutaway video to add context and visual interest to your story. The term is originated from the early days of Hollywood when there used to be an A-roll which was the primary video and B-roll which served as a secondary video footage. This can help you visualize your video from different dimensions, giving it a more realistic look for captivating viewers.

- Compression rate, bit depth, bit
The amount of data the camera records each second is referred to as bit rate. Every single second of a video is subject to significant data processing by cameras. The higher the quality of the video, the more is the bit rate. Bit depth refers to the number of colors your camera can read per pixel. Common bit depths are 8-bit and 10-bit, which enable a camera to read 256 million or 1.07 billion colors respectively. To upload your edited video, a compression is usually required to convert your resolution to internet quality so that the upload can be made simpler, without distorting the video resolution.
Whether your video is short or long, you may want to make it better and appealing. Video editing involves the manipulation of your videos through which the desired transformation is achieved and you can flaunt every move of your video in a more preferable way. Video editing involves cutting the video short, changing the speed, organizing the video in a seamless flow. In short, the better the cuts of your videos, the better your message/story is conveyed.
Part 1: Things to Learn Before Editing First Draft
You have shot your video and now you’re stuck on the post-processing of that video. Don’t worry! We got you covered through this article which will guide you through the different things which you must learn before editing the first draft of your video.
Start a video project
Your smartphone and digital camera can let you record multiple videos but what now? You head out to edit your first draft by choosing a suitable platform or software and then you can surely lay back and see the software doing wonders to your raw videos. By starting off with editing, you choose your video editing preferences and then you just let the video editing tools do the magic.
Get to know the video editing software workspace
Video editing software offer customizable workspaces for different editing tasks. The software workspace streamlines routine actions you take with clips, like editing clips, making DVD and Blu-ray menus, and sharing movies. By placing panels in the layout that best matches your working style, you can personalize your workspace. The additional panels adjust automatically to fit the window as you rearrange them. For various jobs, such as one for editing and one for preview, you can build and store multiple workspaces.
Understand the timeline
The timeline of your video is the backbone of your digital video editing process. It’s called a timeline because the various pieces of video will be lined up horizontally. In a video editing software, the timeline is where you arrange your video clips and plan out all the modifications you want to do. As you work, you will see every single one of your video and audio clips, effects, and transitions sorted chronologically from beginning to end. All the fundamentals of video editing, including reordering, trimming, and enhancing your footage, are available. To preview how your adjustments will turn out, you can also play your project at any point in the timeline.
Add clips to timeline
When you have grasped the idea behind a timeline, the next step you need to follow is to add clips into your timeline. Before adding clips to your timeline, it is suggested that you label each clip. Although it does seem like a lot of work, it will be easier to locate all of the clips later on if you’re working on a large project. after the footages are gathered and named, add important clips in the beginning of the timeline to begin establishing the video’s overall structure and order.
Editing tools
Besides basic cutting, trimming and cropping, video editing software offer multiple professional editing tools which enhance the outlook your videos and make them 10x better. For example, instead of cutting up a clip into a bunch of small clips and unwanted gaps, use the Ripple Edit tool keep your timeline clean. This means when a clip is trimmed, it causes a ripple effect throughout the rest of your timeline, shifting all other clips into a new timeline position.
Similarly, when working with lengthy timelines, the Razor tool is also really helpful because you can select the clip you wish to cut by dragging your razor over it. So, the Razor cut is the tool to use if you need to make a lot of cuts in your videos quickly.
Syncing audio and video
You already know how annoying it can be if audio and video don’t sync while you’re listening to a podcast or viewing a YouTube vlog. The video editing software offer helpful manual and auto sync tools. It can be though a bit of hard work for beginners, but the ‘Lights, Camera, Action’ approach works best in syncing your audio with your video. To sync audio, you need to record audio first and then through matching the wavelengths displayed on your timeline, you can sync the audio with your video.
Edit download talking head/interview footage
Now with professional video editing tools, you can make ‘talking head videos’ if you want to share your expertise as a YouTube vlogger or if you want to do employee training. Talking head films are a fantastic way to stimulate the mind and the heart while increasing learner retention in this digital age.
Additionally, with other video editing tools, you can edit your interview footages and for that, you don’t have to mess with timestamps, cutting or splicing videos, or creating transitions between clips, you just edit the transcript of the video and the video edits itself to match.
Video properties: Scale, position, opacity
Any screen recording, camera-based video, imported video clips, and text picture clips can have their visuals altered using video properties. In video editing software, multiple video properties are offered which include scaling, positioning, rotating, changing the opacity, changing level of reflection and shadow. Additionally, Video properties also include editing the video as a whole or just altering a clip from the video.
Types of cuts: Straight, J-Cut, L-Cut etc
The different types of cuts used in the video editing process is an effective way to make the transitions in your video pop. Basically, these cuts join two or more clips together via audio. Professional editors call these cuts as ‘split edits. The most common cuts are called J-Cut and L-Cut. They help to mix the content’s flow and keep the on-screen narrative in motion. In essence, these edits are necessary to make your scenes feel warm and more authentic.
Part 2: Practical Video Editing Tips
Choose right software
The push start of video editing for beginners is based on one common step: know your software or workspace. Selecting the appropriate software for editing your video is the first step in streamlining your video editing process. Although all software often includes the tools that you need to make ordinary video edits, you could favor one over the others based on its usefulness, digital interface, and features. Instead of just using the latest and trending video editing software available, the key is to choose what functions for you and your editing style.
Use a fast computer
Slow rendering hinders video editing process and other commands given to a computer. From a practical point of view, it is recommended that irrespective of the model of the computer or version of your software; your computer must be efficient to help you to access your files and software easily and to speed up your export time. With a slow computer, you will definitely feel stuck and the video editing complications will haunt you in your dreams.
Watch video editing tutorials
None of us is a pro until we’ve practiced something enough to know everything about it. Video editing requires both; technical knowledge as well as your creativity, so it is better not to do try things on your own. A little guidance can surely help you get through the basics of the video editing process. There are tons of helpful tutorials for making excellent videos on YouTube, vlogs, and educational websites. The majority of tutorials you’ll discover online are free, making the readily available at the tip of your fingers.
Get the project files
Most of the beginner video editors prefer to use the same project files as the tutorial instructors when they are following along. Your work will exactly resemble the demo’s sample, which will aid in your understanding of the steps. For precisely this reason, many tutorials let you download the project files. You can repeat a process with your own video files once you’ve mastered this technique.
Edit for a story
Remembering your creative objective to create a wonderful story or message through your edited video is one of the most crucial lessons you should learn from this article. It is critically important that you make your film visually appealing and dramatically engaging to effectively evoke the right emotions and to communicate your desired message. Instead of merely adding a huge amount of effects to wow your audience, use your practical and technical skills to do this.
Maintain an efficient workflow
You’ll need to be systematic and organized in addition to having an editing software if you want to become a more competent editor. Putting your projects and files in folders that you may use repeatedly is one method to streamline your process. Besides this, organizing your projects and files into an external hard drive or USB is recommended in case of losing access to your intricately designed projects.
Utilize keyboard shortcuts
Keyboard shortcuts speed up the process of video editing and save you ample time. Different keyboard shortcuts are compatible with different video editing software; leaving a few which are mutual in every software. Don’t attempt to put all of these shortcuts into action at once. Pick a small number to begin with, and as they become instinctive, add more. You’ll progress more quickly if you use less mouse while editing your video.
Learn important terms
As a beginner, you may not want to feel a lump in the throat caused by the complicated dictionary of video editing software. There are some broad video editing terms that refer to videography as a whole as well as video editing terms specific to the process of editing footage. You must first learn what these terms means for example you may want to know what the terms like ‘aspect ratio, B-roll, bit rate, close up, compression, crop and compositing’ mean.
Color correct your clips
Do you own a rather boring video? Perhaps it’s a little too dull or the colors don’t stand out as much as they should? A crucial step is to modify the video’s color. This will assist in reducing the saturation and revive your video. Yet, there are some color correcting presets which can be easily accessed in different video editing apps.
Select good music
You ever saw an ad on YouTube or other social media platforms without an audio background. You may just want to skip it because the video, which may apparently be appealing, fails to strike you. Coordinating and complimenting your video with a music in the background is like cherry on top. It’s a huge plus to attract viewers’ attention. Though it is necessary that the music you choose must be relevant to your video file and should target the majority. So, choose good music to adorn your videos and trigger emotions in your target audience.
Add text and graphics
Some people are attracted more towards textual descriptions rather visual representation of content. It is crucial that considering the preferences of majority, you add significant details to your video which can target your audience in a multidimension. You might need to include more text in addition to the title, opening/closing billboards (for broadcasting), and film credits, depending on the type of film you’re making. However, you can make dazzling visuals using your editing program if you feel the urge to do so.
Export web versions
When your film is finished and is ready to be exported, you would have a natural urge to export it at the highest video resolution possible. If it’s going to be shown in theatres and on ultra-HD screens, this is unquestionably the best course of action. However, you should also export smaller, higher-quality versions for simpler viewing in the modern day where video projects are typically promoted online and on social media.
The objective of creating a file for the web is to keep its high quality while not making it too large for upload and online viewing. Don’t worry if you’re unsure of the export settings to utilize. Websites like Facebook, YouTube, and Vimeo all provide suggested export settings to assist you in correctly resizing your content.
Part 3: 10 Advanced Editing Tips for Professionals
We all definitely have experimented with video editing tools to some extent. But now, it is definitely time to become a pro. Don’t worry, the process isn’t as scary as we imagine it to be. This article is your best stop to grab some fine guidelines about how to become a video editor, in fact, a Pro video editor.
- Make titles stand out
You’re skilled in video editing, but do your titles seem a little…unfinished? Do those lower thirds strike you as being monotonous and boring? Is your typography competing for attention against your pictures? It appears that you would benefit from some basic title design advice, and lucky for you, we have some. Your title must be readable by majority and always choose your safe way in selecting texts for example, a sans-serif typeface is usually going to be a safe choice for video. You can also animate text to highlight it so that it is more captivating.
- Put video inside text or logos effects
Videos resonate with your brand and content if you add a specific logo or text effects to it. Almost all the video editors allow this featuring so that the identification of your work is maintained and copyright claim can be imposed if you see your content being copied or manipulated.
- Add light leaks, film burns and lens flares
Incorporating unique transitions into your monotonous videos can get you your viewer’s attention in a go. Lens flares, light leaks, and film burns can result in a unique look, but are not always easy to add naturally in-camera. Some of the best video editing software which allow access to adding lens flares, light leaks and film burns include: Free 4K Light Leaks – RocketStock, Motion Array Free Light Leaks, WZZLY Free Light Leaks, LIGHT LEAK FILM OVERLAY and many more.
- Add the vintage old film look
The quick Instagram-category of filters are common today but what makes your videos more natural and appealing is the addition of some presets which almost every video editor offers. These presets add a classic vintage old film look to your videos by manipulating color correction effects, framerate settings, overlays, and aspect ratio hacks. Some popular vintage old film effects are found in software namely VSDC, VEED, Adobe Premium Pro and many others in list.
- Add type-on effect
A type-on effect added to your videos comprehend your content more firmly. Simply by tabbing on ‘Add text effect’ in any video editor, you can add type-on effect to your videos and to add ravishing component to the overall structure of your video.
- Zoom in or out effect
The zoom-in or out feature (if available) in your video editing software can allow you to magnify any part of your video quickly and easily. Some of the best video editors featuring this specification include: Wondershare DemoCreator Zoom in Video Effect, DaVinci Resolve, Wondershare Filmora , Windows Movie Maker and Apowersoft Screen Recorder.
- Custom wipe on/off reveal effect
The wipe on/off reveal transition or effect is one of the earliest ways of transitioning from one scene to another. An object (usually a line) moves across the screen, revealing the next scene, while simultaneously removing (or wiping) the previous scene and when used properly, they can create a very powerful effect. It involves creative fading in and out transitions to give a more dramatic look.
- 4k, 8k, HD resolution
The latest video editing software offer the export your edited video in multiple formats, out of which 4k, 8k and HD resolution formats are preferable for majority of the professional video editors. It is necessary that even after the video is uploaded to a platform, the pixels do not decrease and the quality of the video is maintained. Although attractive to the viewers, the higher the resolution, the more the data with which you must deal. It is suggested that a standard or default resolution is chosen to play and replay the video in different computers.
- B-roll
B-roll is secondary video that is frequently used as cutaway video to add context and visual interest to your story. The term is originated from the early days of Hollywood when there used to be an A-roll which was the primary video and B-roll which served as a secondary video footage. This can help you visualize your video from different dimensions, giving it a more realistic look for captivating viewers.
- Compression rate, bit depth, bit
The amount of data the camera records each second is referred to as bit rate. Every single second of a video is subject to significant data processing by cameras. The higher the quality of the video, the more is the bit rate. Bit depth refers to the number of colors your camera can read per pixel. Common bit depths are 8-bit and 10-bit, which enable a camera to read 256 million or 1.07 billion colors respectively. To upload your edited video, a compression is usually required to convert your resolution to internet quality so that the upload can be made simpler, without distorting the video resolution.
The Benefits Of Using Video For Social Media Marketing
When it comes to social media marketing, video is one of the most powerful tools at your disposal. Videos can be used to create engaging content that draws in new followers, and they can also be used to promote your products or services. In fact, videos are so effective that nearly 90% of businesses now use them as part of their social media marketing strategy. So, if you’re not using video yet, now is the time to start. In this post, we’ll discuss the benefits of using video for social media marketing and provide tips for getting started. Keep reading to learn more!
1. More Engaging Than Text or Images
When you’re scrolling through your feed, what’s more, likely to stop you in your tracks: a picture or a video? For most people, the answer is video. In general, video is more engaging than image because it captures our attention more effectively and holds it for longer. Studies have shown that the human brain processes video 60,000 times faster than text, and that viewers retain 95% of a message when they watch it in a video, as opposed to 10% when they read it in text. Furthermore, video is more likely to evoke an emotional response than an image. We can’t help but be drawn in by the movement, sound, and facial expressions of the people in the video, which makes us more likely to feel connected to them. So next time you’re trying to capture someone’s attention, think about using video instead of a still image.

Video Format
2. Build a Relationship with Audience
Video can help you build a relationship with your audience on social media. That’s because people like to watch videos. They’re fun and interesting. You can show people what you’re doing and what’s going on in your life. And people can leave comments and talk to you on the video. The more you interact with your audience, the more they’ll like you.
Plus, video is a great way to show off your products or services. You can give people a tour of your store or office. Or show them how to use your product. If you have a new product, you can create a video to show it off. People are more likely to buy a product if they can see it in action.

Videos Help You Build a Relationship
3. Promote Your Brand or Product
Video allows you to show, rather than just tell, potential customers what your brand is all about. You can give them a behind-the-scenes look at your company, or showcase your products in action. And because people are more likely to watch a video than read an article or blog post, you’re more likely to reach a wider audience with your message.
Creating a video doesn’t have to be expensive or time-consuming. You can use your smartphone or a simple video camera to get started. And there are plenty of free or low-cost video editing software programs available if you want to get fancier with your finished product.
If you’re not sure where to start, try creating a short video that introduces your brand and tells viewers what they can expect from your products or services. Then post it on your website and social media channels and see how it goes! You might be surprised at how well it performs.

Videos Help Promote Your Brand
4. Drive Traffic to Your Website
Website traffic refers to the number of visitors who visit a website. This can be measured in a number of ways, including the number of unique visitors, the number of page views, and the amount of time spent on the site.
If you’re looking for a way to give your website a boost, you may want to consider using videos. By posting engaging videos on social media sites, you can drive traffic to your site and increase your visibility. And, with more people visiting your site, you’ll have a better chance of converting visitors into customers. Of course, creating videos can be time-consuming and requires some level of creative talent. But it’s worth the effort if you’re looking for a way to improve your web traffic.
So, if you’re ready to take your social media marketing to the next level, why not give video a try?

Videos Help Drive Traffic
5. Increase Your Social Media Reach
Social media reach is the number of people who see your content. It’s the potential audience for your message. The more people who see it, the more likely it is that someone will engage with it. The size of your reach depends on the platform you’re using and how many followers you have. Some platforms, like Facebook, make it easy to reach a large audience.
The best way to increase your reach is to create compelling video content that people want to share. Videos are highly shareable, and if they are well-made and engaging, they can quickly attract a large audience. In addition, videos are a great way to build brand awareness and show potential customers what your business is all about. By including videos in your social media marketing strategy, you can reach a wider audience and create more opportunities for customer engagement.

Videos Help Drive Traffic
6. Boost your SEO
SEO is an acronym that stands for “search engine optimization.” It is a process of improving the visibility and ranking of a website or web page in search engine results pages (SERPs). The higher a website or web page appears in the SERPs, the more likely it is to be clicked by users.
If you’re like most people, you probably spend a good chunk of your day scrolling through social media sites like Facebook, Twitter, and Instagram. And when you’re not scrolling through your feed, you’re probably watching videos. Whether it’s a funny cat video or a cooking tutorial, chances are you’ve watched a video online in the past 24 hours. What you may not realize is that videos can also be used to boost your SEO.
That’s right - by creating and posting engaging videos, you can attract more visitors to your website and improve your search engine ranking. Here’s how it works: when people watch your videos and share them with their friends, they are effectively giving your website a “vote” of approval. This helps to improve your visibility on search engines and attracts more visitors to your site. In addition, videos help to keep people on your website for longer periods of time, which is also a positive signal to search engines. So if you’re looking for a new way to improve your SEO, consider adding videos to your website. You might just be surprised at the results.

Videos Help Boost Your SEO
Wrap Up
- Now that you know the importance of using video for your social media marketing, it’s time to start planning your next campaign.
- Keep in mind the different ways you can use video to engage with your audience and think about what kind of content will resonate best with them.
- Don’t be afraid to try something new – after all, that’s how we learn and grow. What are some ideas you have for using video in your social media marketing? We want to hear from you! Comment down below and let us know.

Videos Conclusion
When it comes to social media marketing, video is one of the most powerful tools at your disposal. Videos can be used to create engaging content that draws in new followers, and they can also be used to promote your products or services. In fact, videos are so effective that nearly 90% of businesses now use them as part of their social media marketing strategy. So, if you’re not using video yet, now is the time to start. In this post, we’ll discuss the benefits of using video for social media marketing and provide tips for getting started. Keep reading to learn more!
1. More Engaging Than Text or Images
When you’re scrolling through your feed, what’s more, likely to stop you in your tracks: a picture or a video? For most people, the answer is video. In general, video is more engaging than image because it captures our attention more effectively and holds it for longer. Studies have shown that the human brain processes video 60,000 times faster than text, and that viewers retain 95% of a message when they watch it in a video, as opposed to 10% when they read it in text. Furthermore, video is more likely to evoke an emotional response than an image. We can’t help but be drawn in by the movement, sound, and facial expressions of the people in the video, which makes us more likely to feel connected to them. So next time you’re trying to capture someone’s attention, think about using video instead of a still image.
Video Format
2. Build a Relationship with Audience
Video can help you build a relationship with your audience on social media. That’s because people like to watch videos. They’re fun and interesting. You can show people what you’re doing and what’s going on in your life. And people can leave comments and talk to you on the video. The more you interact with your audience, the more they’ll like you.
Plus, video is a great way to show off your products or services. You can give people a tour of your store or office. Or show them how to use your product. If you have a new product, you can create a video to show it off. People are more likely to buy a product if they can see it in action.
Videos Help You Build a Relationship
3. Promote Your Brand or Product
Video allows you to show, rather than just tell, potential customers what your brand is all about. You can give them a behind-the-scenes look at your company, or showcase your products in action. And because people are more likely to watch a video than read an article or blog post, you’re more likely to reach a wider audience with your message.
Creating a video doesn’t have to be expensive or time-consuming. You can use your smartphone or a simple video camera to get started. And there are plenty of free or low-cost video editing software programs available if you want to get fancier with your finished product.
If you’re not sure where to start, try creating a short video that introduces your brand and tells viewers what they can expect from your products or services. Then post it on your website and social media channels and see how it goes! You might be surprised at how well it performs.
Videos Help Promote Your Brand
4. Drive Traffic to Your Website
Website traffic refers to the number of visitors who visit a website. This can be measured in a number of ways, including the number of unique visitors, the number of page views, and the amount of time spent on the site.
If you’re looking for a way to give your website a boost, you may want to consider using videos. By posting engaging videos on social media sites, you can drive traffic to your site and increase your visibility. And, with more people visiting your site, you’ll have a better chance of converting visitors into customers. Of course, creating videos can be time-consuming and requires some level of creative talent. But it’s worth the effort if you’re looking for a way to improve your web traffic.
So, if you’re ready to take your social media marketing to the next level, why not give video a try?
Videos Help Drive Traffic
5. Increase Your Social Media Reach
Social media reach is the number of people who see your content. It’s the potential audience for your message. The more people who see it, the more likely it is that someone will engage with it. The size of your reach depends on the platform you’re using and how many followers you have. Some platforms, like Facebook, make it easy to reach a large audience.
The best way to increase your reach is to create compelling video content that people want to share. Videos are highly shareable, and if they are well-made and engaging, they can quickly attract a large audience. In addition, videos are a great way to build brand awareness and show potential customers what your business is all about. By including videos in your social media marketing strategy, you can reach a wider audience and create more opportunities for customer engagement.
Videos Help Drive Traffic
6. Boost your SEO
SEO is an acronym that stands for “search engine optimization.” It is a process of improving the visibility and ranking of a website or web page in search engine results pages (SERPs). The higher a website or web page appears in the SERPs, the more likely it is to be clicked by users.
If you’re like most people, you probably spend a good chunk of your day scrolling through social media sites like Facebook, Twitter, and Instagram. And when you’re not scrolling through your feed, you’re probably watching videos. Whether it’s a funny cat video or a cooking tutorial, chances are you’ve watched a video online in the past 24 hours. What you may not realize is that videos can also be used to boost your SEO.
That’s right - by creating and posting engaging videos, you can attract more visitors to your website and improve your search engine ranking. Here’s how it works: when people watch your videos and share them with their friends, they are effectively giving your website a “vote” of approval. This helps to improve your visibility on search engines and attracts more visitors to your site. In addition, videos help to keep people on your website for longer periods of time, which is also a positive signal to search engines. So if you’re looking for a new way to improve your SEO, consider adding videos to your website. You might just be surprised at the results.
Videos Help Boost Your SEO
Wrap Up
- Now that you know the importance of using video for your social media marketing, it’s time to start planning your next campaign.
- Keep in mind the different ways you can use video to engage with your audience and think about what kind of content will resonate best with them.
- Don’t be afraid to try something new – after all, that’s how we learn and grow. What are some ideas you have for using video in your social media marketing? We want to hear from you! Comment down below and let us know.
Videos Conclusion
Top 15 Slow Motion CapCut Templates to Work With
With everything being advanced, the editing world is also moving towards advancements. The integration of AI technology or pre-built effect enables quick editing. With the increasing hype of slow-motion videos, everyone’s adding this effect to content. Hence, most editing applications or software have assembled some templates.
CapCut is one of these video editors that offers CapCut templates linked to slow motion for enhanced editing. In this article, we have assembled a slow-motion CapCut template link. Moreover, you can also learn how to access and employ slow-mo CapCut template links. This piece will also give you a brief review of an AI-driven CapCut alternative.
Slow Motion Video Maker Slow your video’s speed with better control of your keyframes to create unique cinematic effects!
Make A Slow Motion Video Make A Slow Motion Video More Features

Part 1: Finding Some Best CapCut Templates for Creating Slow Motion Videos
CapCut functions as a versatile content editing platform that excels in diverse video editing tasks. It delivers professional content using an array of effects, text styles, stickers, and audio tracks. You can incorporate subtitles and captions into the edited content. CapCut extends its functionality and facilitates in-camera recording, utilizes multi-clip options, and more.
Amongst these editing features, CapCut offers a pre-built Templates collection. Whether you seek a fast-motion, slow-motion, or any other effect, it has it. You can employ these templates via the trending or hashtags section. Here are some of the CapCut slow-motion template links for you to employ:
- Stereo Love
- Slow motion
- SLOWMOTION TREND
- Slowmo Aesthetic
- Slowmo
- Slowmo Video
- Slowmotion Trend
- Slowmotion
- Slowmo Part 441 New
- Slowmo Eda
- Slowmo Filter
- AESTHETIC SLOMO
- Slowmotion mentari
- Slowmotion Eda 2
- Slowmo x velocity
1. Stereo Love
If you want to employ a template that comes with a trendy song, this CapCut template link slow motion is for you. It will give your video a motion blur that starts and eventually gets clear while adding a slo-mo effect. It is one of the most trending templates with a duration of 18 seconds and a single clip range.

2. Slow motion
For destination or weather videos, this slow-motion motion CapCut template link is perfect. It gradually transforms from a blur motion to a slow motion. In addition, the template has a 6-second duration, which is perfect for such videos. You can employ it for one clip at a time, and the final video export ratio is 9:16.

3. SLOWMOTION TREND
Craft an 11-second slow motion that trends using this CapCut slow-motion template link. It is a collaboration between an intense blur lens and a high frame rate with a 9:16 ratio. It is free to access in CapCut and perfect for your reels and online stuff. Moreover, it only offers the ability to add one video at a time while providing text personalization.

4. Slowmo Aesthetic
Capture aesthetic outdoor shots or roads with this pre-built slow-motion cap cut template link. You can create a 17-second video in this template with an aspect ratio of 9:16. The template has more than 388K uses and is available in CapCut’s Template collection. In addition, the tools come with background music to craft amazing slo-mos.

5. Slowmo
This CapCut template link slow motion is a perfect blend of framerate and visual effects. Although the video is 6 seconds long, the slo-mo effect adds details to it. You can only edit one video at a time while keeping its ratio 9:16. If you are working on a group project, you can share these templates straight to other platforms.

6. Slowmo Video
Flaunt your beautiful dress or create aesthetic GRWM reels with this beautiful slow-motion template. It adds slow motion and blur effect at several points in 13 seconds of video. These effects and the integration of a pleasant background music take. It can also be useful in fashioning and enhancing running, walking, or modeling videos.

7. Slowmotion Trend
You can presume the catchiness of this slow-mo CapCut template link just through its background music. This song and slow-motion effect have been trending on TikTok for a long time. The duration of creating a video in it is 9 seconds, and it has more than 93.68K uses. You can only fashion one slow-motion video within CapCut using this template.

8. Slowmotion
Whether it’s a plain video of you walking or a basic stair walk, this template can create magic. It uses multiple visual effects to create a classic slow motion. Moreover, it has the perfect music track for your video background. With its 8 seconds of creativity, you can create a perfect video with this slow-motion CapCut template link.

9. Slowmo Part 441 New
Curate an amazing 18-second slo-mo using the latest slow-motion effect with this template. You can access it via the given CapCut template link in slow motion and edit further. Instead of simply roaming around the city to flaunt dresses or destinations, become creative. Using this template will start your video a bit blurry while adding a slow-mo and music effect at the right time.

10. Slowmo Eda
With the advancements in editing and filters, basics are no longer what the audience opts for. Even if you want to keep your videos or transitions minimal, this template can help. You can get 14 seconds of your audience’s undivided attention with it. This CapCut slow-mo template link assists in creating a video in a 9:16 ratio for reels and similar content.

11. Slowmo Filter
If you want to be more than just creative with your content, this CapCut template link slow motion is the best option for you. It starts with a blend of blur filter and trending background music to craft a 17-second’ clip. The effects gradually transform into slow motion and a second trending music. This trending template has 1 clip capacity and has been used by over 7.81M users.

12. AESTHETIC SLOMO
Give your destination videos a cinematic outlook using this CapCut slow-motion template link. It offers a 26-second clip duration with light background music and minimal effects. The video limit for this template is 3, and it will jump from one video to another using smooth slo-mo and other visual effects.

13. Slowmotion mentari
Are you a travel vlogger and prefer creative reels to feature the destinations you’re visiting? This CapCut slow-motion template link will take you to a perfect solution. It will transform your normal videos into 11 extraordinary seconds. With a music track and well-aligned blur to slow motion transition, this is seamless.

14. Slowmotion Eda 2
Create the perfect GRMW makeup videos with this CapCut slow-motion template link. The template supports a 15-second clip with the first half being blurred. This is more like a transition template that slowly transforms a blur video into a slow motion. With its 9:16 aspect ratio and trendy background music, it is perfect for social media stuff.

15. Slowmo x velocity
This 10-second slow-motion video template adds a hint of class and minimalism to your clips. You can access it via the CapCut slow-mo template link and share it further with your friends. In addition, you can also share the slo-mo directly to Instagram, Facebook, and other sites. It only requires one video for you to get started with the editing.

Part 2: Using These Templates to Create Semblance in Videos on CapCut
The CapCut video editor not only facilitates a decreasing video playback but also enhances the post-editing process. Using any of the above CapCut template links in slow motion, you can craft slo-mos effortlessly. The following is a step-by-step guide for employing a CapCut slo-mo template:
Step 1
Initiate by downloading CapCut on your smartphone and launching the application. From its main menu, navigate towards the lower toolbar and select “Templates.”

Step 2
Within the templates collection, use the search bar to search “slow motion.” Numerous options will feature on the screen; choose a template that you prefer. Upon selecting a template, the editing process is done by clicking the “Use template” button.

Step 3
Afterward, click the “Preview” button to assess the selected template.

Step 4
Proceed to the “Text” option and incorporate text elements according to your video. Upon completion of editing, click the “Export” button to download the edited clip.

Part 3: Facing Difficulties in Creating Slow-Motion Videos on Smartphones? Try Filmora for a Desktop
If you are someone who is switching to professional editing, then you need a desktop tool. Wondershare Filmora is the slow-mo CapCut template link alternative that you can use. This software is compatible across multiple computing devices while offering cloud storage. You can create, edit, and export your slow motions from anywhere using this software.
Filmora is one of those professional yet rare editors that offer a minimal interface. The interface looks keen, and it has a timeline editing panel for professional editing. It has voice editing, color correcting, and video enhancing features to bring out the best. Within its resource collection, you can find limitless effects and soundtracks. In short, Filmora is an editor that assists both amateurs and skilled editors.
Step-by-Step Guide to Creating a Slow Motion in Filmora
This section of the article will teach you how to craft a slow-motion Filmora in three steps. Here is a simple guide on fashioning a simple slow-motion in Filmora:
Step 1Manipulate the Playback Speed
Upon entering Filmora, employ the “Ctrl + I” functionality to import a clip. Bring the imported clip to the timeline and select it. Further, navigate toward the settings panel and access “Speed” > “Uniform Speed.” Here, locate the Speed slider and drag it towards the left for slow motion.

Step 2Start the AI Frame Interpolation Function
To add smoothness to your slo-mo, access the “AI Frame Interpolation” option. Expand the options there and select “Optical Flow” for seamless slow motion.

Step 3Render Preview to See The Results
After editing, simply press the “Enter” key from your keyboard to start rendering. After reviewing the results, click the “Export” button to end the process and save the video.

Key Features of Filmora
Filmora offers a range of features that you can employ for multipurpose editing. In this section, we are going to discuss some of its video-enhancing features below:
AI Smart Masking: Apply multiple effects to a specific video section without disturbing other visuals. This feature masks an area or, more like, secure it from any changes, and you can edit the other part. The employment of AI mask results in automated masking of instructed areas with custom settings.
Remove Background: Don’t just focus on the product or model, but add colorful or gradient backgrounds for videos. This feature uses AI technology to effortlessly separate a background. It uses the cutout tool for the precise removal of background while retaining the object’s integrity.
AI Music Generator: Why craft boring slow motions or other videos when you can do more with AI? This feature uses AI technology to create royalty-free music according to your mood. It enables you to choose the theme, mood, duration, and other aspects of the AI music. Moreover, you can generate up to 15 AI music outcomes for diversity.
AI Copilot Editing: How would you like it if you had a personal guide to Filmora’s interface? This feature is an AI chatbot assistant to help you locate Filmora’s features. You can ask it about any Filmora function, and it will give you brief instructions on accessing it. In addition, the tool can also be your editing partner, throwing insightful editing suggestions.
Conclusion
Slow motion CapCut template links stand as a productive approach for crafting slowed motions. The drawback, however, lies in the limitation of customization options while using them. In contrast, Wondershare Filmora emerges as a professional desktop alternative.
It offers customizable features encircling visual and auditory elements while presenting an expansive range of editing options. Thus, if you want to improve your editing proficiency, Filmora is a preferable choice.
Make A Slow Motion Video Make A Slow Motion Video More Features
Part 1: Finding Some Best CapCut Templates for Creating Slow Motion Videos
CapCut functions as a versatile content editing platform that excels in diverse video editing tasks. It delivers professional content using an array of effects, text styles, stickers, and audio tracks. You can incorporate subtitles and captions into the edited content. CapCut extends its functionality and facilitates in-camera recording, utilizes multi-clip options, and more.
Amongst these editing features, CapCut offers a pre-built Templates collection. Whether you seek a fast-motion, slow-motion, or any other effect, it has it. You can employ these templates via the trending or hashtags section. Here are some of the CapCut slow-motion template links for you to employ:
- Stereo Love
- Slow motion
- SLOWMOTION TREND
- Slowmo Aesthetic
- Slowmo
- Slowmo Video
- Slowmotion Trend
- Slowmotion
- Slowmo Part 441 New
- Slowmo Eda
- Slowmo Filter
- AESTHETIC SLOMO
- Slowmotion mentari
- Slowmotion Eda 2
- Slowmo x velocity
1. Stereo Love
If you want to employ a template that comes with a trendy song, this CapCut template link slow motion is for you. It will give your video a motion blur that starts and eventually gets clear while adding a slo-mo effect. It is one of the most trending templates with a duration of 18 seconds and a single clip range.
2. Slow motion
For destination or weather videos, this slow-motion motion CapCut template link is perfect. It gradually transforms from a blur motion to a slow motion. In addition, the template has a 6-second duration, which is perfect for such videos. You can employ it for one clip at a time, and the final video export ratio is 9:16.
3. SLOWMOTION TREND
Craft an 11-second slow motion that trends using this CapCut slow-motion template link. It is a collaboration between an intense blur lens and a high frame rate with a 9:16 ratio. It is free to access in CapCut and perfect for your reels and online stuff. Moreover, it only offers the ability to add one video at a time while providing text personalization.
4. Slowmo Aesthetic
Capture aesthetic outdoor shots or roads with this pre-built slow-motion cap cut template link. You can create a 17-second video in this template with an aspect ratio of 9:16. The template has more than 388K uses and is available in CapCut’s Template collection. In addition, the tools come with background music to craft amazing slo-mos.
5. Slowmo
This CapCut template link slow motion is a perfect blend of framerate and visual effects. Although the video is 6 seconds long, the slo-mo effect adds details to it. You can only edit one video at a time while keeping its ratio 9:16. If you are working on a group project, you can share these templates straight to other platforms.
6. Slowmo Video
Flaunt your beautiful dress or create aesthetic GRWM reels with this beautiful slow-motion template. It adds slow motion and blur effect at several points in 13 seconds of video. These effects and the integration of a pleasant background music take. It can also be useful in fashioning and enhancing running, walking, or modeling videos.
7. Slowmotion Trend
You can presume the catchiness of this slow-mo CapCut template link just through its background music. This song and slow-motion effect have been trending on TikTok for a long time. The duration of creating a video in it is 9 seconds, and it has more than 93.68K uses. You can only fashion one slow-motion video within CapCut using this template.
8. Slowmotion
Whether it’s a plain video of you walking or a basic stair walk, this template can create magic. It uses multiple visual effects to create a classic slow motion. Moreover, it has the perfect music track for your video background. With its 8 seconds of creativity, you can create a perfect video with this slow-motion CapCut template link.
9. Slowmo Part 441 New
Curate an amazing 18-second slo-mo using the latest slow-motion effect with this template. You can access it via the given CapCut template link in slow motion and edit further. Instead of simply roaming around the city to flaunt dresses or destinations, become creative. Using this template will start your video a bit blurry while adding a slow-mo and music effect at the right time.
10. Slowmo Eda
With the advancements in editing and filters, basics are no longer what the audience opts for. Even if you want to keep your videos or transitions minimal, this template can help. You can get 14 seconds of your audience’s undivided attention with it. This CapCut slow-mo template link assists in creating a video in a 9:16 ratio for reels and similar content.
11. Slowmo Filter
If you want to be more than just creative with your content, this CapCut template link slow motion is the best option for you. It starts with a blend of blur filter and trending background music to craft a 17-second’ clip. The effects gradually transform into slow motion and a second trending music. This trending template has 1 clip capacity and has been used by over 7.81M users.
12. AESTHETIC SLOMO
Give your destination videos a cinematic outlook using this CapCut slow-motion template link. It offers a 26-second clip duration with light background music and minimal effects. The video limit for this template is 3, and it will jump from one video to another using smooth slo-mo and other visual effects.
13. Slowmotion mentari
Are you a travel vlogger and prefer creative reels to feature the destinations you’re visiting? This CapCut slow-motion template link will take you to a perfect solution. It will transform your normal videos into 11 extraordinary seconds. With a music track and well-aligned blur to slow motion transition, this is seamless.
14. Slowmotion Eda 2
Create the perfect GRMW makeup videos with this CapCut slow-motion template link. The template supports a 15-second clip with the first half being blurred. This is more like a transition template that slowly transforms a blur video into a slow motion. With its 9:16 aspect ratio and trendy background music, it is perfect for social media stuff.
15. Slowmo x velocity
This 10-second slow-motion video template adds a hint of class and minimalism to your clips. You can access it via the CapCut slow-mo template link and share it further with your friends. In addition, you can also share the slo-mo directly to Instagram, Facebook, and other sites. It only requires one video for you to get started with the editing.
Part 2: Using These Templates to Create Semblance in Videos on CapCut
The CapCut video editor not only facilitates a decreasing video playback but also enhances the post-editing process. Using any of the above CapCut template links in slow motion, you can craft slo-mos effortlessly. The following is a step-by-step guide for employing a CapCut slo-mo template:
Step 1
Initiate by downloading CapCut on your smartphone and launching the application. From its main menu, navigate towards the lower toolbar and select “Templates.”
Step 2
Within the templates collection, use the search bar to search “slow motion.” Numerous options will feature on the screen; choose a template that you prefer. Upon selecting a template, the editing process is done by clicking the “Use template” button.
Step 3
Afterward, click the “Preview” button to assess the selected template.
Step 4
Proceed to the “Text” option and incorporate text elements according to your video. Upon completion of editing, click the “Export” button to download the edited clip.
Part 3: Facing Difficulties in Creating Slow-Motion Videos on Smartphones? Try Filmora for a Desktop
If you are someone who is switching to professional editing, then you need a desktop tool. Wondershare Filmora is the slow-mo CapCut template link alternative that you can use. This software is compatible across multiple computing devices while offering cloud storage. You can create, edit, and export your slow motions from anywhere using this software.
Filmora is one of those professional yet rare editors that offer a minimal interface. The interface looks keen, and it has a timeline editing panel for professional editing. It has voice editing, color correcting, and video enhancing features to bring out the best. Within its resource collection, you can find limitless effects and soundtracks. In short, Filmora is an editor that assists both amateurs and skilled editors.
Step-by-Step Guide to Creating a Slow Motion in Filmora
This section of the article will teach you how to craft a slow-motion Filmora in three steps. Here is a simple guide on fashioning a simple slow-motion in Filmora:
Step 1Manipulate the Playback Speed
Upon entering Filmora, employ the “Ctrl + I” functionality to import a clip. Bring the imported clip to the timeline and select it. Further, navigate toward the settings panel and access “Speed” > “Uniform Speed.” Here, locate the Speed slider and drag it towards the left for slow motion.
Step 2Start the AI Frame Interpolation Function
To add smoothness to your slo-mo, access the “AI Frame Interpolation” option. Expand the options there and select “Optical Flow” for seamless slow motion.
Step 3Render Preview to See The Results
After editing, simply press the “Enter” key from your keyboard to start rendering. After reviewing the results, click the “Export” button to end the process and save the video.
Key Features of Filmora
Filmora offers a range of features that you can employ for multipurpose editing. In this section, we are going to discuss some of its video-enhancing features below:
AI Smart Masking: Apply multiple effects to a specific video section without disturbing other visuals. This feature masks an area or, more like, secure it from any changes, and you can edit the other part. The employment of AI mask results in automated masking of instructed areas with custom settings.
Remove Background: Don’t just focus on the product or model, but add colorful or gradient backgrounds for videos. This feature uses AI technology to effortlessly separate a background. It uses the cutout tool for the precise removal of background while retaining the object’s integrity.
AI Music Generator: Why craft boring slow motions or other videos when you can do more with AI? This feature uses AI technology to create royalty-free music according to your mood. It enables you to choose the theme, mood, duration, and other aspects of the AI music. Moreover, you can generate up to 15 AI music outcomes for diversity.
AI Copilot Editing: How would you like it if you had a personal guide to Filmora’s interface? This feature is an AI chatbot assistant to help you locate Filmora’s features. You can ask it about any Filmora function, and it will give you brief instructions on accessing it. In addition, the tool can also be your editing partner, throwing insightful editing suggestions.
Conclusion
Slow motion CapCut template links stand as a productive approach for crafting slowed motions. The drawback, however, lies in the limitation of customization options while using them. In contrast, Wondershare Filmora emerges as a professional desktop alternative.
It offers customizable features encircling visual and auditory elements while presenting an expansive range of editing options. Thus, if you want to improve your editing proficiency, Filmora is a preferable choice.
Also read:
- New 33 Best Video Splitter Recommended for 2024
- Create Your Face Zoom TikTok Now for 2024
- Updated 2024 Approved How to Fade in Text in Adobe Premiere Pro
- New Here You Can Lean About the Different Ways for GIMP Transparent Background PNG Format Files
- Updated Whatsapp Video converterKeywords Convert Video for Whatsapp 6600; Video Converter for Whatsapp 6600; Reduce Video Size for Whatsapp 1600; Whatsapp Supported Video Formats 720; Convert Video to Whatsapp Format 590
- New 2024 Approved Enhance Your Film Production with These 5 Silence Detection Tools
- New 2024 Approved How to Create and Add an Adjustment Layer in Final Cut Pro
- New 10 Crazy-Cool Examples of AR Video for 2024
- New Difference Between Time Lapse and Hyperlapse
- New Best Video Editing Courses Online with Certificate for 2024
- 2024 Approved How to Convert a GIF to a Video for Instagram
- Updated As Video Editing Has Become a Pillar Stone in Post-Production Work, You Might Need to Upgrade Your Knowledge About It. In This Article, You Will Learn How to Rotate the Video
- Updated 2024 Approved How to Slow Down Time-Lapse Videos on iPhone
- New In 2024, What Are the Best 15 Slideshow Presentation Examples Your Audience Will Love
- 2024 Approved Your Powerpoint Slides Are Not Always Perfect and Sometimes Need a Little Editing Before Being Sent to the Client. Here Are some Ways You Can Make Sure Your Powerpoint Is Not Wrong
- 2024 Approved 4 Methods for Rotating Your GoPro Videos Professionally
- Looking for Free Tools to Create Radial Blur Images Online? Read Our Full Guide to Learn About the 6 Best Programs to Add This Effect to Your Pictures
- In 2024, Top 5 Tracking Apps to Track Vivo V27e without Them Knowing | Dr.fone
- A Detailed Pokemon Go PvP Tier List to Make you a Pro Trainer For Apple iPhone 11 | Dr.fone
- 3 Ways to Fake GPS Without Root On Vivo X Fold 2 | Dr.fone
- In 2024, Hassle-Free Ways to Remove FRP Lock on Xiaomi 14 Pro Phones with/without a PC
- In 2024, Remove the Lock Screen Fingerprint Of Your Poco M6 Pro 5G
- In 2024, How to Transfer Contacts from Vivo Y77t to iPhone XS/11 | Dr.fone
- Forgotten The Voicemail Password Of Vivo Y200? Try These Fixes
- In 2024, Forgot Locked iPhone 13 mini Password? Learn the Best Methods To Unlock
- Calls on Sony Xperia 10 V Go Straight to Voicemail? 12 Fixes | Dr.fone
- How to identify some outdated your hardware drivers with Windows Device Manager in Windows 11/10
- How to Reset a Locked Vivo V27 Pro Phone
- How to Sign Out of Apple ID From Apple iPhone 12 mini without Password?
- In 2024, Complete Guide For iPhone 6s Plus Lock Screen
- In 2024, Reasons why Pokémon GPS does not Work On Vivo Y02T? | Dr.fone
- How Do You Get Sun Stone Evolutions in Pokémon For Samsung Galaxy S24+? | Dr.fone
- Title: New How to Brighten Video in Premiere Pro for 2024
- Author: Chloe
- Created at : 2024-04-24 07:08:34
- Updated at : 2024-04-25 07:08:34
- Link: https://ai-editing-video.techidaily.com/new-how-to-brighten-video-in-premiere-pro-for-2024/
- License: This work is licensed under CC BY-NC-SA 4.0.
