
:max_bytes(150000):strip_icc():format(webp)/lg-channels-guide-1800-x-0f720f6afeb842c299c88baa42f3bd88.jpg)
New How to Calculate & Change Video Aspect Ratio Online
How to Calculate & Change Video Aspect Ratio Online
Versatile Video Editor - Wondershare Filmora
An easy yet powerful editor
Numerous effects to choose from
Detailed tutorials provided by the official channel
While watching movies, you might have noticed specific clips have black lines at the sides of the screen. It is because the original video’s aspect ratio is different from that of the screen on which you see it.
Nowadays, people are using multiple devices with different aspect ratios. Videos are an effective marketing tool that most marketers are using to expand their business. Therefore, the video aspect ratio has become vital.
Some people feel technical aspects such as video aspect ratio or using aspect ratio editor are a bit intimidating. But they are easy and simple to understand. So, let us know more about them.
In this article
01 [How to Calculate Video Aspect Ratio Online?](#Part 1)
02 [Websites to Change Video Aspect Ratio Online](#Part 2)
Part 1 How to Calculate Video Aspect Ratio Online?
Do you want to make changes to the video? If yes, then it is important to understand the basic concepts of video aspect ratios. Moreover, you can determine the specifications using an aspect ratio editor online.
Every photo, canvas, responsive design, digital video, or frame is rectangular with precise proportions. Outline the aspect ratios to create shapes according to different mediums like computers, TV, movies, or camera screens.
With the help of aspect ratio calculators, you can calculate the image’s value and new size. You can also use it to convert the image size and keep the objects in shape to make them look natural.
The formula to find an aspect ratio is: Width / Height
Aspect Ratio Calculation Process
Calculating the aspect resolution is pretty straightforward. The steps mentioned below will help you to get the correct height for the edited image:
- Take the original height-for example, 2400 units.
- Take the actual width- for example, 3200 units.
- Then, divide the height by width- for example, 2400/3200=0.75.
- Multiply the result (quotient) by new expected width- for instance, 0.75*600=450.
- The resulting figure is a new height.
Part 2 Websites to Change Video Aspect Ratio Online
If you want to change the video aspect ratio, you can easily crop the size of the video online with the help of different websites. These websites offer other aspect ratio options. So, let us learn more about them:
Free Convert

FreeConvert.com is a free editing website that allows you to edit video aspect ratio online. Usually, it is a cloud-based editor that converts a variety of files. So, you can use it to change the video aspect ratio of your clip.
You can see various options such as aspect ratio, codec, screen resolution, or more during video file conversion. For example, you can opt for an aspect ratio as per your requirements there.
Then, this converter will fix the clip automatically in the resolution selected by you. This website can process multiple files up to 1GB at once.
Pros:
- No Pop-ups occur while converting
- It did not affect the download speed
- Easy to convert the files
Cons:
- You have a limit of 25 minutes to convert files. After that, you need to upgrade to pro by making monthly payments.
CloudConvert

Cloud Convert is a file conversion service supporting around 200 file formats online for free. You can adjust the aspect ratio of videos on this website easily.
You have to upload a video clip and select its output format as per your original file. Then go to output video configuration to change the aspect ratio there. Choose the aspect ratio from the options given.
Pros:
- Several conversion options for high-quality files
- Supports cloud services
- Platform independent
- User-friendly
- Supports batch conversion
- It offers a powerful API
Cons:
- Get 25 minutes a day to convert the files
Kapwing

It is a free online aspect ratio editor to create content online. This tool has several features and a collection of online material. For example, through this aspect ratio editor, you can crop the size of video online.
You can select or resize video aspect ratio according to different social media platforms. But you can export only 720 p quality through this website for free after that; you have to create an account.
Pros:
- Merge multiple videos or images collectively in any order and add audio.
- Reduce the video size of any format with a single click.
- Add video subtitles
- Resize or crop videos for all social media posts.
- Cut out multiple sections of a video.
Cons:
- 250MB file upload limit
- Export only in 720p quality
- Export video clips for 7 minutes
- Edit or store content till two days
IMOVIE

Try the iMovie iPhone aspect ratio editor if you want to drag or drop the interface for editing videos simply. It has primitive tools to edit videos or images, and you can also import content from local drives or cloud storage with it.
It offers various visual effects like picture-in-picture, split-screen, or green screen effects. You can also enable viewers to zoom in or pass the scenes. Imovie set aspect ratio gives videos a cinematic feel using its 13 different video filters.
Pros:
- It has a simple interface.
- Its 4K resolution support allows you to give a cinematic feel to videos.
- iMovie has great speed controls that enable you for optimal pace-setting of scenes.
Cons:
- It does not have many output controls options.
- It only works on Mac systems.
Wondershare Filmora
If you permanently want to change the aspect ratio online, you must opt for a video converter or editor. Wondershare Filmora is the most remarkable aspect ratio editor that allows you to easily create videos of 4:3, 9:16, 16:9, and 1:1 aspect ratios.
Moreover, it is a convenient tool to edit videos on YouTube, Apple TV, Vimeo, or mobile devices. So, many YouTubers or bloggers are using it.
It is a reliable and cost-effective tool that offers drop and drag effects, audio, templates, soundtracks, filters, and other options. In addition, you can access features like split-screen, green screen, motion tracking, etc.
Its keyframing feature allows you to include custom animations, while motion tracking helps you track objects. Then, the color matching feature enables you to copy the color settings of one video and apply them to another clip.
You can even assign hotkeys shortcuts for various tools to save your time. Moreover, you can use different transitions, motion elements, filters, clips, titles, audios, and many other things with a simple drag and drop option.
Wondershare Filmora
Get started easily with Filmora’s powerful performance, intuitive interface, and countless effects!
Try It Free Try It Free Try It Free Learn More >

With its green screen feature, you can remove or change the video background. Then, you have an audio ducking feature to lower down the background volume or fade the audio track to another.
Here are various methods to change the aspect ratio in Wondershare Filmora:
Method 1: Change Aspect Ratio at the Starting Interface
Wondershare Filmora allows you to resize video aspect ratio when you launch the editor program. First, go to the drop-down menu button. Then, click on it to see various aspect ratios such as 16:9, 1:1, 4:3, 9:16, or 21:9.
Choose the aspect ratio that you want by simply clicking on it.

Method 2: Change Aspect Ratio under Project Settings
You can change the aspect ratio by clicking on the “Project Settings.” You can decide the target aspect ratio based on the aspect ratio of the media source.
For instance, if the aspect ratio of media source files is 4:3, select the standard aspect ratio of 4:3. Then, media files with other aspect ratios will show black bars.
In case of any discordance or if you want to change the aspect ratio, choose the proper ratio from project settings.

Method 3: Change Aspect Ratio during Editing
Even after importing the videos or images into Filmora’s timeline, you can easily change the ratio from the Crop and Zoom tool.
- Go to timeline and right-click on the video clip. Then, select “Crop and Zoom.” You will see the pop-up window.
- Click on 16:9, 4:3, 1:1, or 9:16 manually at the bottom if you like to change the video aspect ratio.
- You can also manually enter the video aspect ratio. Next, click on the “Ok” button.

After changing the aspect ratio, add background blur effects if you notice a black bar. It will enhance the video. You can also intensify your video by using filters, visual effects, overlays, or titles.

Method 4: Change the Aspect Ratio with Auto-Reframe
If you use Filmora’s latest versions, you will notice Auto Reframe helps to change the aspect ratio. Other than cropping, it will find the object in clips and crop it automatically if needed.
The following are steps to change the aspect ratio using the Auto-Reframe option:
Step1 Once you upload the video clips to the media library, right-click on it and choose the Auto-Reframe option

Step2 You will see the Auto Reframe window appear on the screen. Replace the existing video with a new clip. Then, change the video aspect ratio and video motion speed. Make sure to change the aspect ratio that fits most with different social media platforms

Step3 Once you choose the aspect ratio, click on the “Analyze” button. Filmora will Auto-Reframe the video itself. Once the process completes, you can see results in the preview window
Drag box to adjust the frame or to keep the object in it. It will automatically remove the content outside the box.

Step4 After completing adjustment or reframing, click on the “Export” button to save your video
Change the name of the video and select the location where you want to save the video. Now, click on the “Export” again to save.

Method 5: Change Aspect Ratio at Exporting
You can save the clip to your system or smartphones, depending on your requirements. Then, upload them directly to Youtube or burn them into DVD by clicking on the “Export button.” In this way, you can watch on widescreen or standard TV whenever you want.

● Change Aspect Ratio for the Local Computer
First, you will see the “Local” tab. There you can save the clip in a particular aspect ratio to your system.
You can see all resolutions with various aspect ratios after selecting the format. The output video depends on the media click resolution.
● Change Aspect Ratio for a Device
Change the “Device” tab to save the video in formats compatible with popular devices, including iPod, iPhone, PSP, iPad, etc. Once you choose the device, you will see all resolutions. Choose your favorite or the best resolution.
The video quality will continue improving with higher resolutions. But it will also increase the size of the file.
● Change Aspect Ratio for YouTube
Go to the “YouTube” tab and fill in the information. Then, click the “Export” button. Selecting the aspect ratio again is not necessary. It will directly upload your videos to YouTube.
● Change Aspect Ratio for DVD TV
When you go to the “DVD” tab, you will notice various aspect ratio options. Switching the aspect ratio for TV from 4:3 to 16:9 is pretty straightforward. To do so, select what you think is right.
Conclusion
From the article above, you have learned about different online converters. Now you know how to change the video aspect ratio online and use the video aspect ratio editor. Also, understand how to calculate aspect ratios.
So, you can decide for yourself that Wondershare Filmora video editor is one of the best tools. Using its different methods you can change the aspect ratio easily.
Furthermore, you can use it to make changes on both social media platforms and your devices because it is an effective and reliable tool.
For Win 7 or later (64-bit)
For macOS 10.12 or later
While watching movies, you might have noticed specific clips have black lines at the sides of the screen. It is because the original video’s aspect ratio is different from that of the screen on which you see it.
Nowadays, people are using multiple devices with different aspect ratios. Videos are an effective marketing tool that most marketers are using to expand their business. Therefore, the video aspect ratio has become vital.
Some people feel technical aspects such as video aspect ratio or using aspect ratio editor are a bit intimidating. But they are easy and simple to understand. So, let us know more about them.
In this article
01 [How to Calculate Video Aspect Ratio Online?](#Part 1)
02 [Websites to Change Video Aspect Ratio Online](#Part 2)
Part 1 How to Calculate Video Aspect Ratio Online?
Do you want to make changes to the video? If yes, then it is important to understand the basic concepts of video aspect ratios. Moreover, you can determine the specifications using an aspect ratio editor online.
Every photo, canvas, responsive design, digital video, or frame is rectangular with precise proportions. Outline the aspect ratios to create shapes according to different mediums like computers, TV, movies, or camera screens.
With the help of aspect ratio calculators, you can calculate the image’s value and new size. You can also use it to convert the image size and keep the objects in shape to make them look natural.
The formula to find an aspect ratio is: Width / Height
Aspect Ratio Calculation Process
Calculating the aspect resolution is pretty straightforward. The steps mentioned below will help you to get the correct height for the edited image:
- Take the original height-for example, 2400 units.
- Take the actual width- for example, 3200 units.
- Then, divide the height by width- for example, 2400/3200=0.75.
- Multiply the result (quotient) by new expected width- for instance, 0.75*600=450.
- The resulting figure is a new height.
Part 2 Websites to Change Video Aspect Ratio Online
If you want to change the video aspect ratio, you can easily crop the size of the video online with the help of different websites. These websites offer other aspect ratio options. So, let us learn more about them:
Free Convert
FreeConvert.com is a free editing website that allows you to edit video aspect ratio online. Usually, it is a cloud-based editor that converts a variety of files. So, you can use it to change the video aspect ratio of your clip.
You can see various options such as aspect ratio, codec, screen resolution, or more during video file conversion. For example, you can opt for an aspect ratio as per your requirements there.
Then, this converter will fix the clip automatically in the resolution selected by you. This website can process multiple files up to 1GB at once.
Pros:
- No Pop-ups occur while converting
- It did not affect the download speed
- Easy to convert the files
Cons:
- You have a limit of 25 minutes to convert files. After that, you need to upgrade to pro by making monthly payments.
CloudConvert
Cloud Convert is a file conversion service supporting around 200 file formats online for free. You can adjust the aspect ratio of videos on this website easily.
You have to upload a video clip and select its output format as per your original file. Then go to output video configuration to change the aspect ratio there. Choose the aspect ratio from the options given.
Pros:
- Several conversion options for high-quality files
- Supports cloud services
- Platform independent
- User-friendly
- Supports batch conversion
- It offers a powerful API
Cons:
- Get 25 minutes a day to convert the files
Kapwing
It is a free online aspect ratio editor to create content online. This tool has several features and a collection of online material. For example, through this aspect ratio editor, you can crop the size of video online.
You can select or resize video aspect ratio according to different social media platforms. But you can export only 720 p quality through this website for free after that; you have to create an account.
Pros:
- Merge multiple videos or images collectively in any order and add audio.
- Reduce the video size of any format with a single click.
- Add video subtitles
- Resize or crop videos for all social media posts.
- Cut out multiple sections of a video.
Cons:
- 250MB file upload limit
- Export only in 720p quality
- Export video clips for 7 minutes
- Edit or store content till two days
IMOVIE
Try the iMovie iPhone aspect ratio editor if you want to drag or drop the interface for editing videos simply. It has primitive tools to edit videos or images, and you can also import content from local drives or cloud storage with it.
It offers various visual effects like picture-in-picture, split-screen, or green screen effects. You can also enable viewers to zoom in or pass the scenes. Imovie set aspect ratio gives videos a cinematic feel using its 13 different video filters.
Pros:
- It has a simple interface.
- Its 4K resolution support allows you to give a cinematic feel to videos.
- iMovie has great speed controls that enable you for optimal pace-setting of scenes.
Cons:
- It does not have many output controls options.
- It only works on Mac systems.
Wondershare Filmora
If you permanently want to change the aspect ratio online, you must opt for a video converter or editor. Wondershare Filmora is the most remarkable aspect ratio editor that allows you to easily create videos of 4:3, 9:16, 16:9, and 1:1 aspect ratios.
Moreover, it is a convenient tool to edit videos on YouTube, Apple TV, Vimeo, or mobile devices. So, many YouTubers or bloggers are using it.
It is a reliable and cost-effective tool that offers drop and drag effects, audio, templates, soundtracks, filters, and other options. In addition, you can access features like split-screen, green screen, motion tracking, etc.
Its keyframing feature allows you to include custom animations, while motion tracking helps you track objects. Then, the color matching feature enables you to copy the color settings of one video and apply them to another clip.
You can even assign hotkeys shortcuts for various tools to save your time. Moreover, you can use different transitions, motion elements, filters, clips, titles, audios, and many other things with a simple drag and drop option.
Wondershare Filmora
Get started easily with Filmora’s powerful performance, intuitive interface, and countless effects!
Try It Free Try It Free Try It Free Learn More >
With its green screen feature, you can remove or change the video background. Then, you have an audio ducking feature to lower down the background volume or fade the audio track to another.
Here are various methods to change the aspect ratio in Wondershare Filmora:
Method 1: Change Aspect Ratio at the Starting Interface
Wondershare Filmora allows you to resize video aspect ratio when you launch the editor program. First, go to the drop-down menu button. Then, click on it to see various aspect ratios such as 16:9, 1:1, 4:3, 9:16, or 21:9.
Choose the aspect ratio that you want by simply clicking on it.
Method 2: Change Aspect Ratio under Project Settings
You can change the aspect ratio by clicking on the “Project Settings.” You can decide the target aspect ratio based on the aspect ratio of the media source.
For instance, if the aspect ratio of media source files is 4:3, select the standard aspect ratio of 4:3. Then, media files with other aspect ratios will show black bars.
In case of any discordance or if you want to change the aspect ratio, choose the proper ratio from project settings.
Method 3: Change Aspect Ratio during Editing
Even after importing the videos or images into Filmora’s timeline, you can easily change the ratio from the Crop and Zoom tool.
- Go to timeline and right-click on the video clip. Then, select “Crop and Zoom.” You will see the pop-up window.
- Click on 16:9, 4:3, 1:1, or 9:16 manually at the bottom if you like to change the video aspect ratio.
- You can also manually enter the video aspect ratio. Next, click on the “Ok” button.
After changing the aspect ratio, add background blur effects if you notice a black bar. It will enhance the video. You can also intensify your video by using filters, visual effects, overlays, or titles.
Method 4: Change the Aspect Ratio with Auto-Reframe
If you use Filmora’s latest versions, you will notice Auto Reframe helps to change the aspect ratio. Other than cropping, it will find the object in clips and crop it automatically if needed.
The following are steps to change the aspect ratio using the Auto-Reframe option:
Step1 Once you upload the video clips to the media library, right-click on it and choose the Auto-Reframe option
Step2 You will see the Auto Reframe window appear on the screen. Replace the existing video with a new clip. Then, change the video aspect ratio and video motion speed. Make sure to change the aspect ratio that fits most with different social media platforms
Step3 Once you choose the aspect ratio, click on the “Analyze” button. Filmora will Auto-Reframe the video itself. Once the process completes, you can see results in the preview window
Drag box to adjust the frame or to keep the object in it. It will automatically remove the content outside the box.
Step4 After completing adjustment or reframing, click on the “Export” button to save your video
Change the name of the video and select the location where you want to save the video. Now, click on the “Export” again to save.
Method 5: Change Aspect Ratio at Exporting
You can save the clip to your system or smartphones, depending on your requirements. Then, upload them directly to Youtube or burn them into DVD by clicking on the “Export button.” In this way, you can watch on widescreen or standard TV whenever you want.
● Change Aspect Ratio for the Local Computer
First, you will see the “Local” tab. There you can save the clip in a particular aspect ratio to your system.
You can see all resolutions with various aspect ratios after selecting the format. The output video depends on the media click resolution.
● Change Aspect Ratio for a Device
Change the “Device” tab to save the video in formats compatible with popular devices, including iPod, iPhone, PSP, iPad, etc. Once you choose the device, you will see all resolutions. Choose your favorite or the best resolution.
The video quality will continue improving with higher resolutions. But it will also increase the size of the file.
● Change Aspect Ratio for YouTube
Go to the “YouTube” tab and fill in the information. Then, click the “Export” button. Selecting the aspect ratio again is not necessary. It will directly upload your videos to YouTube.
● Change Aspect Ratio for DVD TV
When you go to the “DVD” tab, you will notice various aspect ratio options. Switching the aspect ratio for TV from 4:3 to 16:9 is pretty straightforward. To do so, select what you think is right.
Conclusion
From the article above, you have learned about different online converters. Now you know how to change the video aspect ratio online and use the video aspect ratio editor. Also, understand how to calculate aspect ratios.
So, you can decide for yourself that Wondershare Filmora video editor is one of the best tools. Using its different methods you can change the aspect ratio easily.
Furthermore, you can use it to make changes on both social media platforms and your devices because it is an effective and reliable tool.
For Win 7 or later (64-bit)
For macOS 10.12 or later
Best 10 Fun Discord Bots You Need
Top 10 Fun Discord Bots You Need in 2024
An easy yet powerful editor
Numerous effects to choose from
Detailed tutorials provided by the official channel
Consumers enjoy discord because it serves as a hub for their social groups and communities. It’s a haven where users can be themselves while socializing with others who share their interests and hobbies. There is no algorithm selecting what they should see, no continuous scrolling, and no news feed. Common interests fuel conversations and you can use some fun discord bots to pep up the conversation.
Fun bots to add discord with artificial intelligence (AI) technologies are among the most helpful tools available on the discord platform. Funny emojis for discord may be beneficial to greet new members and have funny light conversations! This aids in the creation and maintenance of a vibrant online community. You can add music, games, and fun memes to your server using these bots if you wish to.
In this article
01 [10 Fun Discord Bots You Need in 2024](#Part 1)
02 [Fun Discord Bots FAQs](#Part 2)
Part 1 Fun Discord Bots You Need in 2024
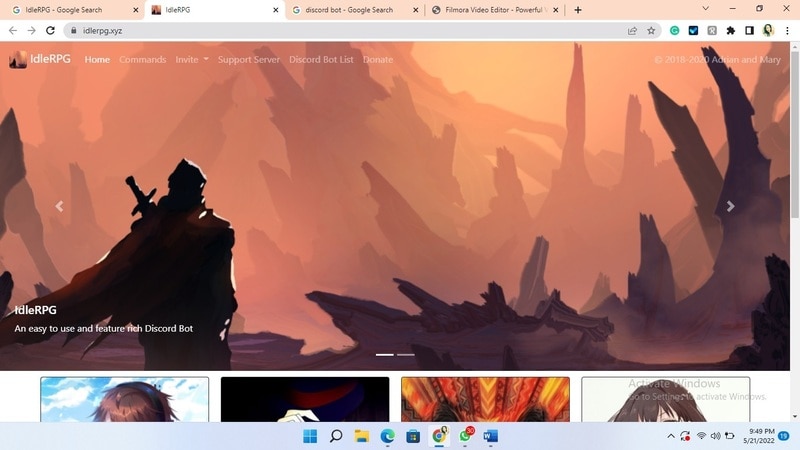
01IdleRPG
The IdleRPG is another enjoyable and engaging fun discord bot in the RPG gaming experience. It rewards server members for participating in the game while gaining XP and having fun. It offers character advancement and is comparable to other RPG games.
You may travel on a quest, trade various things, fight other players, and even find love. There’s also a scoreboard for the top ten loves, top ten PvP players, top ten wealthiest, and top ten XP players. IdleRPG also allows you to wager in various ways to help you boost your gaming money.
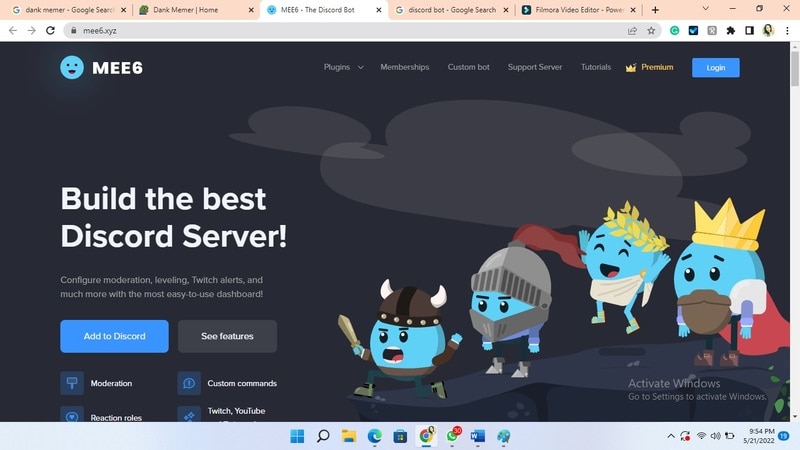
02MEE6
MEE6 is a widespread moderation and one of the greatest fun bots for discord. It takes care of many tasks that a mod team would typically do. This includes greeting new members, informing your server when you or your favorite content producers go live on Twitch or YouTube, and allowing users to assign roles depending on their reactions.
A command tool that allows you to generate custom commands and an XP leveling system that users may grind to earn access to various channels and permissions depending on activity are two of MEE6’s more complicated features. MEE6 also includes plugins for music and developing your fun discord bot.
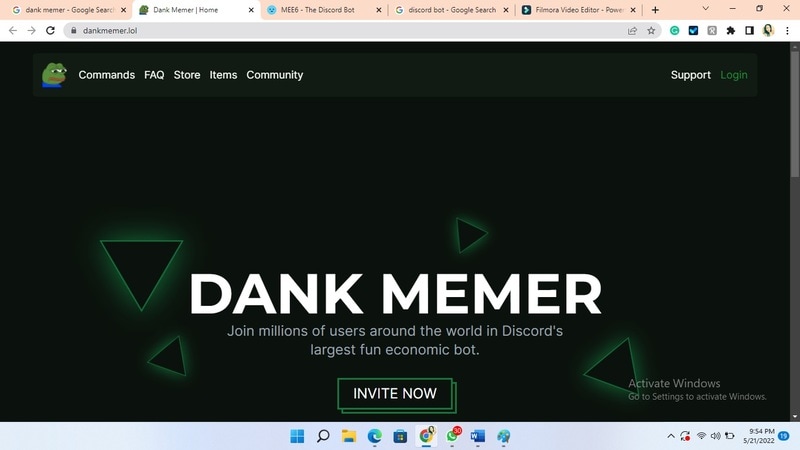
03Dank Memer
Dank Memer is another fun bot to add to discord with a lighthearted tone. It offers one of the most extensive built-in economies, allowing participants to engage in text-based thievery, bank robbery, and gambling experiences.
As its name implies, it also offers a slew of meme-related commands. You can use simple chat instructions to create memes. Other memes automatically publish.
Even more impressive is that awesome memes are collected daily from Reddit’s top meme collections.
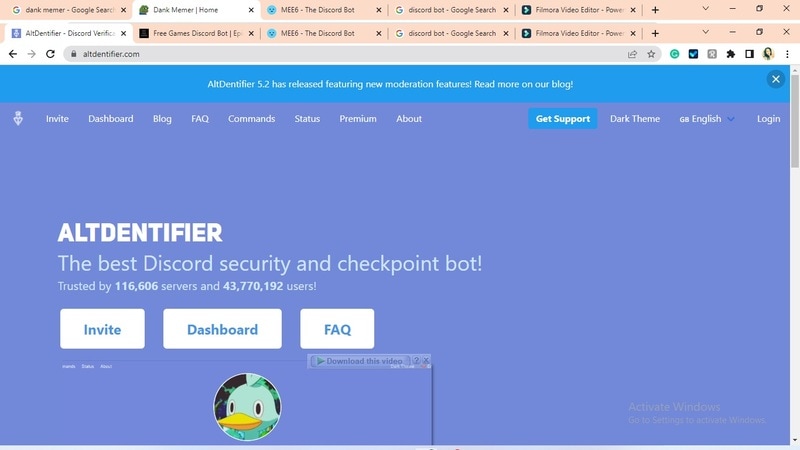
04AltDentifier
Another unique funny discord emoji bot is AltDentifier, which maintains your server clean and spam-free. It’s simple to set up and takes only a few minutes to get up and run. It now has over 35 million users spread across 100,000 servers. It also includes several more moderation commands to make administration easier.
The AltDentifier bot contains:
● An automated anti-raid system.
● A robust verification mechanism.
● Multilingual support.
● A review record.
It will also notify you if a user attempts to circumvent any limitations by utilizing a VPN.
05EpicFreeGames
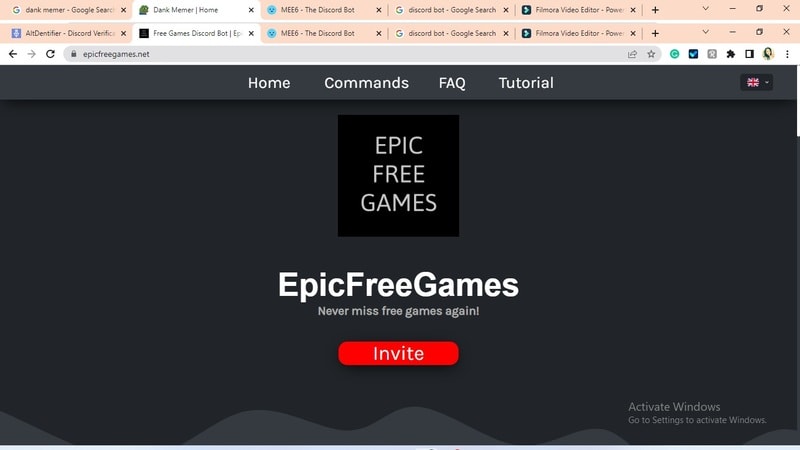
Over the last two years, Epic Free Games has given away thousands of free games. GTA V, Dead By Daylight, and NBA 2K21 are among the given-away titles. It even-handed away Discord Nitro lately. Have any of these free games ever escaped your notice? Fear not, for the EpicFreeGames bot has your back.
The EpicFreeGames bot delivers a message to a channel, reminding everyone of Epic’s free game(s). It only has one task, yet it can provide you with hundreds of dollars worth of games. Never miss another fantastic free Epic Games game again.
06**Rythm **
Rythm is a great fun discord bot for playing music in the voice stream of your server. This one features a beautiful user interface that includes a music player that you can interact with. This makes controlling the channel’s queue a breeze.
The options are changeable. You can designate DJ duties, prohibit the same songs from appearing in queues again, and block particular channels from playing music. Rhythm is less platform-agnostic than Groovy. Spotify, YouTube, SoundCloud, and Bandcamp are among the options. Apple Music is not currently supported.
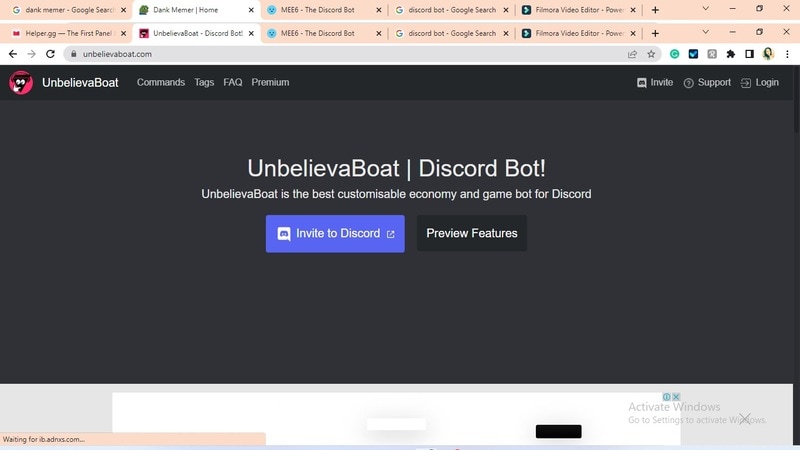
07Unbelievaboat
UnbelievaBoat is a versatile, fun bot to add to discord that uses exciting activities to keep server members engaged. These capabilities, fortunately, include a moderation mechanism that you may utilize to issue warnings and enforce bans. Your moderators may keep track of each action by assigning it a case number.
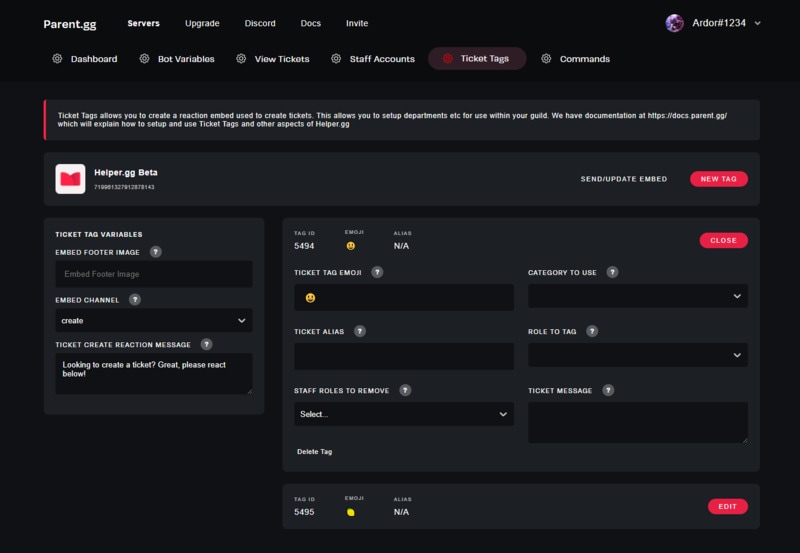
08Helper.gg
Helper.gg enables you to transform your discord server into a support ticket system. It’s a board ticket bot with a stunning UI that makes managing and responding to client tickets simple.
Create staff accounts for your company’s customer support representatives and manage their access. Ticket logging with the flexibility to rename and relocate tickets, add and delete users, and the contentment of having tickets close automatically based on the amount of time that has passed since the previous reply are all accessible.
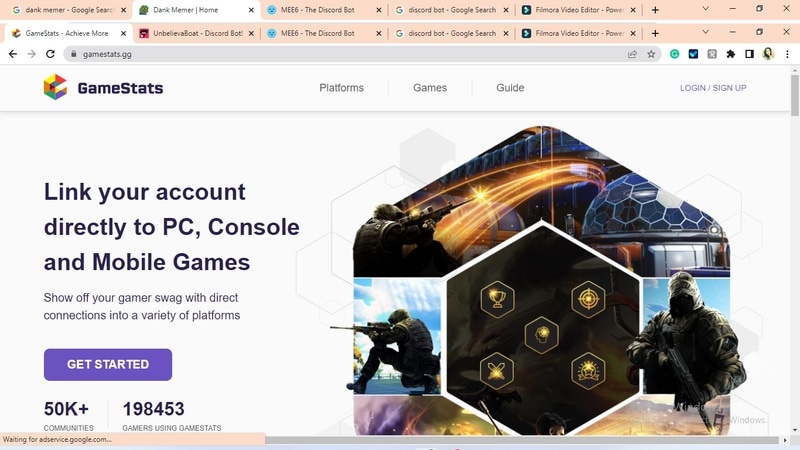
09GameStats
Next, GameStats has one-of-a-kind funny emojis for the discord bot. We all enjoy looking at our in-game statistics and comparing them. The GameStats Discord bot makes sharing and displaying your impressive numbers simple.
Connect to your game or platform, make a personalized profile card, and begin sharing your tryhard statistics.
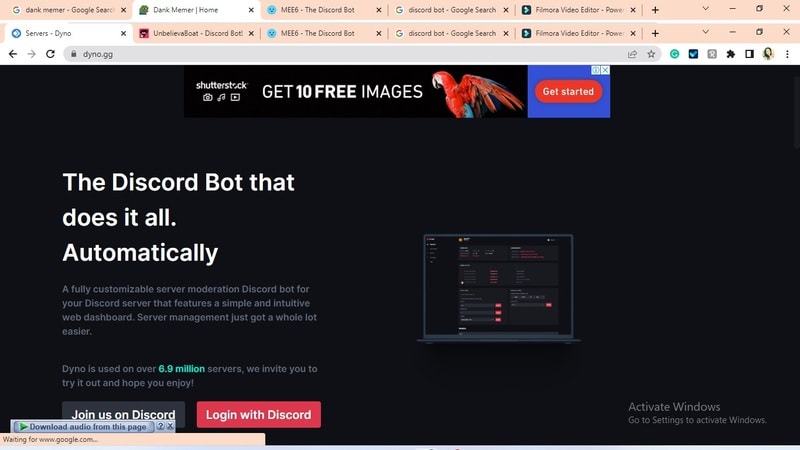
10Dyno
Dyno is another well-crafted fun discord bot. It’s an utterly customizable server moderation bot that assists with server automation. You also receive a basic online dashboard with Dyno that you can use to monitor and control your server.
It has functions such as creating positions, making announcements, banning members, and even requesting puppy or cat images. Dyno is a fun bot that allows you to automate your server management effortlessly. Premium subscriptions, which start at $4.99 per month and unlock more exclusive features, are also available.
However, if you are a creative video editor who likes sharing their experience on discord, Filmora is for you. With Filmora, you can bring your recorded experiences with funny discord emojis to life!
But Wait, What is Wondershare Filmora Video Editor ?
Filmora is a famous video editing program for those who wish to focus on editing and producing high-quality videos with the support of 4K video editing. It’s a reasonably priced software featuring tools like split, trim, add text, color, etc. When it comes to designing, adding effects, and modifying movies, it provides users with many possibilities. Users can add overlays, create animations and objects, add music, and more with Wondershare’s Filmora. It’s an excellent tool for individuals who wish to include dedications, tributes, fun emojis and anecdotes in their films. Any video can also benefit from voiceovers.
For Win 7 or later (64-bit)
For macOS 10.12 or later
Part 2 Fun Discord Bots FAQs
Q. What does MEE6 stand for?
A. MEE6 is a discord role bot that lets users assign roles to themselves via discord replies. This discord role generator will change user rights in discord automatically.
Q. Are these fun bots free?
A. Yes and no. Most fun bots for discord are free to use, although you must pay for some features.
Q. What is the top level I can reach on the MEE6 bot?
A. The maximum level accessible is 1,768,802, which would take 935 billion years if messages sent every minute.
Q. Help! My discord got hacked; how did that even happen?
A. Users may edit discord javascript files. A cybercriminal can install harmful malware to discord client files if they get user authorization. When people open the file, the code also gets executed. After then, the hacker has access to the user’s discord data.
Q. What can discord bots do?
A. On your server, the bots can conduct a variety of helpful automated chores and bot commands, like welcoming new users, monitoring content, and banning rule violators. Using fun discord bots’ instructions, you can add music, humor, games, and other emojis to your server.
● Ending Thoughts →
● In short, moderators and administrators can use funny discord emojis to administer their servers better, make them attractive, and get more users. There are many vanilla discord commands to choose from, and when you put fun bots to add to discord, the possibilities become unlimited.
● Besides, there are several funny emojis for discord to improve your discord skills and establish your discord server. Finally, Filmora can assist you in beautifying your recorded videos make funny emojis for discord.
Consumers enjoy discord because it serves as a hub for their social groups and communities. It’s a haven where users can be themselves while socializing with others who share their interests and hobbies. There is no algorithm selecting what they should see, no continuous scrolling, and no news feed. Common interests fuel conversations and you can use some fun discord bots to pep up the conversation.
Fun bots to add discord with artificial intelligence (AI) technologies are among the most helpful tools available on the discord platform. Funny emojis for discord may be beneficial to greet new members and have funny light conversations! This aids in the creation and maintenance of a vibrant online community. You can add music, games, and fun memes to your server using these bots if you wish to.
In this article
01 [10 Fun Discord Bots You Need in 2024](#Part 1)
02 [Fun Discord Bots FAQs](#Part 2)
Part 1 Fun Discord Bots You Need in 2024
01IdleRPG
The IdleRPG is another enjoyable and engaging fun discord bot in the RPG gaming experience. It rewards server members for participating in the game while gaining XP and having fun. It offers character advancement and is comparable to other RPG games.
You may travel on a quest, trade various things, fight other players, and even find love. There’s also a scoreboard for the top ten loves, top ten PvP players, top ten wealthiest, and top ten XP players. IdleRPG also allows you to wager in various ways to help you boost your gaming money.
02MEE6
MEE6 is a widespread moderation and one of the greatest fun bots for discord. It takes care of many tasks that a mod team would typically do. This includes greeting new members, informing your server when you or your favorite content producers go live on Twitch or YouTube, and allowing users to assign roles depending on their reactions.
A command tool that allows you to generate custom commands and an XP leveling system that users may grind to earn access to various channels and permissions depending on activity are two of MEE6’s more complicated features. MEE6 also includes plugins for music and developing your fun discord bot.
03Dank Memer
Dank Memer is another fun bot to add to discord with a lighthearted tone. It offers one of the most extensive built-in economies, allowing participants to engage in text-based thievery, bank robbery, and gambling experiences.
As its name implies, it also offers a slew of meme-related commands. You can use simple chat instructions to create memes. Other memes automatically publish.
Even more impressive is that awesome memes are collected daily from Reddit’s top meme collections.
04AltDentifier
Another unique funny discord emoji bot is AltDentifier, which maintains your server clean and spam-free. It’s simple to set up and takes only a few minutes to get up and run. It now has over 35 million users spread across 100,000 servers. It also includes several more moderation commands to make administration easier.
The AltDentifier bot contains:
● An automated anti-raid system.
● A robust verification mechanism.
● Multilingual support.
● A review record.
It will also notify you if a user attempts to circumvent any limitations by utilizing a VPN.
05EpicFreeGames
Over the last two years, Epic Free Games has given away thousands of free games. GTA V, Dead By Daylight, and NBA 2K21 are among the given-away titles. It even-handed away Discord Nitro lately. Have any of these free games ever escaped your notice? Fear not, for the EpicFreeGames bot has your back.
The EpicFreeGames bot delivers a message to a channel, reminding everyone of Epic’s free game(s). It only has one task, yet it can provide you with hundreds of dollars worth of games. Never miss another fantastic free Epic Games game again.
06**Rythm **
Rythm is a great fun discord bot for playing music in the voice stream of your server. This one features a beautiful user interface that includes a music player that you can interact with. This makes controlling the channel’s queue a breeze.
The options are changeable. You can designate DJ duties, prohibit the same songs from appearing in queues again, and block particular channels from playing music. Rhythm is less platform-agnostic than Groovy. Spotify, YouTube, SoundCloud, and Bandcamp are among the options. Apple Music is not currently supported.
07Unbelievaboat
UnbelievaBoat is a versatile, fun bot to add to discord that uses exciting activities to keep server members engaged. These capabilities, fortunately, include a moderation mechanism that you may utilize to issue warnings and enforce bans. Your moderators may keep track of each action by assigning it a case number.
08Helper.gg
Helper.gg enables you to transform your discord server into a support ticket system. It’s a board ticket bot with a stunning UI that makes managing and responding to client tickets simple.
Create staff accounts for your company’s customer support representatives and manage their access. Ticket logging with the flexibility to rename and relocate tickets, add and delete users, and the contentment of having tickets close automatically based on the amount of time that has passed since the previous reply are all accessible.
09GameStats
Next, GameStats has one-of-a-kind funny emojis for the discord bot. We all enjoy looking at our in-game statistics and comparing them. The GameStats Discord bot makes sharing and displaying your impressive numbers simple.
Connect to your game or platform, make a personalized profile card, and begin sharing your tryhard statistics.
10Dyno
Dyno is another well-crafted fun discord bot. It’s an utterly customizable server moderation bot that assists with server automation. You also receive a basic online dashboard with Dyno that you can use to monitor and control your server.
It has functions such as creating positions, making announcements, banning members, and even requesting puppy or cat images. Dyno is a fun bot that allows you to automate your server management effortlessly. Premium subscriptions, which start at $4.99 per month and unlock more exclusive features, are also available.
However, if you are a creative video editor who likes sharing their experience on discord, Filmora is for you. With Filmora, you can bring your recorded experiences with funny discord emojis to life!
But Wait, What is Wondershare Filmora Video Editor ?
Filmora is a famous video editing program for those who wish to focus on editing and producing high-quality videos with the support of 4K video editing. It’s a reasonably priced software featuring tools like split, trim, add text, color, etc. When it comes to designing, adding effects, and modifying movies, it provides users with many possibilities. Users can add overlays, create animations and objects, add music, and more with Wondershare’s Filmora. It’s an excellent tool for individuals who wish to include dedications, tributes, fun emojis and anecdotes in their films. Any video can also benefit from voiceovers.
For Win 7 or later (64-bit)
For macOS 10.12 or later
Part 2 Fun Discord Bots FAQs
Q. What does MEE6 stand for?
A. MEE6 is a discord role bot that lets users assign roles to themselves via discord replies. This discord role generator will change user rights in discord automatically.
Q. Are these fun bots free?
A. Yes and no. Most fun bots for discord are free to use, although you must pay for some features.
Q. What is the top level I can reach on the MEE6 bot?
A. The maximum level accessible is 1,768,802, which would take 935 billion years if messages sent every minute.
Q. Help! My discord got hacked; how did that even happen?
A. Users may edit discord javascript files. A cybercriminal can install harmful malware to discord client files if they get user authorization. When people open the file, the code also gets executed. After then, the hacker has access to the user’s discord data.
Q. What can discord bots do?
A. On your server, the bots can conduct a variety of helpful automated chores and bot commands, like welcoming new users, monitoring content, and banning rule violators. Using fun discord bots’ instructions, you can add music, humor, games, and other emojis to your server.
● Ending Thoughts →
● In short, moderators and administrators can use funny discord emojis to administer their servers better, make them attractive, and get more users. There are many vanilla discord commands to choose from, and when you put fun bots to add to discord, the possibilities become unlimited.
● Besides, there are several funny emojis for discord to improve your discord skills and establish your discord server. Finally, Filmora can assist you in beautifying your recorded videos make funny emojis for discord.
Add Selective Color Effect to Your Videos Using Filmora
Selective color is an effect that lets you desaturate all the colors in a photo or video while preserving one or more colors of your choice. It is done by isolating a specific color of your choice in the frame while all other colors turn into black and white, just like this.

By using this effect, we can draw viewers’ attention to a specific point in the clip. If you want your video do the same, Filmora can be a good helper. Alright, we’ll be creating selective color effects in two examples. Let’s get started.
Tutorial 1 on making color isolation by selective color effect
In this first example, we are going to use stock footage showing a subject on a bike.
To add a selective color effect, download Wondershare Filmora on your PC or Mac. Now follow the steps as explained below to add this effect and isolate the color of your choice.
Free Download For Win 7 or later(64-bit)
Free Download For macOS 10.14 or later
Step1 Launch Wondershare Filmora and drag and drop your clip to the timeline.

Step2 Go to effects and then click “NewBlue FX” option and select Newblue filters.

Step3 Find the Selective Color Effect and drag it onto the clip. The effect will be instantly applied.

Step4 Next, double-click on the clip and check out the effects menu at the top of the screen.

Step5 Open the preset drop-down menu. There will be a lot of presets with different colors. Select the preset you want to use. In this scenario, let us select Just Blue.

Step6 If you see a blue tint at a place or object which you want to be white and black, click on the first color.

Step7 Now adjust the range slider to decrease the number of unwanted tints.

Step8 To blur the edges of the effects, turn up the softened slider and remove any unwanted tint previously remaining.

In this way, you can add a selective color effect to your video clips and isolate the color of your choice.
Tutorial 2 on make color isolation using eyedropper tool
You might ask how do we use the eyedropper tool here. It can sample colors from anywhere in a video or an image and add them to your swatch panel. The steps to use the eyedropper tool to add a selective color to your video are below.
Step1 As same as the first one, launching Wondershare Filmora is the first priority. And drag your clip to the timeline.

Step2 Go to effects at the top, and find Newblue effects, and click on the Newblue filters.

Step3 Find the selective color effect and drag it to the clip.

Step4 Double-click on the clip and visit the effects menu at the top of the screen.

Step5 Click on the ‘first color’ and select the eye dropper tool. This will allow us to select the red flower in the preview window. You can also click different parts of the image to get the color that we want.

Step6 Next, try selecting a second color to isolate within our shot. In this example, we are going to make the stems on the flowers stand out as well. Select second color and go to the tint section. And find a color that is close to the second color, which will be green in this case.

Step7 Pick the eyedropper tool and click it on the green part of the clip. Then adjust the range slider as needed.

Alright, let’s watch back the video to see how both colors are now isolated.

Follow all the steps in the correct order. This is how you can use NewBlue effects for color isolation using Wondershare Filmora. The color isolation using the selective color effect defines the point of interest in the clip for the viewers.
Free Download For macOS 10.14 or later
Step1 Launch Wondershare Filmora and drag and drop your clip to the timeline.
Step2 Go to effects and then click “NewBlue FX” option and select Newblue filters.
Step3 Find the Selective Color Effect and drag it onto the clip. The effect will be instantly applied.
Step4 Next, double-click on the clip and check out the effects menu at the top of the screen.
Step5 Open the preset drop-down menu. There will be a lot of presets with different colors. Select the preset you want to use. In this scenario, let us select Just Blue.
Step6 If you see a blue tint at a place or object which you want to be white and black, click on the first color.
Step7 Now adjust the range slider to decrease the number of unwanted tints.
Step8 To blur the edges of the effects, turn up the softened slider and remove any unwanted tint previously remaining.
In this way, you can add a selective color effect to your video clips and isolate the color of your choice.
Tutorial 2 on make color isolation using eyedropper tool
You might ask how do we use the eyedropper tool here. It can sample colors from anywhere in a video or an image and add them to your swatch panel. The steps to use the eyedropper tool to add a selective color to your video are below.
Step1 As same as the first one, launching Wondershare Filmora is the first priority. And drag your clip to the timeline.
Step2 Go to effects at the top, and find Newblue effects, and click on the Newblue filters.
Step3 Find the selective color effect and drag it to the clip.
Step4 Double-click on the clip and visit the effects menu at the top of the screen.
Step5 Click on the ‘first color’ and select the eye dropper tool. This will allow us to select the red flower in the preview window. You can also click different parts of the image to get the color that we want.
Step6 Next, try selecting a second color to isolate within our shot. In this example, we are going to make the stems on the flowers stand out as well. Select second color and go to the tint section. And find a color that is close to the second color, which will be green in this case.
Step7 Pick the eyedropper tool and click it on the green part of the clip. Then adjust the range slider as needed.
Alright, let’s watch back the video to see how both colors are now isolated.
Follow all the steps in the correct order. This is how you can use NewBlue effects for color isolation using Wondershare Filmora. The color isolation using the selective color effect defines the point of interest in the clip for the viewers.
Zoom In and Out on Discord
Abundant Video Effects - Wondershare Filmora
Provide abundant video effects - A creative video editor
Powerful color correction and grading
Detailed tutorials are provided by the official channel
Discord has gained much popularity in recent years owing to its versatility and wide range of customization options available. It is an innovative program that allows users to communicate via text messages, voice and video calls, media files, and more.
One of the main reasons for Discord’s growing popularity is its multipurpose resources that allow people to stay in touch with their communities. As Discord features are customizable, you can alter the zoom settings on the servers and chat screens to increase visibility and ease.
Not sure how to do that? You can head over to the article below to find easy step-by-step guides on how to zoom in Discord desktop and mobile applications and the official website.
In this article
Part 1: Zoom In and Out on Discord Software
Part 2: Zoom In and Out in Discord Mobile App
Part 3: Zoom In and Out on Discord Website
Part 4: Frequently Asked Questions (FAQs)
Part 1: Zoom In and Out on Discord Software
The Discord desktop software is available for Windows 7 and above, Linux, and Mac computers. If you want to know how to zoom in on Discord desktop software, you have landed on the right page. The following steps indicate how to zoom in or out on Discord’s desktop version by accessing the software’s settings.
Step 1: To begin with, launch the Discord desktop application on your computer. Sign in to your Discord profile if asked.
Step 2: On Discord’s homepage, in the left corner at the bottom, you will see your profile name along with the headphones and microphone icons. Next to these, a cog-shaped icon for Settings will be visible. Tap on it to launch user settings.

Step 3: Under “User Settings,” locate the “App Settings” category from the sidebar at the left. Find and click on the “Appearance” option from here.

Step 4: When you scroll down under the “Appearance” settings, you will find the sliders to change the “Chant Font Scaling,” “Space between Message Groups,” and the “Zoom Level” settings at the bottom.

Step 5: The sliders are set on a highlighted percentage visible in green by default. If you wish to increase the chat font size, drag that particular slider to the right and check the preview until you arrive at the size you want. To decrease the font size, you have to drag the slider to the left and look for the desired result in the preview section.

Step 6: If you wish to change the zoom levels of all the elements in a chat screen, you can change the “Zoom Level” slider’s position until you reach your desired result. Now exit the Settings window to apply your changes.

Part 2: Zoom In and Out in Discord Mobile App
Discord offers its mobile applications for Android and iOS devices. You can easily change the Discord app’s built-in settings to change the zoom level. To know how to zoom in on the Discord mobile app, take a look at the comprehensive step-by-step guide below:
Step 1: Firstly, install and launch the Discord app on your mobile and sign in to your profile.
Step 2: Go to the app’s homepage and search for your profile icon at the bottom-right corner of the screen. Click on it to access “User Settings.”

Step 3: Now, look for the “Appearance” settings by scrolling down and tapping on it. You will see the “Chat Font Scaling” option and a slider under it. You can drag the slider to adjust the font size on the Discord application.

Step 4: You can drag the slider to the right to increase the font scale across the app and check for your desired preview. To decrease the font size, you will need to drag the slider to the left. Now exit your Settings and restart the app to make your changes effective.

Step 5: If you want to restore the zoom settings to default, you can click the “Reset” button at the bottom left corner of the screen.

Part 3: Zoom In and Out on Discord Website
If you are using the web version of Discord, there are multiple ways to zoom in. On your native web browser, you can access the ellipses icon at the right and find the “Zoom” option. From here, you can simply click on the “+” icon to zoom in and the “-” icon to zoom out on the page you have opened at the moment.
If you prefer to change the Zoom settings using Discord’s native settings, you can easily do so in the web version using keyboard shortcuts. Here is an in-depth guide indicating how to zoom out in Discord for the online version.
Step 1: Launch the web browser on your computer and open the online version of the Discord software. You might be asked to sign in to your profile at this point.

Step 2: Once you are at the homepage of your Discord profile, you can access the keyboard shortcuts to zoom in or out. To zoom in on Discord, simply hold the “CTRL” key on your keyboard and click the “+” icon key. Each click of the key will result in a 10% increase in the zoom level of the screen.

Step 3: If you want to zoom out on Discord’s screen, you can use your keyboard. Similar to the step mentioned above, tap the “-” key on your keyboard while holding down the “Ctrl” key to make your screen and chat appear smaller.

Step 4: You can reset the zoom settings to default by holding down the “Ctrl” key and hitting “0” on the keyboard. This will restore the settings back to the default 100%.
Part 4: Frequently Asked Questions (FAQs)
Are Discord zoom and text size settings different?
Yes, there is a difference between the zoom levels and the text size settings on Discord. By changing the zoom levels of the software, you alter the zoom level of all the elements, including icons, images, windows, and more, across the Discord application. Changing the text size settings will simply alter the chat font scale in a specific chat window.
Does changing the Discord zoom on my PC affect the settings on my mobile app?
No, all the changes made on the zoom level or text size of Discord remain limited to the version of the software you are currently using. If you change the zoom settings on your PC, the change will not be reflected on your mobile application.
Conclusion
Digital chatting applications such as Discord have made it exceedingly easy to stay in touch with friends and family over long distances. From sending and receiving messages to voice and video calls, you can do a lot with Discord.
If you are a Discord user, knowing how to alter the zoom level on the app can prove to be incredibly beneficial. By changing the zoom settings on Discord, you can make the text, images, and other items present on the screen appear bigger or smaller. With the guide mentioned above, you now know how to zoom in on Discord across the mobile, desktop, and web.
Discord has gained much popularity in recent years owing to its versatility and wide range of customization options available. It is an innovative program that allows users to communicate via text messages, voice and video calls, media files, and more.
One of the main reasons for Discord’s growing popularity is its multipurpose resources that allow people to stay in touch with their communities. As Discord features are customizable, you can alter the zoom settings on the servers and chat screens to increase visibility and ease.
Not sure how to do that? You can head over to the article below to find easy step-by-step guides on how to zoom in Discord desktop and mobile applications and the official website.
In this article
Part 1: Zoom In and Out on Discord Software
Part 2: Zoom In and Out in Discord Mobile App
Part 3: Zoom In and Out on Discord Website
Part 4: Frequently Asked Questions (FAQs)
Part 1: Zoom In and Out on Discord Software
The Discord desktop software is available for Windows 7 and above, Linux, and Mac computers. If you want to know how to zoom in on Discord desktop software, you have landed on the right page. The following steps indicate how to zoom in or out on Discord’s desktop version by accessing the software’s settings.
Step 1: To begin with, launch the Discord desktop application on your computer. Sign in to your Discord profile if asked.
Step 2: On Discord’s homepage, in the left corner at the bottom, you will see your profile name along with the headphones and microphone icons. Next to these, a cog-shaped icon for Settings will be visible. Tap on it to launch user settings.
Step 3: Under “User Settings,” locate the “App Settings” category from the sidebar at the left. Find and click on the “Appearance” option from here.
Step 4: When you scroll down under the “Appearance” settings, you will find the sliders to change the “Chant Font Scaling,” “Space between Message Groups,” and the “Zoom Level” settings at the bottom.
Step 5: The sliders are set on a highlighted percentage visible in green by default. If you wish to increase the chat font size, drag that particular slider to the right and check the preview until you arrive at the size you want. To decrease the font size, you have to drag the slider to the left and look for the desired result in the preview section.
Step 6: If you wish to change the zoom levels of all the elements in a chat screen, you can change the “Zoom Level” slider’s position until you reach your desired result. Now exit the Settings window to apply your changes.
Part 2: Zoom In and Out in Discord Mobile App
Discord offers its mobile applications for Android and iOS devices. You can easily change the Discord app’s built-in settings to change the zoom level. To know how to zoom in on the Discord mobile app, take a look at the comprehensive step-by-step guide below:
Step 1: Firstly, install and launch the Discord app on your mobile and sign in to your profile.
Step 2: Go to the app’s homepage and search for your profile icon at the bottom-right corner of the screen. Click on it to access “User Settings.”
Step 3: Now, look for the “Appearance” settings by scrolling down and tapping on it. You will see the “Chat Font Scaling” option and a slider under it. You can drag the slider to adjust the font size on the Discord application.
Step 4: You can drag the slider to the right to increase the font scale across the app and check for your desired preview. To decrease the font size, you will need to drag the slider to the left. Now exit your Settings and restart the app to make your changes effective.
Step 5: If you want to restore the zoom settings to default, you can click the “Reset” button at the bottom left corner of the screen.
Part 3: Zoom In and Out on Discord Website
If you are using the web version of Discord, there are multiple ways to zoom in. On your native web browser, you can access the ellipses icon at the right and find the “Zoom” option. From here, you can simply click on the “+” icon to zoom in and the “-” icon to zoom out on the page you have opened at the moment.
If you prefer to change the Zoom settings using Discord’s native settings, you can easily do so in the web version using keyboard shortcuts. Here is an in-depth guide indicating how to zoom out in Discord for the online version.
Step 1: Launch the web browser on your computer and open the online version of the Discord software. You might be asked to sign in to your profile at this point.
Step 2: Once you are at the homepage of your Discord profile, you can access the keyboard shortcuts to zoom in or out. To zoom in on Discord, simply hold the “CTRL” key on your keyboard and click the “+” icon key. Each click of the key will result in a 10% increase in the zoom level of the screen.
Step 3: If you want to zoom out on Discord’s screen, you can use your keyboard. Similar to the step mentioned above, tap the “-” key on your keyboard while holding down the “Ctrl” key to make your screen and chat appear smaller.
Step 4: You can reset the zoom settings to default by holding down the “Ctrl” key and hitting “0” on the keyboard. This will restore the settings back to the default 100%.
Part 4: Frequently Asked Questions (FAQs)
Are Discord zoom and text size settings different?
Yes, there is a difference between the zoom levels and the text size settings on Discord. By changing the zoom levels of the software, you alter the zoom level of all the elements, including icons, images, windows, and more, across the Discord application. Changing the text size settings will simply alter the chat font scale in a specific chat window.
Does changing the Discord zoom on my PC affect the settings on my mobile app?
No, all the changes made on the zoom level or text size of Discord remain limited to the version of the software you are currently using. If you change the zoom settings on your PC, the change will not be reflected on your mobile application.
Conclusion
Digital chatting applications such as Discord have made it exceedingly easy to stay in touch with friends and family over long distances. From sending and receiving messages to voice and video calls, you can do a lot with Discord.
If you are a Discord user, knowing how to alter the zoom level on the app can prove to be incredibly beneficial. By changing the zoom settings on Discord, you can make the text, images, and other items present on the screen appear bigger or smaller. With the guide mentioned above, you now know how to zoom in on Discord across the mobile, desktop, and web.
Also read:
- New Do You Want to Know How to Add Captivating Audio in Simple Videos? Nothing to Be Concerned About because This Article Will Help You in This Matter
- 2024 Approved Step by Step to Crop a Video Using Lightworks
- Updated 2024 Approved How to Create Loop Videos Using Filmora
- 20 Must-Have Graduation Songs for 2024
- Powerpoint Supported Video Format and User Tips
- Updated 2024 Approved Deleting White Background in Photoshop Is Hard?
- 2024 Approved Trailer Guide for Creators and Developers
- 2024 Approved Are You Excited to Learn About a File Format that Helps in Easy Transfer? We Are Talking About the 3GP Format. Stay with Us and Get to Know More About It
- Step by Step to Crop a Video Using Lightworks
- New 2024 Approved Basic Introduction for LumaFusion Color Grading
- 2024 Approved Which Is the Best Video Slideshow Maker Available Online? Methods to Prepare Custom Slideshows for Google Presentation. How to Make a Slide Show Video?
- 2024 Approved How to Share YouTube Video on Zoom?
- New Top 8 Memoji Makers to Make a Memoji on PC, Android & iPhone
- 5 Tried-And-True Ways to GIF Making for 2024
- Do You Know You Can Use Mobile Apps to Apply Camera Effects to Your Videos? Many Smartphone Applications Allow You to Apply Camcorder Effects for 2024
- Updated In 2024, Funny Content Ideas for YouTube Videos
- Updated In 2024, 15 Best CapCut Templates for Slow Motion Editing
- Top 15 Best Free MP4 Video Rotators Windows, Mac, Android, iPhone & Online for 2024
- Updated A Detailed Guide to Do Color Correction in OBS for 2024
- Step by Step to Rotate Videos Using Kdenlive for 2024
- New How to Color Grade Your Picture in LightRoom for 2024
- In 2024, An Intro Video Describing You and Your Content Is the First and the Foremost Thing Which a Viewer Sees. Thinking of How to Make an Interesting Intro Video, This Blog Is Surely a Supportive Guide for You. Learn More Here
- In 2024, Here Are a Number of Tools Used in the Market to Resize the Videos. We Are Going to Teach How to Resize the Video in Davinci Resolve and Fimora Wondershare. Once You Have Mastered How to Resize a Video, It Would Be as Simple as the Click
- Updated Creating Flawless Slow-Motion Videos Is Every Content Creators Dream. Learn About DaVinci Resolve Slow-Motion Video Creation, Amongst Other Tools
- Updated Best 5 Tips to Freeze-Frame in After Effects for 2024
- New In the Realm of Creating Graphic Presentation, People Also Ask About Designing Professionally Sound Slideshow Word Presentations. Heres How You Can Go About the Process
- Updated Ultimate Guide on Making A Slideshow Video
- Updated In 2024, Best Animated Text Generator
- 2024 Approved If Youre Considering Starting a Podcast Video Recording, You Need to Read This Article and Learn All You Need to Know About Making a Successful Podcast
- Are You an Apple User Interested in Adding a Slow-Mo to Their Videos? This Article Features an Exceptional Procedure for Creating Slow-Mo in iMovie for 2024
- In 2024, 7 Ways Add Subtitles to MKV Videos on All Platforms
- 2024 Approved Want to Make Your Slideshows More Fun and Exciting? Follow the Given Discussion to Know How to Make a Slideshow Gif, Thereby Making Your Slideshow More Enjoyable than Ever
- New Looking for the Best Free Video Editing Software Reddit to Make Your Video Perfectly? Check Out Our List of the Best Video Editors for Reddit and You Can Choose Any of Them
- This Article Aim to Teach You How to Make a Night to Day Effect Video with Filmora. Follow the Steps to Figure It Out
- Updated 2024 Approved 8 Free Title Makers to Use
- New This Article Introduces How Sheila Become a Youtuber and How She Started Video Editing
- New Do You Want to Know Where You Can Find Online Video Editing Courses? In This Article, We Have Provided 15 Options for Your Various Demand. We Also Recommend a Great Video Editor to Help You Start Your Video Editing Journey with Ease
- New 2024 Approved 3 Ways To Stream And Record At The Same Time
- In 2024, Best Ways to Add Photos to Tik Tok Video
- Splice App for Android - How to Download & Use
- Updated In 2024, How to Create a Vacation Slideshow in 5 Minutes
- In 2024, Are You Seeking an Answer for What Is a LUT in the Video? In This Article, We Will Provide You with Detailed Information About LUTs and Their Utility
- Updated 2024 Approved CapCut Lenta Template How It Benefits Slow Motion Video
- How to Unlock Disabled Apple iPhone 15 Plus/iPad Without Computer | Dr.fone
- In 2024, AddROM Bypass An Android Tool to Unlock FRP Lock Screen For your Lava
- Will Pokémon Go Ban the Account if You Use PGSharp On Nubia Red Magic 8S Pro+ | Dr.fone
- How Do I SIM Unlock My Apple iPhone 12?
- 8 Workable Fixes to the SIM not provisioned MM#2 Error on OnePlus Ace 3 | Dr.fone
- In 2024, How to Transfer Data from Lava Storm 5G to Samsung Phone | Dr.fone
- In 2024, Unlock Apple iPhone 7 With Forgotten Passcode Different Methods You Can Try | Dr.fone
- Android Safe Mode - How to Turn off Safe Mode on Honor Magic 6? | Dr.fone
- A Step-by-Step Guide on Using ADB and Fastboot to Remove FRP Lock from your Vivo S18
- 7 Solutions to Fix Chrome Crashes or Wont Open on Oppo A58 4G | Dr.fone
- 2 Ways to Monitor Samsung Galaxy S24 Ultra Activity | Dr.fone
- In 2024, Full Guide to Unlock Your Nokia G22
- 3 Easy Solutions to Hard Reset Lava Yuva 3 | Dr.fone
- How to Change your Realme 11 Pro+ Location on Twitter | Dr.fone
- In 2024, How to Come up With the Best Pokemon Team On Apple iPhone SE (2022)? | Dr.fone
- In 2024, Mastering Android Device Manager The Ultimate Guide to Unlocking Your Vivo Y55s 5G (2023) Device
- Top 7 Phone Number Locators To Track Nokia C300 Location | Dr.fone
- Find My App Troubleshooting No Location Found vs. Location Not Available & How to Fix Them On Apple iPhone 12 | Dr.fone
- Best 3 Nokia C12 Pro Emulator for Mac to Run Your Wanted Android Apps | Dr.fone
- A Quick Guide to Infinix Hot 30i FRP Bypass Instantly
- How To Reset Your iPhone 8? | Dr.fone
- How To Revive Your Bricked Oppo F25 Pro 5G in Minutes | Dr.fone
- In 2024, How to Change Netflix Location to Get More Country Version On Motorola Moto G73 5G | Dr.fone
- What to Do if Google Play Services Keeps Stopping on Sony Xperia 1 V | Dr.fone
- In 2024, Best Pokemons for PVP Matches in Pokemon Go For Vivo S18 | Dr.fone
- How to Reset a Locked Oppo Reno 11 Pro 5G Phone
- In 2024, How to Share/Fake Location on WhatsApp for Samsung Galaxy S23 Ultra | Dr.fone
- How To Update or Downgrade iPhone 13 Pro Without Data Loss? | Dr.fone
- In 2024, Network Locked SIM Card Inserted On Your Samsung Galaxy M14 5G Phone? Unlock It Now
- In 2024, Bypass iCloud Activation Lock with IMEI Code From Apple iPhone 13 Pro Max
- In 2024, How to Bypass Google FRP Lock on Samsung Galaxy A25 5G Devices
- 3 Methods to Mirror Nokia 105 Classic to Roku | Dr.fone
- Title: New How to Calculate & Change Video Aspect Ratio Online
- Author: Chloe
- Created at : 2024-05-20 03:38:05
- Updated at : 2024-05-21 03:38:05
- Link: https://ai-editing-video.techidaily.com/new-how-to-calculate-and-change-video-aspect-ratio-online/
- License: This work is licensed under CC BY-NC-SA 4.0.
