:max_bytes(150000):strip_icc():format(webp)/GettyImages-1094009490-2694d308001d46049e0755f4dd7fdf4c.jpg)
New How to Concatenate Videos Using FFmpeg

How to Concatenate Videos Using FFmpeg
Video editing is a crucial aspect of creating content for many people. Whether you’re a YouTuber, a marketer, or just someone who wants to share videos with friends and family, being able to edit and manipulate your videos is key. One of the most basic video editing tasks is concatenating videos, which combines multiple files to create one cohesive video.
FFmpeg is a powerful tool that allows you to do just that, and in this guide, we’ll walk you through the process of FFmpeg concatenate videos. Whether a beginner or an experienced video editor, this guide will provide you with all the information you need to seamlessly merge your videos. From installation to execution, we’ll cover it all so you can streamline your video editing process.
Overview and Installation of FFmpeg
FFmpeg is free, open-source project that allows you to record, convert, and stream digital audio and video. It is a command-line tool widely used in video editing and transcoding. FFmpeg can be used to concatenate videos and other tasks, such as adding subtitles, changing video resolution, and more. It is available for Windows, Mac, and Linux, making it a versatile and accessible tool for anyone to use.
Here’s how to install FFmpeg:
Step1 Log in to your Ubuntu server via SSH and update the package index.
$ sudo apt update
Step2 Install FFmpeg and all the required dependencies
$ sudo apt install ffmpeg
Step3 Verify the version of FFmpeg that you’ve installed.
$ ffmpeg -version
Prerequisite
Before we merge videos using FFmpeg, we must understand the various methods available to us. FFmpeg offers three ways to concatenate videos: a demuxer, a filter, or a protocol. However, each method has its own set of considerations, and the best method for you will depend on the properties of the videos you’re working with.
It’s crucial to ensure that all encoding-related properties align with your chosen method. This includes the timebase, height and width, codecs, and pixel format. Some methods require the videos you’re merging to have the same encoding, while others allow for different encodings. It’s essential to keep this in mind to ensure that the final video is seamless without any breaks. Remember that these prerequisites will help you have a smooth process.
Concatenate Videos With Same Codecs Using FFmpeg
If the videos you want to concatenate have the same codec, you can use the FFmpeg “concat” demuxer or protocol to join them together. This simple and efficient method doesn’t require re-encoding the videos, saving time and preserving the original quality. This section will review the steps to concatenate videos using the “concat” demuxer and “concat” protocols in FFmpeg.
Merge Videos With the “Concat” Demuxer
The concat demuxer in FFmpeg allows you to join together multiple video files with the same codecs by reading a list of file paths from a text file and demuxing them in sequence. Each video starts where the previous one finishes without needing to re-encode the videos. Here’s how to do it:
Step1 Create a .txt file and list the paths of the video files you want to merge.
Join_video.txt
file /Users/Video/input1.mp4
file /Users/Video/input2.mp4
![]()
Note: You can add more than two video files.
Step2 Run the FFmpeg command:
ffmpeg -f concat -safe 0 -i join_video.txt -c copy output_demuxer.mp4
![]()
Note: -safe 0 is added to accept any file name.
-c copy will copy all the streams.
As this method allows you to “stream copy” the files instead of re-encoding them, the concatenation is very fast. This can be a good option if you have videos with the same codecs and want to join them quickly without losing quality.
Join Videos With the “Concat” Protocol
The concat protocol in FFmpeg allows you to join together multiple video files in a specific format that supports file-level concatenation, such as MPEG-2 TS. However, it cannot be used for other video formats like MP4 and WEBM.
Here’s how to use the “concat protocol:
Step1 Run the FFmpeg command:
ffmpeg -i “concat:input1.ts|input2.ts” -c copy output_protocol.ts
![]()
Note: The concat protocol allows you to “stream copy” the files by adding the option -c copy.
Step2 Input the file name of the video using this code:
ffmpeg -i “concat:input1.mp4|input2.mp4” -c copy output_protocol.mp4
![]()
Note: If you try to use this method on video formats that are not supported, only the first input video will be saved in the output video. And the video ends after the first video.
Although this method is limited in terms of supported video formats, it’s very easy to use if you merge videos in the supported formats. It’s a single command in the terminal without needing a text file. Additionally, using the -c copy option makes it efficient as it doesn’t require re-encoding, saving time.
Concatenate MP4 Video Files of Different Codecs & Resolutions Using FFmpeg
If the videos you want to concatenate have different codecs or resolutions, you can still use FFmpeg to join them together. However, this method requires re-encoding the videos, which can take longer and may result in a loss of quality. This section will cover the steps to concatenate videos with different codecs or resolutions using FFmpeg.
Here’s how to do it:
Step1 Provide the names of the input files to FFmpeg.
ffmpeg -i file1.mp4 -i file2.mp4 -i file3.mp4 \
Step2 Use the filter_complex filtergraph parameter to instruct FFmpeg from where to take the audio and video.
-filter_complex “[0:v] [0:a] [1:v] [1:a] [2:v] [2:a]
![]()
Note: [0:v][0:a] means FFmpeg needs to take the video and audio from the 0th video (file1.mp4).
Step3 Tell FFmpeg to concatenate three files (n=3).
concat=n=3:v=1:a=1 [vv] [aa]“ \
![]()
Note: The v=1:a=1 implies one stream for the audio and one stream for the video.
Step4 Map these audio and video outputs to the final video container. This is done as follows:
-map “[vv]“ -map “[aa]“ mergedVideo.mp4
It is important to note that this method requires re-encoding the videos, which can take more time and may result in a loss of quality. However, it offers the flexibility of filtering the videos before concatenating them. The filter_complex method in FFmpeg allows you to concatenate videos of different codecs and resolutions. The final step is to map the audio and video outputs to the final video container. This can be done using the -map command.
Concatenate Videos With Multiple Audio Streams Using FFmpeg
Concatenating videos with multiple audio streams can be more complex than concatenating videos with a single audio stream. This section will cover the steps to concatenate videos with multiple audio streams using FFmpeg. We’ll be using the filter_complex method in FFmpeg, which allows you to manipulate and concatenate multiple audio and video streams in a single command. This method is more advanced but allows you to join videos with different audio streams and create a final video with multiple audio tracks.
Step1 Specify the input files and opening.mkv, episode.mkv, and ending.mkv:
$ ffmpeg -i opening.mkv -i episode.mkv -i ending.mkv -filter_complex
Step2 Use the filter_complex parameter in FFmpeg to specify the input streams for the video and audio.
[0:0] [0:1] [0:2] [1:0] [1:1] [1:2] [2:0] [2:1] [2:2]
![]()
Note: Single video stream ([0:0], [1:0], [2:0])
Dual audio streams ([0:1][0:2], [1:1][1:2], [2:1][2:2])
Step3 Use the concat filter to specify that you want to concatenate 3 files (n=3) with 1 video stream (v=1) and 2 audio streams (a=2). Specify the output streams as [v], [a1], [a2]:
concat=n=3:v=1:a=2 [v] [a1] [a2]
Step4 Use the -map option to map the output streams to the final video container:
-map ‘[v]‘ -map ‘[a1]‘ -map ‘[a2]‘ output.mkv
[Bonus] Join Videos Together With Filmora
While FFmpeg offers a wide range of options for joining videos together, it can have a steep learning curve for some users. An alternative method for joining videos is using Filmora. Wondershare Filmora is a user-friendly video editing software that allows you to easily join multiple videos. It’s a great option for users new to video editing or needing experience with command-line tools like FFmpeg.
Free Download For Win 7 or later(64-bit)
Free Download For macOS 10.14 or later
Filmora has a simple drag-and-drop interface, making adding, arranging, and editing videos and audio tracks easy. Additionally, it offers various features like split, trim, crop, merge, and more. It also has various effects, transitions, and animations to enhance the overall look of your video. With Filmora, you can create professional-looking videos with minimal effort.
How-to Steps
Here’s how to merge videos using Filmora:
Step1 Open Filmora and click “New Project.”

Step2 Go to “File“ > “Import Media“ > “Import Media Files“ to add your video files to the media library.

Step3 Drag and drop the files you want to merge from the media library to the timeline, and then you’ll get the merged video seamlessly.

Step4 Edit your video.

Step5 After editing, click the “Export“ tab to save your videos.

Conclusion
FFmpeg is a powerful tool that allows you to concatenate videos in various ways. Whether you’re working with videos of the same codecs and resolutions or videos with multiple audio streams, FFmpeg can handle it. However, for users new to video editing or needing experience with command-line tools, using Filmora can be a more user-friendly option. It offers a simple drag-and-drop interface and a variety of features and effects to enhance the overall look of your video.
Step2 Run the FFmpeg command:
ffmpeg -f concat -safe 0 -i join_video.txt -c copy output_demuxer.mp4
![]()
Note: -safe 0 is added to accept any file name.
-c copy will copy all the streams.
As this method allows you to “stream copy” the files instead of re-encoding them, the concatenation is very fast. This can be a good option if you have videos with the same codecs and want to join them quickly without losing quality.
Join Videos With the “Concat” Protocol
The concat protocol in FFmpeg allows you to join together multiple video files in a specific format that supports file-level concatenation, such as MPEG-2 TS. However, it cannot be used for other video formats like MP4 and WEBM.
Here’s how to use the “concat protocol:
Step1 Run the FFmpeg command:
ffmpeg -i “concat:input1.ts|input2.ts” -c copy output_protocol.ts
![]()
Note: The concat protocol allows you to “stream copy” the files by adding the option -c copy.
Step2 Input the file name of the video using this code:
ffmpeg -i “concat:input1.mp4|input2.mp4” -c copy output_protocol.mp4
![]()
Note: If you try to use this method on video formats that are not supported, only the first input video will be saved in the output video. And the video ends after the first video.
Although this method is limited in terms of supported video formats, it’s very easy to use if you merge videos in the supported formats. It’s a single command in the terminal without needing a text file. Additionally, using the -c copy option makes it efficient as it doesn’t require re-encoding, saving time.
Concatenate MP4 Video Files of Different Codecs & Resolutions Using FFmpeg
If the videos you want to concatenate have different codecs or resolutions, you can still use FFmpeg to join them together. However, this method requires re-encoding the videos, which can take longer and may result in a loss of quality. This section will cover the steps to concatenate videos with different codecs or resolutions using FFmpeg.
Here’s how to do it:
Step1 Provide the names of the input files to FFmpeg.
ffmpeg -i file1.mp4 -i file2.mp4 -i file3.mp4 \
Step2 Use the filter_complex filtergraph parameter to instruct FFmpeg from where to take the audio and video.
-filter_complex “[0:v] [0:a] [1:v] [1:a] [2:v] [2:a]
![]()
Note: [0:v][0:a] means FFmpeg needs to take the video and audio from the 0th video (file1.mp4).
Step3 Tell FFmpeg to concatenate three files (n=3).
concat=n=3:v=1:a=1 [vv] [aa]“ \
![]()
Note: The v=1:a=1 implies one stream for the audio and one stream for the video.
Step4 Map these audio and video outputs to the final video container. This is done as follows:
-map “[vv]“ -map “[aa]“ mergedVideo.mp4
It is important to note that this method requires re-encoding the videos, which can take more time and may result in a loss of quality. However, it offers the flexibility of filtering the videos before concatenating them. The filter_complex method in FFmpeg allows you to concatenate videos of different codecs and resolutions. The final step is to map the audio and video outputs to the final video container. This can be done using the -map command.
Concatenate Videos With Multiple Audio Streams Using FFmpeg
Concatenating videos with multiple audio streams can be more complex than concatenating videos with a single audio stream. This section will cover the steps to concatenate videos with multiple audio streams using FFmpeg. We’ll be using the filter_complex method in FFmpeg, which allows you to manipulate and concatenate multiple audio and video streams in a single command. This method is more advanced but allows you to join videos with different audio streams and create a final video with multiple audio tracks.
Step1 Specify the input files and opening.mkv, episode.mkv, and ending.mkv:
$ ffmpeg -i opening.mkv -i episode.mkv -i ending.mkv -filter_complex
Step2 Use the filter_complex parameter in FFmpeg to specify the input streams for the video and audio.
[0:0] [0:1] [0:2] [1:0] [1:1] [1:2] [2:0] [2:1] [2:2]
![]()
Note: Single video stream ([0:0], [1:0], [2:0])
Dual audio streams ([0:1][0:2], [1:1][1:2], [2:1][2:2])
Step3 Use the concat filter to specify that you want to concatenate 3 files (n=3) with 1 video stream (v=1) and 2 audio streams (a=2). Specify the output streams as [v], [a1], [a2]:
concat=n=3:v=1:a=2 [v] [a1] [a2]
Step4 Use the -map option to map the output streams to the final video container:
-map ‘[v]‘ -map ‘[a1]‘ -map ‘[a2]‘ output.mkv
[Bonus] Join Videos Together With Filmora
While FFmpeg offers a wide range of options for joining videos together, it can have a steep learning curve for some users. An alternative method for joining videos is using Filmora. Wondershare Filmora is a user-friendly video editing software that allows you to easily join multiple videos. It’s a great option for users new to video editing or needing experience with command-line tools like FFmpeg.
Free Download For Win 7 or later(64-bit)
Free Download For macOS 10.14 or later
Filmora has a simple drag-and-drop interface, making adding, arranging, and editing videos and audio tracks easy. Additionally, it offers various features like split, trim, crop, merge, and more. It also has various effects, transitions, and animations to enhance the overall look of your video. With Filmora, you can create professional-looking videos with minimal effort.
How-to Steps
Here’s how to merge videos using Filmora:
Step1 Open Filmora and click “New Project.”

Step2 Go to “File“ > “Import Media“ > “Import Media Files“ to add your video files to the media library.

Step3 Drag and drop the files you want to merge from the media library to the timeline, and then you’ll get the merged video seamlessly.

Step4 Edit your video.

Step5 After editing, click the “Export“ tab to save your videos.

Conclusion
FFmpeg is a powerful tool that allows you to concatenate videos in various ways. Whether you’re working with videos of the same codecs and resolutions or videos with multiple audio streams, FFmpeg can handle it. However, for users new to video editing or needing experience with command-line tools, using Filmora can be a more user-friendly option. It offers a simple drag-and-drop interface and a variety of features and effects to enhance the overall look of your video.
Easy Way to Combine Several Xvid Files Into One [Windows, Mac,Android
Best Xvid Merger to Merge/Combine Xvid Files on Windows - Filmora Video Editor
- Importing an Xvid file
There are two ways to import a Xvid file.
Click Import to browse for Xvid videos on your computer and select all Xvid files to load while holding down the Ctrl or Shift key. Drag and drop the Xvid file directly into the program window.
If you want to add images and sounds and merge them seamlessly, do that. All regular image and audio files are supported.

- Drag and drop the Xvid video together
When you load all the Xvid files, they will appear as thumbnails in your album. To merge them, you need to drag and drop them one by one into the video timeline. They are seamlessly merged without gaps. Click the play icon to see the merged Xvid files in the screen on the right.
To change the order, simply drag the video element to the left or right. Note: Do not overlay another video clip. Otherwise, split and paste the original video in its place.

- Improve merged Xvid videos (optional)
You can also do other work to personalize your Xvid video before you export the merged Xvid video. As a powerful and easy-to-use video editor, you can use Wondershare Filmora:
for basic editing (trimming, splitting, rotating, trimming, brightness, contrast, tint adjustment, playback speed, pitch change, etc.). I can do it. Video Customization: Apply transitions, effects, subtitles, PIPs, intros / credits and add background noise. Over 300 templates are provided. Edit like a pro Take your Xvid video editing to the next level with built-in power tools such as jump cut, face off, mosaic, tilt shift, flash and hold.
- Export related Xvid files
You can preview the content you created after making the necessary changes. When you are satisfied, click the “Create” button to save. In the pop-up output window, you can choose the desired format from all common formats such as WMV, MP4, AVI, MOV, MPG, FLV. In addition, in Advanced Settings, you can further select encoder resolution settings such as 1280 x 720, 640 x 480, 1920x1080.
Would you like to burn the merged Xvid files to DVD for viewing on a regular DVD player or big screen TV? Click the DVD tab, set the aspect ratio to 16: 9 or 4: 3, set the TV standard and create a DVD video.

Film / Media File Preparation: Filmora supports a variety of file formats. You can check if your file is supported by Filmora here. Be sure to save the file to your computer or storage drive.
Review System Requirements: Review Filmora’s system requirements to ensure that your Mac meets these requirements for the best user experience.
Create a new project or open a recently used project
1 To create a new project, select a video aspect ratio and click New Project.
2 Click Open Project to open an existing project. Importing

Media Files Imports
video footage, audio, or other media files. To import media files, you can:
1 Click the “+” icon to browse to a local file on your Mac and add a file.
2 Drag and drop the media file into the Media Library area.
3 Import media files from an external device.
4 Import using the Instant Cutter tool.

Media File Placement on the Timeline To place a clip or sequence of other media files, you can:
Drag the video, audio, and images into the timeline window and place them in the order you want. Apply Transitions and Effects
Transitions and effects help make your video more eye-catching. The Transitions and Effects panel contains various transitions and effects that you can apply. Adding a title
Filmora has a number of title templates. What you can do:
1 Select an existing title template in the Title section, enter text and save.
2 Click the text to adjust the text style. You can save it as a custom for later use.

Color Editing
Filmora has multiple color editing options. You can do the following.
Improves video color.
Adjust the white balance.
Tone changes: Contrast, Saturation, Brightness.
2 Match the colors of two different clips.
To edit the color, double-click the clip, click Color, change the parameters, and then click Save. If you need more advanced editing, you can click Details. Edit Audio
Filmora has a complete audio editing solution. You can remove background noise, change audio speed, auto-normalize audio, and more.
Export videos to a supported format or post directly to the social platform.
Another way to combine multiple Xvid files into one using Avidemux
There are many different video formats, and it can be difficult to meet some of them without knowing exactly what they are. For example, Xvid files are Xviden-encoded video file formats that use the Xvid codec, rather than the formats you are used to in everyday life like the MP4 format. This program is used to compress and decompress video to the compression standard MPEG4 ASP, save disk space and file transfer speed, and open this type of file. Many modern DVD and Bluray players can play XVID files. Like a PC, any software program that can decode MPEG4 ASP-encoded video can play XVID files.
This article describes how to combine multiple Xvid files into one using Avidemux, a free video editor and encoder that supports multiple file types. Merging common video and video in Avidemux is not a big deal, but you can learn how to merge different Xvid files with this editor from the detailed article.
Therefore, first you need to change some of the settings for the selected video. Frame rate etc. Next, you need to open the first video clip, find and open the menu file option that displays the drop-down menu at the top left of the screen, and select Attach.
Step 1:
Adding Xvid Video to a program in batch
Before importing an Xvid file, you need to make sure that you have the latest version of Joyoshare Video Joiner installed on your computer. Then it’s up to you to upload the Xvid video. There are two options. Touch the Open File icon in the lower left corner, or drag directly in bulk as needed.
Step 2:
Finish setting the output format
When all the Xvid video files are loaded, click Format in the lower right corner of the main screen and select the output format. Formatting can be set in “Fast Mode” or “Encode Mode”. The only difference between the two modes is that the former is a lossless mode, which provides a 60x speed solution that stitches multiple Xvid files in their original quality, but the output format must be the same as the source video. The latter is a customizable mockup that allows you to choose any format as the output format and customize the output quality by simply clicking on the gear icon.
Step 3:
Cut Xvid Video File When you have finished setting the
output format, tap OK to save and you will be returned to the first interface. You can now crop Xvid videos as needed by simply dragging the timeline.
Step 4
Editing a Xvid file in encode mode
The Joyoshare Video Joiner is equipped with a video editor that works only in encode mode. Therefore, if you want to combine Xvid files, then click the Edit icon next to the Xvid file you just added to crop, crop, mirror, adjust brightness, watermark, apply effects, subtitles, etc. You can edit the video.
2 Ways to Merge/Combine Xvid Files on Android using Wave.video (paid software)
Wave.video allows you to easily combine two or more video clips or images to create longer videos.
To do this, go to https: //wave.video, click the New Video button and select Blank Video.

This will open a video editor and ask you to select a format.
You can then select the Upload Media (from your computer) or Select from Library (Go to Stock Library, Favorites, Purchased, Previous Uploads, and Read My Video Folders) option. The video clip is added to the editor. You can add a second clip by clicking the + sign on the timeline.

Not only can you merge original video clips, but you can also merge with stock footage, video clips, image merges or merges. Multiple images in the video.

If you add multiple video clips or images to your timeline, you can add transitions between them to “glue” them into your story. If you’re happy with how to combine video clips, go to the publishing steps to download the video or share it directly with your social media account.


2 Ways to Merge/Combine Xvid Files on Android using InShot (unpaid software)
How to merge videos on your smartphone
Smartphone apps are less functional and slower on handheld devices, so it’s usually best to edit videos on your computer.
But if you’re trying to make a simple video on the go, your smartphone will do the job. Combining videos on Android phones.
Android users, InShot is a great option for combining multiple videos.
Transitions, effects, stickers, etc. are limited by the free version of the app.
How to get started:
- Open the app and select a video option.
Other options are not related to video.

- Select the videos you want to combine from the library.
Select the videos in the order you want them to appear.

- Crop the clip to crop and polish the video
Tap the video clip section to crop the clip.
- Add a transition effect between video clips
To add a Transition, simply select the white icon on the timeline that ends one video clip and starts another.
Click to see the transitions. Only basic transitions are available in the free version. Super and glitch are available to professional users.

- Insert text to add stickers
The sticker options available in the free version of the app are limited.
- Correct the color of the clip Select the clip and click the Filter option.
Go to the Adjustment tab and modify the lighting, saturation, etc. of the clip.

- Save Video
Click Save in the upper right corner of the screen and select the desired video quality.

Merge/Combine Xvid Files on iPhone using iMovie (unpaid software)
Merge videos with iMovie on iPhone
iMovie is already installed on your iPhone.
Combine multiple video clips into one project in a few simple steps.
The method is as follows:
- Open the app and create a new project
Select Movie from the options displayed on the screen.

2nd Click Media in the upper left.
Select the video files in the order you want them to appear.

- Start editing
Click the white icon in the center of the clip to add a transition effect.

- Select Finish in the upper left corner of the screen.
Video is stored.
Note: You can apply a filter to make all video clips look the same.
Merge/Combine Xvid Files on iPhone using Biteable (paid software)
Merge videos like an expert
Biteable’s video combiner allows you to quickly merge footage and add transition effects.
From flashy dissolves to smoother slide-ins than Barry White eating ice cream, merging videos has never been easier.
Method is as follows:
- Upload video footage
First, log in to Biteable and create a new video project. Alternatively, click this link to sign up and get started in seconds.
Then select Start with Blank Video on the toolbar to start a new project or select a template. The Biteable Video Editor launches.
To add your first footage, tap the canvas, then tap Add Scene> Upload. Select the video you want to add. Then repeat this process to upload the second video.
- Merge and add transitions
This will merge the footage on the timeline. If you want to add a transition, move the mouse pointer to the area between the video clips on the timeline.
Tap the white arrow that appears and swipe up, swipe left, or select a dreamy crossfade effect.
- Click the Preview button to export the merged video
Immediately export the video and later upgrade to a premium membership to remove the small watermark.
https://biteable.com/tools/merge-videos/

Merge/Combine Xvid Files Online using ClipChamp (paid software)
Step 1. Create an account on Clipchamp
Log into your Clipchamp Create account, or join up without spending a dime to get started.

Step 2. Create a brand new task
Click on Create a Video button withinside the pinnacle proper corner. We provide plenty of codecs and templates to pick from.
Before you choose a layout or a template have a clean concept of ways you need to continue consistent with your requirement. Select an element ratio that fits the pleasant in your video.
Your element ratio can vary primarily based totally upon the platform that you`re aiming to submit the video.

Step 3. Add the motion pictures you need to merge
Now that you`ve created a brand new task at the video merger, click on the Add Media button withinside the left toolbar to import video documents into the empty task.
You can pick to tug and drop motion pictures out of your difficult drive, your phone, dropbox, google drive, or different on line storage. You may even upload inventory photos or Gifs from the inventory button at the left toolbar.
Once you`ve imported your media documents they`ll seem withinside the video merger.

Step 4. Add your motion pictures to the video merger timeline
Select the 2 movies and drag them to the editor`s timeline. After adjusting the clips to their accurate positions a inexperienced spotlight will seem round them
indicating that those documents will drop to the timeline in case you allow pass of your click on. You may also upload extra clips sequentially on your timeline relying at the requirement.
You may want to scroll beyond the clips at the timeline to alter them into areas in case your video receives longer. Your clips at the moment are located at the timeline!

Step 5. Resize and rearrange your motion pictures
We have selected a nine:sixteen ratio however our inventory photos is sixteen:nine ratio. You will want to resize your video photos. Click at the preview display then click on Crop to fill.
Drag the video throughout the display to put the video. Repeat this technique for each motion pictures. Since the motion pictures won’t be withinside the series you need them to be in,
you may have to tug and drop them to the favored series. You can trim the video without a doubt through transferring your mouse over to both give up of a clip and dragging them as consistent with your want.


Step 6. Recheck and export
Often even as enhancing or merging our motion pictures we export in a rush and recognize that we had to trim a segment a tad bit more.
This takes place to maximum folks however does now no longer fear as Clipchamp robotically saves your task and you could re-take a look at the complete video earlier than exporting it.
If you are happy with the merge of the two videos, you can click the export button in the upper right corner of the video editor.
Select the resolution for which you want to export the video file and click Next.
You can also change the aspect ratio to suit the needs of other platforms and repeat the export process.

Merge/Combine Xvid Files Online using Kapwing (unpaid software)
Step 1: Upload the video
First, upload the video to Kapwing’s video merging tool. This free tool is available for iPhone, Android, PC, or tablet in Chrome or Safari browser. Click Upload to add the videos one at a time, or select multiple clips to import them all at once.
Kapwing supports major video file types such as MP4, .FLV, .3PG. To embed a video from the web, just copy and paste the link. You can upload photos and GIFs and combine them with videos.

Think of a video that looks great when spliced together into two consecutive videos. This can be a similar color palette, an event or travel video, or a video of the same person. When
videos are uploaded, the video preview shows how they look combined. Kapwing highlights each scene with a purple box during playback.

Step 2: Place the video /photo in the desired order.
Think about which clips are next to each other and work best, and arrange them accordingly. You can drag clips to rearrange them and delete them when you no longer need them.
In the menu on the left, you can choose the format of the finished video (choose 1: 1 (square)), whether to crop the video (choose Fit to Border), and the length.

The video should be a montage photo Kapwing also has the option to crop the video clip to shorten the required section.
Creators can crop videos and remove sections from the center. To crop a clip, first select it and click Edit to open Kapwing Studio.

Drag both ends of the layer to change the timing of the start and end of the clip, or click the timing and use the arrow keys to make fine adjustments.
Besides trimming, you can look at other edits. To remove a section or add a clip in the center, use the split tool above the timeline or type “s” on your keyboard and use the shortcut.
Next, delete the layers you no longer need, drag the clips to combine them, and display them side by side on the timeline.
creators have more control over the montage by editing the scene in Studio. In Studio, you can add music to your montage,
insert title slides, attach endings, watermark corners, and animate.

Step 3: Save the merged video
When you have finished merging the video into the merged video, click Export Video in the upper right corner. Once the video is processed, you will be taken to the download page.
From here, you can save the video to your device or create a free account with your Google or Facebook login credentials to remove the watermark first.
There are two ways to import a Xvid file.
Click Import to browse for Xvid videos on your computer and select all Xvid files to load while holding down the Ctrl or Shift key. Drag and drop the Xvid file directly into the program window.
If you want to add images and sounds and merge them seamlessly, do that. All regular image and audio files are supported.

- Drag and drop the Xvid video together
When you load all the Xvid files, they will appear as thumbnails in your album. To merge them, you need to drag and drop them one by one into the video timeline. They are seamlessly merged without gaps. Click the play icon to see the merged Xvid files in the screen on the right.
To change the order, simply drag the video element to the left or right. Note: Do not overlay another video clip. Otherwise, split and paste the original video in its place.

- Improve merged Xvid videos (optional)
You can also do other work to personalize your Xvid video before you export the merged Xvid video. As a powerful and easy-to-use video editor, you can use Wondershare Filmora:
for basic editing (trimming, splitting, rotating, trimming, brightness, contrast, tint adjustment, playback speed, pitch change, etc.). I can do it. Video Customization: Apply transitions, effects, subtitles, PIPs, intros / credits and add background noise. Over 300 templates are provided. Edit like a pro Take your Xvid video editing to the next level with built-in power tools such as jump cut, face off, mosaic, tilt shift, flash and hold.
- Export related Xvid files
You can preview the content you created after making the necessary changes. When you are satisfied, click the “Create” button to save. In the pop-up output window, you can choose the desired format from all common formats such as WMV, MP4, AVI, MOV, MPG, FLV. In addition, in Advanced Settings, you can further select encoder resolution settings such as 1280 x 720, 640 x 480, 1920x1080.
Would you like to burn the merged Xvid files to DVD for viewing on a regular DVD player or big screen TV? Click the DVD tab, set the aspect ratio to 16: 9 or 4: 3, set the TV standard and create a DVD video.

Film / Media File Preparation: Filmora supports a variety of file formats. You can check if your file is supported by Filmora here. Be sure to save the file to your computer or storage drive.
Review System Requirements: Review Filmora’s system requirements to ensure that your Mac meets these requirements for the best user experience.
Create a new project or open a recently used project
1 To create a new project, select a video aspect ratio and click New Project.
2 Click Open Project to open an existing project. Importing

Media Files Imports
video footage, audio, or other media files. To import media files, you can:
1 Click the “+” icon to browse to a local file on your Mac and add a file.
2 Drag and drop the media file into the Media Library area.
3 Import media files from an external device.
4 Import using the Instant Cutter tool.

Media File Placement on the Timeline To place a clip or sequence of other media files, you can:
Drag the video, audio, and images into the timeline window and place them in the order you want. Apply Transitions and Effects
Transitions and effects help make your video more eye-catching. The Transitions and Effects panel contains various transitions and effects that you can apply. Adding a title
Filmora has a number of title templates. What you can do:
1 Select an existing title template in the Title section, enter text and save.
2 Click the text to adjust the text style. You can save it as a custom for later use.

Color Editing
Filmora has multiple color editing options. You can do the following.
Improves video color.
Adjust the white balance.
Tone changes: Contrast, Saturation, Brightness.
2 Match the colors of two different clips.
To edit the color, double-click the clip, click Color, change the parameters, and then click Save. If you need more advanced editing, you can click Details. Edit Audio
Filmora has a complete audio editing solution. You can remove background noise, change audio speed, auto-normalize audio, and more.
Export videos to a supported format or post directly to the social platform.
Another way to combine multiple Xvid files into one using Avidemux
There are many different video formats, and it can be difficult to meet some of them without knowing exactly what they are. For example, Xvid files are Xviden-encoded video file formats that use the Xvid codec, rather than the formats you are used to in everyday life like the MP4 format. This program is used to compress and decompress video to the compression standard MPEG4 ASP, save disk space and file transfer speed, and open this type of file. Many modern DVD and Bluray players can play XVID files. Like a PC, any software program that can decode MPEG4 ASP-encoded video can play XVID files.
This article describes how to combine multiple Xvid files into one using Avidemux, a free video editor and encoder that supports multiple file types. Merging common video and video in Avidemux is not a big deal, but you can learn how to merge different Xvid files with this editor from the detailed article.
Therefore, first you need to change some of the settings for the selected video. Frame rate etc. Next, you need to open the first video clip, find and open the menu file option that displays the drop-down menu at the top left of the screen, and select Attach.
Step 1:
Adding Xvid Video to a program in batch
Before importing an Xvid file, you need to make sure that you have the latest version of Joyoshare Video Joiner installed on your computer. Then it’s up to you to upload the Xvid video. There are two options. Touch the Open File icon in the lower left corner, or drag directly in bulk as needed.
Step 2:
Finish setting the output format
When all the Xvid video files are loaded, click Format in the lower right corner of the main screen and select the output format. Formatting can be set in “Fast Mode” or “Encode Mode”. The only difference between the two modes is that the former is a lossless mode, which provides a 60x speed solution that stitches multiple Xvid files in their original quality, but the output format must be the same as the source video. The latter is a customizable mockup that allows you to choose any format as the output format and customize the output quality by simply clicking on the gear icon.
Step 3:
Cut Xvid Video File When you have finished setting the
output format, tap OK to save and you will be returned to the first interface. You can now crop Xvid videos as needed by simply dragging the timeline.
Step 4
Editing a Xvid file in encode mode
The Joyoshare Video Joiner is equipped with a video editor that works only in encode mode. Therefore, if you want to combine Xvid files, then click the Edit icon next to the Xvid file you just added to crop, crop, mirror, adjust brightness, watermark, apply effects, subtitles, etc. You can edit the video.
2 Ways to Merge/Combine Xvid Files on Android using Wave.video (paid software)
Wave.video allows you to easily combine two or more video clips or images to create longer videos.
To do this, go to https: //wave.video, click the New Video button and select Blank Video.

This will open a video editor and ask you to select a format.
You can then select the Upload Media (from your computer) or Select from Library (Go to Stock Library, Favorites, Purchased, Previous Uploads, and Read My Video Folders) option. The video clip is added to the editor. You can add a second clip by clicking the + sign on the timeline.

Not only can you merge original video clips, but you can also merge with stock footage, video clips, image merges or merges. Multiple images in the video.

If you add multiple video clips or images to your timeline, you can add transitions between them to “glue” them into your story. If you’re happy with how to combine video clips, go to the publishing steps to download the video or share it directly with your social media account.


2 Ways to Merge/Combine Xvid Files on Android using InShot (unpaid software)
How to merge videos on your smartphone
Smartphone apps are less functional and slower on handheld devices, so it’s usually best to edit videos on your computer.
But if you’re trying to make a simple video on the go, your smartphone will do the job. Combining videos on Android phones.
Android users, InShot is a great option for combining multiple videos.
Transitions, effects, stickers, etc. are limited by the free version of the app.
How to get started:
- Open the app and select a video option.
Other options are not related to video.

- Select the videos you want to combine from the library.
Select the videos in the order you want them to appear.

- Crop the clip to crop and polish the video
Tap the video clip section to crop the clip.
- Add a transition effect between video clips
To add a Transition, simply select the white icon on the timeline that ends one video clip and starts another.
Click to see the transitions. Only basic transitions are available in the free version. Super and glitch are available to professional users.

- Insert text to add stickers
The sticker options available in the free version of the app are limited.
- Correct the color of the clip Select the clip and click the Filter option.
Go to the Adjustment tab and modify the lighting, saturation, etc. of the clip.

- Save Video
Click Save in the upper right corner of the screen and select the desired video quality.

Merge/Combine Xvid Files on iPhone using iMovie (unpaid software)
Merge videos with iMovie on iPhone
iMovie is already installed on your iPhone.
Combine multiple video clips into one project in a few simple steps.
The method is as follows:
- Open the app and create a new project
Select Movie from the options displayed on the screen.

2nd Click Media in the upper left.
Select the video files in the order you want them to appear.

- Start editing
Click the white icon in the center of the clip to add a transition effect.

- Select Finish in the upper left corner of the screen.
Video is stored.
Note: You can apply a filter to make all video clips look the same.
Merge/Combine Xvid Files on iPhone using Biteable (paid software)
Merge videos like an expert
Biteable’s video combiner allows you to quickly merge footage and add transition effects.
From flashy dissolves to smoother slide-ins than Barry White eating ice cream, merging videos has never been easier.
Method is as follows:
- Upload video footage
First, log in to Biteable and create a new video project. Alternatively, click this link to sign up and get started in seconds.
Then select Start with Blank Video on the toolbar to start a new project or select a template. The Biteable Video Editor launches.
To add your first footage, tap the canvas, then tap Add Scene> Upload. Select the video you want to add. Then repeat this process to upload the second video.
- Merge and add transitions
This will merge the footage on the timeline. If you want to add a transition, move the mouse pointer to the area between the video clips on the timeline.
Tap the white arrow that appears and swipe up, swipe left, or select a dreamy crossfade effect.
- Click the Preview button to export the merged video
Immediately export the video and later upgrade to a premium membership to remove the small watermark.
https://biteable.com/tools/merge-videos/

Merge/Combine Xvid Files Online using ClipChamp (paid software)
Step 1. Create an account on Clipchamp
Log into your Clipchamp Create account, or join up without spending a dime to get started.

Step 2. Create a brand new task
Click on Create a Video button withinside the pinnacle proper corner. We provide plenty of codecs and templates to pick from.
Before you choose a layout or a template have a clean concept of ways you need to continue consistent with your requirement. Select an element ratio that fits the pleasant in your video.
Your element ratio can vary primarily based totally upon the platform that you`re aiming to submit the video.

Step 3. Add the motion pictures you need to merge
Now that you`ve created a brand new task at the video merger, click on the Add Media button withinside the left toolbar to import video documents into the empty task.
You can pick to tug and drop motion pictures out of your difficult drive, your phone, dropbox, google drive, or different on line storage. You may even upload inventory photos or Gifs from the inventory button at the left toolbar.
Once you`ve imported your media documents they`ll seem withinside the video merger.

Step 4. Add your motion pictures to the video merger timeline
Select the 2 movies and drag them to the editor`s timeline. After adjusting the clips to their accurate positions a inexperienced spotlight will seem round them
indicating that those documents will drop to the timeline in case you allow pass of your click on. You may also upload extra clips sequentially on your timeline relying at the requirement.
You may want to scroll beyond the clips at the timeline to alter them into areas in case your video receives longer. Your clips at the moment are located at the timeline!

Step 5. Resize and rearrange your motion pictures
We have selected a nine:sixteen ratio however our inventory photos is sixteen:nine ratio. You will want to resize your video photos. Click at the preview display then click on Crop to fill.
Drag the video throughout the display to put the video. Repeat this technique for each motion pictures. Since the motion pictures won’t be withinside the series you need them to be in,
you may have to tug and drop them to the favored series. You can trim the video without a doubt through transferring your mouse over to both give up of a clip and dragging them as consistent with your want.


Step 6. Recheck and export
Often even as enhancing or merging our motion pictures we export in a rush and recognize that we had to trim a segment a tad bit more.
This takes place to maximum folks however does now no longer fear as Clipchamp robotically saves your task and you could re-take a look at the complete video earlier than exporting it.
If you are happy with the merge of the two videos, you can click the export button in the upper right corner of the video editor.
Select the resolution for which you want to export the video file and click Next.
You can also change the aspect ratio to suit the needs of other platforms and repeat the export process.

Merge/Combine Xvid Files Online using Kapwing (unpaid software)
Step 1: Upload the video
First, upload the video to Kapwing’s video merging tool. This free tool is available for iPhone, Android, PC, or tablet in Chrome or Safari browser. Click Upload to add the videos one at a time, or select multiple clips to import them all at once.
Kapwing supports major video file types such as MP4, .FLV, .3PG. To embed a video from the web, just copy and paste the link. You can upload photos and GIFs and combine them with videos.

Think of a video that looks great when spliced together into two consecutive videos. This can be a similar color palette, an event or travel video, or a video of the same person. When
videos are uploaded, the video preview shows how they look combined. Kapwing highlights each scene with a purple box during playback.

Step 2: Place the video /photo in the desired order.
Think about which clips are next to each other and work best, and arrange them accordingly. You can drag clips to rearrange them and delete them when you no longer need them.
In the menu on the left, you can choose the format of the finished video (choose 1: 1 (square)), whether to crop the video (choose Fit to Border), and the length.

The video should be a montage photo Kapwing also has the option to crop the video clip to shorten the required section.
Creators can crop videos and remove sections from the center. To crop a clip, first select it and click Edit to open Kapwing Studio.

Drag both ends of the layer to change the timing of the start and end of the clip, or click the timing and use the arrow keys to make fine adjustments.
Besides trimming, you can look at other edits. To remove a section or add a clip in the center, use the split tool above the timeline or type “s” on your keyboard and use the shortcut.
Next, delete the layers you no longer need, drag the clips to combine them, and display them side by side on the timeline.
creators have more control over the montage by editing the scene in Studio. In Studio, you can add music to your montage,
insert title slides, attach endings, watermark corners, and animate.

Step 3: Save the merged video
When you have finished merging the video into the merged video, click Export Video in the upper right corner. Once the video is processed, you will be taken to the download page.
From here, you can save the video to your device or create a free account with your Google or Facebook login credentials to remove the watermark first.
There are two ways to import a Xvid file.
Click Import to browse for Xvid videos on your computer and select all Xvid files to load while holding down the Ctrl or Shift key. Drag and drop the Xvid file directly into the program window.
If you want to add images and sounds and merge them seamlessly, do that. All regular image and audio files are supported.

- Drag and drop the Xvid video together
When you load all the Xvid files, they will appear as thumbnails in your album. To merge them, you need to drag and drop them one by one into the video timeline. They are seamlessly merged without gaps. Click the play icon to see the merged Xvid files in the screen on the right.
To change the order, simply drag the video element to the left or right. Note: Do not overlay another video clip. Otherwise, split and paste the original video in its place.

- Improve merged Xvid videos (optional)
You can also do other work to personalize your Xvid video before you export the merged Xvid video. As a powerful and easy-to-use video editor, you can use Wondershare Filmora:
for basic editing (trimming, splitting, rotating, trimming, brightness, contrast, tint adjustment, playback speed, pitch change, etc.). I can do it. Video Customization: Apply transitions, effects, subtitles, PIPs, intros / credits and add background noise. Over 300 templates are provided. Edit like a pro Take your Xvid video editing to the next level with built-in power tools such as jump cut, face off, mosaic, tilt shift, flash and hold.
- Export related Xvid files
You can preview the content you created after making the necessary changes. When you are satisfied, click the “Create” button to save. In the pop-up output window, you can choose the desired format from all common formats such as WMV, MP4, AVI, MOV, MPG, FLV. In addition, in Advanced Settings, you can further select encoder resolution settings such as 1280 x 720, 640 x 480, 1920x1080.
Would you like to burn the merged Xvid files to DVD for viewing on a regular DVD player or big screen TV? Click the DVD tab, set the aspect ratio to 16: 9 or 4: 3, set the TV standard and create a DVD video.

Film / Media File Preparation: Filmora supports a variety of file formats. You can check if your file is supported by Filmora here. Be sure to save the file to your computer or storage drive.
Review System Requirements: Review Filmora’s system requirements to ensure that your Mac meets these requirements for the best user experience.
Create a new project or open a recently used project
1 To create a new project, select a video aspect ratio and click New Project.
2 Click Open Project to open an existing project. Importing

Media Files Imports
video footage, audio, or other media files. To import media files, you can:
1 Click the “+” icon to browse to a local file on your Mac and add a file.
2 Drag and drop the media file into the Media Library area.
3 Import media files from an external device.
4 Import using the Instant Cutter tool.

Media File Placement on the Timeline To place a clip or sequence of other media files, you can:
Drag the video, audio, and images into the timeline window and place them in the order you want. Apply Transitions and Effects
Transitions and effects help make your video more eye-catching. The Transitions and Effects panel contains various transitions and effects that you can apply. Adding a title
Filmora has a number of title templates. What you can do:
1 Select an existing title template in the Title section, enter text and save.
2 Click the text to adjust the text style. You can save it as a custom for later use.

Color Editing
Filmora has multiple color editing options. You can do the following.
Improves video color.
Adjust the white balance.
Tone changes: Contrast, Saturation, Brightness.
2 Match the colors of two different clips.
To edit the color, double-click the clip, click Color, change the parameters, and then click Save. If you need more advanced editing, you can click Details. Edit Audio
Filmora has a complete audio editing solution. You can remove background noise, change audio speed, auto-normalize audio, and more.
Export videos to a supported format or post directly to the social platform.
Another way to combine multiple Xvid files into one using Avidemux
There are many different video formats, and it can be difficult to meet some of them without knowing exactly what they are. For example, Xvid files are Xviden-encoded video file formats that use the Xvid codec, rather than the formats you are used to in everyday life like the MP4 format. This program is used to compress and decompress video to the compression standard MPEG4 ASP, save disk space and file transfer speed, and open this type of file. Many modern DVD and Bluray players can play XVID files. Like a PC, any software program that can decode MPEG4 ASP-encoded video can play XVID files.
This article describes how to combine multiple Xvid files into one using Avidemux, a free video editor and encoder that supports multiple file types. Merging common video and video in Avidemux is not a big deal, but you can learn how to merge different Xvid files with this editor from the detailed article.
Therefore, first you need to change some of the settings for the selected video. Frame rate etc. Next, you need to open the first video clip, find and open the menu file option that displays the drop-down menu at the top left of the screen, and select Attach.
Step 1:
Adding Xvid Video to a program in batch
Before importing an Xvid file, you need to make sure that you have the latest version of Joyoshare Video Joiner installed on your computer. Then it’s up to you to upload the Xvid video. There are two options. Touch the Open File icon in the lower left corner, or drag directly in bulk as needed.
Step 2:
Finish setting the output format
When all the Xvid video files are loaded, click Format in the lower right corner of the main screen and select the output format. Formatting can be set in “Fast Mode” or “Encode Mode”. The only difference between the two modes is that the former is a lossless mode, which provides a 60x speed solution that stitches multiple Xvid files in their original quality, but the output format must be the same as the source video. The latter is a customizable mockup that allows you to choose any format as the output format and customize the output quality by simply clicking on the gear icon.
Step 3:
Cut Xvid Video File When you have finished setting the
output format, tap OK to save and you will be returned to the first interface. You can now crop Xvid videos as needed by simply dragging the timeline.
Step 4
Editing a Xvid file in encode mode
The Joyoshare Video Joiner is equipped with a video editor that works only in encode mode. Therefore, if you want to combine Xvid files, then click the Edit icon next to the Xvid file you just added to crop, crop, mirror, adjust brightness, watermark, apply effects, subtitles, etc. You can edit the video.
2 Ways to Merge/Combine Xvid Files on Android using Wave.video (paid software)
Wave.video allows you to easily combine two or more video clips or images to create longer videos.
To do this, go to https: //wave.video, click the New Video button and select Blank Video.

This will open a video editor and ask you to select a format.
You can then select the Upload Media (from your computer) or Select from Library (Go to Stock Library, Favorites, Purchased, Previous Uploads, and Read My Video Folders) option. The video clip is added to the editor. You can add a second clip by clicking the + sign on the timeline.

Not only can you merge original video clips, but you can also merge with stock footage, video clips, image merges or merges. Multiple images in the video.

If you add multiple video clips or images to your timeline, you can add transitions between them to “glue” them into your story. If you’re happy with how to combine video clips, go to the publishing steps to download the video or share it directly with your social media account.


2 Ways to Merge/Combine Xvid Files on Android using InShot (unpaid software)
How to merge videos on your smartphone
Smartphone apps are less functional and slower on handheld devices, so it’s usually best to edit videos on your computer.
But if you’re trying to make a simple video on the go, your smartphone will do the job. Combining videos on Android phones.
Android users, InShot is a great option for combining multiple videos.
Transitions, effects, stickers, etc. are limited by the free version of the app.
How to get started:
- Open the app and select a video option.
Other options are not related to video.

- Select the videos you want to combine from the library.
Select the videos in the order you want them to appear.

- Crop the clip to crop and polish the video
Tap the video clip section to crop the clip.
- Add a transition effect between video clips
To add a Transition, simply select the white icon on the timeline that ends one video clip and starts another.
Click to see the transitions. Only basic transitions are available in the free version. Super and glitch are available to professional users.

- Insert text to add stickers
The sticker options available in the free version of the app are limited.
- Correct the color of the clip Select the clip and click the Filter option.
Go to the Adjustment tab and modify the lighting, saturation, etc. of the clip.

- Save Video
Click Save in the upper right corner of the screen and select the desired video quality.

Merge/Combine Xvid Files on iPhone using iMovie (unpaid software)
Merge videos with iMovie on iPhone
iMovie is already installed on your iPhone.
Combine multiple video clips into one project in a few simple steps.
The method is as follows:
- Open the app and create a new project
Select Movie from the options displayed on the screen.

2nd Click Media in the upper left.
Select the video files in the order you want them to appear.

- Start editing
Click the white icon in the center of the clip to add a transition effect.

- Select Finish in the upper left corner of the screen.
Video is stored.
Note: You can apply a filter to make all video clips look the same.
Merge/Combine Xvid Files on iPhone using Biteable (paid software)
Merge videos like an expert
Biteable’s video combiner allows you to quickly merge footage and add transition effects.
From flashy dissolves to smoother slide-ins than Barry White eating ice cream, merging videos has never been easier.
Method is as follows:
- Upload video footage
First, log in to Biteable and create a new video project. Alternatively, click this link to sign up and get started in seconds.
Then select Start with Blank Video on the toolbar to start a new project or select a template. The Biteable Video Editor launches.
To add your first footage, tap the canvas, then tap Add Scene> Upload. Select the video you want to add. Then repeat this process to upload the second video.
- Merge and add transitions
This will merge the footage on the timeline. If you want to add a transition, move the mouse pointer to the area between the video clips on the timeline.
Tap the white arrow that appears and swipe up, swipe left, or select a dreamy crossfade effect.
- Click the Preview button to export the merged video
Immediately export the video and later upgrade to a premium membership to remove the small watermark.
https://biteable.com/tools/merge-videos/

Merge/Combine Xvid Files Online using ClipChamp (paid software)
Step 1. Create an account on Clipchamp
Log into your Clipchamp Create account, or join up without spending a dime to get started.

Step 2. Create a brand new task
Click on Create a Video button withinside the pinnacle proper corner. We provide plenty of codecs and templates to pick from.
Before you choose a layout or a template have a clean concept of ways you need to continue consistent with your requirement. Select an element ratio that fits the pleasant in your video.
Your element ratio can vary primarily based totally upon the platform that you`re aiming to submit the video.

Step 3. Add the motion pictures you need to merge
Now that you`ve created a brand new task at the video merger, click on the Add Media button withinside the left toolbar to import video documents into the empty task.
You can pick to tug and drop motion pictures out of your difficult drive, your phone, dropbox, google drive, or different on line storage. You may even upload inventory photos or Gifs from the inventory button at the left toolbar.
Once you`ve imported your media documents they`ll seem withinside the video merger.

Step 4. Add your motion pictures to the video merger timeline
Select the 2 movies and drag them to the editor`s timeline. After adjusting the clips to their accurate positions a inexperienced spotlight will seem round them
indicating that those documents will drop to the timeline in case you allow pass of your click on. You may also upload extra clips sequentially on your timeline relying at the requirement.
You may want to scroll beyond the clips at the timeline to alter them into areas in case your video receives longer. Your clips at the moment are located at the timeline!

Step 5. Resize and rearrange your motion pictures
We have selected a nine:sixteen ratio however our inventory photos is sixteen:nine ratio. You will want to resize your video photos. Click at the preview display then click on Crop to fill.
Drag the video throughout the display to put the video. Repeat this technique for each motion pictures. Since the motion pictures won’t be withinside the series you need them to be in,
you may have to tug and drop them to the favored series. You can trim the video without a doubt through transferring your mouse over to both give up of a clip and dragging them as consistent with your want.


Step 6. Recheck and export
Often even as enhancing or merging our motion pictures we export in a rush and recognize that we had to trim a segment a tad bit more.
This takes place to maximum folks however does now no longer fear as Clipchamp robotically saves your task and you could re-take a look at the complete video earlier than exporting it.
If you are happy with the merge of the two videos, you can click the export button in the upper right corner of the video editor.
Select the resolution for which you want to export the video file and click Next.
You can also change the aspect ratio to suit the needs of other platforms and repeat the export process.

Merge/Combine Xvid Files Online using Kapwing (unpaid software)
Step 1: Upload the video
First, upload the video to Kapwing’s video merging tool. This free tool is available for iPhone, Android, PC, or tablet in Chrome or Safari browser. Click Upload to add the videos one at a time, or select multiple clips to import them all at once.
Kapwing supports major video file types such as MP4, .FLV, .3PG. To embed a video from the web, just copy and paste the link. You can upload photos and GIFs and combine them with videos.

Think of a video that looks great when spliced together into two consecutive videos. This can be a similar color palette, an event or travel video, or a video of the same person. When
videos are uploaded, the video preview shows how they look combined. Kapwing highlights each scene with a purple box during playback.

Step 2: Place the video /photo in the desired order.
Think about which clips are next to each other and work best, and arrange them accordingly. You can drag clips to rearrange them and delete them when you no longer need them.
In the menu on the left, you can choose the format of the finished video (choose 1: 1 (square)), whether to crop the video (choose Fit to Border), and the length.

The video should be a montage photo Kapwing also has the option to crop the video clip to shorten the required section.
Creators can crop videos and remove sections from the center. To crop a clip, first select it and click Edit to open Kapwing Studio.

Drag both ends of the layer to change the timing of the start and end of the clip, or click the timing and use the arrow keys to make fine adjustments.
Besides trimming, you can look at other edits. To remove a section or add a clip in the center, use the split tool above the timeline or type “s” on your keyboard and use the shortcut.
Next, delete the layers you no longer need, drag the clips to combine them, and display them side by side on the timeline.
creators have more control over the montage by editing the scene in Studio. In Studio, you can add music to your montage,
insert title slides, attach endings, watermark corners, and animate.

Step 3: Save the merged video
When you have finished merging the video into the merged video, click Export Video in the upper right corner. Once the video is processed, you will be taken to the download page.
From here, you can save the video to your device or create a free account with your Google or Facebook login credentials to remove the watermark first.
There are two ways to import a Xvid file.
Click Import to browse for Xvid videos on your computer and select all Xvid files to load while holding down the Ctrl or Shift key. Drag and drop the Xvid file directly into the program window.
If you want to add images and sounds and merge them seamlessly, do that. All regular image and audio files are supported.

- Drag and drop the Xvid video together
When you load all the Xvid files, they will appear as thumbnails in your album. To merge them, you need to drag and drop them one by one into the video timeline. They are seamlessly merged without gaps. Click the play icon to see the merged Xvid files in the screen on the right.
To change the order, simply drag the video element to the left or right. Note: Do not overlay another video clip. Otherwise, split and paste the original video in its place.

- Improve merged Xvid videos (optional)
You can also do other work to personalize your Xvid video before you export the merged Xvid video. As a powerful and easy-to-use video editor, you can use Wondershare Filmora:
for basic editing (trimming, splitting, rotating, trimming, brightness, contrast, tint adjustment, playback speed, pitch change, etc.). I can do it. Video Customization: Apply transitions, effects, subtitles, PIPs, intros / credits and add background noise. Over 300 templates are provided. Edit like a pro Take your Xvid video editing to the next level with built-in power tools such as jump cut, face off, mosaic, tilt shift, flash and hold.
- Export related Xvid files
You can preview the content you created after making the necessary changes. When you are satisfied, click the “Create” button to save. In the pop-up output window, you can choose the desired format from all common formats such as WMV, MP4, AVI, MOV, MPG, FLV. In addition, in Advanced Settings, you can further select encoder resolution settings such as 1280 x 720, 640 x 480, 1920x1080.
Would you like to burn the merged Xvid files to DVD for viewing on a regular DVD player or big screen TV? Click the DVD tab, set the aspect ratio to 16: 9 or 4: 3, set the TV standard and create a DVD video.

Film / Media File Preparation: Filmora supports a variety of file formats. You can check if your file is supported by Filmora here. Be sure to save the file to your computer or storage drive.
Review System Requirements: Review Filmora’s system requirements to ensure that your Mac meets these requirements for the best user experience.
Create a new project or open a recently used project
1 To create a new project, select a video aspect ratio and click New Project.
2 Click Open Project to open an existing project. Importing

Media Files Imports
video footage, audio, or other media files. To import media files, you can:
1 Click the “+” icon to browse to a local file on your Mac and add a file.
2 Drag and drop the media file into the Media Library area.
3 Import media files from an external device.
4 Import using the Instant Cutter tool.

Media File Placement on the Timeline To place a clip or sequence of other media files, you can:
Drag the video, audio, and images into the timeline window and place them in the order you want. Apply Transitions and Effects
Transitions and effects help make your video more eye-catching. The Transitions and Effects panel contains various transitions and effects that you can apply. Adding a title
Filmora has a number of title templates. What you can do:
1 Select an existing title template in the Title section, enter text and save.
2 Click the text to adjust the text style. You can save it as a custom for later use.

Color Editing
Filmora has multiple color editing options. You can do the following.
Improves video color.
Adjust the white balance.
Tone changes: Contrast, Saturation, Brightness.
2 Match the colors of two different clips.
To edit the color, double-click the clip, click Color, change the parameters, and then click Save. If you need more advanced editing, you can click Details. Edit Audio
Filmora has a complete audio editing solution. You can remove background noise, change audio speed, auto-normalize audio, and more.
Export videos to a supported format or post directly to the social platform.
Another way to combine multiple Xvid files into one using Avidemux
There are many different video formats, and it can be difficult to meet some of them without knowing exactly what they are. For example, Xvid files are Xviden-encoded video file formats that use the Xvid codec, rather than the formats you are used to in everyday life like the MP4 format. This program is used to compress and decompress video to the compression standard MPEG4 ASP, save disk space and file transfer speed, and open this type of file. Many modern DVD and Bluray players can play XVID files. Like a PC, any software program that can decode MPEG4 ASP-encoded video can play XVID files.
This article describes how to combine multiple Xvid files into one using Avidemux, a free video editor and encoder that supports multiple file types. Merging common video and video in Avidemux is not a big deal, but you can learn how to merge different Xvid files with this editor from the detailed article.
Therefore, first you need to change some of the settings for the selected video. Frame rate etc. Next, you need to open the first video clip, find and open the menu file option that displays the drop-down menu at the top left of the screen, and select Attach.
Step 1:
Adding Xvid Video to a program in batch
Before importing an Xvid file, you need to make sure that you have the latest version of Joyoshare Video Joiner installed on your computer. Then it’s up to you to upload the Xvid video. There are two options. Touch the Open File icon in the lower left corner, or drag directly in bulk as needed.
Step 2:
Finish setting the output format
When all the Xvid video files are loaded, click Format in the lower right corner of the main screen and select the output format. Formatting can be set in “Fast Mode” or “Encode Mode”. The only difference between the two modes is that the former is a lossless mode, which provides a 60x speed solution that stitches multiple Xvid files in their original quality, but the output format must be the same as the source video. The latter is a customizable mockup that allows you to choose any format as the output format and customize the output quality by simply clicking on the gear icon.
Step 3:
Cut Xvid Video File When you have finished setting the
output format, tap OK to save and you will be returned to the first interface. You can now crop Xvid videos as needed by simply dragging the timeline.
Step 4
Editing a Xvid file in encode mode
The Joyoshare Video Joiner is equipped with a video editor that works only in encode mode. Therefore, if you want to combine Xvid files, then click the Edit icon next to the Xvid file you just added to crop, crop, mirror, adjust brightness, watermark, apply effects, subtitles, etc. You can edit the video.
2 Ways to Merge/Combine Xvid Files on Android using Wave.video (paid software)
Wave.video allows you to easily combine two or more video clips or images to create longer videos.
To do this, go to https: //wave.video, click the New Video button and select Blank Video.

This will open a video editor and ask you to select a format.
You can then select the Upload Media (from your computer) or Select from Library (Go to Stock Library, Favorites, Purchased, Previous Uploads, and Read My Video Folders) option. The video clip is added to the editor. You can add a second clip by clicking the + sign on the timeline.

Not only can you merge original video clips, but you can also merge with stock footage, video clips, image merges or merges. Multiple images in the video.

If you add multiple video clips or images to your timeline, you can add transitions between them to “glue” them into your story. If you’re happy with how to combine video clips, go to the publishing steps to download the video or share it directly with your social media account.


2 Ways to Merge/Combine Xvid Files on Android using InShot (unpaid software)
How to merge videos on your smartphone
Smartphone apps are less functional and slower on handheld devices, so it’s usually best to edit videos on your computer.
But if you’re trying to make a simple video on the go, your smartphone will do the job. Combining videos on Android phones.
Android users, InShot is a great option for combining multiple videos.
Transitions, effects, stickers, etc. are limited by the free version of the app.
How to get started:
- Open the app and select a video option.
Other options are not related to video.

- Select the videos you want to combine from the library.
Select the videos in the order you want them to appear.

- Crop the clip to crop and polish the video
Tap the video clip section to crop the clip.
- Add a transition effect between video clips
To add a Transition, simply select the white icon on the timeline that ends one video clip and starts another.
Click to see the transitions. Only basic transitions are available in the free version. Super and glitch are available to professional users.

- Insert text to add stickers
The sticker options available in the free version of the app are limited.
- Correct the color of the clip Select the clip and click the Filter option.
Go to the Adjustment tab and modify the lighting, saturation, etc. of the clip.

- Save Video
Click Save in the upper right corner of the screen and select the desired video quality.

Merge/Combine Xvid Files on iPhone using iMovie (unpaid software)
Merge videos with iMovie on iPhone
iMovie is already installed on your iPhone.
Combine multiple video clips into one project in a few simple steps.
The method is as follows:
- Open the app and create a new project
Select Movie from the options displayed on the screen.

2nd Click Media in the upper left.
Select the video files in the order you want them to appear.

- Start editing
Click the white icon in the center of the clip to add a transition effect.

- Select Finish in the upper left corner of the screen.
Video is stored.
Note: You can apply a filter to make all video clips look the same.
Merge/Combine Xvid Files on iPhone using Biteable (paid software)
Merge videos like an expert
Biteable’s video combiner allows you to quickly merge footage and add transition effects.
From flashy dissolves to smoother slide-ins than Barry White eating ice cream, merging videos has never been easier.
Method is as follows:
- Upload video footage
First, log in to Biteable and create a new video project. Alternatively, click this link to sign up and get started in seconds.
Then select Start with Blank Video on the toolbar to start a new project or select a template. The Biteable Video Editor launches.
To add your first footage, tap the canvas, then tap Add Scene> Upload. Select the video you want to add. Then repeat this process to upload the second video.
- Merge and add transitions
This will merge the footage on the timeline. If you want to add a transition, move the mouse pointer to the area between the video clips on the timeline.
Tap the white arrow that appears and swipe up, swipe left, or select a dreamy crossfade effect.
- Click the Preview button to export the merged video
Immediately export the video and later upgrade to a premium membership to remove the small watermark.
https://biteable.com/tools/merge-videos/

Merge/Combine Xvid Files Online using ClipChamp (paid software)
Step 1. Create an account on Clipchamp
Log into your Clipchamp Create account, or join up without spending a dime to get started.

Step 2. Create a brand new task
Click on Create a Video button withinside the pinnacle proper corner. We provide plenty of codecs and templates to pick from.
Before you choose a layout or a template have a clean concept of ways you need to continue consistent with your requirement. Select an element ratio that fits the pleasant in your video.
Your element ratio can vary primarily based totally upon the platform that you`re aiming to submit the video.

Step 3. Add the motion pictures you need to merge
Now that you`ve created a brand new task at the video merger, click on the Add Media button withinside the left toolbar to import video documents into the empty task.
You can pick to tug and drop motion pictures out of your difficult drive, your phone, dropbox, google drive, or different on line storage. You may even upload inventory photos or Gifs from the inventory button at the left toolbar.
Once you`ve imported your media documents they`ll seem withinside the video merger.

Step 4. Add your motion pictures to the video merger timeline
Select the 2 movies and drag them to the editor`s timeline. After adjusting the clips to their accurate positions a inexperienced spotlight will seem round them
indicating that those documents will drop to the timeline in case you allow pass of your click on. You may also upload extra clips sequentially on your timeline relying at the requirement.
You may want to scroll beyond the clips at the timeline to alter them into areas in case your video receives longer. Your clips at the moment are located at the timeline!

Step 5. Resize and rearrange your motion pictures
We have selected a nine:sixteen ratio however our inventory photos is sixteen:nine ratio. You will want to resize your video photos. Click at the preview display then click on Crop to fill.
Drag the video throughout the display to put the video. Repeat this technique for each motion pictures. Since the motion pictures won’t be withinside the series you need them to be in,
you may have to tug and drop them to the favored series. You can trim the video without a doubt through transferring your mouse over to both give up of a clip and dragging them as consistent with your want.


Step 6. Recheck and export
Often even as enhancing or merging our motion pictures we export in a rush and recognize that we had to trim a segment a tad bit more.
This takes place to maximum folks however does now no longer fear as Clipchamp robotically saves your task and you could re-take a look at the complete video earlier than exporting it.
If you are happy with the merge of the two videos, you can click the export button in the upper right corner of the video editor.
Select the resolution for which you want to export the video file and click Next.
You can also change the aspect ratio to suit the needs of other platforms and repeat the export process.

Merge/Combine Xvid Files Online using Kapwing (unpaid software)
Step 1: Upload the video
First, upload the video to Kapwing’s video merging tool. This free tool is available for iPhone, Android, PC, or tablet in Chrome or Safari browser. Click Upload to add the videos one at a time, or select multiple clips to import them all at once.
Kapwing supports major video file types such as MP4, .FLV, .3PG. To embed a video from the web, just copy and paste the link. You can upload photos and GIFs and combine them with videos.

Think of a video that looks great when spliced together into two consecutive videos. This can be a similar color palette, an event or travel video, or a video of the same person. When
videos are uploaded, the video preview shows how they look combined. Kapwing highlights each scene with a purple box during playback.

Step 2: Place the video /photo in the desired order.
Think about which clips are next to each other and work best, and arrange them accordingly. You can drag clips to rearrange them and delete them when you no longer need them.
In the menu on the left, you can choose the format of the finished video (choose 1: 1 (square)), whether to crop the video (choose Fit to Border), and the length.

The video should be a montage photo Kapwing also has the option to crop the video clip to shorten the required section.
Creators can crop videos and remove sections from the center. To crop a clip, first select it and click Edit to open Kapwing Studio.

Drag both ends of the layer to change the timing of the start and end of the clip, or click the timing and use the arrow keys to make fine adjustments.
Besides trimming, you can look at other edits. To remove a section or add a clip in the center, use the split tool above the timeline or type “s” on your keyboard and use the shortcut.
Next, delete the layers you no longer need, drag the clips to combine them, and display them side by side on the timeline.
creators have more control over the montage by editing the scene in Studio. In Studio, you can add music to your montage,
insert title slides, attach endings, watermark corners, and animate.

Step 3: Save the merged video
When you have finished merging the video into the merged video, click Export Video in the upper right corner. Once the video is processed, you will be taken to the download page.
From here, you can save the video to your device or create a free account with your Google or Facebook login credentials to remove the watermark first.
Online Calculate and Change Video Aspect Ratio
Versatile Video Editor - Wondershare Filmora
An easy yet powerful editor
Numerous effects to choose from
Detailed tutorials provided by the official channel
While watching movies, you might have noticed specific clips have black lines at the sides of the screen. It is because the original video’s aspect ratio is different from that of the screen on which you see it.
Nowadays, people are using multiple devices with different aspect ratios. Videos are an effective marketing tool that most marketers are using to expand their business. Therefore, the video aspect ratio has become vital.
Some people feel technical aspects such as video aspect ratio or using aspect ratio editor are a bit intimidating. But they are easy and simple to understand. So, let us know more about them.
In this article
01 [How to Calculate Video Aspect Ratio Online?](#Part 1)
02 [Websites to Change Video Aspect Ratio Online](#Part 2)
Part 1 How to Calculate Video Aspect Ratio Online?
Do you want to make changes to the video? If yes, then it is important to understand the basic concepts of video aspect ratios. Moreover, you can determine the specifications using an aspect ratio editor online.
Every photo, canvas, responsive design, digital video, or frame is rectangular with precise proportions. Outline the aspect ratios to create shapes according to different mediums like computers, TV, movies, or camera screens.
With the help of aspect ratio calculators, you can calculate the image’s value and new size. You can also use it to convert the image size and keep the objects in shape to make them look natural.
The formula to find an aspect ratio is: Width / Height
Aspect Ratio Calculation Process
Calculating the aspect resolution is pretty straightforward. The steps mentioned below will help you to get the correct height for the edited image:
- Take the original height-for example, 2400 units.
- Take the actual width- for example, 3200 units.
- Then, divide the height by width- for example, 2400/3200=0.75.
- Multiply the result (quotient) by new expected width- for instance, 0.75*600=450.
- The resulting figure is a new height.
Part 2 Websites to Change Video Aspect Ratio Online
If you want to change the video aspect ratio, you can easily crop the size of the video online with the help of different websites. These websites offer other aspect ratio options. So, let us learn more about them:
Free Convert

FreeConvert.com is a free editing website that allows you to edit video aspect ratio online. Usually, it is a cloud-based editor that converts a variety of files. So, you can use it to change the video aspect ratio of your clip.
You can see various options such as aspect ratio, codec, screen resolution, or more during video file conversion. For example, you can opt for an aspect ratio as per your requirements there.
Then, this converter will fix the clip automatically in the resolution selected by you. This website can process multiple files up to 1GB at once.
Pros:
- No Pop-ups occur while converting
- It did not affect the download speed
- Easy to convert the files
Cons:
- You have a limit of 25 minutes to convert files. After that, you need to upgrade to pro by making monthly payments.
CloudConvert

Cloud Convert is a file conversion service supporting around 200 file formats online for free. You can adjust the aspect ratio of videos on this website easily.
You have to upload a video clip and select its output format as per your original file. Then go to output video configuration to change the aspect ratio there. Choose the aspect ratio from the options given.
Pros:
- Several conversion options for high-quality files
- Supports cloud services
- Platform independent
- User-friendly
- Supports batch conversion
- It offers a powerful API
Cons:
- Get 25 minutes a day to convert the files
Kapwing

It is a free online aspect ratio editor to create content online. This tool has several features and a collection of online material. For example, through this aspect ratio editor, you can crop the size of video online.
You can select or resize video aspect ratio according to different social media platforms. But you can export only 720 p quality through this website for free after that; you have to create an account.
Pros:
- Merge multiple videos or images collectively in any order and add audio.
- Reduce the video size of any format with a single click.
- Add video subtitles
- Resize or crop videos for all social media posts.
- Cut out multiple sections of a video.
Cons:
- 250MB file upload limit
- Export only in 720p quality
- Export video clips for 7 minutes
- Edit or store content till two days
IMOVIE

Try the iMovie iPhone aspect ratio editor if you want to drag or drop the interface for editing videos simply. It has primitive tools to edit videos or images, and you can also import content from local drives or cloud storage with it.
It offers various visual effects like picture-in-picture, split-screen, or green screen effects. You can also enable viewers to zoom in or pass the scenes. Imovie set aspect ratio gives videos a cinematic feel using its 13 different video filters.
Pros:
- It has a simple interface.
- Its 4K resolution support allows you to give a cinematic feel to videos.
- iMovie has great speed controls that enable you for optimal pace-setting of scenes.
Cons:
- It does not have many output controls options.
- It only works on Mac systems.
Wondershare Filmora
If you permanently want to change the aspect ratio online, you must opt for a video converter or editor. Wondershare Filmora is the most remarkable aspect ratio editor that allows you to easily create videos of 4:3, 9:16, 16:9, and 1:1 aspect ratios.
Moreover, it is a convenient tool to edit videos on YouTube, Apple TV, Vimeo, or mobile devices. So, many YouTubers or bloggers are using it.
It is a reliable and cost-effective tool that offers drop and drag effects, audio, templates, soundtracks, filters, and other options. In addition, you can access features like split-screen, green screen, motion tracking, etc.
Its keyframing feature allows you to include custom animations, while motion tracking helps you track objects. Then, the color matching feature enables you to copy the color settings of one video and apply them to another clip.
You can even assign hotkeys shortcuts for various tools to save your time. Moreover, you can use different transitions, motion elements, filters, clips, titles, audios, and many other things with a simple drag and drop option.
Wondershare Filmora
Get started easily with Filmora’s powerful performance, intuitive interface, and countless effects!
Try It Free Try It Free Try It Free Learn More >

With its green screen feature, you can remove or change the video background. Then, you have an audio ducking feature to lower down the background volume or fade the audio track to another.
Here are various methods to change the aspect ratio in Wondershare Filmora:
Method 1: Change Aspect Ratio at the Starting Interface
Wondershare Filmora allows you to resize video aspect ratio when you launch the editor program. First, go to the drop-down menu button. Then, click on it to see various aspect ratios such as 16:9, 1:1, 4:3, 9:16, or 21:9.
Choose the aspect ratio that you want by simply clicking on it.

Method 2: Change Aspect Ratio under Project Settings
You can change the aspect ratio by clicking on the “Project Settings.” You can decide the target aspect ratio based on the aspect ratio of the media source.
For instance, if the aspect ratio of media source files is 4:3, select the standard aspect ratio of 4:3. Then, media files with other aspect ratios will show black bars.
In case of any discordance or if you want to change the aspect ratio, choose the proper ratio from project settings.

Method 3: Change Aspect Ratio during Editing
Even after importing the videos or images into Filmora’s timeline, you can easily change the ratio from the Crop and Zoom tool.
- Go to timeline and right-click on the video clip. Then, select “Crop and Zoom.” You will see the pop-up window.
- Click on 16:9, 4:3, 1:1, or 9:16 manually at the bottom if you like to change the video aspect ratio.
- You can also manually enter the video aspect ratio. Next, click on the “Ok” button.

After changing the aspect ratio, add background blur effects if you notice a black bar. It will enhance the video. You can also intensify your video by using filters, visual effects, overlays, or titles.

Method 4: Change the Aspect Ratio with Auto-Reframe
If you use Filmora’s latest versions, you will notice Auto Reframe helps to change the aspect ratio. Other than cropping, it will find the object in clips and crop it automatically if needed.
The following are steps to change the aspect ratio using the Auto-Reframe option:
Step1 Once you upload the video clips to the media library, right-click on it and choose the Auto-Reframe option

Step2 You will see the Auto Reframe window appear on the screen. Replace the existing video with a new clip. Then, change the video aspect ratio and video motion speed. Make sure to change the aspect ratio that fits most with different social media platforms

Step3 Once you choose the aspect ratio, click on the “Analyze” button. Filmora will Auto-Reframe the video itself. Once the process completes, you can see results in the preview window
Drag box to adjust the frame or to keep the object in it. It will automatically remove the content outside the box.

Step4 After completing adjustment or reframing, click on the “Export” button to save your video
Change the name of the video and select the location where you want to save the video. Now, click on the “Export” again to save.

Method 5: Change Aspect Ratio at Exporting
You can save the clip to your system or smartphones, depending on your requirements. Then, upload them directly to Youtube or burn them into DVD by clicking on the “Export button.” In this way, you can watch on widescreen or standard TV whenever you want.

● Change Aspect Ratio for the Local Computer
First, you will see the “Local” tab. There you can save the clip in a particular aspect ratio to your system.
You can see all resolutions with various aspect ratios after selecting the format. The output video depends on the media click resolution.
● Change Aspect Ratio for a Device
Change the “Device” tab to save the video in formats compatible with popular devices, including iPod, iPhone, PSP, iPad, etc. Once you choose the device, you will see all resolutions. Choose your favorite or the best resolution.
The video quality will continue improving with higher resolutions. But it will also increase the size of the file.
● Change Aspect Ratio for YouTube
Go to the “YouTube” tab and fill in the information. Then, click the “Export” button. Selecting the aspect ratio again is not necessary. It will directly upload your videos to YouTube.
● Change Aspect Ratio for DVD TV
When you go to the “DVD” tab, you will notice various aspect ratio options. Switching the aspect ratio for TV from 4:3 to 16:9 is pretty straightforward. To do so, select what you think is right.
Conclusion
From the article above, you have learned about different online converters. Now you know how to change the video aspect ratio online and use the video aspect ratio editor. Also, understand how to calculate aspect ratios.
So, you can decide for yourself that Wondershare Filmora video editor is one of the best tools. Using its different methods you can change the aspect ratio easily.
Furthermore, you can use it to make changes on both social media platforms and your devices because it is an effective and reliable tool.
For Win 7 or later (64-bit)
For macOS 10.12 or later
While watching movies, you might have noticed specific clips have black lines at the sides of the screen. It is because the original video’s aspect ratio is different from that of the screen on which you see it.
Nowadays, people are using multiple devices with different aspect ratios. Videos are an effective marketing tool that most marketers are using to expand their business. Therefore, the video aspect ratio has become vital.
Some people feel technical aspects such as video aspect ratio or using aspect ratio editor are a bit intimidating. But they are easy and simple to understand. So, let us know more about them.
In this article
01 [How to Calculate Video Aspect Ratio Online?](#Part 1)
02 [Websites to Change Video Aspect Ratio Online](#Part 2)
Part 1 How to Calculate Video Aspect Ratio Online?
Do you want to make changes to the video? If yes, then it is important to understand the basic concepts of video aspect ratios. Moreover, you can determine the specifications using an aspect ratio editor online.
Every photo, canvas, responsive design, digital video, or frame is rectangular with precise proportions. Outline the aspect ratios to create shapes according to different mediums like computers, TV, movies, or camera screens.
With the help of aspect ratio calculators, you can calculate the image’s value and new size. You can also use it to convert the image size and keep the objects in shape to make them look natural.
The formula to find an aspect ratio is: Width / Height
Aspect Ratio Calculation Process
Calculating the aspect resolution is pretty straightforward. The steps mentioned below will help you to get the correct height for the edited image:
- Take the original height-for example, 2400 units.
- Take the actual width- for example, 3200 units.
- Then, divide the height by width- for example, 2400/3200=0.75.
- Multiply the result (quotient) by new expected width- for instance, 0.75*600=450.
- The resulting figure is a new height.
Part 2 Websites to Change Video Aspect Ratio Online
If you want to change the video aspect ratio, you can easily crop the size of the video online with the help of different websites. These websites offer other aspect ratio options. So, let us learn more about them:
Free Convert

FreeConvert.com is a free editing website that allows you to edit video aspect ratio online. Usually, it is a cloud-based editor that converts a variety of files. So, you can use it to change the video aspect ratio of your clip.
You can see various options such as aspect ratio, codec, screen resolution, or more during video file conversion. For example, you can opt for an aspect ratio as per your requirements there.
Then, this converter will fix the clip automatically in the resolution selected by you. This website can process multiple files up to 1GB at once.
Pros:
- No Pop-ups occur while converting
- It did not affect the download speed
- Easy to convert the files
Cons:
- You have a limit of 25 minutes to convert files. After that, you need to upgrade to pro by making monthly payments.
CloudConvert

Cloud Convert is a file conversion service supporting around 200 file formats online for free. You can adjust the aspect ratio of videos on this website easily.
You have to upload a video clip and select its output format as per your original file. Then go to output video configuration to change the aspect ratio there. Choose the aspect ratio from the options given.
Pros:
- Several conversion options for high-quality files
- Supports cloud services
- Platform independent
- User-friendly
- Supports batch conversion
- It offers a powerful API
Cons:
- Get 25 minutes a day to convert the files
Kapwing

It is a free online aspect ratio editor to create content online. This tool has several features and a collection of online material. For example, through this aspect ratio editor, you can crop the size of video online.
You can select or resize video aspect ratio according to different social media platforms. But you can export only 720 p quality through this website for free after that; you have to create an account.
Pros:
- Merge multiple videos or images collectively in any order and add audio.
- Reduce the video size of any format with a single click.
- Add video subtitles
- Resize or crop videos for all social media posts.
- Cut out multiple sections of a video.
Cons:
- 250MB file upload limit
- Export only in 720p quality
- Export video clips for 7 minutes
- Edit or store content till two days
IMOVIE

Try the iMovie iPhone aspect ratio editor if you want to drag or drop the interface for editing videos simply. It has primitive tools to edit videos or images, and you can also import content from local drives or cloud storage with it.
It offers various visual effects like picture-in-picture, split-screen, or green screen effects. You can also enable viewers to zoom in or pass the scenes. Imovie set aspect ratio gives videos a cinematic feel using its 13 different video filters.
Pros:
- It has a simple interface.
- Its 4K resolution support allows you to give a cinematic feel to videos.
- iMovie has great speed controls that enable you for optimal pace-setting of scenes.
Cons:
- It does not have many output controls options.
- It only works on Mac systems.
Wondershare Filmora
If you permanently want to change the aspect ratio online, you must opt for a video converter or editor. Wondershare Filmora is the most remarkable aspect ratio editor that allows you to easily create videos of 4:3, 9:16, 16:9, and 1:1 aspect ratios.
Moreover, it is a convenient tool to edit videos on YouTube, Apple TV, Vimeo, or mobile devices. So, many YouTubers or bloggers are using it.
It is a reliable and cost-effective tool that offers drop and drag effects, audio, templates, soundtracks, filters, and other options. In addition, you can access features like split-screen, green screen, motion tracking, etc.
Its keyframing feature allows you to include custom animations, while motion tracking helps you track objects. Then, the color matching feature enables you to copy the color settings of one video and apply them to another clip.
You can even assign hotkeys shortcuts for various tools to save your time. Moreover, you can use different transitions, motion elements, filters, clips, titles, audios, and many other things with a simple drag and drop option.
Wondershare Filmora
Get started easily with Filmora’s powerful performance, intuitive interface, and countless effects!
Try It Free Try It Free Try It Free Learn More >

With its green screen feature, you can remove or change the video background. Then, you have an audio ducking feature to lower down the background volume or fade the audio track to another.
Here are various methods to change the aspect ratio in Wondershare Filmora:
Method 1: Change Aspect Ratio at the Starting Interface
Wondershare Filmora allows you to resize video aspect ratio when you launch the editor program. First, go to the drop-down menu button. Then, click on it to see various aspect ratios such as 16:9, 1:1, 4:3, 9:16, or 21:9.
Choose the aspect ratio that you want by simply clicking on it.

Method 2: Change Aspect Ratio under Project Settings
You can change the aspect ratio by clicking on the “Project Settings.” You can decide the target aspect ratio based on the aspect ratio of the media source.
For instance, if the aspect ratio of media source files is 4:3, select the standard aspect ratio of 4:3. Then, media files with other aspect ratios will show black bars.
In case of any discordance or if you want to change the aspect ratio, choose the proper ratio from project settings.

Method 3: Change Aspect Ratio during Editing
Even after importing the videos or images into Filmora’s timeline, you can easily change the ratio from the Crop and Zoom tool.
- Go to timeline and right-click on the video clip. Then, select “Crop and Zoom.” You will see the pop-up window.
- Click on 16:9, 4:3, 1:1, or 9:16 manually at the bottom if you like to change the video aspect ratio.
- You can also manually enter the video aspect ratio. Next, click on the “Ok” button.

After changing the aspect ratio, add background blur effects if you notice a black bar. It will enhance the video. You can also intensify your video by using filters, visual effects, overlays, or titles.

Method 4: Change the Aspect Ratio with Auto-Reframe
If you use Filmora’s latest versions, you will notice Auto Reframe helps to change the aspect ratio. Other than cropping, it will find the object in clips and crop it automatically if needed.
The following are steps to change the aspect ratio using the Auto-Reframe option:
Step1 Once you upload the video clips to the media library, right-click on it and choose the Auto-Reframe option

Step2 You will see the Auto Reframe window appear on the screen. Replace the existing video with a new clip. Then, change the video aspect ratio and video motion speed. Make sure to change the aspect ratio that fits most with different social media platforms

Step3 Once you choose the aspect ratio, click on the “Analyze” button. Filmora will Auto-Reframe the video itself. Once the process completes, you can see results in the preview window
Drag box to adjust the frame or to keep the object in it. It will automatically remove the content outside the box.

Step4 After completing adjustment or reframing, click on the “Export” button to save your video
Change the name of the video and select the location where you want to save the video. Now, click on the “Export” again to save.

Method 5: Change Aspect Ratio at Exporting
You can save the clip to your system or smartphones, depending on your requirements. Then, upload them directly to Youtube or burn them into DVD by clicking on the “Export button.” In this way, you can watch on widescreen or standard TV whenever you want.

● Change Aspect Ratio for the Local Computer
First, you will see the “Local” tab. There you can save the clip in a particular aspect ratio to your system.
You can see all resolutions with various aspect ratios after selecting the format. The output video depends on the media click resolution.
● Change Aspect Ratio for a Device
Change the “Device” tab to save the video in formats compatible with popular devices, including iPod, iPhone, PSP, iPad, etc. Once you choose the device, you will see all resolutions. Choose your favorite or the best resolution.
The video quality will continue improving with higher resolutions. But it will also increase the size of the file.
● Change Aspect Ratio for YouTube
Go to the “YouTube” tab and fill in the information. Then, click the “Export” button. Selecting the aspect ratio again is not necessary. It will directly upload your videos to YouTube.
● Change Aspect Ratio for DVD TV
When you go to the “DVD” tab, you will notice various aspect ratio options. Switching the aspect ratio for TV from 4:3 to 16:9 is pretty straightforward. To do so, select what you think is right.
Conclusion
From the article above, you have learned about different online converters. Now you know how to change the video aspect ratio online and use the video aspect ratio editor. Also, understand how to calculate aspect ratios.
So, you can decide for yourself that Wondershare Filmora video editor is one of the best tools. Using its different methods you can change the aspect ratio easily.
Furthermore, you can use it to make changes on both social media platforms and your devices because it is an effective and reliable tool.
For Win 7 or later (64-bit)
For macOS 10.12 or later
While watching movies, you might have noticed specific clips have black lines at the sides of the screen. It is because the original video’s aspect ratio is different from that of the screen on which you see it.
Nowadays, people are using multiple devices with different aspect ratios. Videos are an effective marketing tool that most marketers are using to expand their business. Therefore, the video aspect ratio has become vital.
Some people feel technical aspects such as video aspect ratio or using aspect ratio editor are a bit intimidating. But they are easy and simple to understand. So, let us know more about them.
In this article
01 [How to Calculate Video Aspect Ratio Online?](#Part 1)
02 [Websites to Change Video Aspect Ratio Online](#Part 2)
Part 1 How to Calculate Video Aspect Ratio Online?
Do you want to make changes to the video? If yes, then it is important to understand the basic concepts of video aspect ratios. Moreover, you can determine the specifications using an aspect ratio editor online.
Every photo, canvas, responsive design, digital video, or frame is rectangular with precise proportions. Outline the aspect ratios to create shapes according to different mediums like computers, TV, movies, or camera screens.
With the help of aspect ratio calculators, you can calculate the image’s value and new size. You can also use it to convert the image size and keep the objects in shape to make them look natural.
The formula to find an aspect ratio is: Width / Height
Aspect Ratio Calculation Process
Calculating the aspect resolution is pretty straightforward. The steps mentioned below will help you to get the correct height for the edited image:
- Take the original height-for example, 2400 units.
- Take the actual width- for example, 3200 units.
- Then, divide the height by width- for example, 2400/3200=0.75.
- Multiply the result (quotient) by new expected width- for instance, 0.75*600=450.
- The resulting figure is a new height.
Part 2 Websites to Change Video Aspect Ratio Online
If you want to change the video aspect ratio, you can easily crop the size of the video online with the help of different websites. These websites offer other aspect ratio options. So, let us learn more about them:
Free Convert

FreeConvert.com is a free editing website that allows you to edit video aspect ratio online. Usually, it is a cloud-based editor that converts a variety of files. So, you can use it to change the video aspect ratio of your clip.
You can see various options such as aspect ratio, codec, screen resolution, or more during video file conversion. For example, you can opt for an aspect ratio as per your requirements there.
Then, this converter will fix the clip automatically in the resolution selected by you. This website can process multiple files up to 1GB at once.
Pros:
- No Pop-ups occur while converting
- It did not affect the download speed
- Easy to convert the files
Cons:
- You have a limit of 25 minutes to convert files. After that, you need to upgrade to pro by making monthly payments.
CloudConvert

Cloud Convert is a file conversion service supporting around 200 file formats online for free. You can adjust the aspect ratio of videos on this website easily.
You have to upload a video clip and select its output format as per your original file. Then go to output video configuration to change the aspect ratio there. Choose the aspect ratio from the options given.
Pros:
- Several conversion options for high-quality files
- Supports cloud services
- Platform independent
- User-friendly
- Supports batch conversion
- It offers a powerful API
Cons:
- Get 25 minutes a day to convert the files
Kapwing

It is a free online aspect ratio editor to create content online. This tool has several features and a collection of online material. For example, through this aspect ratio editor, you can crop the size of video online.
You can select or resize video aspect ratio according to different social media platforms. But you can export only 720 p quality through this website for free after that; you have to create an account.
Pros:
- Merge multiple videos or images collectively in any order and add audio.
- Reduce the video size of any format with a single click.
- Add video subtitles
- Resize or crop videos for all social media posts.
- Cut out multiple sections of a video.
Cons:
- 250MB file upload limit
- Export only in 720p quality
- Export video clips for 7 minutes
- Edit or store content till two days
IMOVIE

Try the iMovie iPhone aspect ratio editor if you want to drag or drop the interface for editing videos simply. It has primitive tools to edit videos or images, and you can also import content from local drives or cloud storage with it.
It offers various visual effects like picture-in-picture, split-screen, or green screen effects. You can also enable viewers to zoom in or pass the scenes. Imovie set aspect ratio gives videos a cinematic feel using its 13 different video filters.
Pros:
- It has a simple interface.
- Its 4K resolution support allows you to give a cinematic feel to videos.
- iMovie has great speed controls that enable you for optimal pace-setting of scenes.
Cons:
- It does not have many output controls options.
- It only works on Mac systems.
Wondershare Filmora
If you permanently want to change the aspect ratio online, you must opt for a video converter or editor. Wondershare Filmora is the most remarkable aspect ratio editor that allows you to easily create videos of 4:3, 9:16, 16:9, and 1:1 aspect ratios.
Moreover, it is a convenient tool to edit videos on YouTube, Apple TV, Vimeo, or mobile devices. So, many YouTubers or bloggers are using it.
It is a reliable and cost-effective tool that offers drop and drag effects, audio, templates, soundtracks, filters, and other options. In addition, you can access features like split-screen, green screen, motion tracking, etc.
Its keyframing feature allows you to include custom animations, while motion tracking helps you track objects. Then, the color matching feature enables you to copy the color settings of one video and apply them to another clip.
You can even assign hotkeys shortcuts for various tools to save your time. Moreover, you can use different transitions, motion elements, filters, clips, titles, audios, and many other things with a simple drag and drop option.
Wondershare Filmora
Get started easily with Filmora’s powerful performance, intuitive interface, and countless effects!
Try It Free Try It Free Try It Free Learn More >

With its green screen feature, you can remove or change the video background. Then, you have an audio ducking feature to lower down the background volume or fade the audio track to another.
Here are various methods to change the aspect ratio in Wondershare Filmora:
Method 1: Change Aspect Ratio at the Starting Interface
Wondershare Filmora allows you to resize video aspect ratio when you launch the editor program. First, go to the drop-down menu button. Then, click on it to see various aspect ratios such as 16:9, 1:1, 4:3, 9:16, or 21:9.
Choose the aspect ratio that you want by simply clicking on it.

Method 2: Change Aspect Ratio under Project Settings
You can change the aspect ratio by clicking on the “Project Settings.” You can decide the target aspect ratio based on the aspect ratio of the media source.
For instance, if the aspect ratio of media source files is 4:3, select the standard aspect ratio of 4:3. Then, media files with other aspect ratios will show black bars.
In case of any discordance or if you want to change the aspect ratio, choose the proper ratio from project settings.

Method 3: Change Aspect Ratio during Editing
Even after importing the videos or images into Filmora’s timeline, you can easily change the ratio from the Crop and Zoom tool.
- Go to timeline and right-click on the video clip. Then, select “Crop and Zoom.” You will see the pop-up window.
- Click on 16:9, 4:3, 1:1, or 9:16 manually at the bottom if you like to change the video aspect ratio.
- You can also manually enter the video aspect ratio. Next, click on the “Ok” button.

After changing the aspect ratio, add background blur effects if you notice a black bar. It will enhance the video. You can also intensify your video by using filters, visual effects, overlays, or titles.

Method 4: Change the Aspect Ratio with Auto-Reframe
If you use Filmora’s latest versions, you will notice Auto Reframe helps to change the aspect ratio. Other than cropping, it will find the object in clips and crop it automatically if needed.
The following are steps to change the aspect ratio using the Auto-Reframe option:
Step1 Once you upload the video clips to the media library, right-click on it and choose the Auto-Reframe option

Step2 You will see the Auto Reframe window appear on the screen. Replace the existing video with a new clip. Then, change the video aspect ratio and video motion speed. Make sure to change the aspect ratio that fits most with different social media platforms

Step3 Once you choose the aspect ratio, click on the “Analyze” button. Filmora will Auto-Reframe the video itself. Once the process completes, you can see results in the preview window
Drag box to adjust the frame or to keep the object in it. It will automatically remove the content outside the box.

Step4 After completing adjustment or reframing, click on the “Export” button to save your video
Change the name of the video and select the location where you want to save the video. Now, click on the “Export” again to save.

Method 5: Change Aspect Ratio at Exporting
You can save the clip to your system or smartphones, depending on your requirements. Then, upload them directly to Youtube or burn them into DVD by clicking on the “Export button.” In this way, you can watch on widescreen or standard TV whenever you want.

● Change Aspect Ratio for the Local Computer
First, you will see the “Local” tab. There you can save the clip in a particular aspect ratio to your system.
You can see all resolutions with various aspect ratios after selecting the format. The output video depends on the media click resolution.
● Change Aspect Ratio for a Device
Change the “Device” tab to save the video in formats compatible with popular devices, including iPod, iPhone, PSP, iPad, etc. Once you choose the device, you will see all resolutions. Choose your favorite or the best resolution.
The video quality will continue improving with higher resolutions. But it will also increase the size of the file.
● Change Aspect Ratio for YouTube
Go to the “YouTube” tab and fill in the information. Then, click the “Export” button. Selecting the aspect ratio again is not necessary. It will directly upload your videos to YouTube.
● Change Aspect Ratio for DVD TV
When you go to the “DVD” tab, you will notice various aspect ratio options. Switching the aspect ratio for TV from 4:3 to 16:9 is pretty straightforward. To do so, select what you think is right.
Conclusion
From the article above, you have learned about different online converters. Now you know how to change the video aspect ratio online and use the video aspect ratio editor. Also, understand how to calculate aspect ratios.
So, you can decide for yourself that Wondershare Filmora video editor is one of the best tools. Using its different methods you can change the aspect ratio easily.
Furthermore, you can use it to make changes on both social media platforms and your devices because it is an effective and reliable tool.
For Win 7 or later (64-bit)
For macOS 10.12 or later
While watching movies, you might have noticed specific clips have black lines at the sides of the screen. It is because the original video’s aspect ratio is different from that of the screen on which you see it.
Nowadays, people are using multiple devices with different aspect ratios. Videos are an effective marketing tool that most marketers are using to expand their business. Therefore, the video aspect ratio has become vital.
Some people feel technical aspects such as video aspect ratio or using aspect ratio editor are a bit intimidating. But they are easy and simple to understand. So, let us know more about them.
In this article
01 [How to Calculate Video Aspect Ratio Online?](#Part 1)
02 [Websites to Change Video Aspect Ratio Online](#Part 2)
Part 1 How to Calculate Video Aspect Ratio Online?
Do you want to make changes to the video? If yes, then it is important to understand the basic concepts of video aspect ratios. Moreover, you can determine the specifications using an aspect ratio editor online.
Every photo, canvas, responsive design, digital video, or frame is rectangular with precise proportions. Outline the aspect ratios to create shapes according to different mediums like computers, TV, movies, or camera screens.
With the help of aspect ratio calculators, you can calculate the image’s value and new size. You can also use it to convert the image size and keep the objects in shape to make them look natural.
The formula to find an aspect ratio is: Width / Height
Aspect Ratio Calculation Process
Calculating the aspect resolution is pretty straightforward. The steps mentioned below will help you to get the correct height for the edited image:
- Take the original height-for example, 2400 units.
- Take the actual width- for example, 3200 units.
- Then, divide the height by width- for example, 2400/3200=0.75.
- Multiply the result (quotient) by new expected width- for instance, 0.75*600=450.
- The resulting figure is a new height.
Part 2 Websites to Change Video Aspect Ratio Online
If you want to change the video aspect ratio, you can easily crop the size of the video online with the help of different websites. These websites offer other aspect ratio options. So, let us learn more about them:
Free Convert

FreeConvert.com is a free editing website that allows you to edit video aspect ratio online. Usually, it is a cloud-based editor that converts a variety of files. So, you can use it to change the video aspect ratio of your clip.
You can see various options such as aspect ratio, codec, screen resolution, or more during video file conversion. For example, you can opt for an aspect ratio as per your requirements there.
Then, this converter will fix the clip automatically in the resolution selected by you. This website can process multiple files up to 1GB at once.
Pros:
- No Pop-ups occur while converting
- It did not affect the download speed
- Easy to convert the files
Cons:
- You have a limit of 25 minutes to convert files. After that, you need to upgrade to pro by making monthly payments.
CloudConvert

Cloud Convert is a file conversion service supporting around 200 file formats online for free. You can adjust the aspect ratio of videos on this website easily.
You have to upload a video clip and select its output format as per your original file. Then go to output video configuration to change the aspect ratio there. Choose the aspect ratio from the options given.
Pros:
- Several conversion options for high-quality files
- Supports cloud services
- Platform independent
- User-friendly
- Supports batch conversion
- It offers a powerful API
Cons:
- Get 25 minutes a day to convert the files
Kapwing

It is a free online aspect ratio editor to create content online. This tool has several features and a collection of online material. For example, through this aspect ratio editor, you can crop the size of video online.
You can select or resize video aspect ratio according to different social media platforms. But you can export only 720 p quality through this website for free after that; you have to create an account.
Pros:
- Merge multiple videos or images collectively in any order and add audio.
- Reduce the video size of any format with a single click.
- Add video subtitles
- Resize or crop videos for all social media posts.
- Cut out multiple sections of a video.
Cons:
- 250MB file upload limit
- Export only in 720p quality
- Export video clips for 7 minutes
- Edit or store content till two days
IMOVIE

Try the iMovie iPhone aspect ratio editor if you want to drag or drop the interface for editing videos simply. It has primitive tools to edit videos or images, and you can also import content from local drives or cloud storage with it.
It offers various visual effects like picture-in-picture, split-screen, or green screen effects. You can also enable viewers to zoom in or pass the scenes. Imovie set aspect ratio gives videos a cinematic feel using its 13 different video filters.
Pros:
- It has a simple interface.
- Its 4K resolution support allows you to give a cinematic feel to videos.
- iMovie has great speed controls that enable you for optimal pace-setting of scenes.
Cons:
- It does not have many output controls options.
- It only works on Mac systems.
Wondershare Filmora
If you permanently want to change the aspect ratio online, you must opt for a video converter or editor. Wondershare Filmora is the most remarkable aspect ratio editor that allows you to easily create videos of 4:3, 9:16, 16:9, and 1:1 aspect ratios.
Moreover, it is a convenient tool to edit videos on YouTube, Apple TV, Vimeo, or mobile devices. So, many YouTubers or bloggers are using it.
It is a reliable and cost-effective tool that offers drop and drag effects, audio, templates, soundtracks, filters, and other options. In addition, you can access features like split-screen, green screen, motion tracking, etc.
Its keyframing feature allows you to include custom animations, while motion tracking helps you track objects. Then, the color matching feature enables you to copy the color settings of one video and apply them to another clip.
You can even assign hotkeys shortcuts for various tools to save your time. Moreover, you can use different transitions, motion elements, filters, clips, titles, audios, and many other things with a simple drag and drop option.
Wondershare Filmora
Get started easily with Filmora’s powerful performance, intuitive interface, and countless effects!
Try It Free Try It Free Try It Free Learn More >

With its green screen feature, you can remove or change the video background. Then, you have an audio ducking feature to lower down the background volume or fade the audio track to another.
Here are various methods to change the aspect ratio in Wondershare Filmora:
Method 1: Change Aspect Ratio at the Starting Interface
Wondershare Filmora allows you to resize video aspect ratio when you launch the editor program. First, go to the drop-down menu button. Then, click on it to see various aspect ratios such as 16:9, 1:1, 4:3, 9:16, or 21:9.
Choose the aspect ratio that you want by simply clicking on it.

Method 2: Change Aspect Ratio under Project Settings
You can change the aspect ratio by clicking on the “Project Settings.” You can decide the target aspect ratio based on the aspect ratio of the media source.
For instance, if the aspect ratio of media source files is 4:3, select the standard aspect ratio of 4:3. Then, media files with other aspect ratios will show black bars.
In case of any discordance or if you want to change the aspect ratio, choose the proper ratio from project settings.

Method 3: Change Aspect Ratio during Editing
Even after importing the videos or images into Filmora’s timeline, you can easily change the ratio from the Crop and Zoom tool.
- Go to timeline and right-click on the video clip. Then, select “Crop and Zoom.” You will see the pop-up window.
- Click on 16:9, 4:3, 1:1, or 9:16 manually at the bottom if you like to change the video aspect ratio.
- You can also manually enter the video aspect ratio. Next, click on the “Ok” button.

After changing the aspect ratio, add background blur effects if you notice a black bar. It will enhance the video. You can also intensify your video by using filters, visual effects, overlays, or titles.

Method 4: Change the Aspect Ratio with Auto-Reframe
If you use Filmora’s latest versions, you will notice Auto Reframe helps to change the aspect ratio. Other than cropping, it will find the object in clips and crop it automatically if needed.
The following are steps to change the aspect ratio using the Auto-Reframe option:
Step1 Once you upload the video clips to the media library, right-click on it and choose the Auto-Reframe option

Step2 You will see the Auto Reframe window appear on the screen. Replace the existing video with a new clip. Then, change the video aspect ratio and video motion speed. Make sure to change the aspect ratio that fits most with different social media platforms

Step3 Once you choose the aspect ratio, click on the “Analyze” button. Filmora will Auto-Reframe the video itself. Once the process completes, you can see results in the preview window
Drag box to adjust the frame or to keep the object in it. It will automatically remove the content outside the box.

Step4 After completing adjustment or reframing, click on the “Export” button to save your video
Change the name of the video and select the location where you want to save the video. Now, click on the “Export” again to save.

Method 5: Change Aspect Ratio at Exporting
You can save the clip to your system or smartphones, depending on your requirements. Then, upload them directly to Youtube or burn them into DVD by clicking on the “Export button.” In this way, you can watch on widescreen or standard TV whenever you want.

● Change Aspect Ratio for the Local Computer
First, you will see the “Local” tab. There you can save the clip in a particular aspect ratio to your system.
You can see all resolutions with various aspect ratios after selecting the format. The output video depends on the media click resolution.
● Change Aspect Ratio for a Device
Change the “Device” tab to save the video in formats compatible with popular devices, including iPod, iPhone, PSP, iPad, etc. Once you choose the device, you will see all resolutions. Choose your favorite or the best resolution.
The video quality will continue improving with higher resolutions. But it will also increase the size of the file.
● Change Aspect Ratio for YouTube
Go to the “YouTube” tab and fill in the information. Then, click the “Export” button. Selecting the aspect ratio again is not necessary. It will directly upload your videos to YouTube.
● Change Aspect Ratio for DVD TV
When you go to the “DVD” tab, you will notice various aspect ratio options. Switching the aspect ratio for TV from 4:3 to 16:9 is pretty straightforward. To do so, select what you think is right.
Conclusion
From the article above, you have learned about different online converters. Now you know how to change the video aspect ratio online and use the video aspect ratio editor. Also, understand how to calculate aspect ratios.
So, you can decide for yourself that Wondershare Filmora video editor is one of the best tools. Using its different methods you can change the aspect ratio easily.
Furthermore, you can use it to make changes on both social media platforms and your devices because it is an effective and reliable tool.
For Win 7 or later (64-bit)
For macOS 10.12 or later
Best Tips for Camtasia Freeze-Frame
Best Tips of Camtasia Freeze Frame
An easy yet powerful editor
Numerous effects to choose from
Detailed tutorials provided by the official channel
A freeze-frame is a technique whereby editors can suddenly halt motion in a film to make it look like a photograph. Then the still shot in the movie is usually used to create suspense or add emphasis to a scene. When freeze-frame gets added at the film’s end, it leaves the viewer guessing what will happen next.

Freezing or extending a frame will allow users to pace their video better. More importantly, freeze-frame applies on a per track basis, which helps buy users more time for a voiceover or an annotation. This article will teach you how to freeze-frame in Camtasia perfectly.
In this article
01 [How to Do Freeze-frame or Extended Frame in Camtasia?](#Part 1)
02 [What’s the Best Freeze-frame Video Editing Effect in Camtasia?](#Part 2)
03 [Best 5 Alternatives to Freeze-frame](#Part 3)
Part 1 How to Do Freeze-frame or Extended Frame in Camtasia?
If you are looking to bring in more creativity to your video clips by doing freeze-frame in Camtasia or extend frame, here is a step-by-step guide:
Step 1: Select the Video Part and Enter Duration
You have to move the Playhead to the frame if you want to extend. Then right-click on the track you wish to extend to choose the Extend Frame option or press shift+E.
For the keyboard shortcut to work, select the track first.
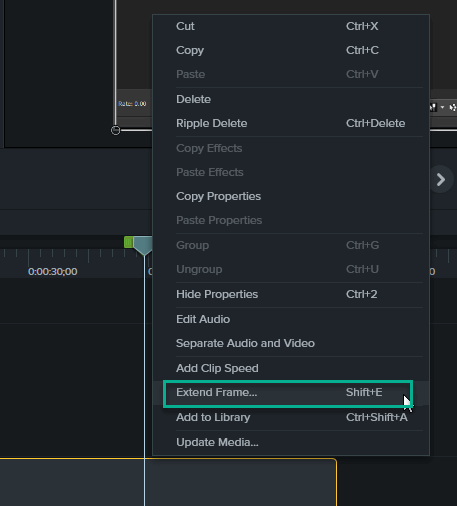
Now, enter the desired duration in seconds.
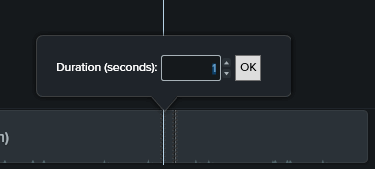
This will, in turn, create a stitched clip, provided that the auto-stitch in preferences hasn’t been disabled.
In addition, if the auto-stitch has been disabled, the clip will be split into three, as shown below, with the middle clip containing the extended frame.

Step 2: Change the Duration
To change the freeze duration in Camtasia freeze frame, right-click on the still portion of the clip and choose the Duration option. However, this will work with both split segments and stitched segments.
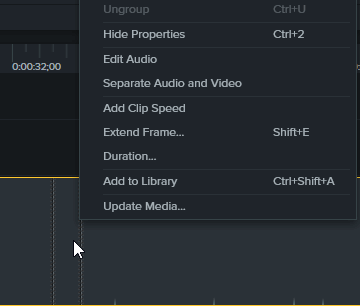
Part 2 What’s the Best Freeze-frame Video Editing Effect in Camtasia?
The freeze-frame effect in Camtasia is an excellent feature with a unique, elegant glitch and warp design. This well-organized and straightforward template is perfect for any event and features a full HD version and different freeze time effects. It is easy to use and customize, render your new awesome video, and drop media.
Here is the best Camtasia freeze-frame video editing effect of 2021, which is how to extend the frame and customize the amount of time in Camtasia Studio:
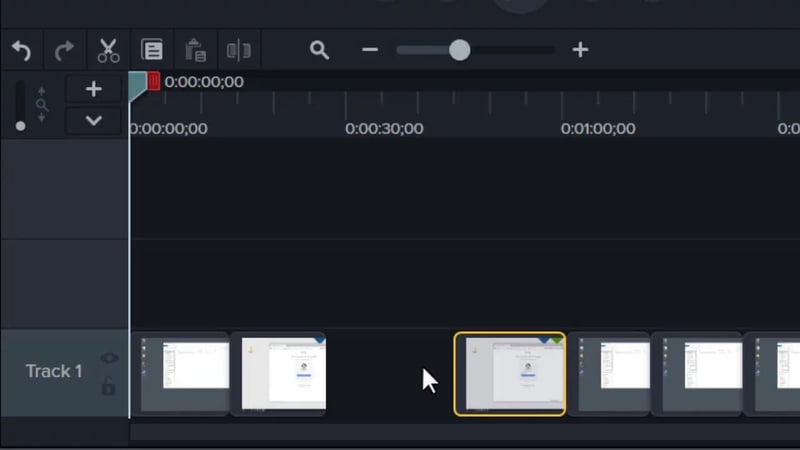
Step 1: Upload the Video
Download the Camtasia software, install and open it on your PC. Then drag and drop the video that must be freeze-frame on the timeline.
Step 2: Select Video Portion and Duration
Play the click on the timeline and when it gets to the position, you want to freeze-frame, pause the video and left-click on the Playhead to select extend the frame.
Now, select the desired duration you want to extend the freeze-frame
Step 3: Extend Frame
Next is to go back to the timeline and left-click on the Playhead to select extend frame, then, click on split tool. After that, drag the extended frame to the upper new layer.
Step 4: Add Clip Speed
Right-click on the extended frame and apply “add clip speed” to select the amount of time required.
Step 5: Export and Save
Finally, reposition it back to the main track and play your video. Then, when you feel satisfied with the result, export and save it on your device.
For a more detailed, interactive explanation and understanding, watch the video
https://m.youtube.com/watch?v=j4zHxtflMsM
Part 3 Best 5 Alternatives to Freeze-frame
Here are the top five (5) alternatives to Camtasia freeze frames. We have mentioned their pros and cons for better understanding.
01**Wondershare Filmora Video Editor **
For Win 7 or later (64-bit)
For macOS 10.12 or later
Filmora is our first alternative for freeze frames in Camtasia. It is an easy-to-use video editing software with excellent tools and an outline of creative video effects. Being the best Mac video editor, it is safe to say you can directly make your freeze-frame effect from scratch.
Filmora is free to download, supports Mac and Windows devices, and has a practical freeze-frame effect function.
Pros:
● Ease of use
● No payment until required
● The full-featured video editing tool
● Tons of effects are available
Cons:
● Some effects are not free.
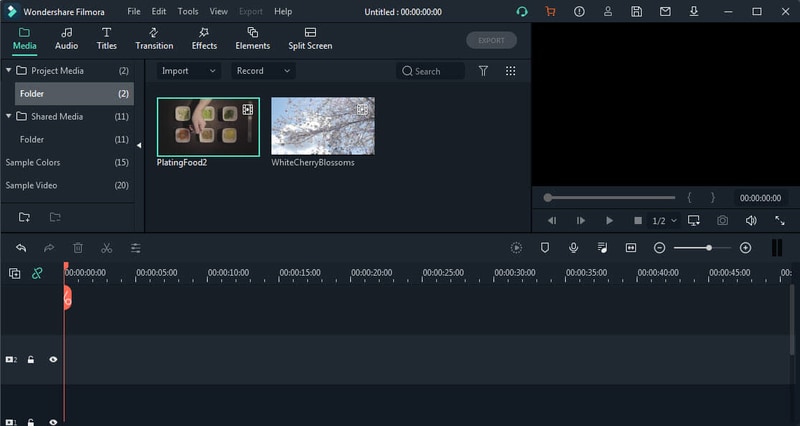
02Kinemaster
This is a free video editing application that edits your smartphone with much more fun and accessibility. It is equipped with top-notch editing tools and features and supports iOS and Android devices. Kinemaster is also a powerful application you can get creative with and makes it the top 5 alternatives to Camtasia freeze frame.
Pros:
● Easy-to-use editing tools.
● User-friendly interface.
Cons:
● There is a watermark at the end of the video
● Limited video format support.
03InShot
This is a free iOS and Android video editing application and a multi-featured application that assits you to get creative and edit videos with limitless features and the freeze-frame effect inclusive of its element.
Pros:
● Easy to use
● A wide range of quick, accessible features and editing tools to use.
Cons:
● Purchase needed to access the top features.
● Hardly intuitive.

04Videoshop video editor.
This is an effortless video editing application that is specifically for iOS devices. In addition, it comes furnished with remarkable video editing tools and stunning features to transform your video. This freeze-frame Camtasia alternative app is easy to use and gives your videos a creative shine.
Pros
● It is straightforward to use
● It has a detailed UI design
Cons:
● It has some glitches
● It has limited resolution support.
● The CIT can support a large amount of content.
05iMovie
iMovie application is popularly known to create and edit videos into a movie-like shine. However, the application is accessible for iOS video editing software equipped with the freeze-frame effect. iMovie is stocked with a bonus of powerful features to make your pop and stand out amongst others.
Pros:
● it has a user-friendly interface
● Allow users to share videos directly after editing
● It is straightforward and intuitive to use without guidelines
Cons:
● It supports a limited video format
● Video edits take up lots of phone storage.
● It crashes if video content is significant.

● Ending Thoughts →
● This article guided using the Camtasia freeze-frame and explained extending the freeze-frame features.
● The report also included the top 5 alternatives to freeze-frame Camtasia and rated Filmora as the number one due to its many latest effects in the upgraded version.
A freeze-frame is a technique whereby editors can suddenly halt motion in a film to make it look like a photograph. Then the still shot in the movie is usually used to create suspense or add emphasis to a scene. When freeze-frame gets added at the film’s end, it leaves the viewer guessing what will happen next.

Freezing or extending a frame will allow users to pace their video better. More importantly, freeze-frame applies on a per track basis, which helps buy users more time for a voiceover or an annotation. This article will teach you how to freeze-frame in Camtasia perfectly.
In this article
01 [How to Do Freeze-frame or Extended Frame in Camtasia?](#Part 1)
02 [What’s the Best Freeze-frame Video Editing Effect in Camtasia?](#Part 2)
03 [Best 5 Alternatives to Freeze-frame](#Part 3)
Part 1 How to Do Freeze-frame or Extended Frame in Camtasia?
If you are looking to bring in more creativity to your video clips by doing freeze-frame in Camtasia or extend frame, here is a step-by-step guide:
Step 1: Select the Video Part and Enter Duration
You have to move the Playhead to the frame if you want to extend. Then right-click on the track you wish to extend to choose the Extend Frame option or press shift+E.
For the keyboard shortcut to work, select the track first.

Now, enter the desired duration in seconds.

This will, in turn, create a stitched clip, provided that the auto-stitch in preferences hasn’t been disabled.

In addition, if the auto-stitch has been disabled, the clip will be split into three, as shown below, with the middle clip containing the extended frame.

Step 2: Change the Duration
To change the freeze duration in Camtasia freeze frame, right-click on the still portion of the clip and choose the Duration option. However, this will work with both split segments and stitched segments.

Part 2 What’s the Best Freeze-frame Video Editing Effect in Camtasia?
The freeze-frame effect in Camtasia is an excellent feature with a unique, elegant glitch and warp design. This well-organized and straightforward template is perfect for any event and features a full HD version and different freeze time effects. It is easy to use and customize, render your new awesome video, and drop media.
Here is the best Camtasia freeze-frame video editing effect of 2021, which is how to extend the frame and customize the amount of time in Camtasia Studio:

Step 1: Upload the Video
Download the Camtasia software, install and open it on your PC. Then drag and drop the video that must be freeze-frame on the timeline.
Step 2: Select Video Portion and Duration
Play the click on the timeline and when it gets to the position, you want to freeze-frame, pause the video and left-click on the Playhead to select extend the frame.
Now, select the desired duration you want to extend the freeze-frame
Step 3: Extend Frame
Next is to go back to the timeline and left-click on the Playhead to select extend frame, then, click on split tool. After that, drag the extended frame to the upper new layer.
Step 4: Add Clip Speed
Right-click on the extended frame and apply “add clip speed” to select the amount of time required.
Step 5: Export and Save
Finally, reposition it back to the main track and play your video. Then, when you feel satisfied with the result, export and save it on your device.
For a more detailed, interactive explanation and understanding, watch the video
https://m.youtube.com/watch?v=j4zHxtflMsM
Part 3 Best 5 Alternatives to Freeze-frame
Here are the top five (5) alternatives to Camtasia freeze frames. We have mentioned their pros and cons for better understanding.
01**Wondershare Filmora Video Editor **
For Win 7 or later (64-bit)
For macOS 10.12 or later
Filmora is our first alternative for freeze frames in Camtasia. It is an easy-to-use video editing software with excellent tools and an outline of creative video effects. Being the best Mac video editor, it is safe to say you can directly make your freeze-frame effect from scratch.
Filmora is free to download, supports Mac and Windows devices, and has a practical freeze-frame effect function.
Pros:
● Ease of use
● No payment until required
● The full-featured video editing tool
● Tons of effects are available
Cons:
● Some effects are not free.

02Kinemaster
This is a free video editing application that edits your smartphone with much more fun and accessibility. It is equipped with top-notch editing tools and features and supports iOS and Android devices. Kinemaster is also a powerful application you can get creative with and makes it the top 5 alternatives to Camtasia freeze frame.
Pros:
● Easy-to-use editing tools.
● User-friendly interface.
Cons:
● There is a watermark at the end of the video
● Limited video format support.

03InShot
This is a free iOS and Android video editing application and a multi-featured application that assits you to get creative and edit videos with limitless features and the freeze-frame effect inclusive of its element.
Pros:
● Easy to use
● A wide range of quick, accessible features and editing tools to use.
Cons:
● Purchase needed to access the top features.
● Hardly intuitive.

04Videoshop video editor.
This is an effortless video editing application that is specifically for iOS devices. In addition, it comes furnished with remarkable video editing tools and stunning features to transform your video. This freeze-frame Camtasia alternative app is easy to use and gives your videos a creative shine.
Pros
● It is straightforward to use
● It has a detailed UI design
Cons:
● It has some glitches
● It has limited resolution support.
● The CIT can support a large amount of content.

05iMovie
iMovie application is popularly known to create and edit videos into a movie-like shine. However, the application is accessible for iOS video editing software equipped with the freeze-frame effect. iMovie is stocked with a bonus of powerful features to make your pop and stand out amongst others.
Pros:
● it has a user-friendly interface
● Allow users to share videos directly after editing
● It is straightforward and intuitive to use without guidelines
Cons:
● It supports a limited video format
● Video edits take up lots of phone storage.
● It crashes if video content is significant.

● Ending Thoughts →
● This article guided using the Camtasia freeze-frame and explained extending the freeze-frame features.
● The report also included the top 5 alternatives to freeze-frame Camtasia and rated Filmora as the number one due to its many latest effects in the upgraded version.
A freeze-frame is a technique whereby editors can suddenly halt motion in a film to make it look like a photograph. Then the still shot in the movie is usually used to create suspense or add emphasis to a scene. When freeze-frame gets added at the film’s end, it leaves the viewer guessing what will happen next.

Freezing or extending a frame will allow users to pace their video better. More importantly, freeze-frame applies on a per track basis, which helps buy users more time for a voiceover or an annotation. This article will teach you how to freeze-frame in Camtasia perfectly.
In this article
01 [How to Do Freeze-frame or Extended Frame in Camtasia?](#Part 1)
02 [What’s the Best Freeze-frame Video Editing Effect in Camtasia?](#Part 2)
03 [Best 5 Alternatives to Freeze-frame](#Part 3)
Part 1 How to Do Freeze-frame or Extended Frame in Camtasia?
If you are looking to bring in more creativity to your video clips by doing freeze-frame in Camtasia or extend frame, here is a step-by-step guide:
Step 1: Select the Video Part and Enter Duration
You have to move the Playhead to the frame if you want to extend. Then right-click on the track you wish to extend to choose the Extend Frame option or press shift+E.
For the keyboard shortcut to work, select the track first.

Now, enter the desired duration in seconds.

This will, in turn, create a stitched clip, provided that the auto-stitch in preferences hasn’t been disabled.

In addition, if the auto-stitch has been disabled, the clip will be split into three, as shown below, with the middle clip containing the extended frame.

Step 2: Change the Duration
To change the freeze duration in Camtasia freeze frame, right-click on the still portion of the clip and choose the Duration option. However, this will work with both split segments and stitched segments.

Part 2 What’s the Best Freeze-frame Video Editing Effect in Camtasia?
The freeze-frame effect in Camtasia is an excellent feature with a unique, elegant glitch and warp design. This well-organized and straightforward template is perfect for any event and features a full HD version and different freeze time effects. It is easy to use and customize, render your new awesome video, and drop media.
Here is the best Camtasia freeze-frame video editing effect of 2021, which is how to extend the frame and customize the amount of time in Camtasia Studio:

Step 1: Upload the Video
Download the Camtasia software, install and open it on your PC. Then drag and drop the video that must be freeze-frame on the timeline.
Step 2: Select Video Portion and Duration
Play the click on the timeline and when it gets to the position, you want to freeze-frame, pause the video and left-click on the Playhead to select extend the frame.
Now, select the desired duration you want to extend the freeze-frame
Step 3: Extend Frame
Next is to go back to the timeline and left-click on the Playhead to select extend frame, then, click on split tool. After that, drag the extended frame to the upper new layer.
Step 4: Add Clip Speed
Right-click on the extended frame and apply “add clip speed” to select the amount of time required.
Step 5: Export and Save
Finally, reposition it back to the main track and play your video. Then, when you feel satisfied with the result, export and save it on your device.
For a more detailed, interactive explanation and understanding, watch the video
https://m.youtube.com/watch?v=j4zHxtflMsM
Part 3 Best 5 Alternatives to Freeze-frame
Here are the top five (5) alternatives to Camtasia freeze frames. We have mentioned their pros and cons for better understanding.
01**Wondershare Filmora Video Editor **
For Win 7 or later (64-bit)
For macOS 10.12 or later
Filmora is our first alternative for freeze frames in Camtasia. It is an easy-to-use video editing software with excellent tools and an outline of creative video effects. Being the best Mac video editor, it is safe to say you can directly make your freeze-frame effect from scratch.
Filmora is free to download, supports Mac and Windows devices, and has a practical freeze-frame effect function.
Pros:
● Ease of use
● No payment until required
● The full-featured video editing tool
● Tons of effects are available
Cons:
● Some effects are not free.

02Kinemaster
This is a free video editing application that edits your smartphone with much more fun and accessibility. It is equipped with top-notch editing tools and features and supports iOS and Android devices. Kinemaster is also a powerful application you can get creative with and makes it the top 5 alternatives to Camtasia freeze frame.
Pros:
● Easy-to-use editing tools.
● User-friendly interface.
Cons:
● There is a watermark at the end of the video
● Limited video format support.

03InShot
This is a free iOS and Android video editing application and a multi-featured application that assits you to get creative and edit videos with limitless features and the freeze-frame effect inclusive of its element.
Pros:
● Easy to use
● A wide range of quick, accessible features and editing tools to use.
Cons:
● Purchase needed to access the top features.
● Hardly intuitive.

04Videoshop video editor.
This is an effortless video editing application that is specifically for iOS devices. In addition, it comes furnished with remarkable video editing tools and stunning features to transform your video. This freeze-frame Camtasia alternative app is easy to use and gives your videos a creative shine.
Pros
● It is straightforward to use
● It has a detailed UI design
Cons:
● It has some glitches
● It has limited resolution support.
● The CIT can support a large amount of content.

05iMovie
iMovie application is popularly known to create and edit videos into a movie-like shine. However, the application is accessible for iOS video editing software equipped with the freeze-frame effect. iMovie is stocked with a bonus of powerful features to make your pop and stand out amongst others.
Pros:
● it has a user-friendly interface
● Allow users to share videos directly after editing
● It is straightforward and intuitive to use without guidelines
Cons:
● It supports a limited video format
● Video edits take up lots of phone storage.
● It crashes if video content is significant.

● Ending Thoughts →
● This article guided using the Camtasia freeze-frame and explained extending the freeze-frame features.
● The report also included the top 5 alternatives to freeze-frame Camtasia and rated Filmora as the number one due to its many latest effects in the upgraded version.
A freeze-frame is a technique whereby editors can suddenly halt motion in a film to make it look like a photograph. Then the still shot in the movie is usually used to create suspense or add emphasis to a scene. When freeze-frame gets added at the film’s end, it leaves the viewer guessing what will happen next.

Freezing or extending a frame will allow users to pace their video better. More importantly, freeze-frame applies on a per track basis, which helps buy users more time for a voiceover or an annotation. This article will teach you how to freeze-frame in Camtasia perfectly.
In this article
01 [How to Do Freeze-frame or Extended Frame in Camtasia?](#Part 1)
02 [What’s the Best Freeze-frame Video Editing Effect in Camtasia?](#Part 2)
03 [Best 5 Alternatives to Freeze-frame](#Part 3)
Part 1 How to Do Freeze-frame or Extended Frame in Camtasia?
If you are looking to bring in more creativity to your video clips by doing freeze-frame in Camtasia or extend frame, here is a step-by-step guide:
Step 1: Select the Video Part and Enter Duration
You have to move the Playhead to the frame if you want to extend. Then right-click on the track you wish to extend to choose the Extend Frame option or press shift+E.
For the keyboard shortcut to work, select the track first.

Now, enter the desired duration in seconds.

This will, in turn, create a stitched clip, provided that the auto-stitch in preferences hasn’t been disabled.

In addition, if the auto-stitch has been disabled, the clip will be split into three, as shown below, with the middle clip containing the extended frame.

Step 2: Change the Duration
To change the freeze duration in Camtasia freeze frame, right-click on the still portion of the clip and choose the Duration option. However, this will work with both split segments and stitched segments.

Part 2 What’s the Best Freeze-frame Video Editing Effect in Camtasia?
The freeze-frame effect in Camtasia is an excellent feature with a unique, elegant glitch and warp design. This well-organized and straightforward template is perfect for any event and features a full HD version and different freeze time effects. It is easy to use and customize, render your new awesome video, and drop media.
Here is the best Camtasia freeze-frame video editing effect of 2021, which is how to extend the frame and customize the amount of time in Camtasia Studio:

Step 1: Upload the Video
Download the Camtasia software, install and open it on your PC. Then drag and drop the video that must be freeze-frame on the timeline.
Step 2: Select Video Portion and Duration
Play the click on the timeline and when it gets to the position, you want to freeze-frame, pause the video and left-click on the Playhead to select extend the frame.
Now, select the desired duration you want to extend the freeze-frame
Step 3: Extend Frame
Next is to go back to the timeline and left-click on the Playhead to select extend frame, then, click on split tool. After that, drag the extended frame to the upper new layer.
Step 4: Add Clip Speed
Right-click on the extended frame and apply “add clip speed” to select the amount of time required.
Step 5: Export and Save
Finally, reposition it back to the main track and play your video. Then, when you feel satisfied with the result, export and save it on your device.
For a more detailed, interactive explanation and understanding, watch the video
https://m.youtube.com/watch?v=j4zHxtflMsM
Part 3 Best 5 Alternatives to Freeze-frame
Here are the top five (5) alternatives to Camtasia freeze frames. We have mentioned their pros and cons for better understanding.
01**Wondershare Filmora Video Editor **
For Win 7 or later (64-bit)
For macOS 10.12 or later
Filmora is our first alternative for freeze frames in Camtasia. It is an easy-to-use video editing software with excellent tools and an outline of creative video effects. Being the best Mac video editor, it is safe to say you can directly make your freeze-frame effect from scratch.
Filmora is free to download, supports Mac and Windows devices, and has a practical freeze-frame effect function.
Pros:
● Ease of use
● No payment until required
● The full-featured video editing tool
● Tons of effects are available
Cons:
● Some effects are not free.

02Kinemaster
This is a free video editing application that edits your smartphone with much more fun and accessibility. It is equipped with top-notch editing tools and features and supports iOS and Android devices. Kinemaster is also a powerful application you can get creative with and makes it the top 5 alternatives to Camtasia freeze frame.
Pros:
● Easy-to-use editing tools.
● User-friendly interface.
Cons:
● There is a watermark at the end of the video
● Limited video format support.

03InShot
This is a free iOS and Android video editing application and a multi-featured application that assits you to get creative and edit videos with limitless features and the freeze-frame effect inclusive of its element.
Pros:
● Easy to use
● A wide range of quick, accessible features and editing tools to use.
Cons:
● Purchase needed to access the top features.
● Hardly intuitive.

04Videoshop video editor.
This is an effortless video editing application that is specifically for iOS devices. In addition, it comes furnished with remarkable video editing tools and stunning features to transform your video. This freeze-frame Camtasia alternative app is easy to use and gives your videos a creative shine.
Pros
● It is straightforward to use
● It has a detailed UI design
Cons:
● It has some glitches
● It has limited resolution support.
● The CIT can support a large amount of content.

05iMovie
iMovie application is popularly known to create and edit videos into a movie-like shine. However, the application is accessible for iOS video editing software equipped with the freeze-frame effect. iMovie is stocked with a bonus of powerful features to make your pop and stand out amongst others.
Pros:
● it has a user-friendly interface
● Allow users to share videos directly after editing
● It is straightforward and intuitive to use without guidelines
Cons:
● It supports a limited video format
● Video edits take up lots of phone storage.
● It crashes if video content is significant.

● Ending Thoughts →
● This article guided using the Camtasia freeze-frame and explained extending the freeze-frame features.
● The report also included the top 5 alternatives to freeze-frame Camtasia and rated Filmora as the number one due to its many latest effects in the upgraded version.
Also read:
- New 2024 Approved Create A Freeze Frame Sequence In Your Videos
- 2024 Approved 10 Best Mp3 Visualizers Windows, Mac, Android, iPhone & Online
- Top LUTs for Sony HLG
- Updated In 2024, How To Brighten Video In Premiere Pro | Step By Step Guide
- 2024 Approved Templates Increase the Editing Possibilities for Beginners and Professionals. Read This Article to Learn About some Customizable Slow-Motion CapCut Templates
- Updated AI Has Influenced All Video Editors to Speed up Editing. This Article Discusses the Significance of AI Slow Motion and the Tools that Offer It
- How to Zoom in on PowerPoint Easy Ways for 2024
- Updated 2024 Approved How to Resize FLV Videos Efficiently Windows, Mac,Android, iPhone & Online
- Updated How to Make Your CSGO Montage Impressive for 2024
- Updated Best 16 Motion Blur Apps for Videos & Photos for 2024
- Premiere Pro Text Effects Beginner Guide for 2024
- Updated In 2024, What If YouTube Zoom to Fill Not Working?
- 8 Websites to Find 3D Text PNG
- New 10 Best Text to Robot Voice Generators Windows, Mac, Android, iPhone & Online
- Updated Best 5 Solutions on How to Add Emojis to iPhone for 2024
- New Best 5 GIF to Video Converters You Cant-Miss
- Updated Using Slow Motion in Adobe After Effects A Step-by-Step Procession
- New How to Create Datamoshing Effect to Your Footage in After Effects, In 2024
- Looking Into How Slow Mo Guys Have Changed the Dynamics of Slow-Motion for 2024
- New In 2024, How to Denoise in After Effects – Audio & Video Noise Removal
- How to Create Loop Videos with Filmora for 2024
- 2024 Approved Splitting Audio From Video in Sony Vegas Step by Step
- New Voice Changer for Discord | Use Voicemod on Discord for 2024
- Updated In 2024, Facts About GIF Background You Didnt Know
- Updated How to Create LUTs with LUTs Generator for 2024
- Make Super Easy Coin Magic With Filmora
- Updated Best LUTs for Vlog A 2024 Overview
- Updated What Is Motion Tracking and How to Use It
- How to Unlock iCloud Activation Lock and iCloud Account On Apple iPhone XR?
- In 2024, How to Detect and Remove Spyware on Xiaomi 14? | Dr.fone
- How to Reset Gmail Password on Xiaomi 13T Devices
- In 2024, The Updated Method to Bypass Samsung Galaxy XCover 6 Pro Tactical Edition FRP
- In 2024, How to Migrate Android Data From Honor X7b to New Android Phone? | Dr.fone
- In 2024, How To Activate and Use Life360 Ghost Mode On OnePlus Nord CE 3 Lite 5G | Dr.fone
- YouTube Keyword Tool
- In 2024, Top-Notch Solutions for Disabled Apple ID From Apple iPhone 12 mini Making It Possible
- Pattern Locks Are Unsafe Secure Your Infinix Smart 8 Plus Phone Now with These Tips
- Creating AI Videos With Templates
- Title: New How to Concatenate Videos Using FFmpeg
- Author: Chloe
- Created at : 2024-05-20 03:38:06
- Updated at : 2024-05-21 03:38:06
- Link: https://ai-editing-video.techidaily.com/new-how-to-concatenate-videos-using-ffmpeg/
- License: This work is licensed under CC BY-NC-SA 4.0.


