:max_bytes(150000):strip_icc():format(webp)/family-hanging-out-watching-videos-online-1166432791-309c6f7ac8cb4cc99875db5a77fd6f35.jpg)
New How To Export Video in Filmora

How To Export Video in Filmora
After you edit your video with Filmora you may wonder how to export your video in Filmora Indeed, you can export your video in Filmora in various options. This article will show you the multiple options you can get if you want to export your video in Filmora.
Steps to export your video with Filmora
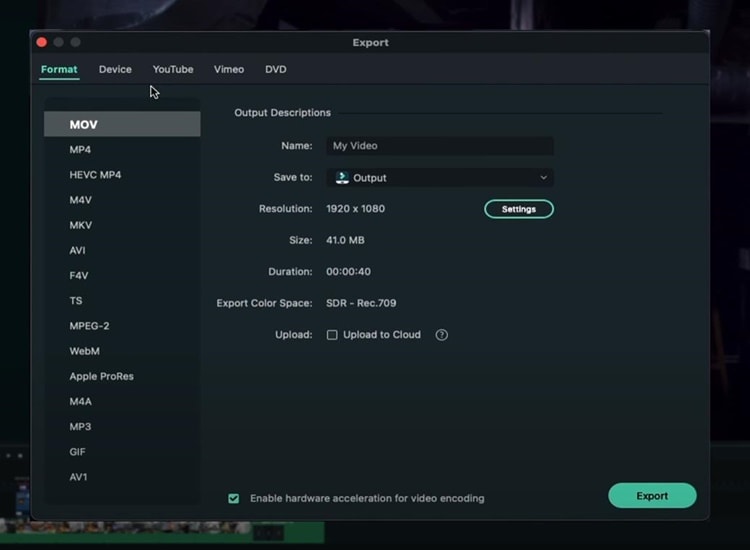
To open the export box, press “CTRL+E” on your keyboard. After that, you’ll see many export options you can do.
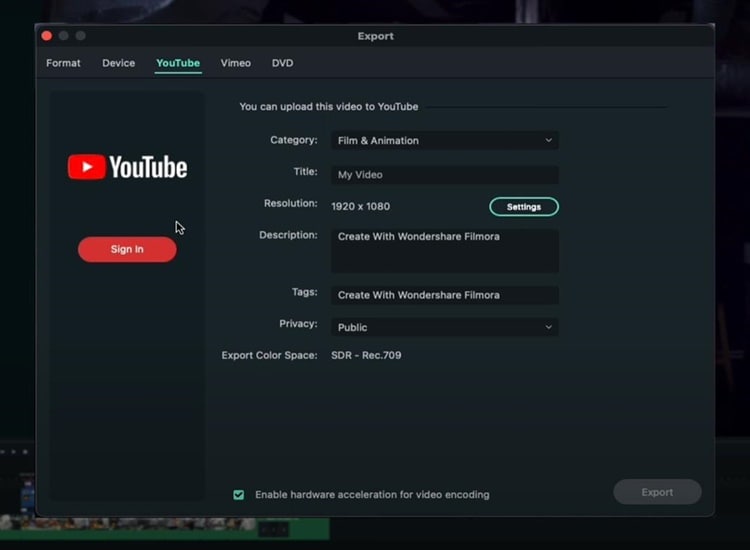
Export Video Platform
If you want your video to end up on YouTube, you can click on the “YouTube” option, sign in, and enter all the basic metadata you need for your YouTube video. Then you can click “Export”, and the video will go straight to YouTube. Also, you can have all of your privacy settings, descriptions, and everything else.
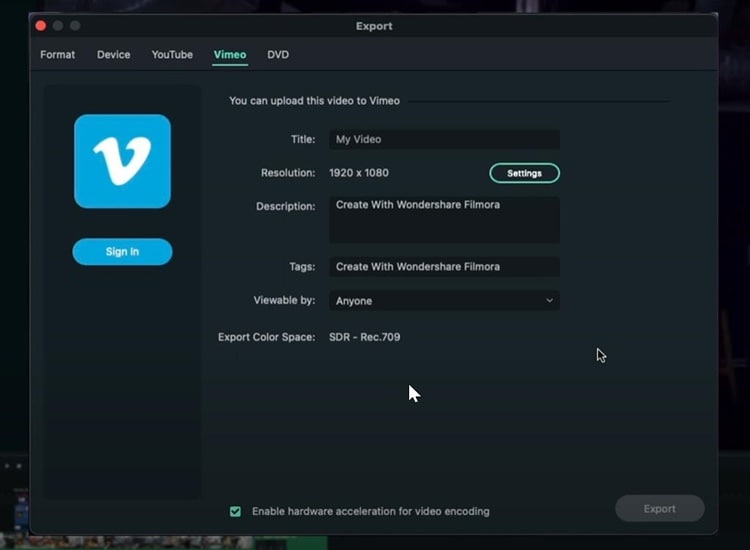
Similar to YouTube, you can do the same thing if you want to export your video on Vimeo.
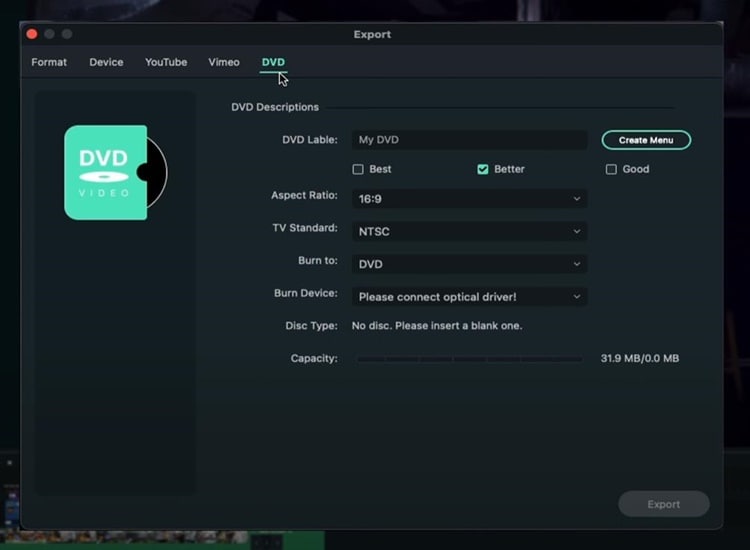
Export and Burn Video into DVD
You can also directly burn your video to a DVD. Even though video to DVD isn’t as common as it used to be, it’s still nice to be able to do it, especially if you like making DVDs.
Export Video to Other Devices
Go to the “Devices” option if you want to export your video to specific devices with everything looking good on that particular device. For instance, if you want to export your video to iPhone, you can see the size will be 41MB, and the resolution will be 1080p. All those things are going to look much better on an iPhone.
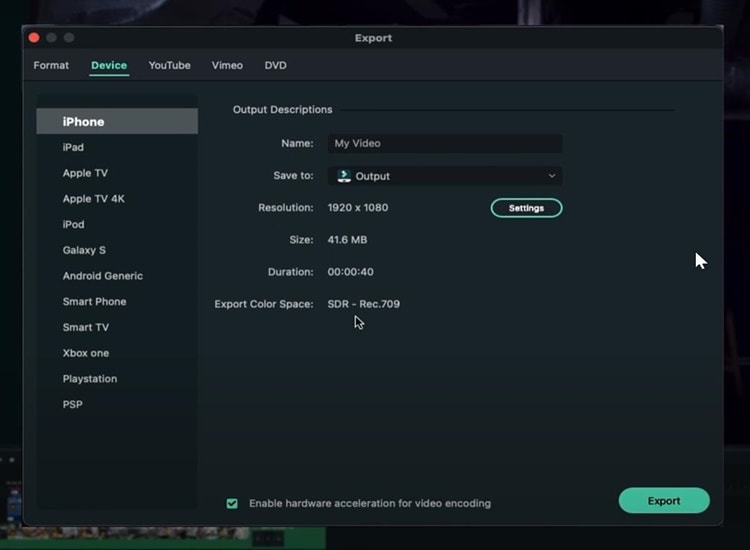
You can also adjust the quality of your video based on your needs by clicking on “Setting.”
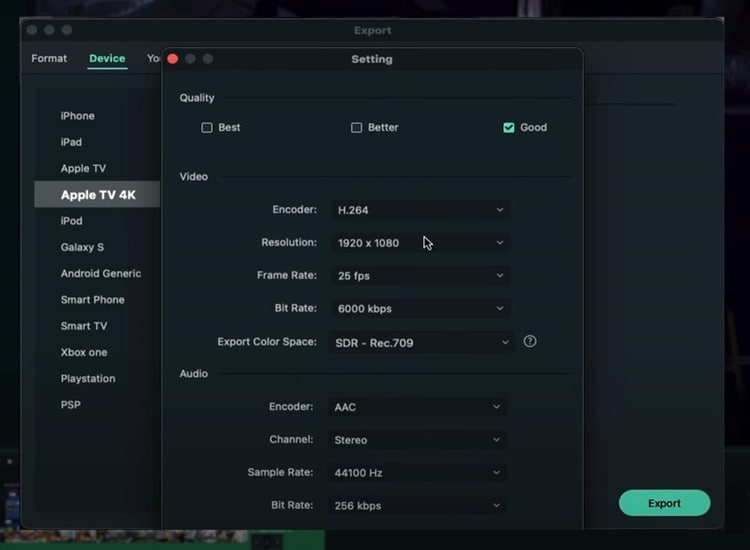
Export Videos in High Res Quality
In the “Format” option you can choose the file extension, the format, or the codec. Exporting your video based on format is good if you prefer to save your video on your computer since maybe you may upload your video on YouTube, Instagram or other social media platforms.
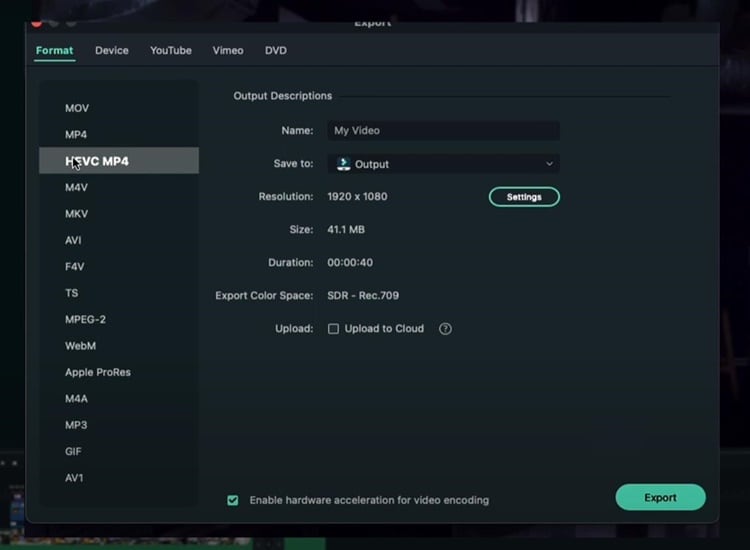
You can choose “Apple Prores” if you want the least amount of compression possible and don’t care about the file size. For example, if you want to export a video from Filmora and then import it into another video editor without losing too much quality, you should definitely choose “Apple Prores.”
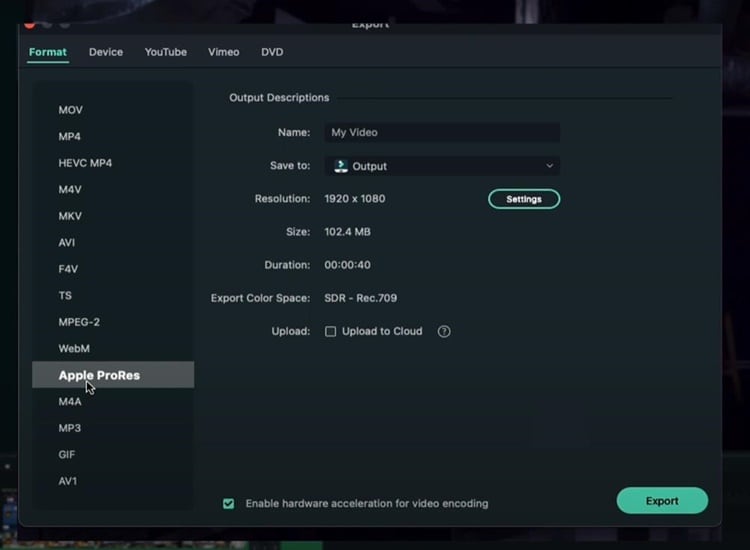
Before exporting, there is the option to upload to the cloud. If you do not know what it is, Wondershare has its own Drive, which allows you to save and remotely view your video files.
In the meantime, if you have a decent PC, you can enable “Hardware acceleration for video encoding.” This option will utilize as much computer power as you have to export the video and make the process significantly faster. Once everything is finished, click “Export.”
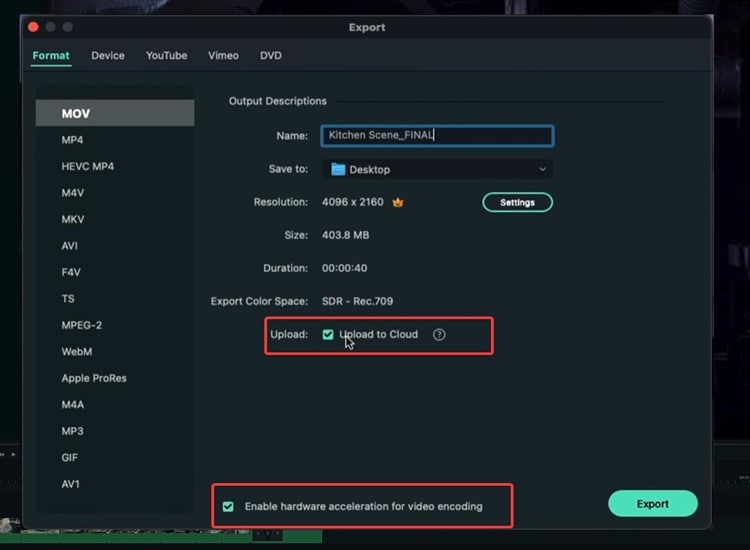
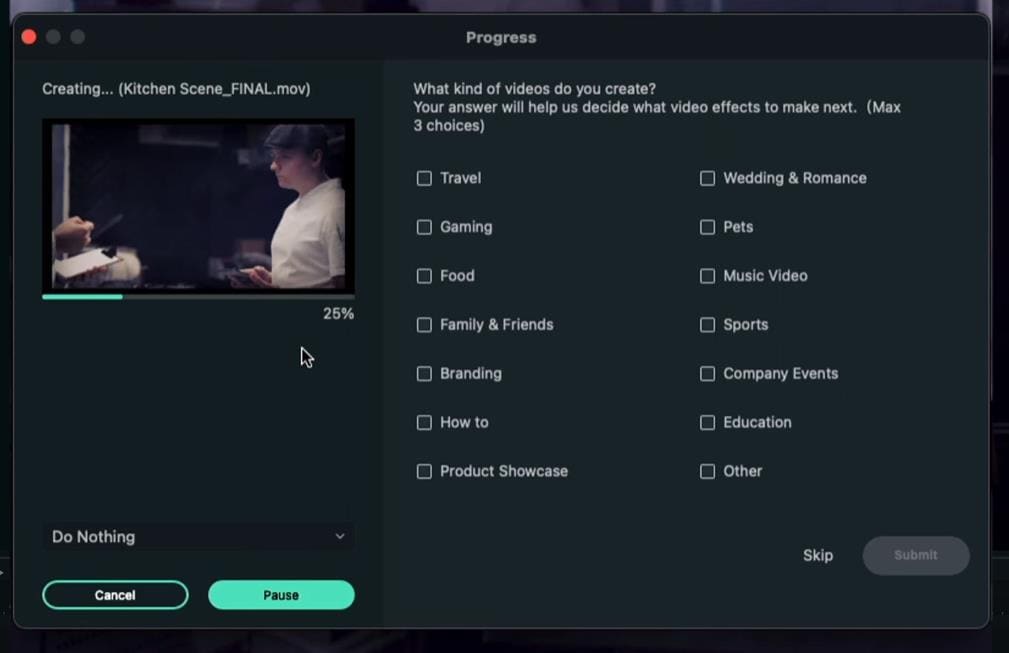
When you click Export, you can see the progress with thumbnails and everything. Lastly, your video has been exported successfully when the exporting process reaches 100%.
Summary
Indeed, there are many options to export your video using Filmora. If you wish to export your video directly to YouTube, simply select the YouTube option in the Export box. Meanwhile, if you want to export your video on your computer and upload it to various social media platforms, it’s much better to export it with a format option.
Free Download For Win 7 or later(64-bit)
Free Download For macOS 10.14 or later
Free Download For macOS 10.14 or later Free Download For macOS 10.14 or later Free Download For macOS 10.14 or later
Hard to Remove Black Background in After Effects?
Hard to Remove Black Background in After Effects? Here’s the Best Way to Deal With It
An easy yet powerful editor
Numerous effects to choose from
Detailed tutorials provided by the official channel
Having to adjust with black backgrounds in After Effects is quite annoying, but not anymore. Stay tuned to get through quick and hastle free solutions!
In this article
01 [How to Remove Black Background from After Effects](#Part 1)
02 [How to Export After Effects Transparent Background](#Part 2)
Part 1 How to Remove Black Background from After Effects
Graphic and video editing are enormous domains to explore your creative skills in graphic design and animation. The software market is a pool of editing applications that are packed with extensive libraries to garnish your creations with varieties of exciting after effects. However, the additive black backgrounds are an annoying cringe to your creative artwork.
While these black backgrounds are evident on account of being inherent application properties of video and film editing software, the relaxing note is, there are effective solutions to the removal of these black screens. When browsing through affordable way to take up the removal process, you can adhere to the following procedure for making and exporting after effects transparent background videos:
Step 1: Launch After Effects
This one is an efficient motion graphics template that you can use to add a visible spunk to your graphic design artworks. Begin with launching the template in your system after an official website download of the same.
Step 2: Make Your Film Ready
Before beginning to remove the black background in After Effects template, make sure that your footage is ready to take up the action. The tool you are about to use is known to eliminate black pixels from your clip proportional to the luminous intensity variation in the scene under consideration.
Check for any areas you would like to remain untouched and mask them to retain the dark elements. To ensure effective masking, it is recommended to use the ‘Levels and Curves’ effect for a convenient tweak to the final key at the end.
Step 2: Shift Channels Effect
In the composition panel, navigate to the ‘Shift Channels’ effect and use the ‘Drag and Drop’ method to add it to the dark pixelated layer you wish to remove. You can also use this effect to work with adjustment layers.
Step 3: Luminance Adjustments
While continuing with the ‘Shift Channels’ effect, navigate to the ‘Take Alpha From’ checkbox and set ‘Luminance’ as the ‘Reset’ parameter. You are instantly fetched a footage without the black background. If this does not happen, navigate to the bottom of the composition panel and enable the ‘Transparency Grid’ option with a right side toggle.
Step 4: Color Tweaks
Use the‘Levels and Curves’ effect mentioned in Step 2 to make level adjustments until you get the perfect result. You can experiment with varieties of curve and level variations, both, before and after using the ‘Shift Channels’ effect to get the right tweaks. That’s it! You are now ready to export after effects transparent background video.
Part 2 How to Export After Effects Transparent Background
Videos with transparent backgrounds are trending examples of motion graphic designing and video editing artworks. The cue behind these backgrounds is that they exclusively permit the object of focus to have an opaque or colored pixelation, while leaving the remaining pixels as transparent or colorless. This is beneficial in adding an extra spotlight to the main elements of your creation, while rendering the less important parts behind the scene.
Having known the credibility of transparent backgrounds in video crafting, you may feel motivated to try hands on experimenting with transparent backgrounds to uplift your graphic motion artwork.
Considering the most affordable picks of video editing software to choose from, you can rely on the ‘After Effects’ motion graphic template to kick start the creation process. When using the aforesaid template to export videos with transparent backgrounds, you need to adhere to the following steps:
Step 1: Launch the After Effects Template
Start with downloading the graphic template from its official website and launching the same on your system.
Step 2: Select Your Video
On a successful launch, the template welcomes you with its composition timeline and project panel. Here, you need to select a desired video from either of the two places to export with a transparent background.
Step 3: Add to Queue
Once you have made your choice, navigate to the top toolbar in the composition panel and hit the ‘Composition’ tab. From the drop down menu that follows, choose ‘Add to Render Queue’. You can alternatively use the ‘Ctrl + M’ shortcut to carry out the above task.
“
Step 4: Output Settings
In the ‘Render Queue’ window that pops up after completion of Step 3, navigate to the left and tap ‘Output Module’ to see the ‘Output Module Settings’ window pop up. Here, click on ’Format’ and choose the standard ‘Quicktime’ format.
“
Step 5: Output Channel Selection
In the ‘Output Module’ window itself, navigate to the ‘Video Output’ tab and select ‘Channels’. In the drop down menu that follows, choose ‘RGB + Alpha’. When you are done, tap ‘OK’ at the bottom. Your video is ready for a transparent background export.
“
Exporting Transparent Background Videos in Wondershare Filmora Video Editor
Using the ‘After Effects’ motion graphic template is certainly one among the most affordable and convenient solutions for a transparent video export; however there are other feasible alternatives to adhere to the task. While searching through viable substitutes of the ‘After Effects’ template, you can surely pick Filmora as a reliable choice.
For Win 7 or later (64-bit)
For macOS 10.12 or later
Launched by Wondershare, this one is excellent video creator and editor software, capable of adhering to your requirement of a transparent background video export in the simplest way possible and that too in the quickest time span. You can further apply a plethora amazing effects to your creation from the extensive Filmora video effects library. The software comes with an advanced ‘Green Screen’ feature to create transparent video backgrounds.
It is recommended to create a Green Screen video in the software for excellent transparency. Having done that, you can take the following steps to export videos with transparent backgrounds using Filmora:
Step 1: Launch the Software
Download the free Filmora Video Editor software from its official website and install the same in any of your Windows or MacOS devices. Having done that, launch the software in your system.
Step 2: Import Your Video
In the software’s welcome interface, navigate to and hit the ‘Import’ tab. From the drop don menu that follows, choose the ‘Import Media Files’ option to import your desired background and green screen videos to Filmora’s media library.
“
Step 3: Adding Clips to Timeline
Now you need to add background footage in the timeline’s video track and repeat the process with the green screen footage to add it into a separate timeline track. You can either insert both the clips into different video tracks using the ‘Drag and Drop’ method.
“
Step 4: Chromatic Settings
In the green screen video timeline, double click on the added video to directly access the ‘Chroma Key’ settings. You can alternatively, right click the video footage and choose ‘Green Screen’ to access the ‘Chroma Key’ option.
“
Step 5: Applying Transparency Effect
Enable the Chroma Key by checking in the option boxes. Next, you need to click either the ‘Color Picker’ icon or the ‘Color Picker’ drop down menu for an automatic generation of transparent background for your footage.
“
Step 6: Preview Your Artwork
Once the transparent background is applied, the editor will redirect you to its ‘Preview’ window, where you can play the footage to see the result. You can now save and export the created video with a transparent background to any social media platform of your choice.
“
● Ending Thoughts →
● Videos with transparent backgrounds are capable of attracting much greater attention for the prime object of concern in any footage.
● You can choose from a variety of video editor tools and software, like, the After Effects template, to export videos with transparent backgrounds on various media sharing platforms. if you are looking for suitable alternatives, consider using the Filmora Video Editor software to create and export transparent background videos.
Best Tips for Camtasia Freeze-Frame
Best Tips of Camtasia Freeze Frame
An easy yet powerful editor
Numerous effects to choose from
Detailed tutorials provided by the official channel
A freeze-frame is a technique whereby editors can suddenly halt motion in a film to make it look like a photograph. Then the still shot in the movie is usually used to create suspense or add emphasis to a scene. When freeze-frame gets added at the film’s end, it leaves the viewer guessing what will happen next.

Freezing or extending a frame will allow users to pace their video better. More importantly, freeze-frame applies on a per track basis, which helps buy users more time for a voiceover or an annotation. This article will teach you how to freeze-frame in Camtasia perfectly.
In this article
01 [How to Do Freeze-frame or Extended Frame in Camtasia?](#Part 1)
02 [What’s the Best Freeze-frame Video Editing Effect in Camtasia?](#Part 2)
03 [Best 5 Alternatives to Freeze-frame](#Part 3)
Part 1 How to Do Freeze-frame or Extended Frame in Camtasia?
If you are looking to bring in more creativity to your video clips by doing freeze-frame in Camtasia or extend frame, here is a step-by-step guide:
Step 1: Select the Video Part and Enter Duration
You have to move the Playhead to the frame if you want to extend. Then right-click on the track you wish to extend to choose the Extend Frame option or press shift+E.
For the keyboard shortcut to work, select the track first.
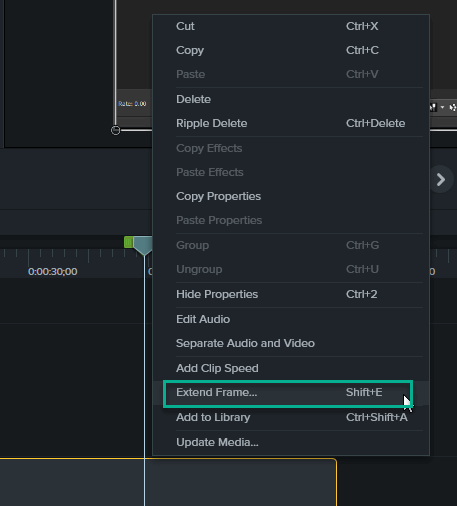
Now, enter the desired duration in seconds.
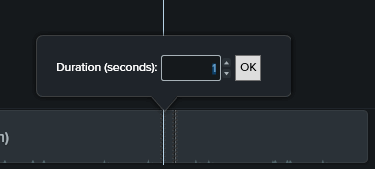
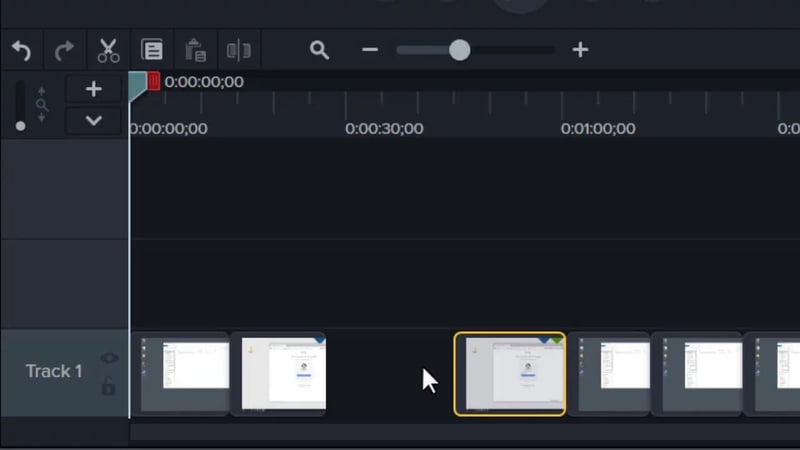
This will, in turn, create a stitched clip, provided that the auto-stitch in preferences hasn’t been disabled.
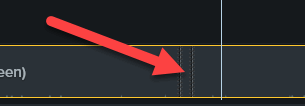
In addition, if the auto-stitch has been disabled, the clip will be split into three, as shown below, with the middle clip containing the extended frame.

Step 2: Change the Duration
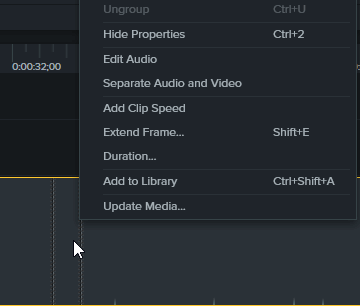
To change the freeze duration in Camtasia freeze frame, right-click on the still portion of the clip and choose the Duration option. However, this will work with both split segments and stitched segments.
Part 2 What’s the Best Freeze-frame Video Editing Effect in Camtasia?
The freeze-frame effect in Camtasia is an excellent feature with a unique, elegant glitch and warp design. This well-organized and straightforward template is perfect for any event and features a full HD version and different freeze time effects. It is easy to use and customize, render your new awesome video, and drop media.
Here is the best Camtasia freeze-frame video editing effect of 2021, which is how to extend the frame and customize the amount of time in Camtasia Studio:
Step 1: Upload the Video
Download the Camtasia software, install and open it on your PC. Then drag and drop the video that must be freeze-frame on the timeline.
Step 2: Select Video Portion and Duration
Play the click on the timeline and when it gets to the position, you want to freeze-frame, pause the video and left-click on the Playhead to select extend the frame.
Now, select the desired duration you want to extend the freeze-frame
Step 3: Extend Frame
Next is to go back to the timeline and left-click on the Playhead to select extend frame, then, click on split tool. After that, drag the extended frame to the upper new layer.
Step 4: Add Clip Speed
Right-click on the extended frame and apply “add clip speed” to select the amount of time required.
Step 5: Export and Save
Finally, reposition it back to the main track and play your video. Then, when you feel satisfied with the result, export and save it on your device.
For a more detailed, interactive explanation and understanding, watch the video
https://m.youtube.com/watch?v=j4zHxtflMsM
Part 3 Best 5 Alternatives to Freeze-frame
Here are the top five (5) alternatives to Camtasia freeze frames. We have mentioned their pros and cons for better understanding.
01**Wondershare Filmora Video Editor **
For Win 7 or later (64-bit)
For macOS 10.12 or later
Filmora is our first alternative for freeze frames in Camtasia. It is an easy-to-use video editing software with excellent tools and an outline of creative video effects. Being the best Mac video editor, it is safe to say you can directly make your freeze-frame effect from scratch.
Filmora is free to download, supports Mac and Windows devices, and has a practical freeze-frame effect function.
Pros:
● Ease of use
● No payment until required
● The full-featured video editing tool
● Tons of effects are available
Cons:
● Some effects are not free.
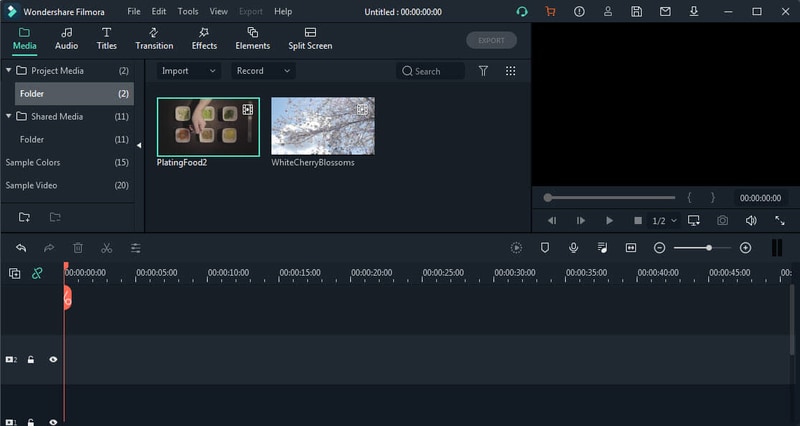
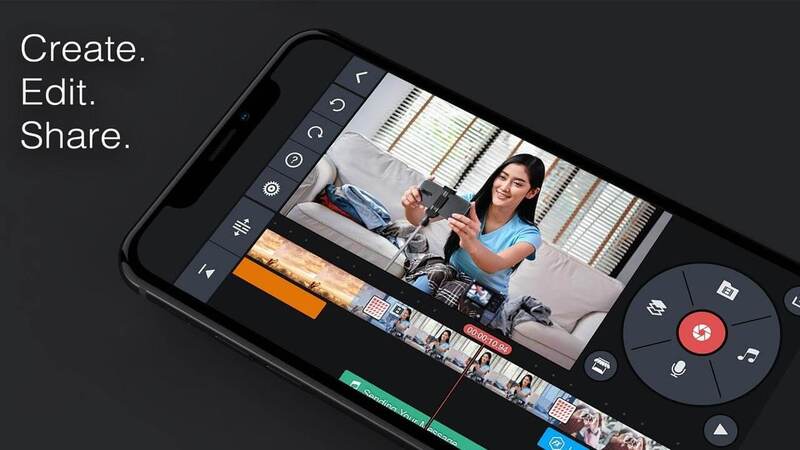
02Kinemaster
This is a free video editing application that edits your smartphone with much more fun and accessibility. It is equipped with top-notch editing tools and features and supports iOS and Android devices. Kinemaster is also a powerful application you can get creative with and makes it the top 5 alternatives to Camtasia freeze frame.
Pros:
● Easy-to-use editing tools.
● User-friendly interface.
Cons:
● There is a watermark at the end of the video
● Limited video format support.
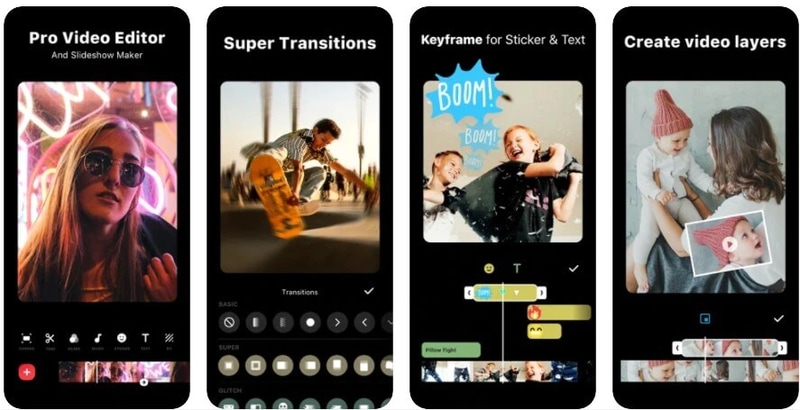
03InShot
This is a free iOS and Android video editing application and a multi-featured application that assits you to get creative and edit videos with limitless features and the freeze-frame effect inclusive of its element.
Pros:
● Easy to use
● A wide range of quick, accessible features and editing tools to use.
Cons:
● Purchase needed to access the top features.
● Hardly intuitive.
04Videoshop video editor.
This is an effortless video editing application that is specifically for iOS devices. In addition, it comes furnished with remarkable video editing tools and stunning features to transform your video. This freeze-frame Camtasia alternative app is easy to use and gives your videos a creative shine.
Pros
● It is straightforward to use
● It has a detailed UI design
Cons:
● It has some glitches
● It has limited resolution support.
● The CIT can support a large amount of content.

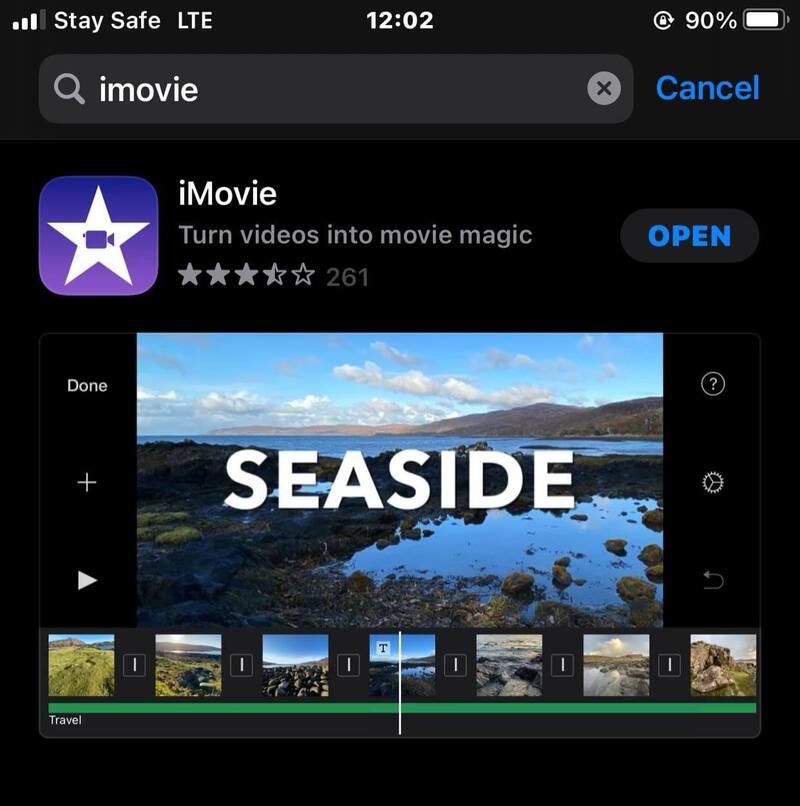
05iMovie
iMovie application is popularly known to create and edit videos into a movie-like shine. However, the application is accessible for iOS video editing software equipped with the freeze-frame effect. iMovie is stocked with a bonus of powerful features to make your pop and stand out amongst others.
Pros:
● it has a user-friendly interface
● Allow users to share videos directly after editing
● It is straightforward and intuitive to use without guidelines
Cons:
● It supports a limited video format
● Video edits take up lots of phone storage.
● It crashes if video content is significant.
● Ending Thoughts →
● This article guided using the Camtasia freeze-frame and explained extending the freeze-frame features.
● The report also included the top 5 alternatives to freeze-frame Camtasia and rated Filmora as the number one due to its many latest effects in the upgraded version.
A freeze-frame is a technique whereby editors can suddenly halt motion in a film to make it look like a photograph. Then the still shot in the movie is usually used to create suspense or add emphasis to a scene. When freeze-frame gets added at the film’s end, it leaves the viewer guessing what will happen next.

Freezing or extending a frame will allow users to pace their video better. More importantly, freeze-frame applies on a per track basis, which helps buy users more time for a voiceover or an annotation. This article will teach you how to freeze-frame in Camtasia perfectly.
In this article
01 [How to Do Freeze-frame or Extended Frame in Camtasia?](#Part 1)
02 [What’s the Best Freeze-frame Video Editing Effect in Camtasia?](#Part 2)
03 [Best 5 Alternatives to Freeze-frame](#Part 3)
Part 1 How to Do Freeze-frame or Extended Frame in Camtasia?
If you are looking to bring in more creativity to your video clips by doing freeze-frame in Camtasia or extend frame, here is a step-by-step guide:
Step 1: Select the Video Part and Enter Duration
You have to move the Playhead to the frame if you want to extend. Then right-click on the track you wish to extend to choose the Extend Frame option or press shift+E.
For the keyboard shortcut to work, select the track first.

Now, enter the desired duration in seconds.

This will, in turn, create a stitched clip, provided that the auto-stitch in preferences hasn’t been disabled.

In addition, if the auto-stitch has been disabled, the clip will be split into three, as shown below, with the middle clip containing the extended frame.

Step 2: Change the Duration
To change the freeze duration in Camtasia freeze frame, right-click on the still portion of the clip and choose the Duration option. However, this will work with both split segments and stitched segments.

Part 2 What’s the Best Freeze-frame Video Editing Effect in Camtasia?
The freeze-frame effect in Camtasia is an excellent feature with a unique, elegant glitch and warp design. This well-organized and straightforward template is perfect for any event and features a full HD version and different freeze time effects. It is easy to use and customize, render your new awesome video, and drop media.
Here is the best Camtasia freeze-frame video editing effect of 2021, which is how to extend the frame and customize the amount of time in Camtasia Studio:

Step 1: Upload the Video
Download the Camtasia software, install and open it on your PC. Then drag and drop the video that must be freeze-frame on the timeline.
Step 2: Select Video Portion and Duration
Play the click on the timeline and when it gets to the position, you want to freeze-frame, pause the video and left-click on the Playhead to select extend the frame.
Now, select the desired duration you want to extend the freeze-frame
Step 3: Extend Frame
Next is to go back to the timeline and left-click on the Playhead to select extend frame, then, click on split tool. After that, drag the extended frame to the upper new layer.
Step 4: Add Clip Speed
Right-click on the extended frame and apply “add clip speed” to select the amount of time required.
Step 5: Export and Save
Finally, reposition it back to the main track and play your video. Then, when you feel satisfied with the result, export and save it on your device.
For a more detailed, interactive explanation and understanding, watch the video
https://m.youtube.com/watch?v=j4zHxtflMsM
Part 3 Best 5 Alternatives to Freeze-frame
Here are the top five (5) alternatives to Camtasia freeze frames. We have mentioned their pros and cons for better understanding.
01**Wondershare Filmora Video Editor **
For Win 7 or later (64-bit)
For macOS 10.12 or later
Filmora is our first alternative for freeze frames in Camtasia. It is an easy-to-use video editing software with excellent tools and an outline of creative video effects. Being the best Mac video editor, it is safe to say you can directly make your freeze-frame effect from scratch.
Filmora is free to download, supports Mac and Windows devices, and has a practical freeze-frame effect function.
Pros:
● Ease of use
● No payment until required
● The full-featured video editing tool
● Tons of effects are available
Cons:
● Some effects are not free.

02Kinemaster
This is a free video editing application that edits your smartphone with much more fun and accessibility. It is equipped with top-notch editing tools and features and supports iOS and Android devices. Kinemaster is also a powerful application you can get creative with and makes it the top 5 alternatives to Camtasia freeze frame.
Pros:
● Easy-to-use editing tools.
● User-friendly interface.
Cons:
● There is a watermark at the end of the video
● Limited video format support.

03InShot
This is a free iOS and Android video editing application and a multi-featured application that assits you to get creative and edit videos with limitless features and the freeze-frame effect inclusive of its element.
Pros:
● Easy to use
● A wide range of quick, accessible features and editing tools to use.
Cons:
● Purchase needed to access the top features.
● Hardly intuitive.

04Videoshop video editor.
This is an effortless video editing application that is specifically for iOS devices. In addition, it comes furnished with remarkable video editing tools and stunning features to transform your video. This freeze-frame Camtasia alternative app is easy to use and gives your videos a creative shine.
Pros
● It is straightforward to use
● It has a detailed UI design
Cons:
● It has some glitches
● It has limited resolution support.
● The CIT can support a large amount of content.

05iMovie
iMovie application is popularly known to create and edit videos into a movie-like shine. However, the application is accessible for iOS video editing software equipped with the freeze-frame effect. iMovie is stocked with a bonus of powerful features to make your pop and stand out amongst others.
Pros:
● it has a user-friendly interface
● Allow users to share videos directly after editing
● It is straightforward and intuitive to use without guidelines
Cons:
● It supports a limited video format
● Video edits take up lots of phone storage.
● It crashes if video content is significant.

● Ending Thoughts →
● This article guided using the Camtasia freeze-frame and explained extending the freeze-frame features.
● The report also included the top 5 alternatives to freeze-frame Camtasia and rated Filmora as the number one due to its many latest effects in the upgraded version.
A freeze-frame is a technique whereby editors can suddenly halt motion in a film to make it look like a photograph. Then the still shot in the movie is usually used to create suspense or add emphasis to a scene. When freeze-frame gets added at the film’s end, it leaves the viewer guessing what will happen next.

Freezing or extending a frame will allow users to pace their video better. More importantly, freeze-frame applies on a per track basis, which helps buy users more time for a voiceover or an annotation. This article will teach you how to freeze-frame in Camtasia perfectly.
In this article
01 [How to Do Freeze-frame or Extended Frame in Camtasia?](#Part 1)
02 [What’s the Best Freeze-frame Video Editing Effect in Camtasia?](#Part 2)
03 [Best 5 Alternatives to Freeze-frame](#Part 3)
Part 1 How to Do Freeze-frame or Extended Frame in Camtasia?
If you are looking to bring in more creativity to your video clips by doing freeze-frame in Camtasia or extend frame, here is a step-by-step guide:
Step 1: Select the Video Part and Enter Duration
You have to move the Playhead to the frame if you want to extend. Then right-click on the track you wish to extend to choose the Extend Frame option or press shift+E.
For the keyboard shortcut to work, select the track first.

Now, enter the desired duration in seconds.

This will, in turn, create a stitched clip, provided that the auto-stitch in preferences hasn’t been disabled.

In addition, if the auto-stitch has been disabled, the clip will be split into three, as shown below, with the middle clip containing the extended frame.

Step 2: Change the Duration
To change the freeze duration in Camtasia freeze frame, right-click on the still portion of the clip and choose the Duration option. However, this will work with both split segments and stitched segments.

Part 2 What’s the Best Freeze-frame Video Editing Effect in Camtasia?
The freeze-frame effect in Camtasia is an excellent feature with a unique, elegant glitch and warp design. This well-organized and straightforward template is perfect for any event and features a full HD version and different freeze time effects. It is easy to use and customize, render your new awesome video, and drop media.
Here is the best Camtasia freeze-frame video editing effect of 2021, which is how to extend the frame and customize the amount of time in Camtasia Studio:

Step 1: Upload the Video
Download the Camtasia software, install and open it on your PC. Then drag and drop the video that must be freeze-frame on the timeline.
Step 2: Select Video Portion and Duration
Play the click on the timeline and when it gets to the position, you want to freeze-frame, pause the video and left-click on the Playhead to select extend the frame.
Now, select the desired duration you want to extend the freeze-frame
Step 3: Extend Frame
Next is to go back to the timeline and left-click on the Playhead to select extend frame, then, click on split tool. After that, drag the extended frame to the upper new layer.
Step 4: Add Clip Speed
Right-click on the extended frame and apply “add clip speed” to select the amount of time required.
Step 5: Export and Save
Finally, reposition it back to the main track and play your video. Then, when you feel satisfied with the result, export and save it on your device.
For a more detailed, interactive explanation and understanding, watch the video
https://m.youtube.com/watch?v=j4zHxtflMsM
Part 3 Best 5 Alternatives to Freeze-frame
Here are the top five (5) alternatives to Camtasia freeze frames. We have mentioned their pros and cons for better understanding.
01**Wondershare Filmora Video Editor **
For Win 7 or later (64-bit)
For macOS 10.12 or later
Filmora is our first alternative for freeze frames in Camtasia. It is an easy-to-use video editing software with excellent tools and an outline of creative video effects. Being the best Mac video editor, it is safe to say you can directly make your freeze-frame effect from scratch.
Filmora is free to download, supports Mac and Windows devices, and has a practical freeze-frame effect function.
Pros:
● Ease of use
● No payment until required
● The full-featured video editing tool
● Tons of effects are available
Cons:
● Some effects are not free.

02Kinemaster
This is a free video editing application that edits your smartphone with much more fun and accessibility. It is equipped with top-notch editing tools and features and supports iOS and Android devices. Kinemaster is also a powerful application you can get creative with and makes it the top 5 alternatives to Camtasia freeze frame.
Pros:
● Easy-to-use editing tools.
● User-friendly interface.
Cons:
● There is a watermark at the end of the video
● Limited video format support.

03InShot
This is a free iOS and Android video editing application and a multi-featured application that assits you to get creative and edit videos with limitless features and the freeze-frame effect inclusive of its element.
Pros:
● Easy to use
● A wide range of quick, accessible features and editing tools to use.
Cons:
● Purchase needed to access the top features.
● Hardly intuitive.

04Videoshop video editor.
This is an effortless video editing application that is specifically for iOS devices. In addition, it comes furnished with remarkable video editing tools and stunning features to transform your video. This freeze-frame Camtasia alternative app is easy to use and gives your videos a creative shine.
Pros
● It is straightforward to use
● It has a detailed UI design
Cons:
● It has some glitches
● It has limited resolution support.
● The CIT can support a large amount of content.

05iMovie
iMovie application is popularly known to create and edit videos into a movie-like shine. However, the application is accessible for iOS video editing software equipped with the freeze-frame effect. iMovie is stocked with a bonus of powerful features to make your pop and stand out amongst others.
Pros:
● it has a user-friendly interface
● Allow users to share videos directly after editing
● It is straightforward and intuitive to use without guidelines
Cons:
● It supports a limited video format
● Video edits take up lots of phone storage.
● It crashes if video content is significant.

● Ending Thoughts →
● This article guided using the Camtasia freeze-frame and explained extending the freeze-frame features.
● The report also included the top 5 alternatives to freeze-frame Camtasia and rated Filmora as the number one due to its many latest effects in the upgraded version.
A freeze-frame is a technique whereby editors can suddenly halt motion in a film to make it look like a photograph. Then the still shot in the movie is usually used to create suspense or add emphasis to a scene. When freeze-frame gets added at the film’s end, it leaves the viewer guessing what will happen next.

Freezing or extending a frame will allow users to pace their video better. More importantly, freeze-frame applies on a per track basis, which helps buy users more time for a voiceover or an annotation. This article will teach you how to freeze-frame in Camtasia perfectly.
In this article
01 [How to Do Freeze-frame or Extended Frame in Camtasia?](#Part 1)
02 [What’s the Best Freeze-frame Video Editing Effect in Camtasia?](#Part 2)
03 [Best 5 Alternatives to Freeze-frame](#Part 3)
Part 1 How to Do Freeze-frame or Extended Frame in Camtasia?
If you are looking to bring in more creativity to your video clips by doing freeze-frame in Camtasia or extend frame, here is a step-by-step guide:
Step 1: Select the Video Part and Enter Duration
You have to move the Playhead to the frame if you want to extend. Then right-click on the track you wish to extend to choose the Extend Frame option or press shift+E.
For the keyboard shortcut to work, select the track first.

Now, enter the desired duration in seconds.

This will, in turn, create a stitched clip, provided that the auto-stitch in preferences hasn’t been disabled.

In addition, if the auto-stitch has been disabled, the clip will be split into three, as shown below, with the middle clip containing the extended frame.

Step 2: Change the Duration
To change the freeze duration in Camtasia freeze frame, right-click on the still portion of the clip and choose the Duration option. However, this will work with both split segments and stitched segments.

Part 2 What’s the Best Freeze-frame Video Editing Effect in Camtasia?
The freeze-frame effect in Camtasia is an excellent feature with a unique, elegant glitch and warp design. This well-organized and straightforward template is perfect for any event and features a full HD version and different freeze time effects. It is easy to use and customize, render your new awesome video, and drop media.
Here is the best Camtasia freeze-frame video editing effect of 2021, which is how to extend the frame and customize the amount of time in Camtasia Studio:

Step 1: Upload the Video
Download the Camtasia software, install and open it on your PC. Then drag and drop the video that must be freeze-frame on the timeline.
Step 2: Select Video Portion and Duration
Play the click on the timeline and when it gets to the position, you want to freeze-frame, pause the video and left-click on the Playhead to select extend the frame.
Now, select the desired duration you want to extend the freeze-frame
Step 3: Extend Frame
Next is to go back to the timeline and left-click on the Playhead to select extend frame, then, click on split tool. After that, drag the extended frame to the upper new layer.
Step 4: Add Clip Speed
Right-click on the extended frame and apply “add clip speed” to select the amount of time required.
Step 5: Export and Save
Finally, reposition it back to the main track and play your video. Then, when you feel satisfied with the result, export and save it on your device.
For a more detailed, interactive explanation and understanding, watch the video
https://m.youtube.com/watch?v=j4zHxtflMsM
Part 3 Best 5 Alternatives to Freeze-frame
Here are the top five (5) alternatives to Camtasia freeze frames. We have mentioned their pros and cons for better understanding.
01**Wondershare Filmora Video Editor **
For Win 7 or later (64-bit)
For macOS 10.12 or later
Filmora is our first alternative for freeze frames in Camtasia. It is an easy-to-use video editing software with excellent tools and an outline of creative video effects. Being the best Mac video editor, it is safe to say you can directly make your freeze-frame effect from scratch.
Filmora is free to download, supports Mac and Windows devices, and has a practical freeze-frame effect function.
Pros:
● Ease of use
● No payment until required
● The full-featured video editing tool
● Tons of effects are available
Cons:
● Some effects are not free.

02Kinemaster
This is a free video editing application that edits your smartphone with much more fun and accessibility. It is equipped with top-notch editing tools and features and supports iOS and Android devices. Kinemaster is also a powerful application you can get creative with and makes it the top 5 alternatives to Camtasia freeze frame.
Pros:
● Easy-to-use editing tools.
● User-friendly interface.
Cons:
● There is a watermark at the end of the video
● Limited video format support.

03InShot
This is a free iOS and Android video editing application and a multi-featured application that assits you to get creative and edit videos with limitless features and the freeze-frame effect inclusive of its element.
Pros:
● Easy to use
● A wide range of quick, accessible features and editing tools to use.
Cons:
● Purchase needed to access the top features.
● Hardly intuitive.

04Videoshop video editor.
This is an effortless video editing application that is specifically for iOS devices. In addition, it comes furnished with remarkable video editing tools and stunning features to transform your video. This freeze-frame Camtasia alternative app is easy to use and gives your videos a creative shine.
Pros
● It is straightforward to use
● It has a detailed UI design
Cons:
● It has some glitches
● It has limited resolution support.
● The CIT can support a large amount of content.

05iMovie
iMovie application is popularly known to create and edit videos into a movie-like shine. However, the application is accessible for iOS video editing software equipped with the freeze-frame effect. iMovie is stocked with a bonus of powerful features to make your pop and stand out amongst others.
Pros:
● it has a user-friendly interface
● Allow users to share videos directly after editing
● It is straightforward and intuitive to use without guidelines
Cons:
● It supports a limited video format
● Video edits take up lots of phone storage.
● It crashes if video content is significant.

● Ending Thoughts →
● This article guided using the Camtasia freeze-frame and explained extending the freeze-frame features.
● The report also included the top 5 alternatives to freeze-frame Camtasia and rated Filmora as the number one due to its many latest effects in the upgraded version.
Best 12 Best Freeze Frame Video Editing Examples
Top 12 Best Freeze Frame Video Editing Examples
An easy yet powerful editor
Numerous effects to choose from
Detailed tutorials provided by the official channel
Freeze frame effect in video editing is a skill that requires more practice to master. It adds drama and impact to movies. If you want to see more energy and acting in the videos you watch, then you should see more freeze-frame examples.
Sometimes we notice that a particular action stays on longer than necessary in a movie or video. The filmmakers use this skill to emphasize some intense moments further to sustain or pique your interest.
The freeze-frame video editing feature is a valuable skill that helps filmmakers make excellent movies. We have a list of the top 12 examples of freeze-frame effects in movies for you.
In this article
01 [What is freeze-frame video editing?](#Part 1)
02 [Ways to use freeze-frame video editing](#Part 2)
03 [What are the best freeze-frame video editing examples?](#Part 3)
Part 1 What Is Freeze Frame Video Editing?
Freeze frame video editing is a video editing technique that halts movement in a video for a given period. It converts moving pictures into still photography for some time. These video editor effects help filmmakers gear attention to the video editing or filmmaking process. In other words, they are self-reflexive.
Part 2 Ways to Use Freeze Frame in Video editing
Freeze frames can be helpful in 3 significant ways in video editing;
● At the beginning of a movie/video: Freeze-frame at the beginning helps you pique the audience’s interest and give them a sneak peek of what to expect in the movie. This freeze-frame technique was used in the film ‘Good Fellas’ to pique the audience’s interests.
● At the end: Using a freeze-frame allows the audience to choose or decide how the movie ends, whether it is obvious. The ‘breakfast club’ filmmakers use a freeze-frame at the end to emphasize the young boy.
● In the middle, subtly capturing intense moments like in the movie ‘The Departed.’
Part 3 What are the Best Freeze-Frame Video Editing Examples?
It takes a great deal of skill to employ freeze frame with the best results correctly. It might bore the audience or give another impression other than the intended when not done effectively.
But several movie directors have effectively used the freeze-frame video editing technique that wowed the audience.
Here is a list of the best freeze frame examples you would love;
01The Departed
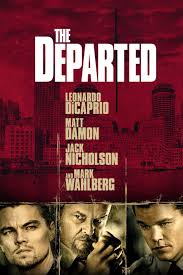
In this 2006 movie, an undercover cop and a mole try to identify each other. Scorsese shows his editing prowess once again as he uses freeze-frame more subtly.
He changes the frame speed instead of stopping on one frame for a considerably longer time. This emphasizes some memorable moments that you may overlook on a first watch.
02Rocky III
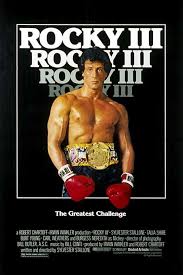
The freeze-frame came in during the final match between Apollo and Balboa in this movie.
During the first 3 Rocky movies, Apollo and Balboa had an intriguing rivalry. At the end of Rocky III, the duo decides to engage in a friendly battle to determine who was the Lord in boxing.
The movie ends in a freeze-frame with Rocky swinging a right hook after Apollo imitates the bell, saying, “Ding Dong.”
The freeze-frame allows the audience to guess who the winner will be, thus a longer time to think of the movie after watching.
03400 Blows
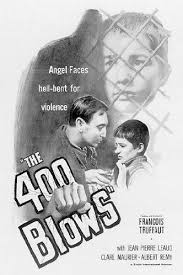
In 400 Blows, the main character Antoine, a young Parisian, was hardly out of trouble.
In an attempt to end his troubles, he arrives at the beach after running away from a soccer match.
He is faced with either jumping right in or going back. The movie ends in a freeze-frame as no one finds out. The decision was left to the audience.
04Thelma and Louise
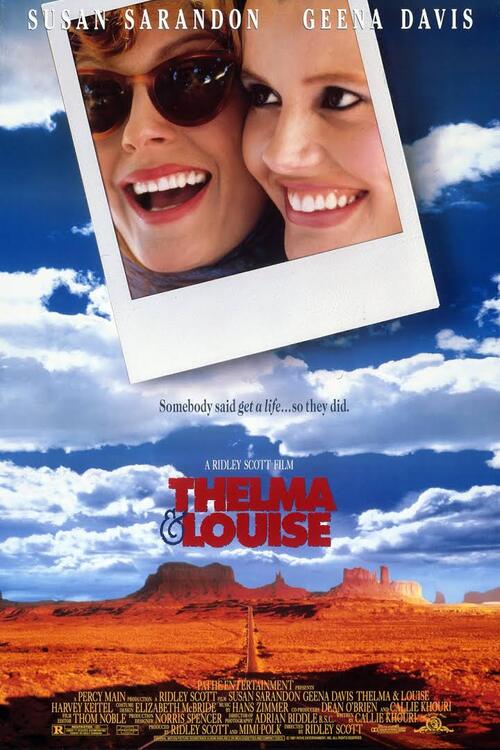
Thelma and Louise is about two (2) friends, Thelma Dickinson and Louise Sawyer. They both rise to defend themselves in a male-dominated world. In the film, Thelma and Louise are both running from the authorities. Louise killed a man who almost raped her friend, Thelma, thus the run. Things get out of control as they try to escape to Mexico, away from the authorities.
While on the run, they get ambushed by the police towards the grand canyon. The audience, at this point, is in suspense as to whether the ladies will survive or not.
Instead of surrendering, they drive right into the grand canyon, and the movie ends in a freeze-frame as they get caught hanging in the air while plunging into the canyon.
Regular movies might decide to give us all the details of the car plunging and exploding.
05The Wolf of Wall Street
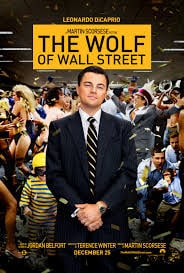
Scorsese uses freeze-frame at the beginning of this movie, just as he did in Good Fellas. The freeze-frame effect here helps introduce the character and shows us the plot of the movie hence piquing the audience’s interests immediately.
06Out of Sight
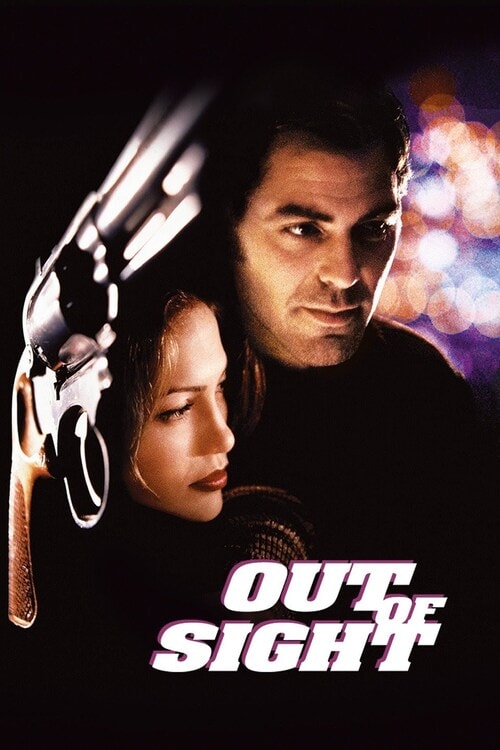
This movie is another excellent example of freeze-frame video editing. What other way to pique the audience’s interest significantly and emphasize them than capture them in a freeze-frame.
07Death Proof
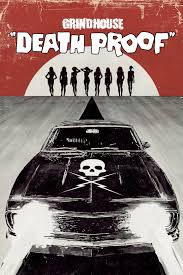
In this movie, the freeze-frame stays till the very end. It captures three women as they raise their hands-on celebration after successfully beating to death a psychopath who has been killing young women.
08Butch Cassidy and the Sundance Kid
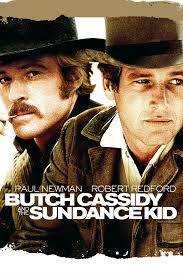
This movie follows two train robbers, Butch Cassidy and Harry Longabaugh, known as the ‘Sundance Kid.’ After conducting several robberies, they go on the run as the authorities pursue them. After a gun battle with the authorities, they take cover inside a building, but they get surrounded with no other escape route.
Thus they decide to engage in the last fight instead of surrendering, and you see them in a gun battle with the authorities. The movie ends with them caught in a freeze-frame brandishing their guns at the officers instead of actual bloodshed. Though we all know they will get killed.
09Good Fellas
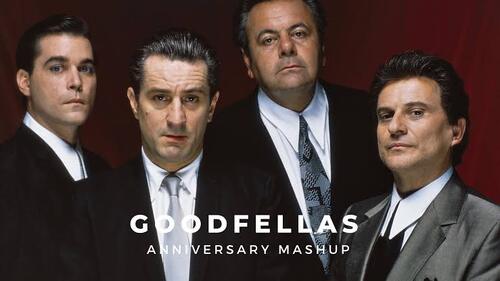
Initially, we mentioned that a freeze-frame could be of use at the beginning of a movie. Scorsese used this effectively in ‘Good Fellas’ to emphasize the movie plot.
In the opening scene, the characters Henry, Jimmy, and Tonny, played by Ray Liotta, Robert De Niro, and Joe Pesci, respectively, stop their car in the middle of the road.
They open their truck and see a man badly wounded and beaten, Tonny stabs him, and Jimmy shoots him. Henry then closes the truck and looks on in a freeze-frame before uttering the lines, “As far back as I can remember, I have always wanted to be a gangster.”
This lets us know right away what will happen in the movie. That person will get killed, and this is the mob territory.
10Harry Potter and the Prisoner of Azkaban
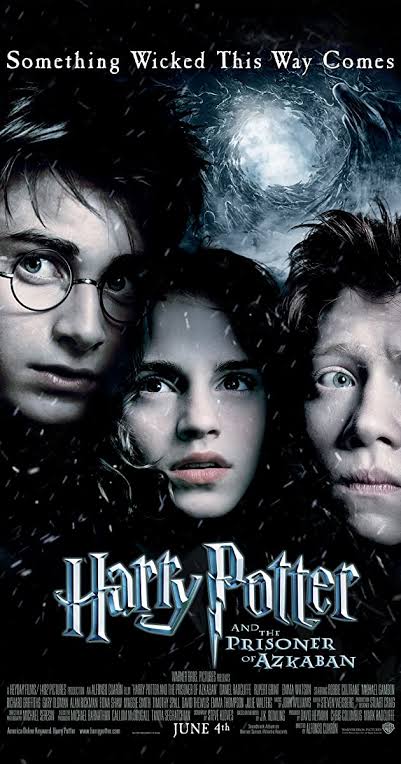
During a bad and weird year at Hogwarts, Harry potter experiences an extremely joyous moment when he goes anti-gravity on his new Firebolt broom.
He becomes overjoyed and his expression gets captured in a freeze-frame.
11The Breakfast Club
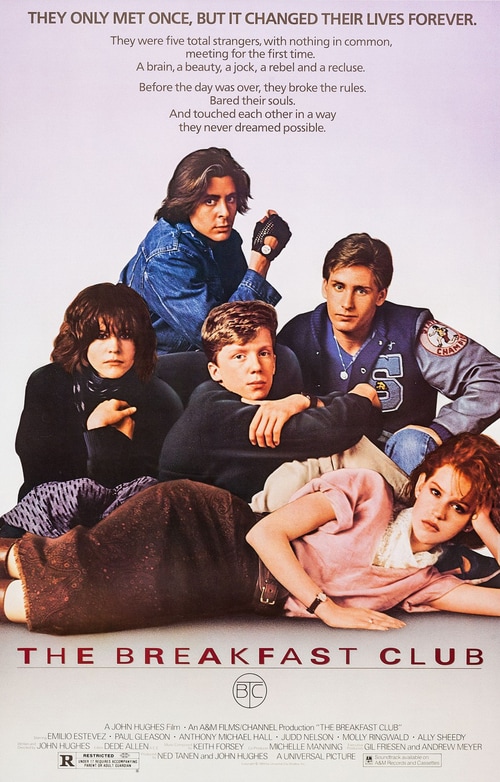
The Breakfast Club is an 80s movie showing teenagers trying to find their identity in life and overcoming the challenges of these years.
This is another freeze frame example where the filmmakers showed great expertise. The character John Bender is caught in a freeze-frame, punching the air to celebrate his victory.
He has just shared a kiss with the class sweetheart Claire. He and his classmates have also just won over the authoritative principal, Mr. Vernon.
12Pulp Fiction: Pumpkin and Honey Bunny.
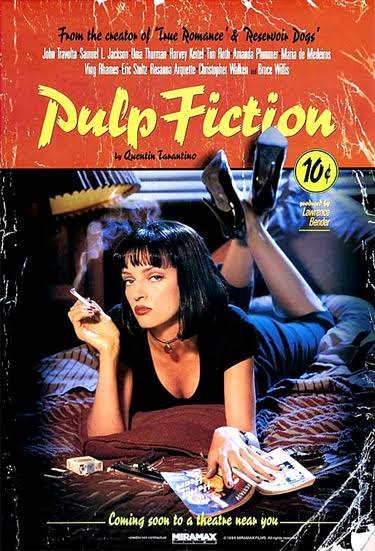
Pulp Fiction is another movie such as ‘Good Fellas’ with its freeze-frame edition done at the movie’s beginning.
Pumpkin and Honey Bunny are shown at the movie’s beginning, sitting together in a diner. They argue whether it will be safer to rub a bank or a restaurant. In the end, they settle for a diner — the same one they are sitting in.
They kiss and pull out their guns, and the images freeze before the credits roll out.
The freeze-frame gives us a sneak peek of the violence to experience in the movie, and indeed, we were not disappointed.
For Win 7 or later (64-bit)
For macOS 10.12 or later
With Wondershare Filmora Video Editor ‘s speed ramping feature, you can adjust your video speed while controlling the keyframes to create fascinating cinematic videos.
Filmora is a video editing tool developed by wondershare and has exciting features. Filmora makes video editing easy and seamless yet produces professional results.
Filmora’s freeze-frame feature helps bring dynamism and energy to your videos using its keyframe feature.
● Ending Thoughts →
● It is an inexplicable feeling that we get every time we remember a movie we watched a long time ago, the ones whereas kept debating with our friends as to what would have happened.
● That is the purpose of adding freeze-frame effects at the end of videos. So you keep thinking about them.
● Now that you know this effect, you can figure out which freeze-frame video examples you still find very interesting. Also, do not hesitate to try out the new features of Filmora. It would bring out the best of your video to the audience.
Freeze frame effect in video editing is a skill that requires more practice to master. It adds drama and impact to movies. If you want to see more energy and acting in the videos you watch, then you should see more freeze-frame examples.
Sometimes we notice that a particular action stays on longer than necessary in a movie or video. The filmmakers use this skill to emphasize some intense moments further to sustain or pique your interest.
The freeze-frame video editing feature is a valuable skill that helps filmmakers make excellent movies. We have a list of the top 12 examples of freeze-frame effects in movies for you.
In this article
01 [What is freeze-frame video editing?](#Part 1)
02 [Ways to use freeze-frame video editing](#Part 2)
03 [What are the best freeze-frame video editing examples?](#Part 3)
Part 1 What Is Freeze Frame Video Editing?
Freeze frame video editing is a video editing technique that halts movement in a video for a given period. It converts moving pictures into still photography for some time. These video editor effects help filmmakers gear attention to the video editing or filmmaking process. In other words, they are self-reflexive.
Part 2 Ways to Use Freeze Frame in Video editing
Freeze frames can be helpful in 3 significant ways in video editing;
● At the beginning of a movie/video: Freeze-frame at the beginning helps you pique the audience’s interest and give them a sneak peek of what to expect in the movie. This freeze-frame technique was used in the film ‘Good Fellas’ to pique the audience’s interests.
● At the end: Using a freeze-frame allows the audience to choose or decide how the movie ends, whether it is obvious. The ‘breakfast club’ filmmakers use a freeze-frame at the end to emphasize the young boy.
● In the middle, subtly capturing intense moments like in the movie ‘The Departed.’
Part 3 What are the Best Freeze-Frame Video Editing Examples?
It takes a great deal of skill to employ freeze frame with the best results correctly. It might bore the audience or give another impression other than the intended when not done effectively.
But several movie directors have effectively used the freeze-frame video editing technique that wowed the audience.
Here is a list of the best freeze frame examples you would love;
01The Departed

In this 2006 movie, an undercover cop and a mole try to identify each other. Scorsese shows his editing prowess once again as he uses freeze-frame more subtly.
He changes the frame speed instead of stopping on one frame for a considerably longer time. This emphasizes some memorable moments that you may overlook on a first watch.
02Rocky III

The freeze-frame came in during the final match between Apollo and Balboa in this movie.
During the first 3 Rocky movies, Apollo and Balboa had an intriguing rivalry. At the end of Rocky III, the duo decides to engage in a friendly battle to determine who was the Lord in boxing.
The movie ends in a freeze-frame with Rocky swinging a right hook after Apollo imitates the bell, saying, “Ding Dong.”
The freeze-frame allows the audience to guess who the winner will be, thus a longer time to think of the movie after watching.
03400 Blows

In 400 Blows, the main character Antoine, a young Parisian, was hardly out of trouble.
In an attempt to end his troubles, he arrives at the beach after running away from a soccer match.
He is faced with either jumping right in or going back. The movie ends in a freeze-frame as no one finds out. The decision was left to the audience.
04Thelma and Louise

Thelma and Louise is about two (2) friends, Thelma Dickinson and Louise Sawyer. They both rise to defend themselves in a male-dominated world. In the film, Thelma and Louise are both running from the authorities. Louise killed a man who almost raped her friend, Thelma, thus the run. Things get out of control as they try to escape to Mexico, away from the authorities.
While on the run, they get ambushed by the police towards the grand canyon. The audience, at this point, is in suspense as to whether the ladies will survive or not.
Instead of surrendering, they drive right into the grand canyon, and the movie ends in a freeze-frame as they get caught hanging in the air while plunging into the canyon.
Regular movies might decide to give us all the details of the car plunging and exploding.
05The Wolf of Wall Street

Scorsese uses freeze-frame at the beginning of this movie, just as he did in Good Fellas. The freeze-frame effect here helps introduce the character and shows us the plot of the movie hence piquing the audience’s interests immediately.
06Out of Sight

This movie is another excellent example of freeze-frame video editing. What other way to pique the audience’s interest significantly and emphasize them than capture them in a freeze-frame.
07Death Proof

In this movie, the freeze-frame stays till the very end. It captures three women as they raise their hands-on celebration after successfully beating to death a psychopath who has been killing young women.
08Butch Cassidy and the Sundance Kid

This movie follows two train robbers, Butch Cassidy and Harry Longabaugh, known as the ‘Sundance Kid.’ After conducting several robberies, they go on the run as the authorities pursue them. After a gun battle with the authorities, they take cover inside a building, but they get surrounded with no other escape route.
Thus they decide to engage in the last fight instead of surrendering, and you see them in a gun battle with the authorities. The movie ends with them caught in a freeze-frame brandishing their guns at the officers instead of actual bloodshed. Though we all know they will get killed.
09Good Fellas

Initially, we mentioned that a freeze-frame could be of use at the beginning of a movie. Scorsese used this effectively in ‘Good Fellas’ to emphasize the movie plot.
In the opening scene, the characters Henry, Jimmy, and Tonny, played by Ray Liotta, Robert De Niro, and Joe Pesci, respectively, stop their car in the middle of the road.
They open their truck and see a man badly wounded and beaten, Tonny stabs him, and Jimmy shoots him. Henry then closes the truck and looks on in a freeze-frame before uttering the lines, “As far back as I can remember, I have always wanted to be a gangster.”
This lets us know right away what will happen in the movie. That person will get killed, and this is the mob territory.
10Harry Potter and the Prisoner of Azkaban

During a bad and weird year at Hogwarts, Harry potter experiences an extremely joyous moment when he goes anti-gravity on his new Firebolt broom.
He becomes overjoyed and his expression gets captured in a freeze-frame.
11The Breakfast Club

The Breakfast Club is an 80s movie showing teenagers trying to find their identity in life and overcoming the challenges of these years.
This is another freeze frame example where the filmmakers showed great expertise. The character John Bender is caught in a freeze-frame, punching the air to celebrate his victory.
He has just shared a kiss with the class sweetheart Claire. He and his classmates have also just won over the authoritative principal, Mr. Vernon.
12Pulp Fiction: Pumpkin and Honey Bunny.

Pulp Fiction is another movie such as ‘Good Fellas’ with its freeze-frame edition done at the movie’s beginning.
Pumpkin and Honey Bunny are shown at the movie’s beginning, sitting together in a diner. They argue whether it will be safer to rub a bank or a restaurant. In the end, they settle for a diner — the same one they are sitting in.
They kiss and pull out their guns, and the images freeze before the credits roll out.
The freeze-frame gives us a sneak peek of the violence to experience in the movie, and indeed, we were not disappointed.
For Win 7 or later (64-bit)
For macOS 10.12 or later
With Wondershare Filmora Video Editor ‘s speed ramping feature, you can adjust your video speed while controlling the keyframes to create fascinating cinematic videos.
Filmora is a video editing tool developed by wondershare and has exciting features. Filmora makes video editing easy and seamless yet produces professional results.
Filmora’s freeze-frame feature helps bring dynamism and energy to your videos using its keyframe feature.
● Ending Thoughts →
● It is an inexplicable feeling that we get every time we remember a movie we watched a long time ago, the ones whereas kept debating with our friends as to what would have happened.
● That is the purpose of adding freeze-frame effects at the end of videos. So you keep thinking about them.
● Now that you know this effect, you can figure out which freeze-frame video examples you still find very interesting. Also, do not hesitate to try out the new features of Filmora. It would bring out the best of your video to the audience.
Freeze frame effect in video editing is a skill that requires more practice to master. It adds drama and impact to movies. If you want to see more energy and acting in the videos you watch, then you should see more freeze-frame examples.
Sometimes we notice that a particular action stays on longer than necessary in a movie or video. The filmmakers use this skill to emphasize some intense moments further to sustain or pique your interest.
The freeze-frame video editing feature is a valuable skill that helps filmmakers make excellent movies. We have a list of the top 12 examples of freeze-frame effects in movies for you.
In this article
01 [What is freeze-frame video editing?](#Part 1)
02 [Ways to use freeze-frame video editing](#Part 2)
03 [What are the best freeze-frame video editing examples?](#Part 3)
Part 1 What Is Freeze Frame Video Editing?
Freeze frame video editing is a video editing technique that halts movement in a video for a given period. It converts moving pictures into still photography for some time. These video editor effects help filmmakers gear attention to the video editing or filmmaking process. In other words, they are self-reflexive.
Part 2 Ways to Use Freeze Frame in Video editing
Freeze frames can be helpful in 3 significant ways in video editing;
● At the beginning of a movie/video: Freeze-frame at the beginning helps you pique the audience’s interest and give them a sneak peek of what to expect in the movie. This freeze-frame technique was used in the film ‘Good Fellas’ to pique the audience’s interests.
● At the end: Using a freeze-frame allows the audience to choose or decide how the movie ends, whether it is obvious. The ‘breakfast club’ filmmakers use a freeze-frame at the end to emphasize the young boy.
● In the middle, subtly capturing intense moments like in the movie ‘The Departed.’
Part 3 What are the Best Freeze-Frame Video Editing Examples?
It takes a great deal of skill to employ freeze frame with the best results correctly. It might bore the audience or give another impression other than the intended when not done effectively.
But several movie directors have effectively used the freeze-frame video editing technique that wowed the audience.
Here is a list of the best freeze frame examples you would love;
01The Departed

In this 2006 movie, an undercover cop and a mole try to identify each other. Scorsese shows his editing prowess once again as he uses freeze-frame more subtly.
He changes the frame speed instead of stopping on one frame for a considerably longer time. This emphasizes some memorable moments that you may overlook on a first watch.
02Rocky III

The freeze-frame came in during the final match between Apollo and Balboa in this movie.
During the first 3 Rocky movies, Apollo and Balboa had an intriguing rivalry. At the end of Rocky III, the duo decides to engage in a friendly battle to determine who was the Lord in boxing.
The movie ends in a freeze-frame with Rocky swinging a right hook after Apollo imitates the bell, saying, “Ding Dong.”
The freeze-frame allows the audience to guess who the winner will be, thus a longer time to think of the movie after watching.
03400 Blows

In 400 Blows, the main character Antoine, a young Parisian, was hardly out of trouble.
In an attempt to end his troubles, he arrives at the beach after running away from a soccer match.
He is faced with either jumping right in or going back. The movie ends in a freeze-frame as no one finds out. The decision was left to the audience.
04Thelma and Louise

Thelma and Louise is about two (2) friends, Thelma Dickinson and Louise Sawyer. They both rise to defend themselves in a male-dominated world. In the film, Thelma and Louise are both running from the authorities. Louise killed a man who almost raped her friend, Thelma, thus the run. Things get out of control as they try to escape to Mexico, away from the authorities.
While on the run, they get ambushed by the police towards the grand canyon. The audience, at this point, is in suspense as to whether the ladies will survive or not.
Instead of surrendering, they drive right into the grand canyon, and the movie ends in a freeze-frame as they get caught hanging in the air while plunging into the canyon.
Regular movies might decide to give us all the details of the car plunging and exploding.
05The Wolf of Wall Street

Scorsese uses freeze-frame at the beginning of this movie, just as he did in Good Fellas. The freeze-frame effect here helps introduce the character and shows us the plot of the movie hence piquing the audience’s interests immediately.
06Out of Sight

This movie is another excellent example of freeze-frame video editing. What other way to pique the audience’s interest significantly and emphasize them than capture them in a freeze-frame.
07Death Proof

In this movie, the freeze-frame stays till the very end. It captures three women as they raise their hands-on celebration after successfully beating to death a psychopath who has been killing young women.
08Butch Cassidy and the Sundance Kid

This movie follows two train robbers, Butch Cassidy and Harry Longabaugh, known as the ‘Sundance Kid.’ After conducting several robberies, they go on the run as the authorities pursue them. After a gun battle with the authorities, they take cover inside a building, but they get surrounded with no other escape route.
Thus they decide to engage in the last fight instead of surrendering, and you see them in a gun battle with the authorities. The movie ends with them caught in a freeze-frame brandishing their guns at the officers instead of actual bloodshed. Though we all know they will get killed.
09Good Fellas

Initially, we mentioned that a freeze-frame could be of use at the beginning of a movie. Scorsese used this effectively in ‘Good Fellas’ to emphasize the movie plot.
In the opening scene, the characters Henry, Jimmy, and Tonny, played by Ray Liotta, Robert De Niro, and Joe Pesci, respectively, stop their car in the middle of the road.
They open their truck and see a man badly wounded and beaten, Tonny stabs him, and Jimmy shoots him. Henry then closes the truck and looks on in a freeze-frame before uttering the lines, “As far back as I can remember, I have always wanted to be a gangster.”
This lets us know right away what will happen in the movie. That person will get killed, and this is the mob territory.
10Harry Potter and the Prisoner of Azkaban

During a bad and weird year at Hogwarts, Harry potter experiences an extremely joyous moment when he goes anti-gravity on his new Firebolt broom.
He becomes overjoyed and his expression gets captured in a freeze-frame.
11The Breakfast Club

The Breakfast Club is an 80s movie showing teenagers trying to find their identity in life and overcoming the challenges of these years.
This is another freeze frame example where the filmmakers showed great expertise. The character John Bender is caught in a freeze-frame, punching the air to celebrate his victory.
He has just shared a kiss with the class sweetheart Claire. He and his classmates have also just won over the authoritative principal, Mr. Vernon.
12Pulp Fiction: Pumpkin and Honey Bunny.

Pulp Fiction is another movie such as ‘Good Fellas’ with its freeze-frame edition done at the movie’s beginning.
Pumpkin and Honey Bunny are shown at the movie’s beginning, sitting together in a diner. They argue whether it will be safer to rub a bank or a restaurant. In the end, they settle for a diner — the same one they are sitting in.
They kiss and pull out their guns, and the images freeze before the credits roll out.
The freeze-frame gives us a sneak peek of the violence to experience in the movie, and indeed, we were not disappointed.
For Win 7 or later (64-bit)
For macOS 10.12 or later
With Wondershare Filmora Video Editor ‘s speed ramping feature, you can adjust your video speed while controlling the keyframes to create fascinating cinematic videos.
Filmora is a video editing tool developed by wondershare and has exciting features. Filmora makes video editing easy and seamless yet produces professional results.
Filmora’s freeze-frame feature helps bring dynamism and energy to your videos using its keyframe feature.
● Ending Thoughts →
● It is an inexplicable feeling that we get every time we remember a movie we watched a long time ago, the ones whereas kept debating with our friends as to what would have happened.
● That is the purpose of adding freeze-frame effects at the end of videos. So you keep thinking about them.
● Now that you know this effect, you can figure out which freeze-frame video examples you still find very interesting. Also, do not hesitate to try out the new features of Filmora. It would bring out the best of your video to the audience.
Freeze frame effect in video editing is a skill that requires more practice to master. It adds drama and impact to movies. If you want to see more energy and acting in the videos you watch, then you should see more freeze-frame examples.
Sometimes we notice that a particular action stays on longer than necessary in a movie or video. The filmmakers use this skill to emphasize some intense moments further to sustain or pique your interest.
The freeze-frame video editing feature is a valuable skill that helps filmmakers make excellent movies. We have a list of the top 12 examples of freeze-frame effects in movies for you.
In this article
01 [What is freeze-frame video editing?](#Part 1)
02 [Ways to use freeze-frame video editing](#Part 2)
03 [What are the best freeze-frame video editing examples?](#Part 3)
Part 1 What Is Freeze Frame Video Editing?
Freeze frame video editing is a video editing technique that halts movement in a video for a given period. It converts moving pictures into still photography for some time. These video editor effects help filmmakers gear attention to the video editing or filmmaking process. In other words, they are self-reflexive.
Part 2 Ways to Use Freeze Frame in Video editing
Freeze frames can be helpful in 3 significant ways in video editing;
● At the beginning of a movie/video: Freeze-frame at the beginning helps you pique the audience’s interest and give them a sneak peek of what to expect in the movie. This freeze-frame technique was used in the film ‘Good Fellas’ to pique the audience’s interests.
● At the end: Using a freeze-frame allows the audience to choose or decide how the movie ends, whether it is obvious. The ‘breakfast club’ filmmakers use a freeze-frame at the end to emphasize the young boy.
● In the middle, subtly capturing intense moments like in the movie ‘The Departed.’
Part 3 What are the Best Freeze-Frame Video Editing Examples?
It takes a great deal of skill to employ freeze frame with the best results correctly. It might bore the audience or give another impression other than the intended when not done effectively.
But several movie directors have effectively used the freeze-frame video editing technique that wowed the audience.
Here is a list of the best freeze frame examples you would love;
01The Departed

In this 2006 movie, an undercover cop and a mole try to identify each other. Scorsese shows his editing prowess once again as he uses freeze-frame more subtly.
He changes the frame speed instead of stopping on one frame for a considerably longer time. This emphasizes some memorable moments that you may overlook on a first watch.
02Rocky III

The freeze-frame came in during the final match between Apollo and Balboa in this movie.
During the first 3 Rocky movies, Apollo and Balboa had an intriguing rivalry. At the end of Rocky III, the duo decides to engage in a friendly battle to determine who was the Lord in boxing.
The movie ends in a freeze-frame with Rocky swinging a right hook after Apollo imitates the bell, saying, “Ding Dong.”
The freeze-frame allows the audience to guess who the winner will be, thus a longer time to think of the movie after watching.
03400 Blows

In 400 Blows, the main character Antoine, a young Parisian, was hardly out of trouble.
In an attempt to end his troubles, he arrives at the beach after running away from a soccer match.
He is faced with either jumping right in or going back. The movie ends in a freeze-frame as no one finds out. The decision was left to the audience.
04Thelma and Louise

Thelma and Louise is about two (2) friends, Thelma Dickinson and Louise Sawyer. They both rise to defend themselves in a male-dominated world. In the film, Thelma and Louise are both running from the authorities. Louise killed a man who almost raped her friend, Thelma, thus the run. Things get out of control as they try to escape to Mexico, away from the authorities.
While on the run, they get ambushed by the police towards the grand canyon. The audience, at this point, is in suspense as to whether the ladies will survive or not.
Instead of surrendering, they drive right into the grand canyon, and the movie ends in a freeze-frame as they get caught hanging in the air while plunging into the canyon.
Regular movies might decide to give us all the details of the car plunging and exploding.
05The Wolf of Wall Street

Scorsese uses freeze-frame at the beginning of this movie, just as he did in Good Fellas. The freeze-frame effect here helps introduce the character and shows us the plot of the movie hence piquing the audience’s interests immediately.
06Out of Sight

This movie is another excellent example of freeze-frame video editing. What other way to pique the audience’s interest significantly and emphasize them than capture them in a freeze-frame.
07Death Proof

In this movie, the freeze-frame stays till the very end. It captures three women as they raise their hands-on celebration after successfully beating to death a psychopath who has been killing young women.
08Butch Cassidy and the Sundance Kid

This movie follows two train robbers, Butch Cassidy and Harry Longabaugh, known as the ‘Sundance Kid.’ After conducting several robberies, they go on the run as the authorities pursue them. After a gun battle with the authorities, they take cover inside a building, but they get surrounded with no other escape route.
Thus they decide to engage in the last fight instead of surrendering, and you see them in a gun battle with the authorities. The movie ends with them caught in a freeze-frame brandishing their guns at the officers instead of actual bloodshed. Though we all know they will get killed.
09Good Fellas

Initially, we mentioned that a freeze-frame could be of use at the beginning of a movie. Scorsese used this effectively in ‘Good Fellas’ to emphasize the movie plot.
In the opening scene, the characters Henry, Jimmy, and Tonny, played by Ray Liotta, Robert De Niro, and Joe Pesci, respectively, stop their car in the middle of the road.
They open their truck and see a man badly wounded and beaten, Tonny stabs him, and Jimmy shoots him. Henry then closes the truck and looks on in a freeze-frame before uttering the lines, “As far back as I can remember, I have always wanted to be a gangster.”
This lets us know right away what will happen in the movie. That person will get killed, and this is the mob territory.
10Harry Potter and the Prisoner of Azkaban

During a bad and weird year at Hogwarts, Harry potter experiences an extremely joyous moment when he goes anti-gravity on his new Firebolt broom.
He becomes overjoyed and his expression gets captured in a freeze-frame.
11The Breakfast Club

The Breakfast Club is an 80s movie showing teenagers trying to find their identity in life and overcoming the challenges of these years.
This is another freeze frame example where the filmmakers showed great expertise. The character John Bender is caught in a freeze-frame, punching the air to celebrate his victory.
He has just shared a kiss with the class sweetheart Claire. He and his classmates have also just won over the authoritative principal, Mr. Vernon.
12Pulp Fiction: Pumpkin and Honey Bunny.

Pulp Fiction is another movie such as ‘Good Fellas’ with its freeze-frame edition done at the movie’s beginning.
Pumpkin and Honey Bunny are shown at the movie’s beginning, sitting together in a diner. They argue whether it will be safer to rub a bank or a restaurant. In the end, they settle for a diner — the same one they are sitting in.
They kiss and pull out their guns, and the images freeze before the credits roll out.
The freeze-frame gives us a sneak peek of the violence to experience in the movie, and indeed, we were not disappointed.
For Win 7 or later (64-bit)
For macOS 10.12 or later
With Wondershare Filmora Video Editor ‘s speed ramping feature, you can adjust your video speed while controlling the keyframes to create fascinating cinematic videos.
Filmora is a video editing tool developed by wondershare and has exciting features. Filmora makes video editing easy and seamless yet produces professional results.
Filmora’s freeze-frame feature helps bring dynamism and energy to your videos using its keyframe feature.
● Ending Thoughts →
● It is an inexplicable feeling that we get every time we remember a movie we watched a long time ago, the ones whereas kept debating with our friends as to what would have happened.
● That is the purpose of adding freeze-frame effects at the end of videos. So you keep thinking about them.
● Now that you know this effect, you can figure out which freeze-frame video examples you still find very interesting. Also, do not hesitate to try out the new features of Filmora. It would bring out the best of your video to the audience.
Also read:
- New In 2024, A Detailed Guid to Remove Background From a Video in Premier Pro
- In 2024, Create Slow Motion Videos Using Final Cut Pro with Ease
- Editing Videos Was Never so Easy as It Is Now. With Video Enhancer Ai, This Task Is Very Simple to Do and No Trouble Will Be There in Getting the Things Done as Needed. Choose the Right AI Video Enhancer for Task Completion
- 2024 Approved How to Stabilize Videos with Google Photos App for Free
- New How to Find a High-Quality Video Marketing Agency, In 2024
- Updated 2024 Approved Easy Ways to Remove Motion Blur In Photoshop
- Are You Trying to Make Slow-Mo Videos on Instagram? In This Article, We Will Discuss Top-Rated Ways to Produce Perfect Slow-Motion Videos for Instagram for 2024
- 2024 Approved Do You Want to Make Your Background Disappear and Replace with an Attractive Background? Here Is How to Add a Green Screen to Zoom App and Add Any Virtual Background of Your Choice
- 2024 Approved Want to Learn How to Create the Random Letter Reveal Intro? Read Through the Stages of Preparing This Effect via Filmora in This Guide
- New Best Ways to Add Meme Text to Videos for 2024
- Updated How to Add Filters on iMovie
- Reversing Time Lapse Videos on iPhone Using Top Applications
- 2024 Approved Top 22 Free Video Editing Software
- New 2024 Approved Top 10 Old Film Overlays to Make Your Videos Look Vintage
- In 2024, Spooky Halloween with the Best 15+ Halloween Countdown Video Clips
- Updated 2024 Approved How to Create the Night-to-Day Effect Video
- 2024 Approved How to Convert Videos to Slow Motion? Complete Guide
- Updated Every Compositor Should Know The Tips of Color Match in After Effects
- In 2024, How to Use Color Grading in Final Cut Pro
- New In 2024, 10 Recommended Websites to Discover Awesome Premiere Pro Video Templates
- New 2024 Approved How To Blur Background in Adobe Premiere Pro Detailed Guide
- New Top 8 AR Apps for Android and iOS | Help You See the World of AR
- Live Stream on YouTube Using Zoom for 2024
- New Top 11 Best Video Editing Apps for iPhone for 2024
- In 2024, Ways to trade pokemon go from far away On Poco M6 Pro 4G? | Dr.fone
- In 2024, 15 Best Collage Makers to Create Aesthetic Collages
- Methods to Change GPS Location On Poco X6 | Dr.fone
- How to Rescue Lost Music from GT Neo 5
- How to restore wiped call history on Motorola Moto G Stylus 5G (2023)?
- Three Solutions to Hard Reset Oppo Find X6? | Dr.fone
- Updated Learn Disney Cartoon Drawing to See More Disney Magic Moments for 2024
- In 2024, How To Remove or Bypass Knox Enrollment Service On Vivo V27 Pro
- In 2024, Full Guide to Fix iToolab AnyGO Not Working On Apple iPhone 12 Pro Max | Dr.fone
- In 2024, 3 Ways to Track Xiaomi Redmi 12 5G without Them Knowing | Dr.fone
- Updated In 2024, A Complete Guide To Translate Video With Google
- How to Detect and Stop mSpy from Spying on Your Motorola Razr 40 | Dr.fone
- 2024 Approved The Best Translator to Translate Videos Online
- How To Bypass iCloud Activation Lock on Mac For Apple iPhone 12 mini?
- How to Intercept Text Messages on OnePlus 11 5G | Dr.fone
- How To Repair iPhone 12 iOS System Issues? | Dr.fone
- How To Make Talking Emoji on iPhone in Easy Steps for 2024
- Gmail Not Working on Honor Magic 5 Pro 7 Common Problems & Fixes | Dr.fone
- In 2024, Can I use iTools gpx file to catch the rare Pokemon On Realme 11 Pro+ | Dr.fone
- In 2024, Mastering Lock Screen Settings How to Enable and Disable on Realme GT Neo 5
- In 2024, Did Your Apple iPhone 13 mini Passcode Change Itself? Unlock It Now | Dr.fone
- In 2024, How To Pause Life360 Location Sharing For Vivo Y77t | Dr.fone
- In 2024, 5 Techniques to Transfer Data from Samsung Galaxy A05s to iPhone 15/14/13/12 | Dr.fone
- Title: New How To Export Video in Filmora
- Author: Chloe
- Created at : 2024-05-20 03:38:08
- Updated at : 2024-05-21 03:38:08
- Link: https://ai-editing-video.techidaily.com/new-how-to-export-video-in-filmora/
- License: This work is licensed under CC BY-NC-SA 4.0.


