:max_bytes(150000):strip_icc():format(webp)/GettyImages-664800650-4349941504c24712b81975694798236b.jpg)
New How To Make A Video Longer

How To Make A Video Longer
These days when you head on to social media, you can easily find 4-5 seconds video clips on the internet. However, many social media platforms like YouTube, Instagram, and other videos sharing platforms require you to make your video longer to meet the site’s minimum length requirements. So, for example, although Instagram’s minimum length is 3 seconds, you might want to find ways to engage your audience longer.
This article will describe the best ways to make a video longer. We’ll also offer a bonus tip on how you can edit your video to make it look better and attract more audience. On that note, let’s take a look.
6 Best Methods to Make a Video Longer
There are many methods out there to make your video longer. This section will touch on the six best methods to make a video longer.
Loop the Video
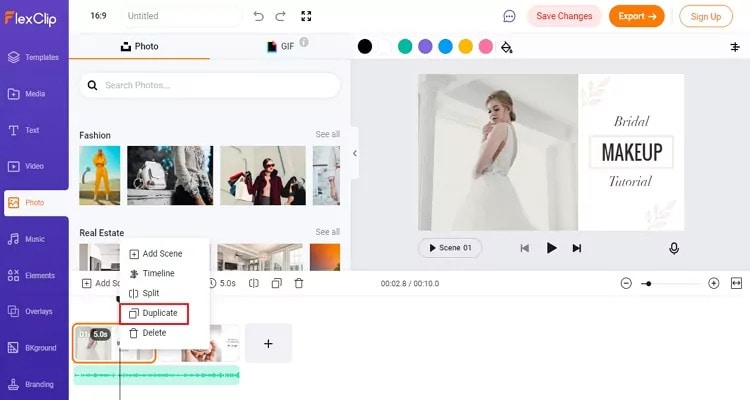
One of the best ways to make your video longer for most social media platforms is to loop the video. When you replay the video several times in a single row, it helps to multiply its length. An example is taking a 2-second video and looping it 4x. This automatically makes it into an 8-second video clip. With looping, you can simply replay the action of the clip rather than altering it in any way.
Many video editing software today allows you to loop your video for free. You have to upload the video and choose how many times you would like to loop it, and the software will get to work.
Slow Down the Video Speed

We would all agree that slow-motion makes everything seem longer automatically. You can utilize the same technique when you want to make a video longer. When you slow down a video clip, every second lasts longer. Using the slow-motion effect on a 3-second video will make the video 6 or even 9 seconds longer.
Add an Intro and Outro

Intro and outro are scenes you add before and after the video; these scenes are popular in YouTube videos. More generally, an intro is like a trailer. It shows the audience what the video is about, and the outro scene is usually used to show more information about the video maker. Adding an intro and outro to your video can add 2-4 seconds to your video clips.
It’s quite easy to add an intro and outro to any video. You can create them separately and then merge them with your video. The intro must be something relevant to the video clip; an example is adding a fast photo slideshow to the beginning of your video or a black frame. Relevant intro and outro scenes will make your video longer and maybe more engaging.
Add Images to the Video
This is another trick that most bloggers use to make their videos longer. It is an old trick in the book and makes your video significantly longer, depending on the number of videos you’re adding. A single picture can add a second or two to your video. You can simply use a video editor to merge the video clip and pictures into one seamless file.
Boomerang Your Video
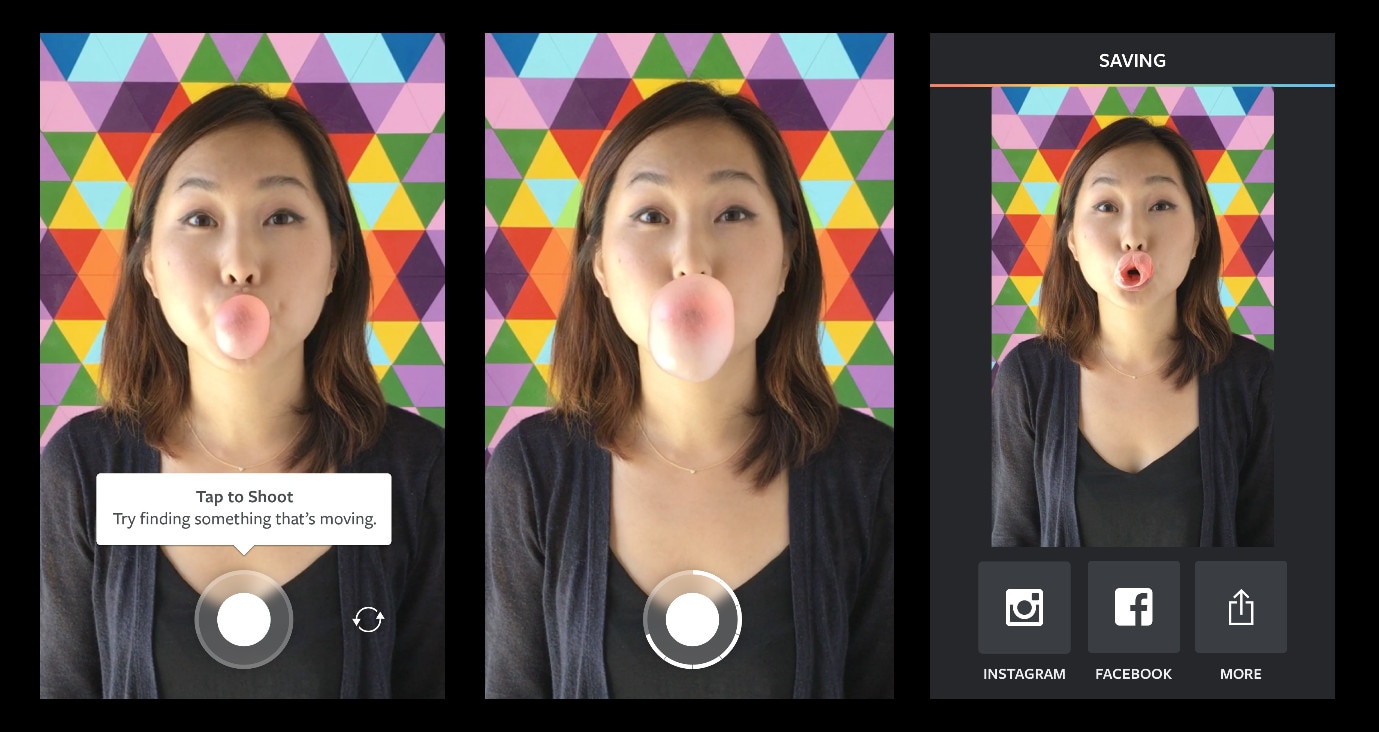
If you have plans to upload your media to Instagram, then a top feature you can use to make your video longer is the boomerang feature. Instagram introduced the Boomerang feature to play short video clips forward and then repeat their reverse. So by using the Boomerang feature, you don’t only add a memory effect to your video, but you also make your video longer.
Alternatively, you can manually append your video clip to a reversed version; this option allows you to make a boomerang from an existing clip. Apart from Instagram, you can utilize many other editing tools to create a boomerang from an existing video.
Add More Content to Your Video Clip

Another step you can take is to add more materials to your video. This doesn’t necessarily mean you have to get your camera out and start shooting more scenes to add to your video. Instead, you can simply access online media libraries and get amazing materials from there that are relevant to your video clip.
Today, most professional video editors offer you access to royalty-free photos and music material. You can simply browse through their collections and pick materials relevant to your video. For example, you could add a soundtrack and videos or GIFs that make your videos engaging. Adding extra content to your video clip can make it longer by 10 seconds.
Bonus Tips: How to Edit Video Easily on a Computer
Social media platforms offer you basic video editing features that you can use to optimize your video. However, these features are limited in what they can provide you with. If you want to have more control over the editing of your video clip and make it look even more professional, you should try Wondershare Filmora. This video editing tool is powerful and provides you with more editing features to ensure you get the result you want.
Filmora offers users over 300 effects like motion elements, overlays, titles, music sounds, and many more features to make your video more engaging and attractive. Using this app is relatively easy as well, and it offers users the option of changing the file format of their video if the social media platform does not support the original format.
If you would like to edit your video to give it a more engaging and professional look, follow the simple steps below.
Step 1: Import Video to Wondershare Filmora
First, you need to download the app on your device. After that, you can download it from the official website. Luckily, Wondershare Filmora supports Windows and Mac OS. Once you download the file, install and launch the app to get started.
On the menu, click on create a new project to begin. Next, click on the import button, and from the dropdown menu, choose ‘import media file.’ Alternatively, you can simply drag the video directly to the media library of this video editor. In addition, Filmora allows you to preview your video as you add different features to optimize the video.

If your video is shaky, you can use the stabilization feature to make it more stable. Simply right-click on the video in the preview window and select the option. Once you are sure, the video is ok, drag and drop it into the timeline to start editing your video.
Step 2: Cut, Slip, Rotate, or Color-Tune Your Video
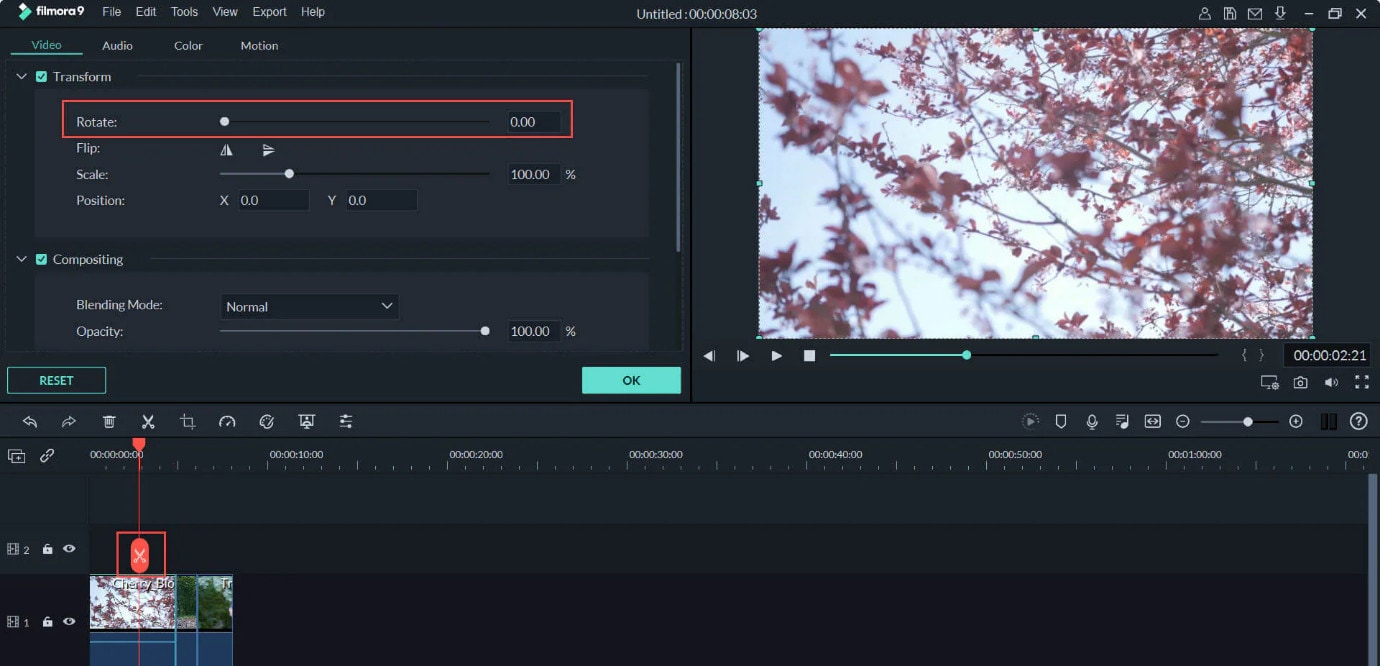
You can use many features to shape your video quickly on Wondershare Filmora. For example, you can use the scissors tool to cut or split your video. You can also use the transform tool to rotate and flip your video if you would prefer. In addition, Filmora allows you to add some advanced color tuning to your video with the color feature. This automatically makes your video even more beautiful.
Step 3: Add Filters and Effects to Your Video
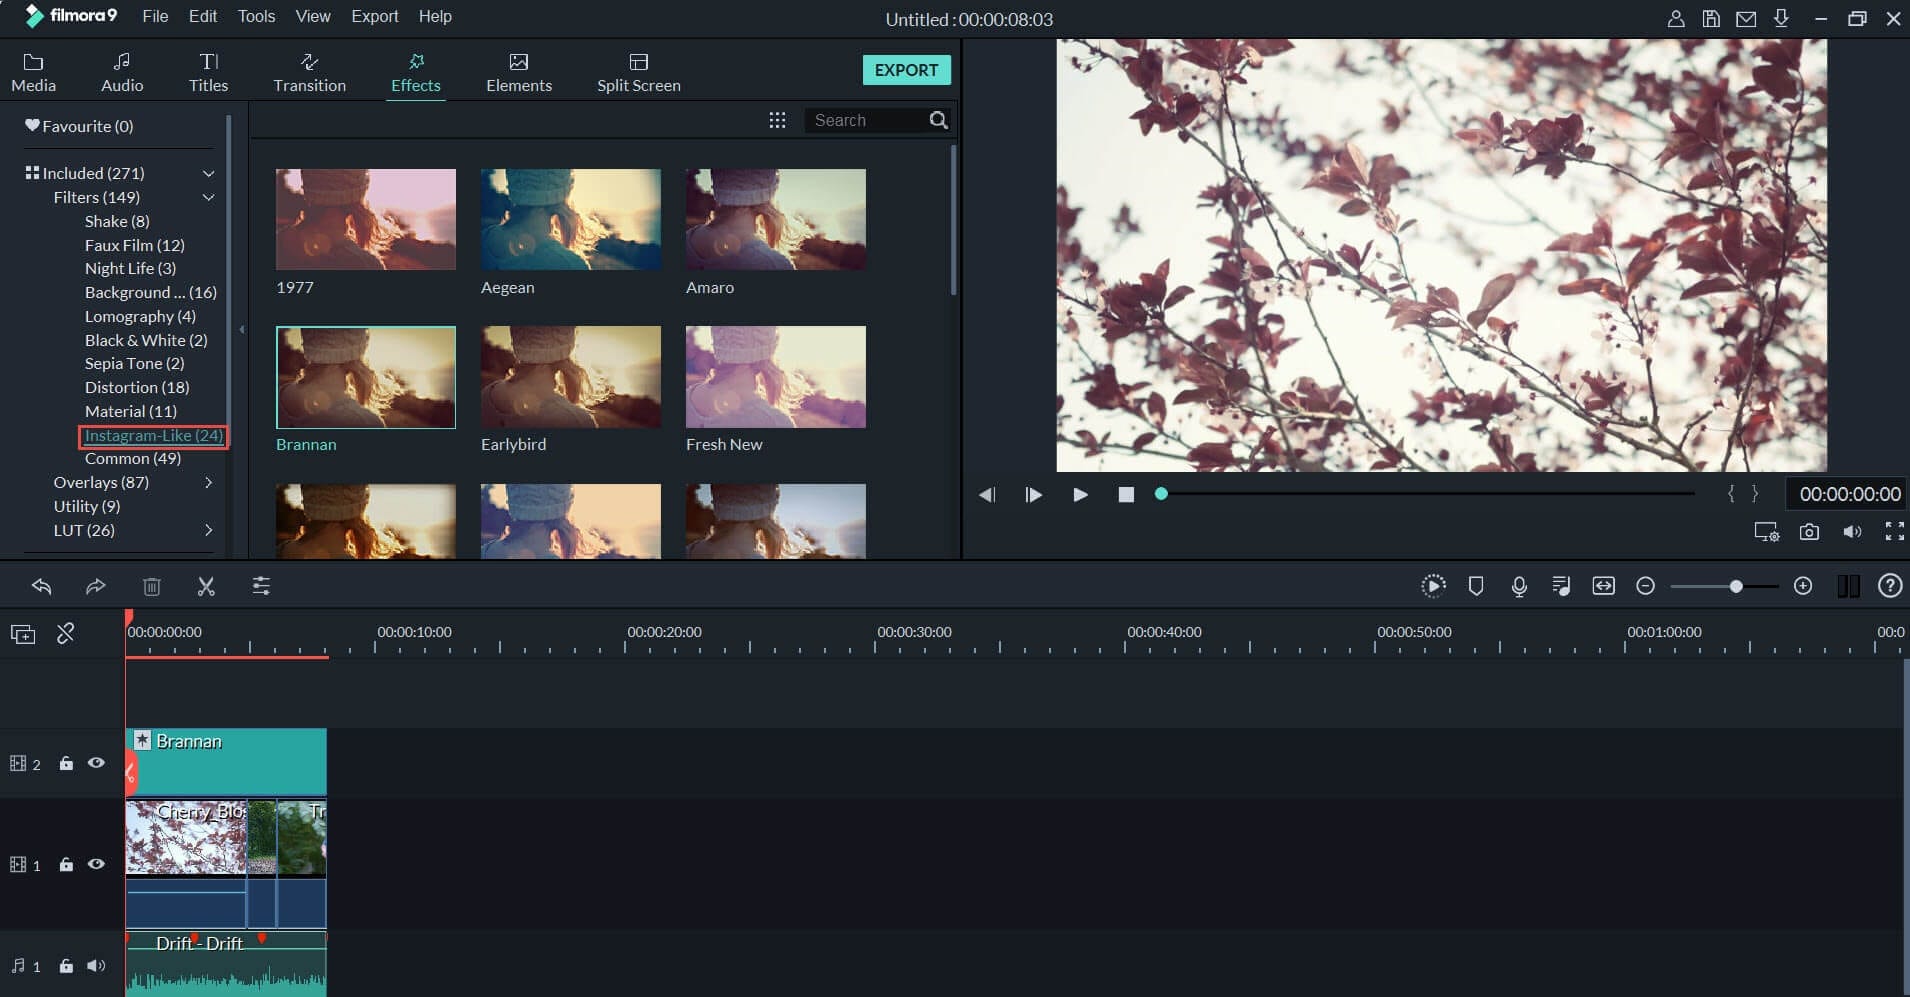
Additionally, Wondershare Filmora allows you to choose different transitions, graphics, tiles, texts, sound effects, titles, filters, overlays, and elements for your videos. With this video editing tool, you can get the exact look and sound you’re looking to achieve. In addition, there are different effect tabs above the timeline that directs you to the right feature you would like to include in your video.
You can just drag these effects and drop them on the timeline to apply to your video. Filmora has over 100 in-built filters and royalty-free music you can implement on your video. If you’re not sure which feature you’re looking for. Simply experiment and undo the effect till you find exactly what you’re looking for.
Step 4: Save and Share Edited Video

Once you’re satisfied with your video clip, you can now proceed to save it. You can choose to save the video to your local folder or a storage device you’d prefer. Wondershare Filmora allows you to save in the original format or change the format to your preferred option. Filmora also allows you to change your video’s resolution and bit rate to your preference. Alternatively, you can upload your video to video-sharing platforms like Instagram, Vimeo, YouTube, etc. You can also burn the video into a DVD collection if that’s what you’re looking for.
Final Thoughts
Social media platforms are great for gaining recognition and promoting your brand. However, there are times when you don’t meet the right video length, and you would like to make your video longer. With the six methods explained above, you can make your video as long as you want and also make your video more engaging. Additionally, you can use Wondershare Filmora to make your video more professional-looking. It offers you hundreds of effects and filters you can use to optimize your video.
Meta Description: If your video is short and you need to make it longer, this article gives you six methods to make a video longer and optimize them.
One of the best ways to make your video longer for most social media platforms is to loop the video. When you replay the video several times in a single row, it helps to multiply its length. An example is taking a 2-second video and looping it 4x. This automatically makes it into an 8-second video clip. With looping, you can simply replay the action of the clip rather than altering it in any way.
Many video editing software today allows you to loop your video for free. You have to upload the video and choose how many times you would like to loop it, and the software will get to work.
Slow Down the Video Speed

We would all agree that slow-motion makes everything seem longer automatically. You can utilize the same technique when you want to make a video longer. When you slow down a video clip, every second lasts longer. Using the slow-motion effect on a 3-second video will make the video 6 or even 9 seconds longer.
Add an Intro and Outro

Intro and outro are scenes you add before and after the video; these scenes are popular in YouTube videos. More generally, an intro is like a trailer. It shows the audience what the video is about, and the outro scene is usually used to show more information about the video maker. Adding an intro and outro to your video can add 2-4 seconds to your video clips.
It’s quite easy to add an intro and outro to any video. You can create them separately and then merge them with your video. The intro must be something relevant to the video clip; an example is adding a fast photo slideshow to the beginning of your video or a black frame. Relevant intro and outro scenes will make your video longer and maybe more engaging.
Add Images to the Video
This is another trick that most bloggers use to make their videos longer. It is an old trick in the book and makes your video significantly longer, depending on the number of videos you’re adding. A single picture can add a second or two to your video. You can simply use a video editor to merge the video clip and pictures into one seamless file.
Boomerang Your Video

If you have plans to upload your media to Instagram, then a top feature you can use to make your video longer is the boomerang feature. Instagram introduced the Boomerang feature to play short video clips forward and then repeat their reverse. So by using the Boomerang feature, you don’t only add a memory effect to your video, but you also make your video longer.
Alternatively, you can manually append your video clip to a reversed version; this option allows you to make a boomerang from an existing clip. Apart from Instagram, you can utilize many other editing tools to create a boomerang from an existing video.
Add More Content to Your Video Clip

Another step you can take is to add more materials to your video. This doesn’t necessarily mean you have to get your camera out and start shooting more scenes to add to your video. Instead, you can simply access online media libraries and get amazing materials from there that are relevant to your video clip.
Today, most professional video editors offer you access to royalty-free photos and music material. You can simply browse through their collections and pick materials relevant to your video. For example, you could add a soundtrack and videos or GIFs that make your videos engaging. Adding extra content to your video clip can make it longer by 10 seconds.
Bonus Tips: How to Edit Video Easily on a Computer
Social media platforms offer you basic video editing features that you can use to optimize your video. However, these features are limited in what they can provide you with. If you want to have more control over the editing of your video clip and make it look even more professional, you should try Wondershare Filmora. This video editing tool is powerful and provides you with more editing features to ensure you get the result you want.
Filmora offers users over 300 effects like motion elements, overlays, titles, music sounds, and many more features to make your video more engaging and attractive. Using this app is relatively easy as well, and it offers users the option of changing the file format of their video if the social media platform does not support the original format.
If you would like to edit your video to give it a more engaging and professional look, follow the simple steps below.
Step 1: Import Video to Wondershare Filmora
First, you need to download the app on your device. After that, you can download it from the official website. Luckily, Wondershare Filmora supports Windows and Mac OS. Once you download the file, install and launch the app to get started.
On the menu, click on create a new project to begin. Next, click on the import button, and from the dropdown menu, choose ‘import media file.’ Alternatively, you can simply drag the video directly to the media library of this video editor. In addition, Filmora allows you to preview your video as you add different features to optimize the video.

If your video is shaky, you can use the stabilization feature to make it more stable. Simply right-click on the video in the preview window and select the option. Once you are sure, the video is ok, drag and drop it into the timeline to start editing your video.
Step 2: Cut, Slip, Rotate, or Color-Tune Your Video

You can use many features to shape your video quickly on Wondershare Filmora. For example, you can use the scissors tool to cut or split your video. You can also use the transform tool to rotate and flip your video if you would prefer. In addition, Filmora allows you to add some advanced color tuning to your video with the color feature. This automatically makes your video even more beautiful.
Step 3: Add Filters and Effects to Your Video

Additionally, Wondershare Filmora allows you to choose different transitions, graphics, tiles, texts, sound effects, titles, filters, overlays, and elements for your videos. With this video editing tool, you can get the exact look and sound you’re looking to achieve. In addition, there are different effect tabs above the timeline that directs you to the right feature you would like to include in your video.
You can just drag these effects and drop them on the timeline to apply to your video. Filmora has over 100 in-built filters and royalty-free music you can implement on your video. If you’re not sure which feature you’re looking for. Simply experiment and undo the effect till you find exactly what you’re looking for.
Step 4: Save and Share Edited Video

Once you’re satisfied with your video clip, you can now proceed to save it. You can choose to save the video to your local folder or a storage device you’d prefer. Wondershare Filmora allows you to save in the original format or change the format to your preferred option. Filmora also allows you to change your video’s resolution and bit rate to your preference. Alternatively, you can upload your video to video-sharing platforms like Instagram, Vimeo, YouTube, etc. You can also burn the video into a DVD collection if that’s what you’re looking for.
Final Thoughts
Social media platforms are great for gaining recognition and promoting your brand. However, there are times when you don’t meet the right video length, and you would like to make your video longer. With the six methods explained above, you can make your video as long as you want and also make your video more engaging. Additionally, you can use Wondershare Filmora to make your video more professional-looking. It offers you hundreds of effects and filters you can use to optimize your video.
Meta Description: If your video is short and you need to make it longer, this article gives you six methods to make a video longer and optimize them.
One of the best ways to make your video longer for most social media platforms is to loop the video. When you replay the video several times in a single row, it helps to multiply its length. An example is taking a 2-second video and looping it 4x. This automatically makes it into an 8-second video clip. With looping, you can simply replay the action of the clip rather than altering it in any way.
Many video editing software today allows you to loop your video for free. You have to upload the video and choose how many times you would like to loop it, and the software will get to work.
Slow Down the Video Speed

We would all agree that slow-motion makes everything seem longer automatically. You can utilize the same technique when you want to make a video longer. When you slow down a video clip, every second lasts longer. Using the slow-motion effect on a 3-second video will make the video 6 or even 9 seconds longer.
Add an Intro and Outro

Intro and outro are scenes you add before and after the video; these scenes are popular in YouTube videos. More generally, an intro is like a trailer. It shows the audience what the video is about, and the outro scene is usually used to show more information about the video maker. Adding an intro and outro to your video can add 2-4 seconds to your video clips.
It’s quite easy to add an intro and outro to any video. You can create them separately and then merge them with your video. The intro must be something relevant to the video clip; an example is adding a fast photo slideshow to the beginning of your video or a black frame. Relevant intro and outro scenes will make your video longer and maybe more engaging.
Add Images to the Video
This is another trick that most bloggers use to make their videos longer. It is an old trick in the book and makes your video significantly longer, depending on the number of videos you’re adding. A single picture can add a second or two to your video. You can simply use a video editor to merge the video clip and pictures into one seamless file.
Boomerang Your Video

If you have plans to upload your media to Instagram, then a top feature you can use to make your video longer is the boomerang feature. Instagram introduced the Boomerang feature to play short video clips forward and then repeat their reverse. So by using the Boomerang feature, you don’t only add a memory effect to your video, but you also make your video longer.
Alternatively, you can manually append your video clip to a reversed version; this option allows you to make a boomerang from an existing clip. Apart from Instagram, you can utilize many other editing tools to create a boomerang from an existing video.
Add More Content to Your Video Clip

Another step you can take is to add more materials to your video. This doesn’t necessarily mean you have to get your camera out and start shooting more scenes to add to your video. Instead, you can simply access online media libraries and get amazing materials from there that are relevant to your video clip.
Today, most professional video editors offer you access to royalty-free photos and music material. You can simply browse through their collections and pick materials relevant to your video. For example, you could add a soundtrack and videos or GIFs that make your videos engaging. Adding extra content to your video clip can make it longer by 10 seconds.
Bonus Tips: How to Edit Video Easily on a Computer
Social media platforms offer you basic video editing features that you can use to optimize your video. However, these features are limited in what they can provide you with. If you want to have more control over the editing of your video clip and make it look even more professional, you should try Wondershare Filmora. This video editing tool is powerful and provides you with more editing features to ensure you get the result you want.
Filmora offers users over 300 effects like motion elements, overlays, titles, music sounds, and many more features to make your video more engaging and attractive. Using this app is relatively easy as well, and it offers users the option of changing the file format of their video if the social media platform does not support the original format.
If you would like to edit your video to give it a more engaging and professional look, follow the simple steps below.
Step 1: Import Video to Wondershare Filmora
First, you need to download the app on your device. After that, you can download it from the official website. Luckily, Wondershare Filmora supports Windows and Mac OS. Once you download the file, install and launch the app to get started.
On the menu, click on create a new project to begin. Next, click on the import button, and from the dropdown menu, choose ‘import media file.’ Alternatively, you can simply drag the video directly to the media library of this video editor. In addition, Filmora allows you to preview your video as you add different features to optimize the video.

If your video is shaky, you can use the stabilization feature to make it more stable. Simply right-click on the video in the preview window and select the option. Once you are sure, the video is ok, drag and drop it into the timeline to start editing your video.
Step 2: Cut, Slip, Rotate, or Color-Tune Your Video

You can use many features to shape your video quickly on Wondershare Filmora. For example, you can use the scissors tool to cut or split your video. You can also use the transform tool to rotate and flip your video if you would prefer. In addition, Filmora allows you to add some advanced color tuning to your video with the color feature. This automatically makes your video even more beautiful.
Step 3: Add Filters and Effects to Your Video

Additionally, Wondershare Filmora allows you to choose different transitions, graphics, tiles, texts, sound effects, titles, filters, overlays, and elements for your videos. With this video editing tool, you can get the exact look and sound you’re looking to achieve. In addition, there are different effect tabs above the timeline that directs you to the right feature you would like to include in your video.
You can just drag these effects and drop them on the timeline to apply to your video. Filmora has over 100 in-built filters and royalty-free music you can implement on your video. If you’re not sure which feature you’re looking for. Simply experiment and undo the effect till you find exactly what you’re looking for.
Step 4: Save and Share Edited Video

Once you’re satisfied with your video clip, you can now proceed to save it. You can choose to save the video to your local folder or a storage device you’d prefer. Wondershare Filmora allows you to save in the original format or change the format to your preferred option. Filmora also allows you to change your video’s resolution and bit rate to your preference. Alternatively, you can upload your video to video-sharing platforms like Instagram, Vimeo, YouTube, etc. You can also burn the video into a DVD collection if that’s what you’re looking for.
Final Thoughts
Social media platforms are great for gaining recognition and promoting your brand. However, there are times when you don’t meet the right video length, and you would like to make your video longer. With the six methods explained above, you can make your video as long as you want and also make your video more engaging. Additionally, you can use Wondershare Filmora to make your video more professional-looking. It offers you hundreds of effects and filters you can use to optimize your video.
Meta Description: If your video is short and you need to make it longer, this article gives you six methods to make a video longer and optimize them.
One of the best ways to make your video longer for most social media platforms is to loop the video. When you replay the video several times in a single row, it helps to multiply its length. An example is taking a 2-second video and looping it 4x. This automatically makes it into an 8-second video clip. With looping, you can simply replay the action of the clip rather than altering it in any way.
Many video editing software today allows you to loop your video for free. You have to upload the video and choose how many times you would like to loop it, and the software will get to work.
Slow Down the Video Speed

We would all agree that slow-motion makes everything seem longer automatically. You can utilize the same technique when you want to make a video longer. When you slow down a video clip, every second lasts longer. Using the slow-motion effect on a 3-second video will make the video 6 or even 9 seconds longer.
Add an Intro and Outro

Intro and outro are scenes you add before and after the video; these scenes are popular in YouTube videos. More generally, an intro is like a trailer. It shows the audience what the video is about, and the outro scene is usually used to show more information about the video maker. Adding an intro and outro to your video can add 2-4 seconds to your video clips.
It’s quite easy to add an intro and outro to any video. You can create them separately and then merge them with your video. The intro must be something relevant to the video clip; an example is adding a fast photo slideshow to the beginning of your video or a black frame. Relevant intro and outro scenes will make your video longer and maybe more engaging.
Add Images to the Video
This is another trick that most bloggers use to make their videos longer. It is an old trick in the book and makes your video significantly longer, depending on the number of videos you’re adding. A single picture can add a second or two to your video. You can simply use a video editor to merge the video clip and pictures into one seamless file.
Boomerang Your Video

If you have plans to upload your media to Instagram, then a top feature you can use to make your video longer is the boomerang feature. Instagram introduced the Boomerang feature to play short video clips forward and then repeat their reverse. So by using the Boomerang feature, you don’t only add a memory effect to your video, but you also make your video longer.
Alternatively, you can manually append your video clip to a reversed version; this option allows you to make a boomerang from an existing clip. Apart from Instagram, you can utilize many other editing tools to create a boomerang from an existing video.
Add More Content to Your Video Clip

Another step you can take is to add more materials to your video. This doesn’t necessarily mean you have to get your camera out and start shooting more scenes to add to your video. Instead, you can simply access online media libraries and get amazing materials from there that are relevant to your video clip.
Today, most professional video editors offer you access to royalty-free photos and music material. You can simply browse through their collections and pick materials relevant to your video. For example, you could add a soundtrack and videos or GIFs that make your videos engaging. Adding extra content to your video clip can make it longer by 10 seconds.
Bonus Tips: How to Edit Video Easily on a Computer
Social media platforms offer you basic video editing features that you can use to optimize your video. However, these features are limited in what they can provide you with. If you want to have more control over the editing of your video clip and make it look even more professional, you should try Wondershare Filmora. This video editing tool is powerful and provides you with more editing features to ensure you get the result you want.
Filmora offers users over 300 effects like motion elements, overlays, titles, music sounds, and many more features to make your video more engaging and attractive. Using this app is relatively easy as well, and it offers users the option of changing the file format of their video if the social media platform does not support the original format.
If you would like to edit your video to give it a more engaging and professional look, follow the simple steps below.
Step 1: Import Video to Wondershare Filmora
First, you need to download the app on your device. After that, you can download it from the official website. Luckily, Wondershare Filmora supports Windows and Mac OS. Once you download the file, install and launch the app to get started.
On the menu, click on create a new project to begin. Next, click on the import button, and from the dropdown menu, choose ‘import media file.’ Alternatively, you can simply drag the video directly to the media library of this video editor. In addition, Filmora allows you to preview your video as you add different features to optimize the video.

If your video is shaky, you can use the stabilization feature to make it more stable. Simply right-click on the video in the preview window and select the option. Once you are sure, the video is ok, drag and drop it into the timeline to start editing your video.
Step 2: Cut, Slip, Rotate, or Color-Tune Your Video

You can use many features to shape your video quickly on Wondershare Filmora. For example, you can use the scissors tool to cut or split your video. You can also use the transform tool to rotate and flip your video if you would prefer. In addition, Filmora allows you to add some advanced color tuning to your video with the color feature. This automatically makes your video even more beautiful.
Step 3: Add Filters and Effects to Your Video

Additionally, Wondershare Filmora allows you to choose different transitions, graphics, tiles, texts, sound effects, titles, filters, overlays, and elements for your videos. With this video editing tool, you can get the exact look and sound you’re looking to achieve. In addition, there are different effect tabs above the timeline that directs you to the right feature you would like to include in your video.
You can just drag these effects and drop them on the timeline to apply to your video. Filmora has over 100 in-built filters and royalty-free music you can implement on your video. If you’re not sure which feature you’re looking for. Simply experiment and undo the effect till you find exactly what you’re looking for.
Step 4: Save and Share Edited Video

Once you’re satisfied with your video clip, you can now proceed to save it. You can choose to save the video to your local folder or a storage device you’d prefer. Wondershare Filmora allows you to save in the original format or change the format to your preferred option. Filmora also allows you to change your video’s resolution and bit rate to your preference. Alternatively, you can upload your video to video-sharing platforms like Instagram, Vimeo, YouTube, etc. You can also burn the video into a DVD collection if that’s what you’re looking for.
Final Thoughts
Social media platforms are great for gaining recognition and promoting your brand. However, there are times when you don’t meet the right video length, and you would like to make your video longer. With the six methods explained above, you can make your video as long as you want and also make your video more engaging. Additionally, you can use Wondershare Filmora to make your video more professional-looking. It offers you hundreds of effects and filters you can use to optimize your video.
Meta Description: If your video is short and you need to make it longer, this article gives you six methods to make a video longer and optimize them.
This Article Discusses What Is Vegas Pro, How to Download, Install and Use It, and Its Key Features. It Further Discusses Its Alternative for Editing Your Videos and More. Check Out Now
Vegas Pro is one of the best video and audio editing software for professionals. It provides one of the best editing tools with which you will be able to create professional videos. It was a product of Sony’s electronic giant, but now it is seen by Magix. It is suitable for serious amateurs and professionals who want to use it as a part of their career. However, the more recent version is a bit user-friendly, but if you are not interested in it seriously, then Vegas Pro is not your cup of tea.
One of the most significant advantages of using the high voltage Vegas Pro is that it gives you all the tools to make a professional video and multiple audio-visual effects. The software is exciting for those who already know about video and audio editing. Moreover, the price of the software is affordable and cost-effective as you get some royalty-free stock content.
How to download and install Vegas Pro?
Unshackle your creativity using Vegas Pro, one of the best professional video and audio editing software. If you have an idea for video editing, you will find the Vegas Pro video editor high on speed and editing. It will be like a new world of various professional editing tools in front of you, sure to keep you in front of the monitor without any distractions. You will be able to add images, sounds, and videos without any effort. The entire work of the software is impressive as you can make changes to your main storyboard according to your convenience.
It is an excellent way of boosting your confidence in professional video editing. Therefore, if you are serious about making professional videos, you must try your hand in Vegas Pros.
Steps to downloading and installing Vegas Pro
Vegas Pro video editor needs a good amount of space on your hard disk. Therefore, it is advisable that you either free the space or install a secondary hard disk for the Vegas Pro. Moreover, you will need Windows 7 to Windows 10 to run the Vegas Pro on your computer.

- If you are using an older version of Vegas Pro, you can upgrade it to a newer version. However, if you are downloading for the first time, you need to open the official website of Vegas Pro.
- Click on purchase.
- You will find the payment option.
- You can choose a monthly or yearly subscription.
- Once you make the payment, you will get a link for the download option.
- You can now download the Vegas Pro on your computer.
- When the process is complete, you will get an icon of Vegas Pro on your desktop.
- Click on the icon and start your exciting journey with Vegas Pro.

Key Features of Vegas Pro
Vegas Pro video editing software has some of the best features to enhance your creativity. Following are some of its key features:
**OFX Plug-ins for special effects
Vegas Pro offers OFX plug-ins that help professionals create their videos with new techniques with various special effects. You can also use different filters in your videos to give them a professional look.
**Picture-in-Picture Plug-ins
With the help of Picture-in-Picture plug-ins, users will be able to edit the pictures of their own will. You will be able to control the movement of the images and even place them accordingly.
**Editing Timeline
One of the most significant advantages of using Vegas Pro video editing software is that the timeline is much simpler and faster. Various features will help you create professional videos with the help of the timeline.
You will be able to arrange the clips in the timeline quickly and smoothly with special effects like crossfades and similar other products.
**Instant Freeze time
With the help of the Freeze option of Vegas Pro, you will be able to control the playback speed of the video. Professionals use the instant freeze time to portray a dramatic scene that requires some special effects.
It is a specific feature where you need to place the cursor on a particular frame to apply the freeze and time.
**Look-up table OFX Plug-in
The look-up table is a handy feature of Vegas Pro as you can access editing software like Adobe. It helps you to edit the images accordingly. You can also modify the clips of a particular video.
There are also various other features of the look-up table like color grading, cinematic effects, camera, and similar other attributes.
**Authoring Blu-Ray Discs and DVDs
With the help of Vegas Pro, you will be able to create exciting videos and be able to create a DVD layout with a professional look. There are various sets of effects and animations that you can choose while making the final layout of your video.
Moreover, you will be able to burn the DVDs and Blu-Ray Discs to end the final process of your video creation.
How to Edit Videos with Vegas Pro?
Video editing is an art. Hence, before creating a video, you need to have a plan. The clips must be in sequential order so that it makes a story. With the help of Vegas Pro, you can turn all your video footage into an exciting account. However, you need to have some basic skills in video editing before you lay your hands on the powerful Vegas Pro video editing software.
Following is a brief guideline that will give you an idea of how to edit videos with Vegas Pro.
**Previewing
The first step in creating a video is to have a plan of action. Before you start making the video, you must decide the clips you want to import. It is because importing all the video clips and selecting them can be a waste of time.

However, do not delete the clips permanently, as you may require them at some point in time if the need arises. Vegas Pro has some exciting editing tools where you will be able to perform color correction and also stabilize the shaky videos.
**Planning
To make an excellent sensible video, you must have a plan. Your video must have a story. Hence, you must decide beforehand how to start the video with a good beginning, the middle, and the end.
It would be best if you placed the clips in sequential order so that it creates a story. It would be best also to decide how to put the text and the transitions in your video.
**A rough cut
It is advisable to place the video clips in sequential order before you start editing, and it will give you a rough idea of the outcome of the video. You can make the changes in the initial stage in the storyboard and check the outcome before you start the editing.
**Editing
Once you are happy with the final layout of the video clips, you can start with your creativity. Vegas Pro has many exciting editing tools to give your video a professional look.
You can use transitions, trimming, fades, and other editing features to make a great video. You can also add titles, music, and other elements to your video.

**Delivery
Now that you are final with the process of creating a video, it is time to show the world your creativity and talent. You will be able to either stream it online or burn a DVD to share with your friends and loved ones.
Vegas Pro Alternative to Edit Videos
If there is one video editing platform where you want to unleash your talent and creativity, then Filmora is the one. It has all the resources you need to edit your videos and exciting editing tools. Moreover, it is easy to use as it offers many tutorials on creating videos in simple steps. With the help of Filmora, you can adjust the speed of your videos and even work on multiple screens. One of the most outstanding features of Filmora is that you use various video effects like filters and titles and even change the background of your video.
For Win 7 or later (64-bit)
For macOS 10.12 or later
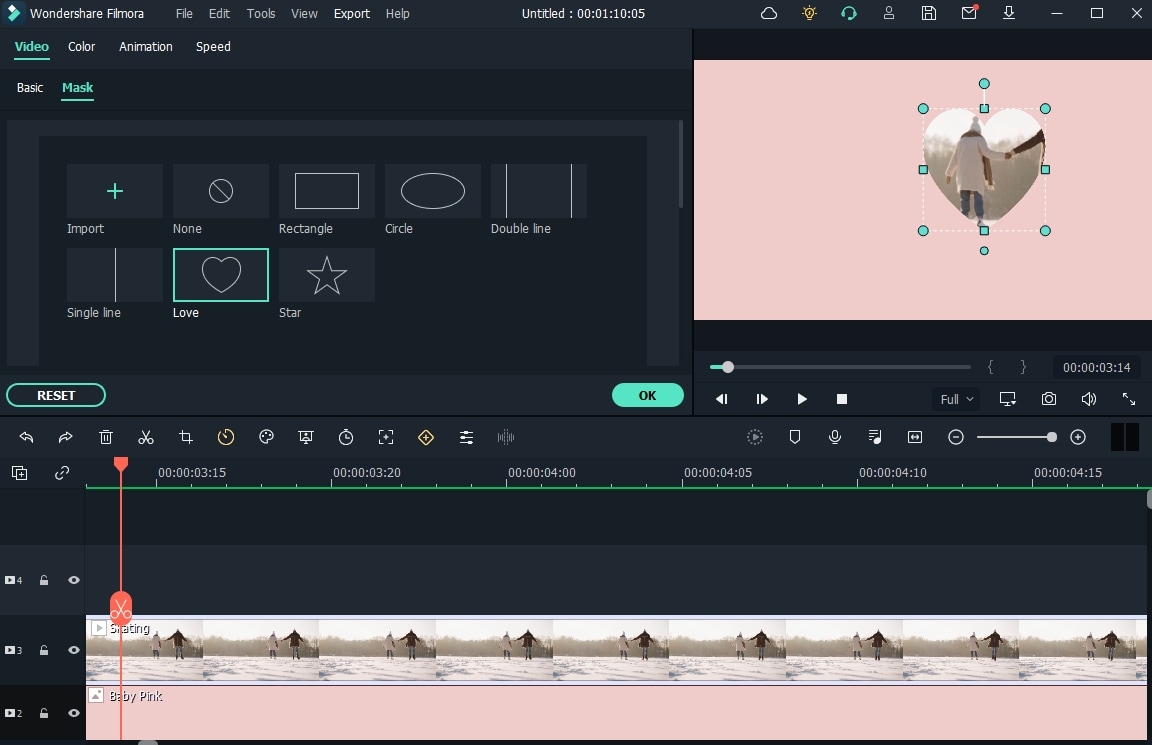
Following are the steps on how to use Filmora:
- Click on a new project from the file menu
- If you want to import media files, click on the ‘+’ icon to browse the files from your hard drive.
- Drag and drop the video clips on your timeline.
- You can now add titles, transitions, and even music.
- Arrange the video clips in sequential order.
- Once you finish the process, you will be able to export it or share it with your friends and loved ones.
FAQs about Vegas Pro
Q1. How much does Vegas Pro cost?
Ans: The cost of Vegas Pro is affordable as you can get it for $155.88 a year, and it means that you pay only about $12.99 per month. You will also get free royalty-free stock videos and 20 GB of online storage.
Q2. Is Vegas Pro a good software?
Ans: If you check the Vegas Pro review, you will understand its popularity. It is an ideal software for professionals who want to unleash their talent and creativity, and it has some high-end editing features to enhance a professional video.
Q3. Is Vegas Pro better than Premiere Pro?
Ans: Vegas Pro is better than Premiere Pro in the user interface. When you compare Vegas Pro with other video editing software, you will find that the software is much easier. Moreover, it has some great editing tools to make a great video.
Conclusion
Vegas Pro gives you all the exciting editing features to create a professional video. It is compelling and user-friendly with simple, easy to understand user interfaces. You can use the trial version to get a feel of the video editing software. Once you are ready to take full command, you can go with the Pro version of Vegas Pro. It is one of the best software where you can learn video editing in a better way. You can check the Vegas Pro review online if you want to know about its usage.

Key Features of Vegas Pro
Vegas Pro video editing software has some of the best features to enhance your creativity. Following are some of its key features:
**OFX Plug-ins for special effects
Vegas Pro offers OFX plug-ins that help professionals create their videos with new techniques with various special effects. You can also use different filters in your videos to give them a professional look.
**Picture-in-Picture Plug-ins
With the help of Picture-in-Picture plug-ins, users will be able to edit the pictures of their own will. You will be able to control the movement of the images and even place them accordingly.
**Editing Timeline
One of the most significant advantages of using Vegas Pro video editing software is that the timeline is much simpler and faster. Various features will help you create professional videos with the help of the timeline.
You will be able to arrange the clips in the timeline quickly and smoothly with special effects like crossfades and similar other products.
**Instant Freeze time
With the help of the Freeze option of Vegas Pro, you will be able to control the playback speed of the video. Professionals use the instant freeze time to portray a dramatic scene that requires some special effects.
It is a specific feature where you need to place the cursor on a particular frame to apply the freeze and time.
**Look-up table OFX Plug-in
The look-up table is a handy feature of Vegas Pro as you can access editing software like Adobe. It helps you to edit the images accordingly. You can also modify the clips of a particular video.
There are also various other features of the look-up table like color grading, cinematic effects, camera, and similar other attributes.
**Authoring Blu-Ray Discs and DVDs
With the help of Vegas Pro, you will be able to create exciting videos and be able to create a DVD layout with a professional look. There are various sets of effects and animations that you can choose while making the final layout of your video.
Moreover, you will be able to burn the DVDs and Blu-Ray Discs to end the final process of your video creation.
How to Edit Videos with Vegas Pro?
Video editing is an art. Hence, before creating a video, you need to have a plan. The clips must be in sequential order so that it makes a story. With the help of Vegas Pro, you can turn all your video footage into an exciting account. However, you need to have some basic skills in video editing before you lay your hands on the powerful Vegas Pro video editing software.
Following is a brief guideline that will give you an idea of how to edit videos with Vegas Pro.
**Previewing
The first step in creating a video is to have a plan of action. Before you start making the video, you must decide the clips you want to import. It is because importing all the video clips and selecting them can be a waste of time.

However, do not delete the clips permanently, as you may require them at some point in time if the need arises. Vegas Pro has some exciting editing tools where you will be able to perform color correction and also stabilize the shaky videos.
**Planning
To make an excellent sensible video, you must have a plan. Your video must have a story. Hence, you must decide beforehand how to start the video with a good beginning, the middle, and the end.
It would be best if you placed the clips in sequential order so that it creates a story. It would be best also to decide how to put the text and the transitions in your video.
**A rough cut
It is advisable to place the video clips in sequential order before you start editing, and it will give you a rough idea of the outcome of the video. You can make the changes in the initial stage in the storyboard and check the outcome before you start the editing.
**Editing
Once you are happy with the final layout of the video clips, you can start with your creativity. Vegas Pro has many exciting editing tools to give your video a professional look.
You can use transitions, trimming, fades, and other editing features to make a great video. You can also add titles, music, and other elements to your video.

**Delivery
Now that you are final with the process of creating a video, it is time to show the world your creativity and talent. You will be able to either stream it online or burn a DVD to share with your friends and loved ones.
Vegas Pro Alternative to Edit Videos
If there is one video editing platform where you want to unleash your talent and creativity, then Filmora is the one. It has all the resources you need to edit your videos and exciting editing tools. Moreover, it is easy to use as it offers many tutorials on creating videos in simple steps. With the help of Filmora, you can adjust the speed of your videos and even work on multiple screens. One of the most outstanding features of Filmora is that you use various video effects like filters and titles and even change the background of your video.
For Win 7 or later (64-bit)
For macOS 10.12 or later

Following are the steps on how to use Filmora:
- Click on a new project from the file menu
- If you want to import media files, click on the ‘+’ icon to browse the files from your hard drive.
- Drag and drop the video clips on your timeline.
- You can now add titles, transitions, and even music.
- Arrange the video clips in sequential order.
- Once you finish the process, you will be able to export it or share it with your friends and loved ones.
FAQs about Vegas Pro
Q1. How much does Vegas Pro cost?
Ans: The cost of Vegas Pro is affordable as you can get it for $155.88 a year, and it means that you pay only about $12.99 per month. You will also get free royalty-free stock videos and 20 GB of online storage.
Q2. Is Vegas Pro a good software?
Ans: If you check the Vegas Pro review, you will understand its popularity. It is an ideal software for professionals who want to unleash their talent and creativity, and it has some high-end editing features to enhance a professional video.
Q3. Is Vegas Pro better than Premiere Pro?
Ans: Vegas Pro is better than Premiere Pro in the user interface. When you compare Vegas Pro with other video editing software, you will find that the software is much easier. Moreover, it has some great editing tools to make a great video.
Conclusion
Vegas Pro gives you all the exciting editing features to create a professional video. It is compelling and user-friendly with simple, easy to understand user interfaces. You can use the trial version to get a feel of the video editing software. Once you are ready to take full command, you can go with the Pro version of Vegas Pro. It is one of the best software where you can learn video editing in a better way. You can check the Vegas Pro review online if you want to know about its usage.

Key Features of Vegas Pro
Vegas Pro video editing software has some of the best features to enhance your creativity. Following are some of its key features:
**OFX Plug-ins for special effects
Vegas Pro offers OFX plug-ins that help professionals create their videos with new techniques with various special effects. You can also use different filters in your videos to give them a professional look.
**Picture-in-Picture Plug-ins
With the help of Picture-in-Picture plug-ins, users will be able to edit the pictures of their own will. You will be able to control the movement of the images and even place them accordingly.
**Editing Timeline
One of the most significant advantages of using Vegas Pro video editing software is that the timeline is much simpler and faster. Various features will help you create professional videos with the help of the timeline.
You will be able to arrange the clips in the timeline quickly and smoothly with special effects like crossfades and similar other products.
**Instant Freeze time
With the help of the Freeze option of Vegas Pro, you will be able to control the playback speed of the video. Professionals use the instant freeze time to portray a dramatic scene that requires some special effects.
It is a specific feature where you need to place the cursor on a particular frame to apply the freeze and time.
**Look-up table OFX Plug-in
The look-up table is a handy feature of Vegas Pro as you can access editing software like Adobe. It helps you to edit the images accordingly. You can also modify the clips of a particular video.
There are also various other features of the look-up table like color grading, cinematic effects, camera, and similar other attributes.
**Authoring Blu-Ray Discs and DVDs
With the help of Vegas Pro, you will be able to create exciting videos and be able to create a DVD layout with a professional look. There are various sets of effects and animations that you can choose while making the final layout of your video.
Moreover, you will be able to burn the DVDs and Blu-Ray Discs to end the final process of your video creation.
How to Edit Videos with Vegas Pro?
Video editing is an art. Hence, before creating a video, you need to have a plan. The clips must be in sequential order so that it makes a story. With the help of Vegas Pro, you can turn all your video footage into an exciting account. However, you need to have some basic skills in video editing before you lay your hands on the powerful Vegas Pro video editing software.
Following is a brief guideline that will give you an idea of how to edit videos with Vegas Pro.
**Previewing
The first step in creating a video is to have a plan of action. Before you start making the video, you must decide the clips you want to import. It is because importing all the video clips and selecting them can be a waste of time.

However, do not delete the clips permanently, as you may require them at some point in time if the need arises. Vegas Pro has some exciting editing tools where you will be able to perform color correction and also stabilize the shaky videos.
**Planning
To make an excellent sensible video, you must have a plan. Your video must have a story. Hence, you must decide beforehand how to start the video with a good beginning, the middle, and the end.
It would be best if you placed the clips in sequential order so that it creates a story. It would be best also to decide how to put the text and the transitions in your video.
**A rough cut
It is advisable to place the video clips in sequential order before you start editing, and it will give you a rough idea of the outcome of the video. You can make the changes in the initial stage in the storyboard and check the outcome before you start the editing.
**Editing
Once you are happy with the final layout of the video clips, you can start with your creativity. Vegas Pro has many exciting editing tools to give your video a professional look.
You can use transitions, trimming, fades, and other editing features to make a great video. You can also add titles, music, and other elements to your video.

**Delivery
Now that you are final with the process of creating a video, it is time to show the world your creativity and talent. You will be able to either stream it online or burn a DVD to share with your friends and loved ones.
Vegas Pro Alternative to Edit Videos
If there is one video editing platform where you want to unleash your talent and creativity, then Filmora is the one. It has all the resources you need to edit your videos and exciting editing tools. Moreover, it is easy to use as it offers many tutorials on creating videos in simple steps. With the help of Filmora, you can adjust the speed of your videos and even work on multiple screens. One of the most outstanding features of Filmora is that you use various video effects like filters and titles and even change the background of your video.
For Win 7 or later (64-bit)
For macOS 10.12 or later

Following are the steps on how to use Filmora:
- Click on a new project from the file menu
- If you want to import media files, click on the ‘+’ icon to browse the files from your hard drive.
- Drag and drop the video clips on your timeline.
- You can now add titles, transitions, and even music.
- Arrange the video clips in sequential order.
- Once you finish the process, you will be able to export it or share it with your friends and loved ones.
FAQs about Vegas Pro
Q1. How much does Vegas Pro cost?
Ans: The cost of Vegas Pro is affordable as you can get it for $155.88 a year, and it means that you pay only about $12.99 per month. You will also get free royalty-free stock videos and 20 GB of online storage.
Q2. Is Vegas Pro a good software?
Ans: If you check the Vegas Pro review, you will understand its popularity. It is an ideal software for professionals who want to unleash their talent and creativity, and it has some high-end editing features to enhance a professional video.
Q3. Is Vegas Pro better than Premiere Pro?
Ans: Vegas Pro is better than Premiere Pro in the user interface. When you compare Vegas Pro with other video editing software, you will find that the software is much easier. Moreover, it has some great editing tools to make a great video.
Conclusion
Vegas Pro gives you all the exciting editing features to create a professional video. It is compelling and user-friendly with simple, easy to understand user interfaces. You can use the trial version to get a feel of the video editing software. Once you are ready to take full command, you can go with the Pro version of Vegas Pro. It is one of the best software where you can learn video editing in a better way. You can check the Vegas Pro review online if you want to know about its usage.

Key Features of Vegas Pro
Vegas Pro video editing software has some of the best features to enhance your creativity. Following are some of its key features:
**OFX Plug-ins for special effects
Vegas Pro offers OFX plug-ins that help professionals create their videos with new techniques with various special effects. You can also use different filters in your videos to give them a professional look.
**Picture-in-Picture Plug-ins
With the help of Picture-in-Picture plug-ins, users will be able to edit the pictures of their own will. You will be able to control the movement of the images and even place them accordingly.
**Editing Timeline
One of the most significant advantages of using Vegas Pro video editing software is that the timeline is much simpler and faster. Various features will help you create professional videos with the help of the timeline.
You will be able to arrange the clips in the timeline quickly and smoothly with special effects like crossfades and similar other products.
**Instant Freeze time
With the help of the Freeze option of Vegas Pro, you will be able to control the playback speed of the video. Professionals use the instant freeze time to portray a dramatic scene that requires some special effects.
It is a specific feature where you need to place the cursor on a particular frame to apply the freeze and time.
**Look-up table OFX Plug-in
The look-up table is a handy feature of Vegas Pro as you can access editing software like Adobe. It helps you to edit the images accordingly. You can also modify the clips of a particular video.
There are also various other features of the look-up table like color grading, cinematic effects, camera, and similar other attributes.
**Authoring Blu-Ray Discs and DVDs
With the help of Vegas Pro, you will be able to create exciting videos and be able to create a DVD layout with a professional look. There are various sets of effects and animations that you can choose while making the final layout of your video.
Moreover, you will be able to burn the DVDs and Blu-Ray Discs to end the final process of your video creation.
How to Edit Videos with Vegas Pro?
Video editing is an art. Hence, before creating a video, you need to have a plan. The clips must be in sequential order so that it makes a story. With the help of Vegas Pro, you can turn all your video footage into an exciting account. However, you need to have some basic skills in video editing before you lay your hands on the powerful Vegas Pro video editing software.
Following is a brief guideline that will give you an idea of how to edit videos with Vegas Pro.
**Previewing
The first step in creating a video is to have a plan of action. Before you start making the video, you must decide the clips you want to import. It is because importing all the video clips and selecting them can be a waste of time.

However, do not delete the clips permanently, as you may require them at some point in time if the need arises. Vegas Pro has some exciting editing tools where you will be able to perform color correction and also stabilize the shaky videos.
**Planning
To make an excellent sensible video, you must have a plan. Your video must have a story. Hence, you must decide beforehand how to start the video with a good beginning, the middle, and the end.
It would be best if you placed the clips in sequential order so that it creates a story. It would be best also to decide how to put the text and the transitions in your video.
**A rough cut
It is advisable to place the video clips in sequential order before you start editing, and it will give you a rough idea of the outcome of the video. You can make the changes in the initial stage in the storyboard and check the outcome before you start the editing.
**Editing
Once you are happy with the final layout of the video clips, you can start with your creativity. Vegas Pro has many exciting editing tools to give your video a professional look.
You can use transitions, trimming, fades, and other editing features to make a great video. You can also add titles, music, and other elements to your video.

**Delivery
Now that you are final with the process of creating a video, it is time to show the world your creativity and talent. You will be able to either stream it online or burn a DVD to share with your friends and loved ones.
Vegas Pro Alternative to Edit Videos
If there is one video editing platform where you want to unleash your talent and creativity, then Filmora is the one. It has all the resources you need to edit your videos and exciting editing tools. Moreover, it is easy to use as it offers many tutorials on creating videos in simple steps. With the help of Filmora, you can adjust the speed of your videos and even work on multiple screens. One of the most outstanding features of Filmora is that you use various video effects like filters and titles and even change the background of your video.
For Win 7 or later (64-bit)
For macOS 10.12 or later

Following are the steps on how to use Filmora:
- Click on a new project from the file menu
- If you want to import media files, click on the ‘+’ icon to browse the files from your hard drive.
- Drag and drop the video clips on your timeline.
- You can now add titles, transitions, and even music.
- Arrange the video clips in sequential order.
- Once you finish the process, you will be able to export it or share it with your friends and loved ones.
FAQs about Vegas Pro
Q1. How much does Vegas Pro cost?
Ans: The cost of Vegas Pro is affordable as you can get it for $155.88 a year, and it means that you pay only about $12.99 per month. You will also get free royalty-free stock videos and 20 GB of online storage.
Q2. Is Vegas Pro a good software?
Ans: If you check the Vegas Pro review, you will understand its popularity. It is an ideal software for professionals who want to unleash their talent and creativity, and it has some high-end editing features to enhance a professional video.
Q3. Is Vegas Pro better than Premiere Pro?
Ans: Vegas Pro is better than Premiere Pro in the user interface. When you compare Vegas Pro with other video editing software, you will find that the software is much easier. Moreover, it has some great editing tools to make a great video.
Conclusion
Vegas Pro gives you all the exciting editing features to create a professional video. It is compelling and user-friendly with simple, easy to understand user interfaces. You can use the trial version to get a feel of the video editing software. Once you are ready to take full command, you can go with the Pro version of Vegas Pro. It is one of the best software where you can learn video editing in a better way. You can check the Vegas Pro review online if you want to know about its usage.
5 Ways to Denoise a Video
In today’s world, the quality of digital product such as photos and videos increase day by day, prompting us to create our content crystal clear and keep it that way. Of course, different kinds of effects and filters are great, and something called “noise” is one of them, but sometimes it is actually unwanted and makes our footage less likable. What is noise, or denoising, anyway? Well, instead of clear video, it’s something quite different – the footage looks grainy, sometimes excessively, and makes our eyes hurt, or simply, more difficult to see what’s going on on the screen. And if you didn’t decide to use a noise effect, then from where does it appear?..
Noise means a mix of different variations of brightness or color information in the shot. It is likely to show up when there is a low light, and/or when the video is taken with small sensors such as smartphones and action cameras. It works as follows: if someone tries to compensate for low-light settings with gain and ISO, more noise is produced.
But, as our readers already know, almost nothing is ever impossible to solve. There is a way to get rid of this annoying grain, and it is called, as pretty obvious, denoising. Hence, denoising in image and video production is used as a technique to take footage from grainy to crystal-clear. And, as you may already agree, it improves a viewer’s quality of experience. And how does this happen? - There are varied techniques, and each of them uses different mathematical and statistical models.
What is considered a good noise reduction? The technique is successful when it suppresses noise effectively in uniform regions; preserves edges and other characteristics, such as fine details and textures; and provides a visually natural experience.
and here you will learn 5 ways, as in 5 software to denoise a video. We’ll touch upon the following ones: Final Cut Pro, Adobe After Effects, Adobe Premiere Pro, DaVinci Resolve and Movavi Video Editor. But, we are not limited to these ones, so maybe there is one more you could use? You’ll find out in the article!
- Final Cut Pro
Noise that appears as unwanted grain or artifacts in the video image can be removed in Final Cut Pro pretty easily, you just have to follow the little steps for it. Keep in mind that Final Cut Pro is not eligible for PC, this editor is only available for Mac (but Windows users, tune in for the editors functioning on PC’s!)
So, you have your grained footage, which you already chose to denoise, and for which you will need a video reduction effect.
First, you will need to open Final Cut Pro and import abovementioned video. Select this clip in the timeline,

and position the play head in a way that the clip appears in the viewer, that is, on the big screen - for you to see well.

Click the Effects button in the top-right corner of the timeline, or, to use the shortcut, press Command & 5.

In the Effects browser, select the Basics category in the list of Video effects on the left, then select the Noise Reduction effect. For 360° clips, select the 360° category, then select the 360° Noise Reduction effect.
And you will need to do one of the following:
Drag the effect to the timeline clip you want to apply it to, or double-click the effect thumbnail to apply the effect to the selected clip.
When the effect is applied, Final Cut Pro analyzes the clip for noise, so you might need to wait for a little while the process is complete and only then see the result.
Interesting tip you can remember is that if you are using several effects to your video clip, then adding Noise Reduction as the first effect would guarantee the best results for you. So, Mac users, you can start denoising your videos in Final Cut Pro now!
- Adobe After Effects
Adobe After Effects is a digital visual effects, motion graphics, and compositing application… Pretty intense, right? This very software has endless powers, and one of them is, you guessed correctly – denoising the video! So, how are we going to do that in this monster of the industry?
Sometimes what’s annoying about this kind of programs is that you need plugins, so let’s try to find a way to achieve our desired result without using anything external.
So, first of all (as in all cases!) import your video into After Effects. Then, you will need to find Effect in the menu, and find: Noise and Grain. There, you will choose Remove Grain and click on it.

On the left side of the program layout, the Effects Control will be opened. Now, you see viewing mode, where you need to change Preview to Final Output.

So, this will be the video with Preview checked:

Which will look like this when Final Output is checked:

Somewhat different and looking better, right?..
By the way, you can watch the whole process video here !
- Adobe Premiere Pro
Adobe Premiere Pro is one of the most and sophisticated video editor. So, of course, there is a way to reduce noise in this software as well, and this can be reached using effect called Median.
First of all, you add your footage to the Timeline in Premiere Pro and then go find the Effects Panel, where Median can be found. You need to drag and drop the Median effect to your video clip.

The next step is to make sure that adding the effect to the grainiest parts of the clip, which can be done using masks. So, in the Effects Control panel, you’ll need to select the mask shape for your clip – you can either choose rectangle, circle, or pen tool. With the latter you can move the Mask around the screen and resize it to cover the area.

And if you Change the Feather setting to 100, the effect will not have a very visible edge and some smoothness will cover for it.

You will need to repeat the process with more than one mask, if you would like to have covered all of the grainy area of your shot.
Lastly, you’ll need to adjust the effect settings to reduce the noise.

The Median effect doesn’t actually take away the graininess, it just blurs it. You’ll need to experiment with the Radius settings until you are happy with the result.
- DaVinci Resolve
When it comes to DaVinci Resolve, the process is somewhat different in the free version of it. So, first of all, off course, you add your footage into the timeline. Then,you are going to find the fusion tab underneath the timeline panel.

You will see MediaIn1 and MediaOut1, you click on MediaIn1, which will ensure the scene appears in the first viewer – and MediaOut1 by default is appearing in the second. So, now you stay on MediaIn1, hit shift+spacebar, and find the option which says: Remove Noise (RN) and then click Add, which adds the Remove Noise1 node. On the top right corner you will find Inspector, and if you click on it, you will see all the properties you can modify.
After going only into the second viewer, and in the top bar we can find channel icons. We open it and click on red, which makes the footage black and white for a while. Then, we go back to the Inspector, increase Softness Red and Detail Red.

This removes much grain from the red channel. Then we repeat the same for green, as well as for blue channel. Once you finish, you go to the same channel button in the bar and change it to “back to color”. So, the footage will have its colors back and you will see that it has become clearer, compared to the first viewer.

You can play around with the Chroma and Luma channels in the Inspector, if that is something you have ever had experience with!
- Movavi Video Editor
In Movavi Video Editor, it is pretty straightforward – unlike DaVinci Resolve, of course! So, getting to the point: the first thing you need to do is Entering the Edit Mode. In order to achieve it, you’ll need to click the Edit button next to the file you want to adjust or select Adjustments in the Tools tab.

After this, you will be able to select the Noise removal option, and then, move the Noise level slider to reflect the amount of noise you can see in the preview. The more noise you need to remove, the higher the Noise level, and vice versa.

When you’re finished removing the noise, click Apply, but in case you need to remove noise from several files, select Apply to all files, which ensures the same noise level will be applied on all your files there.
Lastly, of course, Wondershare Filmora X offers the same option as well. The steps are ase follows: You need to go to the Effects panel and type: “Smart Denoise”. Then, right-click on the video and choose Edit Properties.

This will make sure you go inside the Smart Denoise, where you can change opacity of the clip, threshold and radius.

You should reduce Opacity until you are satisfied with the result. Then, you can use the box next to Smart Denoise in order to see the scene before and after noise and grain removal.
So, that’s it! – We learned how to remove/reduce noise and grain from the videos, using several video editors. So you might as well start making your video clips look better right away!
Noise that appears as unwanted grain or artifacts in the video image can be removed in Final Cut Pro pretty easily, you just have to follow the little steps for it. Keep in mind that Final Cut Pro is not eligible for PC, this editor is only available for Mac (but Windows users, tune in for the editors functioning on PC’s!)
So, you have your grained footage, which you already chose to denoise, and for which you will need a video reduction effect.
First, you will need to open Final Cut Pro and import abovementioned video. Select this clip in the timeline,

and position the play head in a way that the clip appears in the viewer, that is, on the big screen - for you to see well.

Click the Effects button in the top-right corner of the timeline, or, to use the shortcut, press Command & 5.

In the Effects browser, select the Basics category in the list of Video effects on the left, then select the Noise Reduction effect. For 360° clips, select the 360° category, then select the 360° Noise Reduction effect.
And you will need to do one of the following:
Drag the effect to the timeline clip you want to apply it to, or double-click the effect thumbnail to apply the effect to the selected clip.
When the effect is applied, Final Cut Pro analyzes the clip for noise, so you might need to wait for a little while the process is complete and only then see the result.
Interesting tip you can remember is that if you are using several effects to your video clip, then adding Noise Reduction as the first effect would guarantee the best results for you. So, Mac users, you can start denoising your videos in Final Cut Pro now!
- Adobe After Effects
Adobe After Effects is a digital visual effects, motion graphics, and compositing application… Pretty intense, right? This very software has endless powers, and one of them is, you guessed correctly – denoising the video! So, how are we going to do that in this monster of the industry?
Sometimes what’s annoying about this kind of programs is that you need plugins, so let’s try to find a way to achieve our desired result without using anything external.
So, first of all (as in all cases!) import your video into After Effects. Then, you will need to find Effect in the menu, and find: Noise and Grain. There, you will choose Remove Grain and click on it.

On the left side of the program layout, the Effects Control will be opened. Now, you see viewing mode, where you need to change Preview to Final Output.

So, this will be the video with Preview checked:

Which will look like this when Final Output is checked:

Somewhat different and looking better, right?..
By the way, you can watch the whole process video here !
- Adobe Premiere Pro
Adobe Premiere Pro is one of the most and sophisticated video editor. So, of course, there is a way to reduce noise in this software as well, and this can be reached using effect called Median.
First of all, you add your footage to the Timeline in Premiere Pro and then go find the Effects Panel, where Median can be found. You need to drag and drop the Median effect to your video clip.

The next step is to make sure that adding the effect to the grainiest parts of the clip, which can be done using masks. So, in the Effects Control panel, you’ll need to select the mask shape for your clip – you can either choose rectangle, circle, or pen tool. With the latter you can move the Mask around the screen and resize it to cover the area.

And if you Change the Feather setting to 100, the effect will not have a very visible edge and some smoothness will cover for it.

You will need to repeat the process with more than one mask, if you would like to have covered all of the grainy area of your shot.
Lastly, you’ll need to adjust the effect settings to reduce the noise.

The Median effect doesn’t actually take away the graininess, it just blurs it. You’ll need to experiment with the Radius settings until you are happy with the result.
- DaVinci Resolve
When it comes to DaVinci Resolve, the process is somewhat different in the free version of it. So, first of all, off course, you add your footage into the timeline. Then,you are going to find the fusion tab underneath the timeline panel.

You will see MediaIn1 and MediaOut1, you click on MediaIn1, which will ensure the scene appears in the first viewer – and MediaOut1 by default is appearing in the second. So, now you stay on MediaIn1, hit shift+spacebar, and find the option which says: Remove Noise (RN) and then click Add, which adds the Remove Noise1 node. On the top right corner you will find Inspector, and if you click on it, you will see all the properties you can modify.
After going only into the second viewer, and in the top bar we can find channel icons. We open it and click on red, which makes the footage black and white for a while. Then, we go back to the Inspector, increase Softness Red and Detail Red.

This removes much grain from the red channel. Then we repeat the same for green, as well as for blue channel. Once you finish, you go to the same channel button in the bar and change it to “back to color”. So, the footage will have its colors back and you will see that it has become clearer, compared to the first viewer.

You can play around with the Chroma and Luma channels in the Inspector, if that is something you have ever had experience with!
- Movavi Video Editor
In Movavi Video Editor, it is pretty straightforward – unlike DaVinci Resolve, of course! So, getting to the point: the first thing you need to do is Entering the Edit Mode. In order to achieve it, you’ll need to click the Edit button next to the file you want to adjust or select Adjustments in the Tools tab.

After this, you will be able to select the Noise removal option, and then, move the Noise level slider to reflect the amount of noise you can see in the preview. The more noise you need to remove, the higher the Noise level, and vice versa.

When you’re finished removing the noise, click Apply, but in case you need to remove noise from several files, select Apply to all files, which ensures the same noise level will be applied on all your files there.
Lastly, of course, Wondershare Filmora X offers the same option as well. The steps are ase follows: You need to go to the Effects panel and type: “Smart Denoise”. Then, right-click on the video and choose Edit Properties.

This will make sure you go inside the Smart Denoise, where you can change opacity of the clip, threshold and radius.

You should reduce Opacity until you are satisfied with the result. Then, you can use the box next to Smart Denoise in order to see the scene before and after noise and grain removal.
So, that’s it! – We learned how to remove/reduce noise and grain from the videos, using several video editors. So you might as well start making your video clips look better right away!
Noise that appears as unwanted grain or artifacts in the video image can be removed in Final Cut Pro pretty easily, you just have to follow the little steps for it. Keep in mind that Final Cut Pro is not eligible for PC, this editor is only available for Mac (but Windows users, tune in for the editors functioning on PC’s!)
So, you have your grained footage, which you already chose to denoise, and for which you will need a video reduction effect.
First, you will need to open Final Cut Pro and import abovementioned video. Select this clip in the timeline,

and position the play head in a way that the clip appears in the viewer, that is, on the big screen - for you to see well.

Click the Effects button in the top-right corner of the timeline, or, to use the shortcut, press Command & 5.

In the Effects browser, select the Basics category in the list of Video effects on the left, then select the Noise Reduction effect. For 360° clips, select the 360° category, then select the 360° Noise Reduction effect.
And you will need to do one of the following:
Drag the effect to the timeline clip you want to apply it to, or double-click the effect thumbnail to apply the effect to the selected clip.
When the effect is applied, Final Cut Pro analyzes the clip for noise, so you might need to wait for a little while the process is complete and only then see the result.
Interesting tip you can remember is that if you are using several effects to your video clip, then adding Noise Reduction as the first effect would guarantee the best results for you. So, Mac users, you can start denoising your videos in Final Cut Pro now!
- Adobe After Effects
Adobe After Effects is a digital visual effects, motion graphics, and compositing application… Pretty intense, right? This very software has endless powers, and one of them is, you guessed correctly – denoising the video! So, how are we going to do that in this monster of the industry?
Sometimes what’s annoying about this kind of programs is that you need plugins, so let’s try to find a way to achieve our desired result without using anything external.
So, first of all (as in all cases!) import your video into After Effects. Then, you will need to find Effect in the menu, and find: Noise and Grain. There, you will choose Remove Grain and click on it.

On the left side of the program layout, the Effects Control will be opened. Now, you see viewing mode, where you need to change Preview to Final Output.

So, this will be the video with Preview checked:

Which will look like this when Final Output is checked:

Somewhat different and looking better, right?..
By the way, you can watch the whole process video here !
- Adobe Premiere Pro
Adobe Premiere Pro is one of the most and sophisticated video editor. So, of course, there is a way to reduce noise in this software as well, and this can be reached using effect called Median.
First of all, you add your footage to the Timeline in Premiere Pro and then go find the Effects Panel, where Median can be found. You need to drag and drop the Median effect to your video clip.

The next step is to make sure that adding the effect to the grainiest parts of the clip, which can be done using masks. So, in the Effects Control panel, you’ll need to select the mask shape for your clip – you can either choose rectangle, circle, or pen tool. With the latter you can move the Mask around the screen and resize it to cover the area.

And if you Change the Feather setting to 100, the effect will not have a very visible edge and some smoothness will cover for it.

You will need to repeat the process with more than one mask, if you would like to have covered all of the grainy area of your shot.
Lastly, you’ll need to adjust the effect settings to reduce the noise.

The Median effect doesn’t actually take away the graininess, it just blurs it. You’ll need to experiment with the Radius settings until you are happy with the result.
- DaVinci Resolve
When it comes to DaVinci Resolve, the process is somewhat different in the free version of it. So, first of all, off course, you add your footage into the timeline. Then,you are going to find the fusion tab underneath the timeline panel.

You will see MediaIn1 and MediaOut1, you click on MediaIn1, which will ensure the scene appears in the first viewer – and MediaOut1 by default is appearing in the second. So, now you stay on MediaIn1, hit shift+spacebar, and find the option which says: Remove Noise (RN) and then click Add, which adds the Remove Noise1 node. On the top right corner you will find Inspector, and if you click on it, you will see all the properties you can modify.
After going only into the second viewer, and in the top bar we can find channel icons. We open it and click on red, which makes the footage black and white for a while. Then, we go back to the Inspector, increase Softness Red and Detail Red.

This removes much grain from the red channel. Then we repeat the same for green, as well as for blue channel. Once you finish, you go to the same channel button in the bar and change it to “back to color”. So, the footage will have its colors back and you will see that it has become clearer, compared to the first viewer.

You can play around with the Chroma and Luma channels in the Inspector, if that is something you have ever had experience with!
- Movavi Video Editor
In Movavi Video Editor, it is pretty straightforward – unlike DaVinci Resolve, of course! So, getting to the point: the first thing you need to do is Entering the Edit Mode. In order to achieve it, you’ll need to click the Edit button next to the file you want to adjust or select Adjustments in the Tools tab.

After this, you will be able to select the Noise removal option, and then, move the Noise level slider to reflect the amount of noise you can see in the preview. The more noise you need to remove, the higher the Noise level, and vice versa.

When you’re finished removing the noise, click Apply, but in case you need to remove noise from several files, select Apply to all files, which ensures the same noise level will be applied on all your files there.
Lastly, of course, Wondershare Filmora X offers the same option as well. The steps are ase follows: You need to go to the Effects panel and type: “Smart Denoise”. Then, right-click on the video and choose Edit Properties.

This will make sure you go inside the Smart Denoise, where you can change opacity of the clip, threshold and radius.

You should reduce Opacity until you are satisfied with the result. Then, you can use the box next to Smart Denoise in order to see the scene before and after noise and grain removal.
So, that’s it! – We learned how to remove/reduce noise and grain from the videos, using several video editors. So you might as well start making your video clips look better right away!
Noise that appears as unwanted grain or artifacts in the video image can be removed in Final Cut Pro pretty easily, you just have to follow the little steps for it. Keep in mind that Final Cut Pro is not eligible for PC, this editor is only available for Mac (but Windows users, tune in for the editors functioning on PC’s!)
So, you have your grained footage, which you already chose to denoise, and for which you will need a video reduction effect.
First, you will need to open Final Cut Pro and import abovementioned video. Select this clip in the timeline,

and position the play head in a way that the clip appears in the viewer, that is, on the big screen - for you to see well.

Click the Effects button in the top-right corner of the timeline, or, to use the shortcut, press Command & 5.

In the Effects browser, select the Basics category in the list of Video effects on the left, then select the Noise Reduction effect. For 360° clips, select the 360° category, then select the 360° Noise Reduction effect.
And you will need to do one of the following:
Drag the effect to the timeline clip you want to apply it to, or double-click the effect thumbnail to apply the effect to the selected clip.
When the effect is applied, Final Cut Pro analyzes the clip for noise, so you might need to wait for a little while the process is complete and only then see the result.
Interesting tip you can remember is that if you are using several effects to your video clip, then adding Noise Reduction as the first effect would guarantee the best results for you. So, Mac users, you can start denoising your videos in Final Cut Pro now!
- Adobe After Effects
Adobe After Effects is a digital visual effects, motion graphics, and compositing application… Pretty intense, right? This very software has endless powers, and one of them is, you guessed correctly – denoising the video! So, how are we going to do that in this monster of the industry?
Sometimes what’s annoying about this kind of programs is that you need plugins, so let’s try to find a way to achieve our desired result without using anything external.
So, first of all (as in all cases!) import your video into After Effects. Then, you will need to find Effect in the menu, and find: Noise and Grain. There, you will choose Remove Grain and click on it.

On the left side of the program layout, the Effects Control will be opened. Now, you see viewing mode, where you need to change Preview to Final Output.

So, this will be the video with Preview checked:

Which will look like this when Final Output is checked:

Somewhat different and looking better, right?..
By the way, you can watch the whole process video here !
- Adobe Premiere Pro
Adobe Premiere Pro is one of the most and sophisticated video editor. So, of course, there is a way to reduce noise in this software as well, and this can be reached using effect called Median.
First of all, you add your footage to the Timeline in Premiere Pro and then go find the Effects Panel, where Median can be found. You need to drag and drop the Median effect to your video clip.

The next step is to make sure that adding the effect to the grainiest parts of the clip, which can be done using masks. So, in the Effects Control panel, you’ll need to select the mask shape for your clip – you can either choose rectangle, circle, or pen tool. With the latter you can move the Mask around the screen and resize it to cover the area.

And if you Change the Feather setting to 100, the effect will not have a very visible edge and some smoothness will cover for it.

You will need to repeat the process with more than one mask, if you would like to have covered all of the grainy area of your shot.
Lastly, you’ll need to adjust the effect settings to reduce the noise.

The Median effect doesn’t actually take away the graininess, it just blurs it. You’ll need to experiment with the Radius settings until you are happy with the result.
- DaVinci Resolve
When it comes to DaVinci Resolve, the process is somewhat different in the free version of it. So, first of all, off course, you add your footage into the timeline. Then,you are going to find the fusion tab underneath the timeline panel.

You will see MediaIn1 and MediaOut1, you click on MediaIn1, which will ensure the scene appears in the first viewer – and MediaOut1 by default is appearing in the second. So, now you stay on MediaIn1, hit shift+spacebar, and find the option which says: Remove Noise (RN) and then click Add, which adds the Remove Noise1 node. On the top right corner you will find Inspector, and if you click on it, you will see all the properties you can modify.
After going only into the second viewer, and in the top bar we can find channel icons. We open it and click on red, which makes the footage black and white for a while. Then, we go back to the Inspector, increase Softness Red and Detail Red.

This removes much grain from the red channel. Then we repeat the same for green, as well as for blue channel. Once you finish, you go to the same channel button in the bar and change it to “back to color”. So, the footage will have its colors back and you will see that it has become clearer, compared to the first viewer.

You can play around with the Chroma and Luma channels in the Inspector, if that is something you have ever had experience with!
- Movavi Video Editor
In Movavi Video Editor, it is pretty straightforward – unlike DaVinci Resolve, of course! So, getting to the point: the first thing you need to do is Entering the Edit Mode. In order to achieve it, you’ll need to click the Edit button next to the file you want to adjust or select Adjustments in the Tools tab.

After this, you will be able to select the Noise removal option, and then, move the Noise level slider to reflect the amount of noise you can see in the preview. The more noise you need to remove, the higher the Noise level, and vice versa.

When you’re finished removing the noise, click Apply, but in case you need to remove noise from several files, select Apply to all files, which ensures the same noise level will be applied on all your files there.
Lastly, of course, Wondershare Filmora X offers the same option as well. The steps are ase follows: You need to go to the Effects panel and type: “Smart Denoise”. Then, right-click on the video and choose Edit Properties.

This will make sure you go inside the Smart Denoise, where you can change opacity of the clip, threshold and radius.

You should reduce Opacity until you are satisfied with the result. Then, you can use the box next to Smart Denoise in order to see the scene before and after noise and grain removal.
So, that’s it! – We learned how to remove/reduce noise and grain from the videos, using several video editors. So you might as well start making your video clips look better right away!
Do You Want to Edit a TikTok After Posting? This Article Will Provide Multiple Methods Through Which You Can Do It in No Time
If you are planning to start your own business but have limited marketing resources, use TikTok. Your marketing expense will be minimized, and you will reach a large audience quickly. You can easily create the product video on TikTok and save it in a draft for later use. Many thinks adding TikTok back to the feed from the draft is complicated, but it is not.
Additionally, you can make as many videos on TikTok as you want and share them across the globe. It is also possible to make changes in the posted TikTok videos to enhance engagement. This article will help you learn how to edit a TikTok video after posting.

Part 1: Editing Your TikTok Posted Video
Sometimes you want to make changes to the uploaded TikTok videos because they are not gaining more likes. You don’t have to make it again from scratch because it is possible to edit TikTok videos even after uploading. You can then follow the underneath steps to learn how to edit a TikTok video after posting:
Step 1: Open your TikTok profile and select the video you want to edit. Tap the “Three Dots” icon present in the right panel. Press the “Save Video” icon. After successfully saving the video, locate and select the “Delete” option to remove the video from your profile.
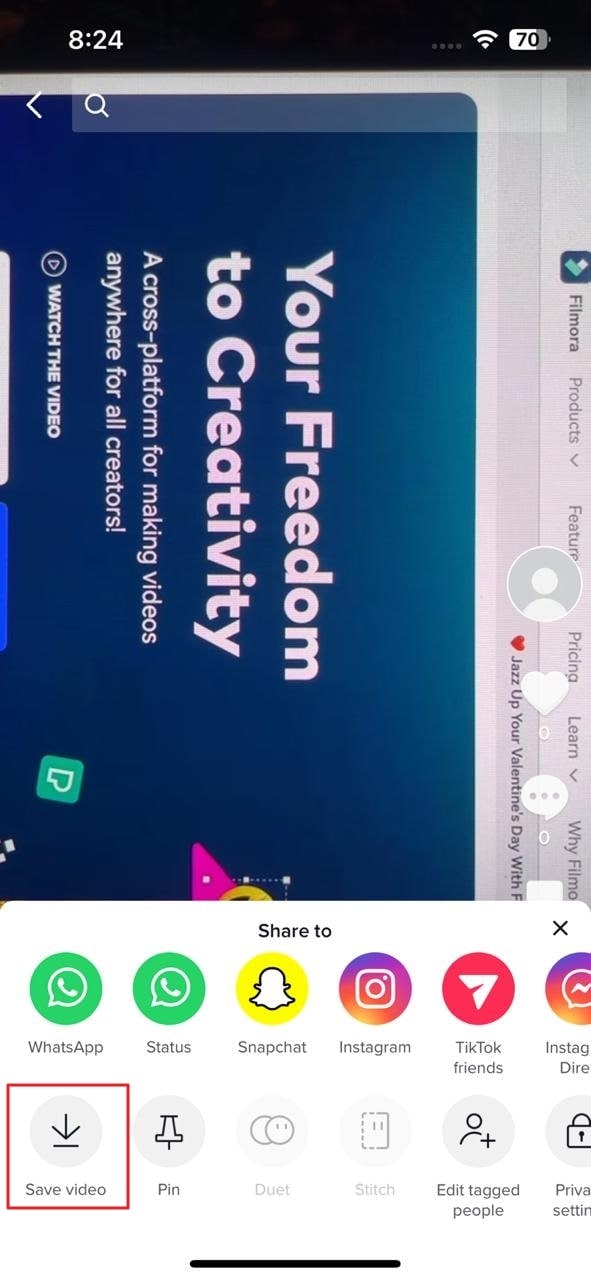
Step 2: Now tap on the “Plus” sign and select the “Upload” option. Choose the video which you have recently saved and then click the “Next” button.
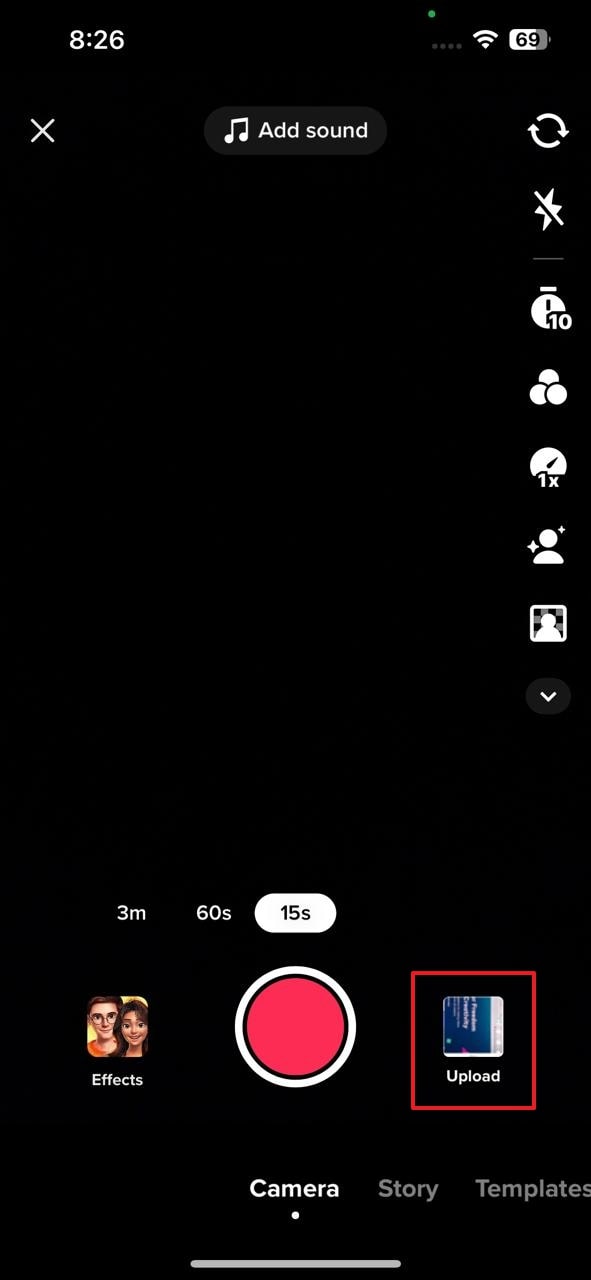
Step 3: Select the “Edit” icon in the right panel to start editing. Tap on the timeline video to enable editing options like split, speed, volume, rotate and delete. More editing options, such as sound, text, overlay, and effect, will appear when you unselect the timeline video.
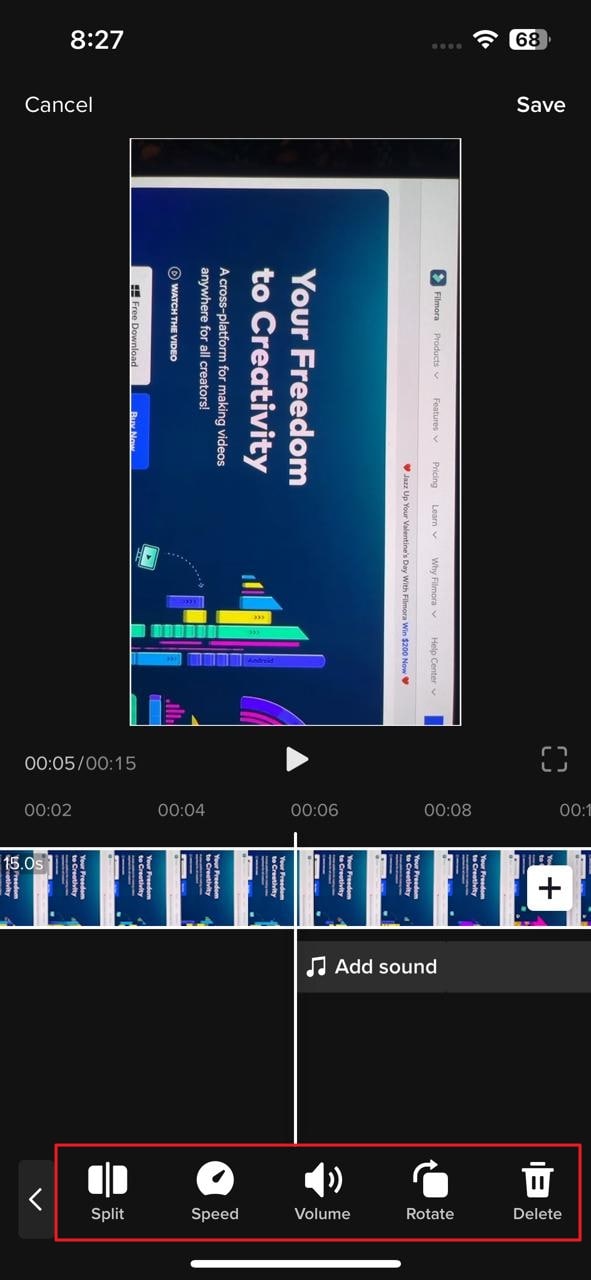
Step 4: After editing the video, save the changes using the “Save” option present at the top. Now hit the “Next” button to add desired hashtags and use the “Post” button to publish your video.
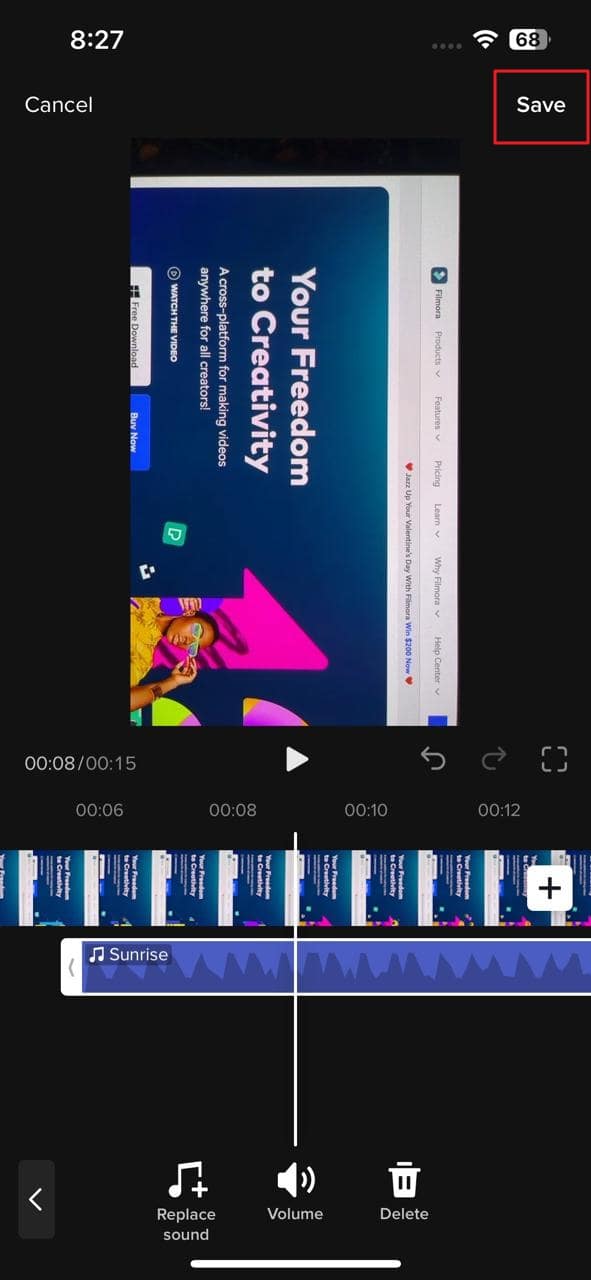
Part 2: Editing a Draft
From the above part, it is clear how you can edit videos in different ways by using the TikTok app. If you don’t want to publicize your video, it is possible to store the video as a draft. TikTok doesn’t require you to make your videos public. Moreover, it is possible to edit videos stored in the TikTok drafts.
You don’t have to worry about how to put a TikTok back from the draft because it is a simple procedure, and anyone can perform it in no time. We have provided simple steps for editing a draft using the TikTok app:
Step 1: Launch TikTok mobile app on your smartphone and open your “Profile.” Afterward, select the draft you want to edit from the “Drafts” menu.

Step 2: Press the “Edit” icon to edit the draft. Different editing options will appear when you select the draft video present in the timeline. Adjust the speed, volume, and orientation of the draft video through the features available in the bottom toolbar.
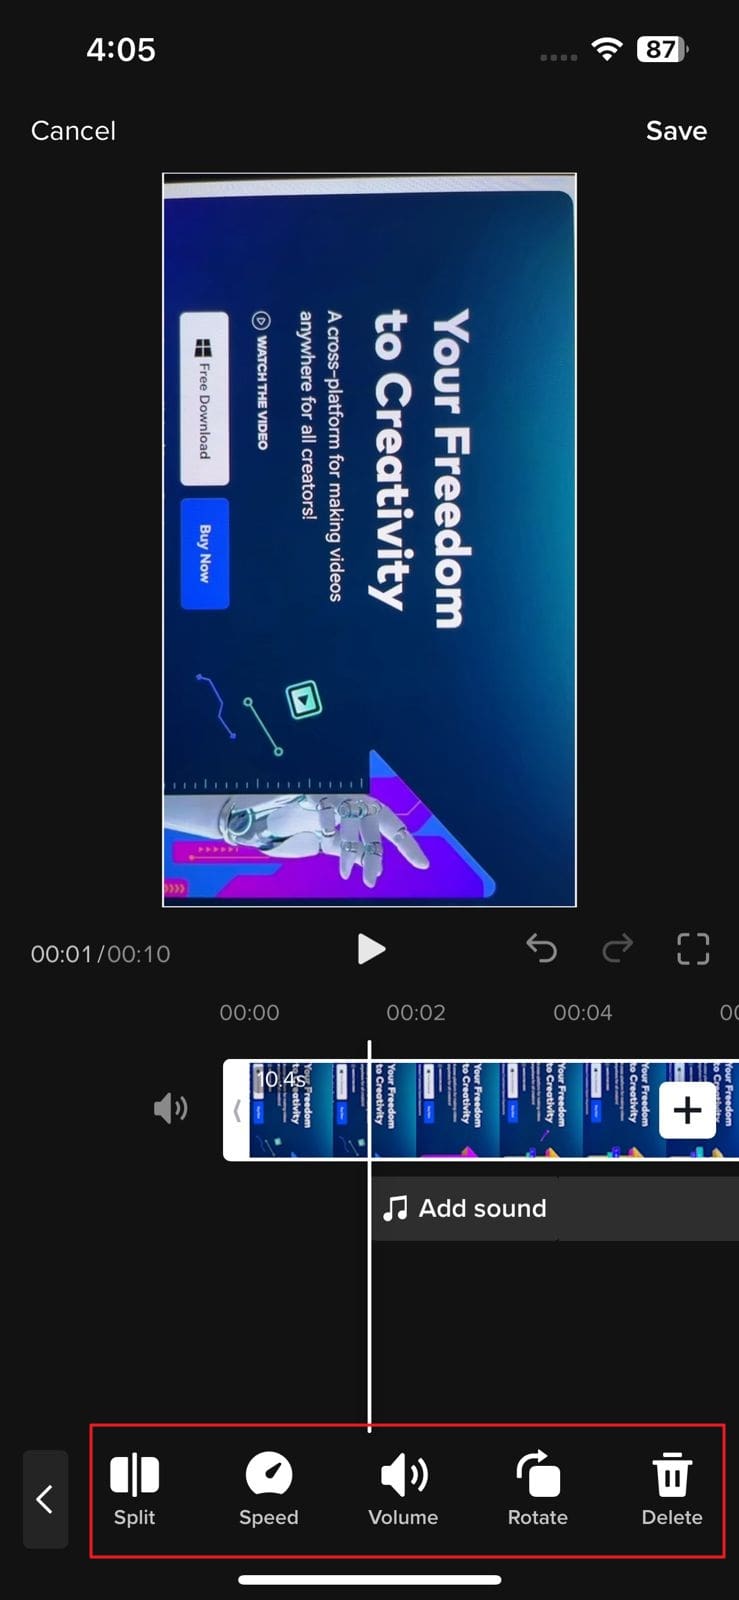
Step 3: Now tap again to unselect the draft. A wide range of options will appear that can be used for adding sound, text, and effects to the video. Use them according to your requirement.
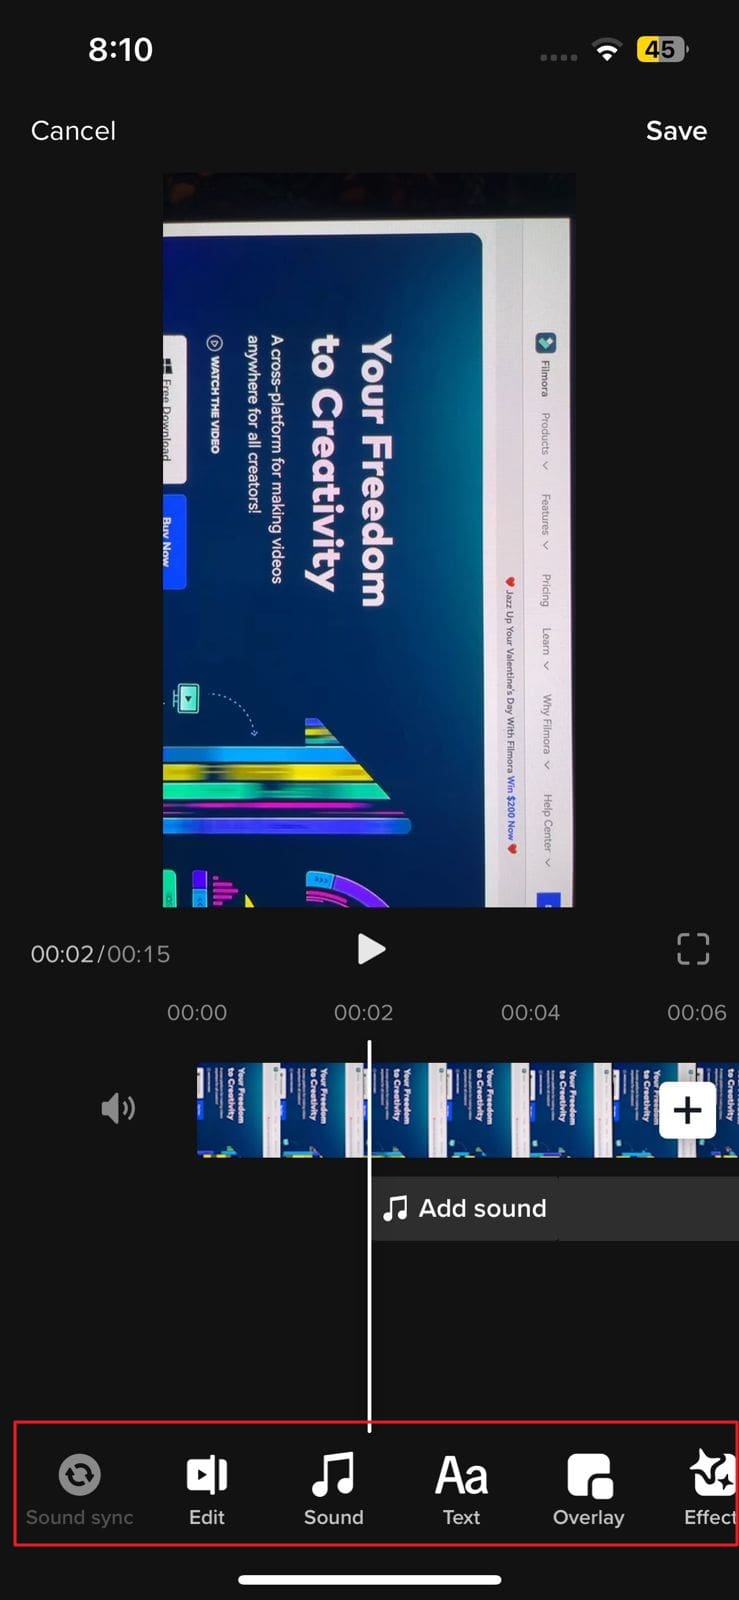
Step 4: After making changes to the draft, tap the “Save” option and hit the “Next” button. Write a description of the post if you want and press the “Post” button.

Part 3: Using a Third-Party Video Editor to Make a New Video or Edit an Old One
Although TikTok provides the option of editing, however, they are very few tools to make the required changes to the video. You can go for the Wondershare Filmora mobile app, as it gives more advanced editing options.
Filmora is a powerful application used by more than 100 million users for making trending videos for social media accounts. This award-winner video editor can make surprising changes in your clips through its filters, effects, and transitions.
download filmora app for ios ](https://app.adjust.com/b0k9hf2%5F4bsu85t ) download filmora app for android ](https://app.adjust.com/b0k9hf2%5F4bsu85t )

Amazing Features of Filmora
If you are confused about why you should use Filmora to edit a TikTok after posting, read these fantastic features of Filmora that are discussed below:
1. Speed Ramping
TikTok videos can be made more cinematic by adjusting their speed. Filmora presents speed ramping options such as Bullet, Montage, or Jump Cut to professionally adjust the speed of the video. You can also create your speed ramping effect and save it for later use. Don’t worry about the audio pitch during speed ramping because Filmora automatically adjusts the pitch of video sound.
2. Title Editing
You can add up to the mark titles to your TikTok videos to convey your main theme. These titles can be added in the form of text or animations, each having different colors and styles. Its title feature is loaded with varying styles of text that can be used to catch viewers’ attention.
3. Stickers and Effects
Multiple effects options are available on the Filmora video editor to give the video an exclusive look. These effects help you to enhance your video beauty and make you more confident on TikTok. You can also use the stickers option to beautify your TikTok video. Those people who make TikTok can engage children by adding GIFs or emojis in videos with this app.
4. Music Library
Filmora also allows its users to add music to the video. You can use its royal-free music library or add your voice. The volume of the soundtrack can easily be adjusted through its volume adjustment feature. You can also extract the music from a video and split the audio to eliminate the unnecessary part. Moreover, its beat detection feature is highly advanced and adjusts the beat according to the video.
Steps to Use Filmora Mobile App to Edit TikTok Videos
Are you interested in making further edits to your TikTok video? Simply follow the underneath steps to avail the editing features of this app to edit a TikTok after posting:
Step 1: Download Wondershare Filmora
Download Wondershare Filmora and launch it on your smartphone. While doing so, make sure you have a strong internet connection.
Step 2: Import the Video
Go to the “New Project” tab present at the top and then select the “Video” button. All the videos on your device will appear; just choose the one you want to edit for TikTok. Following this, press the “Import” button.

Step 3: Edit the TikTok Video
After importing process completes, multiple options for editing will appear. You can add music, text, or stickers to the video. Different filters and effects can also be used to make the video more trending.
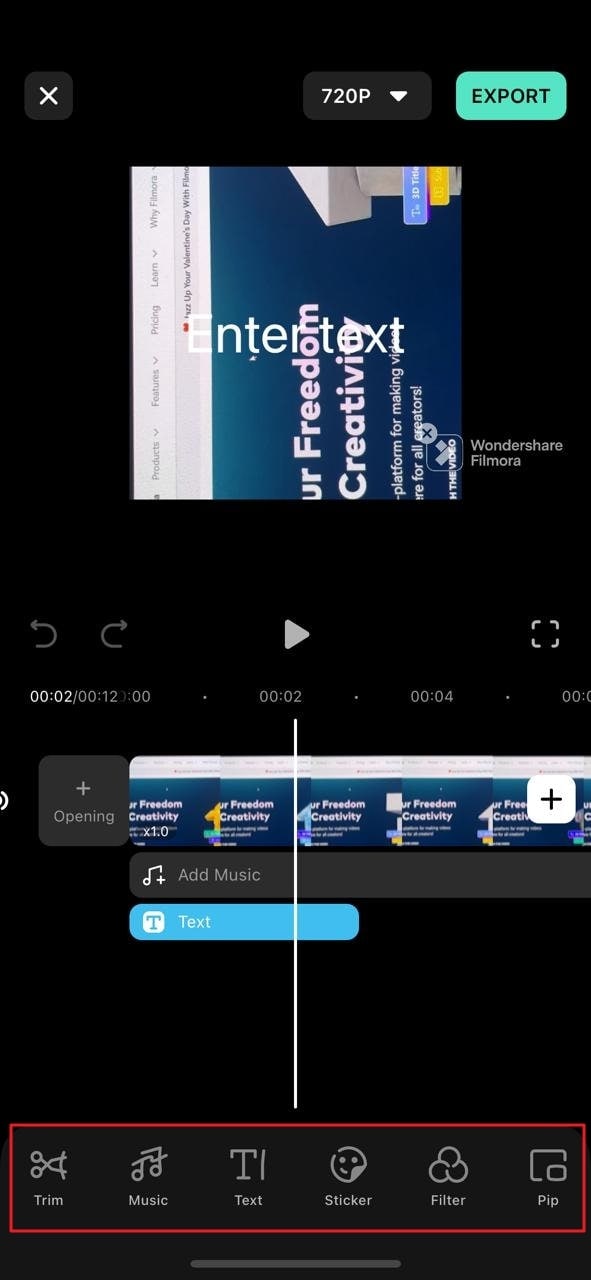
Step 4: Use More Editing Options
Now, select the video clip from the timeline to find more editing options like crop, precut, mask, adjust, and many more. The tool also provides fade-in and fade-out options to give an artistic touch to the video. Once all the changes have been made, select the video resolution and export the TikTok video.
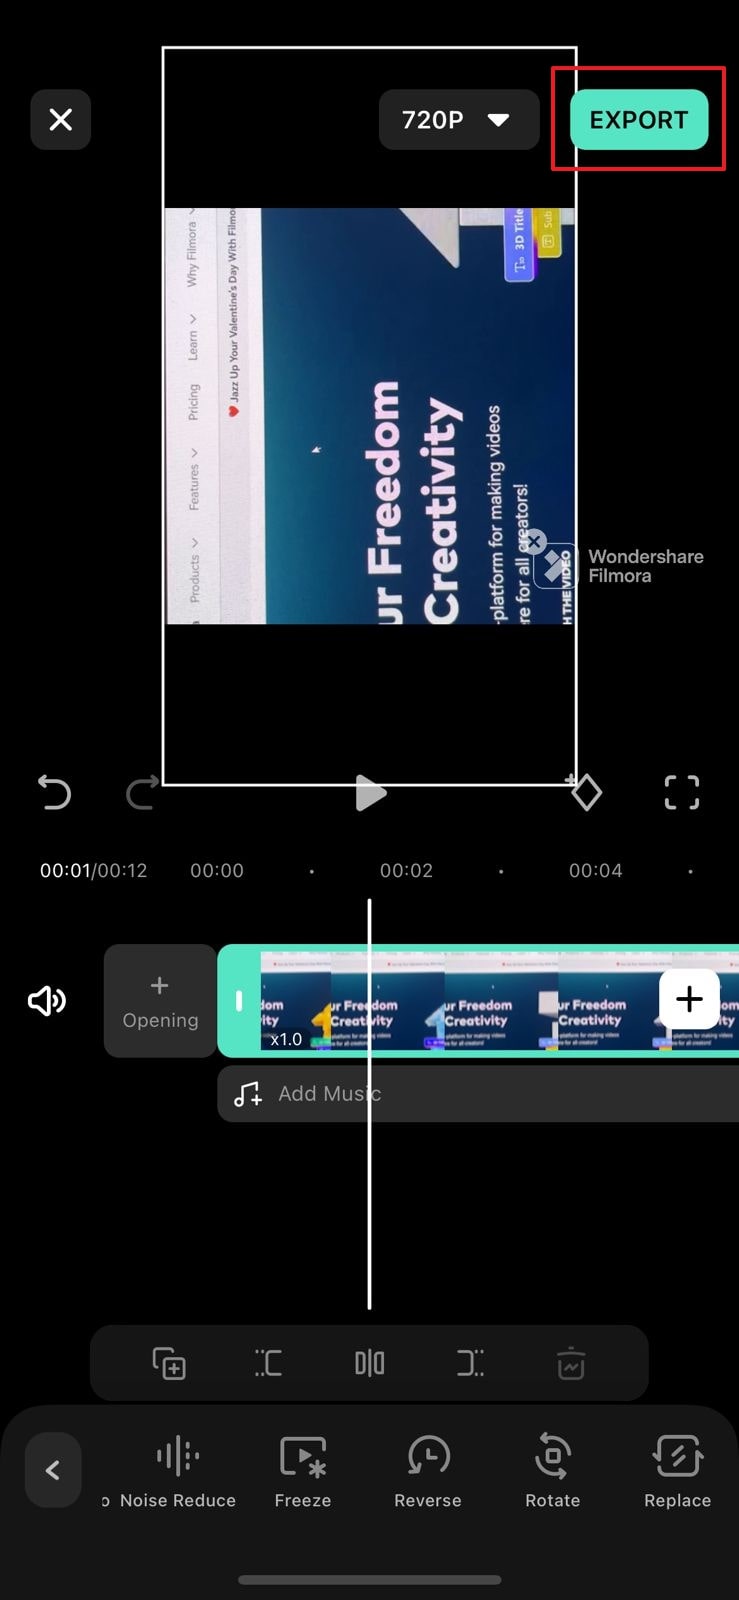
Conclusion
This article has answered all the queries related to “can you edit a posted TikTok.” To cut a long story short, Filmora is the best video editing tool that can be used for making amazing videos for TikTok. Anyone can create breathtaking video clips from this innovative video editing mobile app in no time. So, folks, increase your TikTok following by editing videos through Filmora.

Amazing Features of Filmora
If you are confused about why you should use Filmora to edit a TikTok after posting, read these fantastic features of Filmora that are discussed below:
1. Speed Ramping
TikTok videos can be made more cinematic by adjusting their speed. Filmora presents speed ramping options such as Bullet, Montage, or Jump Cut to professionally adjust the speed of the video. You can also create your speed ramping effect and save it for later use. Don’t worry about the audio pitch during speed ramping because Filmora automatically adjusts the pitch of video sound.
2. Title Editing
You can add up to the mark titles to your TikTok videos to convey your main theme. These titles can be added in the form of text or animations, each having different colors and styles. Its title feature is loaded with varying styles of text that can be used to catch viewers’ attention.
3. Stickers and Effects
Multiple effects options are available on the Filmora video editor to give the video an exclusive look. These effects help you to enhance your video beauty and make you more confident on TikTok. You can also use the stickers option to beautify your TikTok video. Those people who make TikTok can engage children by adding GIFs or emojis in videos with this app.
4. Music Library
Filmora also allows its users to add music to the video. You can use its royal-free music library or add your voice. The volume of the soundtrack can easily be adjusted through its volume adjustment feature. You can also extract the music from a video and split the audio to eliminate the unnecessary part. Moreover, its beat detection feature is highly advanced and adjusts the beat according to the video.
Steps to Use Filmora Mobile App to Edit TikTok Videos
Are you interested in making further edits to your TikTok video? Simply follow the underneath steps to avail the editing features of this app to edit a TikTok after posting:
Step 1: Download Wondershare Filmora
Download Wondershare Filmora and launch it on your smartphone. While doing so, make sure you have a strong internet connection.

Step 2: Import the Video
Go to the “New Project” tab present at the top and then select the “Video” button. All the videos on your device will appear; just choose the one you want to edit for TikTok. Following this, press the “Import” button.

Step 3: Edit the TikTok Video
After importing process completes, multiple options for editing will appear. You can add music, text, or stickers to the video. Different filters and effects can also be used to make the video more trending.

Step 4: Use More Editing Options
Now, select the video clip from the timeline to find more editing options like crop, precut, mask, adjust, and many more. The tool also provides fade-in and fade-out options to give an artistic touch to the video. Once all the changes have been made, select the video resolution and export the TikTok video.

Conclusion
This article has answered all the queries related to “can you edit a posted TikTok.” To cut a long story short, Filmora is the best video editing tool that can be used for making amazing videos for TikTok. Anyone can create breathtaking video clips from this innovative video editing mobile app in no time. So, folks, increase your TikTok following by editing videos through Filmora.
Also read:
- Updated How to Create Liquid Water Reveal Intro for 2024
- New How to Add Adjustment Layer (Clip) in DaVinci Resolve for 2024
- New In 2024, Cropping a Video in Final Cut Pro Step by Step
- 2024 Approved Video Editing Tips to Know Before Editing First Draft
- 2024 Approved Best 16 Motion Blur Apps for Videos & Photos
- Updated In 2024, Learning Some Perfect Ways to Convert a Slow-Motion Video to Normal
- New 2024 Approved FLV Editor for Windows 11/10/8.1/8/7 Easily Edit FLV Videos on PC
- 2024 Approved Best Guide for Setting TikTok Countdown Timer
- Updated Split Audio From a Video in Adobe Premiere Pro Step by Step
- Learn Color Correction in After Effects with These YouTube Videos
- Do You Have an Idea on How to Zoom in on Snapchat? Using This Article, You Will Find the Easiest Way to Zoom in and Out on Snapchat Videos for Different Purposes
- Updated In 2024, 10 Recommended Websites to Discover Awesome Premiere Pro Video Templates
- How to Animate Text in A Video
- New What Are The Stages Of Film Production for 2024
- Updated Do You Want to Apply Professional-Looking Color Grading on Your iPhones Photos and Videos? You Can Use Different iPhone LUTs for Your Pictures and Videos
- Updated 2024 Approved The Craziest 10 AI Editors Youve Ever Seen
- Updated 2024 Approved Motion Blur Photo With GIMP Step-By-Step Guide
- Top 10 Secret Tips & Tricks to Use in Wondershare Filmora
- Updated In 2024, How to Denoise in Final Cut Pro – Reduce Video and Audio Noise
- New Easy Guide to Overlay Videos in Premiere Pro for 2024
- Updated 2024 Approved How to Create a Bokeh Effect
- Updated You Might Have Difficulty Rotating a Video without an Efficient Media Player or Editing Tool. Below Is a Detailed Guide on Rotating a Video on Any Axes
- New 2024 Approved How to Create Intro Video with KineMaster
- Updated Discover How to Download Mobile Phone Green Screen Videos and Pictures for Free. Elevate Your Content with HD Quality Green Screen Frames
- New This Is the Method Employed During Every Evening Weather Broadcast The Newscaster Is Standing in Front of a Blank Screen, but the Viewers at Home See a Weather Map
- New 2024 Approved Best MOV to GIF Converters
- New In 2024, Color Lut in Video - Color Grade Your Video
- New Bandicut Video Editor Review
- Updated Best 10 Mind-Blowing Video Collage Maker for PC for 2024
- In 2024, Top 10 Free WhatsApp Video Converter 2023
- New How to Choose A Nice GoPro for Vlogging?
- In 2024, 10 Best Movie Trailer Voice Generators Windows, Mac, Android, iPhone & Online
- Your Search for the Best GIF Creator Tools Ends Here for 2024
- New LUTs Can Make Ordinary-Looking Footage Look More Attractive. Read This Guide to Learn How You Can Easily Create Your Own LUTs Using Filmora
- Leading Applications to Create Fast Motion in iPhone for 2024
- Updated Looking for the Best Online Video Editors to Add Filter to Your Video? Here Is the List of the Best Video Editors to Add Filter Video Online in Simple Steps
- 2024 Approved 10 Best Meme Text to Speech Tools Windows, Mac, Android, iPhone
- Top 16 Motion Blur Apps for Videos & Photos for 2024
- A Guide to Use Distortion Effect in Premeiere Pro
- 2024 Approved How to Create Motion Text Effects for Your Video?
- Updated Learning How to Create LUTs with LUTs Generator for 2024
- 2024 Approved 6 Instant Mp4 to GIF Online Tools for You
- In 2024, 4 Ways to Transfer Contacts from Apple iPhone 12 Pro Max to iPhone Quickly | Dr.fone
- Latest Guide How To Bypass Samsung Galaxy A24 FRP Without Computer
- How to Cast Vivo S17t Screen to PC Using WiFi | Dr.fone
- The Best Methods to Unlock the iPhone Locked to Owner for Apple iPhone 13 Pro
- How To Deal With the Vivo Y200 Screen Black But Still Works? | Dr.fone
- 3 Best Tools to Hard Reset OnePlus Ace 2 | Dr.fone
- How To Reset iPhone 6 Plus? | Dr.fone
- Rootjunky APK To Bypass Google FRP Lock For Vivo Y17s
- How to Detect and Stop mSpy from Spying on Your Nokia C12 Pro | Dr.fone
- In 2024, How to Factory Reset iPad or Apple iPhone SE without iCloud Password or Apple ID?
- 5 Hassle-Free Solutions to Fake Location on Find My Friends Of Realme C67 4G | Dr.fone
- 4 Things You Must Know About Apple iPhone 15 Pro Max Activation Lock
- Cannot play MKV files on Xiaomi Redmi K70
- Super Easy Ways To Deal with Motorola G24 Power Unresponsive Screen | Dr.fone
- Does find my friends work on OnePlus Ace 2 | Dr.fone
- How To Bypass Google FRP on Xiaomi Redmi K70
- In 2024, How to Fix Pokemon Go Route Not Working On Itel P55? | Dr.fone
- What You Want To Know About Two-Factor Authentication for iCloud On your iPhone 15
- Proven Ways in How To Hide Location on Life360 For Poco M6 Pro 4G | Dr.fone
- How to Perform Hard Reset on Oppo A1x 5G? | Dr.fone
- In 2024, Proven Ways in How To Hide Location on Life360 For Oppo Reno 11 5G | Dr.fone
- Preparation to Beat Giovani in Pokemon Go For Tecno Spark 10 4G | Dr.fone
- How To Use Allshare Cast To Turn On Screen Mirroring On Motorola Razr 40 | Dr.fone
- Top 10 AI Avatar Generators for 2024
- Does Airplane Mode Turn off GPS Location On Motorola Edge+ (2023)? | Dr.fone
- Proven Ways in How To Hide Location on Life360 For Apple iPhone 6s Plus | Dr.fone
- How to get back lost contacts from Asus ROG Phone 8.
- In 2024, How to Fix Pokemon Go Route Not Working On Apple iPhone 15 Pro Max? | Dr.fone
- Play Store Not Working On Nokia C12 Pro? 8 Solutions Inside | Dr.fone
- How to Rescue Lost Photos from Vivo Y78t?
- In 2024, Top 9 OnePlus Ace 2 Monitoring Apps for Parental Controls | Dr.fone
- In 2024, Ultimate Guide from Oppo Reno 10 5G FRP Bypass
- How to recover deleted photos from Android Gallery after format on Xiaomi Redmi 13C
- How can I get more stardust in pokemon go On Honor 80 Pro Straight Screen Edition? | Dr.fone
- In 2024, How to Make the Most of Your iPhone 14 Pro Lock Screen with Notifications? | Dr.fone
- In 2024, Remove the Lock Screen Fingerprint Of Your Itel A60
- In 2024, 3 Effective Methods to Fake GPS location on Android For your Samsung Galaxy S23 Ultra | Dr.fone
- Why does the pokemon go battle league not available On HTC U23 | Dr.fone
- 5 Ways to Track Honor Play 8T without App | Dr.fone
- Title: New How To Make A Video Longer
- Author: Chloe
- Created at : 2024-05-20 03:38:10
- Updated at : 2024-05-21 03:38:10
- Link: https://ai-editing-video.techidaily.com/new-how-to-make-a-video-longer/
- License: This work is licensed under CC BY-NC-SA 4.0.

