
New How to Make Glitch Effect with Filmora

How to Make Glitch Effect with Filmora
You don’t need outdated VCRs or any other broken technology to produce glitch effects. Instead, you can use a video editing program for Mac and PCs, such as Filmora , to transform your videos into glitch-effect masterpieces. You can also use the glitch effects to provide striking shot transitions or opening titles. Keep reading this article on how to apply various glitch video effects in Filmora 11:
Part 1: What is a Glitch Effect?
A glitch effect occurs when a section of your video temporarily changes look or “glitches” for a short while. Although transient glitches are typical, they can occasionally linger for a few seconds or more.

You can use a glitch effect to temporarily change the appearance of the image in the video to give the impression that a machine is processing it. Additionally, it gives your finished piece a fantastic, dreamlike aspect.
Part 2: When Should you Apply a Glitch Effect?
A few years back, we had no choice but to watch glitchy movies on rusty VCR devices. Nowadays, retro video effects are very popular in TV movies and even games. You can use these effects in many ways, like making fake vintage footage or emulating a glitching computer.
Filmmakers frequently employ glitching in their videos to give the impression that a character has been affected by a technical abnormality, is having a flashback, or is being watched by someone else via a digital camera system. Something happens when the person or image flashes, often without their knowledge. In addition, you can apply the glitch effect to a composition to evoke a feeling of dramatic irony.
Part 3: Tutorial to Chromatic Aberration Effect
Chromatic aberration refers to how old lenses tend to split colors. This effect is very common in Old media like VHS or LaserDisc.

Here is a complete breakdown of each component of the Retro look and how you can make your glitch effects in Filmora 11:
Step1 Download Wondersshare Filmora 11 on your Pc by visiting filmora.wondershare.com.

Step2 Open Filmora and click on the Effects tab.
Step3 Search Chromatic aberration and drag the effect right onto your clip. It will give you a fantastic pre-made version of the effect.
Part 4: How to Customize Glitch Effect with Filmora
You can add final touches to your video clips by customizing Filmora’s effects to take your glitch effect to the next level. You can mix and match different effects in your video to create your custom glitch effect in Filmora 11.
Free Download For Win 7 or later(64-bit)
Free Download For macOS 10.14 or later
Step1 Once you have your clip on the timeline, select your clip and click on Edit. Now choose Duplicate to create two more copies.

Step2 Put the new copies on the layer above the others and make sure everything is lined up exactly. To create the glitch effect, separate the color channels on your Clips into the primary colors red, green, and blue.

Step3 Double-click on the top clip.

Go to Color and open the White Balance option to make this layer completely red. Next, drag both Temperature and Tint sliders to a hundred.

Step4 Now click the little eye icon on the timeline to hide the top layer and move on to the middle layer.
Step5 Double-click on your middle clip and go to Color, then select White Balance and set your Temperature to -100 and your Tint to 100.

Step6 Finally, hide this layer just like before. Repeat the same steps for the last clip but make this clip the blue layer by leaving the Temperature at zero and setting the Tint to -100.

Step7 Double-click the clip in the top layer, click the Video Tab, and open the Compositing options. Set the Blending Mode of this top layer to Soft Light.

Now click on the clip in your preview window and move the image over by pressing the left Arrow key on your keyboard a few times. Once you’re happy with the top clip, hide that layer by clicking the eye icon.

Step8 To make the middle layer visible, double-click the clip in your mid layer and set the Blending Mode of this layer to Screen.

Now click on your clip in the preview window and press the Right key as many times as you did before. Finally, make all the layers visible by clicking the eye icon.

Vignette
A vignette is a dark border that fades around the frame’s edges in Filmora. You can easily add a vignette effect to your video by using these steps:
Step1 First, click the Effects Tab and type in Vignette.
Step2 Next, drag the Vignette Radius effect to a layer above your previous three layers.
Step3 Now adjust the length to match the other clips.
VHS static effects
A VHS effect is a grainy distortion that resembles an old analog video cassette recording. To apply the VHS static effects:
Step1 Click the Effects tab.
Step2 Search for the VHS static and drag it to a new layer above everything else.
Step3 Extend one of the effects to match the length of your previous clips.
VCR Distortion
VCR Distortion effect will make your video look highly glitched. To apply this effect:
Step1 Click on the Effects tab.
Step2 Search for VCR Distortion, then drag and drop this effect over your previous layer.
Part 5: Tips to Create Awesome Glitch Effects
- One of the best ways to use the VCR Distortion effect is to cut it short and intersperse it around your video in random parts.
- The glitch Distortion effect is very intense, so we recommend cutting this effect very short and dropping it at random parts of your video.
- You can also use these effects as a sneaky way to hide Cuts in your video.
Summary
You can use glitch effects created or inspired by faulty video equipment as a powerful storytelling tool. These effects can help you change the tone of the entire video by adding a specific visual aesthetic and making the narrative simpler to convey and more approachable for the audience.
We recommend using Filmora 11 for adding built-in glitch effects. You can also use this app to create custom glitch effects within a few minutes.
Free Download For macOS 10.14 or later
Step1 Once you have your clip on the timeline, select your clip and click on Edit. Now choose Duplicate to create two more copies.

Step2 Put the new copies on the layer above the others and make sure everything is lined up exactly. To create the glitch effect, separate the color channels on your Clips into the primary colors red, green, and blue.

Step3 Double-click on the top clip.

Go to Color and open the White Balance option to make this layer completely red. Next, drag both Temperature and Tint sliders to a hundred.

Step4 Now click the little eye icon on the timeline to hide the top layer and move on to the middle layer.
Step5 Double-click on your middle clip and go to Color, then select White Balance and set your Temperature to -100 and your Tint to 100.

Step6 Finally, hide this layer just like before. Repeat the same steps for the last clip but make this clip the blue layer by leaving the Temperature at zero and setting the Tint to -100.

Step7 Double-click the clip in the top layer, click the Video Tab, and open the Compositing options. Set the Blending Mode of this top layer to Soft Light.

Now click on the clip in your preview window and move the image over by pressing the left Arrow key on your keyboard a few times. Once you’re happy with the top clip, hide that layer by clicking the eye icon.

Step8 To make the middle layer visible, double-click the clip in your mid layer and set the Blending Mode of this layer to Screen.

Now click on your clip in the preview window and press the Right key as many times as you did before. Finally, make all the layers visible by clicking the eye icon.

Vignette
A vignette is a dark border that fades around the frame’s edges in Filmora. You can easily add a vignette effect to your video by using these steps:
Step1 First, click the Effects Tab and type in Vignette.
Step2 Next, drag the Vignette Radius effect to a layer above your previous three layers.
Step3 Now adjust the length to match the other clips.
VHS static effects
A VHS effect is a grainy distortion that resembles an old analog video cassette recording. To apply the VHS static effects:
Step1 Click the Effects tab.
Step2 Search for the VHS static and drag it to a new layer above everything else.
Step3 Extend one of the effects to match the length of your previous clips.
VCR Distortion
VCR Distortion effect will make your video look highly glitched. To apply this effect:
Step1 Click on the Effects tab.
Step2 Search for VCR Distortion, then drag and drop this effect over your previous layer.
Part 5: Tips to Create Awesome Glitch Effects
- One of the best ways to use the VCR Distortion effect is to cut it short and intersperse it around your video in random parts.
- The glitch Distortion effect is very intense, so we recommend cutting this effect very short and dropping it at random parts of your video.
- You can also use these effects as a sneaky way to hide Cuts in your video.
Summary
You can use glitch effects created or inspired by faulty video equipment as a powerful storytelling tool. These effects can help you change the tone of the entire video by adding a specific visual aesthetic and making the narrative simpler to convey and more approachable for the audience.
We recommend using Filmora 11 for adding built-in glitch effects. You can also use this app to create custom glitch effects within a few minutes.
Best Online YouTube Video Trimmer
Since the shift in interest from on-site jobs to content creators and exploring opportunities to take advantage of better and improved career growth opportunities, YouTube is one of the most popular social media platforms to get started.
But how do people face difficulties in finding an affordable and quick online YouTube video trimmer? Are you also facing issues with trimming your video before uploading it to get more views?
This is an ultimate guide on online YouTube video trimmer software and how you can trim your YouTube videos in no time.
Part 1. What is a YouTube trimmer?
Before diving into any details, it is important to introduce you to what is a YouTube trimmer and why it is important to trim your video. A YouTube trimmer is an easy and fast video editing tool that allows you to trim, crop, and share your favorite video parts online. You can also create custom links to YouTube Crops to embed on your website.
There are two popular online YouTube trimmers available; one only allows you to edit the YouTube link, which means you can only view the edited video online, while the other allows you to do related operations on the video file and download and save it as an mp4 or other file type for offline viewing.
Part 2. How to online trim YouTube videos?
1. Online YouTube trimmer (no edit and download)
Using these two websites, you can easily find the YouTube video clip you want to keep, but there is no way to download the video or add more editing to the clip. However, it works well for sharing links online or adding them to your website and using them to describe the part that best fits the topic.
The straightforward interface has just one function. Enter the start and end times in the box after entering the right YouTube link, then click “Crop!” to create a string of links.

The video’s beginning and ending times are selected in the same way as on the previous website. However, this website offers some basic code that you may copy and paste into your web pages to suit your demands in order to add YouTube videos.

Once you are done trimming your videos, you can download or export your videos in different formats, depending on your preference. It can be in mp4, mp3, or any other supported format.
2. Online YouTube trimmer (edit and download)
The websites that are listed after that combine an online YouTube downloader with a video editor, allowing you to make a variety of further edits to the selected video clip before downloading it locally.
- Veed.io :
Anyone can make powerful videos and expand their audiences thanks to the online video editing application Veed. It has some useful capabilities, such as the capacity to cut videos and filter them using different aesthetics. Users can crop, add text, make drawings, and even add photos to the movies. In addition, Veed serves as a tool for producing social media films that may be customized for each channel where they will be shared.
Additionally, they are free to play with various tools like rotate, trim, add photos, stickers, emojis, and more. Through the program, users may even create video memes online by uploading a target movie, modifying it using a variety of features, and downloading the altered video after a brief rendering.
Step1Launch veed.io on your web browser. Click on ‘Upload Your Video‘ to upload the video file you want to edit.
Step2You will notice a button to upload your media file once you are taken to the editing page.

Step3You can trim your video section by dragging the mark after you’ve uploaded the media file.

Step4Now, delete the unwanted video segment and click on ‘Export’ to save the trimmed video.
- Kapwing :
An effective, non-linear editing workflow is supported by the online video editor Kapwing. Upload your audio, video, and image files, then edit everything in one location. Since Kapwing is entirely online, content creators may access and edit their work from any computer or mobile device.
Step1Launch Kapwing.com on your web browser. If you are not directed to the trim video section, then go to the ‘Tools‘ menu and select ‘Trim Video‘. Now, click on ‘Choose a Video.’
Step2From the main page, click ‘Click to upload’ to upload the media file.

Step3After uploading the media file, Click on ‘Trim’ from the editing section on the right side of the screen.

Step4A pop-up screen will appear on your screen labeled as Trim Video. Trim the parts of the video as per your requirement and Click ‘Trim’ to finish.

Step5Once you have completed editing, click on ‘Export’ to save the video to your device.
Part 3. How to trim YouTube videos on a desktop?
Using an online video trimmer has been one of the last options that anyone would consider, but due to the expensive software, they have turned out to be a friendly and easy approach to editing videos. But the online video trimmers still rank at the bottom of the list because they’re unstable, and you can’t save the project at any time. If the online program breaks down, all your effort will be wasted. But desktop programs such as Filmora will never make you encounter such problems unless you experience a technical glitch.
With the help of a variety of strong editing tools and Wondershare Filmora , users may quickly and easily make outstanding videos. With Wondershare Filmora, anyone can learn how to be an excellent video editor, thanks to its wonderfully simple design.
You can follow these easy steps to trim your video:
Step1Click “Import” on the main windows and then select the desired video files from your computer to add video files to the Timeline for cutting. Movies can also be dropped directly into the Media Library.

Step2By moving the playhead over the unwanted section and choosing the trash can icon, you can delete it.

Step3When you’re through trimming, click “Export”, then select a location to store the edited video.
Conclusion
Depending on the comparison of how different software work, it is justifiable to conclude that Filmora is the best video editing software by all means. It offers a wide range of editing tools and ensures that progress has not been lost. If you are looking forward to trimming a video, download Filmora on your device to get started.
Free Download For Win 7 or later(64-bit)
Free Download For macOS 10.14 or later
Free Download For macOS 10.14 or later
End Screen Makers
A YouTube end screen is the final section of a YouTube video and generally makes up the final 5-20 seconds of the video. Video creators often use this section of the video to add calls-to-action, playlists, links to videos, and more.
It can therefore be a very crucial 5-20 seconds and you may want to make sure that the end screen works for your brand. To do that, you need to make use of a good end screen maker that will ensure you are taking full advantage of this final part of the video. Here, we will look at some of the best end screen makers for you to choose from.
Best End Screen Makers
The following are the best end screen makers that you can use to finish your YouTube videos in style;
Filmora
Wondershare Filmora is one of the best video creation and editing tools in the market and as such you can be sure that it has all the necessary features to help you create and edit an end screen for your YouTube video that users will interact with. It has a lot of different features that make the process easy and allows you to customize our video in so many ways.

You can add all kinds of assets to the video project including images, video clips, text, and more, and use Filmora’s filters, animated elements, and video effects to put them together. All these features come in a very simple-to-use interface that makes the often-complicated process of creating and editing videos very easy.
For Win 7 or later (64-bit)
For macOS 10.12 or later
Key Features
- You can export the completed video in very high quality
- It can be used to create and edit GIFs
- It has numerous editing tools including noise removal options, advanced color tuning, advanced text editor, scene stabilization, and more.
- You can add audio including voiceover and music to the video
- It has a very simple user interface that makes it very easy to use
Canva
Canva is a simple-to-use animated YouTube end screen maker that has a large library of resources ideal for creating different types of end screens. One of the best things about Canva is the numerous templates that you can choose from, along with effects and media files including stock photos that can be very useful when creating your video.
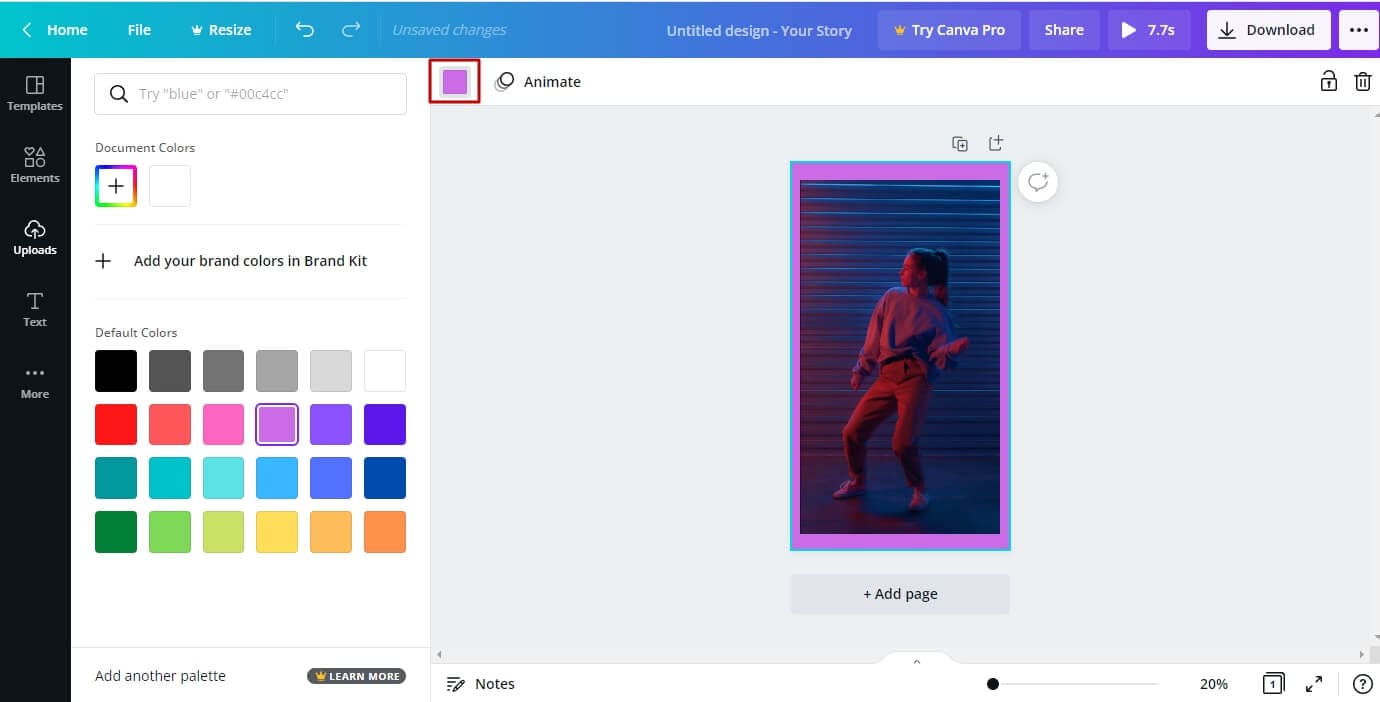
Although most of the features, including many of the templates, are free, the best resources are only available on the premium plan. Using a premium photo or template will mean that a watermark is added to your design.
Key Features
- Most of the resources you need to create your end screen on Canva are free
- The interface is very easy to use, with tutorials that can help when you get stuck.
- It has many great resources including stock images and unique templates
- You can add many effects to the end screen
Fotor
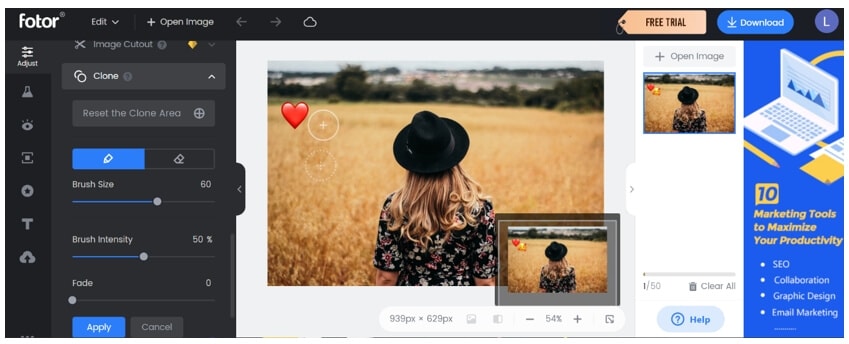
Fotor is another great solution that can be very useful in creating the YouTube end screen. It comes with a lot of different templates to choose from, allowing you to customize the end screen for maximum engagement. You can also upload your images to use in the project or choose from the Fotor library which offers options for different kinds of videos.
Key Features
- Most of the templates that you can choose are completely free to use
- The templates also come in different sizes to suit all needs
- You can use one of the many effects to further customize the end screen.
- The templates and effects are also customizable
Snappa
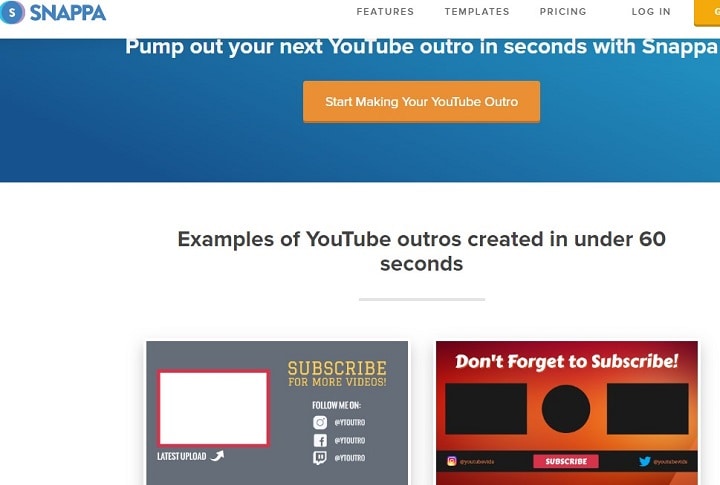
Snappa can also be a good way to create the perfect end screen for your YouTube video. It is a versatile solution with a lot of options to help you customize the end screen to suit your brand and targets. One such resource is the huge library of stock images as well as icons and shapes that you can choose from. Snappa makes the process much easier by allowing you to start from a suitable template that you can then customize as desired.
Key Features
- There are a lot of templates to choose from
- You can import your media files to customize the design
- You can also start from a blank canvas and work from there
- There is also a large library of stock photos that you can choose from
Placeit.net
This is an online solution that is one of the best ways to create an end screen for your YouTube video. The user interface is very simple to navigate and very well designed, allowing you to easily create the end screen even if you are a beginner.
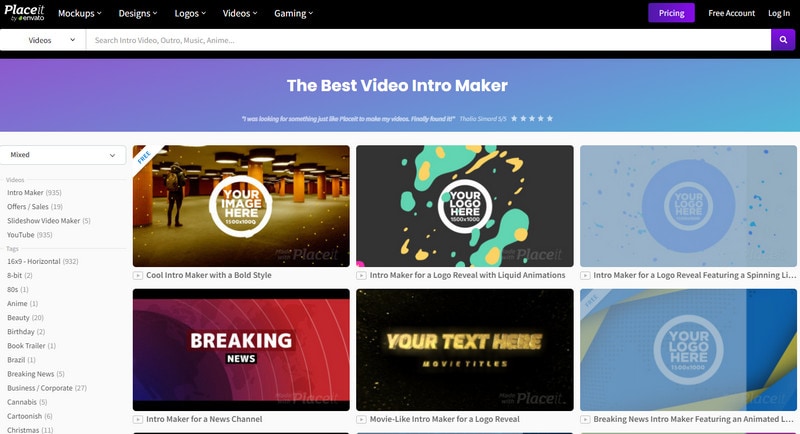
You can upload your images to add to the design or choose from the large library of resources that Placeit.net provides. You also have numerous export options to choose from.
Key Features
- There are numerous templates to choose from
- You can export the end screen with transparency
- The interface is very easy to use
- Most of the resources are available for free
Kapwing
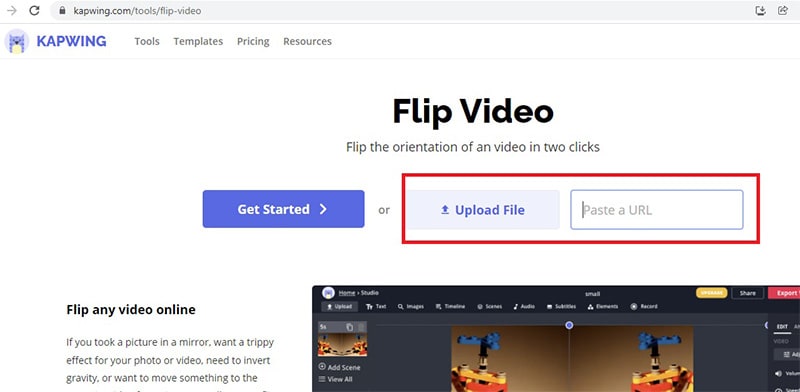
Kapwing is an online video editing solution that you can also use to create an end screen for your YouTube video. It has extensive features that can allow you to customize your end screen any way you want to. It has numerous templates to choose from and the simple drag-and-drop interface makes creating the end screen very easy.
Key Features
- You can choose the size of the end screen to use
- There are a lot of templates to choose from
- You can upload your images and other elements to the project
- You get to choose the duration of the end screen before you begin the project
How to Make an End Screen with Filmora
Creating an end screen for your YouTube video using Filmora is a very simple process. Use these steps to do it;
Step 1: The first thing you need to do is install Filmora on your computer. You can download the setup file from the main website and then follow the instructions on the setup wizard to install the program.
Once the installation is complete, open the program and click on “New Project” to start.
Step 2: Click on the “Titles” section and search for “End Screen” using the search bar. Select the best template for your end screen and drag it into the timeline.
Step 3: Now you are ready to add elements to the end screen. Add your profile picture on a new track across the timeline and stretch it to fit the screen as desired.
Step 4: Click on “Effects” and use the search function to search for the “Mask” effect. When you find it, add it across the timeline and double-click on it to open its settings and adjust the effect accordingly.
Step 5: You may also want to add your social media handles to the end screen. To do that, use the “Titles” tab to find the different social media handles and add each one to the timeline.
You are now ready to save and export the end screen and add it to your YouTube video.
Related FAQs About End Screen Maker
1. How Do You Make an End Screen?
Making an end screen is different depending on the tool that you use to create the end screen as well as the number of elements that you choose to add to it. But usually, you would start with a template and begin adding elements to the project one by one.
2.What is the Best Free Outro Maker?
The best tool to create an end screen for YouTube videos is Filmora simply because it makes the process very easy while allowing you to customize your creation as much as you need. But even though it has a free trial version, most of the features you need to create a unique end screen are not available on the free plan.
A good free solution would be Canva because it has numerous free resources that can create a decent end screen. Although we must point out that many of the best templates and elements on Canva are also not available for free.
3.How Long can a YouTube End Screen Be?
A typical end screen is often 5-20 seconds long. You don’t need any more than 20 seconds because it is only used as a way to promote additional content or add a call to action. So when creating an End screen, ensure that all elements are clear enough as your audience will have only 20 seconds to see it.
Even though it is just 20 seconds long, the end screen of your YouTube video can be the most important aspect of the entire video. It is a great way to further engage with your audience and with the tools on
this list, you can now create the best end screen for your video.
For macOS 10.12 or later
Key Features
- You can export the completed video in very high quality
- It can be used to create and edit GIFs
- It has numerous editing tools including noise removal options, advanced color tuning, advanced text editor, scene stabilization, and more.
- You can add audio including voiceover and music to the video
- It has a very simple user interface that makes it very easy to use
Canva
Canva is a simple-to-use animated YouTube end screen maker that has a large library of resources ideal for creating different types of end screens. One of the best things about Canva is the numerous templates that you can choose from, along with effects and media files including stock photos that can be very useful when creating your video.

Although most of the features, including many of the templates, are free, the best resources are only available on the premium plan. Using a premium photo or template will mean that a watermark is added to your design.
Key Features
- Most of the resources you need to create your end screen on Canva are free
- The interface is very easy to use, with tutorials that can help when you get stuck.
- It has many great resources including stock images and unique templates
- You can add many effects to the end screen
Fotor
Fotor is another great solution that can be very useful in creating the YouTube end screen. It comes with a lot of different templates to choose from, allowing you to customize the end screen for maximum engagement. You can also upload your images to use in the project or choose from the Fotor library which offers options for different kinds of videos.

Key Features
- Most of the templates that you can choose are completely free to use
- The templates also come in different sizes to suit all needs
- You can use one of the many effects to further customize the end screen.
- The templates and effects are also customizable
Snappa
Snappa can also be a good way to create the perfect end screen for your YouTube video. It is a versatile solution with a lot of options to help you customize the end screen to suit your brand and targets. One such resource is the huge library of stock images as well as icons and shapes that you can choose from. Snappa makes the process much easier by allowing you to start from a suitable template that you can then customize as desired.

Key Features
- There are a lot of templates to choose from
- You can import your media files to customize the design
- You can also start from a blank canvas and work from there
- There is also a large library of stock photos that you can choose from
Placeit.net
This is an online solution that is one of the best ways to create an end screen for your YouTube video. The user interface is very simple to navigate and very well designed, allowing you to easily create the end screen even if you are a beginner.

You can upload your images to add to the design or choose from the large library of resources that Placeit.net provides. You also have numerous export options to choose from.
Key Features
- There are numerous templates to choose from
- You can export the end screen with transparency
- The interface is very easy to use
- Most of the resources are available for free
Kapwing
Kapwing is an online video editing solution that you can also use to create an end screen for your YouTube video. It has extensive features that can allow you to customize your end screen any way you want to. It has numerous templates to choose from and the simple drag-and-drop interface makes creating the end screen very easy.

Key Features
- You can choose the size of the end screen to use
- There are a lot of templates to choose from
- You can upload your images and other elements to the project
- You get to choose the duration of the end screen before you begin the project
How to Make an End Screen with Filmora
Creating an end screen for your YouTube video using Filmora is a very simple process. Use these steps to do it;
Step 1: The first thing you need to do is install Filmora on your computer. You can download the setup file from the main website and then follow the instructions on the setup wizard to install the program.
Once the installation is complete, open the program and click on “New Project” to start.
Step 2: Click on the “Titles” section and search for “End Screen” using the search bar. Select the best template for your end screen and drag it into the timeline.
Step 3: Now you are ready to add elements to the end screen. Add your profile picture on a new track across the timeline and stretch it to fit the screen as desired.
Step 4: Click on “Effects” and use the search function to search for the “Mask” effect. When you find it, add it across the timeline and double-click on it to open its settings and adjust the effect accordingly.
Step 5: You may also want to add your social media handles to the end screen. To do that, use the “Titles” tab to find the different social media handles and add each one to the timeline.
You are now ready to save and export the end screen and add it to your YouTube video.
Related FAQs About End Screen Maker
1. How Do You Make an End Screen?
Making an end screen is different depending on the tool that you use to create the end screen as well as the number of elements that you choose to add to it. But usually, you would start with a template and begin adding elements to the project one by one.
2.What is the Best Free Outro Maker?
The best tool to create an end screen for YouTube videos is Filmora simply because it makes the process very easy while allowing you to customize your creation as much as you need. But even though it has a free trial version, most of the features you need to create a unique end screen are not available on the free plan.
A good free solution would be Canva because it has numerous free resources that can create a decent end screen. Although we must point out that many of the best templates and elements on Canva are also not available for free.
3.How Long can a YouTube End Screen Be?
A typical end screen is often 5-20 seconds long. You don’t need any more than 20 seconds because it is only used as a way to promote additional content or add a call to action. So when creating an End screen, ensure that all elements are clear enough as your audience will have only 20 seconds to see it.
Even though it is just 20 seconds long, the end screen of your YouTube video can be the most important aspect of the entire video. It is a great way to further engage with your audience and with the tools on
this list, you can now create the best end screen for your video.
For macOS 10.12 or later
Key Features
- You can export the completed video in very high quality
- It can be used to create and edit GIFs
- It has numerous editing tools including noise removal options, advanced color tuning, advanced text editor, scene stabilization, and more.
- You can add audio including voiceover and music to the video
- It has a very simple user interface that makes it very easy to use
Canva
Canva is a simple-to-use animated YouTube end screen maker that has a large library of resources ideal for creating different types of end screens. One of the best things about Canva is the numerous templates that you can choose from, along with effects and media files including stock photos that can be very useful when creating your video.

Although most of the features, including many of the templates, are free, the best resources are only available on the premium plan. Using a premium photo or template will mean that a watermark is added to your design.
Key Features
- Most of the resources you need to create your end screen on Canva are free
- The interface is very easy to use, with tutorials that can help when you get stuck.
- It has many great resources including stock images and unique templates
- You can add many effects to the end screen
Fotor
Fotor is another great solution that can be very useful in creating the YouTube end screen. It comes with a lot of different templates to choose from, allowing you to customize the end screen for maximum engagement. You can also upload your images to use in the project or choose from the Fotor library which offers options for different kinds of videos.

Key Features
- Most of the templates that you can choose are completely free to use
- The templates also come in different sizes to suit all needs
- You can use one of the many effects to further customize the end screen.
- The templates and effects are also customizable
Snappa
Snappa can also be a good way to create the perfect end screen for your YouTube video. It is a versatile solution with a lot of options to help you customize the end screen to suit your brand and targets. One such resource is the huge library of stock images as well as icons and shapes that you can choose from. Snappa makes the process much easier by allowing you to start from a suitable template that you can then customize as desired.

Key Features
- There are a lot of templates to choose from
- You can import your media files to customize the design
- You can also start from a blank canvas and work from there
- There is also a large library of stock photos that you can choose from
Placeit.net
This is an online solution that is one of the best ways to create an end screen for your YouTube video. The user interface is very simple to navigate and very well designed, allowing you to easily create the end screen even if you are a beginner.

You can upload your images to add to the design or choose from the large library of resources that Placeit.net provides. You also have numerous export options to choose from.
Key Features
- There are numerous templates to choose from
- You can export the end screen with transparency
- The interface is very easy to use
- Most of the resources are available for free
Kapwing
Kapwing is an online video editing solution that you can also use to create an end screen for your YouTube video. It has extensive features that can allow you to customize your end screen any way you want to. It has numerous templates to choose from and the simple drag-and-drop interface makes creating the end screen very easy.

Key Features
- You can choose the size of the end screen to use
- There are a lot of templates to choose from
- You can upload your images and other elements to the project
- You get to choose the duration of the end screen before you begin the project
How to Make an End Screen with Filmora
Creating an end screen for your YouTube video using Filmora is a very simple process. Use these steps to do it;
Step 1: The first thing you need to do is install Filmora on your computer. You can download the setup file from the main website and then follow the instructions on the setup wizard to install the program.
Once the installation is complete, open the program and click on “New Project” to start.
Step 2: Click on the “Titles” section and search for “End Screen” using the search bar. Select the best template for your end screen and drag it into the timeline.
Step 3: Now you are ready to add elements to the end screen. Add your profile picture on a new track across the timeline and stretch it to fit the screen as desired.
Step 4: Click on “Effects” and use the search function to search for the “Mask” effect. When you find it, add it across the timeline and double-click on it to open its settings and adjust the effect accordingly.
Step 5: You may also want to add your social media handles to the end screen. To do that, use the “Titles” tab to find the different social media handles and add each one to the timeline.
You are now ready to save and export the end screen and add it to your YouTube video.
Related FAQs About End Screen Maker
1. How Do You Make an End Screen?
Making an end screen is different depending on the tool that you use to create the end screen as well as the number of elements that you choose to add to it. But usually, you would start with a template and begin adding elements to the project one by one.
2.What is the Best Free Outro Maker?
The best tool to create an end screen for YouTube videos is Filmora simply because it makes the process very easy while allowing you to customize your creation as much as you need. But even though it has a free trial version, most of the features you need to create a unique end screen are not available on the free plan.
A good free solution would be Canva because it has numerous free resources that can create a decent end screen. Although we must point out that many of the best templates and elements on Canva are also not available for free.
3.How Long can a YouTube End Screen Be?
A typical end screen is often 5-20 seconds long. You don’t need any more than 20 seconds because it is only used as a way to promote additional content or add a call to action. So when creating an End screen, ensure that all elements are clear enough as your audience will have only 20 seconds to see it.
Even though it is just 20 seconds long, the end screen of your YouTube video can be the most important aspect of the entire video. It is a great way to further engage with your audience and with the tools on
this list, you can now create the best end screen for your video.
For macOS 10.12 or later
Key Features
- You can export the completed video in very high quality
- It can be used to create and edit GIFs
- It has numerous editing tools including noise removal options, advanced color tuning, advanced text editor, scene stabilization, and more.
- You can add audio including voiceover and music to the video
- It has a very simple user interface that makes it very easy to use
Canva
Canva is a simple-to-use animated YouTube end screen maker that has a large library of resources ideal for creating different types of end screens. One of the best things about Canva is the numerous templates that you can choose from, along with effects and media files including stock photos that can be very useful when creating your video.

Although most of the features, including many of the templates, are free, the best resources are only available on the premium plan. Using a premium photo or template will mean that a watermark is added to your design.
Key Features
- Most of the resources you need to create your end screen on Canva are free
- The interface is very easy to use, with tutorials that can help when you get stuck.
- It has many great resources including stock images and unique templates
- You can add many effects to the end screen
Fotor
Fotor is another great solution that can be very useful in creating the YouTube end screen. It comes with a lot of different templates to choose from, allowing you to customize the end screen for maximum engagement. You can also upload your images to use in the project or choose from the Fotor library which offers options for different kinds of videos.

Key Features
- Most of the templates that you can choose are completely free to use
- The templates also come in different sizes to suit all needs
- You can use one of the many effects to further customize the end screen.
- The templates and effects are also customizable
Snappa
Snappa can also be a good way to create the perfect end screen for your YouTube video. It is a versatile solution with a lot of options to help you customize the end screen to suit your brand and targets. One such resource is the huge library of stock images as well as icons and shapes that you can choose from. Snappa makes the process much easier by allowing you to start from a suitable template that you can then customize as desired.

Key Features
- There are a lot of templates to choose from
- You can import your media files to customize the design
- You can also start from a blank canvas and work from there
- There is also a large library of stock photos that you can choose from
Placeit.net
This is an online solution that is one of the best ways to create an end screen for your YouTube video. The user interface is very simple to navigate and very well designed, allowing you to easily create the end screen even if you are a beginner.

You can upload your images to add to the design or choose from the large library of resources that Placeit.net provides. You also have numerous export options to choose from.
Key Features
- There are numerous templates to choose from
- You can export the end screen with transparency
- The interface is very easy to use
- Most of the resources are available for free
Kapwing
Kapwing is an online video editing solution that you can also use to create an end screen for your YouTube video. It has extensive features that can allow you to customize your end screen any way you want to. It has numerous templates to choose from and the simple drag-and-drop interface makes creating the end screen very easy.

Key Features
- You can choose the size of the end screen to use
- There are a lot of templates to choose from
- You can upload your images and other elements to the project
- You get to choose the duration of the end screen before you begin the project
How to Make an End Screen with Filmora
Creating an end screen for your YouTube video using Filmora is a very simple process. Use these steps to do it;
Step 1: The first thing you need to do is install Filmora on your computer. You can download the setup file from the main website and then follow the instructions on the setup wizard to install the program.
Once the installation is complete, open the program and click on “New Project” to start.
Step 2: Click on the “Titles” section and search for “End Screen” using the search bar. Select the best template for your end screen and drag it into the timeline.
Step 3: Now you are ready to add elements to the end screen. Add your profile picture on a new track across the timeline and stretch it to fit the screen as desired.
Step 4: Click on “Effects” and use the search function to search for the “Mask” effect. When you find it, add it across the timeline and double-click on it to open its settings and adjust the effect accordingly.
Step 5: You may also want to add your social media handles to the end screen. To do that, use the “Titles” tab to find the different social media handles and add each one to the timeline.
You are now ready to save and export the end screen and add it to your YouTube video.
Related FAQs About End Screen Maker
1. How Do You Make an End Screen?
Making an end screen is different depending on the tool that you use to create the end screen as well as the number of elements that you choose to add to it. But usually, you would start with a template and begin adding elements to the project one by one.
2.What is the Best Free Outro Maker?
The best tool to create an end screen for YouTube videos is Filmora simply because it makes the process very easy while allowing you to customize your creation as much as you need. But even though it has a free trial version, most of the features you need to create a unique end screen are not available on the free plan.
A good free solution would be Canva because it has numerous free resources that can create a decent end screen. Although we must point out that many of the best templates and elements on Canva are also not available for free.
3.How Long can a YouTube End Screen Be?
A typical end screen is often 5-20 seconds long. You don’t need any more than 20 seconds because it is only used as a way to promote additional content or add a call to action. So when creating an End screen, ensure that all elements are clear enough as your audience will have only 20 seconds to see it.
Even though it is just 20 seconds long, the end screen of your YouTube video can be the most important aspect of the entire video. It is a great way to further engage with your audience and with the tools on
this list, you can now create the best end screen for your video.
How to Add Font Effects to Videos
Adding titles and texts to a video clip during the post-production phase is a common thing. You may need to add texts in the intro and outro of the video as well as to highlight important parts in the middle of the video. Showing regular and static texts and titles is very unappealing, and that is why everyone includes font effects to animate the texts.
There are different types of font effects available to apply to the texts and titles in your video. There are premium video editors available with a wide range of effects such as After Effect font effects. If you are an occasional video creator, you can use online font effects while you edit your videos on the go. We will illustrate how to add font effects to videos on any device.
Part 1. Add Font Effects to Video on Windows PC
If you have the video where you want to edit and add font effect on your Windows PC, you will need a video editor where the font effects are available. If you are a regular video creator, you should opt for a premium video editor, and we recommend Wondershare Filmora. Filmora is a professional video editor with a super intuitive user interface. You can add texts and titles and add animation to the text conveniently without any prior knowledge or experience.
Filmora has a wide range of effects and animations that you can add to the text of the video. In fact, there are categorized so that you can choose from them as per your requirements. All you have to do is go for font effect download and apply them to any text on your video. Here are the steps to add font effects to video on your Windows computer.
Step1Download and install Wondershare Filmora for Windows PC. Launch the application to edit your video.
Step2To start a new project, click on New Project option on the welcome screen. Alternatively, you can go to File> New Project from the menu bar.

Step3Import your video file from your hard drive by going to File> Import Media> Import Media Files from the menu bar. Alternatively, you can drag and drop the video file into Project Media folder.

Step4Drag and drop the video file into the Timeline. You can add multiple video clips. Thereafter, you can arrange them in proper order on the Timeline.

Step5Go to Titles located at the top bar. From the left panel, select any category of text effect and drop into the Timeline on top of the video clip. You should place the text effect on the Timeline wherever you want it to appear in the video. You can also stretch the duration of the text effect as per your preference.

Step6Customize the text effect by double clicking on the text effect located on Timeline. Under Preset tab, you will find different font effects and styles. Change the text, font, size, color, and every other parameter as required. For more customization, you can click on Advanced button. Finally, click on OK button.

Step7Play the video and click on Export button. Select your desired file format and save the edited video on your hard drive.
Part 2. Add Video Font Effects on Mac
If you are using a Mac where you want to edit your video and add font effects, you do not have to install any external video editor. This is because Mac comes with a built-in video editor called iMovie by Apple where you can easily add font effects. There are different types of video font effects available on iMovie starting from animated titles to credits and callouts. You can get similar font for After Effect on iMovie. Here are the steps to add video font effects on Mac.
Step1Open iMovie on your Mac from Applications folder. Go to File> Import Media option to import your video under Project Media.

Step2Drag and drop the selected video into Timeline for your iMovie project. Click on Titles tab located at the top.

Step3Place the mouse point over the different text styles to check them. Drag and drop the desired text style into the Timeline and place it where you want the text to appear. You can stretch the duration of the text effect.

Step4From Viewer interface, double click on the text part of the video to customize the text. You will see options to change the font, font size, color and much more.

Step5Play the video and once you are satisfied, go to File> Share> File and save the edited video on your storage device.
Part 3. How to Add Font Effects Online
If you edit videos occasionally and you want to add font effects to your video without downloading any video editor, you can use an online video editor. There are several online video editors you will come across, but for adding free font effects, we recommend FlexClip video editor. It is a completely free online video editor where you can edit and export video without any watermark. There are several elegant font effects available, and you can make easy adjustments instantly. Here are the steps to add font effects to your video.
Step1Open your web browser and visit on “flexclip.com/tools/add-text-to-video”. Click on Browser Video button. Select the video from your storage device.

Step2Once the video is uploaded, you will see Text tab already selected. Go through the list of font effects available. Drag and drop the desired font effect into the video on the Viewer.

Step3Double-click on the font effect on the Viewer and customize all the parameters such as text, size, and style.

Step4Once you are satisfied, click on Export button in the top-right corner.

Conclusion
Adding font effects on video is a common practice especially when you have intro and outro in your video clip. Instead of the regular titles and texts, you should opt for creative font effects so that the text parts on your video look attractive. If it is a one-time thing, you can opt for an online video editor. If you use a Mac, you can use iMovie, and for Windows PC, we recommend Wondershare Filmora .
Free Download For Win 7 or later(64-bit)
Free Download For macOS 10.14 or later
Free Download For macOS 10.14 or later
Also read:
- [Updated] 2024 Approved Expert Methods for Weaving in Live Streaming Content Online
- 2024 Approved Deep Dive Into Rank Tracker Solutions for Peak Success on YouTube
- 2024 Approved School Media Creation Advanced Editing Tips
- BitRaser Pro: Comprehensive Tutorial on Secure Data Destruction via Video
- Boosting Your YT Subs A Complete Strategy Guide
- Enhancing Listener Experience with New Apple Podcasts' Auto-Transcribing Feature | Tech News
- How to Reinstall GPU Drivers With DDU - 2024 Ultimate Guide
- Is Windows Movie Maker Still Available, In 2024
- Malleus Maleficarum: Hammer of the Witches | Free Book
- New Are You in Search for a Step-by-Step Guide to How to Add Effects in TikTok? Here It Is. To Add some Flavor to Your TikTok Videos. Use These How to Add Effect to TikTok Recommendations
- Revitalizing Photos: Stellar's Repair Software Debuts
- The New Frontier of Personal Health: The Amazon Halo's Revolutionary Design and Functionality
- Updated Do You Want a LUT that You Can Use for Your High-Definition Content? You Can Use Rec 709 LUT Premiere Pro for Your HD Digital Media to Give the Perfect Result
- Updated How to Add Adjustment Layer (Clip) in DaVinci Resolve?
- Updated How To Make Ninja Jump Effect with Filmora
- We're Still Here | Free Book
- Title: New How to Make Glitch Effect with Filmora
- Author: Chloe
- Created at : 2024-12-09 17:26:50
- Updated at : 2024-12-11 22:18:44
- Link: https://ai-editing-video.techidaily.com/new-how-to-make-glitch-effect-with-filmora/
- License: This work is licensed under CC BY-NC-SA 4.0.