:max_bytes(150000):strip_icc():format(webp)/social-media-text-588a94263df78caebc620f05.jpg)
New How to Make Hand Shake Effect with Final Cut Pro

How to Make Hand Shake Effect with Final Cut Pro
Are you struggling to attract audiences to your videos? If so, you may consider adding effects to them during your editing process. Most video editing software includes preset video effects to create and publish attractive videos quickly. For example, Final Cut Pro is a video editing software for Apple devices and includes lots of editing tools and video effects. Here is a detailed guide on how to apply the Final Cut Pro camera shake effect to your videos.
- What are hand shake effects for
- What kind of shots are best for such an effect
- Is it better to hand shake when shooting or add the effects
Part1: When Do You Need a Hand Shake Effect?

Adding effects to your videos is a great way to make them more impactful. However, you need to apply them correctly for them to be effective. The following information explores different aspects of the Final Cut Pro camera shake effect, including its definition, why video creators use it, and how best to apply it.
What are hand shake effects for?
Hand shake effects are video adjustments you apply to specific scenes that make the shot vibrate. Depending on the software you use, there are multiple variations of the effect. In addition, developers refer to it by different names. For example, Final Cut Pro users know it as the earthquake effect, which is a preset video effect in most versions of the software.
Typically, video creators use the Final Cut Pro camera shake effect to add energy to their videos. As such, their scenes are more dramatic and encourage you to pay more attention to the video. For example, you can apply the effect to indicate the arrival of the villain in your video. In addition, the effect will be more impactful if the villain is a giant.
You can also use the camera shake video effect for the following purposes:
- Break the monotony in a scene. Applying this scene after a long dialogue scene will give your audience a brief respite, allowing them to regain their focus.
- The camera shake effect can also be an effective tool to build your brand identity. Instead of applying it during the screenplay, you can use it in the end credits to introduce your logo to audiences. Furthermore, you can include a creative sound track for additional emphasis.
What kind of shots are best for such an effect?
The best shot to apply the camera shake effect are still shots. This is because they give you extra creative room with the scene since the subjects are facing the camera directly from a level angle. As such, you can customize unique motion patterns for each subject when applying the camera shake effect.
Is it better to hand shake when shooting or add the effects?
Although it may seem tempting to physically shake the camera when shooting, most filmmakers prefer to add the effect during editing. This is because shaking the camera during shooting may result in unusable shots in post-production. For example, shooting a car scene from a hand-held camera in the passenger seat often results in shaky footage. As such, video creators mount the camera on a tripod to capture still shots and then add the camera shake during post-production.
Part2: How to Add a hand shake effect with FCPX?
The following is a step-to-step guide on how to add a hand shake effect on Final Cut Pro X. However, you need to meet the following requirements for the process to work.
A licensed copy of Final Cut Pro X
The camera shake effect is only available with the full version of Final Cut Pro X. In addition, you will access all variations of the effect with the full version.
A compatible video file
Apple’s Final Cut Pro X is compatible with the following video file formats:
- QuickTime formats.
- Apple ProRes
- Apple Animation Codec
- XF-AVC
- Container files, such as3GP, AVI, and MP4.
Camera shake effect plugins
The video editing software comes with preset camera shake effects, which you can find in the Effects Browser. However, you can also download compatible plugins from established sources, such as the Camera Shake Effects pack from Motion Array.
Once you have everything in place, follow the below steps.
- Import your desired video clip to the Final Cut Pro X workspace. Your video will appear in the timeline section at the bottom of your workspace.

- Select the section where you want to add the camera shake effect. In addition, you need to set the in and out points from the timeline. For example, Mac users can set these points by pressing the Iand O keys, respectively.
- Then, select the Shakefrom the Effects browser and search for Hand Held.
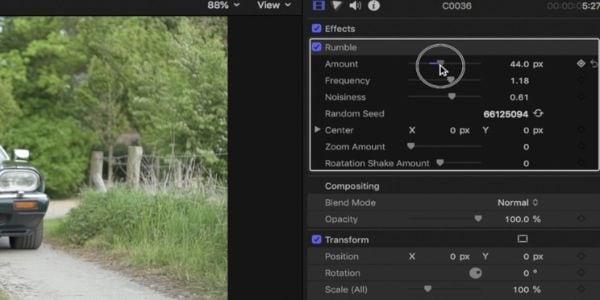
- Drag the effect over your selection to apply the effect.
- You can also make additional adjustments to your hand-held shake effect from the inspector panel.
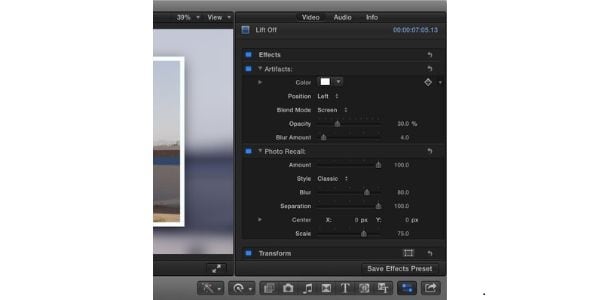
For example, you can prevent black borders from appearing with the effect by increasing the Scale attribute to 105%. Scroll to the bottom right section of your workspace to the Inspector Panel, and click on Scale to make the adjustment.
Part3: How to add hand shake effect in the simplest way?
If the above guide is too complicated for you, Wondershare Filmora offers you the simplest way to add the hand shake effect to your videos.

The program is a stand-alone video editor for Windows and macOS users. It comes with a variety of preset camera shaking effects, including
- Up-down shaking
- Extreme shaking
- Chaos shaking
- Sideways shaking
Free Download For Win 7 or later(64-bit)
Free Download For macOS 10.14 or later
The above effects offer various shaking intensities and patterns to help you achieve your desired effect. In addition, you will need to purchase a license to access the different versions of the hand shake video effect. Once you have Wondershare Filmora running on your device, follow the below steps to add the hand shake effect to your videos.
1. Import your video
Click on the Import tab on your user interface and select Import Media Files. Then, drag and drop the files you want to edit to your timeline from the resulting window.
2. Applying Wondershare Filmora’s hand shake effect
Click on the Effects tab from the user interface and then select Filters. Next, proceed to the Shake subcategory to view all available presets. Currently, the program has eight camera shake presets, which you can preview using the pop-up thumbnail on your workspace.
Once you identify your desired effect, drag and drop it over the video selection, you want to apply it. You can make further adjustments using the sliders on the effect’s sub menu. For example, you can vary the duration of the effect by adjusting the frequency and intensity sliders.
Finally, click on Ok to apply the hand shake effect to your video and save the changes.
3. Exporting your final project
Wondershare Filmora allows you to export your completed projects to external locations, such as external hard drives and cloud storage. In addition, you can directly upload your videos to YouTube and Vimeo from the workspace.
Here is how to export videos from Filmora:
- Click on the Exporttab from the program’s main menu.
- Identify your file destination from the options on the Export The latest version of Filmora allows file exports to your local storage, YouTube, Vimeo, and DVD.
- Select your file format from the left menu and click Exporton the bottom right corner to finalize the process. Some of the available file formats include MP4, WMV, and FLV.
Kindly note that the above guide is for the latest version of Wondershare Filmora. As such, confirm that you have the latest edition before using it. Alternatively, you can download the latest version for free from the Filmora website.
FAQs
1. What are the minimum system requirements to run Film Cut Pro X?
According to Apple, your device needs to have the below minimum system requirements.
- 4 gigabytes of RAM. However, running the program on a device with 8 GB RAM allows you to work with 4K videos and perform 360-degree video editing seamlessly.
- A dedicated graphics processing unit with at least 1 GB of VRAM.
- About 4.5 GB of storage space for Final Cut Pro’s system files.
- An active internet connection to enable access to online customer support and additional features.
- You will also need a Blu-ray recorder to export videos directly to DVDs.
- Finally, your device should be running macOS 11.5.1 or later.
2. Can you import custom hand shake effects to Final Cut Pro?
Yes, you can import custom hand shake effects to your licensed version of Final Cut Pro. However, always install custom plugins from verifiable sites to prevent the installation of malicious software such as spyware. Some of the sites to consider consist of Motion Array, Studio Binder, and FCPX Free. For example, you can check out these 10 free plugins for Final Cut Pro from Filmora .
- A licensed copy of Final Cut Pro X
- A compatible video file
- Camera shake effect plugins
- How to add hand shake effect in the simplest way
Part1: When Do You Need a Hand Shake Effect?

Adding effects to your videos is a great way to make them more impactful. However, you need to apply them correctly for them to be effective. The following information explores different aspects of the Final Cut Pro camera shake effect, including its definition, why video creators use it, and how best to apply it.
What are hand shake effects for?
Hand shake effects are video adjustments you apply to specific scenes that make the shot vibrate. Depending on the software you use, there are multiple variations of the effect. In addition, developers refer to it by different names. For example, Final Cut Pro users know it as the earthquake effect, which is a preset video effect in most versions of the software.
Typically, video creators use the Final Cut Pro camera shake effect to add energy to their videos. As such, their scenes are more dramatic and encourage you to pay more attention to the video. For example, you can apply the effect to indicate the arrival of the villain in your video. In addition, the effect will be more impactful if the villain is a giant.
You can also use the camera shake video effect for the following purposes:
- Break the monotony in a scene. Applying this scene after a long dialogue scene will give your audience a brief respite, allowing them to regain their focus.
- The camera shake effect can also be an effective tool to build your brand identity. Instead of applying it during the screenplay, you can use it in the end credits to introduce your logo to audiences. Furthermore, you can include a creative sound track for additional emphasis.
What kind of shots are best for such an effect?
The best shot to apply the camera shake effect are still shots. This is because they give you extra creative room with the scene since the subjects are facing the camera directly from a level angle. As such, you can customize unique motion patterns for each subject when applying the camera shake effect.
Is it better to hand shake when shooting or add the effects?
Although it may seem tempting to physically shake the camera when shooting, most filmmakers prefer to add the effect during editing. This is because shaking the camera during shooting may result in unusable shots in post-production. For example, shooting a car scene from a hand-held camera in the passenger seat often results in shaky footage. As such, video creators mount the camera on a tripod to capture still shots and then add the camera shake during post-production.
Part2: How to Add a hand shake effect with FCPX?
The following is a step-to-step guide on how to add a hand shake effect on Final Cut Pro X. However, you need to meet the following requirements for the process to work.
A licensed copy of Final Cut Pro X

The camera shake effect is only available with the full version of Final Cut Pro X. In addition, you will access all variations of the effect with the full version.
A compatible video file
Apple’s Final Cut Pro X is compatible with the following video file formats:
- QuickTime formats.
- Apple ProRes
- Apple Animation Codec
- XF-AVC
- Container files, such as3GP, AVI, and MP4.
Camera shake effect plugins
The video editing software comes with preset camera shake effects, which you can find in the Effects Browser. However, you can also download compatible plugins from established sources, such as the Camera Shake Effects pack from Motion Array.
Once you have everything in place, follow the below steps.
- Import your desired video clip to the Final Cut Pro X workspace. Your video will appear in the timeline section at the bottom of your workspace.

- Select the section where you want to add the camera shake effect. In addition, you need to set the in and out points from the timeline. For example, Mac users can set these points by pressing the Iand O keys, respectively.
- Then, select the Shakefrom the Effects browser and search for Hand Held.

- Drag the effect over your selection to apply the effect.
- You can also make additional adjustments to your hand-held shake effect from the inspector panel.

For example, you can prevent black borders from appearing with the effect by increasing the Scale attribute to 105%. Scroll to the bottom right section of your workspace to the Inspector Panel, and click on Scale to make the adjustment.
Part3: How to add hand shake effect in the simplest way?
If the above guide is too complicated for you, Wondershare Filmora offers you the simplest way to add the hand shake effect to your videos.

The program is a stand-alone video editor for Windows and macOS users. It comes with a variety of preset camera shaking effects, including
- Up-down shaking
- Extreme shaking
- Chaos shaking
- Sideways shaking
Free Download For Win 7 or later(64-bit)
Free Download For macOS 10.14 or later
The above effects offer various shaking intensities and patterns to help you achieve your desired effect. In addition, you will need to purchase a license to access the different versions of the hand shake video effect. Once you have Wondershare Filmora running on your device, follow the below steps to add the hand shake effect to your videos.
1. Import your video
Click on the Import tab on your user interface and select Import Media Files. Then, drag and drop the files you want to edit to your timeline from the resulting window.
2. Applying Wondershare Filmora’s hand shake effect
Click on the Effects tab from the user interface and then select Filters. Next, proceed to the Shake subcategory to view all available presets. Currently, the program has eight camera shake presets, which you can preview using the pop-up thumbnail on your workspace.
Once you identify your desired effect, drag and drop it over the video selection, you want to apply it. You can make further adjustments using the sliders on the effect’s sub menu. For example, you can vary the duration of the effect by adjusting the frequency and intensity sliders.
Finally, click on Ok to apply the hand shake effect to your video and save the changes.
3. Exporting your final project
Wondershare Filmora allows you to export your completed projects to external locations, such as external hard drives and cloud storage. In addition, you can directly upload your videos to YouTube and Vimeo from the workspace.
Here is how to export videos from Filmora:
- Click on the Exporttab from the program’s main menu.
- Identify your file destination from the options on the Export The latest version of Filmora allows file exports to your local storage, YouTube, Vimeo, and DVD.
- Select your file format from the left menu and click Exporton the bottom right corner to finalize the process. Some of the available file formats include MP4, WMV, and FLV.
Kindly note that the above guide is for the latest version of Wondershare Filmora. As such, confirm that you have the latest edition before using it. Alternatively, you can download the latest version for free from the Filmora website.
FAQs
1. What are the minimum system requirements to run Film Cut Pro X?
According to Apple, your device needs to have the below minimum system requirements.
- 4 gigabytes of RAM. However, running the program on a device with 8 GB RAM allows you to work with 4K videos and perform 360-degree video editing seamlessly.
- A dedicated graphics processing unit with at least 1 GB of VRAM.
- About 4.5 GB of storage space for Final Cut Pro’s system files.
- An active internet connection to enable access to online customer support and additional features.
- You will also need a Blu-ray recorder to export videos directly to DVDs.
- Finally, your device should be running macOS 11.5.1 or later.
2. Can you import custom hand shake effects to Final Cut Pro?
Yes, you can import custom hand shake effects to your licensed version of Final Cut Pro. However, always install custom plugins from verifiable sites to prevent the installation of malicious software such as spyware. Some of the sites to consider consist of Motion Array, Studio Binder, and FCPX Free. For example, you can check out these 10 free plugins for Final Cut Pro from Filmora .
Guide To Cropping and Combining Content in Wondershare Filmora [Latest]
Video editing is one of the most essential tasks in a video project. It plays a role in creating videos that leave a lasting impression on your audience. From the initial raw footage to the final product, a video goes through several processes. One vital aspect of video editing is trimming and merging, which holds great importance for any video project.
The editing process changes the whole narrative of a video by adding more depth and feel to it. Through editing, you can remove unwanted segments, rearrange clips, and much more. Capturing and recording video is one thing, but bringing the best out of the raw files is another. To make your raw footage somewhat stunning, you have to sit in the editing room.
Part 1: How Does Trimming or Merging Videos Help Users?
Merging and trimming videos is an editing technique that offers many benefits. Here’s how these actions can help you in so many ways. Find out how it helps the users when they merge or trim a video:
Trimming Videos
- Trimming allows users to remove unwanted portions of a video. You can eliminate mistakes, irrelevant footage, or unnecessary pauses in the video. It also helps streamline the content and improve its overall quality.
- It can help adjust the pacing of a video by removing or shortening sections that may be too slow or lengthy. This ensures a more engaging and dynamic viewing experience.
- By trimming, you can select the best moments from a longer video. You can also create highlight reels that showcase the most important or exciting parts.
- Many social media platforms have specific time limitations for videos. It allows you to meet these requirements and share their content without compromising its essence.
Merging Videos
- The merging of videos enables you to combine multiple clips or segments into a single video. This technique is useful when users want to compile footage from different sources. It also creates a uniform narrative from separate scenes.
- Merging allows you to create montages or collages that showcase various moments or perspectives. This is often used in music videos, compilations, or video presentations.
- Doing this can make seamless transitions between different shots or scenes. This further creates a visually fluid experience for the viewer.
- It also helps you create a coherent storyline by combining different clips. You can use this technique to communicate ideas, emotions, or messages effectively.
Part 2: Wondershare Filmora: An Introduction to A Great Video Editor
Wondershare Filmora is a video editing tool that is created for almost everyone. This tool has it all, from simple edit options to more complicated ones. You can apply various kinds of filters and effects to your video. Additionally, you can change the color tone of your video project by making a few adjustments. However, this is not it, as you can even do trimming and merging in your project.
Trimming or Merging Videos Editor A cross-platform for making videos anywhere for all creators, providing trimming and merging videos functions.
Free Download Free Download Learn More

Besides all this, the tool offers more than you’re expectations. It exists for professionals, enthusiasts, and even those who have started learning how to edit. Moreover, you can import and export videos up to 4K resolution using Wondershare Filmora. Choose a suitable template, import your media files, and start editing your videos with this tool.
Key Features
- Almost all tools provide effects and filters, but Wondershare Filmora offers more. The tool provides free media assets, overlays, transitions, stickers, and more.
- Filmora enables you to add keyframes to your video. This feature will allow you to make changes and add effects to the particular frame.
- Moreover, you can add a virtual green screen in Wondershare Filmora. By using this feature, you can add VFX and other motion effects to your video.
Part 3: Guide to Cropping and Trimming Videos on Wondershare Filmora
You’re in luck if you want to learn about trimming and cropping videos using Wondershare Filmora. This portion will let you know how to crop a video and trim parts of it using this tool.
Filmora Tutorial - Basic Editing in Filmora
Free Download For Win 7 or later(64-bit)
Free Download For macOS 10.14 or later
Step 1Guide to Cropping Videos
To start cropping your video, open Wondershare Filmora and select “New Project” to create a new editing project. Import your video file by dragging and dropping it into the tool. Further, locate your video file in the tool and drag it into the timeline.

Step 2Proceed To Crop and Zoom Window
In the timeline window, look for the “Crop” button and select it, which is located right next to the “Split” option. However, you can press “Alt + C” as a shortcut to access the next screen. This will help you lead into the “Crop and Zoom” window.

Step 3Adjust the Crop
Crop the video by moving the edges accordingly using your mouse. Click and drag the edges inward or outward to define the new frame of your video. If desired, you can also change the “Ratio” by entering the dimensions in the given boxes. This allows you to set specific dimensions for your cropped video.

Step 4Apply the Crop and Save
When done with the cropping adjustments, click “Apply.” This will save the changes, and your video will be cropped based on your preferences. Lastly, make sure to save your file by selecting the “Export” option.

Trimming Methods and Guide
Free Download For Win 7 or later(64-bit)
Free Download For macOS 10.14 or later
01of 05Method 1: Trim Using Video Layer Edges
Step 1: First, import your video into Wondershare Filmora. Then, drag and drop the video onto the timeline and locate the edge of your video layer.

Step 2: Slide the left or right edge to trim the video according to your requirement. Release the edge when you are satisfied with the trimmed portion. Moreover, save your file by pressing the “Export” button.

02of 05Method 2: Trim Using Playhead Slider
Step 1: After importing your media file into the timeline, place the Playhead slider on your video layer at the desired trimming point. Click the “Scissor” icon displayed on the Playhead. The video will be trimmed at the Playhead position.

Step 2: Delete the unwanted portion of the video by selecting it and pressing the “Delete” key on your keyboard. Don’t forget to save your file by exporting it to your system.

03of 05Method 3: Trim Using Option Menu
Step 1: Once your video is in the timeline, move the Playhead slider to the point where you want to trim the video. Right-click on the video layer in the timeline to open a menu.
Step 2: Select “Trim Start to Playhead” to trim the video from the start to the Playback slider.
Step 3: Alternatively, you can select “Trim End to Playhead” to trim the video from the Playhead slider to the end.

04of 05Method 4: Trim Using Shortcut Keys
Step 1: Move the Playhead slider to the desired trimming point after bringing your video into the timeline.
Step 2: Press “Alt + [“ to trim the video from the beginning to the Playhead position.
Step 3: Contrary, you can press the shortcut keys “Alt + ]“ to trim the video from the Playhead position to the end.
05of 05Method 5: Trim Using Instant Cutter Tool
Step 1: Open Wondershare Filmora and select the “Media” button. Go to the “Import” drop-down menu and choose “Import with Instant Cutter Tool.” A new window will appear.

Step 2: Select “Open File” to import your media file into the new window. Once imported, use the sliders at the edges of the video to trim it. Adjust the sliders as needed to define the trimmed portion. Lastly, press “Export” to add a trimmed video to your project.

Part 4: Manual and Automated Techniques of Merging Content on Wondershare Filmora
Wondershare Filmora is an editing platform that makes editing simple for everyone. If you’re an enthusiast looking to learn basics like merging videos and cropping YouTube videos, you’re at the right place. In the part below, you will learn two methods to merge video in Filmora.
Free Download For Win 7 or later(64-bit)
Free Download For macOS 10.14 or later
Methods to merge video in Filmora
Manual Method To Merge Video Clips in Wondershare Filmora
Step 1Launch Wondershare Filmora
To merge two or more video clips using Wondershare Filmora, start by launching the software on your computer. In the editing window of Filmora, locate the “Click here to import” option and import the video clips you want to merge. This will bring the video to the preview window.

Step 2Arrange Clips in Timeline
Proceed to drag and drop each video clip, one by one, onto the timeline. Ensure that you place each clip layer right next to each other in the desired merging order.

Step 3Adjust and Export
Adjust the timeframe of your videos, if needed, by trimming or extending them on the timeline. Once you are satisfied with the arrangement, proceed to export the project. By exporting, your multiple video clips will be merged into a single video file.

Automated Method for Merging Videos in Wondershare Filmora
Step 1Importing Videos
Start by going to the import section and clicking the “Import” drop-down menu. As this opens a menu, select the option of “Import with Instant Cutter Tool.”

Step 2Merging Videos
Within the new window, locate the “Merge” option and click on it. Select the video clips you want to merge by accessing “Open.” Filmora will now import your video clips and merge them.

Step 3Exporting the Merged File
After your video clips have been successfully merged, it’s time to export the final result. In the same window, find the “Export” option and click on it. This will export the merged file directly to the editing window of Wondershare Filmora.

Conclusion
To conclude, video editing and post-production are tasks that polish your project. Editing fine-tunes your project, and the result is always better than the raw footage. Wondershare Filmora is a tool that makes it easy to edit your raw footage into an exceptional video. This tool has everything from trimming and merging to more advanced, like an AI-powered edit option.
For those who are in search to crop YouTube videos, they can surely stop by Filmora. They will get their required results in no time in a highly professional environment.
Free Download Free Download Learn More

Besides all this, the tool offers more than you’re expectations. It exists for professionals, enthusiasts, and even those who have started learning how to edit. Moreover, you can import and export videos up to 4K resolution using Wondershare Filmora. Choose a suitable template, import your media files, and start editing your videos with this tool.
Key Features
- Almost all tools provide effects and filters, but Wondershare Filmora offers more. The tool provides free media assets, overlays, transitions, stickers, and more.
- Filmora enables you to add keyframes to your video. This feature will allow you to make changes and add effects to the particular frame.
- Moreover, you can add a virtual green screen in Wondershare Filmora. By using this feature, you can add VFX and other motion effects to your video.
Part 3: Guide to Cropping and Trimming Videos on Wondershare Filmora
You’re in luck if you want to learn about trimming and cropping videos using Wondershare Filmora. This portion will let you know how to crop a video and trim parts of it using this tool.
Filmora Tutorial - Basic Editing in Filmora
Free Download For Win 7 or later(64-bit)
Free Download For macOS 10.14 or later
Step 1Guide to Cropping Videos
To start cropping your video, open Wondershare Filmora and select “New Project” to create a new editing project. Import your video file by dragging and dropping it into the tool. Further, locate your video file in the tool and drag it into the timeline.

Step 2Proceed To Crop and Zoom Window
In the timeline window, look for the “Crop” button and select it, which is located right next to the “Split” option. However, you can press “Alt + C” as a shortcut to access the next screen. This will help you lead into the “Crop and Zoom” window.

Step 3Adjust the Crop
Crop the video by moving the edges accordingly using your mouse. Click and drag the edges inward or outward to define the new frame of your video. If desired, you can also change the “Ratio” by entering the dimensions in the given boxes. This allows you to set specific dimensions for your cropped video.

Step 4Apply the Crop and Save
When done with the cropping adjustments, click “Apply.” This will save the changes, and your video will be cropped based on your preferences. Lastly, make sure to save your file by selecting the “Export” option.

Trimming Methods and Guide
Free Download For Win 7 or later(64-bit)
Free Download For macOS 10.14 or later
01of 05Method 1: Trim Using Video Layer Edges
Step 1: First, import your video into Wondershare Filmora. Then, drag and drop the video onto the timeline and locate the edge of your video layer.

Step 2: Slide the left or right edge to trim the video according to your requirement. Release the edge when you are satisfied with the trimmed portion. Moreover, save your file by pressing the “Export” button.

02of 05Method 2: Trim Using Playhead Slider
Step 1: After importing your media file into the timeline, place the Playhead slider on your video layer at the desired trimming point. Click the “Scissor” icon displayed on the Playhead. The video will be trimmed at the Playhead position.

Step 2: Delete the unwanted portion of the video by selecting it and pressing the “Delete” key on your keyboard. Don’t forget to save your file by exporting it to your system.

03of 05Method 3: Trim Using Option Menu
Step 1: Once your video is in the timeline, move the Playhead slider to the point where you want to trim the video. Right-click on the video layer in the timeline to open a menu.
Step 2: Select “Trim Start to Playhead” to trim the video from the start to the Playback slider.
Step 3: Alternatively, you can select “Trim End to Playhead” to trim the video from the Playhead slider to the end.

04of 05Method 4: Trim Using Shortcut Keys
Step 1: Move the Playhead slider to the desired trimming point after bringing your video into the timeline.
Step 2: Press “Alt + [“ to trim the video from the beginning to the Playhead position.
Step 3: Contrary, you can press the shortcut keys “Alt + ]“ to trim the video from the Playhead position to the end.
05of 05Method 5: Trim Using Instant Cutter Tool
Step 1: Open Wondershare Filmora and select the “Media” button. Go to the “Import” drop-down menu and choose “Import with Instant Cutter Tool.” A new window will appear.

Step 2: Select “Open File” to import your media file into the new window. Once imported, use the sliders at the edges of the video to trim it. Adjust the sliders as needed to define the trimmed portion. Lastly, press “Export” to add a trimmed video to your project.

Part 4: Manual and Automated Techniques of Merging Content on Wondershare Filmora
Wondershare Filmora is an editing platform that makes editing simple for everyone. If you’re an enthusiast looking to learn basics like merging videos and cropping YouTube videos, you’re at the right place. In the part below, you will learn two methods to merge video in Filmora.
Free Download For Win 7 or later(64-bit)
Free Download For macOS 10.14 or later
Methods to merge video in Filmora
Manual Method To Merge Video Clips in Wondershare Filmora
Step 1Launch Wondershare Filmora
To merge two or more video clips using Wondershare Filmora, start by launching the software on your computer. In the editing window of Filmora, locate the “Click here to import” option and import the video clips you want to merge. This will bring the video to the preview window.

Step 2Arrange Clips in Timeline
Proceed to drag and drop each video clip, one by one, onto the timeline. Ensure that you place each clip layer right next to each other in the desired merging order.

Step 3Adjust and Export
Adjust the timeframe of your videos, if needed, by trimming or extending them on the timeline. Once you are satisfied with the arrangement, proceed to export the project. By exporting, your multiple video clips will be merged into a single video file.

Automated Method for Merging Videos in Wondershare Filmora
Step 1Importing Videos
Start by going to the import section and clicking the “Import” drop-down menu. As this opens a menu, select the option of “Import with Instant Cutter Tool.”

Step 2Merging Videos
Within the new window, locate the “Merge” option and click on it. Select the video clips you want to merge by accessing “Open.” Filmora will now import your video clips and merge them.

Step 3Exporting the Merged File
After your video clips have been successfully merged, it’s time to export the final result. In the same window, find the “Export” option and click on it. This will export the merged file directly to the editing window of Wondershare Filmora.

Conclusion
To conclude, video editing and post-production are tasks that polish your project. Editing fine-tunes your project, and the result is always better than the raw footage. Wondershare Filmora is a tool that makes it easy to edit your raw footage into an exceptional video. This tool has everything from trimming and merging to more advanced, like an AI-powered edit option.
For those who are in search to crop YouTube videos, they can surely stop by Filmora. They will get their required results in no time in a highly professional environment.
What’re the Best Alternatives to Pexels?
Sites like Pexels provide you with royalty-free images to include in your messages to further their impact. Although Pexels is a great resource for royalty-free photos and animations, it is not without its limitations. Here is a list of Pexels alternatives for you to consider when creating content. It includes reasons why the sites are suitable alternatives and brief guides on how to get started on them.
Part1: What are the best alternatives to Pexels?
There are several factors to consider when selecting a suitable image resource for your messaging. For example, you may consider a site favorable to another because of its intuitive user interface, or you may consider another because it has no pesky advertisements. Taking this into consideration, here is a list of the three best Pexels alternatives worth checking out for your next project.
No.1 Unsplash

Unsplash is a stock photo-sharing website run by Getty Images. According to recent reports, the site hosts over 265,000 photographers contributing to a library of over 3.5 million photos. Initially, all photos were under a creative commons license zero, meaning you could distribute the photos without restriction. However, following lobbying from some creators, all photos are now under the Unsplash license.
This means you can still copy, modify, share, and download images for free. However, under the new licensing terms, you cannot use unedited copies of the images for commercial purposes such as T-Shirt printing or branding and using the photos on a similar or competing service.
Most Unsplash users praise it for the following features:
- The library contains tons of high-resolution photos.
- You can access the site through your web browser or the app available on Android and iOS devices.
- There are no download limits to the photos, and everything is free.
- Unsplash is a plugin for various content editing software such as Filmora 11, Adobe XD, and Figma.
Despite all the positives, here are a few improvements to make Unsplash even better.
- The website lacks a free HD video library, which would be a great addition for aspiring content creators.
- In addition, the search algorithm is not as accurate, and you may struggle to find suitable images for your subject matter.
No.2 Shutterstock
Another Pexels alternative to consider is Shutterstock. It is an online resource where individuals and businesses can access high-quality, licensed photos, videos, illustrations, vectors, and music for their content creation.

Unlike Unsplash above, you need to create an account to access Shutterstock services. In addition, the website offers different pricing models for each user, depending on your unique requirements. For example, you can subscribe to an image-only subscription that allows you ten image downloads monthly for $29. Alternatively, you can purchase the Mix and Match subscription that offers you 25 credits monthly to download different media from the site.
Currently, the website boasts a collection of over 200 million royalty-free images and over 10 million video clips. In addition, the company also offers a percentage-based compensation model to contributors, with first-timers earning up to 15% of content sales. Furthermore, the site continues to populate its library through the acquisition of different companies in a similar space. Some of its notable acquisitions include Turbosquid, Bigstock, Rex Features, and BEImages.
No.3 Filmstock [Editor’s Choices]

Filmstock is an online library of different editing resources for filmmakers. Some of the resources you can obtain are effects, elements, titles, and audio. In addition, Filmstock is the most recent version of the formerly known Filmora Effects Store. Regardless of the close association with Filmora Video Editing Software, you can still use these resources in your creations on other programs.
Filmstock currently offers its services in three categories. They are:
- A Free package that allows you unlimited downloads of media effects and resources under a royalty-free license. However, any resource you download from the site comes with a Filmora tag.
- The Standard subscription will cost you $9.99 per month and includes free technical support as an additional feature to those available in the free package.
- Finally, the Premium subscription gives you access to the premium library that contains an exclusive selection of the contributors’ commercial work. The package will cost you $32.99 monthly and also includes all the features in the previous subscription models.
Kindly note that you must register for a Filmstock or Wondershare account to use the service. In addition, you will need to purchase a separate license to use the service with Filmora Video Editing software.
No.4 Getty Images

Getty Images is an online supplier of media resources for media, creative, and corporate clients. It boasts a resource library of over 477 million entries. Access to the site requires you to create a user account. In addition, some of the prints you will find on the site will require you to make a purchase, depending on the size and quality.
No.5 iStock

iStock is an online library of creative resources, including music, videos, illustrations, and images. In addition, the site offers access to its exclusive stock-image library through different subscription models. Some of the platforms appealing features include the following:
- An AI-powered search engine that provides more accurate results than Pexels.
- Preset templates for easier creation of videos and social media posts.
No.6 Flickr

Flickr is another alternative to Pexels worth considering. This is because it offers you free and paid access to one of the internet’s largest creative libraries. In addition, you can select from several licenses, including creative commons and U.S. Government works licenses for your assets, something other similar sites lack in their offering.
No.7 Pixabay

Pixabay gives you access to over 1 million creative assets in different categories, including videos, music, and sound effects. In addition, the site offers its content under the creative commons zero licenses, meaning you can use all stock photos without fear of backlash. Although the site’s search function requires work on its accuracy, the numerous categories make it easier to pinpoint your desired image.
No.8 Adobe Stock

Another site like Pexels is Adobe Stock, where you can access millions of creative assets for your content. Depending on your licensing options, the site offers free and paid access to its services. For example, you can increase your creativity by subscribing to the different Adobe design assets, including Adobe Stock Vector and Adobe Stock Illustrations.
No.9 Vista Create

Vista Create is an online free photo and image website like Pexels that also includes design tools to alter the images to your liking. In addition, you have plenty of templates to suit different platform requirements, including social media sites such as Facebook and Instagram. Furthermore, Vista Creare also boasts a wide collection of vectors, which you can customize in three easy steps.
No.10 LibreStock

Unlike the ones above, LIbreStock is an aggregator site that combines stock photo databases in a single platform. As such, it is arguably the largest provider of royalty-free images on the web. In addition, it automatically filters out poor-quality images, guaranteeing you excellence each time.
Most LibreStock users name the website’s search function as its best feature. This is because it also utilizes search tags when scanning through different databases. As such, you can easily find unique stock photos for your creation, regardless of how outrageous the search tag is. Finally, LibreStock provides its content under the creative commons zero licenses, meaning you can use the assets for personal and commercial work.
No.11 StockSnap

StockSnap operates similarly to Pexels, as it also offers a variety of free stock photos and images. However, a few tweaks to how you receive these creative assets make it slightly better. For example, StockSnap allows you to download ten free images from Shutterstock if what you need is unavailable in their library.
In addition, the platform also displays the most recent additions to their library in the top search results. As such, you are guaranteed to receive unique pictures without significant overuse.
Part2: FAQs
What is better than Pexels?
From the above information, Unsplash ranks as the best alternative to Pexels. This is because of its user-friendly interface, availability across web-based and smartphones, and compatibility with different video editing software such as Adobe XD and Filmora . As such, its versatility allows you to always create on the go.
Can I use Pexels on YouTube?
Yes, you can use Pexels on YouTube, provided you apply the creative assets to your material. In addition, you will need to make alterations to Pexels images and videos before using them to avoid violating your license agreement.
Free Download For Win 7 or later(64-bit)
Free Download For macOS 10.14 or later
Free Download For macOS 10.14 or later
Best 12 Best Freeze Frame Video Editing Examples
Top 12 Best Freeze Frame Video Editing Examples
An easy yet powerful editor
Numerous effects to choose from
Detailed tutorials provided by the official channel
Freeze frame effect in video editing is a skill that requires more practice to master. It adds drama and impact to movies. If you want to see more energy and acting in the videos you watch, then you should see more freeze-frame examples.
Sometimes we notice that a particular action stays on longer than necessary in a movie or video. The filmmakers use this skill to emphasize some intense moments further to sustain or pique your interest.
The freeze-frame video editing feature is a valuable skill that helps filmmakers make excellent movies. We have a list of the top 12 examples of freeze-frame effects in movies for you.
In this article
01 [What is freeze-frame video editing?](#Part 1)
02 [Ways to use freeze-frame video editing](#Part 2)
03 [What are the best freeze-frame video editing examples?](#Part 3)
Part 1 What Is Freeze Frame Video Editing?
Freeze frame video editing is a video editing technique that halts movement in a video for a given period. It converts moving pictures into still photography for some time. These video editor effects help filmmakers gear attention to the video editing or filmmaking process. In other words, they are self-reflexive.
Part 2 Ways to Use Freeze Frame in Video editing
Freeze frames can be helpful in 3 significant ways in video editing;
● At the beginning of a movie/video: Freeze-frame at the beginning helps you pique the audience’s interest and give them a sneak peek of what to expect in the movie. This freeze-frame technique was used in the film ‘Good Fellas’ to pique the audience’s interests.
● At the end: Using a freeze-frame allows the audience to choose or decide how the movie ends, whether it is obvious. The ‘breakfast club’ filmmakers use a freeze-frame at the end to emphasize the young boy.
● In the middle, subtly capturing intense moments like in the movie ‘The Departed.’
Part 3 What are the Best Freeze-Frame Video Editing Examples?
It takes a great deal of skill to employ freeze frame with the best results correctly. It might bore the audience or give another impression other than the intended when not done effectively.
But several movie directors have effectively used the freeze-frame video editing technique that wowed the audience.
Here is a list of the best freeze frame examples you would love;
01The Departed
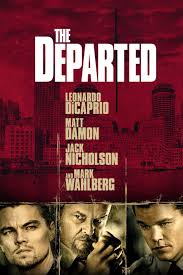
In this 2006 movie, an undercover cop and a mole try to identify each other. Scorsese shows his editing prowess once again as he uses freeze-frame more subtly.
He changes the frame speed instead of stopping on one frame for a considerably longer time. This emphasizes some memorable moments that you may overlook on a first watch.
02Rocky III
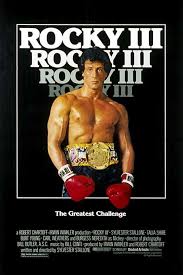
The freeze-frame came in during the final match between Apollo and Balboa in this movie.
During the first 3 Rocky movies, Apollo and Balboa had an intriguing rivalry. At the end of Rocky III, the duo decides to engage in a friendly battle to determine who was the Lord in boxing.
The movie ends in a freeze-frame with Rocky swinging a right hook after Apollo imitates the bell, saying, “Ding Dong.”
The freeze-frame allows the audience to guess who the winner will be, thus a longer time to think of the movie after watching.
03400 Blows
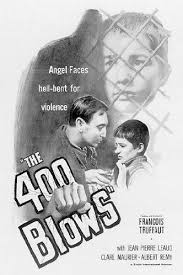
In 400 Blows, the main character Antoine, a young Parisian, was hardly out of trouble.
In an attempt to end his troubles, he arrives at the beach after running away from a soccer match.
He is faced with either jumping right in or going back. The movie ends in a freeze-frame as no one finds out. The decision was left to the audience.
04Thelma and Louise
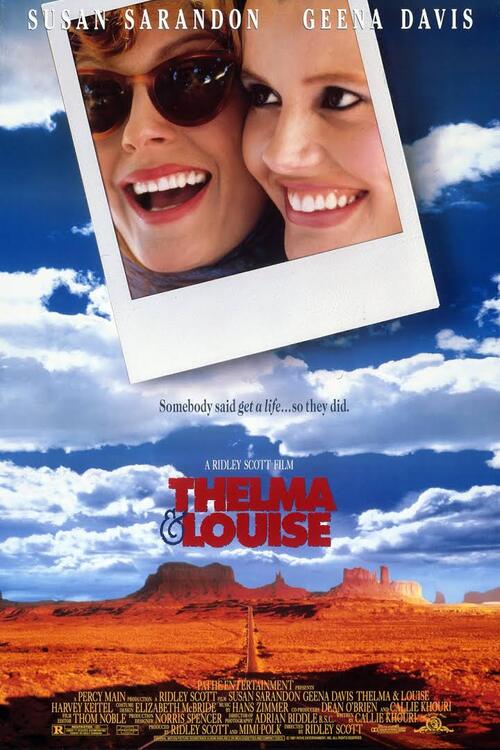
Thelma and Louise is about two (2) friends, Thelma Dickinson and Louise Sawyer. They both rise to defend themselves in a male-dominated world. In the film, Thelma and Louise are both running from the authorities. Louise killed a man who almost raped her friend, Thelma, thus the run. Things get out of control as they try to escape to Mexico, away from the authorities.
While on the run, they get ambushed by the police towards the grand canyon. The audience, at this point, is in suspense as to whether the ladies will survive or not.
Instead of surrendering, they drive right into the grand canyon, and the movie ends in a freeze-frame as they get caught hanging in the air while plunging into the canyon.
Regular movies might decide to give us all the details of the car plunging and exploding.
05The Wolf of Wall Street
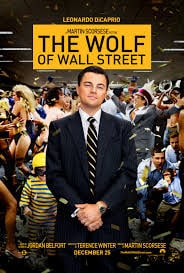
Scorsese uses freeze-frame at the beginning of this movie, just as he did in Good Fellas. The freeze-frame effect here helps introduce the character and shows us the plot of the movie hence piquing the audience’s interests immediately.
06Out of Sight
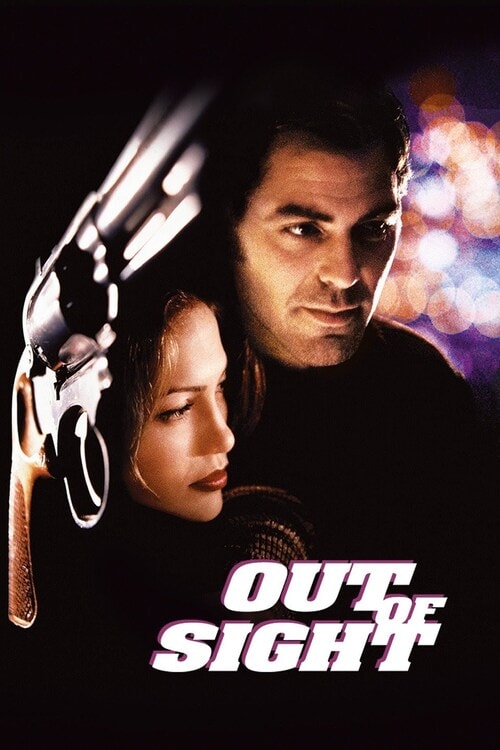
This movie is another excellent example of freeze-frame video editing. What other way to pique the audience’s interest significantly and emphasize them than capture them in a freeze-frame.
07Death Proof
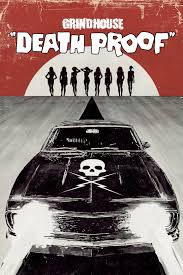
In this movie, the freeze-frame stays till the very end. It captures three women as they raise their hands-on celebration after successfully beating to death a psychopath who has been killing young women.
08Butch Cassidy and the Sundance Kid
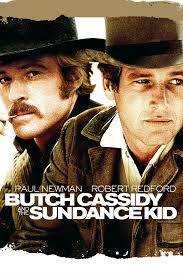
This movie follows two train robbers, Butch Cassidy and Harry Longabaugh, known as the ‘Sundance Kid.’ After conducting several robberies, they go on the run as the authorities pursue them. After a gun battle with the authorities, they take cover inside a building, but they get surrounded with no other escape route.
Thus they decide to engage in the last fight instead of surrendering, and you see them in a gun battle with the authorities. The movie ends with them caught in a freeze-frame brandishing their guns at the officers instead of actual bloodshed. Though we all know they will get killed.
09Good Fellas
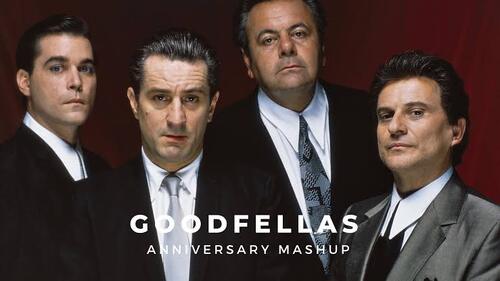
Initially, we mentioned that a freeze-frame could be of use at the beginning of a movie. Scorsese used this effectively in ‘Good Fellas’ to emphasize the movie plot.
In the opening scene, the characters Henry, Jimmy, and Tonny, played by Ray Liotta, Robert De Niro, and Joe Pesci, respectively, stop their car in the middle of the road.
They open their truck and see a man badly wounded and beaten, Tonny stabs him, and Jimmy shoots him. Henry then closes the truck and looks on in a freeze-frame before uttering the lines, “As far back as I can remember, I have always wanted to be a gangster.”
This lets us know right away what will happen in the movie. That person will get killed, and this is the mob territory.
10Harry Potter and the Prisoner of Azkaban
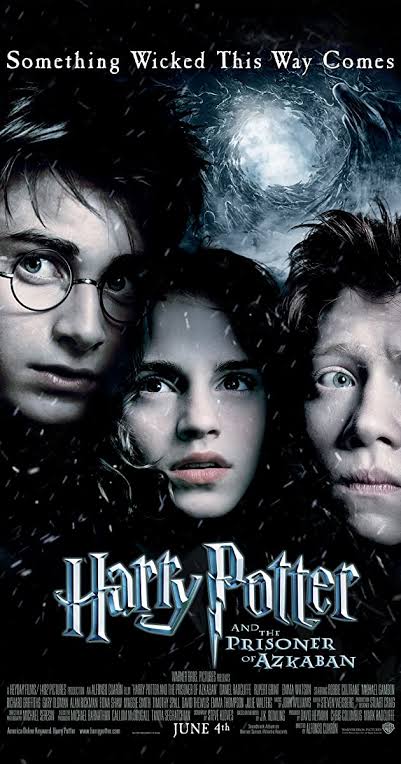
During a bad and weird year at Hogwarts, Harry potter experiences an extremely joyous moment when he goes anti-gravity on his new Firebolt broom.
He becomes overjoyed and his expression gets captured in a freeze-frame.
11The Breakfast Club
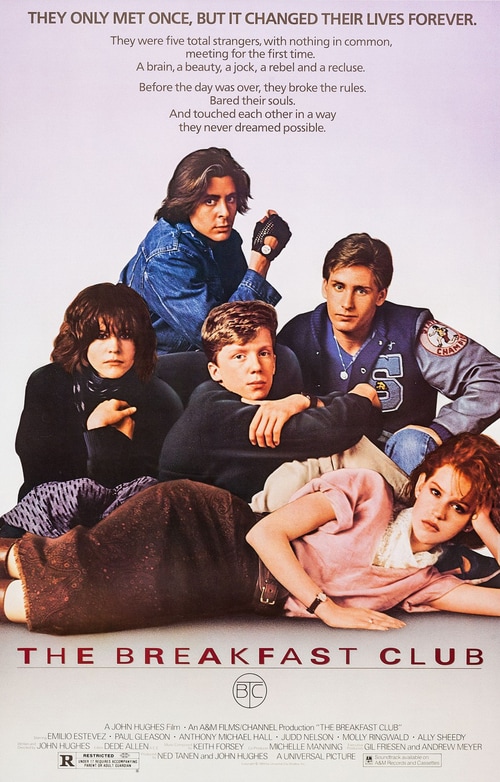
The Breakfast Club is an 80s movie showing teenagers trying to find their identity in life and overcoming the challenges of these years.
This is another freeze frame example where the filmmakers showed great expertise. The character John Bender is caught in a freeze-frame, punching the air to celebrate his victory.
He has just shared a kiss with the class sweetheart Claire. He and his classmates have also just won over the authoritative principal, Mr. Vernon.
12Pulp Fiction: Pumpkin and Honey Bunny.
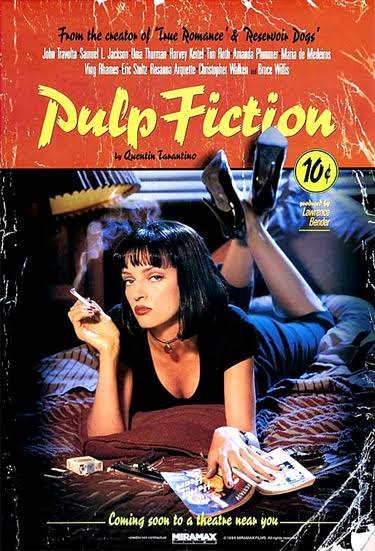
Pulp Fiction is another movie such as ‘Good Fellas’ with its freeze-frame edition done at the movie’s beginning.
Pumpkin and Honey Bunny are shown at the movie’s beginning, sitting together in a diner. They argue whether it will be safer to rub a bank or a restaurant. In the end, they settle for a diner — the same one they are sitting in.
They kiss and pull out their guns, and the images freeze before the credits roll out.
The freeze-frame gives us a sneak peek of the violence to experience in the movie, and indeed, we were not disappointed.
For Win 7 or later (64-bit)
For macOS 10.12 or later
With Wondershare Filmora Video Editor ‘s speed ramping feature, you can adjust your video speed while controlling the keyframes to create fascinating cinematic videos.
Filmora is a video editing tool developed by wondershare and has exciting features. Filmora makes video editing easy and seamless yet produces professional results.
Filmora’s freeze-frame feature helps bring dynamism and energy to your videos using its keyframe feature.
● Ending Thoughts →
● It is an inexplicable feeling that we get every time we remember a movie we watched a long time ago, the ones whereas kept debating with our friends as to what would have happened.
● That is the purpose of adding freeze-frame effects at the end of videos. So you keep thinking about them.
● Now that you know this effect, you can figure out which freeze-frame video examples you still find very interesting. Also, do not hesitate to try out the new features of Filmora. It would bring out the best of your video to the audience.
Freeze frame effect in video editing is a skill that requires more practice to master. It adds drama and impact to movies. If you want to see more energy and acting in the videos you watch, then you should see more freeze-frame examples.
Sometimes we notice that a particular action stays on longer than necessary in a movie or video. The filmmakers use this skill to emphasize some intense moments further to sustain or pique your interest.
The freeze-frame video editing feature is a valuable skill that helps filmmakers make excellent movies. We have a list of the top 12 examples of freeze-frame effects in movies for you.
In this article
01 [What is freeze-frame video editing?](#Part 1)
02 [Ways to use freeze-frame video editing](#Part 2)
03 [What are the best freeze-frame video editing examples?](#Part 3)
Part 1 What Is Freeze Frame Video Editing?
Freeze frame video editing is a video editing technique that halts movement in a video for a given period. It converts moving pictures into still photography for some time. These video editor effects help filmmakers gear attention to the video editing or filmmaking process. In other words, they are self-reflexive.
Part 2 Ways to Use Freeze Frame in Video editing
Freeze frames can be helpful in 3 significant ways in video editing;
● At the beginning of a movie/video: Freeze-frame at the beginning helps you pique the audience’s interest and give them a sneak peek of what to expect in the movie. This freeze-frame technique was used in the film ‘Good Fellas’ to pique the audience’s interests.
● At the end: Using a freeze-frame allows the audience to choose or decide how the movie ends, whether it is obvious. The ‘breakfast club’ filmmakers use a freeze-frame at the end to emphasize the young boy.
● In the middle, subtly capturing intense moments like in the movie ‘The Departed.’
Part 3 What are the Best Freeze-Frame Video Editing Examples?
It takes a great deal of skill to employ freeze frame with the best results correctly. It might bore the audience or give another impression other than the intended when not done effectively.
But several movie directors have effectively used the freeze-frame video editing technique that wowed the audience.
Here is a list of the best freeze frame examples you would love;
01The Departed

In this 2006 movie, an undercover cop and a mole try to identify each other. Scorsese shows his editing prowess once again as he uses freeze-frame more subtly.
He changes the frame speed instead of stopping on one frame for a considerably longer time. This emphasizes some memorable moments that you may overlook on a first watch.
02Rocky III

The freeze-frame came in during the final match between Apollo and Balboa in this movie.
During the first 3 Rocky movies, Apollo and Balboa had an intriguing rivalry. At the end of Rocky III, the duo decides to engage in a friendly battle to determine who was the Lord in boxing.
The movie ends in a freeze-frame with Rocky swinging a right hook after Apollo imitates the bell, saying, “Ding Dong.”
The freeze-frame allows the audience to guess who the winner will be, thus a longer time to think of the movie after watching.
03400 Blows

In 400 Blows, the main character Antoine, a young Parisian, was hardly out of trouble.
In an attempt to end his troubles, he arrives at the beach after running away from a soccer match.
He is faced with either jumping right in or going back. The movie ends in a freeze-frame as no one finds out. The decision was left to the audience.
04Thelma and Louise

Thelma and Louise is about two (2) friends, Thelma Dickinson and Louise Sawyer. They both rise to defend themselves in a male-dominated world. In the film, Thelma and Louise are both running from the authorities. Louise killed a man who almost raped her friend, Thelma, thus the run. Things get out of control as they try to escape to Mexico, away from the authorities.
While on the run, they get ambushed by the police towards the grand canyon. The audience, at this point, is in suspense as to whether the ladies will survive or not.
Instead of surrendering, they drive right into the grand canyon, and the movie ends in a freeze-frame as they get caught hanging in the air while plunging into the canyon.
Regular movies might decide to give us all the details of the car plunging and exploding.
05The Wolf of Wall Street

Scorsese uses freeze-frame at the beginning of this movie, just as he did in Good Fellas. The freeze-frame effect here helps introduce the character and shows us the plot of the movie hence piquing the audience’s interests immediately.
06Out of Sight

This movie is another excellent example of freeze-frame video editing. What other way to pique the audience’s interest significantly and emphasize them than capture them in a freeze-frame.
07Death Proof

In this movie, the freeze-frame stays till the very end. It captures three women as they raise their hands-on celebration after successfully beating to death a psychopath who has been killing young women.
08Butch Cassidy and the Sundance Kid

This movie follows two train robbers, Butch Cassidy and Harry Longabaugh, known as the ‘Sundance Kid.’ After conducting several robberies, they go on the run as the authorities pursue them. After a gun battle with the authorities, they take cover inside a building, but they get surrounded with no other escape route.
Thus they decide to engage in the last fight instead of surrendering, and you see them in a gun battle with the authorities. The movie ends with them caught in a freeze-frame brandishing their guns at the officers instead of actual bloodshed. Though we all know they will get killed.
09Good Fellas

Initially, we mentioned that a freeze-frame could be of use at the beginning of a movie. Scorsese used this effectively in ‘Good Fellas’ to emphasize the movie plot.
In the opening scene, the characters Henry, Jimmy, and Tonny, played by Ray Liotta, Robert De Niro, and Joe Pesci, respectively, stop their car in the middle of the road.
They open their truck and see a man badly wounded and beaten, Tonny stabs him, and Jimmy shoots him. Henry then closes the truck and looks on in a freeze-frame before uttering the lines, “As far back as I can remember, I have always wanted to be a gangster.”
This lets us know right away what will happen in the movie. That person will get killed, and this is the mob territory.
10Harry Potter and the Prisoner of Azkaban

During a bad and weird year at Hogwarts, Harry potter experiences an extremely joyous moment when he goes anti-gravity on his new Firebolt broom.
He becomes overjoyed and his expression gets captured in a freeze-frame.
11The Breakfast Club

The Breakfast Club is an 80s movie showing teenagers trying to find their identity in life and overcoming the challenges of these years.
This is another freeze frame example where the filmmakers showed great expertise. The character John Bender is caught in a freeze-frame, punching the air to celebrate his victory.
He has just shared a kiss with the class sweetheart Claire. He and his classmates have also just won over the authoritative principal, Mr. Vernon.
12Pulp Fiction: Pumpkin and Honey Bunny.

Pulp Fiction is another movie such as ‘Good Fellas’ with its freeze-frame edition done at the movie’s beginning.
Pumpkin and Honey Bunny are shown at the movie’s beginning, sitting together in a diner. They argue whether it will be safer to rub a bank or a restaurant. In the end, they settle for a diner — the same one they are sitting in.
They kiss and pull out their guns, and the images freeze before the credits roll out.
The freeze-frame gives us a sneak peek of the violence to experience in the movie, and indeed, we were not disappointed.
For Win 7 or later (64-bit)
For macOS 10.12 or later
With Wondershare Filmora Video Editor ‘s speed ramping feature, you can adjust your video speed while controlling the keyframes to create fascinating cinematic videos.
Filmora is a video editing tool developed by wondershare and has exciting features. Filmora makes video editing easy and seamless yet produces professional results.
Filmora’s freeze-frame feature helps bring dynamism and energy to your videos using its keyframe feature.
● Ending Thoughts →
● It is an inexplicable feeling that we get every time we remember a movie we watched a long time ago, the ones whereas kept debating with our friends as to what would have happened.
● That is the purpose of adding freeze-frame effects at the end of videos. So you keep thinking about them.
● Now that you know this effect, you can figure out which freeze-frame video examples you still find very interesting. Also, do not hesitate to try out the new features of Filmora. It would bring out the best of your video to the audience.
Freeze frame effect in video editing is a skill that requires more practice to master. It adds drama and impact to movies. If you want to see more energy and acting in the videos you watch, then you should see more freeze-frame examples.
Sometimes we notice that a particular action stays on longer than necessary in a movie or video. The filmmakers use this skill to emphasize some intense moments further to sustain or pique your interest.
The freeze-frame video editing feature is a valuable skill that helps filmmakers make excellent movies. We have a list of the top 12 examples of freeze-frame effects in movies for you.
In this article
01 [What is freeze-frame video editing?](#Part 1)
02 [Ways to use freeze-frame video editing](#Part 2)
03 [What are the best freeze-frame video editing examples?](#Part 3)
Part 1 What Is Freeze Frame Video Editing?
Freeze frame video editing is a video editing technique that halts movement in a video for a given period. It converts moving pictures into still photography for some time. These video editor effects help filmmakers gear attention to the video editing or filmmaking process. In other words, they are self-reflexive.
Part 2 Ways to Use Freeze Frame in Video editing
Freeze frames can be helpful in 3 significant ways in video editing;
● At the beginning of a movie/video: Freeze-frame at the beginning helps you pique the audience’s interest and give them a sneak peek of what to expect in the movie. This freeze-frame technique was used in the film ‘Good Fellas’ to pique the audience’s interests.
● At the end: Using a freeze-frame allows the audience to choose or decide how the movie ends, whether it is obvious. The ‘breakfast club’ filmmakers use a freeze-frame at the end to emphasize the young boy.
● In the middle, subtly capturing intense moments like in the movie ‘The Departed.’
Part 3 What are the Best Freeze-Frame Video Editing Examples?
It takes a great deal of skill to employ freeze frame with the best results correctly. It might bore the audience or give another impression other than the intended when not done effectively.
But several movie directors have effectively used the freeze-frame video editing technique that wowed the audience.
Here is a list of the best freeze frame examples you would love;
01The Departed

In this 2006 movie, an undercover cop and a mole try to identify each other. Scorsese shows his editing prowess once again as he uses freeze-frame more subtly.
He changes the frame speed instead of stopping on one frame for a considerably longer time. This emphasizes some memorable moments that you may overlook on a first watch.
02Rocky III

The freeze-frame came in during the final match between Apollo and Balboa in this movie.
During the first 3 Rocky movies, Apollo and Balboa had an intriguing rivalry. At the end of Rocky III, the duo decides to engage in a friendly battle to determine who was the Lord in boxing.
The movie ends in a freeze-frame with Rocky swinging a right hook after Apollo imitates the bell, saying, “Ding Dong.”
The freeze-frame allows the audience to guess who the winner will be, thus a longer time to think of the movie after watching.
03400 Blows

In 400 Blows, the main character Antoine, a young Parisian, was hardly out of trouble.
In an attempt to end his troubles, he arrives at the beach after running away from a soccer match.
He is faced with either jumping right in or going back. The movie ends in a freeze-frame as no one finds out. The decision was left to the audience.
04Thelma and Louise

Thelma and Louise is about two (2) friends, Thelma Dickinson and Louise Sawyer. They both rise to defend themselves in a male-dominated world. In the film, Thelma and Louise are both running from the authorities. Louise killed a man who almost raped her friend, Thelma, thus the run. Things get out of control as they try to escape to Mexico, away from the authorities.
While on the run, they get ambushed by the police towards the grand canyon. The audience, at this point, is in suspense as to whether the ladies will survive or not.
Instead of surrendering, they drive right into the grand canyon, and the movie ends in a freeze-frame as they get caught hanging in the air while plunging into the canyon.
Regular movies might decide to give us all the details of the car plunging and exploding.
05The Wolf of Wall Street

Scorsese uses freeze-frame at the beginning of this movie, just as he did in Good Fellas. The freeze-frame effect here helps introduce the character and shows us the plot of the movie hence piquing the audience’s interests immediately.
06Out of Sight

This movie is another excellent example of freeze-frame video editing. What other way to pique the audience’s interest significantly and emphasize them than capture them in a freeze-frame.
07Death Proof

In this movie, the freeze-frame stays till the very end. It captures three women as they raise their hands-on celebration after successfully beating to death a psychopath who has been killing young women.
08Butch Cassidy and the Sundance Kid

This movie follows two train robbers, Butch Cassidy and Harry Longabaugh, known as the ‘Sundance Kid.’ After conducting several robberies, they go on the run as the authorities pursue them. After a gun battle with the authorities, they take cover inside a building, but they get surrounded with no other escape route.
Thus they decide to engage in the last fight instead of surrendering, and you see them in a gun battle with the authorities. The movie ends with them caught in a freeze-frame brandishing their guns at the officers instead of actual bloodshed. Though we all know they will get killed.
09Good Fellas

Initially, we mentioned that a freeze-frame could be of use at the beginning of a movie. Scorsese used this effectively in ‘Good Fellas’ to emphasize the movie plot.
In the opening scene, the characters Henry, Jimmy, and Tonny, played by Ray Liotta, Robert De Niro, and Joe Pesci, respectively, stop their car in the middle of the road.
They open their truck and see a man badly wounded and beaten, Tonny stabs him, and Jimmy shoots him. Henry then closes the truck and looks on in a freeze-frame before uttering the lines, “As far back as I can remember, I have always wanted to be a gangster.”
This lets us know right away what will happen in the movie. That person will get killed, and this is the mob territory.
10Harry Potter and the Prisoner of Azkaban

During a bad and weird year at Hogwarts, Harry potter experiences an extremely joyous moment when he goes anti-gravity on his new Firebolt broom.
He becomes overjoyed and his expression gets captured in a freeze-frame.
11The Breakfast Club

The Breakfast Club is an 80s movie showing teenagers trying to find their identity in life and overcoming the challenges of these years.
This is another freeze frame example where the filmmakers showed great expertise. The character John Bender is caught in a freeze-frame, punching the air to celebrate his victory.
He has just shared a kiss with the class sweetheart Claire. He and his classmates have also just won over the authoritative principal, Mr. Vernon.
12Pulp Fiction: Pumpkin and Honey Bunny.

Pulp Fiction is another movie such as ‘Good Fellas’ with its freeze-frame edition done at the movie’s beginning.
Pumpkin and Honey Bunny are shown at the movie’s beginning, sitting together in a diner. They argue whether it will be safer to rub a bank or a restaurant. In the end, they settle for a diner — the same one they are sitting in.
They kiss and pull out their guns, and the images freeze before the credits roll out.
The freeze-frame gives us a sneak peek of the violence to experience in the movie, and indeed, we were not disappointed.
For Win 7 or later (64-bit)
For macOS 10.12 or later
With Wondershare Filmora Video Editor ‘s speed ramping feature, you can adjust your video speed while controlling the keyframes to create fascinating cinematic videos.
Filmora is a video editing tool developed by wondershare and has exciting features. Filmora makes video editing easy and seamless yet produces professional results.
Filmora’s freeze-frame feature helps bring dynamism and energy to your videos using its keyframe feature.
● Ending Thoughts →
● It is an inexplicable feeling that we get every time we remember a movie we watched a long time ago, the ones whereas kept debating with our friends as to what would have happened.
● That is the purpose of adding freeze-frame effects at the end of videos. So you keep thinking about them.
● Now that you know this effect, you can figure out which freeze-frame video examples you still find very interesting. Also, do not hesitate to try out the new features of Filmora. It would bring out the best of your video to the audience.
Freeze frame effect in video editing is a skill that requires more practice to master. It adds drama and impact to movies. If you want to see more energy and acting in the videos you watch, then you should see more freeze-frame examples.
Sometimes we notice that a particular action stays on longer than necessary in a movie or video. The filmmakers use this skill to emphasize some intense moments further to sustain or pique your interest.
The freeze-frame video editing feature is a valuable skill that helps filmmakers make excellent movies. We have a list of the top 12 examples of freeze-frame effects in movies for you.
In this article
01 [What is freeze-frame video editing?](#Part 1)
02 [Ways to use freeze-frame video editing](#Part 2)
03 [What are the best freeze-frame video editing examples?](#Part 3)
Part 1 What Is Freeze Frame Video Editing?
Freeze frame video editing is a video editing technique that halts movement in a video for a given period. It converts moving pictures into still photography for some time. These video editor effects help filmmakers gear attention to the video editing or filmmaking process. In other words, they are self-reflexive.
Part 2 Ways to Use Freeze Frame in Video editing
Freeze frames can be helpful in 3 significant ways in video editing;
● At the beginning of a movie/video: Freeze-frame at the beginning helps you pique the audience’s interest and give them a sneak peek of what to expect in the movie. This freeze-frame technique was used in the film ‘Good Fellas’ to pique the audience’s interests.
● At the end: Using a freeze-frame allows the audience to choose or decide how the movie ends, whether it is obvious. The ‘breakfast club’ filmmakers use a freeze-frame at the end to emphasize the young boy.
● In the middle, subtly capturing intense moments like in the movie ‘The Departed.’
Part 3 What are the Best Freeze-Frame Video Editing Examples?
It takes a great deal of skill to employ freeze frame with the best results correctly. It might bore the audience or give another impression other than the intended when not done effectively.
But several movie directors have effectively used the freeze-frame video editing technique that wowed the audience.
Here is a list of the best freeze frame examples you would love;
01The Departed

In this 2006 movie, an undercover cop and a mole try to identify each other. Scorsese shows his editing prowess once again as he uses freeze-frame more subtly.
He changes the frame speed instead of stopping on one frame for a considerably longer time. This emphasizes some memorable moments that you may overlook on a first watch.
02Rocky III

The freeze-frame came in during the final match between Apollo and Balboa in this movie.
During the first 3 Rocky movies, Apollo and Balboa had an intriguing rivalry. At the end of Rocky III, the duo decides to engage in a friendly battle to determine who was the Lord in boxing.
The movie ends in a freeze-frame with Rocky swinging a right hook after Apollo imitates the bell, saying, “Ding Dong.”
The freeze-frame allows the audience to guess who the winner will be, thus a longer time to think of the movie after watching.
03400 Blows

In 400 Blows, the main character Antoine, a young Parisian, was hardly out of trouble.
In an attempt to end his troubles, he arrives at the beach after running away from a soccer match.
He is faced with either jumping right in or going back. The movie ends in a freeze-frame as no one finds out. The decision was left to the audience.
04Thelma and Louise

Thelma and Louise is about two (2) friends, Thelma Dickinson and Louise Sawyer. They both rise to defend themselves in a male-dominated world. In the film, Thelma and Louise are both running from the authorities. Louise killed a man who almost raped her friend, Thelma, thus the run. Things get out of control as they try to escape to Mexico, away from the authorities.
While on the run, they get ambushed by the police towards the grand canyon. The audience, at this point, is in suspense as to whether the ladies will survive or not.
Instead of surrendering, they drive right into the grand canyon, and the movie ends in a freeze-frame as they get caught hanging in the air while plunging into the canyon.
Regular movies might decide to give us all the details of the car plunging and exploding.
05The Wolf of Wall Street

Scorsese uses freeze-frame at the beginning of this movie, just as he did in Good Fellas. The freeze-frame effect here helps introduce the character and shows us the plot of the movie hence piquing the audience’s interests immediately.
06Out of Sight

This movie is another excellent example of freeze-frame video editing. What other way to pique the audience’s interest significantly and emphasize them than capture them in a freeze-frame.
07Death Proof

In this movie, the freeze-frame stays till the very end. It captures three women as they raise their hands-on celebration after successfully beating to death a psychopath who has been killing young women.
08Butch Cassidy and the Sundance Kid

This movie follows two train robbers, Butch Cassidy and Harry Longabaugh, known as the ‘Sundance Kid.’ After conducting several robberies, they go on the run as the authorities pursue them. After a gun battle with the authorities, they take cover inside a building, but they get surrounded with no other escape route.
Thus they decide to engage in the last fight instead of surrendering, and you see them in a gun battle with the authorities. The movie ends with them caught in a freeze-frame brandishing their guns at the officers instead of actual bloodshed. Though we all know they will get killed.
09Good Fellas

Initially, we mentioned that a freeze-frame could be of use at the beginning of a movie. Scorsese used this effectively in ‘Good Fellas’ to emphasize the movie plot.
In the opening scene, the characters Henry, Jimmy, and Tonny, played by Ray Liotta, Robert De Niro, and Joe Pesci, respectively, stop their car in the middle of the road.
They open their truck and see a man badly wounded and beaten, Tonny stabs him, and Jimmy shoots him. Henry then closes the truck and looks on in a freeze-frame before uttering the lines, “As far back as I can remember, I have always wanted to be a gangster.”
This lets us know right away what will happen in the movie. That person will get killed, and this is the mob territory.
10Harry Potter and the Prisoner of Azkaban

During a bad and weird year at Hogwarts, Harry potter experiences an extremely joyous moment when he goes anti-gravity on his new Firebolt broom.
He becomes overjoyed and his expression gets captured in a freeze-frame.
11The Breakfast Club

The Breakfast Club is an 80s movie showing teenagers trying to find their identity in life and overcoming the challenges of these years.
This is another freeze frame example where the filmmakers showed great expertise. The character John Bender is caught in a freeze-frame, punching the air to celebrate his victory.
He has just shared a kiss with the class sweetheart Claire. He and his classmates have also just won over the authoritative principal, Mr. Vernon.
12Pulp Fiction: Pumpkin and Honey Bunny.

Pulp Fiction is another movie such as ‘Good Fellas’ with its freeze-frame edition done at the movie’s beginning.
Pumpkin and Honey Bunny are shown at the movie’s beginning, sitting together in a diner. They argue whether it will be safer to rub a bank or a restaurant. In the end, they settle for a diner — the same one they are sitting in.
They kiss and pull out their guns, and the images freeze before the credits roll out.
The freeze-frame gives us a sneak peek of the violence to experience in the movie, and indeed, we were not disappointed.
For Win 7 or later (64-bit)
For macOS 10.12 or later
With Wondershare Filmora Video Editor ‘s speed ramping feature, you can adjust your video speed while controlling the keyframes to create fascinating cinematic videos.
Filmora is a video editing tool developed by wondershare and has exciting features. Filmora makes video editing easy and seamless yet produces professional results.
Filmora’s freeze-frame feature helps bring dynamism and energy to your videos using its keyframe feature.
● Ending Thoughts →
● It is an inexplicable feeling that we get every time we remember a movie we watched a long time ago, the ones whereas kept debating with our friends as to what would have happened.
● That is the purpose of adding freeze-frame effects at the end of videos. So you keep thinking about them.
● Now that you know this effect, you can figure out which freeze-frame video examples you still find very interesting. Also, do not hesitate to try out the new features of Filmora. It would bring out the best of your video to the audience.
Also read:
- New The Necessity of the Creation of Video Content for Social Media Has Urged Many Editing Software to Come Out on the Market. We Have Reviewed some, Free of Them in This Article for You
- Updated 2024 Approved How to Add Selective Color Effect to Your Videos
- The Ultimate Guide to Using AR Emoji Stickers in Your Videos
- Updated How to Change the Speed of Video in DaVinci Resolve?
- In 2024, How to Put a Filter on a Video in iMovie
- 2024 Approved Do You Want to Make Your Photos and Videos Look Different From Others? There Are Many Lightroom LUTs Free, and They Make Your Media Content Stand Out From Others
- Within the Realm of Graphic Editing, People Also Ask How to Add Emoji to Photo. Stay Tuned to Walk Through the Best Possible Solutions in the IT Market for 2024
- Updated 2024 Approved Guide to Synchronizing Your Audio And Videos Properly?
- Updated Guide on VHS Technology and Its Influence on Video Editing
- Updated Learning How to Slow Down a Video on iPhone Properly
- Updated 2024 Approved Easy Guide to Apply Slow Zoom Effects to Videos
- Updated How to Use Twixtor Effect to Add Slow-Motion Effect to Video?
- Updated What Are the Best Video Background Changers Online?
- Turn Your Blog Content Into Audio Podcasts to Reach a Wider Audience and Increase Reader Participation for 2024
- Updated A Guide to Find a High-Quality Video Marketing Agency
- 2024 Approved How to Make Discord GIF PFP? Solved
- New The Right Ways to Slow Down a Video on iPhone for 2024
- Best GIF to Video Converters
- Online Video Makers
- In 2024, iSpoofer is not working On Itel P40+? Fixed | Dr.fone
- In 2024, Complete Fixes To Solve iPhone 8 Randomly Asking for Apple ID Password | Dr.fone
- How to Hard Reset Xiaomi Redmi K70 Without Password | Dr.fone
- Getting the Pokemon Go GPS Signal Not Found 11 Error in Motorola Moto G04 | Dr.fone
- 2024 Approved Diverse Template | Online
- How To Get the Apple ID Verification Code On Apple iPhone 7 Plus in the Best Ways
- How to Mirror Your Nokia C12 Plus Screen to PC with Chromecast | Dr.fone
- In 2024, Is Fake GPS Location Spoofer a Good Choice On Motorola Edge 40 Pro? | Dr.fone
- A Comprehensive Guide to iCloud Unlock On Apple iPhone 11 Pro Online
- Latest Guide on iPad 2/3 and iPhone 8 iCloud Activation Lock Bypass
- Factory Reset iPhone XR | Dr.fone
- Does Life360 Notify When You Log Out On Motorola Defy 2? | Dr.fone
- App Wont Open on Your Samsung Galaxy A23 5G? Here Are All Fixes | Dr.fone
- In 2024, How Huawei P60 Mirror Screen to PC? | Dr.fone
- Title: New How to Make Hand Shake Effect with Final Cut Pro
- Author: Chloe
- Created at : 2024-04-24 07:08:12
- Updated at : 2024-04-25 07:08:12
- Link: https://ai-editing-video.techidaily.com/new-how-to-make-hand-shake-effect-with-final-cut-pro/
- License: This work is licensed under CC BY-NC-SA 4.0.

