
:max_bytes(150000):strip_icc():format(webp)/coffeecup-free-html-editor-profile-3467555-8876645f89c444c8b94addcf4307b22d.png)
New If You Are Wondering How to Play a Slideshow in PowerPoint Automatically, This Article Is for You. Here We Will Be Looking at How to Add a Slideshow in PowerPoint and Other Relevant Headings that Would Help You Quickly Work on a PowerPoint
If You Are Wondering How to Play a Slideshow in PowerPoint Automatically, This Article Is for You. Here We Will Be Looking at How to Add a Slideshow in PowerPoint and Other Relevant Headings that Would Help You Quickly Work on a PowerPoint
How to Add a Slideshow in PowerPoint
An easy yet powerful editor
Numerous effects to choose from
Detailed tutorials provided by the official channel
A slideshow view fills the entire computer screen, much like a real slide show. The presentation is exhibited in full-screen mode, as the audience will see it. Graphics, timings, videos, animated elements, and transition effects get displayed in the same way they appear on stage. PowerPoint is an excellent tool for preparing presentations on the fly, whether for a seminar, classroom, lecture hall, conference, or even a contract pitch. With PowerPoint software, you can never go wrong. We’ll show you how to do a slideshow presentation in this post, even if you’re a complete novice who has never used it before.
In this article
01 How to Add Slideshow in PowerPoint
02 [How to Prepare a slideshow in PowerPoint](#Part 2)
03 [How to Play Slideshow in PowerPoint Automatically](#Part 3)
04 [How to Add Sound to a PowerPoint Slideshow](#Part 4)
05 [How to View Slideshow PowerPoint](#Part 5)
05 [How to Add Audio to the Slideshow](#Part 5)
Part 1 How to Add Slideshow in PowerPoint
Below are the steps on how to prepare a slideshow in PowerPoint
Step 1: Open New
Click on open new presentation in Microsoft PowerPoint.

Step 2: Add Photo
Add a new photo album to your presentation.

Step 3: Add Transition
Customize your presentation by adding transitions and effects to your slideshow.

Step 4: Advanced Settings
Set the slides to advance automatically.

Step 5: Set Slideshow Loop
To make the slideshow loop continuously, go to the “ set up” group on the “slide show” tap and check the box next to “Loop continuously until Esc .”Then click OK. The slide will start from the beginning after displaying the last slide.

Now, your slideshow has been created and is ready for viewing.
Part 2 How to Prepare Slideshows in PowerPoint
Learning how to do a slideshow in PowerPoint is a relatively simple process that anyone can accomplish.
Ready to make aslideshow? Let us get you started.
Step 1: Create New Presentation
To do so:
● Go to your browser and click on the PowerPoint icon.
● When PowerPoint opens, go to the upper left-hand corner and choose “File,” then “New,” listed under “File.”
● Choose “New Presentation” from the drop-down menu, which will create a new slide show for you to begin uploading photos to.

Step 2: Save PowerPoint
Go to the top right-hand side of the presentation screen and click on the flash drive icon. After that, you’ll be able to name your presentation and pick where to save it.
Remember to save your presentation after something that will remind you of the images in the File. This act will make it easier for you to find them later.

Step 3: Name the Page
Consider a title and type it in the box. Your title page can include a name, date, or image.
Choose an image-friendly arrangement, such as a slide with a title box and an image box, a slide with only an image box, or even a blank slide.

Step 4: Add Slides
You can choose from a variety of slide layouts and visuals. You can select “New Slide” from either “Home” or “Insert.” You may also right-click any slide in the left-hand panel and select “New Slide.” [1]

Step 5: Import Images
You have the option add one or multiple pictures to each slide. It’s all up to you. Double-click inside the picture box (or select Insert > Picture > From File from the Insert menu) and click OK.

Step 6: Rearrange the Photo
You will find it easier to decide the optimum order for the slides if you use the slide sorter.
Bear the bottom of the image pane, and look for the “Slide Sorter” button. Then, using your mouse, drag the slides to their preferred locations.

Step 7: Add Transitions
Transitions are essential for tying the presentation together and allowing it to flow smoothly from one image to the next. Go to the “Transitions” tab at the top of the bar and experiment with the various possibilities.

Step 8: Add a Background.
If the white space around the edges of your photographs bothers you, right-click on any slide, choose “Format Background,” and then adjust the background fill. You may change the hue, direction, and transparency of a solid fill, a gradient fill, etc. To make your slides look more professional,

Step 9: Save your PowerPoint
Before exiting, save your show once you’ve finished adding photos and graphics. If you named and saved your presentation at the start, all you have to do now is click the flash drive icon in the upper left corner.

Now your Powerpoint is ready to be displayed, and you can also view your slideshow automatically. Read the next part for details.
Part 3 How to Play Slideshow in PowerPoint Automatically
Before you can play a slideshow automatically**,** you have to make sure to save the presentation.
This is how to play a slideshow automatically in PowerPoint. Follow these simple steps, and your slideshow will auto-play when you double-click it.
Step 1: Save File and Visit More Option
After creating your slideshow, select file,” save as,” or “save as a copy.” Click on More options.
Step 2: Save in Desired Folder
Reach the folder where you want to save your presentation.
Step 3: Name your Presentation
Type a name for your presentation in the file name box
Step 4: Select Format
Select PowerPoint slideshow under the Save as type. This indicates what format you want to save your presentation as.
Save the File as a .ppsx file. After saving, double click the File, and it will open up as a slideshow.

Now, you can automatically play your slideshow on PowerPoint.
Part 4 How to Add Sound to a PowerPoint Slideshow
Sounds make your PowerPoint presentation more lively. Sound helps to widen your audience’s attention span. If you want your presentation to have sound:
Open your presentation and click the slide to which you want to add a sound. Then, visit the Insert tab, click on the Media group, and select the arrow under Audio.
Now, from the list displayed, click Audio from File. Locate the Audio you want to use and then select the audio clip you want.
Finally, click Insert.
Your audio icon and controls will appear on the slide.

Part 5 How to View Slide Show in PowerPoint
Viewing an already created slideshow in PowerPoint is easy. Following these steps below, you will be able to do it without stress.
Step 1: Open your PowerPoint presentation.
Open and go to the bottom of the PowerPoint window and click on the view slideshow command.
Step 2: Visit the More Options Tab
Navigate to the slideshow tab on the ribbon to access even more options.
Step 3: Start your Presentation
You can start the presentation from here and view the current slide.

Thus, that is how you can video slideshow in Microsoft PowerPoint
Now, we will move on to adding sound to your Slideshow to make it more attractive.
Part 6 How to Add Audio to a Slideshow
You can add audio, music, narration, and soundbites to your PowerPoint presentation. But to record and hear any audio, the computer you are using must have a sound card, microphone, and speakers.
To add audio from your computer:
Step 1: Select insert
Select audio on your computer.

Step 2: Select Desired Audio
An insert audio dialog box will pop up. Select the desired audio file and click insert.

To record audio
Step 1: Select Record Audio
Select insert>Audio> record audio

Step 2: Name Audio
Type in the name you want your audio file to be saved as.

Step 3: Start Recording
Select the record and start speaking.

Step 4: Review Recordings
Select a stop and then play to listen to and review your recording.

If you arent satisfied, you can select a record to re-record your audio or click OK if you are satisfied.
To place the audio at your desired location in the slide, select and drag the audio icon to where you want it. If you’re going to use numerous audio per slide, it is better to put the voice icon in the same place on the slide to be easily discoverable.
Note that you must enable a microphone on your device to start recording audio.
● Bonus Tip with Wondershare Filmora Video Editor

If you are looking to present your message to a large audience using slideshows, Filmora software has covered you. Whether you’re a professional at making slideshows or a beginner who wants to try it out for the first time, it has an easy-to-use interface.
For Win 7 or later (64-bit)
For macOS 10.12 or later
● Filmora software also creates photo and video slideshows and can add music, texts, filters, different transition effects, and even animation to your slideshow.
● Many tools can help you create these kinds of videos, and Filmora is one of the best in them with its latest upgrade.
● Its ready-to-use templates and unique features, like split-screen, freeze-frame, etc., make it one of the best slideshow makers.
● The Filmora software has the flexibility to suit whatever kind of slideshow you want to make, whether it is a photo slideshow or video slideshow.
● Ending Thoughts →
● Many people use PowerPoint cause of its simplicity, flexible function, easy sharing and conversion, reliability, and vast template library. So, after going through this, you would know how to add slides in PowerPoint and many more.
● Thus, we believe creating a slideshow in PowerPoint is now a bit easier with this guide to walk you through it.
A slideshow view fills the entire computer screen, much like a real slide show. The presentation is exhibited in full-screen mode, as the audience will see it. Graphics, timings, videos, animated elements, and transition effects get displayed in the same way they appear on stage. PowerPoint is an excellent tool for preparing presentations on the fly, whether for a seminar, classroom, lecture hall, conference, or even a contract pitch. With PowerPoint software, you can never go wrong. We’ll show you how to do a slideshow presentation in this post, even if you’re a complete novice who has never used it before.
In this article
01 How to Add Slideshow in PowerPoint
02 [How to Prepare a slideshow in PowerPoint](#Part 2)
03 [How to Play Slideshow in PowerPoint Automatically](#Part 3)
04 [How to Add Sound to a PowerPoint Slideshow](#Part 4)
05 [How to View Slideshow PowerPoint](#Part 5)
05 [How to Add Audio to the Slideshow](#Part 5)
Part 1 How to Add Slideshow in PowerPoint
Below are the steps on how to prepare a slideshow in PowerPoint
Step 1: Open New
Click on open new presentation in Microsoft PowerPoint.
Step 2: Add Photo
Add a new photo album to your presentation.
Step 3: Add Transition
Customize your presentation by adding transitions and effects to your slideshow.
Step 4: Advanced Settings
Set the slides to advance automatically.
Step 5: Set Slideshow Loop
To make the slideshow loop continuously, go to the “ set up” group on the “slide show” tap and check the box next to “Loop continuously until Esc .”Then click OK. The slide will start from the beginning after displaying the last slide.
Now, your slideshow has been created and is ready for viewing.
Part 2 How to Prepare Slideshows in PowerPoint
Learning how to do a slideshow in PowerPoint is a relatively simple process that anyone can accomplish.
Ready to make aslideshow? Let us get you started.
Step 1: Create New Presentation
To do so:
● Go to your browser and click on the PowerPoint icon.
● When PowerPoint opens, go to the upper left-hand corner and choose “File,” then “New,” listed under “File.”
● Choose “New Presentation” from the drop-down menu, which will create a new slide show for you to begin uploading photos to.
Step 2: Save PowerPoint
Go to the top right-hand side of the presentation screen and click on the flash drive icon. After that, you’ll be able to name your presentation and pick where to save it.
Remember to save your presentation after something that will remind you of the images in the File. This act will make it easier for you to find them later.
Step 3: Name the Page
Consider a title and type it in the box. Your title page can include a name, date, or image.
Choose an image-friendly arrangement, such as a slide with a title box and an image box, a slide with only an image box, or even a blank slide.
Step 4: Add Slides
You can choose from a variety of slide layouts and visuals. You can select “New Slide” from either “Home” or “Insert.” You may also right-click any slide in the left-hand panel and select “New Slide.” [1]
Step 5: Import Images
You have the option add one or multiple pictures to each slide. It’s all up to you. Double-click inside the picture box (or select Insert > Picture > From File from the Insert menu) and click OK.
Step 6: Rearrange the Photo
You will find it easier to decide the optimum order for the slides if you use the slide sorter.
Bear the bottom of the image pane, and look for the “Slide Sorter” button. Then, using your mouse, drag the slides to their preferred locations.
Step 7: Add Transitions
Transitions are essential for tying the presentation together and allowing it to flow smoothly from one image to the next. Go to the “Transitions” tab at the top of the bar and experiment with the various possibilities.
Step 8: Add a Background.
If the white space around the edges of your photographs bothers you, right-click on any slide, choose “Format Background,” and then adjust the background fill. You may change the hue, direction, and transparency of a solid fill, a gradient fill, etc. To make your slides look more professional,
Step 9: Save your PowerPoint
Before exiting, save your show once you’ve finished adding photos and graphics. If you named and saved your presentation at the start, all you have to do now is click the flash drive icon in the upper left corner.
Now your Powerpoint is ready to be displayed, and you can also view your slideshow automatically. Read the next part for details.
Part 3 How to Play Slideshow in PowerPoint Automatically
Before you can play a slideshow automatically**,** you have to make sure to save the presentation.
This is how to play a slideshow automatically in PowerPoint. Follow these simple steps, and your slideshow will auto-play when you double-click it.
Step 1: Save File and Visit More Option
After creating your slideshow, select file,” save as,” or “save as a copy.” Click on More options.
Step 2: Save in Desired Folder
Reach the folder where you want to save your presentation.
Step 3: Name your Presentation
Type a name for your presentation in the file name box
Step 4: Select Format
Select PowerPoint slideshow under the Save as type. This indicates what format you want to save your presentation as.
Save the File as a .ppsx file. After saving, double click the File, and it will open up as a slideshow.
Now, you can automatically play your slideshow on PowerPoint.
Part 4 How to Add Sound to a PowerPoint Slideshow
Sounds make your PowerPoint presentation more lively. Sound helps to widen your audience’s attention span. If you want your presentation to have sound:
Open your presentation and click the slide to which you want to add a sound. Then, visit the Insert tab, click on the Media group, and select the arrow under Audio.
Now, from the list displayed, click Audio from File. Locate the Audio you want to use and then select the audio clip you want.
Finally, click Insert.
Your audio icon and controls will appear on the slide.
Part 5 How to View Slide Show in PowerPoint
Viewing an already created slideshow in PowerPoint is easy. Following these steps below, you will be able to do it without stress.
Step 1: Open your PowerPoint presentation.
Open and go to the bottom of the PowerPoint window and click on the view slideshow command.
Step 2: Visit the More Options Tab
Navigate to the slideshow tab on the ribbon to access even more options.
Step 3: Start your Presentation
You can start the presentation from here and view the current slide.
Thus, that is how you can video slideshow in Microsoft PowerPoint
Now, we will move on to adding sound to your Slideshow to make it more attractive.
Part 6 How to Add Audio to a Slideshow
You can add audio, music, narration, and soundbites to your PowerPoint presentation. But to record and hear any audio, the computer you are using must have a sound card, microphone, and speakers.
To add audio from your computer:
Step 1: Select insert
Select audio on your computer.
Step 2: Select Desired Audio
An insert audio dialog box will pop up. Select the desired audio file and click insert.
To record audio
Step 1: Select Record Audio
Select insert>Audio> record audio
Step 2: Name Audio
Type in the name you want your audio file to be saved as.
Step 3: Start Recording
Select the record and start speaking.
Step 4: Review Recordings
Select a stop and then play to listen to and review your recording.
If you arent satisfied, you can select a record to re-record your audio or click OK if you are satisfied.
To place the audio at your desired location in the slide, select and drag the audio icon to where you want it. If you’re going to use numerous audio per slide, it is better to put the voice icon in the same place on the slide to be easily discoverable.
Note that you must enable a microphone on your device to start recording audio.
● Bonus Tip with Wondershare Filmora Video Editor
If you are looking to present your message to a large audience using slideshows, Filmora software has covered you. Whether you’re a professional at making slideshows or a beginner who wants to try it out for the first time, it has an easy-to-use interface.
For Win 7 or later (64-bit)
For macOS 10.12 or later
● Filmora software also creates photo and video slideshows and can add music, texts, filters, different transition effects, and even animation to your slideshow.
● Many tools can help you create these kinds of videos, and Filmora is one of the best in them with its latest upgrade.
● Its ready-to-use templates and unique features, like split-screen, freeze-frame, etc., make it one of the best slideshow makers.
● The Filmora software has the flexibility to suit whatever kind of slideshow you want to make, whether it is a photo slideshow or video slideshow.
● Ending Thoughts →
● Many people use PowerPoint cause of its simplicity, flexible function, easy sharing and conversion, reliability, and vast template library. So, after going through this, you would know how to add slides in PowerPoint and many more.
● Thus, we believe creating a slideshow in PowerPoint is now a bit easier with this guide to walk you through it.
15 Must-Use Gifs Editors
15 Must-Use Gifs Editors in 2024
An easy yet powerful editor
Numerous effects to choose from
Detailed tutorials provided by the official channel
Several websites and companies use the graphics interchange format that is the GIF. It can be seen to be used by a wide number of people on the internet and its format is supported by all platforms. The common goal of all the users can be satisfied.
Are you looking to create and edit gifs online or on your laptop but cannot find a suitable way out?
Finding the best and most user friendly GIF maker is not very hard, especially considering that free gif editor software is offered by so many providers. But if you’re only starting your journey with apps to make GIFs, it can be a difficult choice.
In this article
01 [How to Make GIF Interesting?](#Part 1)
02 [Top 5 Editors for Windows](#Part 2)
03 [Top 5 Editors for iPhone/Android](#Part 3)
04 [Top 5 Editors for Animated GIF Editing](#Part 4)
Part 1 How to Make GIF Interesting?
There are several ways by which a GIF can be made interesting. You can use colorful graphics and drop duplicate frames. Using fewer colors lets you make longer and more involved gifs.
Part 2 Top 5 Editors for Windows
Below are the top 5 editors which will help you to form GIFs for Windows: -
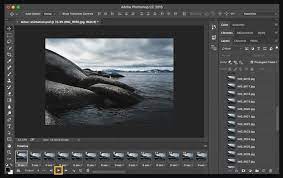
01Adobe Photoshop
Adobe Photoshop could be a useful device for making videos, image redaction, and GIF editing. This GIF code for Windows can allow you to import a GIF file so begin with the modification process.
Therefore, GIF editing is a breeze as you’ll alter the effects, modification the frame animation within the Timeline section, and do plenty a lot with this tool. You’ll simply utilize the free trial version to urge accustomed to the tool initial and then opt for the premium version to try to a lot more.
02EaseUS Video Editor
In the context of GIF makers, EaseUS Video Editor can also be said as one of the best. Free templates of texts, filters, elements, overlays, transitions, and music are available here which its users create GIF images with easily. You can also create lively and fully animated images, convert MP4 to GIFs and share it on YouTube, or other social media platforms.
The capabilities of this animated GIF maker for Windows are not restrained to this alone, as it can be used to edit all kinds of images, audio, and videos.
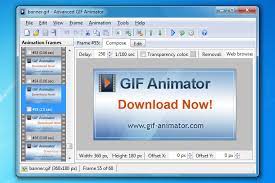
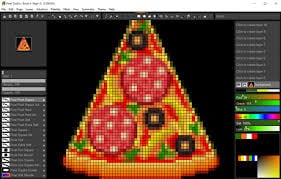
03GIF Animator
GIF animator editor is one of the first-rate GIF makers and is an awesome device for you if you desire to create GIF images, banners, buttons, and GIF videos. The device is very convenient to use and is a favorite of animators and designers.
The measurement of the photo can be modified and alongside that, it is feasible to control the frames, hastily cross texts, and enhance. Corrections to the movies can be brought and the built-in photograph editor can be used to rectify photographs and pictures, you can draw on them and you can convert movies to GIFs by the usage of the fragmented section of the video files.
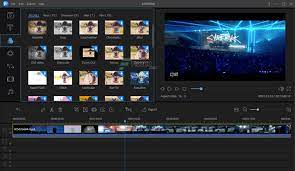
04**Wondershare Filmora Video Editor **
If you are searching for nice animated GIF makers for Windows computers, then Wondershare Filmora’s animated movies and GIF editor device may want to be a brilliant choice. That’s due to the fact with this GIF maker Windows device lets you add a video, convert it to the GIF structure and then edit it later with its super features.
The interactive UI helps customers manner greater than one hundred fifty file codecs easily. With this device, you can crop, pace up a video, alter the body size, and caption it. Additionally, you add texts, add animation consequences to the images, and alter the pictures and movies in a few steps.

Wondershare Filmora - Best Video Editor for Mac/Windows
5,481,435 people have downloaded it.
Build unique custom animations without breaking a sweat.
Focus on creating epic stories and leave the details to Filmora’s auto features.
Start a creative adventure with drag & drop effects and endless possibilities.
Filmora simplifies advanced features to save you time and effort.
Filmora cuts out repetition so you can move on to your next creative breakthrough.
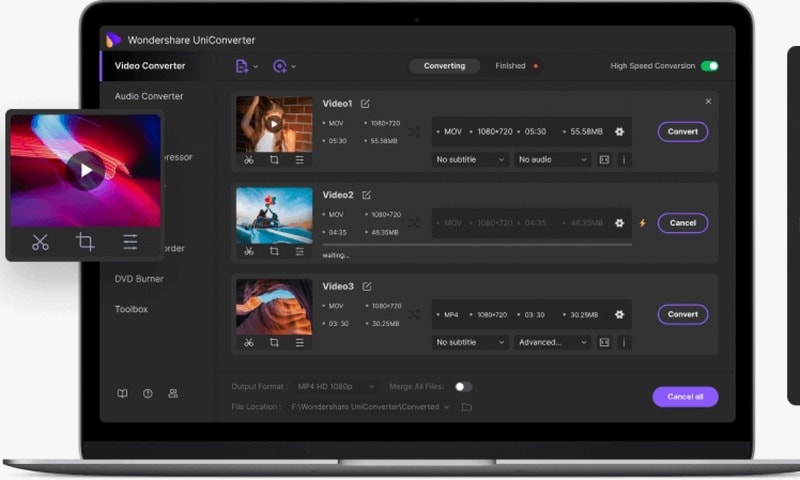
05Wondershare UniConverter
Wondershare UniConverter is one of the fine image, audio, and video editor and converter out there, and ranked the excellent GIF maker here. This GIF editor app is easy for customers and will furnish a pleasant platform for novices to operate their tasks. And when performed to create and edit GIF files, a person can export the GIF archives to both Android or iPhone barring having to use iTunes.
Part 3 Top 5 Editors for iPhone/Android
01PixelStudio
Pixel Studio is an animation app for pixel artwork fans. You can draw your little creations with pixel art. It additionally comes with a textual content tool, aid for matters like Samsung S-Pen, and it auto-saves so you don’t lose work. You can export your creations to GIF as nicely and that makes Pixel Studio one of the quality apps for customized GIFs. It’s normally an artwork app so meme lords may additionally want to put in a little greater effort than usual, however, the consequences are normally well worth it.
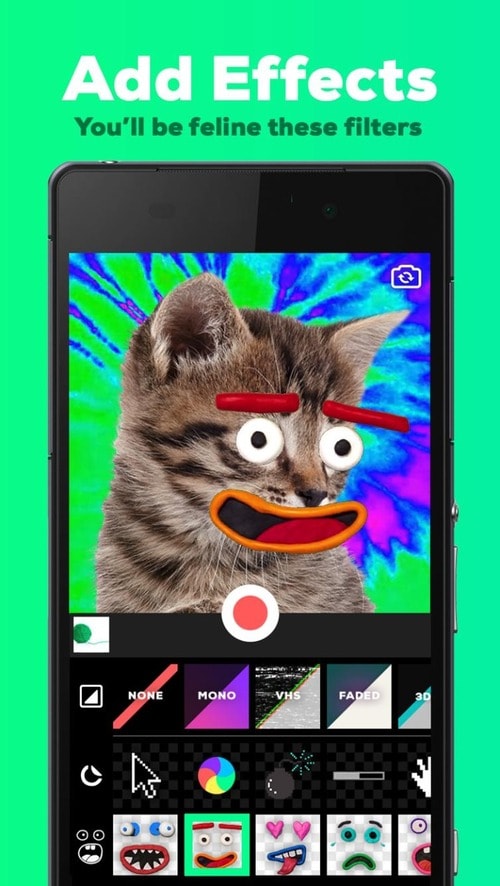
02Giphy Cam
Giphy Cam is one of the more recent gif editing apps. The digicam data is a brief phase of video. You can alter that video with lots of filters, different effects, stickers, text, and more. It additionally has a five-shot burst mode alongside its video mode. This is likely the excellent GIF/camera app hybrid. It doesn’t have any digital camera features; however, it does GIFs higher than the others by way of a large margin. It’s free with no in-app purchases.
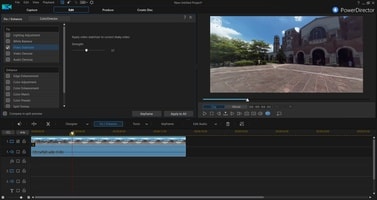
03PowerDirector
PowerDirector is one of many videos modifying apps with GIF support. This one simply takes place to be higher than most of the different ones. It’s a video editor app. Thus, it’ll have comparable features. However, two of the export codecs encompass GIF nonetheless pix and animated GIFs. This will work first-class for turning a video into a shorter GIF. The app is free to download and play with. You may additionally want to buy extra aspects by using in-app purchases.
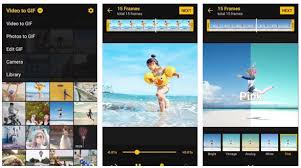
04ImgPlay – GIF Maker
ImgPlay is a popular GIF editing app that is available for Android and iOS. You have the option of using an existing video or shooting one using your phone’s camera. In GIFs, you can apply 30 effects, crop a portion of your choice, and modify the frame rate.
05Motion Stills
Motion Stills is a Google app that allows you to record short films and turn them into looping GIFs. You can use the app to take a short 3s clip with a single tap or utilize the Fast Forward feature to condense an existing video into a short one. To make yips GIFs even better, you may add motion text and emoticons. After that, save it as a GIF and send it to your friends.
Part 4 Top 5 Editors for Animated GIF Editing
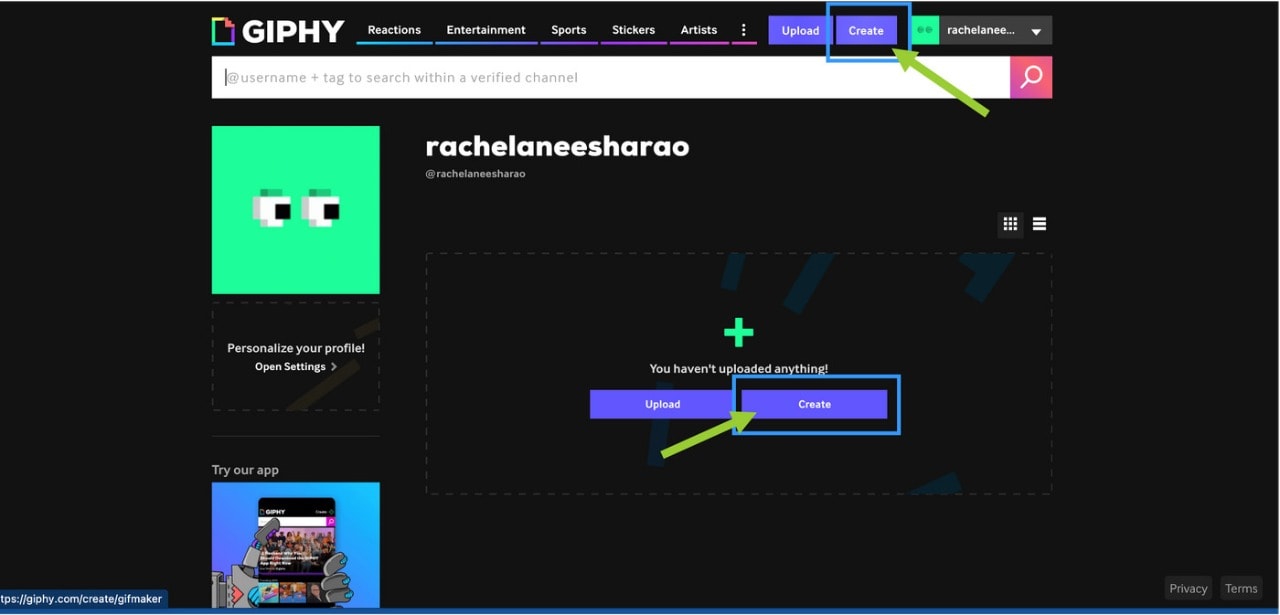
01Giphy
GIPHY is a designing tool that helps customers to create extraordinary GIFs, stickers, and backdrops. You can edit your plan with filters, captions, stickers, and different plan elements. The popular codecs for GIF uploads are JPG, PNG, GIF, MP4, or MOV, whilst the conventional file codecs to convert to stickers are JPG or PNG.
GIPHY permits you to paste URLs from specific sources such as Vimeo, YouTube, GIPHY, and others. The animated GIF maker software program makes it convenient for customers to edit and organize the uploaded archives in the favored order.
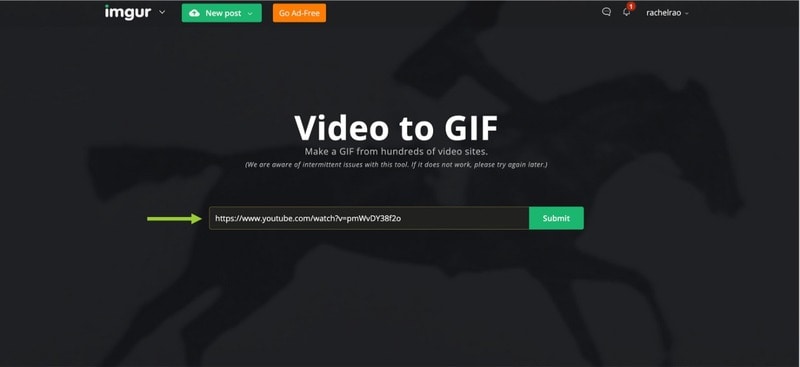
02Imgur
It’s a website that makes it simple to make GIFs. Simply paste the video URL into the web app and wait for it to process. After that, all you must do now is set the start time and duration of your GIF.
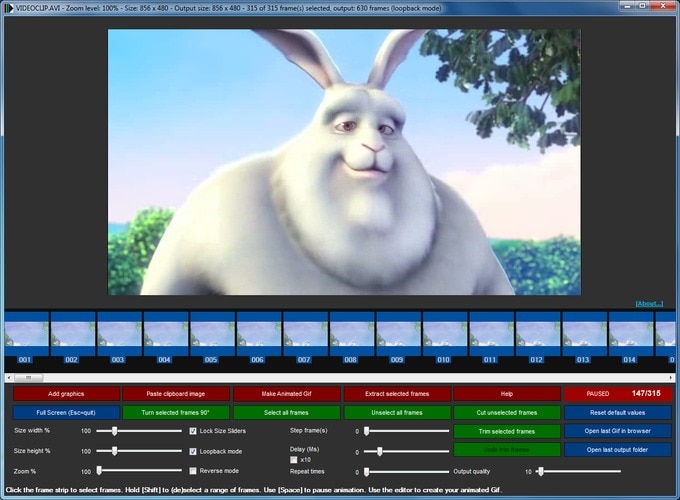
03KickMyGraphics
The utility comes with a humble person interface and it approves you to create animated GIFs from neighborhood images. In addition, you can additionally paste snapshots from your clipboard at once to the application. The utility additionally helps video files; however, you want to convert the video earlier than you can edit it. The utility affords a stay preview so you can see how your animation appears at any time. You can additionally see all handy frames and dispose of useless frames with ease.
As for editing, you can’t add your textual content or alter the brightness of your frames, however, you can trade their width, peak, and zoom level. You can additionally allow Loopback or Reverse mode and set delay, step frames, and a variety of repeats. You can additionally configure output first-class right from the application.
04Instagiffer
Instagiffer is some other easy software that lets you create animated GIFs on your PC. This utility affords a humble consumer interface; however, it makes up for it with an extensive variety of features. The software approves you to convert nearby movies to GIFs, however, you can additionally paste a YouTube URL and convert an online video to GIF with ease. According to the developer, the software additionally works with different video web hosting websites.
05GIMP
The software is free, so you can download and use it except for any restrictions. GIMP is best for picture designers and it comes with all preferences that an image editor needs. You can without problems edit your images, exchange their color, hue, saturation, or brightness, and add exceptional outcomes to them.
In addition, you can create special creations thanks to the built-in layer system. It’s worth citing that the software additionally helps programming algorithms so you can effortlessly edit your photos with the use of scripts.

● Key Takeaways from This Episode →
● If you are typically worried about how you can be able to come up with fascinating GIFs, you ought to hold in thought that you don’t have to create them from scratch.
● You can be capable to advance inspiring GIFs from current movies and photos eight after GIF editor software program free download.
● Hopefully, you are now capable to pick out a perfect GIF creator to use for your modifying tasks.
Several websites and companies use the graphics interchange format that is the GIF. It can be seen to be used by a wide number of people on the internet and its format is supported by all platforms. The common goal of all the users can be satisfied.
Are you looking to create and edit gifs online or on your laptop but cannot find a suitable way out?
Finding the best and most user friendly GIF maker is not very hard, especially considering that free gif editor software is offered by so many providers. But if you’re only starting your journey with apps to make GIFs, it can be a difficult choice.
In this article
01 [How to Make GIF Interesting?](#Part 1)
02 [Top 5 Editors for Windows](#Part 2)
03 [Top 5 Editors for iPhone/Android](#Part 3)
04 [Top 5 Editors for Animated GIF Editing](#Part 4)
Part 1 How to Make GIF Interesting?
There are several ways by which a GIF can be made interesting. You can use colorful graphics and drop duplicate frames. Using fewer colors lets you make longer and more involved gifs.
Part 2 Top 5 Editors for Windows
Below are the top 5 editors which will help you to form GIFs for Windows: -
01Adobe Photoshop
Adobe Photoshop could be a useful device for making videos, image redaction, and GIF editing. This GIF code for Windows can allow you to import a GIF file so begin with the modification process.
Therefore, GIF editing is a breeze as you’ll alter the effects, modification the frame animation within the Timeline section, and do plenty a lot with this tool. You’ll simply utilize the free trial version to urge accustomed to the tool initial and then opt for the premium version to try to a lot more.
02EaseUS Video Editor
In the context of GIF makers, EaseUS Video Editor can also be said as one of the best. Free templates of texts, filters, elements, overlays, transitions, and music are available here which its users create GIF images with easily. You can also create lively and fully animated images, convert MP4 to GIFs and share it on YouTube, or other social media platforms.
The capabilities of this animated GIF maker for Windows are not restrained to this alone, as it can be used to edit all kinds of images, audio, and videos.
03GIF Animator
GIF animator editor is one of the first-rate GIF makers and is an awesome device for you if you desire to create GIF images, banners, buttons, and GIF videos. The device is very convenient to use and is a favorite of animators and designers.
The measurement of the photo can be modified and alongside that, it is feasible to control the frames, hastily cross texts, and enhance. Corrections to the movies can be brought and the built-in photograph editor can be used to rectify photographs and pictures, you can draw on them and you can convert movies to GIFs by the usage of the fragmented section of the video files.
04**Wondershare Filmora Video Editor **
If you are searching for nice animated GIF makers for Windows computers, then Wondershare Filmora’s animated movies and GIF editor device may want to be a brilliant choice. That’s due to the fact with this GIF maker Windows device lets you add a video, convert it to the GIF structure and then edit it later with its super features.
The interactive UI helps customers manner greater than one hundred fifty file codecs easily. With this device, you can crop, pace up a video, alter the body size, and caption it. Additionally, you add texts, add animation consequences to the images, and alter the pictures and movies in a few steps.
Wondershare Filmora - Best Video Editor for Mac/Windows
5,481,435 people have downloaded it.
Build unique custom animations without breaking a sweat.
Focus on creating epic stories and leave the details to Filmora’s auto features.
Start a creative adventure with drag & drop effects and endless possibilities.
Filmora simplifies advanced features to save you time and effort.
Filmora cuts out repetition so you can move on to your next creative breakthrough.
05Wondershare UniConverter
Wondershare UniConverter is one of the fine image, audio, and video editor and converter out there, and ranked the excellent GIF maker here. This GIF editor app is easy for customers and will furnish a pleasant platform for novices to operate their tasks. And when performed to create and edit GIF files, a person can export the GIF archives to both Android or iPhone barring having to use iTunes.
Part 3 Top 5 Editors for iPhone/Android
01PixelStudio
Pixel Studio is an animation app for pixel artwork fans. You can draw your little creations with pixel art. It additionally comes with a textual content tool, aid for matters like Samsung S-Pen, and it auto-saves so you don’t lose work. You can export your creations to GIF as nicely and that makes Pixel Studio one of the quality apps for customized GIFs. It’s normally an artwork app so meme lords may additionally want to put in a little greater effort than usual, however, the consequences are normally well worth it.
02Giphy Cam
Giphy Cam is one of the more recent gif editing apps. The digicam data is a brief phase of video. You can alter that video with lots of filters, different effects, stickers, text, and more. It additionally has a five-shot burst mode alongside its video mode. This is likely the excellent GIF/camera app hybrid. It doesn’t have any digital camera features; however, it does GIFs higher than the others by way of a large margin. It’s free with no in-app purchases.
03PowerDirector
PowerDirector is one of many videos modifying apps with GIF support. This one simply takes place to be higher than most of the different ones. It’s a video editor app. Thus, it’ll have comparable features. However, two of the export codecs encompass GIF nonetheless pix and animated GIFs. This will work first-class for turning a video into a shorter GIF. The app is free to download and play with. You may additionally want to buy extra aspects by using in-app purchases.
04ImgPlay – GIF Maker
ImgPlay is a popular GIF editing app that is available for Android and iOS. You have the option of using an existing video or shooting one using your phone’s camera. In GIFs, you can apply 30 effects, crop a portion of your choice, and modify the frame rate.
05Motion Stills
Motion Stills is a Google app that allows you to record short films and turn them into looping GIFs. You can use the app to take a short 3s clip with a single tap or utilize the Fast Forward feature to condense an existing video into a short one. To make yips GIFs even better, you may add motion text and emoticons. After that, save it as a GIF and send it to your friends.
Part 4 Top 5 Editors for Animated GIF Editing
01Giphy
GIPHY is a designing tool that helps customers to create extraordinary GIFs, stickers, and backdrops. You can edit your plan with filters, captions, stickers, and different plan elements. The popular codecs for GIF uploads are JPG, PNG, GIF, MP4, or MOV, whilst the conventional file codecs to convert to stickers are JPG or PNG.
GIPHY permits you to paste URLs from specific sources such as Vimeo, YouTube, GIPHY, and others. The animated GIF maker software program makes it convenient for customers to edit and organize the uploaded archives in the favored order.
02Imgur
It’s a website that makes it simple to make GIFs. Simply paste the video URL into the web app and wait for it to process. After that, all you must do now is set the start time and duration of your GIF.
03KickMyGraphics
The utility comes with a humble person interface and it approves you to create animated GIFs from neighborhood images. In addition, you can additionally paste snapshots from your clipboard at once to the application. The utility additionally helps video files; however, you want to convert the video earlier than you can edit it. The utility affords a stay preview so you can see how your animation appears at any time. You can additionally see all handy frames and dispose of useless frames with ease.
As for editing, you can’t add your textual content or alter the brightness of your frames, however, you can trade their width, peak, and zoom level. You can additionally allow Loopback or Reverse mode and set delay, step frames, and a variety of repeats. You can additionally configure output first-class right from the application.
04Instagiffer
Instagiffer is some other easy software that lets you create animated GIFs on your PC. This utility affords a humble consumer interface; however, it makes up for it with an extensive variety of features. The software approves you to convert nearby movies to GIFs, however, you can additionally paste a YouTube URL and convert an online video to GIF with ease. According to the developer, the software additionally works with different video web hosting websites.
05GIMP
The software is free, so you can download and use it except for any restrictions. GIMP is best for picture designers and it comes with all preferences that an image editor needs. You can without problems edit your images, exchange their color, hue, saturation, or brightness, and add exceptional outcomes to them.
In addition, you can create special creations thanks to the built-in layer system. It’s worth citing that the software additionally helps programming algorithms so you can effortlessly edit your photos with the use of scripts.
● Key Takeaways from This Episode →
● If you are typically worried about how you can be able to come up with fascinating GIFs, you ought to hold in thought that you don’t have to create them from scratch.
● You can be capable to advance inspiring GIFs from current movies and photos eight after GIF editor software program free download.
● Hopefully, you are now capable to pick out a perfect GIF creator to use for your modifying tasks.
Several websites and companies use the graphics interchange format that is the GIF. It can be seen to be used by a wide number of people on the internet and its format is supported by all platforms. The common goal of all the users can be satisfied.
Are you looking to create and edit gifs online or on your laptop but cannot find a suitable way out?
Finding the best and most user friendly GIF maker is not very hard, especially considering that free gif editor software is offered by so many providers. But if you’re only starting your journey with apps to make GIFs, it can be a difficult choice.
In this article
01 [How to Make GIF Interesting?](#Part 1)
02 [Top 5 Editors for Windows](#Part 2)
03 [Top 5 Editors for iPhone/Android](#Part 3)
04 [Top 5 Editors for Animated GIF Editing](#Part 4)
Part 1 How to Make GIF Interesting?
There are several ways by which a GIF can be made interesting. You can use colorful graphics and drop duplicate frames. Using fewer colors lets you make longer and more involved gifs.
Part 2 Top 5 Editors for Windows
Below are the top 5 editors which will help you to form GIFs for Windows: -
01Adobe Photoshop
Adobe Photoshop could be a useful device for making videos, image redaction, and GIF editing. This GIF code for Windows can allow you to import a GIF file so begin with the modification process.
Therefore, GIF editing is a breeze as you’ll alter the effects, modification the frame animation within the Timeline section, and do plenty a lot with this tool. You’ll simply utilize the free trial version to urge accustomed to the tool initial and then opt for the premium version to try to a lot more.
02EaseUS Video Editor
In the context of GIF makers, EaseUS Video Editor can also be said as one of the best. Free templates of texts, filters, elements, overlays, transitions, and music are available here which its users create GIF images with easily. You can also create lively and fully animated images, convert MP4 to GIFs and share it on YouTube, or other social media platforms.
The capabilities of this animated GIF maker for Windows are not restrained to this alone, as it can be used to edit all kinds of images, audio, and videos.
03GIF Animator
GIF animator editor is one of the first-rate GIF makers and is an awesome device for you if you desire to create GIF images, banners, buttons, and GIF videos. The device is very convenient to use and is a favorite of animators and designers.
The measurement of the photo can be modified and alongside that, it is feasible to control the frames, hastily cross texts, and enhance. Corrections to the movies can be brought and the built-in photograph editor can be used to rectify photographs and pictures, you can draw on them and you can convert movies to GIFs by the usage of the fragmented section of the video files.
04**Wondershare Filmora Video Editor **
If you are searching for nice animated GIF makers for Windows computers, then Wondershare Filmora’s animated movies and GIF editor device may want to be a brilliant choice. That’s due to the fact with this GIF maker Windows device lets you add a video, convert it to the GIF structure and then edit it later with its super features.
The interactive UI helps customers manner greater than one hundred fifty file codecs easily. With this device, you can crop, pace up a video, alter the body size, and caption it. Additionally, you add texts, add animation consequences to the images, and alter the pictures and movies in a few steps.
Wondershare Filmora - Best Video Editor for Mac/Windows
5,481,435 people have downloaded it.
Build unique custom animations without breaking a sweat.
Focus on creating epic stories and leave the details to Filmora’s auto features.
Start a creative adventure with drag & drop effects and endless possibilities.
Filmora simplifies advanced features to save you time and effort.
Filmora cuts out repetition so you can move on to your next creative breakthrough.
05Wondershare UniConverter
Wondershare UniConverter is one of the fine image, audio, and video editor and converter out there, and ranked the excellent GIF maker here. This GIF editor app is easy for customers and will furnish a pleasant platform for novices to operate their tasks. And when performed to create and edit GIF files, a person can export the GIF archives to both Android or iPhone barring having to use iTunes.
Part 3 Top 5 Editors for iPhone/Android
01PixelStudio
Pixel Studio is an animation app for pixel artwork fans. You can draw your little creations with pixel art. It additionally comes with a textual content tool, aid for matters like Samsung S-Pen, and it auto-saves so you don’t lose work. You can export your creations to GIF as nicely and that makes Pixel Studio one of the quality apps for customized GIFs. It’s normally an artwork app so meme lords may additionally want to put in a little greater effort than usual, however, the consequences are normally well worth it.
02Giphy Cam
Giphy Cam is one of the more recent gif editing apps. The digicam data is a brief phase of video. You can alter that video with lots of filters, different effects, stickers, text, and more. It additionally has a five-shot burst mode alongside its video mode. This is likely the excellent GIF/camera app hybrid. It doesn’t have any digital camera features; however, it does GIFs higher than the others by way of a large margin. It’s free with no in-app purchases.
03PowerDirector
PowerDirector is one of many videos modifying apps with GIF support. This one simply takes place to be higher than most of the different ones. It’s a video editor app. Thus, it’ll have comparable features. However, two of the export codecs encompass GIF nonetheless pix and animated GIFs. This will work first-class for turning a video into a shorter GIF. The app is free to download and play with. You may additionally want to buy extra aspects by using in-app purchases.
04ImgPlay – GIF Maker
ImgPlay is a popular GIF editing app that is available for Android and iOS. You have the option of using an existing video or shooting one using your phone’s camera. In GIFs, you can apply 30 effects, crop a portion of your choice, and modify the frame rate.
05Motion Stills
Motion Stills is a Google app that allows you to record short films and turn them into looping GIFs. You can use the app to take a short 3s clip with a single tap or utilize the Fast Forward feature to condense an existing video into a short one. To make yips GIFs even better, you may add motion text and emoticons. After that, save it as a GIF and send it to your friends.
Part 4 Top 5 Editors for Animated GIF Editing
01Giphy
GIPHY is a designing tool that helps customers to create extraordinary GIFs, stickers, and backdrops. You can edit your plan with filters, captions, stickers, and different plan elements. The popular codecs for GIF uploads are JPG, PNG, GIF, MP4, or MOV, whilst the conventional file codecs to convert to stickers are JPG or PNG.
GIPHY permits you to paste URLs from specific sources such as Vimeo, YouTube, GIPHY, and others. The animated GIF maker software program makes it convenient for customers to edit and organize the uploaded archives in the favored order.
02Imgur
It’s a website that makes it simple to make GIFs. Simply paste the video URL into the web app and wait for it to process. After that, all you must do now is set the start time and duration of your GIF.
03KickMyGraphics
The utility comes with a humble person interface and it approves you to create animated GIFs from neighborhood images. In addition, you can additionally paste snapshots from your clipboard at once to the application. The utility additionally helps video files; however, you want to convert the video earlier than you can edit it. The utility affords a stay preview so you can see how your animation appears at any time. You can additionally see all handy frames and dispose of useless frames with ease.
As for editing, you can’t add your textual content or alter the brightness of your frames, however, you can trade their width, peak, and zoom level. You can additionally allow Loopback or Reverse mode and set delay, step frames, and a variety of repeats. You can additionally configure output first-class right from the application.
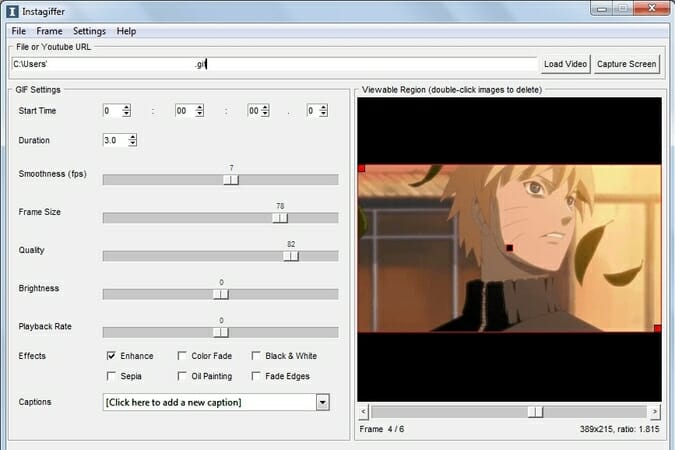
04Instagiffer
Instagiffer is some other easy software that lets you create animated GIFs on your PC. This utility affords a humble consumer interface; however, it makes up for it with an extensive variety of features. The software approves you to convert nearby movies to GIFs, however, you can additionally paste a YouTube URL and convert an online video to GIF with ease. According to the developer, the software additionally works with different video web hosting websites.
05GIMP
The software is free, so you can download and use it except for any restrictions. GIMP is best for picture designers and it comes with all preferences that an image editor needs. You can without problems edit your images, exchange their color, hue, saturation, or brightness, and add exceptional outcomes to them.
In addition, you can create special creations thanks to the built-in layer system. It’s worth citing that the software additionally helps programming algorithms so you can effortlessly edit your photos with the use of scripts.
● Key Takeaways from This Episode →
● If you are typically worried about how you can be able to come up with fascinating GIFs, you ought to hold in thought that you don’t have to create them from scratch.
● You can be capable to advance inspiring GIFs from current movies and photos eight after GIF editor software program free download.
● Hopefully, you are now capable to pick out a perfect GIF creator to use for your modifying tasks.
Turn Your Text Into a Podcast Made Possible (+ EASY Editing Tips)
Being a content creator, either writing or generating videos, requires podcast text-to-speech knowledge. The impact of content depends on how many people see it. It means finding new ways to get it into real and virtual places where customers and users might be.
Depending on the context, podcasting can be a perfect alternative for sharing content.
This article will address your questions about the easiest way to turn a blog into a podcast. Let’s begin with the reasons why you should do a podcast.
Part 1. Why You Should Podcast
Podcasts are one of the simplest and most cost-effective ways. It helps to advertise yourself and your products to a highly targeted audience. Podcasts are also excellent for engaging with potential clients interested in your content. In your field, you can achieve fame and expertise.

Repurposing of Content
Podcasters can maximize their potential for successful episodes and repurposing their podcast into multiple content pieces.
This podcasting strategy can help you reach more people by putting your podcasts on more channels and engaging more people who might be interested.
More Fulfilling than Articles
Unlike music, news, TV, and social media, podcast listeners don’t have to watch the screen like they do with YouTube videos or TV shows. This means they can listen while walking or driving home from work.
Podcasts are the best way to get people to pay attention and make fundamental societal changes. They can keep people interested for a long time, so you can go into detail and get personal without turning off your audience.
Minimal Start-Up Costs
To start a podcast, you can spend a little money. Even some of the most famous podcasts use a microphone, a computer, and software for recording. But it’s common to spend more money on advertising and better hosting.
Starting a podcast doesn’t cost much, as you can get everything you need for about $145.
Expansion of Search Potential
In the past few years, many big brands and small to medium-sized businesses have started using podcasts as a marketing strategy. This is because podcasts are becoming more and more popular and can help raise your company’s profile.
Podcasting is another way to disseminate your study to a broader audience, whether that audience consists of policymakers or interested citizens.
Potential to Monetize
Using an affiliate program podcast, you can earn money. Businesses can increase their income by offering paid advertising sponsorships to monetize podcasts. Suppose you accept an affiliate offer to sell ads. In that case, you become the company’s voice and put recorded ads in your podcast episodes.
The most common way to make money from a podcast is through sponsorship. It’s also the easiest way to make money because you don’t have to make or sell anything. You just have to make a deal with a sponsor.
Part 2. Why Are Writers Hesitant to Start a Podcast?
Even after knowing all these benefits, writers are still hesitant to start a podcast. One of the main reasons a writer may be reluctant to launch a podcast is the cost of the necessary equipment. You will need at least $80 to $500 for this unpromissing business.
However, let me tell you a secret that many podcastors didn’t buy any audio equipment for the launch of their podcast channel on Spotify.
Moreover, many writers don’t want to show their voice through recordings. This is because they couldn’t just make a recording and hand it off to a sound specialist. Besides, finding their voice through the stories they write is the routine.
But we all need to get the truth that many podcastors don’t record a single word of the podcast with their own voice. Due to a solution: text-to-speech, technology like this has been around for a while and continues to improve.
The two important issues have been solved, so what are you waiting for? Platform building has always relied heavily on content marketing. With blog posts and social media, additional support was provided, and now podcasts are becoming more commonplace.
Part 3. How to Turn a Text Into a Podcast?
Text To Speech
To turn your text into audible content, Text-to-speech (TTS) is an assistive technology. With a single click, TTS reads your written text aloud. Many people also use it for writing and editing to maintain audience concentration.
Text-to-speech technology is compatible with all digital devices, including computers, tablets, and smartphones. Increasing numbers of websites and products now have developed this function. For example, you can find it within the trusted video editing software like Filmora. With Filmora’s Text to Speech (TTS) feature , you may add extra aspects to your video by turning your text files into voiceovers.
Why we regard text to speech as a good
For writers, imagination is the only tool to construct their stories. To bring our stories to life, all we need is a laptop. The same holds for text-to-speech technologies, which can significantly assist writing and editing by allowing the author to hear their words without using their voice.
- Text-to-speech applications can assist you in repurposing your material.
Your written work can be converted into spoken language or a podcast. A podcast can be converted into a YouTube video with a few alterations. All of these factors can help you reach new audiences.
Repurposing material permits your audience to consume it in a variety of ways. The audience can read, listen to, or view your content.
- Text-to-speech systems enable authors to create information that is accessible.
As per World Health Organization, there are almost 285 million visually impaired persons and 39 million blind people. We writers can create a more inclusive world by constantly keeping accessibility in mind.
The limitations of text to speech
Text-to-speech software is becoming increasingly lifelike thanks to technological advancements. However, it cannot still express genuine human emotions. However, this should allow you to utilize these tools. The positives significantly exceed the disadvantages, and technology is continually improving.
Easiest Fix: Turn Texts Into Podcasts With TTS in Filmora
So how can you use text-to-speech? Andhow you can turn your texts into audio podcasts in a daily routine? Filmora , a all-in-one video editor, gets you the solution.
Free Download For Win 7 or later(64-bit)
Free Download For macOS 10.14 or later
Step1 Download and install Filmora on your PC or Mac.

Step2 Open Filmora and select the video on which you wish to add audio.

Step3 After adding your selected video, select the option “Titles” to add text to your video.

Step4 Select your favorite position for text in the video, like “lower third,” which is used the most in video titles.

Step5 Add text to the timeline and click “Ok.” You can move the red timeline marker if you want your text in a certain spot.

Click the “+” button marked in the picture below to add text.

You can also edit the text by changing its style, color, and font or by animating it.

Step6 Press the “Text-to-Speech” button in the lower right side and choose your preferred voice. For example, Lilly’s voice resembles Siri.

You can also choose another language other than English.

Click “Ok” once you’ve selected everything according to your requirements.
Step7 Once the transcription is completed, go ahead and test the video and audio to see if it’s synching.

And that’s done. This is how easy it is to turn your texts into speech using Filmora.
Part 4. Hot FAQs on Podcast Text to Speech
How do I convert podcasts to text?
With the help of the smartphone app Google Recorder you can easily convert podcasts to texts for free.
- Open the app on your phone, start recording to it, and start recording your podcast simultaneously.
- The words will be automatically recorded and entered into the application as you talk into your phone’s microphone.
- After you click stop on the app, you can store and share the files once you finish your recording.
You have an option of sharing the text, the audio, or both. Alternatively, you can save them to your Google Drive if you don’t want to share them.
How to turn my podcast into a sound?
To convert your video podcasts into audio through Filmora. Follow these steps:
- Drag the imported video from the media library into the video timeline.
- To extract the audio from the video, right-click the video clip and select “Audio Detach.”
- After a while, audio and video will be seen on separate tracks.
Can I save the sound after converting text to speech?
Once the text has been converted to speech, you can save the sound. Select your preferred format after clicking the “export” option in Filmora.
Conclusion
Many of us wish to launch a podcast and blog. A productive podcast’s essence is turning writing into audio using various podcasting techniques. AI-powered text-to-speech softwares can quickly convert articles into podcasts. Or, you can invite significant people to your podcast to personalize it. Podcasting can give outdated content a new life.
Free Download For macOS 10.14 or later
Step1 Download and install Filmora on your PC or Mac.
Step2 Open Filmora and select the video on which you wish to add audio.
Step3 After adding your selected video, select the option “Titles” to add text to your video.
Step4 Select your favorite position for text in the video, like “lower third,” which is used the most in video titles.
Step5 Add text to the timeline and click “Ok.” You can move the red timeline marker if you want your text in a certain spot.
Click the “+” button marked in the picture below to add text.
You can also edit the text by changing its style, color, and font or by animating it.
Step6 Press the “Text-to-Speech” button in the lower right side and choose your preferred voice. For example, Lilly’s voice resembles Siri.
You can also choose another language other than English.
Click “Ok” once you’ve selected everything according to your requirements.
Step7 Once the transcription is completed, go ahead and test the video and audio to see if it’s synching.
And that’s done. This is how easy it is to turn your texts into speech using Filmora.
Part 4. Hot FAQs on Podcast Text to Speech
How do I convert podcasts to text?
With the help of the smartphone app Google Recorder you can easily convert podcasts to texts for free.
- Open the app on your phone, start recording to it, and start recording your podcast simultaneously.
- The words will be automatically recorded and entered into the application as you talk into your phone’s microphone.
- After you click stop on the app, you can store and share the files once you finish your recording.
You have an option of sharing the text, the audio, or both. Alternatively, you can save them to your Google Drive if you don’t want to share them.
How to turn my podcast into a sound?
To convert your video podcasts into audio through Filmora. Follow these steps:
- Drag the imported video from the media library into the video timeline.
- To extract the audio from the video, right-click the video clip and select “Audio Detach.”
- After a while, audio and video will be seen on separate tracks.
Can I save the sound after converting text to speech?
Once the text has been converted to speech, you can save the sound. Select your preferred format after clicking the “export” option in Filmora.
Conclusion
Many of us wish to launch a podcast and blog. A productive podcast’s essence is turning writing into audio using various podcasting techniques. AI-powered text-to-speech softwares can quickly convert articles into podcasts. Or, you can invite significant people to your podcast to personalize it. Podcasting can give outdated content a new life.
Let Us Talk About the Famous Photoshop and Most Commonly Used Glitch Effect. The Article Understudy Will Discuss in Detail About Photo Glitch Effect
Many of us are fascinated by glitch art. The aesthetic effect it adds to your content is unmatched. You can add color and class to your pictures with glitch picture effects. Someone who isn’t aware of the glitch effect is inspired by any technical mishap or digital error. The damage that the malfunctioning of a system causes is used as an art and an effect to beautify things.
You can add the glitch image effect to your photos easily. There are multiple cool templates available on the internet that could be used. You can also make your own stunning yet customized glitch effect Photoshop. If this has impressed you, then stay here because we will talk a lot about glitch photo editors.
In this article
01 Part 1. How Do You Do Photo Glitch Effect in Photoshop?
02 Part 2. 5 Awesome Glitch Effect Photoshop Actions.
Part 1. How Do You Do Photo Glitch Effect in Photoshop?
The jagged lines, the colorful pixels, frozen visuals, and also the distorted colors, everything perfectly blends to make a glitch effect. Usually, this is how all the glitch templates are, but if you get an opportunity to customize your image glitch effect and make your special effect, what will you do?
The best option to adopt in any such circumstances is Photoshop. With Photoshop, you can create a stunning and mind-blowing Photoshop VHS effect. If you want to learn about its steps, then continue reading.
Step 1: The process starts by importing the image to Photoshop on which you plan to add the photo glitch effect. Then you should always convert the image from colorful to black and white. This could be done quickly by going into the ‘Image’ menu from the menu bar. Next, go for the ‘Adjustments’ option and select ‘Desaturate.’

Step 2: Now duplicate the image by dragging it onto the New Layer icon in the Layers Panel. Then double click on the duplicated image. This will open a ‘Layer Style’ settings menu. Here, click on the icon for ‘R Channel’ and deselect it.

Step 3: Now, it’s time to add the first glitch element. For that, hold the ‘Shift’ key and move the image by using the left/right cursor keys on the keyboard. This will offset the image layer from the original.

Step 4: You can now select the ‘Mark’ tool from the left side. Make a rectangle anywhere on the image with the Mark tool and then switch back to the ‘Move’ tool. Then again, nudge the rectangular portion left or right to offset it. You can repeat this process multiple times on different areas of the image.

Step 5: At this point, make a New Layer and fill it with White. Now right-click on this white layer and select the option of ‘Convert to Smart Object.’

Step 6: Move to the menu bar at the top and go to the ‘Filter’ section. From there, select the option of ‘Filter Gallery.’ A new window will show up. Head to the ‘Sketch’ category, and there change the ‘Pattern Type’ to ‘Line.’ You can also play with the ‘Contrast’ and the ‘Size’ of the lines.

Step 7: Now, in the ‘Layers Panel,’ select the option of ‘Overlay’ from the dropdown menu so that the different layers can show through. You can adjust the visibility of the lines by adjusting the number on the scale.

Step 8: After setting everything for the glitch effect in your image, you can now add colors using the ‘Gradient Map.’ Or you can also import some graphic textures to Photoshop and add them to the image. Don’t forget to change the ‘Binding Mode’ to ‘Overlay.’ You can then play with the color and graphic settings.

Step 9: Once all the color adjustments have satisfied you, it’s time to add some text to your glitch image. For that, head to the ‘Text’ tool from the left menu and type in your text. Edit it as you did to your image so that you can make a cool glitch text effect Photoshop and with this, you are all done with making the most stunning glitch effect Photoshop.

Part 2. 5 Awesome Glitch Effect Photoshop Actions
With Photoshop, you can create your photo glitch effect as you prefer instead of using the available standard templates. What if you don’t have enough time to create the effect? Are you going to use the basic and standard templates?
If you are looking for some jaw-dropping glitch picture effects rather than using the basic effects, then this section of the article is perfect for you. We are going to talk about 5 fantastic glitch effects Photoshop action.
1. Distorted Glitch Photoshop Action
The first effect we will discuss is Distorted Glitch Photoshop Action. The effect is very easy to use. You can set it with just one click action. The effect allows you to do adjustment settings with very easy steps to edit it.
The effect has all the dark, distorted, and disturbance-related elements that make it an amazing effect to add glitch effect to image.

2. Geometric Glitch Photoshop Action
If glitch effect with lines is too mainstream for you, then this next effect will surely impress you. This effect is the Geometric Glitch Photoshop Action. You can edit this effect. All its colors, layers, and even elements are fully editable.
You can create a modern yet professional glitch image with this stunning effect. The effect lets you add shapes, abstract styles, and also glitch lines to make cool images.

3. Animated Glitch Photoshop Action
If you are looking for a glitch effect to add to animated content, then nothing is better than Animated Glitch Photoshop Action. The effect template is fully editable with 12 distinct color options. The animated effect has a very organized structure of layers, color coding, etc.
By using this effect, you can add a great vibe to your image. The template greatly shows the distortion, digital error, etc. You can play around with RGB to make it look crazy brilliant.

4. Futuristic Photoshop Action
The next effect in line to be discussed is Futuristic Photoshop Action. This effect has all the bright and neon colors. The effect could be added easily to your images regardless of the type of your content. Graphic designers and photographers use the Futuristic Effect to create stunning and professional glitch images.

5. Glitch Art Photoshop Action
The last effect template that we are going to shed light on is Glitch Art Photoshop Action. The effect is fully editable with 10 different abstract elements. The template has absolutely professional results. The effect delivers complete glitchy vibes.
The distortion, the abstract elements, the digital error, and everything else in effect represents all the glitchy vibes.

Final Words
This article is everything one person needs if they want to learn about glitch effect Photoshop. We have talked about creating a jaw-dropping glitch effect in Photoshop. The steps to create a stunning glitch effect have been mentioned above.
We then shared 5 incredible glitch effects that could be used in case you don’t want to create your own effect.
02 Part 2. 5 Awesome Glitch Effect Photoshop Actions.
Part 1. How Do You Do Photo Glitch Effect in Photoshop?
The jagged lines, the colorful pixels, frozen visuals, and also the distorted colors, everything perfectly blends to make a glitch effect. Usually, this is how all the glitch templates are, but if you get an opportunity to customize your image glitch effect and make your special effect, what will you do?
The best option to adopt in any such circumstances is Photoshop. With Photoshop, you can create a stunning and mind-blowing Photoshop VHS effect. If you want to learn about its steps, then continue reading.
Step 1: The process starts by importing the image to Photoshop on which you plan to add the photo glitch effect. Then you should always convert the image from colorful to black and white. This could be done quickly by going into the ‘Image’ menu from the menu bar. Next, go for the ‘Adjustments’ option and select ‘Desaturate.’
Step 2: Now duplicate the image by dragging it onto the New Layer icon in the Layers Panel. Then double click on the duplicated image. This will open a ‘Layer Style’ settings menu. Here, click on the icon for ‘R Channel’ and deselect it.
Step 3: Now, it’s time to add the first glitch element. For that, hold the ‘Shift’ key and move the image by using the left/right cursor keys on the keyboard. This will offset the image layer from the original.
Step 4: You can now select the ‘Mark’ tool from the left side. Make a rectangle anywhere on the image with the Mark tool and then switch back to the ‘Move’ tool. Then again, nudge the rectangular portion left or right to offset it. You can repeat this process multiple times on different areas of the image.
Step 5: At this point, make a New Layer and fill it with White. Now right-click on this white layer and select the option of ‘Convert to Smart Object.’
Step 6: Move to the menu bar at the top and go to the ‘Filter’ section. From there, select the option of ‘Filter Gallery.’ A new window will show up. Head to the ‘Sketch’ category, and there change the ‘Pattern Type’ to ‘Line.’ You can also play with the ‘Contrast’ and the ‘Size’ of the lines.
Step 7: Now, in the ‘Layers Panel,’ select the option of ‘Overlay’ from the dropdown menu so that the different layers can show through. You can adjust the visibility of the lines by adjusting the number on the scale.
Step 8: After setting everything for the glitch effect in your image, you can now add colors using the ‘Gradient Map.’ Or you can also import some graphic textures to Photoshop and add them to the image. Don’t forget to change the ‘Binding Mode’ to ‘Overlay.’ You can then play with the color and graphic settings.
Step 9: Once all the color adjustments have satisfied you, it’s time to add some text to your glitch image. For that, head to the ‘Text’ tool from the left menu and type in your text. Edit it as you did to your image so that you can make a cool glitch text effect Photoshop and with this, you are all done with making the most stunning glitch effect Photoshop.
Part 2. 5 Awesome Glitch Effect Photoshop Actions
With Photoshop, you can create your photo glitch effect as you prefer instead of using the available standard templates. What if you don’t have enough time to create the effect? Are you going to use the basic and standard templates?
If you are looking for some jaw-dropping glitch picture effects rather than using the basic effects, then this section of the article is perfect for you. We are going to talk about 5 fantastic glitch effects Photoshop action.
1. Distorted Glitch Photoshop Action
The first effect we will discuss is Distorted Glitch Photoshop Action. The effect is very easy to use. You can set it with just one click action. The effect allows you to do adjustment settings with very easy steps to edit it.
The effect has all the dark, distorted, and disturbance-related elements that make it an amazing effect to add glitch effect to image.
2. Geometric Glitch Photoshop Action
If glitch effect with lines is too mainstream for you, then this next effect will surely impress you. This effect is the Geometric Glitch Photoshop Action. You can edit this effect. All its colors, layers, and even elements are fully editable.
You can create a modern yet professional glitch image with this stunning effect. The effect lets you add shapes, abstract styles, and also glitch lines to make cool images.
3. Animated Glitch Photoshop Action
If you are looking for a glitch effect to add to animated content, then nothing is better than Animated Glitch Photoshop Action. The effect template is fully editable with 12 distinct color options. The animated effect has a very organized structure of layers, color coding, etc.
By using this effect, you can add a great vibe to your image. The template greatly shows the distortion, digital error, etc. You can play around with RGB to make it look crazy brilliant.
4. Futuristic Photoshop Action
The next effect in line to be discussed is Futuristic Photoshop Action. This effect has all the bright and neon colors. The effect could be added easily to your images regardless of the type of your content. Graphic designers and photographers use the Futuristic Effect to create stunning and professional glitch images.
5. Glitch Art Photoshop Action
The last effect template that we are going to shed light on is Glitch Art Photoshop Action. The effect is fully editable with 10 different abstract elements. The template has absolutely professional results. The effect delivers complete glitchy vibes.
The distortion, the abstract elements, the digital error, and everything else in effect represents all the glitchy vibes.
Final Words
This article is everything one person needs if they want to learn about glitch effect Photoshop. We have talked about creating a jaw-dropping glitch effect in Photoshop. The steps to create a stunning glitch effect have been mentioned above.
We then shared 5 incredible glitch effects that could be used in case you don’t want to create your own effect.
Also read:
- You Can Create a Photo Video Slideshow on YouTube. In Slideshow on YouTube You Can Add Photos and Videos, Effects and Transitions and Make a Quality Slideshow
- Updated In 2024, How To Create Quiz Videos Detailed Guide
- Enhance Your Film Production with These 5 Silence Detection Tools
- 2024 Approved 18 Video Editors Weve Tested Heres What We Learned
- 2024 Approved Splice App for Android - How to Download & Use
- Updated Do You Wish to Design the Perfect Slow-Motion Video on Your Smartphone? Learn some Top-Rated Free Slow-Mo Apps for Android and iOS Users in This Article
- New Top 8 Video Editor with Useful Masking for 2024
- In 2024, Have You Ever Heard Bokeh Effects for Videos? Do You Know that You Can Make Your Own Bokeh Video Easily with some Software. This Article Will Introduce You How to Make a Bokeh Effect Video with Steps
- Updated 2024 Approved Learn to Merge Clips in DaVinci Resolve with Simple Steps
- Experience Time Differently with The Top Slow-Motion Applications for 2024
- Updated What Is the Best MP4 Cutters for YouTubers on Mac?
- 2024 Approved 8 Best Free Photo Collage with Music Video Maker
- In 2024, FLV Editor for Windows 11/10/8.1/8/7 Easily Edit FLV Videos on PC
- New General Information That You Need To Know About MKV Format
- New Bandicut Video Editor Download and Review
- Learn How to Slow Down Time-Lapse Videos on iPhone to Make Detailed and Captivating Slow-Motion Effects in Your Time-Lapse Captures for 2024
- Updated How to Do Perfect Match Paint 100 the Easy Way
- New What Do You Prefer More, MKV File Format or MOV? Increase Your Knowledge and Learn More About MKV Format by Ready the Detailed Article Below
- Best 8 Animated Video Makers for 2024
- Updated How To Brighten Video In Premiere Pro | Step By Step Guide
- New How to Convert Images Into Video - Kapwing Tutorial for 2024
- New In 2024, Best Free Video Editing Software to Boost Your Content Creation
- New 2024 Approved 6 Best MP4 Mergers to Join Videos Easily
- Updated Add Emoji to Linkedin Post – 5 Tips You Would Like to Know for 2024
- Change Speed of a Video on iPhone for 2024
- 2024 Approved How to Make a YouTube Intro by Filmora
- New In 2024, How to Create a Smooth Cut Transition Effect?
- Updated Thousands Already Know Ezgif and So Can You
- How to Slow Down Time-Lapse Videos on iPhone for 2024
- Updated Create the Night-to-Day Effect Videos
- Updated Learn How to Create Custom Titles in Filmora and Add a Unique Lower Third Animation Effect in Six Simple Steps
- This Article Aims to Show You How to Improve Your Lighting in the Sun for 2024
- New In 2024, How to Create A Freeze Frame Sequence in Video
- New The Best Laptops For Video Editing
- Updated In 2024, Detailed Guide to Crop Video in Sony Vegas Pro
- New 2024 Approved Which 10 Best Video Editing Online Makers Is Worth Your Attention?
- 3 Effective Methods to Correct Color Distortion in Videos for 2024
- New How to Export iMovie?
- Updated 2024 Approved Blender - A Video Editor for All Professor
- Updated In 2024, Color Match Game Tips for You
- Updated Ultimate Guide on How to Film Better in Public for 2024
- New 2024 Approved 5 Tried-And-True Methods to GIF Making
- New How to Create After Effects Gifs
- New Keyframes Interval Everything You Need To Know for 2024
- New In 2024, 10 Top Vloggers on YouTube
- In 2024, What Are AR Emoji Stickers & How to Add Them to Your Video
- In 2024, How to Make a Slow Motion Video Complete Guide
- Updated Replacing the Sky in Adobe After Effects An Extensive Guide for 2024
- App Wont Open on Your Asus ROG Phone 8? Here Are All Fixes | Dr.fone
- What Legendaries Are In Pokemon Platinum On Oppo A38? | Dr.fone
- A Comprehensive Guide to Apple iPhone 13 Pro Max Blacklist Removal Tips and Tools
- How to use Snapchat Location Spoofer to Protect Your Privacy On Xiaomi Redmi K70 Pro? | Dr.fone
- In 2024, iPhone Is Disabled? Here Is The Way To Unlock Disabled iPhone 8 Plus | Dr.fone
- How to get back lost contacts from Spark Go (2024).
- In 2024, Why Your WhatsApp Live Location is Not Updating and How to Fix on your Realme GT 5 Pro | Dr.fone
- In 2024, The Magnificent Art of Pokemon Go Streaming On Motorola Moto G13? | Dr.fone
- In 2024, Proven Ways in How To Hide Location on Life360 For Realme C33 2023 | Dr.fone
- Translate Instagram Videos Easily A Step-by-Step Guide
- New The Ultimate Guide to Generating Speech in Different Languages With the Best Tools
- Video File Repair - How to Fix Corrupted video files of 100 on Mac?
- How To Unlink Apple ID From iPhone 15 Pro
- Fix Vivo S18e Android System Webview Crash 2024 Issue | Dr.fone
- In 2024, Is Fake GPS Location Spoofer a Good Choice On Tecno Camon 20? | Dr.fone
- Top 5 Vivo V29 Bypass FRP Tools for PC That Actually Work
- How to Screen Mirroring OnePlus Nord N30 SE? | Dr.fone
- What Does Jailbreaking Apple iPhone 14 Pro i Do? Get Answers here
- In 2024, How to Fix Pokemon Go Route Not Working On Realme GT 5? | Dr.fone
- In 2024, How to Transfer Contacts from OnePlus 11R to Other Android Devices Devices? | Dr.fone
- In 2024, How to Unlock Apple iPhone SE (2022) with/without SIM Card
- How to Hide/Fake Snapchat Location on Your Vivo V29e | Dr.fone
- Video Translator | Wondershare Virbo Online
- How to Bypass Activation Lock on Apple iPhone XS or iPad?
- Best Methods for Infinix Smart 8 Pro Wont Turn On | Dr.fone
- In 2024, How to Transfer Data from Lava Blaze 2 5G to Samsung Phone | Dr.fone
- A Detailed Guide on Faking Your Location in Mozilla Firefox On Infinix Note 30i | Dr.fone
- 9 Solutions to Fix Tecno Spark 20C System Crash Issue | Dr.fone
- In 2024, Easily Unlock Your Oppo F25 Pro 5G Device SIM
- 10 Fake GPS Location Apps on Android Of your Honor 90 GT | Dr.fone
- In 2024, 5 Most Effective Methods to Unlock Apple iPhone 7 in Lost Mode
- How Samsung Galaxy A14 4G Mirror Screen to PC? | Dr.fone
- In 2024, How to Spy on Text Messages from Computer & Vivo Y36 | Dr.fone
- How to Update Apple iPhone 6 Plus without Losing Data? | Dr.fone
- Here are Some of the Best Pokemon Discord Servers to Join On Honor Magic 5 Pro | Dr.fone
- A Detailed Guide on Faking Your Location in Mozilla Firefox On Sony Xperia 1 V | Dr.fone
- Title: New If You Are Wondering How to Play a Slideshow in PowerPoint Automatically, This Article Is for You. Here We Will Be Looking at How to Add a Slideshow in PowerPoint and Other Relevant Headings that Would Help You Quickly Work on a PowerPoint
- Author: Chloe
- Created at : 2024-04-24 07:08:20
- Updated at : 2024-04-25 07:08:20
- Link: https://ai-editing-video.techidaily.com/new-if-you-are-wondering-how-to-play-a-slideshow-in-powerpoint-automatically-this-article-is-for-you-here-we-will-be-looking-at-how-to-add-a-slideshow-in-po/
- License: This work is licensed under CC BY-NC-SA 4.0.
