
:max_bytes(150000):strip_icc():format(webp)/GettyImages-165567842-58e5bd253df78c51625e84ab.jpg)
New If You Want to Record Video Streams on Windows or Mac Using FFmpeg, Read Our Guide and Learn How to Do This with Easy Step-by-Step Instructions
If You Want to Record Video Streams on Windows or Mac Using FFmpeg, Read Our Guide and Learn How to Do This with Easy Step-by-Step Instructions
FFmpeg is an open-source video processing tool with many powerful features. Many of these features are exposed through FFmpeg’s command line interface but can also be accessed from the program’s Python bindings and its Qt GUI frontend, called QFFMpeg.
This article will explain using FFmpeg command line tools to record video streams on Windows and Mac computers with step-by-step examples and screenshots.
Part 1. What is FFmpeg?
FFmpeg stands for “FF Multi-Platform Executable” and was originally developed by Fabrice Bellard in the year 2000 as an extension of the MPlayer project. The sole purpose of the software command-line design is to provide a complete solution for users to record live streams (audio and/or video) from any type of device that supports either the RTSP or HTTP streaming protocols.
FFmpeg is a complete, cross-platform solution to record, convert, mix, and edit audio and video files. The software has over 250 input formats, which allows users to record video streams in any media format. The FFmpeg commands stream the video back after recording, convert it into MP4 or MKV file, and process incoming data on the fly, such as rtmpdump.
Part 2. How to Record a Video Stream With FFmpeg on Windows?
The free FFmpeg command line tool is a great way to record a live internet stream and listen back to it later. If you have a Windows PC and want to record a video stream or screen using FFmpeg, our following step-by-step method will help you go through this process without facing many difficulties.
Step1 First, launch a browser of your choice on your Windows PC and head to the FFmpeg website. Hover over the Windows icon in the middle pane and select either the gyan.dev or BTbn build.

On the next screen, select the latest Windows 64-bit file from the list. Why? You need to use a computer compatible with the Windows 64-bit version. Next, download the ZIP file on your PC and use ZIP file extraction software to open the file contents.
Step2 Locate the ffmpeg.exe file on the extracted file and copy it to a new folder on your computer hard drive (e.g., C:\VideoRecorder).

Step3 In the next step, click the Start icon on your Windows dashboard and type cmd in the search box. Right-click on Command Prompt, select “Run as Administrator,” and launch the program.

Now, write the command to select the FFmpeg directory. For example, cd C:\VideoRecorder, and hit the “Enter” key.
Step4 To start recording the video stream, simply call FFmpeg and use the following command line. In this case, we are taking the example of capturing a YouTube video of “Running up that hill” from the top-rated TV show Stranger Things.
ffmpeg.exe -y -i https://www.youtube.com/watch?v=bV0RAcuG2Ao runningup.mp4
Hit the “Enter” key, and the output of this command will be displayed on the Command Prompt interface.
The command options have the following meanings:
-y allows automatic rewriting of existing files.
-i https://www.youtube.com/watch?v=bV0RAcuG2Ao is the stream URL that FFmpeg will record. You can change it with any video stream URL.
runningup.mp4 is the name of the output file.
Tips: Automatically Recording Video Streams on Windows PC
If you want your computer to record a specific video stream time automatically, use the Windows Task Scheduler to create a Timer to stop the recording after a particular time is passed.
Part 3. How to Record a Video Stream With FFmpeg on Mac?
You can use the Mac Terminal to record video streams via FFmpeg in the following way.
Step1 First, launch a browser on your Mac computer and head to the FFmpeg website. Hover over the Apple icon in the middle pane and select the macOS 64-bit static build option.

Download the ZIP file on your Mac and use ZIP file extraction software to open the file contents.
Step2 Launch the terminal on your Mac from the Apple menu, type the “ffmpeg -f avfoundation -list_devices true -i” command to let the system know which device to record from, and hit the Enter key.
Step3 Next, designate the path where you want to save your video, e.g., cd Path/to/my/videostream and press Enter.
Step4 Type in the “ffmpeg -f avfoundation -i “1:1”-c:v libx264 -qp 0-preset ultrafast out.mp4” command and hit Enter to start recording the video stream.

Stop recording the video stream by pressing “q.”

Part 4. How to Record Video Stream More Easily?
Sometimes, using FFmpeg to record a video stream on your Windows or Mac computer is too complicated. So, we recommend using Filmora Screen Recorder to make things a little easier for you.
A few benefits of using the Filmora Screen Recording software are as follows:
- Capture the computer screen and webcam at the same time.
- Select whether to record an entire screen or a part of it.
- Record your Windows or Mac computer audio and microphone voice at the same time.
Step1 Launch a browser on your Windows or Mac computer, install the Filmora Screen Recorder software, launch it, and select a New Project from the dashboard. Next, click the File option and select Record PC.

Step2 On the new Scrn pop-up window, customize the recording size by entering your desired dimensions. Also, choose if you want to record audio and which device to record it from.

Step3 Click Record to start recording the video stream. Once you are done capturing the video stream on the computer screen, click the F9 button to stop the recording.
Conclusion
In this guide, we have discussed FFmpeg and explored how you can use it to record video streams on your Windows and Mac computer.
We have also discussed Filmora Screen Recorder as an easy alternative to FFmpeg. You can get started immediately with recordings or dive deeper into advanced options as you gain more experience with this software. To help you out, we’ve also shared easy step-by-step instructions to use Filmora Screen Recorder on your computer.
Hopefully, you can now record your video streams and save them in high quality to view or share later.
Free Download For Win 7 or later(64-bit)
Free Download For macOS 10.14 or later
Free Download For macOS 10.14 or later
Top 31 Video Trimmers That Will Save You Time in Ediitng
In the world of videography, editing a video is equally important as shooting a video. No matter how perfectly you shoot a video, there are some parts that you need to trim out so that the video could be presented perfectly to your target audience. If you are getting started in the videography world, this article is for you to learn how to trim videos with the best video trimmer.
First, we will touch upon different ways of making a video. Thereafter, you will move on to how to trim a video that you have either recorded with recording software or shot with your digital camera. We will begin by providing you the list of the best video trimmers for Windows, Mac and mobile users. The video trimmers are segregated for beginner and advanced users, and hence, you can choose as per your preference and requirements.
We will also touch on how to edit your video and share the edited video among your target audiences. Therefore, take your time to go through our list of the top 32 best video trimmers of 2022. Starting from free and premium video trimmers to video trimmers for beginners and advanced users, you will definitely find the best video trimmer that is tailor-made to satisfy your requirements.
Contents
01 [How to Make a Video before Trimming](#Part 1)
02 [Video Trimmer for PC and Mac](#Part 2)
03 [Video Trimmers for Mobile](#Part 3)
04 [Online Video Trimmers ](#Part 4)
05 [Editing Tips to Improve Your Videos](#Part 5)
06 [How to Share Your Videos](#Part 6)
07 [Related FAQs about Video Trimming](#Part 7)
Part 1 How to Make a Video before Trimming
Before coming to the trimming of a video section in detail, let us begin with how to make a video. You have two options when it comes to making a video. You can either record a video with recording software or you can shoot a video with your camera. Let us discuss both options in detail now.
-Record a video
You can record a video with recording software when you are capturing video from your webcam or from your computer screen. There are two options you have when it comes to choose a recording software.
- Premium Recorder - A premium recorder is a professional video recording software that you have to purchase to avail all the features and functionalities. Choose the best video recorder.
- Free Recorder - If you are not willing to spend any money on a recording software, there are plenty of free recording applications available. We recommend OBS Studio as the best free video recorder.
-Shoot a video
The second option is shooting a video with your external digital camera. You can also use your phone camera to shoot a video. For example, making vlogs, comedy skits, travel videos, or short films needs a digital camera. If you are using your phone camera, you can cut and crop the video after shooting using the video trimmer apps or online video trimmers. If you are shooting external with an external camera, you can transfer the video to your mobile or computer and use a preferred video trimmer for editing.
Part 2 Video Trimmer for PC and Mac
When it comes to editing and trimming a video, using a computer is the best option. This is because you have a wider screen to pay attention to the details of the video and trim out the unnecessary parts easily. Besides, editing a video requires CPU resources which are best served by a computer. We have divided the video trimmers for computers into two categories for user convenience. You can easily find video trimmers for Windows PC as well as for Mac.
# For Beginner Users
This category is perfect for those who do not have any experience in video editing and they are looking for a basic video trimmer to get the job done. Besides, if you need to trim videos once in a while, these are perfect for you. You can trim video free with the following video trimmers.
1. Windows Photos
Best for: Windows users with no editing skills
G2 rating: 4.0/5
Price: Free
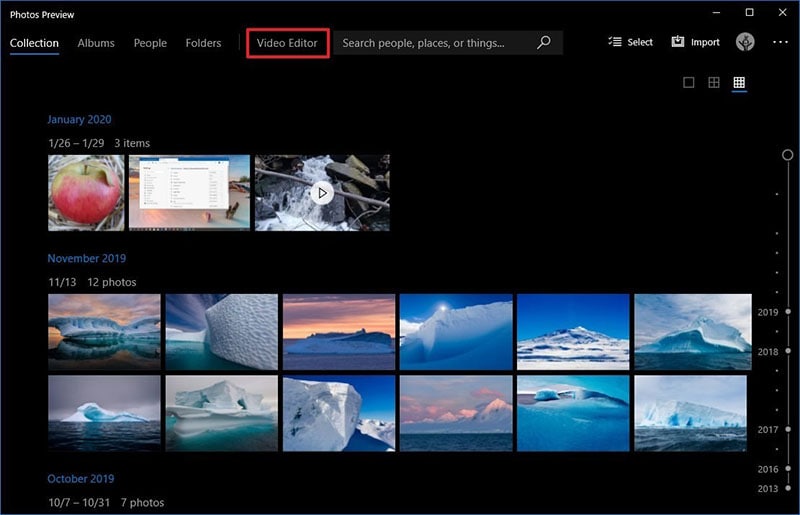
If you are a Windows PC user and you are looking for a basic video trimming application, Windows Photos is right there for you. The application comes pre-installed on Windows PC and hence, there is no need to install any external application. Even though Windows Photos is primarily used for viewing photos, there is a dedicated video editor available where you can trim your recorded video easily. Apart from trimming videos, you can do some basic editing like adding title cards and text, video effects, background music, and filters. Here are the pros and cons of Windows Photos.
Pros:-
- Comes pre-installed in Windows.
- Super easy user interface to operate.
- Quick trimming and cutting out videos.
- Different motion transitions and effects present.
- Add titles, texts, and audio to video.
- AVarious filters and 3D effects available.
Cons:-
- Not suitable for trimming large videos.
- Lack of different file formats for saving the videos.
2. QuickTime Player
Best for: Mac users with basic trimming needs
G2 rating: 4.2/5
Price: Free
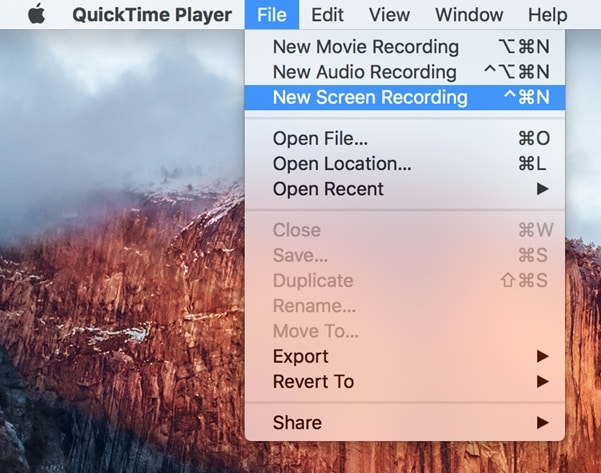
If you are a Mac user and you are looking for a free video editor for trimming your video, QuickTime Player is the best application for you. Just like Windows Photos for Windows users, QuickTime Player comes pre-installed for Mac users. In fact, it is the default media player for Mac users. Apart from playing media files, you can use QuickTime Player for video recording as well as editing the recorded video. This includes trimming videos and replaying on the application to reach the level of perfection easily. Here are the pros and cons of QuickTime Player you should be aware of.
Pros:-
- The user interface is super easy to operate.
- Trim, flip, split, and merge videos quickly.
- Option to record video with audio flawlessly.
- Instant preview of the edited video on QuickTime.
- QuickTime is compatible with iPhone and iPad.
- Advanced streaming options available in Pro version.
- Supports playing different video file formats.
Cons:-
- Some of the settings are complicated.
- It can crash while editing large video files.
3. iMovie
Best for: Playing and editing videos
G2 rating: 4.3/5
Price: Free

If you are a Mac user and you are looking for a dedicated video editor, iMovie is a great choice. iMovie also comes pre-install on Mac and it is compatible with iPhone and iPad as well. The application is available completely free for mac users and hence, many prefer it over QuickTime Player for editing videos. You can quickly trim your videos as well as rotate and crop your videos as per your requirements. You can enhance your video with effects and filters available. Here are the pros and cons of iMovie you should be aware of.
Pros:-
- Intuitive user interface for easy operation.
- Quick edits to make a raw video presentable.
- Supports 4K video editing without crashing.
- Add different graphical elements for engaging videos.
- Different types of effects and filters for video enhancement.
- Easy sharing options across devices and online platforms.
- Work on multiple video projects simultaneously.
Cons:-
- Editing MP4 video is complicated.
- Lacks advanced editing features.
4. Media Cope
Best for: Multiple video using needs
G2 rating: 4.0/5
Price: Free
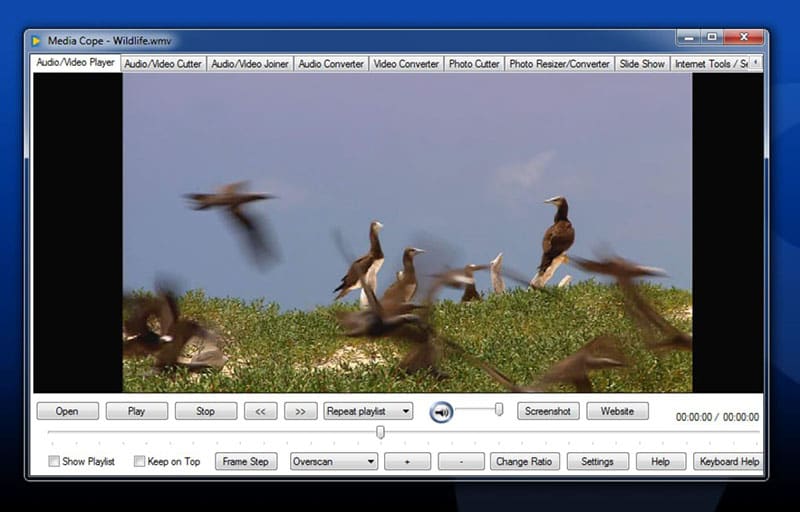
Media Cope is a freeware video trimmer for Windows users only. It is a basic video editor with standard editing options. The software is best suited for those who have older Windows versions such as Windows 7. The lightweight application can act as an audio and video player. You can easily trim your video and extract import parts as well. You can also join audio and video files and convert them into desired file formats. Here are the pros and cons of Media Cope.
Pros:-
- Can play audio and video files of different formats.
- Instantly trim and cut video and audio files.
- Can join audio and video clips and save in desired file format.
- Can convert audio and video files as per requirements.
- Transform photos into slideshow instantly.
- Resize photos and take screenshots from videos.
- Modify different video parameters and export the file.
Cons:-
- Lack of various standard video editing options.
- Looks outdated for modern Windows OS.
5. OpenShot
Best for: Open source software lovers
G2 rating: 4.4/5
Price: Free

If you are looking for a video editor that is compatible with all desktop operating system, OpenShot is the best choice for you. It is a completely free, open-source video editor for Windows, Mac and even Linux users. In this list of video editors for beginners, this is the best in terms of features and functionalities. You can trim and slice video, add animations, insert different layers and video effects to enhance the video content. The user interface is rather intuitive in spite of having all the different options you look for in a video editor. Here are the pros and cons of OpenShot video editor.
Pros:-
- Simple but powerful user interface.
- Trim video instantly without different options.
- Add 3D titles, 3D animations, and slow motion effects.
- Loads of video and audio effects present to apply.
- Add different layers of videos, audio tracks, and images.
- Advanced option for keyframing and time mapping.
- Multi-lingual support and frequent updates for new features.
Cons:-
- Unstable performance for large video files.
- The hardware acceleration is not very powerful.
# For Advanced Users
If you are a regular video creator and you want your videos to stand out, this category is for you. You can edit and trim your videos exactly the way you want. Besides, you can transform your raw videos into professional-quality videos with the following video editors.
1. Filmora
Best for: Rich videos effects and templates
G2 rating: 4.4/5
Price: $49.99

Wondershare Filmora is an outstanding video editor where you can trim your video and audio files like a professional. Since you are an advanced user, you will need more than just trimming to make your raw video look stunning. Filmora offers you all the tools and features you will ever need to take your video to the next level.
Compared to other popular premium video editors, Filmora does not need heavy CPU resource and it has an intuitive user interface. That is why video creators especially YouTubers and Vloggers prefer it for editing their videos regularly. The software is available for both Windows and Mac users. Here are the pros and cons of Filmora that you should be aware of.
For Win 7 or later (64-bit)
For macOS 10.12 or later
Pros:-
- Record screen and webcam video with audio sources.
- Basic tools for trimming, splitting, and joining video files.
- Customize different video settings and parameters.
- Add video and audio effects and graphical elements.
- Wide range of stock library of media files and animations.
- Add multiple layers and work with multiple channels while editing.
- Export the recorded or edited video file in different file formats.
Cons:-
- Saving the edited video takes time due to processing part.
2. Adobe Premiere Pro
Best for: Professional video trim, edit and after effects
G2 rating: 4.5/5
Price: $20.99/month

Adobe Premiere Pro is the most powerful video editor and that is why even professional video editors use it for editing movies. There is hardly any video file format that Premiere does not support. You can edit multiple videos at the same time and switch between scenes and clips. Trimming video and audio files is swift with intuitive controls. There is also option for non-linear video editing for advanced users.
Since it is extremely popular in the videography world, there are many organizational tools available for editing large video projects and integrated workflow. The software supports VR video, 3D video, and multicam video editing. The software is available for Windows as well as Mac users. Here are the pros and cons of Adobe Premiere Pro.
Pros:-
- Customizable layouts for reorganizing user interface.
- Quick trimming and playback option without rendering.
- Supports a wide range of file formats for import and export.
- All the different tools for professional video and audio editing.
- Can work on and render multiple video files easily.
- Cross-app functionality with amazing stabilization features.
Cons:-
- The learning curve is rather steep and takes a lot of time.
- The software is only suitable for high-end computers.
3. Final Cut Pro
Best for: Advanced organizing tools of any professional video editing
G2 rating: 4.4/5
Price: $299

Final Cut Pro is equally popular in the videography world as Adobe Premiere Pro. Final Cut Pro is primarily for Mac users as it is developed by Apple. This is the most powerful video editor for Mac users as it is packed with loads of features for professional video editing. Trimming videos is as easy as it gets, along with other standard editing options.
The software supports editing multicam videos, VR videos, 3D videos as well as 360 degree videos. There are endless presets and effects available that you can apply on your video while editing. You can easily edit 4K videos without performance lag. In fact, Final Cut Pro shines where other video editors fail to perform with high resolution and large video files. Here are the pros and cons of Final Cut Pro.
Pros:-
- Trimming, cutting, splitting and joining videos are easy.
- Seamless video editing with standard and advanced tools.
- Different motion graphics templates available.
- Supports external plug-ins and VR headset playback.
- Proper video files and assets organizing and audio editing options.
- Relatively quick rendering of large video files.
Cons:-
- May take time to get used to all the available options.
- Relatively expensive in comparison to peers.
4. Movavi Video Editor
Best for: People who love more brilliant effects in videos
G2 rating: 4.8/5
Price: $74.95

Movavi Video Editor is a premium software for trimming and editing videos. It is available for both Windows and Mac users. There is a free version available but it puts a watermark on the output video. Apart from trimming and splitting videos, you can add various video effects starting from adding titles and transitions to stickers and elements. Besides, you can opt for greenscreen effect and edit videos in vertical mode. Here are the pros and cons of Movavi Video Editor you should be aware of.
Pros:-
- Integrated video capturing options from different sources.
- Instant trimming, splitting, and joining of videos.
- Loads of titles, filters and transitions present.
- Add video PiP layers as well as voiceover.
- Vertical video editing mode present.
- Video stabilization mode and Chroma key.
- Keyframing, slow motion and motion tracking.
Cons:-
- The rendering is not very fast.
- Lack of color tuning options.
5. Bandicut
Best for: Trim, join and split video with fast speed
G2 rating: 4.0/5
Price: $44.96
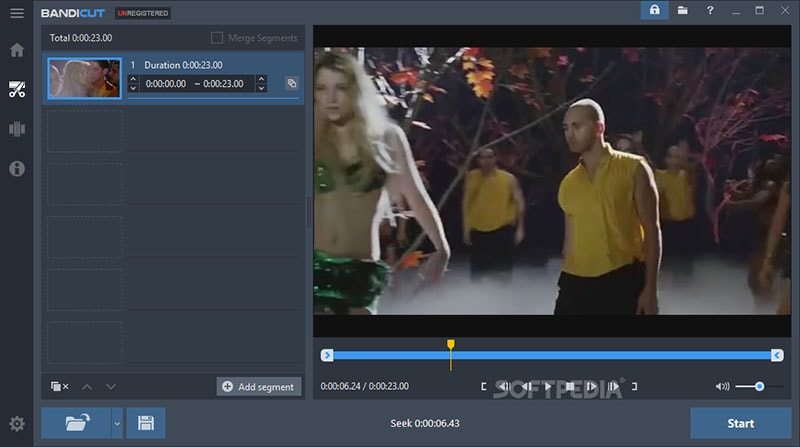
Bandicut from Bandicam is a dedicated video trimmer for Windows users. It is a premium application with a one-time purchase fee. The software ensures lossless video trimming, and you can trim video instantly thanks to its intuitive user interface. It is a versatile application that you can use to extract audio from a video as well as joining multiple video files. Splitting a large video file into multiple files is super easy. However, it is not a full-fledged video editor like Filmora or Premiere. Therefore, if your objective is specifically to trim, split, and join videos, this is the one for you. Here are the pros and cons of Bandicut.
Pros:-
- Trim and split videos instantly
- Super intuitive user interface.
- Cut segments from videos.
- Join multiple videos quickly.
- Supports different file formats.
- No loss of video quality during editing.
- Hardware acceleration for high performance.
Cons:-
- Very limited editing features.
6. VSDC
Best for: Movie level video cut with light professional skills
G2 rating: 4.0/5
Price: $19.99

VSDC is a free video editor with all the basic editing tools available. VSDC Pro is a premium video editor where advanced features are available. For trimming a video, VSDC free video editor can get the job done. Even though it is completely free, some features are comparable to many premium video editors. For example, you get access to a large set of filters, effects, and transitions that you can apply to your videos. Even when you have a low-end PC, you can do basic video editing works comfortably. Here are all the pros and cons of VSDC free video editor you should know.
Pros:-
- Instant trimming and basic editing of videos.
- Wide range of effects and filters as well as Chroma key.
- Color correction option and non-linear editing available.
- Supports editing 360 degree videos and split-screen videos.
- Supports different video and audio file formats.
- Lightweight and suitable for low-end computers.
Cons:-
- Lacks standard audio editing options.
- Lacks hotkeys and useful keyboard shortcuts.
7. Camtasia
Best for: Tutorial video recording and editing
G2 rating: 4.6/5
Price: $224.99

Camtasia by TechSmith is a premium video editor for Windows and Mac users. Even though it is more popular as a video editor, you can trim your videos easily on the software. You can record anything on your screen as well as external webcam. You can edit recorded video as well as import external video files for quick editing. The software offers easy share instant through which you can share on popular video streaming platforms. There are various templates and themes available to create and edit videos of different categories. Here are the pros and cons of Camtasia.
Pros:-
- Quick trimming, splitting, joining video options.
- Different templates and packages for versatile video creation.
- Various transitions, annotations, and presets present.
- PowerPoint integration, screen and web cam capture.
- Different cursor and audio effects with royalty-free assets.
- Import different media files and upload directly on video streaming platforms.
Cons:-
- Reports of crashes when working with large files.
- No keyframe and motion tracking.
- Very few customization options.
Part 3 Video Trimmers for Mobile
In today’s world, the cameras of smartphones are extremely powerful, and there are many who shoot videos with phone cameras instead of a dedicated digital camera. For example, there are many popular vloggers who shoot their videos with phone cameras, and video creators make short videos with phone cameras. When you shoot a video on your phone, you must be looking for a video trimmer app for your phone so that you can trim the recorded video instantly and share across social media and video streaming platforms. Here is the list of the best video trimmers for mobile.
# For Beginner Users
1. VidTrim Pro
Best for: Android video trimming, merging, frame grabbing
Rating: 4.1/5
Download Link: https://play.google.com/store/apps/details?id=com.goseet.VidTrimPro&hl=en\_US&gl=US
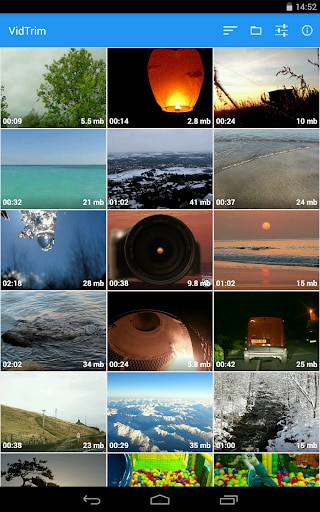
VidTrim is a dedicated video trimmer available for Android users. The free version adds a watermark to the output video, and hence, you have to opt for VidTrim Pro to avoid all limitations. Apart from trimming videos, you can merge videos and convert videos into audio files. You can also add effects and music tracks to your videos. The user interface is as simple as it gets. Here are the pros and cons of VidTrim Pro app.
Pros:-
- Trim videos as well as merge video clips.
- Convert supported video files into Mp3 audio files.
- Rotate videos as well as save screenshots from videos.
- Add cool video effects, sound effects, and soundtracks.
- Multi-lingual support and video file format converter.
Cons:-
- Limited video editing features for a paid video editor app.
- The user interface is simple but outdated.
2. KineMaster
Best for: Video content downloadable
Rating: 4.2/5
Download Link: https://play.google.com/store/apps/details?id=com.nexstreaming.app.kinemasterfree&hl=en\_US&gl=US

You must have seen many videos online with the watermark “Made with Kinemaster”. This is because KineMaster is very popular among amateur video creators. KineMaster is available for Android as well as iOS users. You can instantly trim and crop videos. Besides, you can add special effects, animations and stickers as well as tweak different video settings for enhancements. KineMaster is available free of cost but it attaches a watermark to the output video at one corner. You can subscribe to KineMaster Premium to remove watermark and unlock more features. Here are the pros and cons of KineMaster.
Pros:-
- Trim, cut, slice, and crop videos instantly.
- Add music, sound effects as well as voiceover.
- Provides amazing visual effects and animations.
- Adjust color filters, modes and video speed.
- Supports keyframing and motion tracking.
- Save 4K videos and share instantly online.
Cons:-
- KineMaster chroma key feature has bugs.
- Can crash or freeze handling large video files.
3. Quik
Best for: Producing cinematic auto-edits.
Rating: 4.3/5
Download Link: https://play.google.com/store/apps/details?id=com.gopro.smarty&hl=en\_US&gl=US
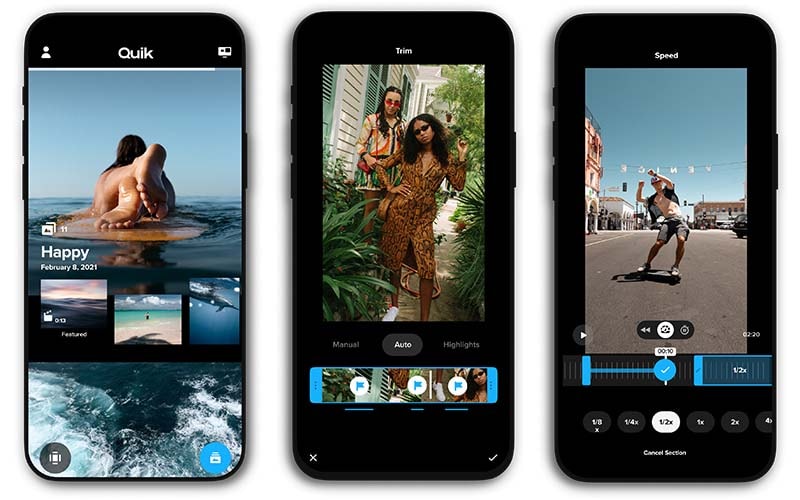
Quick from GoPro is fast becoming a popular video editor app. GoPro is the most popular action camera brand and naturally, its video editing app has garnered enough attention. The app is available for Android and iOS users. The app has a mixed bag of options for editing videos quickly. You can trim your videos, add filters and adjust video speed. Besides, its AI can locate the best shots in a video and enhance them with special effects. Here are the pros and cons of Quick app.
Pros:-
- Trim, crop, adjust speed, remove audio from videos.
- Different preset templates available with effects and filters.
- Add music, titles, effects, and transitions.
- Easy sharing of videos and photos.
- Powerful AI to highlight the best shots in a video.
- Adjust video orientation, save in 1080p resolution.
Cons:-
- Not suitable for large video files.
- No font adjustment options.
4. iMovie
Best for: Create Hollywood-style trailers and beautiful movies
Rating: 4.0/5
Download Link: https://apps.apple.com/us/app/imovie/id377298193
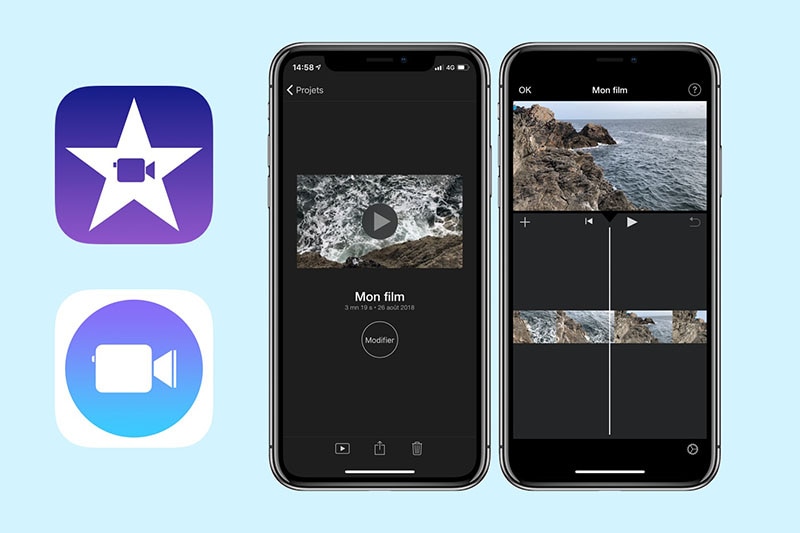
iMovie app by Apple is exclusively available for iOS users. iMovie is also available as a software which we have already discussed. In terms of features, iMovie app is very similar to iMovie software. You can instantly make basic editing works. Apart from editing, the app is ideal for creating different types of videos with ready-made templates. There are loads of graphical effects, animated titles, and video filters available to apply. Here are the pros and cons of iMovie app for you.
Pros:-
- Record, trim, split, join and crop videos on the go.
- Choose from different themes and templates to create videos.
- Animated titles, video filters, graphical effects available.
- Chroma key, PiP mode as well as split screen effect possible.
- Add sound effects, music, and depth of field effect.
- Optimized output for social media and video streaming platforms.
- Supports 4K video editing and easy share across Apple devices.
Cons:-
- Limited resources and customization options.
- The app size is large and uses high CPU resources.
# For Advanced Users
1. LumaFusion
Best for: Professional video trimming for iOS devices
Rating: 4.8/5
Download Link: https://apps.apple.com/us/app/lumafusion/id1062022008

LumaFusion is a top-rated video editor for iPad and iPhone. The app is as good as a premium video editor for desktop users. Therefore, professional video creators who use iPhone or iPad for video editing prefer LumaFusion all the time. You can trim, cut, crop, split, and merge videos intuitively from its timeline. Most importantly, you can edit multiple video and audio files together like a professional. Here are the pros and cons of LumaFusion.
Pros:-
- Trim and export video in different file formats.
- Work with multiple video and audio files.
- Preset transitions, instant preview, markers for timeline.
- Add Chroma and Luma key effects as well as stunning visual effects.
- Adjust speed, audio, use keyframes, correct colors.
- Work with titles, fonts, borders, and share conveniently.
- Wide range of media files available in the library.
Cons:-
- Does not support motion tracking.
- Can be difficult to edit large files.
2. Adobe Premiere Rush
Best for: Shoot, edit, and share online videos anywhere.
Rating: 3.0/5
Download Link: https://play.google.com/store/apps/details?id=com.adobe.premiererush.videoeditor&hl=en\_US&gl=US
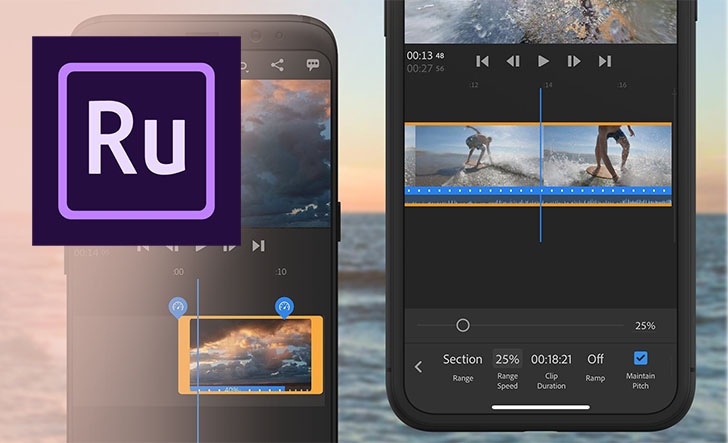
Even though Adobe Premium Rush app is available or Android and iOS users, it is more popular among iPhone and iPad users. The app is free though there are in-app purchases available. Rush Premium has more features and functionalities. Editing any video is quite convenient though Adobe has tried its level best to offer all the possible features of Adobe Premium Pro desktop software on the app. The app supports multitrack timeline for professional videos. Here are all the pros and cons of Adobe Premiere Rush you should be aware of.
Pros:-
- Record video in high-resolution with the app.
- Trim, crop, mirror, and flip videos.
- Add images, overlays, texts, and stickers.
- Pan and zoom effect, animation titles.
- Royalty-free audio tracks, color correction options.
- Easy exporting of files in different formats.
Cons:-
- Rendering projects can be slow.
- Comes with limited features.
3. Filmmaker Pro Video Editor
Best for: 4K quality video editing
Rating: 4.6/5
Download Link: https://apps.apple.com/us/app/filmmaker-pro-video-editor/id1082956994
Filmmaker Pro is a highly rated video editor that you can use to trim your videos. Filmmaker Pro app is available for both Android and iOS. The app supports 4K video for editing works. The timeline has color codes for different assets and hence, editing becomes easy. You can edit different video parameters and settings and add different effects. The auto save option is extremely useful when it comes to editing a large file. Even though it is available for free, they have a subscription plan for unlocking all features. Here are the pros and cons of Filmmaker Pro Video Editor.
Pros:-
- Trim, split, crop and rotate videos.
- Adjust video speed, volume, video grading.
- Chroma key, voice to text caption, keyframe and motion tracking.
- Different Picture-in-Picture mode for videos, photos, and GIFs.
- Various transition effects, audio effects, and text overlays.
- Different drawing tools, stickers, and graphical elements present.
Cons:-
- The free version has limited features.
- The number of effects are relatively less.
4. Splice Video Editor and Maker
Best for: Vloggers and social platform video cutting
Rating: 4.7/5
Download Link: https://play.google.com/store/apps/details?id=com.splice.video.editor&hl=en\_US&gl=US
Splice Video Editor and Maker is a free but powerful app that enables you to do pro-level editing. You can trim your video clips, adjust speed, and add music on the go. In fact, you can create videos and slideshows instantly and you can add texts and overlays. The music library has different categories of tracks to apply to videos. You can also merge videos as well as change aspect ratio according. The app is available for Android and iOS users. Here are all the pros and cons of Splice Video Editor and Marker.
Pros:-
- Easy interface for smooth trimming and merging of videos.
- Adjust speed, aspect ratio, and video parameters.
- Organize clips and tracks in the timeline intuitively.
- Add custom texts, titles, tracks, transitions, and effects.
- Comes with a wide stock library of media files.
- Direct uploading video files on different social media platforms.
Cons:-
- Limited effects and filters available.
- Frequent crashes while handling large files.
5. Funimate
Best for: Mobile game video trim to show off gaming skills
Rating: 4.5/5
Download Link: https://play.google.com/store/apps/details?id=com.avcrbt.funimate&hl=en\_US&gl=US
Funimate video editor and maker app is quite highly rated on both Play Store and App Store. It is a very powerful and feature-rich app where you will get all the desired editing tools to publish a professional-quality video. Starting from element library to video masks and AI effects, the app takes your video to the next level. You can obviously perform the basic editing works like trimming, splitting and joining. Here are the pros and cons of Funimate app.
Pros:-
- Trimming, merging, and cutting videos.
- Text effects, video AI effects, and effect mixer.
- Comes with over 100 advanced video effects.
- Allows adding music to videos for engaging videos.
- Supports slow motion and looping videos.
- Advanced keyframing and element library.
- Allows creating a professional photo slideshow.
Cons:-
- No multilingual support and auto-save feature.
- Some lagging issues have been reported.
Part 4 Online Video Trimmers
If you are using a video editor on your computer, it takes considerable amount of space in your storage. The same is applicable to video editors for smartphones. If you do not want to install any app on your device yet trim videos conveniently, the online video trimmers are for you. You can open the video trimmer directly from your web browser and trim your video and save it without installing any application on your device. Here is the list of the best online video trimmers.
# For Beginner Users
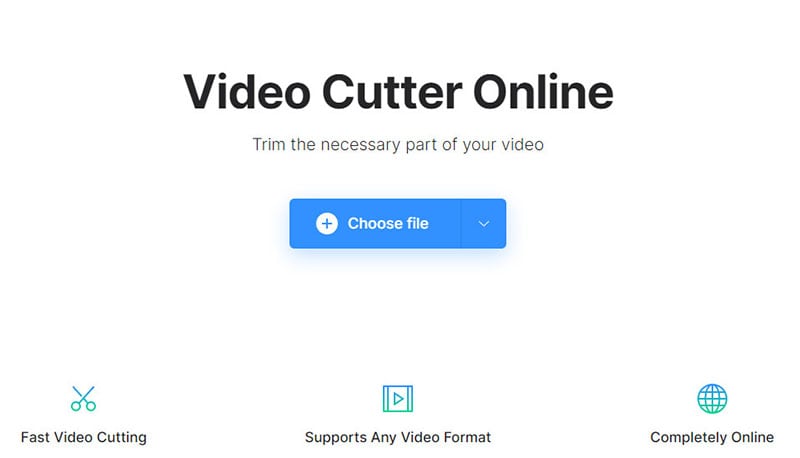
1. https://online-video-cutter.com/
Best for: Trimming large videos files.
Ratings: 4.2/5
Online Video Cutter is a dedicated video trimmer where you need to drag and drop your video file and cut out the required portion. You can even crop and rotate your videos if there is any such requirement. You can access the online platform directly from your web browser. There is no need for installation of any web launcher. The platform is also secured and hence, your videos won’t get leaked. There is also a Chrome extension available that you can use if you are a Chrome user. Here are the pros and cons of Online Video Cutter.
Pros:-
- Easy video trimming by drag-and-drop files.
- Enables uploading different file formats.
- Rotate feature for saving in portrait and landscape mode.
- Automatically deletes files for better security.
- Crop feature for changing frame size.
- Can edit video file of 4GB capacity.
Cons:-
- May reduce the video quality for the editing video.
2. https://clideo.com/cut-video
Best for: Trimming short videos.
Ratings: 4.5/5
This is another online video trimmer that supports different video file formats. The user interface is sleek for quick video trimming. You can upload file from your device as well as from Cloud storage. In fact, you can use the platform to convert video files. The level of trust and security is high and there are additional settings available for better editing. Here are the pros and cons Clideo Video Cutter.
Pros:-
- Intuitive interface for quick trimming.
- Supports different file formats.
- Converts videos into different formats.
- Offers high-level online security.
- Add fade in and fade out effects.
- Upload video files from Google Drive and Dropbox.
Cons:-
- No drag and drop feature.
- File size is limited to 500 MB only.
3. https://www.kapwing.com/tools/trim-video
Best for: Editing video elaborately.
Ratings: 4.4/5
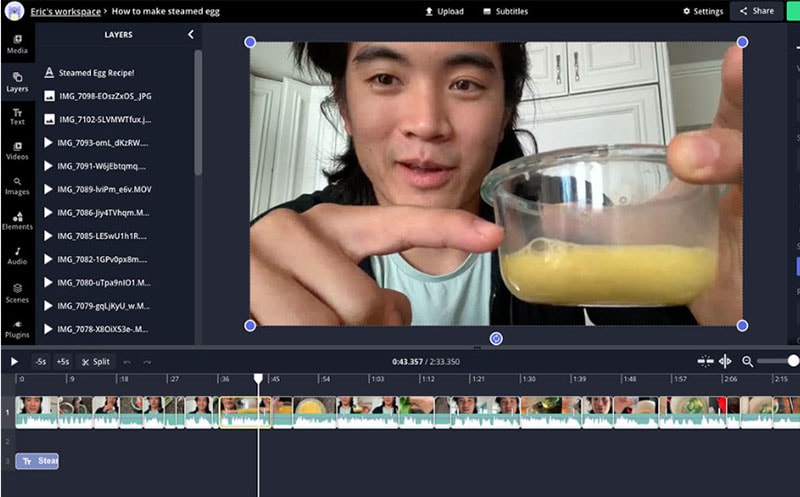
Kapwing is a dedicated online video editor that will give you the vibe of using a desktop video editor. Therefore, it is suitable for those who are looking for an online platform for trimming as well as various other editing works. You can add texts, images, elements, audio, transitions, as well as record videos. You can also export in different file formats. However, the free version attaches a watermark. Therefore, you have to upgrade to its premium version and use the platform is a full-fledged video editor. Here are the pros and cons of Kapwing.
Pros:-
- Trim, crop, zoom videos and adjust video parameters.
- Supports import and export of different file formats.
- Add effects, audio, and elements to the videos.
- You can work with multiple layers while editing.
- Different sound effects, templates, and scenes and emojis present.
- Stunning user interface that looks like a video editor software.
Cons:-
- Free version attaches watermark and lowers video quality.
4. https://www.freeconvert.com/video-trimmer
Best for: Basic video trimming
Ratings: 4.0/5
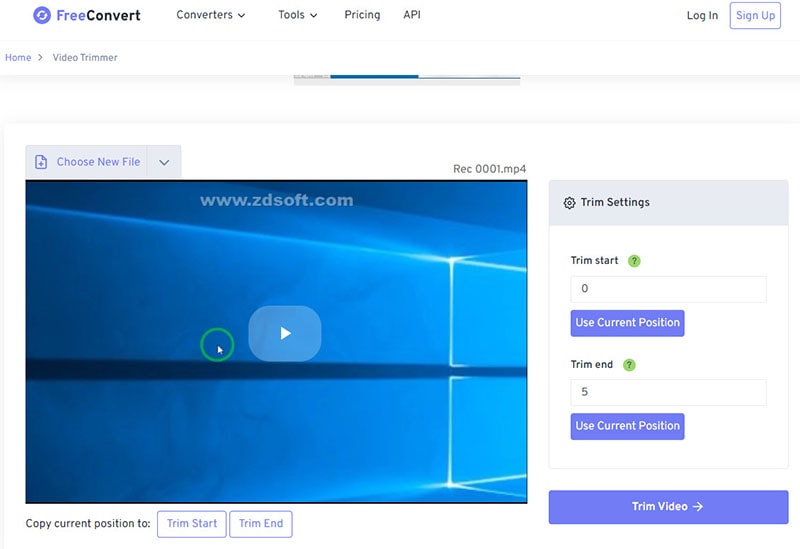
FreeConvert Video Trimmer is a free online tool through which you can trim videos of size up to 1GB easily. The platform supports as many as 40 different video file formats. Therefore, you can trim almost any video file easily. The security is tightened so that the uploaded videos do not get leaked. You can upload video files from your device, Google Drive, Dropbox as well as from URL. Therefore, if you want to trim videos that are available online, you can do it easily with this tool. Here are the pros and cons of FreeConvert Video Trimmer.
Pros:-
- Easy to use, intuitive interface.
- Does not require any registration.
- Supports over 40 file formats.
- Compatible with multiple browsers.
- 256-bit SSL encryption offers better security.
- Allows adjustment of parameters before conversion.
Cons:-
- There are too many annoying ads.
# For Advanced Users
5. https://www.veed.io/tools/video-cutter
Best for: Trimming videos for social media platforms.
Ratings: 4.3/5
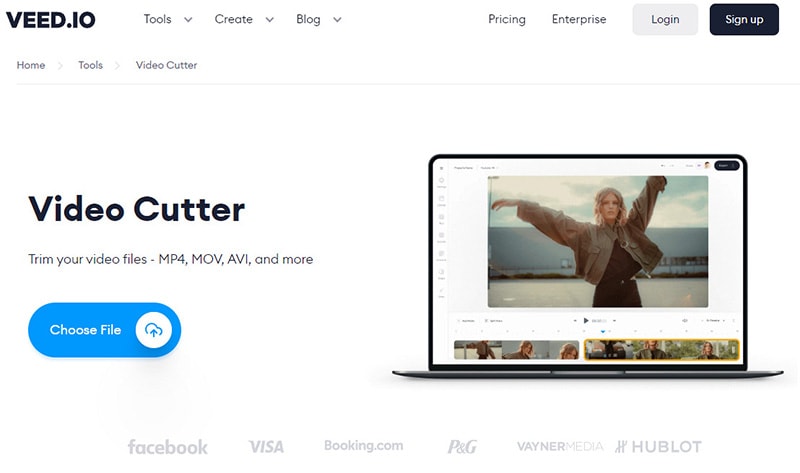
Veed.io has a wide collection of tools for video editing and the video cutter is a dedicated video trimmer. You can trim videos of popular file formats easily. Apart from video files, the platform supports trimming GIFs and audio files. You can upload videos as well as mention URL of videos that are present online for trimming. The online tool does not degrade the video quality and the output file is of high-quality as well. Here are the pros and cons of Veed.io video cutter.
Pros:-
- Allows saving the video in a high-quality format.
- Supports cutting a wide range of audio file formats.
- Ability to upload and cut animated GIFs.
- Allows cutting YouTube videos directly using URL.
- Easy drag and drop feature for saving time.
- “Split” option for removing the middle part of the video.
Cons:-
- Not suitable for trimming large video files.
6. https://www.fastreel.com/video-cutter.html
Best for: Trimming videos for personal use.
Ratings: 4.2/5
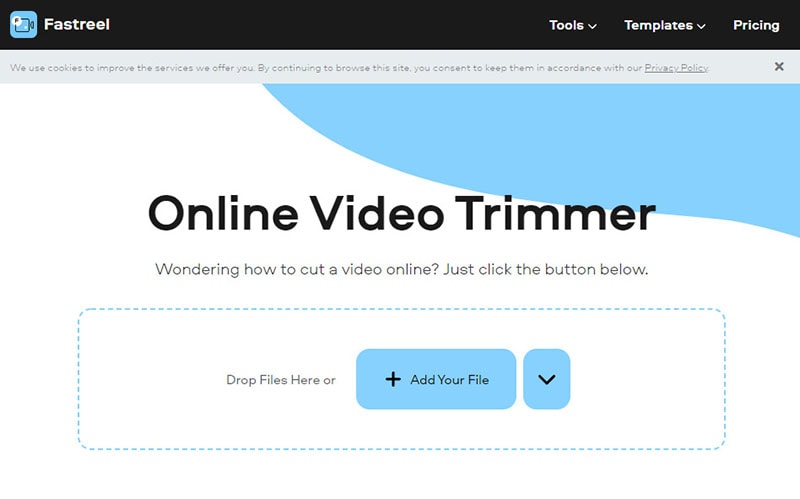
Fastreel online video trimmer lets you trim your videos with a few clicks. Drop your file and mark the points for trimming and there you go. That tool is also useful if you want to split your video. There are several video file formats that the platform supports. The user interface is intuitive and the trimming can be precise. The free version attaches a watermark and hence, the premium version is what you should have. Here are the pros and cons of Fastreel online video trimmer.
Pros:-
- Simple interface for hassle-free trimming.
- Supports different video file formats.
- Feature of data security offers better safety.
- Quick video trimming without using the editor.
- Different file formats while saving the video.
- Precision cutting for removing unwanted segments.
Cons:-
- The free version comes with watermark.
- Free version lowers the video quality.
7. https://flixier.com/tools/video-trimmer
Best for: editing videos as a teamwork
Ratings: 4.4/5

Flixier Video Trimmer is a premium tool to trim and crop videos instantly. The tool is available in a free version but there are many limitations. Therefore, you need to have a premium version of Flixier Video Trimmer. You can export videos in 1080p and 4K resolution. You can opt for transcribing your videos and store videos in the cloud. In the premium version, two team members can work together. Here are the pros and cons of Flixier Video Trimmer.
Pros:-
- Upload videos from YouTube, Twitch, and cloud platforms.
- No need to create account for instant trimming.
- Trim, crop, cut, and add images to videos.
- Supports multiple file formats.
- Comes with an easy collaborative platform.
- Additional translation and transcribe options.
Cons:-
- There are lots of limitations of premium plans as well.
- Only the highest premium plan supports 4K resolution.
8. https://www.wevideo.com/features/video-cutter
Best for: Best premium online video editor
Ratings: 4.5/5
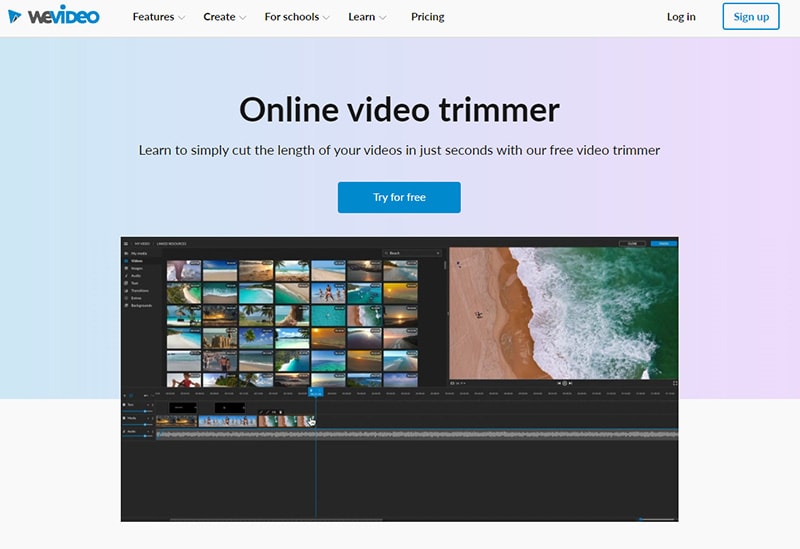
WeVideo Video Cutter is a paid video trimmer though you try out the platform for free. The platform supports a wide range of video files. You can drag and drop files and trim videos instantly. Trimming cannot get any easier and the processing speed of the editing video is fast. You can finish trimming your videos in a few seconds. There is a unique zoom feature to trim out videos accurately. You can also add texts and music to your video file before exporting. Here are the pros and cons of WeVideo Video Cutter.
Pros:-
- Drag and drop feature for quick editing.
- Smooth and accurate trimming with zoom function.
- Music and motion titles library.
- Compatible with different web browsers.
- Export edited files in different file formats.
- There is no capping on file size as such.
Cons:-
- The pricing is on the steeper side.
Part 5 Editing Tips to Improve Your Videos
Apart from trimming, you have to edit different other aspects so that you can make the video engaging and eye-catching. Here are some editing tips you should stick to improve your video content.
Get The Best Video Editor - Editing a video is equally important as shooting a video. Once you have the best video editor, you can rest assured that your editing work is half done. This is because you have all the tools to turn your raw video into stunning video. You can experiment and come up with the best editing work to your own surprise.
Get The Length Correct - In today’s world, viewers have very less time to watch videos. Therefore, a lengthy and elaborative video is a bummer. Hence, you should trim the video and keep only the portions that are relevant, engaging, and not boring.
Start with a Bang - The first impression is always the most important, and hence, the intro of your video is extremely crucial to keep the attention of the audiences intact. To make the intro interesting, you should not only focus on the content but also on video effects and animations that are attention-grabbing.
Smooth Cuts and Soothing Colours - When you are cutting from one scene or angle to another, the transition should be smooth so that it does not feel abrupt. Therefore, you should cut scenes when the subjects and objects seem to be static so that the transition is smooth naturally. Play attention to colour and the video editors allow you to enhance the quality by adjusting the colors and picture properties.
Graphical Objects - Use graphical objects and animated texts wherever possible for better explanations. Things can get boring visually when you do not add graphical elements, transitions, and animations appropriately in different places. Similarly, the use of texts and titles makes the video more engaging. Instead of static texts, there are animated texts and titles available with stickers and memes that you can edit your video with.
Play Attention to Sound - Sound is the most neglected part of a video by amateur video creators when one should pay attention to it. The sound effects can keep the audiences hooked to your video and make them not get bored. Certain sound effects refresh the attention of the audiences when it starts to fade, and hence, you should place the sound effects wisely.
Proper Flow - The editing work should be smooth so that the flow of the video is smooth and efficient. It takes time, and hence, you can practice and learn video editing so that your video can stand out instantly after your editing touches. Besides, the editing should be such that the video feels like a story that audiences can invest in and get engaged throughout.
Part 6 How to Share Your Videos
In order to share videos after trimming them, you need to save the video properly. There are different file formats available for video files. For example, MP4 is the most popular video file format among Windows users. On the contrary, MOV is the most popular video file format. Different file formats have different features such as compression and lossless. According to the file format, the file size varies for the same duration of video.
Therefore, the video trimmer you are using must have different file formats for saving and exporting the editing video files. Some video trimmers have in-built features to share videos on social media platforms and upload on video streaming platforms like YouTube. Depending on your target audiences, you need to adjust the parameters like aspect ratio, video resolution, as well as duration. Besides, you can upload videos on cloud storage and share with anyone as per your requirements.
Part 7 Related FAQs about Video Trimming
1. What is the best video trimmer?
Wondershare Filmora is the best video trimmer as all the features are well-balanced. Apart from trimming, it has all the tools for professional-quality video editing. Filmora can also be used for recording videos. Trimming videos is as easy as it gets and you can export the edited video in different file formats.
2. How can I trim a video?
To trim a video, you will need a video trimmer. If you are a desktop user and you need to regularly edit videos, there are video trimmers available for beginners as well as advanced users. Similarly, there are video editor apps available for mobile users. If you need to trim just one video, you should use an online video trimmer.
3. How can I trim a large video?
In order to trim a large video file, you will need a professional video editor like Filmora so that there is no loss in video quality and frequent crashes and screen freezing incidents while trimming. Drag and drop the video file on Filmora’s timeline and trim the unnecessary parts. You can view the changes and export the file in desired file format.
4. What does trim mean in video editing?
Trimming a video means you are cutting off different portions of a video and reducing its length. Trimming is mostly done to remove unnecessary parts from a video so that the video becomes more engaging without any unnecessary fillers.
5. Can I trim a video in VLC?
Here are the steps to trim a video in VLC Media Player.
- Open VLC Player. Go to View> Advanced Controls. This will make the recording buttons appear.
- Open the video that you want to trim. Mark the portion that you want to keep in your video.
- Play the video and go to the point from where you want to keep the video. Click on Record button.
- Go to the point where you want to end the video. Click on Record button again. All other portions are trimmed and the edited video will be saved.
6. How to trim YouTube videos?
In order to trim YouTube videos, you need to download the videos on your device. You can use an online video trimmer where you can upload the files and trim the videos as per your requirements.
02 [Video Trimmer for PC and Mac](#Part 2)
03 [Video Trimmers for Mobile](#Part 3)
04 [Online Video Trimmers ](#Part 4)
05 [Editing Tips to Improve Your Videos](#Part 5)
06 [How to Share Your Videos](#Part 6)
07 [Related FAQs about Video Trimming](#Part 7)
Part 1 How to Make a Video before Trimming
Before coming to the trimming of a video section in detail, let us begin with how to make a video. You have two options when it comes to making a video. You can either record a video with recording software or you can shoot a video with your camera. Let us discuss both options in detail now.
-Record a video
You can record a video with recording software when you are capturing video from your webcam or from your computer screen. There are two options you have when it comes to choose a recording software.
- Premium Recorder - A premium recorder is a professional video recording software that you have to purchase to avail all the features and functionalities. Choose the best video recorder.
- Free Recorder - If you are not willing to spend any money on a recording software, there are plenty of free recording applications available. We recommend OBS Studio as the best free video recorder.
-Shoot a video
The second option is shooting a video with your external digital camera. You can also use your phone camera to shoot a video. For example, making vlogs, comedy skits, travel videos, or short films needs a digital camera. If you are using your phone camera, you can cut and crop the video after shooting using the video trimmer apps or online video trimmers. If you are shooting external with an external camera, you can transfer the video to your mobile or computer and use a preferred video trimmer for editing.
Part 2 Video Trimmer for PC and Mac
When it comes to editing and trimming a video, using a computer is the best option. This is because you have a wider screen to pay attention to the details of the video and trim out the unnecessary parts easily. Besides, editing a video requires CPU resources which are best served by a computer. We have divided the video trimmers for computers into two categories for user convenience. You can easily find video trimmers for Windows PC as well as for Mac.
# For Beginner Users
This category is perfect for those who do not have any experience in video editing and they are looking for a basic video trimmer to get the job done. Besides, if you need to trim videos once in a while, these are perfect for you. You can trim video free with the following video trimmers.
1. Windows Photos
Best for: Windows users with no editing skills
G2 rating: 4.0/5
Price: Free
If you are a Windows PC user and you are looking for a basic video trimming application, Windows Photos is right there for you. The application comes pre-installed on Windows PC and hence, there is no need to install any external application. Even though Windows Photos is primarily used for viewing photos, there is a dedicated video editor available where you can trim your recorded video easily. Apart from trimming videos, you can do some basic editing like adding title cards and text, video effects, background music, and filters. Here are the pros and cons of Windows Photos.
Pros:-
- Comes pre-installed in Windows.
- Super easy user interface to operate.
- Quick trimming and cutting out videos.
- Different motion transitions and effects present.
- Add titles, texts, and audio to video.
- AVarious filters and 3D effects available.
Cons:-
- Not suitable for trimming large videos.
- Lack of different file formats for saving the videos.
2. QuickTime Player
Best for: Mac users with basic trimming needs
G2 rating: 4.2/5
Price: Free
If you are a Mac user and you are looking for a free video editor for trimming your video, QuickTime Player is the best application for you. Just like Windows Photos for Windows users, QuickTime Player comes pre-installed for Mac users. In fact, it is the default media player for Mac users. Apart from playing media files, you can use QuickTime Player for video recording as well as editing the recorded video. This includes trimming videos and replaying on the application to reach the level of perfection easily. Here are the pros and cons of QuickTime Player you should be aware of.
Pros:-
- The user interface is super easy to operate.
- Trim, flip, split, and merge videos quickly.
- Option to record video with audio flawlessly.
- Instant preview of the edited video on QuickTime.
- QuickTime is compatible with iPhone and iPad.
- Advanced streaming options available in Pro version.
- Supports playing different video file formats.
Cons:-
- Some of the settings are complicated.
- It can crash while editing large video files.
3. iMovie
Best for: Playing and editing videos
G2 rating: 4.3/5
Price: Free
If you are a Mac user and you are looking for a dedicated video editor, iMovie is a great choice. iMovie also comes pre-install on Mac and it is compatible with iPhone and iPad as well. The application is available completely free for mac users and hence, many prefer it over QuickTime Player for editing videos. You can quickly trim your videos as well as rotate and crop your videos as per your requirements. You can enhance your video with effects and filters available. Here are the pros and cons of iMovie you should be aware of.
Pros:-
- Intuitive user interface for easy operation.
- Quick edits to make a raw video presentable.
- Supports 4K video editing without crashing.
- Add different graphical elements for engaging videos.
- Different types of effects and filters for video enhancement.
- Easy sharing options across devices and online platforms.
- Work on multiple video projects simultaneously.
Cons:-
- Editing MP4 video is complicated.
- Lacks advanced editing features.
4. Media Cope
Best for: Multiple video using needs
G2 rating: 4.0/5
Price: Free
Media Cope is a freeware video trimmer for Windows users only. It is a basic video editor with standard editing options. The software is best suited for those who have older Windows versions such as Windows 7. The lightweight application can act as an audio and video player. You can easily trim your video and extract import parts as well. You can also join audio and video files and convert them into desired file formats. Here are the pros and cons of Media Cope.
Pros:-
- Can play audio and video files of different formats.
- Instantly trim and cut video and audio files.
- Can join audio and video clips and save in desired file format.
- Can convert audio and video files as per requirements.
- Transform photos into slideshow instantly.
- Resize photos and take screenshots from videos.
- Modify different video parameters and export the file.
Cons:-
- Lack of various standard video editing options.
- Looks outdated for modern Windows OS.
5. OpenShot
Best for: Open source software lovers
G2 rating: 4.4/5
Price: Free
If you are looking for a video editor that is compatible with all desktop operating system, OpenShot is the best choice for you. It is a completely free, open-source video editor for Windows, Mac and even Linux users. In this list of video editors for beginners, this is the best in terms of features and functionalities. You can trim and slice video, add animations, insert different layers and video effects to enhance the video content. The user interface is rather intuitive in spite of having all the different options you look for in a video editor. Here are the pros and cons of OpenShot video editor.
Pros:-
- Simple but powerful user interface.
- Trim video instantly without different options.
- Add 3D titles, 3D animations, and slow motion effects.
- Loads of video and audio effects present to apply.
- Add different layers of videos, audio tracks, and images.
- Advanced option for keyframing and time mapping.
- Multi-lingual support and frequent updates for new features.
Cons:-
- Unstable performance for large video files.
- The hardware acceleration is not very powerful.
# For Advanced Users
If you are a regular video creator and you want your videos to stand out, this category is for you. You can edit and trim your videos exactly the way you want. Besides, you can transform your raw videos into professional-quality videos with the following video editors.
1. Filmora
Best for: Rich videos effects and templates
G2 rating: 4.4/5
Price: $49.99
Wondershare Filmora is an outstanding video editor where you can trim your video and audio files like a professional. Since you are an advanced user, you will need more than just trimming to make your raw video look stunning. Filmora offers you all the tools and features you will ever need to take your video to the next level.
Compared to other popular premium video editors, Filmora does not need heavy CPU resource and it has an intuitive user interface. That is why video creators especially YouTubers and Vloggers prefer it for editing their videos regularly. The software is available for both Windows and Mac users. Here are the pros and cons of Filmora that you should be aware of.
For Win 7 or later (64-bit)
For macOS 10.12 or later
Pros:-
- Record screen and webcam video with audio sources.
- Basic tools for trimming, splitting, and joining video files.
- Customize different video settings and parameters.
- Add video and audio effects and graphical elements.
- Wide range of stock library of media files and animations.
- Add multiple layers and work with multiple channels while editing.
- Export the recorded or edited video file in different file formats.
Cons:-
- Saving the edited video takes time due to processing part.
2. Adobe Premiere Pro
Best for: Professional video trim, edit and after effects
G2 rating: 4.5/5
Price: $20.99/month
Adobe Premiere Pro is the most powerful video editor and that is why even professional video editors use it for editing movies. There is hardly any video file format that Premiere does not support. You can edit multiple videos at the same time and switch between scenes and clips. Trimming video and audio files is swift with intuitive controls. There is also option for non-linear video editing for advanced users.
Since it is extremely popular in the videography world, there are many organizational tools available for editing large video projects and integrated workflow. The software supports VR video, 3D video, and multicam video editing. The software is available for Windows as well as Mac users. Here are the pros and cons of Adobe Premiere Pro.
Pros:-
- Customizable layouts for reorganizing user interface.
- Quick trimming and playback option without rendering.
- Supports a wide range of file formats for import and export.
- All the different tools for professional video and audio editing.
- Can work on and render multiple video files easily.
- Cross-app functionality with amazing stabilization features.
Cons:-
- The learning curve is rather steep and takes a lot of time.
- The software is only suitable for high-end computers.
3. Final Cut Pro
Best for: Advanced organizing tools of any professional video editing
G2 rating: 4.4/5
Price: $299
Final Cut Pro is equally popular in the videography world as Adobe Premiere Pro. Final Cut Pro is primarily for Mac users as it is developed by Apple. This is the most powerful video editor for Mac users as it is packed with loads of features for professional video editing. Trimming videos is as easy as it gets, along with other standard editing options.
The software supports editing multicam videos, VR videos, 3D videos as well as 360 degree videos. There are endless presets and effects available that you can apply on your video while editing. You can easily edit 4K videos without performance lag. In fact, Final Cut Pro shines where other video editors fail to perform with high resolution and large video files. Here are the pros and cons of Final Cut Pro.
Pros:-
- Trimming, cutting, splitting and joining videos are easy.
- Seamless video editing with standard and advanced tools.
- Different motion graphics templates available.
- Supports external plug-ins and VR headset playback.
- Proper video files and assets organizing and audio editing options.
- Relatively quick rendering of large video files.
Cons:-
- May take time to get used to all the available options.
- Relatively expensive in comparison to peers.
4. Movavi Video Editor
Best for: People who love more brilliant effects in videos
G2 rating: 4.8/5
Price: $74.95
Movavi Video Editor is a premium software for trimming and editing videos. It is available for both Windows and Mac users. There is a free version available but it puts a watermark on the output video. Apart from trimming and splitting videos, you can add various video effects starting from adding titles and transitions to stickers and elements. Besides, you can opt for greenscreen effect and edit videos in vertical mode. Here are the pros and cons of Movavi Video Editor you should be aware of.
Pros:-
- Integrated video capturing options from different sources.
- Instant trimming, splitting, and joining of videos.
- Loads of titles, filters and transitions present.
- Add video PiP layers as well as voiceover.
- Vertical video editing mode present.
- Video stabilization mode and Chroma key.
- Keyframing, slow motion and motion tracking.
Cons:-
- The rendering is not very fast.
- Lack of color tuning options.
5. Bandicut
Best for: Trim, join and split video with fast speed
G2 rating: 4.0/5
Price: $44.96
Bandicut from Bandicam is a dedicated video trimmer for Windows users. It is a premium application with a one-time purchase fee. The software ensures lossless video trimming, and you can trim video instantly thanks to its intuitive user interface. It is a versatile application that you can use to extract audio from a video as well as joining multiple video files. Splitting a large video file into multiple files is super easy. However, it is not a full-fledged video editor like Filmora or Premiere. Therefore, if your objective is specifically to trim, split, and join videos, this is the one for you. Here are the pros and cons of Bandicut.
Pros:-
- Trim and split videos instantly
- Super intuitive user interface.
- Cut segments from videos.
- Join multiple videos quickly.
- Supports different file formats.
- No loss of video quality during editing.
- Hardware acceleration for high performance.
Cons:-
- Very limited editing features.
6. VSDC
Best for: Movie level video cut with light professional skills
G2 rating: 4.0/5
Price: $19.99
VSDC is a free video editor with all the basic editing tools available. VSDC Pro is a premium video editor where advanced features are available. For trimming a video, VSDC free video editor can get the job done. Even though it is completely free, some features are comparable to many premium video editors. For example, you get access to a large set of filters, effects, and transitions that you can apply to your videos. Even when you have a low-end PC, you can do basic video editing works comfortably. Here are all the pros and cons of VSDC free video editor you should know.
Pros:-
- Instant trimming and basic editing of videos.
- Wide range of effects and filters as well as Chroma key.
- Color correction option and non-linear editing available.
- Supports editing 360 degree videos and split-screen videos.
- Supports different video and audio file formats.
- Lightweight and suitable for low-end computers.
Cons:-
- Lacks standard audio editing options.
- Lacks hotkeys and useful keyboard shortcuts.
7. Camtasia
Best for: Tutorial video recording and editing
G2 rating: 4.6/5
Price: $224.99
Camtasia by TechSmith is a premium video editor for Windows and Mac users. Even though it is more popular as a video editor, you can trim your videos easily on the software. You can record anything on your screen as well as external webcam. You can edit recorded video as well as import external video files for quick editing. The software offers easy share instant through which you can share on popular video streaming platforms. There are various templates and themes available to create and edit videos of different categories. Here are the pros and cons of Camtasia.
Pros:-
- Quick trimming, splitting, joining video options.
- Different templates and packages for versatile video creation.
- Various transitions, annotations, and presets present.
- PowerPoint integration, screen and web cam capture.
- Different cursor and audio effects with royalty-free assets.
- Import different media files and upload directly on video streaming platforms.
Cons:-
- Reports of crashes when working with large files.
- No keyframe and motion tracking.
- Very few customization options.
Part 3 Video Trimmers for Mobile
In today’s world, the cameras of smartphones are extremely powerful, and there are many who shoot videos with phone cameras instead of a dedicated digital camera. For example, there are many popular vloggers who shoot their videos with phone cameras, and video creators make short videos with phone cameras. When you shoot a video on your phone, you must be looking for a video trimmer app for your phone so that you can trim the recorded video instantly and share across social media and video streaming platforms. Here is the list of the best video trimmers for mobile.
# For Beginner Users
1. VidTrim Pro
Best for: Android video trimming, merging, frame grabbing
Rating: 4.1/5
Download Link: https://play.google.com/store/apps/details?id=com.goseet.VidTrimPro&hl=en\_US&gl=US
VidTrim is a dedicated video trimmer available for Android users. The free version adds a watermark to the output video, and hence, you have to opt for VidTrim Pro to avoid all limitations. Apart from trimming videos, you can merge videos and convert videos into audio files. You can also add effects and music tracks to your videos. The user interface is as simple as it gets. Here are the pros and cons of VidTrim Pro app.
Pros:-
- Trim videos as well as merge video clips.
- Convert supported video files into Mp3 audio files.
- Rotate videos as well as save screenshots from videos.
- Add cool video effects, sound effects, and soundtracks.
- Multi-lingual support and video file format converter.
Cons:-
- Limited video editing features for a paid video editor app.
- The user interface is simple but outdated.
2. KineMaster
Best for: Video content downloadable
Rating: 4.2/5
Download Link: https://play.google.com/store/apps/details?id=com.nexstreaming.app.kinemasterfree&hl=en\_US&gl=US
You must have seen many videos online with the watermark “Made with Kinemaster”. This is because KineMaster is very popular among amateur video creators. KineMaster is available for Android as well as iOS users. You can instantly trim and crop videos. Besides, you can add special effects, animations and stickers as well as tweak different video settings for enhancements. KineMaster is available free of cost but it attaches a watermark to the output video at one corner. You can subscribe to KineMaster Premium to remove watermark and unlock more features. Here are the pros and cons of KineMaster.
Pros:-
- Trim, cut, slice, and crop videos instantly.
- Add music, sound effects as well as voiceover.
- Provides amazing visual effects and animations.
- Adjust color filters, modes and video speed.
- Supports keyframing and motion tracking.
- Save 4K videos and share instantly online.
Cons:-
- KineMaster chroma key feature has bugs.
- Can crash or freeze handling large video files.
3. Quik
Best for: Producing cinematic auto-edits.
Rating: 4.3/5
Download Link: https://play.google.com/store/apps/details?id=com.gopro.smarty&hl=en\_US&gl=US
Quick from GoPro is fast becoming a popular video editor app. GoPro is the most popular action camera brand and naturally, its video editing app has garnered enough attention. The app is available for Android and iOS users. The app has a mixed bag of options for editing videos quickly. You can trim your videos, add filters and adjust video speed. Besides, its AI can locate the best shots in a video and enhance them with special effects. Here are the pros and cons of Quick app.
Pros:-
- Trim, crop, adjust speed, remove audio from videos.
- Different preset templates available with effects and filters.
- Add music, titles, effects, and transitions.
- Easy sharing of videos and photos.
- Powerful AI to highlight the best shots in a video.
- Adjust video orientation, save in 1080p resolution.
Cons:-
- Not suitable for large video files.
- No font adjustment options.
4. iMovie
Best for: Create Hollywood-style trailers and beautiful movies
Rating: 4.0/5
Download Link: https://apps.apple.com/us/app/imovie/id377298193
iMovie app by Apple is exclusively available for iOS users. iMovie is also available as a software which we have already discussed. In terms of features, iMovie app is very similar to iMovie software. You can instantly make basic editing works. Apart from editing, the app is ideal for creating different types of videos with ready-made templates. There are loads of graphical effects, animated titles, and video filters available to apply. Here are the pros and cons of iMovie app for you.
Pros:-
- Record, trim, split, join and crop videos on the go.
- Choose from different themes and templates to create videos.
- Animated titles, video filters, graphical effects available.
- Chroma key, PiP mode as well as split screen effect possible.
- Add sound effects, music, and depth of field effect.
- Optimized output for social media and video streaming platforms.
- Supports 4K video editing and easy share across Apple devices.
Cons:-
- Limited resources and customization options.
- The app size is large and uses high CPU resources.
# For Advanced Users
1. LumaFusion
Best for: Professional video trimming for iOS devices
Rating: 4.8/5
Download Link: https://apps.apple.com/us/app/lumafusion/id1062022008
LumaFusion is a top-rated video editor for iPad and iPhone. The app is as good as a premium video editor for desktop users. Therefore, professional video creators who use iPhone or iPad for video editing prefer LumaFusion all the time. You can trim, cut, crop, split, and merge videos intuitively from its timeline. Most importantly, you can edit multiple video and audio files together like a professional. Here are the pros and cons of LumaFusion.
Pros:-
- Trim and export video in different file formats.
- Work with multiple video and audio files.
- Preset transitions, instant preview, markers for timeline.
- Add Chroma and Luma key effects as well as stunning visual effects.
- Adjust speed, audio, use keyframes, correct colors.
- Work with titles, fonts, borders, and share conveniently.
- Wide range of media files available in the library.
Cons:-
- Does not support motion tracking.
- Can be difficult to edit large files.
2. Adobe Premiere Rush
Best for: Shoot, edit, and share online videos anywhere.
Rating: 3.0/5
Download Link: https://play.google.com/store/apps/details?id=com.adobe.premiererush.videoeditor&hl=en\_US&gl=US
Even though Adobe Premium Rush app is available or Android and iOS users, it is more popular among iPhone and iPad users. The app is free though there are in-app purchases available. Rush Premium has more features and functionalities. Editing any video is quite convenient though Adobe has tried its level best to offer all the possible features of Adobe Premium Pro desktop software on the app. The app supports multitrack timeline for professional videos. Here are all the pros and cons of Adobe Premiere Rush you should be aware of.
Pros:-
- Record video in high-resolution with the app.
- Trim, crop, mirror, and flip videos.
- Add images, overlays, texts, and stickers.
- Pan and zoom effect, animation titles.
- Royalty-free audio tracks, color correction options.
- Easy exporting of files in different formats.
Cons:-
- Rendering projects can be slow.
- Comes with limited features.
3. Filmmaker Pro Video Editor
Best for: 4K quality video editing
Rating: 4.6/5
Download Link: https://apps.apple.com/us/app/filmmaker-pro-video-editor/id1082956994
Filmmaker Pro is a highly rated video editor that you can use to trim your videos. Filmmaker Pro app is available for both Android and iOS. The app supports 4K video for editing works. The timeline has color codes for different assets and hence, editing becomes easy. You can edit different video parameters and settings and add different effects. The auto save option is extremely useful when it comes to editing a large file. Even though it is available for free, they have a subscription plan for unlocking all features. Here are the pros and cons of Filmmaker Pro Video Editor.
Pros:-
- Trim, split, crop and rotate videos.
- Adjust video speed, volume, video grading.
- Chroma key, voice to text caption, keyframe and motion tracking.
- Different Picture-in-Picture mode for videos, photos, and GIFs.
- Various transition effects, audio effects, and text overlays.
- Different drawing tools, stickers, and graphical elements present.
Cons:-
- The free version has limited features.
- The number of effects are relatively less.
4. Splice Video Editor and Maker
Best for: Vloggers and social platform video cutting
Rating: 4.7/5
Download Link: https://play.google.com/store/apps/details?id=com.splice.video.editor&hl=en\_US&gl=US
Splice Video Editor and Maker is a free but powerful app that enables you to do pro-level editing. You can trim your video clips, adjust speed, and add music on the go. In fact, you can create videos and slideshows instantly and you can add texts and overlays. The music library has different categories of tracks to apply to videos. You can also merge videos as well as change aspect ratio according. The app is available for Android and iOS users. Here are all the pros and cons of Splice Video Editor and Marker.
Pros:-
- Easy interface for smooth trimming and merging of videos.
- Adjust speed, aspect ratio, and video parameters.
- Organize clips and tracks in the timeline intuitively.
- Add custom texts, titles, tracks, transitions, and effects.
- Comes with a wide stock library of media files.
- Direct uploading video files on different social media platforms.
Cons:-
- Limited effects and filters available.
- Frequent crashes while handling large files.
5. Funimate
Best for: Mobile game video trim to show off gaming skills
Rating: 4.5/5
Download Link: https://play.google.com/store/apps/details?id=com.avcrbt.funimate&hl=en\_US&gl=US
Funimate video editor and maker app is quite highly rated on both Play Store and App Store. It is a very powerful and feature-rich app where you will get all the desired editing tools to publish a professional-quality video. Starting from element library to video masks and AI effects, the app takes your video to the next level. You can obviously perform the basic editing works like trimming, splitting and joining. Here are the pros and cons of Funimate app.
Pros:-
- Trimming, merging, and cutting videos.
- Text effects, video AI effects, and effect mixer.
- Comes with over 100 advanced video effects.
- Allows adding music to videos for engaging videos.
- Supports slow motion and looping videos.
- Advanced keyframing and element library.
- Allows creating a professional photo slideshow.
Cons:-
- No multilingual support and auto-save feature.
- Some lagging issues have been reported.
Part 4 Online Video Trimmers
If you are using a video editor on your computer, it takes considerable amount of space in your storage. The same is applicable to video editors for smartphones. If you do not want to install any app on your device yet trim videos conveniently, the online video trimmers are for you. You can open the video trimmer directly from your web browser and trim your video and save it without installing any application on your device. Here is the list of the best online video trimmers.
# For Beginner Users
1. https://online-video-cutter.com/
Best for: Trimming large videos files.
Ratings: 4.2/5
Online Video Cutter is a dedicated video trimmer where you need to drag and drop your video file and cut out the required portion. You can even crop and rotate your videos if there is any such requirement. You can access the online platform directly from your web browser. There is no need for installation of any web launcher. The platform is also secured and hence, your videos won’t get leaked. There is also a Chrome extension available that you can use if you are a Chrome user. Here are the pros and cons of Online Video Cutter.
Pros:-
- Easy video trimming by drag-and-drop files.
- Enables uploading different file formats.
- Rotate feature for saving in portrait and landscape mode.
- Automatically deletes files for better security.
- Crop feature for changing frame size.
- Can edit video file of 4GB capacity.
Cons:-
- May reduce the video quality for the editing video.
2. https://clideo.com/cut-video
Best for: Trimming short videos.
Ratings: 4.5/5
This is another online video trimmer that supports different video file formats. The user interface is sleek for quick video trimming. You can upload file from your device as well as from Cloud storage. In fact, you can use the platform to convert video files. The level of trust and security is high and there are additional settings available for better editing. Here are the pros and cons Clideo Video Cutter.
Pros:-
- Intuitive interface for quick trimming.
- Supports different file formats.
- Converts videos into different formats.
- Offers high-level online security.
- Add fade in and fade out effects.
- Upload video files from Google Drive and Dropbox.
Cons:-
- No drag and drop feature.
- File size is limited to 500 MB only.
3. https://www.kapwing.com/tools/trim-video
Best for: Editing video elaborately.
Ratings: 4.4/5
Kapwing is a dedicated online video editor that will give you the vibe of using a desktop video editor. Therefore, it is suitable for those who are looking for an online platform for trimming as well as various other editing works. You can add texts, images, elements, audio, transitions, as well as record videos. You can also export in different file formats. However, the free version attaches a watermark. Therefore, you have to upgrade to its premium version and use the platform is a full-fledged video editor. Here are the pros and cons of Kapwing.
Pros:-
- Trim, crop, zoom videos and adjust video parameters.
- Supports import and export of different file formats.
- Add effects, audio, and elements to the videos.
- You can work with multiple layers while editing.
- Different sound effects, templates, and scenes and emojis present.
- Stunning user interface that looks like a video editor software.
Cons:-
- Free version attaches watermark and lowers video quality.
4. https://www.freeconvert.com/video-trimmer
Best for: Basic video trimming
Ratings: 4.0/5
FreeConvert Video Trimmer is a free online tool through which you can trim videos of size up to 1GB easily. The platform supports as many as 40 different video file formats. Therefore, you can trim almost any video file easily. The security is tightened so that the uploaded videos do not get leaked. You can upload video files from your device, Google Drive, Dropbox as well as from URL. Therefore, if you want to trim videos that are available online, you can do it easily with this tool. Here are the pros and cons of FreeConvert Video Trimmer.
Pros:-
- Easy to use, intuitive interface.
- Does not require any registration.
- Supports over 40 file formats.
- Compatible with multiple browsers.
- 256-bit SSL encryption offers better security.
- Allows adjustment of parameters before conversion.
Cons:-
- There are too many annoying ads.
# For Advanced Users
5. https://www.veed.io/tools/video-cutter
Best for: Trimming videos for social media platforms.
Ratings: 4.3/5
Veed.io has a wide collection of tools for video editing and the video cutter is a dedicated video trimmer. You can trim videos of popular file formats easily. Apart from video files, the platform supports trimming GIFs and audio files. You can upload videos as well as mention URL of videos that are present online for trimming. The online tool does not degrade the video quality and the output file is of high-quality as well. Here are the pros and cons of Veed.io video cutter.
Pros:-
- Allows saving the video in a high-quality format.
- Supports cutting a wide range of audio file formats.
- Ability to upload and cut animated GIFs.
- Allows cutting YouTube videos directly using URL.
- Easy drag and drop feature for saving time.
- “Split” option for removing the middle part of the video.
Cons:-
- Not suitable for trimming large video files.
6. https://www.fastreel.com/video-cutter.html
Best for: Trimming videos for personal use.
Ratings: 4.2/5
Fastreel online video trimmer lets you trim your videos with a few clicks. Drop your file and mark the points for trimming and there you go. That tool is also useful if you want to split your video. There are several video file formats that the platform supports. The user interface is intuitive and the trimming can be precise. The free version attaches a watermark and hence, the premium version is what you should have. Here are the pros and cons of Fastreel online video trimmer.
Pros:-
- Simple interface for hassle-free trimming.
- Supports different video file formats.
- Feature of data security offers better safety.
- Quick video trimming without using the editor.
- Different file formats while saving the video.
- Precision cutting for removing unwanted segments.
Cons:-
- The free version comes with watermark.
- Free version lowers the video quality.
7. https://flixier.com/tools/video-trimmer
Best for: editing videos as a teamwork
Ratings: 4.4/5
Flixier Video Trimmer is a premium tool to trim and crop videos instantly. The tool is available in a free version but there are many limitations. Therefore, you need to have a premium version of Flixier Video Trimmer. You can export videos in 1080p and 4K resolution. You can opt for transcribing your videos and store videos in the cloud. In the premium version, two team members can work together. Here are the pros and cons of Flixier Video Trimmer.
Pros:-
- Upload videos from YouTube, Twitch, and cloud platforms.
- No need to create account for instant trimming.
- Trim, crop, cut, and add images to videos.
- Supports multiple file formats.
- Comes with an easy collaborative platform.
- Additional translation and transcribe options.
Cons:-
- There are lots of limitations of premium plans as well.
- Only the highest premium plan supports 4K resolution.
8. https://www.wevideo.com/features/video-cutter
Best for: Best premium online video editor
Ratings: 4.5/5
WeVideo Video Cutter is a paid video trimmer though you try out the platform for free. The platform supports a wide range of video files. You can drag and drop files and trim videos instantly. Trimming cannot get any easier and the processing speed of the editing video is fast. You can finish trimming your videos in a few seconds. There is a unique zoom feature to trim out videos accurately. You can also add texts and music to your video file before exporting. Here are the pros and cons of WeVideo Video Cutter.
Pros:-
- Drag and drop feature for quick editing.
- Smooth and accurate trimming with zoom function.
- Music and motion titles library.
- Compatible with different web browsers.
- Export edited files in different file formats.
- There is no capping on file size as such.
Cons:-
- The pricing is on the steeper side.
Part 5 Editing Tips to Improve Your Videos
Apart from trimming, you have to edit different other aspects so that you can make the video engaging and eye-catching. Here are some editing tips you should stick to improve your video content.
Get The Best Video Editor - Editing a video is equally important as shooting a video. Once you have the best video editor, you can rest assured that your editing work is half done. This is because you have all the tools to turn your raw video into stunning video. You can experiment and come up with the best editing work to your own surprise.
Get The Length Correct - In today’s world, viewers have very less time to watch videos. Therefore, a lengthy and elaborative video is a bummer. Hence, you should trim the video and keep only the portions that are relevant, engaging, and not boring.
Start with a Bang - The first impression is always the most important, and hence, the intro of your video is extremely crucial to keep the attention of the audiences intact. To make the intro interesting, you should not only focus on the content but also on video effects and animations that are attention-grabbing.
Smooth Cuts and Soothing Colours - When you are cutting from one scene or angle to another, the transition should be smooth so that it does not feel abrupt. Therefore, you should cut scenes when the subjects and objects seem to be static so that the transition is smooth naturally. Play attention to colour and the video editors allow you to enhance the quality by adjusting the colors and picture properties.
Graphical Objects - Use graphical objects and animated texts wherever possible for better explanations. Things can get boring visually when you do not add graphical elements, transitions, and animations appropriately in different places. Similarly, the use of texts and titles makes the video more engaging. Instead of static texts, there are animated texts and titles available with stickers and memes that you can edit your video with.
Play Attention to Sound - Sound is the most neglected part of a video by amateur video creators when one should pay attention to it. The sound effects can keep the audiences hooked to your video and make them not get bored. Certain sound effects refresh the attention of the audiences when it starts to fade, and hence, you should place the sound effects wisely.
Proper Flow - The editing work should be smooth so that the flow of the video is smooth and efficient. It takes time, and hence, you can practice and learn video editing so that your video can stand out instantly after your editing touches. Besides, the editing should be such that the video feels like a story that audiences can invest in and get engaged throughout.
Part 6 How to Share Your Videos
In order to share videos after trimming them, you need to save the video properly. There are different file formats available for video files. For example, MP4 is the most popular video file format among Windows users. On the contrary, MOV is the most popular video file format. Different file formats have different features such as compression and lossless. According to the file format, the file size varies for the same duration of video.
Therefore, the video trimmer you are using must have different file formats for saving and exporting the editing video files. Some video trimmers have in-built features to share videos on social media platforms and upload on video streaming platforms like YouTube. Depending on your target audiences, you need to adjust the parameters like aspect ratio, video resolution, as well as duration. Besides, you can upload videos on cloud storage and share with anyone as per your requirements.
Part 7 Related FAQs about Video Trimming
1. What is the best video trimmer?
Wondershare Filmora is the best video trimmer as all the features are well-balanced. Apart from trimming, it has all the tools for professional-quality video editing. Filmora can also be used for recording videos. Trimming videos is as easy as it gets and you can export the edited video in different file formats.
2. How can I trim a video?
To trim a video, you will need a video trimmer. If you are a desktop user and you need to regularly edit videos, there are video trimmers available for beginners as well as advanced users. Similarly, there are video editor apps available for mobile users. If you need to trim just one video, you should use an online video trimmer.
3. How can I trim a large video?
In order to trim a large video file, you will need a professional video editor like Filmora so that there is no loss in video quality and frequent crashes and screen freezing incidents while trimming. Drag and drop the video file on Filmora’s timeline and trim the unnecessary parts. You can view the changes and export the file in desired file format.
4. What does trim mean in video editing?
Trimming a video means you are cutting off different portions of a video and reducing its length. Trimming is mostly done to remove unnecessary parts from a video so that the video becomes more engaging without any unnecessary fillers.
5. Can I trim a video in VLC?
Here are the steps to trim a video in VLC Media Player.
- Open VLC Player. Go to View> Advanced Controls. This will make the recording buttons appear.
- Open the video that you want to trim. Mark the portion that you want to keep in your video.
- Play the video and go to the point from where you want to keep the video. Click on Record button.
- Go to the point where you want to end the video. Click on Record button again. All other portions are trimmed and the edited video will be saved.
6. How to trim YouTube videos?
In order to trim YouTube videos, you need to download the videos on your device. You can use an online video trimmer where you can upload the files and trim the videos as per your requirements.
How to Use Kahoot! On Zoom
In the educational game Kahoot! participants respond to multiple-choice questions based on trivia. Each participant uses their own controller to answer questions in the online game. There are several question kinds to pick from, allowing for complete customization of the test. Each player needs their own controller for Kahoot! The game questions will be shown in the Zoom/Google Meet window, but the answers must be entered using the controller. With the Kahoot!! app for Zoom, presenters may use play and friendly rivalry to increase participant engagement. Users may organize knowledge- and feedback-gathering pulse checks with staff members, encourage original thought with word clouds, and empower participants’ voices with surveys, open-ended questions, and other tools. Utilizing the brainstorm tool, organizations may crowdsource ideas and advance teamwork.
Engagement has emerged as a crucial component of successful learning, collaboration, and connection as the globe has increased the use of video communications in social and professional situations. Users may access, host, and play Kahoot!! games and educational information with other meeting participants using the Kahoot!! app for Zoom without ever leaving the Zoom Meeting or requiring a second device. Corporate executives may motivate their staff via speeches, meetings, and online activities. Meeting hosts will have immediate access to data and statistics from their Kahoot!! experience, allowing them to respond in real time to audience engagement with the material. Additionally, hosts may email the Kahoot!! games to all participants so they can practice and improve their scores, which will increase participant engagement and learning retention. Hosts can also distribute the Kahoot!! games as self-paced challenges with individuals who couldn’t attend in person.
Part 1: Key Features of Kahoot
What more is there to discuss, Kahoot!? Every pupil adores it. Many instructors and educators use it all around the world to make learning simple, enjoyable, and interesting. Everyone may use it since it is free and extremely simple to use. These are some of its attributes:
- Quizzes may be made in a matter of minutes.
- Develop games based on the abilities of the kids. Playing at home or in the Zoom is simple for them.
- Various templates are offered. You can choose one of them with confidence.
- Kahoot! has the ability to be organized into many folders according to topics or subjects.
- Additionally, multiple choice questions may be included by quiz makers.
- Teachers using Kahoot! may combine different questions into one format, such as quizzes, polls, riddles, and slides.
- Use Apple Schoolwork, Google Zooms, and Microsoft Teams to share student-centered tasks.
Part 2: How to Host a Kahoot! Session within a Zoom Meeting
With the Zoom app, Kahoot! may be viewed, hosted, and used. It’s amazing that Kahoot!!, one of the most well-known brands in quiz-based learning, still provides a free-to-use platform, making it very accessible to both instructors and students. It’s also a useful resource for a hybrid class that combines online and classroom instruction. Most devices will be able to use the cloud-based service using a web browser. This implies that students using computers, tablets, and cellphones in class or at home may access this. Participants in Zoom Meetings may play games and learn without having to leave the Zoom meeting or bring a second device.
Step1Sign up for Zoom ahead of time and get ready. On the other hand, launch the Kahoot! test in your web browser, then be ready to share your screen in Zoom.
Step2As the participants come, allow them in and check to see whether you and they can both hear each other. To access the Kahoot! quiz, make sure they have a device or another browser tab open.
Step3Open the Kahoot! test and share it using Zoom’s “Share Screen” feature. While your screen is shared, continue to host the Kahoot! as normal. To view participants next to your shared screen, we advise selecting Side-by-Side Mode.
Part 3: How to Participate in Kahoot! Sessions within a Zoom Meeting
With more than 40 million ready-made games available on Kahoot!!, getting started is fast and simple. When time and resources are limited, hybrid or distant learning is ideal. After linking the Kahoot! to your Zoom account, you may utilize it. Use this app and start a meeting. Go to Apps on the toolbar and choose the program you wish to use. Select Who is Hosting to locate their host or to join a Kahoot! session being hosted by a friend or another player. Players may post a question to a shared screen on the Kahoot! platform. Kahoot!! just needs an account to be made in order to use it since it is free. Most devices may be used by students to access Kahoot!! from wherever there is an internet connection. This is how:
Step1Take the time to check that Zoom, Skype, Cisco Webex, or Google Hangout are operating and that your camera, microphone, and speaker are all operational.
Step2In the right-side panel, add the Kahoot!! app to your list of apps and click Join.
Step3The lobby will reveal your game PIN when you click the Play button, allowing the computer to show you a Kahoot! You may enter the game PIN and press Enter to join the Kahoot! session once the host shows their screen with you. To participate in a Kahoot! session, you don’t need a Kahoot! account.
Part 4: How to Record Zoom Meetings
Zoom is a conference tool that enables real-time, high-quality, low-latency communication. Filmora is an excellent video recorder for that reason, enabling users to capture on-screen activity such Zoom audio tracks and video conversations. Wondershare One of the most versatile and portable Zoom voice recorders is the Filmora. Even novices may easily utilize it due to its user-friendly UI. All you have to do is click the record button after choosing the proper audio source in the settings. The all-in-one video editing program Filmora allows you to record your screen with audio, a facecam, and a green screen effect. You can record the entire screen or just a portion of it, and you can perform a number of quick edits on your video using tools like trimming, cropping, changing the audio track’s volume, and so on.
How to Use Filmora to Record Zoom Lectures
Having said that, Filmora is a great Zoom recorder that can capture games, audio, and video conversations. This video recorder may be used to make video clip lessons in addition to recording movies, video games, and webcam footage. In addition to Zoom, it can also capture internet streaming audio. Here is information on how to record Zoom meetings using this software:
Step1Download and Install Filmora on your PC
To use this program for a number of tasks, including screen recording and recording editing, you must first download and install it on your computer. To achieve this, download the recording program by clicking the link below. Launch the program as soon as the download is finished to start the installation process, and then adhere to the on-screen directions to install and make this software available for usage.
Step2Choose the Record’s Ideal Position in the Zoom
Use it on your PC at this point. As soon as you start the program, a window interface with two choices for screen recording, editing already recorded videos, and generating videos will display. Choose the Recording option from the menu. When you click the record button, the program will direct you to the recording interface, where you can easily adjust the settings for your camera and audio. To add the microphone or Zoom sound in that particular field, use the necessary buttons as described below:
Step3Press the Record Button
It goes without saying that you must test your recording tools to ensure they are functional and capturing the highest quality audio. But once you’re ready, click the record button, which will allow you 3-5 seconds before starting to record the personalized screen of your PC as seen below:
Step4Export and Save Your Zoom Recording
You may now save the Zoom video for sharing on social media after making and modifying it. The following file types may be used to save the document: MP4, WMV, AVI, MOV, GIF, and MP3. The finest feature of Wondershare Filmora is the direct export and sharing of Zoom video recordings to YouTube; the only need is that you must be signed in to your YouTube account inside the application:
Because the MOV format is only available for online movies, you may also export your Zoom recordings to MP4 if you want to publish them to your YouTube channel. You are free to choose the format that best suits your needs. You may choose the encoder from a drop-down menu in the export options.
Conclusion
With the aid of several interesting tools and programs made accessible in this virtual environment, learning has now become enjoyable. Of them is Kahoot! In Zoom. It is an application that acts as a learning tool by providing fun games, tests, and a variety of other chances. In only a few minutes, quizzes may be made and distributed. Games and quizzes may be planned using this platform quite easily. The Kahoot! with Zoom will make it simpler than ever for corporate leaders to engage and encourage their team members with Kahoot!! engaging game-based learning experiences at a time when many organizations are staying virtual or planning for a hybrid model. Head towards recording Kahoot with Filmora to experience a smooth Kahoot! usage on Zoom. Plus, you can also share the gameplay afterwards.
How to Create Sports Intro and Outro for YouTube Video?
Are you deep into sports? Have you created a sports channel on YouTube but are still clueless? You do not need to panic. The article has got you covered.
There is an extensive range of sports channels on YouTube struggling and surviving. It includes gaming, exercise, athletics, basketball, hockey, and tennis sports. A promising sports background music in the intro and outro makes it appealing for the audience. Hence, the article will focus on three platforms for exercise downloading impeccable background music.
The step-by-step guide to creating an outstanding sports intro will also be sketched out. So, what are we waiting for? Time to commence this!
In this article
01 How to Create an Epic Sports Intro?
02 How to Edit a Sport Style YouTube Outro or End Screen?
03 3 Recommended Sites to Download Background Music for Exercise Videos
Part 1: How to Create an Epic Sports Intro?
Do you own a sports channel? Continue exploring the section to know more!
A sports channel needs a promising intro to keep the audience interested in the content. An exceptional intro to a sports channel with great music enables you to gain subscribers. The sub-section would cover an extensive procedure to make a startling sports intro with yoga background music or other sport. So, let us start? Shall we?
For Win 7 or later (64-bit)
For macOS 10.12 or later
Step 1: Open Wondershare Filmora from your computer. Now, head to the “Audio” panel to drop a powerful track to the timeline. Use the “Media” panel to import the sports video clips for your intro.

Step 2: Keep the highlights and trim the clips to be in sync with the music. After the editing is concluded, shift your focus to the “Titles.” Move to the Titles panel and use title animations for the “Energy Sports” pack.

Step 3: Drag and drop the titles on the top of the footage. It would be best to match the duration of the video clips with the titles. Now, double-click the title to rename it according to your need.

Step 4: To make the ending more powerful, right-click on the last video clip and click on “Speed and Duration.” Enhance the speed to make it engaging. Moving on, navigate to the “Effects” panel.

Step 5: From there, pick the “Shake” filter and drag and drop the “Chaos 1” to the last clip. Similarly, click on the “Distortion” filter to drop the “Chromatic Aberration” effect onto the last clip.

Step 6: Now, it is time to add transitions to create a smooth connection between the clips. Click on “Transitions” and then “Energy Sports” pack. Drag and drop both transitions in between the clips. A creative and captivating sports intro has been created with solid sports background music.

Part 2: How to Edit a Sport Style YouTube Outro or End Screen?
Communicating with the users about a channel doesn’t have to be with words. The background music for exercise expresses the aims of a channel more perfectly. The same goes for a profound sport-style outro which tells the audience that we are ending on a high note.
The sub-section takes the opportunity to offer a step-by-step to edit a sport-style YouTube end screen. So, come with us as we explore it together! Let us go!
For Win 7 or later (64-bit)
For macOS 10.12 or later
Step 1: To begin, launch Wondershare. Import the targeted video clips that you need as an engaging YouTube outro. After that, click on “Split Screen.” Please choose your favorite split-screen design and drag it to the timeline.

Step 2: Use the imported videos to drag them on the preview window in the split-screen design as selected. You can adjust the scale and position through the mouse click. Now, drag and drop the video onto the timeline and trim it as needed.

Step 3: Head to the “Effects” tab and search for blur in the space bar. Drag and drop the square blur to the second part of the video. Adjust the blur intensity as required. Import another video and add it to the timeline.

Step 4: Insert dissolved transitions between the first two cuts to smooth the process. Now, it is time to add an avatar image. Import the profile picture to the timeline above the second track. Head to the utility category under the “Effects” tab and drag the “Image Mask” to the image on the timeline.

Step 5: Double click on it to alter the masking width so that the circle mask can fit on the image. Scale down the picture and set it to the center of the frame. Navigate to the “Elements” panel and pick the YouTube subscribe button. Drag it to the third track afterward.

Step 6: Place the location on the preview window as you need. Now, move to the social media category in the “Titles” to choose the perfect one and add it to the timeline above the last clip. The user is instructed to add a transition at the beginning of the clip. Rename the social media names of your sports channel, and you are done with the process.

Part 3: 3 Recommended Sites to Download Background Music for Exercise Videos
Sports background music is one of the significant ways to keep the audience motivated for sports and exercise. It helps enhance the subscribers’ multifold. Therefore, the importance of promising yoga background music cannot be neglected.
Mixkit
Mixkit is a renowned place to access royalty-free marketplaces, bringing revolution to the market and content creators. It is extremely workable to download background music for exercise in seconds. Based on genre, mood, and tag, you can search for a suitable music track.
The trap sport workout, motivating mornings, positive energy, super strong, and the greatest comeback is one of the most exemplary tracks from Mixkit. The audio can be listened to before making the decision. The genre offers ambient, cinematic, funk, hip-hop, acoustic, classical, and electronica.

TunePocket
Changing the narrative of music platforms, TunePocket pretty much takes the lead. The filter results make the process flawless. You can tailor the search results by playing with category, mood, genres, instruments, length, and tempo.
The duration of each sports background music is also mentioned to give the content creators an idea. Power dance workout, workout fitness motivation, summer western dance, young gamers, and sports power electro, and techno blast are some examples of outstanding music tracks.

Envato Elements
The next on the list is Envato Elements making wonders in the business. The search filters are refined as the user deems necessary. Online exercise, motivational EDM, fitness, workout, corporate meditation, and exercise are some amazing examples of royalty-free music. The search results can be tailored according to relevancy and popularity.

Concluding Remarks
There is an awful load of sports channels on YouTube. The content creators are trying their best to beat the competitors. It is crucial to access energetic background music for exercise to make intro and outro engaging.
The article recommended three apps to download sports background music. The step-by-step guide to creating an inspiring sports intro and editing sports style YouTube outro via Filmora.
Wondershare Filmora
Get started easily with Filmora’s powerful performance, intuitive interface, and countless effects!
Try It Free Try It Free Try It Free Learn More >

02 How to Edit a Sport Style YouTube Outro or End Screen?
03 3 Recommended Sites to Download Background Music for Exercise Videos
Part 1: How to Create an Epic Sports Intro?
Do you own a sports channel? Continue exploring the section to know more!
A sports channel needs a promising intro to keep the audience interested in the content. An exceptional intro to a sports channel with great music enables you to gain subscribers. The sub-section would cover an extensive procedure to make a startling sports intro with yoga background music or other sport. So, let us start? Shall we?
For Win 7 or later (64-bit)
For macOS 10.12 or later
Step 1: Open Wondershare Filmora from your computer. Now, head to the “Audio” panel to drop a powerful track to the timeline. Use the “Media” panel to import the sports video clips for your intro.
Step 2: Keep the highlights and trim the clips to be in sync with the music. After the editing is concluded, shift your focus to the “Titles.” Move to the Titles panel and use title animations for the “Energy Sports” pack.
Step 3: Drag and drop the titles on the top of the footage. It would be best to match the duration of the video clips with the titles. Now, double-click the title to rename it according to your need.
Step 4: To make the ending more powerful, right-click on the last video clip and click on “Speed and Duration.” Enhance the speed to make it engaging. Moving on, navigate to the “Effects” panel.
Step 5: From there, pick the “Shake” filter and drag and drop the “Chaos 1” to the last clip. Similarly, click on the “Distortion” filter to drop the “Chromatic Aberration” effect onto the last clip.
Step 6: Now, it is time to add transitions to create a smooth connection between the clips. Click on “Transitions” and then “Energy Sports” pack. Drag and drop both transitions in between the clips. A creative and captivating sports intro has been created with solid sports background music.
Part 2: How to Edit a Sport Style YouTube Outro or End Screen?
Communicating with the users about a channel doesn’t have to be with words. The background music for exercise expresses the aims of a channel more perfectly. The same goes for a profound sport-style outro which tells the audience that we are ending on a high note.
The sub-section takes the opportunity to offer a step-by-step to edit a sport-style YouTube end screen. So, come with us as we explore it together! Let us go!
For Win 7 or later (64-bit)
For macOS 10.12 or later
Step 1: To begin, launch Wondershare. Import the targeted video clips that you need as an engaging YouTube outro. After that, click on “Split Screen.” Please choose your favorite split-screen design and drag it to the timeline.
Step 2: Use the imported videos to drag them on the preview window in the split-screen design as selected. You can adjust the scale and position through the mouse click. Now, drag and drop the video onto the timeline and trim it as needed.
Step 3: Head to the “Effects” tab and search for blur in the space bar. Drag and drop the square blur to the second part of the video. Adjust the blur intensity as required. Import another video and add it to the timeline.
Step 4: Insert dissolved transitions between the first two cuts to smooth the process. Now, it is time to add an avatar image. Import the profile picture to the timeline above the second track. Head to the utility category under the “Effects” tab and drag the “Image Mask” to the image on the timeline.
Step 5: Double click on it to alter the masking width so that the circle mask can fit on the image. Scale down the picture and set it to the center of the frame. Navigate to the “Elements” panel and pick the YouTube subscribe button. Drag it to the third track afterward.
Step 6: Place the location on the preview window as you need. Now, move to the social media category in the “Titles” to choose the perfect one and add it to the timeline above the last clip. The user is instructed to add a transition at the beginning of the clip. Rename the social media names of your sports channel, and you are done with the process.
Part 3: 3 Recommended Sites to Download Background Music for Exercise Videos
Sports background music is one of the significant ways to keep the audience motivated for sports and exercise. It helps enhance the subscribers’ multifold. Therefore, the importance of promising yoga background music cannot be neglected.
Mixkit
Mixkit is a renowned place to access royalty-free marketplaces, bringing revolution to the market and content creators. It is extremely workable to download background music for exercise in seconds. Based on genre, mood, and tag, you can search for a suitable music track.
The trap sport workout, motivating mornings, positive energy, super strong, and the greatest comeback is one of the most exemplary tracks from Mixkit. The audio can be listened to before making the decision. The genre offers ambient, cinematic, funk, hip-hop, acoustic, classical, and electronica.
TunePocket
Changing the narrative of music platforms, TunePocket pretty much takes the lead. The filter results make the process flawless. You can tailor the search results by playing with category, mood, genres, instruments, length, and tempo.
The duration of each sports background music is also mentioned to give the content creators an idea. Power dance workout, workout fitness motivation, summer western dance, young gamers, and sports power electro, and techno blast are some examples of outstanding music tracks.
Envato Elements
The next on the list is Envato Elements making wonders in the business. The search filters are refined as the user deems necessary. Online exercise, motivational EDM, fitness, workout, corporate meditation, and exercise are some amazing examples of royalty-free music. The search results can be tailored according to relevancy and popularity.
Concluding Remarks
There is an awful load of sports channels on YouTube. The content creators are trying their best to beat the competitors. It is crucial to access energetic background music for exercise to make intro and outro engaging.
The article recommended three apps to download sports background music. The step-by-step guide to creating an inspiring sports intro and editing sports style YouTube outro via Filmora.
Wondershare Filmora
Get started easily with Filmora’s powerful performance, intuitive interface, and countless effects!
Try It Free Try It Free Try It Free Learn More >
Also read:
- New 2024 Approved Best Free Slow Motion Apps For Android and iPhone
- In 2024, Beginners Guide to Green Screen Keying
- In 2024, Filmora Is a Great Video Editor that Many Users Are Making Intro Video with It. This Article Will Guide You How to Create an Intro Video with Filmora
- In 2024, How Can I Control Speed of a Video
- New In 2024, 5 Tried-And-True Ways to GIF Making
- Want to Convert MP4 Video To 60 FPS GIF? Read This
- Do You Want to Make Your Photos and Videos Look Different From Others? There Are Many Lightroom LUTs Free, and They Make Your Media Content Stand Out From Others
- New Finding The Best LUTs for Wondershare Filmora
- Guide To Selecting and Using the Best Braw Luts
- New 5 Simple Tools to Merge Video and Audio Online for 2024
- New This Article Is Regarding the Guidance About the Split of the Audio From the Video in Premiere Pro. And Also, the Discussion of the Wondershare Fllmora as the Replacement and How to Perform a Similar Task in It
- Updated 5 Simple Tools to Merge Video and Audio Online for 2024
- Finding the Best GIF Websites Was Never Easier
- New Little Tricks to Create Canva Slideshow No One Is Telling You for 2024
- New In 2024, How to Convert Videos to Slow Motion?
- Updated In 2024, Easy Steps to Export Video in Filmora
- 2024 Approved Easy Steps to Add Miniature Effect to Videos
- 2024 Approved Best 8 Online GIF to APNG Converters
- New 7 Best MP4 Video Editors on Mac Edit MP4 Videos Easily for 2024
- Updated Have You Ever Tried Using the Premiere Pro Motion Blur Plugin? Read This Article to Learn How to Efficiently Use the ReelSmart Motion Blur Plugin in Premiere Pro
- Steps to Rotate Videos Using Handbrake
- Tips for Choosing Location and Scheduling Music Video
- 2024 Approved Unraveling How the Slow Motion Guys Have Revolutionized The Slow Motion Game
- In This Article I Will Share to You My Tips and Experiences on How to Become a YouTube Vlogger and Things You Need to Consider Being a Vlogger for 2024
- Updated In 2024, Best Video Editors to Add Text to a Video
- Updated Are You Looking to Make Subscribe Channel Graphics? Here Is a Complete Guide on How to Make One on Your Own
- In 2024, 4 Ways to Sync Contacts from Apple iPhone XS Max to iPad Easily | Dr.fone
- How to Transfer Music from Vivo V29 to iPod | Dr.fone
- Detailed guide of ispoofer for pogo installation On Tecno Phantom V Flip | Dr.fone
- Recover Deleted iPhone 14 Pro Max WhatsApp Attachments on Mac and Windows | Stellar
- A Step-by-Step Guide to Finding Your Apple ID From Your iPhone X
- How to Fix Unfortunately, Contacts Has Stopped Error on Realme Note 50 | Dr.fone
- Prank Your Friends! Easy Ways to Fake and Share Google Maps Location On Samsung Galaxy A15 4G | Dr.fone
- Detailed guide of ispoofer for pogo installation On Nokia C110 | Dr.fone
- Top 5 Car Locator Apps for Samsung Galaxy M54 5G | Dr.fone
- How to Turn Off Google Location to Stop Tracking You on Apple iPhone 15 Pro | Dr.fone
- In 2024, Create AI Avatar Videos | Wondershare Virbo Online
- Fix the Error of Unfortunately the Process.com.android.phone Has Stopped on Vivo Y56 5G | Dr.fone
- Remove the lock of Tecno
- In 2024, Ultimate guide to get the meltan box pokemon go For Realme 12 Pro 5G | Dr.fone
- How to Unlock Apple ID Activation Lock From iPhone 11?
- Complete Tutorial for Samsung Galaxy S24 Ultra Hard Reset | Dr.fone
- Title: New If You Want to Record Video Streams on Windows or Mac Using FFmpeg, Read Our Guide and Learn How to Do This with Easy Step-by-Step Instructions
- Author: Chloe
- Created at : 2024-04-24 07:08:20
- Updated at : 2024-04-25 07:08:20
- Link: https://ai-editing-video.techidaily.com/new-if-you-want-to-record-video-streams-on-windows-or-mac-using-ffmpeg-read-our-guide-and-learn-how-to-do-this-with-easy-step-by-step-instructions/
- License: This work is licensed under CC BY-NC-SA 4.0.
