
:max_bytes(150000):strip_icc():format(webp)/On-Line-Job-Search-aa2565e859bd43a2aa34dfa1537dbd50.jpg)
New In 2024, 8 Ways To Live Stream Pre-Recorded Video
8 Ways To Live Stream Pre-Recorded Video
Many people tend to Livestream pre-recorded videos because of their exciting benefits. People often want to give their audience a near-perfect video in live sessions. They want to avoid the multiple errors and flaws that are usually known to plague live video sessions. Live streaming pre-recorded videos allow people to avoid all these errors effortlessly.
Uploading pre-recorded videos has a lot of excellent benefits attached to it. For example, it allows you to provide an error-free video. You can always re-record a video if you think it does not match your requirements or standards. Recording videos in advance also can help you to get the opportunity to determine the video quality. You may easily edit your videos if you decide it is not suited for the internet. Prerecorded videos allow you to switch between scenarios while watching them easily.
Part 1. 8 Best Tools To Live Stream Your Pre-recorded Video
If you also want to try live streaming a pre-recorded video, you can choose from the following 8 ways to do it easily.
1. Restream

Restream is a website that allows users to interact actively with their audience through live streaming. This tool gives you access to live streams on 30+ media platforms.
Restream supports pre-recorded video live streaming, which helps content creators to come up with better content and scenes. Using Restream, you can go live on multiple media like Twitch and Facebook and get to engage with your audience more by live chat.
To make your live sessions more attractive, you can add texts and other effects to style up your live stream and make it more engaging. Restream boasts a cloud storage facility that helps users back up their recorded videos. This tool also provides an analysis of the audience.
Pros
- This website allows you to live stream pre-recorded videos with ease.
- io support multiple streaming.
- This sure is very easy to navigate through.
Cons
- Most of the key features of this website can only be accessed by subscriptions.
2. Prism Live Studio

Prism Live Studio software supports live and pre-recorded live video streaming on major platforms. It is suitable for individuals and businesses. Prism live studio features three fascinating camera modes; photo, live stream, and video. And it also boosts your live sessions with its live effects and lives chat. Creators can also add texts, audio, GIFs, and animated texts.
Price & Download
Because Prism is a multi-platform product, you have the option of using a mobile app or an online product. Prism live studio is available for free download for both iOS and Android .
Pros
- This application supports prerecorded streaming videos.
- Prism allows users to add external content to their videos.
- Prism live studio features a desktop version as well as a mobile version.
Cons
- Some users have complained about the quality of its live streaming. Its resolution needs to be improved.
3. SplitCam

SplitCam is a live streaming software that can be used for many live sessions, like live gaming, online classes, etc. Using SplitCam, you can host up to 5 guests at once using a split screen. Users can also edit their videos while on live sessions. This software features an audio mixer that gives users complete control of the audio in their video. With SplitCam, you can stream your live sessions to Twitch, LinkedIn, Facebook, etc.
Price & Download
SplitCam is a free application. You can click its official website to download it.
Pros
- This software allows users to split their screen.
- SplitCam supports live streaming.
Cons
- This app is only available for desktop users.
4. vMix

Vmix is an online live streaming platform that supports NDI tools that give users access to several channels of audio and videos. It allows users to get access to several animations. With Vmix, you can also explore the fascinating slow-motion world of videos. This platform lets users customize their live sessions to their tastes. Vmix takes editing to a new level with its multiple editing options. You can also reach out to your audience by live streaming on several social media sites.
Price
vMix consists of five different versions. The basic version is free, and the Basic HD version goes for $60 per year, the HD version goes for $350 per year, the 4K version goes for $700 annually, the pro version goes for $1200 annually, while the MAX version goes for $50 per month.
Pros
- All version of vMix allows users to use the app for 60 days free.
- vMix can be used by professionals as it has proven to be efficient.
- vMix allows users to live stream on popular media platforms.
Cons
- vMix may appear difficult to use.
- vMix can only be used by Windows users.
5. OneStream

OneStream is a software that enables pre-recorded video live streaming. It is a platform that helps users get premium content to their audience around the globe. Using OneStream, you can schedule your live sessions up to 60 days in advance. Users can also add titles and subtitles to their videos. This software also boasts of the playlist streaming feature. With this tool, you can line up videos and schedule them to go live one after the other.
Price
OneStream is coming in 3 versions:
- Basic PLAN $10 monthly
- Standard PLAN $39 monthly
- Enterprise PLAN $89 monthly
Pros
- OneStream allows users to add extra content like captions and subtitles in their video.
- Users can schedule streaming.
- This tool does not need to be installed. You get access to its features easily.
Cons
- OneStream may be difficult to understand.
- The mobile version of this software needs improvement.
6. Be Live

Be Live is a beginner-friendly live streaming tool that gives users an in-depth analysis of their audience. It makes your live session more interactive with its live chat. This software features a customization tool. With Be Live, users can live stream pre-recorded videos with ease. This tool allows users to host more than two guests simultaneously by sharing the screen. You can also go live on several platforms with this tool.
Price
Be Live is available in 2 versions:
- Standard PLAN $24.99 monthly
- Pro PLAN $37.50 monthly
Pros
- This software helps users to reach a maximum audience.
- Be Live is very easy to use.
- Users can design their videos to their taste.
Cons
- They need to improve on their video’s quality.
- This software can only work on some browsers.
- Most of their amazing features can only be accessed by subscription.
7. OBS Studio

OBS Studio (Open Broadcaster Software Studio) is a live streaming and recording software compatible with Windows, Mac, and Linus. It features a powerful editing tool that would make your live sessions more engaging. This tool boasts an audio mixer that gives users complete control of the audio part of their videos. This software allows users to brand their videos the way they want. You can also use customized plugins to give your audience a more quality presentation.
Price
OBS Studio is a free software.
Pros
- This amazing tool is free.
- OBS allows you to customize your videos.
- OBS allows users to preview their videos.
Cons
- OBS may be difficult to navigate through.
- This software will need a large storage capacity.
8. Live Pigeon

Live Pigeon is a live streaming platform that boasts of one of the best premium editing tools. With live pigeon, you can schedule your live sessions. This tool provides users with audience engagement analysis.
Live pigeon makes your live sessions more enjoyable by allowing the audience to use the mic and interact with you. Users can also organize live pools for their audience.
Price
Live Pigeon is available in 3 versions:
- Basic PLAN $15
- Standard PLAN $37
- Enterprise PLAN $97
Pros
- Live Pigeon produces high-quality videos.
- This tool is easy to use.
- No limitations to Streaming.
Cons
- Live Pigeon only supports pre-recorded videos live streams.
Part 2. How To livestream pre-recorded Video with mobile app?
Suppose you are interested in the tools described above. In that case, we will provide you with a detailed tutorial to help you finish your pre-recorded live in advance on your phone.
Since the steps for the cell phone are similar, the following steps are based on OneStream Live as an example. You can operate the rest of the products similarly.
Step1 Connect your social platform
To avoid reminders for subsequent video uploads, you can associate the platform account you want to live stream with once you enter the app.

Step2 Upload your pre-recorded video
Click “Create Event” and choose the left button “Upload New Video”. Then, you can choose to import your pre-recorded video from your device or the cloud.

Step3 Edit your stream details
After analyzing the video, OneStream Live will let you edit some basic information about this video. You can change its thumbnail and add a title, tags and description. Also, you can do some light editing on this pre-recorded video. Adding some captions will be a good idea.

Step4 Choose the social accounts and schedule time
After finishing all your preparation, you can finally confirm the scheduled time of your pre-recorded stream. Then, choose the social account where you want to live stream. At last, don’t forget to click the SCHEDULE button to save your streams.

Bonus Tips: How to create pre-recorded Video?
To live stream quality pre-recorded videos, you would need an appropriate tool. Filmora, built by Wondershare, is one of the best you can find.
Filmora allows you to create and edit your videos efficiently. The newest version Filmora 11, boasts several effects, a simple interface, speakers, and mics amongst others. Here are some of Filmora’s wonderful features:
- **Instant mode:**This mode works with AI to help users do some editing and speed up video creation. You can make video creation fast and easy
- Speed control: Filmora 11 also allows users to have ultimate control of the speed of their videos. You can make your video faster or slower depending on what you want.
- Chroma key filming: Content creators often do not want their background to show while recording. With Filmora 11, you don’t have to worry about poor video backgrounds to another background with just one choice. In other words, Filmora 11 makes you appear anywhere you fancy.
How to record your video with Wondershare Filmora?
Step1 After downloading and installing Filmora Screen Recorder , click on the “PC Screen” to start the recording.

Step2 You can change the recording area, video quality and audio source in the following pop-up.

Step3 Press the F9 to stop your recording. Then, you can directly edit the recorded video with the advanced features of Filmora. When you’re through editing, export it to the video format you wish.
Conclusion
We can’t possibly overhype the importance of live streaming pre-recorded videos. Its benefits are just simply overwhelming and worthwhile. In this article, we have given you all the help that is necessary for you to start putting out excellent pre-recorded videos on the internet.
Free Download For Win 7 or later(64-bit)
Free Download For macOS 10.14 or later
Part 1. 8 Best Tools To Live Stream Your Pre-recorded Video
If you also want to try live streaming a pre-recorded video, you can choose from the following 8 ways to do it easily.
1. Restream
Restream is a website that allows users to interact actively with their audience through live streaming. This tool gives you access to live streams on 30+ media platforms.
Restream supports pre-recorded video live streaming, which helps content creators to come up with better content and scenes. Using Restream, you can go live on multiple media like Twitch and Facebook and get to engage with your audience more by live chat.
To make your live sessions more attractive, you can add texts and other effects to style up your live stream and make it more engaging. Restream boasts a cloud storage facility that helps users back up their recorded videos. This tool also provides an analysis of the audience.
Pros
- This website allows you to live stream pre-recorded videos with ease.
- io support multiple streaming.
- This sure is very easy to navigate through.
Cons
- Most of the key features of this website can only be accessed by subscriptions.
2. Prism Live Studio
Prism Live Studio software supports live and pre-recorded live video streaming on major platforms. It is suitable for individuals and businesses. Prism live studio features three fascinating camera modes; photo, live stream, and video. And it also boosts your live sessions with its live effects and lives chat. Creators can also add texts, audio, GIFs, and animated texts.
Price & Download
Because Prism is a multi-platform product, you have the option of using a mobile app or an online product. Prism live studio is available for free download for both iOS and Android .
Pros
- This application supports prerecorded streaming videos.
- Prism allows users to add external content to their videos.
- Prism live studio features a desktop version as well as a mobile version.
Cons
- Some users have complained about the quality of its live streaming. Its resolution needs to be improved.
3. SplitCam
SplitCam is a live streaming software that can be used for many live sessions, like live gaming, online classes, etc. Using SplitCam, you can host up to 5 guests at once using a split screen. Users can also edit their videos while on live sessions. This software features an audio mixer that gives users complete control of the audio in their video. With SplitCam, you can stream your live sessions to Twitch, LinkedIn, Facebook, etc.
Price & Download
SplitCam is a free application. You can click its official website to download it.
Pros
- This software allows users to split their screen.
- SplitCam supports live streaming.
Cons
- This app is only available for desktop users.
4. vMix
Vmix is an online live streaming platform that supports NDI tools that give users access to several channels of audio and videos. It allows users to get access to several animations. With Vmix, you can also explore the fascinating slow-motion world of videos. This platform lets users customize their live sessions to their tastes. Vmix takes editing to a new level with its multiple editing options. You can also reach out to your audience by live streaming on several social media sites.
Price
vMix consists of five different versions. The basic version is free, and the Basic HD version goes for $60 per year, the HD version goes for $350 per year, the 4K version goes for $700 annually, the pro version goes for $1200 annually, while the MAX version goes for $50 per month.
Pros
- All version of vMix allows users to use the app for 60 days free.
- vMix can be used by professionals as it has proven to be efficient.
- vMix allows users to live stream on popular media platforms.
Cons
- vMix may appear difficult to use.
- vMix can only be used by Windows users.
5. OneStream
OneStream is a software that enables pre-recorded video live streaming. It is a platform that helps users get premium content to their audience around the globe. Using OneStream, you can schedule your live sessions up to 60 days in advance. Users can also add titles and subtitles to their videos. This software also boasts of the playlist streaming feature. With this tool, you can line up videos and schedule them to go live one after the other.
Price
OneStream is coming in 3 versions:
- Basic PLAN $10 monthly
- Standard PLAN $39 monthly
- Enterprise PLAN $89 monthly
Pros
- OneStream allows users to add extra content like captions and subtitles in their video.
- Users can schedule streaming.
- This tool does not need to be installed. You get access to its features easily.
Cons
- OneStream may be difficult to understand.
- The mobile version of this software needs improvement.
6. Be Live
Be Live is a beginner-friendly live streaming tool that gives users an in-depth analysis of their audience. It makes your live session more interactive with its live chat. This software features a customization tool. With Be Live, users can live stream pre-recorded videos with ease. This tool allows users to host more than two guests simultaneously by sharing the screen. You can also go live on several platforms with this tool.
Price
Be Live is available in 2 versions:
- Standard PLAN $24.99 monthly
- Pro PLAN $37.50 monthly
Pros
- This software helps users to reach a maximum audience.
- Be Live is very easy to use.
- Users can design their videos to their taste.
Cons
- They need to improve on their video’s quality.
- This software can only work on some browsers.
- Most of their amazing features can only be accessed by subscription.
7. OBS Studio
OBS Studio (Open Broadcaster Software Studio) is a live streaming and recording software compatible with Windows, Mac, and Linus. It features a powerful editing tool that would make your live sessions more engaging. This tool boasts an audio mixer that gives users complete control of the audio part of their videos. This software allows users to brand their videos the way they want. You can also use customized plugins to give your audience a more quality presentation.
Price
OBS Studio is a free software.
Pros
- This amazing tool is free.
- OBS allows you to customize your videos.
- OBS allows users to preview their videos.
Cons
- OBS may be difficult to navigate through.
- This software will need a large storage capacity.
8. Live Pigeon
Live Pigeon is a live streaming platform that boasts of one of the best premium editing tools. With live pigeon, you can schedule your live sessions. This tool provides users with audience engagement analysis.
Live pigeon makes your live sessions more enjoyable by allowing the audience to use the mic and interact with you. Users can also organize live pools for their audience.
Price
Live Pigeon is available in 3 versions:
- Basic PLAN $15
- Standard PLAN $37
- Enterprise PLAN $97
Pros
- Live Pigeon produces high-quality videos.
- This tool is easy to use.
- No limitations to Streaming.
Cons
- Live Pigeon only supports pre-recorded videos live streams.
Part 2. How To livestream pre-recorded Video with mobile app?
Suppose you are interested in the tools described above. In that case, we will provide you with a detailed tutorial to help you finish your pre-recorded live in advance on your phone.
Since the steps for the cell phone are similar, the following steps are based on OneStream Live as an example. You can operate the rest of the products similarly.
Step1 Connect your social platform
To avoid reminders for subsequent video uploads, you can associate the platform account you want to live stream with once you enter the app.
Step2 Upload your pre-recorded video
Click “Create Event” and choose the left button “Upload New Video”. Then, you can choose to import your pre-recorded video from your device or the cloud.
Step3 Edit your stream details
After analyzing the video, OneStream Live will let you edit some basic information about this video. You can change its thumbnail and add a title, tags and description. Also, you can do some light editing on this pre-recorded video. Adding some captions will be a good idea.
Step4 Choose the social accounts and schedule time
After finishing all your preparation, you can finally confirm the scheduled time of your pre-recorded stream. Then, choose the social account where you want to live stream. At last, don’t forget to click the SCHEDULE button to save your streams.
Bonus Tips: How to create pre-recorded Video?
To live stream quality pre-recorded videos, you would need an appropriate tool. Filmora, built by Wondershare, is one of the best you can find.
Filmora allows you to create and edit your videos efficiently. The newest version Filmora 11, boasts several effects, a simple interface, speakers, and mics amongst others. Here are some of Filmora’s wonderful features:
- **Instant mode:**This mode works with AI to help users do some editing and speed up video creation. You can make video creation fast and easy
- Speed control: Filmora 11 also allows users to have ultimate control of the speed of their videos. You can make your video faster or slower depending on what you want.
- Chroma key filming: Content creators often do not want their background to show while recording. With Filmora 11, you don’t have to worry about poor video backgrounds to another background with just one choice. In other words, Filmora 11 makes you appear anywhere you fancy.
How to record your video with Wondershare Filmora?
Step1 After downloading and installing Filmora Screen Recorder , click on the “PC Screen” to start the recording.
Step2 You can change the recording area, video quality and audio source in the following pop-up.
Step3 Press the F9 to stop your recording. Then, you can directly edit the recorded video with the advanced features of Filmora. When you’re through editing, export it to the video format you wish.
Conclusion
We can’t possibly overhype the importance of live streaming pre-recorded videos. Its benefits are just simply overwhelming and worthwhile. In this article, we have given you all the help that is necessary for you to start putting out excellent pre-recorded videos on the internet.
Free Download For Win 7 or later(64-bit)
Free Download For macOS 10.14 or later
How Can You Import and Adjust the Video Clips on Wondershare Filmora?
Video editing surely improves the quality and impact of your video projects. By refining and polishing your video, editing can elevate your content from ordinary to extraordinary. It not only improves the overall look of the video but also enhances the narrative as well. Additionally, this makes the video more appealing, and more and more people want to see your video.
The editing process in a video project is essential as it allows you to present your video uniformly. It helps you remove unwanted sections, rearrange clips, and more to create a seamless flow. Editing might be difficult initially, but you can start from the basics and gradually build your skills. Begin by learning how to import and adjust clips. In this way, you will learn video editing step by step and get to a professional level.
Part 1: How Should Video Clips Be Integrated To Make the Perfect Video?
Video Clip Editor Use Wondershare Filmora to Import and Adjust the Video Clips to Make the Perfect Video.
Free Download Free Download Learn More

You can make YouTube video clips or clips for other platforms by integrating video clips. If you want to know how combining clips can help you, this portion will help you. In this part, you will learn a few tips on making a perfect video by integrating videos.
1. Establish a Clear Narrative
You can determine the purpose and message of your video. It doesn’t matter whether it’s a story, tutorial, promotional content, or documentary. However, having a clear narrative or message will guide your clip selection and arrangement.
2. Plan the Storyboard or Structure
Before editing, create a storyboard or outline to visualize the flow and structure of your video. It will help you organize your clips and determine the sequencing of scenes. Additionally, similar shots support the narrative of your project.
3. Start with a Strong Opening
If you want to grab the viewer’s attention from the beginning, follow this trick. It would be best to choose a compelling opening shot or sequence for your project. It can set the tone and hook the audience, encouraging them to continue watching.
4. Maintain Visual Continuity
Ensure visual continuity between clips by considering different factors. Lighting, color, composition, and camera angles are a few factors to be considered. Furthermore, smooth transitions between shots help maintain a seamless viewing experience.
5. Vary Shot Types and Perspectives
Incorporate various shot types and perspectives to add visual interest and engagement. You can use a mix of wide shots, close-ups, and medium shots. Additionally, unique camera angles also matter to provide a dynamic viewing experience.
6. Consider Shot Length and Pacing
What else you can do is pay attention to each clip’s duration and arrangement to maintain pace. Longer shots can create a sense of calmness or allow for more detailed storytelling. However, short video clips can create a sense of energy and keep the viewer’s attention.
7. Use Transitions Wisely
Choose appropriate transitions to connect different clips smoothly. Transitions like cuts, fades, dissolves, or wipes can help create continuity. Furthermore, such transitions indicate time or location changes or add a stylistic touch. However, avoid overusing flashy transitions that may distract from the content.
8. Sync Video with Audio
Some videos include audio, so ensure the video clips are synchronized properly. Moreover, align dialogue, music, or sound effects with the corresponding video. This will enhance the overall impact and coherence of your video project.
9. Enhance with Visual Effects or Graphics
Consider using effects, graphics, or text overlays to improve your video. It will even improve the storytelling or provide additional information. Additionally, you can use these elements purposefully to complement the narrative.
10. End Strong
The ending of a video with a memorable and impactful closing shot or sequence also matters. By doing so, your video will surely leave a lasting impression. It can summarize the main message, provide a call to action, or create an emotional impact.
11. Smooth Transitions Between Scenes
Another way is to add smooth transitions if your video includes multiple scenes or locations. Use techniques like matching action or complementary visuals to create seamless transitions. It will surely enhance the viewer’s experience.
12. Test and Refine
Lastly, preview your edited video and gather feedback from others to ensure its effectiveness. Adjust the sequence, pacing, or elements as necessary to improve the overall flow and impact. It will help you to finalize your video with a little touch-up using the feedback.
Part 2: Wondershare Filmora and Video Editing: A Heaven For Video Editors
Wondershare Filmora is a video editing solution for all of your boring videos. If you’re a content creator and want to up your game, use a good editing tool like Filmora. This platform provides you with different templates and presets that you can apply to your content. Furthermore, you don’t need extensive training to learn this tool, as it is pretty straightforward.
However, this tool has a lot to offer, including its new AI-powered features and options. You can automatically audio duct using this tool and much more. If you can’t find any suitable music for your video, simply search, listen, and use audio files in the tool. Wondershare Filmora is indeed heaven for video editors and enthusiasts, as it offers so much. Be it long or short video clips; this tool will help you easily edit them.
Free Download For Win 7 or later(64-bit)
Free Download For macOS 10.14 or later
Part 3: Learning Different Ways of Importing Video Clips in Filmora
If you’re searching for ways to import videos in Wondershare Filmora, you’re in luck. This portion is going to discuss different ways to import long and short video clips in the tool.
Filmora Tutorial - Import And Organize Media Files
Step 1Launch Wondershare Filmora and Create a New Project
Access Wondershare Filmora on your system. Start a new project by selecting “New Project.”

Step 2Select the Import Option
In the new window, select “Click here to import media” and choose the files you want to import into the tool.

Step 3Import Files by Drag and Down
Alternatively, drag and drop your media files into the Media Import section. In this way, you can choose your media using dragging and dropping.

Step 4Import Your Media Files from Drop-Down Menu
Another way to import files is by locating the Media Import section and clicking the “Import” drop-down menu. Then select “Import Media Files” and browse to choose your media file.

Step 5Import Using Shortcut Keys
You can use shortcut keys by launching the tool and pressing “Ctrl + I.” A new window will appear where you can add media files.

Step 6Import Your Media Folder
To import a media folder, go to the Media Import section and click the “Import” drop-down menu. Then, select “Import a Media Folder” and choose the media you want to import.

Step 7Import from a Device
Wondershare Filmora also allows you to import media directly from an external camera or phone. Attach the device, go to the “Import” drop-down menu, and select “Import from a Camera or a Phone.” Next, choose the media from your device folder and click “OK.”

Step 8Import from Your Cloud Storage
You can also import media files from your cloud storage. In the “Import” drop-down menu, find “Import from other Apps” and select it. Further, select the storage app from where you want to import your media files. Once your storage account is linked to your computer, you can easily import media files from there as well.

Part 4: Adjustment Layers: A New Thing in Filmora?
Wondershare Filmora is the ultimate editing tool that even lets you add layers to your video. The Filmora adjustment layer will allow you to make changes without changing the original footage.
Filmroa Tutorial - Adjustment Layers in Filmora Files
Free Download For Win 7 or later(64-bit)
Free Download For macOS 10.14 or later
Step 1Add an Adjustment Layer
To create a video slideshow using a Filmora adjustment layer, open the tool and create a new project. Once you’ve imported all the video clips in the timeline then, select the “Media” button. Proceed next by choosing the “Adjustment Layer” tab in the bottom panel. Then, click on the layer and drop it in the timeline above your video.

Step 2Apply Effects to the Adjustment Layer
If you want to add effects, select the adjustment layer and locate the “Effects” button. Next, drag and drop the effect onto the adjustment layer.

Step 3Color Correct Your Adjustment Layer
Adjust the color toning of your video by finding the “Histogram” icon in the “Preview” section. Modify the curves according to your preference while turning on this function. Continue to select the “Adjustment Layer” and lead to the “Color” tab to look for the “Curves” option.

Step 4Add Multiple Adjustment Layers
Additionally, you can apply different effects at different durations and drag the adjustment layer to the end of the layer. Further, split the adjustment layer using the “Playhead” slider at the desired duration to add a new effect. To make your slideshow better, you can also add transition effects by dragging and dropping them between two clips.

Step 5Save as a Preset
You can also save your adjustment layer as a preset. Select your adjustment layer, locate the “Save as Custom” option in the right panel, and click on it. This will save the adjustment layer as a preset. Your preset will be in the “Adjustment Layer” section of the “Media” tab.

Conclusion
Video editing might not be as easy as you think. It is a skill that requires time, effort, and even knowledge. There are many people who took video editing and post-production as a professional career. You can also learn to edit videos like a professional by taking baby steps. Firstly you can learn how to adjust clips and import them in Wondershare Filmora, a great tool.
Free Download Free Download Learn More
You can make YouTube video clips or clips for other platforms by integrating video clips. If you want to know how combining clips can help you, this portion will help you. In this part, you will learn a few tips on making a perfect video by integrating videos.
1. Establish a Clear Narrative
You can determine the purpose and message of your video. It doesn’t matter whether it’s a story, tutorial, promotional content, or documentary. However, having a clear narrative or message will guide your clip selection and arrangement.
2. Plan the Storyboard or Structure
Before editing, create a storyboard or outline to visualize the flow and structure of your video. It will help you organize your clips and determine the sequencing of scenes. Additionally, similar shots support the narrative of your project.
3. Start with a Strong Opening
If you want to grab the viewer’s attention from the beginning, follow this trick. It would be best to choose a compelling opening shot or sequence for your project. It can set the tone and hook the audience, encouraging them to continue watching.
4. Maintain Visual Continuity
Ensure visual continuity between clips by considering different factors. Lighting, color, composition, and camera angles are a few factors to be considered. Furthermore, smooth transitions between shots help maintain a seamless viewing experience.
5. Vary Shot Types and Perspectives
Incorporate various shot types and perspectives to add visual interest and engagement. You can use a mix of wide shots, close-ups, and medium shots. Additionally, unique camera angles also matter to provide a dynamic viewing experience.
6. Consider Shot Length and Pacing
What else you can do is pay attention to each clip’s duration and arrangement to maintain pace. Longer shots can create a sense of calmness or allow for more detailed storytelling. However, short video clips can create a sense of energy and keep the viewer’s attention.
7. Use Transitions Wisely
Choose appropriate transitions to connect different clips smoothly. Transitions like cuts, fades, dissolves, or wipes can help create continuity. Furthermore, such transitions indicate time or location changes or add a stylistic touch. However, avoid overusing flashy transitions that may distract from the content.
8. Sync Video with Audio
Some videos include audio, so ensure the video clips are synchronized properly. Moreover, align dialogue, music, or sound effects with the corresponding video. This will enhance the overall impact and coherence of your video project.
9. Enhance with Visual Effects or Graphics
Consider using effects, graphics, or text overlays to improve your video. It will even improve the storytelling or provide additional information. Additionally, you can use these elements purposefully to complement the narrative.
10. End Strong
The ending of a video with a memorable and impactful closing shot or sequence also matters. By doing so, your video will surely leave a lasting impression. It can summarize the main message, provide a call to action, or create an emotional impact.
11. Smooth Transitions Between Scenes
Another way is to add smooth transitions if your video includes multiple scenes or locations. Use techniques like matching action or complementary visuals to create seamless transitions. It will surely enhance the viewer’s experience.
12. Test and Refine
Lastly, preview your edited video and gather feedback from others to ensure its effectiveness. Adjust the sequence, pacing, or elements as necessary to improve the overall flow and impact. It will help you to finalize your video with a little touch-up using the feedback.
Part 2: Wondershare Filmora and Video Editing: A Heaven For Video Editors
Wondershare Filmora is a video editing solution for all of your boring videos. If you’re a content creator and want to up your game, use a good editing tool like Filmora. This platform provides you with different templates and presets that you can apply to your content. Furthermore, you don’t need extensive training to learn this tool, as it is pretty straightforward.
However, this tool has a lot to offer, including its new AI-powered features and options. You can automatically audio duct using this tool and much more. If you can’t find any suitable music for your video, simply search, listen, and use audio files in the tool. Wondershare Filmora is indeed heaven for video editors and enthusiasts, as it offers so much. Be it long or short video clips; this tool will help you easily edit them.
Free Download For Win 7 or later(64-bit)
Free Download For macOS 10.14 or later
Part 3: Learning Different Ways of Importing Video Clips in Filmora
If you’re searching for ways to import videos in Wondershare Filmora, you’re in luck. This portion is going to discuss different ways to import long and short video clips in the tool.
Filmora Tutorial - Import And Organize Media Files
Step 1Launch Wondershare Filmora and Create a New Project
Access Wondershare Filmora on your system. Start a new project by selecting “New Project.”
Step 2Select the Import Option
In the new window, select “Click here to import media” and choose the files you want to import into the tool.
Step 3Import Files by Drag and Down
Alternatively, drag and drop your media files into the Media Import section. In this way, you can choose your media using dragging and dropping.
Step 4Import Your Media Files from Drop-Down Menu
Another way to import files is by locating the Media Import section and clicking the “Import” drop-down menu. Then select “Import Media Files” and browse to choose your media file.
Step 5Import Using Shortcut Keys
You can use shortcut keys by launching the tool and pressing “Ctrl + I.” A new window will appear where you can add media files.
Step 6Import Your Media Folder
To import a media folder, go to the Media Import section and click the “Import” drop-down menu. Then, select “Import a Media Folder” and choose the media you want to import.
Step 7Import from a Device
Wondershare Filmora also allows you to import media directly from an external camera or phone. Attach the device, go to the “Import” drop-down menu, and select “Import from a Camera or a Phone.” Next, choose the media from your device folder and click “OK.”
Step 8Import from Your Cloud Storage
You can also import media files from your cloud storage. In the “Import” drop-down menu, find “Import from other Apps” and select it. Further, select the storage app from where you want to import your media files. Once your storage account is linked to your computer, you can easily import media files from there as well.
Part 4: Adjustment Layers: A New Thing in Filmora?
Wondershare Filmora is the ultimate editing tool that even lets you add layers to your video. The Filmora adjustment layer will allow you to make changes without changing the original footage.
Filmroa Tutorial - Adjustment Layers in Filmora Files
Free Download For Win 7 or later(64-bit)
Free Download For macOS 10.14 or later
Step 1Add an Adjustment Layer
To create a video slideshow using a Filmora adjustment layer, open the tool and create a new project. Once you’ve imported all the video clips in the timeline then, select the “Media” button. Proceed next by choosing the “Adjustment Layer” tab in the bottom panel. Then, click on the layer and drop it in the timeline above your video.
Step 2Apply Effects to the Adjustment Layer
If you want to add effects, select the adjustment layer and locate the “Effects” button. Next, drag and drop the effect onto the adjustment layer.
Step 3Color Correct Your Adjustment Layer
Adjust the color toning of your video by finding the “Histogram” icon in the “Preview” section. Modify the curves according to your preference while turning on this function. Continue to select the “Adjustment Layer” and lead to the “Color” tab to look for the “Curves” option.
Step 4Add Multiple Adjustment Layers
Additionally, you can apply different effects at different durations and drag the adjustment layer to the end of the layer. Further, split the adjustment layer using the “Playhead” slider at the desired duration to add a new effect. To make your slideshow better, you can also add transition effects by dragging and dropping them between two clips.
Step 5Save as a Preset
You can also save your adjustment layer as a preset. Select your adjustment layer, locate the “Save as Custom” option in the right panel, and click on it. This will save the adjustment layer as a preset. Your preset will be in the “Adjustment Layer” section of the “Media” tab.
Conclusion
Video editing might not be as easy as you think. It is a skill that requires time, effort, and even knowledge. There are many people who took video editing and post-production as a professional career. You can also learn to edit videos like a professional by taking baby steps. Firstly you can learn how to adjust clips and import them in Wondershare Filmora, a great tool.
Slow Down or Speed Up Videos Easily on PC, Online, and Phone
Have you ever wondered how to slow down the video to make it more surreal? You may want add an extra flair or revamp educational content in the video. You may want to slow down a product demo or glide through a lengthy instructional video. Adjusting the speed of the video can be beneficial in many ways. Let’s explore how to slow down videos or speed them up for various reasons. In this article, you will learn three ways on how to speed up a slow mo video or slow a fast motoon one.
Speed Ramping Video Maker Slow down or speed up your videos with better control of your keyframes to create unique cinematic effects!
Make A Slow Motion Video Make A Speed Ramping Video More Features
Part 1. Slowing Down or Speeding Up Videos on PC: Windows and Mac Guide
The most effective way to adjust the speed of a video on a PC is to use video editing software. With Wondershare Filmora, you get the tools and features to adjust the speed of your videos. The AI Co-piloy feature is particularly useful in guiding you through the steps of editing your videos. The versatile video editing software helps you adjust the speed with just a few clicks. The approach is similar for both Windows and Mac devices, making Filmora a user-friendly and effective software for editors at all experience levels. So, how do you make a video fast-motion?
Free Download For Win 7 or later(64-bit)
Free Download For macOS 10.14 or later
Step 1: Launch Filmora and Import Video Files
Once you start Filmora on your PC, click on New Project. Then select the Import icon to choose the files you want to import from your computer library. Another way is to drag and drop the files from your computer into Filmora.

Step 2: Add the Clips to the Timeline
After importing the video files, drag and drop them onto the timeline. This prepares the clips for speed adjustment.

Step 3: Open the Speed Adjustment Panel
The Filmora feature that allows you to adjust the speed of your video clips is the speed adjustment panel or Uniform Speed. To open the Uniform Speed Panel, double-click the video clip in the timeline. Find the Uniform Speed option in the pop-up column that appears and click on it. Make adjustments using the speed control.

Step 4: Adjust the Speed Slider
In the speed control panel, clikd the speed adjuster slider. Adjust the slider to the rate of speed you want for your clips between 0.5 (slowest) to 2.00 (fastest).

Step 5: Detach the Audio
Once you adjust the speed of your video, the audio will be affected. It can be a great idea to detach the audio to further edit the video. Right-click the video clip on the timeline, and select the Detach Audio option from the pop-up column. Once the audio has detached, you can further adjust it with fade and other available options.

Step 6: Export Video
Once satisfied with your video adjustments, export it to the desired format. For this step, click the Export button. Select the directory and video format and other preferences, then click ok.

Part 2. How to Quickly Adjust Video Speed Using Online Tool
Are you wondering how to speed up slow mo video or slow a video without installing a special video editor on your computer, using an online tool is the best choice. A free online tool like Fastreel helps you change the speed of short videos, which are smaller than 500 MB with just a few steps. However, this online tool oonly works with MP4 format. When working with other video formats, you will have to convert them first.
Here’s how to speed up a slo mo video using Fastreel
Step 1
Go to the Fastreel website . Upload the video you want to slow down or speed up. Click the Add Your File button to choose and upload the clips.

Step 2
Set the Appropriate Speed. Select the speed you want for your video onVideo Speed section. The results will be displayed in the preview window. Save Processed Video. Mute the video by clicking the corresponding icon if necessary. Then, save the video by selecting the Export Results button.

Part 3. A Guide to Slowing Down or Speeding Up Videos on Android and iPhone
How to speed up slow mo video on phone is a normal concern for many people. Luckily, there are many apps available to do that. In most cases, making a mobile video bit slower or faster will make it seem better. You may want to reduce the duration of your video or check out the details in a specific scene. You may want to speed watch or speed listen to the content. Let’s have a look at how you can achieve this on your Android or Apple device.
1. How to Change the Speed of Your Video on Android
When someone asks how do I slow down a video? The first response that comes to mind is using their phone. This is the device they always have with them. And most people, consider editng easier on theior phones than compiters. For someonw with an Android phone, the Gallery app makes it easier to adjust the speed of a video. Find out how to make fast motion video or slow mo with Android phone. Follow these few steps:
Step 1Launch the Gallery app
Open the video you want to edit. Then, tap on the Edit icon at the bottom to open the video editor.

Step 2Find the Speed Icon
Scroll through the list of the icons at the bottom. Then tap on the Speed icon to start making the adjustments

Step 3Adjust the Speed of the Video
The default speed of the video is 1x. Tap on 2x to seep it up or 1/2x to slow down the video. Then press the Play icon to preview the view with these speed settings.

Step 4Save the Video
Once satisfied with the speed of the video, tap the save button.

2. How to Change the Speed of Your Video on iPhone
The iMovie app offers an easy and effective way of speeding up or slowing down videos on your iPhone. How do you make a video fast motion? The free video editing app from Apple is available for iOS and and can also be used on iPads:
Step 1Launch iMovie App
Once you have installed and opened the iMovie app on your phone, tap on the Create Projects (+) button.

Step 2Select Movie
The app will prompt you to select the kind of project you want between Movie and Trailer.

Step 3Create Movie
Tap on the video that you want to adjust speed. Then, tap on the Create Movie button.

Step 4Adjust the Speed of the Video
On the editing screen, tap on the video clip. The video editing tools will appear at the bottom, allowing you to make the adjustments of your choise. Tap on the Speed icon that looks like a speedometer and drag the slider until you attain the speed you want.

Step 5Preview and Safe
After adjusting the speed, play the video to preview it with the new speed. Then tap on the Done button at the top to save the project. Hit the Share icon, and the Save the Video.

Conclusion
When it comes to creating slow motion videos, Wondershare Filmora stands out as a great software to use. Filmora V13 allows you to speed up or slow down videos with only a few clicks. The versatile video editing software can be used on Windows and Mac PC while producing the same quality of videos. Be sure to check out the range of AI features available in the software. These are helpful in automating most of the tasks and doing a lot more with your editing tasks.
Make A Slow Motion Video Make A Speed Ramping Video More Features
Part 1. Slowing Down or Speeding Up Videos on PC: Windows and Mac Guide
The most effective way to adjust the speed of a video on a PC is to use video editing software. With Wondershare Filmora, you get the tools and features to adjust the speed of your videos. The AI Co-piloy feature is particularly useful in guiding you through the steps of editing your videos. The versatile video editing software helps you adjust the speed with just a few clicks. The approach is similar for both Windows and Mac devices, making Filmora a user-friendly and effective software for editors at all experience levels. So, how do you make a video fast-motion?
Free Download For Win 7 or later(64-bit)
Free Download For macOS 10.14 or later
Step 1: Launch Filmora and Import Video Files
Once you start Filmora on your PC, click on New Project. Then select the Import icon to choose the files you want to import from your computer library. Another way is to drag and drop the files from your computer into Filmora.
Step 2: Add the Clips to the Timeline
After importing the video files, drag and drop them onto the timeline. This prepares the clips for speed adjustment.
Step 3: Open the Speed Adjustment Panel
The Filmora feature that allows you to adjust the speed of your video clips is the speed adjustment panel or Uniform Speed. To open the Uniform Speed Panel, double-click the video clip in the timeline. Find the Uniform Speed option in the pop-up column that appears and click on it. Make adjustments using the speed control.
Step 4: Adjust the Speed Slider
In the speed control panel, clikd the speed adjuster slider. Adjust the slider to the rate of speed you want for your clips between 0.5 (slowest) to 2.00 (fastest).
Step 5: Detach the Audio
Once you adjust the speed of your video, the audio will be affected. It can be a great idea to detach the audio to further edit the video. Right-click the video clip on the timeline, and select the Detach Audio option from the pop-up column. Once the audio has detached, you can further adjust it with fade and other available options.
Step 6: Export Video
Once satisfied with your video adjustments, export it to the desired format. For this step, click the Export button. Select the directory and video format and other preferences, then click ok.
Part 2. How to Quickly Adjust Video Speed Using Online Tool
Are you wondering how to speed up slow mo video or slow a video without installing a special video editor on your computer, using an online tool is the best choice. A free online tool like Fastreel helps you change the speed of short videos, which are smaller than 500 MB with just a few steps. However, this online tool oonly works with MP4 format. When working with other video formats, you will have to convert them first.
Here’s how to speed up a slo mo video using Fastreel
Step 1
Go to the Fastreel website . Upload the video you want to slow down or speed up. Click the Add Your File button to choose and upload the clips.
Step 2
Set the Appropriate Speed. Select the speed you want for your video onVideo Speed section. The results will be displayed in the preview window. Save Processed Video. Mute the video by clicking the corresponding icon if necessary. Then, save the video by selecting the Export Results button.
Part 3. A Guide to Slowing Down or Speeding Up Videos on Android and iPhone
How to speed up slow mo video on phone is a normal concern for many people. Luckily, there are many apps available to do that. In most cases, making a mobile video bit slower or faster will make it seem better. You may want to reduce the duration of your video or check out the details in a specific scene. You may want to speed watch or speed listen to the content. Let’s have a look at how you can achieve this on your Android or Apple device.
1. How to Change the Speed of Your Video on Android
When someone asks how do I slow down a video? The first response that comes to mind is using their phone. This is the device they always have with them. And most people, consider editng easier on theior phones than compiters. For someonw with an Android phone, the Gallery app makes it easier to adjust the speed of a video. Find out how to make fast motion video or slow mo with Android phone. Follow these few steps:
Step 1Launch the Gallery app
Open the video you want to edit. Then, tap on the Edit icon at the bottom to open the video editor.
Step 2Find the Speed Icon
Scroll through the list of the icons at the bottom. Then tap on the Speed icon to start making the adjustments
Step 3Adjust the Speed of the Video
The default speed of the video is 1x. Tap on 2x to seep it up or 1/2x to slow down the video. Then press the Play icon to preview the view with these speed settings.
Step 4Save the Video
Once satisfied with the speed of the video, tap the save button.
2. How to Change the Speed of Your Video on iPhone
The iMovie app offers an easy and effective way of speeding up or slowing down videos on your iPhone. How do you make a video fast motion? The free video editing app from Apple is available for iOS and and can also be used on iPads:
Step 1Launch iMovie App
Once you have installed and opened the iMovie app on your phone, tap on the Create Projects (+) button.
Step 2Select Movie
The app will prompt you to select the kind of project you want between Movie and Trailer.
Step 3Create Movie
Tap on the video that you want to adjust speed. Then, tap on the Create Movie button.
Step 4Adjust the Speed of the Video
On the editing screen, tap on the video clip. The video editing tools will appear at the bottom, allowing you to make the adjustments of your choise. Tap on the Speed icon that looks like a speedometer and drag the slider until you attain the speed you want.
Step 5Preview and Safe
After adjusting the speed, play the video to preview it with the new speed. Then tap on the Done button at the top to save the project. Hit the Share icon, and the Save the Video.
Conclusion
When it comes to creating slow motion videos, Wondershare Filmora stands out as a great software to use. Filmora V13 allows you to speed up or slow down videos with only a few clicks. The versatile video editing software can be used on Windows and Mac PC while producing the same quality of videos. Be sure to check out the range of AI features available in the software. These are helpful in automating most of the tasks and doing a lot more with your editing tasks.
Trailer Guide for Creators and Developers
Trailers are a popular means to showcase a product you are about to release to the market. Teasers and trailers are traditionally created for movies, but have eventually evolved to include book trailers, game trailers, and app trailers. In this article, we will explain the key details of a trailer, highlight some examples, and show you how to create an effective trailer.
Part 1. What is a Trailer?
A trailer is a type of video commercial advertisement made to advertise and inform audiences about a specific program or item. To persuade customers to view or use the product, it includes a brief series of previews of the entire material. It also serves as a means of creating anticipation for a show or product that is about to hit the market.

Trailers were originally made for cinema movies. Nowadays, trailers are created for different forms of media like shows, apps, programs, video games, and book videos. A typical traditional trailer lasts between 1 to 3 minutes.
Part 2. What Are the Similarities and Differences Between a Teaser and Trailer?
Teasers and trailers can often be confused with each other. After all, they pretty much have the same objective.
Both are created for the purpose of advertising an upcoming show, product, or service. Teasers and trailers are similarly shown to audiences prior to the release of the thing they are advertising. They are meant to show a small portion of the full experience to create curiosity and excitement towards a targeted market. Both videos are typically short in length - taking up only a maximum of 3 minutes in duration.
The differences between them lie in their content, timeline, and duration. A teaser is much shorter than a trailer - the former runs for only 20-30 seconds while the latter can go between 1-3 minutes in length. This is because teasers are typically made before or during the production process of a movie or feature, whilst trailers are commonly made at the end.
For films, movies, and shows, teasers generally capture only a single part of that media. It focuses on the most intense or impactful scene. Trailers are formed from a series of clips depicting striking scenes derived from the beginning, middle, and end of the show. These scenes are normally arranged in a nonlinear structure, allowing viewers to have a general understanding of the story without revealing the entirety of the plot.
Part 3. Examples of good trailers
An excellent trailer is one who can effectively attract and maintain the audience’s attention. It satisfies its objective of showcasing striking and captivating pieces of the main product and entices viewers to experience its entirety. Here are some examples of trailers who have well fulfilled the criteria of a good trailer.
1. The Suicide Squad
The Suicide Squad is a fresh take featuring DC’s anti-heroes assemble in a single chaotic and unconventional team. James Gunn’s iteration on these characters is brought to life in the trailer with a majestic cast including John Cena, Idris Elba, Margot Robbie, and David Dastmalchian. Several key scenes are shown, highlighting its standout characters in the process while portraying the movie’s setting.
2. Raya and the Last Dragon
The trailer starts out innocently and comes with an adorable and surprising twist. The brief 2-minute trailer is packed with relevant scenes that depict the character’s quest without revealing too much. Many action-packed scenes and emotional interactions are satisfactorily squeezed into the trailer. Excitement builds further with Tamara Bubble’s “I’m That Good” playing in the background on the last minute of the video.
3. Men (2022)
Ingenious combination of sound effects and background music play a distinct role in this 2022 trailer. The female lead’s voice echoing from a tunnel, the haunting piano keys gradually building up the suspense, and the common but cleverly used horror audio effects create a chilling ensemble of haunting scenes in the movie. The sounds gradually rise up as more aggressive and energized scenes flash on the screen, and eventually end back into the sombre intro that leaves the audience with questions.
4. The Farewell
Lulu Wang’s dramatic comedy The Farewell is all about a family hiding the truth of a family member’s terminal illness from the person herself. What makes the trailer special is that it steers away from the sad, melancholic direction and veers toward a feel-good movie vibe. The conflict, struggle, and the beliefs featured in the movie are depicted in the trailer. However, the clever placement of interactions and the uplifting music tug at the audience’s heartstrings and urge them to want to see more.
5. Pokémon Go
Pokémon has become a culture to several generations. Becoming a Pokémon trainer is a secret dream that almost all of us have, even as adults. Niantic’s collaboration with the Pokémon franchise brings people closer to that reality by introducing its AR and location-powered app Pokémon Go. The trailer shows people of all ages living out their trainer dreams in the real world and interacting with Pokémon. The different features of the game are dramatized in a real-life setting, inciting more excitement, and pulling out the nostalgia from its market. The trailer keeps the actual app showcase to a minimum, instead focusing on once again selling that dream to audiences and bringing out the inner child in everyone.
Part 4. How to bring your trailer to the next level?
While it may seem intimidating to create a trailer for your upcoming product, there is no need to worry. It is now easier than ever to create a well-crafted trailer by taking advantage of a program’s tools and templates.
- Stock media
Filmora makes it easy to craft a trailer with only a few clicks. Make use of the program’s media library to gain access to a wealth of resources like stock photos, videos, music, and audio files.
- Keyframing
Keyframing lets you smoothly transition from one scene to another, making it an effective tool for trailers. It is particularly appealing for shows that highlight motion like sports, dancing, and action. Experiment with more than 80 preset templates and create smooth scene transitions with ease.
- Speed Ramping
Speed Ramping is a feature that works perfectly with keyframing. Increase the energy and dynamics in your trailer with 6 preset speed types. You can also customize these templates. There is also no need for concern about the audio - Filmora lets you maintain the audio pitch even when using these features.
- FX Effects
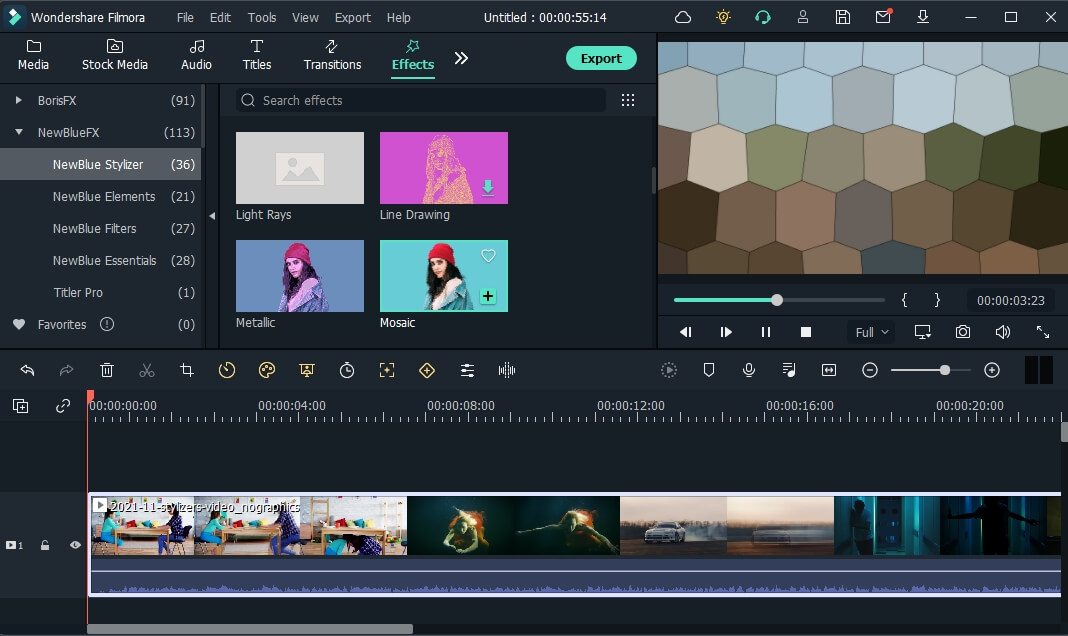
The program also offers many effects and filters for an extra element in your trailer. The Borix FX is an example of that. Designed in collaboration with the award-winning developer of the same name, Boris FX and its extension Continuum features a wide array of tasteful effects for your convenience. There are over 91 customizable and adjustable presets including types like blurs, stylization, and lights. NewBlue is another option that carries choices of filters, titlers, and stylizers.
Filmora offers different features, tools, and effects to explore that can help make your trailer editing objectives easier and more convenient. Save time and resources by taking advantage of its powerful yet easy-to-use tools.
Free Download For Win 7 or later(64-bit)
Free Download For macOS 10.14 or later
2. Raya and the Last Dragon
The trailer starts out innocently and comes with an adorable and surprising twist. The brief 2-minute trailer is packed with relevant scenes that depict the character’s quest without revealing too much. Many action-packed scenes and emotional interactions are satisfactorily squeezed into the trailer. Excitement builds further with Tamara Bubble’s “I’m That Good” playing in the background on the last minute of the video.
3. Men (2022)
Ingenious combination of sound effects and background music play a distinct role in this 2022 trailer. The female lead’s voice echoing from a tunnel, the haunting piano keys gradually building up the suspense, and the common but cleverly used horror audio effects create a chilling ensemble of haunting scenes in the movie. The sounds gradually rise up as more aggressive and energized scenes flash on the screen, and eventually end back into the sombre intro that leaves the audience with questions.
4. The Farewell
Lulu Wang’s dramatic comedy The Farewell is all about a family hiding the truth of a family member’s terminal illness from the person herself. What makes the trailer special is that it steers away from the sad, melancholic direction and veers toward a feel-good movie vibe. The conflict, struggle, and the beliefs featured in the movie are depicted in the trailer. However, the clever placement of interactions and the uplifting music tug at the audience’s heartstrings and urge them to want to see more.
5. Pokémon Go
Pokémon has become a culture to several generations. Becoming a Pokémon trainer is a secret dream that almost all of us have, even as adults. Niantic’s collaboration with the Pokémon franchise brings people closer to that reality by introducing its AR and location-powered app Pokémon Go. The trailer shows people of all ages living out their trainer dreams in the real world and interacting with Pokémon. The different features of the game are dramatized in a real-life setting, inciting more excitement, and pulling out the nostalgia from its market. The trailer keeps the actual app showcase to a minimum, instead focusing on once again selling that dream to audiences and bringing out the inner child in everyone.
Part 4. How to bring your trailer to the next level?
While it may seem intimidating to create a trailer for your upcoming product, there is no need to worry. It is now easier than ever to create a well-crafted trailer by taking advantage of a program’s tools and templates.
- Stock media
Filmora makes it easy to craft a trailer with only a few clicks. Make use of the program’s media library to gain access to a wealth of resources like stock photos, videos, music, and audio files.
- Keyframing
Keyframing lets you smoothly transition from one scene to another, making it an effective tool for trailers. It is particularly appealing for shows that highlight motion like sports, dancing, and action. Experiment with more than 80 preset templates and create smooth scene transitions with ease.
- Speed Ramping
Speed Ramping is a feature that works perfectly with keyframing. Increase the energy and dynamics in your trailer with 6 preset speed types. You can also customize these templates. There is also no need for concern about the audio - Filmora lets you maintain the audio pitch even when using these features.
- FX Effects
The program also offers many effects and filters for an extra element in your trailer. The Borix FX is an example of that. Designed in collaboration with the award-winning developer of the same name, Boris FX and its extension Continuum features a wide array of tasteful effects for your convenience. There are over 91 customizable and adjustable presets including types like blurs, stylization, and lights. NewBlue is another option that carries choices of filters, titlers, and stylizers.
Filmora offers different features, tools, and effects to explore that can help make your trailer editing objectives easier and more convenient. Save time and resources by taking advantage of its powerful yet easy-to-use tools.
Free Download For Win 7 or later(64-bit)
Free Download For macOS 10.14 or later
Also read:
- Camtasia Vs. Final Cut Pro for 2024
- In 2024, Are You Looking to Enhance Your Video or Photo Colors Using Premiere LUTs? Get to Know About the Best Free LUT Effects to Get Started
- New REVIEW Whats Best 10 Software to Make AI Upscaling Video
- Useful Tips for Tiktok Video Aspect Ratio Included
- New 2024 Approved 10 Matching Color Combination That Works Together
- Updated Different Ways To Trim Video In Premiere Pro
- New In 2024, How to Make Video Slow Motion?
- 2024 Approved You Are at the Right Post if You Are Surfing for a GIF to MP4 Conversion Tool. This Article Will Provide You with the Top Best Converters that Can Help You Convert GIF to MP4 Videos Quickly and Easily
- Updated Phone Aspect Ratio Vertical Definition, Types and Tips for 2024
- Updated 2024 Approved How to Make an Adobe Slideshow the Easy Way
- New In 2024, Guide to Synchronizing Your Audio And Videos Properly?
- Updated Free LUTs for OBS How to Use Them?
- Updated Want to Learn How to Make a Fortnite Montage? This Guide Will Give You the Low-Down on Creating Epic Montage Fortnite Videos that You Can Share with Other Players on Social Media Platforms
- In 2024, In This Article, You Will Learn How to Make an Engaging and Creative YouTube Intro to Give a Hook and Recap Information to the Audience by Using Wondershare Filmora
- New In 2024, A Complete Guideline About QuickTime Player
- New Learn How to Do Velocity Edits on PC to Enhance Your Videos, Adjusting Speed for Dynamic and Visually Engaging Results
- New 2024 Approved 2 Effective Ways to Add Text Behind Objects
- 2024 Approved Step by Step to Cut Videos in Lightworks
- How to Color Grade Your Picture in LightRoom for 2024
- Updated Make Super Easy Coin Magic With Filmora for 2024
- Updated In 2024, Best 31 Video Trimmers for Computer, Phone and Online
- Creative Ways to Add Green Screen Effects In Photoshop
- Consider a LUT to Be a Color Preset that a Filmmaker Can Use to Start Working on a Project Quickly. Sony Engineers Have Developed LUTs to Help Filmmakers Perform Specific Tasks. All of These Are Available for Free
- 2024 Approved How to Change Video Thumbnail in Google Drive
- In 2024, Change Video Speed with FFmpeg
- Add Fade in Windows Video Editor
- Updated In 2024, How to Make Split Screen Videos in Filmora
- New 15 Best CapCut Templates for Slow Motion Editing
- In 2024, Have You Recently Experienced Motion Blur in Games? Do You Wish to Learn More About It? This Article Provides an Overview and the Need for Motion Blur Gaming
- New 2024 Approved Best 8 Srt File Creators
- How to Upload Videos to Twitch? Heres a Guide for Beginner
- Updated 2024 Approved How to Achieve GoPro Slow Motion With Quality
- Video Maker with Song for 2024
- New 2024 Approved Best 6 WebM to GIF Converters
- New In 2024, Color Match Game Tips for You
- New 2024 Approved How to Correct Lens Distortion With Filmora
- Do You Want to Add a Motion Blur Effect in Valorant? Read This Guide to Find Out How to Create a Motion Blur Effect in Valorant without Any Hassle
- Complete Guide to Change Video Resolution in Filmora for 2024
- In 2024, Top-Notch Solutions for Disabled Apple ID On Apple iPhone 12 Making It Possible
- How to Remove Find My iPhone without Apple ID From your Apple iPhone SE (2022)?
- In 2024, How to Change Your Realme C51 Location on life360 Without Anyone Knowing? | Dr.fone
- In 2024, Unlocking Apple iPhone 6 Passcode without a Computer
- How to Lock Apps on Nubia Red Magic 9 Pro+ to Protect Your Individual Information
- In 2024, A Working Guide For Pachirisu Pokemon Go Map On Honor Magic V2 | Dr.fone
- In 2024, How to Track Oppo Find N3 by Phone Number | Dr.fone
- In 2024, The Best iSpoofer Alternative to Try On OnePlus Ace 2 Pro | Dr.fone
- AddROM Bypass An Android Tool to Unlock FRP Lock Screen For your Sony Xperia 10 V
- Top 5 Vivo T2x 5G Bypass FRP Tools for PC That Actually Work
- How To Transfer Data From Apple iPhone 7 Plus To Other iPhone devices? | Dr.fone
- 8 Best Apps for Screen Mirroring Google Pixel Fold PC | Dr.fone
- In 2024, 4 Effective Methods Fake GPS Location on Apple iPhone 6s Plus/iPad | Dr.fone
- 2024 Approved Samples of Cartoon Character Face
- How to Quickly Fix Bluetooth Not Working on Tecno Spark 10 Pro | Dr.fone
- How To Unlock SIM Cards Of Vivo S17t Without PUK Codes
- In 2024, Lock Your Realme Narzo N55 Phone in Style The Top 5 Gesture Lock Screen Apps
- Top 12 Prominent Realme V30 Fingerprint Not Working Solutions
- In 2024, Does Airplane Mode Turn off GPS Location On Nokia C110? | Dr.fone
- Sign a PDF v1.2 document with digital signature software
- 2024 Approved How to Translate Instagram Videos for Global Engagement
- Updated Text To Speech | Online
- Bypass Activation Lock From Apple iPhone 13 - 4 Easy Ways
- Easy steps to recover deleted music from Nubia Red Magic 8S Pro
- Best Nokia Pattern Lock Removal Tools Remove Android Pattern Lock Without Losing Data
- In 2024, 4 Most-Known Ways to Find Someone on Tinder For Realme 11 5G by Name | Dr.fone
- How To Change Your Apple iPhone SE (2022) Apple ID on MacBook
- How To Fix Apple iPhone 13 Pro Could Not Be Activated/Reached Issue
- Wondering the Best Alternative to Hola On Samsung Galaxy F04? Here Is the Answer | Dr.fone
- Ultimate Guide to Free PPTP VPN For Beginners On Samsung Galaxy A34 5G | Dr.fone
- Title: New In 2024, 8 Ways To Live Stream Pre-Recorded Video
- Author: Chloe
- Created at : 2024-04-24 07:08:28
- Updated at : 2024-04-25 07:08:28
- Link: https://ai-editing-video.techidaily.com/new-in-2024-8-ways-to-live-stream-pre-recorded-video/
- License: This work is licensed under CC BY-NC-SA 4.0.
