
:max_bytes(150000):strip_icc():format(webp)/should-you-buy-a-kindle-5270180-b1c49aad9c1142dc8722cfdb5d02072c.jpg)
New In 2024, Cropping Videos in Final Cut Pro Step by Step
Cropping Videos in Final Cut Pro [Step by Step]
“Storytelling at its most powerful”, - words we read on the first page of the official web-site of Final Cut Pro, non-linear video editing software program which runs on Mac computers. The software lets us to log and transfer videos onto a hard drive, where it can be edited, processed, and output to a wide variety of formats. Final Cut Pro is so advanced that it is used by hobbyist filmmakers and industry professionals in TV, Film, and media. Anyone can get a free trial of the software for their Macs, but, to purchase directly from the Mac App Store it costs $299.99. It’s evident that Final Cut Pro can’t be downloaded, installed, and thus used on Windows, which is unfortunate, but for Mac users, it’s a very powerful video editing software.

What are the features this advanced computer program offers to Mac users? – itreads on the web-site of Final Cut Pro:
- Object Tracker and Cinematic mode;
- Blazing pro performance;
- Editing, audio, motion graphics, color grading, and delivery;
- The best plug-ins, effects, and tools from leading developers.
One of the most impressive things about Final Cut Pro is that through it, you can create 2D and 3D titles right in the program, apply and modify filters, and use the built-in chroma key for high-quality green- and blue-screen effects. But, one should not be alarmed when it comes to experience and knowledge in editing – even though Final Cut Pro seems so advanced with its powerful tools and the possibilities it contains, it is designed for easy use and can be used by amateurs as well as professionals.
The interface, which, when it comes to editing, is one of the most important aspects (if not the main one!), seems quite standard - an ordinary window configuration, sidebar with libraries, events, projects, collections… If you want to know more about the basics of Final Cut Pro, it would be helpful to watch a beginner tutorial , with the length of only 20 minutes, an introduction of the whole program.

Anyway, the main topic of this article is about cropping – how to crop a video in Final Cut Pro? If you are a Mac user and have this program installed on your computer, and you as well have a footage where you want to remove some portions of the video and adjust the size of the cropped clip within a certain area, this article is for you. Even though cropping is especially used when it comes to the images, it is extremely helpful in certain situations about the video clips, as well. So, let’s dive into each step of cropping in Final Cut Pro!
Steps to crop a video in Final Cut Pro
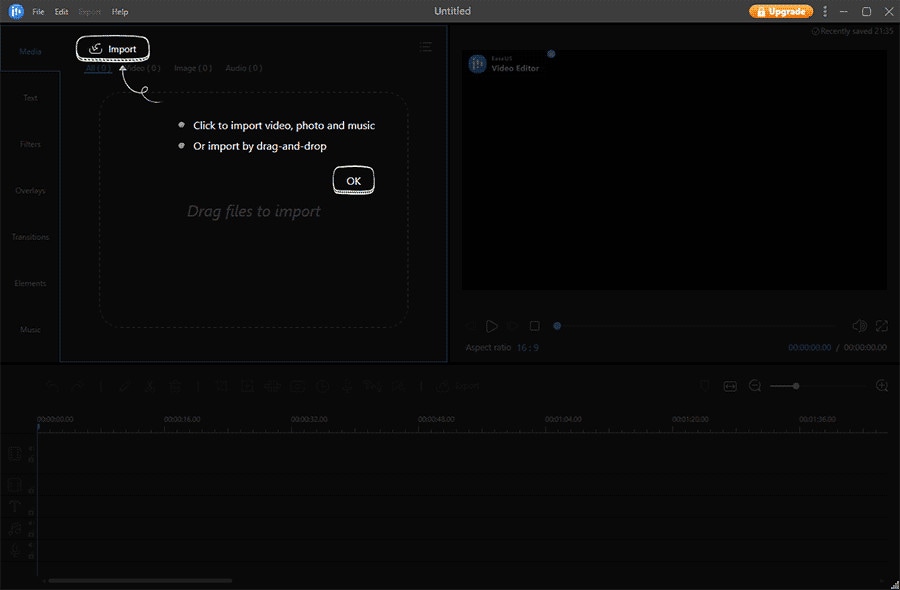
After getting Final Cut Pro ready to work in and opening it, you need to start as always, as in any other software: Of course, choose Import Media.

The software will ask your permission to access files in your computer, so, in order to import some, guess you have to click on OK.

Then, it will let you choose your file – but not by opening the new window (as in most cases), rather, you can choose file within the software.

Once you have your file(s) chosen, you need to find Import Selected button on the down and right.

This will lead you towards the editor again, but if you try to drag and drop your file into the sequence, the program will not follow this simple order…

This is because what the window below reads and looks like – it offers you create a New Project first. So, you need to hit it.

This will create the sequence where you can add the video you have already selected and imported from your media.

Now, it’s time to find where the cropping option is. It’s quite simple – look at the icon below and a little left of the screen where your video clip shows, click on it and you will see three options: Transform, Crop, and Distort. Needless to say, you will choose crop in this case, even if other options sound quite interesting, too!

Choosing Crop also gives you three options: Trim, Crop, and Ken Burns. Stick with the Crop again!

You will notice the kind of rulers on the angles of the video clip – they are there so you can crop your footage manually, by holding and moving them with your cursor to your liking.

Of course, if you direct your cursor in the middle of the cropped video, you can move the whole cropping window around it, so you can find the area where you intend to crop better.

And when the selected area is ready, you need to click on Done button on the right top side of the screen. If you are not satisfied with the result, you can take the step back, by clicking on Reset button right next to Done and modify the area again.

On the right side of the screen, you notice a window where Crop is also written. Alongside it, if you hover over the option with your mouse, you will see the word: Show. Clicking on it will let you crop the video from each side from there, too.

There, you can “play around” with Left, Right, Top, and Bottom sides.

In the process, if you are unsure or you want to compare the original video to the cropped version of it, keep in mind that you can uncheck the Crop button.

Finally, when you feel the result is what you have imagined, you can proceed to saving your work. For it to be done, you need to now find an Export button top right of the whole editor, and then, choose Export File (or else, if that’s what you are willing to do).


The next step would be Export Settings. You will see a new window which has three sections: Info, Settings, and Roles. The most important one here would be considered Settings, where you choose your preferred Format, Video Codec, Resolution, Color Space, Audio Format, and Action.


When you click on Next, you then choose the Name of your project and the location where you want to save it exactly.

Then you click on Save, and in a short amount of time, you have your new cropped video where you chose to save it! So, that’s it with cropping in the Final Cut Pro!


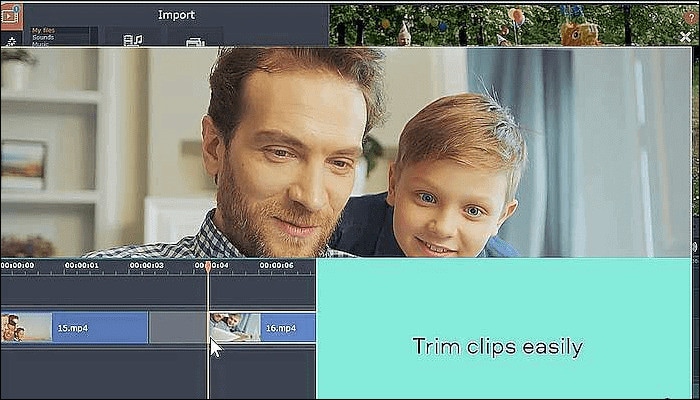
An easier way to crop a video in Wondershare Filmora
When it comes down to Mac, we can also discussed another program which is available on Mac as well as Windows operating system. This software is Filmora Video Editor , which is a simple yet sophisticated video editor that empowers the stories with everything a video editor program can offer to its users. On its official web-site, Filmora is declared as the best video editor, which allows you to edit videos with minimal effort (and isn’t that exactly what one wants when trying to just crop a video?..), enhance videos with 800+ stunning effects, unleash creativity with Hollywood effects, and, import and export in almost any format. One can say that the interface looks quite like that of Final Cut Pro…
For Win 7 or later (64-bit)
For macOS 10.14 or later

So, shall we imagine we use Wondershare Filmora X to crop our video, what would be the steps to do it?..
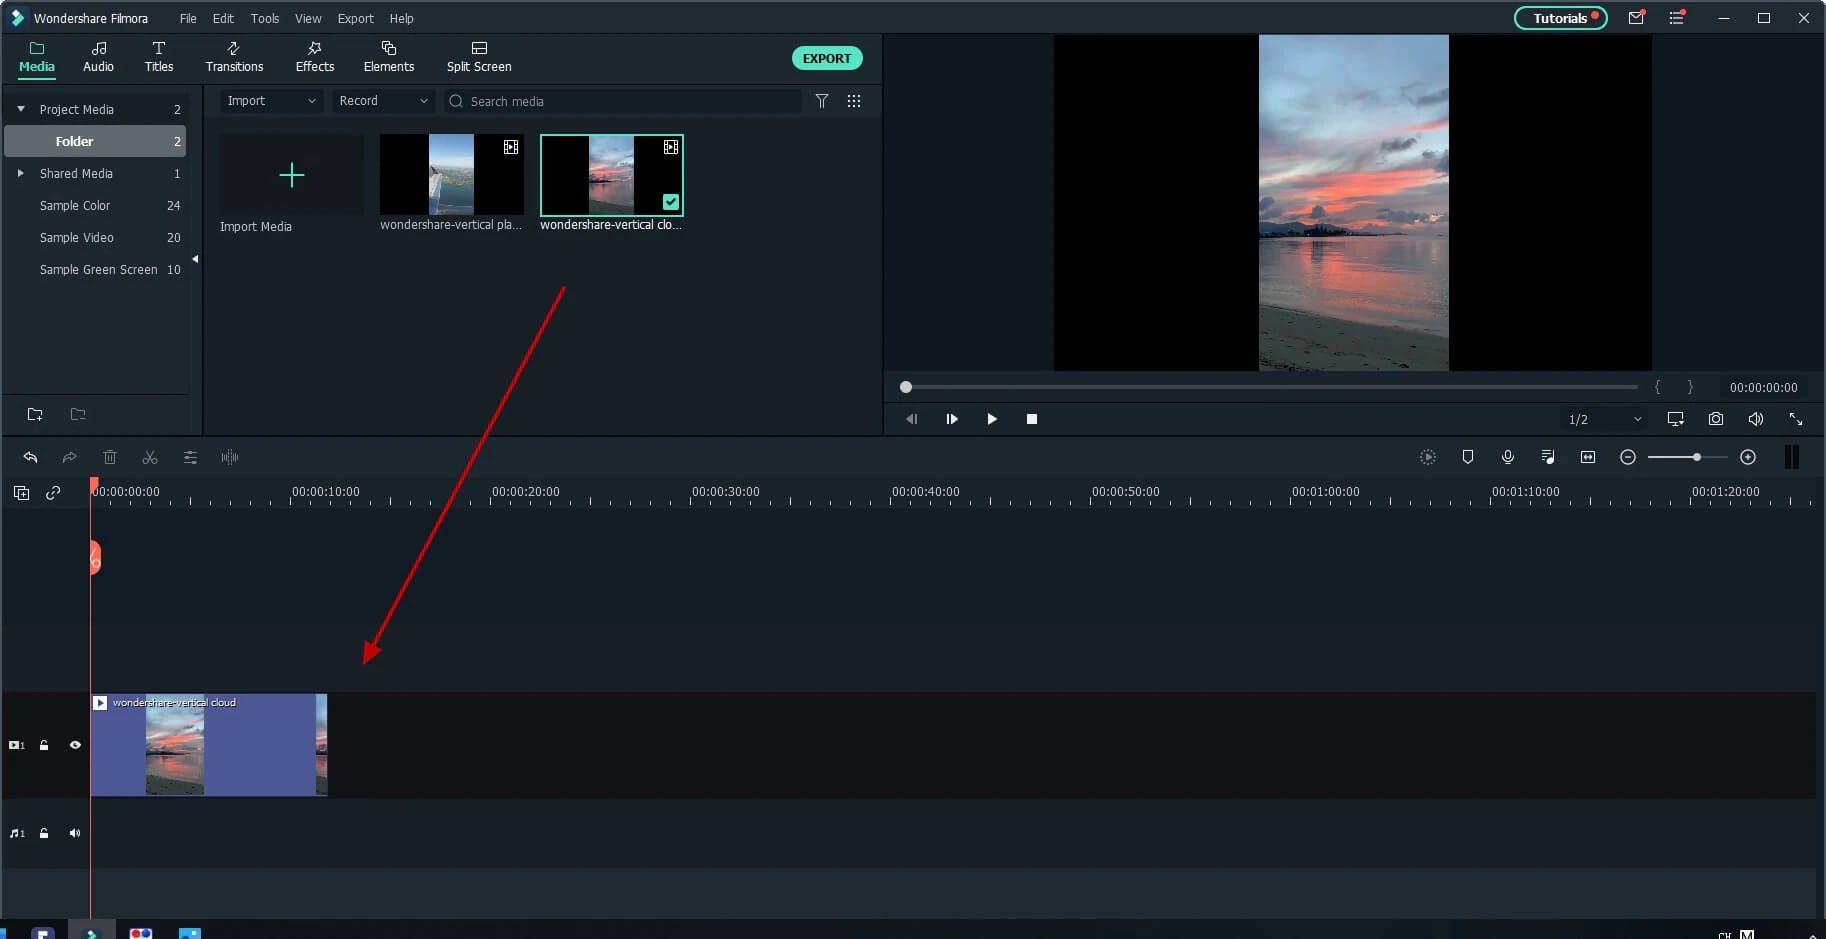
Needless to say, downloading and installing the software is the first step. To add files, you need to click on Import Media Files Here.

Choose your clip(s) you would like to crop and then drag and drop it in the sequence.

Above your video in the sequence, you will see little icons and find a Crop one.

Click on it and a new window will open – it’s for Crop and Zoom, where you can choose a needed ratio or do it manually (for it, you have to select Custom first).

After clicking OK, your video will be cropped as you like. Then, you can proceed with Exporting it – click on Export, choose your preferred settings, and save the video.

So, in this article, we got to know to software Final Cut Pro better and learned about how to crop our footage using this program; we also discussed how to do the same in Wondershare Filmora X, shall we need a different software.
And now, you can choose your preferred one and follow these step, or, why not try both?..
What are the features this advanced computer program offers to Mac users? – itreads on the web-site of Final Cut Pro:
- Object Tracker and Cinematic mode;
- Blazing pro performance;
- Editing, audio, motion graphics, color grading, and delivery;
- The best plug-ins, effects, and tools from leading developers.
One of the most impressive things about Final Cut Pro is that through it, you can create 2D and 3D titles right in the program, apply and modify filters, and use the built-in chroma key for high-quality green- and blue-screen effects. But, one should not be alarmed when it comes to experience and knowledge in editing – even though Final Cut Pro seems so advanced with its powerful tools and the possibilities it contains, it is designed for easy use and can be used by amateurs as well as professionals.
The interface, which, when it comes to editing, is one of the most important aspects (if not the main one!), seems quite standard - an ordinary window configuration, sidebar with libraries, events, projects, collections… If you want to know more about the basics of Final Cut Pro, it would be helpful to watch a beginner tutorial , with the length of only 20 minutes, an introduction of the whole program.
Anyway, the main topic of this article is about cropping – how to crop a video in Final Cut Pro? If you are a Mac user and have this program installed on your computer, and you as well have a footage where you want to remove some portions of the video and adjust the size of the cropped clip within a certain area, this article is for you. Even though cropping is especially used when it comes to the images, it is extremely helpful in certain situations about the video clips, as well. So, let’s dive into each step of cropping in Final Cut Pro!
Steps to crop a video in Final Cut Pro
After getting Final Cut Pro ready to work in and opening it, you need to start as always, as in any other software: Of course, choose Import Media.
The software will ask your permission to access files in your computer, so, in order to import some, guess you have to click on OK.
Then, it will let you choose your file – but not by opening the new window (as in most cases), rather, you can choose file within the software.
Once you have your file(s) chosen, you need to find Import Selected button on the down and right.
This will lead you towards the editor again, but if you try to drag and drop your file into the sequence, the program will not follow this simple order…
This is because what the window below reads and looks like – it offers you create a New Project first. So, you need to hit it.
This will create the sequence where you can add the video you have already selected and imported from your media.
Now, it’s time to find where the cropping option is. It’s quite simple – look at the icon below and a little left of the screen where your video clip shows, click on it and you will see three options: Transform, Crop, and Distort. Needless to say, you will choose crop in this case, even if other options sound quite interesting, too!
Choosing Crop also gives you three options: Trim, Crop, and Ken Burns. Stick with the Crop again!
You will notice the kind of rulers on the angles of the video clip – they are there so you can crop your footage manually, by holding and moving them with your cursor to your liking.
Of course, if you direct your cursor in the middle of the cropped video, you can move the whole cropping window around it, so you can find the area where you intend to crop better.
And when the selected area is ready, you need to click on Done button on the right top side of the screen. If you are not satisfied with the result, you can take the step back, by clicking on Reset button right next to Done and modify the area again.
On the right side of the screen, you notice a window where Crop is also written. Alongside it, if you hover over the option with your mouse, you will see the word: Show. Clicking on it will let you crop the video from each side from there, too.
There, you can “play around” with Left, Right, Top, and Bottom sides.
In the process, if you are unsure or you want to compare the original video to the cropped version of it, keep in mind that you can uncheck the Crop button.
Finally, when you feel the result is what you have imagined, you can proceed to saving your work. For it to be done, you need to now find an Export button top right of the whole editor, and then, choose Export File (or else, if that’s what you are willing to do).
The next step would be Export Settings. You will see a new window which has three sections: Info, Settings, and Roles. The most important one here would be considered Settings, where you choose your preferred Format, Video Codec, Resolution, Color Space, Audio Format, and Action.
When you click on Next, you then choose the Name of your project and the location where you want to save it exactly.
Then you click on Save, and in a short amount of time, you have your new cropped video where you chose to save it! So, that’s it with cropping in the Final Cut Pro!
An easier way to crop a video in Wondershare Filmora
When it comes down to Mac, we can also discussed another program which is available on Mac as well as Windows operating system. This software is Filmora Video Editor , which is a simple yet sophisticated video editor that empowers the stories with everything a video editor program can offer to its users. On its official web-site, Filmora is declared as the best video editor, which allows you to edit videos with minimal effort (and isn’t that exactly what one wants when trying to just crop a video?..), enhance videos with 800+ stunning effects, unleash creativity with Hollywood effects, and, import and export in almost any format. One can say that the interface looks quite like that of Final Cut Pro…
For Win 7 or later (64-bit)
For macOS 10.14 or later
So, shall we imagine we use Wondershare Filmora X to crop our video, what would be the steps to do it?..
Needless to say, downloading and installing the software is the first step. To add files, you need to click on Import Media Files Here.
Choose your clip(s) you would like to crop and then drag and drop it in the sequence.
Above your video in the sequence, you will see little icons and find a Crop one.
Click on it and a new window will open – it’s for Crop and Zoom, where you can choose a needed ratio or do it manually (for it, you have to select Custom first).
After clicking OK, your video will be cropped as you like. Then, you can proceed with Exporting it – click on Export, choose your preferred settings, and save the video.
So, in this article, we got to know to software Final Cut Pro better and learned about how to crop our footage using this program; we also discussed how to do the same in Wondershare Filmora X, shall we need a different software.
And now, you can choose your preferred one and follow these step, or, why not try both?..
Top 15 Best Free MP4 Video Rotators [Windows, Mac, Android, iPhone & Online]
Have you ever encountered a problem where you saved a video in the wrong orientation? So you ask yourself what’s the best tool to rotate. There are tools that help to flip videos recorded so that you don’t get frustrated while you watch them later on your pc or phone. So why don’t you take a look at the best video rotators that are available for Android, iOs, Windows, Mac, and online tools?
Best MP4 Video Rotators to Rotate MP4 Video on Windows and Mac - Filmroa Video Editor
Filmora Video Editor allows you to rotate your video to any angle. You can also zoom in and crop out the parts of the video that you don’t want to see. It also includes predefined aspect ratios such as 16:9, 9:16, 4:5, 1:1, and others to help you quickly discover the ideal aspect ratio for YouTube, Instagram, and other sites. Let’s look at how to modify the orientation of a video in Filmora.
For Win 7 or later (64-bit)
For macOS 10.14 or later
How to change the video orientation in Filmora
Step 1:Import the video file into Filmora, and then drag it to the timeline.
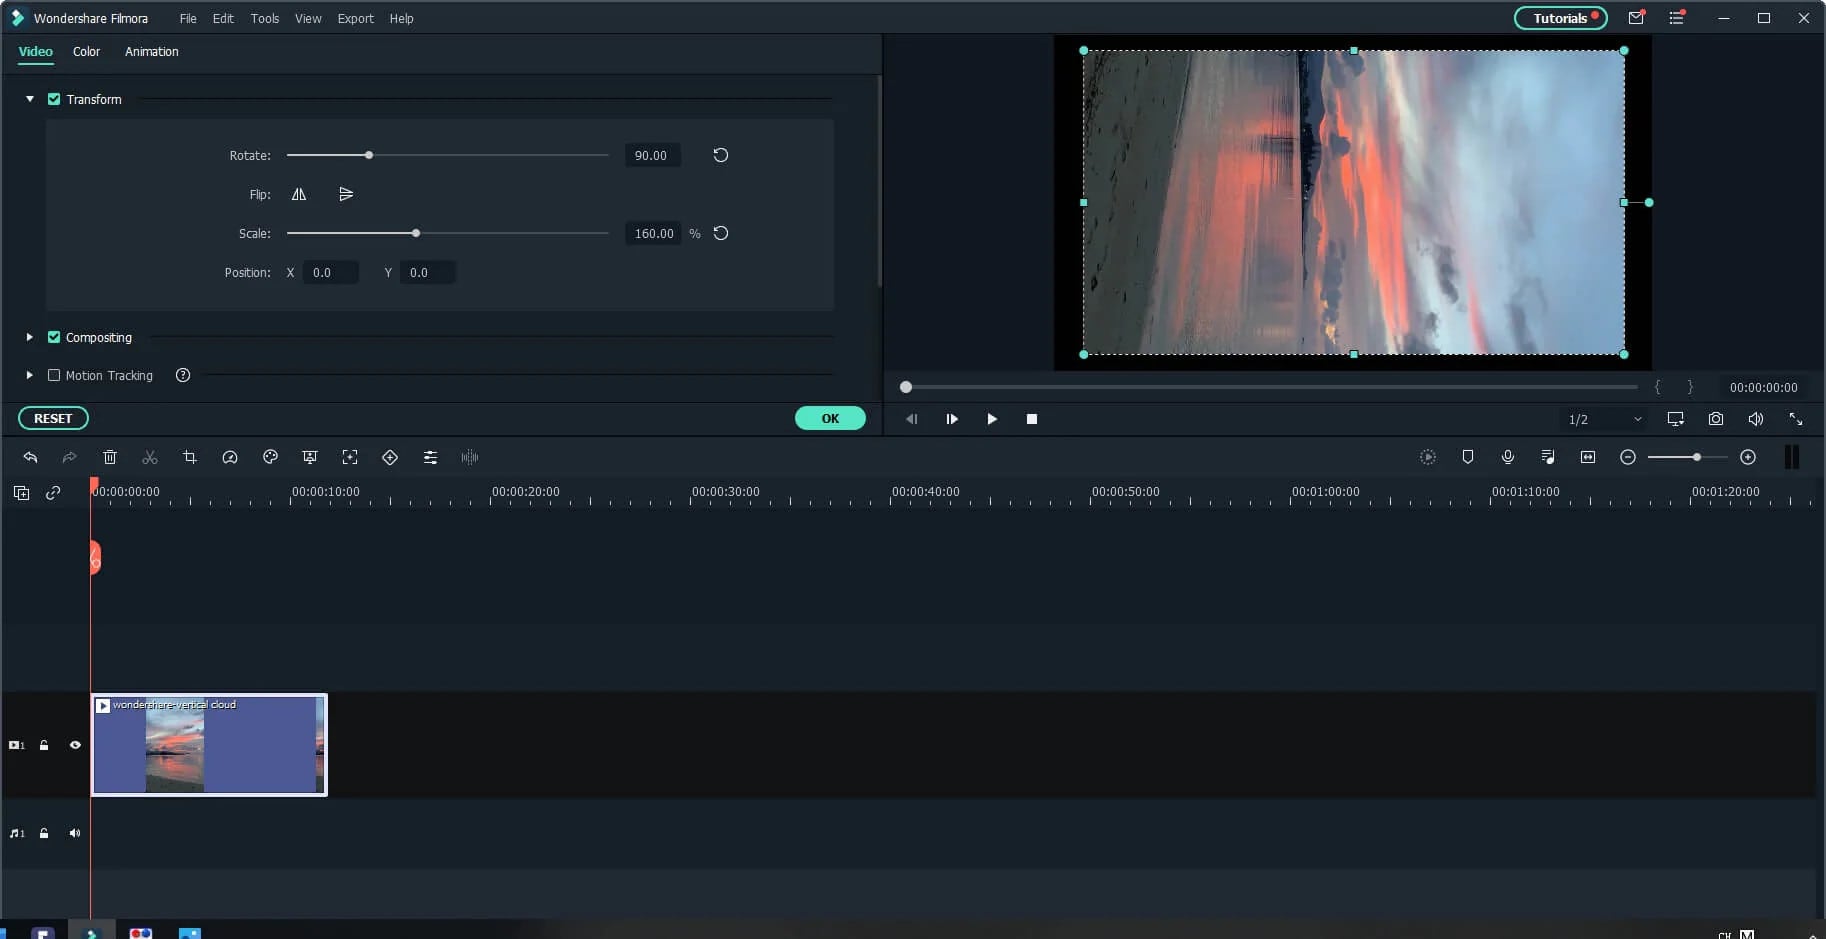
Step 2: To enter the video editing panel, double-click the video clip in the timeline. Locate the “Rotate” option under the “Transform” menu. You can drag the slider or enter a specific number to adjust the rotation value. You can rotate up to 360 degrees. When you enter “90” in the box, the video clip will be rotated 90 degrees.
By dragging the “Scale” slider, you can make the full image screen, or you can directly adjust its position, size, shape, etc., in the Viewer panel.
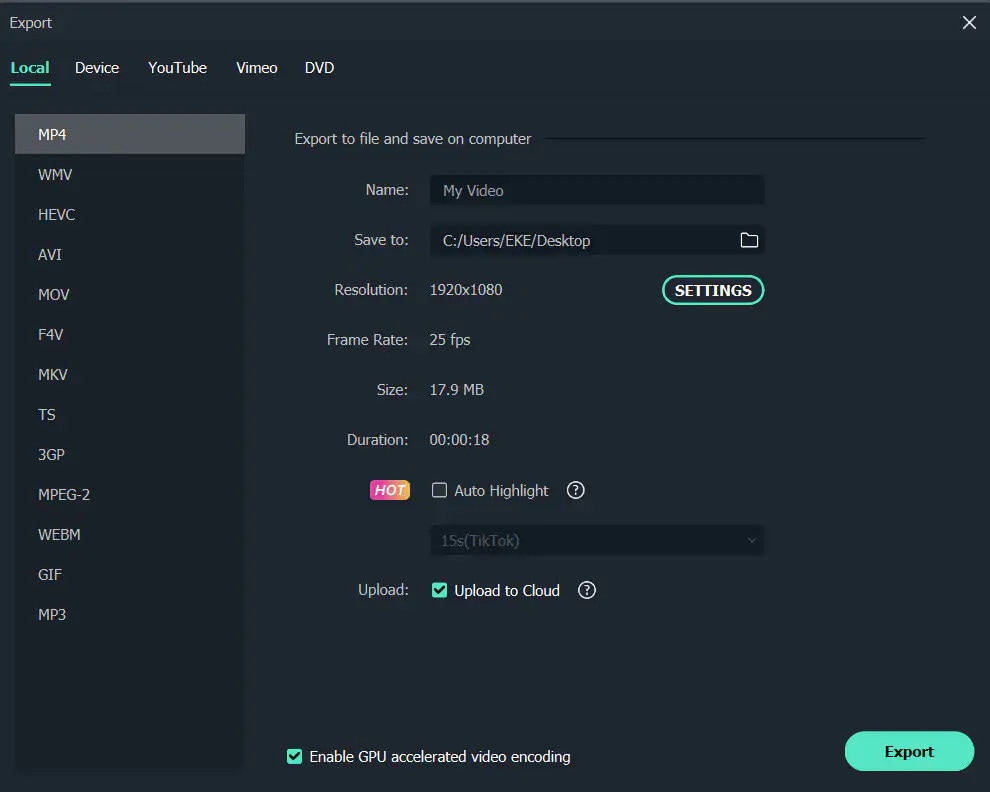
Step 3: After you are satisfied, click the export button. You can change the format here, or you can upload the file to YouTube.
Top 3 Free MP4 Video Rotators on Windows
Looking for the best free video rotator?
If you are looking for a free video rotator for windows, then this article has got you covered. A list of the top 3 free video rotators for windows has been listed.
- VSDC Free Video Editor

It is a highly functional video editing suite with easy controls. It provides anyone who is a beginner to easily access and edit the video easily.
It helps you rotate the videos in increments of 90 degrees, be it clockwise or anticlockwise )
VSDC is a free video editor with non-linear editing capabilities. Users may swiftly convert video and audio files from one format to another with VSDC. A built-in disk burning tool for DVDs is also included in the software. This free program, designed for educational purposes, can be used by businesses or individuals.
VSDC Free Video Editor features
- Built-In DVD Burning Tool
- Colour Blending And Filters
- Specific Multimedia Devices Creation
- Desktop Video Capture
- Export To Social Networking Sites
- Masking
- Non-Linear Video Editing
- Subpixel Accuracy
- Supports Popular Formats
- Video File Converter
Pros
- It’s completely free.
- There is no watermark.
- There are numerous free video editing programs available.
- Support a wide range of file formats
Cons
There isn’t a macOS version available.
Take a severe learning curve into consideration.
There are numerous premium-only features.
The timeline isn’t the same as most NLE editing software.
- Windows Movie Maker
The most well-known video rotator and editor are probably Windows Movie Maker. Most of us who grew up with Microsoft’s various operating systems have had access to it because it comes as a free download with most Microsoft products. It can handle a wide range of files and is generally simple to use. Adding features like sound, music, special effects, or even speeding up the video is simple, and you’ll love the variety of skins available.
For beginners, Windows Video Maker is ideal. It is available for free on Windows PCs and includes basic capabilities and workflow aspects found in professional video editing systems. Its user-friendly interface resembles a simplified version of a video editor timeline and is simple enough for even inexperienced editors to understand.
Features of Windows Movie Maker
- Customization Tool’s title
- Auto Movie Options
- Credit Customization Tool
- Special Effects Options
- Overlays for Transitions
Pros:
- Various video editing functions;
- A variety of output possibilities
Cons:
- Many different versions of the same product;
- No longer included in the Windows operating system.
3.EaseUS Video Editor
EaseUS Video Editor is one of the few most popular video rotators we have today. Its video editing provides tools that can change the video orientation by 90 degrees anticlockwise and clockwise, which can flip vertically and horizontally.
In terms of videos, adding great filters, sound, music, subtitles and other elements to have a great video output can be achieved using the EaseUS. Moreover, it accepts video formats and can convert files to MP4 and other great features.
Features of EaseUS Video Editor
- Can easily trim, cut, split, merge, rotate, and mix video clips.
- Ability to apply stylish video effects
- Can add or remove the watermark and reduce background or wind noise from a video.
Pros:
- User-friendly interface, perfect for beginners
- Easily trim, cut, split, merge, rotate, mix video clips
- A full range of free visual and audio effects
- Change of contrast, exposure, brightness, and other video aspects
- Use the voiceover function to add your comments to the video
Cons:
- The software has no version for macOS
Top 3 Free MP4 Video Rotators on Mac
- iMovie
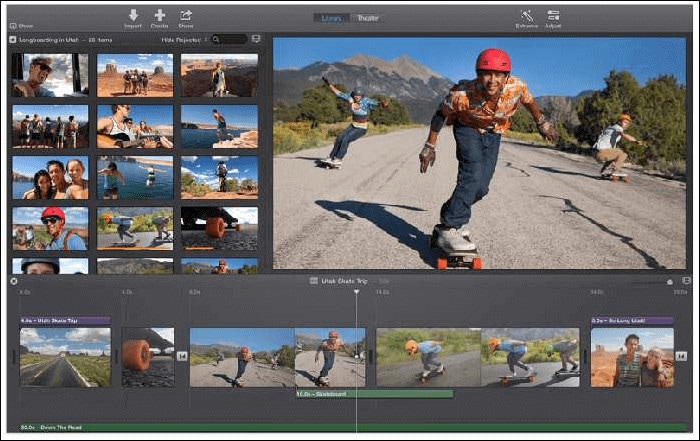
The iMovie for Mac users is an exceptional video rotator. You can turn any video or movie you may have into an amazing masterpiece with more features due to the special after-effects it has. Simple application to use and navigate easily, although when importing video takes a while at certain times.
Features of the iMovie include
- Full range of options to modify
- Ability to enhance colour settings
- Easily crop and edit video clips ease
- Ability to change the speed of clips.
Pros:
- Nice interface;
- The function is to create fun Movie Trailers.
Cons:
- Supports only a few video formats;
- Pre-processing and import trans-coding can be time-consuming.
- Movavi Video Editor
Movavi has a free version that is easy to use, especially for beginners. It allows you to add titles, filters, transitions, and special effects to your videos and photographs to make attractive movies. You can use the animation to smoothly move things around the screen in your film. On the multi-track timeline, you can add as many tracks as you wish. From the expanded built-in collection, you can get more example video clips, stickers, and audio tracks.
Features of Movavi Video Editor
- You can upload files and photographs in almost any format.
- To make videos automatically, use the Montage Wizard.
- Transition Wizard allows you to quickly put together slideshows.
- Enhance image quality by cutting, cropping, and rotating videos on the timeline.
- Apply artistic filters, and make transitions between portions as smooth as possible.
- Create animated headlines, stickers, callouts, and video overlays:
Pros:
- It’s appropriate for newcomers and casual users alike.
- A number of video formats are supported, including.mov (QuickTime)
- Chroma Key and Slow Motion are examples of special effects.
Cons
- Only the premium version supports the advanced features.
- It uses the basic colour grading tool
- QuickTime Player
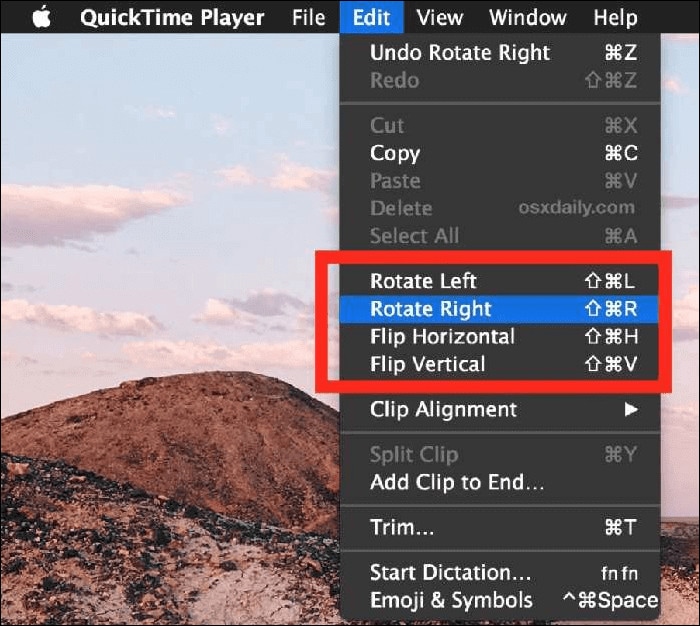
The key advantage of Apple’s QuickTime is that it comes pre-installed on your Mac’s macOS operating system. It’s powerful enough to rotate your clip, yet it’s simple enough for beginners to do. iTunes files can be played and edited with QuickTime. After rotation, it exports a new video file, leaving the old clip on the Mac. The output video will be compressed slightly, resulting in a smaller rotational video file than the original.
Features of QuickTime Player
- Anything can be recorded, including video, audio, and the screen.
- Cropping, audio detachment, combining, and rotation are all simple video editing techniques.
- From 4K to 480p video compression
- Quickly share your video: directly upload videos to YouTube
Pros:
- With macOS, it comes pre-installed.
- Work with iTunes files Streaming video player with no configuration
Cons:
- Only QuickTime Pro 7 unlocks the editing feature.
- There will be no more Windows versions.
- It isn’t compatible with standard subtitle files.
Top 3 Free MP4 Video Rotators on Android
When we use a smartphone to capture a video or download one from a website, we occasionally discover that the video has been inverted. As a result, we’ll require a video rotator app to correct the problem. On the market, there are many different sorts of tools for various platforms. However, you may have discovered that separating the wheat from the chaff can be difficult at times. To save you time, I’ve compiled a list of 3 video rotator applications for Android
- VivaVideo
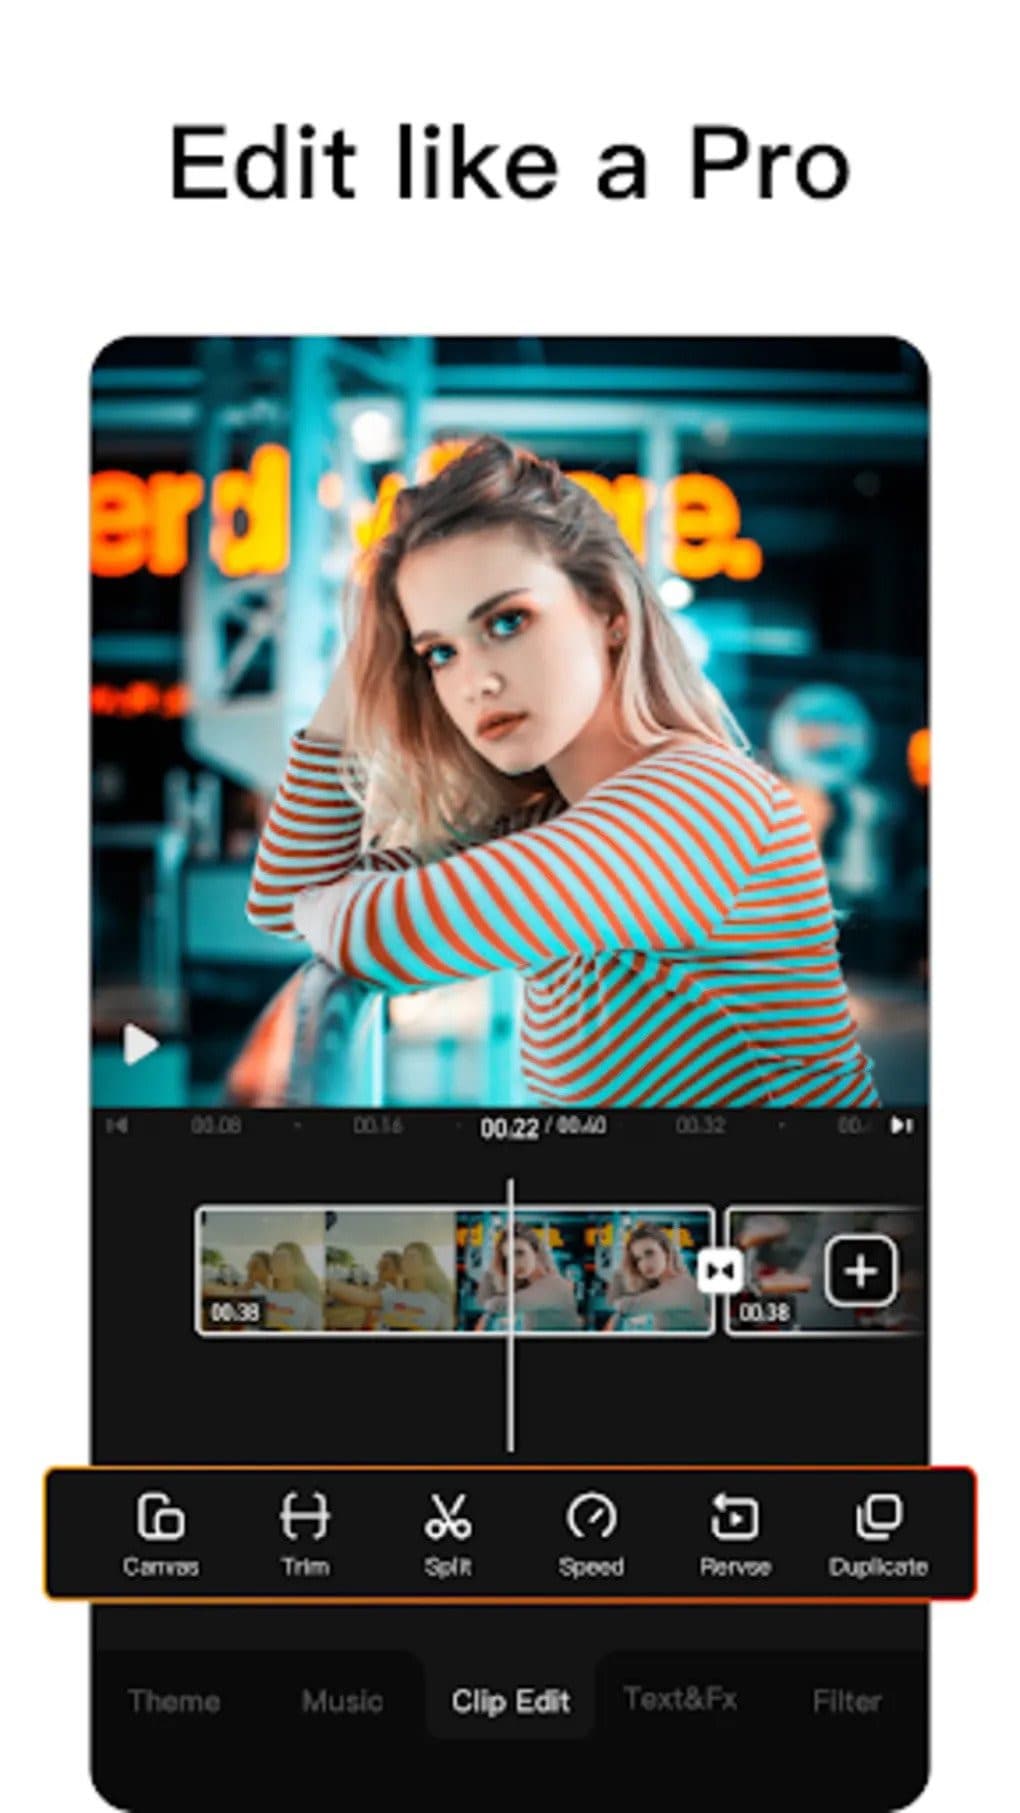
VivaVideo is one of the top movie producers and free video rotators for Android devices as a media editor. This application allows you to alter the orientation of your videos. Aside from rotating videos, this software also includes cropping, combining, cutting, and other editing features. “The best video editor software is VivaVideo - Video Maker App,” an Android expert previously said. This program is a video producer as well as an editor.
Features of VivaVideo
- It allows you to add music to videos.
- Combine videos clips into one video
- Can apply video effects.
- After you’ve finished editing your videos, you may save and share them on YouTube and TikTok! To rotate video, use this program!
Pros
- It has an In-app camera with live effects previews for capturing videos.
- More than 60 effects to choose from with additional downloadable effects.
- Enhance the videos using themes.
- Ability to Merge videos and create montages with storyboarding features
- Edit frames within a video
Cons
- There is no negative review to say about this app
2.Google Photos
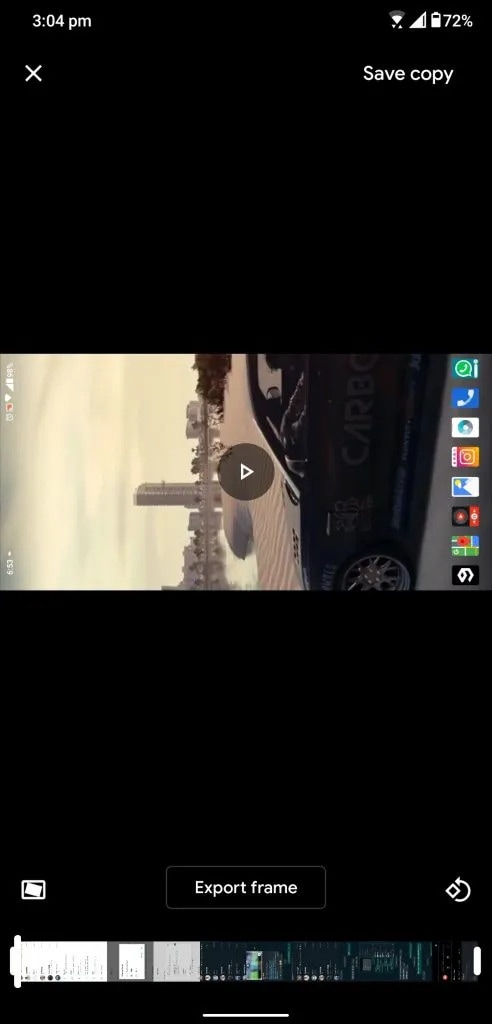
This app may already be installed on your smartphone, but you are unaware of its full potential. This program includes a built-in picture and video editor in addition to backing up your photos. This program includes three essential video editing tools that are extremely basic and easy to use.
The first is to stabilize the video; if your video is unsteady, you can use this option in Google Photos to stabilize it. You may also use the timeline below the video to cut the video. If you mistakenly captured the video in the wrong orientation, there is a tool to rotate it.
Features of Google Photos
- You can modify photographs and videos in Google Photos.
- On Google Photos, make a collage or a movie.
- Recover photos or videos that were recently erased.
- Clear off some space on Google Photos…
- Place photos in the Archive.
Pros
Google Images automatically backs up all of your device’s photos and videos.
Despite its many advantages, the reason I choose Google Photos is that it helps me save space on my smartphone.
The original quality of images stored in Google Photos is really high. Photos and videos are saved in the same resolution as when they were taken.
Over time, Google has improved the Google Photos interface, and it now incorporates AI to provide consumers with even better performance.
Cons
There aren’t many effects, and there aren’t any other editing tools.
The lack of a password-protection option in Google Photos is annoying. Some photos are private, and you may not wish to share them with others.
Users of Google Photos will no longer have limitless storage.
3Adobe Rush
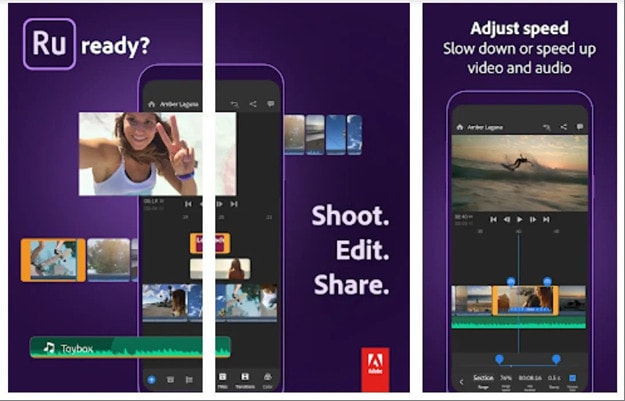
Adobe Rush is a new video editor that Adobe released via a partnership with Samsung’s latest flagship smartphone. This app is a simple yet powerful tool for editing videos on the go, on your smartphone.
This app comes with some powerful tools which you find on some high-end video editing apps. You get a timeline interface to edit your videos perfectly, and you get some music recommendations right into the app.
Features Of Adobe Rush
- In the timeline, you can make changes to your video.
- Audio can be added and refined.
- Change the colour, size, and position of the video.
- Make a title.
- Add transitions, pan and zoom effects, and reframe your clips automatically.
- Change the clip’s attributes.
- Change your video’s aspect ratio.
- Create the illusion of a picture-in-picture effect.
Pros
- It has a user-friendly UI that is responsive and snappy.
- It’s easy to use and provides helpful advice for newcomers.
- It enables Adobe users to quickly and easily produce stunning videos that are customized to their preferences.
- When compared to its competitors, exporting files is a breeze.
- Unlike most of its competitors, it comes with good colour and title tools.
- YouTube, Facebook, Vimeo, Snapchat, Instagram, and Twitter are just a few of the social media channels where the finished files can be simply shared.
- It synchronizes projects between desktop and mobile devices, making them more accessible.
Cons
- When compared to its competitors, it is a little costly.
- It renders projects slowly and only supports three transitions.
- The app does not have storyboard templates and cannot specify the exact structure for output files.
- It only comes with a few video and audio editing capabilities.
- Many standard video effects are missing.
Top 3 Free MP4 Video Rotators on iPhone
1.Splice

Trimming, cropping, effects, titles, speed adjustments, animation, transitions, and music are all available in this well-known video editor, which has a cultish following of dedicated Splicers.
Splice’s music library is one of its strongest assets. It offers a large selection of free music and sound effects to layer over your video, as well as the ability to sync your movie to the beat of your soundtrack.
Features of Splice
Clips should be cropped and trimmed to focus on the highlights.
With an Audio Library and iTunes Integration, you may add music to your videos.
To smooth transitions between clips and images, use transitions.
Enhance videos with effects.
Pros:
- Developed by GoPro, award-winning, highly regarded.
Cons:
- Only available on iOS devices.
2. Clips

It’s easy to miss pre-loaded apps like Apple’s Clips, but this video editing tool has lots of impressive features to enjoy, thanks to the weight of the tech giant’s greatest brains behind it. Take, for example, their live tiles setting. You can use this to generate animated captions and titles that appear as you speak.
To liven things up, you may add animated emojis and backgrounds, and music tracks dynamically sync to the length of your video.
Features of Clips
- Ability to generate animated captions
- Full access to Animated emojis and backgrounds
- Ability to have your music sync to your videos
Pros:
- Simple to use, unique features, and Apple’s support.
Cons:
- It’s only for iOS devices (obviously! ), and it has trouble with a big number of clips.
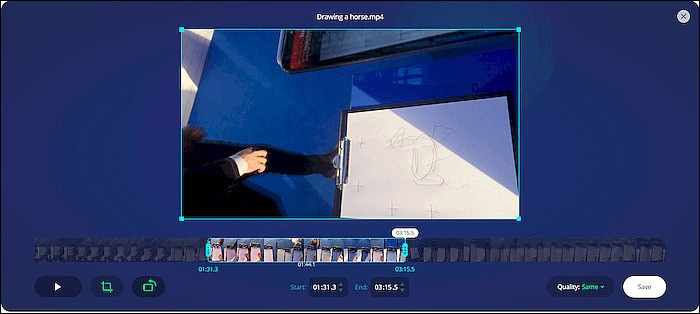
3. Quik

You may apply transitions and effects to up to 200 photographs and video clips from your photo library or GoPro Plus with this free software. You may not only crop, zoom, and rotate photos and video clips, but you can also customize them with 26 different themes, fonts, effects, and artwork.
You may make HD 1080p or 720p films for social sharing in cinema, square, or portrait formats, and you can store your draft creations for up to seven days.
Features of Quik
- Everything that is available for free.
- There are no limits to the number of mural events.
- Editing is unrestricted.
- There are now a total of 25 more photo and video filters.
Pros:
- Tons of features, including access to 100+ free songs,
- Flashbacks and QuikStories, which make videos based on your most recent footage,
- syncs footage to the beat of your soundtrack, and AI editing help.
Cons:
- Limited control and no trimming option; customers have claimed that it is occasionally glitchy.
Top 3 Free MP4 Video Rotators Online
1.Online Video Cutter
This web tool comes in helpful when you need to rapidly edit a small video file. It is not necessary to install it; you may use it right from your browser. The clip can only be rotated 90, 180, or 270 degrees. It’ll come in handy, especially if you’ve closed the video in portrait mode and want to watch it on a big screen. The service’s provider says that the files will be automatically erased from the servers a few hours after you accomplish your task, resulting in a high level of security.
Features of Online Video cutter.
- It Supports Any Video Format. …
- Completely Online for you to access
- Additional Settings to make more edits to videos
- Easy to use, User-friendly interface.
Pros:
It has a very simple user interface.
You do not need to pay for a license to utilize it.
Almost every video format is supported.
Cons:
Only suitable for little clips
Performing simply the most basic functions, such as rotating and cropping
2.EzGif
This unique internet tool not only creates animated GIFs but can also rotate video. You simply choose the clip from your local folder. However, the file’s maximum size is limited to 100MB. A basic tool for rotating the video through 90, 180, and 270 degrees. You can also vertically and horizontally flip the video before exporting it in a different format and encoding.
Features of EzGif
- A simple user interface to find your way around the website.
- Ability to do resizing and rotating of videos and images.
- Capable of video conversions and editing
Pros:
- Many video formats are supported, including MP4, WebM, AVI, MPEG, FLV, MOV, and 3GP.
- The rotation procedure is quick and simple to utilize.
- After rotating, provide a preview function.
Cons:
- The maximum file size is 100 megabytes.
- There are no filters or transitions, and only basic editing functions are available.
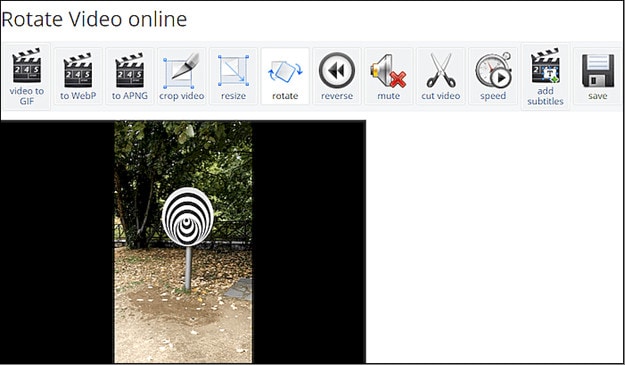
3.Videorotate
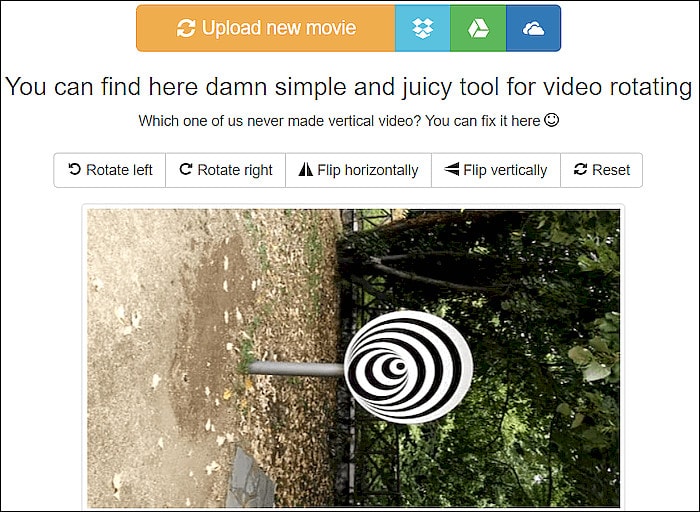
- This is a free online video rotator that is simple and quick to use. You can upload your video from a local folder or import a recorded clip from major cloud services like Dropbox, Google Drive, and One Drive, just like the other online services (there are buttons for each of them). You can flip the clip or rotate it left and right. Other video capabilities available on the site include cropping, stabilizing, and slicing.
Features of Videorotate
- Ability to crop, stabilize and slice videos.
Pros:
- Simple and straightforward to use
- Clips from your Dropbox, Google Drive, and OneDrive accounts can be uploaded.
- A specific “Reset” button is available.
Cons:
- For basic operations, a service for newcomers is available.
- Only a few video file formats are supported.
FAQs about Video Rotator
- What is the best way to rotate a video?
Use an easy-to-use video editing program. It’s easy to rotate a video, even if you’ve never edited one before. You can also use some media players.
- How do I rotate a video permanently?
In this guide, we will show you exactly how to rotate video in Windows with EaseUS Video Editor and save it permanently.
3.How can I rotate a video for free on the internet?
It’s simple to rotate a video online, and there are various services that offer free online video rotators.
- Videorotate
- Ezgif
- Video cutter on the internet
- How do I mirror a video on the internet?
The websites that support video rotation also offer the ability to “flip” the video vertically and horizontally. You’ll have “mirroring” frames in this manner as if you’re filming your pals in the mirror.
For macOS 10.14 or later
How to change the video orientation in Filmora
Step 1:Import the video file into Filmora, and then drag it to the timeline.
Step 2: To enter the video editing panel, double-click the video clip in the timeline. Locate the “Rotate” option under the “Transform” menu. You can drag the slider or enter a specific number to adjust the rotation value. You can rotate up to 360 degrees. When you enter “90” in the box, the video clip will be rotated 90 degrees.
By dragging the “Scale” slider, you can make the full image screen, or you can directly adjust its position, size, shape, etc., in the Viewer panel.
Step 3: After you are satisfied, click the export button. You can change the format here, or you can upload the file to YouTube.
Top 3 Free MP4 Video Rotators on Windows
Looking for the best free video rotator?
If you are looking for a free video rotator for windows, then this article has got you covered. A list of the top 3 free video rotators for windows has been listed.
- VSDC Free Video Editor
It is a highly functional video editing suite with easy controls. It provides anyone who is a beginner to easily access and edit the video easily.
It helps you rotate the videos in increments of 90 degrees, be it clockwise or anticlockwise )
VSDC is a free video editor with non-linear editing capabilities. Users may swiftly convert video and audio files from one format to another with VSDC. A built-in disk burning tool for DVDs is also included in the software. This free program, designed for educational purposes, can be used by businesses or individuals.
VSDC Free Video Editor features
- Built-In DVD Burning Tool
- Colour Blending And Filters
- Specific Multimedia Devices Creation
- Desktop Video Capture
- Export To Social Networking Sites
- Masking
- Non-Linear Video Editing
- Subpixel Accuracy
- Supports Popular Formats
- Video File Converter
Pros
- It’s completely free.
- There is no watermark.
- There are numerous free video editing programs available.
- Support a wide range of file formats
Cons
There isn’t a macOS version available.
Take a severe learning curve into consideration.
There are numerous premium-only features.
The timeline isn’t the same as most NLE editing software.
- Windows Movie Maker
The most well-known video rotator and editor are probably Windows Movie Maker. Most of us who grew up with Microsoft’s various operating systems have had access to it because it comes as a free download with most Microsoft products. It can handle a wide range of files and is generally simple to use. Adding features like sound, music, special effects, or even speeding up the video is simple, and you’ll love the variety of skins available.
For beginners, Windows Video Maker is ideal. It is available for free on Windows PCs and includes basic capabilities and workflow aspects found in professional video editing systems. Its user-friendly interface resembles a simplified version of a video editor timeline and is simple enough for even inexperienced editors to understand.
Features of Windows Movie Maker
- Customization Tool’s title
- Auto Movie Options
- Credit Customization Tool
- Special Effects Options
- Overlays for Transitions
Pros:
- Various video editing functions;
- A variety of output possibilities
Cons:
- Many different versions of the same product;
- No longer included in the Windows operating system.
3.EaseUS Video Editor
EaseUS Video Editor is one of the few most popular video rotators we have today. Its video editing provides tools that can change the video orientation by 90 degrees anticlockwise and clockwise, which can flip vertically and horizontally.
In terms of videos, adding great filters, sound, music, subtitles and other elements to have a great video output can be achieved using the EaseUS. Moreover, it accepts video formats and can convert files to MP4 and other great features.
Features of EaseUS Video Editor
- Can easily trim, cut, split, merge, rotate, and mix video clips.
- Ability to apply stylish video effects
- Can add or remove the watermark and reduce background or wind noise from a video.
Pros:
- User-friendly interface, perfect for beginners
- Easily trim, cut, split, merge, rotate, mix video clips
- A full range of free visual and audio effects
- Change of contrast, exposure, brightness, and other video aspects
- Use the voiceover function to add your comments to the video
Cons:
- The software has no version for macOS
Top 3 Free MP4 Video Rotators on Mac
- iMovie
The iMovie for Mac users is an exceptional video rotator. You can turn any video or movie you may have into an amazing masterpiece with more features due to the special after-effects it has. Simple application to use and navigate easily, although when importing video takes a while at certain times.
Features of the iMovie include
- Full range of options to modify
- Ability to enhance colour settings
- Easily crop and edit video clips ease
- Ability to change the speed of clips.
Pros:
- Nice interface;
- The function is to create fun Movie Trailers.
Cons:
- Supports only a few video formats;
- Pre-processing and import trans-coding can be time-consuming.
- Movavi Video Editor
Movavi has a free version that is easy to use, especially for beginners. It allows you to add titles, filters, transitions, and special effects to your videos and photographs to make attractive movies. You can use the animation to smoothly move things around the screen in your film. On the multi-track timeline, you can add as many tracks as you wish. From the expanded built-in collection, you can get more example video clips, stickers, and audio tracks.
Features of Movavi Video Editor
- You can upload files and photographs in almost any format.
- To make videos automatically, use the Montage Wizard.
- Transition Wizard allows you to quickly put together slideshows.
- Enhance image quality by cutting, cropping, and rotating videos on the timeline.
- Apply artistic filters, and make transitions between portions as smooth as possible.
- Create animated headlines, stickers, callouts, and video overlays:
Pros:
- It’s appropriate for newcomers and casual users alike.
- A number of video formats are supported, including.mov (QuickTime)
- Chroma Key and Slow Motion are examples of special effects.
Cons
- Only the premium version supports the advanced features.
- It uses the basic colour grading tool
- QuickTime Player
The key advantage of Apple’s QuickTime is that it comes pre-installed on your Mac’s macOS operating system. It’s powerful enough to rotate your clip, yet it’s simple enough for beginners to do. iTunes files can be played and edited with QuickTime. After rotation, it exports a new video file, leaving the old clip on the Mac. The output video will be compressed slightly, resulting in a smaller rotational video file than the original.
Features of QuickTime Player
- Anything can be recorded, including video, audio, and the screen.
- Cropping, audio detachment, combining, and rotation are all simple video editing techniques.
- From 4K to 480p video compression
- Quickly share your video: directly upload videos to YouTube
Pros:
- With macOS, it comes pre-installed.
- Work with iTunes files Streaming video player with no configuration
Cons:
- Only QuickTime Pro 7 unlocks the editing feature.
- There will be no more Windows versions.
- It isn’t compatible with standard subtitle files.
Top 3 Free MP4 Video Rotators on Android
When we use a smartphone to capture a video or download one from a website, we occasionally discover that the video has been inverted. As a result, we’ll require a video rotator app to correct the problem. On the market, there are many different sorts of tools for various platforms. However, you may have discovered that separating the wheat from the chaff can be difficult at times. To save you time, I’ve compiled a list of 3 video rotator applications for Android
- VivaVideo
VivaVideo is one of the top movie producers and free video rotators for Android devices as a media editor. This application allows you to alter the orientation of your videos. Aside from rotating videos, this software also includes cropping, combining, cutting, and other editing features. “The best video editor software is VivaVideo - Video Maker App,” an Android expert previously said. This program is a video producer as well as an editor.
Features of VivaVideo
- It allows you to add music to videos.
- Combine videos clips into one video
- Can apply video effects.
- After you’ve finished editing your videos, you may save and share them on YouTube and TikTok! To rotate video, use this program!
Pros
- It has an In-app camera with live effects previews for capturing videos.
- More than 60 effects to choose from with additional downloadable effects.
- Enhance the videos using themes.
- Ability to Merge videos and create montages with storyboarding features
- Edit frames within a video
Cons
- There is no negative review to say about this app
2.Google Photos
This app may already be installed on your smartphone, but you are unaware of its full potential. This program includes a built-in picture and video editor in addition to backing up your photos. This program includes three essential video editing tools that are extremely basic and easy to use.
The first is to stabilize the video; if your video is unsteady, you can use this option in Google Photos to stabilize it. You may also use the timeline below the video to cut the video. If you mistakenly captured the video in the wrong orientation, there is a tool to rotate it.
Features of Google Photos
- You can modify photographs and videos in Google Photos.
- On Google Photos, make a collage or a movie.
- Recover photos or videos that were recently erased.
- Clear off some space on Google Photos…
- Place photos in the Archive.
Pros
Google Images automatically backs up all of your device’s photos and videos.
Despite its many advantages, the reason I choose Google Photos is that it helps me save space on my smartphone.
The original quality of images stored in Google Photos is really high. Photos and videos are saved in the same resolution as when they were taken.
Over time, Google has improved the Google Photos interface, and it now incorporates AI to provide consumers with even better performance.
Cons
There aren’t many effects, and there aren’t any other editing tools.
The lack of a password-protection option in Google Photos is annoying. Some photos are private, and you may not wish to share them with others.
Users of Google Photos will no longer have limitless storage.
3Adobe Rush
Adobe Rush is a new video editor that Adobe released via a partnership with Samsung’s latest flagship smartphone. This app is a simple yet powerful tool for editing videos on the go, on your smartphone.
This app comes with some powerful tools which you find on some high-end video editing apps. You get a timeline interface to edit your videos perfectly, and you get some music recommendations right into the app.
Features Of Adobe Rush
- In the timeline, you can make changes to your video.
- Audio can be added and refined.
- Change the colour, size, and position of the video.
- Make a title.
- Add transitions, pan and zoom effects, and reframe your clips automatically.
- Change the clip’s attributes.
- Change your video’s aspect ratio.
- Create the illusion of a picture-in-picture effect.
Pros
- It has a user-friendly UI that is responsive and snappy.
- It’s easy to use and provides helpful advice for newcomers.
- It enables Adobe users to quickly and easily produce stunning videos that are customized to their preferences.
- When compared to its competitors, exporting files is a breeze.
- Unlike most of its competitors, it comes with good colour and title tools.
- YouTube, Facebook, Vimeo, Snapchat, Instagram, and Twitter are just a few of the social media channels where the finished files can be simply shared.
- It synchronizes projects between desktop and mobile devices, making them more accessible.
Cons
- When compared to its competitors, it is a little costly.
- It renders projects slowly and only supports three transitions.
- The app does not have storyboard templates and cannot specify the exact structure for output files.
- It only comes with a few video and audio editing capabilities.
- Many standard video effects are missing.
Top 3 Free MP4 Video Rotators on iPhone
1.Splice
Trimming, cropping, effects, titles, speed adjustments, animation, transitions, and music are all available in this well-known video editor, which has a cultish following of dedicated Splicers.
Splice’s music library is one of its strongest assets. It offers a large selection of free music and sound effects to layer over your video, as well as the ability to sync your movie to the beat of your soundtrack.
Features of Splice
Clips should be cropped and trimmed to focus on the highlights.
With an Audio Library and iTunes Integration, you may add music to your videos.
To smooth transitions between clips and images, use transitions.
Enhance videos with effects.
Pros:
- Developed by GoPro, award-winning, highly regarded.
Cons:
- Only available on iOS devices.
2. Clips
It’s easy to miss pre-loaded apps like Apple’s Clips, but this video editing tool has lots of impressive features to enjoy, thanks to the weight of the tech giant’s greatest brains behind it. Take, for example, their live tiles setting. You can use this to generate animated captions and titles that appear as you speak.
To liven things up, you may add animated emojis and backgrounds, and music tracks dynamically sync to the length of your video.
Features of Clips
- Ability to generate animated captions
- Full access to Animated emojis and backgrounds
- Ability to have your music sync to your videos
Pros:
- Simple to use, unique features, and Apple’s support.
Cons:
- It’s only for iOS devices (obviously! ), and it has trouble with a big number of clips.
3. Quik
You may apply transitions and effects to up to 200 photographs and video clips from your photo library or GoPro Plus with this free software. You may not only crop, zoom, and rotate photos and video clips, but you can also customize them with 26 different themes, fonts, effects, and artwork.
You may make HD 1080p or 720p films for social sharing in cinema, square, or portrait formats, and you can store your draft creations for up to seven days.
Features of Quik
- Everything that is available for free.
- There are no limits to the number of mural events.
- Editing is unrestricted.
- There are now a total of 25 more photo and video filters.
Pros:
- Tons of features, including access to 100+ free songs,
- Flashbacks and QuikStories, which make videos based on your most recent footage,
- syncs footage to the beat of your soundtrack, and AI editing help.
Cons:
- Limited control and no trimming option; customers have claimed that it is occasionally glitchy.
Top 3 Free MP4 Video Rotators Online
1.Online Video Cutter
This web tool comes in helpful when you need to rapidly edit a small video file. It is not necessary to install it; you may use it right from your browser. The clip can only be rotated 90, 180, or 270 degrees. It’ll come in handy, especially if you’ve closed the video in portrait mode and want to watch it on a big screen. The service’s provider says that the files will be automatically erased from the servers a few hours after you accomplish your task, resulting in a high level of security.
Features of Online Video cutter.
- It Supports Any Video Format. …
- Completely Online for you to access
- Additional Settings to make more edits to videos
- Easy to use, User-friendly interface.
Pros:
It has a very simple user interface.
You do not need to pay for a license to utilize it.
Almost every video format is supported.
Cons:
Only suitable for little clips
Performing simply the most basic functions, such as rotating and cropping
2.EzGif
This unique internet tool not only creates animated GIFs but can also rotate video. You simply choose the clip from your local folder. However, the file’s maximum size is limited to 100MB. A basic tool for rotating the video through 90, 180, and 270 degrees. You can also vertically and horizontally flip the video before exporting it in a different format and encoding.
Features of EzGif
- A simple user interface to find your way around the website.
- Ability to do resizing and rotating of videos and images.
- Capable of video conversions and editing
Pros:
- Many video formats are supported, including MP4, WebM, AVI, MPEG, FLV, MOV, and 3GP.
- The rotation procedure is quick and simple to utilize.
- After rotating, provide a preview function.
Cons:
- The maximum file size is 100 megabytes.
- There are no filters or transitions, and only basic editing functions are available.
3.Videorotate
- This is a free online video rotator that is simple and quick to use. You can upload your video from a local folder or import a recorded clip from major cloud services like Dropbox, Google Drive, and One Drive, just like the other online services (there are buttons for each of them). You can flip the clip or rotate it left and right. Other video capabilities available on the site include cropping, stabilizing, and slicing.
Features of Videorotate
- Ability to crop, stabilize and slice videos.
Pros:
- Simple and straightforward to use
- Clips from your Dropbox, Google Drive, and OneDrive accounts can be uploaded.
- A specific “Reset” button is available.
Cons:
- For basic operations, a service for newcomers is available.
- Only a few video file formats are supported.
FAQs about Video Rotator
- What is the best way to rotate a video?
Use an easy-to-use video editing program. It’s easy to rotate a video, even if you’ve never edited one before. You can also use some media players.
- How do I rotate a video permanently?
In this guide, we will show you exactly how to rotate video in Windows with EaseUS Video Editor and save it permanently.
3.How can I rotate a video for free on the internet?
It’s simple to rotate a video online, and there are various services that offer free online video rotators.
- Videorotate
- Ezgif
- Video cutter on the internet
- How do I mirror a video on the internet?
The websites that support video rotation also offer the ability to “flip” the video vertically and horizontally. You’ll have “mirroring” frames in this manner as if you’re filming your pals in the mirror.
Best 8 Online GIF to APNG Converters
Great Video Converter - Wondershare Filmora
Provide abundant video effects - A creative video editor
Powerful color correction and grading
Detailed tutorials provided by the official channel
The GIF image format is a bitmap image format that supports up to 8 bits per pixel. APNG (Animated Portable Network Graphics) is a format for animated images that supports 24 bits per pixel and 8 bits of transparency, which is not available in GIFs. Backward compatibility with non-animated PNG files is also maintained.
Because the initial frame of an APNG file saves as a regular PNG stream, it can display by most conventional PNG decoders. Extra chunks can hold frame speed data and different animation frames (as provided by the original PNG specification).
Is APNG superior to GIF? APNG files are smaller and have more outstanding quality than GIF files. However, GIF is more compatible than APNG. Firefox, Safari, Google Chrome, and Opera support APNG, while practically all online browsers support GIF.
Let’s look at the top 8 best GIFs to APNG converters now.
In this article
Part 1: Best 8 GIF to APNG Converters
Part 2: How to Convert a GIF to APNG
Part 3: FAQs
Part 1. Best 8 GIF to APNG Converters
Here are the top 8 GIFs to APNG converters to look out for
1. EZgif

Ezgif.com is a free, easy-to-use toolset for making and modifying animated GIFs. Besides some basic video editing, we also offer editing and conversions for various other picture formats, like animated WebP, PNG, MNG, and FLIF. GIF maker, video to GIF converter, and photo resizer are three of our most popular online utilities.
In addition, EZgif lets you edit GIFs before converting them to APNG.
Features:
- ImageMagick - conducts most picture editing tasks such as resizing, optimization, cropping, etc.
- Making, optimizing, trimming, and resizing animated GIFs with gifsicle and lossygif.
- For video conversions and editing, use FFmpeg (the genuine one).
- This video to GIF converter online has a low conversion rate.
- This free online GIF banner maker can assist you in creating GIF banners.
- This online GIF creator has an extremely user-friendly UI.
- This web program’s impressive capabilities are completely free to use.
- This GIF converter online maintains high-quality GIF conversion.
- You can make GIFs from videos in seconds.
Pros
The program at ezgif.com is entirely secure to use.
Users do not have to install any other programs for the software to work.
The application is simple and allows users to create GIFs online without exerting any effort.
Cons
Because there is a problem in the program, the result of this online GIF maker from photographs degrades. Hence it is not advised for high professional use.
2. FreeConvert

FreeConvert is a GIF to APNG converter that can convert photos, videos, audio files, documents, eBooks, and units, among other formats. It can upload GIFs from your device, Google Drive, Dropbox, or a URL, and it can batch convert many GIFs to animated PNG files without sacrificing quality. FreeConvert is a safe program because it automatically deletes converted files after two hours.
Features:
- You can convert numerous files at once without sacrificing quality.
- It provides a variety of output file types.
- You can choose from your device (computer, smartphone, etc.) or a Dropbox or Google Drive account to select your files.
Pros
It’s as simple as uploading your GIF files and clicking convert.
Convert a GIF to APNG(animated PNG) while keeping the original GIF’s animation quality.
It is entirely free and works with any web browser.
All files are encrypted using 256-bit SSL and erased after two hours.
Cons
Limited services for free users
3. Aconvert

Aconvert is another free online GIF to APNG converter. It not only converts GIFs to APNG but also compresses, resizes, merges, crops, and rotates GIFs. GIFs can be stored on your device or online storage services after being uploaded from local, online storage services or a URL.
The uploaded image file can be up to 200 MB in size.
My favorite software is AVS Image Converter, which can convert GIF to APNG and APNG to GIF. Furthermore, its ability to support a wide range of image formats and editing capabilities such as Watermarks, Filters, Image Corrections, and others is fantastic.
Features:
- It supports large file conversion of up to 200MB
- It can also resize and rotate GIF file
- It supports a wide range of image formats
- Edits watermark
Pros
Simple user interface
File compression settings get support across platforms
Multiplatform
Free and can be used on a web browser
Cons
Limited services for free users.
4. AVS Image Converter

AVS Image Converter for Windows is a free GIF to APNG converter. You can use it to convert animated GIF files into animated PNG files. This software can convert GIFs to APNGs and APNGs to animated GIFs. Aside from APNG and GIF, this shareware accepts various additional image and project formats as input, including BMP, JPEG, TIFF, TGA, PCX, PSD, PDD, and more. Unlike input types, only JPEG, PDF, GIF, PNG (APNG), TIFF, BMP, TGA, and RAS are the output formats. You can convert several photos from one format to another using our GIF to APNG converter’s batch conversion.
Features:
- It supports a variety of formats.
- It converts in batches.
- Convert animated GIFs into animated PNG files
Pros
Processes large groups of images
It’s possible to utilize it from the command line.
Presets for various dimensions
Multiple input formats are supported.
Allows you to convert photos to PDF.
Multiple effects are applied.
Cons
There are no individual presets.
Displays advertisements
5. Real World Paint
RealWorld Paint - portable image editor (rw-designer.com)

Another free GIF to APNG converter for Windows is RealWorld Paint. It can also convert an APNG file back to a GIF. Additionally, format conversions between PNG, JPEG, GIF, WEBP, animated WEBP, and other formats are possible. The prime benefit of this software is that it can work with projects created by various famous photo editors, including Photoshop, Paint.Net, GIMP, and others.
You can also add, edit, and improve frames in GIF files and simple conversion. When you open a GIF file in it, an editor area appears, right below which you can see all of the GIF file’s frames.
Features:
- Supports a wide range of file types
- Easy to use interface
- Doesn’t consume a lot of hardware resources
- Can convert in a few minutes
Pros
Transformation of a particular area
Multi-platform
Folder selection is simple.
Set the conversion quality quickly.
Cons
For novices, it’s a bit difficult.
Only the premium version is available.
6. Convertio

Convertio is a competitor to Browserling in terms of simplicity. Convertio, on the other hand, outnumbers the former in terms of picture formats supported. Convertio can also convert GIFs to TGA, PSD, JPG, TIFF, ICO, etc. Unfortunately, it lacks image editing capabilities.
Features:
- The file size is unrestricted.
- There is no restriction to how many conversions you can do at once.
- Priority number one.
- Every day, you have an unlimited number of conversion minutes.
- The maximum conversion time per file is unlimited.
- Pages with no advertisements.
Pros
Allows you to convert files by dragging and dropping them.
The ETA is less than 2 minutes, and the conversion is quick.
There are 3 membership options.
Cons
After 24 hours/manually, files saved on the server/cloud gets removed.
7. Onlineconvertfree

Onlineconvertfree is a lovely PNG converter that works with all standard image formats. You can create a PNG file from various formats, including GIF, JPG, HTML, TIFF, RAW, and more. Users may crop, clip, rotate, flip, and perform many other editing actions on their files.
Features:
- It has offline access for quick connectivity and document access.
- Even when an internet connection is unavailable, this helps speed up the entire document management process.
- The software comes with a free version that includes all of the basic capabilities
- Individuals and small enterprises will find it very affordable due to this.
- It supports a Variety of Formats
Pros
Converted files are simple to upload and download.
You can convert almost any file to your preferred format.
There is no need to give personal information such as an email address.
It offers three subscription tiers, all of which are ad-free.
Cons
This is a free service with a limit of two files per conversion.
8. Zamzar

Zamzar is the easiest online GIF to APNG converter on this list. It has numbered steps that make it extremely simple to use. You may convert GIF to PNG, TIFF, TGA, JPG, BMP, and other image formats on Zamzar.
Features:
- Uploading files by dragging and dropping them and speedier file conversions.
- All Zamzar subscribers get high-speed downloads.
- Email files to be converted.
- You can stream the converted videos and audio to your iPhone, iPad, and iPod.
Pros
Allows you to convert files from URLs. Batch conversion is supported.
Presets a three-step method that is quite easy to follow.
Over 1200 file formats are supported.
Multiplatform
File compression settings are now supported.
Developers will appreciate the API.
Cons
File size restricted to 50 MB on free accounts for uploads.
Like other online tools, it lacks OCR.
Part 2. How to Convert a GIF to APNG
Follow the 3 simple steps to convert GIF to animated PNG
Step 1: Choose Files
Select several files on your computer using the “Choose Files” button or the dropdown menu to select an online file from a URL, Google Drive, or Dropbox. The file size of an image can be up to 200 megabytes. You can use a file analyzer to gain detailed information about a source image, including its size, resolution, quality, and transparent color.

Step 2: Choose Image Format
Determine the image format, quality, and size you want to use. You choose to use the original image size or select “Change width and height” and enter a custom image size. 1920x1080 is an example of a [width]x[height] format. Only a few image formats support the picture quality choice, such as JPG, WEBP, or AVIF. The value ranges from 1 (lowest picture quality and highest compression) to 100 (highest image quality and lowest compression) (best quality but least effective compression). If this field is left blank, the converter will use the estimated quality of your input image if found; otherwise, 92 by default. JPG, PNG, TIFF, GIF, HEIC, BMP, PS, PSD, WEBP, TGA, DDS, EXR, J2K, PNM, or SVG are examples of target image formats.

Step 3: Click on Convert Now
Click the “Convert Now” option to begin the batch conversion. If one server fails, it will automatically attempt another; please be patient while converting. The resultant files will be in the “Conversion Results” section. Click the icon to display the QR code for the file or save it to an online storage like Google Drive or Dropbox.

Part 3. FAQ
1. What Is APNG (Animated Portable Network Graphics )
The .apng (Animated Portable Network Graphics) extension is an unofficial extension to the Portable Network Graphics format (PNG ). It is a series of frames (a PNG image) that represent an animation sequence, producing a visual effect comparable to a GIF. APNG files support 24-bit pictures with 8-bit transparency. You can convert non-animated GIF files to APNG format. APNG files have the same.png extension as PNG files and can be opened by software like Mozilla Firefox, Chrome with APNG compatibility, and iOS 10’s iMessage apps.
2. How to Create APNG File?
Step 1: Select Image
Click File > Open to bring up the photo you wish to convert to PNG.

Step 2: Click Open
Click “Open” when you’ve navigated to your picture.

Step 3: Go to Save As
After you’ve opened the file, go to File > Save As.

Step 4: Save
Make sure PNG is selected from the drop-down list of formats in the following box, then click “Save.”

Step 5: Compress
The compression rate is set to “Best” by default, but the Save Options box contains a few extras to check if you want a bit more control over the compression of your file. The file size will be determined by changing the compression rate; the higher the value, the less compression will be utilized when saving your image.

3. How Do I Save Something as APNG?
Here are the steps to take when saving an image as APNG
Step 1: Open Paint
Open an image-editing program on your computer, such as Paint for Windows or Paintbrush for Mac. Simply double-click the software’s icon on your desktop, or choose it from your applications list.
Step 2: Go to saved Images
Open the image you already saved. Navigate to the window where you saved the image. Click-hold it, drag it, and drop it onto the editor to display the image.
Step 3: Resize Image
Make changes to the image. You can resize or rescale the image before saving it as a PNG file, and you can even add text using your software’s Text tool. This is, however, wholly optional.
Step 4: Choose Save as
PNG is the top format for saving images. Choose “Save as” from the “File” menu in the editor’s upper left corner.
In the File Name window, provide the name you want for the file.
Under the File Name field, click the “Save as type” drop-down option to see all of the image’s possible formats.
Click “Save” after selecting “PNG.” The file will be saved as a PNG file in the same directory as the original.
Conclusion
After getting to know the eight best GIF to APNG converters, you can utilize them efficiently when converting files. Also, we provided answers to frequently asked questions to help increase your knowledge of what an APNG is and how to save and create an APNG file.
Now explore these and convert GIF to animated PNG.
The GIF image format is a bitmap image format that supports up to 8 bits per pixel. APNG (Animated Portable Network Graphics) is a format for animated images that supports 24 bits per pixel and 8 bits of transparency, which is not available in GIFs. Backward compatibility with non-animated PNG files is also maintained.
Because the initial frame of an APNG file saves as a regular PNG stream, it can display by most conventional PNG decoders. Extra chunks can hold frame speed data and different animation frames (as provided by the original PNG specification).
Is APNG superior to GIF? APNG files are smaller and have more outstanding quality than GIF files. However, GIF is more compatible than APNG. Firefox, Safari, Google Chrome, and Opera support APNG, while practically all online browsers support GIF.
Let’s look at the top 8 best GIFs to APNG converters now.
In this article
Part 1: Best 8 GIF to APNG Converters
Part 2: How to Convert a GIF to APNG
Part 3: FAQs
Part 1. Best 8 GIF to APNG Converters
Here are the top 8 GIFs to APNG converters to look out for
1. EZgif
Ezgif.com is a free, easy-to-use toolset for making and modifying animated GIFs. Besides some basic video editing, we also offer editing and conversions for various other picture formats, like animated WebP, PNG, MNG, and FLIF. GIF maker, video to GIF converter, and photo resizer are three of our most popular online utilities.
In addition, EZgif lets you edit GIFs before converting them to APNG.
Features:
- ImageMagick - conducts most picture editing tasks such as resizing, optimization, cropping, etc.
- Making, optimizing, trimming, and resizing animated GIFs with gifsicle and lossygif.
- For video conversions and editing, use FFmpeg (the genuine one).
- This video to GIF converter online has a low conversion rate.
- This free online GIF banner maker can assist you in creating GIF banners.
- This online GIF creator has an extremely user-friendly UI.
- This web program’s impressive capabilities are completely free to use.
- This GIF converter online maintains high-quality GIF conversion.
- You can make GIFs from videos in seconds.
Pros
The program at ezgif.com is entirely secure to use.
Users do not have to install any other programs for the software to work.
The application is simple and allows users to create GIFs online without exerting any effort.
Cons
Because there is a problem in the program, the result of this online GIF maker from photographs degrades. Hence it is not advised for high professional use.
2. FreeConvert
FreeConvert is a GIF to APNG converter that can convert photos, videos, audio files, documents, eBooks, and units, among other formats. It can upload GIFs from your device, Google Drive, Dropbox, or a URL, and it can batch convert many GIFs to animated PNG files without sacrificing quality. FreeConvert is a safe program because it automatically deletes converted files after two hours.
Features:
- You can convert numerous files at once without sacrificing quality.
- It provides a variety of output file types.
- You can choose from your device (computer, smartphone, etc.) or a Dropbox or Google Drive account to select your files.
Pros
It’s as simple as uploading your GIF files and clicking convert.
Convert a GIF to APNG(animated PNG) while keeping the original GIF’s animation quality.
It is entirely free and works with any web browser.
All files are encrypted using 256-bit SSL and erased after two hours.
Cons
Limited services for free users
3. Aconvert
Aconvert is another free online GIF to APNG converter. It not only converts GIFs to APNG but also compresses, resizes, merges, crops, and rotates GIFs. GIFs can be stored on your device or online storage services after being uploaded from local, online storage services or a URL.
The uploaded image file can be up to 200 MB in size.
My favorite software is AVS Image Converter, which can convert GIF to APNG and APNG to GIF. Furthermore, its ability to support a wide range of image formats and editing capabilities such as Watermarks, Filters, Image Corrections, and others is fantastic.
Features:
- It supports large file conversion of up to 200MB
- It can also resize and rotate GIF file
- It supports a wide range of image formats
- Edits watermark
Pros
Simple user interface
File compression settings get support across platforms
Multiplatform
Free and can be used on a web browser
Cons
Limited services for free users.
4. AVS Image Converter
AVS Image Converter for Windows is a free GIF to APNG converter. You can use it to convert animated GIF files into animated PNG files. This software can convert GIFs to APNGs and APNGs to animated GIFs. Aside from APNG and GIF, this shareware accepts various additional image and project formats as input, including BMP, JPEG, TIFF, TGA, PCX, PSD, PDD, and more. Unlike input types, only JPEG, PDF, GIF, PNG (APNG), TIFF, BMP, TGA, and RAS are the output formats. You can convert several photos from one format to another using our GIF to APNG converter’s batch conversion.
Features:
- It supports a variety of formats.
- It converts in batches.
- Convert animated GIFs into animated PNG files
Pros
Processes large groups of images
It’s possible to utilize it from the command line.
Presets for various dimensions
Multiple input formats are supported.
Allows you to convert photos to PDF.
Multiple effects are applied.
Cons
There are no individual presets.
Displays advertisements
5. Real World Paint
RealWorld Paint - portable image editor (rw-designer.com)
Another free GIF to APNG converter for Windows is RealWorld Paint. It can also convert an APNG file back to a GIF. Additionally, format conversions between PNG, JPEG, GIF, WEBP, animated WEBP, and other formats are possible. The prime benefit of this software is that it can work with projects created by various famous photo editors, including Photoshop, Paint.Net, GIMP, and others.
You can also add, edit, and improve frames in GIF files and simple conversion. When you open a GIF file in it, an editor area appears, right below which you can see all of the GIF file’s frames.
Features:
- Supports a wide range of file types
- Easy to use interface
- Doesn’t consume a lot of hardware resources
- Can convert in a few minutes
Pros
Transformation of a particular area
Multi-platform
Folder selection is simple.
Set the conversion quality quickly.
Cons
For novices, it’s a bit difficult.
Only the premium version is available.
6. Convertio
Convertio is a competitor to Browserling in terms of simplicity. Convertio, on the other hand, outnumbers the former in terms of picture formats supported. Convertio can also convert GIFs to TGA, PSD, JPG, TIFF, ICO, etc. Unfortunately, it lacks image editing capabilities.
Features:
- The file size is unrestricted.
- There is no restriction to how many conversions you can do at once.
- Priority number one.
- Every day, you have an unlimited number of conversion minutes.
- The maximum conversion time per file is unlimited.
- Pages with no advertisements.
Pros
Allows you to convert files by dragging and dropping them.
The ETA is less than 2 minutes, and the conversion is quick.
There are 3 membership options.
Cons
After 24 hours/manually, files saved on the server/cloud gets removed.
7. Onlineconvertfree
Onlineconvertfree is a lovely PNG converter that works with all standard image formats. You can create a PNG file from various formats, including GIF, JPG, HTML, TIFF, RAW, and more. Users may crop, clip, rotate, flip, and perform many other editing actions on their files.
Features:
- It has offline access for quick connectivity and document access.
- Even when an internet connection is unavailable, this helps speed up the entire document management process.
- The software comes with a free version that includes all of the basic capabilities
- Individuals and small enterprises will find it very affordable due to this.
- It supports a Variety of Formats
Pros
Converted files are simple to upload and download.
You can convert almost any file to your preferred format.
There is no need to give personal information such as an email address.
It offers three subscription tiers, all of which are ad-free.
Cons
This is a free service with a limit of two files per conversion.
8. Zamzar
Zamzar is the easiest online GIF to APNG converter on this list. It has numbered steps that make it extremely simple to use. You may convert GIF to PNG, TIFF, TGA, JPG, BMP, and other image formats on Zamzar.
Features:
- Uploading files by dragging and dropping them and speedier file conversions.
- All Zamzar subscribers get high-speed downloads.
- Email files to be converted.
- You can stream the converted videos and audio to your iPhone, iPad, and iPod.
Pros
Allows you to convert files from URLs. Batch conversion is supported.
Presets a three-step method that is quite easy to follow.
Over 1200 file formats are supported.
Multiplatform
File compression settings are now supported.
Developers will appreciate the API.
Cons
File size restricted to 50 MB on free accounts for uploads.
Like other online tools, it lacks OCR.
Part 2. How to Convert a GIF to APNG
Follow the 3 simple steps to convert GIF to animated PNG
Step 1: Choose Files
Select several files on your computer using the “Choose Files” button or the dropdown menu to select an online file from a URL, Google Drive, or Dropbox. The file size of an image can be up to 200 megabytes. You can use a file analyzer to gain detailed information about a source image, including its size, resolution, quality, and transparent color.
Step 2: Choose Image Format
Determine the image format, quality, and size you want to use. You choose to use the original image size or select “Change width and height” and enter a custom image size. 1920x1080 is an example of a [width]x[height] format. Only a few image formats support the picture quality choice, such as JPG, WEBP, or AVIF. The value ranges from 1 (lowest picture quality and highest compression) to 100 (highest image quality and lowest compression) (best quality but least effective compression). If this field is left blank, the converter will use the estimated quality of your input image if found; otherwise, 92 by default. JPG, PNG, TIFF, GIF, HEIC, BMP, PS, PSD, WEBP, TGA, DDS, EXR, J2K, PNM, or SVG are examples of target image formats.
Step 3: Click on Convert Now
Click the “Convert Now” option to begin the batch conversion. If one server fails, it will automatically attempt another; please be patient while converting. The resultant files will be in the “Conversion Results” section. Click the icon to display the QR code for the file or save it to an online storage like Google Drive or Dropbox.
Part 3. FAQ
1. What Is APNG (Animated Portable Network Graphics )
The .apng (Animated Portable Network Graphics) extension is an unofficial extension to the Portable Network Graphics format (PNG ). It is a series of frames (a PNG image) that represent an animation sequence, producing a visual effect comparable to a GIF. APNG files support 24-bit pictures with 8-bit transparency. You can convert non-animated GIF files to APNG format. APNG files have the same.png extension as PNG files and can be opened by software like Mozilla Firefox, Chrome with APNG compatibility, and iOS 10’s iMessage apps.
2. How to Create APNG File?
Step 1: Select Image
Click File > Open to bring up the photo you wish to convert to PNG.
Step 2: Click Open
Click “Open” when you’ve navigated to your picture.
Step 3: Go to Save As
After you’ve opened the file, go to File > Save As.
Step 4: Save
Make sure PNG is selected from the drop-down list of formats in the following box, then click “Save.”
Step 5: Compress
The compression rate is set to “Best” by default, but the Save Options box contains a few extras to check if you want a bit more control over the compression of your file. The file size will be determined by changing the compression rate; the higher the value, the less compression will be utilized when saving your image.
3. How Do I Save Something as APNG?
Here are the steps to take when saving an image as APNG
Step 1: Open Paint
Open an image-editing program on your computer, such as Paint for Windows or Paintbrush for Mac. Simply double-click the software’s icon on your desktop, or choose it from your applications list.
Step 2: Go to saved Images
Open the image you already saved. Navigate to the window where you saved the image. Click-hold it, drag it, and drop it onto the editor to display the image.
Step 3: Resize Image
Make changes to the image. You can resize or rescale the image before saving it as a PNG file, and you can even add text using your software’s Text tool. This is, however, wholly optional.
Step 4: Choose Save as
PNG is the top format for saving images. Choose “Save as” from the “File” menu in the editor’s upper left corner.
In the File Name window, provide the name you want for the file.
Under the File Name field, click the “Save as type” drop-down option to see all of the image’s possible formats.
Click “Save” after selecting “PNG.” The file will be saved as a PNG file in the same directory as the original.
Conclusion
After getting to know the eight best GIF to APNG converters, you can utilize them efficiently when converting files. Also, we provided answers to frequently asked questions to help increase your knowledge of what an APNG is and how to save and create an APNG file.
Now explore these and convert GIF to animated PNG.
How to Turn On/Off Motion Blur in Dying Light 2?
Are you playing Dying Light 2 on PlayStation or PC and not satisfied with the graphics? No need to worry, as this article will introduce an efficient way through which you can improve your gaming graphics tremendously. By adding a motion blur effect in your gameplay while playing PlayStation, such as Dying Light 2, you can enhance the visual appeal of the game significantly.
By reading this article, you can come to know how to use Dying Light 2 motion blur proficiently. Thus, continue reading this guide to find out simple solutions to apply the motion blur effect.

Part 1: What is Dying Light 2?
Dying Light 2 , recently released on February 2022, revolves around survival in a zombie-apocalyptic world. It involves a protagonist known as Aiden Caldwell, who comprises different capabilities and skills. Being a player, you can perform various actions such as running, climbing, sliding, etc. This particular game is melee-based, as a majority of the players will be using melee weapons.
Moreover, players can also use other weapons, such as spears, shotguns, or crossbows. As the development occurs while playing the game, you will see that more zombies will be added to give you a thrilling experience. This game is set in the city of Villedor, having beautiful infrastructure. While accomplishing the goals, players can freely roam around the city.
While exploring the city, you would also encounter different inhibitors through which you can enhance the health and power of Aiden. You can easily find this adventurous and thrilling game on various platforms, such as PlayStation 4, PlayStation 5, Xbox One, Xbox Series X/S, Windows, and Nintendo Switch.

Part 2: How to Turn On/Off Motion Blur in Dying Light 2?
Dying Light 2 provides the players complete freedom to change the game settings. On this gaming platform, you can easily modify and adjust the settings according to your need to enhance the graphics while playing the game.
Moreover, unlike other games, you can easily adjust the motion blur quality on Dying Light 2, preferably. To turn off motion blur in Dying Light 2, you can check the following simple instructions:
Step1 Open and load your Dying Light 2 game on your PC. Head to its Menu and select “Options.” Afterward, click on the “Video” option from the top toolbar.

Step2 Now click on “Advanced Video Settings” from the bottom to proceed further. Afterward, scroll down and locate the option called “Motion Blur Quality.” Using this option, you can easily select the mode of motion blur quality, such as Medium, High, Low, or None.

Bonus Tips – How to Add Motion Blur to Your Dying Light Gaming Video
It may be possible that you only want to add the motion blur effect in the game’s highlight. So, if you don’t want to thoroughly add the motion blur effect in the whole gameplay, you can use professional software such as Wondershare Filmora . This platform is supported by all the major operating systems and functions effortlessly. It contains various editing features that can help you to produce a high-end quality video.
Free Download For Win 7 or later(64-bit)
Free Download For macOS 10.14 or later
Moreover, Filmora can also help you in modifying the speed of your video. Using this all-rounder tool, you can also add and synchronize the audio clips with your videos. Apart from editing your videos, you can use this platform to add a motion blur effect to your gaming videos. Hence, it’s a must-try tool to increase the visual appeal of your recorded gameplay.
Key Features of Filmora
- Using Filmora, you can add different transitions and effects to your video clips within a few clicks.
- This tool allows you to split the screen so you can tell the story through your video in a fun way.
- Using the Green Screen feature, you can craft special effects for your videos. Also you can also change and replace the backgrounds of your videos using this special feature.
- To precisely resize your videos without putting in any manual effort, you can use its AI Reframe feature.
How to Add Motion Blur to Dying Light 2 Using Filmora
Are you eager to know how to turn off motion blur Dying Light 2? In this section, we will guide you on how to use Filmora to create a motion blur effect on the desired place of your recorded gameplay. The entire process is simple and easy to follow, even for beginners. Hence, proceed to read this part to check the authentic steps of adding a motion blur effect:
Step1 Choose New Project
Download and initiate the Wondershare Filmora on your PC or Mac. Once done, click on the “New Project” button and then tap on the “Import” icon. By doing so, you can upload the recorded gameplay of Dying Light 2.

Step2 Select the Position to Apply the Effect
After uploading, make sure to drag and drop the video into the timeline. Now move the play head to the place where you wish to add a motion blur effect. Afterward, use the “Scissors” icon to split the video flawlessly.

Step3 Locate the Blur Effect
To proceed further, go to the “Effects” tab and select “Video Effects” from the left panel. Search for the blur effect and choose any blur effects from the results. Once you have selected the blur effect, drag and apply it to the timeline.

Step4 Add a Suitable Transition
If you want to make the video look clean and smooth, go to the “Transitions” tab. From there, search for “Dissolve” and select it from the results. Now apply it to the timeline where you have added the motion blur. Once done, click on the “Export” button and save the edited Dying Light 2 gameplay video.

Conclusion
Motion blur effect can undoubtedly change the appearance of your gaming graphics. If you are a game lover and want to add perfection to your gameplay, this article has answered all your questions. By exploring this guide, you have learned how to use Dying Light 2 motion blur. You can also use the recommended software known as Filmora to apply the motion blur effect to the highlights of your gameplay aesthetically.
Free Download For macOS 10.14 or later
Moreover, Filmora can also help you in modifying the speed of your video. Using this all-rounder tool, you can also add and synchronize the audio clips with your videos. Apart from editing your videos, you can use this platform to add a motion blur effect to your gaming videos. Hence, it’s a must-try tool to increase the visual appeal of your recorded gameplay.
Key Features of Filmora
- Using Filmora, you can add different transitions and effects to your video clips within a few clicks.
- This tool allows you to split the screen so you can tell the story through your video in a fun way.
- Using the Green Screen feature, you can craft special effects for your videos. Also you can also change and replace the backgrounds of your videos using this special feature.
- To precisely resize your videos without putting in any manual effort, you can use its AI Reframe feature.
How to Add Motion Blur to Dying Light 2 Using Filmora
Are you eager to know how to turn off motion blur Dying Light 2? In this section, we will guide you on how to use Filmora to create a motion blur effect on the desired place of your recorded gameplay. The entire process is simple and easy to follow, even for beginners. Hence, proceed to read this part to check the authentic steps of adding a motion blur effect:
Step1 Choose New Project
Download and initiate the Wondershare Filmora on your PC or Mac. Once done, click on the “New Project” button and then tap on the “Import” icon. By doing so, you can upload the recorded gameplay of Dying Light 2.
Step2 Select the Position to Apply the Effect
After uploading, make sure to drag and drop the video into the timeline. Now move the play head to the place where you wish to add a motion blur effect. Afterward, use the “Scissors” icon to split the video flawlessly.
Step3 Locate the Blur Effect
To proceed further, go to the “Effects” tab and select “Video Effects” from the left panel. Search for the blur effect and choose any blur effects from the results. Once you have selected the blur effect, drag and apply it to the timeline.
Step4 Add a Suitable Transition
If you want to make the video look clean and smooth, go to the “Transitions” tab. From there, search for “Dissolve” and select it from the results. Now apply it to the timeline where you have added the motion blur. Once done, click on the “Export” button and save the edited Dying Light 2 gameplay video.
Conclusion
Motion blur effect can undoubtedly change the appearance of your gaming graphics. If you are a game lover and want to add perfection to your gameplay, this article has answered all your questions. By exploring this guide, you have learned how to use Dying Light 2 motion blur. You can also use the recommended software known as Filmora to apply the motion blur effect to the highlights of your gameplay aesthetically.
Also read:
- Updated How to Split a Video Into Parts on All Platforms
- 2024 Approved Have You Recently Experienced Motion Blur in Games? Do You Wish to Learn More About It? This Article Provides an Overview and the Need for Motion Blur Gaming
- In 2024, Tutorial How To Add Motion Blur in Blender?
- New 2024 Approved What Are the Best 15 Slideshow Presentation Examples Your Audience Will Love
- Updated Hitfilm Express Video Editor Review
- If You Are Trying to Create a Countdown Effect, but Youre Not Sure Where to Start, Then This Post Is Going to Show You some Ways to Create a Countdown Animation for Your Videos
- Updated This Article Is Regarding the Guidance About the Split of the Audio From the Video in Premiere Pro. And Also, the Discussion of the Wondershare Fllmora as the Replacement and How to Perform a Similar Task in It
- How to Find a High-Quality Video Marketing Agency, In 2024
- New In 2024, Dollar-Store DIY Hacks to Use for Filmmaking on a Budget
- In 2024, Splice Video Editor Online - Get Your Videos Splice
- In 2024, How to Add Filter to Video Online
- Updated 2024 Approved 33 Best Video Splitter Recommended
- In 2024, The Upcoming Generation of AR and VR Is Going to Define Augmented Reality Conferencing as the New Normal for All Business Purposes. With a Global Perspective to Build Better Communication, AR Can Be the Future of Collaborative Workspace
- In 2024, Free Titles For Final Cut Pro
- Create Your Face Zoom TikTok Now
- 2024 Approved 5 Ways to Denoise a Video
- New In 2024, How to Use the Logo Intro Templates for Your Next Video
- In 2024, Best Free Slow Motion Apps For Android and iPhone
- How to Stabilize Videos with Google Photos App for Free for 2024
- Updated Are You Excited to Find Out the Top-Class VHS Video Effects Maker? Put Your Worries at Rest because This Article Will Provide the Best VHS Effect Makers
- Guide to Create an Intro Video with Filmora
- Ultimate Guide to Catch the Regional-Located Pokemon For Samsung Galaxy M14 5G | Dr.fone
- 4 Most-Known Ways to Find Someone on Tinder For Motorola Razr 40 Ultra by Name | Dr.fone
- Why Stellar Data Recovery for iPhone 14 Pro Max takes time in scanning my iPhone? | Stellar
- Tutorial to Change Samsung Galaxy XCover 7 IMEI without Root A Comprehensive Guide
- Authentication Error Occurred on Realme Note 50? Here Are 10 Proven Fixes | Dr.fone
- All About Factory Reset, What Is It and What It Does to Your Nokia C210? | Dr.fone
- In 2024, The Most Useful Tips for Pokemon Go Ultra League On Honor X9a | Dr.fone
- Spotify Keeps Crashing A Complete List of Fixes You Can Use on Lava Blaze 2 5G | Dr.fone
- Proven Ways in How To Hide Location on Life360 For Asus ROG Phone 8 | Dr.fone
- In 2024, How to Mirror Honor Magic 5 to Mac? | Dr.fone
- In 2024, 8 Ways to Transfer Photos from Xiaomi Redmi K70 to iPhone Easily | Dr.fone
- Title: New In 2024, Cropping Videos in Final Cut Pro Step by Step
- Author: Chloe
- Created at : 2024-04-24 07:08:42
- Updated at : 2024-04-25 07:08:42
- Link: https://ai-editing-video.techidaily.com/new-in-2024-cropping-videos-in-final-cut-pro-step-by-step/
- License: This work is licensed under CC BY-NC-SA 4.0.
