
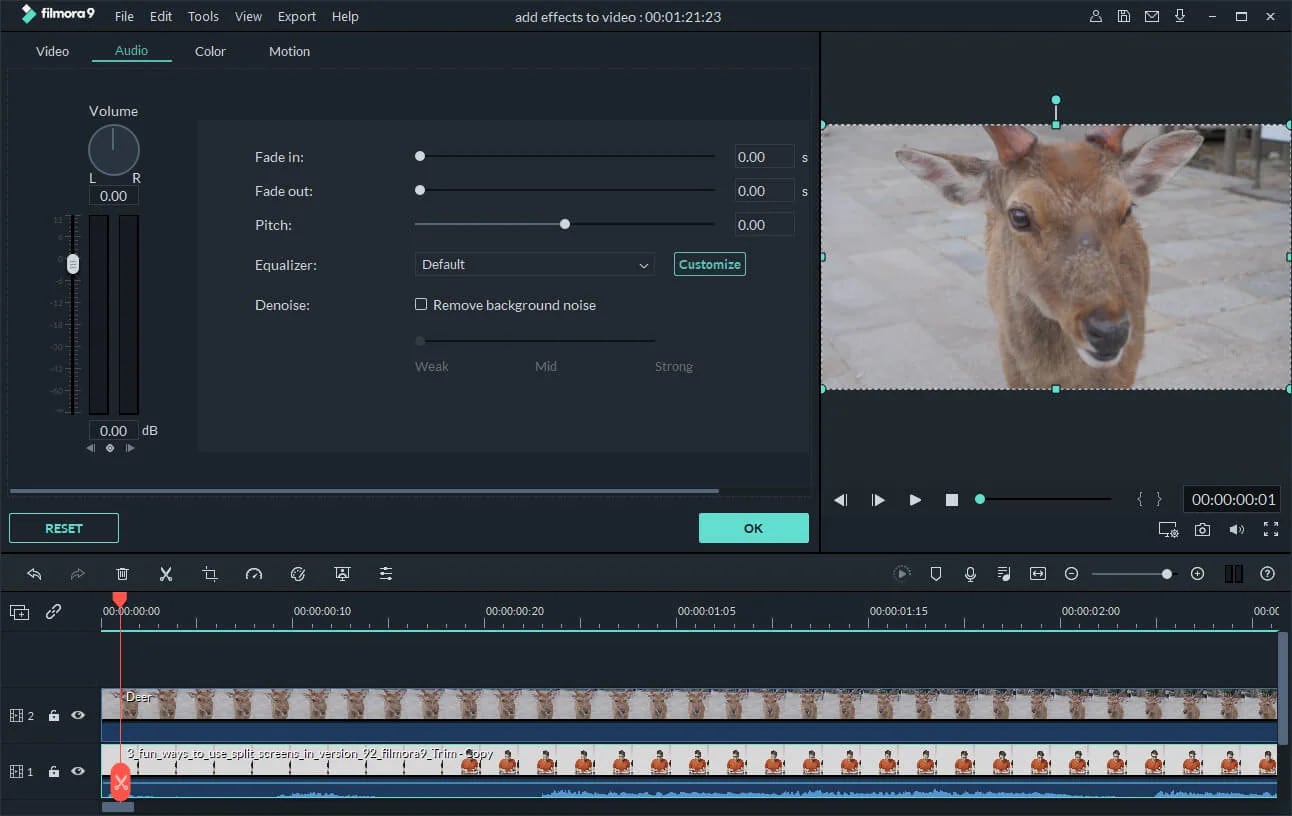
:max_bytes(150000):strip_icc():format(webp)/GettyImages-93420821-0ce0b19097fb47d78dec8dbc039c1260.jpg)
New In 2024, Detailed Guide to Resize Your Video in VLC
Detailed Guide to Resize Your Video in VLC
Videos are one of the most popular types of content on the internet. There are millions of videos uploaded to YouTube, Facebook, and other video-sharing sites each day. Sharing your videos with others is possible when you know how to resize them in VLC. VLC is a free media player that allows you to convert or compress your videos in order to make them smaller for uploading or downloading.
Videos are a great way to showcase your business, company, or product on social media sites like Facebook and Twitter. But what happens when you use the wrong size for your video? The whole thing looks distorted and low quality. It’s not very appealing.
Luckily, resizing videos in VLC is simple. All you need is the right software and the right steps.
This blog post will walk you through how to resize videos using VLC. We’ll cover what the default settings are for video resolutions, how to change them, and why it’s important to know what size of video you’re uploading before uploading it.
So without further ado, let’s get started!
Step by step to resize your video in VLC
Anyone who has a lot of videos on their computer knows how frustrating it can be to find the video you want among the hundreds of ones you have. Well, VLC makes it possible to resize your videos so they’ll fit onto your desktop. Here’s how:
Resizing by converting to a smaller file size
Because some video formats, such as MKV and AVI, take up too much space, it’s a good idea to convert videos to smaller formats, such as FLV, WMV, and so on. To lower the video size, you’ll be pleased to learn that VLC allows you to convert video/audio files without the need to install any other software. The video conversion guide for VLC can be found below.
Step 1: Launch the VLC Media Player.

Step 2: Go to the menu and pick Media > Convert/Save from the drop-down menu, then Add > Convert/Save from the drop-down menu.

Step 3: Choose a profile for the video you wish to convert.

Step 4: Select the Start button to start VLC video compression.
Resizing by cutting unnecessary video segment
Step 1: Launch the VLC Media Player

Step 2: Go to Menu > View Menu > Advanced Controls in VLC Media Player and select it from the menu.

Step 3: Play the video you want to crop and then click the Record button on the scene you want to crop and then the same button to pause the video where you want to crop it.

Step 4: In Windows 7, 8, and XP, the film will automatically save in Library > Videos, and in My Documents > My Videos in Windows 7.
VLC Media Player is unquestionably one of the greatest video players available for free. Nonetheless, it isn’t the finest video reduction because it just reduces the size of videos by using certain simple parameters rather than complex ones. As a result, we offer Fimora, an all-in-one video toolbox that can convert, compress, download, record, edit, burn, and more, as a better video compressor. You can change the video resolution, bit rate, encoder, format, and other settings to compress video and audio files in a variety of formats. Follow the simple steps below to get this VLC compressor replacement on your Windows/Mac for free.
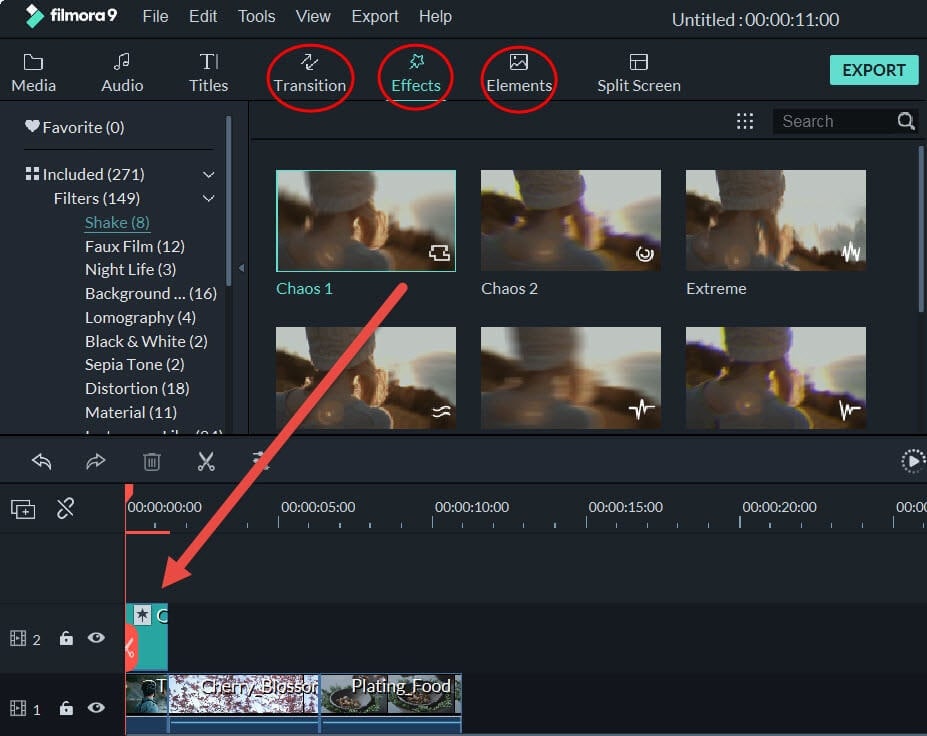
An easier way to resize videos using Filmora
Filmora Video Editor is a powerful, yet easy to use video editor for PC and Mac. With the most intuitive and streamlined editing process out there, Filmora lets you cut and resize videos with just a few clicks of your mouse.
Through this part, we’ll show you how to resize videos using Filmora’s three-step process: import video files, select video clips, and edit them. We’ll also teach you some shortcuts for making the editing process as quick as possible!
A common challenge for beginner video editors is knowing where to start. With Filmora, you begin by importing your video files, selecting the clip you want to cut, and then editing it. It’s a three-step process that takes less than five minutes!
Once you have finished editing your video clip, Filmora will give you the option to share it on social media or export it in MP4 or AVI format.
Keep reading to learn more about how to cut and resize videos using Filmora’s three-step process!
For Win 7 or later (64-bit)
For macOS 10.14 or later
Step by Step on How to Resize Videos using Filmora
Resizing videos in Filmora is a quick and easy process. To resize videos, first make sure you have imported your video file into the editor.
Resizing by changing the dimensions
Step 1: To import a video file, either drag and drop the file on the screen or click on “Import Files” in the toolbar.

Step 2: Once you’ve imported your video, select the video clips that you want to resize by clicking on them; then, resizing them is as simple as dragging their borders!

Step 3: You can also use the size fields at the bottom of the frame to change their dimensions.
Step 4: Keep in mind that changing one dimension of a video clip will affect both its width and height proportionally. For example, if you enlarge a 16:9 widescreen clip to 720p (from 480p), it will be double its original proportions (720x480).
Resizing by shrinking video file size.
Step 1: To import a video file, either drag and drop it onto the screen or use the toolbar’s “Import Files” option.

Step 2: Open the video shrinker’s output window by clicking the “Export” button.

Step 3: Select the Format tab and keep the video in its original format as a result. Then, in the “Settings” panel, click the triangle button below to downsize the video by choosing a lower video resolution, frame rate, or bit rate. When it comes to video formats, you can choose among FLV, MP4, and other similar formats, which normally result in smaller files.

Step 4: The shrunk file should be exported.
Conclusion
So you’ve got this beautiful video you want to post on your social media page or website, but the dimensions are all wrong. No worries! There’s an easy solution to your problem. Filmora is a video editing software that is easy to use and versatile and powerful at the same time. Whether you’re just starting out or are a pro, Filmora is the perfect tool for the job. You don’t need to be an expert to edit videos in Filmora; it’s easy enough for beginners. With Filmora, you can resize your videos in seconds by following these simple steps above.
Step 2: Go to the menu and pick Media > Convert/Save from the drop-down menu, then Add > Convert/Save from the drop-down menu.
Step 3: Choose a profile for the video you wish to convert.
Step 4: Select the Start button to start VLC video compression.
Resizing by cutting unnecessary video segment
Step 1: Launch the VLC Media Player
Step 2: Go to Menu > View Menu > Advanced Controls in VLC Media Player and select it from the menu.
Step 3: Play the video you want to crop and then click the Record button on the scene you want to crop and then the same button to pause the video where you want to crop it.
Step 4: In Windows 7, 8, and XP, the film will automatically save in Library > Videos, and in My Documents > My Videos in Windows 7.
VLC Media Player is unquestionably one of the greatest video players available for free. Nonetheless, it isn’t the finest video reduction because it just reduces the size of videos by using certain simple parameters rather than complex ones. As a result, we offer Fimora, an all-in-one video toolbox that can convert, compress, download, record, edit, burn, and more, as a better video compressor. You can change the video resolution, bit rate, encoder, format, and other settings to compress video and audio files in a variety of formats. Follow the simple steps below to get this VLC compressor replacement on your Windows/Mac for free.
An easier way to resize videos using Filmora
Filmora Video Editor is a powerful, yet easy to use video editor for PC and Mac. With the most intuitive and streamlined editing process out there, Filmora lets you cut and resize videos with just a few clicks of your mouse.
Through this part, we’ll show you how to resize videos using Filmora’s three-step process: import video files, select video clips, and edit them. We’ll also teach you some shortcuts for making the editing process as quick as possible!
A common challenge for beginner video editors is knowing where to start. With Filmora, you begin by importing your video files, selecting the clip you want to cut, and then editing it. It’s a three-step process that takes less than five minutes!
Once you have finished editing your video clip, Filmora will give you the option to share it on social media or export it in MP4 or AVI format.
Keep reading to learn more about how to cut and resize videos using Filmora’s three-step process!
For Win 7 or later (64-bit)
For macOS 10.14 or later
Step by Step on How to Resize Videos using Filmora
Resizing videos in Filmora is a quick and easy process. To resize videos, first make sure you have imported your video file into the editor.
Resizing by changing the dimensions
Step 1: To import a video file, either drag and drop the file on the screen or click on “Import Files” in the toolbar.
Step 2: Once you’ve imported your video, select the video clips that you want to resize by clicking on them; then, resizing them is as simple as dragging their borders!
Step 3: You can also use the size fields at the bottom of the frame to change their dimensions.
Step 4: Keep in mind that changing one dimension of a video clip will affect both its width and height proportionally. For example, if you enlarge a 16:9 widescreen clip to 720p (from 480p), it will be double its original proportions (720x480).
Resizing by shrinking video file size.
Step 1: To import a video file, either drag and drop it onto the screen or use the toolbar’s “Import Files” option.
Step 2: Open the video shrinker’s output window by clicking the “Export” button.
Step 3: Select the Format tab and keep the video in its original format as a result. Then, in the “Settings” panel, click the triangle button below to downsize the video by choosing a lower video resolution, frame rate, or bit rate. When it comes to video formats, you can choose among FLV, MP4, and other similar formats, which normally result in smaller files.
Step 4: The shrunk file should be exported.
Conclusion
So you’ve got this beautiful video you want to post on your social media page or website, but the dimensions are all wrong. No worries! There’s an easy solution to your problem. Filmora is a video editing software that is easy to use and versatile and powerful at the same time. Whether you’re just starting out or are a pro, Filmora is the perfect tool for the job. You don’t need to be an expert to edit videos in Filmora; it’s easy enough for beginners. With Filmora, you can resize your videos in seconds by following these simple steps above.
How to Use Adjustment Layer in Final Cut Pro
Final Cut Pro is an advanced editing software that is available for Mac users exclusively. Using this high-end software, you can create compelling storytelling in your video clips. It offers different features through which you can effortlessly add audio and motion graphics to your videos. You can also add cinematic effects to your videos using Final Cut Pro to modify their focus points.
You can also add adjustment layers in Final Cut Pro to efficiently add the effects in video clips. By reading this article, you will learn how to add an adjustment layer in Final Cut Pro.

Part 1: What is Adjustment Layer in Final Cut Pro?
The adjustment layer in video editing can provide you with great ease as you can apply effects to multiple videos using this particular layer. Using the adjustment layer, you can apply effects and color grading to your video clips that come beneath this layer. So, apart from adding effects and executing color correction to individual clips, you can use an adjustment layer to generate quicker results.
After creating an adjustment layer in any video editor, you can easily cut and extend it like any other clip. You can also remove it anytime from your timeline with a single tap. In Final Cut Pro, you cannot insert adjustment layers in its timeline directly, like in Premiere Pro or After Effects.
To do so, you have to use third-party tools to create adjustment layers from scratch in Final Cut Pro. The process of creating an adjustment layer in Final Cut Pro is a little bit longer compared to other editors. To learn more about the adjustment layer in FCPX, continue reading this article.

Part 2: How to Add an Adjustment Layer in Final Cut Pro?
Are you eager to know how to add adjustment layers in Final Cut Pro? In this section, you can find simple instructions to generate an adjustment layer in Final Cut Pro without hassle.
Step1 First, click on this link to download the adjustment layer in your MacBook. Once done, copy your “Adjustment Layer” folder to the “User” folder. Afterward, move it to “Movies” and then “Motion Templates.” Once done, copy it to the “Titles” folder eventually.

Step2 Now open Final Cut Pro and locate the “Adjustment Layer” under the “Titles” section. After locating it, drag and drop it into the timeline. This adjustment layer was created as a title layer in Apple Motion that got published in Final Cut Pro using the built-in publishing tools.

Step3 Once you have created the adjustment layer, you can apply any sort of effects to the video clips. However, you should make sure to place the adjustment layer above in the layers stack.

Bonus Tips – How to Use Adjustment Layers in the Best Alternative to FCPX?
If you want to use an alternative to Final Cut Pro for creating the adjustment layer, you can try Wondershare Filmora 12 . You can edit your videos in an advanced and secure environment using this tool. It supports all multiple platforms, such as Windows, Mac, Android, and iOS. You can do color correction in your videos to manage the saturation, brightness, contrast, exposure, and other factors in Filmora.
Free Download For Win 7 or later(64-bit)
Free Download For macOS 10.14 or later
Moreover, you can also create 3D animated titles in Filmora to give your project a unique look. It also provides a wide range of keyboard shortcut presets through which you can make your editing easier and faster. Apart from editing and modifying your videos, you can also increase their vibrancy by using Filmora effects. You can explore and select a diverse range of visual effects in Filmora to give a new dimension to your video clips.
Key Features of Filmora
- Filmora offers cloud services that allow you to collaborate with your team members effectively. On its workspace cloud platform, you can share and review the edited video clips with your team members in a comfortable environment.
- It offers a pen tool through which you can draw complex mask shapes, such as straight lines or curves around the objects.
- Using the AI Smart Cutout feature, you can use advanced technology to select people or objects in the video effectively.
- Are you annoyed by the background noises in your video clips? You can try the AI Denoise feature of Filmora that can help you to eradicate background noises from the video clips precisely.
How to Add an Adjustment Layer Using Filmora
To create and use the adjustment layer in Wondershare Filmora 12, you can proceed to the following steps:
Step1 Import the Video Clip
Launch Filmora and click on the “New Project” button. Afterward, upload the video file on the project media and then drag and drop it into the timeline.

Step2 Add the Adjustment Layer
Now head to the “Media” section on the left side, where you can find the option of the “Adjustment Layer.” Next, drag and drop the adjustment layer into the timeline. You can double-click on it to change its settings effectively.

Step3 Add Multiple Presets to Adjustment Layer
From the settings, you can change blending mode, rotation, position, and opacity easily. Moreover, you can add different presets to the adjustment layer for more modifications. You can use the color match tool to adjust the colors in your video clip. With this tool, you can also add a border across the video clips using the adjustment layer. Also, you can color code the adjustment layer to create a more attractive look in the video clip.

Conclusion
Adjustment layers can make your editing process easy and fast. If you want to pursue video editing as your profession, you should know how to use the adjustment layer in famous tools like Final Cut Pro. After reading this article, you have learned how to create an adjustment layer in Final Cut Pro without complications.
However, if you want a more compatible and easier-to-use tool to generate adjustment layers, you can try Wondershare Filmora. It’s a powerful video editor that you can use to perform professional editing using adjustment layers.
Free Download For macOS 10.14 or later
Moreover, you can also create 3D animated titles in Filmora to give your project a unique look. It also provides a wide range of keyboard shortcut presets through which you can make your editing easier and faster. Apart from editing and modifying your videos, you can also increase their vibrancy by using Filmora effects. You can explore and select a diverse range of visual effects in Filmora to give a new dimension to your video clips.
Key Features of Filmora
- Filmora offers cloud services that allow you to collaborate with your team members effectively. On its workspace cloud platform, you can share and review the edited video clips with your team members in a comfortable environment.
- It offers a pen tool through which you can draw complex mask shapes, such as straight lines or curves around the objects.
- Using the AI Smart Cutout feature, you can use advanced technology to select people or objects in the video effectively.
- Are you annoyed by the background noises in your video clips? You can try the AI Denoise feature of Filmora that can help you to eradicate background noises from the video clips precisely.
How to Add an Adjustment Layer Using Filmora
To create and use the adjustment layer in Wondershare Filmora 12, you can proceed to the following steps:
Step1 Import the Video Clip
Launch Filmora and click on the “New Project” button. Afterward, upload the video file on the project media and then drag and drop it into the timeline.
Step2 Add the Adjustment Layer
Now head to the “Media” section on the left side, where you can find the option of the “Adjustment Layer.” Next, drag and drop the adjustment layer into the timeline. You can double-click on it to change its settings effectively.
Step3 Add Multiple Presets to Adjustment Layer
From the settings, you can change blending mode, rotation, position, and opacity easily. Moreover, you can add different presets to the adjustment layer for more modifications. You can use the color match tool to adjust the colors in your video clip. With this tool, you can also add a border across the video clips using the adjustment layer. Also, you can color code the adjustment layer to create a more attractive look in the video clip.
Conclusion
Adjustment layers can make your editing process easy and fast. If you want to pursue video editing as your profession, you should know how to use the adjustment layer in famous tools like Final Cut Pro. After reading this article, you have learned how to create an adjustment layer in Final Cut Pro without complications.
However, if you want a more compatible and easier-to-use tool to generate adjustment layers, you can try Wondershare Filmora. It’s a powerful video editor that you can use to perform professional editing using adjustment layers.
The Top Tools for Converting Slides to Digital - 2024 Review
The Best Tools for Converting Slides to Digital - Review
An easy yet powerful editor
Numerous effects to choose from
Detailed tutorials provided by the official channel
Are you looking to convert your slides into digital form at home? Are you in search of the best tools for converting old slides to digital? Here, you will get every single detail for it. These conversion tools can help you to convert your old slides into digital images just by sitting at home. In this blog, we will discuss the need, how to achieve it, and the best 8 tools for the conversion. The list of these top tools will be based on the user reviews and ratings of 2024.
In this article
01 [Why We Need to Turn Old Slides into Digital Images](#Part 1)
02 [How to Convert Slides to Digital - Step-by-Step Guide](#Part 2)
03 [Best 8 Slide to Digital Image Converters 2024](#Part 3)
04 [FAQ of Converting Slides to Digital](#Part 4)
Part 1 Why We Need to Turn Old Slides into Digital Images
In this digital era, people rather have access to projectors to view old slides. Therefore, it is beneficial to convert those slides into digital form. There are also many benefits of this conversion such as:
● Preserving the photos for future generations without the fear of getting them lost or damaged.
● Old slides might fade up and you can give them a brand new look by using new tools and technologies.
● The organization becomes much easier than the physical ones.
● It will create less clutter.
● You can share the pictures with just one click with your friends, family members, etc to flourish the memories.
● It lets you enjoy your old memories in a better and more enhanced way.
So, you might have understood why there is a need for converting slides to pictures. Now, let’s dig down more on the topic.
Part 2 How to Convert Slides to Digital - Step-by-Step Guide
Here, we will discuss step-by-step ways to turn the old slides into digital images. So, let’s begin:
Step 1: Resolution
The very first step for converting slides to digital photos is measuring and fixing the resolution of the slides. The technical measurement of image resolution is DPI (dot per inch). It helps you to predict the sharpness or clarity of the final image. The overall measurement depends on the size of the slide and the type of converter or scanner you are using. For example,
A 35 mm slide scanned at 10 MP will give you the images of size 13”*9”.
Step 2: Dust and Scratch Removal
If you have slides that have been wrapped in a box and remained untouched for so long, they might require cleaning. Such slides may develop mold buildup, age-related blemishes, or scratches. They need a cleaning process before using them to convert into slides. A lint-free cloth and an anti-static film cleaner are the best combinations to gently clean the slides and make them fresh.
Step 3: Color Correction and Restoration
Color correction and restoration is another important step when you are dealing with converting old slides into digital images. In order to correct the fading and color shift, you can use the built-in scanning software. You can also use other software for such purposes.
Wondershare Filmora is the best tool which can be used for the color correction of old slides. It is a handy tool with a variety of features. Filmora offers a number of options when it comes to color correction and grading. These options include color histogram, white balance, 3D LUT (3D Lookup table), color and light, HSL, vignette, etc.
Step 4: Using the Best Scanner cum Digital Converter
The next step is choosing the best quality scanner according to the requirement. 35 mm is the most common size of the slides. But, it does come with other uncommon formats too such as 110, 126, 120, 127, etc. You will come to know about the actual size when the image is mounted on the cardboard. Therefore, it is essential to select a quality and versatile scanner which can convert slides of any size effectively.
Part 3 Best 8 Slide to Digital Image Converters 2024
Here, you can run down the list of the best tools to convert the photo slides into digital images on the basis of user reviews and ratings.
01Wolverine Titan 8-in-1

Wolverine Titan 8-in-1 is one of the top choices when it comes to converting photo slides to digital. It is easy to use the device with a fast conversion process. It provides a variety of features such as:
● High output resolution
● Large built-in display
● Wide-format compatibility
● Standalone performance
● Small, compact, and lightweight design
● Pretty fast processing
● Fast uploading slide-adapters
● 4.3-inch color display
● Contains HDMI-to-out jack
● Comes in 3 colors
● Highest quality sensors
● Available at a reasonable price
02Digitnow Film Scanner

A digitnow film scanner is a great option for converting physical photo prints or slides into digital images. The easy to use standalone device comes with a small display which can be attached to the TV screen, PC, or MacBook. It provides a lot of additional tools including
● Adapter tray frames to hold photo prints and slides.
● Slots to insert slides into the scanner.
● GB memory card to hold approximately 1000 photos.
● A disc of image retouching software for Windows users.
● A soft brush to clean dust and other debris from slides and film.
● User manual.
● TV cable.
● Standard buttons.
03Plustek ePhoto Z300

Plustek ePhoto Z300 is not just a slide converter but also a photo scanner. It has the capability to convert a photo or slide of size 6*4 in just 2 to 3 seconds. This simple and compact photo scanner can be attached to a PC or Mac. The device also has a built-in editor which provides photo editing options along with the crop and resizes. The major advantage of this tool is its fastest scanning capacity. This is a good option if you own a large collection of old photos and wish to digitize them quickly. You can use this device by combining it with others too.
04Sharper Image Slide and Negative Converter

It is a lightweight slide to digital converter weighing just 0.6 pounds. The tool provides on-screen interfaces in 7 languages. Despite its small size, the tool has as many features as compared to other slide converters. Sharper image slide and negative converter are easy to use with a basic interface and clearly labeled buttons. The additional tools that come with this device are:
● Cleaning brush
● User manual
● Well designed plastic frame trays
The converter does not come with an in-built SD card and you are required to buy one.
05Kodak Scanza Digital Film and Slide Scanner

Kodak scanza digital film and slide scanner is the best tool if you have a large heap of images. It provides the largest storage option and due to which it is a little expensive. Scanza can convert images and reels into JPEG files within seconds of time. The device is an all-rounder and contains all the latest features and specifications. One can easily use this plastic design and lightweight device because of its small and sleek design. The additional features of Scanza include:
● Adjustable brightness option
● Removable SD card slot
● Powerful photo editing option
● USB power cable
● HDMI cable
● AC adapter
● Video cable
● Six adapter trays
● Film cleaning brush
● 3.5 inch TFT LCD screen
06Zonoz FS-3 22MP All-in-1

Zonoz FS-3 22 MP All-in-1 is a wonderful option if you are looking for a digital converter in an affordable range. It can convert up to 35, 110, 126 slides and negatives along with Super 8 film. One benefit of using this converter is the output images look sharper when compared to other converters. The additional features that the tool avail to its users are:
● Photo editing capabilities
● Brightness adjustment
● Mirroring or flipping
● Small built-in color display
● Adapter tray frames
● Cleaning brush
● USB and TV cables
● User manual
07Kodak Mini Digital Films and Slide Scanners

This miniature scanner model is the best selling slide scanner on the internet. Anyone can use it easily without any requirement for external extensions. With a rating of 4.2 upon 5, it is on the list of best slide scanners of 2024. It weighs around 1.4 pounds and measures 3.6*3.4*3.9 inches.
08Magnasonic
Magnasonic is named as the fastest slide scanner. The device is capable of quickly scanning the slides which saves both your time and efforts. It comes with fast scanning speed, 2.4 inch LCD screen, and 22 MP quality. The tool allows you to store upto 100 images. It also comes with some additional tools such as featured film trays etc.
Part 4 FAQ of Converting Slides to Digital
01What to do with the old slides?
Converting slides to digital images can help you to experiment a lot with them. The old slides might be faded and you can use some tools with the option color correction to make them look new and more appealing. Videos are in trend these days. You can create a video out of those slides after converting them into digital. It will help you to enjoy the old memories in the new version with new effects, songs, etc.
Wondershare Filmora Video Editor is the most powerful tool to prepare an effective video in a hassle-free manner. It has many useful features to make your video more enhanced. Also, it has the option of color correction and grading to make the faded old pics colorful and better. There is no need for professionalism to use this tool, but any beginner can also use it effectively with ease. So, make your memories everlasting with Wondershare Filmora.
For Win 7 or later (64-bit)
For macOS 10.12 or later
02Can you clean negatives with alcohol?
Yes, it is possible to clean negatives with alcohol. But make sure to use 98% isopropyl alcohol for this purpose. For cleaning, use a cotton ball and dab it on the alcohol. Then, lightly wipe the negatives and keep them to dry for some time.
● Ending Thoughts →
● So, hope you get all the required knowledge to convert the slides into digital images.
● We have shared the list of top tools for the purpose. Now, it is up to you to choose any according to your suitability and requirement.
● Just use these devices and accomplish your conversion purpose at home without the need for any professional and worrying about the cost of converting slides to digital.
● At last, with the help of Filmora create an effective video to make your memories everlasting and enhanced.
Are you looking to convert your slides into digital form at home? Are you in search of the best tools for converting old slides to digital? Here, you will get every single detail for it. These conversion tools can help you to convert your old slides into digital images just by sitting at home. In this blog, we will discuss the need, how to achieve it, and the best 8 tools for the conversion. The list of these top tools will be based on the user reviews and ratings of 2024.
In this article
01 [Why We Need to Turn Old Slides into Digital Images](#Part 1)
02 [How to Convert Slides to Digital - Step-by-Step Guide](#Part 2)
03 [Best 8 Slide to Digital Image Converters 2024](#Part 3)
04 [FAQ of Converting Slides to Digital](#Part 4)
Part 1 Why We Need to Turn Old Slides into Digital Images
In this digital era, people rather have access to projectors to view old slides. Therefore, it is beneficial to convert those slides into digital form. There are also many benefits of this conversion such as:
● Preserving the photos for future generations without the fear of getting them lost or damaged.
● Old slides might fade up and you can give them a brand new look by using new tools and technologies.
● The organization becomes much easier than the physical ones.
● It will create less clutter.
● You can share the pictures with just one click with your friends, family members, etc to flourish the memories.
● It lets you enjoy your old memories in a better and more enhanced way.
So, you might have understood why there is a need for converting slides to pictures. Now, let’s dig down more on the topic.
Part 2 How to Convert Slides to Digital - Step-by-Step Guide
Here, we will discuss step-by-step ways to turn the old slides into digital images. So, let’s begin:
Step 1: Resolution
The very first step for converting slides to digital photos is measuring and fixing the resolution of the slides. The technical measurement of image resolution is DPI (dot per inch). It helps you to predict the sharpness or clarity of the final image. The overall measurement depends on the size of the slide and the type of converter or scanner you are using. For example,
A 35 mm slide scanned at 10 MP will give you the images of size 13”*9”.
Step 2: Dust and Scratch Removal
If you have slides that have been wrapped in a box and remained untouched for so long, they might require cleaning. Such slides may develop mold buildup, age-related blemishes, or scratches. They need a cleaning process before using them to convert into slides. A lint-free cloth and an anti-static film cleaner are the best combinations to gently clean the slides and make them fresh.
Step 3: Color Correction and Restoration
Color correction and restoration is another important step when you are dealing with converting old slides into digital images. In order to correct the fading and color shift, you can use the built-in scanning software. You can also use other software for such purposes.
Wondershare Filmora is the best tool which can be used for the color correction of old slides. It is a handy tool with a variety of features. Filmora offers a number of options when it comes to color correction and grading. These options include color histogram, white balance, 3D LUT (3D Lookup table), color and light, HSL, vignette, etc.
Step 4: Using the Best Scanner cum Digital Converter
The next step is choosing the best quality scanner according to the requirement. 35 mm is the most common size of the slides. But, it does come with other uncommon formats too such as 110, 126, 120, 127, etc. You will come to know about the actual size when the image is mounted on the cardboard. Therefore, it is essential to select a quality and versatile scanner which can convert slides of any size effectively.
Part 3 Best 8 Slide to Digital Image Converters 2024
Here, you can run down the list of the best tools to convert the photo slides into digital images on the basis of user reviews and ratings.
01Wolverine Titan 8-in-1
Wolverine Titan 8-in-1 is one of the top choices when it comes to converting photo slides to digital. It is easy to use the device with a fast conversion process. It provides a variety of features such as:
● High output resolution
● Large built-in display
● Wide-format compatibility
● Standalone performance
● Small, compact, and lightweight design
● Pretty fast processing
● Fast uploading slide-adapters
● 4.3-inch color display
● Contains HDMI-to-out jack
● Comes in 3 colors
● Highest quality sensors
● Available at a reasonable price
02Digitnow Film Scanner
A digitnow film scanner is a great option for converting physical photo prints or slides into digital images. The easy to use standalone device comes with a small display which can be attached to the TV screen, PC, or MacBook. It provides a lot of additional tools including
● Adapter tray frames to hold photo prints and slides.
● Slots to insert slides into the scanner.
● GB memory card to hold approximately 1000 photos.
● A disc of image retouching software for Windows users.
● A soft brush to clean dust and other debris from slides and film.
● User manual.
● TV cable.
● Standard buttons.
03Plustek ePhoto Z300
Plustek ePhoto Z300 is not just a slide converter but also a photo scanner. It has the capability to convert a photo or slide of size 6*4 in just 2 to 3 seconds. This simple and compact photo scanner can be attached to a PC or Mac. The device also has a built-in editor which provides photo editing options along with the crop and resizes. The major advantage of this tool is its fastest scanning capacity. This is a good option if you own a large collection of old photos and wish to digitize them quickly. You can use this device by combining it with others too.
04Sharper Image Slide and Negative Converter
It is a lightweight slide to digital converter weighing just 0.6 pounds. The tool provides on-screen interfaces in 7 languages. Despite its small size, the tool has as many features as compared to other slide converters. Sharper image slide and negative converter are easy to use with a basic interface and clearly labeled buttons. The additional tools that come with this device are:
● Cleaning brush
● User manual
● Well designed plastic frame trays
The converter does not come with an in-built SD card and you are required to buy one.
05Kodak Scanza Digital Film and Slide Scanner
Kodak scanza digital film and slide scanner is the best tool if you have a large heap of images. It provides the largest storage option and due to which it is a little expensive. Scanza can convert images and reels into JPEG files within seconds of time. The device is an all-rounder and contains all the latest features and specifications. One can easily use this plastic design and lightweight device because of its small and sleek design. The additional features of Scanza include:
● Adjustable brightness option
● Removable SD card slot
● Powerful photo editing option
● USB power cable
● HDMI cable
● AC adapter
● Video cable
● Six adapter trays
● Film cleaning brush
● 3.5 inch TFT LCD screen
06Zonoz FS-3 22MP All-in-1
Zonoz FS-3 22 MP All-in-1 is a wonderful option if you are looking for a digital converter in an affordable range. It can convert up to 35, 110, 126 slides and negatives along with Super 8 film. One benefit of using this converter is the output images look sharper when compared to other converters. The additional features that the tool avail to its users are:
● Photo editing capabilities
● Brightness adjustment
● Mirroring or flipping
● Small built-in color display
● Adapter tray frames
● Cleaning brush
● USB and TV cables
● User manual
07Kodak Mini Digital Films and Slide Scanners
This miniature scanner model is the best selling slide scanner on the internet. Anyone can use it easily without any requirement for external extensions. With a rating of 4.2 upon 5, it is on the list of best slide scanners of 2024. It weighs around 1.4 pounds and measures 3.6*3.4*3.9 inches.
08Magnasonic
Magnasonic is named as the fastest slide scanner. The device is capable of quickly scanning the slides which saves both your time and efforts. It comes with fast scanning speed, 2.4 inch LCD screen, and 22 MP quality. The tool allows you to store upto 100 images. It also comes with some additional tools such as featured film trays etc.
Part 4 FAQ of Converting Slides to Digital
01What to do with the old slides?
Converting slides to digital images can help you to experiment a lot with them. The old slides might be faded and you can use some tools with the option color correction to make them look new and more appealing. Videos are in trend these days. You can create a video out of those slides after converting them into digital. It will help you to enjoy the old memories in the new version with new effects, songs, etc.
Wondershare Filmora Video Editor is the most powerful tool to prepare an effective video in a hassle-free manner. It has many useful features to make your video more enhanced. Also, it has the option of color correction and grading to make the faded old pics colorful and better. There is no need for professionalism to use this tool, but any beginner can also use it effectively with ease. So, make your memories everlasting with Wondershare Filmora.
For Win 7 or later (64-bit)
For macOS 10.12 or later
02Can you clean negatives with alcohol?
Yes, it is possible to clean negatives with alcohol. But make sure to use 98% isopropyl alcohol for this purpose. For cleaning, use a cotton ball and dab it on the alcohol. Then, lightly wipe the negatives and keep them to dry for some time.
● Ending Thoughts →
● So, hope you get all the required knowledge to convert the slides into digital images.
● We have shared the list of top tools for the purpose. Now, it is up to you to choose any according to your suitability and requirement.
● Just use these devices and accomplish your conversion purpose at home without the need for any professional and worrying about the cost of converting slides to digital.
● At last, with the help of Filmora create an effective video to make your memories everlasting and enhanced.
How to Edit FLV Video Files with FLV Editor [Windows, Mac,Android, iPhone & Online]
FLV is a common container format for transferring digital video and audio information over the Internet. A.flv file is a flash video that may be seen on your computer with Adobe Flash Player, Adobe Air, or some third-party Adobe Flash plugins.
FLV has become the standard video format for web-based streaming video service providers such as Hulu and VEVO due to its superior functionality and tiny size. It’s also the default format for Quicktime on Mac systems.
If you wish to edit FLV videos without any problems, you should utilize a multipurpose video editor that supports the FLV file format.
Best FLV Editor to Edit FlV Video on Windows and Mac - Filmroa Video Editor
Filmora Video Editor is a professional FLV video editing application. This software allows you to edit 4K video files, share completed films directly on social media platforms, and add subtitles and audio files.
You may mix multiple films and enhance your footage with numerous transitions and other effects using this FLV video editing software. Furthermore, the free Filmora application is ideal for adding audio files or video clips from the wide library and uploading your soundtrack.
For Win 7 or later (64-bit)
For macOS 10.14 or later
Therefore, you can use the following steps to edit FLV video on Windows and Mac:
Step 1: Import file:

Step 2: Edit the FLV file:
Acquire the perfect tool in your palm for anything you want to do, such as clipping, cropping, rotating, and more.
Furthermore, all editing capabilities in the toolbar allow drag-and-drop, making it even easier to touch up your films quickly. Consider the following scenario:
- Drag and drop a transition into the video/photo, or right-click it and select “Apply to All.”
- Please drag & drop a title template to the position where you want it to appear, then adjust it.
- To use the effects, select one from the 50+ available video effects, select it, and apply it to your photos/videos instantaneously.
Step 3: Save or Export the file:

When you’re done, export your modified MP4 files to Windows/Mac and quickly share them on YouTube, with the option of sending a message to Facebook and Twitter. When you click Create in the program window’s middle right corner, you’ll be taken to the Output window below.
Alternative Way to Edit FlV Video on Windows
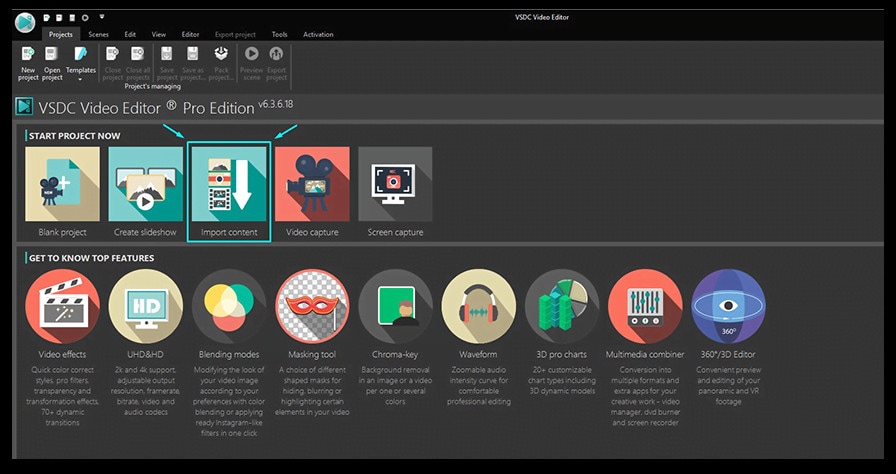
1. VSDC
VSDC is a free video editor along with a lot of advanced features. Cut, combine, trim, crop, and other editing capabilities are available to help you polish your FLV films.
Although it may not look logical, learning the editing capabilities hidden within modular boxes is simple. One noteworthy aspect of VSDC is its ability to produce good visual effects using many trendy video effects, transitions, and filters.
Furthermore, strong chroma keys, color correction, object modification, and other editing tools can be utilized to edit FLV videos. It not only creates excellent FLV videos, but it also supports a wide range of media conversion, allowing you to convert FLV files to various formats and export them without a watermark.
Therefore, follow the below mentioned steps to edit FLV video using VSDC:
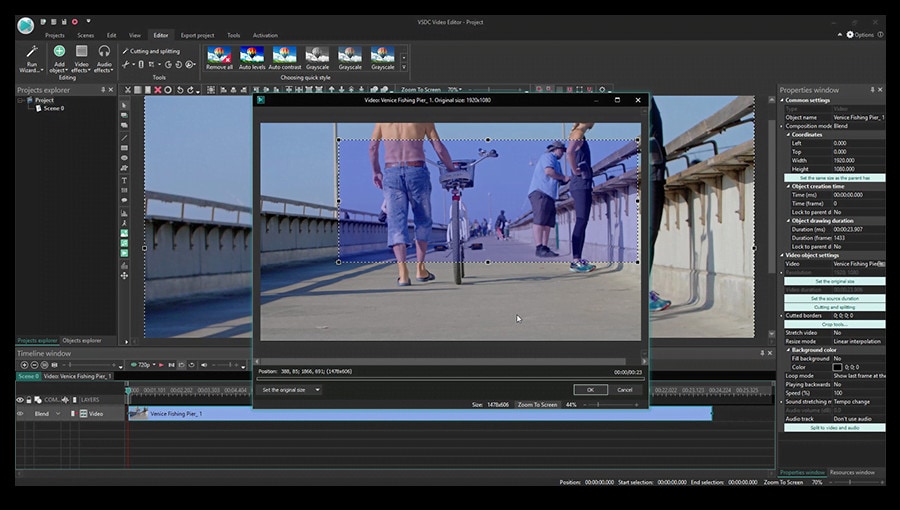
Step 1: Install the software on the Windows. Open the application and import the video.
Step 2: Use cutting and splitting tools to edit the video.
The first icon is a picture of a pair of scissors, which is a cutting tool. It’s very useful when you need to cut the beginning or end of a film. Place the cursor exactly where you want to cut, then select “Trim start” or “Trim finish” from the dropdown cutting menu (the small triangle next to the scissors icon).
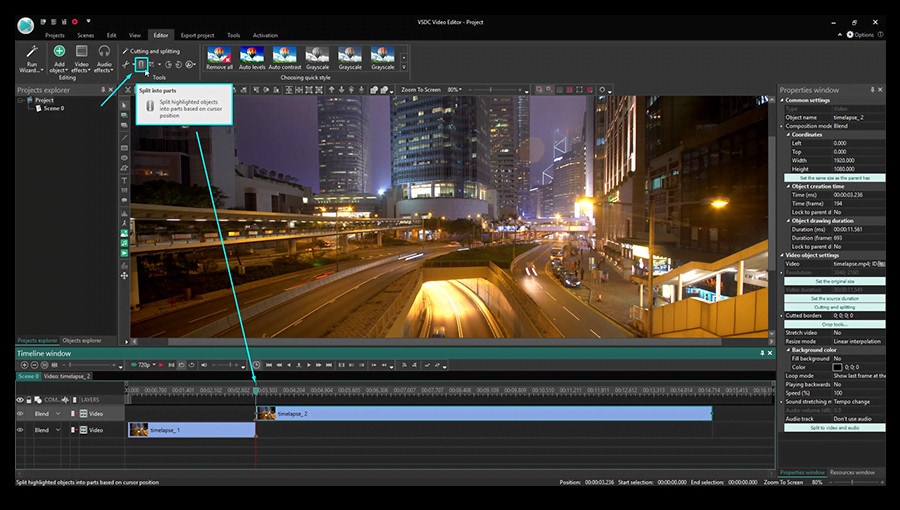
Cropping is also simple. If you have too much additional space around the scene object recorded, just choose the file you want to trim and select the cropping icon from the “Cutting and Splitting” option. A new window will appear, allowing you to select the region of the scene that should stay.
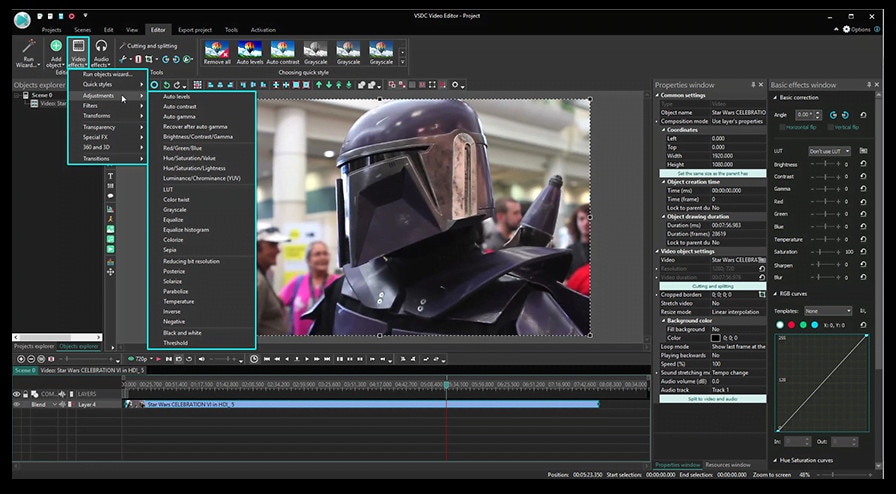
Step 3: Apply effects and transitions.
To use one, first select the video file you wish to edit, then go to the Video effects tab and select the effect you want to use. On the timeline, a new tab will appear, containing all of the effects done to the selected object. You can alter the effect’s duration and position in time by dragging it with the mouse there. The properties pane on the right-hand side can be used to change other parameters.
Transitions follow the same rule. Place your cursor where you want the transition to begin, then choose a transition from the Video effects dropdown menu and manually adjust the duration.
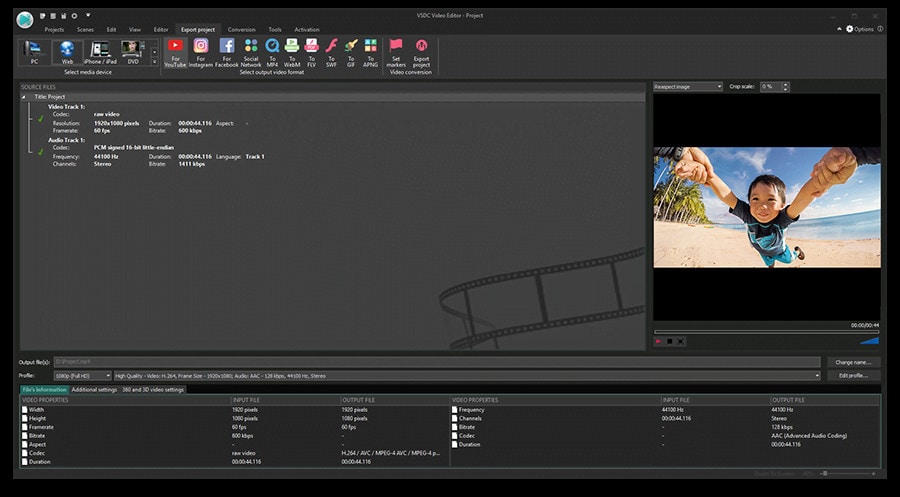
Step 4: Save changes and export video.
Make sure your movie appears exactly how you want it to before exporting it. If the video appears choppy, use the red preview button and lower the preview quality. When the PC’s resources are insufficient to process the video in real time, lagging can occur. Keep in mind that it has no bearing on the outcome. When you’re finished, navigate to the Export project tab and select an export format.
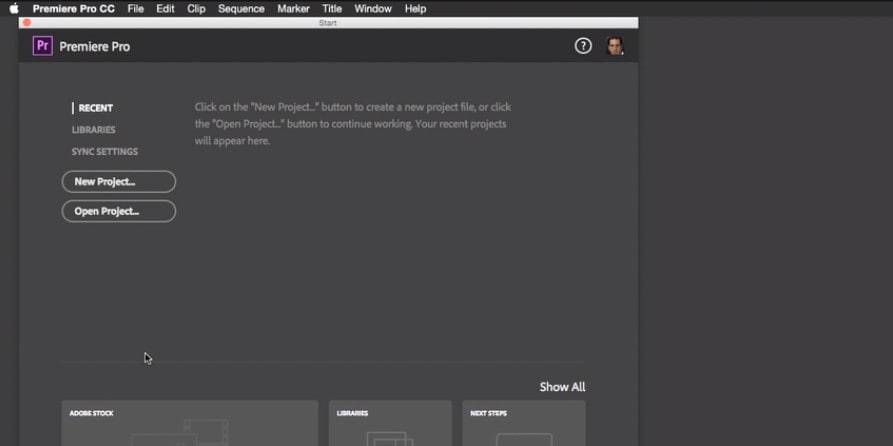
2. Adobe Premiere Pro:
Professional video editors use Premiere Pro to make everything from YouTube videos to Hollywood films like Mank, a 2021 Oscar candidate. It’s also widely utilized in the workflows of designers, animators, and VFX artists, and we can see why after lengthy testing.
We found the software’s UI to be simple to use, and it increased our productivity by separating things into various workspaces, such as editing, effects, and audio. When we tested it on both Mac and PC, we discovered that each workspace helps handle a specific activity while minimizing distraction.
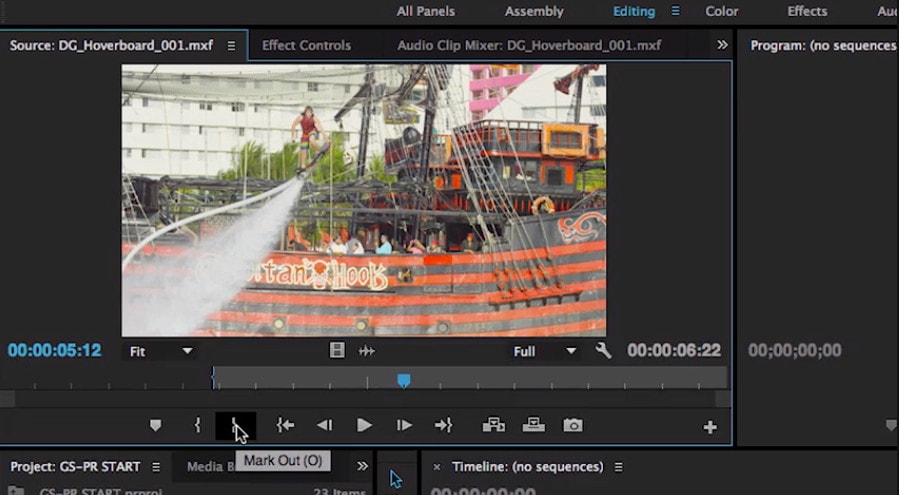
Edit the FLV video with Adobe Premiere Pro using the following steps:
Step 1: Import the video and create initial sequence.
Step 2: In the Timeline, trim and rearrange clips, add audio, and transitions.
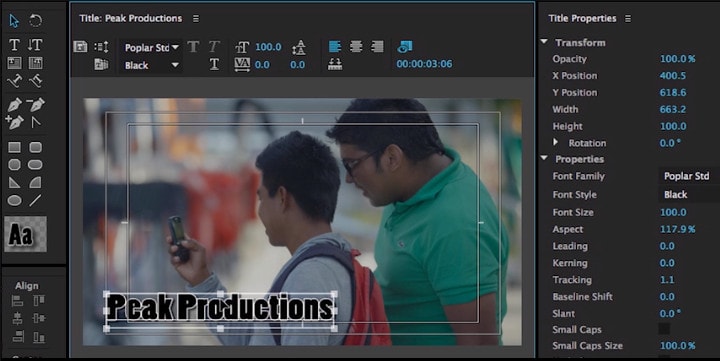
Step 3: Add title and graphics.
In Premiere Pro, you may make onscreen titles, as well as stylize and animate your images.
Step 4: Export your video.

Alternative Way to Edit FlV Video on Mac
1. Blender:
Under the GNU General Public License, Blender is a free, open-source 3D content production program that runs on all major operating systems. Blender is one of the greatest video editors for both Windows and Mac, with advanced features such as modifier-based modeling tools, powerful character animation capabilities, a node-based material, etc.
Because it is developed for professionals, it is tough to use as a beginner. However, it is unrestricted in its use and distribution. In addition, color options are changeable and versatile in the UI.
In contrast, this free video editor is perfect for semi-pros or those who want to enhance their video editing skills. However, you’ll need a lot of time and effort to learn it.
Step 1: Open the application.
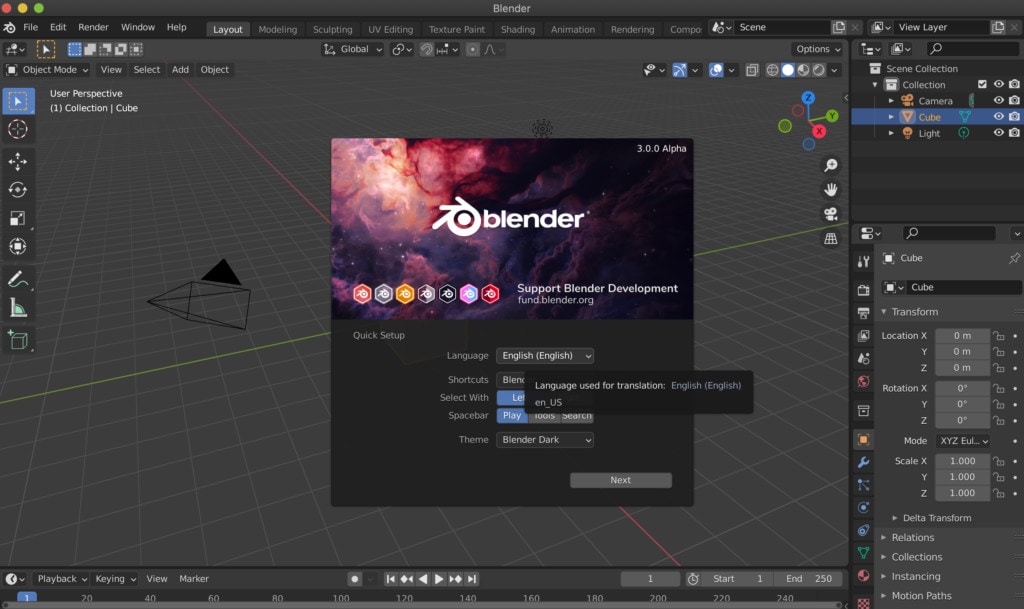
Step 2: Then, go into File->New->Video Editing to open the video editor.
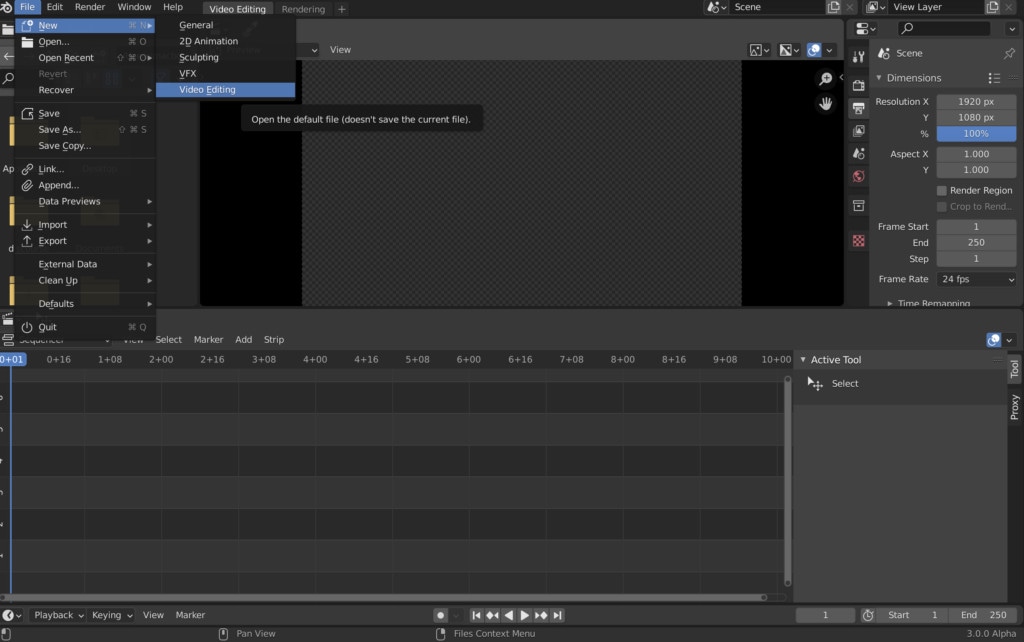
Step 3: Import the video and start editing using the editing tools.
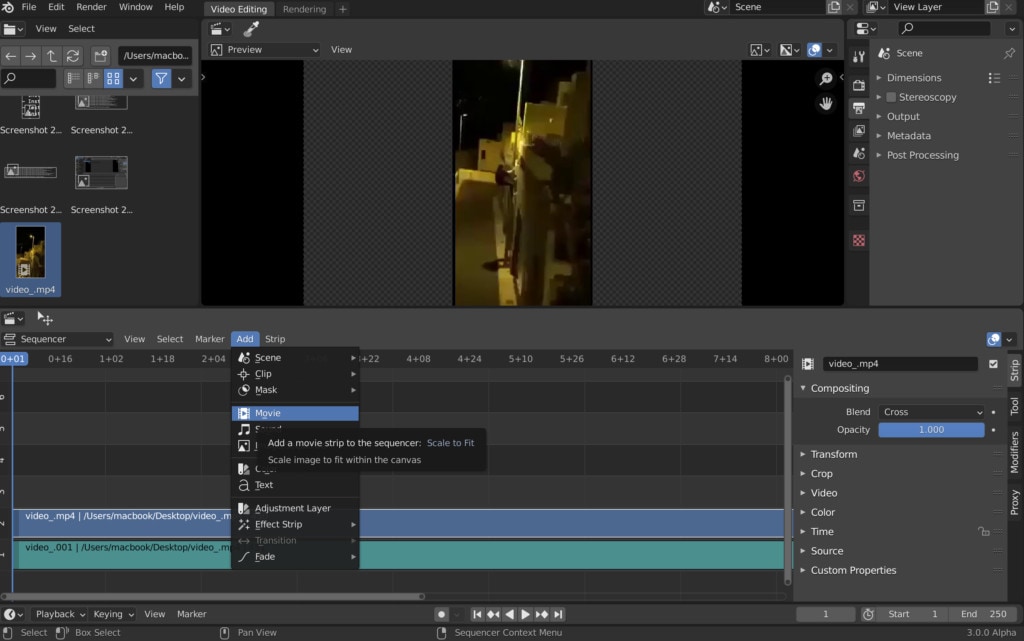
Step 4: Save and export the video.

2. Final Cut Pro:
When it comes to video editing software, Apple’s Final Cut Pro is one of the industry standards. As a result, it’s widely utilized in the television and film industries - at least among Mac users. However, one of the truly convincing reasons to choose it over Premiere Pro is because it is subscription-free: you only pay once.
The software’s Magnetic Timeline, grouping tools, a vast selection of effects, solid organizational capabilities, and simple ways to add and edit audio make it a favorite among professional video editors. 360° video, HDR, and powerful color correcting tools are among the other capabilities. It’s a strong software with a lot of features.
Follow the steps to edit FLV video using Final Cut Pro:
Step 1: Create Project.
To make a movie in Final Cut Pro, you must first establish a project, which keeps track of your editing selections and the media you utilize.
Step 2: Select and add clips to the timeline:
The second stage in making a movie with Final Cut Pro is to add and arrange clips in your project. In the timeline, you can move and reorder clips.
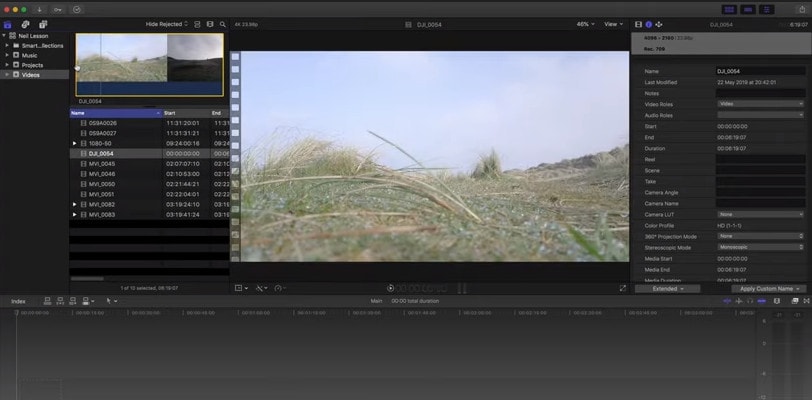
Step 3: Cut and trim video:
Final Cut Pro has a number of features for altering the start and stop points of clips in the timeline, as well as regulating the pacing of shots from one to the next.
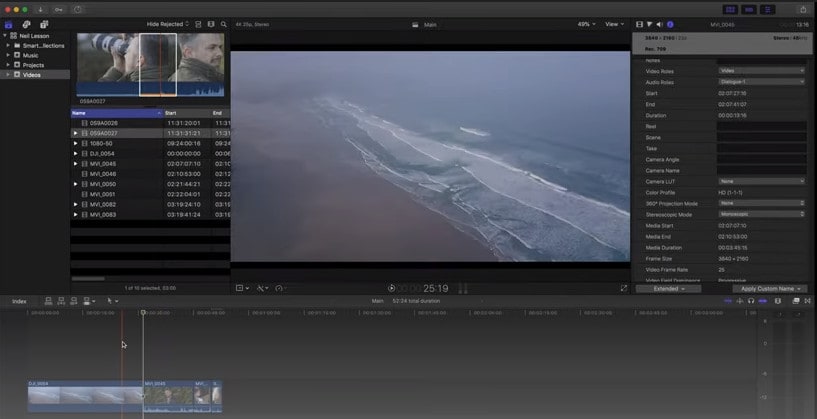
Step 4: Edit the video by adding effects and transitions:
Final Cut Pro includes a number of advanced editing features that make it simple to create a professional film. Visual enhancements and colour correction are among the finishing touches.

Step 5: Save and export video:
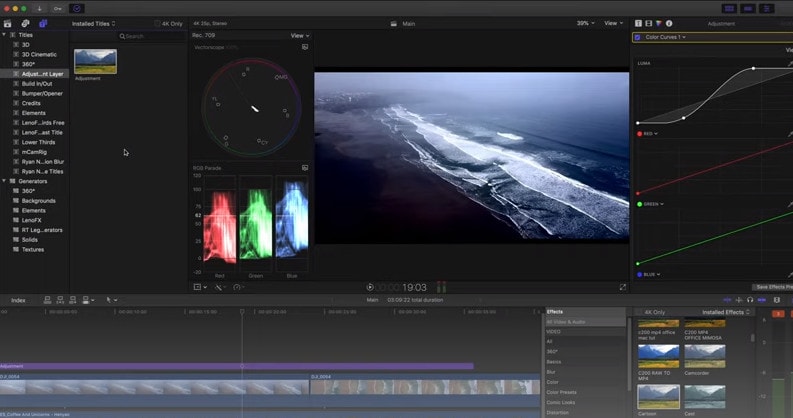
2 Ways to Edit FlV Video on Android:
1. Inshot:
For Android users, Inshot is a fantastic image and video editor. This Android video editor allows you to add popular stickers and emoticons to your films, making them more fashionable and unique.
The program supports HD video output, allowing you more control over your footage. Moreover, the additional sound and video can be synchronized with the available video chronology.
You can quickly blend more than two movies into one with rich effects and sound with this Android editor app. In addition, you can generate a watermark using unique text provided in the app, and subtitles support allow you to produce one with a variety of fonts.
Following are the steps that you can follow to edit FLV video using Inshot:
Step 1: Open the app and import the video.
Tap “Video” to open your phone’s gallery folder and begin editing a video in the InShot app. Select a video to work with. Adjust the canvass after your video has been loaded into the InShot App. For your other social media accounts, there are aspect ratios and sizes that work well with the video. It also has the option of being in portrait or landscape mode.
Step 2: Trim and split videos.
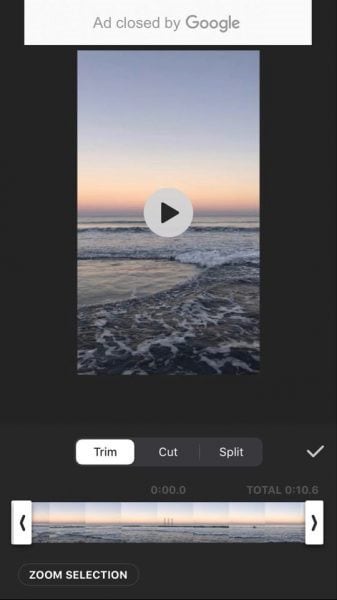
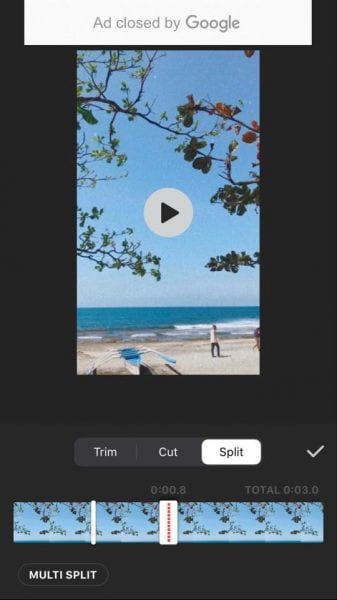
Step 3: Merge videos (optional):
By combining clips, you can combine them into a single film or project. Simply choose the videos you want to import from the drop-down menu. By tapping the “+” button on the lower left of the screen, you can insert and merge more videos. Your project will then be updated using the selected video.
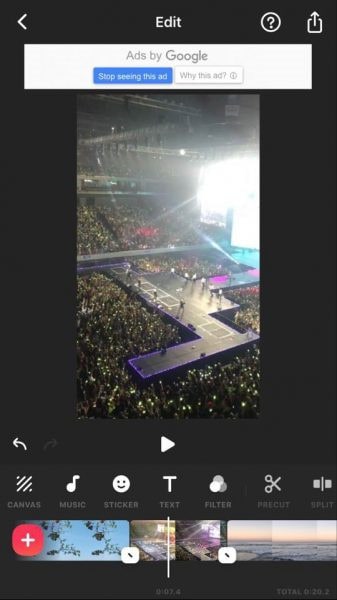
Step 4: Apply filters, add music, text and stickers.
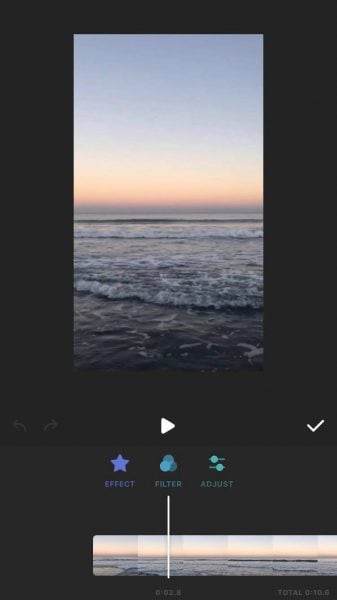
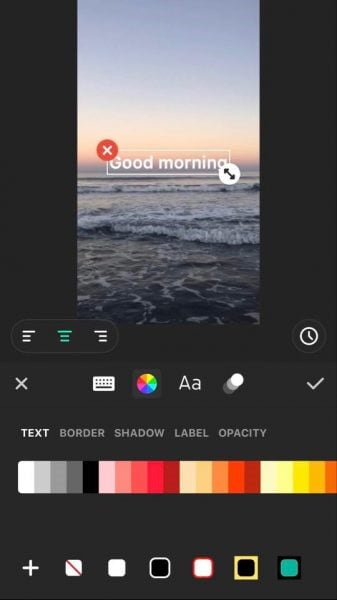
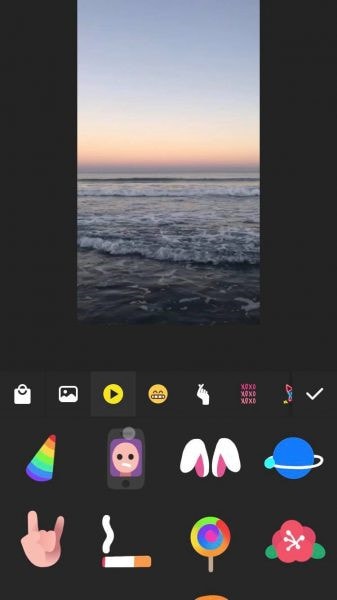
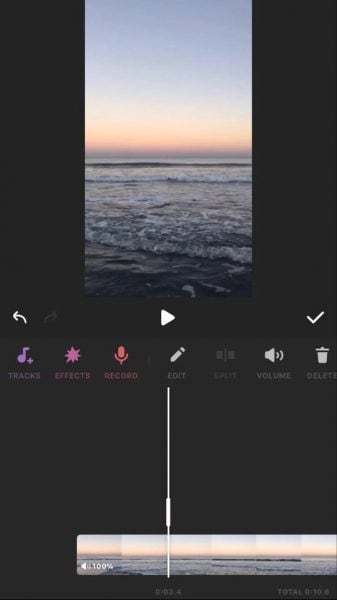
Step 5: Once you are done with the editing process, save the file.
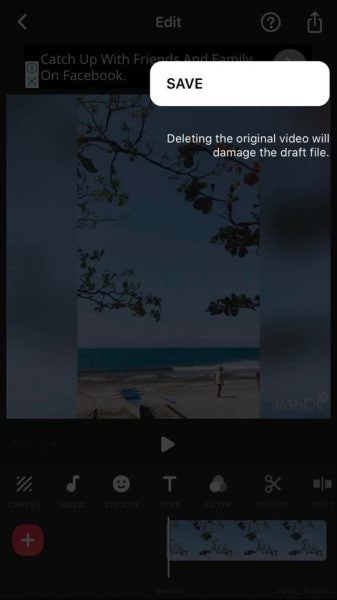
2. Videoshow:
VideoShow has a lot of video editing options. It is a simple and practical video editing program and movie scene maker for art directors and beginners. Using this video cutter, you may reverse, blur, duplicate, edit, merge and split collage clips or films.
You can also use VideoShow to adjust the audio or add subtitles to any video. It also allows you to use different filters on any video on your device. Over 50 intricate themes are included in the program, allowing you to create gorgeous music videos, slide shows, and vlogs in no time.
The annual subscription package is for $135.19, or you can also make a one-time purchase for $225.78.
However, to edit the video, you can use the following steps:
Step 1: Download and install the videoshow application and open it. Upload the video that you want to edit.
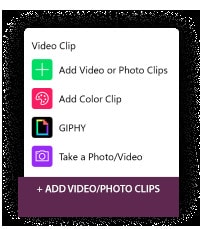
Step 2: Edit the video by applying filters or cutting and trimming the part of the video that you want to remove.
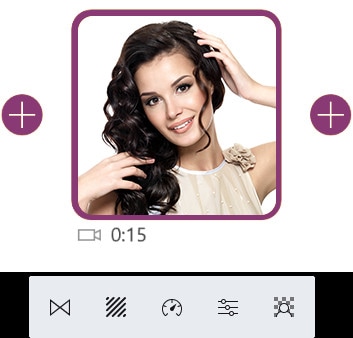
Step 3: Save changes and export the video to your preferred location.
2 Ways to Edit FlV Video on iPhone:
1. LumaFusion:
No other software program on the iPhone comes close to the feature set that LumaFusion offers for video editing. It is the only premium app on this list, and it is well worth every penny.
But, of course, YouTubers aren’t the only ones who use the program; mobile journalists and professional video producers who don’t want to lug along their bulky camera equipment and editing apparatus also use it.
LumaFusion deals with up to six video and audio tracks for photographs, movies, audio, titles, and graphics, and six audio tracks for narration, music, and sound effects. You also receive a magnetic timeline; importing clips is a breeze once they’ve been imported.
There are many transitions and effects to choose from, all of which can be layered. Finally, it includes much royalty-free music, sound effects, and other assets. So if you need a professional video editing tool for your iPhone, LumaFusion ($29.99) is the way to go.
Follow these steps to edit FLV video using LumaFusion:
Step 1: To create your first project, press + at the bottom of the screen. You can create a new project by tapping that area or by tapping the Plus button.
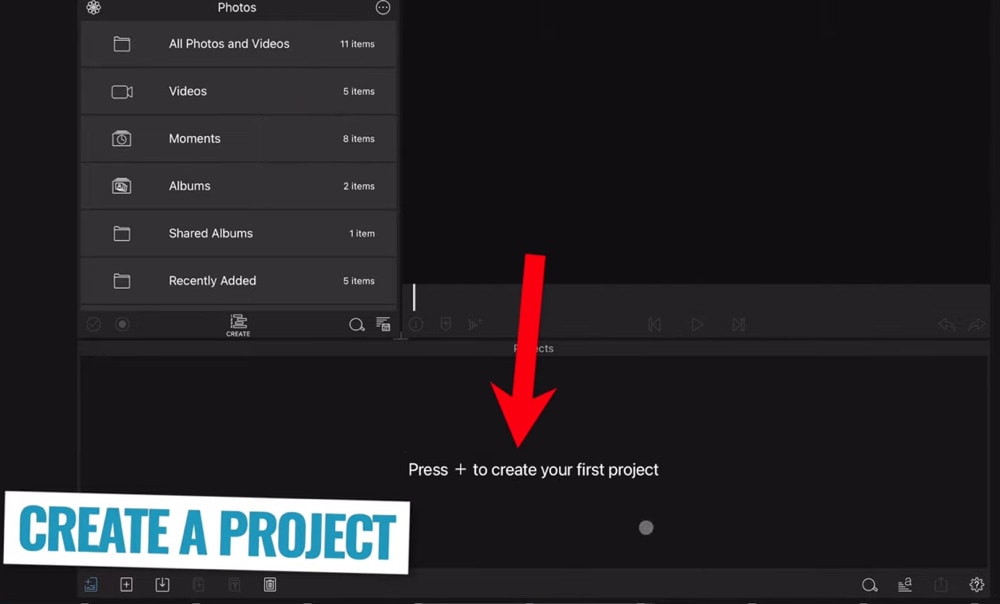
Step 2: Import video:
The Import section is located in the top left corner of the screen. This defaults to the Photos tab when you initially launch a new project. All of the photographs and videos can be seen here.
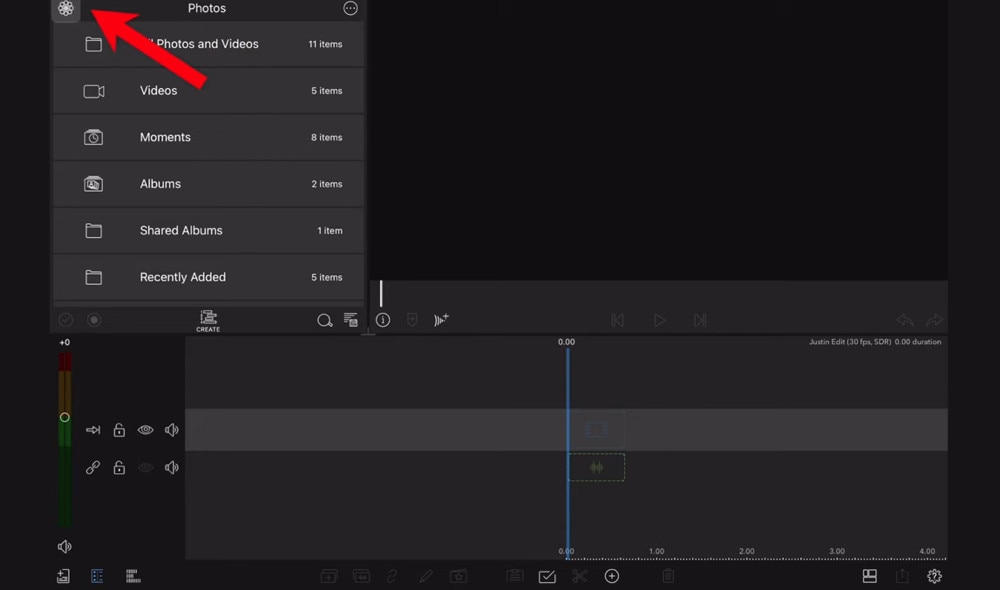
Step 3: Check layout and adjust volume levels
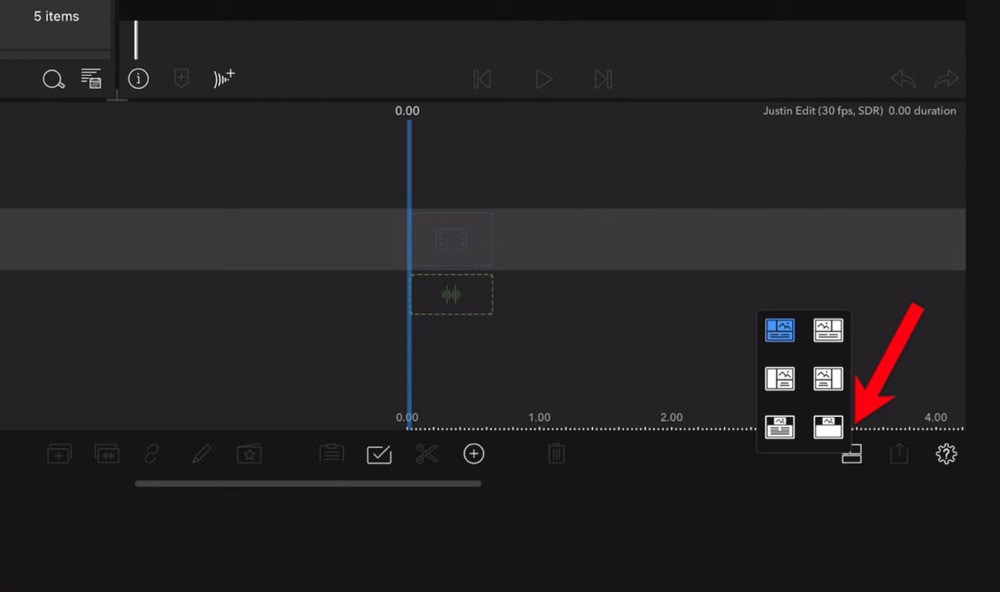
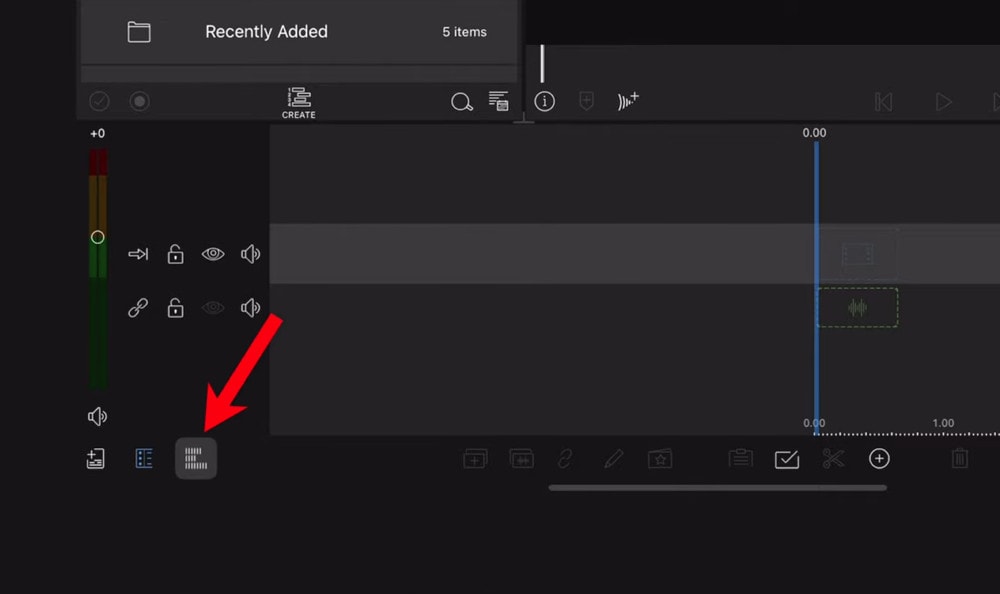
Step 4: Edit the video and add titles.
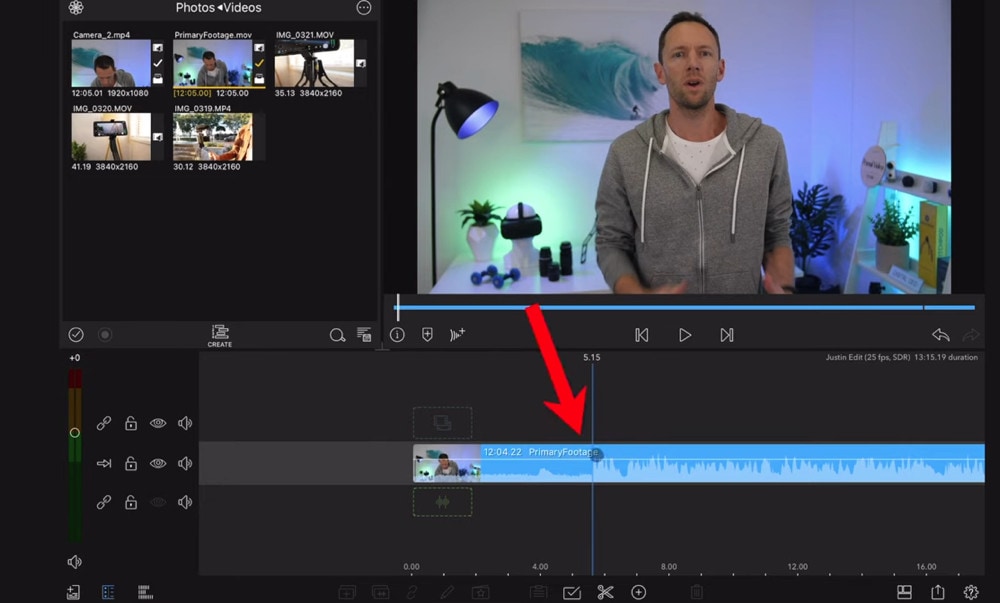
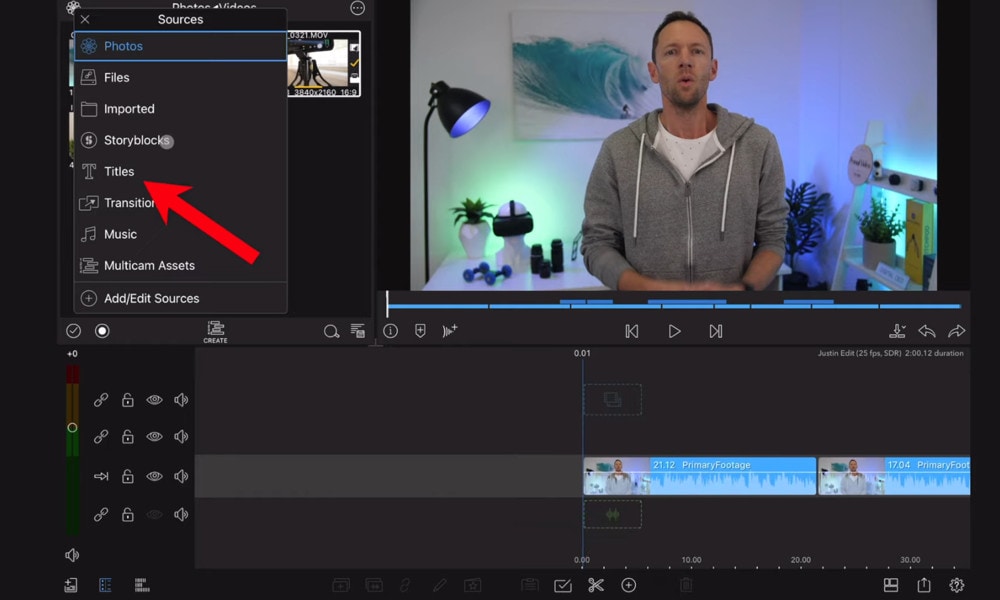
Step 5: Export the video.
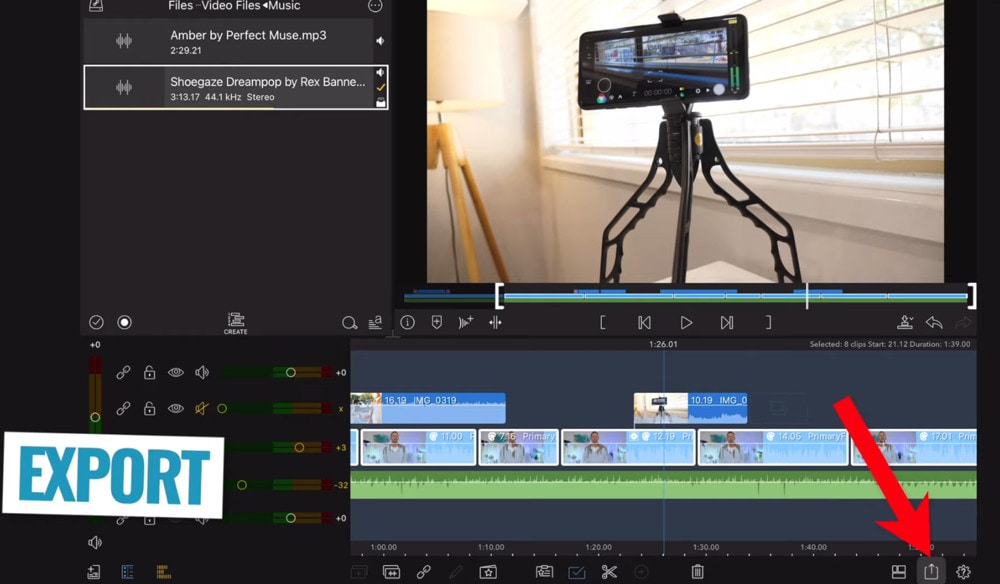
2. Filmora Go:
Without a doubt, Filmora is one of the greatest free video editors for iPhone that does not contain any watermarks. In addition, it’s compatible with both iPhones and Android devices and has a simple user interface.
Filmora is the greatest iPhone video editor for beginners, with themed filters and effects that add flair to your videos without any work.
Filmora has many unique features, including themes for your videos and ‘Materials,’ which are visual effects created by the program. Unfortunately, materials are only available with Filmora Pro, so keep that in mind.
Aside from that, you’ll find all of the typical features here. You can also add titles to videos, utilize stickers and effects, and add music to the background of your movie. You may also add another clip in picture-in-picture mode, which is beneficial.
Below are the following steps to edit FLV video:
Step 1: Open the application and select ‘Create new video’. Now, import the video by choosing the video icon.
Step 2: Edit the video. Within the edit tool, you can trim and split the video. You can also improve the video quality by adding titles, transitions, and music, and voiceovers.

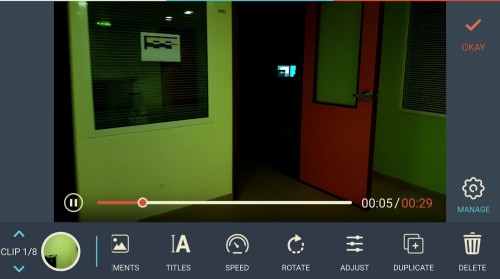

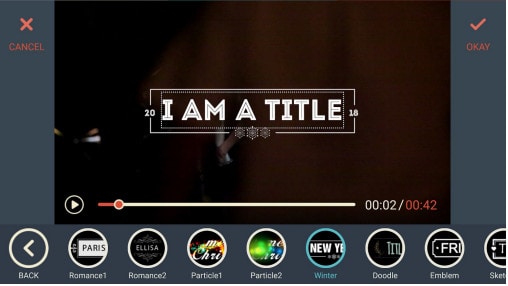
Step 3: After editing the video, select ‘SAVE’ and export the video or download it.
2 Ways to Edit FlV Video Online:
1. Fastreel:
If you’re seeking the finest free online video editor, Fastreel is a terrific tool to start with. This online video editing software provides a wide range of editing options. It can merge, edit, crop, and compress videos to make sharing easier.
It also includes many pre-made templates that you can change to create titles and transitions and other editing features like reverse, looping, and rotating. It’s also quite simple to use, and you can have polished videos in minutes.
There are also numerous pricing options to suit different customers, ranging from a completely free plan with watermarks to paid subscriptions with no limitations.
Use the following steps to edit FLV video:
Step 1: Open Fastreel web and import the video.
Step 2: Use templates to make it look attractive.
Step 3: Edit the video using the template.
Templates are unfinished videos with all of the effects already applied, such as backdrops, transitions, animated stickers, and titles. There are blank spots for your photos or videos, and you can arrange them in any sequence you like. You can also add music from the Fastreel library or upload your own track after entering your text.
Step 4: Once you are done with edits, save the video and export it.
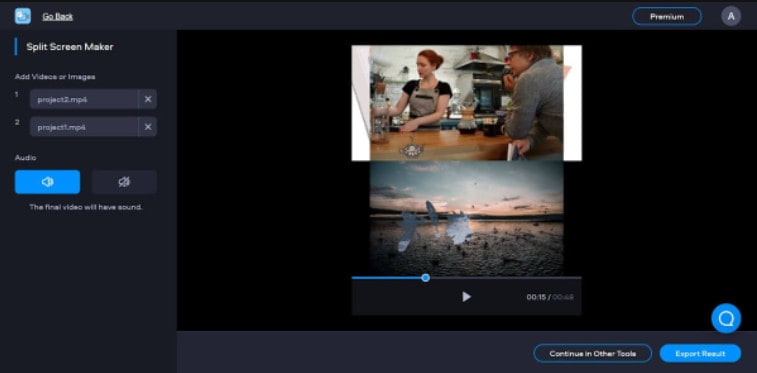
2. WeVideo:
When you’re seeking the greatest video producer online, another wonderful choice to explore is WeVideo.
Google, Dropbox, Rover, and Roche are just a few of the huge names that trust our online editor. Its fast, versatile editing engine and vast stock content collection for adding stock movies, photos, and audio tracks to your productions are ideal for business users.
WeVideo also stands out since it provides unlimited cloud storage for all of your videos, which you can download and watch on any device. The only drawback is that all of this comes at a price, with WeVideo offering a variety of payment plans ranging from $4.99 to $36.99 a month.
Follow the steps to edit videos using WeVideo:
Step 1: Open WeVideo and import the video file.
Step 2: Click on create new video in the left-hand corner of the screen.
Step 3: Edit the video.
The video clip you imported will appear in the viewing window to the right once you click on it. By moving the arrows and either end, you can edit out the beginning or end of your footage.
- Drag the clip into your timeline from your media pool.
- Place the clip on your timeline by dragging and dropping it.
- Click the scissor symbol after moving the blue marker to the spot where you want to cut your clip.
- Once the material has been chopped, you can erase bits of it by selecting it with your mouse and then pressing delete on your keyboard or rearrange the clips in the timeline by dragging and dropping them to other positions.
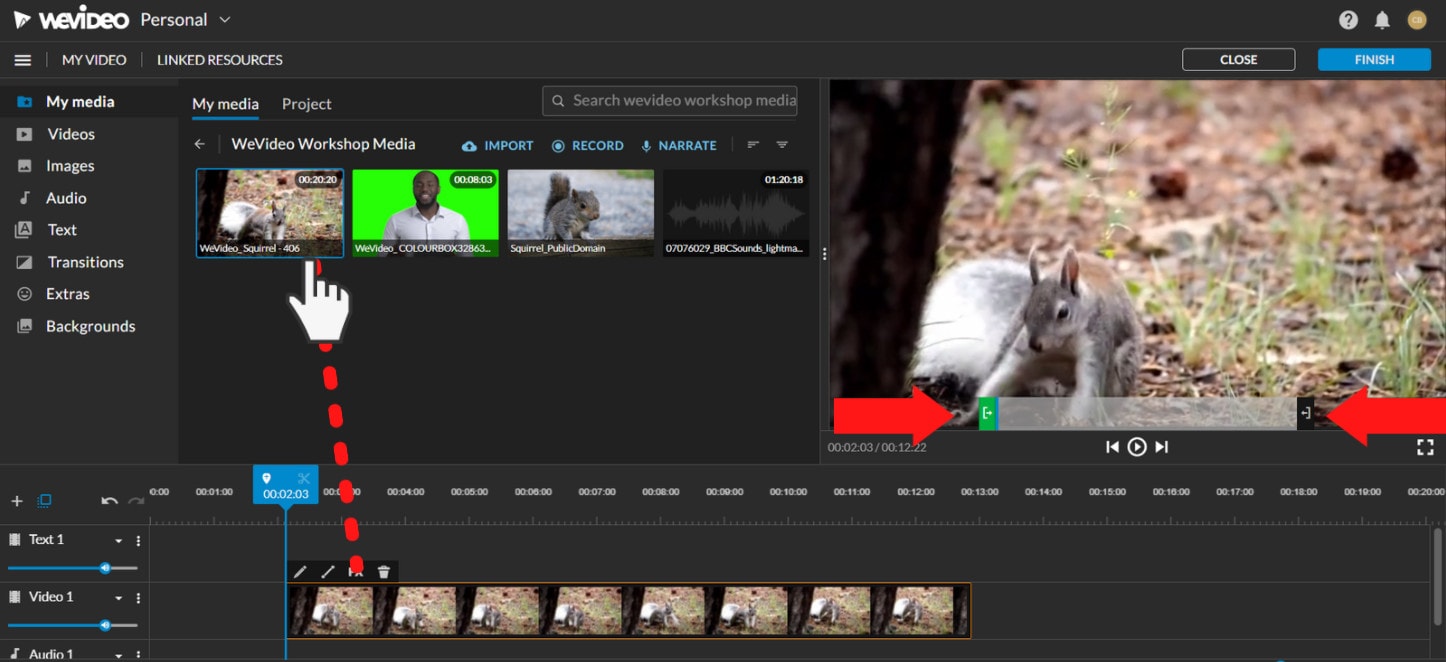
Step 4: Add effects, transitions, and music to the video.
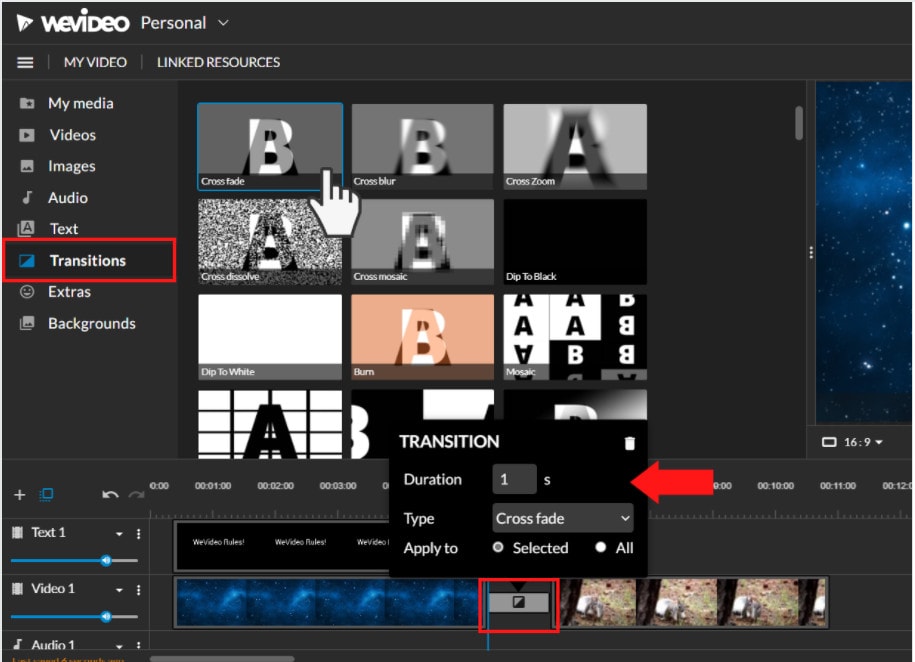
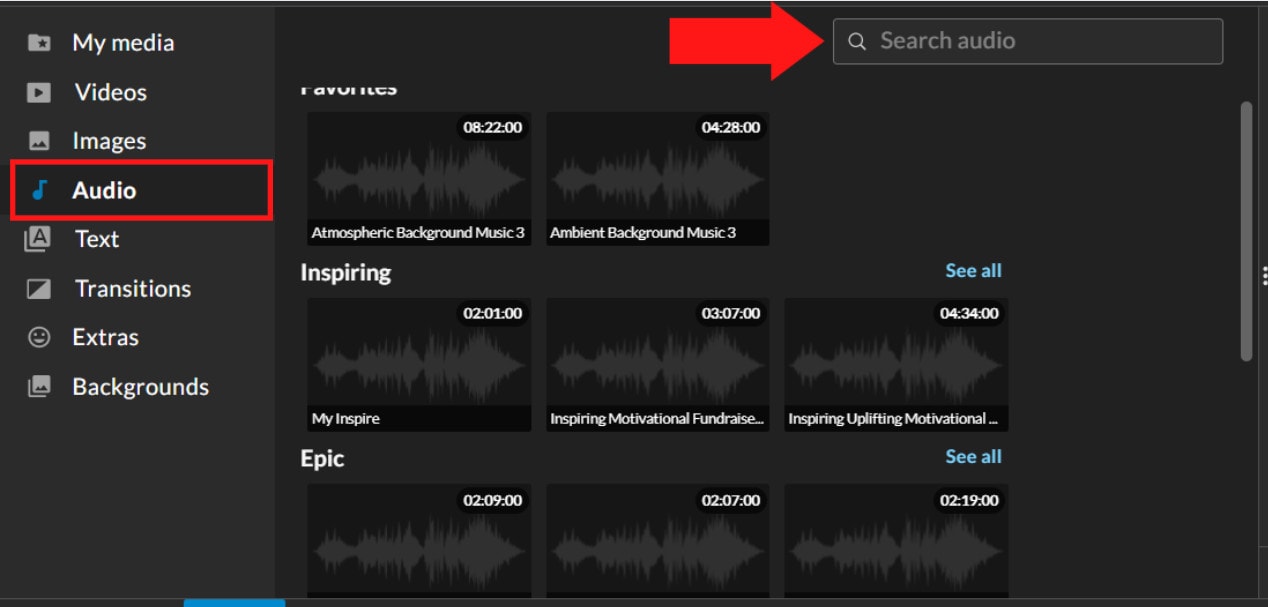
Step 5: Save and export the video by clicking on the Finish tab.
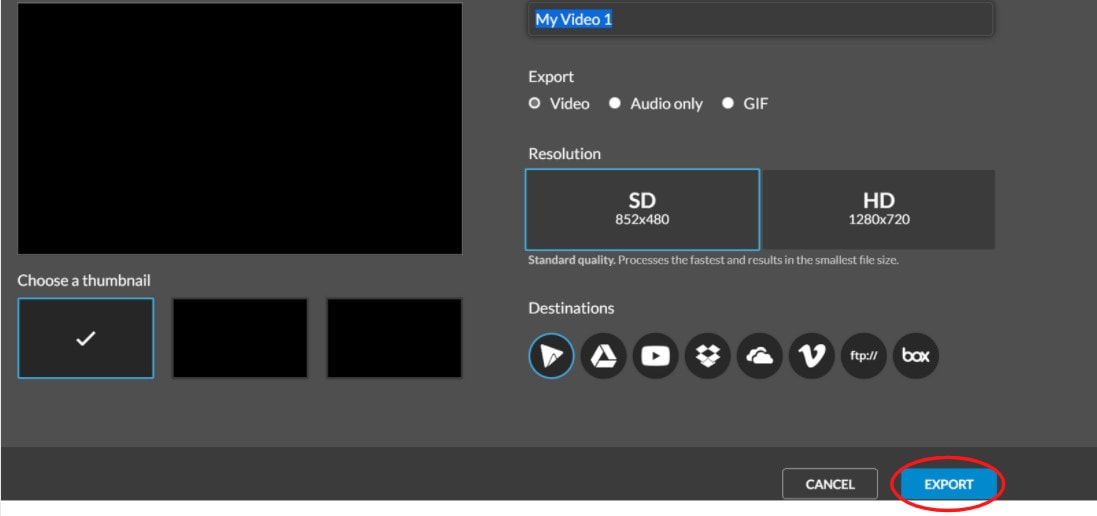
FAQs about editing FLV video
- How to open FLV files?
Any FLV player is required to view FLV files. Various players are available, including VLC, FLV Player, Sothink FLV Player for Mac, Tonec Free FLV Player, Any FLV Player, and others.
- Is Filmora compatible with Mac?
Filmora requires macOS Sierra (version 10.12) or later and the Big Sur (version 11) and Apple M1 chips. Touch Bar compatibility for MacBook Pro users and custom shortcuts to speed up editing.
- What is the best online FLV editor?
There are numerous free online editors to choose from. Fastreel, WeVideo, and FlexClip Video Maker are a few of the most popular.
- Is FLV better than MP4?
Because FLV and MP4 are the two most popular video file formats, it’s crucial to know which one is preferable. Adobe’s proprietary format is FLV. Both formats employ video and audio codecs and have equal performance levels. In their unprocessed state, MP4 files are more adaptable. You can, however, use an FLV file at the same time if you have the correct player.
- How do I choose a video editor?
When comparing video editing software, there are six crucial elements to consider.
- Budget and cost
- Ease of use/learning curve
- Multi-GPGPU acceleration and video format support
- Tools for advanced editing
- Music, special effects, and other goodies
- Customer service is second to none.
For macOS 10.14 or later
Therefore, you can use the following steps to edit FLV video on Windows and Mac:
Step 1: Import file:
Step 2: Edit the FLV file:
Acquire the perfect tool in your palm for anything you want to do, such as clipping, cropping, rotating, and more.
Furthermore, all editing capabilities in the toolbar allow drag-and-drop, making it even easier to touch up your films quickly. Consider the following scenario:
- Drag and drop a transition into the video/photo, or right-click it and select “Apply to All.”
- Please drag & drop a title template to the position where you want it to appear, then adjust it.
- To use the effects, select one from the 50+ available video effects, select it, and apply it to your photos/videos instantaneously.
Step 3: Save or Export the file:
When you’re done, export your modified MP4 files to Windows/Mac and quickly share them on YouTube, with the option of sending a message to Facebook and Twitter. When you click Create in the program window’s middle right corner, you’ll be taken to the Output window below.
Alternative Way to Edit FlV Video on Windows
1. VSDC
VSDC is a free video editor along with a lot of advanced features. Cut, combine, trim, crop, and other editing capabilities are available to help you polish your FLV films.
Although it may not look logical, learning the editing capabilities hidden within modular boxes is simple. One noteworthy aspect of VSDC is its ability to produce good visual effects using many trendy video effects, transitions, and filters.
Furthermore, strong chroma keys, color correction, object modification, and other editing tools can be utilized to edit FLV videos. It not only creates excellent FLV videos, but it also supports a wide range of media conversion, allowing you to convert FLV files to various formats and export them without a watermark.
Therefore, follow the below mentioned steps to edit FLV video using VSDC:
Step 1: Install the software on the Windows. Open the application and import the video.
Step 2: Use cutting and splitting tools to edit the video.
The first icon is a picture of a pair of scissors, which is a cutting tool. It’s very useful when you need to cut the beginning or end of a film. Place the cursor exactly where you want to cut, then select “Trim start” or “Trim finish” from the dropdown cutting menu (the small triangle next to the scissors icon).
Cropping is also simple. If you have too much additional space around the scene object recorded, just choose the file you want to trim and select the cropping icon from the “Cutting and Splitting” option. A new window will appear, allowing you to select the region of the scene that should stay.
Step 3: Apply effects and transitions.
To use one, first select the video file you wish to edit, then go to the Video effects tab and select the effect you want to use. On the timeline, a new tab will appear, containing all of the effects done to the selected object. You can alter the effect’s duration and position in time by dragging it with the mouse there. The properties pane on the right-hand side can be used to change other parameters.
Transitions follow the same rule. Place your cursor where you want the transition to begin, then choose a transition from the Video effects dropdown menu and manually adjust the duration.
Step 4: Save changes and export video.
Make sure your movie appears exactly how you want it to before exporting it. If the video appears choppy, use the red preview button and lower the preview quality. When the PC’s resources are insufficient to process the video in real time, lagging can occur. Keep in mind that it has no bearing on the outcome. When you’re finished, navigate to the Export project tab and select an export format.
2. Adobe Premiere Pro:
Professional video editors use Premiere Pro to make everything from YouTube videos to Hollywood films like Mank, a 2021 Oscar candidate. It’s also widely utilized in the workflows of designers, animators, and VFX artists, and we can see why after lengthy testing.
We found the software’s UI to be simple to use, and it increased our productivity by separating things into various workspaces, such as editing, effects, and audio. When we tested it on both Mac and PC, we discovered that each workspace helps handle a specific activity while minimizing distraction.
Edit the FLV video with Adobe Premiere Pro using the following steps:
Step 1: Import the video and create initial sequence.
Step 2: In the Timeline, trim and rearrange clips, add audio, and transitions.
Step 3: Add title and graphics.
In Premiere Pro, you may make onscreen titles, as well as stylize and animate your images.
Step 4: Export your video.
Alternative Way to Edit FlV Video on Mac
1. Blender:
Under the GNU General Public License, Blender is a free, open-source 3D content production program that runs on all major operating systems. Blender is one of the greatest video editors for both Windows and Mac, with advanced features such as modifier-based modeling tools, powerful character animation capabilities, a node-based material, etc.
Because it is developed for professionals, it is tough to use as a beginner. However, it is unrestricted in its use and distribution. In addition, color options are changeable and versatile in the UI.
In contrast, this free video editor is perfect for semi-pros or those who want to enhance their video editing skills. However, you’ll need a lot of time and effort to learn it.
Step 1: Open the application.
Step 2: Then, go into File->New->Video Editing to open the video editor.
Step 3: Import the video and start editing using the editing tools.
Step 4: Save and export the video.
2. Final Cut Pro:
When it comes to video editing software, Apple’s Final Cut Pro is one of the industry standards. As a result, it’s widely utilized in the television and film industries - at least among Mac users. However, one of the truly convincing reasons to choose it over Premiere Pro is because it is subscription-free: you only pay once.
The software’s Magnetic Timeline, grouping tools, a vast selection of effects, solid organizational capabilities, and simple ways to add and edit audio make it a favorite among professional video editors. 360° video, HDR, and powerful color correcting tools are among the other capabilities. It’s a strong software with a lot of features.
Follow the steps to edit FLV video using Final Cut Pro:
Step 1: Create Project.
To make a movie in Final Cut Pro, you must first establish a project, which keeps track of your editing selections and the media you utilize.
Step 2: Select and add clips to the timeline:
The second stage in making a movie with Final Cut Pro is to add and arrange clips in your project. In the timeline, you can move and reorder clips.
Step 3: Cut and trim video:
Final Cut Pro has a number of features for altering the start and stop points of clips in the timeline, as well as regulating the pacing of shots from one to the next.
Step 4: Edit the video by adding effects and transitions:
Final Cut Pro includes a number of advanced editing features that make it simple to create a professional film. Visual enhancements and colour correction are among the finishing touches.
Step 5: Save and export video:
2 Ways to Edit FlV Video on Android:
1. Inshot:
For Android users, Inshot is a fantastic image and video editor. This Android video editor allows you to add popular stickers and emoticons to your films, making them more fashionable and unique.
The program supports HD video output, allowing you more control over your footage. Moreover, the additional sound and video can be synchronized with the available video chronology.
You can quickly blend more than two movies into one with rich effects and sound with this Android editor app. In addition, you can generate a watermark using unique text provided in the app, and subtitles support allow you to produce one with a variety of fonts.
Following are the steps that you can follow to edit FLV video using Inshot:
Step 1: Open the app and import the video.
Tap “Video” to open your phone’s gallery folder and begin editing a video in the InShot app. Select a video to work with. Adjust the canvass after your video has been loaded into the InShot App. For your other social media accounts, there are aspect ratios and sizes that work well with the video. It also has the option of being in portrait or landscape mode.
Step 2: Trim and split videos.
Step 3: Merge videos (optional):
By combining clips, you can combine them into a single film or project. Simply choose the videos you want to import from the drop-down menu. By tapping the “+” button on the lower left of the screen, you can insert and merge more videos. Your project will then be updated using the selected video.
Step 4: Apply filters, add music, text and stickers.
Step 5: Once you are done with the editing process, save the file.
2. Videoshow:
VideoShow has a lot of video editing options. It is a simple and practical video editing program and movie scene maker for art directors and beginners. Using this video cutter, you may reverse, blur, duplicate, edit, merge and split collage clips or films.
You can also use VideoShow to adjust the audio or add subtitles to any video. It also allows you to use different filters on any video on your device. Over 50 intricate themes are included in the program, allowing you to create gorgeous music videos, slide shows, and vlogs in no time.
The annual subscription package is for $135.19, or you can also make a one-time purchase for $225.78.
However, to edit the video, you can use the following steps:
Step 1: Download and install the videoshow application and open it. Upload the video that you want to edit.
Step 2: Edit the video by applying filters or cutting and trimming the part of the video that you want to remove.
Step 3: Save changes and export the video to your preferred location.
2 Ways to Edit FlV Video on iPhone:
1. LumaFusion:
No other software program on the iPhone comes close to the feature set that LumaFusion offers for video editing. It is the only premium app on this list, and it is well worth every penny.
But, of course, YouTubers aren’t the only ones who use the program; mobile journalists and professional video producers who don’t want to lug along their bulky camera equipment and editing apparatus also use it.
LumaFusion deals with up to six video and audio tracks for photographs, movies, audio, titles, and graphics, and six audio tracks for narration, music, and sound effects. You also receive a magnetic timeline; importing clips is a breeze once they’ve been imported.
There are many transitions and effects to choose from, all of which can be layered. Finally, it includes much royalty-free music, sound effects, and other assets. So if you need a professional video editing tool for your iPhone, LumaFusion ($29.99) is the way to go.
Follow these steps to edit FLV video using LumaFusion:
Step 1: To create your first project, press + at the bottom of the screen. You can create a new project by tapping that area or by tapping the Plus button.
Step 2: Import video:
The Import section is located in the top left corner of the screen. This defaults to the Photos tab when you initially launch a new project. All of the photographs and videos can be seen here.
Step 3: Check layout and adjust volume levels
Step 4: Edit the video and add titles.
Step 5: Export the video.
2. Filmora Go:
Without a doubt, Filmora is one of the greatest free video editors for iPhone that does not contain any watermarks. In addition, it’s compatible with both iPhones and Android devices and has a simple user interface.
Filmora is the greatest iPhone video editor for beginners, with themed filters and effects that add flair to your videos without any work.
Filmora has many unique features, including themes for your videos and ‘Materials,’ which are visual effects created by the program. Unfortunately, materials are only available with Filmora Pro, so keep that in mind.
Aside from that, you’ll find all of the typical features here. You can also add titles to videos, utilize stickers and effects, and add music to the background of your movie. You may also add another clip in picture-in-picture mode, which is beneficial.
Below are the following steps to edit FLV video:
Step 1: Open the application and select ‘Create new video’. Now, import the video by choosing the video icon.
Step 2: Edit the video. Within the edit tool, you can trim and split the video. You can also improve the video quality by adding titles, transitions, and music, and voiceovers.
Step 3: After editing the video, select ‘SAVE’ and export the video or download it.
2 Ways to Edit FlV Video Online:
1. Fastreel:
If you’re seeking the finest free online video editor, Fastreel is a terrific tool to start with. This online video editing software provides a wide range of editing options. It can merge, edit, crop, and compress videos to make sharing easier.
It also includes many pre-made templates that you can change to create titles and transitions and other editing features like reverse, looping, and rotating. It’s also quite simple to use, and you can have polished videos in minutes.
There are also numerous pricing options to suit different customers, ranging from a completely free plan with watermarks to paid subscriptions with no limitations.
Use the following steps to edit FLV video:
Step 1: Open Fastreel web and import the video.
Step 2: Use templates to make it look attractive.
Step 3: Edit the video using the template.
Templates are unfinished videos with all of the effects already applied, such as backdrops, transitions, animated stickers, and titles. There are blank spots for your photos or videos, and you can arrange them in any sequence you like. You can also add music from the Fastreel library or upload your own track after entering your text.
Step 4: Once you are done with edits, save the video and export it.
2. WeVideo:
When you’re seeking the greatest video producer online, another wonderful choice to explore is WeVideo.
Google, Dropbox, Rover, and Roche are just a few of the huge names that trust our online editor. Its fast, versatile editing engine and vast stock content collection for adding stock movies, photos, and audio tracks to your productions are ideal for business users.
WeVideo also stands out since it provides unlimited cloud storage for all of your videos, which you can download and watch on any device. The only drawback is that all of this comes at a price, with WeVideo offering a variety of payment plans ranging from $4.99 to $36.99 a month.
Follow the steps to edit videos using WeVideo:
Step 1: Open WeVideo and import the video file.
Step 2: Click on create new video in the left-hand corner of the screen.
Step 3: Edit the video.
The video clip you imported will appear in the viewing window to the right once you click on it. By moving the arrows and either end, you can edit out the beginning or end of your footage.
- Drag the clip into your timeline from your media pool.
- Place the clip on your timeline by dragging and dropping it.
- Click the scissor symbol after moving the blue marker to the spot where you want to cut your clip.
- Once the material has been chopped, you can erase bits of it by selecting it with your mouse and then pressing delete on your keyboard or rearrange the clips in the timeline by dragging and dropping them to other positions.
Step 4: Add effects, transitions, and music to the video.
Step 5: Save and export the video by clicking on the Finish tab.
FAQs about editing FLV video
- How to open FLV files?
Any FLV player is required to view FLV files. Various players are available, including VLC, FLV Player, Sothink FLV Player for Mac, Tonec Free FLV Player, Any FLV Player, and others.
- Is Filmora compatible with Mac?
Filmora requires macOS Sierra (version 10.12) or later and the Big Sur (version 11) and Apple M1 chips. Touch Bar compatibility for MacBook Pro users and custom shortcuts to speed up editing.
- What is the best online FLV editor?
There are numerous free online editors to choose from. Fastreel, WeVideo, and FlexClip Video Maker are a few of the most popular.
- Is FLV better than MP4?
Because FLV and MP4 are the two most popular video file formats, it’s crucial to know which one is preferable. Adobe’s proprietary format is FLV. Both formats employ video and audio codecs and have equal performance levels. In their unprocessed state, MP4 files are more adaptable. You can, however, use an FLV file at the same time if you have the correct player.
- How do I choose a video editor?
When comparing video editing software, there are six crucial elements to consider.
- Budget and cost
- Ease of use/learning curve
- Multi-GPGPU acceleration and video format support
- Tools for advanced editing
- Music, special effects, and other goodies
- Customer service is second to none.
Also read:
- Updated How to Create Intro with Renderforest
- In 2024, Take Your Video Editing to the Next Level with Video Scopes
- Fixing The Slow Playback Issues in DaVinci Resolve for 2024
- In 2024, You Are at the Right Post if You Are Surfing for a GIF to MP4 Conversion Tool. This Article Will Provide You with the Top Best Converters that Can Help You Convert GIF to MP4 Videos Quickly and Easily
- In 2024, In This Article, We Introduce You Our Top 5 Picks of Video to Ppt Converter
- New In 2024, How to Create a Smooth Cut Transition Effect?
- Updated Progressive Solutions to Adding VHS Effects to Video with Ease
- Updated Blender Tips - How to Make Blender Render Transparent Background for 2024
- 2024 Approved Wondering About Vimeo Slideshow Maker? Know Everything About the Platform Which Is Gaining Much Popularity. Also, Browse some Tips to Create Appealing Video Slideshows
- New Are You Tired of Long Video Edits? Do You Speed up the Video in Canva without a Hassle? Well, Stick with Us as We Guide You Through the Process Step by Step
- Updated New Video Inspiration for Birthday Slideshow
- New 2024 Approved Basic Knowledge About WMV Format and Best WMV Video Editor
- How to Make Subtitle Videos for 2024
- Updated Boost the Pace of Your Instagram Reels Videos with These Simple Tricks for 2024
- Updated In 2024, Efficient Ways to Manage Your Timeline
- In 2024, 4 Methods to Resize a WebM File
- Updated 2024 Approved A Complete Overview of VSCO Video Editor
- In 2024, 7 Ways to Lock Apps on iPhone 8 and iPad Securely | Dr.fone
- In 2024, Fake the Location to Get Around the MLB Blackouts on Realme C67 5G | Dr.fone
- In 2024, How To Unlock a Samsung Galaxy A23 5G Easily?
- How to Unlock Vivo X100 Bootloader Easily
- Failed to play HEVC files on 13T
- In 2024, Detailed Guide on Removing Apple iPhone SE Activation Lock without Previous Owner?
- A Detailed VPNa Fake GPS Location Free Review On Tecno Spark 10 5G | Dr.fone
- How to Remove Forgotten PIN Of Your Infinix Note 30 Pro
- Top 5 Tecno Spark Go (2024) Bypass FRP Tools for PC That Actually Work
- In 2024, How can I get more stardust in pokemon go On Vivo Y200? | Dr.fone
- Remove Google FRP Lock on Y200
- How to Factory Reset Xiaomi Civi 3 without Losing Data | Dr.fone
- Title: New In 2024, Detailed Guide to Resize Your Video in VLC
- Author: Chloe
- Created at : 2024-04-24 07:08:42
- Updated at : 2024-04-25 07:08:42
- Link: https://ai-editing-video.techidaily.com/new-in-2024-detailed-guide-to-resize-your-video-in-vlc/
- License: This work is licensed under CC BY-NC-SA 4.0.
