
:max_bytes(150000):strip_icc():format(webp)/ArtificialIntelligence-Chatbot-6921166a1d9e447eb0251f52694d919a.jpg)
New In 2024, Detailed Tutorial to Resize Your Video in VLC
Detailed Tutorial to Resize Your Video in VLC
Videos are one of the most popular types of content on the internet. There are millions of videos uploaded to YouTube, Facebook, and other video-sharing sites each day. Sharing your videos with others is possible when you know how to resize them in VLC. VLC is a free media player that allows you to convert or compress your videos in order to make them smaller for uploading or downloading.
Videos are a great way to showcase your business, company, or product on social media sites like Facebook and Twitter. But what happens when you use the wrong size for your video? The whole thing looks distorted and low quality. It’s not very appealing.
Luckily, resizing videos in VLC is simple. All you need is the right software and the right steps.
This blog post will walk you through how to resize videos using VLC. We’ll cover what the default settings are for video resolutions, how to change them, and why it’s important to know what size of video you’re uploading before uploading it.
So without further ado, let’s get started!
Step by step to resize your video in VLC
Anyone who has a lot of videos on their computer knows how frustrating it can be to find the video you want among the hundreds of ones you have. Well, VLC makes it possible to resize your videos so they’ll fit onto your desktop. Here’s how:
Resizing by converting to a smaller file size
Because some video formats, such as MKV and AVI, take up too much space, it’s a good idea to convert videos to smaller formats, such as FLV, WMV, and so on. To lower the video size, you’ll be pleased to learn that VLC allows you to convert video/audio files without the need to install any other software. The video conversion guide for VLC can be found below.
Step 1: Launch the VLC Media Player.

Step 2: Go to the menu and pick Media > Convert/Save from the drop-down menu, then Add > Convert/Save from the drop-down menu.

Step 3: Choose a profile for the video you wish to convert.

Step 4: Select the Start button to start VLC video compression.
Resizing by cutting unnecessary video segment
Step 1: Launch the VLC Media Player

Step 2: Go to Menu > View Menu > Advanced Controls in VLC Media Player and select it from the menu.

Step 3: Play the video you want to crop and then click the Record button on the scene you want to crop and then the same button to pause the video where you want to crop it.

Step 4: In Windows 7, 8, and XP, the film will automatically save in Library > Videos, and in My Documents > My Videos in Windows 7.
VLC Media Player is unquestionably one of the greatest video players available for free. Nonetheless, it isn’t the finest video reduction because it just reduces the size of videos by using certain simple parameters rather than complex ones. As a result, we offer Fimora, an all-in-one video toolbox that can convert, compress, download, record, edit, burn, and more, as a better video compressor. You can change the video resolution, bit rate, encoder, format, and other settings to compress video and audio files in a variety of formats. Follow the simple steps below to get this VLC compressor replacement on your Windows/Mac for free.
An easier way to resize videos using Filmora
Filmora Video Editor is a powerful, yet easy to use video editor for PC and Mac. With the most intuitive and streamlined editing process out there, Filmora lets you cut and resize videos with just a few clicks of your mouse.
Through this part, we’ll show you how to resize videos using Filmora’s three-step process: import video files, select video clips, and edit them. We’ll also teach you some shortcuts for making the editing process as quick as possible!
A common challenge for beginner video editors is knowing where to start. With Filmora, you begin by importing your video files, selecting the clip you want to cut, and then editing it. It’s a three-step process that takes less than five minutes!
Once you have finished editing your video clip, Filmora will give you the option to share it on social media or export it in MP4 or AVI format.
Keep reading to learn more about how to cut and resize videos using Filmora’s three-step process!
For Win 7 or later (64-bit)
For macOS 10.14 or later
Step by Step on How to Resize Videos using Filmora
Resizing videos in Filmora is a quick and easy process. To resize videos, first make sure you have imported your video file into the editor.
Resizing by changing the dimensions
Step 1: To import a video file, either drag and drop the file on the screen or click on “Import Files” in the toolbar.

Step 2: Once you’ve imported your video, select the video clips that you want to resize by clicking on them; then, resizing them is as simple as dragging their borders!

Step 3: You can also use the size fields at the bottom of the frame to change their dimensions.
Step 4: Keep in mind that changing one dimension of a video clip will affect both its width and height proportionally. For example, if you enlarge a 16:9 widescreen clip to 720p (from 480p), it will be double its original proportions (720x480).
Resizing by shrinking video file size.
Step 1: To import a video file, either drag and drop it onto the screen or use the toolbar’s “Import Files” option.

Step 2: Open the video shrinker’s output window by clicking the “Export” button.

Step 3: Select the Format tab and keep the video in its original format as a result. Then, in the “Settings” panel, click the triangle button below to downsize the video by choosing a lower video resolution, frame rate, or bit rate. When it comes to video formats, you can choose among FLV, MP4, and other similar formats, which normally result in smaller files.

Step 4: The shrunk file should be exported.
Conclusion
So you’ve got this beautiful video you want to post on your social media page or website, but the dimensions are all wrong. No worries! There’s an easy solution to your problem. Filmora is a video editing software that is easy to use and versatile and powerful at the same time. Whether you’re just starting out or are a pro, Filmora is the perfect tool for the job. You don’t need to be an expert to edit videos in Filmora; it’s easy enough for beginners. With Filmora, you can resize your videos in seconds by following these simple steps above.
Step 2: Go to the menu and pick Media > Convert/Save from the drop-down menu, then Add > Convert/Save from the drop-down menu.
Step 3: Choose a profile for the video you wish to convert.
Step 4: Select the Start button to start VLC video compression.
Resizing by cutting unnecessary video segment
Step 1: Launch the VLC Media Player
Step 2: Go to Menu > View Menu > Advanced Controls in VLC Media Player and select it from the menu.
Step 3: Play the video you want to crop and then click the Record button on the scene you want to crop and then the same button to pause the video where you want to crop it.
Step 4: In Windows 7, 8, and XP, the film will automatically save in Library > Videos, and in My Documents > My Videos in Windows 7.
VLC Media Player is unquestionably one of the greatest video players available for free. Nonetheless, it isn’t the finest video reduction because it just reduces the size of videos by using certain simple parameters rather than complex ones. As a result, we offer Fimora, an all-in-one video toolbox that can convert, compress, download, record, edit, burn, and more, as a better video compressor. You can change the video resolution, bit rate, encoder, format, and other settings to compress video and audio files in a variety of formats. Follow the simple steps below to get this VLC compressor replacement on your Windows/Mac for free.
An easier way to resize videos using Filmora
Filmora Video Editor is a powerful, yet easy to use video editor for PC and Mac. With the most intuitive and streamlined editing process out there, Filmora lets you cut and resize videos with just a few clicks of your mouse.
Through this part, we’ll show you how to resize videos using Filmora’s three-step process: import video files, select video clips, and edit them. We’ll also teach you some shortcuts for making the editing process as quick as possible!
A common challenge for beginner video editors is knowing where to start. With Filmora, you begin by importing your video files, selecting the clip you want to cut, and then editing it. It’s a three-step process that takes less than five minutes!
Once you have finished editing your video clip, Filmora will give you the option to share it on social media or export it in MP4 or AVI format.
Keep reading to learn more about how to cut and resize videos using Filmora’s three-step process!
For Win 7 or later (64-bit)
For macOS 10.14 or later
Step by Step on How to Resize Videos using Filmora
Resizing videos in Filmora is a quick and easy process. To resize videos, first make sure you have imported your video file into the editor.
Resizing by changing the dimensions
Step 1: To import a video file, either drag and drop the file on the screen or click on “Import Files” in the toolbar.
Step 2: Once you’ve imported your video, select the video clips that you want to resize by clicking on them; then, resizing them is as simple as dragging their borders!
Step 3: You can also use the size fields at the bottom of the frame to change their dimensions.
Step 4: Keep in mind that changing one dimension of a video clip will affect both its width and height proportionally. For example, if you enlarge a 16:9 widescreen clip to 720p (from 480p), it will be double its original proportions (720x480).
Resizing by shrinking video file size.
Step 1: To import a video file, either drag and drop it onto the screen or use the toolbar’s “Import Files” option.
Step 2: Open the video shrinker’s output window by clicking the “Export” button.
Step 3: Select the Format tab and keep the video in its original format as a result. Then, in the “Settings” panel, click the triangle button below to downsize the video by choosing a lower video resolution, frame rate, or bit rate. When it comes to video formats, you can choose among FLV, MP4, and other similar formats, which normally result in smaller files.
Step 4: The shrunk file should be exported.
Conclusion
So you’ve got this beautiful video you want to post on your social media page or website, but the dimensions are all wrong. No worries! There’s an easy solution to your problem. Filmora is a video editing software that is easy to use and versatile and powerful at the same time. Whether you’re just starting out or are a pro, Filmora is the perfect tool for the job. You don’t need to be an expert to edit videos in Filmora; it’s easy enough for beginners. With Filmora, you can resize your videos in seconds by following these simple steps above.
Best Free LUTs To Use in Shotcut
In this content-driven age, people love to express their emotions through high-quality videos and photos. You can also share your experiences of a trip with other people in the form of videos. Yet to make that video higher quality and engaging, you need vibrant colors. There is no better way to make videos more captivating than to use Shotcut LUTs.
Here on these pages, you will find detailed information about LUTs for Shotcut. Other than we will also guide you about applying LUTs on the videos without any complications.
Part 1: What Do You Know About LUTs in General? What are Their Use Cases
LUTs are the shorter term for Lookup Tables and are used for image processing and video editing. LUTs are mathematical algorithms or tables that can set the color values of the media content to make it more engaging. There are diversified ways through which you can control and customize several metrics of your videos, such as color, brightness, and more.
In addition, LUTs offer a wide array of formats, including 1D, 3D and other LUTs. If you are working on a professional-grade video, you can use the 3D LUTs. However, the 1D LUTs have enough capabilities to make your videos more engaging. You can also use DaVinci Resolve, Shotcut, Adobe Photoshop, or other software to apply LUTs to the videos.
Use Cases of the LUTs
Here are several cases in which you can use the Shotcut LUTs:
- Color Grading and Film Emulation: With LUTs, you can emulate the look of any video in a limited time. Above all, LUTs can also help in color grading, enhancing the video’s overall look. Other than this, you can also control the color metrics, which can lead to a customized look of shots.
- Cinematic Looks and Correction: By using the latest LUTs, you can employ a natural cinematic look in the videos. Above all, they also have the capability to add an aesthetic look to the videos, which can create consistency. Moreover, you can also fix the color problems with LUTs.
- Color Processing and VFX: Along with adding visual effects in videos, you can also streamline your workflow efficiency with it. Moreover, you can also discriminate the color processing and fix all the color issues.
- Calibration and Stimulation: To ensure accurate color representation, you need to adjust the colors and gamma response. Luckily, LUTs can help you to do this without issue. You can also utilize it to enhance important scenes and conditions.
Empower your videos with a new mood using different LUTs. Filmora now offers 100+ top-quality 3D LUTs cover a broad range of scenarios. Transform your videos with Filmora’s powerful 3D LUTs.
Apply LUT on Videos Apply LUT on Videos Learn More


Part 2: Finding the Best LUTs for Using in Shotcut
If you are new in the field of video editing, you must be looking for LUTs that can enhance your Shotcut videos. You can put your concerns to rest as we are going to introduce the LUTs Shotcut in this section. By using the LUTs discussed here, you can upgrade the coloring metrics of your videos in no time:
1. Cinematic LUTs
If you need to make the videos more captivating and attractive, cinematic LUT is the option of recommendation. With these LUTs, you can add stunning effects to the videos. Moreover, it is equipped with modernized colors, so you don’t have to worry about making extra efforts to make your video rank. The dimensions of this LUT are 1920x1080 (HD), so you can make videos of higher quality.

2. Indie Film LUTs
With Indie Film LUTs, you can add the filmy touch to simple videos. It can also be used to convert low-quality videos into the highest-quality films. This adds to you make your videos blockbuster and has optimized file size capability. Furthermore, it can work on video captured with any camera, so there is no restriction on device compatibility.

3. Moody LUTs Pack
Moody LUTs can add the most savage feelings in your simplest videos and photos. It not only changes the colors in the video but also presents the video with a moody feel. Moreover, you can use this LUT for both personal and professional use. It also enhances the details in the videos, which makes the characters more notable.

4. Urban LUTs
If you are an age-town girl in the city and want to present your videos in city style, Urban LUTs can aid you. It can add a realistic look to the videos and work with RAW and LOG. It can also give an aesthetic look to the videos and add consistency. You can also use it for inspiration and references.

5. Portrait LUTs
If you love to create portrait-oriented videos, these LUTs can help you a lot. You can implement your creativity and imagination into the videos and present it to the audience. Above all, it can work with several video editing software, which also makes it a better choice. It also has the capability to add a filmy, lush, grainy, and warm look to the videos.

6. Luxury Grey LUTs
As the name indicates, you can give the most luxurious outlook to the video with it. This LUT can also work on any video without facing any restrictions. Moreover, it is perfect for promoting a product to gain more marketing value. You can add it to marketing ads for several products, such as watches, glasses, and more.

7. Nature LUTs
When working with landscapes or nature videos, sunlight or other lightening issues can impact the video quality. To cater to this, you can take assistance from Nature LUTs. It can add nutty, alive, bamboo, hazel, or many other effects to the videos. The quality of this LUT is also a term to discuss, which plays an essential role in making it unique.

8. Bright Food LUTs for Photo & Video
Food bloggers can never be satisfied with the quality of their food videos. Thus, you can rest easy because this LUT can handle the quality issues of your videos. You can use it to make the food look more delightful and tasty in the videos. It can also be used to add the Bon Appetite effects, which can escalate the engagement ratio of the videos.

Part 3: How to Apply LUTs in Shotcut: A Guide
Is your video extra bright, and now you wish to optimize its color quality? Worry no more because you can take assistance from free LUTs Shotcut to get through this. However, many of you don’t know the procedure to apply LUTs to the videos with Shotcut.
The instructions given below are specifically designed to help you with applying LUTs on video. Follow the steps here to get the work done:
Step 1: First and foremost, find the LUTs that suit the theme of the videos and download it. Following this, go to “Downloads” and right-click “LUTs Files.” Hit the “Extract Here” option to extract the LUTs.

Step 2: Open Shotcut on your computer and import the video. Once the video is opened with Shotcut, click on the “Add a Filter” icon and select “LUT (3D)” while you are in the “Videos” section. Again, select “LUT (3D)” and tap on the “Open” button.

Step 3: To proceed, select the “LUT” from the prompt window and click “Open.” Once the LUT is added, mark the “Checkbox” to enable it. You can also notice the difference in the video before and after adding the LUTs. If you are working on multiple small clips and wish to apply the same LUT on them, select the “Copy” icon.
After this, tap on the clip and select the “Paste” icon. Again, mark the “Checkbox” to apply LUT on the entire video. In case you want to apply the different LUT, choose the clip in “Timeline” and again follow the above procedure to add LUTs.

Conclusion
To sum up everything, you can use the Shotcut LUTs to escalate the quality of your video in no time. Moreover, it can also fix all the color grading issues from the videos and photos. You can also use them for professional purposes, as the LUTs never impact the overlays and content of the video.
There are uncountable LUTs on the web, and you can find some of the commonly used ones above. Moreover, the procedure to apply LUTs to the videos using Shotcut is also discussed above for your ease. You can follow the steps above to maximize your video’s attractiveness in no time.
You can try another video editor - Filmora to add LUTs on videos.
Add LUTs on Video For Win 7 or later(64-bit)
Add LUTs on Video For macOS 10.14 or later
Apply LUT on Videos Apply LUT on Videos Learn More
Part 2: Finding the Best LUTs for Using in Shotcut
If you are new in the field of video editing, you must be looking for LUTs that can enhance your Shotcut videos. You can put your concerns to rest as we are going to introduce the LUTs Shotcut in this section. By using the LUTs discussed here, you can upgrade the coloring metrics of your videos in no time:
1. Cinematic LUTs
If you need to make the videos more captivating and attractive, cinematic LUT is the option of recommendation. With these LUTs, you can add stunning effects to the videos. Moreover, it is equipped with modernized colors, so you don’t have to worry about making extra efforts to make your video rank. The dimensions of this LUT are 1920x1080 (HD), so you can make videos of higher quality.
2. Indie Film LUTs
With Indie Film LUTs, you can add the filmy touch to simple videos. It can also be used to convert low-quality videos into the highest-quality films. This adds to you make your videos blockbuster and has optimized file size capability. Furthermore, it can work on video captured with any camera, so there is no restriction on device compatibility.
3. Moody LUTs Pack
Moody LUTs can add the most savage feelings in your simplest videos and photos. It not only changes the colors in the video but also presents the video with a moody feel. Moreover, you can use this LUT for both personal and professional use. It also enhances the details in the videos, which makes the characters more notable.
4. Urban LUTs
If you are an age-town girl in the city and want to present your videos in city style, Urban LUTs can aid you. It can add a realistic look to the videos and work with RAW and LOG. It can also give an aesthetic look to the videos and add consistency. You can also use it for inspiration and references.
5. Portrait LUTs
If you love to create portrait-oriented videos, these LUTs can help you a lot. You can implement your creativity and imagination into the videos and present it to the audience. Above all, it can work with several video editing software, which also makes it a better choice. It also has the capability to add a filmy, lush, grainy, and warm look to the videos.
6. Luxury Grey LUTs
As the name indicates, you can give the most luxurious outlook to the video with it. This LUT can also work on any video without facing any restrictions. Moreover, it is perfect for promoting a product to gain more marketing value. You can add it to marketing ads for several products, such as watches, glasses, and more.
7. Nature LUTs
When working with landscapes or nature videos, sunlight or other lightening issues can impact the video quality. To cater to this, you can take assistance from Nature LUTs. It can add nutty, alive, bamboo, hazel, or many other effects to the videos. The quality of this LUT is also a term to discuss, which plays an essential role in making it unique.
8. Bright Food LUTs for Photo & Video
Food bloggers can never be satisfied with the quality of their food videos. Thus, you can rest easy because this LUT can handle the quality issues of your videos. You can use it to make the food look more delightful and tasty in the videos. It can also be used to add the Bon Appetite effects, which can escalate the engagement ratio of the videos.
Part 3: How to Apply LUTs in Shotcut: A Guide
Is your video extra bright, and now you wish to optimize its color quality? Worry no more because you can take assistance from free LUTs Shotcut to get through this. However, many of you don’t know the procedure to apply LUTs to the videos with Shotcut.
The instructions given below are specifically designed to help you with applying LUTs on video. Follow the steps here to get the work done:
Step 1: First and foremost, find the LUTs that suit the theme of the videos and download it. Following this, go to “Downloads” and right-click “LUTs Files.” Hit the “Extract Here” option to extract the LUTs.
Step 2: Open Shotcut on your computer and import the video. Once the video is opened with Shotcut, click on the “Add a Filter” icon and select “LUT (3D)” while you are in the “Videos” section. Again, select “LUT (3D)” and tap on the “Open” button.
Step 3: To proceed, select the “LUT” from the prompt window and click “Open.” Once the LUT is added, mark the “Checkbox” to enable it. You can also notice the difference in the video before and after adding the LUTs. If you are working on multiple small clips and wish to apply the same LUT on them, select the “Copy” icon.
After this, tap on the clip and select the “Paste” icon. Again, mark the “Checkbox” to apply LUT on the entire video. In case you want to apply the different LUT, choose the clip in “Timeline” and again follow the above procedure to add LUTs.
Conclusion
To sum up everything, you can use the Shotcut LUTs to escalate the quality of your video in no time. Moreover, it can also fix all the color grading issues from the videos and photos. You can also use them for professional purposes, as the LUTs never impact the overlays and content of the video.
There are uncountable LUTs on the web, and you can find some of the commonly used ones above. Moreover, the procedure to apply LUTs to the videos using Shotcut is also discussed above for your ease. You can follow the steps above to maximize your video’s attractiveness in no time.
You can try another video editor - Filmora to add LUTs on videos.
Add LUTs on Video For Win 7 or later(64-bit)
Add LUTs on Video For macOS 10.14 or later
Deleting White Background in Photoshop Is Hard? No
Deleting White Background in Photoshop Is Hard? No
An easy yet powerful editor
Numerous effects to choose from
Detailed tutorials provided by the official channel
Know how Photoshop make white background transparent. Learn to create transparent background in Photoshop in simple steps. How to delete white background in image?
In this article
01 [Why Shooting with a White Background Makes Sense](#Part 1)
02 [When We Need to Delete White Background and when Not?](#Part 2)
03 [How to Delete White Background in Photoshop (5 Fast Ways)](#Part 3)
04 [Which Photoshop Selection Tool is Best for White Backdrop Removal](#Part 4)
Part 1 Why Shooting with a White Background Makes Sense

Products have gone online with E-commerce and people explore the products over internet more than they pick it from the stores. So, every business needs to showcase their products in a attractive way to get more customers. This needs an attractive photography by experts. Photography for e-commerce products requires expert product photography or commercial photography. They are very important for a business to get success in long run. To do branding the product image should be accurate and attractive.
So, if your company is going online, your products photography should be attractive enough to make buyers purchase your products. Background is essential part of any photography or video making. Whether it is product catalogue, shoot, advertising or commercial videos, white backdrop and white background are always good. With white background one can pay attention to the product. Every details of the product are highlighted when a white background is used.
When you need bright and highlighted images for any commercial videos, using a right technique for background color is must. White background creates a clean and bright commercial photo. If the same is not done correctly, the white background may turn to be off white or grey. A white background is good for isolating an object in the picture.
So, let’s know why shooting with white background make sense. Here are some reasons for it:

Removal of background becomes Easy and quick:
The most important benefit of applying white background is that it can be easily removed or replaced. In place of the blank white background, one can easily apply other background color or make it transparent. The white background has a speciality that it reflects the color of the product better which makes the product image visually good. This can be done with the help of any tool or application. Thus, using a white background gives an opportunity to apply any other background on it.
Promoting product in every occasion: An image with colorful background may not be useful to present in every event or occasion. For example a simple image with colorful background will not look good in a promotional event, while a colorful background will look happening in any festival event celebration. This, a blank background has the option to change as per the need of the occasion.
An image with white background can be changed as per the occasion. This helps a business to use a single image throughout the year without any additional cost for making a different picture. You can just change the white background of any image through various application or software.
Time saving: Removing white background is easy and streamlined as compared to any other color. The reason is that it does not require much editing and work on the edges. So, the steps in removing the white background are less and thus it saves time of the artist and the editors.
Saves location and bulk shooting expenses: When shooting with a white background is done; the same picture with some changes can be reused for number of times in several occasions. Thus, it saves the cost of shooting different in pictures in different location.
Good to celebrate every special day: A picture with white background is perfect and ready to edit for any special day. Whether it I a father’s day, mother’s day or any special day, a single picture can be edited as per the requirement. It will be a great gifting idea also after changing white background of the picture as per the special day.
Part 2 When We Need to Delete White Background and when Not?

A single picture of a person or product cannot be used for a single instance or purpose. Especially when it is a promotional campaign or commercial advertisements, a product is required to be showcased in several marketing campaign for different categories of consumers. Thus, a white background image is good for several purposes while in some circumstances, it requires changes. So, let’s see when to delete white background and when not:
When a picture requires special editing: When a picture requires some special effects like reflection, highlights and shadow effects, the picture with white background is required to be changed. When improvement in picture is requires, the white, transparent and color background can be changed accordingly.
Enhancing the visual impact of the picture: A white background picture grab the attention of the customers. So, it is good for advertising and promotion. While this needs to be removed when one desire to add some visual impact on the pictures or deliver some message to the viewers. So, it requires adding colorful and visually good background in a picture.
Adding more items to a picture: A white background need to be removed when more items are required to be included in it. Special edits and enhancing the pictures requires removing or adding a white background as per the purpose of the picture.
Part 3 How to Delete White Background in Photoshop (5 Fast Ways)

Editing a picture with white background can be done in easy steps through various applications. Deleting white background in Photoshop can be done through various tools. Some of the top 5 fast ways to clear background Photoshop are**:**
With the object selection tool:
● Start Photoshop and open the picture. Select the “object selection” from the tool bar. Hover cursor over subject till it turns blue. The subject is selected.
● Press the shift key to remove the background while selecting the objects which you want in the picture.
● To invert the selection go to Select>Inverse.
● Unlock the image based on what you want in the background. It will no longer be a background. It can be also used to create transparent background Photoshop.
● Click on Erase tool and start erasing the background.
Removing background with quick action
This is the quick method for removing a background when a user is going for own purpose. It is in-built quick action in Photoshop for removing the background. Although it is good for performing work, but the same cannot meet the perfection level that any other method does. It can be done by following the mentioned steps:
● Open the image in Photoshop, right click on background layer and click Duplicate layer. Then click on OK.
● Always try to open the properties panel by going to Window>Properties.
● Click on new layer at Layer panel. Go to Quick action and click on Remove Background.
● The background gets removed with quick action.
● At this point refinements and adjustments can be made.
Using pen tool to remove the background
● Open image in Photoshop, right click on background layer and go to Duplicate Layer. Name the layer and click OK.
● Select the Pen tool from the toolbox. Zoom the area. Start at the edge of subject. Start working on the object; add anchors which will outline the subject.
● Click-hold-drag to produce a curved line.
● Use the Direct Selection tool in the toolbox if you want to adjust an anchor point or directional lines for fine tuning
● Complete the path from where you started and save it by going to Windows>paths. Go to three bar menu, click New Path to name it and then save.
● Go to path panel and right click New Path. Choose Make selection and click OK. This will give the outline of the path.
● Go to Select> Inverse if you don’t want to delete what is inside the selection. An outline can be seen around the image.
● Press delete to delete the background. It can be also done to add Adobe Photoshop transparent background.
With Magnetic Lasso Tool
● Right click Background layer and click duplicate layer on the image opened in Photoshop. Name the layer and then click OK. From the toolbox, select Magic Lasso tool. Start drawing at the edges of subject.
● Move around the subject and complete till the start point. Marching ants can be seen around the selection.
● Go to Selection>Save selection to save and give it a name.
● Select>Inverse to delete the background. Photoshop checkered background is visible now.
With quick selection tool
● Click on Duplicate Layer by right clicking on background layer of the picture opened on the Photoshop. Name the layer and click OK.
● Go to the tool box and select quick selection tool.
● Paint the subject by using tool.
● Clean up the selection path with click by holding the Option key (macOS) or Alt key (Windows).
● Go to Selection>Save selection to save and give it a name.
● Select>Inverse to delete the background. The white background can be seen now.
Part 4 Which Photoshop Selection Tool is Best for White Backdrop Removal

There are various tools available at Photoshop to turn a background white. Each one of them has great utility based on the applications. Background Eraser tool is one of the good tools if there is need of more control over removing the background in Photoshop. It is highly effective and saves time of the user. It gives the desired outcome with perfection to an image. The visualization of image becomes better when the background is turned into white with the help of Background Eraser tool.
The other application that is very helpful in making background white to any image is Filmora.
Filmora is an excellent image and video editing software which helps the users in creating some amazing images and videos. It has wide range of image and video editing tools that can make any user a professional in image and video editing. It has features to add or remove background of an image to make it more visually good. Changing background and adding special effects to images and videos can be easily done through filmora.
Wondershare Filmora Video Editor allows transformation of pictures and videos in a better way by adding filters and graphics. Availability of support, drawing tools, editing tools, special effects and sound make it a complete application for both beginners and professionals. It can be used with various other applications also. Those who wish to know how to make a layer transparent in Photoshop can learn it from Filmora.
For Win 7 or later (64-bit)
For macOS 10.12 or later
● Ending Thoughts →
● Making white background or transparent background adobe photoshop has many benefits like it highlight the picture and make it good for various applications and occasions. It saves money and cost for the image editors and video makers.
● One should also know when to use the white background for images, catalogue and video shoot. Adding and deleting white background can only be done when required as per the demand of the occasion and the category of the user like marketing, media, customers etc.
● Various tools on Photoshop make it easy for the users to add or remove white background of images. Filmora is one of the applications that is very popular for its image editing features. It can be used to give special effects to any image or video.
Know how Photoshop make white background transparent. Learn to create transparent background in Photoshop in simple steps. How to delete white background in image?
In this article
01 [Why Shooting with a White Background Makes Sense](#Part 1)
02 [When We Need to Delete White Background and when Not?](#Part 2)
03 [How to Delete White Background in Photoshop (5 Fast Ways)](#Part 3)
04 [Which Photoshop Selection Tool is Best for White Backdrop Removal](#Part 4)
Part 1 Why Shooting with a White Background Makes Sense
Products have gone online with E-commerce and people explore the products over internet more than they pick it from the stores. So, every business needs to showcase their products in a attractive way to get more customers. This needs an attractive photography by experts. Photography for e-commerce products requires expert product photography or commercial photography. They are very important for a business to get success in long run. To do branding the product image should be accurate and attractive.
So, if your company is going online, your products photography should be attractive enough to make buyers purchase your products. Background is essential part of any photography or video making. Whether it is product catalogue, shoot, advertising or commercial videos, white backdrop and white background are always good. With white background one can pay attention to the product. Every details of the product are highlighted when a white background is used.
When you need bright and highlighted images for any commercial videos, using a right technique for background color is must. White background creates a clean and bright commercial photo. If the same is not done correctly, the white background may turn to be off white or grey. A white background is good for isolating an object in the picture.
So, let’s know why shooting with white background make sense. Here are some reasons for it:
Removal of background becomes Easy and quick:
The most important benefit of applying white background is that it can be easily removed or replaced. In place of the blank white background, one can easily apply other background color or make it transparent. The white background has a speciality that it reflects the color of the product better which makes the product image visually good. This can be done with the help of any tool or application. Thus, using a white background gives an opportunity to apply any other background on it.
Promoting product in every occasion: An image with colorful background may not be useful to present in every event or occasion. For example a simple image with colorful background will not look good in a promotional event, while a colorful background will look happening in any festival event celebration. This, a blank background has the option to change as per the need of the occasion.
An image with white background can be changed as per the occasion. This helps a business to use a single image throughout the year without any additional cost for making a different picture. You can just change the white background of any image through various application or software.
Time saving: Removing white background is easy and streamlined as compared to any other color. The reason is that it does not require much editing and work on the edges. So, the steps in removing the white background are less and thus it saves time of the artist and the editors.
Saves location and bulk shooting expenses: When shooting with a white background is done; the same picture with some changes can be reused for number of times in several occasions. Thus, it saves the cost of shooting different in pictures in different location.
Good to celebrate every special day: A picture with white background is perfect and ready to edit for any special day. Whether it I a father’s day, mother’s day or any special day, a single picture can be edited as per the requirement. It will be a great gifting idea also after changing white background of the picture as per the special day.
Part 2 When We Need to Delete White Background and when Not?
A single picture of a person or product cannot be used for a single instance or purpose. Especially when it is a promotional campaign or commercial advertisements, a product is required to be showcased in several marketing campaign for different categories of consumers. Thus, a white background image is good for several purposes while in some circumstances, it requires changes. So, let’s see when to delete white background and when not:
When a picture requires special editing: When a picture requires some special effects like reflection, highlights and shadow effects, the picture with white background is required to be changed. When improvement in picture is requires, the white, transparent and color background can be changed accordingly.
Enhancing the visual impact of the picture: A white background picture grab the attention of the customers. So, it is good for advertising and promotion. While this needs to be removed when one desire to add some visual impact on the pictures or deliver some message to the viewers. So, it requires adding colorful and visually good background in a picture.
Adding more items to a picture: A white background need to be removed when more items are required to be included in it. Special edits and enhancing the pictures requires removing or adding a white background as per the purpose of the picture.
Part 3 How to Delete White Background in Photoshop (5 Fast Ways)
Editing a picture with white background can be done in easy steps through various applications. Deleting white background in Photoshop can be done through various tools. Some of the top 5 fast ways to clear background Photoshop are**:**
With the object selection tool:
● Start Photoshop and open the picture. Select the “object selection” from the tool bar. Hover cursor over subject till it turns blue. The subject is selected.
● Press the shift key to remove the background while selecting the objects which you want in the picture.
● To invert the selection go to Select>Inverse.
● Unlock the image based on what you want in the background. It will no longer be a background. It can be also used to create transparent background Photoshop.
● Click on Erase tool and start erasing the background.
Removing background with quick action
This is the quick method for removing a background when a user is going for own purpose. It is in-built quick action in Photoshop for removing the background. Although it is good for performing work, but the same cannot meet the perfection level that any other method does. It can be done by following the mentioned steps:
● Open the image in Photoshop, right click on background layer and click Duplicate layer. Then click on OK.
● Always try to open the properties panel by going to Window>Properties.
● Click on new layer at Layer panel. Go to Quick action and click on Remove Background.
● The background gets removed with quick action.
● At this point refinements and adjustments can be made.
Using pen tool to remove the background
● Open image in Photoshop, right click on background layer and go to Duplicate Layer. Name the layer and click OK.
● Select the Pen tool from the toolbox. Zoom the area. Start at the edge of subject. Start working on the object; add anchors which will outline the subject.
● Click-hold-drag to produce a curved line.
● Use the Direct Selection tool in the toolbox if you want to adjust an anchor point or directional lines for fine tuning
● Complete the path from where you started and save it by going to Windows>paths. Go to three bar menu, click New Path to name it and then save.
● Go to path panel and right click New Path. Choose Make selection and click OK. This will give the outline of the path.
● Go to Select> Inverse if you don’t want to delete what is inside the selection. An outline can be seen around the image.
● Press delete to delete the background. It can be also done to add Adobe Photoshop transparent background.
With Magnetic Lasso Tool
● Right click Background layer and click duplicate layer on the image opened in Photoshop. Name the layer and then click OK. From the toolbox, select Magic Lasso tool. Start drawing at the edges of subject.
● Move around the subject and complete till the start point. Marching ants can be seen around the selection.
● Go to Selection>Save selection to save and give it a name.
● Select>Inverse to delete the background. Photoshop checkered background is visible now.
With quick selection tool
● Click on Duplicate Layer by right clicking on background layer of the picture opened on the Photoshop. Name the layer and click OK.
● Go to the tool box and select quick selection tool.
● Paint the subject by using tool.
● Clean up the selection path with click by holding the Option key (macOS) or Alt key (Windows).
● Go to Selection>Save selection to save and give it a name.
● Select>Inverse to delete the background. The white background can be seen now.
Part 4 Which Photoshop Selection Tool is Best for White Backdrop Removal
There are various tools available at Photoshop to turn a background white. Each one of them has great utility based on the applications. Background Eraser tool is one of the good tools if there is need of more control over removing the background in Photoshop. It is highly effective and saves time of the user. It gives the desired outcome with perfection to an image. The visualization of image becomes better when the background is turned into white with the help of Background Eraser tool.
The other application that is very helpful in making background white to any image is Filmora.
Filmora is an excellent image and video editing software which helps the users in creating some amazing images and videos. It has wide range of image and video editing tools that can make any user a professional in image and video editing. It has features to add or remove background of an image to make it more visually good. Changing background and adding special effects to images and videos can be easily done through filmora.
Wondershare Filmora Video Editor allows transformation of pictures and videos in a better way by adding filters and graphics. Availability of support, drawing tools, editing tools, special effects and sound make it a complete application for both beginners and professionals. It can be used with various other applications also. Those who wish to know how to make a layer transparent in Photoshop can learn it from Filmora.
For Win 7 or later (64-bit)
For macOS 10.12 or later
● Ending Thoughts →
● Making white background or transparent background adobe photoshop has many benefits like it highlight the picture and make it good for various applications and occasions. It saves money and cost for the image editors and video makers.
● One should also know when to use the white background for images, catalogue and video shoot. Adding and deleting white background can only be done when required as per the demand of the occasion and the category of the user like marketing, media, customers etc.
● Various tools on Photoshop make it easy for the users to add or remove white background of images. Filmora is one of the applications that is very popular for its image editing features. It can be used to give special effects to any image or video.
Despite the Aforementioned Restrictions, Cartoon Video Makers Still Offer a Sea of Possibilities to Their Users, so Let’s Dive Into the Magical World of Animated Videos
Abundant Video Effects - Wondershare Filmora
Provide abundant video effects - A creative video editor
Powerful color correction and grading
Detailed tutorials are provided by the official channel
Introduction
There are some issues common to the video production process. However, animated or cartoon videos have helped to combat such issues. You do not need to scout for locations, go through a seemingly endless casting process, or rent the pricey equipment. A cartoon is simply a type of animation or an illustration that usually appears in a semi-realistic or an unreal style. In addition, it uses simple, satirical, and humorous drawing language to tell the story.
Although there are restrictions, there are a lot of possibilities cartoon video makers still offer to their users. Therefore, this article will share the top 10 best cartoon video makers online and on PC that you can use before diving into an animated video world.
So, here is what we shall learn about cartoon makers today:
In this article
01 Best 5 Online Cartoon Makers
02 Cartoon Video Maker for Desktop (Win and Mac)
03 How Can I Create My Own Cartoon Using Wondershare Anireel
Part 1: Best 5 Online Cartoon Makers
1. Biteable
Biteable provides a seemingly endless list of template categories to cater to your online media marketing needs. Aside from offering entertaining cartoon-making templates, the platform also allows users to create motion graphics or content, and Facebook covers for their social media channels.
Price: Free, $23 per month, billed annually.
Features:
- Offering library with lots of templates to choose from
- Free to use, except you are looking for additional features
- Five simple steps to an incredible cartoon video
- It has an easily customizable template
Pros
- It is a perfect option for social media managers
- Quickly create entertaining cartoons
- Used by biggies like Amazon, Microsoft, Google, Disney, BBC, Shopify, Samsung, and salesforce.
- Over 9 million users
Cons
- There is a mandatory registration
- There are no audio editing options
- The file-sharing capabilities are limited to YouTube and Facebook
- The download option is disabled in the free version
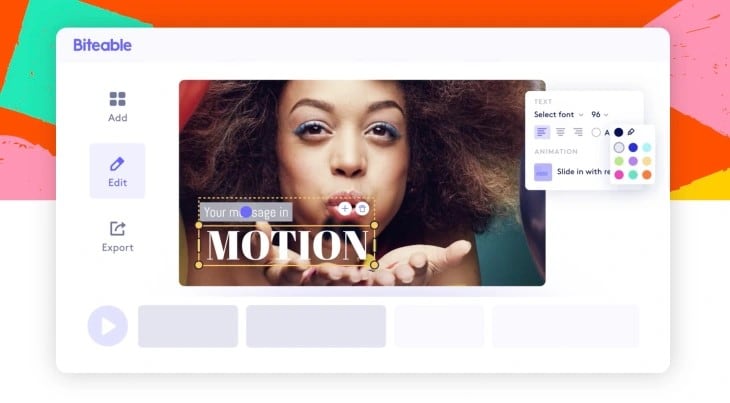
2. Animaker
With this animated maker, you get access to hundreds of animated characters, maps, and backgrounds. There are six (6) video styles available in this cartoon maker: Typography, Infographic, or 2D for different types of projects.
Price: Free version available. Subscription plans start at $12 per month/billed annually.
Features
- Different video styles, marketing, explainer, or 2D animation.
- Posts itself as the number 1 cartoon maker
- No need for a credit card to start.
- Four-step process; select template, customize it, add music, and download or share.
- 200+ voices, 25+ languages, and loads of customizable options.
- It offers auto-lip sync with advanced animation effects.
- There is a rich selection of 1000+ templates
Pros:
- Superb audio editing options
- Excellent and quick animation tools.
- Over 10 million users so far and still counting.
- Currently used by Amazon, Bosch, HP, Nokia, and Philips.
Cons:
- The monthly fee is pricey
- Account creation is mandatory for a free version
- The free version contains a watermark
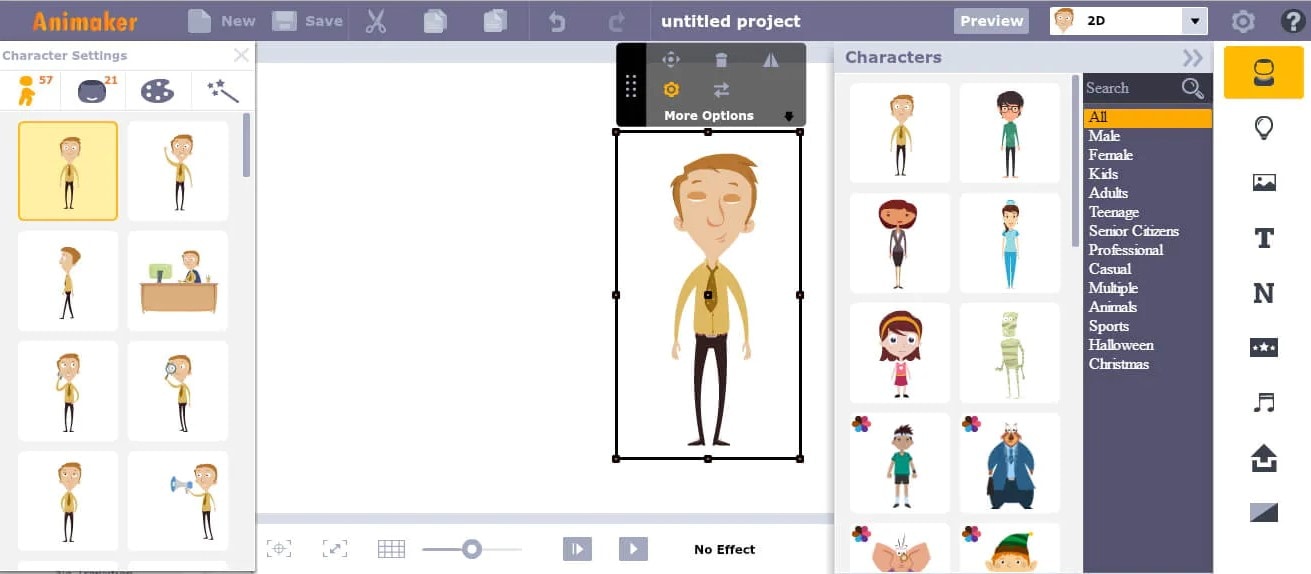
3. Vyond
Vyond, the cartoon creator launched in 2007, is probably one of the oldest online cartoon video makers. Additionally, it is still one of the most popular online destinations meant for anyone who wants to create an animated video quickly.
Price: Subscription plans start from $39 per month, billed annually.
Features:
- Perfect for animated video creation
- There is automatic character lip-syncing
- Try it for free before purchasing
- Make videos for training, e-learning, marketing, human resources, etc.
- The maximum duration of the video is 120 minutes
Pros:
- It has a fully customizable template
- There are high-end object and character animated features
- Certified by GDPR, TrustArc, BSI, and CCPA
- A wholesome cartoon makerfor enterprise and individual
- Data security and privacy assurance by BSI, CCPA, and GPDR.
Cons:
- It is quite expensive
- Vyond is not the best option for inexperienced animators
- The features depend on the subscription model
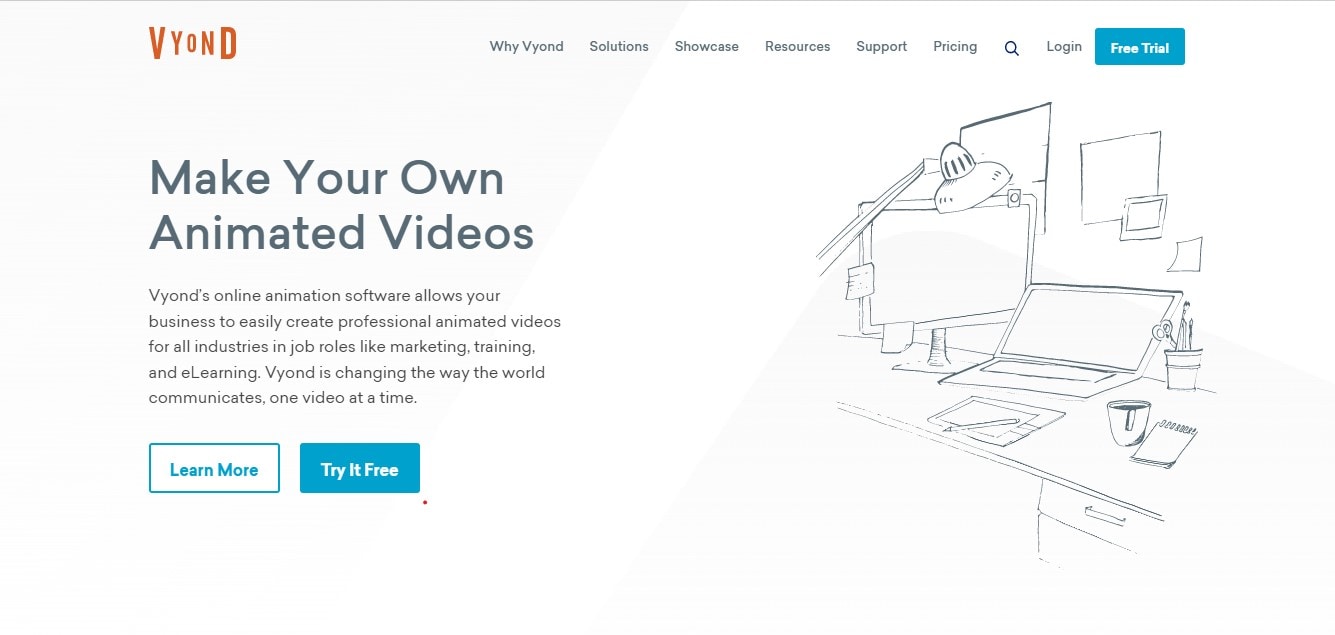
4. Renderforest
This is a famous online cartoon video maker for many purposes. Among the numerous options, the platform offers to its user. They include; 3D explainer videos, logo animations, or professional presentations.
Price: Free version available. Subscription plans start at $16 per month, billed annually.
Features:
- There is an extensive library of templates with numerous options
- Has a large online storage
- Was among the top 100 software companies in 2019.
- Top ranked solution holder for 2020
- Up to 250GB of online storage space
- Use the in-built template to make a story, customize the video, and then export it to share with your friends.
- Amadeus, Bose, BBC, Vodafone, Sony Music, and many others use Renderforest.
Pros:
- Produce videos like a pro
- Comes with an ultimate animation pack.
- Trusted by millions and one of the oldest cartoon makers.
Cons:
- A limited amount of commercial music tracks
- There are modest export options
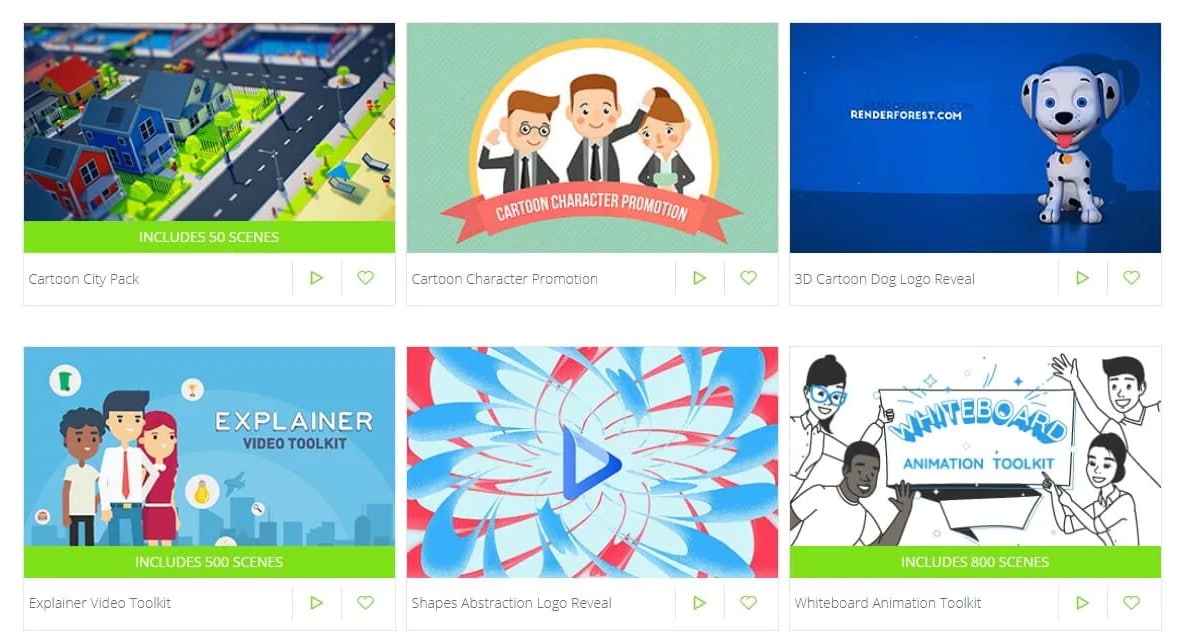
5. Moovly
With this cartoon maker, users must first log in. However, there is no need to create a new account as you can use your LinkedIn or Google account to sign in quickly.
Price: Free 30-day trial, $24.92 per month billed annually.
Features:
- Moovly is the perfect cartoon video maker for sales&marketing, human resources, internal communication, learning&development, agencies, and education.
- Apply expert features in one click with Moovly.
- Create videos and edit with browser-based or drag and drop features without installing software.
- Moovly has over 1.3 million free media, like images, sounds, music, and royalty-free stock videos at no extra charge.
- Besides, it offers 100 million extra media you can try and then purchase.
- You can add your images, music, and videos to create unique clips in style.
- Add text, remove color, add subtitles or generate them, auto-translate your text and subtitles, import PPT files, structure your content, record yourself or your computer screen, edit, mix, etc.
Pros:
- Even if users need to log in, they don’t need to create an account
- Allows users to import content from online sources like Storyblock, Shutterstock, etc.
- It is the number 1 customizable and straightforward solution to making cartoons.
- Use by Colgate-Palmolive, NHS, Teradata, Amadeus, Cisco, Continental, and Logitech.
- The interface is intuitive and user-friendly.
Cons:
- Watermarked videos during the free trial
- To export videos in HD 1080p quality, one needs to purchase one of the available plans.
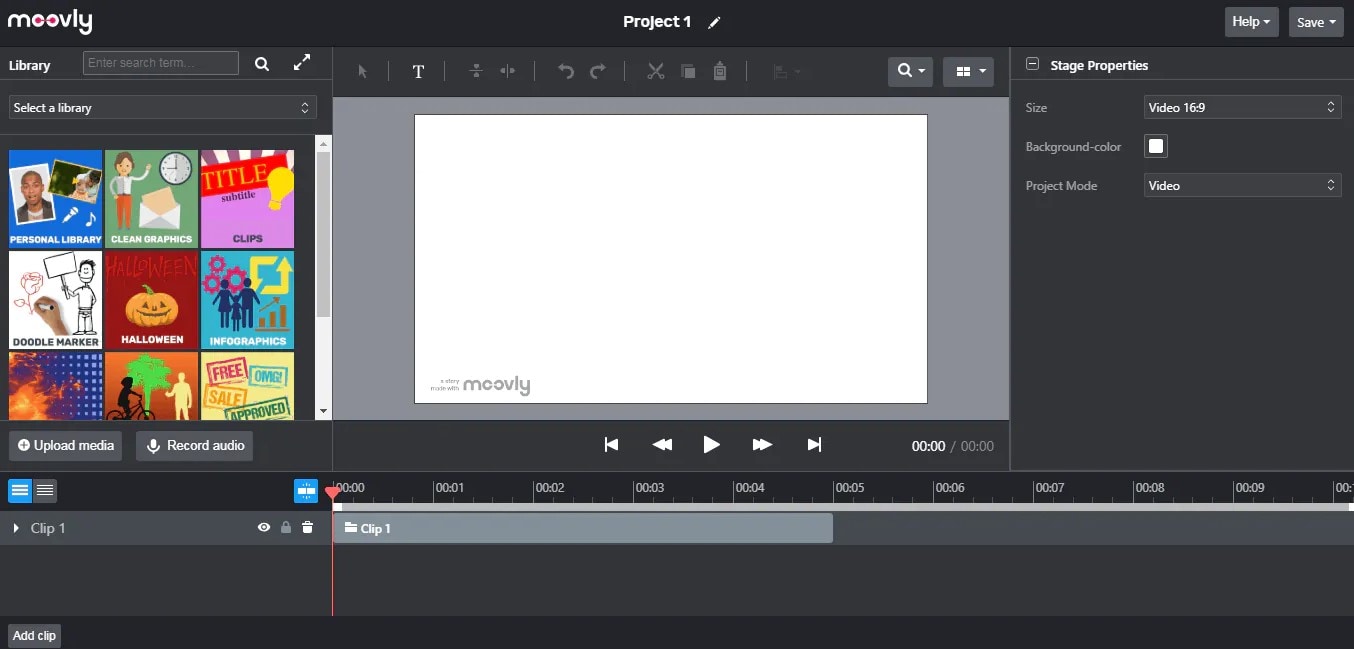
Renderforest is the best cartoon maker online of the listed five in this article due to the vast library template and large online bandwidth.
Part 2: Cartoon Video Maker for Desktop (Win and Mac)
1. Wondershare Anireel
Anireel is one of the top animation software on the internet that allows users to bring their imaginations to life with a huge range of customizable elements and features.
Price: $9.99 per month billed annually and $19.99 monthly
Features:
- 40+ customizable templates
- Top animation software
- Compatible with Windows 11/10/8.1 (64 bit OS)
- Only three steps to an excellent animated video.
- Import images, videos, and sound in almost all formats.
- Create unique avatar, logo images, and more specific to your brand.
- The Deep Learning tech offers quick text-to-speech conversion.
- Animate camera movements, entry and exit effects, motion path, etc.
- Use the one-click option and change scripts to clips.
- Anireel cartoon video makercan lip-sync your characters with perfection.
- Quick and easy drag and drop editing.
Pros:
- It is convenient and simple to use
- Anireel has an intuitive interface
- The cartoon makeroffers a practical and seamless animated video editing
- It comes at an affordable and competitive price
Cons:
- It has a limited amount of assets
- Not suitable for too professional people to use.
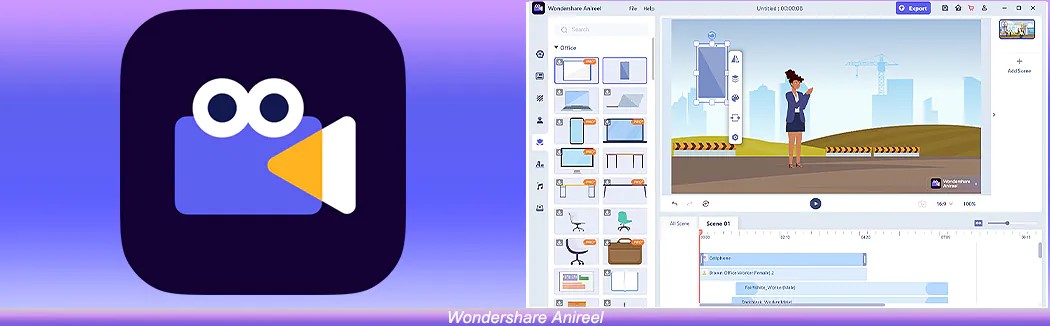
2. Autodesk Maya
Autodesk Maya is one of the best animation tools used to create animation pictures, video games, and add 3D effects in motion pictures. Plus, this cartoon maker is the best if you require a high-quality visual impact.
Price: Free trial, $225 billed monthly.
Features:
- It offers AutoDesk financing for new buyers.
- Maya is the go-to shop for architects, engineers, designers, media, and entertainment.
- Shape 3D objects and add realistic effects with Maya cartoon maker’s NURBS modeling.
- The Integrated Arnold rendering technology lets you view scene changes in real-time.
- Maya has been part of the top movie makers, including the MCU.
- This cartoon video maker offers geometry-based polygon modeling and helps create accurate simulations for visual programming.
- Maya can load and change vast data sets at a faster pace.
Pros:
- It makes complex hand-made animation tasks extremely easy
- Efficient color management
- Allows the creation of realistic effects like cloth simulations and explosions
- 30-day free trial and 30-day money-back guarantee
- Meet deadlines, add fine details to develop even the most complex shots or characters.
- Excellent tool for professionals
Cons:
- The pro is quite expensive
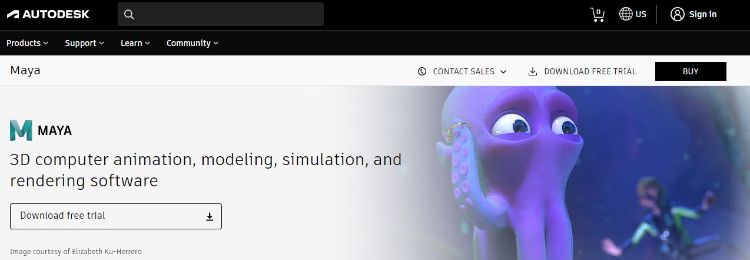
3. Adobe Animate
This is one of the most powerful animation software products on the internet that has been available for decades. It can animate images used for games, film, or online and produce HTML 5, WebGL, or Flash content.
Price: This cartoon creator offers three pricing plans starting at US$24.14/month
Features:
- Excellent for complex animation
- The capability of freehand drawing
- Animate, illustrate, and make 3D typography.
- Import and add vector drawings for further editing.
- Export your work as HTML5 Canvas, WebGL, Flash/Adobe AIR, GIF, or QuickTime movie.
- With the Bone tool, make your cartoon characters fluid and natural.
- Synchronize sounds and music for your project.
- Choose parts of the clip to be animated.
Pros:
- It has Puppeting features
- It is an excellent choice for complex animations
- It includes freehand drawing capability
Cons:
- It is not suitable for beginners
- Other Adobe software may be required while working on a project
4. Adobe Character Animator
Adobe Character Animator is another type of Adobe’s animation software stack that allows users to use motion to capture and create live animations of their 2D characters.
Price: Adobe Character Animator has two pricing plans starting at US$34,49/month for the first year
Features:
- This product requires other Adobe products to function
- Lots of options to export and import.
- Make your real-life cartoon using the Motion Capture feature in five steps.
- The Avatar will walk, talk, and copy your expressions in real-time.
- Integrate and add assets from other Adobe Creative Cloud apps.
- Auto lip-syncing and real-time facial movement capture.
- Works on iOS and Android.
Pros:
- Easy to replicate real-life movements and expressions with facial tracking.
- There are various import and export options.
Cons:
- It is not a standalone product.
- Users need to have a webcam and microphone to use the motion capture feature.
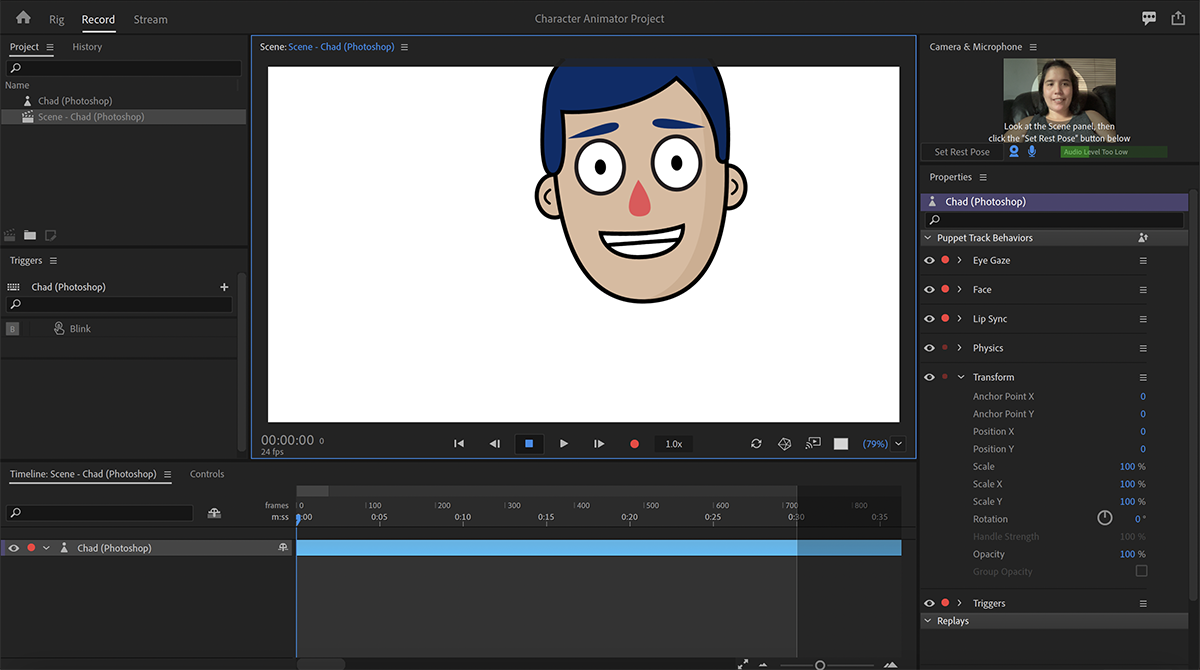
5. Cinema 4D
This cartoon maker has a 3D application interface that offers a keyframe animation, life-like characters, simulation building, object tracking, flexible rig building, cartoon styling, and animation basics.
Price: 4 pricing plans, starting at $99.91/month and $1199.00 billed annually.
Features:
- Keyframing animation effect
- It has a 3d interface
- The ZRemesher for retopology and new tools for modeling add to the new features.
- The Cloth Simulation features help make your cartoon more real.
- It supports CPU rendering with Redshift, which helps you preview, import, and export in high quality.
Pros:
- It is pretty easy to use.
- Lots of exciting design templates are available
- Many editing features are available
Cons
- It is pretty expensive compared to other software
- Not good for beginners
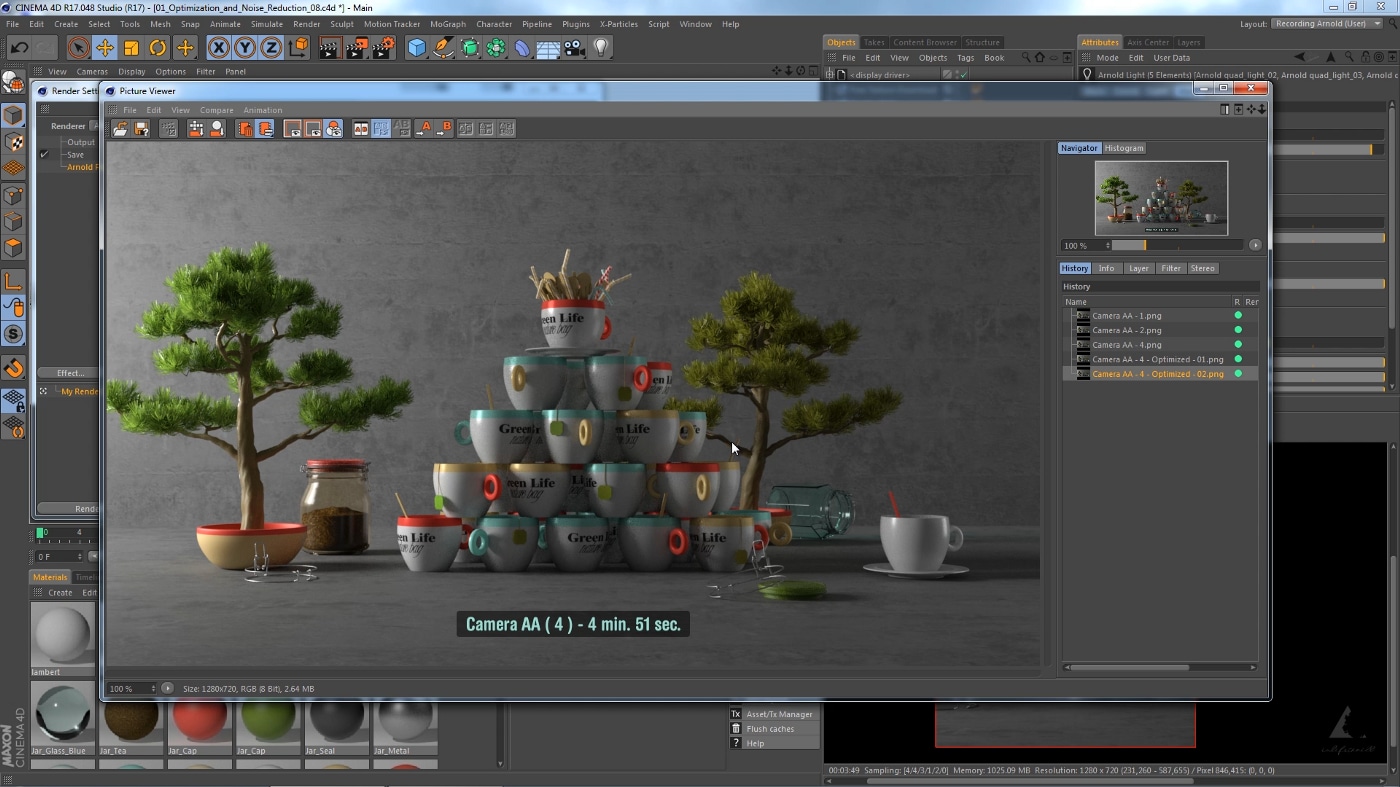
Wondershare Anireel is the best cartoon maker of the five listed in this article. It has lots of advanced features and templates to choose from.
Part 3: How Can I Create My Own Cartoon Using Wondershare Anireel
As stated, Wondershare Anireel has become our top cartoon creator pick due to its affordable pricing, secure server, and ease of use.
So, let us view the simple steps to create your cartoon using the Anireel software.
Step 1: Download, install and Create Character
Run Anireel on your device, visit Characters Tab and then click on Create a Character option, or you may click on the Create Brand Characters tab on the home screen.
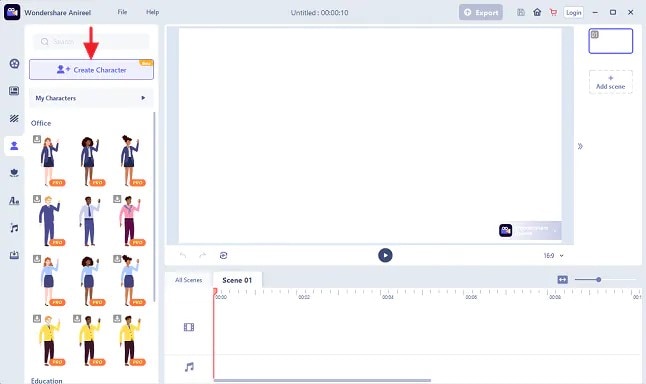
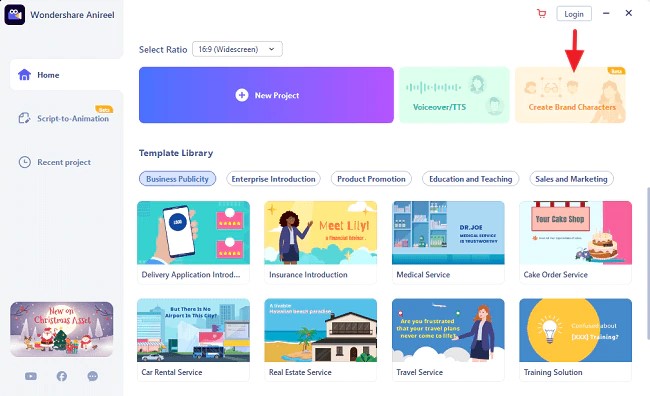
Step 2: Start Creating your Cartoon Character
Choose your gender and body shape, and apply some preset suits.
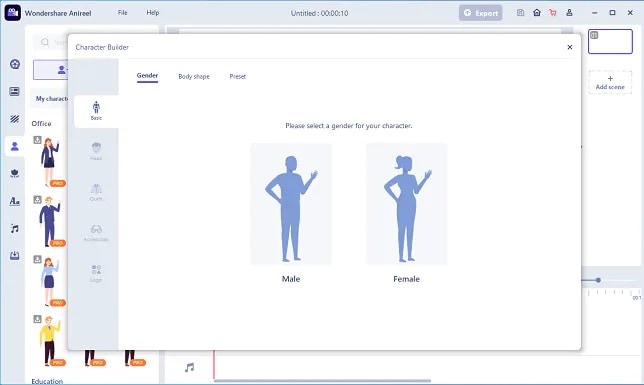
Now, you can start building facial features using the Head tab to customize the shape of the face, eyes, hairstyle, nose, mouth, ears, and eyebrows.
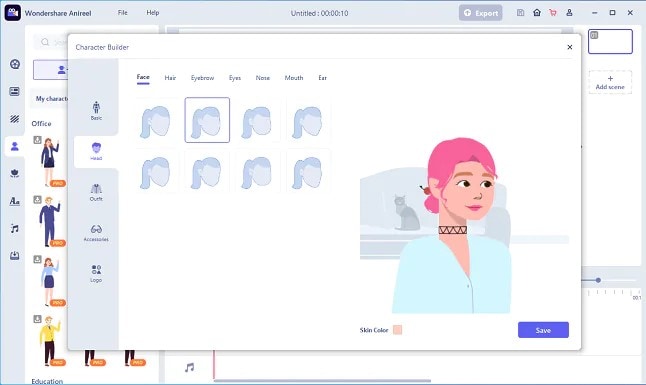
You can also choose to change the skin tone to match yours.
Step 3: Add an Outfit and Accessories
Choose the Outfit tab in Character Builder to select the base layer, outfit, bottom wear, and footwear. Pick what you want to use on your cartoon and keep adding.
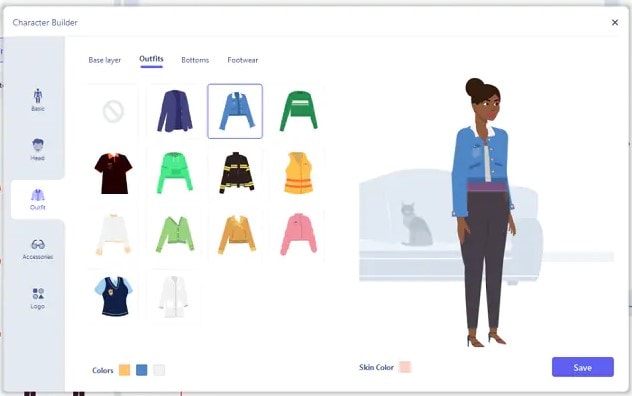
Next, reach the Accessories tab to add glasses, necklaces, and more to your cartoon character.
Step 4: Name your Cartoon and Apply
Click on Save and add a name to your cartoon when all done. Finally, click Apply Now to add your cartoon character to your Anireel cartoon maker canvas or My Characters tab.
Part 4: People Also Want to Know
Below are some answers to a few queries about cartoon creators. Let us look at them one by one.
1. What is the best free cartoon maker?
Wondershare Anireel is the best cartoon maker for Android as it is free to use with lots of advanced features and templates to choose from.
2. What is the best app to make a cartoon?
Wondershare Anireel’s Microsoft app is also one of the best cartoon applications that are very flexible and easy to use on the go.
Conclusion
In this article, we explained the best cartoon creators in the industry. Also, we gave the best cartoon video maker from the list. Thus, as you saw, in this report, we have summarized a few essential points regarding cartoon video makers. You learned:
- The cartoon video maker for free that you should know of.
- The ten best cartoon video makers.
- Why are Wondershare Anireel and Renderforest excellent online cartoon video makers?
- How does Anireel, cartoon creator, work?
- Finally, a few FAQs for users to better understand the cartoon maker
Introduction
There are some issues common to the video production process. However, animated or cartoon videos have helped to combat such issues. You do not need to scout for locations, go through a seemingly endless casting process, or rent the pricey equipment. A cartoon is simply a type of animation or an illustration that usually appears in a semi-realistic or an unreal style. In addition, it uses simple, satirical, and humorous drawing language to tell the story.
Although there are restrictions, there are a lot of possibilities cartoon video makers still offer to their users. Therefore, this article will share the top 10 best cartoon video makers online and on PC that you can use before diving into an animated video world.
So, here is what we shall learn about cartoon makers today:
In this article
01 Best 5 Online Cartoon Makers
02 Cartoon Video Maker for Desktop (Win and Mac)
03 How Can I Create My Own Cartoon Using Wondershare Anireel
Part 1: Best 5 Online Cartoon Makers
1. Biteable
Biteable provides a seemingly endless list of template categories to cater to your online media marketing needs. Aside from offering entertaining cartoon-making templates, the platform also allows users to create motion graphics or content, and Facebook covers for their social media channels.
Price: Free, $23 per month, billed annually.
Features:
- Offering library with lots of templates to choose from
- Free to use, except you are looking for additional features
- Five simple steps to an incredible cartoon video
- It has an easily customizable template
Pros
- It is a perfect option for social media managers
- Quickly create entertaining cartoons
- Used by biggies like Amazon, Microsoft, Google, Disney, BBC, Shopify, Samsung, and salesforce.
- Over 9 million users
Cons
- There is a mandatory registration
- There are no audio editing options
- The file-sharing capabilities are limited to YouTube and Facebook
- The download option is disabled in the free version
2. Animaker
With this animated maker, you get access to hundreds of animated characters, maps, and backgrounds. There are six (6) video styles available in this cartoon maker: Typography, Infographic, or 2D for different types of projects.
Price: Free version available. Subscription plans start at $12 per month/billed annually.
Features
- Different video styles, marketing, explainer, or 2D animation.
- Posts itself as the number 1 cartoon maker
- No need for a credit card to start.
- Four-step process; select template, customize it, add music, and download or share.
- 200+ voices, 25+ languages, and loads of customizable options.
- It offers auto-lip sync with advanced animation effects.
- There is a rich selection of 1000+ templates
Pros:
- Superb audio editing options
- Excellent and quick animation tools.
- Over 10 million users so far and still counting.
- Currently used by Amazon, Bosch, HP, Nokia, and Philips.
Cons:
- The monthly fee is pricey
- Account creation is mandatory for a free version
- The free version contains a watermark
3. Vyond
Vyond, the cartoon creator launched in 2007, is probably one of the oldest online cartoon video makers. Additionally, it is still one of the most popular online destinations meant for anyone who wants to create an animated video quickly.
Price: Subscription plans start from $39 per month, billed annually.
Features:
- Perfect for animated video creation
- There is automatic character lip-syncing
- Try it for free before purchasing
- Make videos for training, e-learning, marketing, human resources, etc.
- The maximum duration of the video is 120 minutes
Pros:
- It has a fully customizable template
- There are high-end object and character animated features
- Certified by GDPR, TrustArc, BSI, and CCPA
- A wholesome cartoon makerfor enterprise and individual
- Data security and privacy assurance by BSI, CCPA, and GPDR.
Cons:
- It is quite expensive
- Vyond is not the best option for inexperienced animators
- The features depend on the subscription model
4. Renderforest
This is a famous online cartoon video maker for many purposes. Among the numerous options, the platform offers to its user. They include; 3D explainer videos, logo animations, or professional presentations.
Price: Free version available. Subscription plans start at $16 per month, billed annually.
Features:
- There is an extensive library of templates with numerous options
- Has a large online storage
- Was among the top 100 software companies in 2019.
- Top ranked solution holder for 2020
- Up to 250GB of online storage space
- Use the in-built template to make a story, customize the video, and then export it to share with your friends.
- Amadeus, Bose, BBC, Vodafone, Sony Music, and many others use Renderforest.
Pros:
- Produce videos like a pro
- Comes with an ultimate animation pack.
- Trusted by millions and one of the oldest cartoon makers.
Cons:
- A limited amount of commercial music tracks
- There are modest export options
5. Moovly
With this cartoon maker, users must first log in. However, there is no need to create a new account as you can use your LinkedIn or Google account to sign in quickly.
Price: Free 30-day trial, $24.92 per month billed annually.
Features:
- Moovly is the perfect cartoon video maker for sales&marketing, human resources, internal communication, learning&development, agencies, and education.
- Apply expert features in one click with Moovly.
- Create videos and edit with browser-based or drag and drop features without installing software.
- Moovly has over 1.3 million free media, like images, sounds, music, and royalty-free stock videos at no extra charge.
- Besides, it offers 100 million extra media you can try and then purchase.
- You can add your images, music, and videos to create unique clips in style.
- Add text, remove color, add subtitles or generate them, auto-translate your text and subtitles, import PPT files, structure your content, record yourself or your computer screen, edit, mix, etc.
Pros:
- Even if users need to log in, they don’t need to create an account
- Allows users to import content from online sources like Storyblock, Shutterstock, etc.
- It is the number 1 customizable and straightforward solution to making cartoons.
- Use by Colgate-Palmolive, NHS, Teradata, Amadeus, Cisco, Continental, and Logitech.
- The interface is intuitive and user-friendly.
Cons:
- Watermarked videos during the free trial
- To export videos in HD 1080p quality, one needs to purchase one of the available plans.
Renderforest is the best cartoon maker online of the listed five in this article due to the vast library template and large online bandwidth.
Part 2: Cartoon Video Maker for Desktop (Win and Mac)
1. Wondershare Anireel
Anireel is one of the top animation software on the internet that allows users to bring their imaginations to life with a huge range of customizable elements and features.
Price: $9.99 per month billed annually and $19.99 monthly
Features:
- 40+ customizable templates
- Top animation software
- Compatible with Windows 11/10/8.1 (64 bit OS)
- Only three steps to an excellent animated video.
- Import images, videos, and sound in almost all formats.
- Create unique avatar, logo images, and more specific to your brand.
- The Deep Learning tech offers quick text-to-speech conversion.
- Animate camera movements, entry and exit effects, motion path, etc.
- Use the one-click option and change scripts to clips.
- Anireel cartoon video makercan lip-sync your characters with perfection.
- Quick and easy drag and drop editing.
Pros:
- It is convenient and simple to use
- Anireel has an intuitive interface
- The cartoon makeroffers a practical and seamless animated video editing
- It comes at an affordable and competitive price
Cons:
- It has a limited amount of assets
- Not suitable for too professional people to use.
2. Autodesk Maya
Autodesk Maya is one of the best animation tools used to create animation pictures, video games, and add 3D effects in motion pictures. Plus, this cartoon maker is the best if you require a high-quality visual impact.
Price: Free trial, $225 billed monthly.
Features:
- It offers AutoDesk financing for new buyers.
- Maya is the go-to shop for architects, engineers, designers, media, and entertainment.
- Shape 3D objects and add realistic effects with Maya cartoon maker’s NURBS modeling.
- The Integrated Arnold rendering technology lets you view scene changes in real-time.
- Maya has been part of the top movie makers, including the MCU.
- This cartoon video maker offers geometry-based polygon modeling and helps create accurate simulations for visual programming.
- Maya can load and change vast data sets at a faster pace.
Pros:
- It makes complex hand-made animation tasks extremely easy
- Efficient color management
- Allows the creation of realistic effects like cloth simulations and explosions
- 30-day free trial and 30-day money-back guarantee
- Meet deadlines, add fine details to develop even the most complex shots or characters.
- Excellent tool for professionals
Cons:
- The pro is quite expensive
3. Adobe Animate
This is one of the most powerful animation software products on the internet that has been available for decades. It can animate images used for games, film, or online and produce HTML 5, WebGL, or Flash content.
Price: This cartoon creator offers three pricing plans starting at US$24.14/month
Features:
- Excellent for complex animation
- The capability of freehand drawing
- Animate, illustrate, and make 3D typography.
- Import and add vector drawings for further editing.
- Export your work as HTML5 Canvas, WebGL, Flash/Adobe AIR, GIF, or QuickTime movie.
- With the Bone tool, make your cartoon characters fluid and natural.
- Synchronize sounds and music for your project.
- Choose parts of the clip to be animated.
Pros:
- It has Puppeting features
- It is an excellent choice for complex animations
- It includes freehand drawing capability
Cons:
- It is not suitable for beginners
- Other Adobe software may be required while working on a project
4. Adobe Character Animator
Adobe Character Animator is another type of Adobe’s animation software stack that allows users to use motion to capture and create live animations of their 2D characters.
Price: Adobe Character Animator has two pricing plans starting at US$34,49/month for the first year
Features:
- This product requires other Adobe products to function
- Lots of options to export and import.
- Make your real-life cartoon using the Motion Capture feature in five steps.
- The Avatar will walk, talk, and copy your expressions in real-time.
- Integrate and add assets from other Adobe Creative Cloud apps.
- Auto lip-syncing and real-time facial movement capture.
- Works on iOS and Android.
Pros:
- Easy to replicate real-life movements and expressions with facial tracking.
- There are various import and export options.
Cons:
- It is not a standalone product.
- Users need to have a webcam and microphone to use the motion capture feature.
5. Cinema 4D
This cartoon maker has a 3D application interface that offers a keyframe animation, life-like characters, simulation building, object tracking, flexible rig building, cartoon styling, and animation basics.
Price: 4 pricing plans, starting at $99.91/month and $1199.00 billed annually.
Features:
- Keyframing animation effect
- It has a 3d interface
- The ZRemesher for retopology and new tools for modeling add to the new features.
- The Cloth Simulation features help make your cartoon more real.
- It supports CPU rendering with Redshift, which helps you preview, import, and export in high quality.
Pros:
- It is pretty easy to use.
- Lots of exciting design templates are available
- Many editing features are available
Cons
- It is pretty expensive compared to other software
- Not good for beginners
Wondershare Anireel is the best cartoon maker of the five listed in this article. It has lots of advanced features and templates to choose from.
Part 3: How Can I Create My Own Cartoon Using Wondershare Anireel
As stated, Wondershare Anireel has become our top cartoon creator pick due to its affordable pricing, secure server, and ease of use.
So, let us view the simple steps to create your cartoon using the Anireel software.
Step 1: Download, install and Create Character
Run Anireel on your device, visit Characters Tab and then click on Create a Character option, or you may click on the Create Brand Characters tab on the home screen.
Step 2: Start Creating your Cartoon Character
Choose your gender and body shape, and apply some preset suits.
Now, you can start building facial features using the Head tab to customize the shape of the face, eyes, hairstyle, nose, mouth, ears, and eyebrows.
You can also choose to change the skin tone to match yours.
Step 3: Add an Outfit and Accessories
Choose the Outfit tab in Character Builder to select the base layer, outfit, bottom wear, and footwear. Pick what you want to use on your cartoon and keep adding.
Next, reach the Accessories tab to add glasses, necklaces, and more to your cartoon character.
Step 4: Name your Cartoon and Apply
Click on Save and add a name to your cartoon when all done. Finally, click Apply Now to add your cartoon character to your Anireel cartoon maker canvas or My Characters tab.
Part 4: People Also Want to Know
Below are some answers to a few queries about cartoon creators. Let us look at them one by one.
1. What is the best free cartoon maker?
Wondershare Anireel is the best cartoon maker for Android as it is free to use with lots of advanced features and templates to choose from.
2. What is the best app to make a cartoon?
Wondershare Anireel’s Microsoft app is also one of the best cartoon applications that are very flexible and easy to use on the go.
Conclusion
In this article, we explained the best cartoon creators in the industry. Also, we gave the best cartoon video maker from the list. Thus, as you saw, in this report, we have summarized a few essential points regarding cartoon video makers. You learned:
- The cartoon video maker for free that you should know of.
- The ten best cartoon video makers.
- Why are Wondershare Anireel and Renderforest excellent online cartoon video makers?
- How does Anireel, cartoon creator, work?
- Finally, a few FAQs for users to better understand the cartoon maker
Also read:
- How to Create an Aesthetic Slideshow Presentation
- 2024 Approved This Article Will Show You How to Clone Yourslef in Videos with Filmora
- New How To Create A YouTube Intro for 2024
- Updated 2024 Approved How to Create a Slideshow on iPhone
- Updated 2024 Approved Add Subtitles To Videos With Kapwing Step by Step
- New Have You Ever Created a Slow Motion Video on Your Phonr or Camera? This Article Will Show You some Knowledge About Slow Motion Photography
- 8 Free Photo Collage with Music Video Maker
- New A Complete Guide to Use Distortion Effect in Premiere Pro for 2024
- New 2024 Approved Free Ways to Download Mobile Phone Green Screen Videos and Pictures No Copyright
- Guide To Make a YouTube Intro by Filmora for 2024
- Updated 2024 Approved Tips to Make Cinematic Color Grading
- 2024 Approved Best Movie Title Maker
- New End This Problem! Make Transparent Background Video Today
- New Montage Makes It Easy to Create and Share Videos. This Article Will Explain What It Can Do and Show You Examples of Movies that Use Montage
- 2024 Approved Create a Stunning Light Sweep Effect in Filmora. Use Simple and Easy Steps to Export a High-Quality Video that Will Impress Even Pro Video Editors
- New This Article Discusses What Is Hitfilm Express, How to Download, Install and Use It, and Its Key Features. It Further Discusses Its Alternative for Editing Your Videos and More. Check Out Now
- Updated Create an Awesome Logo Reveal with Logo Intro Templates for 2024
- The Necessity of the Creation of Video Content for Social Media Has Urged Many Editing Software to Come Out on the Market. We Have Reviewed some, Free of Them in This Article for You
- New Unlock Your Video Editing Potential With Filmora From Wondershare
- 2024 Approved Do You Know How to Create Video Loops on PowerPoint? If Not Then Read This Article to Learn More Details
- 2024 Approved Through Speed Ramping, Create a Smooth Transition in Slow-Motion Videos. Follow This Guide and Learn About Premiere Pro Slow Motion and a Better Alternative
- In 2024, Best Free Video Editing Software for Reddit
- In 2024, Wondering About How to Easily Create a Slideshow on Your iPhone? Well, Take Note of some of the Finest Apps to Turn Your Vision Into Reality
- Updated 2024 Approved 100 Working Methods to Learn How to Rotate TikTok Video
- New Recording Slow-Motion Videos Is Not More Difficult Using a Smartphone. Learn Everything From How to Record Slow-Motion Video and Edit a Video to Slow Down It
- New In 2024, How to Add a Slideshow in PowerPoint
- In 2024, Splitting a Video in VSDC Step by Step
- New How to Add Filter to Video in Premiere Pro?
- Updated In 2024, List of Whatsapp Video Format That You May Need to Know
- New In 2024, How To Make A Political Video
- In 2024, Best Online MPEG to GIF Converters
- Updated In 2024, How to Create OBS Slideshow
- New Learn How to Perform Velocity Edits on Your PC
- 2024 Approved Make Super Easy Coin Magic With Filmora
- In This Article, You Will Learn How to Create an Attractive and Engaging Slideshow Video Using Tools Available in the Wondershare Filmora
- Updated 2024 Approved Doable Ways to Make Transparent Background in Procreate
- 2024 Approved In This Article, We Talk About How to Add Old Film Overlays and Other Effects to Turn the Videos or Photos More Vintage and with an Older Aspect. We Take a Look at Filmora in This Guide and Give Tips on How to Create Great Retro Videos
- New 2024 Approved How to Blur Faces in Your Video on iPhone
- Updated How To Mirror a Video Clip in Premiere Pro for 2024
- In 2024, How to Make Random Letter Reveal Intro?
- New VSDC Free Video Editor Review for 2024
- The Necessity of the Creation of Video Content for Social Media Has Urged Many Editing Software to Come Out on the Market. We Have Reviewed some, Free of Them in This Article for You for 2024
- Updated How to Add Customized Transitions to OBS for 2024
- 2024 Approved Recording Videos with Your Smartphones Is Fun and Fantastic. But Did You Know that Recording in Slo-Mo Has Become a Trend Nowadays? Read More to Learn About How to Convert Videos to Slow Motion Here
- Updated In 2024, Finest Approach to Slow Down a Video CapCut All-in-One Video Editor
- How to Transfer Music from Lava Yuva 2 to iPod | Dr.fone
- A Detailed Pokemon Go PvP Tier List to Make you a Pro Trainer For Apple iPhone SE (2020) | Dr.fone
- In 2024, What Does Enter PUK Code Mean And Why Did The Sim Get PUK Blocked On Samsung Galaxy S21 FE 5G (2023) Device
- In 2024, Detailed guide of ispoofer for pogo installation On Samsung Galaxy M54 5G | Dr.fone
- How To Upgrade or Downgrade Apple iPhone 12 Without Data Loss? | Dr.fone
- In 2024, How to Access Your Apple iPhone 7 Plus When You Forget the Passcode?
- In 2024, How To Unlock Samsung Galaxy M14 5G Phone Without Password?
- Full Guide How To Fix Connection Is Not Private on Realme C67 5G | Dr.fone
- How to Reset Gmail Password on Vivo G2 Devices
- How To Transfer Data From Apple iPhone 6s To Android/iOS? | Dr.fone
- What Wikipedia Cant Tell You About the 10 Batman Cartoons for 2024
- In 2024, How to Unlock ZTE Blade A73 5G Phone with Broken Screen
- How To Unlock Any Realme 11 Pro Phone Password Using Emergency Call
- Top 11 Free Apps to Check IMEI on Oppo Reno 8T Phones
- Can Life360 Track You When Your Vivo Y27 4G is off? | Dr.fone
- In 2024, How To Unlock Stolen Apple iPhone 11 Pro Max In Different Conditionsin
- Best Pokemons for PVP Matches in Pokemon Go For Tecno Spark Go (2024) | Dr.fone
- In 2024, Fake Android Location without Rooting For Your Realme Note 50 | Dr.fone
- In 2024, How to Change Google Play Location On Vivo S17e | Dr.fone
- 6 Fixes to Unfortunately WhatsApp has stopped Error Popups On Infinix Hot 40 | Dr.fone
- In 2024, Guide on How To Change Your Apple ID Email Address On iPhone 6s | Dr.fone
- In 2024, Did Your iPhone 6 Plus Passcode Change Itself? Unlock It Now
- My Videos Arent Playing on Oppo A78 5G – What Can I Do? | Dr.fone
- The Updated Method to Bypass Vivo X90S FRP
- In 2024, How to Unlock a Network Locked Vivo Y100 Phone?
- In 2024, Unlock Your Boost Mobile Apple iPhone 13 mini Before the Plan Expires
- In 2024, How to Track Poco M6 Pro 4G Location without Installing Software? | Dr.fone
- 4 solution to get rid of pokemon fail to detect location On Xiaomi Redmi Note 12 5G | Dr.fone
- Identify missing or malfunctioning drivers with Windows Device Manager on Windows 7
- How to Check Distance and Radius on Google Maps For your Samsung Galaxy A15 4G | Dr.fone
- Title: New In 2024, Detailed Tutorial to Resize Your Video in VLC
- Author: Chloe
- Created at : 2024-04-24 07:08:33
- Updated at : 2024-04-25 07:08:33
- Link: https://ai-editing-video.techidaily.com/new-in-2024-detailed-tutorial-to-resize-your-video-in-vlc/
- License: This work is licensed under CC BY-NC-SA 4.0.
