
:max_bytes(150000):strip_icc():format(webp)/GettyImages-849896688-6d69f22bcf0a4ff092f444abe6e1c19f.jpg)
New In 2024, Free LUTs for OBS How to Use Them?
Free LUTs for OBS: How to Use Them?
LUTs are powerful tools that can significantly enhance the visual appeal of your content. You can use this tool to change the look and feel of your images and videos. Moreover, you can use LUTs to bring out the desired mood, style, and tone to your media content. Additionally, LUTs provide endless possibilities for creativity with different color adjustments and grading.
There are many software and tools available on the market to apply LUTs. These tools let you import and apply LUTs to your images and videos. Furthermore, you can apply LUTs even using streaming software like OBS. Moreover, you can improve live streams, videos, and recordings by applying LUTs using OBS. However, many paid and free LUTs for OBS are available for usage.
Part 1: Why Do We Need to Use LUTs for Editing in OBS?
There are many free OBS LUTs available that you can download and use for your content. The real question is the utility of LUTs in OBS. Here are some of the reasons to use LUTs in this tool.
Efficiency and Consistency
LUTs provide a quick and consistent way to apply color transformations. Instead of manually adjusting individual color settings, you can use LUTs. Similarly, it allows you to instantly and precisely grade and correct colors.
Time-Saving
Using LUTs saves time because they offer pre-defined color transformations. Instead of adjusting colors for each project or image, you can use LUTs. Additionally, they allow you to match your desired look or style easily.
Artistic Control and Creative Freedom
Furthermore, it gives artists, filmmakers, and photographers more control over their work. They allow for experimentation and exploration of different looks and styles. You can be more creative by experimenting with varying tones of color to the same content.
Consistent Color Reproduction
LUTs are essential for maintaining consistent color tones. The good part is it maintains consistency across different devices, software, and platforms. They ensure that colors look the same, no matter what the viewing medium, like monitors, projectors, or mobile screens.
Film Emulation and Replication
Moreover, it can replicate classic film stocks’ characteristics and aesthetics. They allow filmmakers and photographers to recreate iconic films’ color response and tonal range. In this way, everyone can experiment with color tones inspired by famous movies.
Workflow Flexibility and Collaboration
Lookup tables offer flexibility and facilitate collaboration in post-production workflows. They can be easily shared and applied to different projects or sequences. Similarly, it ensures consistent color grading across multiple editors or teams.
Calibration and Color Management
Additionally, LUTs play an important role in color calibration and management processes. It allows you to align color spaces, correct color variations, and maintain color accuracy. Furthermore, it will maintain consistent color grading throughout the project.
Real-time Color Processing
Lastly, LUTs are valuable in applications that require real-time color processing. It can be used in live broadcasts, video streaming, or video games. You can make instant adjustments and enhancements in real time.
Empower your videos with a new mood using different LUTs. Filmora now offers 100+ top-quality 3D LUTs cover a broad range of scenarios. Transform your videos with Filmora’s powerful 3D LUTs.
Apply LUT on Videos Apply LUT on Videos Learn More


Part 2: Discussing Some Top-Notch Best LUTs for OBS?
If you are searching for the best LUTs for OBS, you’re at the right place. Here is a list of some of the best LUTs you can apply using OBS. You can choose from different styles and tones according to your preference:
1. Vintage LUTs
Take a step back in time with this pack of Vintage LUTs. This pack gives your videos and images a nostalgic, retro feel. Moreover, this pack has different classic film presets, including monochrome and b&w. It enhances warm tones, adds a vignette, and introduces a gentle fade effect. Furthermore, this pack gives your media content the perfect retro feel.

2. 13 FREE Custom LUTs for Log Footage
Using these 13 cinematic LUTs, you can unleash the power of the silver screen. With these LUTs, you can bring Hollywood magic to your videos. Additionally, this pack enhances contrast and saturation to create a dramatic and cinematic look. Moreover, it enhances your media with rich colors, deep shadows, and vibrant highlights giving them a movie-like feel.

3. Vibrant Nature LUTs for Photo & Video
Vibrant Nature LUTs is an excellent pack that enhances the beauty of nature and the outdoors. It is a pack of five different LUTs specifically used to enhance natural landscapes and environmental shots. Furthermore, this pack highlights the earthy tones, adds depth to greens, and brings out the details of nature. Additionally, you can use this pack to improve the scenery in your pictures and videos.

4. Coastal Haze
Coastal Haze is a fantastic LUT to celebrate love and romance with its color grading. It is an excellent free LUT that enhances the colors and emotions of wedding videos and romantic moments. Moreover, it adds a soft and dreamy touch by improving skin tones. Furthermore, it creates a warm and intimate atmosphere allowing you to beautify your special moments.

5. 20 Dark Moody LUTs Pack
Dive into the world of moody dark colors with this 20 Dark Moody LUTs Pack. Each LUT has a different tone and feel to it. These LUTs add darkness to create a mysterious and serious ambiance. It enhances shadows, deepens blacks, and adds a subtle color grading to create an intense look. With this Moody LUT pack, you can make more professional-looking dark videos.

Part 3: How to Use LUTs in OBS Studio Properly?
If you’ve found the best free LUTs for OBS, you can apply them directly to your video feed. Here are simple steps to apply LUTs using OBS Studio. Following these steps, you can easily apply a LUT effect to your video feed or live stream in OBS.
Step 1: Open OBS and start your video feed or live stream using a webcam or capture card. Once your video stream is running, right-click the “Video Capture Device” option. After that, select “Filters” from the options that appear. In the Filters menu, locate the “Effect Filters” section and click the “+” button. Choose the “Apply LUT” option from the options that appear to add the LUT effect to your video stream.

Step 2: A new window will pop up where you can specify the name of your LUT. To select your desired LUT, click the “Browse” button and navigate to its location on your device. Once you’ve found your LUT, click the “Open” button to apply it directly to your video stream. If needed, you can adjust the intensity of the LUT by making changes in the “Preview” screen.

Part 4: Wondershare Filmora: Another Efficient Platform for Adding LUTs on Videos
Wondershare Filmora is an exceptional video editing tool with the additional ability of color grading. With this powerful tool, you can color grade your videos by manually adjusting settings or applying LUTs. The latest update of Wondershare Filmora includes a library of over 200+ LUTs that you can apply to your media files. Furthermore, you can also customize the intensity of the applied LUTs.
Add LUTs on Video For Win 7 or later(64-bit)
Add LUTs on Video For macOS 10.14 or later
Besides color grading, Filmora also provides a variety of effects, filters, and overlays for your videos. These tools allow you to add artistic touches and improve the overall feel of your content. Additionally, it offers professional-grade features such as AI Cutout. This feature enables you to effortlessly select your subject in a video and change their background.

Conclusion
In conclusion, LUTs are useful tools for color-correcting live streams and video editing projects. You can apply LUTs directly to your live streams, and video feeds with OBS. Many free LUTs for OBS are available, each with a different tone and feel. Furthermore, LUTs can also be used in popular video editing tools like Wondershare Filmora. Lastly, LUTs are essential tools to make your content stand out.
Add LUTs on Video For Win 7 or later(64-bit)
Add LUTs on Video For macOS 10.14 or later
Apply LUT on Videos Apply LUT on Videos Learn More
Part 2: Discussing Some Top-Notch Best LUTs for OBS?
If you are searching for the best LUTs for OBS, you’re at the right place. Here is a list of some of the best LUTs you can apply using OBS. You can choose from different styles and tones according to your preference:
1. Vintage LUTs
Take a step back in time with this pack of Vintage LUTs. This pack gives your videos and images a nostalgic, retro feel. Moreover, this pack has different classic film presets, including monochrome and b&w. It enhances warm tones, adds a vignette, and introduces a gentle fade effect. Furthermore, this pack gives your media content the perfect retro feel.
2. 13 FREE Custom LUTs for Log Footage
Using these 13 cinematic LUTs, you can unleash the power of the silver screen. With these LUTs, you can bring Hollywood magic to your videos. Additionally, this pack enhances contrast and saturation to create a dramatic and cinematic look. Moreover, it enhances your media with rich colors, deep shadows, and vibrant highlights giving them a movie-like feel.
3. Vibrant Nature LUTs for Photo & Video
Vibrant Nature LUTs is an excellent pack that enhances the beauty of nature and the outdoors. It is a pack of five different LUTs specifically used to enhance natural landscapes and environmental shots. Furthermore, this pack highlights the earthy tones, adds depth to greens, and brings out the details of nature. Additionally, you can use this pack to improve the scenery in your pictures and videos.
4. Coastal Haze
Coastal Haze is a fantastic LUT to celebrate love and romance with its color grading. It is an excellent free LUT that enhances the colors and emotions of wedding videos and romantic moments. Moreover, it adds a soft and dreamy touch by improving skin tones. Furthermore, it creates a warm and intimate atmosphere allowing you to beautify your special moments.
5. 20 Dark Moody LUTs Pack
Dive into the world of moody dark colors with this 20 Dark Moody LUTs Pack. Each LUT has a different tone and feel to it. These LUTs add darkness to create a mysterious and serious ambiance. It enhances shadows, deepens blacks, and adds a subtle color grading to create an intense look. With this Moody LUT pack, you can make more professional-looking dark videos.
Part 3: How to Use LUTs in OBS Studio Properly?
If you’ve found the best free LUTs for OBS, you can apply them directly to your video feed. Here are simple steps to apply LUTs using OBS Studio. Following these steps, you can easily apply a LUT effect to your video feed or live stream in OBS.
Step 1: Open OBS and start your video feed or live stream using a webcam or capture card. Once your video stream is running, right-click the “Video Capture Device” option. After that, select “Filters” from the options that appear. In the Filters menu, locate the “Effect Filters” section and click the “+” button. Choose the “Apply LUT” option from the options that appear to add the LUT effect to your video stream.
Step 2: A new window will pop up where you can specify the name of your LUT. To select your desired LUT, click the “Browse” button and navigate to its location on your device. Once you’ve found your LUT, click the “Open” button to apply it directly to your video stream. If needed, you can adjust the intensity of the LUT by making changes in the “Preview” screen.
Part 4: Wondershare Filmora: Another Efficient Platform for Adding LUTs on Videos
Wondershare Filmora is an exceptional video editing tool with the additional ability of color grading. With this powerful tool, you can color grade your videos by manually adjusting settings or applying LUTs. The latest update of Wondershare Filmora includes a library of over 200+ LUTs that you can apply to your media files. Furthermore, you can also customize the intensity of the applied LUTs.
Add LUTs on Video For Win 7 or later(64-bit)
Add LUTs on Video For macOS 10.14 or later
Besides color grading, Filmora also provides a variety of effects, filters, and overlays for your videos. These tools allow you to add artistic touches and improve the overall feel of your content. Additionally, it offers professional-grade features such as AI Cutout. This feature enables you to effortlessly select your subject in a video and change their background.
Conclusion
In conclusion, LUTs are useful tools for color-correcting live streams and video editing projects. You can apply LUTs directly to your live streams, and video feeds with OBS. Many free LUTs for OBS are available, each with a different tone and feel. Furthermore, LUTs can also be used in popular video editing tools like Wondershare Filmora. Lastly, LUTs are essential tools to make your content stand out.
Add LUTs on Video For Win 7 or later(64-bit)
Add LUTs on Video For macOS 10.14 or later
How to Merge FLV Files [Windows, Mac,Android, iPhone & Online]
It’s typical to download numerous small FLV files of a popular movie from YouTube or other video-sharing sites instead of the entire movie. Let me tell you here that an FLV (Flash Video) is a container format used to transmit video or audio over the internet. At this point, you may want to combine multiple FLV files into one. Combining multiple FLV files to create a masterpiece, like a trailer, is of course a terrific idea. Well, to combine these FLV files, you need a professional FLV merger as your assistant.
So, let me help you here. Filmora Video Editor may be the best FLV combiner for Windows and Mac available nowadays. This clever tool is ideal for users seeking professional editing functions like video merging. The software is available for download on Windows and Mac systems and allows for the lossless merging of FLV, MP4, MOV, WebM, and many more file formats. It makes it a lot easier for you to merge or combine FLV files into a large video collection without compromising on video quality even if you lack technical expertise. And, you can use it to watch a movie or your favorite content without any annoying interruptions.
Now, I’ll show you how to quickly and effortlessly merge your favorite video clips into a new video collection.
For Win 7 or later (64-bit)
For macOS 10.14 or later
A Step-by-Step Guide to Merge FLV files on Windows/Mac using Wondershare Filmora
Step 1: Launch Wondershare Filmora and load FLV files…
When you run this FLV joiner, simply click “Import” to load all of the local FLV files that you want to merge to the User’s album of this FLV video merger. You can also just drag and drop the target files from your PC into the album.

Step 2: Merge FLV files into one…
At the bottom of this FLV file merger, there lies a Timeline. Drag FLV files from the album to the Timeline and use the slider bar to help you arrange all FLV files in the Timeline without overlapping them. That’s very important as if you put one video to another, the original video will get split. Also, make sure that all FLV files are placed in the sequence in which they are to be played. If not, you can rearrange any video clip with a simple drag-and-drop.

Step 3: Choose the target format as FLV…
When you are sure that all FLV files are in the correct required order on the Timeline, you can view the effect in real-time in the preview pane. If everything is fine, you are now ready to export this new FLV file. All you have to do is just press the “Create”
button, then go to the “Format” tab > “FLV” output format in the output window.

Step 4: Export a new FLV file…
Finally, click the “Create” button to save the settings and export the new FLV file simultaneously. When it’s done, simply navigate to the whole FLV video using the output file path.

Alternative Way to Merge/Combine FLV Files on Windows
Joyoshare Media Cutter (Paid tool to merge FLV Files)
Joyoshare Video Joiner for Windows is a comprehensive and user-friendly audio and video merging software that supports a wide range of file formats such as FLV, F4V, HD,4K, MP4, M4V, M4A, DV, MPEG, FLAV, WMA, and others. It is not only a superb video joiner for joining FLV files in batches without re-encoding, but it is also a video editor thanks to the built-in advanced editing tool. That means you can customize and enhance your FLV files as required before integrating them. The two combing modes (high-speed mode and encoding mode) it employs are also noteworthy. With high-speed mode, you can join an unlimited number of FLV files losslessly and swiftly. You can merge files in different formats without gaps and customize the codec, resolution, bit rate, frame rate, and other parameters of your FLV files while in encoding mode.
A Step-by-Step Guide
Step 1: Add FLV files…
First, go to the Joyoshare website and download the Joyoshare Video Joiner installation package. Install and configure it on your computer. Then, import FLV files into the video joiner. There are two options: click “Open File” to choose them or drag them directly into the software.

Step 2: Choose a merging mode and export format…
You must pick a format from high-speed mode and encoding mode based on your requirements by using the “Format” button. The former is only for combining files of the same format losslessly at 60 X speed. The other is for users who want to modify files while joining files in different formats. With the use of a gear icon beside the selected output format, users can change video settings such as resolution, bit rate, codes, and so on while in encoding mode.

Step 3: Remove undesirable parts…
Once finished choosing mode and format, simply press “OK” to go back to the main screen. Then double-click these FLV files one by one to preview them. You can change the timeline to remove unnecessary sections from your FLV videos. Moreover, renaming and rearranging these video files can also be realized in this step.

Step 4: Edit FLV files (optional)…
The software has an editor that allows you to easily and flexibly enhance your FLV video files by clicking “Edit” next to each file before joining.

Step 5: Merge FLV files and save…
Finally, all you have to do is press the “Convert” button to enable Joyoshare Video Joiner to begin combining these FLV files. The merged FLV file will be saved as a converted file on your computer.
Format Factory (Free tool to merge FLV Files)
Format Factory is a free Windows video joiner, recorder, converter, downloader, and editor. It supports a wide range of file types, including FLV, MKV, MP4, 3GP, WMV, SWF, AVI, MPG, VOB, WebM, and others. It is not difficult to use it to combine FLV files.
A Step-by-Step Guide
Step 1: Run Format Factory…
After installing Format Factory, go to “Video Joiner & Mux” to proceed.

Step 2: Add FLV files…
“Add Files” allows you to import FLV files in batches. When all FLV files have been loaded, click “Clip” to clip and crop FLV files as needed. Then, under “Output Settings,” choose an output format and further customize the output quality.


Step 3: Merge files…
Once done, click “OK” to get back to the first window and press “Start” to begin the merging
process.

Alternative Way to Merge/Combine FLV Files on Mac
iDealshare VideoGo (Paid tool to merge FLV Files)
You can use iDealshare VideoGo to convert media files for playback anywhere. It supports a wide range of video formats, both SD and HD. The application also features its own editor, which includes a wide range of activities. It allows you to trim the selected video, crop it, modify the brightness, contrast, and saturation, add text and image watermarks, and manage or add your own subtitles.

A Step-by-Step Guide
Step 1: Import FLV files…
To import the FLV video files that you want to merge, click the “Add File” button or just drag & drop the files.
Step 2: Choose output format…
Choose FLV as the output video format. Select FLV from the “General Video” category from the “Profile” pop-up menu.
Step 3: Merge FLV files…
Select the FLV video files that you wish to merge into one in the main window list, and then choose the “Merge Selected into One” option from the context menu. Click the “Convert” button to start combining the videos.

Faasoft FLV Joiner/Merger (Free tool to merge FLV Files)
Faasoft FLV Joiner/Merger is used to combine FLV files without any re-encoding as well as retain the output quality. Merges FLV files and converts them to more popular formats as well like; MP4, AVI, MOV, WMV, MKV, ASF, ProRes, MXF, OGV, 3GP, etc. to get played on multiple mediums. Apart from FLV files, Faasoft FLV Joiner allows you to merge various kinds of video and audio clips. In addition, this powerful tool works more than just an FLV Merger, i.e.; It is, even more, an in-built video and audio editor, with which, you can optimize any files as per requirement.
A Step-by-Step Guide
Step 1: Load FLV files…
To add FLV files to this Joiner, run FLV Merger and drag and drop the folder containing FLV files to the program’s main screen. If the FLV files you wish to merge are not in the same folder, you can drag them one by one to the software. You should put them together first to save time.
Step 2: List to merge…
Once all FLV files have loaded, pick them all and choose “Merge Selected into One” from the context menu. In the task list, the combined FLV file will have an extension name similar to “Merge 1.”

Step 3: Convert FLV clips…
Click the “Profile” drop-down button to select “FLV Flash Video Format (*.flv)” from the “Picture & Animation” category as the output format. If you want to re-encode the merged FLV file to another video format, select another output format from the list above.
Step 4: Start joining…
Simply click the round “Convert” button in the bottom right corner and let this fantastic tool do the rest.
2 Ways to Merge/Combine FLV Files on Android
Video Merger by Alyaanah (Paid tool to merge FLV Files)
Video Merger can merge any number of videos together in one video. It also accepts almost any format of videos as input. Some of the input formats for merging that are supported are mp4, mkv, 3gp, 3gpp, mov, flv, avi, mpg, mpeg, m4v, vob, wmv, webm, mts, ts, m2ts, and so on. It can also convert the combined video to a variety of formats. Merged output formats supported include mp4, mkv, mov, avi, 3gp, and others. This application allows you to combine videos with different formats, bitrates, and frame rates into a single video. It also scales multiple videos into a single scale and merges them together. It can also merge videos with different resolutions into one video. The merged videos can also be compressed together maintaining original quality to a smaller sized video than all the original video sizes combined.
Video merger allows you to merge in three different ways as follows;
Side by side:
Choose two files, and they will be merged in a side-by-side format (Horizontal stack).
Top-Bottom:
Choose two files, and they will be merged top to bottom (Vertical stack).
Sequential:
You can select unlimited files and they will be merged one after the other in a sequential format.
VideoChain by Arypex Initiative (Free tool to merge FLV Files)
Now you can combine video files from your Android device camera as well and for free. VideoChain is an easy to learn and use app (with in-built instructions) that allows you to easily combine video clips to create one video using the most advanced encoding techniques. It is an excellent tool for merging video clips from your front and rear cameras, as well as portrait and landscape video files, into a single file. It can combine MP4, MPEG, MKV, FLV, and other video clips with four different quality/compression settings available.
2 Ways to Merge/Combine FLV Files on iPhone
Magisto Video Editor (Paid tool to merge FLV Files)
It is a wonderful app to put FLV clips together on an iPhone. Using this versatile video editing app, you can merge multiple videos and create eye-catching files of up to 5 minutes. You can add text, colors, and even text slides between video frames to the video. The app’s filters can be used to further enhance the files. The app also supports a large library of audio files, which you can use to add music to your video files. And, to use all of the app’s features, you must have a paid subscription.


iMovie (Free tool to merge FLV Files)
iMovie is one of the most popular video editing apps for iOS users. You can edit and merge videos on iMovie with ease. The app is free and secure. If you are looking for a professional way to put two videos together on your iPhone, iMovie can be a good choice. FLV videos can be converted to WMV, M4V, and other popular video formats after merging. You can also modify the video output settings and delete the selected video segments as well.
A Step-by-Step Guide
Step 1: Launch the iMovie app on your iPhone. In the Projects window, press the + button.

Step 2: In the New Project window, select Movie. Browse through your video clips in the gallery and import them.

Step 3: Tap Create Movie at the iPhone screen’s bottom. The videos will automatically get merged in the iMovie timeline.
Step 4: Select the desired video file. You can include transition effects, background music, and other profiles.
Step 5: Tap Done to combine two videos into one on the iPhone using iMovie.

Step 6: To export your merged video file, tap the Share icon to save the video.
2 Ways to Merge/Combine FLV Files Online
Clideo (Paid online tool to merge FLV Files)
Now you can combine your FLV files online using Clideo’s FLV Merger. It allows you to combine several videos, images, and audio files. You will also be able to download the finished product in any format you want. And, as the tool operates online, it will not consume any of your device’s memory. Each file you add in the free edition can be up to 500 MB in size; if this is insufficient for you, you can always subscribe to Clideo Pro.
A Step-by-Step Guide
Step 1: Upload the FLV files…
Click on the “Choose files” button and select the necessary videos from your device. To add a video from Google Drive or Dropbox, use the little arrow to call a drop-down menu.
Step 2: Merge FLV and other files
To add more content, use the menu with all of the options from the previous stage. Rearrange them as you see fit. Crop the frame using one of the available aspect ratios. Upload a soundtrack, then cut it with the scissors icon and adjust the volume. When you’re done, choose a format and click “Merge.”
Step 3: Save joined FLV
Take a peek at the outcome. If you like it, save it to your device or cloud storage. Otherwise, you can return to editing without having to start over.
Veed’s Video Editor (Free online tool to merge FLV Files)
Now there’s no need to pay for expensive apps like Filmora or Wondershare Uniconvertor. You can merge your FLV files using Veed’s Video Editor. It lets you combine multiple flash videos together and export them as a single video file. You can simply do it all straight from your browser and from any device. Veed’s Video Editor is compatible with Windows XP, Windows 10, Mac, Linux, and all mobile devices. And, it is absolutely free. There’s no need for an account or to download anything.
A Step-by-Step Guide
Step 1: Upload the FLV files…
Select multiple FLV videos after clicking on ‘Choose FLV Files’. You can also drag and drop your videos into the box. They’ll be added to the editor.
Step 2: Start editing or add more videos…
You’ll be directed to the video editor, where you can split, combine, and rearrange your video clips. This is a purely optional step. More videos can be added by clicking the plus (+) sign in the editing window or by selecting “Upload” from the left menu.
Step 3: Export your new video…
You can now save your merged videos as a single MP4 file. Simply select ‘Export,’ and your download will initiate.
FAQs about Merging FLV Files
Question 1: How to combine FLV files?
Answer: To combine FLV files, hold down the Ctrl or Shift key while selecting multiple FLV files in the User’s Album, and then drag and drop to the video track on the Timeline. All FLV files will automatically merge one after the other in order.
Question 2: What browser should be used to Merge FLV?
Answer: You can use any modern browser to Merge FLV, such as Google Chrome, Firefox, Opera, or Safari.
Question 3: How long does it take to Merge FLV files?
Answer: The FLV file merger is quite quick and takes only a few seconds.
So, if you have been looking for the best options on how to merge FLV files on different mediums, the above-listed apps will serve your purpose. Now, check out the supported features, formats, and other merging functions of all the apps and choose the one that best meets your needs.
For macOS 10.14 or later
A Step-by-Step Guide to Merge FLV files on Windows/Mac using Wondershare Filmora
Step 1: Launch Wondershare Filmora and load FLV files…
When you run this FLV joiner, simply click “Import” to load all of the local FLV files that you want to merge to the User’s album of this FLV video merger. You can also just drag and drop the target files from your PC into the album.
Step 2: Merge FLV files into one…
At the bottom of this FLV file merger, there lies a Timeline. Drag FLV files from the album to the Timeline and use the slider bar to help you arrange all FLV files in the Timeline without overlapping them. That’s very important as if you put one video to another, the original video will get split. Also, make sure that all FLV files are placed in the sequence in which they are to be played. If not, you can rearrange any video clip with a simple drag-and-drop.
Step 3: Choose the target format as FLV…
When you are sure that all FLV files are in the correct required order on the Timeline, you can view the effect in real-time in the preview pane. If everything is fine, you are now ready to export this new FLV file. All you have to do is just press the “Create”
button, then go to the “Format” tab > “FLV” output format in the output window.
Step 4: Export a new FLV file…
Finally, click the “Create” button to save the settings and export the new FLV file simultaneously. When it’s done, simply navigate to the whole FLV video using the output file path.
Alternative Way to Merge/Combine FLV Files on Windows
Joyoshare Media Cutter (Paid tool to merge FLV Files)
Joyoshare Video Joiner for Windows is a comprehensive and user-friendly audio and video merging software that supports a wide range of file formats such as FLV, F4V, HD,4K, MP4, M4V, M4A, DV, MPEG, FLAV, WMA, and others. It is not only a superb video joiner for joining FLV files in batches without re-encoding, but it is also a video editor thanks to the built-in advanced editing tool. That means you can customize and enhance your FLV files as required before integrating them. The two combing modes (high-speed mode and encoding mode) it employs are also noteworthy. With high-speed mode, you can join an unlimited number of FLV files losslessly and swiftly. You can merge files in different formats without gaps and customize the codec, resolution, bit rate, frame rate, and other parameters of your FLV files while in encoding mode.
A Step-by-Step Guide
Step 1: Add FLV files…
First, go to the Joyoshare website and download the Joyoshare Video Joiner installation package. Install and configure it on your computer. Then, import FLV files into the video joiner. There are two options: click “Open File” to choose them or drag them directly into the software.
Step 2: Choose a merging mode and export format…
You must pick a format from high-speed mode and encoding mode based on your requirements by using the “Format” button. The former is only for combining files of the same format losslessly at 60 X speed. The other is for users who want to modify files while joining files in different formats. With the use of a gear icon beside the selected output format, users can change video settings such as resolution, bit rate, codes, and so on while in encoding mode.
Step 3: Remove undesirable parts…
Once finished choosing mode and format, simply press “OK” to go back to the main screen. Then double-click these FLV files one by one to preview them. You can change the timeline to remove unnecessary sections from your FLV videos. Moreover, renaming and rearranging these video files can also be realized in this step.
Step 4: Edit FLV files (optional)…
The software has an editor that allows you to easily and flexibly enhance your FLV video files by clicking “Edit” next to each file before joining.
Step 5: Merge FLV files and save…
Finally, all you have to do is press the “Convert” button to enable Joyoshare Video Joiner to begin combining these FLV files. The merged FLV file will be saved as a converted file on your computer.
Format Factory (Free tool to merge FLV Files)
Format Factory is a free Windows video joiner, recorder, converter, downloader, and editor. It supports a wide range of file types, including FLV, MKV, MP4, 3GP, WMV, SWF, AVI, MPG, VOB, WebM, and others. It is not difficult to use it to combine FLV files.
A Step-by-Step Guide
Step 1: Run Format Factory…
After installing Format Factory, go to “Video Joiner & Mux” to proceed.
Step 2: Add FLV files…
“Add Files” allows you to import FLV files in batches. When all FLV files have been loaded, click “Clip” to clip and crop FLV files as needed. Then, under “Output Settings,” choose an output format and further customize the output quality.
Step 3: Merge files…
Once done, click “OK” to get back to the first window and press “Start” to begin the merging
process.
Alternative Way to Merge/Combine FLV Files on Mac
iDealshare VideoGo (Paid tool to merge FLV Files)
You can use iDealshare VideoGo to convert media files for playback anywhere. It supports a wide range of video formats, both SD and HD. The application also features its own editor, which includes a wide range of activities. It allows you to trim the selected video, crop it, modify the brightness, contrast, and saturation, add text and image watermarks, and manage or add your own subtitles.
A Step-by-Step Guide
Step 1: Import FLV files…
To import the FLV video files that you want to merge, click the “Add File” button or just drag & drop the files.
Step 2: Choose output format…
Choose FLV as the output video format. Select FLV from the “General Video” category from the “Profile” pop-up menu.
Step 3: Merge FLV files…
Select the FLV video files that you wish to merge into one in the main window list, and then choose the “Merge Selected into One” option from the context menu. Click the “Convert” button to start combining the videos.
Faasoft FLV Joiner/Merger (Free tool to merge FLV Files)
Faasoft FLV Joiner/Merger is used to combine FLV files without any re-encoding as well as retain the output quality. Merges FLV files and converts them to more popular formats as well like; MP4, AVI, MOV, WMV, MKV, ASF, ProRes, MXF, OGV, 3GP, etc. to get played on multiple mediums. Apart from FLV files, Faasoft FLV Joiner allows you to merge various kinds of video and audio clips. In addition, this powerful tool works more than just an FLV Merger, i.e.; It is, even more, an in-built video and audio editor, with which, you can optimize any files as per requirement.
A Step-by-Step Guide
Step 1: Load FLV files…
To add FLV files to this Joiner, run FLV Merger and drag and drop the folder containing FLV files to the program’s main screen. If the FLV files you wish to merge are not in the same folder, you can drag them one by one to the software. You should put them together first to save time.
Step 2: List to merge…
Once all FLV files have loaded, pick them all and choose “Merge Selected into One” from the context menu. In the task list, the combined FLV file will have an extension name similar to “Merge 1.”
Step 3: Convert FLV clips…
Click the “Profile” drop-down button to select “FLV Flash Video Format (*.flv)” from the “Picture & Animation” category as the output format. If you want to re-encode the merged FLV file to another video format, select another output format from the list above.
Step 4: Start joining…
Simply click the round “Convert” button in the bottom right corner and let this fantastic tool do the rest.
2 Ways to Merge/Combine FLV Files on Android
Video Merger by Alyaanah (Paid tool to merge FLV Files)
Video Merger can merge any number of videos together in one video. It also accepts almost any format of videos as input. Some of the input formats for merging that are supported are mp4, mkv, 3gp, 3gpp, mov, flv, avi, mpg, mpeg, m4v, vob, wmv, webm, mts, ts, m2ts, and so on. It can also convert the combined video to a variety of formats. Merged output formats supported include mp4, mkv, mov, avi, 3gp, and others. This application allows you to combine videos with different formats, bitrates, and frame rates into a single video. It also scales multiple videos into a single scale and merges them together. It can also merge videos with different resolutions into one video. The merged videos can also be compressed together maintaining original quality to a smaller sized video than all the original video sizes combined.
Video merger allows you to merge in three different ways as follows;
Side by side:
Choose two files, and they will be merged in a side-by-side format (Horizontal stack).
Top-Bottom:
Choose two files, and they will be merged top to bottom (Vertical stack).
Sequential:
You can select unlimited files and they will be merged one after the other in a sequential format.
VideoChain by Arypex Initiative (Free tool to merge FLV Files)
Now you can combine video files from your Android device camera as well and for free. VideoChain is an easy to learn and use app (with in-built instructions) that allows you to easily combine video clips to create one video using the most advanced encoding techniques. It is an excellent tool for merging video clips from your front and rear cameras, as well as portrait and landscape video files, into a single file. It can combine MP4, MPEG, MKV, FLV, and other video clips with four different quality/compression settings available.
2 Ways to Merge/Combine FLV Files on iPhone
Magisto Video Editor (Paid tool to merge FLV Files)
It is a wonderful app to put FLV clips together on an iPhone. Using this versatile video editing app, you can merge multiple videos and create eye-catching files of up to 5 minutes. You can add text, colors, and even text slides between video frames to the video. The app’s filters can be used to further enhance the files. The app also supports a large library of audio files, which you can use to add music to your video files. And, to use all of the app’s features, you must have a paid subscription.
iMovie (Free tool to merge FLV Files)
iMovie is one of the most popular video editing apps for iOS users. You can edit and merge videos on iMovie with ease. The app is free and secure. If you are looking for a professional way to put two videos together on your iPhone, iMovie can be a good choice. FLV videos can be converted to WMV, M4V, and other popular video formats after merging. You can also modify the video output settings and delete the selected video segments as well.
A Step-by-Step Guide
Step 1: Launch the iMovie app on your iPhone. In the Projects window, press the + button.
Step 2: In the New Project window, select Movie. Browse through your video clips in the gallery and import them.
Step 3: Tap Create Movie at the iPhone screen’s bottom. The videos will automatically get merged in the iMovie timeline.
Step 4: Select the desired video file. You can include transition effects, background music, and other profiles.
Step 5: Tap Done to combine two videos into one on the iPhone using iMovie.
Step 6: To export your merged video file, tap the Share icon to save the video.
2 Ways to Merge/Combine FLV Files Online
Clideo (Paid online tool to merge FLV Files)
Now you can combine your FLV files online using Clideo’s FLV Merger. It allows you to combine several videos, images, and audio files. You will also be able to download the finished product in any format you want. And, as the tool operates online, it will not consume any of your device’s memory. Each file you add in the free edition can be up to 500 MB in size; if this is insufficient for you, you can always subscribe to Clideo Pro.
A Step-by-Step Guide
Step 1: Upload the FLV files…
Click on the “Choose files” button and select the necessary videos from your device. To add a video from Google Drive or Dropbox, use the little arrow to call a drop-down menu.
Step 2: Merge FLV and other files
To add more content, use the menu with all of the options from the previous stage. Rearrange them as you see fit. Crop the frame using one of the available aspect ratios. Upload a soundtrack, then cut it with the scissors icon and adjust the volume. When you’re done, choose a format and click “Merge.”
Step 3: Save joined FLV
Take a peek at the outcome. If you like it, save it to your device or cloud storage. Otherwise, you can return to editing without having to start over.
Veed’s Video Editor (Free online tool to merge FLV Files)
Now there’s no need to pay for expensive apps like Filmora or Wondershare Uniconvertor. You can merge your FLV files using Veed’s Video Editor. It lets you combine multiple flash videos together and export them as a single video file. You can simply do it all straight from your browser and from any device. Veed’s Video Editor is compatible with Windows XP, Windows 10, Mac, Linux, and all mobile devices. And, it is absolutely free. There’s no need for an account or to download anything.
A Step-by-Step Guide
Step 1: Upload the FLV files…
Select multiple FLV videos after clicking on ‘Choose FLV Files’. You can also drag and drop your videos into the box. They’ll be added to the editor.
Step 2: Start editing or add more videos…
You’ll be directed to the video editor, where you can split, combine, and rearrange your video clips. This is a purely optional step. More videos can be added by clicking the plus (+) sign in the editing window or by selecting “Upload” from the left menu.
Step 3: Export your new video…
You can now save your merged videos as a single MP4 file. Simply select ‘Export,’ and your download will initiate.
FAQs about Merging FLV Files
Question 1: How to combine FLV files?
Answer: To combine FLV files, hold down the Ctrl or Shift key while selecting multiple FLV files in the User’s Album, and then drag and drop to the video track on the Timeline. All FLV files will automatically merge one after the other in order.
Question 2: What browser should be used to Merge FLV?
Answer: You can use any modern browser to Merge FLV, such as Google Chrome, Firefox, Opera, or Safari.
Question 3: How long does it take to Merge FLV files?
Answer: The FLV file merger is quite quick and takes only a few seconds.
So, if you have been looking for the best options on how to merge FLV files on different mediums, the above-listed apps will serve your purpose. Now, check out the supported features, formats, and other merging functions of all the apps and choose the one that best meets your needs.
Top Animated Title Makers
You know that your video needs a title, but rather than just type in some bland text to introduce the video, you can create an animated title page that is far more attractive. Animated titles make a video more attractive and when done correctly, they can even guarantee that your target audience will stick around long enough to watch the entire video. They can also be very useful for introducing the content of the video.
But to make an effective animated title, you need a tool that is designed to do just that. In this article, we look at some of the top animated title makers that you can use to create the perfect animated title for your video.
Part 1. Animated Title Maker Online
If you don’t want to install software on your computer to create the animated title, the following are the top online tools to choose from;
Animaker
Link: https://www.animaker.com/text-animation-maker
Rating: 4.5/5
Animaker is an online tool that is specifically designed to help you create text animations that you can then add to your video project. Available online on all browsers, Animaker has a simple user interface that makes it easy to create text animations in a matter of minutes. It is so easy to use that even the average beginner can create stunning text animations.
If you don’t want to create the animations from scratch, Animaker has numerous pre-designed templates for you to choose from that you can then just edit to fit your design. It also has a lot of customizable infographics that you can repurpose.

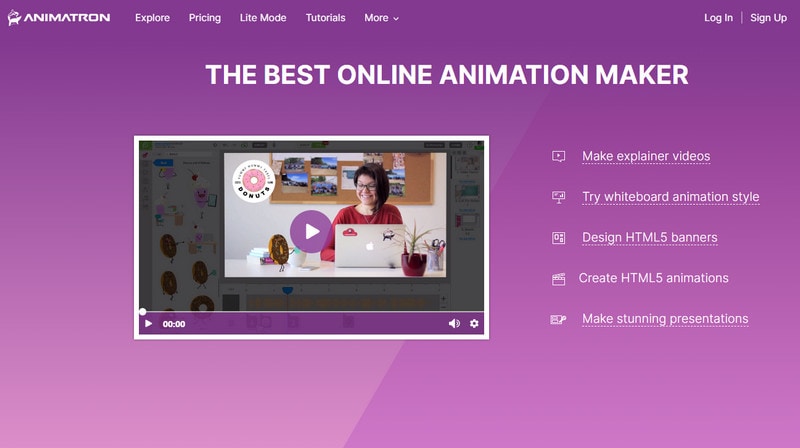
Animatron Studio
Link: https://www.animatron.com/studio
Rating: 4.5/5
The Animatron Studio is a one-stop solution for generating all types of animated texts. You can use it to create the perfect animated title for your video, but its numerous features also mean that it is one of the best ways to create attention-grabbing animated banner ads that can be posted on various ad sites,
It has a wealth of resources that you can use to create the title including more than 500,000 royalty-free images, videos, and audio to include in your project. If you don’t want to build the animated content from the ground up, you can select from the 200 pre-animated sets that Animatron Studio provides.
Kapwing Title Maker
Link: https://www.kapwing.com/animated-text-video-maker
Rating: 4.5/5
If your goal is to do more than just create an animated title for your video, Kapwing is a good solution. It is a complete online video editor that can also be used to create animated titles. As such, you can expect Kapwing to have more advanced features that allow you to customize the animated title in various ways.
For instance, it has a huge selection of animations that you can apply to the text. But you also get the option to upload your own animations, colors, and fonts. But please note that the free version of Kapwing will add a watermark to the video.

Biteable Animated Text Maker
Link: https://biteable.com/animated/text/
Rating: 4.5/5
Biteable is one of the most popular solutions that you can use to create all kinds of animated texts. It is simple enough to use that it is useful to both professionals and amateur video creators. It has numerous useful features including custom scenes, foundations, backgrounds, and characters all of which can work together to create the perfect animated title.
One of the main benefits of choosing Biteable is that you can share the videos you edit directly on social media without having to download the video.

Flexclip Video Maker
Link: https://www.flexclip.com/editor/
Rating: 4.5/5
Flexclip is another very easy-to-use and easily accessible solution to create animated texts for videos. Rather than create the texts from scratch, Flexclip allows you to create stunning animated texts just by selecting several parameters.
There are also a lot of pre-made designer text templates that are fully customizable. All you have to do is select one of the templates, and change the text, font, and any images to make it unique to you and your video.

Part 2. Animated Title Maker for Computer
Online tools can be useful, especially since they are more easily accessible. But if you want additional features and more ways to customize your animated title, the following desktop solutions may be more applicable to you;
Filmora
Rating: 4.5/5
Wondershare Filmora is a complete suite of video editing tools that can also come in handy when creating animated titles for videos. It is a very simple video editor with a simple user interface, making it an ideal solution even for beginner users. Adding a title to your video is easy and you get to choose from more than 200 different animations that you can apply to bring the text to life.
Filmora is also very useful because it comes with advanced editing features for the professional editor. You can use it to edit all aspects of the video including the clips and even any audio that may be on the project.

Adobe Animate
Rating: 4.5/5
Adobe Animate is a great option to create various animations for your video project, including animated texts. Used by animators to create 2D animated content, Adobe Animate has a lot of features designed to facilitate this kind of animation and is, therefore, one of the go-to solutions for designers looking to create illustrations like logos and infographics.
But like other Adobe programs, Adobe Animate is not very easy to use and the beginner may find that it takes quite a long time to figure out how it works. But once you figure it out, the 800+ web fonts can make it very easy for you to customize your animated title in various ways.

Express Animate
Rating: 4.5/5
Express Animate is a completely free program that you can download on your computer. It is a complete video editor which means that you can use it to animate text and characters, but it is also a great way to edit other aspects of the video including the audio tracks and adding digital effects.
With a simple user interface, Express Animate allows users to create 2D animations that can be used to create unique videos. It is also a good way to create GIFs and memes.
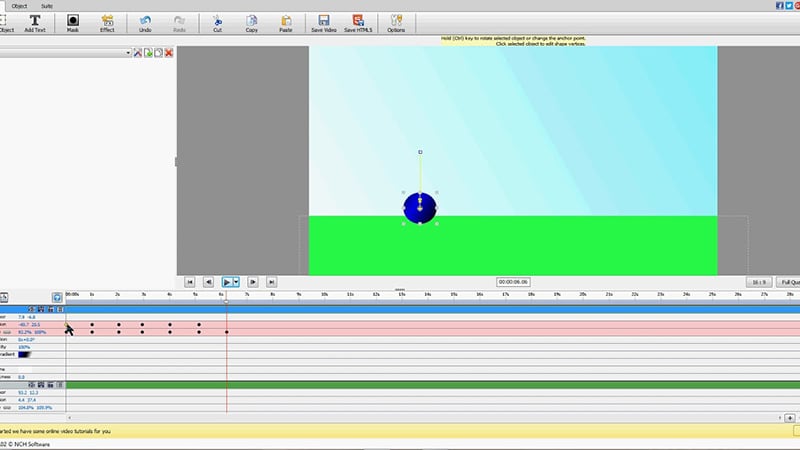
Movavi Video Editor
Rating: 4.5/5
Movavi Video Editor is another complete suite of editing tools that can also come in handy when you want to create an animated title for your video. Designed for both professionals and beginners, this video has all the advanced features you will need to edit all aspects of your video, including a built-in audio editor.
When it comes to animation, Movavi has a lot of effects and transitions as well as pre-made title templates to choose from. Once you have selected the title, you can easily customize the font and color to fit into your project.

Windows Movie Maker
Rating: 4.5/5
For PC users Windows Movie Maker is a simple to use and free way to edit videos. Included with the Windows OS, you likely don’t need to install any software to use and even though it is a free solution, Windows Movie Maker does have the necessary features to create and add animated titles to any video.
It comes with numerous effects, transitions, and templates to choose from when animating text. And it can also be used to edit videos in other ways including trimming and merging clips.

Part 3. Animated Title Maker Apps
If you are editing your videos on your mobile device, the following are the top animated title-making apps to choose from;
Tomo
Rating: 4.5/5
Link: https://m.apkpure.com/tomo-animate-text-in-video/com.entzeners.app.tomo
Tomo is one of the best apps that you can use to animate text in a video. It has robust features that allow you to easily add text to the video and then animate the text using various transitions and effects. Once the edits are complete, Tomo allows you to share the completed video directly on social media apps like Instagram and Twitter.

Adobe Spark
Rating: 4.5/5
Link:https://apps.apple.com/us/app/adobe-spark-post-design-maker/id1051937863
Available for both Android and iOS devices, Adobe Spark is a video editing tool that has numerous tools to add and edit texts on videos. You can use the professionally designed templates that you have access to when using Adobe Spark to create stunning animation titles. And since it easily integrates with other apps on the device, sharing the videos is very easy.
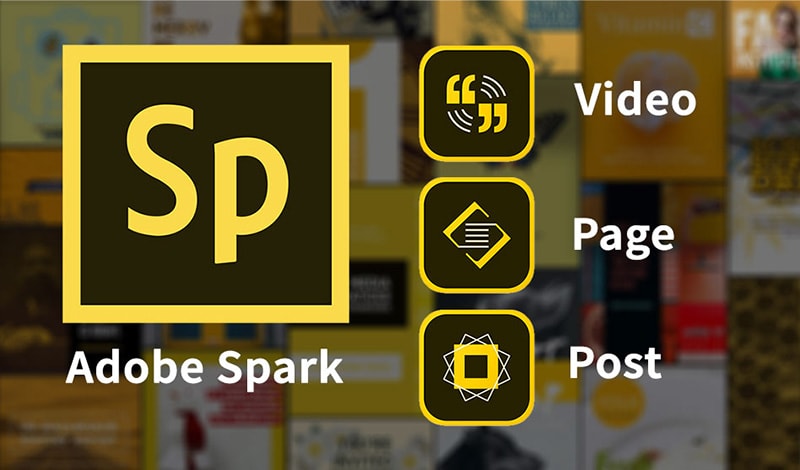
Quik
Rating: 4.5/5
Link: https://play.google.com/store/apps/details?id=com.gopro.smarty&hl=en&gl=US
Quik is an app that is dedicated to text animations and therefore one of the best solutions when you want to add and edit texts on videos. It is available for both iOS and Android and although the free version of the app is slightly limited, its basic editing features are still better than what you find on other more expensive solutions.
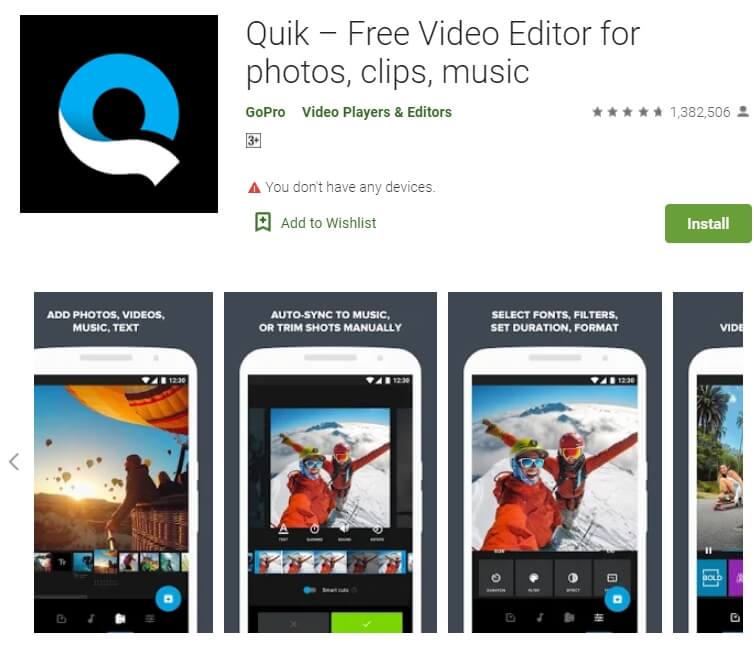
Hyper-type Animated Text Videos
Rating: 4.5/5
Link: https://itunes.apple.com/us/app/hype-type-animated-text-videos
This app gives you two options when it comes to animating the text on your video; auto-motion and typography. It focuses on just adding and editing text on a video and as such may not have any of the other video editing features you will find on some of the other apps. But if your goal is to create an interactive animated video title, Hyper-type Animated Text Videos is a great solution.
Vimeo
Rating: 4.5/5
Link: https://play.google.com/store/apps/details?id=com.vimeo.android.videoapp&hl=en&gl=US
Also available for both iOS and Android devices, Vimeo can also be a handy solution for the creation and editing of animated titles for videos. It has a lot of features to edit not just the text in videos, but also all other elements including audio. You even get a wide selection of royalty-free music that you can add to the video and motion stickers to make your title stand out even more. But the free version of Vimeo will add a watermark to the video.

Free Download For Win 7 or later(64-bit)
Free Download For macOS 10.14 or later
Steps to Create Gold Text Effects After Effects
Have you always wanted to create the gold text effect in After effects but you don’t know how? This polished effect can make your video’s title stand out and is one of the best ways to create a stunning title for YouTube and Instagram clips. In this article, we will be looking at how to create the gold text using After Effects.
Steps to Create Gold Text Effects After Effects
Follow these steps to create a gold text effect in your After Effects video project;
Step1Start by creating an environment. To do that just right-click and choose “New Comp” and click “OK” to create one.
Step2Then we need to add fractal noise. To do that, click on “Effects and Presets” and type in “fractal” to choose “Fractal Noise.” You can double-click on it or drag it to the comp.
Step3Once this is done, you will need to do a little bit of housekeeping on the contrast and brightness. Increase the “Contrast” and reduce the “Brightness.”
Then go to the “Sub Settings” and reduce the “Sub Influence” down to zero.
Go to “Transform Option” and decrease the scale just a little bit. Then increase the “Scale Height” just a little.
Step4The next step is to add color to the scene. To do that, right-click on the layer and choose “New > Solid.” Select the gold color and click “OK.” Do the same with the second layer.
Step5Now you want to blend both colors by choosing a blending mode. Hold the “Shift” key and “hyphen” or “=” sign on the keyboard and choose “Overlay.”
Step6To make the color stronger, go to “Layer > Solid Settings” and choose a color.
Step7Go back to “Comp 3.” Right-click on it and select “New > Light” to add a new point of light.
Step8Go back to the project panel to click on “Comp 4” to add the environment. Right-click on the Comp 4 layer and make it an environment layer.
Step9In the options that appear, set “Appears in Reflections” to “Only” and you can then increase and decrease the color saturation until you have the desired result.
Free Gold Text Effects Template to Use
As you can see from the steps above, creating your gold text effects can be quite difficult. The good news is that you can download pre-made titles that you can simply edit. The following are some of the best to choose from;
- Christmas Title Template
Link: https://mixkit.co/free-after-effects-templates/christmas-title-template-819/
Despite the name, this is an ideal title for elegant projects or when you want your title to stand out. The typography is beautiful and elegant making it the most ideal template for fashion-themed videos. The template is easily customizable in After Effects and you can even change the color you want.

- Fashion Instagram Story
Link: https://mixkit.co/free-after-effects-templates/fashion-instagram-story-551/
This is the most ideal template to choose if you want a gold text effect that is accompanied by an image. Again, this is a very elegant theme that is ideal for YouTube and Instagram videos in the fashion and entertainment genres. It is also fully customizable in After Effects, allowing you to change the color, text, and image.

- Wedding Invitation Opener
Link: https://mixkit.co/free-after-effects-templates/wedding-invitation-opener-803/
This free gold text template is also completely customizable and comes with various text effects that you can include in the text. It is elegant and includes shadow effects that make the text stands out more. But you can remove the shadow effects if they don’t suit your project.

- Golden Luxury Titles
Link: https://motionarray.com/after-effects-templates/golden-luxury-titles-116934/
If you are looking for a gold text title that stands out in terms of design, animation, and color, consider Golden Luxury Titles. It comes with 9 editable layers that you can use to modify the title in any way. It is the most ideal title for movies, teasers, TV shows, and more.

- Emotional Awards Opener
Link: https://motionarray.com/after-effects-templates/emotional-awards-opener-356434/
This is a sparkling and glistering stylish design that can be very useful for movies and TV shows. This attention-grabbing title template has over 18 editable text layers to allow you to customize the title in various ways.

Alternative Way to Create Video Gold
Adobe After Effects is a very good video editor, but one of the things that can make it inaccessible to many users is that it can be very difficult to use. Thankfully, there is another very effective video editor that you can use to create gold text that is much easier to use.
This is the Wondershare Filmora , one of the best video editors in the market. Before we look at how you can use Filmora to create the perfect gold metal texture on your text, let’s first look at some of its main features;
- You can use Filmora to edit videos at a very high resolution including 4K videos
- It can be used to remove the background and noise from the video very easily
- You can edit both video and audio in the same project
- Up to 5 text tracks and 10 music tracks can be added to the same timeline and the same project
- It is very easy to use with a simple and intuitive user interface
Here’s how to use Filmora to create a gold metal texture for your text;
Step1Install Wondershare Filmora on your Computer
Download the Filmora setup file to your computer and double-click on it to start installing the program to your computer.
Open the program once the installation is complete.
Step2Create a New Project
If you are starting from the beginning, you may need to create a new project.
To do that, click on “File > New Project” in the menu bar to start a new project.
If there was a project that you were already working on, click on “Open Project” on the main window and then click “File > Open Project” or “File > Open Recent” in the menu bar.
Step3Add A Title to the Timeline
To add a gold texture effect to a title on your video, we will first of all need to add a title to the project.
To do that, go click on the “Titles” tab at the top and drag one of the default titles to the timeline.
Once it is in the timeline, double-click on the title and edit it. Type in anything you want to appear in the title.

Select the font that you want to use and choose a specific font size to use. These are all your preferences and will depend on your project.
Move the title to the second track in the timeline as you get ready to begin adding the colors.
Step4Start Adding Colors
Go to “Media” at the top and click on “Sample Colors.” Drag the black color image to the track directly below the title timeline.

Then take a snapshot of this newly created image by clicking on the “camera” icon next to the playhead.
Change the Font of the Title to something else more elegant like “Montez” and take another snapshot by clicking on the same camera icon.

Step5Add the Gold Effect
Delete everything from the timeline. Don’t worry you took a photo of all the text layers and the effects added to each.
You will then need to find an image of a gold background. You can find these on any good background image site. Download a good clear image and upload it into Filmora.
Now drag and drop the gold background image to the second track in the timeline. Double click on the background image.
Select “Compositing” and then in the “Blending Mode” drop-down menu, choose “Darken.” Click OK.”

Hide the first layer in the timeline and select the gold background image layer. Click on “Animation” and then select “Customize.”
To create the customized effect that we need, click on the image and drag it from the right to the left side.

Move the playhead to the end of the image to insert another keyframe and then click on the restore icon to restore the size of the image.

Click “OK” and show the track above the timeline. You will now see that the gold texture effect has been applied to your title. You can also add the second snapshot with the varying font for further effect.
Step6Save the Project
Once you are done, you can go ahead and save the project or continue working on other aspects of the video as desired.
Free Download For Win 7 or later(64-bit)
Free Download For macOS 10.14 or later
Also read:
- Heres All About GIF Keyboard Youll Ever Want to Know for 2024
- Updated How to Create Your Own Subscribe Channel Graphics for 2024
- How to Create Video in Text Intro for 2024
- In 2024, How to Make Hand Shake Effect with Final Cut Pro
- New In 2024, Voice Changer for Discord | Use Voicemod on Discord
- New How To Quick Guide for Making Google Slideshows for 2024
- New In 2024, Splitting Video in VSDC Step by Step
- New How to Merge Audio and Video in VLC Media Player
- In 2024, Guide to Create a Timelapse Video in After Effects
- How to Create an Aesthetic Slideshow Presentation
- Updated In 2024, Mastering DaVinci Resolve Scopes A Comprehensive Guide
- How to Select and Use The Best BRAW LUTs
- In 2024, How to Add Customized Transitions to OBS
- Updated If You Are a Teacher or People Who Want to Share Their Ideas via Vides, You Can Always Make It on Your Own. This Article Will Share You 7 Tips to Create an Educational Video Easily
- New How to Apply Video Filters
- New Top List Best VHS Sound Effect That You Can Use in Video Making
- A Normal Video Brings More Editing Opportunities than a Slow-Motion One. This Text Explores How to Convert Slow Motion Video to Normal on iPhone for 2024
- New Blender - A Video Editor for All Professor for 2024
- In 2024, Having Trouble with Black Backgrounds in After Effects? Land in Here to Know How You Can Quickly Escape This Glitch in the Simplest Ever Way Possible
- How to Merge FLV Files Windows, Mac,Android, iPhone & Online for 2024
- What Is Motion Tracking and How to Use It
- In 2024, How Can You Create Outstanding Educational Teaching Videos?
- New Using the Best Templates to Create Slow Motion Videos on CapCut for 2024
- New 2024 Approved List of Whatsapp Video Format That You May Need to Know
- LumaFusion – What Is It and the Best Alternative to Use
- Updated 2024 Approved Detailed Guide to Crop Videos in Sony Vegas Pro
- How To Add Motion Blur In Davinci Resolve?
- Is GSM Flasher ADB Legit? Full Review To Bypass Your Tecno Pova 5 Pro Phone FRP Lock
- How to Repair a Damaged video file of Oppo Find X7 using Video Repair Utility on Windows?
- In 2024, Easy Ways to Manage Your Motorola Moto G Stylus (2023) Location Settings | Dr.fone
- How to Get and Use Pokemon Go Promo Codes On Honor Magic V2 | Dr.fone
- How to Change OnePlus Ace 2 Pro Location on Skout | Dr.fone
- How does the stardust trade cost In pokemon go On Oppo Reno 11 5G? | Dr.fone
- Fixing Persistent Pandora Crashes on Honor X8b | Dr.fone
- How Do You Get Sun Stone Evolutions in Pokémon For Honor Magic5 Ultimate? | Dr.fone
- Full Guide to Hard Reset Your Oppo Reno 11 5G | Dr.fone
- Fix the Error of Unfortunately the Process.com.android.phone Has Stopped on Asus ROG Phone 7 Ultimate | Dr.fone
- How to Come up With the Best Pokemon Team On Motorola Defy 2? | Dr.fone
- In 2024, How to Change Your Vivo S17t Location on life360 Without Anyone Knowing? | Dr.fone
- Title: New In 2024, Free LUTs for OBS How to Use Them?
- Author: Chloe
- Created at : 2024-04-24 07:08:33
- Updated at : 2024-04-25 07:08:33
- Link: https://ai-editing-video.techidaily.com/new-in-2024-free-luts-for-obs-how-to-use-them/
- License: This work is licensed under CC BY-NC-SA 4.0.
