
:max_bytes(150000):strip_icc():format(webp)/GettyImages-944229088-5bd1f61e46e0fb0026fdf2f0.jpg)
New In 2024, How to Add Motion Titles
How to Add Motion Titles
Do you want to make your videos eye-catching instantly? Looking for some cool title animations to make your texts stand out? You should definitely opt for motion title templates that are widely available in popular video editors. Motion title templates come preloaded with animated texts, engaging graphic elements, and even background effects.
You can add them directly to your video and customize them as per you requirements so that your video looks exactly the way you desire. Different video editors have different motion titles, and therefore, you should check them out one by one to find out the templates you are looking for. We will illustrate title motion graphics in all the leading video editors.
Part 1. Add Motion Title with Filmora
The easiest way to add motion title to your video on your computer is through Wondershare Filmora . Filmora is a professional video editor that is available for Windows and Mac users. Filmora has the best collection of motion title templates, and the user interface is super intuitive and anyone can use without any prior experience. Here are the steps to add motion title with Filmora.
Step1Install and launch Wondershare Filmora on your computer. Click on New Project option on the welcome screen or go to File menu and click on New Project option.

Step2Go to File menu and Import Media option to import your video file. Otherwise, you can simply drop the video file into Project Media folder.
Step3Drag the video file from Project Media folder and drop it into the Timeline.

Step4Go to Titles at the top and go to the left panel. You can different categories of motion title templates. Select any desired text effect and drop into the Timeline above the video layer wherever you want.
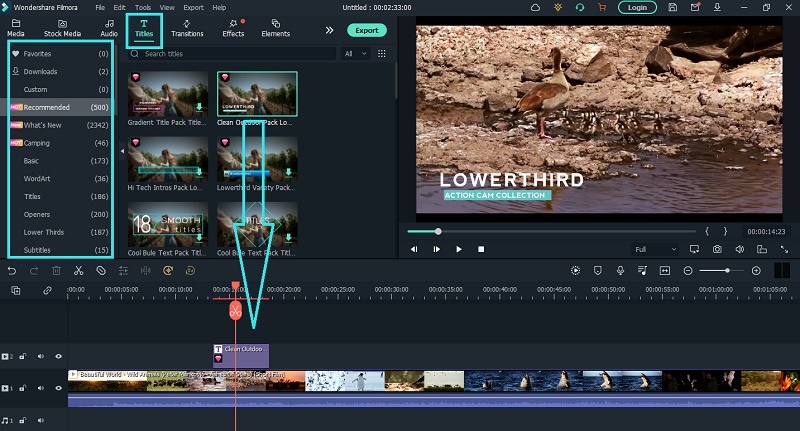
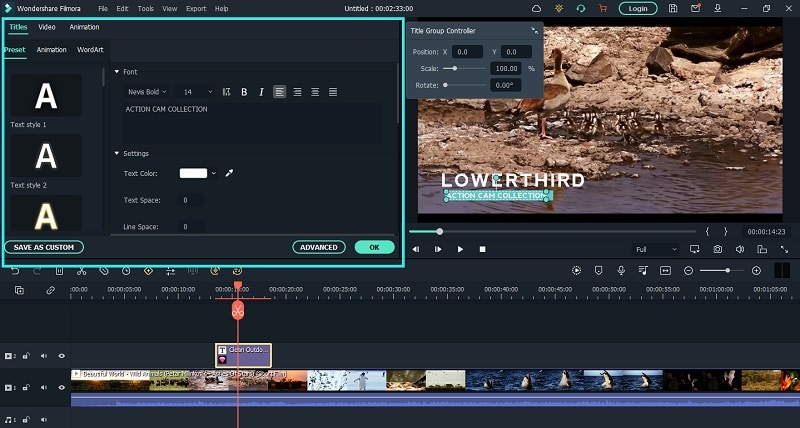
Step5Double clicking on the text layer on Timeline to edit the text and change the styles. Under Preset tab, you can change font, size, and color. Finally, click on OK button to save the edits done.
Part 2. Add Motion Title with Premiere Pro
Adobe Premiere Pro is a renowned video editor that is mostly used by professionals to edit videos and add effects and animations. Even though Premiere Pro has a steep learning curve, you can create motion title in simple steps. You can write any text on the video and select from different effects and animations to create motion title graphics. Here are the steps to add title motion graphics Premiere Pro free.
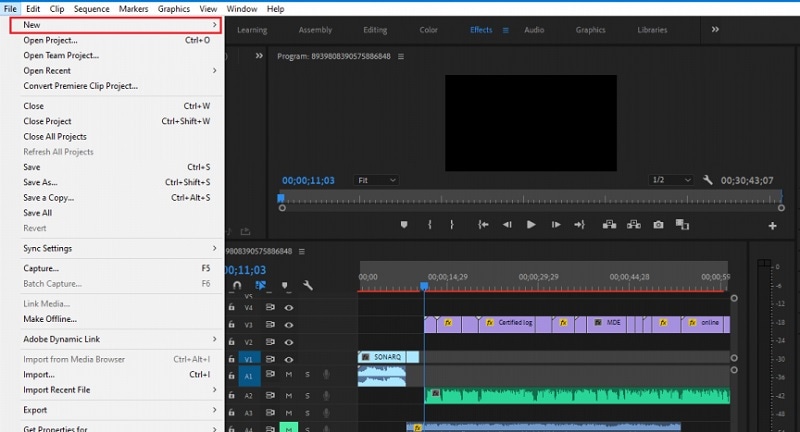
Step1Launch Premiere Pro and go to New> Project option. Import the video file and drop it into Timeline.
Step2Go to Title> New Title> Default Still option and follow the on-screen instructions.

Step3You will see different types of title styles and designs to choose from as you feel.

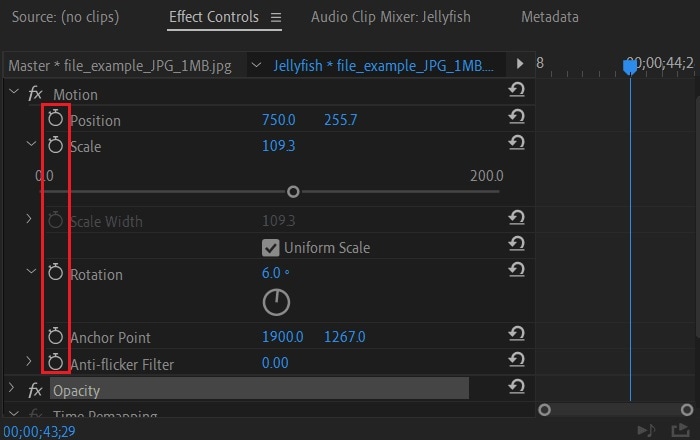
Step4Click on Type Tool option and click on the area on the video where you want the text to appear. You can customize them from the right panel from Title Styles, Title Properties, Tools and Title Actions.
Step5To add motion to the title, click on Effects Control window. Click on any desired animation and turn to Stopwatch icon to apply the effect to the text. There is a dedicated Motion option available.
Part 3. Make motion title with Studio
Studio is a popular video editing software where you can not only apply motion title presets but also create motion title presets from scratch. The reason why video editors choose Studio is because it allows users to customize everything and create different templates and animations for personalization. Here are the steps to create title motion graphics in Studio as per your requirements.
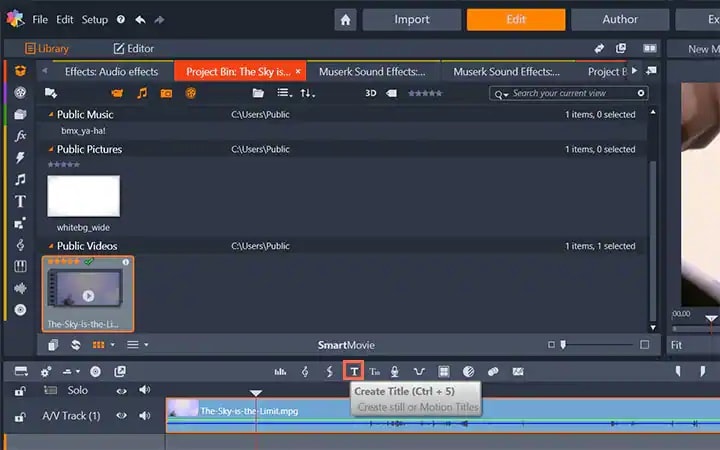
Step1Launch Studio. Import your video file, and you can import single frames such as images from a live video for stop motion titles. Once you have imported, go to the header bar above the Timeline. Click on Create Title option to open Title Editor to create title motion.
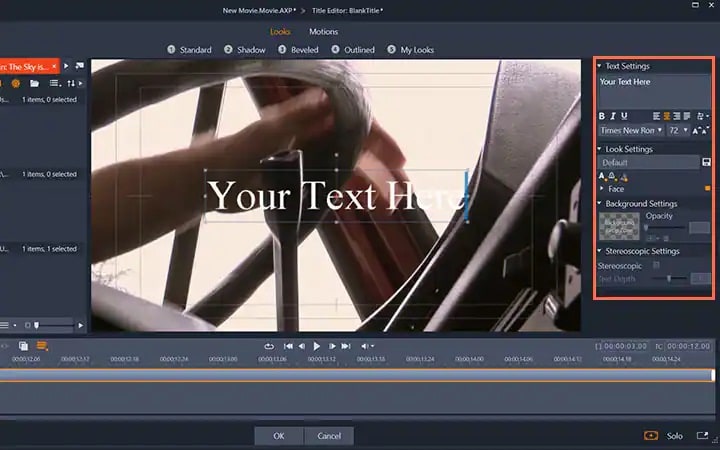
Step2Add your preferred text under Title Editor and adjust font, size, and style as you feel. Go to the right side to make changes to Look, Background, and Stereoscopic Settings to get the perfect text style from the wide range of choices available.
Step3Click on Motion option at the top to add motion to the text. Choose from the different motion title templates as per your preference.
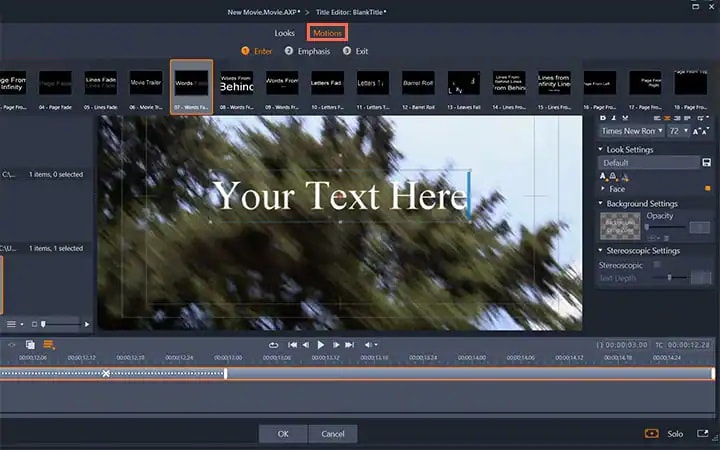
Step4You can adjust the duration of the motion effect from the right panel and click on Ok button.

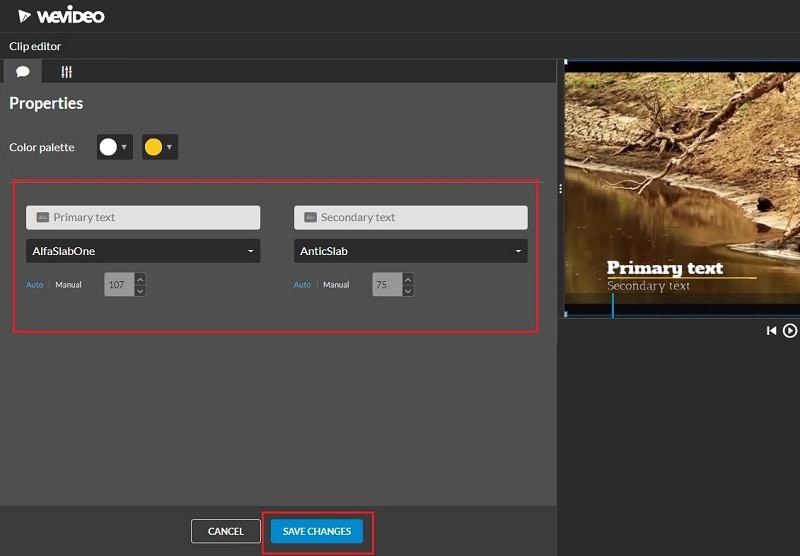
Part 4. Add Motion Title with WeVideo
WeVideo is a popular online video editor that you can use to add title motion graphics Premiere Pro free. You can find many motion titles on WeVideo for free like you get in Premiere Pro and there are many exclusive motion text templates available. You need to create a free account with WeVideo to get started. You can create your video from scratch by selecting from the available video templates. You can even import your recorded video and add motion texts and animations as per your preference. Here are the steps to add motion title with WeVideo.
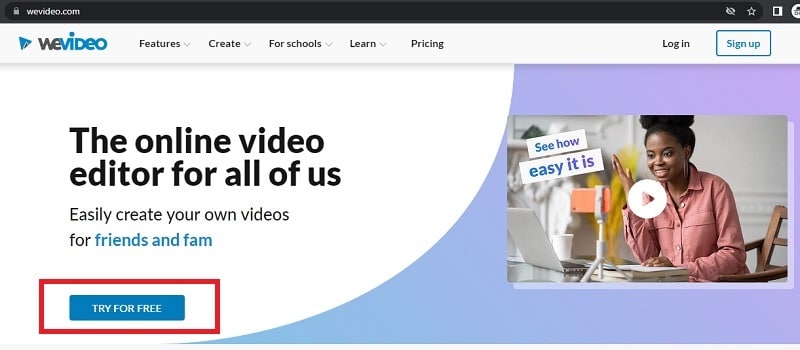
Step1Open your web browser and visit “wevideo.com”. Click on Try For Free button. Sign up for free and go to WeVideo video editor.
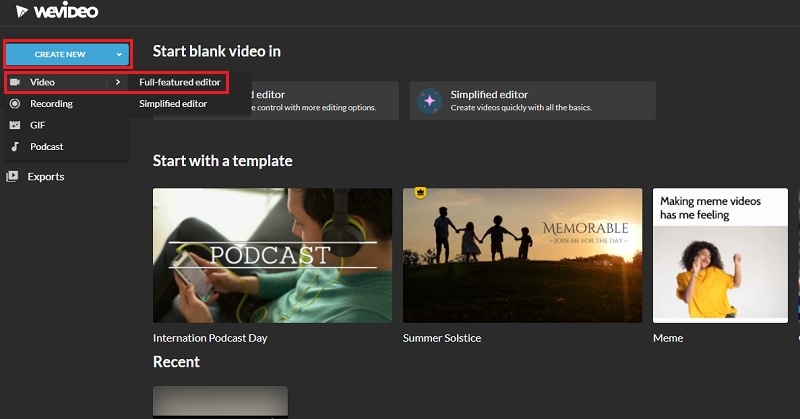
Step2Click on Create New button and select Video option. Click on Full-featured editor option.
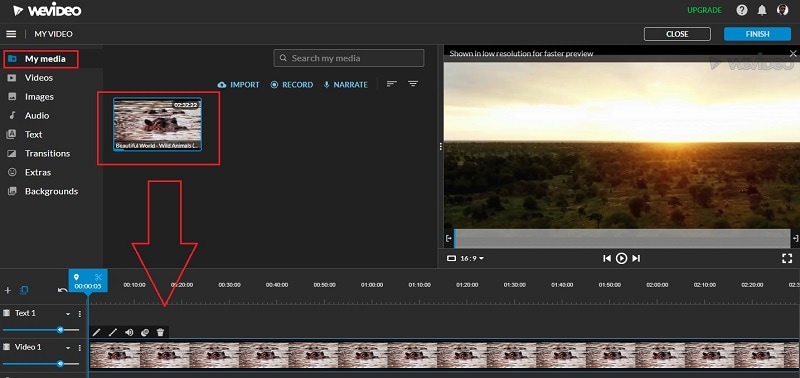
Step3Drag and drop your video file into My Media folder and bring it to Timeline.
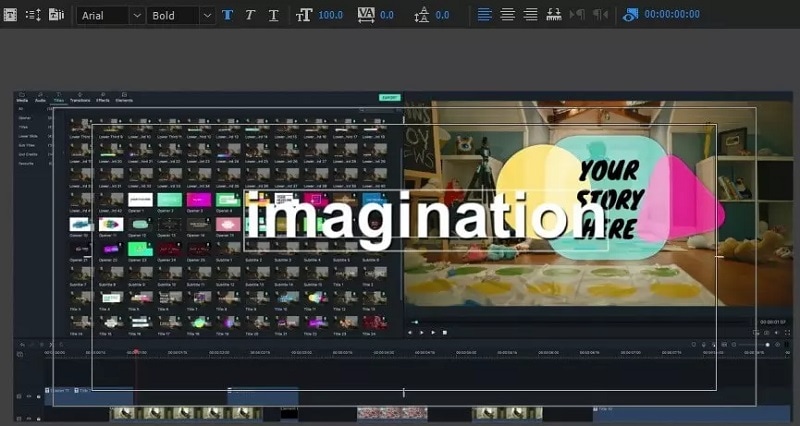
Step4Go to Text tab and you will see all the motion animated titles under Titles section. Click on them to check out their previews in Viewer. If you have selected anyone, drag and drop it into Timeline.
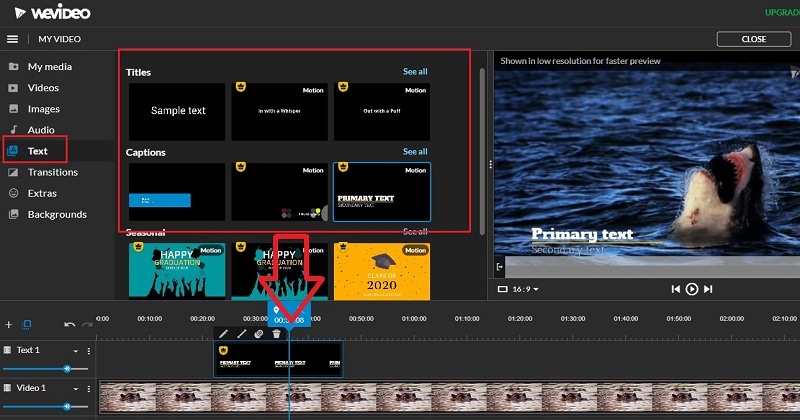
Step5Adjust the position where you want the title to appear on the video and stretch the duration as required. Double-click on the title to edit and customize it as per your preference. Finally, click on Save Changes button.
The Bottom Line
Motion titles are extremely important for any video because they bring in a variety to your video. They make the video eye-catching and help in getting the message across by grabbing the attention of the viewers. We have illustrated how to add motion titles Premiere Pro and Studio. You can also use WeVideo online video editor. We recommend Wondershare Filmora for its extensive collection of motion title templates to choose from and apply to your text.
Free Download For Win 7 or later(64-bit)
Free Download For macOS 10.14 or later
Make Super Easy Coin Magic With Filmora
Do you want to become a magician in your videos? Now, everyone can look like a magician with the magic of editing. This article will show you how to do a cool coin trick in Filmora 11 .
Part 1: What is the filmmaking technique “Cutting on action”
Cutting on action is a technique the editors use to cut in the middle of an action to another shot that matches the first shot’s action. Typically, the subject starts an action in one shot and continues the action in another, creating a smooth transition. For example, when you make the coin trick video, you need to cut on the tapping so it can trick the eyes, and the cut won’t be noticeable.

Part 2: Things You Need to Prepare for The Coin Magic Trick
- Glass and two coins

- Set the phone on a tripod. Because utilizing a tripod can significantly improve the recording’s stability.

Part 3: Start Filming
Step1 Firstly, you must show the coin and the bottom of the glass.

Step2 After that, you need to hold the coin with the fingers part of one hand and tap down on the coin. Make sure it looks like the coin is going through straight to the glass.

Step3 You need someone else to drop the other coin from the top. Meanwhile, you are pretending to tap a coin on the glass. You don’t need to worry about someone else hand in the frame. Since you can remove it easily with the masking feature in Filmora.

Step4 It would help if you had a second shot for a clean plate of the background. You can record background for 20 seconds.

Part 4: Bring the clips into Filmora 11
Step1 If you have not downloaded Filmora, you can visit filmora.wondershare.com to download Filmora’s new version.

Step2 Drag and drop the clip onto the first track of the timeline.Afterward, move the playhead to the right and find the spot where you tapped the coin last time before your friend drops the other coin. Additionally, make sure it is in the middle of the tapping action and cut.

Step3 Then move the playhead to the right and find the spot where your friend drops the coin while you tap without the coin in your hand. Make sure it is in the middle of the tapping action, and the position of your hand roughly matches that in the last cut and make a cut.

Step4 Now you need to delete the middle part and play it back. Indeed, cutting on action is the key to creating the illusion that the action is continued without editing.

Step5 Next, you must remove your friend’s hand in the frame with the Filmora masking feature. Afterwards. drag and drop the clean plate video onto the second track of the timeline.

Step6 Next, double-click the clip to open the setting video. Find the Mask Section and select the single line.

Step7 Here you can see the mask is applied.First, adjust the angle and position of the mask to only show the top part of the frame. Then you have to change the Blur Strength to add more blur to the edge of the mask.

Step8 With the mask finalized, unhide the first video track and adjust the length of the clip on the timeline. Finally, playback the video and see how it looks.

Summary
That’s how to make a coin move through a glass-like MAGIC with the cutting on action editing technique. You can pay close attention to the steps above and follow each step for perfect results.
Free Download For Win 7 or later(64-bit)
Free Download For macOS 10.14 or later
Free Download For macOS 10.14 or later
Learn How to Blur Faces in Your Video on iPhone
Create High-Quality Video - Wondershare Filmora
An easy and powerful YouTube video editor
Numerous video and audio effects to choose from
Detailed tutorials provided by the official channel
Blurring faces on a video allow you to safeguard sensitive data in your screencast video. Blurring also helps you conceal the identity of someone who doesn’t want to appear in your video. When you are recording a video with your iPhone in public places, you cannot always get everyone’s consent. So you might want to blur their faces to protect their identities. Keep reading to learn how to blur faces in a video on iPhone.
In this article
01 How to Blur Faces in Your Video on iPhone
02 Other Useful Apps for Blurring Faces in Videos on iPhone
03 Tutorial for How to Record on GarageBand
How to Blur Faces in Your Video on iPhone
The iMovie app allows you to blur faces in your videos on your iPhone. Apple Inc. developed this pre-installed video editing app for iPadOS, iOS, and macOS devices. The iMovie app started life as an iPhone application in 2010. The app is user-friendly, meaning that you don’t have to be tech-savvy to use it to blur faces in your video on your iPhone.
Follow the steps below to learn how to blur face on iPhone video using this preinstalled video editing application.
- Launch the iMovie application on your iPhone.
- Next, you have to get the video clip that you want to edit into the iMovie app. This process is known as importing. You can import videos by selecting the Plus + option or pressing ⌘ + I.
- Choose the Movie option to create a new project.

- Select the video with the person who you would like to blur their face from the media library.

- Tap Create Movie and add the picture you want to use to hide the face of someone on your video.
- Now, tap the Plus + sign from the iMovie editing timeline.

- Select the photo, then tap the three dots to choose the Picture in Picture option.
- Once you have added the photo you want, edit and drag it to the face you want to blur.
- Play the video to see if the face was successfully blurred.
- Tap Done to save the edited video on your iMovie Projects.
Once you have finished editing your video, it is time to share it with the world. To do this, all you have to do is export your complete project. Exporting allows you to compress your project into a single video file. iMovie will do all this hard work for you. You only have to choose the platform you would like to upload your edited video (like Facebook or YouTube), and this program will export and publish the video for you. You do not have to worry about the complicated settings that resemble hieroglyphics.
Other Useful Apps for Blurring Faces in Videos on iPhone
You can also use other apps to blur faces in videos on your iPhone. A video blur app allows you to blur any part of your video, including the face. It also lets users add blur video effects to their streams. With that in mind, here are some of the applications you can use to blur faces in videos if you are using an iPhone.
1. Blur Video Background
Compatible with iOS 13.0 or later, Blur Video Background can help you blur out moving objects or apply blur filters to videos. You can try radial or rectangular blur shapes and then resize the tool to blur perfectly. Users can also choose from a range of blurry effects, including Pixelate and Gaussian blur.
Additionally, this video blur app allows you to blur multiple objects in your videos. The application has a video keyframe feature that allows users to obscure moving objects and faces in a video. All you have to do is place the keyframe on the area of the video you would like to conceal and keep adjusting the position. Indeed, this video blur app has made censoring videos a breeze.
You can choose from several blurred backgrounds, such as Sepia, Matrix, Fade, or Vignette, and renovate your movies. When you complete making the edits, you can export your video in 4K resolution, Full HD, or HD. What’s more? You can share your edited videos through social profiles with ease.
To learn how to blur part of a video on iPhone using this application, you first need to launch the app on your device. You can select videos from the Gallery or record one directly with your iPhone camera. Next, you have to choose the blur shape you prefer: either circular blur or rectangular blur.
Use your finger to drag the blurred area on the face to get a pixelated face. Once you have done this, you need to adjust the strength of the blur tool with the slider until you get the desired blurred faces. Export your video by tapping the save icon. Getting censored videos or blurry faces has never been this easier.

2. Blur-Video
This blur video app is compatible with iOS 13.0 or later, and it allows you to hide unwanted objects, blur faces, and remove backgrounds from images in your videos. As such, you can easily apply a wide range of effects to blurred video backgrounds and hide sensitive objects and faces of people. The best part is: Blur-Video editor comes with an option to blur multiple areas in a single video.
Blur Video features three blur video modes: Fun Blur, Instagram no Crop, and FreeStyle Blur. The FreeStyle option allows you to blur the outside or inside of any shape, locate the position and content you want to blur, and choose the blur intensity you want. You can also blur up and down, left and right sides. Moreover, you can create a blurred square around your video.
The Instagram no Crop option allows you to add blur effects in any missing portion to square your videos. You can decide to be creative and make your video stand out by adding effects or anything completely and truly yours. Use the free space to make your fantasy a reality.
With the Fun Blur option, you can select inside or outside, play the video, select a shape, and move your finger on your video. The preview allows you to check the changes you made in your video. The application will put a watermark after it has processed five videos separately in Instagram no Crop and Free Blur in the free version. Fun Blur is free for the first videos you edit.

3. VideoShow
With more than 400 million users worldwide, this blur video app is one of the most popular mobile video editors. VideoShow is designed for blurring portrait videos, and it features a powerful facial recognition function. Users can also add dynamic stickers and real-time facial effects.
In addition to blurring videos, this application comes with other editing tools, including creating slow-motion effects, adding visual effects, making music, sound effects, emoticons, and stickers, and using pictures to create videos or slideshows.
The application has hundreds of fully licensed music. Additionally, you can add local songs from your device. The vast local music and online catalogs make your video fun to watch. You can also record and use your voice to make your video more engaging.
The app also features a range of text opacity, fonts, outline color, and styles for you to choose from. Users can change their voices in videos into minions or robots, or extract audio from their videos. They can also doodle on videos and become video stars.
The best part about this blur video app is that it allows users to share their final videos in HD quality without cropping them. This video blur app supports multiple aspect ratios and the square theme. What’s more? You can upload your edited video to any social media platform.
The VideoShow VIP membership allows users to access long video GIF production, adjustable sound changes, scrolling subtitles, HD video export support, and no watermark. They will also access all paid materials, themes, music, sticker privileges, and much more.
The app offers a free trial, a permanent subscription, and an annual fee. The price will depend on the subscription package you’ll choose. VideoShow will charge you the subscription fee when you confirm the purchase. During the membership period, you can use all the paid features and blur as many faces in videos as you want without any limitations.

Conclusion
● Now that you know how to blur faces on iPhone video, you can hide the face of anyone you do not want your viewers to see. You may need to use these applications to keep the identity of people anonymous or cover an object that had accidentally gotten into the scene, but it wasn’t supposed to.
● Since you have checked the above options, you can decide which app suits your preferences. Each app comes with unique features and blur effects.
Blurring faces on a video allow you to safeguard sensitive data in your screencast video. Blurring also helps you conceal the identity of someone who doesn’t want to appear in your video. When you are recording a video with your iPhone in public places, you cannot always get everyone’s consent. So you might want to blur their faces to protect their identities. Keep reading to learn how to blur faces in a video on iPhone.
In this article
01 How to Blur Faces in Your Video on iPhone
02 Other Useful Apps for Blurring Faces in Videos on iPhone
03 Tutorial for How to Record on GarageBand
How to Blur Faces in Your Video on iPhone
The iMovie app allows you to blur faces in your videos on your iPhone. Apple Inc. developed this pre-installed video editing app for iPadOS, iOS, and macOS devices. The iMovie app started life as an iPhone application in 2010. The app is user-friendly, meaning that you don’t have to be tech-savvy to use it to blur faces in your video on your iPhone.
Follow the steps below to learn how to blur face on iPhone video using this preinstalled video editing application.
- Launch the iMovie application on your iPhone.
- Next, you have to get the video clip that you want to edit into the iMovie app. This process is known as importing. You can import videos by selecting the Plus + option or pressing ⌘ + I.
- Choose the Movie option to create a new project.
- Select the video with the person who you would like to blur their face from the media library.
- Tap Create Movie and add the picture you want to use to hide the face of someone on your video.
- Now, tap the Plus + sign from the iMovie editing timeline.
- Select the photo, then tap the three dots to choose the Picture in Picture option.
- Once you have added the photo you want, edit and drag it to the face you want to blur.
- Play the video to see if the face was successfully blurred.
- Tap Done to save the edited video on your iMovie Projects.
Once you have finished editing your video, it is time to share it with the world. To do this, all you have to do is export your complete project. Exporting allows you to compress your project into a single video file. iMovie will do all this hard work for you. You only have to choose the platform you would like to upload your edited video (like Facebook or YouTube), and this program will export and publish the video for you. You do not have to worry about the complicated settings that resemble hieroglyphics.
Other Useful Apps for Blurring Faces in Videos on iPhone
You can also use other apps to blur faces in videos on your iPhone. A video blur app allows you to blur any part of your video, including the face. It also lets users add blur video effects to their streams. With that in mind, here are some of the applications you can use to blur faces in videos if you are using an iPhone.
1. Blur Video Background
Compatible with iOS 13.0 or later, Blur Video Background can help you blur out moving objects or apply blur filters to videos. You can try radial or rectangular blur shapes and then resize the tool to blur perfectly. Users can also choose from a range of blurry effects, including Pixelate and Gaussian blur.
Additionally, this video blur app allows you to blur multiple objects in your videos. The application has a video keyframe feature that allows users to obscure moving objects and faces in a video. All you have to do is place the keyframe on the area of the video you would like to conceal and keep adjusting the position. Indeed, this video blur app has made censoring videos a breeze.
You can choose from several blurred backgrounds, such as Sepia, Matrix, Fade, or Vignette, and renovate your movies. When you complete making the edits, you can export your video in 4K resolution, Full HD, or HD. What’s more? You can share your edited videos through social profiles with ease.
To learn how to blur part of a video on iPhone using this application, you first need to launch the app on your device. You can select videos from the Gallery or record one directly with your iPhone camera. Next, you have to choose the blur shape you prefer: either circular blur or rectangular blur.
Use your finger to drag the blurred area on the face to get a pixelated face. Once you have done this, you need to adjust the strength of the blur tool with the slider until you get the desired blurred faces. Export your video by tapping the save icon. Getting censored videos or blurry faces has never been this easier.
2. Blur-Video
This blur video app is compatible with iOS 13.0 or later, and it allows you to hide unwanted objects, blur faces, and remove backgrounds from images in your videos. As such, you can easily apply a wide range of effects to blurred video backgrounds and hide sensitive objects and faces of people. The best part is: Blur-Video editor comes with an option to blur multiple areas in a single video.
Blur Video features three blur video modes: Fun Blur, Instagram no Crop, and FreeStyle Blur. The FreeStyle option allows you to blur the outside or inside of any shape, locate the position and content you want to blur, and choose the blur intensity you want. You can also blur up and down, left and right sides. Moreover, you can create a blurred square around your video.
The Instagram no Crop option allows you to add blur effects in any missing portion to square your videos. You can decide to be creative and make your video stand out by adding effects or anything completely and truly yours. Use the free space to make your fantasy a reality.
With the Fun Blur option, you can select inside or outside, play the video, select a shape, and move your finger on your video. The preview allows you to check the changes you made in your video. The application will put a watermark after it has processed five videos separately in Instagram no Crop and Free Blur in the free version. Fun Blur is free for the first videos you edit.
3. VideoShow
With more than 400 million users worldwide, this blur video app is one of the most popular mobile video editors. VideoShow is designed for blurring portrait videos, and it features a powerful facial recognition function. Users can also add dynamic stickers and real-time facial effects.
In addition to blurring videos, this application comes with other editing tools, including creating slow-motion effects, adding visual effects, making music, sound effects, emoticons, and stickers, and using pictures to create videos or slideshows.
The application has hundreds of fully licensed music. Additionally, you can add local songs from your device. The vast local music and online catalogs make your video fun to watch. You can also record and use your voice to make your video more engaging.
The app also features a range of text opacity, fonts, outline color, and styles for you to choose from. Users can change their voices in videos into minions or robots, or extract audio from their videos. They can also doodle on videos and become video stars.
The best part about this blur video app is that it allows users to share their final videos in HD quality without cropping them. This video blur app supports multiple aspect ratios and the square theme. What’s more? You can upload your edited video to any social media platform.
The VideoShow VIP membership allows users to access long video GIF production, adjustable sound changes, scrolling subtitles, HD video export support, and no watermark. They will also access all paid materials, themes, music, sticker privileges, and much more.
The app offers a free trial, a permanent subscription, and an annual fee. The price will depend on the subscription package you’ll choose. VideoShow will charge you the subscription fee when you confirm the purchase. During the membership period, you can use all the paid features and blur as many faces in videos as you want without any limitations.
Conclusion
● Now that you know how to blur faces on iPhone video, you can hide the face of anyone you do not want your viewers to see. You may need to use these applications to keep the identity of people anonymous or cover an object that had accidentally gotten into the scene, but it wasn’t supposed to.
● Since you have checked the above options, you can decide which app suits your preferences. Each app comes with unique features and blur effects.
How to Crop Videos in Windows Media Player
In this generation, we are so much engaged in social media forms. We loved to upload and post some pictures and videos. To show the happiness that we had. But sometimes, we are not satisfied with our videos and photos. That is why we gave time to edit, put some effects , transitions and other forms of editing. It is such a big help, especially if you are running some online business. To get and gain the interest and attention of your viewers and costumers, your videos and pictures must be catchy and have some good edits. By doing some basic editing skills can help you boost your social media platform. And also by taking away some unwanted things in your videos and pictures can improved the focus of your video.
One of the basic way of editing is cropping.
Need to modify the point of interest of your video clipped? you don’t need to re-shoot your footage. The crop device can help!
Cropping is the manner of shifting or adjusting the rims of a photograph or video clip.Often used for image modifying, it’s also useful whilst modifying video. With cropping, you may take away pointless or distracting quantities of a video clip or alternate its dimensions to in shape inside a positive area.Whether you’re running with pictures from a digital digicam or display video, you’ll in all likelihood run into instances whilst you want to crop those clips.
In this article you will learn how to crop a video through windows media player and with Filmora Wondershare. Here are ways to crop your video clip.
How to crop a video in Windows Media Player
Actually, Windows Media Player can not crop a video directly. However plug-ins including the SolveigMM WMP Trimmer may be set up and used to cut or edit videos in Windows Media Player for free. Detailed steps are furnished right here to train you a way to deployation and use this unique plug-in.
As said earlier, the Windows Media Player isn’t always a video editor and can not be used immediately to trim or crop your films until with the assist of plug-ins. However, the stages underneath offer info on how to use Windows Media Player to make the edit. Please follow carefully with the steps below and use the SolveigMM WMP Trimmer to your device/Windows Media Player to make an easy edits in your video file.
Step 1: Download and install the SolveigMM WMP Trimmer plug-in. To download the plugin, click this link: https://www.solveigmm.com/en/products/wmp-trimmer-plugin/
Step 3: On Windows Media Player, click on the principle menu object and navigate to Tools Plug-ins SolveigMM WMP Trimmer Plugin.

Your plug-in will be enabled after selecting it from the menu.
Step 4: While playingthe document you need to edit, flow the blue slider to the segment of the film you need to trim/reduce and click “Start”. Manually type the time of the video you need to begin deciding on into the Start box in case you discover the usage of the slider difficult. Click the “End” button on the factor you need the trimming to end.

Step 5: Find and press the “In” button to trim the chosen component; The “Out” button to reduce the chosen component out of the authentic media document.
Note that SolveigMM WMP Trimmer Plugin supports to edit videos including cutting or trimming, however, it doesn’t offer an option to crop video.
An alternative way to crop video on Windows by Wondershare Filmora
Wondershare Filmora Video Editor is one of the great video enhancing software program with cool functions that compares to different competing video enhancing Softwares program. Many video enhancing applications claimed to provide expert results; Filmora is one in every of some consumer-stage equipment that definitely delivers.
For Win 7 or later (64-bit)
For macOS 10.14 or later
Here in Filmora, it is not just trimming but this tool can help you to adjust the focus of your video clip. Here are steps on how to crop a video using wondershare filmora.
1. Install and launch your Filmora Wondershare app.

2. Find the import media. Click it and choose your preferred video fromyour files that you want to edit. Wait a second until the video is finished importing.

3. Drag the video to the lower left side. After dragging ,right-click yourmouse and choose video and then click “crop and zoom.”


4. Now, you can adjust the focus of your video.

5. After cropping, if you are satisfied with your edit you can now save your project by clicking the save project icon.

Conclusion
In this guide, you have acquired some knowledge about using crop on a video clip. Though this process or step could be very difficult but using Filmora Wondershare you can easily follow the steps provided above.
Therefore, cropping video is necessary. It is one of the basic editing skill that you need to know. It is functional to your online business, work projects, school projects and other related stuffs. Cropping will help you to emphasize more about your subject.
It is easier for you to do the edit if you used some software programs. You can used Filmora Wondershare or any of the best editing software programs. While you are giving the best videos and photos of your costumer and viewers you are also improving and enhancing your editing skills.
However, you also need to be careful in doing some edits. Before you save your project you need to make sure that you are cropping the right portion of your video.
Your plug-in will be enabled after selecting it from the menu.
Step 4: While playingthe document you need to edit, flow the blue slider to the segment of the film you need to trim/reduce and click “Start”. Manually type the time of the video you need to begin deciding on into the Start box in case you discover the usage of the slider difficult. Click the “End” button on the factor you need the trimming to end.
Step 5: Find and press the “In” button to trim the chosen component; The “Out” button to reduce the chosen component out of the authentic media document.
Note that SolveigMM WMP Trimmer Plugin supports to edit videos including cutting or trimming, however, it doesn’t offer an option to crop video.
An alternative way to crop video on Windows by Wondershare Filmora
Wondershare Filmora Video Editor is one of the great video enhancing software program with cool functions that compares to different competing video enhancing Softwares program. Many video enhancing applications claimed to provide expert results; Filmora is one in every of some consumer-stage equipment that definitely delivers.
For Win 7 or later (64-bit)
For macOS 10.14 or later
Here in Filmora, it is not just trimming but this tool can help you to adjust the focus of your video clip. Here are steps on how to crop a video using wondershare filmora.
1. Install and launch your Filmora Wondershare app.
2. Find the import media. Click it and choose your preferred video fromyour files that you want to edit. Wait a second until the video is finished importing.
3. Drag the video to the lower left side. After dragging ,right-click yourmouse and choose video and then click “crop and zoom.”
4. Now, you can adjust the focus of your video.
5. After cropping, if you are satisfied with your edit you can now save your project by clicking the save project icon.
Conclusion
In this guide, you have acquired some knowledge about using crop on a video clip. Though this process or step could be very difficult but using Filmora Wondershare you can easily follow the steps provided above.
Therefore, cropping video is necessary. It is one of the basic editing skill that you need to know. It is functional to your online business, work projects, school projects and other related stuffs. Cropping will help you to emphasize more about your subject.
It is easier for you to do the edit if you used some software programs. You can used Filmora Wondershare or any of the best editing software programs. While you are giving the best videos and photos of your costumer and viewers you are also improving and enhancing your editing skills.
However, you also need to be careful in doing some edits. Before you save your project you need to make sure that you are cropping the right portion of your video.
Also read:
- New 2024 Approved How to Combine Several Xvid Files Into One Windows, Mac,Android, iPhone & Online
- Updated 2024 Approved How to Create Realistic Fire Effects
- Looking Forward to Try Hands at Using the Icecream Slideshow Maker Program to Create High End Slideshow Presentations? Stay Here for a Complete Insight Into the Process
- Updated 2024 Approved What Slideshow Templates Can Teach You About Aesthetic
- Updated Despite the Aforementioned Restrictions, Cartoon Video Makers Still Offer a Sea of Possibilities to Their Users, so Lets Dive Into the Magical World of Animated Videos
- Updated In 2024, How to Use LUTs in Adobe Premiere Pro
- 2024 Approved The Best Way To Color Grading & Color Correction in Filmora
- In 2024, 100 Working Methods to Learn How to Rotate TikTok Video
- 2024 Approved Timeline Template Is a Visual Representation Showing the Passage of Time. It Includes Text, Diagrams, Images and Icons. They Are Perfect for Telling Stories, Events Etc
- 2024 Approved Ways to Make Sure Your Video Editing Course Is Worthing to Watch
- 2024 Approved Explore a Variety of Inexpensive Camera Models Suitable for Making Slow-Motion Footage without Compromising Quality
- Updated 2024 Approved How To Change Sky Background With Adobe Photoshop Best Ways
- New Reviewing Efectum App For Smartphone Users Create Slow Motion Videos
- New Do You Want to Create Slow-Motion Videos? This Article Shows Methods to Create Slow-Mo Videos without Changing the Medias Quality
- Updated In 2024, Split a Clip in DaVinci Resolve Step by Step
- In 2024, What Is Animated GIF
- 2024 Approved How To Make A Political Video
- In 2024, Top 18 Video Editors for PC and Mac
- 2024 Approved VLC Media Player How to Merge Audio and Video Like a Pro
- 2024 Approved 3 Effective Methods to Correct Color Distortion in Videos
- New Hitfilm Express Video Editor Review for 2024
- Do You Want to Know About Efficient Motion Blur Plugins for Adobe Effects? Read This Article to Find Out How to Use Motion Blur Plugins for Enhanced Results for 2024
- Updated How Can Filmora Create an Audio Visualizer Project for a Song? All Steps, From Launching the App to Editing the Text, Are Detailed Here
- How to Loop YouTube Videos on iPhone
- Updated Adobe Premiere Pro Download and Use Guide
- 8 Tips to Apply Cinematic Color Grading to Your Video for 2024
- 2024 Approved You Might Have Difficulty Rotating a Video without an Efficient Media Player or Editing Tool. Below Is a Detailed Guide on Rotating a Video on Any Axes
- 2024 Approved Adobe Premiere Pro Rec 709 LUTs Finding The Best Options
- Updated In 2024, 10 Best Free Video Player for Windows 11
- New In 2024, How to Make a Neon Dance Effect With Filmora
- Updated How to Create Sony Vegas Freeze Frame
- What Legendaries Are In Pokemon Platinum On Samsung Galaxy A25 5G? | Dr.fone
- In 2024, FRP Hijacker by Hagard Download and Bypass your Xiaomi 13T FRP Locks
- How to Unlock Apple iPhone XR Passcode without iTunes without Knowing Passcode?
- Ultimate Guide to Free PPTP VPN For Beginners On Infinix Smart 7 | Dr.fone
- How to Bypass MDM on iPhone 15 with Ease Via third Tools?
- New 5 Must Try Ways to Add and Send GIF in Text Message on Android
- Possible solutions to restore deleted contacts from Infinix Note 30.
- Two Ways to Track My Boyfriends Vivo X Fold 2 without Him Knowing | Dr.fone
- Complete Review & Guide to Techeligible FRP Bypass and More For Nubia Red Magic 9 Pro
- Updated How To Make Animation Talk? Explained with Easy Steps for 2024
- Play Store Not Working On Vivo Y100A? 8 Solutions Inside | Dr.fone
- In 2024, The Ultimate Guide to Get the Rare Candy on Pokemon Go Fire Red On Motorola Moto G23 | Dr.fone
- How To Open Your Apple iPhone XS Without a Home Button | Dr.fone
- How to Make the Most of Your iPhone 15 Pro Max Lock Screen with Notifications? | Dr.fone
- Guide on How To Erase Apple iPhone 6 Data Completely | Dr.fone
- Latest Guide How To Bypass Lava FRP Without Computer
- In 2024, How To Unlock Stolen iPhone 15 In Different Conditionsin | Dr.fone
- Simple Solutions to Fix Android SystemUI Has Stopped Error For Poco M6 5G | Dr.fone
- In 2024, How to Screen Mirroring Lava Yuva 2 Pro? | Dr.fone
- In 2024, 3 Effective Methods to Fake GPS location on Android For your Sony Xperia 1 V | Dr.fone
- In 2024, How can I get more stardust in pokemon go On Samsung Galaxy M14 5G? | Dr.fone
- In 2024, Complete Fixes To Solve Apple iPhone 12 Pro Max Randomly Asking for Apple ID Password
- Hassle-Free Ways to Remove FRP Lock on Vivo S17twith/without a PC
- In 2024, Full Guide to Catch 100 IV Pokémon Using a Map On Oppo Reno 8T 5G | Dr.fone
- Pokemon Go Error 12 Failed to Detect Location On Huawei Nova Y71? | Dr.fone
- In 2024, Top 10 Fingerprint Lock Apps to Lock Your Xiaomi Redmi 13C 5G Phone
- How do I play MKV movies on Redmi Note 13 5G?
- In 2024, How to Fix Locked Apple ID on Apple iPhone 13 Pro
- How To Fix Apple ID Verification Code Not Working On iPhone 6s
- In 2024, A Perfect Guide To Remove or Disable Google Smart Lock On Vivo Y78 5G
- Updated Create AI Videos Using Synthesia Avatar and Voices for 2024
- Title: New In 2024, How to Add Motion Titles
- Author: Chloe
- Created at : 2024-04-24 07:08:29
- Updated at : 2024-04-25 07:08:29
- Link: https://ai-editing-video.techidaily.com/new-in-2024-how-to-add-motion-titles/
- License: This work is licensed under CC BY-NC-SA 4.0.
