
New In 2024, How to Change Quicktime Player Speed on Mac?
| How to Change Quicktime Player Speed on Mac?
Powerful Video Editor - Wondershare Filmora
An easy and powerful editor
Numerous effects to choose from
Detailed tutorials are provided by the official channel
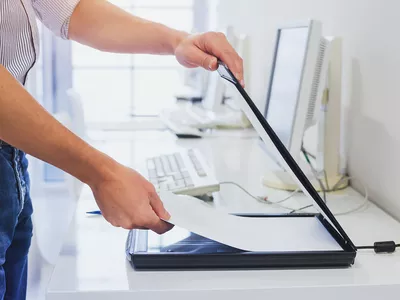
Quicktime Player is an Apple Inc. software that is compatible with all current versions of macOS X as well as Windows.
The user interface of the Quicktime media player is straightforward to navigate. The majority of video formats may be supported, as well. Like VLC, you can quickly speed up or slow down videos with Quicktime player using specific hotkeys or by manually altering the speed of the video.

A broad number of formats may be handled by QuickTime, including music, graphics, and panoramic photography. All of your music and video files will play without a hitch, and it is a fully complete media player.
Many customers buy a Mac computer and instantly install QuickTime, the default video player, under the notion that it is a basic video player with few additional functions. In fact, the QuickTime player has a slew of hidden functions that are pretty useful, but only a few people are aware of it. The option to increase the Quicktime player speed is one of these hidden features’ which is most popular and helpful. This is particularly true if you have to sit through a presentation or lecture.
How to Speed up Videos in Quicktime Player?
If you want to watch your movies on Quicktime player as quickly as possible, go with a long-term solution. The pace of the clip may be raised or lowered from the toolbar, and the settings of the application can be altered.
Thus, in easy words when you download a video to your Mac, you can control the speed at which it plays back on your computer using Quicktime player.

There are two ways to achieve this goal, one is manually through settings whereas the second way is using hotkeys. Let’s discuss both by understanding how to increase QuickTime player speed manually.
Manually Setting Up Quicktime player speed
- Open the Quicktime player installed on your computer.
- Embedding video within the interface is recommended.
- Go to the Toolbar and choose the Windows tab from the drop-down menu.
- To access the A/V controls, press the A/V Controls button. There will be a dialogue box that appears.
- Locate the Playback Speed option and adjust the speed of the movie by increasing or decreasing it.
- Close the box and go to watch the video in its entirety.
Speeding Up playback Speed Quicktime Using Hotkeys
- There isn’t a special hotkey for Quicktime that allows you to speed up or slow down the video. Using your mouse and keyboard, on the other hand, you may do the task in an instant.
- Open the video in the Quicktime Player on your computer by clicking on it.
- Play the video clip, and then hit the “OPTIONS” key on your keyboard to stop it.
- Press the Fast Forward button on the player and the left mouse button at the same time. It will speed up the pace at which the video is played back.
- The tap will cause a 1.1x choice to appear at the top of the screen.

Increasing the speed is accomplished by repeatedly clicking until the desired speed is achieved.
However, keep in mind that there has been a glitch that has existed for years that causes the audio to stop working after you reach 2x speed. To get around this problem, just accelerate to 1.9x and then stop.
If you come across anything you like and want to view it again, you may stop the video by pressing the space bar twice. However, pressing the spacebar will cause the playing speed to be reset.
How to Slow Down Videos in Quicktime Player?
When viewing a movie on your Mac, you may discover that you need to slow it down on a frequent basis. You may discover a range of slow down video editing tools that can help you slow down a video on the internet. Furthermore, various video players may be able to let you quickly slow down your movie. QuickTime Player is one of those programs that may be customized to your individual needs.
We sometimes overlook the enormous capacity inherent inside the dependable and dependable QuickTime Player. QuickTime contains a number of key capabilities meant to help you deal with your media files and play video and audio files.
Steps to follow to slow down Quicktime Player speed
Like speeding up the QuickTime playback speed, the users can simultaneously slow down the playback speed as well. It can be done manually and through the use of specific keys already present on the keyboard.
Manual Setup
In order to manually slowdown QuickTime video, follow the below-mentioned steps:
- Launch the Quicktime player application
- Click on “File” and choose the video which is already saved or downloaded on your MAC.
- Once the video is loaded in the Quicktime player, click on “View” on the toolbar on the top.
- As you click on “View”, a drop-down menu will appear. Locate the “Playback speed” option from the drop-down menu.

- When you click on “Playback speed”, another dialogue box will appear right next to the drop-down menu, which will have options regarding the playback speed.

- Click on “Half speed” and press the play button to watch the video with a slower playback rate.

Slowdown QuickTime speed using Hotkeys
- Open the video or the clip you want to watch.
- If Quicktime is your default player, the video loads in it.
- Otherwise, launch the QuickTime application
- By clicking on “Open”, choose your specific clip or video.
- Once the video is loaded, press the ““OPTIONS”” key next to cmd and simultaneously press the rewind button on the task bar of Quicktime. It starts to slow down the playback speed of the video.
What If Quicktime Player Speed up With No Sound?
No sound may be heard when the video is played back if it was encoded in a format that QuickTime cannot understand. Verifying your QuickTime installation is the most obvious way to find out whether it has decoded all of the video files. Let’s investigate the issue to its root.
Updating Your Quicktime to the Latest Version
The user must carefully study the QuickTime player. For some reason, your QuickTime behaviour is out of whack.
People often neglect to keep their QuickTime software up-to-date, which results in problems with video playback, such as no sound or stuttering, among many other things. To fix this issue, just download and install the most latest release of QuickTime player.
Examine the System and Driver
Faulty speakers, audio issues in the system, and update failures will ultimately cause media playback difficulties.
To find the root cause, you should first check internally to see whether your speakers are working correctly. Speaking straight to Siri and hearing her reaction is the fastest and most straightforward option.
Another reason you may be hearing no sound on QuickTime is because of a recent system update. Apple, as we all know, often releases new operating systems, and you must keep track of the most current versions of updates in order to keep your system running effectively.
You just need to ensure that your machine is running the most recent version. As a result, your system will resume regular functioning, and QuickTime will be immediately fixed and restored.
Inspect if the File is Corrupted or not
Checking the file to see whether it has been corrupted is a good idea regardless of whether QuickTime and your system are up and running. To make matters worse, the lack of sound in QuickTime will be the consequence of a corrupted video file.
Try opening the file in a different programme or player to see if the issue may be resolved. If this is the case, your source video file is either destroyed or corrupted. You may wish to consider regaining access to the file in this situation. The likelihood of your file being corrupted by malware or a virus is relatively high. Remember to be patient if this does happen to you.
It is necessary to use third-party repair programmes to successfully fix the file. Consequently, using third-party software to recover and restore the source file should be considered if you are in a situation where the source file is crucial and do not have a backup. As we’ll see, there are a number of options available, including Filmora.
How to Play Videos at 2X Speed with Sound in Quicktime?
Follow the below-mentioned steps to play video at 2x speed with sound in Quicktime:
- Launch QuickTime.
- Click on Edit, which is located on the toolbar on the top. A drop-down menu will appear.
- From the drop-down menu, click on QuickTime Preferences.
- Then select Audio from the dialogue box.
- Then moving forward, change the music synthesizer to Promethean Audio Device, Promethean USB Audio or USB Audio Device. These options might vary depending on the user’s specific hardware.
- Click on Apply and then OK.
Use Quick Time Features in Filmora
What is Wondershare Filmora?
For users to quickly and easily create high-quality films using a variety of sophisticated editing tools, Wondershare Filmora provides an extensive set of powerful tools for video editors. Wondershare Filmora’s user-friendly interface makes it easy for anybody to become an expert video editor on Mac .
In addition to the usual video effects, Wondershare Filmora provides filters, animated components, and other video effects. In order to alter a movie, you may use filters and overlays to add a variety of effects and graphic overlays. There are several options for titles, openers, and bottom thirds to pick from in Wondershare Filmora.

Using Wondershare Filmora’s drag and drop, users may include moving graphics into their movies. Additionally, users may quickly combine many videos and photographs and choose the good royalty-free music from a wide range of options, all in one spot.
Among the many functions offered by Wondershare Filmora include the ability to edit in 4K and GIF format, noise reduction and colour correction, and an advanced text editor and an audio mixer. A wide range of operating systems can run Wondershare Filmora.
Although there are many other video editors out there vying for attention, Wondershare has been one of the few that has managed to stay relevant in an increasingly competitive industry saturated with old and new video editors all competing for the same consumer base.
Unique and Distinct Features of Filmora
Software is not nearly as good if it does not have the appropriate set of functionalities, and most users will not bother to use it if it does not include these features. Listed here are the most eagerly anticipated features of Filmora’s latest version:
Motion Tracking
The Motion Tracking module enables you to identify an object or point inside a video and then have the computer track that object or point to generate a moving path.
It allows you to capture the motion of a moving object in the frame and add text, subtitles, effects, and other components to the frame that follow the moving object’s motion as it moves around the screen. After you’ve constructed that path, you may link any other item to it and have it follow the initial object.
Colour Matching Feature
This team has always considered that Filmora’s colour grading and correction tools were excellent, but their most recent addition to the ‘Color Matching’ program has garnered them even more praise.
Colour matching is crucial when trying to merge several video images obtained by two different cameras. In this semi-automated module, you may match video from multiple sources or footage acquired at different times of day with one another.
Keyframing Feature
Keyframing is an essential feature for users who wish to boost the appeal of their video by incorporating critical animation sequences throughout the film.
It enables you to create custom animations and have fine-grained control over the effects you apply to your projects via the use of keyframes.
Keyframing becomes critical when creating special effects, custom title cards at the beginning or middle of a film or conjuring precise paths for visuals or picture-in-picture movies to follow.
Audio Ducking
Audio ducking is a method used in video editing and production that allows the narrator’s voice to be heard consistently and clearly over other sounds on the recording that are happening at the same time, such as background music, without being dominated.
Transitions and Vast Amount of Effects
Over 300 special effects, objects, overlays, transitions, and music and audio effects are available whenever and wherever you need them. The bundle includes 25 sound effects and 26 royalty-free recordings, making it a complete package.
Then there are 176 transitions, each of which may be customized to liven up your project. You may also alter and manipulate visuals and text to make your project more aesthetically appealing.
Hardcore Video Editing
Moving on to the heart of this application, Filmora latest version’s video editing features are both excellent and user-friendly. [pagebreak] The editing options in Filmora are comprehensive, with the most noticeable being cutting, audio manipulation, transition creation, visual effects, and a plethora of additional features and functions.
The above editing functions are simple to carry out by selecting a specific section of the video on your timeline, double-clicking it, waiting for it to appear in the preview section, and then applying effects and transitions, adding audio, stabilizing and correcting the video using any of the editing options available to you.
Simplified Exporting Of Your Masterpiece
Exporting a finished project is as simple as any other activity in Filmora latest version. Indeed, the option to export your completed project is clearly presented on the main page and instantly visible to the human eye. After you’ve completed making changes, all you have to do is click the ‘Export’ button.
How to change video playback speed in Filmora
When using fast-motion/slow-motion effects on a video, the clips are sped up or slowed down in comparison to their original speed.
If you’re looking for a “close up in time,” the slow-motion effect may be the best choice, while the fast-forward effect may be used to produce dramatic or amusing videos.
Filmora is widely praised and utilized by professionals throughout the globe because of its user-friendly design and uncomplicated editing features. For this, it is often chosen over other editing programs.
Steps
Follow the below-mentioned steps to change video speed in Filmora:
- A wide range of video formats is supported by Wondershare Filmora, including MP4 and AVI, WMV and MOV, and FLV and M4V, etc. Enter the media library and click Import to import videos from your PC. The software will use the video files on your computer. Drag and drop is also an option for adding files to the User’s Album.

- Right-click on the video track on the Timeline and then drag movies from your User’s Album into it to access the Speed and Duration choices.

- A pop-up window will be shown. The rapidity or sluggishness of the motion effects is denoted by speed numbers. Then you may go at your own speed. Just click on the preview box to test out effects like sped-up or slowed-down videos. 0.5 speed is a good choice if you think it’s too much.

Video playback speed similarly affects the audio playback speed. Delete the video’s audio if you want to maintain the original playing speed of the video’s audio.
You must first double-click the audio clip in the audio editing window in order to adjust it. Adding and deleting fade in/out effects and reducing background noise are all options.
After you’ve finished adjusting the video speed, click Export. To save your movie in a standard format, just choose Format from the File menu.

It’s also possible to publish your videos to YouTube and Vimeo or create a DVD if you’d like.
Choose Device from the drop-down box and choose the proper symbol to view your new video output on your iPod, iPhone, or iPad.
Conclusion
While watching a movie, you may want the audio to be slower or faster, and you may want to adjust the atmosphere with the help of the music track, either when merely a soundtrack is being played or while a movie is being watched. This article, which includes images, explains in great detail how Mac users can achieve this using playback speed Quicktime. It also explains how to alter the speed at which a video play by in Filmora. Filmora has a variety of easy and advanced editing options, as well as video effects like slow motion and fast motion.
Quicktime Player is an Apple Inc. software that is compatible with all current versions of macOS X as well as Windows.
The user interface of the Quicktime media player is straightforward to navigate. The majority of video formats may be supported, as well. Like VLC, you can quickly speed up or slow down videos with Quicktime player using specific hotkeys or by manually altering the speed of the video.
A broad number of formats may be handled by QuickTime, including music, graphics, and panoramic photography. All of your music and video files will play without a hitch, and it is a fully complete media player.
Many customers buy a Mac computer and instantly install QuickTime, the default video player, under the notion that it is a basic video player with few additional functions. In fact, the QuickTime player has a slew of hidden functions that are pretty useful, but only a few people are aware of it. The option to increase the Quicktime player speed is one of these hidden features’ which is most popular and helpful. This is particularly true if you have to sit through a presentation or lecture.
How to Speed up Videos in Quicktime Player?
If you want to watch your movies on Quicktime player as quickly as possible, go with a long-term solution. The pace of the clip may be raised or lowered from the toolbar, and the settings of the application can be altered.
Thus, in easy words when you download a video to your Mac, you can control the speed at which it plays back on your computer using Quicktime player.
There are two ways to achieve this goal, one is manually through settings whereas the second way is using hotkeys. Let’s discuss both by understanding how to increase QuickTime player speed manually.
Manually Setting Up Quicktime player speed
- Open the Quicktime player installed on your computer.
- Embedding video within the interface is recommended.
- Go to the Toolbar and choose the Windows tab from the drop-down menu.
- To access the A/V controls, press the A/V Controls button. There will be a dialogue box that appears.
- Locate the Playback Speed option and adjust the speed of the movie by increasing or decreasing it.
- Close the box and go to watch the video in its entirety.
Speeding Up playback Speed Quicktime Using Hotkeys
- There isn’t a special hotkey for Quicktime that allows you to speed up or slow down the video. Using your mouse and keyboard, on the other hand, you may do the task in an instant.
- Open the video in the Quicktime Player on your computer by clicking on it.
- Play the video clip, and then hit the “OPTIONS” key on your keyboard to stop it.
- Press the Fast Forward button on the player and the left mouse button at the same time. It will speed up the pace at which the video is played back.
- The tap will cause a 1.1x choice to appear at the top of the screen.
Increasing the speed is accomplished by repeatedly clicking until the desired speed is achieved.
However, keep in mind that there has been a glitch that has existed for years that causes the audio to stop working after you reach 2x speed. To get around this problem, just accelerate to 1.9x and then stop.
If you come across anything you like and want to view it again, you may stop the video by pressing the space bar twice. However, pressing the spacebar will cause the playing speed to be reset.
How to Slow Down Videos in Quicktime Player?
When viewing a movie on your Mac, you may discover that you need to slow it down on a frequent basis. You may discover a range of slow down video editing tools that can help you slow down a video on the internet. Furthermore, various video players may be able to let you quickly slow down your movie. QuickTime Player is one of those programs that may be customized to your individual needs.
We sometimes overlook the enormous capacity inherent inside the dependable and dependable QuickTime Player. QuickTime contains a number of key capabilities meant to help you deal with your media files and play video and audio files.
Steps to follow to slow down Quicktime Player speed
Like speeding up the QuickTime playback speed, the users can simultaneously slow down the playback speed as well. It can be done manually and through the use of specific keys already present on the keyboard.
Manual Setup
In order to manually slowdown QuickTime video, follow the below-mentioned steps:
- Launch the Quicktime player application
- Click on “File” and choose the video which is already saved or downloaded on your MAC.
- Once the video is loaded in the Quicktime player, click on “View” on the toolbar on the top.
- As you click on “View”, a drop-down menu will appear. Locate the “Playback speed” option from the drop-down menu.
- When you click on “Playback speed”, another dialogue box will appear right next to the drop-down menu, which will have options regarding the playback speed.
- Click on “Half speed” and press the play button to watch the video with a slower playback rate.
Slowdown QuickTime speed using Hotkeys
- Open the video or the clip you want to watch.
- If Quicktime is your default player, the video loads in it.
- Otherwise, launch the QuickTime application
- By clicking on “Open”, choose your specific clip or video.
- Once the video is loaded, press the ““OPTIONS”” key next to cmd and simultaneously press the rewind button on the task bar of Quicktime. It starts to slow down the playback speed of the video.
What If Quicktime Player Speed up With No Sound?
No sound may be heard when the video is played back if it was encoded in a format that QuickTime cannot understand. Verifying your QuickTime installation is the most obvious way to find out whether it has decoded all of the video files. Let’s investigate the issue to its root.
Updating Your Quicktime to the Latest Version
The user must carefully study the QuickTime player. For some reason, your QuickTime behaviour is out of whack.
People often neglect to keep their QuickTime software up-to-date, which results in problems with video playback, such as no sound or stuttering, among many other things. To fix this issue, just download and install the most latest release of QuickTime player.
Examine the System and Driver
Faulty speakers, audio issues in the system, and update failures will ultimately cause media playback difficulties.
To find the root cause, you should first check internally to see whether your speakers are working correctly. Speaking straight to Siri and hearing her reaction is the fastest and most straightforward option.
Another reason you may be hearing no sound on QuickTime is because of a recent system update. Apple, as we all know, often releases new operating systems, and you must keep track of the most current versions of updates in order to keep your system running effectively.
You just need to ensure that your machine is running the most recent version. As a result, your system will resume regular functioning, and QuickTime will be immediately fixed and restored.
Inspect if the File is Corrupted or not
Checking the file to see whether it has been corrupted is a good idea regardless of whether QuickTime and your system are up and running. To make matters worse, the lack of sound in QuickTime will be the consequence of a corrupted video file.
Try opening the file in a different programme or player to see if the issue may be resolved. If this is the case, your source video file is either destroyed or corrupted. You may wish to consider regaining access to the file in this situation. The likelihood of your file being corrupted by malware or a virus is relatively high. Remember to be patient if this does happen to you.
It is necessary to use third-party repair programmes to successfully fix the file. Consequently, using third-party software to recover and restore the source file should be considered if you are in a situation where the source file is crucial and do not have a backup. As we’ll see, there are a number of options available, including Filmora.
How to Play Videos at 2X Speed with Sound in Quicktime?
Follow the below-mentioned steps to play video at 2x speed with sound in Quicktime:
- Launch QuickTime.
- Click on Edit, which is located on the toolbar on the top. A drop-down menu will appear.
- From the drop-down menu, click on QuickTime Preferences.
- Then select Audio from the dialogue box.
- Then moving forward, change the music synthesizer to Promethean Audio Device, Promethean USB Audio or USB Audio Device. These options might vary depending on the user’s specific hardware.
- Click on Apply and then OK.
Use Quick Time Features in Filmora
What is Wondershare Filmora?
For users to quickly and easily create high-quality films using a variety of sophisticated editing tools, Wondershare Filmora provides an extensive set of powerful tools for video editors. Wondershare Filmora’s user-friendly interface makes it easy for anybody to become an expert video editor on Mac .
In addition to the usual video effects, Wondershare Filmora provides filters, animated components, and other video effects. In order to alter a movie, you may use filters and overlays to add a variety of effects and graphic overlays. There are several options for titles, openers, and bottom thirds to pick from in Wondershare Filmora.
Using Wondershare Filmora’s drag and drop, users may include moving graphics into their movies. Additionally, users may quickly combine many videos and photographs and choose the good royalty-free music from a wide range of options, all in one spot.
Among the many functions offered by Wondershare Filmora include the ability to edit in 4K and GIF format, noise reduction and colour correction, and an advanced text editor and an audio mixer. A wide range of operating systems can run Wondershare Filmora.
Although there are many other video editors out there vying for attention, Wondershare has been one of the few that has managed to stay relevant in an increasingly competitive industry saturated with old and new video editors all competing for the same consumer base.
Unique and Distinct Features of Filmora
Software is not nearly as good if it does not have the appropriate set of functionalities, and most users will not bother to use it if it does not include these features. Listed here are the most eagerly anticipated features of Filmora’s latest version:
Motion Tracking
The Motion Tracking module enables you to identify an object or point inside a video and then have the computer track that object or point to generate a moving path.
It allows you to capture the motion of a moving object in the frame and add text, subtitles, effects, and other components to the frame that follow the moving object’s motion as it moves around the screen. After you’ve constructed that path, you may link any other item to it and have it follow the initial object.
Colour Matching Feature
This team has always considered that Filmora’s colour grading and correction tools were excellent, but their most recent addition to the ‘Color Matching’ program has garnered them even more praise.
Colour matching is crucial when trying to merge several video images obtained by two different cameras. In this semi-automated module, you may match video from multiple sources or footage acquired at different times of day with one another.
Keyframing Feature
Keyframing is an essential feature for users who wish to boost the appeal of their video by incorporating critical animation sequences throughout the film.
It enables you to create custom animations and have fine-grained control over the effects you apply to your projects via the use of keyframes.
Keyframing becomes critical when creating special effects, custom title cards at the beginning or middle of a film or conjuring precise paths for visuals or picture-in-picture movies to follow.
Audio Ducking
Audio ducking is a method used in video editing and production that allows the narrator’s voice to be heard consistently and clearly over other sounds on the recording that are happening at the same time, such as background music, without being dominated.
Transitions and Vast Amount of Effects
Over 300 special effects, objects, overlays, transitions, and music and audio effects are available whenever and wherever you need them. The bundle includes 25 sound effects and 26 royalty-free recordings, making it a complete package.
Then there are 176 transitions, each of which may be customized to liven up your project. You may also alter and manipulate visuals and text to make your project more aesthetically appealing.
Hardcore Video Editing
Moving on to the heart of this application, Filmora latest version’s video editing features are both excellent and user-friendly. [pagebreak] The editing options in Filmora are comprehensive, with the most noticeable being cutting, audio manipulation, transition creation, visual effects, and a plethora of additional features and functions.
The above editing functions are simple to carry out by selecting a specific section of the video on your timeline, double-clicking it, waiting for it to appear in the preview section, and then applying effects and transitions, adding audio, stabilizing and correcting the video using any of the editing options available to you.
Simplified Exporting Of Your Masterpiece
Exporting a finished project is as simple as any other activity in Filmora latest version. Indeed, the option to export your completed project is clearly presented on the main page and instantly visible to the human eye. After you’ve completed making changes, all you have to do is click the ‘Export’ button.
How to change video playback speed in Filmora
When using fast-motion/slow-motion effects on a video, the clips are sped up or slowed down in comparison to their original speed.
If you’re looking for a “close up in time,” the slow-motion effect may be the best choice, while the fast-forward effect may be used to produce dramatic or amusing videos.
Filmora is widely praised and utilized by professionals throughout the globe because of its user-friendly design and uncomplicated editing features. For this, it is often chosen over other editing programs.
Steps
Follow the below-mentioned steps to change video speed in Filmora:
- A wide range of video formats is supported by Wondershare Filmora, including MP4 and AVI, WMV and MOV, and FLV and M4V, etc. Enter the media library and click Import to import videos from your PC. The software will use the video files on your computer. Drag and drop is also an option for adding files to the User’s Album.
- Right-click on the video track on the Timeline and then drag movies from your User’s Album into it to access the Speed and Duration choices.
- A pop-up window will be shown. The rapidity or sluggishness of the motion effects is denoted by speed numbers. Then you may go at your own speed. Just click on the preview box to test out effects like sped-up or slowed-down videos. 0.5 speed is a good choice if you think it’s too much.
Video playback speed similarly affects the audio playback speed. Delete the video’s audio if you want to maintain the original playing speed of the video’s audio.
You must first double-click the audio clip in the audio editing window in order to adjust it. Adding and deleting fade in/out effects and reducing background noise are all options.
After you’ve finished adjusting the video speed, click Export. To save your movie in a standard format, just choose Format from the File menu.
It’s also possible to publish your videos to YouTube and Vimeo or create a DVD if you’d like.
Choose Device from the drop-down box and choose the proper symbol to view your new video output on your iPod, iPhone, or iPad.
Conclusion
While watching a movie, you may want the audio to be slower or faster, and you may want to adjust the atmosphere with the help of the music track, either when merely a soundtrack is being played or while a movie is being watched. This article, which includes images, explains in great detail how Mac users can achieve this using playback speed Quicktime. It also explains how to alter the speed at which a video play by in Filmora. Filmora has a variety of easy and advanced editing options, as well as video effects like slow motion and fast motion.
Easy Guide to Overlay Videos in Premiere Pro
In order to make it simple to combine the shot’s components into a sequence, video overlays are pieces of film that are often recorded in a dark studio. Using image overlays on a video production is fairly frequent. However, adding pictures to every video you export might be tiresome and time-consuming if you have several films to send. For instance, an overlay video in Premiere Pro might be preferred by you rather than a manual addition of the overlay media.
There is a quick and easy method to know how to overlay a video on a video in Premiere Pro and we’ve got it covered. However, depending on the kind of element, there may be some color blending that affects the components themselves. Overlays may be filmed on either a green screen or a blue screen. Snow components photographed against a green screen may have a green hue shift, necessitating further color grading before the footage might be used.
Part 1. How to Overlay Video in Premiere Pro
Videos sometimes need a splash of color to elevate them. With the built-in color effects in Adobe Premiere Pro, you can apply overlays to any video, whether you want to add a little drama to a clip or a splash of color to a social media post. We’ll demonstrate how to overlay videos in this article. To liven up your intros, make your outros stand out, and spruce up your summer social media posts, add a gradient video overlay effect. Adobe Premiere Pro and gorgeous video clips are all you need.
Steps to Overlay Video in Premiere Pro
Step1Activate Premiere Pro
To build a new sequence, start a new project in Premiere, import your footage, then drag your clip onto the timeline. The clip’s parameters will be reflected in the sequence.

Step2Select Overlay Effect
Secondly, choose the Effects workspace (located near the top of your window). This will guarantee that the tools we need are accessible. Alternately, you may go to Window > Workspaces > Effects.

Step3Create a layer of adjustments
Go to File > New > Adjustment Layer to begin. Make sure your Project panel is chosen if the option is not accessible. Your clip and sequence will show up in your Project panel with the adjustment layer. Add the timeline with the adjustment layer selected.

Step4Create the Video Overlay
Transitions, generators, audio effects, and video effects are all included under the Effects panel. We’ll begin by selecting the 4-Color Gradient from the “Generate” folder, which contains generators for patterns and gradients, to produce the video overlay effect. Right-click on the adjustment layer in the timeline and drag the appropriate effect there.

Step5Change the Effect Control
In the Effect Controls panel, you may manage and adjust effects. You may change the default effect settings for each element in your timeline, such as size and opacity, under the Effect Controls panel along with any additional effects you’ve added. To access an item’s effect controls, click on it in the timeline.

By selecting the ‘Show all properties’ next to the adjustment layer in your timeline, you can get a before-and-after comparison. Increase the value by selecting “blend with original.” To change the effect’s strength, move this up and down.
Step6Save the Project
Try switching the linear mode to radial. You can make a color transition for circles by doing this. You will be able to highlight various things with color after this transition. The circle’s starting point may be animated to follow a certain item in the scene.

To the right of the Presets drop-down menu, choose the Auto Save button. Check the Save Effects Settings box when the Choose a Name dialog box appears. Future exports made with this preset will automatically take into account any Image Overlay settings you’ve configured.
Part 2. Premiere Pro Easy Alternative to Overlay Video [Filmora ]
Any professional video editor may be interested in it since it offers the strength, complexity, and adaptability they need. Users need to be well-versed in a variety of editing techniques in order to use the tools properly. Therefore, it’s not really the best option for a novice or someone who hasn’t mastered video editing. We advise using Filmora as a substitute because of this. It is user-friendly for all users and is crammed with numerous theme effects shops to spruce up your video effects, such as transitions, filters, overlays, titles, etc.
Filmora is a powerful and creative video editing program that is really simple to use. With a wide variety of sophisticated video editing tools, Filmora boasts a highly user-friendly interface. Both novice and experienced video editors may utilize the many creative features that Filmora offers. Filmora is the best option if you’re looking for a video editing program that’s not only inexpensive but also offers a variety of features and functions. The program not only has a fantastic user interface, but it also offers strong capabilities that let video editors create precisely the films they desire.
Free Download For Win 7 or later(64-bit)
Free Download For macOS 10.14 or later
Steps to Use Filmora to Overlay Videos:
Step1Launch Filmora
Run the software and switch to Video editor mode. Next, add the image or movie to the media library. Now drag and drop the primary video into the video track or click the “Import Media” button to add it.

Step2Import Media to Overlay
Find the image or video in the media library that you want to overlay over the backdrop video and right-click on it. The image or video overlay may be resized and positioned here as desired.

Step3Spice up with Effects
There are several choices available for adding extra effects to the video. By selecting the effect tab, you may look for more effects as well. The decision to switch to a green screen or include other components into the film is entirely up to you.

Step4Customize Effects and Save
Inside the Effects window, press Ok and once you have applied the required effects to see the modifications appear on the screen. You may also add element movements to make the video seem more entertaining. Once the editing and effect adding are complete, you may export the video on the go.
Conclusion
An image or animation that you contribute to your movies as a video overlay will display below the video and cover the video. Overlay editing is the kind of editing that is most often utilized. It just covers over whatever is in the timeline at the location where you wish to add that clip. If necessary, you may also review the comprehensive instructions for adding images or movies as an overlay to a video, which helps in improving the video quality. With Filmora , video overlays allow for the sharing of additional information without interfering with the viewing of the video.
Free Download For macOS 10.14 or later
Steps to Use Filmora to Overlay Videos:
Step1Launch Filmora
Run the software and switch to Video editor mode. Next, add the image or movie to the media library. Now drag and drop the primary video into the video track or click the “Import Media” button to add it.
Step2Import Media to Overlay
Find the image or video in the media library that you want to overlay over the backdrop video and right-click on it. The image or video overlay may be resized and positioned here as desired.
Step3Spice up with Effects
There are several choices available for adding extra effects to the video. By selecting the effect tab, you may look for more effects as well. The decision to switch to a green screen or include other components into the film is entirely up to you.
Step4Customize Effects and Save
Inside the Effects window, press Ok and once you have applied the required effects to see the modifications appear on the screen. You may also add element movements to make the video seem more entertaining. Once the editing and effect adding are complete, you may export the video on the go.
Conclusion
An image or animation that you contribute to your movies as a video overlay will display below the video and cover the video. Overlay editing is the kind of editing that is most often utilized. It just covers over whatever is in the timeline at the location where you wish to add that clip. If necessary, you may also review the comprehensive instructions for adding images or movies as an overlay to a video, which helps in improving the video quality. With Filmora , video overlays allow for the sharing of additional information without interfering with the viewing of the video.
How to Create Discord Emoji GIF
How to Create Discord Emoji GIF
An easy yet powerful editor
Numerous effects to choose from
Detailed tutorials provided by the official channel
It is a fact that Discord has taken off over the past few years as a go-to social platform available for communities of people with common interests. Whether you are into screenwriting, legal practice, bird-watching, or anime, you can get involved in a Discord server that serves your community and creates Discord Emoji Gif.

One of the ways by which Discord provides so much value for all types of communities is its intuitive and robust server customization options. Custom Discord Gif emojis are especially useful since communities can use inside jokes, prominent members, and favorite images or GIFs to share with the server as a whole.
In this article
01 [Why Discord Is Becoming Popular Recently?](#Part 1)
02 [Why Discord Emojis?](#Part 2)
03 [How to Create Discord Emoji GIF](#Part 3)
Part 1 Why Discord Is Becoming Popular Recently?
Discord has become a viral chatting platform for gamers as many people use it to keep in touch with their family and friends. It made what was initially created for gamers to become something much more. It gives people a communication platform when social interaction through online mediums was not so popular.
First founded in 2015, Discord came intending to be a gamer’s platform to chat and build one another communities. More so, it has become a platform that is more than that and encompasses audiences or communities of different interests and not only gamers.
Discord is now a platform for messaging and allows users to communicate using different channels. This platform can be a less formal version of Slack. Users can write text and send video and voice messages and other forms of rich media such as photos and videos through the platform.
There are a lot of exceptional Discord servers that function as a place to speak about a lot of different things and interact using Gif discord emoji. This is like Reddit, where communities get built via forums that create a network experience through shared interests or hobbies. Due to this, it has become easy to discover a niche on Discord as there are a lot of distinct servers that accommodate an extensive range of interests.
Each server is composed of multiple channels, and every channel has its subjects, individual rule set, and interests. Thus, every channel can be valuable to talk about different things:
● You can talk about gaming
● The other can be useful to talk about sports activities, etc.
The possibilities are endless, and the most crucial part is that it is free to create these servers.
The most effective way to discover servers is by simply Googling them because the search feature on the platform only shows the most popular ones.
Discord is a somewhat flexible platform as it works on both desktop and mobile applications. You will connect your YouTube and Spotify accounts to add to your experience.
On top of its versatility, Discord is also very customizable based on a person’s interests and how someone desires to use the platform. Users can have servers that can be either private or public. There is also a position of an administrator, in which they can assign roles to each person, which comes with special privileges and name tags. These roles may benefit various large groups and provide a moderation sense in the server.
Not only does Discord offer group chats, but it also offers a non-public chatting feature which is also available. This allows users to talk one-on-one with other users and turn out to be friends with one another.

Part 2 Why Discord Emojis?
Gif emojis for Discord is a medium available in Discord that allows you to share data, news, and all other types of content efficiently and quickly to your audience using emojis/Gifs. Hence, note that images and videos are the types of content people can attract on Discord. Some of the reasons for Discord Emojis includes:

● Help you get good engagement on your Discord chats: This is the most important thing to consider in brand growth. The prime goal for every brand is to attract the audience and hold their attention. All you need is to chat content that helps you gain your potential customer’s interest, and sometimes a plain boring text is not enough to do that. Therefore, utilizing emojis in your Discord chats is very beneficial in getting your audience’s attention. Emojis can convey ideas, emotions, and feelings more accurately, and they are also effortless on the eyes. They can also be helpful to add the much-needed buzz that cannot be through word or text.
● Helps to save time and effort: These days, communication tends to be more at a breakneck pace and rapid. The most audience will most likely favor shorter Discord content over longer ones. Many people get tired of your chats o Discord drag on because if your Discord content takes so much effort and time to read or view, your audience might become bored and leave a negative review on your brand. Using emojis on your Discord chats is beneficial because, depending on the type of emoji, you can convey a lot of sense in a shorter time frame than when you are using written text. A perfect example is writing a chat about something very empowering. When you choose to correspond this type of content through text, it could take a little more effort and a bit of intricately used language to build up the reader and get the desired effect of empowering the reader. Emojis are very accurate in passing out the meaning and are shorter than words. That is the primary reason why all-in-all emojis can save effort and time to create your Discord chat.
● It can represent a meaning or idea accurately: Many emojis have a much better effect in a sense than text because a lot of abstract content can be easily understood using images than text.
Part 3 How to Create Discord Emoji GIF
The best software to create Gif discord emojis is Wondershare Filmora Video Editor due to its exclusive feature for creating Emoji, Gif. Filmora is an all-in-one application for video editing that offers users tons of video editing features and options and helps edit interesting emojis that can create beautiful videos. Some of the best or critical elements of Filmora include animation keyframing, motion tracking, noise removal, several animated titles, video effects, enhanced video stabilization, noise effects, etc.

Wondershare Filmora - Best Video Editor for Mac/Windows
5,481,435 people have downloaded it.
Build unique custom animations without breaking a sweat.
Focus on creating epic stories and leave the details to Filmora’s auto features.
Start a creative adventure with drag & drop effects and endless possibilities.
Filmora simplifies advanced features to save you time and effort.
Filmora cuts out repetition so you can move on to your next creative breakthrough.
The option of adding emojis to any video has been a trend for a long time now. This feature allows the creator to express their feelings and idea, and it is also fun as it does not use long texts and does not offend the viewers. Here is how Filmora is used to create emoji Gif discord ideally:

Step 1: Install Filmora
Install Filmora on your PC by first downloading it
Step 2: Video Upload
Click on create a New Project and place the video that requires editing on the Filmora timeline.
Step 3: Emojis under Elements
Click on the Elements tab at the top of the timeline. Now, click on the category where the emoji is on the side to display a list of emoji elements.
Step 4: Select Emoji
Choose your best emoji and drag and drop above the video on your timeline.
Step 5: Edit and Review
Adjust the duration, position, or size of the emoji according to your need and then preview the results and make changes where necessary.
Step 7: Save it
Lastly, click on the Export tab and save the video to your required location.
● Ending Thoughts →
● Discord emerges out a powerful communication platform
●Discord Gif Emojis makes a long-lasting impact
●Filmora is the right tool to edit Gif’s emojis for Discord account.
●Gif Emoji Discord is a perfect way of expressing one’s feelings or ideas or towards a particular thing on Discord platforms like Facebook, YouTube, WhatsApp, etc. More often, the emoji provided by these applications may sometimes not be enough to express ourselves. Hence, you will need to create more emojis using Filmora, which we explained in this article.
It is a fact that Discord has taken off over the past few years as a go-to social platform available for communities of people with common interests. Whether you are into screenwriting, legal practice, bird-watching, or anime, you can get involved in a Discord server that serves your community and creates Discord Emoji Gif.
One of the ways by which Discord provides so much value for all types of communities is its intuitive and robust server customization options. Custom Discord Gif emojis are especially useful since communities can use inside jokes, prominent members, and favorite images or GIFs to share with the server as a whole.
In this article
01 [Why Discord Is Becoming Popular Recently?](#Part 1)
02 [Why Discord Emojis?](#Part 2)
03 [How to Create Discord Emoji GIF](#Part 3)
Part 1 Why Discord Is Becoming Popular Recently?
Discord has become a viral chatting platform for gamers as many people use it to keep in touch with their family and friends. It made what was initially created for gamers to become something much more. It gives people a communication platform when social interaction through online mediums was not so popular.
First founded in 2015, Discord came intending to be a gamer’s platform to chat and build one another communities. More so, it has become a platform that is more than that and encompasses audiences or communities of different interests and not only gamers.
Discord is now a platform for messaging and allows users to communicate using different channels. This platform can be a less formal version of Slack. Users can write text and send video and voice messages and other forms of rich media such as photos and videos through the platform.
There are a lot of exceptional Discord servers that function as a place to speak about a lot of different things and interact using Gif discord emoji. This is like Reddit, where communities get built via forums that create a network experience through shared interests or hobbies. Due to this, it has become easy to discover a niche on Discord as there are a lot of distinct servers that accommodate an extensive range of interests.
Each server is composed of multiple channels, and every channel has its subjects, individual rule set, and interests. Thus, every channel can be valuable to talk about different things:
● You can talk about gaming
● The other can be useful to talk about sports activities, etc.
The possibilities are endless, and the most crucial part is that it is free to create these servers.
The most effective way to discover servers is by simply Googling them because the search feature on the platform only shows the most popular ones.
Discord is a somewhat flexible platform as it works on both desktop and mobile applications. You will connect your YouTube and Spotify accounts to add to your experience.
On top of its versatility, Discord is also very customizable based on a person’s interests and how someone desires to use the platform. Users can have servers that can be either private or public. There is also a position of an administrator, in which they can assign roles to each person, which comes with special privileges and name tags. These roles may benefit various large groups and provide a moderation sense in the server.
Not only does Discord offer group chats, but it also offers a non-public chatting feature which is also available. This allows users to talk one-on-one with other users and turn out to be friends with one another.
Part 2 Why Discord Emojis?
Gif emojis for Discord is a medium available in Discord that allows you to share data, news, and all other types of content efficiently and quickly to your audience using emojis/Gifs. Hence, note that images and videos are the types of content people can attract on Discord. Some of the reasons for Discord Emojis includes:
● Help you get good engagement on your Discord chats: This is the most important thing to consider in brand growth. The prime goal for every brand is to attract the audience and hold their attention. All you need is to chat content that helps you gain your potential customer’s interest, and sometimes a plain boring text is not enough to do that. Therefore, utilizing emojis in your Discord chats is very beneficial in getting your audience’s attention. Emojis can convey ideas, emotions, and feelings more accurately, and they are also effortless on the eyes. They can also be helpful to add the much-needed buzz that cannot be through word or text.
● Helps to save time and effort: These days, communication tends to be more at a breakneck pace and rapid. The most audience will most likely favor shorter Discord content over longer ones. Many people get tired of your chats o Discord drag on because if your Discord content takes so much effort and time to read or view, your audience might become bored and leave a negative review on your brand. Using emojis on your Discord chats is beneficial because, depending on the type of emoji, you can convey a lot of sense in a shorter time frame than when you are using written text. A perfect example is writing a chat about something very empowering. When you choose to correspond this type of content through text, it could take a little more effort and a bit of intricately used language to build up the reader and get the desired effect of empowering the reader. Emojis are very accurate in passing out the meaning and are shorter than words. That is the primary reason why all-in-all emojis can save effort and time to create your Discord chat.
● It can represent a meaning or idea accurately: Many emojis have a much better effect in a sense than text because a lot of abstract content can be easily understood using images than text.
Part 3 How to Create Discord Emoji GIF
The best software to create Gif discord emojis is Wondershare Filmora Video Editor due to its exclusive feature for creating Emoji, Gif. Filmora is an all-in-one application for video editing that offers users tons of video editing features and options and helps edit interesting emojis that can create beautiful videos. Some of the best or critical elements of Filmora include animation keyframing, motion tracking, noise removal, several animated titles, video effects, enhanced video stabilization, noise effects, etc.
Wondershare Filmora - Best Video Editor for Mac/Windows
5,481,435 people have downloaded it.
Build unique custom animations without breaking a sweat.
Focus on creating epic stories and leave the details to Filmora’s auto features.
Start a creative adventure with drag & drop effects and endless possibilities.
Filmora simplifies advanced features to save you time and effort.
Filmora cuts out repetition so you can move on to your next creative breakthrough.
The option of adding emojis to any video has been a trend for a long time now. This feature allows the creator to express their feelings and idea, and it is also fun as it does not use long texts and does not offend the viewers. Here is how Filmora is used to create emoji Gif discord ideally:
Step 1: Install Filmora
Install Filmora on your PC by first downloading it
Step 2: Video Upload
Click on create a New Project and place the video that requires editing on the Filmora timeline.
Step 3: Emojis under Elements
Click on the Elements tab at the top of the timeline. Now, click on the category where the emoji is on the side to display a list of emoji elements.
Step 4: Select Emoji
Choose your best emoji and drag and drop above the video on your timeline.
Step 5: Edit and Review
Adjust the duration, position, or size of the emoji according to your need and then preview the results and make changes where necessary.
Step 7: Save it
Lastly, click on the Export tab and save the video to your required location.
● Ending Thoughts →
● Discord emerges out a powerful communication platform
●Discord Gif Emojis makes a long-lasting impact
●Filmora is the right tool to edit Gif’s emojis for Discord account.
●Gif Emoji Discord is a perfect way of expressing one’s feelings or ideas or towards a particular thing on Discord platforms like Facebook, YouTube, WhatsApp, etc. More often, the emoji provided by these applications may sometimes not be enough to express ourselves. Hence, you will need to create more emojis using Filmora, which we explained in this article.
Also read:
- Figuring Out Proper Ways to Play a Video in Slow Motion on iPhone
- 2024 Approved How to Perfect Quick and Efficient Video Editing | Keyboard Shortcuts in Filmora
- Updated 2024 Approved Easy Way to Inset Text in Video
- New Step By Step Guide on Using Media Player Classic To Rotate A Video
- Updated 2024 Approved How to Change Frame Rate in Premiere Pro
- New 2024 Approved How To Trim Video In Premiere Pro in Different Ways
- In 2024, Top 10 Best Slideshow Makers with Music
- Updated You Have to Get It Right when It Comes to Cinematic Grading. We Highlight the Most Common Mistakes to Avoid While Focusing on Various Tips to Apply in the Process
- Updated 22 Free Video Editing Software to Save Your Money and Time
- New 2024 Approved Top 5 Video Filter Software Improve Your Videos with Filters
- New Vintage Film Effect 1920S - How to Make
- New Guide Adopting Lumetri Color Presets in Effective Color Grading
- 2024 Approved Learn How to Seamlessly Merge Audio and Video in VLC Media Player with This Easy-to-Follow Guide. Step-by-Step Instructions Are Included
- Change Speed of a Video on iPhone for 2024
- Updated In 2024, How To Make A Political Video
- In 2024, Create Stunning Videos Like a Pro with Filmora. Learn About Its Benefits and some Amazing Video and Audio Editing Features Such as Split Screens, Keyframing, Etc
- New Best 10 Crazy-Cool Examples of AR Video
- In 2024, 10 Best Cartoon Video Makers (Online and Desktop Solution)
- New 2024 Approved Best 15 Subtitle Apps 2023 Windows, Mac, iPhone, Android & Online
- New How To Create a Polaroid Collage?
- What Is the Best Filmora Slideshow Templates? Experts Choice for 2024
- New 2024 Approved Create an Awesome Logo Reveal with Logo Intro Templates
- New In This Article I Will Share to You My Tips and Experiences on How to Become a YouTube Vlogger and Things You Need to Consider Being a Vlogger
- In 2024, How to Split a Clip in After Effects
- Updated In 2024, How to Add Filter to Video in Premiere Pro?
- Updated HOW to Add Fade to Black on Premiere Pro
- Updated Easy Guide to Use a Stabilization Tool in Filmora for 2024
- Updated In 2024, Mastering DaVinci Resolve Scopes A Comprehensive Guide
- In 2024, Montage Makes It Easy to Create and Share Videos. This Article Will Explain What It Can Do and Show You Examples of Movies that Use Montage
- 2024 Approved How to Share YouTube Video on Zoom?
- New Top 10 Sound Extractors to Extract Sound From Video 2023
- Updated Detailed Tutorial to Crop a Video in KineMaster
- Updated In 2024, How to Add Subtitles in QuickTime Player?
- Updated In 2024, Camtasia vs Final Cut Pro
- In 2024, Turn Your Blog Content Into Audio Podcasts to Reach a Wider Audience and Increase Reader Participation
- How D AI Video Games Act More Human Than Human for 2024
- 2024 Approved Want to Have Slow Zoom Effect in Your Video? We Will Illustrate How to Apply Slow Zoom Effect to Your Video on Your Smartphone, Computer, and TikTok
- How To Stream Anything From Infinix Note 30 VIP Racing Edition to Apple TV | Dr.fone
- In 2024, 4 Most-Known Ways to Find Someone on Tinder For OnePlus Ace 2 by Name | Dr.fone
- Complete Fixes To Solve iPhone 7 Plus Randomly Asking for Apple ID Password
- In 2024, Full Guide to Fix iToolab AnyGO Not Working On Honor 90 GT | Dr.fone
- 7 Fixes for Unfortunately, Phone Has Stopped on Honor X50i | Dr.fone
- In 2024, How to Turn Off Google Location to Stop Tracking You on Oppo K11x | Dr.fone
- In 2024, How to Lock Apps on Vivo S18 to Protect Your Individual Information
- 6 Proven Ways to Unlock Lava Phone When You Forget the Password
- Your Account Has Been Disabled in the App Store and iTunes From iPhone XS Max?
- In 2024, How to Cast Tecno Camon 20 Screen to PC Using WiFi | Dr.fone
- How To Fix iPhone 15 Could Not Be Activated/Reached Issue
- Title: New In 2024, How to Change Quicktime Player Speed on Mac?
- Author: Chloe
- Created at : 2024-06-09 16:15:10
- Updated at : 2024-06-10 16:15:10
- Link: https://ai-editing-video.techidaily.com/new-in-2024-how-to-change-quicktime-player-speed-on-mac/
- License: This work is licensed under CC BY-NC-SA 4.0.
