
:max_bytes(150000):strip_icc():format(webp)/family-hanging-out-watching-videos-online-1166432791-309c6f7ac8cb4cc99875db5a77fd6f35.jpg)
New In 2024, How to Create a Glitch Text Effect?
How to Create a Glitch Text Effect?
Have you noticed the glitching effect that appears when you play a video or in games, creating a sporadic shaky effect on video edges? While this usually signifies a systematic software issue in these cases, the effect itself can work to create a dynamic visual style for different objects when done intentionally.
In fact, many video editors today use the glitch effect on elements in their videos, like the introductory title in movies or trailers. It creates a futuristic look to the text, which highly appeals to viewers who engage more in the video itself.
Suppose you are looking to add a similar effect to the title of your video project or other text-based content that you will add to your video, use a good tool for that. Wondershare Filmora , in particular, makes adding this effect very simple. Let’s learn how.
1. Launch the Filmora software
Free Download For Win 7 or later(64-bit)
Free Download For macOS 10.14 or later
The first step in preparing a customized glitch text effect is getting your software ready.
Visit the official website of Wondershare Filmora and tap on the Download button at the top to get the free software. The features necessary to create this effect are available under the free version, so you can avoid the plan upgradation process at this point.
After clicking the free download icon, the software’s installer version will save into your device automatically. Double-click on and agree with the related Terms and Conditions prompt. Then, tap on the Install button, and the software will take a few seconds to complete the installation process fully.

After that, click on the Start Now button to launch the software on your Mac or Windows computer that you are using. Filmora will open on its homepage.
2. Add the default title to timeline
Next, click the Create New Project button on the main page to access the editor section. Then, you have to click on the Titles tab and choose the Default Title option from the menu.
Drag it down from the media library section to the timeline and drop it in the Track 2 row. After that, move the play head with your cursor to the 1-second and the 10th frame on the timeline. Then, hold and move this clip until the end part of the clip is at this mark.

3. Adjust the font of the title
Next, double-click on this clip on the editor timeline to open the text editing window. Here, under the Preset section, change the title font to what to want to first word of your title to be.
Change the font style to a bigger bold option like Impact and increase the font size to 100. Then, scroll a little downward and tap on the Text Spacing option. Increase this value by 5 and press the OK button when you are done.

4. Add and copy all of the word clips
After adjusting the text font, tap on this clip on the timeline and copy it. Then, paste it just after the first clip ends, reducing its duration to around 1 second.
Then, double-click on the copied clip to open the text editing window. Click on the section where you can add the text and change it to the second word of your title. Again, copy this clip and paste it next to it, adjust it to be one second long, double-click on it to adjust the text to read the third word, and so on.

Continue until all of your intro’s words are added in these clip forms.
5. Create and add the snapshots
Following the previous step, click on the My Media section. Then, tap on the first clip in the collection and tap on the Snapshot icon at the end of the editing toolbar right above the timeline. Repeat this step for all the clips you have added until a snapshot of each of the words is stored in the media library.
Next, you have to grab hold of the first snapshot that you click and move it to the Track 1 of the timeline. Use the cursor to hold it and reduce the size of the clip to the same amount as the first clip on Track 1. To be sure, you can place the playhead at this point to see that the ending time for both clips is aligned.

6. Adjust the text effect for the first word
You have to click on the first-word snapshot in Track 1 of the Filmora editing timeline and double-click on it. Next, when the text editing window opens, you must change the Scale section to display the value of 290%. Following that, click on the slider in the Opacity parameter and decrease it to the 7% mark. Then, press the OK button.
On the timeline, right-click on this edited clip and choose the “Copy Effects” option from the drop-down menu.

7. Edit the snapshots for all words
After making changes to the first word, you must take hold of the second word’s snapshot from the media library. Drag and then drop it onto Track 1 of the editing timeline right next to the first clip. Then, hold the edge of this clip and reduce its size to fit the same duration as the second clip adjacent to it on Track 2.
Following that, you must choose this clip on Track 1 and right-click on top of it. Click on the “Paste Effects” option from the next drop-down menu, and the same adjustments will apply to this clip.

Repeat this step with all of the next snapshots of the following words.
8. Add the first effect layer
Next, you have to add stylish effects to your text. For that, you must tap on the Effects tab from the top toolbar of Filmora- a list of many effects collections will appear on the left panel.
Scroll down until you reach the Filmstock option. You must click on it and find the Flicker option from the list. Under this collection, there are many options available. You must choose the Video_seg effect and drag it to the editing timeline above Track 2.

At this point, ensure the effect falls right above the first and second clip parts in the track below. Tap on the edges of this clip to reduce the size of the video effect, taking careful note to keep the clip 8 frames long overall.
Then, copy the cut-down effect from Track 3 and paste it at every intersectional point between the separated word-based clips in Track 2.

9. Zoom in to edit the first effect layer
Following this, you must zoom into the timeline for a better view and editing control for the next part.
Go to the Effects tab at the top and choose the Filters collection next. Under it, choose the Chaos 1 effect option, drag it down to the timeline, and place it above the previous clip on Track 4. Adjust the starting edge of this clip to have the same starting point as the Video_seg effect on Track 3 with an overall 8-frame duration.

10. Edit the Effect
Next, you have to double-click on this clip to open the editing window for this effect. In this section, go to the Frequency parameter and increase the slider to 400. Following that, click on the Position X parameter and move the slider to the 0.20 point. Next, do the same for the Position Y parameter, but to the 0.70 point.
Change the Position Z parameter by typing the value 40 and disable the RGB Separate setting. Then, press the OK button and go to the timeline again.

11. Adjust the Glitch effects
Click on the effect clip on Track 4 and copy it. Please do the same as you did for the effect in Track 3 and paste it at the same locations between the clips in this track.
Afterward, go to the Effects tab again and choose the Filmstock tab. Among the collections here, you have to choose the Glitch option and select Glitch Stripe 1 from the collection. For an easier searching experience, you can directly type the effect in the search bar under the Effects tab.

Then, drag and drop it on Track 5 of the timeline right above the previous effect and reduce its duration to the same level as the first two effects. Copy it and then paste the clip again for each clip-to-clip intersection.
After this part, drag the Glitch Dispersion effect down to the timeline. Place it above the previous effect and adjust the clip’s size to the same length. Again, copy the effect and repeat the steps again. Next, repeat the same whole process with the Negative Flicker effect from the Flicker collection on Track 7.

12. See the preview and save the file
Finally, you are done adding all the effects, and you have to click on the Render Preview icon in the toolbar above the timeline. Then, press the Play button on the Preview window to see the full glitch text effect play out properly.

Conclusion
Now, you are done with creating a visually exciting and dynamic look for your introductory or ending title in the video using the glitch effect. For the best results, you should practice this process sometimes to get used to it and even make certain preferential changes to the font style. Ultimately, with the help of this software, you can expect a high-quality title look and use it for further video editing work.
Free Download For macOS 10.14 or later
The first step in preparing a customized glitch text effect is getting your software ready.
Visit the official website of Wondershare Filmora and tap on the Download button at the top to get the free software. The features necessary to create this effect are available under the free version, so you can avoid the plan upgradation process at this point.
After clicking the free download icon, the software’s installer version will save into your device automatically. Double-click on and agree with the related Terms and Conditions prompt. Then, tap on the Install button, and the software will take a few seconds to complete the installation process fully.
After that, click on the Start Now button to launch the software on your Mac or Windows computer that you are using. Filmora will open on its homepage.
2. Add the default title to timeline
Next, click the Create New Project button on the main page to access the editor section. Then, you have to click on the Titles tab and choose the Default Title option from the menu.
Drag it down from the media library section to the timeline and drop it in the Track 2 row. After that, move the play head with your cursor to the 1-second and the 10th frame on the timeline. Then, hold and move this clip until the end part of the clip is at this mark.
3. Adjust the font of the title
Next, double-click on this clip on the editor timeline to open the text editing window. Here, under the Preset section, change the title font to what to want to first word of your title to be.
Change the font style to a bigger bold option like Impact and increase the font size to 100. Then, scroll a little downward and tap on the Text Spacing option. Increase this value by 5 and press the OK button when you are done.
4. Add and copy all of the word clips
After adjusting the text font, tap on this clip on the timeline and copy it. Then, paste it just after the first clip ends, reducing its duration to around 1 second.
Then, double-click on the copied clip to open the text editing window. Click on the section where you can add the text and change it to the second word of your title. Again, copy this clip and paste it next to it, adjust it to be one second long, double-click on it to adjust the text to read the third word, and so on.
Continue until all of your intro’s words are added in these clip forms.
5. Create and add the snapshots
Following the previous step, click on the My Media section. Then, tap on the first clip in the collection and tap on the Snapshot icon at the end of the editing toolbar right above the timeline. Repeat this step for all the clips you have added until a snapshot of each of the words is stored in the media library.
Next, you have to grab hold of the first snapshot that you click and move it to the Track 1 of the timeline. Use the cursor to hold it and reduce the size of the clip to the same amount as the first clip on Track 1. To be sure, you can place the playhead at this point to see that the ending time for both clips is aligned.
6. Adjust the text effect for the first word
You have to click on the first-word snapshot in Track 1 of the Filmora editing timeline and double-click on it. Next, when the text editing window opens, you must change the Scale section to display the value of 290%. Following that, click on the slider in the Opacity parameter and decrease it to the 7% mark. Then, press the OK button.
On the timeline, right-click on this edited clip and choose the “Copy Effects” option from the drop-down menu.
7. Edit the snapshots for all words
After making changes to the first word, you must take hold of the second word’s snapshot from the media library. Drag and then drop it onto Track 1 of the editing timeline right next to the first clip. Then, hold the edge of this clip and reduce its size to fit the same duration as the second clip adjacent to it on Track 2.
Following that, you must choose this clip on Track 1 and right-click on top of it. Click on the “Paste Effects” option from the next drop-down menu, and the same adjustments will apply to this clip.
Repeat this step with all of the next snapshots of the following words.
8. Add the first effect layer
Next, you have to add stylish effects to your text. For that, you must tap on the Effects tab from the top toolbar of Filmora- a list of many effects collections will appear on the left panel.
Scroll down until you reach the Filmstock option. You must click on it and find the Flicker option from the list. Under this collection, there are many options available. You must choose the Video_seg effect and drag it to the editing timeline above Track 2.
At this point, ensure the effect falls right above the first and second clip parts in the track below. Tap on the edges of this clip to reduce the size of the video effect, taking careful note to keep the clip 8 frames long overall.
Then, copy the cut-down effect from Track 3 and paste it at every intersectional point between the separated word-based clips in Track 2.
9. Zoom in to edit the first effect layer
Following this, you must zoom into the timeline for a better view and editing control for the next part.
Go to the Effects tab at the top and choose the Filters collection next. Under it, choose the Chaos 1 effect option, drag it down to the timeline, and place it above the previous clip on Track 4. Adjust the starting edge of this clip to have the same starting point as the Video_seg effect on Track 3 with an overall 8-frame duration.
10. Edit the Effect
Next, you have to double-click on this clip to open the editing window for this effect. In this section, go to the Frequency parameter and increase the slider to 400. Following that, click on the Position X parameter and move the slider to the 0.20 point. Next, do the same for the Position Y parameter, but to the 0.70 point.
Change the Position Z parameter by typing the value 40 and disable the RGB Separate setting. Then, press the OK button and go to the timeline again.
11. Adjust the Glitch effects
Click on the effect clip on Track 4 and copy it. Please do the same as you did for the effect in Track 3 and paste it at the same locations between the clips in this track.
Afterward, go to the Effects tab again and choose the Filmstock tab. Among the collections here, you have to choose the Glitch option and select Glitch Stripe 1 from the collection. For an easier searching experience, you can directly type the effect in the search bar under the Effects tab.
Then, drag and drop it on Track 5 of the timeline right above the previous effect and reduce its duration to the same level as the first two effects. Copy it and then paste the clip again for each clip-to-clip intersection.
After this part, drag the Glitch Dispersion effect down to the timeline. Place it above the previous effect and adjust the clip’s size to the same length. Again, copy the effect and repeat the steps again. Next, repeat the same whole process with the Negative Flicker effect from the Flicker collection on Track 7.
12. See the preview and save the file
Finally, you are done adding all the effects, and you have to click on the Render Preview icon in the toolbar above the timeline. Then, press the Play button on the Preview window to see the full glitch text effect play out properly.
Conclusion
Now, you are done with creating a visually exciting and dynamic look for your introductory or ending title in the video using the glitch effect. For the best results, you should practice this process sometimes to get used to it and even make certain preferential changes to the font style. Ultimately, with the help of this software, you can expect a high-quality title look and use it for further video editing work.
20 Best Text To Speech Software [Windows, Mac, Android, iPhone & O
Best Text To Speech Converter and Video Editor
Filmora’s Text to Speech (TTS) function allows you to convert your text files to voiceover and bring more elements to enrich your video.
Free Download Free Download Free Download Learn More >

Listening has always been more enjoyable, easier, and faster than reading. We understand better when we are listening. So it is good news for us that our life has been made even easier with the development of TTS technology or Text-to-Speech technology.
As its name suggests, TTS or Text-to-Speech is a technology that can convert texts to speech or voices. In other words, it is a technology that reads aloud any type of digital text so one can just listen to it without having to manually read those texts himself/herself. Text-to-Speech is also known as speech synthesis, which means artificial human speech production.
Though Text-to-Speech might sound like a new technology to most people, it has been here for a long time now. It’s just that only the big companies and some authorities had access to it in the past. But now, we can easily find this technology around us. Some of the popular examples would be audiobooks, read-aloud functions on websites, voice assistants like Alexa, Siri, etc.
While text-to-speech service is widely used for convenience and ease of life, its importance is not just limited to that. This technology has been extremely helpful for those with visible imparities and those who cannot read or write. Not only that, but it also has a great contribution to the field of education, business, and technology itself.
So now that we’re a little familiar with this Text to Speech system, it’s about time we have a look at some of the best Text to Speech software or say, Text to Speech converters. In this article, we’ll be covering the Top 20 Best Text to Speech Software with their price, features, and cons along with the platforms they are available for like Windows, Mac, Android, iPhone, and Online:
1. Murf.ai

Supported system: It is a cloud-based platform, therefore can be used online on Windows, Mac, Android, and iPhone.
Basic Intro: Murf.ai is an AI-based voice generator and text to speech converter that is popular for its ability to make studio-quality voiceovers in minutes. Unlike most of the text-to-speech software out there, Murf is focused on creating human-like voices with the help of AI rather than the same old robotic voices. And it’s not just a text-to-speech converter. Its powerful studio allows you to convert speech to editable text, make studio-like quality voiceovers, add audio to videos, etc. Therefore, all these features and its quality service help it rank in the top position on our list.
Features:
- It provides 120+ different types of AI voices for men, and women to use.
- It offers the most natural-sounding AI voices in 20 different languages.
- It has different functionalities aside Text to speech conversion like transcription, making and editing voiceovers, etc.
- It has advanced options like pitch adjustment, adding pauses, emphasizing specific words, speed, etc. to generate the audio as you want.
- It is a simple yet powerful studio for creating, editing, and managing voiceovers and audio.
- It has free grammar and punctuation assistants for your text.
- Free trial allows you to render up to 10 minutes of voice from the text.
- It provides free royalty-free background music to add to videos or voiceovers.
Price: Murf has the following three pricing plans plus a free trial:
- Basic ($13/month):
Unlimited downloads, 24 hours of voice generation per year, Access to 60 voices & 10 languages, etc.
- Pro ($26/month):
96 hours of voice generation per year, 48 hours of transcription per year, Access to 120+ voices & 20 languages, etc.
- Enterprise ($166/month):
5+ users, Unlimited voice generation & transcription, Collaboration and Access Control, Service Agreement, etc.
Cons:
- Not available as a PC or mobile application
- Too limited in the free version
2. Play.ht

Supported system: It is a cloud-based platform, therefore can be used online on Windows, Mac, Android, and iPhone.
Basic intro: Play.ht is a web application that offers a huge library of AI voice options for converting text to speech. It generates realistic TTS audio using an online AI voice generator and the best synthetic voices from Google, Amazon, IBM & Microsoft. Play.ht can help you create professional voiceovers using AI voices from a collection of over 600 male and female voices available across 60+ different languages and accents. Along with converting text to audio, it can also help you enhance the audio with speech styles, pronunciations, and SSML tags.
Features:
- It uses synthetic voices from Google, Microsoft, IBM, and Amazon.
- Huge library of over 600 AI voices including male and female, and 60+ different languages and accents available.
- It supports exporting in MP3 and WAV format with full SSML support.
- Advanced settings for editing and enhancing the voice generated from text.
- Additional functionalities available like speech styles, multi-voice features, voice inflections, custom pronunciations, etc.
- It gives commercial & broadcast rights to use the generated speech files for commercial and personal use with full authority.
Price: Play.ht has the following four pricing plans plus a free trial:
- Personal ($14.25/month):
For personal use such as learning, proofreading, school projects, etc.
- Professional ($29.25/month):
For content creators, bloggers, and freelancers with commercial intent.
- Growth ($74.25/month):
For teams and small companies looking to grow with audio.
- Business ($149.25/month):
For companies and agencies looking to create audio at scale.
Cons:
- Can be a little advanced and difficult for beginners
- Voices other than English can be inconsistent
3. Notevibes
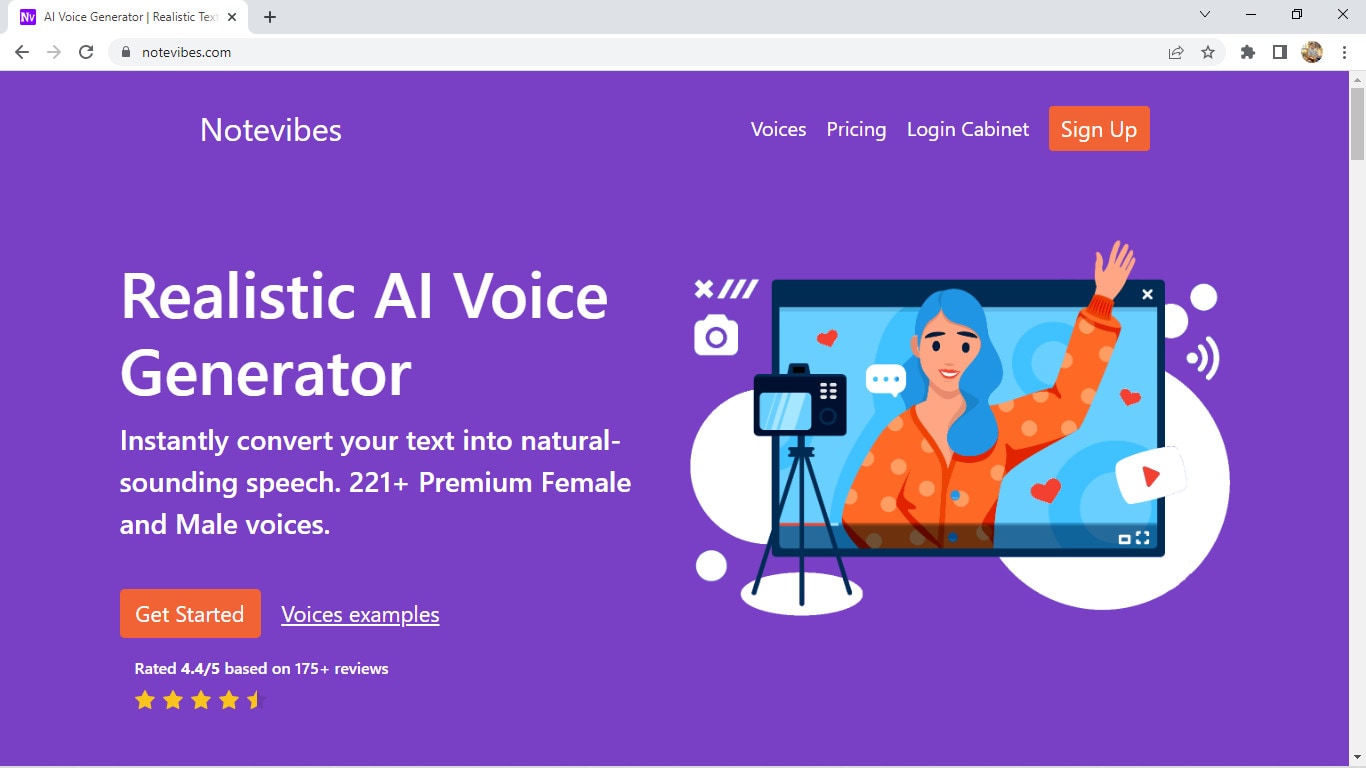
Supported systems: It is a cloud-based platform, therefore can be used online on Windows, Mac, Android, and iPhone.
Basic Intro: Notevibes is online text-to-speech software that can instantly convert your text into natural-sounding speech with AI. It offers over 221 high-quality voices and 25 languages from the most popular providers: Google, Amazon, Microsoft, and IBM to choose from. Notevibes can also convert text to audio and create videos with natural-sounding voices. Using it, you can save both your time and money without hiring professional voiceover artists.
Features:
- It generates realistic and natural human-like voices
- Large library of over 221 voices and 25 different languages
- Powerful editor to add pauses in one click, change speed, pitch, etc.
- Ability to control volume and emphasis on specific words.
- It grants you intellectual rights to freely use or sell voices.
- Backups are available for 14 days, so your work is safe.
- Advanced editor and high fidelity speech synthesys
Price: Notevibes has altogether 3 pricing plans plus a free version:
- Personal Pack ($9/month):
For personal use, private learning, and occasional or general purposes
- Commercial Pack ($90/month):
For Commercial use: Youtube, broadcasts, TV, IVR voiceover, and other businesses
- Corporate Pack ($4000/year):
For corporate or large-scale users with additional specific features
Cons:
- Not available as a PC or mobile application
- Too large gap between pricing plans
4. Lovo

Supported systems: It is a cloud-based platform, therefore can be used online on Windows, Mac, Android, and iPhone.
Basic intro: Lovo.ai is a web-based text to speech software that helps you create perfect voiceovers for audio ads, games, animations, e-learning, etc. It is a next-generation AI voiceover & text to speech converting platform that uses AI and the latest neural network models to generate human-like voices. Lovo offers a unique collection of 180+ voice skins in 33 different languages to choose from, plus, new voices are added on a monthly basis. Its advanced text-to-speech technology provides you the authentic voices that sound very realistic. And Lovo.ai also has the feature of Custom Voice Cloning which lets you create your own customized voice skins.
Features:
- Unique voice collection of 180+ voice skins in 33 different languages, each with unique traits to perfectly fit any content.
- It provides authentic and realistic voices with human emotions.
- Voice cloning technology that requires just 15 minutes of any voice to create the customized voice skins.
- Growing library of voices where new voices are added monthly.
- Voiceover API Integration is also available for the developers to use in their products.
- Well-optimized studio with a smooth interface for easy use.
Price: Lovo Studio offers two pricing plans and one free plan:
- Personal ($17.49/month):
Unlimited access to all voices, the Ability to add BGM and Commercial Rights, Up to 30 downloads per month
- Freelancer ($49.99/month):
Every feature in the Personal plan, Upto 100 downloads/month
Lovo also offers three different API Pricing plans, plus a free trial for 2 weeks without any credit card information:
- Base subscription: $45 per month per 1000 calls
- Overage: $0.04per overage call
- Enterprise license
Cons:
- Not available as a PC or mobile application
- Limits on the number of characters and downloads in paid plans
5. NaturalReader

Supported systems: Supports Windows, iPhone, Android, and online (also available as a chrome extension)
Basic intro: NaturalReader is a powerful application that can convert any text or document to audio anytime anywhere. It is one of the best and most popular text-to-speech software available today that can generate high-quality natural-sounding voices. One of its unique features is OCR Technology which reads aloud text from scanned documents or images for you. It can also be used to create audio from the text for commercial purposes with full rights. You can use NaturalReader online, through software, or with the help of its chrome extension.
Features:
- It offers 100+ natural-sounding voices available in 16 different languages.
- Its WebReader allows you to listen to the contents of any website.
- Specific features available for commercial purposes.
- OCR function available that can also read or convert the scanned documents or images into audios.
- With its pronunciation editor, you can manually modify the pronunciation of certain words.
- Specifically designed as a reading aid to help dyslexic readers.
Price: NaturalReader has three simple pricing plans including the free plan:
- Free ($0/month):
20 minutes per day with premium voices, Unlimited use with free voices, Pronunciation editor
- Premium ($9.99/month):
Unlimited use with premium voices, OCR functionality, MP3 conversion, Chrome extension with unlimited premium voices
- Plus ($19/month):
100+ Premium and Plus voices, Chrome extension with 100+ Premium and Plus voices, all the previous features
Cons:
- Free app requires Internet connectivity to access the voices.
- Not available as downloadable software for Mac devices
6. Amazon Polly

Supported systems: It is a cloud-based platform, therefore can be used online on Windows, Mac, Android, and iPhone.
Basic intro: Amazon Polly is a cloud-based service by Amazon that turns text into life-like speech, allowing you to create applications that talk, and build entirely new categories of speech-enabled products. Amazon Polly uses deep learning technologies and AI technology to synthesize realistic human speech in dozens of voices across many different languages. It is really a revolutionary TTS service that offers Neural Text-to-Speech voices in addition to Standard TTS voices that deliver advanced improvements in speech quality through a new machine learning approach. And, one of the best things is that Amazon Polly Brand Voice can create a custom voice for exclusive use.
Features:
- It provides one of the most realistic and natural-sounding voices.
- A large number of options available for voices and languages.
- Supports API integration for applications or any products.
- It can create a custom voice for the exclusive use of your organization.
- Ability to stream audio in real-time or store & redistribute speech.
- Customisation & control options available for speech output.
- It offers a free tier as well as pay-as-you-go pricing.
Price: Amazon Polly offers two different plans for its service:
- AWS Free Tier: Limited but free 5 million characters per month for 12 months
- Pay-as-you-go plan: Depends on your usage but low cost per character converted and unlimited replays
Cons:
- Not available as a desktop or mobile application
- Beginners might have a hard time using it.
- Their pay-as-you-go pricing plan can be a little difficult to understand
7. Voice Dream Reader

Supported systems: Supports Mac and iPhone (also available as a Safari extension)
Basic intro: Voice Dream Reader is a text-to-speech software specifically designed for Mac and devices running iOS. It is one of the best text-to-speech software for Mac and iOS devices that provides over 100 AI voices in about 20 different languages. It not only helps you convert text to audio, but it also reads the content from any Microsoft documents, Webpage, PDFs, etc. for you. Voice Dream Reader is meticulously designed for everyone including people with blindness, dyslexia, low vision, autism, etc. It has tons of features embedded inside it like synchronized highlighting, OCR recognition, library management, visual and audio controls, etc. Plus, it has some really special features for Mac and iOS devices like Safari extension, iCloud sync, etc. which makes it one of the best choices for text-to-speech conversion.
Features:
- It offers a huge library of over 100 AI voices from Ivona, Acapela, NeoSpeech, etc, across 20 different languages.
- It can read aloud content from any documents, and web pages with different reading modes.
- Enhanced audio and visual controls available.
- Specific features like Safari Extension, and iCloud Sync for Mac and iOS devices.
- Additional functionalities like OCR, Synchronized highlighting, Library management, Annotation, etc.
- Designed with people having blindness, dyslexia, autism, etc. in mind.
- It doesn’t require an internet connection.
- Different reputed awards and recognitions received by Voice Dream Reader.
Price: Voice Dream Reader is free to download from Mac App Store while costs $19.99 to download from iOS App Store. Its free version is pretty sufficient and is feature-rich, however, this software also offers in-app purchases on both platforms.
Cons:
- Only available for Mac and iOS devices.
- Offers in-app purchases to remove limitations.
8. Kukarella

Supported systems: It is a cloud-based platform, therefore can be used online on Windows, Mac, Android, and iPhone.
Basic intro: Kukarella is an online Text-to-Speech software powered by Google, Amazon, Microsoft, and IBM that lets you easily create beautiful voiceovers with realistic AI voices. It can be used both as a Text-to-voice software and an Audio-to-text software. With Kukarella, you can also narrate books or scripts with multiple voices which is a beta feature. It offers one of the largest libraries of around 670 voices across 100+ different languages and accents which is truly remarkable. Furthermore, it has a well-designed studio to work on and also includes commercial rights in its plan.
Features:
- It offers one of the largest collections of around 670 voices across 100+ different languages and accents.
- It provides the best AI neural voices with commercial rights included.
- Also works as an Audio Transcription software to transcribe audio, recordings, and videos.
- It includes the Table Reads feature to narrate books or scripts using multiple voices.
- Referral program for bonuses and free credits to use.
- Well-optimized studio with additional effects to use in the output audio like pitch, pause, speed, emphasis, etc.
Price: Kukarella has three different paid pricing plans available with which they also provide a 15-day money-back guarantee to refund your purchase if you’re not satisfied with their service:
- Free ($0/month): For testing purposes
- Pro ($15/month): For creative people
- Premium ($35/month): For film professionals and experts
- Studio ($99/month): For business and large-scale use
Aside from these four pricing plans, Kukarella also offers a Top Ups option to let you purchase additional credits like extra characters for text-to-speech and extra minutes for audio transcription.
Cons:
- Only available as an online application.
- Doesn’t let you clone your own voice.
9. Speechelo

Supported systems: Supports all devices like Windows, Mac, Linux, iPhone, and Android, and is available online too.
Basic intro: Speechelo is a new cloud-based text-to-speech software that instantly transforms any text into a 100% human-sounding voiceover. Despite being a new product in this huge marketplace, it has gained popularity very quickly due to its awesome text-to-speech conversion ability. All of their voices are said to have the necessary elements and expressions that make a voice sound real. It also claims that 98% of the people hearing a voiceover generated with Speechelo can’t tell if it is a real human voice or an AI-generated voice. However, the best thing about Speechelo is that it is available for all types of devices out there, so it has got you covered everywhere.
Features:
- It offers more than 50 natural-sounding voices in 24 different languages.
- Functionality to add inflections in the voice.
- Different voice styles and tones available.
- Has settings for adjusting the speed and pitch of the voice.
- Additional options to manually add breathing sounds and pauses, or its AI engine can automatically add them on its own.
- Compatible with all major operating systems, so it won’t matter whatever device you have.
Price: Speechelo has only one pricing plan i.e. Founders Special Offer which is basically a one-time payment for only $47 without any recurring monthly fees. On top of that, they provide a “Risk-Free 60 Days Money Back Guarantee” with which you can try Speechelo without any worries. In this one-time subscription plan, you’ll get lifetime updates and support.
Cons:
- No free version or free trial available to try
- Speechelo website might look a bit fishy or scammy
10. Nuance Dragon

Supported systems: Supports Windows, Android & iOS (previously supported Mac too but discontinued)
Basic intro: Nuance Dragon is an AI-based Text-to-Speech technology that leverages neural network techniques to deliver a human-like, engaging and personalized audio. It creates natural-sounding speech in 119 voice options across 53 different languages. With Nuance vocalizer, you can also establish a unique voice for your brand without having to hire, brief, or record voice talent. One of the best things about Nuance Dragon is that they pursue more natural and expressive speech synthesys to provide life-life audio output. And good news for the developers is that they also provide TTS API to use in the applications or any solutions.
Features:
- It supports HIPAA requirements that are important for security and confidentiality.
- It offers a big library of over 119 voice options and 53 different languages.
- AI-optimized text processing and enhanced expressivity.
- It provides text-to-speech API to use in applications and products.
- It can create a customized or unique voice for the brand.
- Has audio controls for managing or editing the generated audio.
- Dictation and transcribing features available.
Price: Nuance Dragon has 3 plans for individual and 3 plans for enterprise productivity, however, there is not a fixed price for enterprise solutions as it may depend:
- Dragon Professional Individual: Starting at $500
- Dragon Legal Individual: Starting at $500
- Dragon Anywhere Mobile: $15/month for both Android and iOS
They also have a free demo and a 30-day money-back guarantee program on every plan.
Cons:
- Not available for Mac devices
- Not much beginner-friendly to use
11. Synthesys

Supported systems: It is a cloud-based platform, therefore can be used online on Windows, Mac, Android, and iPhone.
Basic Intro: Synthesys is a popular web application that can help you produce professional AI voiceovers or even AI videos in just a few clicks. It generates clear and natural voiceovers through artificial intelligence that can help you build trust and connection between you and your customers or clients. This unique text-to-speech converter eliminates the robotic and strange sounds generated by AI to the minimum. Furthermore, this online platform can create beautiful AI videos for you with just text which you can share on social media or wherever you like. It also allows you to choose voices from different gender, style, accent, speed, etc. for the speech generated from text.
Features:
- It is a web application, so you can work on your projects from any device anywhere.
- Large library of professional AI voices: 35 female and 30 male to choose from.
- Can be used as both AI Voice Generator or AI Video Generator
- It allows you to use or sell the generated voices or videos with full rights.
- User-friendly interface and easy to use.
- Advanced options available to change speed, gender, style, and accent of the voice.
Price: Synthesys has a total of three subscription plans with a 3-day moneyback guarantee. Unfortunately, it doesn’t have a free plan or a free trial version.
- Audio Synthesys plan ($29/month):
Access to 20 real human voices, 66 languages & 254 general voices, and Unlimited voice-overs downloads
- Human Studio Synthesys plan ($39/month):
Access to 73 Humatars, Full video customization, Unlimited downloads, etc.
- Audio and Human Studio Synthesys plan ($59/month):
Unlimited videos and voices downloads, and all previous features included
Cons:
- Limited choices for humatars and voices
- No free trial version available
12. Linguatec Voice Reader

Supported systems: Supports only Windows operating system (all versions)
Basic intro: Linguatec Voice Reader is a downloadable text to speech software for Windows users. It offers a big collection of 67 natural-sounding voices in 45 different languages. Aside from converting text to speech, it can also convert Word documents, emails, ebooks, and pdfs to audio for listening to them on any device. Linguatec Voice Reader Home is specifically designed for private or personal use to listen to any content but it has other specific products like Linguatec Voice Reader Studio for professional purposes and Voice Reader Server for large-scale conversion of text to speech. And, it also has a Voice Reader Web which can automatically convert your website to audio. Therefore, it has got you covered in every aspect.
Features:
- It offers 67 natural-sounding voices in 45 different languages.
- It allows you to convert any word documents, emails, ebooks, or pdfs to audio.
- Text to speech software designed solely for personal usage.
- Intuitive editor to change the speed, volume, and pitch of the audio.
- Installable on Windows, so can be directly accessed without a browser.
- Specific products available for specific purposes like personal use, professional use, large scale use, etc.
Price: Linguatec Voice Reader has a single one-time pricing plan for its every product:
- Voice Reader Home: €49 (approximately $51)
- Voice Reader Studio: €499 (approximately $527)
- Voice Reader Web: €299 (approximately $316)
- Voice Reader Server: Depends on the company’s needs
Cons:
- Only available for Windows devices
- Interface is boring and old-fashioned.
- Only one voice and language per license.
13. Resemble AI

Supported systems: Supports Android and iOS devices, and can also be used online
Basic intro: Resemble.ai is professional text-to-speech software that generates realistic AI voices from the text. It can create your own AI voice by recording and cloning your voice data. And, it also comes with API functionality to embed TTS into any of your services or products. With its Resemble fill, it can blend human and synthetic voices for a seamless experience, and it even has a language dubber that can instantly dub your native voice into other languages. Furthermore, one of its best features is its ability to control the emotions of every word in a sentence which really provides a realistic experience.
Features:
- Voice cloning function to clone your own voice with AI.
- Flexible APIs ready for integration in applications, products, or any services.
- Resemble Fill function to blend human and synthetic voices for a seamless experience.
- It can instantly dub your native voice into other languages.
- Optimized interface and additional audio control settings.
- It can be accessed from mobile devices too with installable apps.
Price: Resemble AI has three pricing plans according to your need and a free trial:
- Entry ($30/month): For voices that are recorded right on our platform
- Build (Depends on your needs): For your own data, any voice, no script required
- Enterprise (Depends on your needs): For massive scale and custom deployment needs
Cons:
- Limited options for voices and languages
- Not available as a Windows or Mac program
14. WellSaid

Supported systems: It is a cloud-based platform, therefore can be used online on Windows, Mac, Android, and iPhone.
Basic intro: WellSaid is an AI-powered text-to-speech software that converts text to voice in real-time and it can help you create quality voiceovers for all your digital content easily. It is one of the best voiceover generators that is not only designed for individual use, but also for small teams and large companies to work on together. With WellSaid, you can also customize the output voices, create your own unique voice or even deploy its text-to-speech functionality through API. However, it is kinda limited on the number of voices and languages.
Features:
- Has a well-optimized studio to convert text to audio.
- WellSaid API available to deploy TTS functionality in apps and products.
- It allows you to build your own voices to meet your brand guidelines.
- Suitable for individuals, teams of any size, and even large enterprises.
- Around 50 different voice avatars to choose from.
- High quality and realistic voices.
- Live chat support and rights for commercial usage.
Price: WellSaid has altogether four pricing plans and a free trial:
- Maker ($49/month):
250 downloads, 5 projects, 4 voice avatars
- Creative ($99/month):
750 downloads, 50 projects, 50 voice avatars
- Producer ($199/month):
2500 downloads, Unlimited projects, live chat support
- Team (Not fixed):
Team members, Team projects, Volume licensing, Account manager
Cons:
- Limited number of voice avatars and languages to choose from.
- Lack of features to adjust and edit the audio.
15. TTSReader
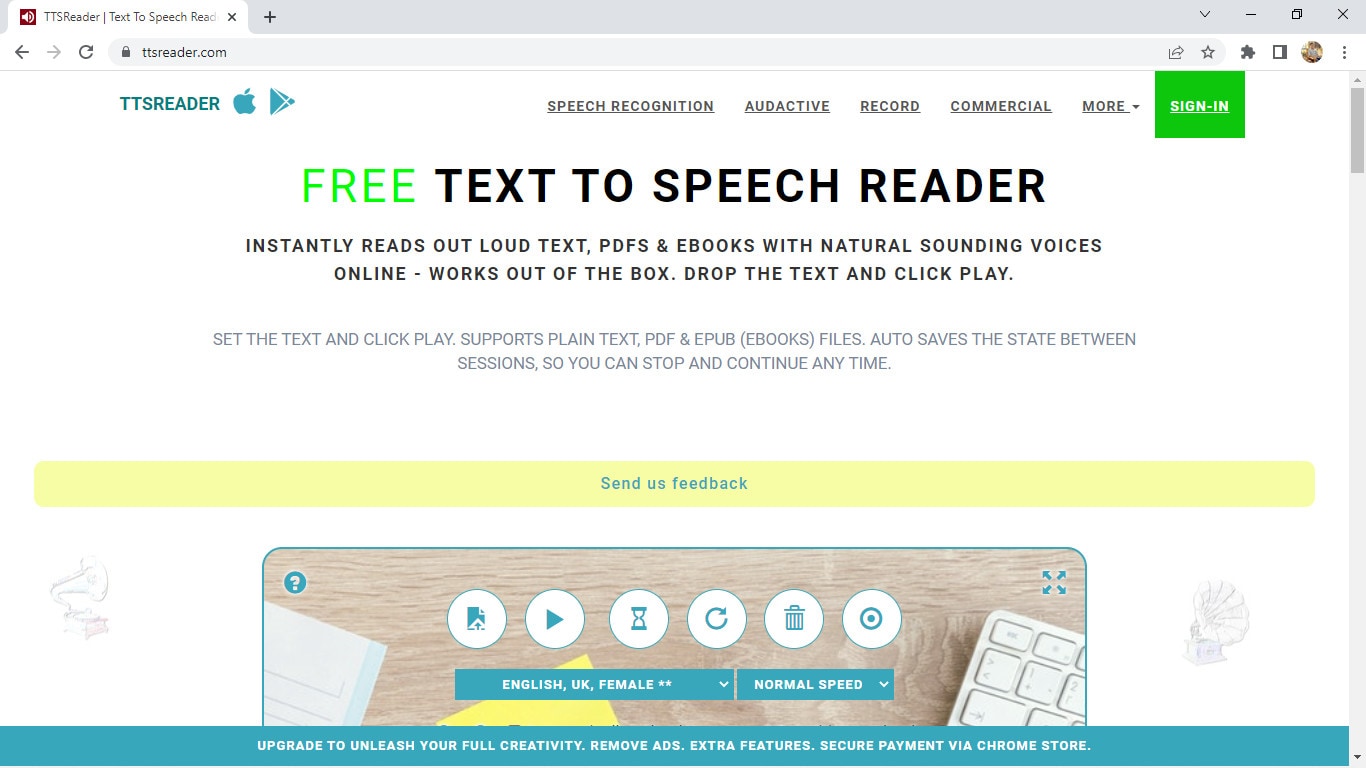
Supported systems: Supports iOS and Android devices, and is also available online and as a chrome extension
Basic intro: TTSReader is one of the simplest and best free text-to-speech readers that instantly reads aloud text, pdfs & ebooks with natural-sounding voices. It is a lightweight online application, so it works out of the box without the need to download and log in. Despite being free software, it has some really great features in it. There are various options of natural sounding voices in different languages and different accents, and it also reads aloud documents, and ebooks for you by uploading them. However, it does not allow you to directly download the audio, but you still have the option to record audio to save it in webm format.
Features:
- Simple and easy-to-use interface
- Completely free for personal or general use.
- It allows you to manually add pauses and alter the speed of the voice.
- Has many options for voices including male and female, accents, and languages.
- It reads aloud ebooks, pdfs, or any text files.
- Available for mobile devices for instant access.
- Automatically remembers the preferences of the previous session and also has options for screen recording.
Price: TTSReader is completely free without any pricing plans at all. However, they do have a premium chrome extension and a separate commercial version available for purchase.
Cons:
- Advanced features for audio are not available.
- May not be the best option for commercial purposes
16. Descript

Supported systems: It is a cloud-based platform, therefore can be used online on Windows, Mac, Android, and iPhone.
Basic intro: Descript is an all-in-one video editing, screen recording, transcription, and podcasting tool you can use online. Its podcasting tool can be a great example of Text-to-Speech software that creates quality podcasts from just text. Descript is that one tool that takes podcasting or TTS to whole another level. It uses AI technology that clones your voice and then allows you to convert any text to speech in your own AI-tailored voice. You can then directly edit the audio in real-time by editing texts. But what really separates it from other software are its unique features for adjusting texts, editing audio, adding effects, etc.
Features:
- Not just a TTS software, but also a video editing, recording, and transcription tool.
- Timeline editor for advanced level editing along with cloud media library
- Different audio effects like crossfading, automatic leveling, loudness normalization, etc.
- It can clone your voice with AI to convert text to speech.
- Free podcasting trial available which includes all the features.
- Has advanced features useful for professional podcasters.
- It supports integrations with API for applications or any services.
Price: Descript has a total of three pricing plans and a free trial version:
- Creator: $12/month
- Pro: $24/month
- Enterprise: (Not fixed)
Cons:
- Not originally a TTS software, but can be used as a one.
- Separate plans for podcasting are not available.
17. Wideo

Supported systems: It is a cloud-based platform, therefore can be used online on Windows, Mac, Android, and iPhone.
Basic intro: Wideo is originally an online video maker that helps you create promo videos, explainer videos, demo videos, presentations, etc. while its Text to Speech software is another added functionality. But still, Wideo is one of the best free TTS software that lets you easily convert text to audio in a fast and straightforward manner. It also allows you to directly add these voices in Wideo’s video maker. Wideo free Text to Speech software integrates with Google Text-to-Speech API, so the quality of voices is as good as other paid software. One of the best things about Wideo TTS software is that it is simple and easy to use.
Features:
- Free and easy-to-use Text to Speech converter.
- Professional video maker along with TTS functionality.
- A large list of voices and languages to choose from.
- Speed of the generated audio adjustable.
- It allows you to download the audio as an mp3 file for free.
Price: Wideo Text-to-Speech Software is basically free with no specific pricing plans. However, its limit in the number of characters can be removed by purchasing any two of their video maker plans:
- PRO: $39/month
- PRO+: $79/month
Cons:
- Advanced text-to-speech features not available
- Voices sound a bit robotic or unreal
- No separate pricing plans available, so will have to purchase the video maker plans to remove limitations
18. Balabolka

Supported systems: Supports all versions of Windows
Basic intro: Balabolka is a Windows text-to-speech software that has been in this field for a long time. It is old and feels outdated, but still is one of the most capable and useful free text to speech converters. Balabolka packs almost all the necessary features required as a TTS program in its lightweight package of just a few megabytes. This program uses various versions of Microsoft Speech API and allows to alter a voice’s parameters, including rate and pitch. Balabolka is also available as a portable version, and as a command-line utility which is a great thing.
Features:
- Lightweight, simple, and completely free to use.
- Can read text from clipboard, and documents, and save the on-screen text as an audio file.
- It uses Microsoft’s Speech API and also includes a spelling checker.
- It uses the pre-installed computer voices of your system.
- Also supports many different text file formats.
- Has options to alter a voice’s parameters, speed, pitch, etc.
- Available for download as a portable and command-line program too.
Price: Balabolka is absolutely free to use without any pricing plans and hidden charges.
Cons:
- Not suitable for large-scale and commercial purposes.
- Only available for Windows operating systems.
- Limited options for voices and languages.
19. iSpeech

Supported systems: Supports iOS, Android, and Online (also available as a chrome extension)
Basic intro: iSpeech is a straightforward and easy-to-use online text-to-speech converter that is also available for mobile devices. Its TTS functionality is powered by Speechelo but makes the whole process a lot simpler and easier. It supports various languages for text-to-speech conversion and also provides the options to change the speed of audio and select gender. And, it also supports Embedded and Hosted TTS services along with API integrations to use TTS in any program or service. Therefore, it acts as a simple yet powerful and professional text-to-speech software to create lifelike voiceovers.
Features:
- It supports over 30 different languages.
- Available online as well as for mobile devices (iOS and Android).
- Has options to select gender and choose audio speed.
- Simple and easy-to-use interface.
- Cloud and hosted services along with API integrations available
- Completely free to convert text to speech online and preview
Price: iSpeech is absolutely free to use online, but it has various pricing plans available for additional features like downloading audio, API integration, etc. They have different options like Pay Per Use, Pay Per Install, Creative Pricing, One-time fees, etc. so it actually depends on your needs.
Cons:
- Very limited in voice styles, accents, and tones.
- Not suitable for beginners and general users.
20. TextAloud

Supported systems: Supports all versions of Windows
Basic intro: TextAloud is a Windows text-to-speech software by NextUp technologies that help you easily generate audio for the given text. It is designed to save your time allowing you to be more productive while converting text to speech. It also allows one to convert texts from web pages, documents, and PDFs into natural-sounding speech. And, it includes assistive technology for people with Dyslexia to improve reading and comprehension. TextAloud by NextUp technologies also offers the natural-sounding Text-to-Speech voices from companies like Acapela, Ivona, Cerence, etc. And with many other features, it can be considered one of the best TTS software for your Windows device.
Features:
- Lightweight software with straightforward interface.
- It allows the conversion of texts on web pages, documents, and PDFs into speech.
- Assistive technology for people with Dyslexia to improve reading and comprehension.
- It uses the pre-installed voices on the system and also offers natural-sounding Text to Speech voices from companies like Acapela, Ivona, Cerence, etc.
- It uses Microsoft’s Speech API and also includes a spelling checker.
- Includes a lot of features and options related to TTS.
Price: TextAloud 4 offers a one-time payment for a Single User License at $34.95 and also has a free trial version to test this software. However, it also offers some additional features for extra fees.
Cons:
- Only available for Windows devices
- Not the best option for commercial purposes
- User interface can seem a little outdated.
Conclusion
Here, we presented you with a list of Top 20 Best Text-to-Speech Software with all their features and other information you need to know. While all of them are best in their own aspects, you should choose the one that suits your needs. For example, you can go for Balabolka or similar free softwares for basic personal use, or if you want something advanced like AI voice cloning, then you can use Murf, Descript, etc. So it all depends on what you intend to do with a TTS software.
However, we have made it easier for you to choose the best one among these many great softwares by breaking them down in terms of their main features, pricing, compatibility, cons, etc. So decide on the software that is best for you and have a happy time creating amazing voiceovers.
Listening has always been more enjoyable, easier, and faster than reading. We understand better when we are listening. So it is good news for us that our life has been made even easier with the development of TTS technology or Text-to-Speech technology.
As its name suggests, TTS or Text-to-Speech is a technology that can convert texts to speech or voices. In other words, it is a technology that reads aloud any type of digital text so one can just listen to it without having to manually read those texts himself/herself. Text-to-Speech is also known as speech synthesis, which means artificial human speech production.
Though Text-to-Speech might sound like a new technology to most people, it has been here for a long time now. It’s just that only the big companies and some authorities had access to it in the past. But now, we can easily find this technology around us. Some of the popular examples would be audiobooks, read-aloud functions on websites, voice assistants like Alexa, Siri, etc.
While text-to-speech service is widely used for convenience and ease of life, its importance is not just limited to that. This technology has been extremely helpful for those with visible imparities and those who cannot read or write. Not only that, but it also has a great contribution to the field of education, business, and technology itself.
So now that we’re a little familiar with this Text to Speech system, it’s about time we have a look at some of the best Text to Speech software or say, Text to Speech converters. In this article, we’ll be covering the Top 20 Best Text to Speech Software with their price, features, and cons along with the platforms they are available for like Windows, Mac, Android, iPhone, and Online:
1. Murf.ai
Supported system: It is a cloud-based platform, therefore can be used online on Windows, Mac, Android, and iPhone.
Basic Intro: Murf.ai is an AI-based voice generator and text to speech converter that is popular for its ability to make studio-quality voiceovers in minutes. Unlike most of the text-to-speech software out there, Murf is focused on creating human-like voices with the help of AI rather than the same old robotic voices. And it’s not just a text-to-speech converter. Its powerful studio allows you to convert speech to editable text, make studio-like quality voiceovers, add audio to videos, etc. Therefore, all these features and its quality service help it rank in the top position on our list.
Features:
- It provides 120+ different types of AI voices for men, and women to use.
- It offers the most natural-sounding AI voices in 20 different languages.
- It has different functionalities aside Text to speech conversion like transcription, making and editing voiceovers, etc.
- It has advanced options like pitch adjustment, adding pauses, emphasizing specific words, speed, etc. to generate the audio as you want.
- It is a simple yet powerful studio for creating, editing, and managing voiceovers and audio.
- It has free grammar and punctuation assistants for your text.
- Free trial allows you to render up to 10 minutes of voice from the text.
- It provides free royalty-free background music to add to videos or voiceovers.
Price: Murf has the following three pricing plans plus a free trial:
- Basic ($13/month):
Unlimited downloads, 24 hours of voice generation per year, Access to 60 voices & 10 languages, etc.
- Pro ($26/month):
96 hours of voice generation per year, 48 hours of transcription per year, Access to 120+ voices & 20 languages, etc.
- Enterprise ($166/month):
5+ users, Unlimited voice generation & transcription, Collaboration and Access Control, Service Agreement, etc.
Cons:
- Not available as a PC or mobile application
- Too limited in the free version
2. Play.ht
Supported system: It is a cloud-based platform, therefore can be used online on Windows, Mac, Android, and iPhone.
Basic intro: Play.ht is a web application that offers a huge library of AI voice options for converting text to speech. It generates realistic TTS audio using an online AI voice generator and the best synthetic voices from Google, Amazon, IBM & Microsoft. Play.ht can help you create professional voiceovers using AI voices from a collection of over 600 male and female voices available across 60+ different languages and accents. Along with converting text to audio, it can also help you enhance the audio with speech styles, pronunciations, and SSML tags.
Features:
- It uses synthetic voices from Google, Microsoft, IBM, and Amazon.
- Huge library of over 600 AI voices including male and female, and 60+ different languages and accents available.
- It supports exporting in MP3 and WAV format with full SSML support.
- Advanced settings for editing and enhancing the voice generated from text.
- Additional functionalities available like speech styles, multi-voice features, voice inflections, custom pronunciations, etc.
- It gives commercial & broadcast rights to use the generated speech files for commercial and personal use with full authority.
Price: Play.ht has the following four pricing plans plus a free trial:
- Personal ($14.25/month):
For personal use such as learning, proofreading, school projects, etc.
- Professional ($29.25/month):
For content creators, bloggers, and freelancers with commercial intent.
- Growth ($74.25/month):
For teams and small companies looking to grow with audio.
- Business ($149.25/month):
For companies and agencies looking to create audio at scale.
Cons:
- Can be a little advanced and difficult for beginners
- Voices other than English can be inconsistent
3. Notevibes
Supported systems: It is a cloud-based platform, therefore can be used online on Windows, Mac, Android, and iPhone.
Basic Intro: Notevibes is online text-to-speech software that can instantly convert your text into natural-sounding speech with AI. It offers over 221 high-quality voices and 25 languages from the most popular providers: Google, Amazon, Microsoft, and IBM to choose from. Notevibes can also convert text to audio and create videos with natural-sounding voices. Using it, you can save both your time and money without hiring professional voiceover artists.
Features:
- It generates realistic and natural human-like voices
- Large library of over 221 voices and 25 different languages
- Powerful editor to add pauses in one click, change speed, pitch, etc.
- Ability to control volume and emphasis on specific words.
- It grants you intellectual rights to freely use or sell voices.
- Backups are available for 14 days, so your work is safe.
- Advanced editor and high fidelity speech synthesys
Price: Notevibes has altogether 3 pricing plans plus a free version:
- Personal Pack ($9/month):
For personal use, private learning, and occasional or general purposes
- Commercial Pack ($90/month):
For Commercial use: Youtube, broadcasts, TV, IVR voiceover, and other businesses
- Corporate Pack ($4000/year):
For corporate or large-scale users with additional specific features
Cons:
- Not available as a PC or mobile application
- Too large gap between pricing plans
4. Lovo
Supported systems: It is a cloud-based platform, therefore can be used online on Windows, Mac, Android, and iPhone.
Basic intro: Lovo.ai is a web-based text to speech software that helps you create perfect voiceovers for audio ads, games, animations, e-learning, etc. It is a next-generation AI voiceover & text to speech converting platform that uses AI and the latest neural network models to generate human-like voices. Lovo offers a unique collection of 180+ voice skins in 33 different languages to choose from, plus, new voices are added on a monthly basis. Its advanced text-to-speech technology provides you the authentic voices that sound very realistic. And Lovo.ai also has the feature of Custom Voice Cloning which lets you create your own customized voice skins.
Features:
- Unique voice collection of 180+ voice skins in 33 different languages, each with unique traits to perfectly fit any content.
- It provides authentic and realistic voices with human emotions.
- Voice cloning technology that requires just 15 minutes of any voice to create the customized voice skins.
- Growing library of voices where new voices are added monthly.
- Voiceover API Integration is also available for the developers to use in their products.
- Well-optimized studio with a smooth interface for easy use.
Price: Lovo Studio offers two pricing plans and one free plan:
- Personal ($17.49/month):
Unlimited access to all voices, the Ability to add BGM and Commercial Rights, Up to 30 downloads per month
- Freelancer ($49.99/month):
Every feature in the Personal plan, Upto 100 downloads/month
Lovo also offers three different API Pricing plans, plus a free trial for 2 weeks without any credit card information:
- Base subscription: $45 per month per 1000 calls
- Overage: $0.04per overage call
- Enterprise license
Cons:
- Not available as a PC or mobile application
- Limits on the number of characters and downloads in paid plans
5. NaturalReader
Supported systems: Supports Windows, iPhone, Android, and online (also available as a chrome extension)
Basic intro: NaturalReader is a powerful application that can convert any text or document to audio anytime anywhere. It is one of the best and most popular text-to-speech software available today that can generate high-quality natural-sounding voices. One of its unique features is OCR Technology which reads aloud text from scanned documents or images for you. It can also be used to create audio from the text for commercial purposes with full rights. You can use NaturalReader online, through software, or with the help of its chrome extension.
Features:
- It offers 100+ natural-sounding voices available in 16 different languages.
- Its WebReader allows you to listen to the contents of any website.
- Specific features available for commercial purposes.
- OCR function available that can also read or convert the scanned documents or images into audios.
- With its pronunciation editor, you can manually modify the pronunciation of certain words.
- Specifically designed as a reading aid to help dyslexic readers.
Price: NaturalReader has three simple pricing plans including the free plan:
- Free ($0/month):
20 minutes per day with premium voices, Unlimited use with free voices, Pronunciation editor
- Premium ($9.99/month):
Unlimited use with premium voices, OCR functionality, MP3 conversion, Chrome extension with unlimited premium voices
- Plus ($19/month):
100+ Premium and Plus voices, Chrome extension with 100+ Premium and Plus voices, all the previous features
Cons:
- Free app requires Internet connectivity to access the voices.
- Not available as downloadable software for Mac devices
6. Amazon Polly
Supported systems: It is a cloud-based platform, therefore can be used online on Windows, Mac, Android, and iPhone.
Basic intro: Amazon Polly is a cloud-based service by Amazon that turns text into life-like speech, allowing you to create applications that talk, and build entirely new categories of speech-enabled products. Amazon Polly uses deep learning technologies and AI technology to synthesize realistic human speech in dozens of voices across many different languages. It is really a revolutionary TTS service that offers Neural Text-to-Speech voices in addition to Standard TTS voices that deliver advanced improvements in speech quality through a new machine learning approach. And, one of the best things is that Amazon Polly Brand Voice can create a custom voice for exclusive use.
Features:
- It provides one of the most realistic and natural-sounding voices.
- A large number of options available for voices and languages.
- Supports API integration for applications or any products.
- It can create a custom voice for the exclusive use of your organization.
- Ability to stream audio in real-time or store & redistribute speech.
- Customisation & control options available for speech output.
- It offers a free tier as well as pay-as-you-go pricing.
Price: Amazon Polly offers two different plans for its service:
- AWS Free Tier: Limited but free 5 million characters per month for 12 months
- Pay-as-you-go plan: Depends on your usage but low cost per character converted and unlimited replays
Cons:
- Not available as a desktop or mobile application
- Beginners might have a hard time using it.
- Their pay-as-you-go pricing plan can be a little difficult to understand
7. Voice Dream Reader
Supported systems: Supports Mac and iPhone (also available as a Safari extension)
Basic intro: Voice Dream Reader is a text-to-speech software specifically designed for Mac and devices running iOS. It is one of the best text-to-speech software for Mac and iOS devices that provides over 100 AI voices in about 20 different languages. It not only helps you convert text to audio, but it also reads the content from any Microsoft documents, Webpage, PDFs, etc. for you. Voice Dream Reader is meticulously designed for everyone including people with blindness, dyslexia, low vision, autism, etc. It has tons of features embedded inside it like synchronized highlighting, OCR recognition, library management, visual and audio controls, etc. Plus, it has some really special features for Mac and iOS devices like Safari extension, iCloud sync, etc. which makes it one of the best choices for text-to-speech conversion.
Features:
- It offers a huge library of over 100 AI voices from Ivona, Acapela, NeoSpeech, etc, across 20 different languages.
- It can read aloud content from any documents, and web pages with different reading modes.
- Enhanced audio and visual controls available.
- Specific features like Safari Extension, and iCloud Sync for Mac and iOS devices.
- Additional functionalities like OCR, Synchronized highlighting, Library management, Annotation, etc.
- Designed with people having blindness, dyslexia, autism, etc. in mind.
- It doesn’t require an internet connection.
- Different reputed awards and recognitions received by Voice Dream Reader.
Price: Voice Dream Reader is free to download from Mac App Store while costs $19.99 to download from iOS App Store. Its free version is pretty sufficient and is feature-rich, however, this software also offers in-app purchases on both platforms.
Cons:
- Only available for Mac and iOS devices.
- Offers in-app purchases to remove limitations.
8. Kukarella
Supported systems: It is a cloud-based platform, therefore can be used online on Windows, Mac, Android, and iPhone.
Basic intro: Kukarella is an online Text-to-Speech software powered by Google, Amazon, Microsoft, and IBM that lets you easily create beautiful voiceovers with realistic AI voices. It can be used both as a Text-to-voice software and an Audio-to-text software. With Kukarella, you can also narrate books or scripts with multiple voices which is a beta feature. It offers one of the largest libraries of around 670 voices across 100+ different languages and accents which is truly remarkable. Furthermore, it has a well-designed studio to work on and also includes commercial rights in its plan.
Features:
- It offers one of the largest collections of around 670 voices across 100+ different languages and accents.
- It provides the best AI neural voices with commercial rights included.
- Also works as an Audio Transcription software to transcribe audio, recordings, and videos.
- It includes the Table Reads feature to narrate books or scripts using multiple voices.
- Referral program for bonuses and free credits to use.
- Well-optimized studio with additional effects to use in the output audio like pitch, pause, speed, emphasis, etc.
Price: Kukarella has three different paid pricing plans available with which they also provide a 15-day money-back guarantee to refund your purchase if you’re not satisfied with their service:
- Free ($0/month): For testing purposes
- Pro ($15/month): For creative people
- Premium ($35/month): For film professionals and experts
- Studio ($99/month): For business and large-scale use
Aside from these four pricing plans, Kukarella also offers a Top Ups option to let you purchase additional credits like extra characters for text-to-speech and extra minutes for audio transcription.
Cons:
- Only available as an online application.
- Doesn’t let you clone your own voice.
9. Speechelo
Supported systems: Supports all devices like Windows, Mac, Linux, iPhone, and Android, and is available online too.
Basic intro: Speechelo is a new cloud-based text-to-speech software that instantly transforms any text into a 100% human-sounding voiceover. Despite being a new product in this huge marketplace, it has gained popularity very quickly due to its awesome text-to-speech conversion ability. All of their voices are said to have the necessary elements and expressions that make a voice sound real. It also claims that 98% of the people hearing a voiceover generated with Speechelo can’t tell if it is a real human voice or an AI-generated voice. However, the best thing about Speechelo is that it is available for all types of devices out there, so it has got you covered everywhere.
Features:
- It offers more than 50 natural-sounding voices in 24 different languages.
- Functionality to add inflections in the voice.
- Different voice styles and tones available.
- Has settings for adjusting the speed and pitch of the voice.
- Additional options to manually add breathing sounds and pauses, or its AI engine can automatically add them on its own.
- Compatible with all major operating systems, so it won’t matter whatever device you have.
Price: Speechelo has only one pricing plan i.e. Founders Special Offer which is basically a one-time payment for only $47 without any recurring monthly fees. On top of that, they provide a “Risk-Free 60 Days Money Back Guarantee” with which you can try Speechelo without any worries. In this one-time subscription plan, you’ll get lifetime updates and support.
Cons:
- No free version or free trial available to try
- Speechelo website might look a bit fishy or scammy
10. Nuance Dragon
Supported systems: Supports Windows, Android & iOS (previously supported Mac too but discontinued)
Basic intro: Nuance Dragon is an AI-based Text-to-Speech technology that leverages neural network techniques to deliver a human-like, engaging and personalized audio. It creates natural-sounding speech in 119 voice options across 53 different languages. With Nuance vocalizer, you can also establish a unique voice for your brand without having to hire, brief, or record voice talent. One of the best things about Nuance Dragon is that they pursue more natural and expressive speech synthesys to provide life-life audio output. And good news for the developers is that they also provide TTS API to use in the applications or any solutions.
Features:
- It supports HIPAA requirements that are important for security and confidentiality.
- It offers a big library of over 119 voice options and 53 different languages.
- AI-optimized text processing and enhanced expressivity.
- It provides text-to-speech API to use in applications and products.
- It can create a customized or unique voice for the brand.
- Has audio controls for managing or editing the generated audio.
- Dictation and transcribing features available.
Price: Nuance Dragon has 3 plans for individual and 3 plans for enterprise productivity, however, there is not a fixed price for enterprise solutions as it may depend:
- Dragon Professional Individual: Starting at $500
- Dragon Legal Individual: Starting at $500
- Dragon Anywhere Mobile: $15/month for both Android and iOS
They also have a free demo and a 30-day money-back guarantee program on every plan.
Cons:
- Not available for Mac devices
- Not much beginner-friendly to use
11. Synthesys
Supported systems: It is a cloud-based platform, therefore can be used online on Windows, Mac, Android, and iPhone.
Basic Intro: Synthesys is a popular web application that can help you produce professional AI voiceovers or even AI videos in just a few clicks. It generates clear and natural voiceovers through artificial intelligence that can help you build trust and connection between you and your customers or clients. This unique text-to-speech converter eliminates the robotic and strange sounds generated by AI to the minimum. Furthermore, this online platform can create beautiful AI videos for you with just text which you can share on social media or wherever you like. It also allows you to choose voices from different gender, style, accent, speed, etc. for the speech generated from text.
Features:
- It is a web application, so you can work on your projects from any device anywhere.
- Large library of professional AI voices: 35 female and 30 male to choose from.
- Can be used as both AI Voice Generator or AI Video Generator
- It allows you to use or sell the generated voices or videos with full rights.
- User-friendly interface and easy to use.
- Advanced options available to change speed, gender, style, and accent of the voice.
Price: Synthesys has a total of three subscription plans with a 3-day moneyback guarantee. Unfortunately, it doesn’t have a free plan or a free trial version.
- Audio Synthesys plan ($29/month):
Access to 20 real human voices, 66 languages & 254 general voices, and Unlimited voice-overs downloads
- Human Studio Synthesys plan ($39/month):
Access to 73 Humatars, Full video customization, Unlimited downloads, etc.
- Audio and Human Studio Synthesys plan ($59/month):
Unlimited videos and voices downloads, and all previous features included
Cons:
- Limited choices for humatars and voices
- No free trial version available
12. Linguatec Voice Reader
Supported systems: Supports only Windows operating system (all versions)
Basic intro: Linguatec Voice Reader is a downloadable text to speech software for Windows users. It offers a big collection of 67 natural-sounding voices in 45 different languages. Aside from converting text to speech, it can also convert Word documents, emails, ebooks, and pdfs to audio for listening to them on any device. Linguatec Voice Reader Home is specifically designed for private or personal use to listen to any content but it has other specific products like Linguatec Voice Reader Studio for professional purposes and Voice Reader Server for large-scale conversion of text to speech. And, it also has a Voice Reader Web which can automatically convert your website to audio. Therefore, it has got you covered in every aspect.
Features:
- It offers 67 natural-sounding voices in 45 different languages.
- It allows you to convert any word documents, emails, ebooks, or pdfs to audio.
- Text to speech software designed solely for personal usage.
- Intuitive editor to change the speed, volume, and pitch of the audio.
- Installable on Windows, so can be directly accessed without a browser.
- Specific products available for specific purposes like personal use, professional use, large scale use, etc.
Price: Linguatec Voice Reader has a single one-time pricing plan for its every product:
- Voice Reader Home: €49 (approximately $51)
- Voice Reader Studio: €499 (approximately $527)
- Voice Reader Web: €299 (approximately $316)
- Voice Reader Server: Depends on the company’s needs
Cons:
- Only available for Windows devices
- Interface is boring and old-fashioned.
- Only one voice and language per license.
13. Resemble AI
Supported systems: Supports Android and iOS devices, and can also be used online
Basic intro: Resemble.ai is professional text-to-speech software that generates realistic AI voices from the text. It can create your own AI voice by recording and cloning your voice data. And, it also comes with API functionality to embed TTS into any of your services or products. With its Resemble fill, it can blend human and synthetic voices for a seamless experience, and it even has a language dubber that can instantly dub your native voice into other languages. Furthermore, one of its best features is its ability to control the emotions of every word in a sentence which really provides a realistic experience.
Features:
- Voice cloning function to clone your own voice with AI.
- Flexible APIs ready for integration in applications, products, or any services.
- Resemble Fill function to blend human and synthetic voices for a seamless experience.
- It can instantly dub your native voice into other languages.
- Optimized interface and additional audio control settings.
- It can be accessed from mobile devices too with installable apps.
Price: Resemble AI has three pricing plans according to your need and a free trial:
- Entry ($30/month): For voices that are recorded right on our platform
- Build (Depends on your needs): For your own data, any voice, no script required
- Enterprise (Depends on your needs): For massive scale and custom deployment needs
Cons:
- Limited options for voices and languages
- Not available as a Windows or Mac program
14. WellSaid
Supported systems: It is a cloud-based platform, therefore can be used online on Windows, Mac, Android, and iPhone.
Basic intro: WellSaid is an AI-powered text-to-speech software that converts text to voice in real-time and it can help you create quality voiceovers for all your digital content easily. It is one of the best voiceover generators that is not only designed for individual use, but also for small teams and large companies to work on together. With WellSaid, you can also customize the output voices, create your own unique voice or even deploy its text-to-speech functionality through API. However, it is kinda limited on the number of voices and languages.
Features:
- Has a well-optimized studio to convert text to audio.
- WellSaid API available to deploy TTS functionality in apps and products.
- It allows you to build your own voices to meet your brand guidelines.
- Suitable for individuals, teams of any size, and even large enterprises.
- Around 50 different voice avatars to choose from.
- High quality and realistic voices.
- Live chat support and rights for commercial usage.
Price: WellSaid has altogether four pricing plans and a free trial:
- Maker ($49/month):
250 downloads, 5 projects, 4 voice avatars
- Creative ($99/month):
750 downloads, 50 projects, 50 voice avatars
- Producer ($199/month):
2500 downloads, Unlimited projects, live chat support
- Team (Not fixed):
Team members, Team projects, Volume licensing, Account manager
Cons:
- Limited number of voice avatars and languages to choose from.
- Lack of features to adjust and edit the audio.
15. TTSReader
Supported systems: Supports iOS and Android devices, and is also available online and as a chrome extension
Basic intro: TTSReader is one of the simplest and best free text-to-speech readers that instantly reads aloud text, pdfs & ebooks with natural-sounding voices. It is a lightweight online application, so it works out of the box without the need to download and log in. Despite being free software, it has some really great features in it. There are various options of natural sounding voices in different languages and different accents, and it also reads aloud documents, and ebooks for you by uploading them. However, it does not allow you to directly download the audio, but you still have the option to record audio to save it in webm format.
Features:
- Simple and easy-to-use interface
- Completely free for personal or general use.
- It allows you to manually add pauses and alter the speed of the voice.
- Has many options for voices including male and female, accents, and languages.
- It reads aloud ebooks, pdfs, or any text files.
- Available for mobile devices for instant access.
- Automatically remembers the preferences of the previous session and also has options for screen recording.
Price: TTSReader is completely free without any pricing plans at all. However, they do have a premium chrome extension and a separate commercial version available for purchase.
Cons:
- Advanced features for audio are not available.
- May not be the best option for commercial purposes
16. Descript
Supported systems: It is a cloud-based platform, therefore can be used online on Windows, Mac, Android, and iPhone.
Basic intro: Descript is an all-in-one video editing, screen recording, transcription, and podcasting tool you can use online. Its podcasting tool can be a great example of Text-to-Speech software that creates quality podcasts from just text. Descript is that one tool that takes podcasting or TTS to whole another level. It uses AI technology that clones your voice and then allows you to convert any text to speech in your own AI-tailored voice. You can then directly edit the audio in real-time by editing texts. But what really separates it from other software are its unique features for adjusting texts, editing audio, adding effects, etc.
Features:
- Not just a TTS software, but also a video editing, recording, and transcription tool.
- Timeline editor for advanced level editing along with cloud media library
- Different audio effects like crossfading, automatic leveling, loudness normalization, etc.
- It can clone your voice with AI to convert text to speech.
- Free podcasting trial available which includes all the features.
- Has advanced features useful for professional podcasters.
- It supports integrations with API for applications or any services.
Price: Descript has a total of three pricing plans and a free trial version:
- Creator: $12/month
- Pro: $24/month
- Enterprise: (Not fixed)
Cons:
- Not originally a TTS software, but can be used as a one.
- Separate plans for podcasting are not available.
17. Wideo
Supported systems: It is a cloud-based platform, therefore can be used online on Windows, Mac, Android, and iPhone.
Basic intro: Wideo is originally an online video maker that helps you create promo videos, explainer videos, demo videos, presentations, etc. while its Text to Speech software is another added functionality. But still, Wideo is one of the best free TTS software that lets you easily convert text to audio in a fast and straightforward manner. It also allows you to directly add these voices in Wideo’s video maker. Wideo free Text to Speech software integrates with Google Text-to-Speech API, so the quality of voices is as good as other paid software. One of the best things about Wideo TTS software is that it is simple and easy to use.
Features:
- Free and easy-to-use Text to Speech converter.
- Professional video maker along with TTS functionality.
- A large list of voices and languages to choose from.
- Speed of the generated audio adjustable.
- It allows you to download the audio as an mp3 file for free.
Price: Wideo Text-to-Speech Software is basically free with no specific pricing plans. However, its limit in the number of characters can be removed by purchasing any two of their video maker plans:
- PRO: $39/month
- PRO+: $79/month
Cons:
- Advanced text-to-speech features not available
- Voices sound a bit robotic or unreal
- No separate pricing plans available, so will have to purchase the video maker plans to remove limitations
18. Balabolka
Supported systems: Supports all versions of Windows
Basic intro: Balabolka is a Windows text-to-speech software that has been in this field for a long time. It is old and feels outdated, but still is one of the most capable and useful free text to speech converters. Balabolka packs almost all the necessary features required as a TTS program in its lightweight package of just a few megabytes. This program uses various versions of Microsoft Speech API and allows to alter a voice’s parameters, including rate and pitch. Balabolka is also available as a portable version, and as a command-line utility which is a great thing.
Features:
- Lightweight, simple, and completely free to use.
- Can read text from clipboard, and documents, and save the on-screen text as an audio file.
- It uses Microsoft’s Speech API and also includes a spelling checker.
- It uses the pre-installed computer voices of your system.
- Also supports many different text file formats.
- Has options to alter a voice’s parameters, speed, pitch, etc.
- Available for download as a portable and command-line program too.
Price: Balabolka is absolutely free to use without any pricing plans and hidden charges.
Cons:
- Not suitable for large-scale and commercial purposes.
- Only available for Windows operating systems.
- Limited options for voices and languages.
19. iSpeech
Supported systems: Supports iOS, Android, and Online (also available as a chrome extension)
Basic intro: iSpeech is a straightforward and easy-to-use online text-to-speech converter that is also available for mobile devices. Its TTS functionality is powered by Speechelo but makes the whole process a lot simpler and easier. It supports various languages for text-to-speech conversion and also provides the options to change the speed of audio and select gender. And, it also supports Embedded and Hosted TTS services along with API integrations to use TTS in any program or service. Therefore, it acts as a simple yet powerful and professional text-to-speech software to create lifelike voiceovers.
Features:
- It supports over 30 different languages.
- Available online as well as for mobile devices (iOS and Android).
- Has options to select gender and choose audio speed.
- Simple and easy-to-use interface.
- Cloud and hosted services along with API integrations available
- Completely free to convert text to speech online and preview
Price: iSpeech is absolutely free to use online, but it has various pricing plans available for additional features like downloading audio, API integration, etc. They have different options like Pay Per Use, Pay Per Install, Creative Pricing, One-time fees, etc. so it actually depends on your needs.
Cons:
- Very limited in voice styles, accents, and tones.
- Not suitable for beginners and general users.
20. TextAloud
Supported systems: Supports all versions of Windows
Basic intro: TextAloud is a Windows text-to-speech software by NextUp technologies that help you easily generate audio for the given text. It is designed to save your time allowing you to be more productive while converting text to speech. It also allows one to convert texts from web pages, documents, and PDFs into natural-sounding speech. And, it includes assistive technology for people with Dyslexia to improve reading and comprehension. TextAloud by NextUp technologies also offers the natural-sounding Text-to-Speech voices from companies like Acapela, Ivona, Cerence, etc. And with many other features, it can be considered one of the best TTS software for your Windows device.
Features:
- Lightweight software with straightforward interface.
- It allows the conversion of texts on web pages, documents, and PDFs into speech.
- Assistive technology for people with Dyslexia to improve reading and comprehension.
- It uses the pre-installed voices on the system and also offers natural-sounding Text to Speech voices from companies like Acapela, Ivona, Cerence, etc.
- It uses Microsoft’s Speech API and also includes a spelling checker.
- Includes a lot of features and options related to TTS.
Price: TextAloud 4 offers a one-time payment for a Single User License at $34.95 and also has a free trial version to test this software. However, it also offers some additional features for extra fees.
Cons:
- Only available for Windows devices
- Not the best option for commercial purposes
- User interface can seem a little outdated.
Conclusion
Here, we presented you with a list of Top 20 Best Text-to-Speech Software with all their features and other information you need to know. While all of them are best in their own aspects, you should choose the one that suits your needs. For example, you can go for Balabolka or similar free softwares for basic personal use, or if you want something advanced like AI voice cloning, then you can use Murf, Descript, etc. So it all depends on what you intend to do with a TTS software.
However, we have made it easier for you to choose the best one among these many great softwares by breaking them down in terms of their main features, pricing, compatibility, cons, etc. So decide on the software that is best for you and have a happy time creating amazing voiceovers.
A Detailed Guide to Do Color Correction in OBS
Create High-Quality Video - Wondershare Filmora
An easy and powerful YouTube video editor
Numerous video and audio effects to choose from
Detailed tutorials are provided by the official channel
Color Correction is an outstanding functionality that allows editing photos and videos by altering their consistency to match a particular standard. Besides, color correction is available in the premium tool and free applications. And one of the established free software tools with color correction is the OBS.
Even though the Open Broadcaster Software is mainly known for live streaming and offline video recording, it also offers color correction functionality from its open canvas. Read this article to completion and get to the bottom line of how to do color correction in OBS.
More about OBS
In this article
01 What is OBS?
What is OBS?
Open Broadcaster Software (OBS) is free and open-source software that allows users to record videos and live stream events right at their comfort. The software functions effectively on Mac, Windows, and Linux computers.
Open Broadcaster Software (OBS) is free and open-source software that allows users to record videos and live stream events right at their comfort. The software functions effectively on Mac, Windows, and Linux computers.
Since its initial launch in 2012, OBS has made tremendous moves – This is not only from the constant release of its new versions but also the relentless increase in the functionality features. Besides, OBS is equipped with a robust API that enables plugins and scripts which provide extensive customization to precisely suit one’s needs.
However, OBS being a free application can function to date due to enough support from sponsors and backers.
How to Apply Color Correction in OBS
When you carry out basic edits to your videos or images with OBS and realize that your project has poor shade, color, or tone, you don’t have to export it to another software to correct it. Instead, you can use filters for color correction in OBS.
Apart from using OBS filters to color correct video clips and images, you can correct games, browser sources, and video capture devices.
There are various aspects of color correction in OBS. It includes:
1. Gamma
Gamma is a fundamental aspect in OBS that functions by balancing the brightness of an image through contrast. To be precise, Gamma works almost similarly to change in brightness while simultaneously increasing or decreasing the contrast.
In editing, Gamma is applicable mainly for removing shiny foreheads and webcam footage in gaming and browsing.
High Gamma is represented by “L,” whereas low Gamm is represented by “R.”
2. Contrast
Contrast is the difference in the degree of colors and tones in an image. Usually, the low contrast image has a narrow color range, whereas the high contrast images have dark shadows and bright highlights.
“L” represents high contrast in OBS contrast, whereas “R” represents low contrast.
3. Brightness
Brightness is the degree to how light or dark a picture is. To be able to understand an image clearly, it is best to correct its brightness. A change in brightness of a picture has a simultaneous change in pixels of that image.
High brightness in OBS is denounced by the letter “L,” whereas Low brightness is denounced by “R.”
4. Saturation
Saturation is the intensity of colors in a video or an image. High saturated images are bright, strong, and are rich, whereas the low saturated photos appear washed out. Black and white (grayscale) photos have no color saturation. In OBS, high saturation and low saturation are represented as “L” and “R.”
5. Hue Shift
Hue shift is the change in an image’s saturation, lightness, and hue colors. Hue shifting occurs when highlighting or shading images. In OBS, you can use the hue shift functionality to reimage your image with a completely different color palette.
With the hue shift functionality in OBS, you can place the image on top of another and have an 80% opacity. It means that you will still see the first image when you place the second one on top of it.
The “L” sign in the OBS hue shift represents 50% opacity, while the “R” represents 100% Opacity.
Color Grade in OBS
Color grading is the process of enhancing the appearance of an image through attributes such as contrast, saturation, and color, making them enchanting for presentations. Color grading is not only done for still images but also for motion pictures and images.
Color grading functionality in OBS is encompassed with several tools – This includes:
1. Lift tool
As the name suggests, lift tools are used in lifting or removing specific colors from an image. It does so without necessarily affecting other colors in an image.
With this tool, you can selectively remove unwanted colors from your image or video, replace them with your desired ones, and create astonishing results.
2. Offset
Offset is another outstanding tool in OBS color grading that controls the blacks/Shadows of an image. It functions by altering the brightness levels and leaving the highlights and the mid-tones unaffected.
3. Gain
A gain is a tool in OBS color correction that functions by only adjusting the white levels in an image. With the gain tool, brighter colors become brighter or darker.
Many people, especially beginner editors, experience difficulty differentiating between the Gamma and Offset tools. Yes, there is a closer similarity between the two, and for you to be on the safe side, you need to know that Gamma goes with the mid-tones (middle gray levels) whereas the Gain goes with highlights/whites.
How to Apply LUTs in OBS
Look up tables (LUTs) is a functionality feature that allows editors, colorists, and filmmakers to save certain colors as their templates. Therefore, when working on a particular project, they don’t have to create new working color grades; instead, you pick it from your LUT.
Using LUTs OBS is not rocket science. With LUTs, you can create unique projects with a vibrant feel. Here are the simple steps of using LUTs in OBS.
Step 1. Prepare your LUT
First, check and establish whether you have your LUT ready. If you don’t have it, you can download one from the internet. Make sure you download it as a folder. Even though OBS has LUT, It has limited color grades; therefore, it is best to download one. You can extract it to an OBS folder if you downloaded it in a zip file.
Step 2. Add your project to the OBS timeline
Open your OBS software and add your project file. Drag and drop your file to the OBS timeline.

Step 3. Add LUTs to your project
Right-click on the area in your project that you wish to apply LUTs, then click on “Filters.” Select “Apply LUT” from the drop-down menu,” which is usually at the top of the list.

Step 4. Apply your LUT as a filter
On the LUTs section, click on the browser, then open your downloaded LUT folder. Usually, the LUT is in the form of a .cube file. You can adjust your LUT by simply clicking on the “Adjust” option.
Bonus! How to Apply Color Correction for Webcam and Camera
People who primarily use their computers for recording sessions often find it difficult to capture quality videos. It is because most computer cameras are not straightforward. To do away with purchasing a new camera due to poor quality video capture, they can freely use OBS LUTs. For their camera and webcam. LUTs for webcam play a vital role in correcting the quality of photos and videos by using filters.
Here are the simple steps on how to use LUTs for color correction in webcam and camera
Step 1. Check whether your camera has additional software
Most webcams and cameras are controlled by external software, so you first need to check whether yours is also controlled. A thing with these cameras are controlled by their software is that the software determines the color settings and the specific image.
Double click on camera source and select “Configure video.” Computers with external software cameras will have a pop-up window that displays various customizable settings. Here, you can adjust the different settings based on your preference.

Step 2. Download your LUTs
Download online the LUTs you want to use. Download them as folders and extract the files you downloaded as zip files. Save them in the OBS folder.
Step 3. Apply your LUTs
Still, in your OBS software, open your camera and then right-click on it. From the displayed menu, click on “Filters.”
On the bottom left corner of your interface, hit the “+” sign, then select “Apply LUTs” > “Browse.”
Open your already downloaded OBS files. Usually, there is an “Adjust” that allows you to regulate the intensity of the LUT by sliding it.

Step 4. Start recording with LUTs on
After turning on your LUT, you can start recording videos and taking photos. There is an eye icon on the left-hand side of your screen. You can use it to turn on or off LUT.
Conclusion
● And that is how to do color correction in OBS. Besides, you do not have to go to the extremes of getting a new camera because of your webcam faultiness. With OBS, you can correct your camera and webcam and get outstanding results.
● Download LUTs from the internet and use them as a template in OBS. Besides, you don’t have to pay for the LUTs, but you can use the free ones.
Color Correction is an outstanding functionality that allows editing photos and videos by altering their consistency to match a particular standard. Besides, color correction is available in the premium tool and free applications. And one of the established free software tools with color correction is the OBS.
Even though the Open Broadcaster Software is mainly known for live streaming and offline video recording, it also offers color correction functionality from its open canvas. Read this article to completion and get to the bottom line of how to do color correction in OBS.
More about OBS
In this article
01 What is OBS?
What is OBS?
Open Broadcaster Software (OBS) is free and open-source software that allows users to record videos and live stream events right at their comfort. The software functions effectively on Mac, Windows, and Linux computers.
Open Broadcaster Software (OBS) is free and open-source software that allows users to record videos and live stream events right at their comfort. The software functions effectively on Mac, Windows, and Linux computers.
Since its initial launch in 2012, OBS has made tremendous moves – This is not only from the constant release of its new versions but also the relentless increase in the functionality features. Besides, OBS is equipped with a robust API that enables plugins and scripts which provide extensive customization to precisely suit one’s needs.
However, OBS being a free application can function to date due to enough support from sponsors and backers.
How to Apply Color Correction in OBS
When you carry out basic edits to your videos or images with OBS and realize that your project has poor shade, color, or tone, you don’t have to export it to another software to correct it. Instead, you can use filters for color correction in OBS.
Apart from using OBS filters to color correct video clips and images, you can correct games, browser sources, and video capture devices.
There are various aspects of color correction in OBS. It includes:
1. Gamma
Gamma is a fundamental aspect in OBS that functions by balancing the brightness of an image through contrast. To be precise, Gamma works almost similarly to change in brightness while simultaneously increasing or decreasing the contrast.
In editing, Gamma is applicable mainly for removing shiny foreheads and webcam footage in gaming and browsing.
High Gamma is represented by “L,” whereas low Gamm is represented by “R.”
2. Contrast
Contrast is the difference in the degree of colors and tones in an image. Usually, the low contrast image has a narrow color range, whereas the high contrast images have dark shadows and bright highlights.
“L” represents high contrast in OBS contrast, whereas “R” represents low contrast.
3. Brightness
Brightness is the degree to how light or dark a picture is. To be able to understand an image clearly, it is best to correct its brightness. A change in brightness of a picture has a simultaneous change in pixels of that image.
High brightness in OBS is denounced by the letter “L,” whereas Low brightness is denounced by “R.”
4. Saturation
Saturation is the intensity of colors in a video or an image. High saturated images are bright, strong, and are rich, whereas the low saturated photos appear washed out. Black and white (grayscale) photos have no color saturation. In OBS, high saturation and low saturation are represented as “L” and “R.”
5. Hue Shift
Hue shift is the change in an image’s saturation, lightness, and hue colors. Hue shifting occurs when highlighting or shading images. In OBS, you can use the hue shift functionality to reimage your image with a completely different color palette.
With the hue shift functionality in OBS, you can place the image on top of another and have an 80% opacity. It means that you will still see the first image when you place the second one on top of it.
The “L” sign in the OBS hue shift represents 50% opacity, while the “R” represents 100% Opacity.
Color Grade in OBS
Color grading is the process of enhancing the appearance of an image through attributes such as contrast, saturation, and color, making them enchanting for presentations. Color grading is not only done for still images but also for motion pictures and images.
Color grading functionality in OBS is encompassed with several tools – This includes:
1. Lift tool
As the name suggests, lift tools are used in lifting or removing specific colors from an image. It does so without necessarily affecting other colors in an image.
With this tool, you can selectively remove unwanted colors from your image or video, replace them with your desired ones, and create astonishing results.
2. Offset
Offset is another outstanding tool in OBS color grading that controls the blacks/Shadows of an image. It functions by altering the brightness levels and leaving the highlights and the mid-tones unaffected.
3. Gain
A gain is a tool in OBS color correction that functions by only adjusting the white levels in an image. With the gain tool, brighter colors become brighter or darker.
Many people, especially beginner editors, experience difficulty differentiating between the Gamma and Offset tools. Yes, there is a closer similarity between the two, and for you to be on the safe side, you need to know that Gamma goes with the mid-tones (middle gray levels) whereas the Gain goes with highlights/whites.
How to Apply LUTs in OBS
Look up tables (LUTs) is a functionality feature that allows editors, colorists, and filmmakers to save certain colors as their templates. Therefore, when working on a particular project, they don’t have to create new working color grades; instead, you pick it from your LUT.
Using LUTs OBS is not rocket science. With LUTs, you can create unique projects with a vibrant feel. Here are the simple steps of using LUTs in OBS.
Step 1. Prepare your LUT
First, check and establish whether you have your LUT ready. If you don’t have it, you can download one from the internet. Make sure you download it as a folder. Even though OBS has LUT, It has limited color grades; therefore, it is best to download one. You can extract it to an OBS folder if you downloaded it in a zip file.
Step 2. Add your project to the OBS timeline
Open your OBS software and add your project file. Drag and drop your file to the OBS timeline.
Step 3. Add LUTs to your project
Right-click on the area in your project that you wish to apply LUTs, then click on “Filters.” Select “Apply LUT” from the drop-down menu,” which is usually at the top of the list.
Step 4. Apply your LUT as a filter
On the LUTs section, click on the browser, then open your downloaded LUT folder. Usually, the LUT is in the form of a .cube file. You can adjust your LUT by simply clicking on the “Adjust” option.
Bonus! How to Apply Color Correction for Webcam and Camera
People who primarily use their computers for recording sessions often find it difficult to capture quality videos. It is because most computer cameras are not straightforward. To do away with purchasing a new camera due to poor quality video capture, they can freely use OBS LUTs. For their camera and webcam. LUTs for webcam play a vital role in correcting the quality of photos and videos by using filters.
Here are the simple steps on how to use LUTs for color correction in webcam and camera
Step 1. Check whether your camera has additional software
Most webcams and cameras are controlled by external software, so you first need to check whether yours is also controlled. A thing with these cameras are controlled by their software is that the software determines the color settings and the specific image.
Double click on camera source and select “Configure video.” Computers with external software cameras will have a pop-up window that displays various customizable settings. Here, you can adjust the different settings based on your preference.
Step 2. Download your LUTs
Download online the LUTs you want to use. Download them as folders and extract the files you downloaded as zip files. Save them in the OBS folder.
Step 3. Apply your LUTs
Still, in your OBS software, open your camera and then right-click on it. From the displayed menu, click on “Filters.”
On the bottom left corner of your interface, hit the “+” sign, then select “Apply LUTs” > “Browse.”
Open your already downloaded OBS files. Usually, there is an “Adjust” that allows you to regulate the intensity of the LUT by sliding it.
Step 4. Start recording with LUTs on
After turning on your LUT, you can start recording videos and taking photos. There is an eye icon on the left-hand side of your screen. You can use it to turn on or off LUT.
Conclusion
● And that is how to do color correction in OBS. Besides, you do not have to go to the extremes of getting a new camera because of your webcam faultiness. With OBS, you can correct your camera and webcam and get outstanding results.
● Download LUTs from the internet and use them as a template in OBS. Besides, you don’t have to pay for the LUTs, but you can use the free ones.
Want to Imbibe Your Graphic Expertise with Designing Classic iMovie Presentations? Be Here to Work Through the Process Within the Quickest Possible Time Span
How to Make a Video Slideshow in iMovie
An easy yet powerful editor
Numerous effects to choose from
Detailed tutorials provided by the official channel
Landing into the world of creativity, it can be a smart choice to experiment with creating a slideshow in iMovie. Stay tuned to understand the exquisite design know-hows!
In this article
01 [What’s the Advantage of Slideshow in iMovie?](#Part 1)
02 [How to Make a Video Slideshow in iMovie?](#Part 2)
03 [In What Way Could You Edit Your Video Shortly?](#Part 3)
Part 1 What’s the Advantage of Slideshow in iMovie?
Slideshow presentations land among the most elusive means of sharing valuable information across a diverse range of personal and professional content creation domains. Be it a fun-filled family event or a high end business centered client presentation; slideshows are there to address it all! Talking about affordable software solutions to adhere the purpose, you can conveniently pick the iMovie slideshow creator program.
Entering deeper into the software specifications, the iMovie application package is essentially a video and graphic editor tool, exclusively for MacOS and iOS supported devices. Working with the program, you can create stunning slideshow presentations and storytelling movies to commemorate your most cherished personal and commercial events, moments and scenarios.
Now that you have got an elementary overview of the iMovie video editor software, let us move ahead with our discussion to talk about the latter’s credibility towards creating top rated slideshow presentations in the following section prior to proceeding with addressing the concern of how to make a slideshow on iMovie:
Benefits of Creating iMovie Slideshows
● User Cohesive Working Interface
The most pronounced credibility of iOS compatible software tools and program utilities is undoubtedly, their user friendly operation characteristic, and iMovie is no exception to the lineage. The editor workspace of the slideshow creator is intelligently designed to suit the technical aptitude of the expanded diversity of tech savvy and amateur graphic editors. The interface is equally appealing to the newbies in the design realm.
To proceed with creating a slideshow in iMovie, you can either begin with scratch, working on an entirely new idea; or move ahead with picking any preset slideshow template or background theme, followed by customizing the same in line with the specific creation requirements. The software’s effect library is a vast storehouse of high end editing features and tools with the most convenient access.
● Customization Elements
The iMovie program allows you to create cinematic movie edits in Hollywood style. From curiosity generating trailers to nail biting thrills, you can add it all to engage your audience within your presentation. Talking about the customization flexibility, you can try hands at including studio logos, cast names and credit rolls to add extra value to the edits, while simultaneously appreciating the participants of your project.
If that’s not enough, you can work to create your presentations in a variety of genres and themes by choosing from tons of premade templates under a variety of genre centered categories and sub-categories. Moving further, you can also add related effects from the program’s effect library to match the mood and setting of the slideshow.
● Effects And Improvisations
The software offers a decent range of slideshow enhancement features and special effects. You can pick from over 10 different filters, 8 vivid themes and several numbers of sound and audio effects, along with including recorded voiceovers of your own. You can also go ahead to import audio tracks and music files that are saved locally on your iOS device.
● Convenient Presentation Sharing
To make your presentations accessible to a wider audience, you can proceed to share the created slideshows directly from IMovie to any of your preferred media sharing platforms, or export the same to an online storage account, like, AirDrop, iCloud Drive, etc.
Part 2 How to Make a Video Slideshow in iMovie?
Having observed the credibility of designing slideshow presentations in the iMovie video editor program, you might easily have a motivation to explore your graphic creativity by working with the software to make an iMovie slideshow of your own. Adhering to the concern, let us see through the process of making a slideshow in iMovie through a detailed, step by step guide in the following section:
User’s Guide to Create Video Slideshow in iMovie
Step 1: Download and Install the Program
To create slideshow with iMovie, start with visiting the home website of the iMovie video editor program and proceed to download the software in your desired iOS system for free. Next in the line is the installation process, which you need to complete in order to successfully launch the application in your system.
Step 2: Open a New Project
In the app’s welcome screen, navigate to and click on the ‘File’ tab in the ‘Functions Toolbar’ at the top. From the dropdown menu that follows, select the ‘New Project’ option to start working on a new slideshow. You can alternatively, press the ‘+ N’ command keys from your device keyboard to launch a new project. Once your project file is created, assign it a suitable name and select a desired aspect ratio.

Step 3: Create the First Slide
The inaugural slide of your presentation is generally consists of the slideshow the title, which you can add by clicking on the ‘Title’ icon under the ‘Preview’ box, to see a variety of text customization choices appear within the editor workspace.
To work with adding titles to a slide, choose a preferred text style; followed by navigating to the ‘Events Pane’ and dropping the same within the first dotted frame box. You can edit the text in the blue box above the first frame. The amount of text you can add depends on the size of the box. To change the length of the box, click on the same to drag it to a desired place and finally include the text in the ‘Preview’ box.
Navigate to and hit the ‘Show Fonts’ button to customize the added text in terms of color, fonts, style and size. Tap the ‘Preview Slide’ button to see the applied changes and click on ‘Done’ to confirm the same. You can repeat the above process to add titles and informative banners to all the slides within the slideshow presentation that you are about to create.

Step 3: Include Still Images
Browse through the locally saved images within your device gallery and add the desired ones at a specific point in the editor timeline using the ‘Drag and Drop’ method. A green colored indicative light will mark the spot where the images are being dropped. You are free to drop all the images at the same time and sort them at a later stage. Do not close the image folder in your device until you have imported all the stills.
The images can be alternatively added to the timeline by selecting the required ones from the iOS device’s Photo Booth or iPhoto account. All you need to do is navigate to and hit the ‘Photo’ button to drop the selected images in the ‘Photos’ box at the bottom right corner of the software workspace.

Step 4: Adjust Image Pans and Transitions
Having included the desired images within the slideshow project, it is now time to improvise them with classic and enhanced looks. You can adhere to the task by making suitable changes under the ‘Video Adjustments’, ‘Crop Tool’ and ‘Clock’ options. Drag the cursor to a desired slide to see all the 3 options pop up at the top your slide screen.

● Video Adjustment Tool
Using the ‘Video Adjustment’ option, you are granted the liberty to adjust the brightness, contrast, white point, exposure, saturation and levels of the added images. If your images have an appreciable quality by default, you can skip this step.
● Crop Tool
Consider working with the ‘Crop Tool’ to zoom or pan the system camera across a selected slide. Click on the ‘Fit’ option to set the image within a chosen frame size; however you need to be cautious lest using the tool may render an incorrectly cropped image. Select the ‘Crop’ option to adjust the image aspect ratio according to your specific size constraints.
The ‘Ken Burns’ tool, you can rely on this one to spark the slideshow images with the coolest zoom and pan effects. The tool is represented by ‘Red and Green’ boxes above the ‘Video Preview’ box in the editor timeline. You can easily move and resize the boxes using the ‘Hand’ and the ‘Cross Hair’ tools respectively. When you are satisfied with your work, hit ‘Done’ to return and confirm the changes, or click on the next presentation slide to crop and pan the same.
● Clock Tool
The ‘Clock’ icon lets you adjust the screen time of each slide, assigning a preset minimum duration of 0.25 seconds to each slide. Setting a play duration somewhere between 2-2.5 seconds would be an optimal choice. Avoid choosing shorter slide duration unless it becomes an obvious requirement, lest the audience may find it hard to process the contents.
Prefer adjusting the screen time separately for each slide, in case you have a large project with more than 50 slides. It is instead, advisable to time the entire project under one time frame, while setting a longer screen time for the title slide.
Step 5: Add an Upbeat Background Audio
Adding background music to your presentation slides is pretty simple, with you having to just position the audio files within the desired slides using the ‘Drag and Drop’ method. The slides containing music pieces will have a ‘Light Green’ highlighting box under them. To correct a wrong placement, drag the audio file across the individual slides and drop at the correct space. You can further, modify the length of the audio clips by extending and trimming them.
To import audio files from your online iTunes account, navigate to and click within the ‘Music and Sound Effects’ box at the bottom right corner of the editor timeline. You can also clip the music file to start playing the background audio from a certain point within the track. To do this, take the cursor to the end of the track and drag the red indicator line to the point where you wish the audio to end at or begin playing from.

Step 6: Share Your Presentation
Run a mock slideshow in the ‘Preview’ box to ensure that every element of the presentation is at its specified place. When all looks good, navigate to the ‘Functions Toolbar’ at the top and hit the ‘Share’ tab to select a media sharing platform of your choice. You can even choose to export your slideshow directly from the editor timeline via QuickTime.
Part 3 In What Way Could You Edit Your Video Shortly?
Creating slideshow iMovie presentations is a creative task and everything comes on the line with the finesse of editing skills to evoke an intelligent play with features, tools and effects. While you can master the art with consistent effort and practice, there are some really cool tips and tricks to quickly edit and uplift iMovie presentations.
Let us have a look at a few of the most prominent ones in the following section before you move ahead to create slideshow in iMovie:
01Cool Ways to Quickly Edit Your iMovie Videos
● Crop to Zoon in the Video
When editing your videos in the iMovie software, you can zoom in a desired portion of the video frame. All you need to do is, select a clip, tap on the ‘Crop’ button at the top right corner over the ‘Preview’ box, choose the ‘Crop to Fill’ option and drag the effect to the specific clip area you wish to crop. Apply your changes by clicking inside the checkbox at the top right corner.

● Split a Clip
You can reduce the size of a sufficiently long video clip by choosing to break the same into several parts or trim it to ward off unwanted portions. To split your footage, take your cursor to the specific splitting point of the clip within the editor timeline, make a right click, and select the ‘Split Clip’ option from the dropdown menu that follows next.
● Detach an Audio File
Detaching audio from a clip allows you to experiment with different video play options. You can let the run the in the background as you proceed to split a clip for inserting a still image. To work with the effect, navigate to and right click on a desired clip within the editor timeline and tap on ‘Detach Audio’ in the upcoming list of options. The added music clip in ’Blue’ will detach to appear as an independent clip in ‘Green’ within the software timeline.
● Fade Audio In and Out
To ensure a smooth audio transition between successive clips, try hands at fading the audio in and out by pointing the cursor at a detached green or an attached blue audio clip, followed by dragging the small round circles at the beginning or end of the footage. To introduce a gradual fade in or out effect, drag the round button to the center of the video clip.
● Include Transitions
Transitions allow a seamless presentation flow by ensuring a smooth movement between different slides appearing in continuity. Add a suitable transition element to the video footage of your slideshow by navigating to and hitting the ‘Transition’ tab in the ‘Functions Toolbar’. The default transition screen time is 1 second, but you can customize the same by double clicking on the effect post the latter’s addition within the editor timeline.
02Editing Video Slideshows in Filmora
The iMovie slideshow maker program is an excellent choice to work on, as far as the creation of classic and stunning examples of professional, personal and commercial presentations is concerned. However, if you ever land across the need to pick alternative software for making high end slideshows, you can safely choose to go with the Wondershare Filmora Video Editor slideshow creator and editor application package without having to think twice.
For Win 7 or later (64-bit)
For macOS 10.12 or later
Talking about the specific concern of editing flexibility, tools and features; working with the program you are entitled to access a trunk of graphic customization utilities to spark up your presentations that are bound to receive jaw dropping viewer appreciation. The vast, inbuilt effect library of the program houses more than 800 different and top rated, latest editing effects to uplift and improvise your presentations. Here’s a mention of some of the most distinguished ones:
● The ‘Picture-in-Picture’ effect allows you to layer several video clips in a single track.
● You can change the background and add special effects to the presentation slides with the ‘Green Screen’ feature.
● The ‘Split Screen’ feature of the editor program allows you to introduce a new and unique style of storytelling though a multi-screen access.
● Filmora offers over 70 different ‘AI Potrait’ effects that visibly have the highest accuracy of background removal.
● Using the ‘Auto Reframe’ tool to automatically resize your videos without any pro level editing skills.
● You can work towards creating high resolution screen recordings of business meetings, live events, gameplay sessions, product demo presentations, etc., with the software’s ‘Screen Recorder’ tool.
● Use the ‘Silence Detection’ feature to instantly fade out the slideshow music and make your narration more pronounced.
● You can use the ‘Color Match’ tool to introduce suitable color corrections simultaneously within several slides, thus saving much of your valuable time.
● The program allows you to eliminate the camera shake distortions from your clips with its ‘Video Stabilization’ feature.
● Ending Thoughts →
● iMovie slideshows are exemplary in class and style as far as graphic presentation design is concerned.
● You can quickly create and conveniently edit slideshow presentations with the iMovie graphic editor package in your favorite iOS devices.
● When looking for relevant iMovie alternatives to design and edit slideshow presentations, you can conveniently depend on the Wondershare Filmora video editor program.
Landing into the world of creativity, it can be a smart choice to experiment with creating a slideshow in iMovie. Stay tuned to understand the exquisite design know-hows!
In this article
01 [What’s the Advantage of Slideshow in iMovie?](#Part 1)
02 [How to Make a Video Slideshow in iMovie?](#Part 2)
03 [In What Way Could You Edit Your Video Shortly?](#Part 3)
Part 1 What’s the Advantage of Slideshow in iMovie?
Slideshow presentations land among the most elusive means of sharing valuable information across a diverse range of personal and professional content creation domains. Be it a fun-filled family event or a high end business centered client presentation; slideshows are there to address it all! Talking about affordable software solutions to adhere the purpose, you can conveniently pick the iMovie slideshow creator program.
Entering deeper into the software specifications, the iMovie application package is essentially a video and graphic editor tool, exclusively for MacOS and iOS supported devices. Working with the program, you can create stunning slideshow presentations and storytelling movies to commemorate your most cherished personal and commercial events, moments and scenarios.
Now that you have got an elementary overview of the iMovie video editor software, let us move ahead with our discussion to talk about the latter’s credibility towards creating top rated slideshow presentations in the following section prior to proceeding with addressing the concern of how to make a slideshow on iMovie:
Benefits of Creating iMovie Slideshows
● User Cohesive Working Interface
The most pronounced credibility of iOS compatible software tools and program utilities is undoubtedly, their user friendly operation characteristic, and iMovie is no exception to the lineage. The editor workspace of the slideshow creator is intelligently designed to suit the technical aptitude of the expanded diversity of tech savvy and amateur graphic editors. The interface is equally appealing to the newbies in the design realm.
To proceed with creating a slideshow in iMovie, you can either begin with scratch, working on an entirely new idea; or move ahead with picking any preset slideshow template or background theme, followed by customizing the same in line with the specific creation requirements. The software’s effect library is a vast storehouse of high end editing features and tools with the most convenient access.
● Customization Elements
The iMovie program allows you to create cinematic movie edits in Hollywood style. From curiosity generating trailers to nail biting thrills, you can add it all to engage your audience within your presentation. Talking about the customization flexibility, you can try hands at including studio logos, cast names and credit rolls to add extra value to the edits, while simultaneously appreciating the participants of your project.
If that’s not enough, you can work to create your presentations in a variety of genres and themes by choosing from tons of premade templates under a variety of genre centered categories and sub-categories. Moving further, you can also add related effects from the program’s effect library to match the mood and setting of the slideshow.
● Effects And Improvisations
The software offers a decent range of slideshow enhancement features and special effects. You can pick from over 10 different filters, 8 vivid themes and several numbers of sound and audio effects, along with including recorded voiceovers of your own. You can also go ahead to import audio tracks and music files that are saved locally on your iOS device.
● Convenient Presentation Sharing
To make your presentations accessible to a wider audience, you can proceed to share the created slideshows directly from IMovie to any of your preferred media sharing platforms, or export the same to an online storage account, like, AirDrop, iCloud Drive, etc.
Part 2 How to Make a Video Slideshow in iMovie?
Having observed the credibility of designing slideshow presentations in the iMovie video editor program, you might easily have a motivation to explore your graphic creativity by working with the software to make an iMovie slideshow of your own. Adhering to the concern, let us see through the process of making a slideshow in iMovie through a detailed, step by step guide in the following section:
User’s Guide to Create Video Slideshow in iMovie
Step 1: Download and Install the Program
To create slideshow with iMovie, start with visiting the home website of the iMovie video editor program and proceed to download the software in your desired iOS system for free. Next in the line is the installation process, which you need to complete in order to successfully launch the application in your system.
Step 2: Open a New Project
In the app’s welcome screen, navigate to and click on the ‘File’ tab in the ‘Functions Toolbar’ at the top. From the dropdown menu that follows, select the ‘New Project’ option to start working on a new slideshow. You can alternatively, press the ‘+ N’ command keys from your device keyboard to launch a new project. Once your project file is created, assign it a suitable name and select a desired aspect ratio.
Step 3: Create the First Slide
The inaugural slide of your presentation is generally consists of the slideshow the title, which you can add by clicking on the ‘Title’ icon under the ‘Preview’ box, to see a variety of text customization choices appear within the editor workspace.
To work with adding titles to a slide, choose a preferred text style; followed by navigating to the ‘Events Pane’ and dropping the same within the first dotted frame box. You can edit the text in the blue box above the first frame. The amount of text you can add depends on the size of the box. To change the length of the box, click on the same to drag it to a desired place and finally include the text in the ‘Preview’ box.
Navigate to and hit the ‘Show Fonts’ button to customize the added text in terms of color, fonts, style and size. Tap the ‘Preview Slide’ button to see the applied changes and click on ‘Done’ to confirm the same. You can repeat the above process to add titles and informative banners to all the slides within the slideshow presentation that you are about to create.
Step 3: Include Still Images
Browse through the locally saved images within your device gallery and add the desired ones at a specific point in the editor timeline using the ‘Drag and Drop’ method. A green colored indicative light will mark the spot where the images are being dropped. You are free to drop all the images at the same time and sort them at a later stage. Do not close the image folder in your device until you have imported all the stills.
The images can be alternatively added to the timeline by selecting the required ones from the iOS device’s Photo Booth or iPhoto account. All you need to do is navigate to and hit the ‘Photo’ button to drop the selected images in the ‘Photos’ box at the bottom right corner of the software workspace.
Step 4: Adjust Image Pans and Transitions
Having included the desired images within the slideshow project, it is now time to improvise them with classic and enhanced looks. You can adhere to the task by making suitable changes under the ‘Video Adjustments’, ‘Crop Tool’ and ‘Clock’ options. Drag the cursor to a desired slide to see all the 3 options pop up at the top your slide screen.
● Video Adjustment Tool
Using the ‘Video Adjustment’ option, you are granted the liberty to adjust the brightness, contrast, white point, exposure, saturation and levels of the added images. If your images have an appreciable quality by default, you can skip this step.
● Crop Tool
Consider working with the ‘Crop Tool’ to zoom or pan the system camera across a selected slide. Click on the ‘Fit’ option to set the image within a chosen frame size; however you need to be cautious lest using the tool may render an incorrectly cropped image. Select the ‘Crop’ option to adjust the image aspect ratio according to your specific size constraints.
The ‘Ken Burns’ tool, you can rely on this one to spark the slideshow images with the coolest zoom and pan effects. The tool is represented by ‘Red and Green’ boxes above the ‘Video Preview’ box in the editor timeline. You can easily move and resize the boxes using the ‘Hand’ and the ‘Cross Hair’ tools respectively. When you are satisfied with your work, hit ‘Done’ to return and confirm the changes, or click on the next presentation slide to crop and pan the same.
● Clock Tool
The ‘Clock’ icon lets you adjust the screen time of each slide, assigning a preset minimum duration of 0.25 seconds to each slide. Setting a play duration somewhere between 2-2.5 seconds would be an optimal choice. Avoid choosing shorter slide duration unless it becomes an obvious requirement, lest the audience may find it hard to process the contents.
Prefer adjusting the screen time separately for each slide, in case you have a large project with more than 50 slides. It is instead, advisable to time the entire project under one time frame, while setting a longer screen time for the title slide.
Step 5: Add an Upbeat Background Audio
Adding background music to your presentation slides is pretty simple, with you having to just position the audio files within the desired slides using the ‘Drag and Drop’ method. The slides containing music pieces will have a ‘Light Green’ highlighting box under them. To correct a wrong placement, drag the audio file across the individual slides and drop at the correct space. You can further, modify the length of the audio clips by extending and trimming them.
To import audio files from your online iTunes account, navigate to and click within the ‘Music and Sound Effects’ box at the bottom right corner of the editor timeline. You can also clip the music file to start playing the background audio from a certain point within the track. To do this, take the cursor to the end of the track and drag the red indicator line to the point where you wish the audio to end at or begin playing from.
Step 6: Share Your Presentation
Run a mock slideshow in the ‘Preview’ box to ensure that every element of the presentation is at its specified place. When all looks good, navigate to the ‘Functions Toolbar’ at the top and hit the ‘Share’ tab to select a media sharing platform of your choice. You can even choose to export your slideshow directly from the editor timeline via QuickTime.
Part 3 In What Way Could You Edit Your Video Shortly?
Creating slideshow iMovie presentations is a creative task and everything comes on the line with the finesse of editing skills to evoke an intelligent play with features, tools and effects. While you can master the art with consistent effort and practice, there are some really cool tips and tricks to quickly edit and uplift iMovie presentations.
Let us have a look at a few of the most prominent ones in the following section before you move ahead to create slideshow in iMovie:
01Cool Ways to Quickly Edit Your iMovie Videos
● Crop to Zoon in the Video
When editing your videos in the iMovie software, you can zoom in a desired portion of the video frame. All you need to do is, select a clip, tap on the ‘Crop’ button at the top right corner over the ‘Preview’ box, choose the ‘Crop to Fill’ option and drag the effect to the specific clip area you wish to crop. Apply your changes by clicking inside the checkbox at the top right corner.
● Split a Clip
You can reduce the size of a sufficiently long video clip by choosing to break the same into several parts or trim it to ward off unwanted portions. To split your footage, take your cursor to the specific splitting point of the clip within the editor timeline, make a right click, and select the ‘Split Clip’ option from the dropdown menu that follows next.
● Detach an Audio File
Detaching audio from a clip allows you to experiment with different video play options. You can let the run the in the background as you proceed to split a clip for inserting a still image. To work with the effect, navigate to and right click on a desired clip within the editor timeline and tap on ‘Detach Audio’ in the upcoming list of options. The added music clip in ’Blue’ will detach to appear as an independent clip in ‘Green’ within the software timeline.
● Fade Audio In and Out
To ensure a smooth audio transition between successive clips, try hands at fading the audio in and out by pointing the cursor at a detached green or an attached blue audio clip, followed by dragging the small round circles at the beginning or end of the footage. To introduce a gradual fade in or out effect, drag the round button to the center of the video clip.
● Include Transitions
Transitions allow a seamless presentation flow by ensuring a smooth movement between different slides appearing in continuity. Add a suitable transition element to the video footage of your slideshow by navigating to and hitting the ‘Transition’ tab in the ‘Functions Toolbar’. The default transition screen time is 1 second, but you can customize the same by double clicking on the effect post the latter’s addition within the editor timeline.
02Editing Video Slideshows in Filmora
The iMovie slideshow maker program is an excellent choice to work on, as far as the creation of classic and stunning examples of professional, personal and commercial presentations is concerned. However, if you ever land across the need to pick alternative software for making high end slideshows, you can safely choose to go with the Wondershare Filmora Video Editor slideshow creator and editor application package without having to think twice.
For Win 7 or later (64-bit)
For macOS 10.12 or later
Talking about the specific concern of editing flexibility, tools and features; working with the program you are entitled to access a trunk of graphic customization utilities to spark up your presentations that are bound to receive jaw dropping viewer appreciation. The vast, inbuilt effect library of the program houses more than 800 different and top rated, latest editing effects to uplift and improvise your presentations. Here’s a mention of some of the most distinguished ones:
● The ‘Picture-in-Picture’ effect allows you to layer several video clips in a single track.
● You can change the background and add special effects to the presentation slides with the ‘Green Screen’ feature.
● The ‘Split Screen’ feature of the editor program allows you to introduce a new and unique style of storytelling though a multi-screen access.
● Filmora offers over 70 different ‘AI Potrait’ effects that visibly have the highest accuracy of background removal.
● Using the ‘Auto Reframe’ tool to automatically resize your videos without any pro level editing skills.
● You can work towards creating high resolution screen recordings of business meetings, live events, gameplay sessions, product demo presentations, etc., with the software’s ‘Screen Recorder’ tool.
● Use the ‘Silence Detection’ feature to instantly fade out the slideshow music and make your narration more pronounced.
● You can use the ‘Color Match’ tool to introduce suitable color corrections simultaneously within several slides, thus saving much of your valuable time.
● The program allows you to eliminate the camera shake distortions from your clips with its ‘Video Stabilization’ feature.
● Ending Thoughts →
● iMovie slideshows are exemplary in class and style as far as graphic presentation design is concerned.
● You can quickly create and conveniently edit slideshow presentations with the iMovie graphic editor package in your favorite iOS devices.
● When looking for relevant iMovie alternatives to design and edit slideshow presentations, you can conveniently depend on the Wondershare Filmora video editor program.
Also read:
- Updated A Guide To Adopting Lumetri Color Presets in Effective Color Grading for 2024
- New Different Ways To Trim Video In Premiere Pro
- 2024 Approved Top 6 Best Alternatives to Clownfish Voice Changer
- New 2024 Approved 2 Methods to Crop a Video in VLC
- Updated 2024 Approved Introduction to The Best Cinematic LUTs in The Market
- New 2024 Approved Frame Rates, Speed, and Wondershare Filmora An Overview
- In 2024, VSDC Free Video Editor Review
- Updated This Article Talks in Detail About How to Convert Time-Lapse to Normal Video Using Certain Methods on iPhone, Online Tools, and so On. It Further Discusses Converting Time-Lapse Video to Normal on the Computer. Check Out
- New How to Color Grading in Final Cut Pro
- New Step by Step to Split a Clip in VLC
- In 2024, Being an After Effects Editor, You Often Find Yourself the Need to Add Motion Blur After Effects. This Guide Has Got You Covered. Follow to Find Out How to Add Motion Blur in After Effects
- Updated Have You Ever Used Premiere Pro to Create Slow-Motion Effects? This Article Will Provide a Guide on Producing Slow-Motion Effects by Using Adobe Premiere Pro
- Updated In 2024, Clone Yourself in Videos with Filmora
- Updated 2024 Approved Add Camera Shake to Video in Adobe After Effects
- 2024 Approved Do You Know How to Create AI Thumbnails for Videos? This Article Will Mention some of the Best Tools to Generate Attractive Thumbnails for Videos with AI
- Video in Text Cinematic Intro【Filmora Tutorial】
- New How to Make Stunning Glitch Effect in Photoshop? Ultimate Guide for 2024
- In 2024, What Are the Best 10 GIF Creator?
- Updated 2024 Approved How to Choose A Nice GoPro for Vlogging?
- 2024 Approved Split Videos in the Lightworks Step by Step
- 2024 Approved Making Slow Motion Videos in Final Cut Pro The Best Methods
- Updated DaVinci Resolve Scopes Have Undergone Significant Improvements. Find Out How to Use These Scopes and Improve Your Video Editing Skills
- New How to Create Discord Emoji GIF for 2024
- New 2024 Approved Guide Add LUTs in Premiere Pro with Ease
- How to Use the Logo Intro Templates for Your Next Video for 2024
- Updated In 2024, Create a Brand Video to Make Your Business Shine
- Updated 2024 Approved Top 8 Sites to Download Glitch Transition for Premiere Pro
- 2024 Approved Step by Step to Cut a Video in QuickTime
- This Article Aims to Show You How to Export Videos in Filmora
- Best 8 Educational Video Websites for Teachers
- New In 2024, Top 18 Video Editors for PC and Mac
- Updated A Complete Overview of VSCO Video Editor
- An Easy-to-Understand Guide on How to Loop a Video on Canva. This Article Is Sure to Help You if This Is Your First Time Attempting a Loop Video
- How to Create a Smooth Cut Transition Effect for 2024
- New How to Create Your Own LUTs for Your Video with Filmora
- In 2024, How to Make a Transparent Background in Paint. How 3D Paint Transparent Background Can Be Made. How to Save an Image with Transparent Background?
- Slow-Motion Innovation with Sony S&Q Feature for 2024
- Updated What If YouTube Zoom to Fill Not Working, In 2024
- Android Screen Stuck General Realme GT 5 Partly Screen Unresponsive | Dr.fone
- New How to Make Animated Videos for Business Simple Guide for 2024
- Authentication Error Occurred on Xiaomi Redmi 12 5G? Here Are 10 Proven Fixes | Dr.fone
- Updated Burn Photos to DVD | How to Burn Photos to DVD with Transitions and Music for 2024
- In 2024, Pokemon Go Error 12 Failed to Detect Location On Poco F5 Pro 5G? | Dr.fone
- Guide How To Unbrick a Bricked Realme Narzo 60x 5G Phone | Dr.fone
- Does find my friends work on Xiaomi 13 Ultra | Dr.fone
- How to Stop Life360 from Tracking You On Samsung Galaxy A24? | Dr.fone
- 5 Ways to Reset OnePlus Ace 2 Without Volume Buttons | Dr.fone
- Recover lost data from Lava Blaze 2 Pro
- How To Change Infinix Note 30 Pro Lock Screen Clock in Seconds
- Possible solutions to restore deleted music from Tecno
- How to Resolve Vivo Y78 5G Screen Not Working | Dr.fone
- Google Play Services Wont Update? 12 Fixes are Here on Oppo A1x 5G | Dr.fone
- Updated In 2024, Live Selling A Comprehensive Starters Guide
- In 2024, A Quick Guide to Motorola Moto G04 FRP Bypass Instantly
- In 2024, 5 Ways to Track Xiaomi Redmi Note 12 Pro+ 5G without App | Dr.fone
- How to Transfer Data After Switching From Xiaomi Redmi Note 12 Pro+ 5G to Latest Samsung | Dr.fone
- How To Unbrick a Dead Oppo Reno 8T 5G | Dr.fone
- In 2024, Top Apps and Online Tools To Track ZTE Blade A73 5G Phone With/Without IMEI Number
- The Ultimate Guide to ZTE Nubia Flip 5G Pattern Lock Screen Everything You Need to Know
- In 2024, How Do I Stop Someone From Tracking My Samsung Galaxy A05? | Dr.fone
- 3 Solutions to Find Your Honor Play 7T Current Location of a Mobile Number | Dr.fone
- Dose Life360 Notify Me When Someone Checks My Location On Infinix Hot 40 Pro? | Dr.fone
- Title: New In 2024, How to Create a Glitch Text Effect?
- Author: Chloe
- Created at : 2024-04-24 07:08:43
- Updated at : 2024-04-25 07:08:43
- Link: https://ai-editing-video.techidaily.com/new-in-2024-how-to-create-a-glitch-text-effect/
- License: This work is licensed under CC BY-NC-SA 4.0.
