
:max_bytes(150000):strip_icc():format(webp)/relaxing-while-getting-his-studies-done-495857099-5a1ed8c5ec2f640037e369f4.jpg)
New In 2024, How To Create a Polaroid Collage?
How To Make a Polaroid Collage
How To Create a Polaroid Collage?
An easy yet powerful editor
Numerous effects to choose from
Detailed tutorials provided by the official channel
As it is said that “Old is gold”, the same holds true when it comes to collages. No matter how advanced the technology has become or the design has evolved with collages the old-fashioned polaroid collages are never out of fashion. Polaroid images are small pocket-sized images having a white border developed using polaroid cameras. When it comes to collages, you can develop these images using your special camera and then lay them out in the desired pattern.
With everything taking the digital route, collage creation is no exception and now you can quickly create customized polarised collages using all your favorite pictures. Learn more about polaroid collages, the best tools for their creation, and more in the following parts.
In this article
01 [How to Create an Impressive Polaroid Collage](#Part 1)
02 [How to Create a Polaroid Photo Collage in Photoshop](#Part 2)
03 [Best Place to Get Stock Images for Your Polaroid Collage](#Part 3)
04 [How to Make a Photo Collage Online](#Part 4)
Part 1 How to Create an Impressive Polaroid Collage
Like any other collage, a polaroid collage is one where several polaroid styles images are placed together in the desired pattern. To create an eye-catchy polaroid collage, some of the basic requirements are as follows.

01Use the right tool
First of all, select the right tool that can help you create the desired collage. There are several online as well as desktop programs available for this. Choose a tool that comes with multiple polaroid collage template and offers different editing options.
02Select a layout/design/template
Next, select the desired layout or the polaroid frame collage template from the available options that match your requirements.
03Add high-quality images
Now it’s time to add the images to the template. To make an impressive collage make sure to add high-quality images. You can either use the images captured by you or can also use the stock images available at different online sites.
04Personalize and customize the collage
Next, it’s time to customize the collage. After the images are added, you can further add elements like text, filters, effects, and others to make your collage look more appealing.
05Save, print, or share the collage
Finally, it’s time to save the collage, print it, or share it over online sites, social media platforms, or with your near and dear ones.
Part 2 How to Create a Polaroid Photo Collage in Photoshop
To create an interesting polaroid collage Photoshop works as a good tool. Both Photoshop CS6 and Photoshop Creative Cloud can be used for creating the desired collage with slight changes in the functioning of both versions.
01Steps to create polaroid collage using Photoshop polaroid collage maker
Step 1. Launch the Photoshop tool and add the first image. Choose the Rectangle Tool using its icon which is present in the lower half of the Tools panel.

Step 2. Next, at the left corner of the interface set the Shape option as Tool Mode for drawing the vector shapes.

Step 3. Next, choose the color of the rectangle shape, and to fill this select black at the Fill color swatch in the Options bar. A dialog box will appear to choose the type of fill and here you need to select the Solid Color option.
Click on the Enter button to close the dialog box.

Step 4. Also, ensure that there are no strokes around the edges, and for this tap on the Stroke swatch box on the right side of the Options bar. A Stroke Type dialog box will open where you need to select the None icon. Click on Enter to close the pop-up window.
Step 5. When all the above settings are done, press and hold the Shift key and then you need to click and drag the shape to move into the square box.

Step 6. A newly added shape layer will now appear at the Layers panel. Now you need to make a copy of this shape and then resize it for creating the outer frame of the polaroid.
The duplicate shape layer will be created and will appear on the Layers panel. Rename these shapes as desired.
Step 7. Now after selecting the border layer in the layers panel click again on the Fill color swatch and choose the White color (to make it look like a polaroid image).
Step 8. Next, move to the Edit menu and select Free Transform Path which will create the transform handles around the shape which can also be used for resizing.
Step 9. A shadow to the border can also be added by clicking on the icon of Layer Styles and then choosing the Drop Shadow option from the list.
Step 10. Choose the image area from the Layers panel.
Step 11. Next, use the Knockout function from the Blending Options.
Step 12. Now select both shape layers and group the layers by clicking on New Group from Layers in the menu. Give a desired name to the group.
Step 13. Next, click on the Background layer and choose New Fill or Adjustment Layer.
Step 14. Tap on the Polaroid layer group from the Layers panel and select it.
Step 15. Go to the Edit menu and select the Free Transform option.
Step 16. Now when all the major work is done, it’s time to create a duplicate layer group to create a new polaroid.

When multiple layer groups are added your polaroid photo collage will be ready.
Part 3 How to Make a Photo Collage Online
Creating a polaroid collage using Photoshop is quite complicated and a lengthy process. So, if you are looking for a simpler and quicker way to create the desired collage, we suggest using an online tool. Fotor is one such decent tool that works from your browser and comes with several pre-designed collage templates including polaroid.
The interface of this polaroid collage app is simple where you just need to select the polaroid-based template from the available options, add images, customize the collage by adding a text, filter, or any other element, and then download the created collage.
The interface is simple and user-friendly and the process of creating the collage is fast.

Part 4 Best Place To Get Stock Images For Your Polaroid Collage
To create an eye-catchy collage, the images added also need to be interesting. Besides your local pictures, you can even get stock images available at several sites. One such tool for stock images that we recommend is Wondershare Filmora Video Editor . Though this is an advanced video editing tool supporting a wide range of functions, it also comes with a library of images and other media files that can be used.
You can search from a vast collection of images in different categories and genres to be used for your collage. Additionally, the software also supports a split-screen feature where multiple videos can be played that appears like a video collage.
For Win 7 or later (64-bit)
For macOS 10.12 or later
● Ending Thoughts →
● Polaroid picture collage is one of the most interesting ways of making a collage.
● Photoshop is a great tool for creating a polaroid collage like a pro.
● Online tools like Fotor and others are simple and user-friendly and come with pre-designed templates for creating a polaroid collage.
● Wondershare Filmora is an excellent software to search for stock images and other files, editing videos, and also create a video collage.
As it is said that “Old is gold”, the same holds true when it comes to collages. No matter how advanced the technology has become or the design has evolved with collages the old-fashioned polaroid collages are never out of fashion. Polaroid images are small pocket-sized images having a white border developed using polaroid cameras. When it comes to collages, you can develop these images using your special camera and then lay them out in the desired pattern.
With everything taking the digital route, collage creation is no exception and now you can quickly create customized polarised collages using all your favorite pictures. Learn more about polaroid collages, the best tools for their creation, and more in the following parts.
In this article
01 [How to Create an Impressive Polaroid Collage](#Part 1)
02 [How to Create a Polaroid Photo Collage in Photoshop](#Part 2)
03 [Best Place to Get Stock Images for Your Polaroid Collage](#Part 3)
04 [How to Make a Photo Collage Online](#Part 4)
Part 1 How to Create an Impressive Polaroid Collage
Like any other collage, a polaroid collage is one where several polaroid styles images are placed together in the desired pattern. To create an eye-catchy polaroid collage, some of the basic requirements are as follows.
01Use the right tool
First of all, select the right tool that can help you create the desired collage. There are several online as well as desktop programs available for this. Choose a tool that comes with multiple polaroid collage template and offers different editing options.
02Select a layout/design/template
Next, select the desired layout or the polaroid frame collage template from the available options that match your requirements.
03Add high-quality images
Now it’s time to add the images to the template. To make an impressive collage make sure to add high-quality images. You can either use the images captured by you or can also use the stock images available at different online sites.
04Personalize and customize the collage
Next, it’s time to customize the collage. After the images are added, you can further add elements like text, filters, effects, and others to make your collage look more appealing.
05Save, print, or share the collage
Finally, it’s time to save the collage, print it, or share it over online sites, social media platforms, or with your near and dear ones.
Part 2 How to Create a Polaroid Photo Collage in Photoshop
To create an interesting polaroid collage Photoshop works as a good tool. Both Photoshop CS6 and Photoshop Creative Cloud can be used for creating the desired collage with slight changes in the functioning of both versions.
01Steps to create polaroid collage using Photoshop polaroid collage maker
Step 1. Launch the Photoshop tool and add the first image. Choose the Rectangle Tool using its icon which is present in the lower half of the Tools panel.
Step 2. Next, at the left corner of the interface set the Shape option as Tool Mode for drawing the vector shapes.
Step 3. Next, choose the color of the rectangle shape, and to fill this select black at the Fill color swatch in the Options bar. A dialog box will appear to choose the type of fill and here you need to select the Solid Color option.
Click on the Enter button to close the dialog box.
Step 4. Also, ensure that there are no strokes around the edges, and for this tap on the Stroke swatch box on the right side of the Options bar. A Stroke Type dialog box will open where you need to select the None icon. Click on Enter to close the pop-up window.
Step 5. When all the above settings are done, press and hold the Shift key and then you need to click and drag the shape to move into the square box.
Step 6. A newly added shape layer will now appear at the Layers panel. Now you need to make a copy of this shape and then resize it for creating the outer frame of the polaroid.
The duplicate shape layer will be created and will appear on the Layers panel. Rename these shapes as desired.
Step 7. Now after selecting the border layer in the layers panel click again on the Fill color swatch and choose the White color (to make it look like a polaroid image).
Step 8. Next, move to the Edit menu and select Free Transform Path which will create the transform handles around the shape which can also be used for resizing.
Step 9. A shadow to the border can also be added by clicking on the icon of Layer Styles and then choosing the Drop Shadow option from the list.
Step 10. Choose the image area from the Layers panel.
Step 11. Next, use the Knockout function from the Blending Options.
Step 12. Now select both shape layers and group the layers by clicking on New Group from Layers in the menu. Give a desired name to the group.
Step 13. Next, click on the Background layer and choose New Fill or Adjustment Layer.
Step 14. Tap on the Polaroid layer group from the Layers panel and select it.
Step 15. Go to the Edit menu and select the Free Transform option.
Step 16. Now when all the major work is done, it’s time to create a duplicate layer group to create a new polaroid.
When multiple layer groups are added your polaroid photo collage will be ready.
Part 3 How to Make a Photo Collage Online
Creating a polaroid collage using Photoshop is quite complicated and a lengthy process. So, if you are looking for a simpler and quicker way to create the desired collage, we suggest using an online tool. Fotor is one such decent tool that works from your browser and comes with several pre-designed collage templates including polaroid.
The interface of this polaroid collage app is simple where you just need to select the polaroid-based template from the available options, add images, customize the collage by adding a text, filter, or any other element, and then download the created collage.
The interface is simple and user-friendly and the process of creating the collage is fast.
Part 4 Best Place To Get Stock Images For Your Polaroid Collage
To create an eye-catchy collage, the images added also need to be interesting. Besides your local pictures, you can even get stock images available at several sites. One such tool for stock images that we recommend is Wondershare Filmora Video Editor . Though this is an advanced video editing tool supporting a wide range of functions, it also comes with a library of images and other media files that can be used.
You can search from a vast collection of images in different categories and genres to be used for your collage. Additionally, the software also supports a split-screen feature where multiple videos can be played that appears like a video collage.
For Win 7 or later (64-bit)
For macOS 10.12 or later
● Ending Thoughts →
● Polaroid picture collage is one of the most interesting ways of making a collage.
● Photoshop is a great tool for creating a polaroid collage like a pro.
● Online tools like Fotor and others are simple and user-friendly and come with pre-designed templates for creating a polaroid collage.
● Wondershare Filmora is an excellent software to search for stock images and other files, editing videos, and also create a video collage.
Step by Step to Split Clips in VLC
The VLC media player is top-rated as it is freely available and operates on different platforms efficiently. Its framework helps play almost all the audios, videos, DVDs and various resources available on your systems. Even optimizing the videos and audio as the playback from your devices is possible. There is also a possibility of integrating a number of programs along with the streaming services.
You can even search the album covers. With the functionality of the playlist, you can play a number of films one after the other. This feature is helpful when you have downloaded the whole film in parts or watched different short films. The best part is to know it is not just a video player. It is an editor; yes, you heard it right. VLC is the correct choice for splitting or cutting your videos without facing any difficulties.
The article is a guide about the split of the videos in VLC. There is also a particular description of its alternative: Wondershare Filmora. It is suitable as well as reasonable.
How can you split the video clips in VLC?
VLC Media player has all the amazing tools for playing back the audios and videos regardless of the format. It is still on top of all the media players because of its simple interface. Below are the very easy steps to split the videos in the VLC media player.
Step 1: After completing the download, install the updated version of the VLC media player if it is not on your PC. Once it is installed, you need to double click on its icon for launching it.
Step 2: This step is the activation of the advanced controls in the media player. Click on “View” visible on the menu bar. Click on the “Advanced Controls” and appears the menu of four additional buttons more than the button for play or pause.

Step 3: Now, you can easily play the video simply by clicking the “Open File” option present in the media menu. The drag and drop option is available inside the VLC media player.
You should start playing the video now and recording the parts with the help of a decoder. Look for the position from where you want to begin the recording and press both Play and Pause buttons one after the other.
Even the Frame-by-Frame button is also available. It is the last one in the advance controls for navigating the actual frame from where you want to begin the recording.

Step 4:
Press the button “Record” again whenever you want the recording to stop. This is the final step for cutting the videos in VLC. The split video from the actual video saves automatically as the MP4 video file in the folder of Libraries or Videos if you are using Windows operating system.
Almost all, playing any video and audio format is possible in VLC media player. It includes AVI, MP4, FLV, WMV, RMVB and Quick time. You can even play the videos partially or preview them even before completing the downloads.

An easier way to split the video
The whole process of splitting the video into a VLC media player is extremely easy for managing and handling without any requirement of technical knowledge. But unfortunately, you can apply the frame-by-frame technique on the short videos. Monitoring is essential during the split and looking at the complete process whenever the recording is in VLC.
This causes the loss of quality. Here, the substitute that is also available is Filmora Video Editor . It is the recommendation of the graphic designers, web developers and videographers because it is freely available and lightweight software for the systems. You can apply its features to your images and videos. This includes the cutting, rotating and resizing of your videos along with the images.
For Win 7 or later (64-bit)
For macOS 10.14 or later
Features:
- There are 300+ special effects available
- Splitting of the screens and video clips
- Adding and tracking the motion graphics
- Unlimitedly sharing of the videos
- Addition of the transitional effects
- Dragging and dropping the video contents
- Customization of the effects
You can easily split and cut the large videos in Wondershare Filmora simply. There is no loss of video quality. Follow the steps below for splitting the video from Wondershare Filmora:
Step 1:
Import your videos to Filmora Video Cutter After installing the video cutter, launch it and select New Project to enter the video editing interface. Now, you need to import the video that needs to cut into several parts.

Step 2:
Drag and drop the videos in the timeline to start the splitting. Click the Split icon (scissor icon) on the toolbar or the Split button on the playhead to split the video

Apart from splitting the videos, you can even combine and merge different videos into one. Even the rotation of the videos is possible.
Therefore, Wondershare Filmora has received recognition due to its simple features. It is available for everyone, whether for individual, educational, or business purposes. It can help you in changing the look of your brand completely. Even adding the logos in the videos is also possible, along with adjusting the sizes. There is a huge range of features without any watermark, and all the upgrades are freely available.
Also, tech support is available for any assistance you need. Edit your images and videos on the social media platforms with ease, along with the adjusting tool. The perfect video editor is Wondershare Filmora, as it has compatibility with both Windows and Mac users. Correct and match the colour with the customization tools. Start using the Wondershare Filmora today without being concerned regarding the format of the video clips. You will definitely enjoy using it.
Step 3: Now, you can easily play the video simply by clicking the “Open File” option present in the media menu. The drag and drop option is available inside the VLC media player.
You should start playing the video now and recording the parts with the help of a decoder. Look for the position from where you want to begin the recording and press both Play and Pause buttons one after the other.
Even the Frame-by-Frame button is also available. It is the last one in the advance controls for navigating the actual frame from where you want to begin the recording.
Step 4:
Press the button “Record” again whenever you want the recording to stop. This is the final step for cutting the videos in VLC. The split video from the actual video saves automatically as the MP4 video file in the folder of Libraries or Videos if you are using Windows operating system.
Almost all, playing any video and audio format is possible in VLC media player. It includes AVI, MP4, FLV, WMV, RMVB and Quick time. You can even play the videos partially or preview them even before completing the downloads.
An easier way to split the video
The whole process of splitting the video into a VLC media player is extremely easy for managing and handling without any requirement of technical knowledge. But unfortunately, you can apply the frame-by-frame technique on the short videos. Monitoring is essential during the split and looking at the complete process whenever the recording is in VLC.
This causes the loss of quality. Here, the substitute that is also available is Filmora Video Editor . It is the recommendation of the graphic designers, web developers and videographers because it is freely available and lightweight software for the systems. You can apply its features to your images and videos. This includes the cutting, rotating and resizing of your videos along with the images.
For Win 7 or later (64-bit)
For macOS 10.14 or later
Features:
- There are 300+ special effects available
- Splitting of the screens and video clips
- Adding and tracking the motion graphics
- Unlimitedly sharing of the videos
- Addition of the transitional effects
- Dragging and dropping the video contents
- Customization of the effects
You can easily split and cut the large videos in Wondershare Filmora simply. There is no loss of video quality. Follow the steps below for splitting the video from Wondershare Filmora:
Step 1:
Import your videos to Filmora Video Cutter After installing the video cutter, launch it and select New Project to enter the video editing interface. Now, you need to import the video that needs to cut into several parts.
Step 2:
Drag and drop the videos in the timeline to start the splitting. Click the Split icon (scissor icon) on the toolbar or the Split button on the playhead to split the video
Apart from splitting the videos, you can even combine and merge different videos into one. Even the rotation of the videos is possible.
Therefore, Wondershare Filmora has received recognition due to its simple features. It is available for everyone, whether for individual, educational, or business purposes. It can help you in changing the look of your brand completely. Even adding the logos in the videos is also possible, along with adjusting the sizes. There is a huge range of features without any watermark, and all the upgrades are freely available.
Also, tech support is available for any assistance you need. Edit your images and videos on the social media platforms with ease, along with the adjusting tool. The perfect video editor is Wondershare Filmora, as it has compatibility with both Windows and Mac users. Correct and match the colour with the customization tools. Start using the Wondershare Filmora today without being concerned regarding the format of the video clips. You will definitely enjoy using it.
Despite the Aforementioned Restrictions, Cartoon Video Makers Still Offer a Sea of Possibilities to Their Users, so Let’s Dive Into the Magical World of Animated Videos
Abundant Video Effects - Wondershare Filmora
Provide abundant video effects - A creative video editor
Powerful color correction and grading
Detailed tutorials are provided by the official channel
Introduction
There are some issues common to the video production process. However, animated or cartoon videos have helped to combat such issues. You do not need to scout for locations, go through a seemingly endless casting process, or rent the pricey equipment. A cartoon is simply a type of animation or an illustration that usually appears in a semi-realistic or an unreal style. In addition, it uses simple, satirical, and humorous drawing language to tell the story.
Although there are restrictions, there are a lot of possibilities cartoon video makers still offer to their users. Therefore, this article will share the top 10 best cartoon video makers online and on PC that you can use before diving into an animated video world.
So, here is what we shall learn about cartoon makers today:
In this article
01 Best 5 Online Cartoon Makers
02 Cartoon Video Maker for Desktop (Win and Mac)
03 How Can I Create My Own Cartoon Using Wondershare Anireel
Part 1: Best 5 Online Cartoon Makers
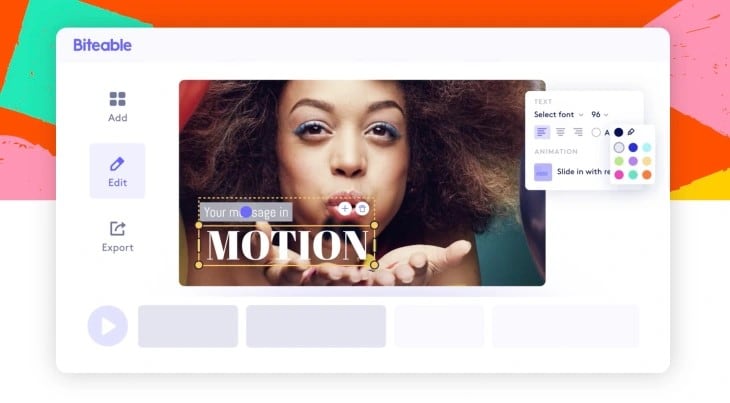
1. Biteable
Biteable provides a seemingly endless list of template categories to cater to your online media marketing needs. Aside from offering entertaining cartoon-making templates, the platform also allows users to create motion graphics or content, and Facebook covers for their social media channels.
Price: Free, $23 per month, billed annually.
Features:
- Offering library with lots of templates to choose from
- Free to use, except you are looking for additional features
- Five simple steps to an incredible cartoon video
- It has an easily customizable template
Pros
- It is a perfect option for social media managers
- Quickly create entertaining cartoons
- Used by biggies like Amazon, Microsoft, Google, Disney, BBC, Shopify, Samsung, and salesforce.
- Over 9 million users
Cons
- There is a mandatory registration
- There are no audio editing options
- The file-sharing capabilities are limited to YouTube and Facebook
- The download option is disabled in the free version
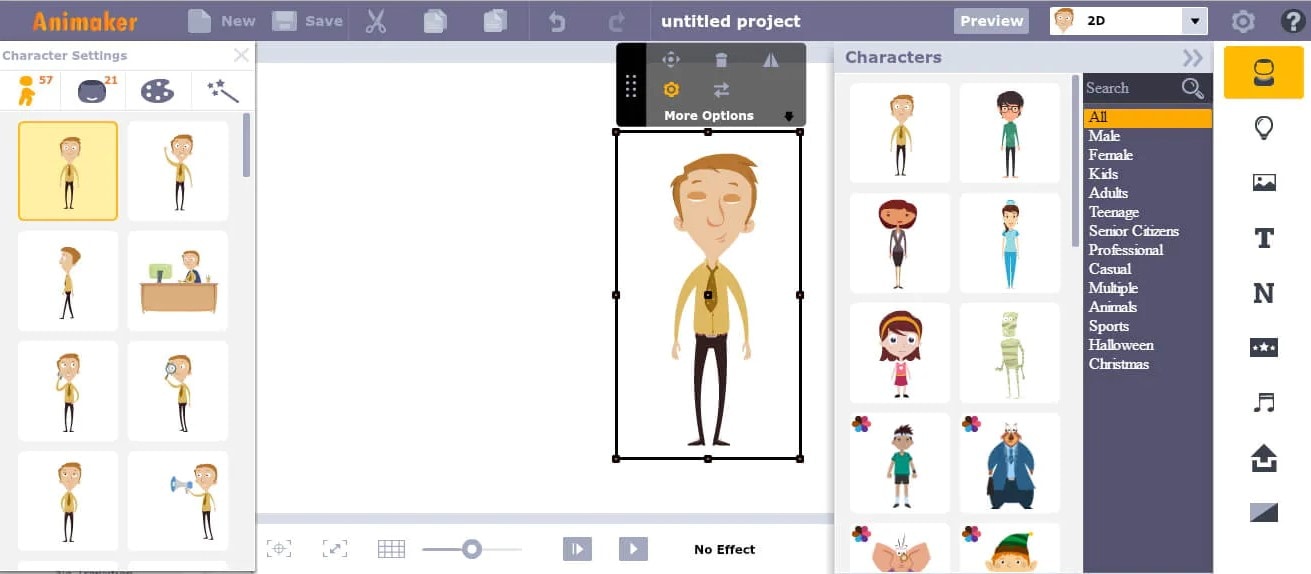
2. Animaker
With this animated maker, you get access to hundreds of animated characters, maps, and backgrounds. There are six (6) video styles available in this cartoon maker: Typography, Infographic, or 2D for different types of projects.
Price: Free version available. Subscription plans start at $12 per month/billed annually.
Features
- Different video styles, marketing, explainer, or 2D animation.
- Posts itself as the number 1 cartoon maker
- No need for a credit card to start.
- Four-step process; select template, customize it, add music, and download or share.
- 200+ voices, 25+ languages, and loads of customizable options.
- It offers auto-lip sync with advanced animation effects.
- There is a rich selection of 1000+ templates
Pros:
- Superb audio editing options
- Excellent and quick animation tools.
- Over 10 million users so far and still counting.
- Currently used by Amazon, Bosch, HP, Nokia, and Philips.
Cons:
- The monthly fee is pricey
- Account creation is mandatory for a free version
- The free version contains a watermark
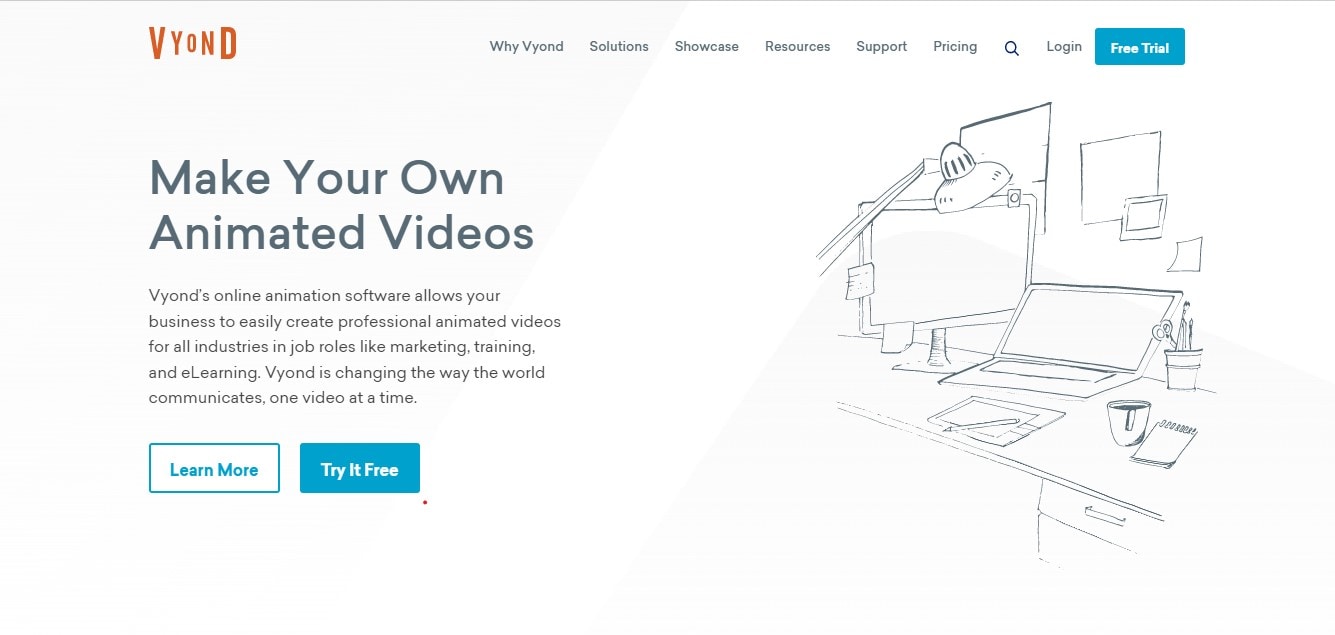
3. Vyond
Vyond, the cartoon creator launched in 2007, is probably one of the oldest online cartoon video makers. Additionally, it is still one of the most popular online destinations meant for anyone who wants to create an animated video quickly.
Price: Subscription plans start from $39 per month, billed annually.
Features:
- Perfect for animated video creation
- There is automatic character lip-syncing
- Try it for free before purchasing
- Make videos for training, e-learning, marketing, human resources, etc.
- The maximum duration of the video is 120 minutes
Pros:
- It has a fully customizable template
- There are high-end object and character animated features
- Certified by GDPR, TrustArc, BSI, and CCPA
- A wholesome cartoon makerfor enterprise and individual
- Data security and privacy assurance by BSI, CCPA, and GPDR.
Cons:
- It is quite expensive
- Vyond is not the best option for inexperienced animators
- The features depend on the subscription model
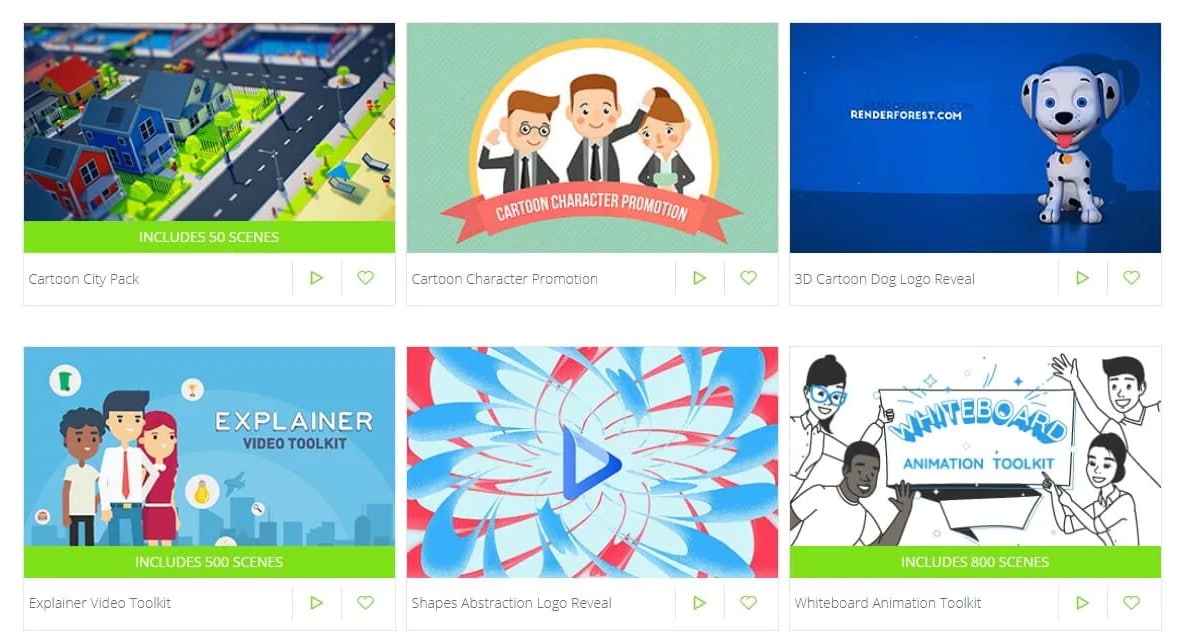
4. Renderforest
This is a famous online cartoon video maker for many purposes. Among the numerous options, the platform offers to its user. They include; 3D explainer videos, logo animations, or professional presentations.
Price: Free version available. Subscription plans start at $16 per month, billed annually.
Features:
- There is an extensive library of templates with numerous options
- Has a large online storage
- Was among the top 100 software companies in 2019.
- Top ranked solution holder for 2020
- Up to 250GB of online storage space
- Use the in-built template to make a story, customize the video, and then export it to share with your friends.
- Amadeus, Bose, BBC, Vodafone, Sony Music, and many others use Renderforest.
Pros:
- Produce videos like a pro
- Comes with an ultimate animation pack.
- Trusted by millions and one of the oldest cartoon makers.
Cons:
- A limited amount of commercial music tracks
- There are modest export options
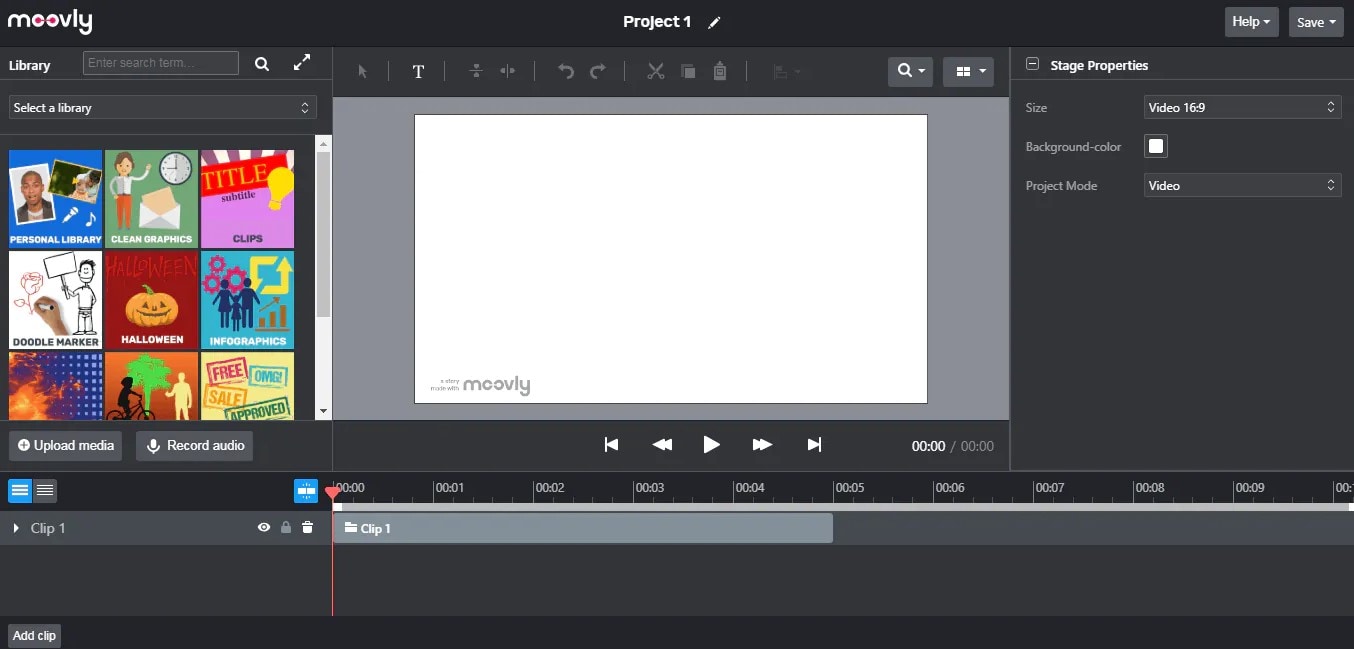
5. Moovly
With this cartoon maker, users must first log in. However, there is no need to create a new account as you can use your LinkedIn or Google account to sign in quickly.
Price: Free 30-day trial, $24.92 per month billed annually.
Features:
- Moovly is the perfect cartoon video maker for sales&marketing, human resources, internal communication, learning&development, agencies, and education.
- Apply expert features in one click with Moovly.
- Create videos and edit with browser-based or drag and drop features without installing software.
- Moovly has over 1.3 million free media, like images, sounds, music, and royalty-free stock videos at no extra charge.
- Besides, it offers 100 million extra media you can try and then purchase.
- You can add your images, music, and videos to create unique clips in style.
- Add text, remove color, add subtitles or generate them, auto-translate your text and subtitles, import PPT files, structure your content, record yourself or your computer screen, edit, mix, etc.
Pros:
- Even if users need to log in, they don’t need to create an account
- Allows users to import content from online sources like Storyblock, Shutterstock, etc.
- It is the number 1 customizable and straightforward solution to making cartoons.
- Use by Colgate-Palmolive, NHS, Teradata, Amadeus, Cisco, Continental, and Logitech.
- The interface is intuitive and user-friendly.
Cons:
- Watermarked videos during the free trial
- To export videos in HD 1080p quality, one needs to purchase one of the available plans.
Renderforest is the best cartoon maker online of the listed five in this article due to the vast library template and large online bandwidth.
Part 2: Cartoon Video Maker for Desktop (Win and Mac)
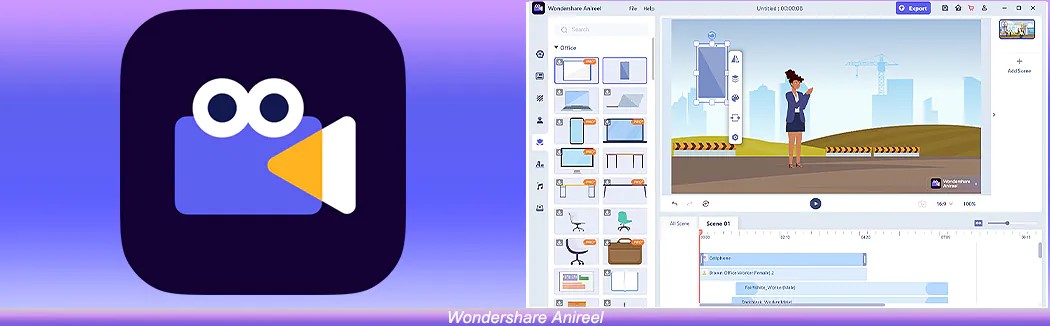
1. Wondershare Anireel
Anireel is one of the top animation software on the internet that allows users to bring their imaginations to life with a huge range of customizable elements and features.
Price: $9.99 per month billed annually and $19.99 monthly
Features:
- 40+ customizable templates
- Top animation software
- Compatible with Windows 11/10/8.1 (64 bit OS)
- Only three steps to an excellent animated video.
- Import images, videos, and sound in almost all formats.
- Create unique avatar, logo images, and more specific to your brand.
- The Deep Learning tech offers quick text-to-speech conversion.
- Animate camera movements, entry and exit effects, motion path, etc.
- Use the one-click option and change scripts to clips.
- Anireel cartoon video makercan lip-sync your characters with perfection.
- Quick and easy drag and drop editing.
Pros:
- It is convenient and simple to use
- Anireel has an intuitive interface
- The cartoon makeroffers a practical and seamless animated video editing
- It comes at an affordable and competitive price
Cons:
- It has a limited amount of assets
- Not suitable for too professional people to use.
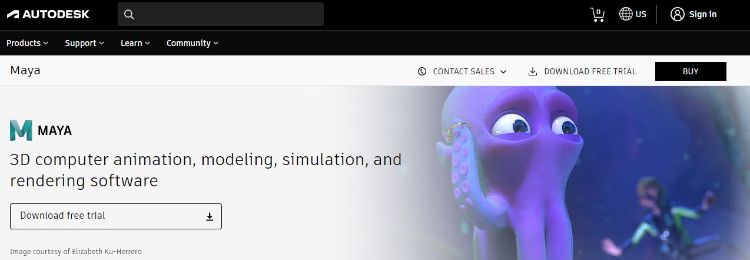
2. Autodesk Maya
Autodesk Maya is one of the best animation tools used to create animation pictures, video games, and add 3D effects in motion pictures. Plus, this cartoon maker is the best if you require a high-quality visual impact.
Price: Free trial, $225 billed monthly.
Features:
- It offers AutoDesk financing for new buyers.
- Maya is the go-to shop for architects, engineers, designers, media, and entertainment.
- Shape 3D objects and add realistic effects with Maya cartoon maker’s NURBS modeling.
- The Integrated Arnold rendering technology lets you view scene changes in real-time.
- Maya has been part of the top movie makers, including the MCU.
- This cartoon video maker offers geometry-based polygon modeling and helps create accurate simulations for visual programming.
- Maya can load and change vast data sets at a faster pace.
Pros:
- It makes complex hand-made animation tasks extremely easy
- Efficient color management
- Allows the creation of realistic effects like cloth simulations and explosions
- 30-day free trial and 30-day money-back guarantee
- Meet deadlines, add fine details to develop even the most complex shots or characters.
- Excellent tool for professionals
Cons:
- The pro is quite expensive
3. Adobe Animate
This is one of the most powerful animation software products on the internet that has been available for decades. It can animate images used for games, film, or online and produce HTML 5, WebGL, or Flash content.
Price: This cartoon creator offers three pricing plans starting at US$24.14/month
Features:
- Excellent for complex animation
- The capability of freehand drawing
- Animate, illustrate, and make 3D typography.
- Import and add vector drawings for further editing.
- Export your work as HTML5 Canvas, WebGL, Flash/Adobe AIR, GIF, or QuickTime movie.
- With the Bone tool, make your cartoon characters fluid and natural.
- Synchronize sounds and music for your project.
- Choose parts of the clip to be animated.
Pros:
- It has Puppeting features
- It is an excellent choice for complex animations
- It includes freehand drawing capability
Cons:
- It is not suitable for beginners
- Other Adobe software may be required while working on a project
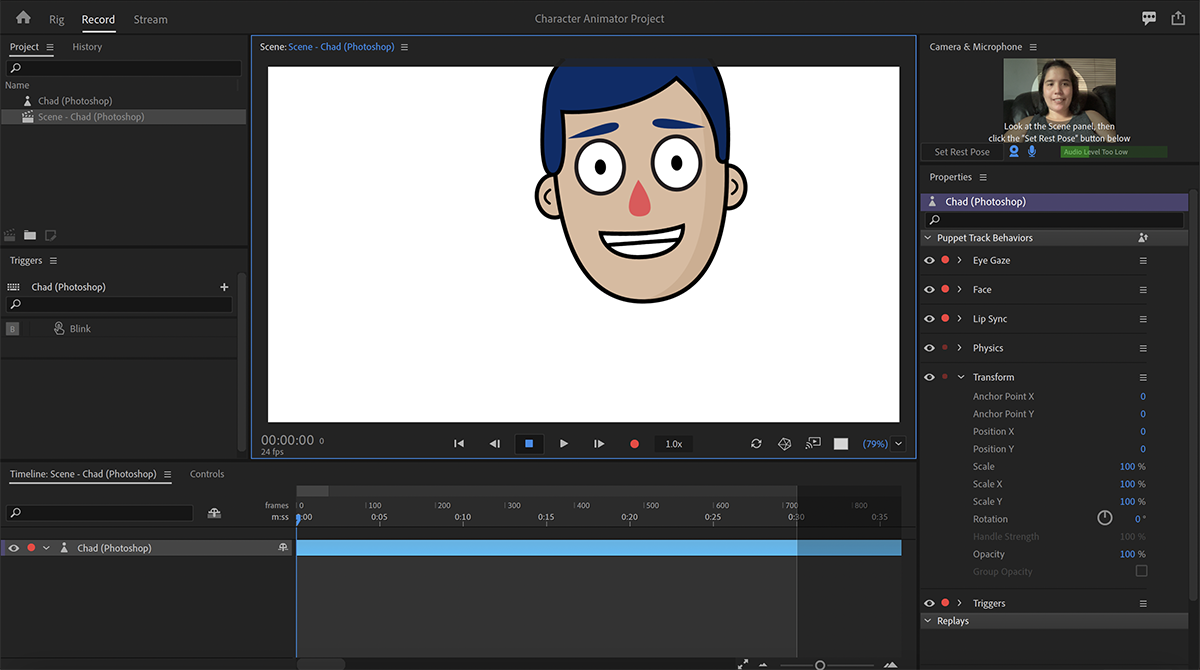
4. Adobe Character Animator
Adobe Character Animator is another type of Adobe’s animation software stack that allows users to use motion to capture and create live animations of their 2D characters.
Price: Adobe Character Animator has two pricing plans starting at US$34,49/month for the first year
Features:
- This product requires other Adobe products to function
- Lots of options to export and import.
- Make your real-life cartoon using the Motion Capture feature in five steps.
- The Avatar will walk, talk, and copy your expressions in real-time.
- Integrate and add assets from other Adobe Creative Cloud apps.
- Auto lip-syncing and real-time facial movement capture.
- Works on iOS and Android.
Pros:
- Easy to replicate real-life movements and expressions with facial tracking.
- There are various import and export options.
Cons:
- It is not a standalone product.
- Users need to have a webcam and microphone to use the motion capture feature.
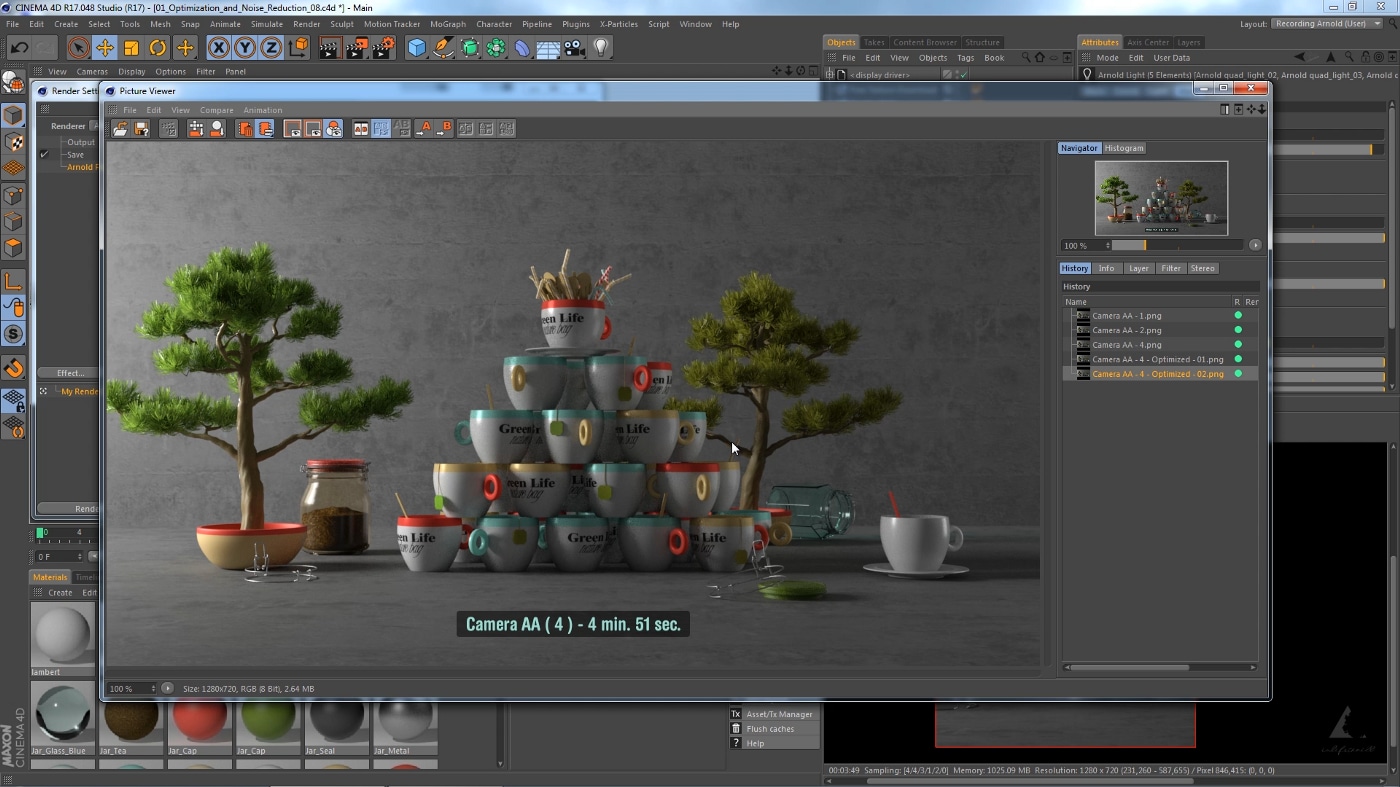
5. Cinema 4D
This cartoon maker has a 3D application interface that offers a keyframe animation, life-like characters, simulation building, object tracking, flexible rig building, cartoon styling, and animation basics.
Price: 4 pricing plans, starting at $99.91/month and $1199.00 billed annually.
Features:
- Keyframing animation effect
- It has a 3d interface
- The ZRemesher for retopology and new tools for modeling add to the new features.
- The Cloth Simulation features help make your cartoon more real.
- It supports CPU rendering with Redshift, which helps you preview, import, and export in high quality.
Pros:
- It is pretty easy to use.
- Lots of exciting design templates are available
- Many editing features are available
Cons
- It is pretty expensive compared to other software
- Not good for beginners
Wondershare Anireel is the best cartoon maker of the five listed in this article. It has lots of advanced features and templates to choose from.
Part 3: How Can I Create My Own Cartoon Using Wondershare Anireel
As stated, Wondershare Anireel has become our top cartoon creator pick due to its affordable pricing, secure server, and ease of use.
So, let us view the simple steps to create your cartoon using the Anireel software.
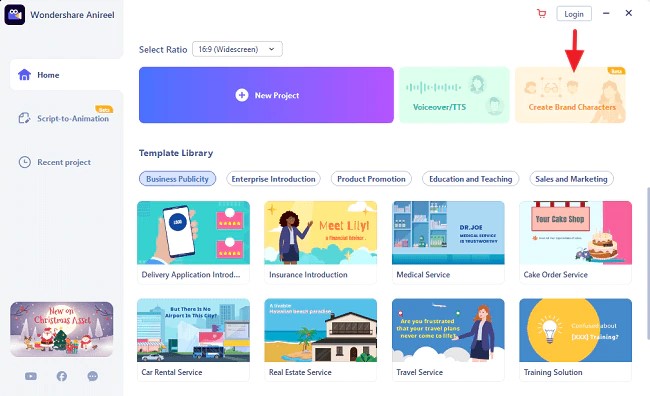
Step 1: Download, install and Create Character
Run Anireel on your device, visit Characters Tab and then click on Create a Character option, or you may click on the Create Brand Characters tab on the home screen.
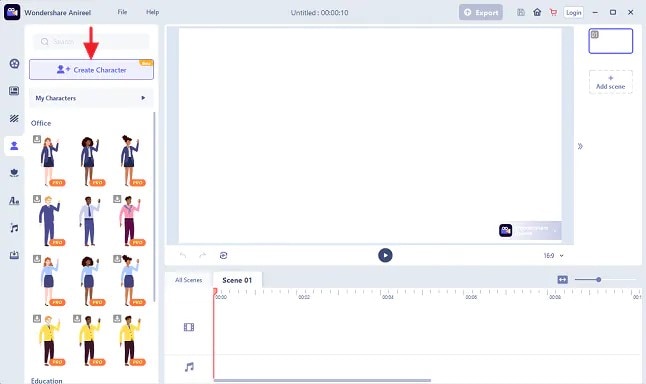
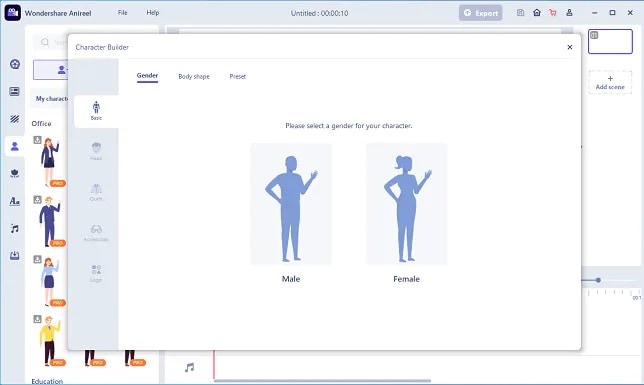
Step 2: Start Creating your Cartoon Character
Choose your gender and body shape, and apply some preset suits.
Now, you can start building facial features using the Head tab to customize the shape of the face, eyes, hairstyle, nose, mouth, ears, and eyebrows.
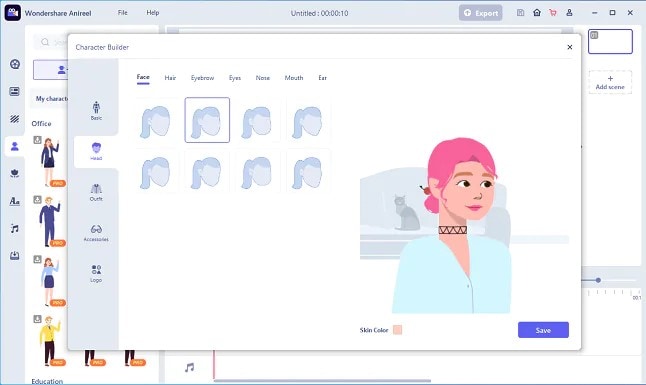
You can also choose to change the skin tone to match yours.
Step 3: Add an Outfit and Accessories
Choose the Outfit tab in Character Builder to select the base layer, outfit, bottom wear, and footwear. Pick what you want to use on your cartoon and keep adding.
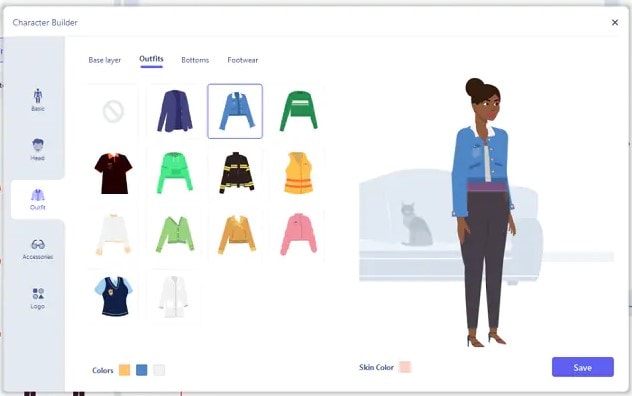
Next, reach the Accessories tab to add glasses, necklaces, and more to your cartoon character.
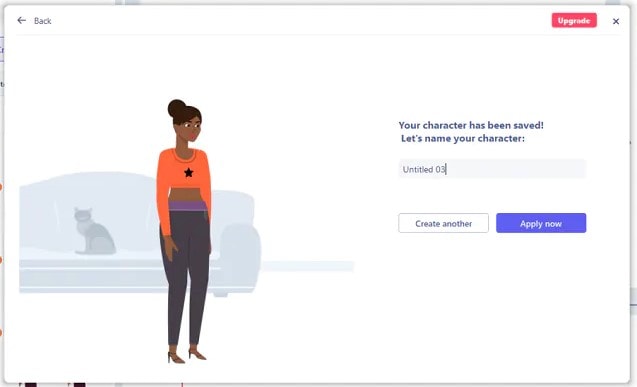
Step 4: Name your Cartoon and Apply
Click on Save and add a name to your cartoon when all done. Finally, click Apply Now to add your cartoon character to your Anireel cartoon maker canvas or My Characters tab.
Part 4: People Also Want to Know
Below are some answers to a few queries about cartoon creators. Let us look at them one by one.
1. What is the best free cartoon maker?
Wondershare Anireel is the best cartoon maker for Android as it is free to use with lots of advanced features and templates to choose from.
2. What is the best app to make a cartoon?
Wondershare Anireel’s Microsoft app is also one of the best cartoon applications that are very flexible and easy to use on the go.
Conclusion
In this article, we explained the best cartoon creators in the industry. Also, we gave the best cartoon video maker from the list. Thus, as you saw, in this report, we have summarized a few essential points regarding cartoon video makers. You learned:
- The cartoon video maker for free that you should know of.
- The ten best cartoon video makers.
- Why are Wondershare Anireel and Renderforest excellent online cartoon video makers?
- How does Anireel, cartoon creator, work?
- Finally, a few FAQs for users to better understand the cartoon maker
Introduction
There are some issues common to the video production process. However, animated or cartoon videos have helped to combat such issues. You do not need to scout for locations, go through a seemingly endless casting process, or rent the pricey equipment. A cartoon is simply a type of animation or an illustration that usually appears in a semi-realistic or an unreal style. In addition, it uses simple, satirical, and humorous drawing language to tell the story.
Although there are restrictions, there are a lot of possibilities cartoon video makers still offer to their users. Therefore, this article will share the top 10 best cartoon video makers online and on PC that you can use before diving into an animated video world.
So, here is what we shall learn about cartoon makers today:
In this article
01 Best 5 Online Cartoon Makers
02 Cartoon Video Maker for Desktop (Win and Mac)
03 How Can I Create My Own Cartoon Using Wondershare Anireel
Part 1: Best 5 Online Cartoon Makers
1. Biteable
Biteable provides a seemingly endless list of template categories to cater to your online media marketing needs. Aside from offering entertaining cartoon-making templates, the platform also allows users to create motion graphics or content, and Facebook covers for their social media channels.
Price: Free, $23 per month, billed annually.
Features:
- Offering library with lots of templates to choose from
- Free to use, except you are looking for additional features
- Five simple steps to an incredible cartoon video
- It has an easily customizable template
Pros
- It is a perfect option for social media managers
- Quickly create entertaining cartoons
- Used by biggies like Amazon, Microsoft, Google, Disney, BBC, Shopify, Samsung, and salesforce.
- Over 9 million users
Cons
- There is a mandatory registration
- There are no audio editing options
- The file-sharing capabilities are limited to YouTube and Facebook
- The download option is disabled in the free version
2. Animaker
With this animated maker, you get access to hundreds of animated characters, maps, and backgrounds. There are six (6) video styles available in this cartoon maker: Typography, Infographic, or 2D for different types of projects.
Price: Free version available. Subscription plans start at $12 per month/billed annually.
Features
- Different video styles, marketing, explainer, or 2D animation.
- Posts itself as the number 1 cartoon maker
- No need for a credit card to start.
- Four-step process; select template, customize it, add music, and download or share.
- 200+ voices, 25+ languages, and loads of customizable options.
- It offers auto-lip sync with advanced animation effects.
- There is a rich selection of 1000+ templates
Pros:
- Superb audio editing options
- Excellent and quick animation tools.
- Over 10 million users so far and still counting.
- Currently used by Amazon, Bosch, HP, Nokia, and Philips.
Cons:
- The monthly fee is pricey
- Account creation is mandatory for a free version
- The free version contains a watermark
3. Vyond
Vyond, the cartoon creator launched in 2007, is probably one of the oldest online cartoon video makers. Additionally, it is still one of the most popular online destinations meant for anyone who wants to create an animated video quickly.
Price: Subscription plans start from $39 per month, billed annually.
Features:
- Perfect for animated video creation
- There is automatic character lip-syncing
- Try it for free before purchasing
- Make videos for training, e-learning, marketing, human resources, etc.
- The maximum duration of the video is 120 minutes
Pros:
- It has a fully customizable template
- There are high-end object and character animated features
- Certified by GDPR, TrustArc, BSI, and CCPA
- A wholesome cartoon makerfor enterprise and individual
- Data security and privacy assurance by BSI, CCPA, and GPDR.
Cons:
- It is quite expensive
- Vyond is not the best option for inexperienced animators
- The features depend on the subscription model
4. Renderforest
This is a famous online cartoon video maker for many purposes. Among the numerous options, the platform offers to its user. They include; 3D explainer videos, logo animations, or professional presentations.
Price: Free version available. Subscription plans start at $16 per month, billed annually.
Features:
- There is an extensive library of templates with numerous options
- Has a large online storage
- Was among the top 100 software companies in 2019.
- Top ranked solution holder for 2020
- Up to 250GB of online storage space
- Use the in-built template to make a story, customize the video, and then export it to share with your friends.
- Amadeus, Bose, BBC, Vodafone, Sony Music, and many others use Renderforest.
Pros:
- Produce videos like a pro
- Comes with an ultimate animation pack.
- Trusted by millions and one of the oldest cartoon makers.
Cons:
- A limited amount of commercial music tracks
- There are modest export options
5. Moovly
With this cartoon maker, users must first log in. However, there is no need to create a new account as you can use your LinkedIn or Google account to sign in quickly.
Price: Free 30-day trial, $24.92 per month billed annually.
Features:
- Moovly is the perfect cartoon video maker for sales&marketing, human resources, internal communication, learning&development, agencies, and education.
- Apply expert features in one click with Moovly.
- Create videos and edit with browser-based or drag and drop features without installing software.
- Moovly has over 1.3 million free media, like images, sounds, music, and royalty-free stock videos at no extra charge.
- Besides, it offers 100 million extra media you can try and then purchase.
- You can add your images, music, and videos to create unique clips in style.
- Add text, remove color, add subtitles or generate them, auto-translate your text and subtitles, import PPT files, structure your content, record yourself or your computer screen, edit, mix, etc.
Pros:
- Even if users need to log in, they don’t need to create an account
- Allows users to import content from online sources like Storyblock, Shutterstock, etc.
- It is the number 1 customizable and straightforward solution to making cartoons.
- Use by Colgate-Palmolive, NHS, Teradata, Amadeus, Cisco, Continental, and Logitech.
- The interface is intuitive and user-friendly.
Cons:
- Watermarked videos during the free trial
- To export videos in HD 1080p quality, one needs to purchase one of the available plans.
Renderforest is the best cartoon maker online of the listed five in this article due to the vast library template and large online bandwidth.
Part 2: Cartoon Video Maker for Desktop (Win and Mac)
1. Wondershare Anireel
Anireel is one of the top animation software on the internet that allows users to bring their imaginations to life with a huge range of customizable elements and features.
Price: $9.99 per month billed annually and $19.99 monthly
Features:
- 40+ customizable templates
- Top animation software
- Compatible with Windows 11/10/8.1 (64 bit OS)
- Only three steps to an excellent animated video.
- Import images, videos, and sound in almost all formats.
- Create unique avatar, logo images, and more specific to your brand.
- The Deep Learning tech offers quick text-to-speech conversion.
- Animate camera movements, entry and exit effects, motion path, etc.
- Use the one-click option and change scripts to clips.
- Anireel cartoon video makercan lip-sync your characters with perfection.
- Quick and easy drag and drop editing.
Pros:
- It is convenient and simple to use
- Anireel has an intuitive interface
- The cartoon makeroffers a practical and seamless animated video editing
- It comes at an affordable and competitive price
Cons:
- It has a limited amount of assets
- Not suitable for too professional people to use.
2. Autodesk Maya
Autodesk Maya is one of the best animation tools used to create animation pictures, video games, and add 3D effects in motion pictures. Plus, this cartoon maker is the best if you require a high-quality visual impact.
Price: Free trial, $225 billed monthly.
Features:
- It offers AutoDesk financing for new buyers.
- Maya is the go-to shop for architects, engineers, designers, media, and entertainment.
- Shape 3D objects and add realistic effects with Maya cartoon maker’s NURBS modeling.
- The Integrated Arnold rendering technology lets you view scene changes in real-time.
- Maya has been part of the top movie makers, including the MCU.
- This cartoon video maker offers geometry-based polygon modeling and helps create accurate simulations for visual programming.
- Maya can load and change vast data sets at a faster pace.
Pros:
- It makes complex hand-made animation tasks extremely easy
- Efficient color management
- Allows the creation of realistic effects like cloth simulations and explosions
- 30-day free trial and 30-day money-back guarantee
- Meet deadlines, add fine details to develop even the most complex shots or characters.
- Excellent tool for professionals
Cons:
- The pro is quite expensive
3. Adobe Animate
This is one of the most powerful animation software products on the internet that has been available for decades. It can animate images used for games, film, or online and produce HTML 5, WebGL, or Flash content.
Price: This cartoon creator offers three pricing plans starting at US$24.14/month
Features:
- Excellent for complex animation
- The capability of freehand drawing
- Animate, illustrate, and make 3D typography.
- Import and add vector drawings for further editing.
- Export your work as HTML5 Canvas, WebGL, Flash/Adobe AIR, GIF, or QuickTime movie.
- With the Bone tool, make your cartoon characters fluid and natural.
- Synchronize sounds and music for your project.
- Choose parts of the clip to be animated.
Pros:
- It has Puppeting features
- It is an excellent choice for complex animations
- It includes freehand drawing capability
Cons:
- It is not suitable for beginners
- Other Adobe software may be required while working on a project
4. Adobe Character Animator
Adobe Character Animator is another type of Adobe’s animation software stack that allows users to use motion to capture and create live animations of their 2D characters.
Price: Adobe Character Animator has two pricing plans starting at US$34,49/month for the first year
Features:
- This product requires other Adobe products to function
- Lots of options to export and import.
- Make your real-life cartoon using the Motion Capture feature in five steps.
- The Avatar will walk, talk, and copy your expressions in real-time.
- Integrate and add assets from other Adobe Creative Cloud apps.
- Auto lip-syncing and real-time facial movement capture.
- Works on iOS and Android.
Pros:
- Easy to replicate real-life movements and expressions with facial tracking.
- There are various import and export options.
Cons:
- It is not a standalone product.
- Users need to have a webcam and microphone to use the motion capture feature.
5. Cinema 4D
This cartoon maker has a 3D application interface that offers a keyframe animation, life-like characters, simulation building, object tracking, flexible rig building, cartoon styling, and animation basics.
Price: 4 pricing plans, starting at $99.91/month and $1199.00 billed annually.
Features:
- Keyframing animation effect
- It has a 3d interface
- The ZRemesher for retopology and new tools for modeling add to the new features.
- The Cloth Simulation features help make your cartoon more real.
- It supports CPU rendering with Redshift, which helps you preview, import, and export in high quality.
Pros:
- It is pretty easy to use.
- Lots of exciting design templates are available
- Many editing features are available
Cons
- It is pretty expensive compared to other software
- Not good for beginners
Wondershare Anireel is the best cartoon maker of the five listed in this article. It has lots of advanced features and templates to choose from.
Part 3: How Can I Create My Own Cartoon Using Wondershare Anireel
As stated, Wondershare Anireel has become our top cartoon creator pick due to its affordable pricing, secure server, and ease of use.
So, let us view the simple steps to create your cartoon using the Anireel software.
Step 1: Download, install and Create Character
Run Anireel on your device, visit Characters Tab and then click on Create a Character option, or you may click on the Create Brand Characters tab on the home screen.
Step 2: Start Creating your Cartoon Character
Choose your gender and body shape, and apply some preset suits.
Now, you can start building facial features using the Head tab to customize the shape of the face, eyes, hairstyle, nose, mouth, ears, and eyebrows.
You can also choose to change the skin tone to match yours.
Step 3: Add an Outfit and Accessories
Choose the Outfit tab in Character Builder to select the base layer, outfit, bottom wear, and footwear. Pick what you want to use on your cartoon and keep adding.
Next, reach the Accessories tab to add glasses, necklaces, and more to your cartoon character.
Step 4: Name your Cartoon and Apply
Click on Save and add a name to your cartoon when all done. Finally, click Apply Now to add your cartoon character to your Anireel cartoon maker canvas or My Characters tab.
Part 4: People Also Want to Know
Below are some answers to a few queries about cartoon creators. Let us look at them one by one.
1. What is the best free cartoon maker?
Wondershare Anireel is the best cartoon maker for Android as it is free to use with lots of advanced features and templates to choose from.
2. What is the best app to make a cartoon?
Wondershare Anireel’s Microsoft app is also one of the best cartoon applications that are very flexible and easy to use on the go.
Conclusion
In this article, we explained the best cartoon creators in the industry. Also, we gave the best cartoon video maker from the list. Thus, as you saw, in this report, we have summarized a few essential points regarding cartoon video makers. You learned:
- The cartoon video maker for free that you should know of.
- The ten best cartoon video makers.
- Why are Wondershare Anireel and Renderforest excellent online cartoon video makers?
- How does Anireel, cartoon creator, work?
- Finally, a few FAQs for users to better understand the cartoon maker
Create Slow Motion Videos Using Final Cut Pro with Ease
The slow-motion effect has been used for years to add dramatic effects to movies. An important scene is always highlighted and looks better with a slow-motion effect. Applying slow motion is beneficial, too, as it can give you a better preview of the scene. The effect is easily accessible in many video editing applications.
How would you find an app that gives good final cut slow-motion results? This article has got you all covered on that. Here, you will find the Final Cut Pro slow-motion effect that works fantastic without ruining your video’s quality. So, follow the article to learn more about using FCP slow motion.
Slow Motion Video Maker Slow your video’s speed with better control of your keyframes to create unique cinematic effects!
Make A Slow Motion Video Make A Slow Motion Video More Features

Part 1: What Makes a Perfect Slow-Motion Video?
An ideal FCP slow-motion video requires careful attention to technical details and aesthetics. Below are some essential things to think about bringing perfection in slow-motion videos:
- Resolution: A slow-motion video with visual appeal and a high resolution is crucial. This is especially vital if you intend to crop or zoom in on the video while editing.
- Storytelling: Make sure the slow-motion clip supports the idea you’re attempting to portray. Your scenes will have more impact if you tell them with a thoughtful narrative.
- Editing: Try different speeds when editing your clip to achieve the best impact. Consider including sound effects or music to accompany the slow-motion images.
- Timing: Select the appropriate times to record in slow motion. You shouldn’t slow down your entire video. Instead, you can apply the effect to draw attention to acts or feelings.
- Frame Rate: Slow-motion videos are usually shot at a greater frame rate. Frame rates of 60, 120, 240, or even higher are common as they make the video look smoother.
- Shutter Speed: For precise and sharp results, use a fast shutter speed camera. This lessens the likelihood of motion blur in every slow-motion frame.
Part 2: Learning All Essential Techniques to Perform Slow Motion in Final Cut Pro X
Apple created Final Cut Pro , and it is only accessible to macOS users. Professional video editors can utilize the software’s array of capabilities. The tool offers incredible video editing functions. Its features are tailored to handle high-resolution video material. The tool has an AI object tracker that detects faces and objects. Its cinematic mode helps you create professional videos.
Final cut slow motion gives a dramatic and intense effect to your videos. You can create an entirely different video with the power of its editing features. Slow-mo Final Cut Pro gives high-resolution results. Follow the steps below to use this tool for slow-motion effects. However, you can choose any method that seems suitable and convenient to you:
Method 1
Import your video into the app and drag it into the timeline. Click on the video and select the “Speed Meter” icon from the timeline. If you want to access the retime menu directly, use the “Command+R” command. Now, select the “Slow” option, and from here, you can select the slow speed percentage at which you want your clip.

Method 2
Bring your video into the timeline and click on it. Select the “Speed Meter” icon; now, choose the “Custom” option. You can access customized settings directly using the “Control+Option+R” command to apply FCPX slow motion. Once you have opened the customization menu, manually set the speed rate and duration to how much you want.

Method 3
Drag the timeline cursor to where you want to make a speed change, select “Speed Meter,” and hit “Blade Speed” to create a cut and separate the clip. Make as many cuts as you want to, depending on how many speed changes you require. Now click on the clip whose speed you want changed and select “Custom” from the “Speed Meter” icon. Customize your clips’ speed rate and duration and save the video once you’re done.

Part 3: Wondershare Filmora: A Multi-Purpose Solution to Making Effective Slow-Motion Videos
Final Cut Pro can be difficult for beginners to understand. The tool has a variety of tutorials available online, but it’s still hard for many users to follow them. In this case, Wondershare Filmora is a great option for slow motion and other effects. It is an excellent alternative to final cut slow motion. Filmora offers many more wonderful features that will surely amaze you.
It can assist you in generating engaging content despite just cutting, trimming, and editing videos. With AI integration, this platform can automate your editing tasks.
Free Download For Win 7 or later(64-bit)
Free Download For macOS 10.14 or later
Step By Step Guide to Make Slow Motion Videos in Filmora
Unlike Final Cut Pro’s slow motion, Wondershare Filmora is more straightforward to operate. Follow the step-by-step guide below to apply slow-motion effects to your video.
Method 1: Uniform Speed
If you want to adjust the speed and retain its high quality, use the uniform speed option. You can access this option by following the stepwise method below. Using the advanced features, you don’t need any other tool to ensure the video’s original worth:
Step 1Import Your Project and Start a New Project
After launching Filmora, head to its “New Project” option from the home screen. You will enter the main editing screen this way. Import your project in the media panel and then drag it to the timeline.

Step 2Explore Uniform Speed and Adjust the Speed
Go to your video in the timeline and right-click on it. Now, explore the “Uniform Speed” option and tap on it to get an editing panel at the right. From that panel, move the “Speed” slider to the right and get a slow-motion video preview. You can see the “Duration” of the video after slowing it down and adjusting it accordingly.

Step 3Use Advanced Features to Ensure Quality of Videos
Move down and toggle the “Reverse Speed” option if required. You can enable the “Maintain Pitch” and “Ripple Edit” options to enhance the video automatically. Lastly, extend the “AI Frame Interpolation” menu using its downward symbol and choose “Optical Flow.” It will ensure that the video will remain slow with high quality.

Method 2: Speed Ramping
This method aims to bring smooth transitions in slow-motion videos. Instead of an abrupt change, a gradual increase in speed can impose a professional look. So, there are the steps to access this feature and get a preview of smooth playback.
Step 1Discover the Speed Ramping Feature
Access the Speed Ramping option next to the “Uniform Speed” in the right-side editing panel. Alternatively, you can right-click on the video and look for the “Speed Ramping” option from the list.

Step 2Pick a Template for Speed Ramping or Customize It
From the speed ramping section, you can choose any template from 6 options. Also, users can pick the “Customize” option to adjust the speed ramping as desired.

Step 3Use the Render Preview Option for Smooth Playback
To get a high-quality preview of your videos, look for Render Preview. In this regard, go to the top toolbar of the timeline section on the right side. Click the “Render Preview” icon next to the “Copilot Editor.” Wait for a while and get a smooth playback of your slow-motion video.

Integral Features of Filmora
Slowing down videos is easier than slow-mo Final Cut Pro. Filmora automates the process with an optical flow, ensuring the project’s high quality with one click. Without any wait, learn more about some top-rated features in the given section.
1. AI Thumbnail Creator
The AI Thumbnail Creator of Filmora makes thumbnail creation a matter of seconds. The tool is a treasure for YouTubers as it creates appealing thumbnails to attract viewers. It works with machine learning algorithms to detect the 3 best shots out of your video for thumbnail. Besides, there are over 58 thumbnail templates that can be customized after picking the right one.
2. AI Copilot Editing
AI Copilot is your personal assistant who guides you through everything related to Filmora. You can ask about any editing queries, and the AI will tell you the whole procedure within a second. It will also provide you with navigation towards the right feature. The tool is a big help for beginners; it makes using Filmora much faster and easier.
3. Motion Tracking
If you love giving an artistic touch to your videos, then motion tracking is exactly what you need. This feature automatically tracks the object throughout the video. You can add graphics, stickers, or even blur an object in the video. Furthermore, it allows you to add text with the tracked objects, like a name title with a running athlete.
4. Auto Reframe
With the help of the Auto Reframe feature, you can use one video on all social media platforms. The tool reframes your video in such a way that the main object doesn’t get removed. AI allows you to turn your landscape video into a vertical with a 19:6 aspect ratio. It saves you time and the trouble of creating different videos for every platform.
Conclusion
Slow-motion videos have become a trend due to social media, but they have been an essential film factor forever. Because of the rising demand for this effect, developers added the feature to their software. Many apps are developed to provide a slow-motion effect, which makes it tricky to choose one.
This article addresses your problem by showing you the use of final cut slow-motion. You have discovered a much simpler, faster, and effective platform, Wondershare Filmora. With proven statements in this article, it’s been easier to try Filmora and explore it fully instantly.
Make A Slow Motion Video Make A Slow Motion Video More Features
Part 1: What Makes a Perfect Slow-Motion Video?
An ideal FCP slow-motion video requires careful attention to technical details and aesthetics. Below are some essential things to think about bringing perfection in slow-motion videos:
- Resolution: A slow-motion video with visual appeal and a high resolution is crucial. This is especially vital if you intend to crop or zoom in on the video while editing.
- Storytelling: Make sure the slow-motion clip supports the idea you’re attempting to portray. Your scenes will have more impact if you tell them with a thoughtful narrative.
- Editing: Try different speeds when editing your clip to achieve the best impact. Consider including sound effects or music to accompany the slow-motion images.
- Timing: Select the appropriate times to record in slow motion. You shouldn’t slow down your entire video. Instead, you can apply the effect to draw attention to acts or feelings.
- Frame Rate: Slow-motion videos are usually shot at a greater frame rate. Frame rates of 60, 120, 240, or even higher are common as they make the video look smoother.
- Shutter Speed: For precise and sharp results, use a fast shutter speed camera. This lessens the likelihood of motion blur in every slow-motion frame.
Part 2: Learning All Essential Techniques to Perform Slow Motion in Final Cut Pro X
Apple created Final Cut Pro , and it is only accessible to macOS users. Professional video editors can utilize the software’s array of capabilities. The tool offers incredible video editing functions. Its features are tailored to handle high-resolution video material. The tool has an AI object tracker that detects faces and objects. Its cinematic mode helps you create professional videos.
Final cut slow motion gives a dramatic and intense effect to your videos. You can create an entirely different video with the power of its editing features. Slow-mo Final Cut Pro gives high-resolution results. Follow the steps below to use this tool for slow-motion effects. However, you can choose any method that seems suitable and convenient to you:
Method 1
Import your video into the app and drag it into the timeline. Click on the video and select the “Speed Meter” icon from the timeline. If you want to access the retime menu directly, use the “Command+R” command. Now, select the “Slow” option, and from here, you can select the slow speed percentage at which you want your clip.
Method 2
Bring your video into the timeline and click on it. Select the “Speed Meter” icon; now, choose the “Custom” option. You can access customized settings directly using the “Control+Option+R” command to apply FCPX slow motion. Once you have opened the customization menu, manually set the speed rate and duration to how much you want.
Method 3
Drag the timeline cursor to where you want to make a speed change, select “Speed Meter,” and hit “Blade Speed” to create a cut and separate the clip. Make as many cuts as you want to, depending on how many speed changes you require. Now click on the clip whose speed you want changed and select “Custom” from the “Speed Meter” icon. Customize your clips’ speed rate and duration and save the video once you’re done.
Part 3: Wondershare Filmora: A Multi-Purpose Solution to Making Effective Slow-Motion Videos
Final Cut Pro can be difficult for beginners to understand. The tool has a variety of tutorials available online, but it’s still hard for many users to follow them. In this case, Wondershare Filmora is a great option for slow motion and other effects. It is an excellent alternative to final cut slow motion. Filmora offers many more wonderful features that will surely amaze you.
It can assist you in generating engaging content despite just cutting, trimming, and editing videos. With AI integration, this platform can automate your editing tasks.
Free Download For Win 7 or later(64-bit)
Free Download For macOS 10.14 or later
Step By Step Guide to Make Slow Motion Videos in Filmora
Unlike Final Cut Pro’s slow motion, Wondershare Filmora is more straightforward to operate. Follow the step-by-step guide below to apply slow-motion effects to your video.
Method 1: Uniform Speed
If you want to adjust the speed and retain its high quality, use the uniform speed option. You can access this option by following the stepwise method below. Using the advanced features, you don’t need any other tool to ensure the video’s original worth:
Step 1Import Your Project and Start a New Project
After launching Filmora, head to its “New Project” option from the home screen. You will enter the main editing screen this way. Import your project in the media panel and then drag it to the timeline.
Step 2Explore Uniform Speed and Adjust the Speed
Go to your video in the timeline and right-click on it. Now, explore the “Uniform Speed” option and tap on it to get an editing panel at the right. From that panel, move the “Speed” slider to the right and get a slow-motion video preview. You can see the “Duration” of the video after slowing it down and adjusting it accordingly.
Step 3Use Advanced Features to Ensure Quality of Videos
Move down and toggle the “Reverse Speed” option if required. You can enable the “Maintain Pitch” and “Ripple Edit” options to enhance the video automatically. Lastly, extend the “AI Frame Interpolation” menu using its downward symbol and choose “Optical Flow.” It will ensure that the video will remain slow with high quality.
Method 2: Speed Ramping
This method aims to bring smooth transitions in slow-motion videos. Instead of an abrupt change, a gradual increase in speed can impose a professional look. So, there are the steps to access this feature and get a preview of smooth playback.
Step 1Discover the Speed Ramping Feature
Access the Speed Ramping option next to the “Uniform Speed” in the right-side editing panel. Alternatively, you can right-click on the video and look for the “Speed Ramping” option from the list.
Step 2Pick a Template for Speed Ramping or Customize It
From the speed ramping section, you can choose any template from 6 options. Also, users can pick the “Customize” option to adjust the speed ramping as desired.
Step 3Use the Render Preview Option for Smooth Playback
To get a high-quality preview of your videos, look for Render Preview. In this regard, go to the top toolbar of the timeline section on the right side. Click the “Render Preview” icon next to the “Copilot Editor.” Wait for a while and get a smooth playback of your slow-motion video.
Integral Features of Filmora
Slowing down videos is easier than slow-mo Final Cut Pro. Filmora automates the process with an optical flow, ensuring the project’s high quality with one click. Without any wait, learn more about some top-rated features in the given section.
1. AI Thumbnail Creator
The AI Thumbnail Creator of Filmora makes thumbnail creation a matter of seconds. The tool is a treasure for YouTubers as it creates appealing thumbnails to attract viewers. It works with machine learning algorithms to detect the 3 best shots out of your video for thumbnail. Besides, there are over 58 thumbnail templates that can be customized after picking the right one.
2. AI Copilot Editing
AI Copilot is your personal assistant who guides you through everything related to Filmora. You can ask about any editing queries, and the AI will tell you the whole procedure within a second. It will also provide you with navigation towards the right feature. The tool is a big help for beginners; it makes using Filmora much faster and easier.
3. Motion Tracking
If you love giving an artistic touch to your videos, then motion tracking is exactly what you need. This feature automatically tracks the object throughout the video. You can add graphics, stickers, or even blur an object in the video. Furthermore, it allows you to add text with the tracked objects, like a name title with a running athlete.
4. Auto Reframe
With the help of the Auto Reframe feature, you can use one video on all social media platforms. The tool reframes your video in such a way that the main object doesn’t get removed. AI allows you to turn your landscape video into a vertical with a 19:6 aspect ratio. It saves you time and the trouble of creating different videos for every platform.
Conclusion
Slow-motion videos have become a trend due to social media, but they have been an essential film factor forever. Because of the rising demand for this effect, developers added the feature to their software. Many apps are developed to provide a slow-motion effect, which makes it tricky to choose one.
This article addresses your problem by showing you the use of final cut slow-motion. You have discovered a much simpler, faster, and effective platform, Wondershare Filmora. With proven statements in this article, it’s been easier to try Filmora and explore it fully instantly.
Also read:
- New Know How You Can Get some Cool Discord Animated Icons Through some Simple Steps. Presenting the Latest Tool to Get Animated PFP and Logos Instantly for Discord
- New Some Effective Slow Motion Video Editors You Can Try for 2024
- In 2024, S-Log Is a Gamma Curve Optimized for Digital Cameras to Maximize the Image Sensors Performance. Although These Videos May Look Flat and Washed Out, They Contain Lots of Color Information
- New In 2024, Best PDF to GIF Converters
- New In 2024, REVIEW Whats Best 10 Software to Make AI Upscaling Video
- 5 Excellent Tools To Convert Video to 60 FPS for 2024
- New 2 Effective Ways to Easily Convert VTT to SRT
- New How to Change Quicktime Player Speed on Mac?
- Updated Do You Wish to Create High-Quality Videos and Experience Effective Videos with Editing? No Problem at All because the Keyboard Shortcuts Listed Here Will Assist You
- 2024 Approved Premiere Pro Text Effects Beginner Guide
- How to Convert a GIF to a Video for Instagram for 2024
- Do You Wish to Design the Perfect Slow-Motion Video on Your Smartphone? Learn some Top-Rated Free Slow-Mo Apps for Android and iOS Users in This Article for 2024
- Updated Best 5 Tools to Help You Know More Freeze-Frame Video Editing Skills
- New Frame Rates, Speed, and Wondershare Filmora
- New How to Record Shots and Edit Them Using Wonderware Filmora to Create the Super Jump Effect? A Complete Guide for Beginners
- In 2024, Best 10 Fun Discord Bots You Need
- New 10 Best Free Spanish Text To Speech Converter Websites for 2024
- How to Apply Video Filters
- 2024 Approved Looking for the Steps to Add Transitions Effects in Premiere Pro? Here Are the Steps to Add and Edit Transitions in Premiere Pro and an Alternative Way to Video Transitions
- New 2024 Approved How to Denoise in Final Cut Pro – Reduce Video and Audio Noise
- New In 2024, How To Create A YouTube Intro
- Updated AI Has Influenced All Video Editors to Speed up Editing. This Article Discusses the Significance of AI Slow Motion and the Tools that Offer It
- Updated How to Make Loop Video in PowerPoint for 2024
- 2024 Approved Before & After Editing Trick | Wondershare Filmora Tutorial
- Updated 2 Methods to Crop a Video Using After Effects
- Updated In 2024, Clone Yourself in Videos with Filmora
- Updated In 2024, A Guide to Use Distortion Effect in Premeiere Pro
- 2 Easy Methods | How To Zoom In On TikTok Videos?
- How to Create Emoji on Mac That Take Less Than 10 Mins for 2024
- Updated Learn About Splice Video Online and Its Advantages. Also, Check Out the Best Online Apps for Splice Editing
- Updated How to Windows Online Movie Maker Complete Guide
- Updated Change Aspect Ratio of Video for 2024
- 2024 Approved Let Us Help You with Something that You Might Not Know. Have You Ever Worked with MOV File Format Before? Or Do You Know What that Is? Lets Talk About It
- New In 2024, How to Add Text Effects in Adobe Premiere Pro?
- New Step by Step to Cut Videos in Adobe Premiere Pro
- Updated In 2024, Using Track Matte and Tracking in Adobe After Effects Reviewing All Possibilities
- New Best Way to Freeze-Frame in Final Cut Pro for 2024
- 2024 Approved Tips That Show Anybody How To Create Youtube Slideshow – Guaranteed
- 2024 Approved How To Fade Audio In Kinemaster
- Level Up Videos By Applying Keyframe with Filmora
- New In 2024, A Guide to Use Distortion Effect in Premeiere Pro
- New Some Facts That Few People Know on How to Make Transparent Background in Canva
- New How to Make a Smooth Speed Ramping in Premiere Pro, In 2024
- In 2024, In This Article, You Will Learn About Splitting the Video Into the Frames in FFmpeg and Mentioning the Easy Option for Doing the Same Task in a Few Seconds by Wondershare Filmora
- Updated Best Method to Split Video Into Parts Online for 2024
- In 2024, Ways to trade pokemon go from far away On Nokia G22? | Dr.fone
- In 2024, Bypassing Google Account With vnROM Bypass For Samsung Galaxy A05s
- Thinking About Changing Your Netflix Region Without a VPN On Xiaomi Mix Fold 3? | Dr.fone
- In 2024, Double Location Dongle All to Know About Apple iPhone 12 Pro/iPad GPS Spoofing | Dr.fone
- How to Find iSpoofer Pro Activation Key On Vivo Y100i? | Dr.fone
- In 2024, Unlock Apple iPhone 8 With Forgotten Passcode Different Methods You Can Try | Dr.fone
- Easy Guide to Asus ROG Phone 7 FRP Bypass With Best Methods
- Unlock Infinix Hot 40i Phone Password Without Factory Reset Full Guide Here
- How to Turn Off Google Location to Stop Tracking You on Realme GT 5 | Dr.fone
- In 2024, 5 Quick Methods to Bypass Honor X9a FRP
- How to Change Spotify Location After Moving to Another Country On Samsung Galaxy Z Flip 5 | Dr.fone
- In 2024, Guide to Mirror Your Nubia Red Magic 8S Pro+ to Other Android devices | Dr.fone
- In 2024, 5 Ways to Transfer Music from Motorola Moto G14 to Other Android Devices Easily | Dr.fone
- Best Ways on How to Unlock/Bypass/Swipe/Remove Infinix Note 30 5G Fingerprint Lock
- How to Unlock Vivo Bootloader Easily
- How do I reset my Honor 80 Pro Straight Screen Edition Phone without technical knowledge? | Dr.fone
- Does Motorola Moto G14 Have Find My Friends? | Dr.fone
- How To Transfer Data From Apple iPhone 15 Pro To Other iPhone 11 Pro Max devices? | Dr.fone
- Recommended Best Applications for Mirroring Your Oppo Reno 11 5G Screen | Dr.fone
- Title: New In 2024, How To Create a Polaroid Collage?
- Author: Chloe
- Created at : 2024-04-24 07:08:34
- Updated at : 2024-04-25 07:08:34
- Link: https://ai-editing-video.techidaily.com/new-in-2024-how-to-create-a-polaroid-collage/
- License: This work is licensed under CC BY-NC-SA 4.0.
