

New In 2024, How to Loop Videos on Android Phones
How to Loop Videos on Android Phones
Looping video is a great way to keep your audience engaged, and it can help you stand out from the crowd. The best part about looping video is that it doesn’t require any special equipment or software, so you don’t have to spend money or time learning how to do it! You can use looped clips as part of a larger advertisement campaign by repeating the same content.
Looping a video on Android is a great way to watch your favorite shows or movies without having to go through the hassle of downloading each episode or movie. You can also use it to share videos with others, which can be perfect for when you want to show off your new movie collection but don’t want to bother downloading it on your phone.
Looping a video on Android can be helpful for several reasons. First, it’s just plain fun to watch a video over and over again! Your phone doesn’t have to work as hard to keep the video playing. This means that your battery life will last longer and you’ll be able to use your phone more often without worrying about it running out of battery life quickly.
Part 1: Steps to Loop a Video on Android
Looping videos can also come in handy when trying to find something specific in a series of videos. For example, if you want to see how long it takes before someone gets hit by a car while crossing the street, then looping through the first few seconds of each clip might help find exactly what you’re looking for!
Loop a video on android is quite simple and easy. You not only can loop a video but also customize it according to your choice. Let’s take an example if you install a reverse or loop app on your mobile phone. Firstly, we install an app whose name is Boomerate reverse or loop app.
Step1 Open the app and record or select the video from the gallery
You can install it from the play-store after installation opens the app. You can record a live video by clicking on the white circle or selecting any media from your gallery. These apps allow you to create short video loops that play over and over again. They’re perfect for setting up as a screensaver or for use as a fun way to show off your favorite photos.

Step2 Crop or select the duration of the video
After selecting the video, you can trim your video or select the duration of your video. Suppose you have a video of 30 seconds so you can also make that video of 1 minute.

Step3 Select the loop option
Several options appear below where you can edit effects to your video or loop your video without any interruption. You can loop your video 3 to 4 times or so on.

Step4 Save the video to the gallery
After editing the video click on the save button in the top left corner. To save the video to your phone, you can use the Save button on the video player or the Save button on the phone’s media player. You can easily access and watch your videos anytime you want.

One of the great things about Android is that you can use it to record looping videos. This can be helpful if you want to create a video that you can share with others or use as a background on your device. If you have a lot of videos that you want to keep on your phone, then you can use loop video to help you save space.
Part 2: How to Edit Time-Lapse Video on a Computer
There are a few things to keep in mind when creating a time-lapse video on a computer. First, make sure the video resolution is high enough to create a good image. Second, make sure the video is smooth and free from any choppy or jittery movements. Finally, make sure the video is timed correctly so that the scenes move in smooth, chronological order.
Here’s how you can make a time-lapse video on your computer:
Step1 Install a program like Final Cut Pro or Filmora. These programs allow you to set up scenes and transitions in advance so that when you start filming, everything is ready to go.
Step2 Get started by choosing a period and location this will help you decide what kind of scenery will make sense for your scene. The longer the period, the more important it is to pick one that has a lot of natural light. If there are no natural light sources available, consider shooting on an overcast day or at night instead.
Step3 Next, choose what type of camera angle works best for showing off your subject matter; this could be static shots or moving ones that mimic motion through time or space. Also, consider how far away from your subject matter you want viewers to see them from before deciding on which angle works best for showing both sides equally well without making either side too large.
Benefits of editing time-lapse on computer
Time-lapse videos are a great way to capture incredible footage of your life with minimal effort. You can set the speed of your camera, and then sit back and watch as it moves through time in real-time.
You can play with the speed of the camera to get just the right look. You might find that you want it to go faster or slower, or even stop altogether so that you can get a good shot of something specific in your life (like the chirping of birds or water droplets).
Editing time-lapses on your computer allows you to zoom in and out at will you don’t have to worry about adjusting the zoom on your camera when you’re filming something out of frame, which means less work for you!
Time-lapses are great for making movies that go from beginning to end you can make one movie that shows how you spend each day from sunrise until sunset or one where every hour is its scene. This way, people who watch your videos will see exactly what they need without having to listen over and over again about all things related to everyday life (which would be boring!).
Filmora editing software:
Filmora is the best editing software for video. We can help you edit your videos in a way that will make them look professional and polished. We provide an easy-to-use interface that makes it simple for any level of user to edit their videos. The interface is clean and intuitive, making it easy for even beginner users to learn how to use the software.
Filmora is designed around simplicity, so you don’t have to worry about being overwhelmed by all the features available on other editing software. You can quickly find what you’re looking for by searching through our library of over 50 000 videos or by browsing through our library of categories such as music videos, TV commercials, wedding videos, movie trailers, and much more!
Steps for editing video on Filmora:
You can use Filmora on your desktop or laptop, which makes it easy for people who want to edit their videos in the comfort of their home but don’t want to spend an arm and a leg on an expensive computer system. If you’re looking for a great way to start editing videos, look no further than Filmora  For Win 7 or later(64-bit)
Free Download For macOS 10.14 or later
Step1 Download the Filmora software
Install Filmora from its official website and open it. Click on create a new project and then start doing your editing.

Step2 Select a video from its location
Click on the plus symbol and select the specific video you want to edit. Or you just simply drag and drop the video into the software.

Step3 Put the video on the timeline
After selecting the video place it on a timeline or drop it on the timeline. If you have multiple clips then place them in a sequence.

Step4 Customize the video
You can add different effects to your video. You can select a title page according to your choice or select any transition.

Step5 Set duration and export it
Set the duration of your video, you can also trim your video or set the time of each clip. Lastly, export the video to your desktop.
Conclusion
The use of looping video on android is a trend that works for pretty much every type of app, from gaming to streaming video to social apps and beyond. It offers another level of engagement for users, as well as something more cinematic and exciting. Furthermore, it offers an easy way to improve your app’s functionality.
After making a loop video, you must require some editing tools. But not need to worry about it, Filmora is the best editing software for your needs. First, it’s easy to use. It has a lot of features that make it so simple to get started and make you look like an expert. You can simply install it and use it, with no need for any registration.
Free Download For macOS 10.14 or later
Step1 Download the Filmora software
Install Filmora from its official website and open it. Click on create a new project and then start doing your editing.
Step2 Select a video from its location
Click on the plus symbol and select the specific video you want to edit. Or you just simply drag and drop the video into the software.
Step3 Put the video on the timeline
After selecting the video place it on a timeline or drop it on the timeline. If you have multiple clips then place them in a sequence.
Step4 Customize the video
You can add different effects to your video. You can select a title page according to your choice or select any transition.
Step5 Set duration and export it
Set the duration of your video, you can also trim your video or set the time of each clip. Lastly, export the video to your desktop.
Conclusion
The use of looping video on android is a trend that works for pretty much every type of app, from gaming to streaming video to social apps and beyond. It offers another level of engagement for users, as well as something more cinematic and exciting. Furthermore, it offers an easy way to improve your app’s functionality.
After making a loop video, you must require some editing tools. But not need to worry about it, Filmora is the best editing software for your needs. First, it’s easy to use. It has a lot of features that make it so simple to get started and make you look like an expert. You can simply install it and use it, with no need for any registration.
The Ultimate Guide to Countdown Animation in Videos
Many online marketers find that the animated countdown timer is the perfect way to bring a visual element to their videos while maintaining the quality and effectiveness of the video itself.
There are many ways to show a countdown timer on videos using animated GIFs. But they can be hard to implement or could cost a lot of money. You can use some free services, but they are limited in terms of features.
But not to worry, this post will go through a detailed process of creating an animated timer with 3 different methods. Before that, let’s discuss the benefits of using a timer for videos.
- Method 1: Make a Countdown Animation with a Professional Video Editing Software
- Method 2: Generate the timer with Free Online Countdown Timer Video Generators
- Method 3: Make a Countdown Timer with a Graphic Design Platform
What are the benefits of using a countdown timer for videos/live streams?
Countdowns are a great way to get your message across and get your viewers excited about your product or service. A countdown timer provides a very simple visual cue to help motivate yourself and your audience to start watching the video.
It also works well with vlogs and YouTube, seamlessly transitioning from one part of your video to the next. This works best when your video isn’t about the product itself (but rather a review, a demo, or something else that lends itself well to a countdown).
As you can see, the Vlogger uses a countdown timer at the beginning of his video. Vlogger uses a countdown timer to make it appear as if the time is running out because it adds urgency and suspense. As a viewer, you’ll want to hurry up and watch this video, so you don’t miss out on anything.
Let’s now dive deep into methods of creating countdown animation for videos.
Method 1: Make a Countdown Animation with a Professional Video Editing Software
The most common trend today is video content creation, and it’s everywhere. Videos are not only entertaining, but they have a significant impact on audience retention.
With a video editor, you can create compelling content that will entice your viewers to watch the whole thing. Moreover, it can also help you get started by adding captions, transitions, effects, etc.
Free Download For Win 7 or later(64-bit)
Free Download For macOS 10.14 or later
If you’re ready to make your next project more engaging and interactive, you can try the best video editing software, Wondershare Filmora !

Wondershare Filmora is the industry standard when it comes to editing video. The video editing software industry is filled with features that promise to be faster, smarter, and easier to use than others.
Moreover, Wondershare has Filmstock effects that have revolutionized the world of video creators.
Filmstock is a collection of videos ready to be used with Filmora that contains more than 1,000 free stock footage clips of various scenes and locations, plus video effects, transitions, and titles, to make creating professional-quality videos faster and easier.
Let’s see some of its features that help us make animation countdown timers easily.
- Rich effects for you to choose customizing countdown animation at ease.
- You’re not stuck with traditional slow motion in your videos; you can add dynamism and energy to your videos with smooth animations.
- It has various countdown animation templates simplify the whole process, just drag-and-drop, everything gets done.
How to make a countdown animation with Filmora
You’re looking for an animated countdown timer for your website or your very first YouTube video, but you want one that stands out. You don’t want your visitors to think it’s generic or boring, so you’re thinking about how to make your countdown timer more interesting.
That’s where Filmora comes in. It’s an amazing tool that makes it easy to create countdown animations on websites or videos for almost any purpose. Let’s look at how to create your own cool, creative countdown timers using Filmora.
Step1Open Filmora and import the background video file from the media section.

Step2After importing the video, go to elements options from the top tab.

Step3After choosing elements, you’ll see the countdown tab on your left. Click on the countdown and choose any animation. You can adjust the animation duration, size, and audio.

Step4Adjust the animation duration according to the background video, and finally, export your animated countdown timer.

Pros and Cons of using Video Editing Software to make a countdown animation
Pros
- You can save any countdown effects project as a project to be used in future videos.
- You can create a vision of your brand concept in your way.
- Free templates are available according to your brand and target audience.
- More stable.
Cons
- Standard out-of-the-box video editing software isn’t enough to create a professional-quality video.
Method 2: Generate the timer with Free Online Countdown Timer Video Generators
If you’re trying to catch your audience’s attention by giving them a reason to ‘countdown’ to something, then you’ll want to use a countdown timer with some great free online countdown videos.
There are many countdown timer websites like;Biteable ,Kapwing ,Movavi ,and MakeWebVideo . But we’ve rounded up the best countdown video generator site you’ll ever see:
FlexClip

FlexClip is a powerful yet easy-to-use online video editor. Its music library is versatile and high-quality. It lets you pick and add favorite tracks without infringing worries. Apply interesting editing to make your videos look better by adding transitions, filters, text, and more.
FlexClip’s biggest advantage is its extensive amount of free media assets. Whether you’re a master or rookie with FlexClip, you’re capable of producing excellent videos with music. You can be a video guru or a video beginner. You’re capable of producing awesome videos with great sound using FlexClip.
Key Features:
- Provides a complete set of video-making processes.
- A diverse range of royalty-free music selection
- Loads of handy editing tools
- Thousands of ready-made templates
- Multiple advanced features like adding text, emoji, effects, and more
How to make a countdown animation with FlexClip
The FlexClip countdown creator is a leading video editor with many powerful features. To make your countdown video, click the Create a Video button below.
Step1Set Your Countdown Video Background
Set your timer to how long you want your message to start your countdown. Usually, it’s 10 seconds.
Then add scenes and adjust the duration of scenes to make them all length. You can use the background color to make it more appealing to your audience.

Step2Highlight Your Countdown with Animated Elements
Using the amazing elements, you can make your countdown interactive and much more fun. Just go to the sidebar and switch to the Elements options. Apply the elements you want, then customize them on size, position, and color.

Step3Add the Number to Your Countdown
Now, add the numbers for the countdown, e.g., if you want a 10-second countdown, type in the number “10”. You can pick a basic text effect and manually enter the number.
After you’ve created the number, go to the timeline and control how long the number will appear and when it will disappear.

Step4Add Music or Sound Effects to Your Countdown Video
FlexClip lets you upload your audio files from a local folder, or you can select one from FlexClip’s library. Once you’re done adding the countdown music, you can trim the duration, set it to start and end at any time, and use the fade-in/out effect to make the music match your countdown. Plus, you can also adjust the volume to make the music softer.

Step5Preview and Export Your Countdown Video
You can preview it to see how the countdown video will look in the end, finally, hit export, and you’re done!
Method 3: Make a Countdown Timer with a Graphic Design Platform
Today’s graphic design platforms give designers more options than ever before, but many designers struggle to make the most of these resources. Let us share some tips and tricks on designing a countdown timer using the tools available through Canva, a graphic design platform.
Canva

Many types of graphic design software are available, and Canva is one of the best. While its critics may disagree, Canva is an undeniable tool to help millions of business owners and marketers improve their social media graphics and redesign their brand image without needing to learn graphic design.
Key Features:
- Drag and drop feature
- Free templates
- Background Removal Tool
- Canva Brand Kit
- Magic Resizing
How to make a countdown animation with Canva
Canva offers a range of great-looking countdown templates that’ll help you create one in just a few minutes. And if you need a simple countdown animation, you can download one of their free templates. Let’s make it from scratch:
Step1Select The Background
With Canva, you get a wide range of free backgrounds. Click on the button labeled “Search.” Now choose the “light old film” background element and click Add.

Step2Enter Your Text (Number)
Then select the text tab and choose any font style, color, and size.

Step3Animate Text
Next, select the font again, and then, at the top, there’s an option for Text Animation.
Adding text animation to your countdown timer will make it more realistic and match your background better than a straight-up countdown timer.

Step4Edit The Page Timing
Next, click on the “Edit Timing” option. You can set the timer for each page as per your choice 
Step5Duplicate The Page
Now, select the duplicate page option and change the number of duplicate pages from 3 to 2,1, with the same design and formatting.

Step6Export / Download Video
You’re finally done! Click the Download button to export your design.
The background of this photo is not a static image, so you cannot select the JPG, PNG, or SVG. You must choose an MP4 video or a GIF when creating an animation.

Top 10 animated countdown effects to make your video like a Pro
Animated countdown effects are a great way to add some “pizzazz” to a simple video. They look awesome and are extremely effective in creating a memorable video. When used well, they can add some excitement to a boring video. We’ll go over the top 10 animated countdown effects from Filmstock


How to use these effects in Wondershare Filmora
You can access Filmstock directly from the Filmora application or by visiting the website:
- Create a new project by clicking Filmora Video Editor in the menu.
- Select the audio effects tab, or go to the Audio tab, title tab. You will see the film stock option.
- Click the Visit Filmstock button, and you will be taken to the Filmstock website.

- Log in to Filmstock using your Wondershare account.

- After the download, the new effects will be added to your project in the appropriate section (Audio, Title, Transitions, and Elements). You’ll also be able to preview each effect from this window.

![]()
Note: It is highly recommended to log in to Filmstock and Filmora with the same Wondershare ID.
Final Words
A countdown is a powerful tool to add suspense to your videos. It gives your audience more incentive to watch your video all the way through. Get this article, as it is the ultimate guide to making your countdown animations, plus the best video editing software, Wondershare Filmora.
Wondershare Filmora is an excellent place to be creative and make some terrific countdown timers that can improve your viewers’ overall experience. Use their templates to create a strong and engaging online presence. Your audience won’t be able to resist the mesmerizing, hypnotizing, and enthralling effects of Wondershare Filmora.
Free Download For Win 7 or later(64-bit)
Free Download For macOS 10.14 or later
What are the benefits of using a countdown timer for videos/live streams?
Countdowns are a great way to get your message across and get your viewers excited about your product or service. A countdown timer provides a very simple visual cue to help motivate yourself and your audience to start watching the video.
It also works well with vlogs and YouTube, seamlessly transitioning from one part of your video to the next. This works best when your video isn’t about the product itself (but rather a review, a demo, or something else that lends itself well to a countdown).
As you can see, the Vlogger uses a countdown timer at the beginning of his video. Vlogger uses a countdown timer to make it appear as if the time is running out because it adds urgency and suspense. As a viewer, you’ll want to hurry up and watch this video, so you don’t miss out on anything.
Let’s now dive deep into methods of creating countdown animation for videos.
Method 1: Make a Countdown Animation with a Professional Video Editing Software
The most common trend today is video content creation, and it’s everywhere. Videos are not only entertaining, but they have a significant impact on audience retention.
With a video editor, you can create compelling content that will entice your viewers to watch the whole thing. Moreover, it can also help you get started by adding captions, transitions, effects, etc.
Free Download For Win 7 or later(64-bit)
Free Download For macOS 10.14 or later
If you’re ready to make your next project more engaging and interactive, you can try the best video editing software, Wondershare Filmora !
Wondershare Filmora is the industry standard when it comes to editing video. The video editing software industry is filled with features that promise to be faster, smarter, and easier to use than others.
Moreover, Wondershare has Filmstock effects that have revolutionized the world of video creators.
Filmstock is a collection of videos ready to be used with Filmora that contains more than 1,000 free stock footage clips of various scenes and locations, plus video effects, transitions, and titles, to make creating professional-quality videos faster and easier.
Let’s see some of its features that help us make animation countdown timers easily.
- Rich effects for you to choose customizing countdown animation at ease.
- You’re not stuck with traditional slow motion in your videos; you can add dynamism and energy to your videos with smooth animations.
- It has various countdown animation templates simplify the whole process, just drag-and-drop, everything gets done.
How to make a countdown animation with Filmora
You’re looking for an animated countdown timer for your website or your very first YouTube video, but you want one that stands out. You don’t want your visitors to think it’s generic or boring, so you’re thinking about how to make your countdown timer more interesting.
That’s where Filmora comes in. It’s an amazing tool that makes it easy to create countdown animations on websites or videos for almost any purpose. Let’s look at how to create your own cool, creative countdown timers using Filmora.
Step1Open Filmora and import the background video file from the media section.
Step2After importing the video, go to elements options from the top tab.
Step3After choosing elements, you’ll see the countdown tab on your left. Click on the countdown and choose any animation. You can adjust the animation duration, size, and audio.
Step4Adjust the animation duration according to the background video, and finally, export your animated countdown timer.
Pros and Cons of using Video Editing Software to make a countdown animation
Pros
- You can save any countdown effects project as a project to be used in future videos.
- You can create a vision of your brand concept in your way.
- Free templates are available according to your brand and target audience.
- More stable.
Cons
- Standard out-of-the-box video editing software isn’t enough to create a professional-quality video.
Method 2: Generate the timer with Free Online Countdown Timer Video Generators
If you’re trying to catch your audience’s attention by giving them a reason to ‘countdown’ to something, then you’ll want to use a countdown timer with some great free online countdown videos.
There are many countdown timer websites like;Biteable ,Kapwing ,Movavi ,and MakeWebVideo . But we’ve rounded up the best countdown video generator site you’ll ever see:
FlexClip
FlexClip is a powerful yet easy-to-use online video editor. Its music library is versatile and high-quality. It lets you pick and add favorite tracks without infringing worries. Apply interesting editing to make your videos look better by adding transitions, filters, text, and more.
FlexClip’s biggest advantage is its extensive amount of free media assets. Whether you’re a master or rookie with FlexClip, you’re capable of producing excellent videos with music. You can be a video guru or a video beginner. You’re capable of producing awesome videos with great sound using FlexClip.
Key Features:
- Provides a complete set of video-making processes.
- A diverse range of royalty-free music selection
- Loads of handy editing tools
- Thousands of ready-made templates
- Multiple advanced features like adding text, emoji, effects, and more
How to make a countdown animation with FlexClip
The FlexClip countdown creator is a leading video editor with many powerful features. To make your countdown video, click the Create a Video button below.
Step1Set Your Countdown Video Background
Set your timer to how long you want your message to start your countdown. Usually, it’s 10 seconds.
Then add scenes and adjust the duration of scenes to make them all length. You can use the background color to make it more appealing to your audience.
Step2Highlight Your Countdown with Animated Elements
Using the amazing elements, you can make your countdown interactive and much more fun. Just go to the sidebar and switch to the Elements options. Apply the elements you want, then customize them on size, position, and color.
Step3Add the Number to Your Countdown
Now, add the numbers for the countdown, e.g., if you want a 10-second countdown, type in the number “10”. You can pick a basic text effect and manually enter the number.
After you’ve created the number, go to the timeline and control how long the number will appear and when it will disappear.
Step4Add Music or Sound Effects to Your Countdown Video
FlexClip lets you upload your audio files from a local folder, or you can select one from FlexClip’s library. Once you’re done adding the countdown music, you can trim the duration, set it to start and end at any time, and use the fade-in/out effect to make the music match your countdown. Plus, you can also adjust the volume to make the music softer.
Step5Preview and Export Your Countdown Video
You can preview it to see how the countdown video will look in the end, finally, hit export, and you’re done!
Method 3: Make a Countdown Timer with a Graphic Design Platform
Today’s graphic design platforms give designers more options than ever before, but many designers struggle to make the most of these resources. Let us share some tips and tricks on designing a countdown timer using the tools available through Canva, a graphic design platform.
Canva
Many types of graphic design software are available, and Canva is one of the best. While its critics may disagree, Canva is an undeniable tool to help millions of business owners and marketers improve their social media graphics and redesign their brand image without needing to learn graphic design.
Key Features:
- Drag and drop feature
- Free templates
- Background Removal Tool
- Canva Brand Kit
- Magic Resizing
How to make a countdown animation with Canva
Canva offers a range of great-looking countdown templates that’ll help you create one in just a few minutes. And if you need a simple countdown animation, you can download one of their free templates. Let’s make it from scratch:
Step1Select The Background
With Canva, you get a wide range of free backgrounds. Click on the button labeled “Search.” Now choose the “light old film” background element and click Add.
Step2Enter Your Text (Number)
Then select the text tab and choose any font style, color, and size.
Step3Animate Text
Next, select the font again, and then, at the top, there’s an option for Text Animation.
Adding text animation to your countdown timer will make it more realistic and match your background better than a straight-up countdown timer.
Step4Edit The Page Timing
Next, click on the “Edit Timing” option. You can set the timer for each page as per your choice
Step5Duplicate The Page
Now, select the duplicate page option and change the number of duplicate pages from 3 to 2,1, with the same design and formatting.
Step6Export / Download Video
You’re finally done! Click the Download button to export your design.
The background of this photo is not a static image, so you cannot select the JPG, PNG, or SVG. You must choose an MP4 video or a GIF when creating an animation.
Top 10 animated countdown effects to make your video like a Pro
Animated countdown effects are a great way to add some “pizzazz” to a simple video. They look awesome and are extremely effective in creating a memorable video. When used well, they can add some excitement to a boring video. We’ll go over the top 10 animated countdown effects from Filmstock
How to use these effects in Wondershare Filmora
You can access Filmstock directly from the Filmora application or by visiting the website:
- Create a new project by clicking Filmora Video Editor in the menu.
- Select the audio effects tab, or go to the Audio tab, title tab. You will see the film stock option.
- Click the Visit Filmstock button, and you will be taken to the Filmstock website.
- Log in to Filmstock using your Wondershare account.
- After the download, the new effects will be added to your project in the appropriate section (Audio, Title, Transitions, and Elements). You’ll also be able to preview each effect from this window.
![]()
Note: It is highly recommended to log in to Filmstock and Filmora with the same Wondershare ID.
Final Words
A countdown is a powerful tool to add suspense to your videos. It gives your audience more incentive to watch your video all the way through. Get this article, as it is the ultimate guide to making your countdown animations, plus the best video editing software, Wondershare Filmora.
Wondershare Filmora is an excellent place to be creative and make some terrific countdown timers that can improve your viewers’ overall experience. Use their templates to create a strong and engaging online presence. Your audience won’t be able to resist the mesmerizing, hypnotizing, and enthralling effects of Wondershare Filmora.
Free Download For Win 7 or later(64-bit)
Free Download For macOS 10.14 or later
How to Add Text Animation Online
Before you can publish your recorded video to your viewers, you need to polish the video so that you can get everyone’s appreciation. This is where the magic of video editing comes into the scene. Editing your video is not just about trimming unnecessary parts and adding transitions and effects. The titles and texts you display on your video play a major role in your video content. In fact, you can create a video based on texts and titles only.
Instead of showing static texts, you should create animated texts and place them in the video wherever appropriate. You do not need to download a video editor on your computer or smartphone to add animated text to your video. You can make text animation online using an online text animation maker. We will illustrate the steps to create animated text with three different online editors.
Part 1. Use Biteable Animated Text
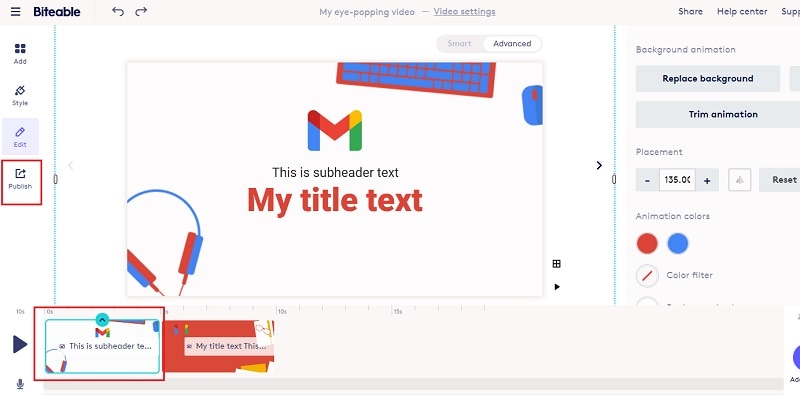
Biteable is a popular online platform where you can create amazing animated text video using Biteable text video maker. You can add animated text to your videos as well as photos. The user interface of Biteable is extremely easy for all users. You have to first create an account for free to get started. There are various templates available to create your animated text video from scratch. Here are the steps to use Biteable online text animation maker to create a video based on animated texts.
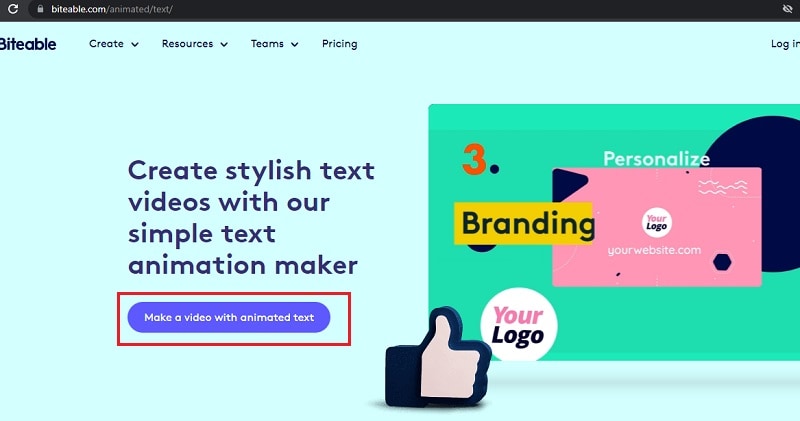
Step1Open your web browser and visit “biteable.com/animated/text”. Click on “Make a video with animated text” button.
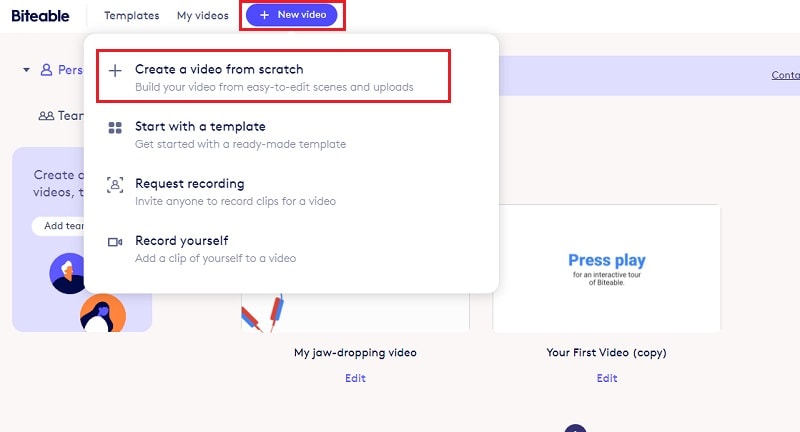
Step2Create an account by following the on-screen instructions. Click on New Video button and select “Create a video from scratch”.
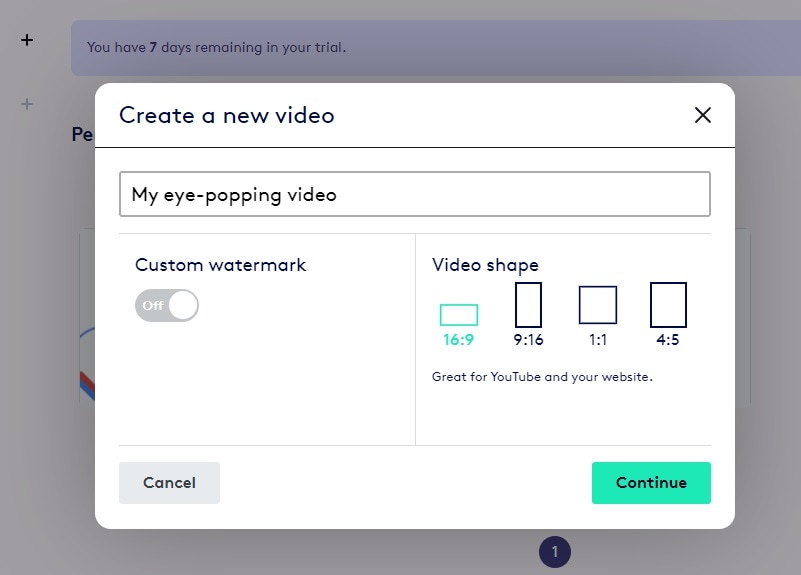
Step3Enter a name for the video and select a video shape as per your preference. Click on Continue button.
Step4Under Titles, select any template and it will be added to the Timeline. Similarly, you can add multiple titles templates, text templates, number templates and likewise. You will see them in the Timeline placed side by side. You can stretch their durations as per your requirements.
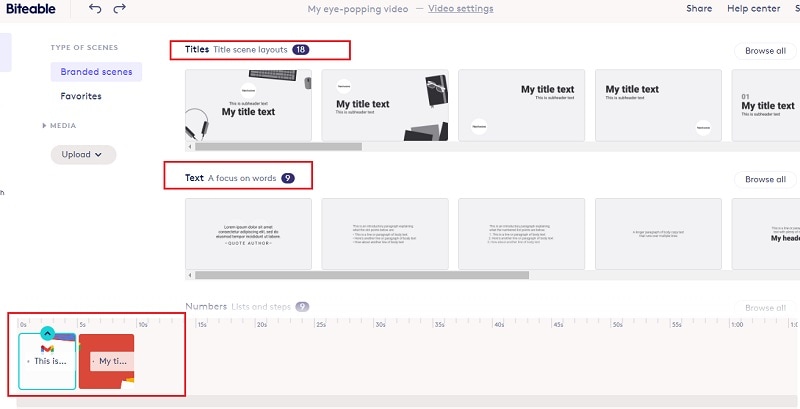
Step5Double-click on each template to edit the text in them and select the text animations as per your preference. Play the video and if you are satisfied, click on Publish button to save the video.
Part 2. Use Motionden Video Maker
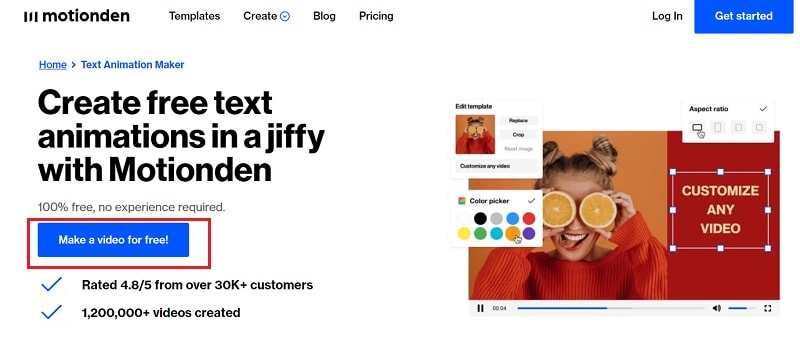
Motionden is yet another powerful text animation maker where you can create free text animations instantly. There are over 1500 templates available to choose from in order to create text videos from scratch. You can choose video templates from any category as per the video theme you want. Besides, you can upload your video or photo and add texts and music as per your preference. Here are the steps to create animated text online using Motionden Video Maker.
Step1Open your web browser and visit “motionden.com/video-maker/text-animation”. Click on “Make a video for free” button.
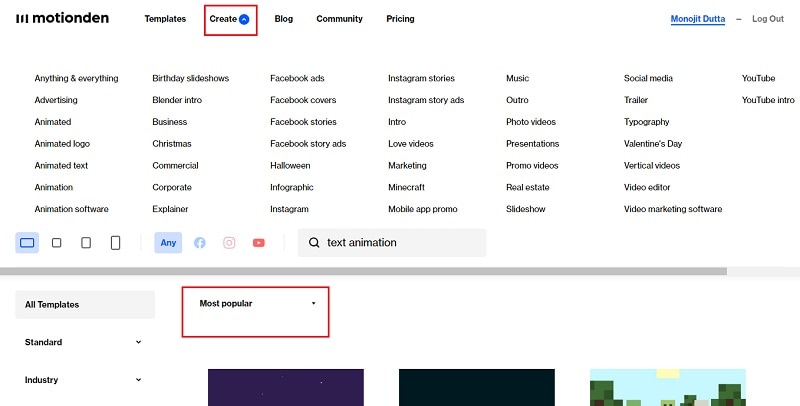
Step2Go to Create menu option and select any category of video templates. You can also check out the popular video templates and select anyone as per your preference.
Step3For the selected category, you need to select the desired video template. Click on Edit Video and you can make changes to the template on the video editor as per your requirements. You need to sign up for free in order to continue and edit the template.
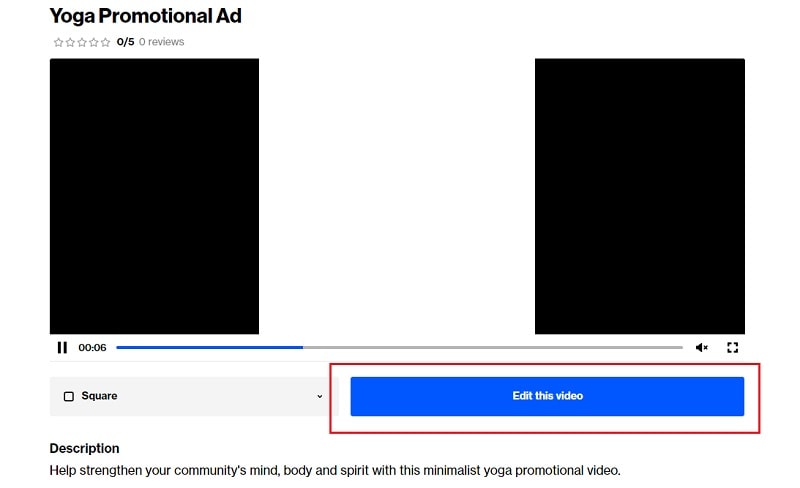
Step4Click on individual scenes and click on texts to customize them. Once the editing is done for each scene, click on Make Video button to build and save the text video.

Part 3. Use Flexclip Text Animation Tool
You can use Flexclip Text Animation Tool to create text video from scratch as well as add text to your recorded video. You should use Biteable and Motionden to create video with text effects only directly using video template while you should use Flexclip to edit your video and add text. You can add text effects to photos and videos and here are the steps to follow.
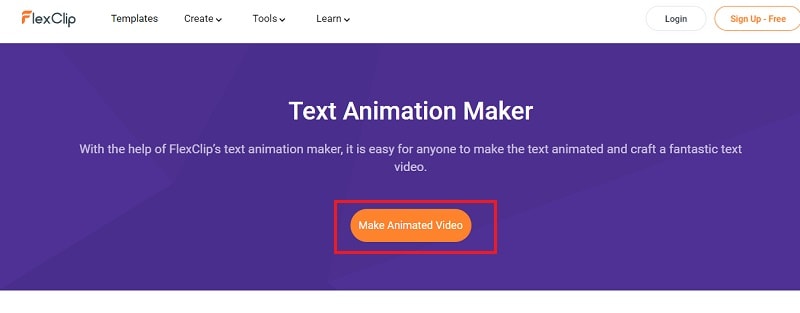
Step1Open web browser and visit “flexclip.com/features/text-animation.html”. Click on Make Animated Video button.
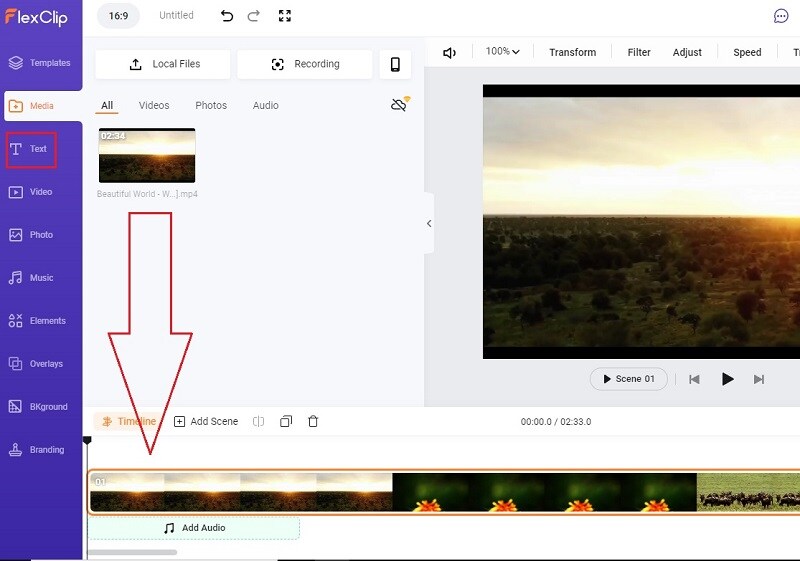
Step2You can choose from the available templates to create video with text from scratch. If you want to add text to your recorded video, go to Media tab. Click on Local Files button and upload your recorded video.

Step3Drag and drop the uploaded video into the Timeline. Thereafter, go to Text tab.
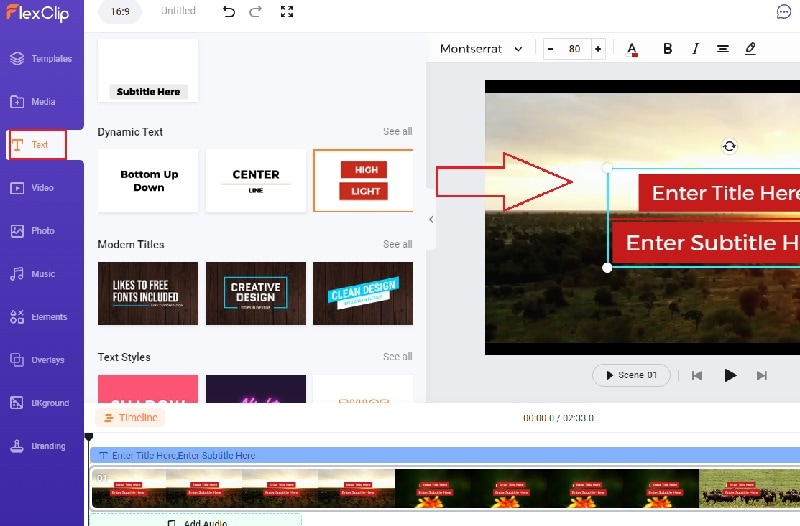
Step4You will see all the different text effects and animations. Place your mouse pointer to preview the animation. Drag and drop the select text template to the video on the Viewer. You can check the Timeline and stretch or compress the text layer as per your requirements.
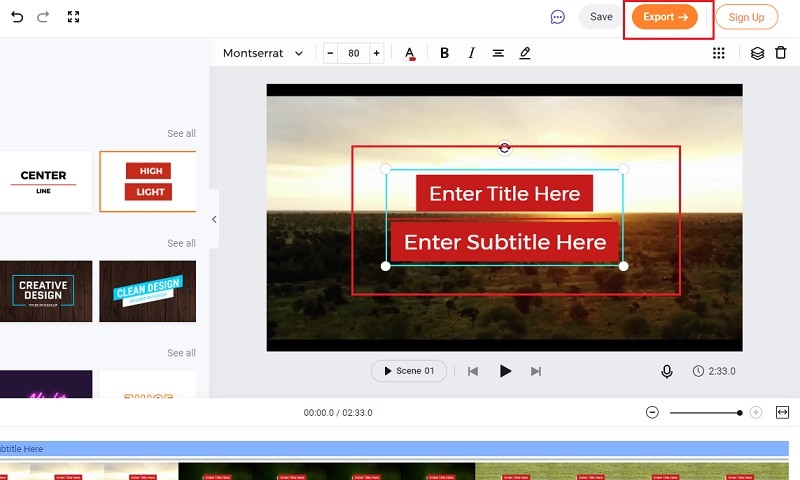
Step5Double-click on the text on Viewer window and customize the text as per your preference. Finally, click on Export button to save the edited video.
Conclusion
You can make video with animated text to make your presentation video eye-catching and attention-grabbing. We have mentioned three different online text animation makers that you can use to create animated text video from scratch by choosing different video templates. You can also edit your recorded video and add animated text wherever you want using Flexclip Text Animation Tool.
Free Download For Win 7 or later(64-bit)
Free Download For macOS 10.14 or later
Splitting Audio From a Video in Sony Vegas [Step by Step]
The Sony Vegas Pro is software for professionally editing videos. There are many tools and effects available for audio and video that you can add respective to your requirements. The stabilization engine is available in Sony Vegas Pro to reduce the movements that you can observe the shaking in the videos. It helps in improving the quality of your content thoroughly. Sony Vegas pro also helps pin the texts or grading of the colours to apply objects in various dimensions.
You can use this software for editing, organizing or viewing the projects that are going on and present on the timeline. Even sharing the small parts of the video is possible. As a user of Sony Vegas Pro, it is a total choice of handling the colouring exposure to maintain the workflow. Here, the main discussion is regarding the split of the audio from the video in the Sony Vegas Pro. There are also some details about the substitute, which is Wondershare Filmora.
How can you separate audio from the video clips in Sony Vegas Pro?
The best features of Sony Vegas Pro help create, edit, trim or even crop the videos. You can use them in making videos worth viewing for your audience. Sony Vegas Pro can make your work on multiple screens at the same time. The most important characteristic is the extraction of the audio from the video.
Step 1: When you have finished the installation of the Sony Vegas Pro on your device, now import the video clip from which you want to extract the audio.

Step 2: Drag and drop your video clip in the editing area. Here, you can easily see the video and audio tracks are all together. Whatever effect you apply, both will show the results.

Step 3: You have to separate the audio from the video files in this step. After selecting the track, whether audio or video, simply press the “U” letter on your keyboard. In this step, keep holding the cursor. It permits you to keep moving the video clips quickly. Now, it is easy to download audio files from this area.
Step 4: The tracks are separate now, so you can move, delete or edit them individually. Definitely, it doesn’t affect the other track.
An easier way to split the audio from the video
Most graphic designers and video editors consider the Sony Vegas Pro as the professional level software for editing purposes. Due to the user interface of advanced level, high pricing and availability only for the Mac users make people look for options as the editing tool and accessible on both devices using Windows and Mac.
Filmora Video Editor is the best consideration among all of the editors. You can also use the Wondershare Filmora in dark mode as well. This feature helps the user edit in his comfort zone without causing any harm to the eyes. In the following steps, you can easily separate the audio from the videos in Wondershare Filmora.
For Win 7 or later (64-bit)
For macOS 10.14 or later
Features
- Simple interface and all the tools are easily available
- Just need a few clicks along the drag and drop to perform the functionalities
- Unlimited sharing of the videos on YouTube, Vimeo and many others
- Splitting of the clips and screen
- Easy to split up the audio from the video
Step 1: After running the Wondershare Filmora, select the ratio of your choice 4:3 or 16:9 for entering in the mode of editing. Click on the “Import” so you can add the photos, video and audio from the folder of your system. After importing the videos, drag and drop in the timeline. As a default, all the files get merged with one another with no gap.

Step 2: Right-click on the video clip from which you want to extract the audio. Select the option of “Detach Audio” from the menu. Instantly, an audio file is visible on the screen, and it is the original one from the source.

Step 3: Now, the audio track gets separated from the video successfully. Wondershare Filmora also offers to add one more audio file. Yes, it is also possible with this software.
Step 4: After separating the audio from the video, it is simple to delete the track, whether it is audio or video that is not in use or want to use. Click on the “Export” option for saving your required audio tracks, or you can even select the “iPod” for playing the audio. You can also save the audio file separately as the new file on your hard drive. After exporting the audio tracks, load the project file again that has the frames for the video and later export the video file.

Whenever you think about the compatibility of editing software with different operating systems, Wondershare Filmora comes to mind as the first choice. All the new features of Wondershare Filmora in its latest version have received positive feedback and reviews. Definitely, it is the actual replacement of the previously used editors such as video editor in Windows or iMovie in Mac.
Wondershare Filmora not only adds the animation but as well offers customization. Adding the keyframes is very easy for the user to change the positions, scale or rotate the clips. The feature of colour matching is also available so you can match the clips from one frame to another. Even the shortcut keys are available for all the commands that bring effective and efficient editing tasks.
Just little guidance and assistance can help you use the Wondershare Filmora as the options are suitable in front of your screen. No more waiting and thinking; start using this most straightforward editor and enjoy all the features of Wondershare Filmora.
Step 2: Drag and drop your video clip in the editing area. Here, you can easily see the video and audio tracks are all together. Whatever effect you apply, both will show the results.
Step 3: You have to separate the audio from the video files in this step. After selecting the track, whether audio or video, simply press the “U” letter on your keyboard. In this step, keep holding the cursor. It permits you to keep moving the video clips quickly. Now, it is easy to download audio files from this area.
Step 4: The tracks are separate now, so you can move, delete or edit them individually. Definitely, it doesn’t affect the other track.
An easier way to split the audio from the video
Most graphic designers and video editors consider the Sony Vegas Pro as the professional level software for editing purposes. Due to the user interface of advanced level, high pricing and availability only for the Mac users make people look for options as the editing tool and accessible on both devices using Windows and Mac.
Filmora Video Editor is the best consideration among all of the editors. You can also use the Wondershare Filmora in dark mode as well. This feature helps the user edit in his comfort zone without causing any harm to the eyes. In the following steps, you can easily separate the audio from the videos in Wondershare Filmora.
For Win 7 or later (64-bit)
For macOS 10.14 or later
Features
- Simple interface and all the tools are easily available
- Just need a few clicks along the drag and drop to perform the functionalities
- Unlimited sharing of the videos on YouTube, Vimeo and many others
- Splitting of the clips and screen
- Easy to split up the audio from the video
Step 1: After running the Wondershare Filmora, select the ratio of your choice 4:3 or 16:9 for entering in the mode of editing. Click on the “Import” so you can add the photos, video and audio from the folder of your system. After importing the videos, drag and drop in the timeline. As a default, all the files get merged with one another with no gap.
Step 2: Right-click on the video clip from which you want to extract the audio. Select the option of “Detach Audio” from the menu. Instantly, an audio file is visible on the screen, and it is the original one from the source.
Step 3: Now, the audio track gets separated from the video successfully. Wondershare Filmora also offers to add one more audio file. Yes, it is also possible with this software.
Step 4: After separating the audio from the video, it is simple to delete the track, whether it is audio or video that is not in use or want to use. Click on the “Export” option for saving your required audio tracks, or you can even select the “iPod” for playing the audio. You can also save the audio file separately as the new file on your hard drive. After exporting the audio tracks, load the project file again that has the frames for the video and later export the video file.
Whenever you think about the compatibility of editing software with different operating systems, Wondershare Filmora comes to mind as the first choice. All the new features of Wondershare Filmora in its latest version have received positive feedback and reviews. Definitely, it is the actual replacement of the previously used editors such as video editor in Windows or iMovie in Mac.
Wondershare Filmora not only adds the animation but as well offers customization. Adding the keyframes is very easy for the user to change the positions, scale or rotate the clips. The feature of colour matching is also available so you can match the clips from one frame to another. Even the shortcut keys are available for all the commands that bring effective and efficient editing tasks.
Just little guidance and assistance can help you use the Wondershare Filmora as the options are suitable in front of your screen. No more waiting and thinking; start using this most straightforward editor and enjoy all the features of Wondershare Filmora.
Also read:
- Updated Do You Know How to Create AI Thumbnails for Videos? This Article Will Mention some of the Best Tools to Generate Attractive Thumbnails for Videos with AI
- New Here You Can Lean About the Different Ways for GIMP Transparent Background PNG Format Files
- Top 8 Augmented Reality Video Games for 2024
- Do You Find Choosing a Good LUT to Color-Correct Your Media Files Difficult? Discover some of the Best Professional LUTs From 3D LUT Creator to Download
- In 2024, All Things About Adding Effects In Kinemaster
- New In 2024, Live Stream on YouTube Using Zoom
- In 2024, Top 10 iPad Slideshow Apps to Create a Slideshow
- New If You Want to Record Video Streams on Windows or Mac Using FFmpeg, Read Our Guide and Learn How to Do This with Easy Step-by-Step Instructions
- Tutorial How To Add Motion Blur in Blender, In 2024
- Updated Are You Looking for a Voice Changer to Make Your Gaming Experience More Fun? Here Is a List of the Top 6 Best Alternatives of Clownfish Voice Changers to Use
- New In 2024, Detailed Tutorial to Crop Video in KineMaster
- In 2024, Here Is a Complete Overview of VSCO Video Editor; the Best Photo-Editing App that Helps You Adjust Your Pictures Right After You Capture Them
- 2024 Approved This Article Talks in Detail About How to Convert Time-Lapse to Normal Video Using Certain Methods on iPhone, Online Tools, and so On. It Further Discusses Converting Time-Lapse Video to Normal on the Computer. Check Out
- New 2024 Approved Best Image (JPG/PNG) to GIF Converters
- 2024 Approved TikTok Slow Zoom | Create Your Slow Zoom TikTok in Minutes
- In 2024, How to Create Discord GIF Avatar in Depth Guide
- Looking for the Best Alternatives of iPad Compatible Slideshow Applications to Design High End Graphic Presentations? Rest Assured, You Have Landed at the Correct Spot
- Updated How to Find a High-Quality Video Marketing Agency for 2024
- How to Turn On/Off Motion Blur in Minecraft, In 2024
- General Information That You Need To Know About MKV Format
- Updated In 2024, Easily Combine Videos and Audios with 5 Simple Online Tools
- New Top 5 Apps To Add Song To Video
- New In 2024, The Best Way to Remove Audio From Your Videos
- Updated In 2024, Easy Ways to Change Aspect Ratio in iMovie?
- New How to Create Cinematic Style Videos for 2024
- Adobe Lightroom Color Grading Tutorial
- New How to Make A Jaw-Dropping Time Lapse Video, In 2024
- New Best 22 Video Editing Tips to Know for 2024
- Updated 2024 Approved Full Guide to Discord Boost
- In 2024, Find Out The Best Dark Moody LUTs During Editing
- New Top 5 Free Online Video Filter Editors
- New Experience Time Differently with The Top Slow-Motion Applications for 2024
- New YouTube Zoom to Fill Is a Great Feature for Viewing Things in Depth. This Article Answers All Questions About Fixing YouTube Zoom to Fill Not Working on Your Device
- ReVisionFX ReelSmart Motion Blur Plugin For Premiere Pro
- Updated How to Use GIMP GREEN SCREEN
- Updated How to Got Free After Effects Templates Slideshow with Simple Trick for 2024
- New Want to Make a Funny Vlog on TikTok? Trying to Find the Right Topic for It? This Article Presents some Impressive Options for Making a Funny Vlog for TikTok
- New In 2024, How to Make a Video Slideshow in iMovie
- New Blender - A Video Editor for Every Professional for 2024
- 2024 Approved How to Create an Alternate Reality Effect
- 3 Methods to Combine 2 or 3 Videos Into 1 for 2024
- Updated 2024 Approved REVIEW Whats Best 10 Software to Make AI Upscaling Video
- Updated In 2024, How to Add a Spooky Shadow Effect
- Updated Top 5 Free Online Video Filter Editors Improve Your Videos with Filters
- Advancements in Game Recording Software A Comprehensive Overview
- Why Vimeo Slideshow Maker Become More and More Popular for 2024
- Updated In 2024, Create Realistic Fire Effects by Filmora
- Whats The Best Laptops For Video Editing
- Updated The Best Peter McKinnon LUTs Recommendation
- In 2024, Samsung Galaxy M34 ADB Format Tool for PC vs. Other Unlocking Tools Which One is the Best?
- How to Transfer Photos from Tecno Spark Go (2023) to New Android? | Dr.fone
- In 2024, Process of Screen Sharing Vivo S17e to PC- Detailed Steps | Dr.fone
- How to Transfer Data from Infinix Note 30 VIP Racing Edition to Any iOS Devices | Dr.fone
- In 2024, How to Track Vivo S18e Location without Installing Software? | Dr.fone
- How to Exit Android Factory Mode On OnePlus 11R? | Dr.fone
- In 2024, 2 Ways to Transfer Text Messages from Poco C65 to iPhone 15/14/13/12/11/X/8/ | Dr.fone
- The Best 20 Motion Graphics Companies & Studios
- In 2024, How can I get more stardust in pokemon go On Poco X6 Pro? | Dr.fone
- How to Find iSpoofer Pro Activation Key On Motorola Razr 40? | Dr.fone
- Which Pokémon can Evolve with a Moon Stone For Vivo Y36? | Dr.fone
- How to Bypass FRP on Google Pixel 8 Pro?
- In 2024, Your Account Has Been Disabled in the App Store and iTunes From Apple iPhone 8?
- In 2024, The Top 5 Android Apps That Use Fingerprint Sensor to Lock Your Apps On Vivo Y77t
- In 2024, How to Transfer Data from Infinix Note 30 5G to Other Android Devices? | Dr.fone
- Title: New In 2024, How to Loop Videos on Android Phones
- Author: Chloe
- Created at : 2024-06-26 06:24:24
- Updated at : 2024-06-27 06:24:24
- Link: https://ai-editing-video.techidaily.com/new-in-2024-how-to-loop-videos-on-android-phones/
- License: This work is licensed under CC BY-NC-SA 4.0.
