
:max_bytes(150000):strip_icc():format(webp)/001_the-16-best-shows-to-watch-on-discovery-plus-right-now-5116795-b17411d87cfd4bd690fda5be50ea188c.jpg)
New In 2024, How to Shoot Cinematic Footage From a Smartphone
How to Shoot Cinematic Footage From a Smartphone
Creating cinematic videos is easy if you have expensive equipment like a film set with high-quality cameras. But many of us can’t afford this, so read this article to get an alternative.
You can use smartphones to record cinematic shots if you don’t have expensive lenses. You’ll learn about filming and editing those shots into Wondershare Filmora to get professional results in the below lines.
But before we get into the filming process, having a general idea about the topic can help a lot. So first, let’s understand what cinematic videos are!
Part 1. What Is a Cinematic Video?
The world of cinema has developed and has high recording quality. A cinematic video is a video that is recorded to look more like a movie. These shots excel in all aspects of a video, such as Color, aspect ratio, and lighting techniques.
Most of the cinematic footage required unique cameras, i.e., IMAX cameras for movies. But these cameras are really costly and only suitable for large-scale production.
With the understanding of cinematic videos, you can now use alternative ways to record a cinematic video without an expensive camera. You can also record a cinematic video using only a smartphone with a few requirements.
Scroll below to learn more about what you need to record a cinematic video!
Part 2. Requirements to Record a Cinematic Video
To record a professional video with cinematic effects, you must have the following equipment in your studio:
1. A Gimbal Stabilizer
When you are recording footage from your smartphone, a significant issue that can disturb your video quality is the shaking of your phone. You may have to record while walking, or it could even be a static shot.
If the phone is held in your hands without support, you will end up with shaky footage. This will eventually ruin your video.
A gimbal stabilizer allows you to stabilize your footage with a handheld stand. Many gimbal stabilizers are available in the market, but for reference, we would be looking at the Q3 Gimbal from Zhiyun.

You can also connect the Gimbal from its app. Scroll below to learn more about the app!
Zhiyun Cami App
Zhiyun Q3 stabilizer also connects with the Zhiyun cami app. This app will allow users to access the filming features more intuitively and comprehensively. You can connect your Gimbal with the app via Bluetooth.

Zhiyun Stabilizer Shooting Modes
There are many modes on different Gimbals, but the Locking and the POV mode are the most useful, which are illustrated as shown below:
- The Locking mode: This mode allows you to lock all three motors of the Gimbal and allows your phone to remain fixed at a certain angle. Due to this, you can shoot your footage from multiple positions while keeping the camera fixed at one angle.
- The POV mode will allow you to unlock all the axes. This mode will also adjust in all three axes when moving around. This feature gives you more freedom of movement.

Extra Features of Zhiyun Q3 Stabilizer
When you are shooting a video using the Gimbal stabilizer, you come across a point where you want extra light. Thus, the Q3 stabilizer comes with a built-in flashlight.
This flashlight will not only light up those small corners of a dark room but also make a huge difference. If you are recording to focus on an object, such as a product, this flashlight will greatly help you.

You can also turn the flashlight towards yourself if you are recording a Vlog or taking a selfie. The light’s temperature is 4300K, giving a relatively warm light on the subject.

2. A Good Smartphone
Most smartphones these days are equipped with cameras with varying powers of recording. Some smartphone cameras focus on Mega Pixels, while others focus on the capture sensor. You need a smartphone camera that balances out all these qualities to record cinematic footage.
The recently released iPhone 14 pro camera is an excellent example of a good quality camera you can use to record cinematic videos.

3. Video Editing Software
There is no better software in the video editing field than the infamous Wondershare Filmora. It allows you to edit high-quality videos with creative features.
Wondershare Filmora allows access to the range of effects and filters you can apply to your videos to give them a more cinematic look. It also allows you to access the vast library of audio to utilize in your videos. Moreover, its engaging UI allows beginners to access to features of Wondershare Filmora easily.

Now that we have learned about the requirements for recording a cinematic video. Let’s look at the different cinematic movements you can use to record from your Smartphone.
Part 3. Top 3 Cinematic Movements to Record From a Smartphone
You may have watched many movies or TV shows, but the general audience usually ignores the effort put into a shot. Only an experienced videographer can detect the difference between a great cinematic shot and a poor one.
Of the great cinematic shots, some are described in this article. These shots can easily record by using a smartphone. The cinematic movements explained below are the best choice. Here we will look at the three camera movements you can record on your smartphone.
- The Reveal Movement.
- The 180° Presentation Movement.
- The Following Movement.
First, let’s take a look at the Reveal movement.
1. The Reveal Movement
This is the most popular movement used in cinematic shooting from your smartphone. With a Gimbal, the Reveal movement is one of the easiest shots to master. But for this, you will need to learn it first.
The Reveal Movement is a shot taken with an object as a perspective. The shot starts from a static object in the foreground. It could be focused at first, but as the camera moves, the focus will be diverted to reveal our target object. This is known as the Reveal Movement.
To shoot the reveal movement, follow the steps mentioned as shown:
- First, ensure your phone is connected properly to the Gimbal.
- Align your Smartphone camera behind the static object.
- Guide the target individual to be ready as you move the camera to reveal them.
- Slowly move the camera, focusing on the static object to change its focus on your main object.

![]()
Note: Make sure to practice and experiment a lot with the steps. Try to be more creative and innovative. With every video you shoot, you gain experience with the errors.
Another thing to remember is that when you are shooting a Reveal movement using the Gimbal, it is best to put it in Locking mode. This mode works the best as it allows the camera to stay fixed in one frame making your footage seem balanced and of quality.

2. The 180° Presentation Movement
The next movement we will be looking at will be the 180° presentation movement. The 180° presentation will move in a half-circle fashion. It will move from one side of the subject to the other side. This will allow you to cover the overall subject’s view.
Apart from that, it will allow you to capture the background with much clarity and detail to maintain a general sense of the ambiance. Making a 180° presentation shot is fairly easy to do so. With its multiple uses, you can use this method in any scenario.
As we will move from one side to the other in a circular manner, we need to fix the frame of our video to move along. Using the POV mode of the Zhiyun Gimbal stabilizer will be the best option in this sense.

Setting the Gimbal in POV mode will allow you to shoot the video from more than one angle while keeping the video balanced. Follow the steps mentioned to shoot a 180° presentation video:
- First, start recording from one side of the subject while keeping the Gimbal in the POV mode.
- Slowly start moving in front of the subject in an arch.
- When you face the subject, do not stop and keep moving to complete the arch.
- When you reach the end of the arch, close the video.

By following the steps mentioned, you can create the 180° presentation movement using a smartphone. Now, move forward to learn about “The Following movement.”
3. The Following Movement
You can use “The following movement” when recording a scene in which the object moves in random directions. Or when there is a high degree of movement of your object in the video, and you want to fix the focus of your footage to that object.
The Following movement is not technically a movement, but a setting that will allow you to record the footage while keeping the object and the video frame focused. In this type of footage, we will use the Zhiyun Cami app to focus on our target object.

To focus on our subject in the video by Cami app, follow the steps mentioned below:
- When recording the video, make sure to put the Gimbal on a tripod stand.
- After that, open the Cami app and draw a square over the object you want to keep in focus.
- Now, the camera will shift its angle to its perspective wherever the object goes.

This is how you will create the following movement.
Part 4. Edit the Clips with Wondershare Filmora
Now that we have recorded our footage, it is time to arrange it and apply the finishing touches. We are going to use Wondershare Filmora for editing the recorded footage.
Free Download For Win 7 or later(64-bit)
Free Download For macOS 10.14 or later
Follow the steps mentioned below to edit on Wondershare Filmora!
Step1 Download Wondershare Filmora
To download Wondershare Filmora, follow the steps outlined below:
- First, download the Wondershare Filmora.
- When the download is finished, click on the setup.
- The Wondershare Filmora installer will begin to load.
- Then you will have installed Wondershare Filmora on your PC or Mac.
If you want to purchase the premium plan’s features, check out the Wondershare Filmora Premium plans.
Step2 Add clips to the timeline
After downloading the Wondershare Filmora app, we must create a workplace. To do so, follow the steps mentioned:
- First of all, click on the import icon in the upper left corner of the home interface of Wondershare Filmora. This will open up your PC library.
- Then Import your footage in the import window.
- Click and drag to drop the footage in the Timeline.

Step3 Trim the Video Clips
After you have added the clips to the timeline, you may have some extra footage you don’t want. Go through the clips you added and trim them according to your wish.
Step4 Add The Effects
After you have trimmed the clips now, you will have to add the finishing touches. To perform this, follow the below instructions:
- Go to the effects icon on the upper bar above the import window.
- Here, you can see the range of effects Wondershare Filmora Provides. Select the one you want for your video.
- You can also search for effects from the search bar.
- Once you have found the effect you want, download it if not been downloaded before.
- Click and drag it to drop below your clips to add the effect.
- Double-click on the effect that you added to adjust its settings.
- Here, you can adjust the opacity to your liking.

Now that we have added the Effects, it is time to add the Overlays!
Step5 Add Overlays
You can also add overlays on your videos to make them pop up even more. You can add Overlays by the following steps:
- In the effects icon on the bar above the import window, you can see the multiple effects of Wondershare Filmora.
- In the left column, you can also see the Filters and Overlays.
- Go to the Overlay
- Select the Overlay that you want.
- Then click and drag it above your video.
- You can also add a border to your video by searching “Border” in the search bar and dragging it below your clips.

Step6 Add Some Music
To finish off your editing, you can also add audio music from the Wondershare Filmora Audio library:
- Before adding the audio music, make sure to lower the volume of your video clips.
- You can do so by dragging below the audio tab on your video clips in the timeline.
- Go to the Audio icon on the bar above the import window.
- Here, you can see the multiple audio available.
- Browse through the library till you find suitable audio.
- Download it and drag it below on the timeline.

Now play the Video from the beginning to see the final looks.

Congratulations! You have now successfully created a cinematic video using Wondershare Filmora.
Conclusion
Using expensive equipment to record a cinematic video can be a reliable step. But it is not in everyone’s budget. You can also use a smartphone to record a cinematic video by the steps mentioned above and give it a professional look by editing on Wondershare Filmora.
Although it might seem strange initially, but the time is close when everyone will create cinematic videos from their smartphones.
Another thing to remember is that when you are shooting a Reveal movement using the Gimbal, it is best to put it in Locking mode. This mode works the best as it allows the camera to stay fixed in one frame making your footage seem balanced and of quality.
2. The 180° Presentation Movement
The next movement we will be looking at will be the 180° presentation movement. The 180° presentation will move in a half-circle fashion. It will move from one side of the subject to the other side. This will allow you to cover the overall subject’s view.
Apart from that, it will allow you to capture the background with much clarity and detail to maintain a general sense of the ambiance. Making a 180° presentation shot is fairly easy to do so. With its multiple uses, you can use this method in any scenario.
As we will move from one side to the other in a circular manner, we need to fix the frame of our video to move along. Using the POV mode of the Zhiyun Gimbal stabilizer will be the best option in this sense.
Setting the Gimbal in POV mode will allow you to shoot the video from more than one angle while keeping the video balanced. Follow the steps mentioned to shoot a 180° presentation video:
- First, start recording from one side of the subject while keeping the Gimbal in the POV mode.
- Slowly start moving in front of the subject in an arch.
- When you face the subject, do not stop and keep moving to complete the arch.
- When you reach the end of the arch, close the video.
By following the steps mentioned, you can create the 180° presentation movement using a smartphone. Now, move forward to learn about “The Following movement.”
3. The Following Movement
You can use “The following movement” when recording a scene in which the object moves in random directions. Or when there is a high degree of movement of your object in the video, and you want to fix the focus of your footage to that object.
The Following movement is not technically a movement, but a setting that will allow you to record the footage while keeping the object and the video frame focused. In this type of footage, we will use the Zhiyun Cami app to focus on our target object.
To focus on our subject in the video by Cami app, follow the steps mentioned below:
- When recording the video, make sure to put the Gimbal on a tripod stand.
- After that, open the Cami app and draw a square over the object you want to keep in focus.
- Now, the camera will shift its angle to its perspective wherever the object goes.
This is how you will create the following movement.
Part 4. Edit the Clips with Wondershare Filmora
Now that we have recorded our footage, it is time to arrange it and apply the finishing touches. We are going to use Wondershare Filmora for editing the recorded footage.
Free Download For Win 7 or later(64-bit)
Free Download For macOS 10.14 or later
Follow the steps mentioned below to edit on Wondershare Filmora!
Step1 Download Wondershare Filmora
To download Wondershare Filmora, follow the steps outlined below:
- First, download the Wondershare Filmora.
- When the download is finished, click on the setup.
- The Wondershare Filmora installer will begin to load.
- Then you will have installed Wondershare Filmora on your PC or Mac.
If you want to purchase the premium plan’s features, check out the Wondershare Filmora Premium plans.
Step2 Add clips to the timeline
After downloading the Wondershare Filmora app, we must create a workplace. To do so, follow the steps mentioned:
- First of all, click on the import icon in the upper left corner of the home interface of Wondershare Filmora. This will open up your PC library.
- Then Import your footage in the import window.
- Click and drag to drop the footage in the Timeline.
Step3 Trim the Video Clips
After you have added the clips to the timeline, you may have some extra footage you don’t want. Go through the clips you added and trim them according to your wish.
Step4 Add The Effects
After you have trimmed the clips now, you will have to add the finishing touches. To perform this, follow the below instructions:
- Go to the effects icon on the upper bar above the import window.
- Here, you can see the range of effects Wondershare Filmora Provides. Select the one you want for your video.
- You can also search for effects from the search bar.
- Once you have found the effect you want, download it if not been downloaded before.
- Click and drag it to drop below your clips to add the effect.
- Double-click on the effect that you added to adjust its settings.
- Here, you can adjust the opacity to your liking.
Now that we have added the Effects, it is time to add the Overlays!
Step5 Add Overlays
You can also add overlays on your videos to make them pop up even more. You can add Overlays by the following steps:
- In the effects icon on the bar above the import window, you can see the multiple effects of Wondershare Filmora.
- In the left column, you can also see the Filters and Overlays.
- Go to the Overlay
- Select the Overlay that you want.
- Then click and drag it above your video.
- You can also add a border to your video by searching “Border” in the search bar and dragging it below your clips.
Step6 Add Some Music
To finish off your editing, you can also add audio music from the Wondershare Filmora Audio library:
- Before adding the audio music, make sure to lower the volume of your video clips.
- You can do so by dragging below the audio tab on your video clips in the timeline.
- Go to the Audio icon on the bar above the import window.
- Here, you can see the multiple audio available.
- Browse through the library till you find suitable audio.
- Download it and drag it below on the timeline.
Now play the Video from the beginning to see the final looks.
Congratulations! You have now successfully created a cinematic video using Wondershare Filmora.
Conclusion
Using expensive equipment to record a cinematic video can be a reliable step. But it is not in everyone’s budget. You can also use a smartphone to record a cinematic video by the steps mentioned above and give it a professional look by editing on Wondershare Filmora.
Although it might seem strange initially, but the time is close when everyone will create cinematic videos from their smartphones.
Attaining Slow Motion Video Trend: Finding The Best CapCut Templates
In this digital realm, CapCut is a video editor, turning into another social media app. It was launched in 2020 but gained massive success by the end of 2022 with the introduction of templates. It’s an automated tool which is a sister app to TikTok. When a TikTok trend goes viral, people move to CapCut to copy that as it is. From social media influencers to users, everyone is using this video editor for good.
Recently, the CapCut template’s new trend of slow motion has been in trend. If you intend to post a video on the CapCut new trend in slow motion, this guide is for you. Without any wait, read this article to learn everything about CapCut’s new slow-motion template. Before delving into detail, you should analyze how these templates have eased our video creation.
Slow Motion Video Maker Slow your video’s speed with better control of your keyframes to create unique cinematic effects!
Make A Slow Motion Video Make A Slow Motion Video More Features

Part 1. CapCut Video Editor: How Is It Making Slow Motion Video Making Easy?
As a social media user, you must be aware of CapCut ; if not, keep reading. CapCut is a video editing platform with advanced options to help you capture key moments. With unique features , your content can go viral on TikTok, Facebook, and Instagram. After making videos, users can directly post on their social media, especially on TikTok.
This software is available to use online or download on Windows, macOS, and smartphones. Delve into its key features besides the CapCut slow motion template with neon effect:
- CapCut can trim, merge, and delete clips like every other video editor.
- You can add transitions between clips from different categories.
- From advanced features, you can add keyframe animations in video.
- Offer millions of music from the music library or extract from existing video clips.
- With its intelligent features, users can remove backgrounds and add auto-captions.
- Allows smooth editing of slow-motion and fast-speed videos with speed ramping.
Part 2. Listing Out Some Unique Templates Available on CapCut for Slow Motion Video
CapCut has a vast library of templates, as discussed earlier. They contain well-designed video layouts, transitions, effects, and texts to inspire others. For slow-motion templates, it offers extensive options that you can choose based on your preferences. If you haven’t found anything attractive, look into these CapCut new slow-motion templates.
- Camera Lenta: It’s a trending slow-motion video template on the internet. As shown, it is used by more than 23k people and requires just one clip to process. This footage shows a blurry start, which gradually turns into a clear shot with music beats.

- Slow Motion: This template is popular with over 87k usages. It requires a single clip to make a video in a 9:16 aspect ratio. In this clip, a woman lip-syncs a song that reveals properly after a blurry transition into slow motion.

- CapCut Slow Motion: With more than 546k utilizations, this template is commonly available everywhere. You need 2 clips to use this, and an 11-second video will be generated. The massive use of this template might be due to its music, effects, and transitions.

- Slow Motion Transisi: Social media influencers prefer this template to show their dance moves. It requires 4 clips to make an attractive slow-motion video. At the start of the clip, you can see a countdown timer and a music beat with dance steps.

- Slow Motion Alih: If you want to reveal your mountain travel video, this template is perfect. This 11-second template is used by over 87k people. It starts with a musical voice and progresses at normal speed. Gradually, it slows down and shifts speed abruptly with the rhythm of the music.

- Slow Motion Izacklstyle: It’s another famous template that is perfect for your travel clips. This CapCut new trend 2022 template slow motion has more than 100k uses. It asks for 4 footage to show the natural beauty of nature, mountains, waterfalls, and you.

- Slow Motion JP: With 1.3 million uses, this template is widely recognized on social media. Actually, the kid smiling in this slow-motion video makes it popular. It is an 8-second clip where the boy is standing chin-down. Suddenly, the music’s rhythm and effect change when he looks upward.

Part 3. How to Create a Simple Slow-Motion Video from a Template in CapCut?
Making a CapCut template new trend in slow motion is not very difficult. For this purpose, you have to pick one template and select the media. After choosing a template from the above section, follow the given steps for better results. Regardless of the mobile device you are using, this step-by-step guide will prove beneficial for each.
Step 1
Launch CapCut on your smartphone and sign in to your account. Access the home screen of CapCut and look for the “Template” option from the bottom. Tap on it and find the vast video template library of this platform.

Step 2
Go to the search and prompt with “Slow Motion Video” to browse results. Pick one video template of your choice and get a preview. From its preview, hit the “Use Template” button and go directly to import media. Select the video you wish and touch the “Preview” button.

Step 3
After previewing results, go to the top right side and tap the “Export” button. You will get an extended “Export Setting” menu at the bottom. It’s up to you whether to choose “Save to Device” or Save and Share to TikTok.”

Part 4. Desktop Solution: How to Make Better Slow-Motion Videos with Wondershare Filmora?
Using CapCut’s new slow-motion templates makes videos easy but restricts certain tasks. If you want to enjoy more flexibility in creating slow-motion videos, use Wondershare Filmora . It’s a video editing platform with innovative features to uplift creativity with personalization. This all-in-all platform offers AI-integrated features to generate unique content effortlessly.
Filmora can assist you in editing tasks by providing AI Copilot Editing . Besides, it can generate engaging scripts with prompts that align with your goals. Moreover, you can get copyright-free music and images to achieve appealing virtual content. Filmora can bring limitless creativity and uniqueness to your media, so move to explore it.
Free Download For Win 7 or later(64-bit)
Free Download For macOS 10.14 or later
How to Create Personalized Slow-Motion Video with Filmora
Filmora offers Speed Ramping features to slow down video as you want. It also ensures smooth playback of slow-mo videos by providing an optical flow option. Let’s move to the real process with the given steps without further delay.
Step 1: Download Filmora and Import the Video to Slow Down
If you haven’t downloaded Filmora, visit its official site and get the latest version. Launch it on your device and access its main screen. Choose “New Project” and enter its editing screen. Press “Ctrl + I” to import your video into Filmora quickly. Drag and drop your imported media to the timeline section for further processing.

Step 2: Access Speed Ramping to Customize Video Speed
Locate your cursor on the video and right-click on it to choose “Speed Ramping” from the list. This way, you will get an editing panel on the right side. You have the flexibility to select a predesigned template for speed ramping. Otherwise, hit the “Customize” button and find the graph below. Use the graph and locate the dots upward and downward to get the desired slow-motion video.

Step 3: Apply Optical Flow and Export within Personalized Settings
Later, go downward to the “AI interpolation” and extend its menu. From the menu, select “Optical Flow” for a smooth playback speed. If you are satisfied with the result, look for the “Export” button at the top right. Get the “Export” screen and adjust the parameter to save the video in your assigned settings.

Conclusion
To conclude, social media influencers set trends using CapCut in real-time. They are getting the audience’s attention through the CapCut template’s new trend of slow motion. This article has also shed light on CapCut, its slow-motion templates, and how to use it. After reading, you must realize that using Wondershare Filmora is a far better option.
Make A Slow Motion Video Make A Slow Motion Video More Features
Part 1. CapCut Video Editor: How Is It Making Slow Motion Video Making Easy?
As a social media user, you must be aware of CapCut ; if not, keep reading. CapCut is a video editing platform with advanced options to help you capture key moments. With unique features , your content can go viral on TikTok, Facebook, and Instagram. After making videos, users can directly post on their social media, especially on TikTok.
This software is available to use online or download on Windows, macOS, and smartphones. Delve into its key features besides the CapCut slow motion template with neon effect:
- CapCut can trim, merge, and delete clips like every other video editor.
- You can add transitions between clips from different categories.
- From advanced features, you can add keyframe animations in video.
- Offer millions of music from the music library or extract from existing video clips.
- With its intelligent features, users can remove backgrounds and add auto-captions.
- Allows smooth editing of slow-motion and fast-speed videos with speed ramping.
Part 2. Listing Out Some Unique Templates Available on CapCut for Slow Motion Video
CapCut has a vast library of templates, as discussed earlier. They contain well-designed video layouts, transitions, effects, and texts to inspire others. For slow-motion templates, it offers extensive options that you can choose based on your preferences. If you haven’t found anything attractive, look into these CapCut new slow-motion templates.
- Camera Lenta: It’s a trending slow-motion video template on the internet. As shown, it is used by more than 23k people and requires just one clip to process. This footage shows a blurry start, which gradually turns into a clear shot with music beats.
- Slow Motion: This template is popular with over 87k usages. It requires a single clip to make a video in a 9:16 aspect ratio. In this clip, a woman lip-syncs a song that reveals properly after a blurry transition into slow motion.
- CapCut Slow Motion: With more than 546k utilizations, this template is commonly available everywhere. You need 2 clips to use this, and an 11-second video will be generated. The massive use of this template might be due to its music, effects, and transitions.
- Slow Motion Transisi: Social media influencers prefer this template to show their dance moves. It requires 4 clips to make an attractive slow-motion video. At the start of the clip, you can see a countdown timer and a music beat with dance steps.
- Slow Motion Alih: If you want to reveal your mountain travel video, this template is perfect. This 11-second template is used by over 87k people. It starts with a musical voice and progresses at normal speed. Gradually, it slows down and shifts speed abruptly with the rhythm of the music.
- Slow Motion Izacklstyle: It’s another famous template that is perfect for your travel clips. This CapCut new trend 2022 template slow motion has more than 100k uses. It asks for 4 footage to show the natural beauty of nature, mountains, waterfalls, and you.
- Slow Motion JP: With 1.3 million uses, this template is widely recognized on social media. Actually, the kid smiling in this slow-motion video makes it popular. It is an 8-second clip where the boy is standing chin-down. Suddenly, the music’s rhythm and effect change when he looks upward.
Part 3. How to Create a Simple Slow-Motion Video from a Template in CapCut?
Making a CapCut template new trend in slow motion is not very difficult. For this purpose, you have to pick one template and select the media. After choosing a template from the above section, follow the given steps for better results. Regardless of the mobile device you are using, this step-by-step guide will prove beneficial for each.
Step 1
Launch CapCut on your smartphone and sign in to your account. Access the home screen of CapCut and look for the “Template” option from the bottom. Tap on it and find the vast video template library of this platform.
Step 2
Go to the search and prompt with “Slow Motion Video” to browse results. Pick one video template of your choice and get a preview. From its preview, hit the “Use Template” button and go directly to import media. Select the video you wish and touch the “Preview” button.
Step 3
After previewing results, go to the top right side and tap the “Export” button. You will get an extended “Export Setting” menu at the bottom. It’s up to you whether to choose “Save to Device” or Save and Share to TikTok.”
Part 4. Desktop Solution: How to Make Better Slow-Motion Videos with Wondershare Filmora?
Using CapCut’s new slow-motion templates makes videos easy but restricts certain tasks. If you want to enjoy more flexibility in creating slow-motion videos, use Wondershare Filmora . It’s a video editing platform with innovative features to uplift creativity with personalization. This all-in-all platform offers AI-integrated features to generate unique content effortlessly.
Filmora can assist you in editing tasks by providing AI Copilot Editing . Besides, it can generate engaging scripts with prompts that align with your goals. Moreover, you can get copyright-free music and images to achieve appealing virtual content. Filmora can bring limitless creativity and uniqueness to your media, so move to explore it.
Free Download For Win 7 or later(64-bit)
Free Download For macOS 10.14 or later
How to Create Personalized Slow-Motion Video with Filmora
Filmora offers Speed Ramping features to slow down video as you want. It also ensures smooth playback of slow-mo videos by providing an optical flow option. Let’s move to the real process with the given steps without further delay.
Step 1: Download Filmora and Import the Video to Slow Down
If you haven’t downloaded Filmora, visit its official site and get the latest version. Launch it on your device and access its main screen. Choose “New Project” and enter its editing screen. Press “Ctrl + I” to import your video into Filmora quickly. Drag and drop your imported media to the timeline section for further processing.
Step 2: Access Speed Ramping to Customize Video Speed
Locate your cursor on the video and right-click on it to choose “Speed Ramping” from the list. This way, you will get an editing panel on the right side. You have the flexibility to select a predesigned template for speed ramping. Otherwise, hit the “Customize” button and find the graph below. Use the graph and locate the dots upward and downward to get the desired slow-motion video.
Step 3: Apply Optical Flow and Export within Personalized Settings
Later, go downward to the “AI interpolation” and extend its menu. From the menu, select “Optical Flow” for a smooth playback speed. If you are satisfied with the result, look for the “Export” button at the top right. Get the “Export” screen and adjust the parameter to save the video in your assigned settings.
Conclusion
To conclude, social media influencers set trends using CapCut in real-time. They are getting the audience’s attention through the CapCut template’s new trend of slow motion. This article has also shed light on CapCut, its slow-motion templates, and how to use it. After reading, you must realize that using Wondershare Filmora is a far better option.
The Best Way to Remove Audio From Your Videos
Extracting audio from video lets you focus on the main video. Moreover, it also protects privacy and addresses copyright problems. Thus, controlling the audio is a crucial skill for video editors. One approach to making the video seem better is to remove the noise. Well, it isn’t just about reducing background noise. Instead, it’s a calculated move to make your editing more precise. So, how do you remove audio from a video? Don’t worry if you are a newcomer in the video editing field! This post is your go-to guide to effortlessly eliminating audio from your video content.
Extracting audio from video lets you focus on the main video. Moreover, it also protects privacy and addresses copyright problems. Thus, controlling the audio is a crucial skill for video editors. One approach to making the video seem better is to remove the noise. Well, it isn’t just about reducing background noise. Instead, it’s a calculated move to make your editing more precise. So, how do you remove audio from a video? Don’t worry if you are a newcomer in the video editing field! This post is your go-to guide to effortlessly eliminating audio from your video content.
In this article
- Part 1: Why Is It Necessary to Remove Audio from a Video?
- Part 2: How Can You Improve Storytelling With Silent Videos?
- Part 3: How to Use Filmora to Remove Audio from Your Video?
Remove Audio Now For Win 7 or later(64-bit)
Remove Audio Now For macOS 10.14 or later
Why Is It Necessary to Remove Audio from a Video?
You can make a video far more versatile and successful for many different things by removing the audio.
Your Video Becomes Multipurpose
Taking the audio out of a video makes it more versatile. Presentations, slide decks, and instructional videos may all benefit from this. The original audio or background noise might be too distracting in such videos.
No Language Issues
The muted or removed audio lets you reach viewers who speak a different language. By removing the original audio, the video becomes language-neutral. Thus, you save time adding subtitles or dubbing without disturbing the narration.
Place Emphasis on the Video Itself
Cutting off the sound may make the video’s visuals the main attraction. It may be beneficial when creating tutorials or instructional videos. That’s because viewers may prefer to see the demos without the sound.
Eliminating Excessive Background Noise
The video might get dull with background noises, echoes, or unwanted sounds. Deleting the audio stream helps to eliminate distractions. As a result, viewers get a cleaner viewing experience.
Keeping Copyright Concerns at Bay
Businesses can avoid copyright infringement problems by eliminating audio from videos. Removing someone’s audio work before using it in public venues is necessary. It supports copyright laws on audio material by limiting display to visual components.
Content Personalization
Creators can let viewers add their soundtracks or voiceovers by removing audio. Thus, it can make the watching experience more customized. It suits projects that need a high degree of personalization or user-generated content.
Confidential Data Security
Sometimes, a video might capture sensitive conversations or information. So, it’s essential to remove the audio to protect privacy. Remember, sharing the visual footage does not compromise confidentiality. It hides the crucial discussions or data from the original audio.
As you can see, removing audio from a video has several benefits. Many options are available when you mute the audio in a video. By eliminating background noise, you’re freeing your imagination.
So, how do silent videos improve your video production strategies? Let’s find out!
How Can You Improve Storytelling With Silent Videos?
There is a much unrealized narrative potential in silent videos. Most videos rely only on visual elements to convey narratives. Thus, mute clips have a unique ability to captivate audiences. It also offers many possibilities for storytelling, allowing for a more immersive experience.
Setting a Narrative
Videos without sound force viewers to rely more on their visual perception of the tale. It can draw your viewers closer to the visuals. Moreover, it also heightens their involvement with the story as it develops.
Improving Stories
Silence directs the viewer’s attention to certain visual aspects. When you remove all sound distractions, the audience can focus on the pictures. It helps you highlight essential story aspects.
For instance, rely on more than just dialogue to convey emotion. Instead, you can take a modest close-up of the character’s face.
Build Emotions With No Audio
One effective method of building intense emotions is the complete absence of sound. Remember, silent clips can keep viewers on the top of their seats. The audience may get more invested in the story’s raw essence when a scene unfolds in silence. In short, this technique aims to evoke a range of emotions in the audience.
Add Metaphor
The lack of audio permits the use of symbolic language only via visual representations. You can use each picture to convey information. It eliminates the need for dialogue or background music.
The audience can interact with the story on a deeper level via interpretation. Here, video scenes, objects, or actions work as symbols.
Simplify Complex Stories
Silent videos let storytellers elicit strong emotional reactions from audiences. They can co-create the story by deciphering visual cues. Besides, they can also add thoughts, emotions, and interpretations in silent videos. Without words, silent videos can help you convey stories that captivate audiences.
How to Use Filmora to Remove Audio from Your Video?
Two main approaches are available for using this software. You can start by downloading Wondershare Filmora for free to try it out. Here is how to remove audio in a video editor.
Remove Audio Now For Win 7 or later(64-bit)
Remove Audio Now For macOS 10.14 or later
Method 1: Use the “Mute” Button
The first method is using the “Mute” function available in Filmora. You can start by importing the local video file into this software.
Drop the file into Filmora’s video editing timeline. You can mute the file by right-clicking on it. Once you’ve finished, choose a format to save the file in.
As you can see, the mute option stands out as a fantastic one-click feature. It removes the necessity for specialized video editing skills. Anyone can effortlessly remove audio from their videos with ease.

Method 2: Use the Audio Detach feature
Now, let’s turn our focus to a different, efficient way. The Audio Detach function becomes a potent feature for separating audio from videos. Let’s check out its detailed instructions for precisely separating audio and video.
Step1Upload Your Video
First, select the video clip whose audio you want to extract. You can start by clicking “Import” and then navigating to the relevant folder on your hard drive.
While you pick more files, keep the “Ctrl” button down to select them all at once. The main editing dashboard will show thumbnails of all the currently loaded files. You can see a preview in the right-hand window when you double-click them.

Step2Cut Out the Music
Now, you should drag videos from the dashboard into the Video Timeline. After that, you can right-click the video to choose the “Audio Detach” option.
The Music Timeline will immediately display a new audio file. Here, you can see the original video’s soundtrack. Now, pressing the “Delete” button can remove the sounds.
You can also detach audio from multiple video files. Remember, all the files will mesh together perfectly on the Video Timeline.
Thus, you need to click the application icon on the left-hand side of the screen and choose “Save As…” to create new project files if you need to extract audio from more than one file. Then, export each output file individually after reloading the project file.

Step3Download the Video
To be sure this is what you need, double-tap the file in the Video Timeline. You can add suitable music files to the clip if needed. To save only the video track, click the “Create” option directly. A popup will open up, asking you to choose a format before you can save it to your PC.
The Music Timeline will immediately display a new audio file. Here, you can see the original video’s soundtrack. Now, pressing the “Delete” button can remove the sounds.
You can also detach audio from multiple video files. Remember, all the files will mesh together perfectly on the Video Timeline.
Thus, you need to click the application icon on the left-hand side of the screen and choose “Save As…” to create new project files if you need to extract audio from more than one file. Then, export each output file individually after reloading the project file.
Now you know how to remove audio from videos in Wondershare Filmora. As you can see, removing background noise from videos is a breeze using Filmora. You don’t need extensive experience or expensive software packages.
Follow the simple steps outlined above, even if this is your first time. You may remove distracting or unnecessary audio from your file in just a few minutes.
Conclusion
As you can see, your ability to control the audio in video editing defines the viewing experience. It is about not just transforming video material but also expanding possibilities. This silent space is where imagination soars.
It’s a technique to make your video clips more adaptable. Thus, they can transcend language obstacles, legal limitations, and distractions.
Think of a vacation video where the beautiful sights and sounds of the busy streets are in front. It will allow the audience to lose themselves in the lively atmosphere completely. If you remove the audio from this clip, it can become livelier.
In short, sound removal is crucial in creating a more engaging story. It changes the viewer’s experience by focusing on visuals and increasing engagement. You can use Filmora’s powerful audio removal features. The software streamlines the editing process without compromising the quality of the video. Learn to use silence as a tool to tell stories and make people feel things in your videos.
- Part 2: How Can You Improve Storytelling With Silent Videos?
- Part 3: How to Use Filmora to Remove Audio from Your Video?
Remove Audio Now For Win 7 or later(64-bit)
Remove Audio Now For macOS 10.14 or later
Why Is It Necessary to Remove Audio from a Video?
You can make a video far more versatile and successful for many different things by removing the audio.
Your Video Becomes Multipurpose
Taking the audio out of a video makes it more versatile. Presentations, slide decks, and instructional videos may all benefit from this. The original audio or background noise might be too distracting in such videos.
No Language Issues
The muted or removed audio lets you reach viewers who speak a different language. By removing the original audio, the video becomes language-neutral. Thus, you save time adding subtitles or dubbing without disturbing the narration.
Place Emphasis on the Video Itself
Cutting off the sound may make the video’s visuals the main attraction. It may be beneficial when creating tutorials or instructional videos. That’s because viewers may prefer to see the demos without the sound.
Eliminating Excessive Background Noise
The video might get dull with background noises, echoes, or unwanted sounds. Deleting the audio stream helps to eliminate distractions. As a result, viewers get a cleaner viewing experience.
Keeping Copyright Concerns at Bay
Businesses can avoid copyright infringement problems by eliminating audio from videos. Removing someone’s audio work before using it in public venues is necessary. It supports copyright laws on audio material by limiting display to visual components.
Content Personalization
Creators can let viewers add their soundtracks or voiceovers by removing audio. Thus, it can make the watching experience more customized. It suits projects that need a high degree of personalization or user-generated content.
Confidential Data Security
Sometimes, a video might capture sensitive conversations or information. So, it’s essential to remove the audio to protect privacy. Remember, sharing the visual footage does not compromise confidentiality. It hides the crucial discussions or data from the original audio.
As you can see, removing audio from a video has several benefits. Many options are available when you mute the audio in a video. By eliminating background noise, you’re freeing your imagination.
So, how do silent videos improve your video production strategies? Let’s find out!
How Can You Improve Storytelling With Silent Videos?
There is a much unrealized narrative potential in silent videos. Most videos rely only on visual elements to convey narratives. Thus, mute clips have a unique ability to captivate audiences. It also offers many possibilities for storytelling, allowing for a more immersive experience.
Setting a Narrative
Videos without sound force viewers to rely more on their visual perception of the tale. It can draw your viewers closer to the visuals. Moreover, it also heightens their involvement with the story as it develops.
Improving Stories
Silence directs the viewer’s attention to certain visual aspects. When you remove all sound distractions, the audience can focus on the pictures. It helps you highlight essential story aspects.
For instance, rely on more than just dialogue to convey emotion. Instead, you can take a modest close-up of the character’s face.
Build Emotions With No Audio
One effective method of building intense emotions is the complete absence of sound. Remember, silent clips can keep viewers on the top of their seats. The audience may get more invested in the story’s raw essence when a scene unfolds in silence. In short, this technique aims to evoke a range of emotions in the audience.
Add Metaphor
The lack of audio permits the use of symbolic language only via visual representations. You can use each picture to convey information. It eliminates the need for dialogue or background music.
The audience can interact with the story on a deeper level via interpretation. Here, video scenes, objects, or actions work as symbols.
Simplify Complex Stories
Silent videos let storytellers elicit strong emotional reactions from audiences. They can co-create the story by deciphering visual cues. Besides, they can also add thoughts, emotions, and interpretations in silent videos. Without words, silent videos can help you convey stories that captivate audiences.
How to Use Filmora to Remove Audio from Your Video?
Two main approaches are available for using this software. You can start by downloading Wondershare Filmora for free to try it out. Here is how to remove audio in a video editor.
Remove Audio Now For Win 7 or later(64-bit)
Remove Audio Now For macOS 10.14 or later
Method 1: Use the “Mute” Button
The first method is using the “Mute” function available in Filmora. You can start by importing the local video file into this software.
Drop the file into Filmora’s video editing timeline. You can mute the file by right-clicking on it. Once you’ve finished, choose a format to save the file in.
As you can see, the mute option stands out as a fantastic one-click feature. It removes the necessity for specialized video editing skills. Anyone can effortlessly remove audio from their videos with ease.
Method 2: Use the Audio Detach feature
Now, let’s turn our focus to a different, efficient way. The Audio Detach function becomes a potent feature for separating audio from videos. Let’s check out its detailed instructions for precisely separating audio and video.
Step1Upload Your Video
First, select the video clip whose audio you want to extract. You can start by clicking “Import” and then navigating to the relevant folder on your hard drive.
While you pick more files, keep the “Ctrl” button down to select them all at once. The main editing dashboard will show thumbnails of all the currently loaded files. You can see a preview in the right-hand window when you double-click them.
Step2Cut Out the Music
Now, you should drag videos from the dashboard into the Video Timeline. After that, you can right-click the video to choose the “Audio Detach” option.
The Music Timeline will immediately display a new audio file. Here, you can see the original video’s soundtrack. Now, pressing the “Delete” button can remove the sounds.
You can also detach audio from multiple video files. Remember, all the files will mesh together perfectly on the Video Timeline.
Thus, you need to click the application icon on the left-hand side of the screen and choose “Save As…” to create new project files if you need to extract audio from more than one file. Then, export each output file individually after reloading the project file.
Step3Download the Video
To be sure this is what you need, double-tap the file in the Video Timeline. You can add suitable music files to the clip if needed. To save only the video track, click the “Create” option directly. A popup will open up, asking you to choose a format before you can save it to your PC.
The Music Timeline will immediately display a new audio file. Here, you can see the original video’s soundtrack. Now, pressing the “Delete” button can remove the sounds.
You can also detach audio from multiple video files. Remember, all the files will mesh together perfectly on the Video Timeline.
Thus, you need to click the application icon on the left-hand side of the screen and choose “Save As…” to create new project files if you need to extract audio from more than one file. Then, export each output file individually after reloading the project file.
Now you know how to remove audio from videos in Wondershare Filmora. As you can see, removing background noise from videos is a breeze using Filmora. You don’t need extensive experience or expensive software packages.
Follow the simple steps outlined above, even if this is your first time. You may remove distracting or unnecessary audio from your file in just a few minutes.
Conclusion
As you can see, your ability to control the audio in video editing defines the viewing experience. It is about not just transforming video material but also expanding possibilities. This silent space is where imagination soars.
It’s a technique to make your video clips more adaptable. Thus, they can transcend language obstacles, legal limitations, and distractions.
Think of a vacation video where the beautiful sights and sounds of the busy streets are in front. It will allow the audience to lose themselves in the lively atmosphere completely. If you remove the audio from this clip, it can become livelier.
In short, sound removal is crucial in creating a more engaging story. It changes the viewer’s experience by focusing on visuals and increasing engagement. You can use Filmora’s powerful audio removal features. The software streamlines the editing process without compromising the quality of the video. Learn to use silence as a tool to tell stories and make people feel things in your videos.
Add Text Animation to A Video Online
Do you want to make a creative video? Do you want your presentation or video to be easy to follow and entertaining? You can take the video to another level with the help of text animation. This article will discuss how to add text animation to online videos. You can use a good video editor from where you can select fresh styles and make the best video from there. One of the simplest ways to elevate your movie from good to excellent is with understandable text animation.
Text animation and short captions can broaden the audience for your content as more consumers view videos without sound these days. It matters what fonts you use in the videos, and they establish the mood and facilitate interaction with most viewers who rely on video captions. Add text, alter the font, add transitions, and use text effects to draw the user’s attention as they scroll. Please continue reading to discover how simple it is to make interactive video titles, words, and supers.
1. Use Kapwing animation text editor
(https://www.kapwing.com/animated-text-video-maker )
You can use the potent online editor Kapwing to add animated text to videos online, utilizing music, videos, GIFs, and images. There are no downloads required because everything is already present inside the browser. Kapwing is a capable tool for content production that is simple enough for everyone to use. The majority of video formats, GIF and image, including avi, png, jpg, gif, MOV, mp4, and more, are supported by Kapwing.
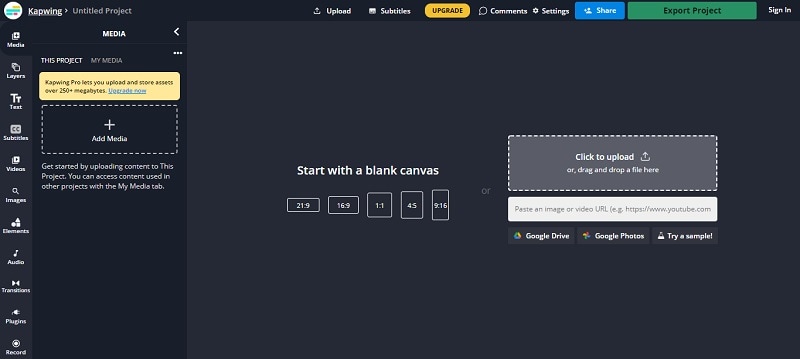
Step1 Upload the Video to Kapwing
You can open Kapwing with the device and tap on “Start Editing” to open up Kapwimg studio. After that, one can use the drag and drop option to upload the video in the studio. You can click on upload or use the link to upload.
If you have a more than 250 MB video, then you will require the Pro version.
Step2 Add the Text
When the video gets uploaded, now you can add your text. You must click the “Text” option on the left and type the text. After that, you can pick your favorite color, background, and color to add style.
You will always want that your text to get animated, but it doesn’t mean that you will have to use explosive fonts or funky or bright, which are very funky. The animation will make your text look attractive, and you can experiment with the colors and fonts to find the best combination.
Step3 Animate the Text
Now the fun part starts; choose the text box present on the right side and click on the “Animate” tab. It will allow the user to select animations like fade, flicker, hue rotates, and many more. Choose the speed according to your requirement, and if you want to change the background and color, you can do it too.
Use “Apply To” for applying this animation in the outro, intro, or both. It will help you to make the text fade out, fade in, or transition out and in with animation. Now the animation library has nine options:
- Drop: It appears on top of the text box
- Flicker: This one is like a candle’s flicker, and text flashes disappear and appear before staying.
- Fade: Opacity can be changed from 0% to 100%.
- Pop:- This grows the text more extensive than the text box and shrinks back to the place.
- Reveal:- Rolls from the left side to the right side
- Wipe:- Rolls from the left side to the right side with a colored background.
- Vibrate: The text box shakes in every direction.
- Hue rotates:- Colour of text cycles through the hue values..
You can use a timeline to adjust the animation’s termination when you set text animation. You can even drag that layer after the start time or use it on end/start time sliders to decrease or increase the time of your video. Text animation can get started when the cursor reaches the start time.
Step4 Export
The video with animated text is now ready to boom. You can click on “Export Video” present at the top and wait for the process. After that, you can download that video and use the links to share it on your social media platform.
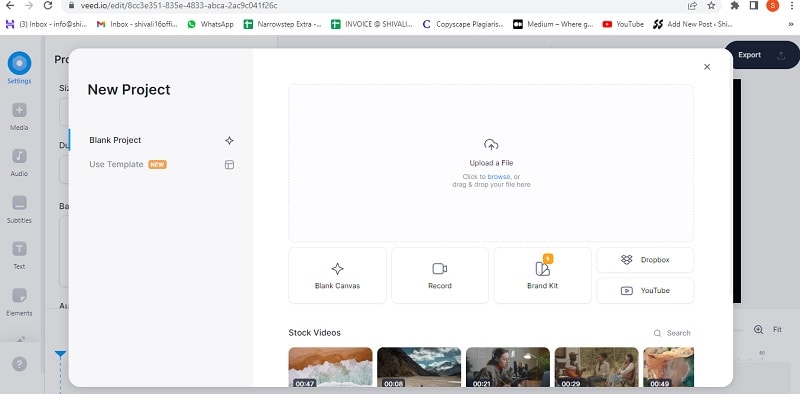
2. Use veed.io text video editor
(https://www.veed.io/create/text-video-maker )
Veed is one of the best video editor text effects online, which allows you to add text to online videos. You can easily add style, color, text, and font in a few clicks. You can upload the video and tap the text to get started. Add title and text or select handwriting font. One can select it from templates. Change transparency, alignment, and font size of the text.
This online software is perfect for creating attractive videos on social media. This is free, which omits the usage of expensive software. It is much easier to avoid many complex video editor apps. With the help of VEED, you can create an excellent video without any experience and do it with a few clicks. Let’s see how to add animated text to photos online.
Step1 Upload the video
Tap on “Choose Video” and choose the file you want to upload on VEED. One can even use the drag and drop option from the folder to the editor.
Step2 Add text
After that, you can add the text by tapping on the “Text” option on the left menu. You can select the text style and start typing.
Step3 Export
Save the video with the text you placed by tapping on “Export.” The video gets saved in an MP4 file.
3. Use Animaker text maker
(https://www.animaker.com/text-animation-maker )
The Animaker is one of the best-animated video makers. This app offers the best collection of charts, BGs, and animated characters. With the help of Animaker, you can make the text disappear or appear off-screen in the best way. After you finish your video, you can download the format in MP4.
Step1 Upload the video clip
First, you can upload your video clip present on top that you wish to add text animation.
- Tap on the “Upload section” on the bottom left. You can upload your video where you wish to add the animated text.
- The video will get uploaded to “My Files.”
- Click on the uploaded video in the library to load it on the workspace.
Step2 Add text to the video
- You can add text in their text section
- In the next section, one can find two different text types. At the top, you will discover plain text options, and at the bottom, you can find pre-designed boxes seasoned at Animaker.
Let’s see how you can use pre-built text boxes.
- Tap on pre-built designs for your text animation. One can see the text appearing in the center of the workspace, and you can click it and type new text if you want to customize it.
- You can notice widespread options appearing with your text. It is known as the item menu. It will allow the user to modify their text. One can change font size, color, style, etc. Your text will come with pre-defined effects, which will help you to animate text instantly.
- You must have noticed that the purple color bar appears on the timeline, representing the duration of the text visible in the video. For example, if you want that text to get visible between 4rth to 8th seconds, then you will have to drag the edges of that purple bar to the same duration.
To see the scene, you must click on the play button on top of the timeline.
Let’s check the other ways of adding animated text to the video. In the previous one, you have seen how you can add text animation using pre-built boxes. Now you will get to know about doing it by using blank boxes.
- Start tapping the “text section”. Select the bank textbox.
- Click on them and then opt to add new text.
- Opt for clicking the cog icon that is there in the item menu.
- You will notice the settings tab that is on the screen’s right side.
- You can easily opt for the customization of the text in the way you wish. You can start by modifying the style of the font. One can change the size and color of the font as well.
- Use these options and opt for the application of enter and/or exit effects to text. Now, opt to click on the effect option to get more than 50 options. You can select the effect from there.
- Once the animation effect is applied to your timeline, you can notice the pink part in the bar i.e. purple. This completes creating text animation by using Animaker.
Step3 Download the Video
- You can visit the publish option in the right window to download the video.
- Tap on the “download video” option for downloading.
Conclusion
Now, you are aware of how to add text animation to video online and the three best video editors that will help you add animated text to your videos. At this point, you can choose the best one according to your needs and usage. These steps will help you create a unique and good video that will be easy to understand and entertaining.
Free Download For Win 7 or later(64-bit)
Free Download For macOS 10.14 or later
Free Download For macOS 10.14 or later
Also read:
- New Want to Have Slow Zoom Effect in Your Video? We Will Illustrate How to Apply Slow Zoom Effect to Your Video on Your Smartphone, Computer, and TikTok
- Lets Create a New Premiere Pro Project, Import some Video, and Control Video Playback Speed. Also, Find Alternative Software (WonderShare Filmora) to Control Playback Speed in Minutes
- 2024 Approved How To Track and Blur Faces in Premiere Pro
- In 2024, Scaling and Setting Videos in Filmora | Tutorial
- In 2024, Learn How to Create Your Own Unique Video in Cinematic Text Intro in Filmora. Its a Simple Process that Will Offer Professional-Level Intros of Your Own
- How to Loop a Video in Canva Editor
- Updated This Article Aims to Show You How to Export Videos in Filmora
- 2024 Approved Want to Know the Simplest Way to Match the Colors of Your Photos in Photoshop? The Following Discussion Will Help Match Color in Photoshop, Almost Effortlessly
- New Understanding More About CapCut Lenta Template and Slow-Motion Videos for 2024
- New A Complete Guideline To Better Use QuickTime Player
- Updated 2024 Approved How to Add Zoom Blur Effect In Photoshop
- In 2024, Recommended Video Background Online Changers
- New How to Add the Popular Video Text Effects to Your Video?
- New Want to Learn How to Make a Fortnite Montage? This Guide Will Give You the Low-Down on Creating Epic Montage Fortnite Videos that You Can Share with Other Players on Social Media Platforms
- Updated Top List The Best Slow Motion Video Editors Available
- New Top 10 iPad Slideshow Apps to Create a Slideshow for 2024
- New 5 Ways to Make a Fake Facetime Call Video
- Easiest Fix Included! Top 5 Ways to Convert HDR to SDR Videos
- Updated 2024 Approved Motion Blur Photo With GIMP Step-By-Step Guide
- Updated Read and Learn How to Convert a Slow-Motion Video to Normal in This Guide. Besides, Find the Best Desktop Solution to Adjust Video Speed Quickly and Easily
- New 2024 Approved Best Green Screen Software for Beginner on Mac
- Updated Techniques You Never Heard of for Learning AI Marketing YouTube
- New 2024 Approved Best Cinematic LUTs For Premiere Pro You Can Come Across
- How to Blur a Still or Moving Part of Video for 2024
- New In 2024, 6 Free Tools To Radial Blur Photos Online
- In 2024, How to Make Glitch Effect with Filmora
- Updated Best 22 Video Editing Tips to Know for 2024
- In 2024, Brighten a Video in Windows 10 Easily When Video Clips You Recorded on Your Windows 10 Computer or Those Downloaded From YouTube Are Too Dark or Too Bright, You Can Easily Adjust the Color Levels in a Few Clicks
- Updated In 2024, 2 Effective Ways to Add Text Behind Objects
- A Guide to Color Grade Your Picture in LightRoom for 2024
- In 2024, Steps to Add Subtitles in Canva
- New Best AR Video App - Top 10 Picks for 2024
- Updated TOP 10 Types of Video Framing From Novice to Master for 2024
- Updated 10 Top Suggestions for AI Video Interviews for 2024
- In 2024, 3GP Video Format What Is 3GP Format And How To Open It?
- In 2024, Best 10 Tools to Convert a GIF Into a PDF
- New Focusing On The Best Ways To Convert Slow-Motion Video to Normal
- Best Shortcut Towards Timeline Template for 2024
- New In 2024, 2 Effective Ways to Add Text Behind Objects
- In 2024, In This Article, We Will Cover the Stages of Film Production You Need to Keep in Mind.Without Further Ado, Lets Get Started
- New Perfect Moody LUTs for VN Editor An Overview for 2024
- Updated In 2024, Best 10 3D Slideshow Software Review
- 2024 Approved Are You in a Funny Chat with a Friend and Want to Send a GIF but Couldnt Find One? Here We Will Provide You with the Top Image for GIF Converters. So, Let Us See How to Turn Images Into GIFs Very Quickly
- In 2024, The Most Useful Tips for Pokemon Go Ultra League On Honor Play 40C | Dr.fone
- How to Downgrade iPhone 12 mini without Losing Any Data? | Dr.fone
- How to Bypass FRP from Motorola Razr 40 Ultra?
- In 2024, 6 Methods to Mirror Apple iPhone 6 to your Windows PC | Dr.fone
- Remove Google FRP lock on Nokia 130 Music
- Forgotten The Voicemail Password Of Honor X50i? Try These Fixes
- In 2024, How to Bypass Android Lock Screen Using Emergency Call On Nokia C12 Plus?
- Fake Android Location without Rooting For Your Vivo Y77t | Dr.fone
- How To Transfer WhatsApp From Apple iPhone 14 Pro to other iPhone 14 Pro Max devices? | Dr.fone
- Can I recover permanently deleted photos from Civi 3 Disney 100th Anniversary Edition
- How to Share/Fake Location on WhatsApp for Nokia C300 | Dr.fone
- Play Store Stuck on Downloading Of Poco X6? 7 Ways to Resolve | Dr.fone
- Android Unlock Code Sim Unlock Your OnePlus 11 5G Phone and Remove Locked Screen
- How To Change Your SIM PIN Code on Your Nubia Z50S Pro Phone
- How To Remove Passcode From Apple iPhone 11 Pro? Complete Guide | Dr.fone
- Unlocking Apple iPhone 14 Pro Lock Screen 3 Foolproof Methods that Actually Work
- The way to get back lost call history from Xiaomi
- In 2024, 9 Best Free Android Monitoring Apps to Monitor Phone Remotely For your Oppo Reno 11 Pro 5G | Dr.fone
- In 2024, How To Change Your SIM PIN Code on Your Oppo A1x 5G Phone
- How to recover old videos from your Infinix Smart 8 Pro
- Authentication Error Occurred on Meizu 21 Pro? Here Are 10 Proven Fixes | Dr.fone
- What Is a SIM Network Unlock PIN? Get Your Vivo Phone Network-Ready
- How to Unlock iPhone 12 Pro With an Apple Watch & What to Do if It Doesnt Work
- A Comprehensive Guide to iCloud Unlock On Apple iPhone SE (2020) Online
- In 2024, The Best Methods to Unlock the iPhone Locked to Owner for Apple iPhone 12 Pro
- Realme C55 Video Recovery - Recover Deleted Videos from Realme C55
- In 2024, The Ultimate Guide to Bypassing iCloud Activation Lock from iPhone 15 Pro
- Why Does My Oppo A58 4G Keep Turning Off By Itself? 6 Fixes Are Here | Dr.fone
- Top 10 Telegram Spy Tools On Realme 12 Pro 5G for Parents | Dr.fone
- In 2024, Overview of the Best Oppo K11x Screen Mirroring App | Dr.fone
- New 2024 Approved Top 10 Free AI Voice Generators to Use in Daily Life
- In 2024, Is GSM Flasher ADB Legit? Full Review To Bypass Your Tecno Pova 6 Pro 5G Phone FRP Lock
- Tips and Tricks for Setting Up your Infinix Zero 30 5G Phone Pattern Lock
- In 2024, iPhone Is Disabled? Here Is The Way To Unlock Disabled Apple iPhone 6s Plus
- Change Location on Yik Yak For your Samsung Galaxy S24+ to Enjoy More Fun | Dr.fone
- Apply These Techniques to Improve How to Detect Fake GPS Location On Oppo F23 5G | Dr.fone
- Title: New In 2024, How to Shoot Cinematic Footage From a Smartphone
- Author: Chloe
- Created at : 2024-04-24 07:08:37
- Updated at : 2024-04-25 07:08:37
- Link: https://ai-editing-video.techidaily.com/new-in-2024-how-to-shoot-cinematic-footage-from-a-smartphone/
- License: This work is licensed under CC BY-NC-SA 4.0.
