
:max_bytes(150000):strip_icc():format(webp)/iPad-Mini-Splash-ef002ffe8db643d2a2b4de772ff46790.jpg)
New Is Augmented Reality Conferencing the Future of Workplace Collaboration?
Is Augmented Reality Conferencing the Future of Workplace Collaboration?
Is Augmented Reality Conferencing the Future of Workplace Collaboration?
An easy yet powerful editor
Numerous effects to choose from
Detailed tutorials provided by the official channel
AR or Augmented Reality and VR or Virtual Reality are quite a common discussion in the world of technology. Similarly, the technology-driven workspaces demand a seamless workspace collaboration post-pandemic. People are used to working from home and the workspace culture is changing rapidly due to such habits. 59% of the US workers want to continue WFH according to a study by TalentLyft. To cut the cost of daily travel and dedicate more quality time to work, employees are prioritizing online offices. On the other hand, employers are willing to save office space and other expenses with such a professional routine. That’s where the idea of augmented reality video conferencing is hitting to keep the collaboration between workers alive for a synchronized workflow.

How AR and VR can assist professional collaboration and lift the operations to a better place is the current question. Also, what would be the system through which employees can be habituated to the use? All of the answers are explained in this article.
In this article
01 [What is Augmented Reality Conferencing and What’s VR Video Streaming Workflow](#Part 1)
02 [Pros and Cons of AR and VR Conferencing](#Part 2)
03 [How does Filmora assists AR video conference?](#Part 3)
Part 1 What is Augmented Reality Conferencing and What’s VR Video Streaming Workflow
Before jumping to the application of AR and VR, it’s important to clarify the concept of the two different technologies. While AR is an enhanced version of the real world, VR is totally virtual. As a basic concept, note that, augmented reality is an arrangement of the user’s real-world view whereas virtual reality is totally an illusion based on a video. AR can be accessed from a phone to set the camera with a view and a virtual arrangement would be present within it. For example, if there’s a room in the real world, with an AR video conference, people can be adjusted virtually.

Virtual reality, as the name suggests, is totally in control of the system. With goggles or headsets, one can view computer-generated video with 360 degrees of technical effects to be seemed as real. This technology is mainly applicable for a video currently and there’re more scopes to experiment further.

Here comes the question, how these technologies can be merged with a permanent business structure that can be as effective as the older system, and there’s scope for even better results? Well, according to a study by FinancesOnline, 72% of the US customers find AR for better collaboration and 69% think it increases the efficiency in the workspace. Also, 49% of the IT experts believe that AR can access real-time information sooner.
The key idea behind augmented reality conferencing is to omit the parameters like distance, time, and space expenses and motivate positive collaboration in business workflow. There are multiple advantages of this technology for both employees and employers. As people are getting accustomed to the virtual setting in any professional or personal work from home, the plan to shift to a semi-virtual or virtual office structure is not vague now. In fact, this adaptation might take place sooner than expected as a long-term effect of the pandemic.
How augmented reality conferencing and virtual reality video streaming will be working?
AR and VR can be implemented through different technologies and hardware devices. As a result, employees can attend a meeting from home, just with a mobile application that enables the office structure in the room. Or, 2-3 members can be present physically in a meeting room while others are joining from remote places through VR. A 3D video streaming would overshadow the physical absence of the teammates. At the same time, the resources can be shared in no time for reference and transparent communication.
So, how exactly a business can be affected by augmented reality video conferencing on a large scale? Here’s a keen observation from both perspectives.
Part 2 Pros and Cons of AR and VR Conferencing

01Pros of AR and VR Conferencing
● This technology has an initial purpose to save time and energy for the workers including daily travel and balancing personal and professional commitments.
● Employers can hire people from remote places based on their skills and without worrying about the distance and timezone gap.
● Additional resources like bigger office space, electricity, and water can be saved if augmented reality video conferencing is in a complete performance.
● Positive collaboration can be expected while the employees have more energy and a comfortable environment to work in. As a result, productivity might take a boost as well.
● AR video conference serves a better experience than normal video conference in Zoom or Google meeting.
02Cons of AR and VR Conferencing
● The whole process is still under experiment and there’s no confirmed news about its beginning. So, there’s no practical feedback on the process of installation, usage, and maintenance.
● It would be expensive and time-consuming to set up a virtual reality conference system in a big office with n number of people.
● Technical fault from the office or from employees’ home can cost serious penalties in the business workflow.
● Hardware limitations like limited battery life, expensive headsets, and wireless connection are required and these things can cause problems while implementation.
● It can be uncomfortable to wear headsets for a long time during augmented reality conferencing andpeople can experience motion sickness due to this.
Part 3 How does Wondershare Filmora Video Editor assists AR video conference?
To use AR and VR professionally at a larger scale, the videos need to be seamless and follow some standard parameters. With Filmora, it would be easier to manage all the videos during an augmented reality video conferencing. There are multiple effects like “Motion Tracking”, “Keyframing”, “Audio ducking”, “Speed Control”, and “Color matching” that are required while managing a virtual conference with multiple people. It’s important to match the environment thoroughly so there’s no lack of concentration and inferiority in the system.
For Win 7 or later (64-bit)
For macOS 10.12 or later
From a business perspective, a video editor has many roles to play. Similarly, for a modern integration like AR and VR video conferencing, the required tools cannot be compromised. With facilities like “Green screen”, “Audio equalizer”, “Split screen”, “3D Lut”, etc. augmented reality would be presented smartly. To match the whole office environment as effectively as the real (present) one and to boost collaboration in the workspace, new generation video editing tools like Filmora is a must. With minimal effort, virtual meetings can be arranged and presented with the key goal to work at a global level and minimize the distance barrier.
● Ending Thoughts →
● Augmented reality conferencing is at an experiment level now and it is expected to be integrated with the real-life workflow sooner.
● As discussed, there’re both advantages and disadvantages of this technology right now. To enhance the facilities and diminish the cons, a smart video editor can be the gamechanger. In this article, you can find all the current news about AR adaptation for workspace collaboration in detail.
AR or Augmented Reality and VR or Virtual Reality are quite a common discussion in the world of technology. Similarly, the technology-driven workspaces demand a seamless workspace collaboration post-pandemic. People are used to working from home and the workspace culture is changing rapidly due to such habits. 59% of the US workers want to continue WFH according to a study by TalentLyft. To cut the cost of daily travel and dedicate more quality time to work, employees are prioritizing online offices. On the other hand, employers are willing to save office space and other expenses with such a professional routine. That’s where the idea of augmented reality video conferencing is hitting to keep the collaboration between workers alive for a synchronized workflow.
How AR and VR can assist professional collaboration and lift the operations to a better place is the current question. Also, what would be the system through which employees can be habituated to the use? All of the answers are explained in this article.
In this article
01 [What is Augmented Reality Conferencing and What’s VR Video Streaming Workflow](#Part 1)
02 [Pros and Cons of AR and VR Conferencing](#Part 2)
03 [How does Filmora assists AR video conference?](#Part 3)
Part 1 What is Augmented Reality Conferencing and What’s VR Video Streaming Workflow
Before jumping to the application of AR and VR, it’s important to clarify the concept of the two different technologies. While AR is an enhanced version of the real world, VR is totally virtual. As a basic concept, note that, augmented reality is an arrangement of the user’s real-world view whereas virtual reality is totally an illusion based on a video. AR can be accessed from a phone to set the camera with a view and a virtual arrangement would be present within it. For example, if there’s a room in the real world, with an AR video conference, people can be adjusted virtually.
Virtual reality, as the name suggests, is totally in control of the system. With goggles or headsets, one can view computer-generated video with 360 degrees of technical effects to be seemed as real. This technology is mainly applicable for a video currently and there’re more scopes to experiment further.
Here comes the question, how these technologies can be merged with a permanent business structure that can be as effective as the older system, and there’s scope for even better results? Well, according to a study by FinancesOnline, 72% of the US customers find AR for better collaboration and 69% think it increases the efficiency in the workspace. Also, 49% of the IT experts believe that AR can access real-time information sooner.
The key idea behind augmented reality conferencing is to omit the parameters like distance, time, and space expenses and motivate positive collaboration in business workflow. There are multiple advantages of this technology for both employees and employers. As people are getting accustomed to the virtual setting in any professional or personal work from home, the plan to shift to a semi-virtual or virtual office structure is not vague now. In fact, this adaptation might take place sooner than expected as a long-term effect of the pandemic.
How augmented reality conferencing and virtual reality video streaming will be working?
AR and VR can be implemented through different technologies and hardware devices. As a result, employees can attend a meeting from home, just with a mobile application that enables the office structure in the room. Or, 2-3 members can be present physically in a meeting room while others are joining from remote places through VR. A 3D video streaming would overshadow the physical absence of the teammates. At the same time, the resources can be shared in no time for reference and transparent communication.
So, how exactly a business can be affected by augmented reality video conferencing on a large scale? Here’s a keen observation from both perspectives.
Part 2 Pros and Cons of AR and VR Conferencing
01Pros of AR and VR Conferencing
● This technology has an initial purpose to save time and energy for the workers including daily travel and balancing personal and professional commitments.
● Employers can hire people from remote places based on their skills and without worrying about the distance and timezone gap.
● Additional resources like bigger office space, electricity, and water can be saved if augmented reality video conferencing is in a complete performance.
● Positive collaboration can be expected while the employees have more energy and a comfortable environment to work in. As a result, productivity might take a boost as well.
● AR video conference serves a better experience than normal video conference in Zoom or Google meeting.
02Cons of AR and VR Conferencing
● The whole process is still under experiment and there’s no confirmed news about its beginning. So, there’s no practical feedback on the process of installation, usage, and maintenance.
● It would be expensive and time-consuming to set up a virtual reality conference system in a big office with n number of people.
● Technical fault from the office or from employees’ home can cost serious penalties in the business workflow.
● Hardware limitations like limited battery life, expensive headsets, and wireless connection are required and these things can cause problems while implementation.
● It can be uncomfortable to wear headsets for a long time during augmented reality conferencing andpeople can experience motion sickness due to this.
Part 3 How does Wondershare Filmora Video Editor assists AR video conference?
To use AR and VR professionally at a larger scale, the videos need to be seamless and follow some standard parameters. With Filmora, it would be easier to manage all the videos during an augmented reality video conferencing. There are multiple effects like “Motion Tracking”, “Keyframing”, “Audio ducking”, “Speed Control”, and “Color matching” that are required while managing a virtual conference with multiple people. It’s important to match the environment thoroughly so there’s no lack of concentration and inferiority in the system.
For Win 7 or later (64-bit)
For macOS 10.12 or later
From a business perspective, a video editor has many roles to play. Similarly, for a modern integration like AR and VR video conferencing, the required tools cannot be compromised. With facilities like “Green screen”, “Audio equalizer”, “Split screen”, “3D Lut”, etc. augmented reality would be presented smartly. To match the whole office environment as effectively as the real (present) one and to boost collaboration in the workspace, new generation video editing tools like Filmora is a must. With minimal effort, virtual meetings can be arranged and presented with the key goal to work at a global level and minimize the distance barrier.
● Ending Thoughts →
● Augmented reality conferencing is at an experiment level now and it is expected to be integrated with the real-life workflow sooner.
● As discussed, there’re both advantages and disadvantages of this technology right now. To enhance the facilities and diminish the cons, a smart video editor can be the gamechanger. In this article, you can find all the current news about AR adaptation for workspace collaboration in detail.
How to Merge Videos in HandBrake? Expectation Vs. Reality
So you have captured some mind-blowing clips and want to join them together to make an excellent movie? But, sadly, you are still stuck because you are not sure what video editors would be suitable to complete this task fast.
If such miseries are haunting you, take a deep breath because many like you are searching for the right video merging tools. However, some people recommend using HandBrake for merging clips. So let’s dig some ground to know if the software can really combine clips. And if there’s a “Yes”? Then how to merge videos in HandBrake?
In this article
02 Using HandBrake to Merge Videos – Possible or Not?
03 Combining Videos with Filmora Wondershare
Part 1: What is HandBrake?
Before you gear up for HandBrake to merge videos, it would be wise to know a few essential details about this software.
HandBrake is a free tool for Windows, Linux, and MAC operating systems. The basic purpose of this software is to convert videos from any format in MKV, WebM, and MP4. It is an open-source program that allows users to convert their videos to play them on multiple devices, such as TV media players, computers, tablets, mobile phones, etc.
Moreover, this platform gives you the power to turn your low-quality videos into high-quality screen time. That is why most professional videographers use this tool to polish videos captured with old cameras.
A few more interesting features of HandBrake are:
- Combing artifacts removal due to interlacing
- Convert videos without negatively affecting the audio quality
- Volume and range adjustment
- Addition, removal, and preservation of soft subtitles
However, one vital thing to understand is that although HandBrake takes a tiny little space of your hard drive, the interface is complicated for beginners.

Part 2: Using HandBrake to Merge Videos – Possible or Not?
There is a great misconception about HandBrake among the newbies that HandBrake is primarily a video merger software. But, in reality, that is not true at all. Or, at least, the latest HandBrake version 1.5.1 lacks such features.
Even the official website states that HandBrake cannot combine two or more clips to make them whole.
So feel yourself lucky to read this article if you haven’t downloaded HandBrake yet. Congratulations! You are saved from another heartbreak.
But wait! If the software is not meant to merge clips, it doesn’t mean that you can’t use it to prepare your videos for the real deal. HandBrake can still be a helpful tool, permitting you to convert videos in a similar format before you start merging them on any other video editor.
For example, suppose you have two video clips in different formats. In that case, you can use HandBrake to convert all of them in a similar format so that they can be easily be merged when imported on any video merger tool.
But, again, the question is, if not HandBrake, then what?
Frankly, you will find hundreds of video editing tools with a combining clips feature, but not all of them deserve your attention and time. While software like DaVinci Resolve includes characteristics to merge two or more clips in a single shot, beginners and mid-level users may still find them a bit difficult at the start.
That is why professionals and experts prefer Filmora by Wondershare to merge videos without banging their heads on the screen.
So, how to merge videos in Filmora with simple clicks? Focus on the next part of the article to learn the step-by-step method within a few minutes.
Part 3: Combining Videos with Filmora Wondershare
Filmora Video Editor is a remarkable video editing tool for all types of users. The software works on all major operating systems (MAC and Windows) and includes a gigantic library of effects, presets, overlays, and so much more than you can imagine.
You can download Filmora for free if watermarks don’t annoy you. On the other hand, you can purchase a suitable plan to get rid of watermarks, so your videos look 100% professional.
For Win 7 or later (64-bit)
For macOS 10.14 or later
Now, without any more delay, let’s start learning how to combine videos in Filmora through the following steps.
Step 1: Install Filmora on Your Computer
Just visit Filmora’s website to download the latest version of the software for your Windows or MAC.

After downloading the software on your computer, install it. Once the software is ready, double-click the “Wondershare Filmora” icon (it should be on your desktop screen) to open the program.
As you can see, the interface is simple with user-friendly options.

Step 2: Import Multiple Videos in Filmora
Click on the blue icon with a “+” sign to import videos.

Or, click on the “File” button on the top menu to import files and drag and drop both clips to the same timeline.
As you can see, there are two clips on the timeline. The first clip is called “Cherry Blossom,” and the second clip’s name is “Plating Food.”

Step 3: Keep Video Clips on the Same Timeline
There shouldn’t be any gap or spaces between the two clips.

It is because gaps will create a dark blank space between the clips when you export the clips, like this:

Therefore, slide the second video right next to the first video without leaving any gaps with your mouse.

And guess what? You have already merged the two clips.
Step 4: Save Video on Your PC
Now, hit the “Export” button and save the merged video on your computer.

HandBrake is an outstanding tool for video conversion, but there’s no benefit of learning how to merge videos in HandBrake, as the software does not include such features. Nevertheless, when it is about combining multiple videos in high quality, you can rely on Filmora to merge clips in no time.
FAQs
Q1. Can you increase the video quality in HandBrake?
Yes. You can use HandBrake to convert videos and adjust the video quality settings as per your requirements before starting the conversion process.
Q2. Can you crop and resize the video in HandBrake?
HandBrake makes it easy to crop and resize all types of videos without disturbing the audio quality.
Q3. Can you use HandBrake clips on other video editors for video mergers?
After converting videos in HandBrake, you can use the clips in video editors, like Filmora, to merge clips.
02 Using HandBrake to Merge Videos – Possible or Not?
03 Combining Videos with Filmora Wondershare
Part 1: What is HandBrake?
Before you gear up for HandBrake to merge videos, it would be wise to know a few essential details about this software.
HandBrake is a free tool for Windows, Linux, and MAC operating systems. The basic purpose of this software is to convert videos from any format in MKV, WebM, and MP4. It is an open-source program that allows users to convert their videos to play them on multiple devices, such as TV media players, computers, tablets, mobile phones, etc.
Moreover, this platform gives you the power to turn your low-quality videos into high-quality screen time. That is why most professional videographers use this tool to polish videos captured with old cameras.
A few more interesting features of HandBrake are:
- Combing artifacts removal due to interlacing
- Convert videos without negatively affecting the audio quality
- Volume and range adjustment
- Addition, removal, and preservation of soft subtitles
However, one vital thing to understand is that although HandBrake takes a tiny little space of your hard drive, the interface is complicated for beginners.
Part 2: Using HandBrake to Merge Videos – Possible or Not?
There is a great misconception about HandBrake among the newbies that HandBrake is primarily a video merger software. But, in reality, that is not true at all. Or, at least, the latest HandBrake version 1.5.1 lacks such features.
Even the official website states that HandBrake cannot combine two or more clips to make them whole.
So feel yourself lucky to read this article if you haven’t downloaded HandBrake yet. Congratulations! You are saved from another heartbreak.
But wait! If the software is not meant to merge clips, it doesn’t mean that you can’t use it to prepare your videos for the real deal. HandBrake can still be a helpful tool, permitting you to convert videos in a similar format before you start merging them on any other video editor.
For example, suppose you have two video clips in different formats. In that case, you can use HandBrake to convert all of them in a similar format so that they can be easily be merged when imported on any video merger tool.
But, again, the question is, if not HandBrake, then what?
Frankly, you will find hundreds of video editing tools with a combining clips feature, but not all of them deserve your attention and time. While software like DaVinci Resolve includes characteristics to merge two or more clips in a single shot, beginners and mid-level users may still find them a bit difficult at the start.
That is why professionals and experts prefer Filmora by Wondershare to merge videos without banging their heads on the screen.
So, how to merge videos in Filmora with simple clicks? Focus on the next part of the article to learn the step-by-step method within a few minutes.
Part 3: Combining Videos with Filmora Wondershare
Filmora Video Editor is a remarkable video editing tool for all types of users. The software works on all major operating systems (MAC and Windows) and includes a gigantic library of effects, presets, overlays, and so much more than you can imagine.
You can download Filmora for free if watermarks don’t annoy you. On the other hand, you can purchase a suitable plan to get rid of watermarks, so your videos look 100% professional.
For Win 7 or later (64-bit)
For macOS 10.14 or later
Now, without any more delay, let’s start learning how to combine videos in Filmora through the following steps.
Step 1: Install Filmora on Your Computer
Just visit Filmora’s website to download the latest version of the software for your Windows or MAC.
After downloading the software on your computer, install it. Once the software is ready, double-click the “Wondershare Filmora” icon (it should be on your desktop screen) to open the program.
As you can see, the interface is simple with user-friendly options.
Step 2: Import Multiple Videos in Filmora
Click on the blue icon with a “+” sign to import videos.
Or, click on the “File” button on the top menu to import files and drag and drop both clips to the same timeline.
As you can see, there are two clips on the timeline. The first clip is called “Cherry Blossom,” and the second clip’s name is “Plating Food.”
Step 3: Keep Video Clips on the Same Timeline
There shouldn’t be any gap or spaces between the two clips.
It is because gaps will create a dark blank space between the clips when you export the clips, like this:
Therefore, slide the second video right next to the first video without leaving any gaps with your mouse.
And guess what? You have already merged the two clips.
Step 4: Save Video on Your PC
Now, hit the “Export” button and save the merged video on your computer.
HandBrake is an outstanding tool for video conversion, but there’s no benefit of learning how to merge videos in HandBrake, as the software does not include such features. Nevertheless, when it is about combining multiple videos in high quality, you can rely on Filmora to merge clips in no time.
FAQs
Q1. Can you increase the video quality in HandBrake?
Yes. You can use HandBrake to convert videos and adjust the video quality settings as per your requirements before starting the conversion process.
Q2. Can you crop and resize the video in HandBrake?
HandBrake makes it easy to crop and resize all types of videos without disturbing the audio quality.
Q3. Can you use HandBrake clips on other video editors for video mergers?
After converting videos in HandBrake, you can use the clips in video editors, like Filmora, to merge clips.
How to Make Strobe Light Text Effect?
In video editing, professionals put in different types of effects to create a unique feel to the visuals. In fact, there are different styles available that you can use in videos to create a specific feel in the viewers—case in point, strobe lights.
This technique involves a series of intense short flashes of light in sections of the clip that create a suspenseful or thrilling ambiance, amping up the horror feel in viewers and more. You might have seen many examples of this in horror movies, thrillers, suspense or action-filled movies, sci-fi films, etc. Similarly, adding the effect to the titles gives a cinematic feel to them.
As a film or video editor, are you interested in adding this effect to your own project as well? Luckily, you do not need significant technical know-how or invest in different types of high-grade equipment to manage it - Wondershare Filmora allows users to add the effect easily in the titles. Want to know how? Read ahead.
Launch the software first
Of course, before you can begin adding the effect to your video, you must have the software. The downloading process for Wondershare Filmora 11 is very straightforward as long as you have a Mac or Windows PC.
Free Download For Win 7 or later(64-bit)
Free Download For macOS 10.14 or later
First, visit the official website to download the software. The Download button at the top of the screen or the description box is available to click on. That will instantly allow the Filmora installer to download into your device.

Double-click on the installer from your notifications or browser downloads section, then click Install. Allow the prompt for permission approval when it comes up, and the installation process will begin. This would take a little bit of time, and you can tap on the Start Now button at the last window that opens.

Add the title
The editor will open automatically next. You have to tap on the Create New Project button to access the editing screen, tap on the Titles tab, and choose the Default Title. If you prefer another version, browse through the different title presets available as options and download the one you prefer.

Then, drag the title from this section and drop it into the editing timeline. Double-click on the title in the timeline to open the title editing window. Insert the text you want to add as the title in the text field and adjust the size, font, and other font modifications here.
Edit the title and click snapshots
Then, you should drag the title clip you added to the timeline to an upper section and click on the Media tab following that. Then, choose the Sample Color option from the listed menu and tap on the Black color choice. After doing so, drag it down to the timeline onto the track under the Default Title clip you added and moved up.
Consequently, click on the Snapshot icon at the right side of the toolbar just above the timeline. This will take a screenshot of the black color picture you added second.

Then you should double-click on the original Default Title you added and start editing your title text once more. This time, add the term you want to appear under your original title here. Adjust the font for it as something other than the original one. For example, if you put Motor Oil 1937 M54 as the first title font, set the second as Montserrat SemBold. Make more adjustments, if necessary, to the font. Then, retake a snapshot of it.

Insert the snapshots
Remove the two title clips you added to the timeline. You have to work with the Snapshots you took now.
It is possible that you will not see the Snapshots saved in your media folder. In this case, tap on the “Click here to insert media” section and go to the device library. It will open in the Wondershare Filmora folder; if not, search for it and access it.
In the folder, double-click on the Snapshot folder. Choose both of the Snapshots you saved right now from here and tap on Open to import them into Filmora.

Import additional music and background visuals
After you have imported the snapshots to Filmora, you have to tap on the Import File option again. Go to the folder where you saved specific files like Lens flare, background video, particles, and sound effect clips. If you have these previously saved in other folders, make sure to keep them all in one folder ahead of time and open that one here.
Choose all files and click on Open to add them to the Filmora software. Now starts the process of merging them all into one cohesive effect.

Drag the files into the timeline
The background video is the first file you will drag and drop to the timeline. For the best effect, choose a flashing light background video. Next, drag the first title you edited into Track 2, right above the first one. Make sure to adjust the length of the clip to match the background video length. Repeat the same for the second snapshot, adding it above the first snapshot in the timeline.

Edit the snapshots via Chroma Key and Composting
You must hide the second snapshot you added, i.e., the one in the 3rd Track on the timeline. After that, click on snapshot 1 and tap on the Chroma Key icon in the toolbar right above the timeline.
When the Chroma Key window opens, tap on the Select Color option and go to the “More…” option. Tap on the basic white color and click on OK.
Following it, move the slider for Edge Thickness to extend it and see the preview to know if you are satisfied with the amount. Then, click on the unhide icon for the second snapshot. Right-click on it and tap on the Composting option. Under the Blending Mode parameter, change the option to Screen. The title background will remove automatically.
Press OK.

Add the sound effect
Again, you must hide the second snapshot in the timeline with the same step as before. Then, drag the sound effect to the audio track timeline next. Tap on the Play button under the Preview to see how the effect looks with the sound. Cut out the extra second of the sound effect clip to align it with the ending section of all of the other clips.
Add the initial keyframes
Choose the first snapshot in the timeline, below the second snapshot, and above the background video clip. Then, double-click on it to open the editor window and choose the Animation tab this time instead of Image.
Add the keyframe here and change the value of the Scale parameter to 400 or something high like that. In the preview, you will see that most of the font in this title is out of frame. After this, click on Rotate and turn the font to 45 degrees.

Move your playhead on this snapshot clip in the timeline by at least 1 second. Then, add another keyframe in this location by tapping the Add button. Here, reset the Scale and Rotate parameters and press the OK button to end.
Add the lens flare and particle video
Next, go back to the media section where all the files you added are present and drag your lens flare clip to the timeline, right on the track above the last one you added. Drop it here and adjust the length of it to match others if it does not show that automatically.
Above it, drag and drop the Particles video from the media files you added previously onto the track above the lens flare one. Do the same to delete the spare part by moving the play head to that point, clicking on the scissor icon, and removing the extra part.
Then, double-click on this Particles video clip on the timeline and go to the Compositing section. Tap on the Blending Mode drop-down choice and choose the Screen option. Press OK. Next, repeat the same for the lens flare video and tap the OK button.
Now, play the preview again.

Adjust the second title, again
Remember how you clicked on the hide button for the second snapshot for title 2? Now, you have to click on the unhide icon beside it.
Move the play head to the 3-second mark from the beginning. If you need clarification on this, check if the lens flare effect is beginning to start below the first title at this point. Move your playhead to that point for the second snapshot.
Here, tap on the Split icon and remove the clip’s first half. Then, double-click on the second half and go to Animation. Press the Add button to insert a keyframe here and change the scale and position of the title at this point. Move it to the placement you want, right above the lens flare. Also, drag the slider for the Opacity parameter to zero at this point.

Subsequently, move the play head to the point when the lens flare effect stop, which is around 2 seconds more. At this point, you have to add another keyframe and change the Opacity to 100.
Play the preview of the whole thing to see how the effect looks in completion.
Conclusion
Indeed, the strobe light effect in the title of movies or videos of different lengths can effectively create a heart-stopping moment on the screen. Moreover, it can work to incite a feeling of anticipation in viewers, especially with the right music beat in the backdrop.
Using Filmora will allow you to add the cinematic effect quickly and efficiently with simple, quick steps. Follow the phases mentioned in this post while trying out different variations before settling on your final shot choice.
Free Download For macOS 10.14 or later
First, visit the official website to download the software. The Download button at the top of the screen or the description box is available to click on. That will instantly allow the Filmora installer to download into your device.
Double-click on the installer from your notifications or browser downloads section, then click Install. Allow the prompt for permission approval when it comes up, and the installation process will begin. This would take a little bit of time, and you can tap on the Start Now button at the last window that opens.
Add the title
The editor will open automatically next. You have to tap on the Create New Project button to access the editing screen, tap on the Titles tab, and choose the Default Title. If you prefer another version, browse through the different title presets available as options and download the one you prefer.
Then, drag the title from this section and drop it into the editing timeline. Double-click on the title in the timeline to open the title editing window. Insert the text you want to add as the title in the text field and adjust the size, font, and other font modifications here.
Edit the title and click snapshots
Then, you should drag the title clip you added to the timeline to an upper section and click on the Media tab following that. Then, choose the Sample Color option from the listed menu and tap on the Black color choice. After doing so, drag it down to the timeline onto the track under the Default Title clip you added and moved up.
Consequently, click on the Snapshot icon at the right side of the toolbar just above the timeline. This will take a screenshot of the black color picture you added second.
Then you should double-click on the original Default Title you added and start editing your title text once more. This time, add the term you want to appear under your original title here. Adjust the font for it as something other than the original one. For example, if you put Motor Oil 1937 M54 as the first title font, set the second as Montserrat SemBold. Make more adjustments, if necessary, to the font. Then, retake a snapshot of it.
Insert the snapshots
Remove the two title clips you added to the timeline. You have to work with the Snapshots you took now.
It is possible that you will not see the Snapshots saved in your media folder. In this case, tap on the “Click here to insert media” section and go to the device library. It will open in the Wondershare Filmora folder; if not, search for it and access it.
In the folder, double-click on the Snapshot folder. Choose both of the Snapshots you saved right now from here and tap on Open to import them into Filmora.
Import additional music and background visuals
After you have imported the snapshots to Filmora, you have to tap on the Import File option again. Go to the folder where you saved specific files like Lens flare, background video, particles, and sound effect clips. If you have these previously saved in other folders, make sure to keep them all in one folder ahead of time and open that one here.
Choose all files and click on Open to add them to the Filmora software. Now starts the process of merging them all into one cohesive effect.
Drag the files into the timeline
The background video is the first file you will drag and drop to the timeline. For the best effect, choose a flashing light background video. Next, drag the first title you edited into Track 2, right above the first one. Make sure to adjust the length of the clip to match the background video length. Repeat the same for the second snapshot, adding it above the first snapshot in the timeline.
Edit the snapshots via Chroma Key and Composting
You must hide the second snapshot you added, i.e., the one in the 3rd Track on the timeline. After that, click on snapshot 1 and tap on the Chroma Key icon in the toolbar right above the timeline.
When the Chroma Key window opens, tap on the Select Color option and go to the “More…” option. Tap on the basic white color and click on OK.
Following it, move the slider for Edge Thickness to extend it and see the preview to know if you are satisfied with the amount. Then, click on the unhide icon for the second snapshot. Right-click on it and tap on the Composting option. Under the Blending Mode parameter, change the option to Screen. The title background will remove automatically.
Press OK.
Add the sound effect
Again, you must hide the second snapshot in the timeline with the same step as before. Then, drag the sound effect to the audio track timeline next. Tap on the Play button under the Preview to see how the effect looks with the sound. Cut out the extra second of the sound effect clip to align it with the ending section of all of the other clips.
Add the initial keyframes
Choose the first snapshot in the timeline, below the second snapshot, and above the background video clip. Then, double-click on it to open the editor window and choose the Animation tab this time instead of Image.
Add the keyframe here and change the value of the Scale parameter to 400 or something high like that. In the preview, you will see that most of the font in this title is out of frame. After this, click on Rotate and turn the font to 45 degrees.
Move your playhead on this snapshot clip in the timeline by at least 1 second. Then, add another keyframe in this location by tapping the Add button. Here, reset the Scale and Rotate parameters and press the OK button to end.
Add the lens flare and particle video
Next, go back to the media section where all the files you added are present and drag your lens flare clip to the timeline, right on the track above the last one you added. Drop it here and adjust the length of it to match others if it does not show that automatically.
Above it, drag and drop the Particles video from the media files you added previously onto the track above the lens flare one. Do the same to delete the spare part by moving the play head to that point, clicking on the scissor icon, and removing the extra part.
Then, double-click on this Particles video clip on the timeline and go to the Compositing section. Tap on the Blending Mode drop-down choice and choose the Screen option. Press OK. Next, repeat the same for the lens flare video and tap the OK button.
Now, play the preview again.
Adjust the second title, again
Remember how you clicked on the hide button for the second snapshot for title 2? Now, you have to click on the unhide icon beside it.
Move the play head to the 3-second mark from the beginning. If you need clarification on this, check if the lens flare effect is beginning to start below the first title at this point. Move your playhead to that point for the second snapshot.
Here, tap on the Split icon and remove the clip’s first half. Then, double-click on the second half and go to Animation. Press the Add button to insert a keyframe here and change the scale and position of the title at this point. Move it to the placement you want, right above the lens flare. Also, drag the slider for the Opacity parameter to zero at this point.
Subsequently, move the play head to the point when the lens flare effect stop, which is around 2 seconds more. At this point, you have to add another keyframe and change the Opacity to 100.
Play the preview of the whole thing to see how the effect looks in completion.
Conclusion
Indeed, the strobe light effect in the title of movies or videos of different lengths can effectively create a heart-stopping moment on the screen. Moreover, it can work to incite a feeling of anticipation in viewers, especially with the right music beat in the backdrop.
Using Filmora will allow you to add the cinematic effect quickly and efficiently with simple, quick steps. Follow the phases mentioned in this post while trying out different variations before settling on your final shot choice.
How to Windows Online Movie Maker [Complete Guide]
The likelihood is that video will soon play a significant role in your content marketing approach, if it hasn’t already – and for that using windows online movie maker is inevitable. You are an emerging brand, a sole proprietor, or even a podcaster. Knowing the importance of video marketing to content producers and agencies is second nature if you’re an astute digital marketer It may be costly and challenging to utilize video editing software. Fortunately, there are free online video editors available.
Before very recently, video editing needed highly specialized skills and was done manually using different tools. Windows Movie Maker used to be a standard component of every Windows user’s toolbox and was a highly recommended video editing product for novices. With the windows movie maker online, the application was well-liked for its ease of use and entertaining special effects, but most significantly - it was free. It came pre-installed on all Windows machines. You may do that with the help of our handy list of the top three online video creators.
Part 1. How to Make a Video Online [Use Movie Maker Windows Online]
Using the help of Movie Maker, you may create videos online with your browser. It enables you to create professional-caliber videos without having to purchase video editing tools at professional-caliber costs. For every genre and need, this web program includes stock video, animated text, audio tracks, and on-screen effects. Your own video clips are uploaded. Then, use the simple drag-and-drop online video editor in Movie Maker to edit footage and add special effects and music to make your movie shine.
Making fantastic compilation films from your already-existing photographs and videos doesn’t need you to be a skilled editor. Even for amateur video makers, the platform’s UI is simple to use and straightforward to navigate. The customizing choices in Movie Maker are many. You have the option of uploading your own fonts and logos. You may also watermark your films and alter the text’s color. Additionally, there are a ton of very unique components like stickers, vector shapes, and masks that may enhance the visual appeal of your video productions and widen your creative boundaries.
Steps to Make Video with Movie Maker Online
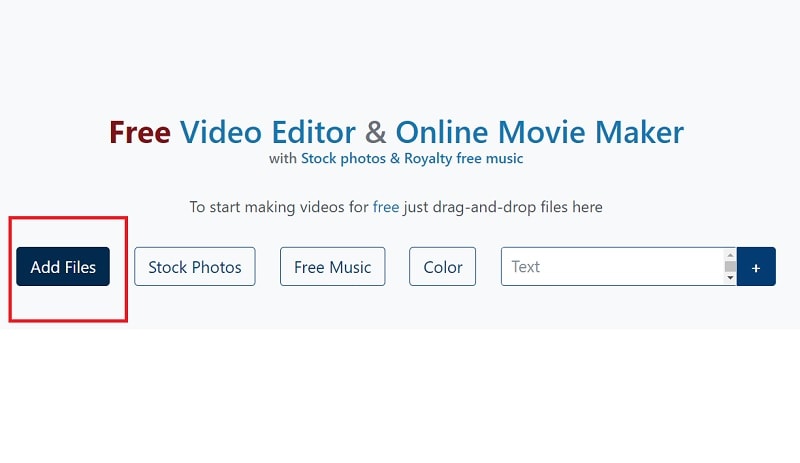
Step1 Go to Movie Maker Online
Using Movie Maker Online, you can quickly and easily make incredibly interesting compilation films using your already-posted photographs and videos. You’ll immediately be sent to the editor, where you can begin organizing your films. Here’s the official link to the toolkit:
Step2 Upload Files to Web
Your photographs, videos, and text may all be uploaded. If you like the default music, you may skip the step to change it; otherwise, you can choose another song from our library or upload your own MP3 file. Files from a variety of sources and devices may be added. Click the Import Media button to start importing your own media. Click Open after locating the video you wish to modify.
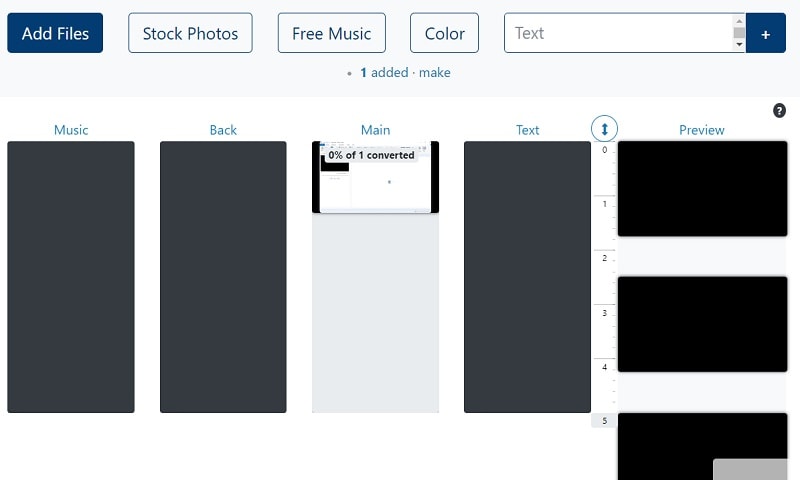
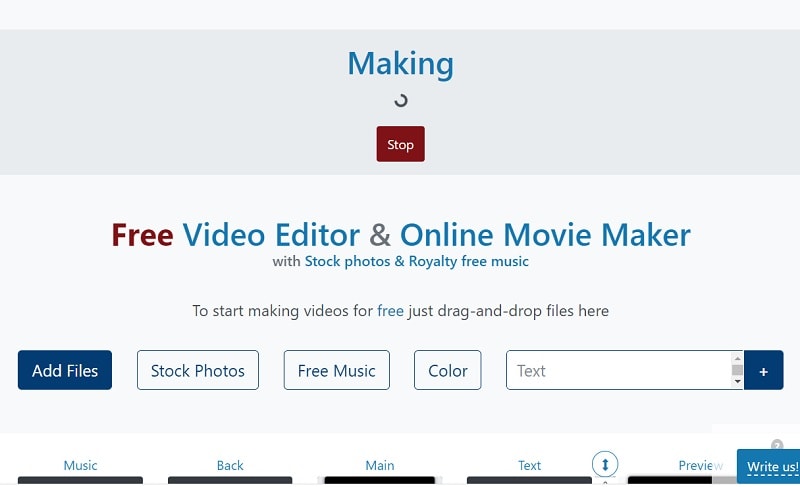
Step3 Create an online video
Add your music to your video compilation after all of your clips have been placed on the timeline. To accomplish that, choose a song depending on the genre or mood you want by clicking on the Music option on the left menu panel. To listen to the music track, click the little icon to the left of it. Text, colors, pictures, and video may all be customized to your heart’s delight. Add effects, drag, cut, etc. Press the Make Video button.
Step4 Save and Share with Others
Sharing your films on Facebook, Instagram, YouTube, and other platforms is made effortless. You may also send your loved ones the URLs to your videos. When you are happy with the changes, click the Save & Share option in the upper right corner, choose the quality you want to download your movie in, and then click the Export button. Download the updated video, then post it.
Part 2. Other Windows Online Movie Makers to Use [Top 3]
1. Kizoa
Link: Kizoa
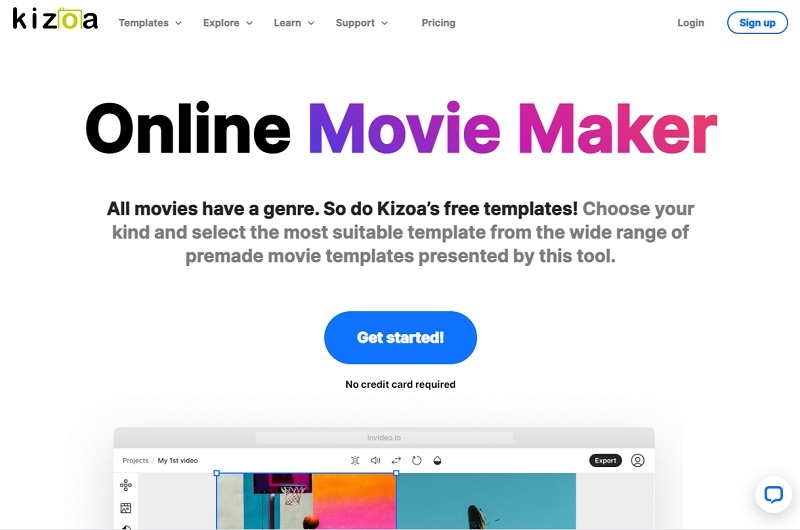
Customizing the appearance of your film is one of the finest ways to make it seem like it is your own. With the Kizoa tool, you may trim, apply a crossfade effect, choose the required resolution, and format for an output video in addition to merging files. Utilize Kizoa’s online video creator to produce eye-catching videos that will hold your audience’s attention. Create any kind of video, from personal family video slideshows to expert films to advertise your company. With the drag-and-drop movie production tool from Kizoa, you can create your very own video in a matter of minutes.
Use a video template as your starting point if you need inspiration. Key framing, animated overlays, noise reduction, transitions, and titles are just a few of the features it provides to help you produce excellent footage. For rapid video editing, there is a video production wizard. Windows Movie Maker’s auto movie themes pale in comparison to those provided by this program. Its extensive collection of stock footage and audio tracks helps you to concentrate on the crucial elements without having to drastically decrease the length of your film or the number of scenes.
2. FlexClip
Link: FlexClip
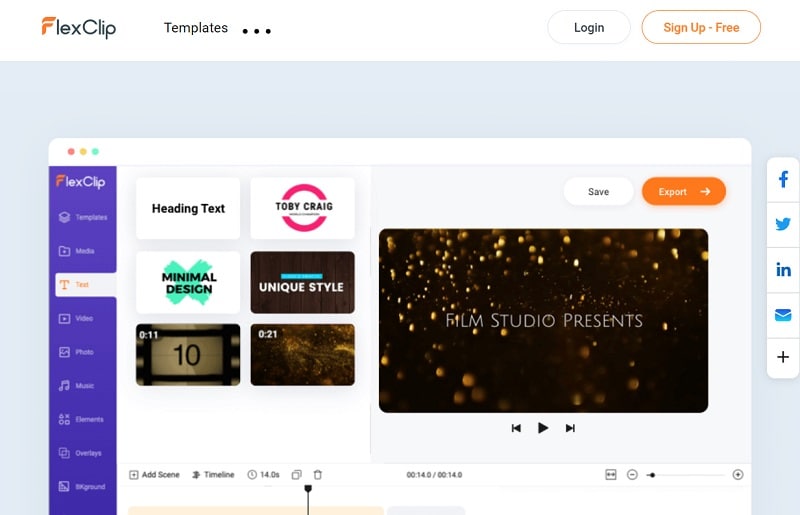
With the aid of the online video effects tool FlexClip, you may quickly and easily make entertaining short films. It has a ton of video editing features that you may use without logging in or creating an account, like merging, compressing, compiling, adding text, creating memes, etc. For those that are muted, you may use FlexClip to add animated text that blends in with the style of your film. Additionally, you may add your logo so that everyone is aware of who created the masterpiece they just saw.
An online video editor called FlexClip is mainly focused on producing high-quality marketing, advertising, and promotional films for companies. Recording a single video that will function on all social networking and video-sharing websites is almost impossible. Instagram, YouTube, and Facebook Marketing are among the partners of FlexClip that have received expert approval. It is used by marketers and enthusiasts to quickly create looping movies and stop motion animation. But as it only provides very basic functionality, it may not be the greatest choice for more intricate, demanding editing.
3. Veed.Io
Link: Veed.Io
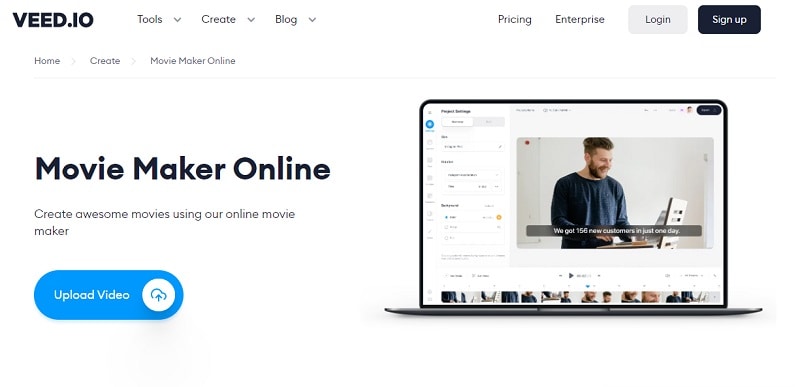
With only a few mouse clicks, users of the browser-based video editing program VEED may create professional-caliber movies. The greatest movie-making tools, including filters, effects, and stickers, are available on VEED. There are no intricate timelines, layers, or intricacy since it is a simple program that runs in your web browser. Simple drag-and-drop functionality is all you need to convey your tales. You may modify your video using its features. Using the video track below, you may combine, divide, or cut your files. Visit our website to see all of our filters, stickers, add-ons, and other tools.
Any device, whether an iPhone or Android phone, a MacBook, a Windows or Linux computer, may use VEED’s online video editor. You have access to all the resources you need to make amazing videos using VEED’s online video editor. Our user-friendly interface is very simple to use and is contemporary and intuitive. The native video sizes on each of the publishing sites, including Facebook, YouTube, and Vimeo, may all be altered using Veed. Finally, click “Export” in the editor’s upper-right corner, and your video will render quickly. Share some!
Conclusion
Use this editing list to produce more compelling video mashups for YouTube and other social media platforms in order to expand your audience, cultivate real connections with them, and eventually increase conversion rates. Because they combine the complex capabilities of the expensive, professional video suites with the user-friendliness and cost that appeal to novices, these online makers are a popular among editors of all skill levels. Make an investment in one of these video editing tools and own it.
Free Download For Win 7 or later(64-bit)
Free Download For macOS 10.14 or later
Part 1. How to Make a Video Online [Use Movie Maker Windows Online]
Using the help of Movie Maker, you may create videos online with your browser. It enables you to create professional-caliber videos without having to purchase video editing tools at professional-caliber costs. For every genre and need, this web program includes stock video, animated text, audio tracks, and on-screen effects. Your own video clips are uploaded. Then, use the simple drag-and-drop online video editor in Movie Maker to edit footage and add special effects and music to make your movie shine.
Making fantastic compilation films from your already-existing photographs and videos doesn’t need you to be a skilled editor. Even for amateur video makers, the platform’s UI is simple to use and straightforward to navigate. The customizing choices in Movie Maker are many. You have the option of uploading your own fonts and logos. You may also watermark your films and alter the text’s color. Additionally, there are a ton of very unique components like stickers, vector shapes, and masks that may enhance the visual appeal of your video productions and widen your creative boundaries.
Steps to Make Video with Movie Maker Online
Step1 Go to Movie Maker Online
Using Movie Maker Online, you can quickly and easily make incredibly interesting compilation films using your already-posted photographs and videos. You’ll immediately be sent to the editor, where you can begin organizing your films. Here’s the official link to the toolkit:
Step2 Upload Files to Web
Your photographs, videos, and text may all be uploaded. If you like the default music, you may skip the step to change it; otherwise, you can choose another song from our library or upload your own MP3 file. Files from a variety of sources and devices may be added. Click the Import Media button to start importing your own media. Click Open after locating the video you wish to modify.
Step3 Create an online video
Add your music to your video compilation after all of your clips have been placed on the timeline. To accomplish that, choose a song depending on the genre or mood you want by clicking on the Music option on the left menu panel. To listen to the music track, click the little icon to the left of it. Text, colors, pictures, and video may all be customized to your heart’s delight. Add effects, drag, cut, etc. Press the Make Video button.
Step4 Save and Share with Others
Sharing your films on Facebook, Instagram, YouTube, and other platforms is made effortless. You may also send your loved ones the URLs to your videos. When you are happy with the changes, click the Save & Share option in the upper right corner, choose the quality you want to download your movie in, and then click the Export button. Download the updated video, then post it.
Part 2. Other Windows Online Movie Makers to Use [Top 3]
1. Kizoa
Link: Kizoa
Customizing the appearance of your film is one of the finest ways to make it seem like it is your own. With the Kizoa tool, you may trim, apply a crossfade effect, choose the required resolution, and format for an output video in addition to merging files. Utilize Kizoa’s online video creator to produce eye-catching videos that will hold your audience’s attention. Create any kind of video, from personal family video slideshows to expert films to advertise your company. With the drag-and-drop movie production tool from Kizoa, you can create your very own video in a matter of minutes.
Use a video template as your starting point if you need inspiration. Key framing, animated overlays, noise reduction, transitions, and titles are just a few of the features it provides to help you produce excellent footage. For rapid video editing, there is a video production wizard. Windows Movie Maker’s auto movie themes pale in comparison to those provided by this program. Its extensive collection of stock footage and audio tracks helps you to concentrate on the crucial elements without having to drastically decrease the length of your film or the number of scenes.
2. FlexClip
Link: FlexClip
With the aid of the online video effects tool FlexClip, you may quickly and easily make entertaining short films. It has a ton of video editing features that you may use without logging in or creating an account, like merging, compressing, compiling, adding text, creating memes, etc. For those that are muted, you may use FlexClip to add animated text that blends in with the style of your film. Additionally, you may add your logo so that everyone is aware of who created the masterpiece they just saw.
An online video editor called FlexClip is mainly focused on producing high-quality marketing, advertising, and promotional films for companies. Recording a single video that will function on all social networking and video-sharing websites is almost impossible. Instagram, YouTube, and Facebook Marketing are among the partners of FlexClip that have received expert approval. It is used by marketers and enthusiasts to quickly create looping movies and stop motion animation. But as it only provides very basic functionality, it may not be the greatest choice for more intricate, demanding editing.
3. Veed.Io
Link: Veed.Io
With only a few mouse clicks, users of the browser-based video editing program VEED may create professional-caliber movies. The greatest movie-making tools, including filters, effects, and stickers, are available on VEED. There are no intricate timelines, layers, or intricacy since it is a simple program that runs in your web browser. Simple drag-and-drop functionality is all you need to convey your tales. You may modify your video using its features. Using the video track below, you may combine, divide, or cut your files. Visit our website to see all of our filters, stickers, add-ons, and other tools.
Any device, whether an iPhone or Android phone, a MacBook, a Windows or Linux computer, may use VEED’s online video editor. You have access to all the resources you need to make amazing videos using VEED’s online video editor. Our user-friendly interface is very simple to use and is contemporary and intuitive. The native video sizes on each of the publishing sites, including Facebook, YouTube, and Vimeo, may all be altered using Veed. Finally, click “Export” in the editor’s upper-right corner, and your video will render quickly. Share some!
Conclusion
Use this editing list to produce more compelling video mashups for YouTube and other social media platforms in order to expand your audience, cultivate real connections with them, and eventually increase conversion rates. Because they combine the complex capabilities of the expensive, professional video suites with the user-friendliness and cost that appeal to novices, these online makers are a popular among editors of all skill levels. Make an investment in one of these video editing tools and own it.
Free Download For Win 7 or later(64-bit)
Free Download For macOS 10.14 or later
Also read:
- Converting an SRT (SRT/Sorted Reader) Into a DOCX File Is a Process. Here We Will Discuss Converting a Set File to a Docx File and More Details About This
- Updated Want to Add Freeze Frame Effect to Your Video on Your Device? Here Are the Steps to Add Freeze Frame on PC, Mac, Smartphone as Well as Online From Any Device
- How to Use a Stabilization Tool in Filmora
- Updated Best Video Format Converter for PC and Online for 2024
- New 2024 Approved How to Add Effects in Premiere Pro
- Updated Top 5 AI Music Video Examples and Makers to Make Them
- Updated In 2024, Best Ways to Slow Down Motion in CapCut
- In 2024, This Article Will Focus on Understanding the Secret Tips in Wondershare Filmora that You Can Use to Edit Videos Faster and More Efficiently
- New As a Designer, Color Is the Most Powerful and the Most Diverse Tool at Your Disposal. Here Are Ten Matching Color Combinations to Get You Started on Your Next Project
- New 30+ Amazing Templates for VN Video Editor for 2024
- Wish to Rock on YouTube, but Lacking Tricks? Here, We Will Tell You Everything About How the YouTube Algorithm AI Works and How You Can Perform Well According to AI
- Updated In 2024, How to Add Subtitles in VLC Media Play
- New Slideshow Makers Are On-Demand as They Come with Multiple Possibilities for Both Professional and Personal Uses. Gradually, the Best Software to Make Slideshows Is Always Welcomed to Save Time and Effort without Compromising the Quality
- Camtasia Vs. Final Cut Pro for 2024
- 2024 Approved Trailer Guide for Creators and Developers
- Add Emoji to Linkedin Post – 5 Tips You Need to Know for 2024
- How to Create Your Own LUTs for Your Video with Filmora
- Updated Different Ways To Trim Video In Premiere Pro
- New 2024 Approved Best Youtube Video Meme Maker
- Updated 2024 Approved Guide to Make Timelapse Video with iMovie
- Updated 2024 Approved How to Create Your Own LUTs for Your Video with Filmora
- Updated 2024 Approved How To Make Transparent Background On Picsart
- New 2024 Approved How to Create Datamoshing Effect to Your Footage in After Effects?
- How To Transfer Data From Apple iPhone 11 Pro To Other iPhone 15 Pro devices? | Dr.fone
- Does Xiaomi Redmi Note 13 Pro 5G support MOV videos ?
- How to Transfer Data from Apple iPhone 11 Pro to ZTE Phones | Dr.fone
- In 2024, Complete Review & Guide to Techeligible FRP Bypass and More For Xiaomi Redmi Note 12T Pro
- In 2024, How to Unlock SIM Card on Samsung Galaxy M34 online without jailbreak
- In 2024, How To Delete iCloud Account Remove Your Apple ID Permanently From Apple iPhone XS Max
- How to Transfer Photos from Asus ROG Phone 7 Ultimate to New Android? | Dr.fone
- In 2024, How To Change Xiaomi Redmi K70E Lock Screen Clock in Seconds
- Play Store Stuck on Downloading Of Motorola Razr 40? 7 Ways to Resolve | Dr.fone
- In 2024, Where Is the Best Place to Catch Dratini On Apple iPhone 15 | Dr.fone
- Complete Tutorial to Use VPNa to Fake GPS Location On Oppo A2 | Dr.fone
- In 2024, Ways To Find Unlocking Codes For Vivo Y56 5G Phones
- The Top 5 Android Apps That Use Fingerprint Sensor to Lock Your Apps On Xiaomi 13 Ultra
- 10 Free Location Spoofers to Fake GPS Location on your Xiaomi Redmi Note 12T Pro | Dr.fone
- Title: New Is Augmented Reality Conferencing the Future of Workplace Collaboration?
- Author: Chloe
- Created at : 2024-05-20 03:38:13
- Updated at : 2024-05-21 03:38:13
- Link: https://ai-editing-video.techidaily.com/new-is-augmented-reality-conferencing-the-future-of-workplace-collaboration/
- License: This work is licensed under CC BY-NC-SA 4.0.
