New Looking For The Best Slow Motion Effect in Premiere Pro for 2024

Looking For The Best Slow Motion Effect in Premiere Pro
Adobe Premiere Pro is a famous video editing program in the media industry. It includes professional-quality features that enable advanced video editing. Due to its impressive performance, many content creators use this tool to add slow-motion effects to the videos. If you are at a beginner stage of video editing, you may not know how to operate Premiere Pro slow-motion effects. Thus, this guide will provide you with basic yet accurate instructions.
To create slow-motion effects in Premiere Pro, the guide will describe the instructions in a simple way. We will also highlight the templates of this tool providing slow-motion effects in Premiere Pro for videos. Hence, keep discovering this guide to learn more details.
Slow Motion Video Maker Slow your video’s speed with better control of your keyframes to create unique cinematic effects 

Part 1: How To Perform Slow Motion on Adobe Premiere Pro?
Adobe Premiere Pro offers an advanced user interface to perform complex functions. It contains a wide range of features supporting non-destructive video editing. Its auto-correct feature lets you adjust the color patterns of the video in a smart way. Moreover, it contains a comparison view to analyze the before and after visual effects. You can also add adjustment layers in the timeline to change many clips at once.
On Premiere Pro, you can also connect third-party plugins for more features. It also supports many professional-grade formats to offer flexibility for video editors. Among other features, it can also apply slow-motion effects to the video. To make Premiere Pro slow-motion effects, you can use the following steps:
Step 1: On Premiere Pro, upload the video in which you want to create a slow-motion effect. To proceed, drag it to the timeline with your cursor. At the start of the timeline, right-click on the small icon saying FX on the left side. From there, select “Time Remapping” and then “Speed.”

Step 2: Now, add the keyframe where you want to begin and end the slow-motion effect. To do so, press “CTRL + Click” on the timeline. To add a ramp, click on the added keyframes and drag them a little to the right side.

Step 3: To proceed, move to the central part of the two added keyframes. Afterward, click on the central part and drag it downwards. By doing so, you can see the reduced percentage number on the timeline. To add a more slow-motion effect, pull down the central part of the timeline. For more adjustments in the length within the keyframes, you can go to the effects control. By doing so, you can determine how smoothly you want to create a slow-motion effect.

Part 2:Leading Templates Offering Quick Slow Motion Effect in Premiere Pro
In this section, you can find popular slow-motion effect Premiere Pro templates. After accessing the templates, you can customize them as per your needs. Hence, let’s dig into the details below:
This template is perfect for use in the intros of videos, presentations, slideshows, etc. It contains 9 different scenes of outdoor areas. Moreover, it offers 16 media placeholders and 7 text placeholders to add custom content. You can promote your brand by using its 2 placeholder logos. Hence, it’s a perfect slow-motion video template with HD-quality resolution.

The slow-motion explosion logo opener is an attractive template featuring vibrant colors. It contains a hand-drawn animated logo with suitable backgrounds. Along with the logo reveal, it includes background music that matches the theme of the video. It also offers media and text placeholders to let you introduce your brand.

Do you want to create a modern video on Premiere Pro? Well, this slow-motion template features freeze frames to offer viewers a unique look. The template gives a glimpse of urban life with energetic background music. It’s available in full HD resolution with eye-catching urban locations. Hence, try this template for demos, fashion, and action videos.

Dynamic Sport is one of the famous slow-motion Premiere Pro templates. With a modern outlook, it includes simple text animation. Moreover, it uses many transitioning effects to produce a stunning video. You can insert extra content with its 8 editable text placeholders. Thus, download this template and customize it in Premiere Pro.

This planet-themed template introduces cinematic spinning planets. With 8 text placeholders, you can write content related to your shows, movies, and events. It contains intriguing background music that can grasp the attention of your audience. In full HD resolution, this template can help you produce cinematic slow-motion videos with minimal effort.

Part 3: Tutorial: Perform Slow Motion in Filmora Video Editing
Are you ready to perform slow-motion effects in Premiere Pro in Filmora? Check the directions below to add a slow-motion effect to your video .
Free Download For Win 7 or later(64-bit)
Free Download For macOS 10.14 or later
Step 1Browse and Import the File
After the launch of Filmora, click on the “New Project” button. Click on the “Import Media” section to browse the video file. Once done, drag the video to the timeline to start the editing process.

Step 2Open Speed Ramping Settings
Go to the right panel of the screen to open the settings. From there, go to the “Speed” tab and select “Speed Ramping”. It will display the speed ramping settings below.

Step 3Adjust the Video Speed
The presets are available for speed ramping in the above section. Choose “Customize” and then proceed to the small graph given below. Here, you can move the points to adjust the video’s speed. By pulling down the points, you can reduce the video’s speed. Continue the process until you achieve your desired speed.

Step 4Render the Video
Expand the option of “AI Frame Interpolation” and choose “Optical Flow.” Once done, click on “Render Preview” from the timeline’s toolbar to see the highest-quality results.

Conclusion
Slow-motion effect Premiere Pro can produce high-end results for professionals. Yet, this tool is not ideal for every kind of user. In contrast, Filmora is the most flexible tool due to its friendly user interface. Without extensive manual efforts, you can produce slow-motion videos within a few clicks. Moreover, it features many AI options to let you increase your productivity.
Make A Slow Motion Video Make A Slow Motion Video More Features

Part 1: How To Perform Slow Motion on Adobe Premiere Pro?
Adobe Premiere Pro offers an advanced user interface to perform complex functions. It contains a wide range of features supporting non-destructive video editing. Its auto-correct feature lets you adjust the color patterns of the video in a smart way. Moreover, it contains a comparison view to analyze the before and after visual effects. You can also add adjustment layers in the timeline to change many clips at once.
On Premiere Pro, you can also connect third-party plugins for more features. It also supports many professional-grade formats to offer flexibility for video editors. Among other features, it can also apply slow-motion effects to the video. To make Premiere Pro slow-motion effects, you can use the following steps:
Step 1: On Premiere Pro, upload the video in which you want to create a slow-motion effect. To proceed, drag it to the timeline with your cursor. At the start of the timeline, right-click on the small icon saying FX on the left side. From there, select “Time Remapping” and then “Speed.”

Step 2: Now, add the keyframe where you want to begin and end the slow-motion effect. To do so, press “CTRL + Click” on the timeline. To add a ramp, click on the added keyframes and drag them a little to the right side.

Step 3: To proceed, move to the central part of the two added keyframes. Afterward, click on the central part and drag it downwards. By doing so, you can see the reduced percentage number on the timeline. To add a more slow-motion effect, pull down the central part of the timeline. For more adjustments in the length within the keyframes, you can go to the effects control. By doing so, you can determine how smoothly you want to create a slow-motion effect.

Part 2:Leading Templates Offering Quick Slow Motion Effect in Premiere Pro
In this section, you can find popular slow-motion effect Premiere Pro templates. After accessing the templates, you can customize them as per your needs. Hence, let’s dig into the details below:
This template is perfect for use in the intros of videos, presentations, slideshows, etc. It contains 9 different scenes of outdoor areas. Moreover, it offers 16 media placeholders and 7 text placeholders to add custom content. You can promote your brand by using its 2 placeholder logos. Hence, it’s a perfect slow-motion video template with HD-quality resolution.

The slow-motion explosion logo opener is an attractive template featuring vibrant colors. It contains a hand-drawn animated logo with suitable backgrounds. Along with the logo reveal, it includes background music that matches the theme of the video. It also offers media and text placeholders to let you introduce your brand.

Do you want to create a modern video on Premiere Pro? Well, this slow-motion template features freeze frames to offer viewers a unique look. The template gives a glimpse of urban life with energetic background music. It’s available in full HD resolution with eye-catching urban locations. Hence, try this template for demos, fashion, and action videos.

Dynamic Sport is one of the famous slow-motion Premiere Pro templates. With a modern outlook, it includes simple text animation. Moreover, it uses many transitioning effects to produce a stunning video. You can insert extra content with its 8 editable text placeholders. Thus, download this template and customize it in Premiere Pro.

This planet-themed template introduces cinematic spinning planets. With 8 text placeholders, you can write content related to your shows, movies, and events. It contains intriguing background music that can grasp the attention of your audience. In full HD resolution, this template can help you produce cinematic slow-motion videos with minimal effort.

Part 3: Tutorial: Perform Slow Motion in Filmora Video Editing
Are you ready to perform slow-motion effects in Premiere Pro in Filmora? Check the directions below to add a slow-motion effect to your video .
Free Download For Win 7 or later(64-bit)
Free Download For macOS 10.14 or later
Step 1Browse and Import the File
After the launch of Filmora, click on the “New Project” button. Click on the “Import Media” section to browse the video file. Once done, drag the video to the timeline to start the editing process.

Step 2Open Speed Ramping Settings
Go to the right panel of the screen to open the settings. From there, go to the “Speed” tab and select “Speed Ramping”. It will display the speed ramping settings below.

Step 3Adjust the Video Speed
The presets are available for speed ramping in the above section. Choose “Customize” and then proceed to the small graph given below. Here, you can move the points to adjust the video’s speed. By pulling down the points, you can reduce the video’s speed. Continue the process until you achieve your desired speed.

Step 4Render the Video
Expand the option of “AI Frame Interpolation” and choose “Optical Flow.” Once done, click on “Render Preview” from the timeline’s toolbar to see the highest-quality results.

Conclusion
Slow-motion effect Premiere Pro can produce high-end results for professionals. Yet, this tool is not ideal for every kind of user. In contrast, Filmora is the most flexible tool due to its friendly user interface. Without extensive manual efforts, you can produce slow-motion videos within a few clicks. Moreover, it features many AI options to let you increase your productivity.
Top 11 Best Video Editing Apps for iPhone
Videography is an art, whether done professionally or just for fun. It includes many phases from pre-production to post-production and video editing is one of its important aspects. It is a gamechanger, as most of the mistakes done during production can be fixed in editing.
Video editing is done on large scale for film industries which require expensive and powerful computers but we won’t about them now. As video editing doesn’t only depend on powerful softwares and expensive computers, Skills play a vital role in video editing. A skilled artist on a mobile phone can create better content than a beginner with an expensive PC.
Therefore, here we will talk about small-scale editing which can be done on mobile phones and especially iPhones. Considering iPhones as they are one of the most common devices used by vloggers and small filmmakers. As a mobile video editor, you can edit your clips anywhere you want. Therefore editing videos on a go is quite important. So we have selected some top iPhone video editors for you which are as following:
- Filmora Go
- Free iPhone Video Editors
- Adobe Premiere Rush
- CapCut
- iMovie
- GoPro-Quik
- VN Video Editor
- Paid iPhone Video Editors
- Kinemaster
- Power Director
- LumaFusion
- InShot
- VivaCut
Filmora Go:
It is available on IOS and Android both.
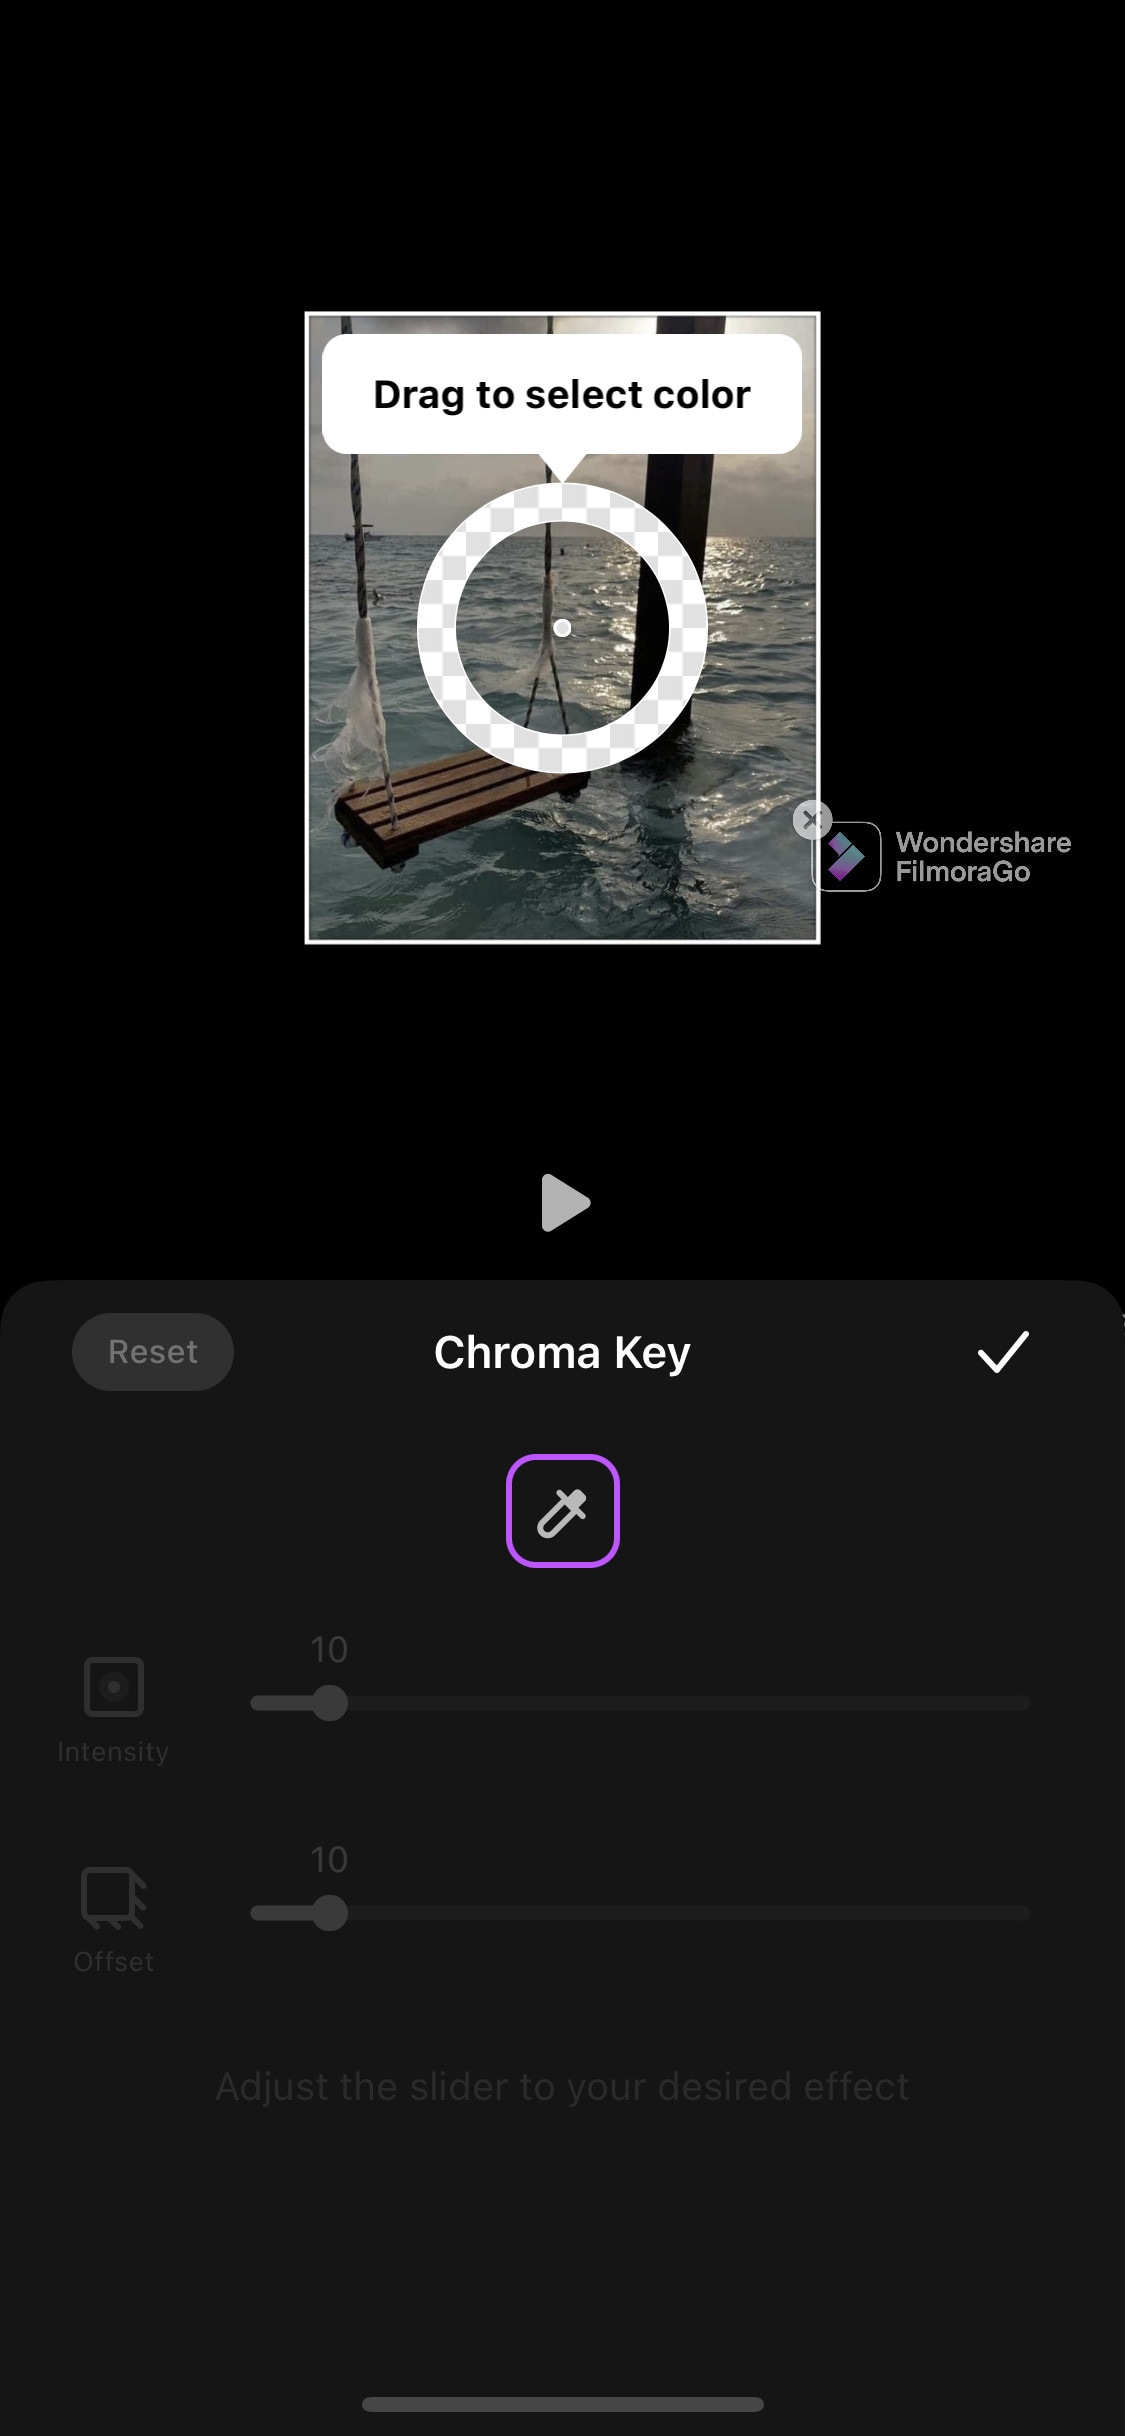
Apart from having a professional video editor for PC, Wondershare has also introduced a video editor for mobile phones. Filmora Go is an amazing video editor, with many cool features such as chroma key, mask, keyframing, blending, e.t.c. It is fast and easy to use with built-in effects, transitions, and presets to speed up the editing process. It is a paid video editor but you can try it for free, free trial includes most of the features but it leaves a watermark on export.
~Features:
- Has speed curves for smooth speed ramping.
- Supports multiple images and video layers.
- Have many presets and filters for fast pace editing.
- Have cool features like chroma key, masking, keyframing, e.t.c.
- Supports “Pixabay’s” stock library.
~Cons:
- Its UI doesn’t support editing in landscape orientation.
- It doesn’t support 4k video resolution.
~Steps:
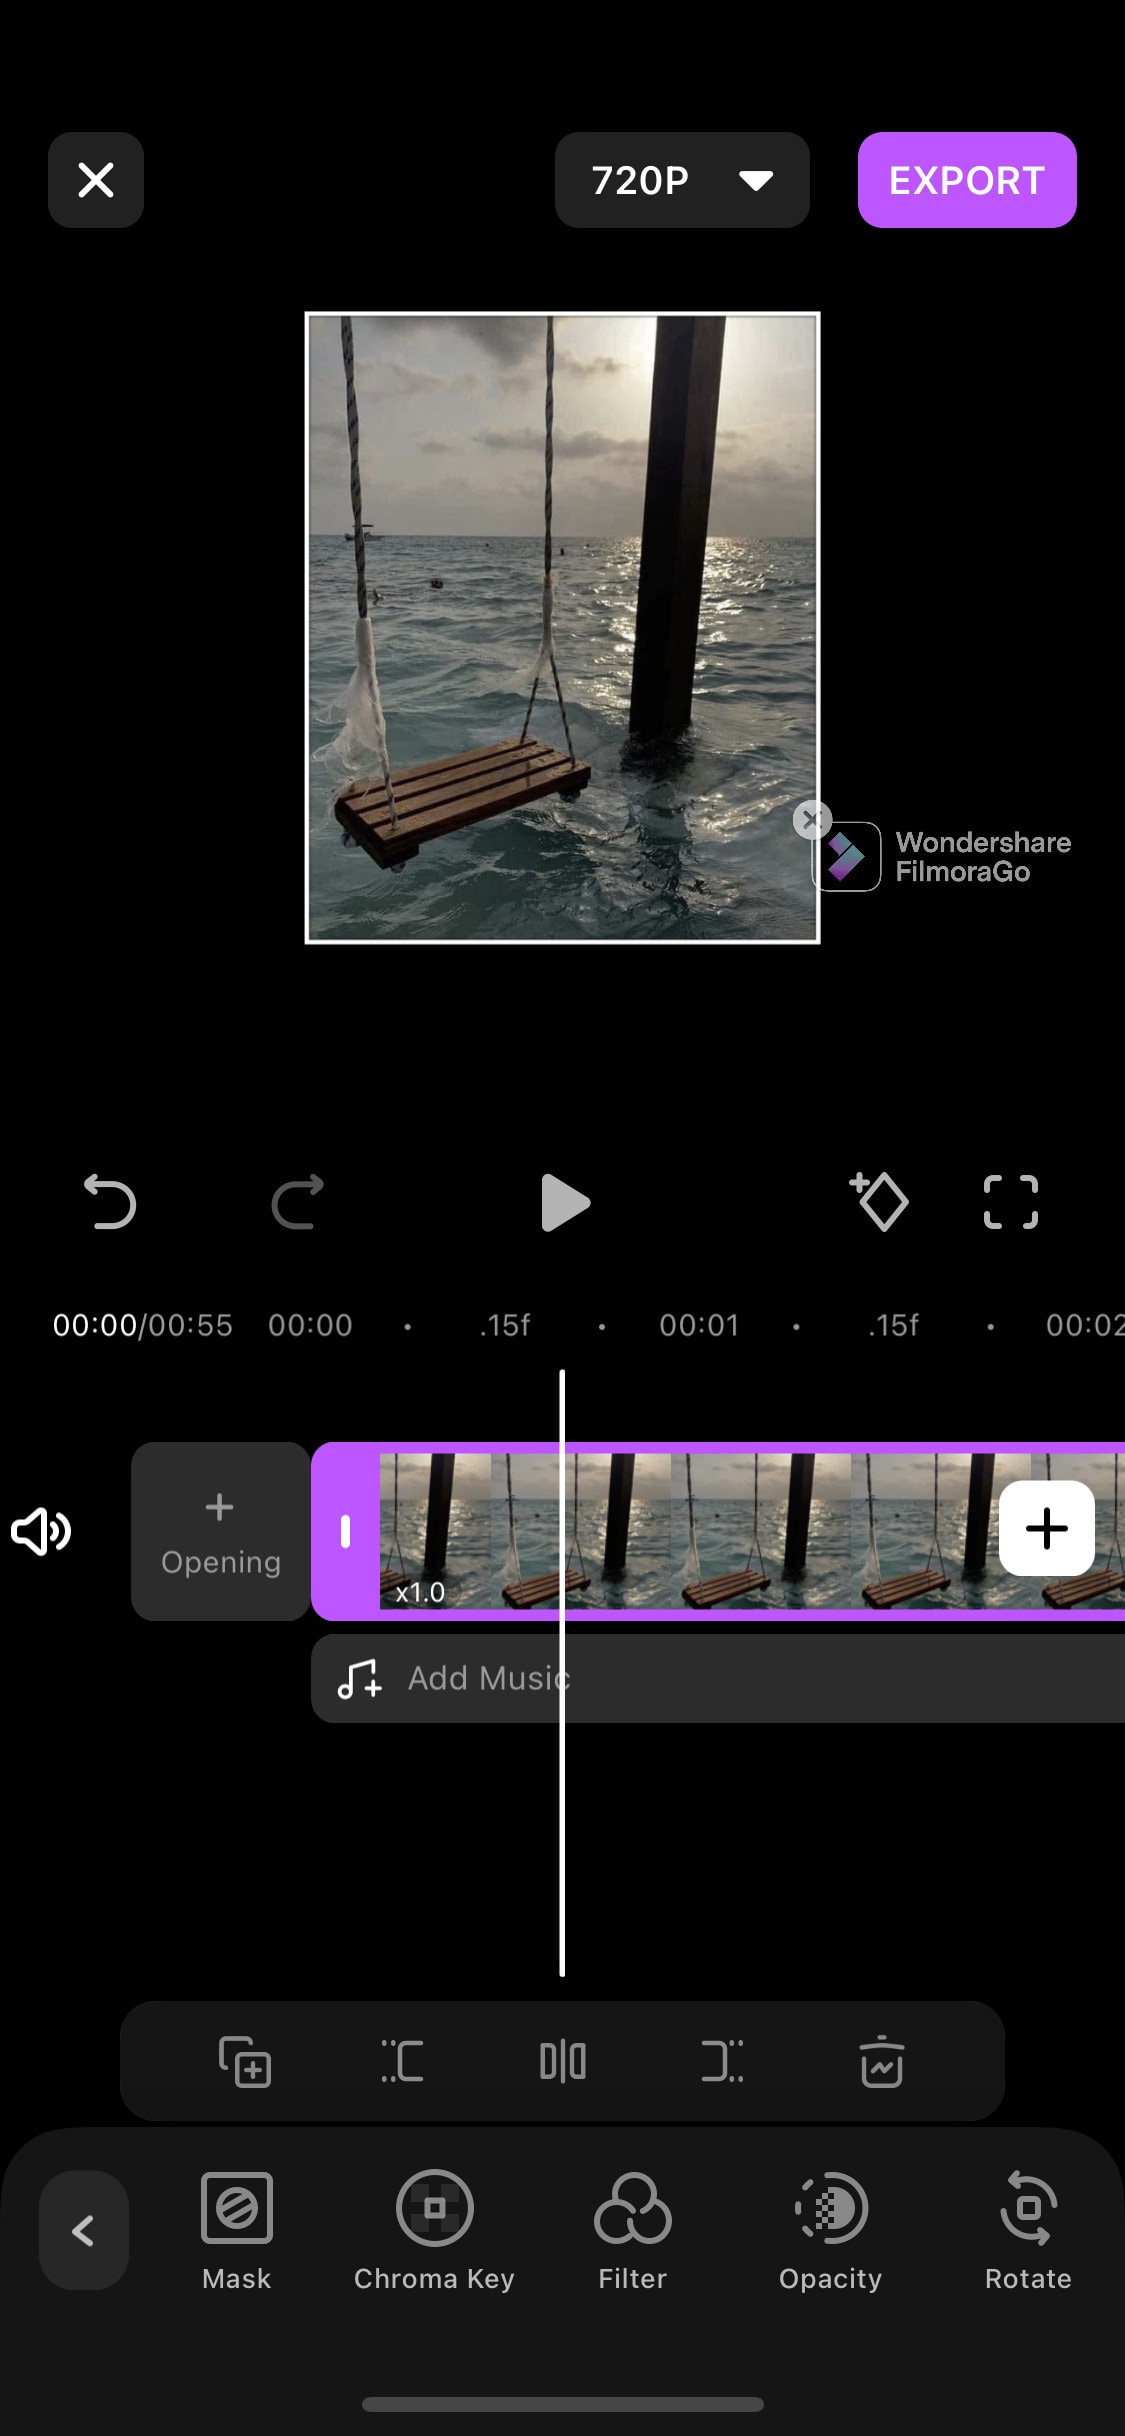
Import: Open Filmora Go, Click “New project” to start a new project, or Choose the previous one from the “Draft” portion. Select videos or images to import to your timeline. Hold and drag the clip to change its arrangement.
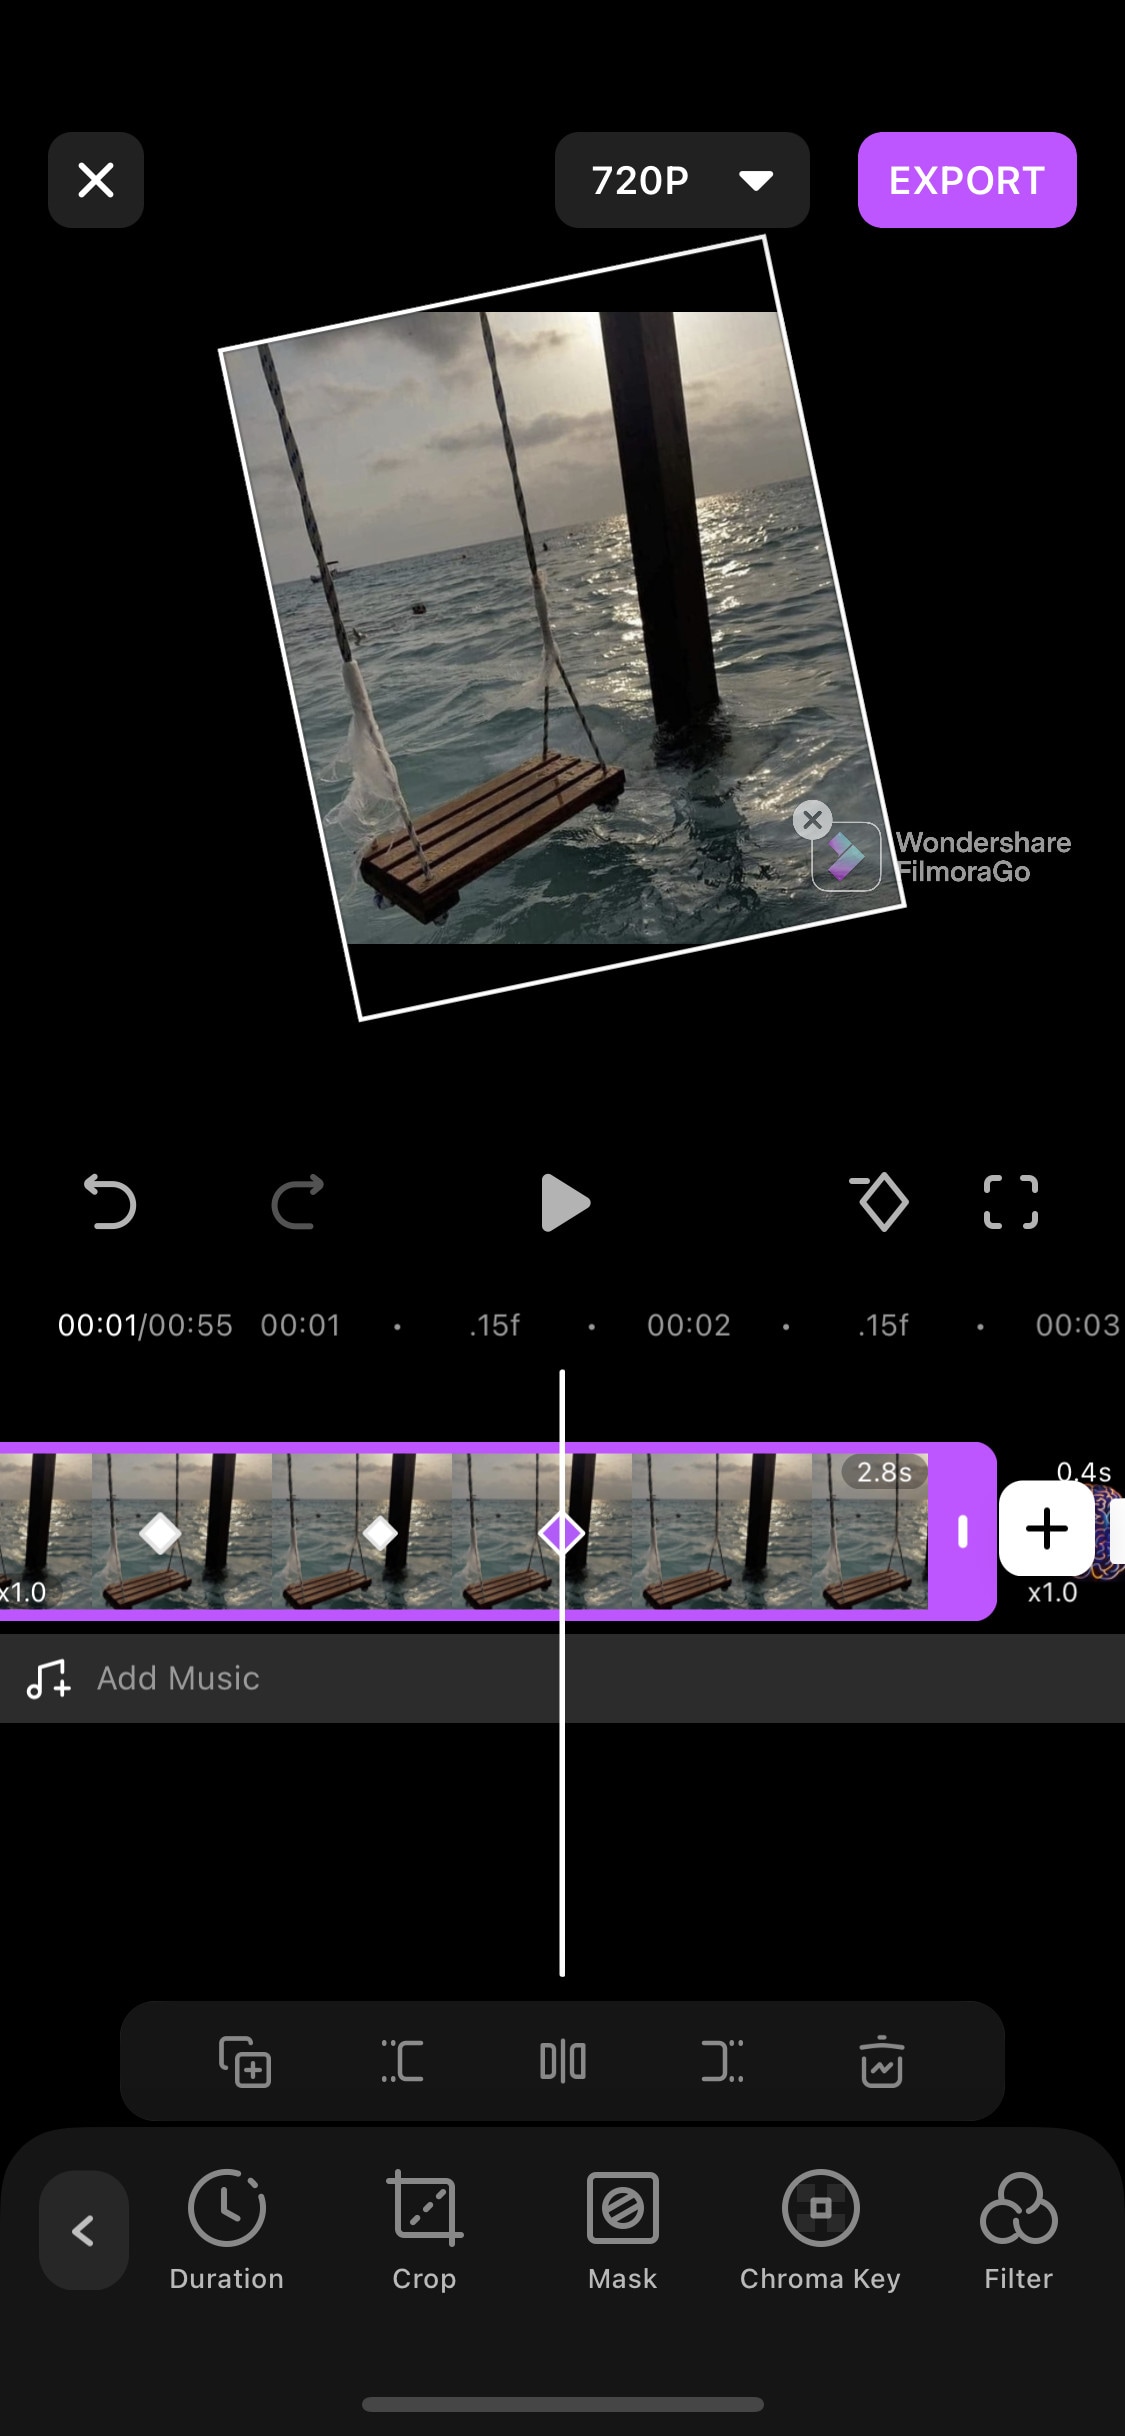
Edit: You can add text, effects, stickers, layers, e.t.c. by clicking their icon, present on the bar at the bottom.
Click the “PiP” icon to add image or video layers, you also can add multiple layers.
Select a clip to edit it. Different editing tools appear on the bottom bar. Here you can change its opacity, its speed, or add animations.
Effects: Click the “Effects” icon to open the effects menu. Select an effect to apply to your clip.
Click the white box between two clips to add transitions.
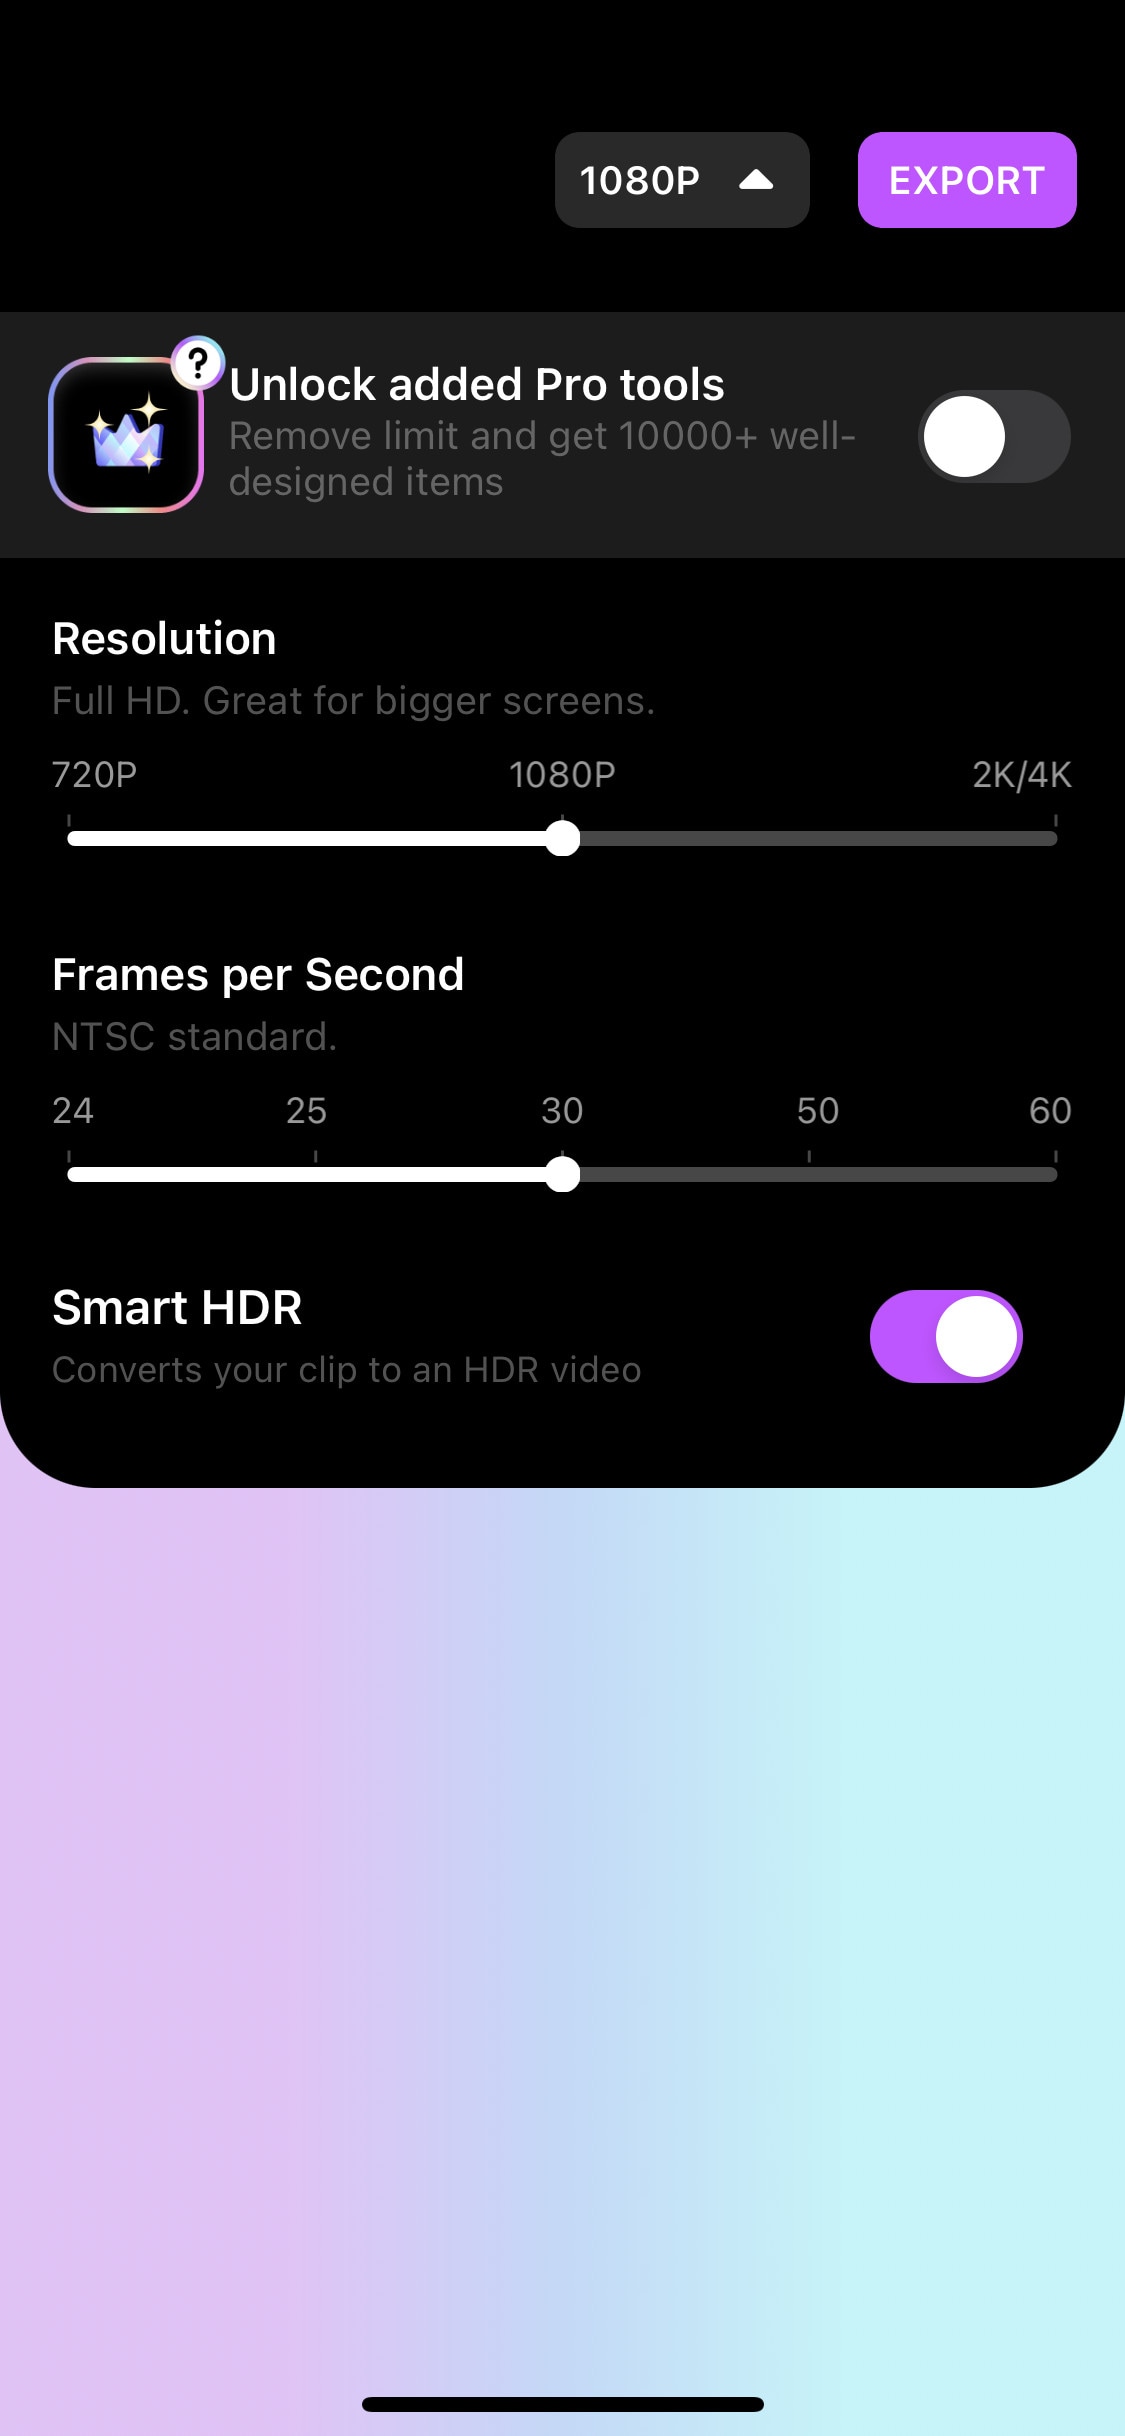
Export: Click the “Export” button to export your file. Select your desired resolution and frame rate to export your clip.
Some Free iPhone Video Editors:
If you do video editing rarely or do just basic video editing then it is useless to purchase paid video editors. Even if you are a content creator but tight on budget or new to this field, you can use free video editing softwares and save your cash for other pieces of equipment.
So, here we have mentioned some free video editors for you. Some of these are quite powerful and can do advanced editing while others are simple but easy to use.
Adobe Premiere Rush:
It is available on IOS and Android both.
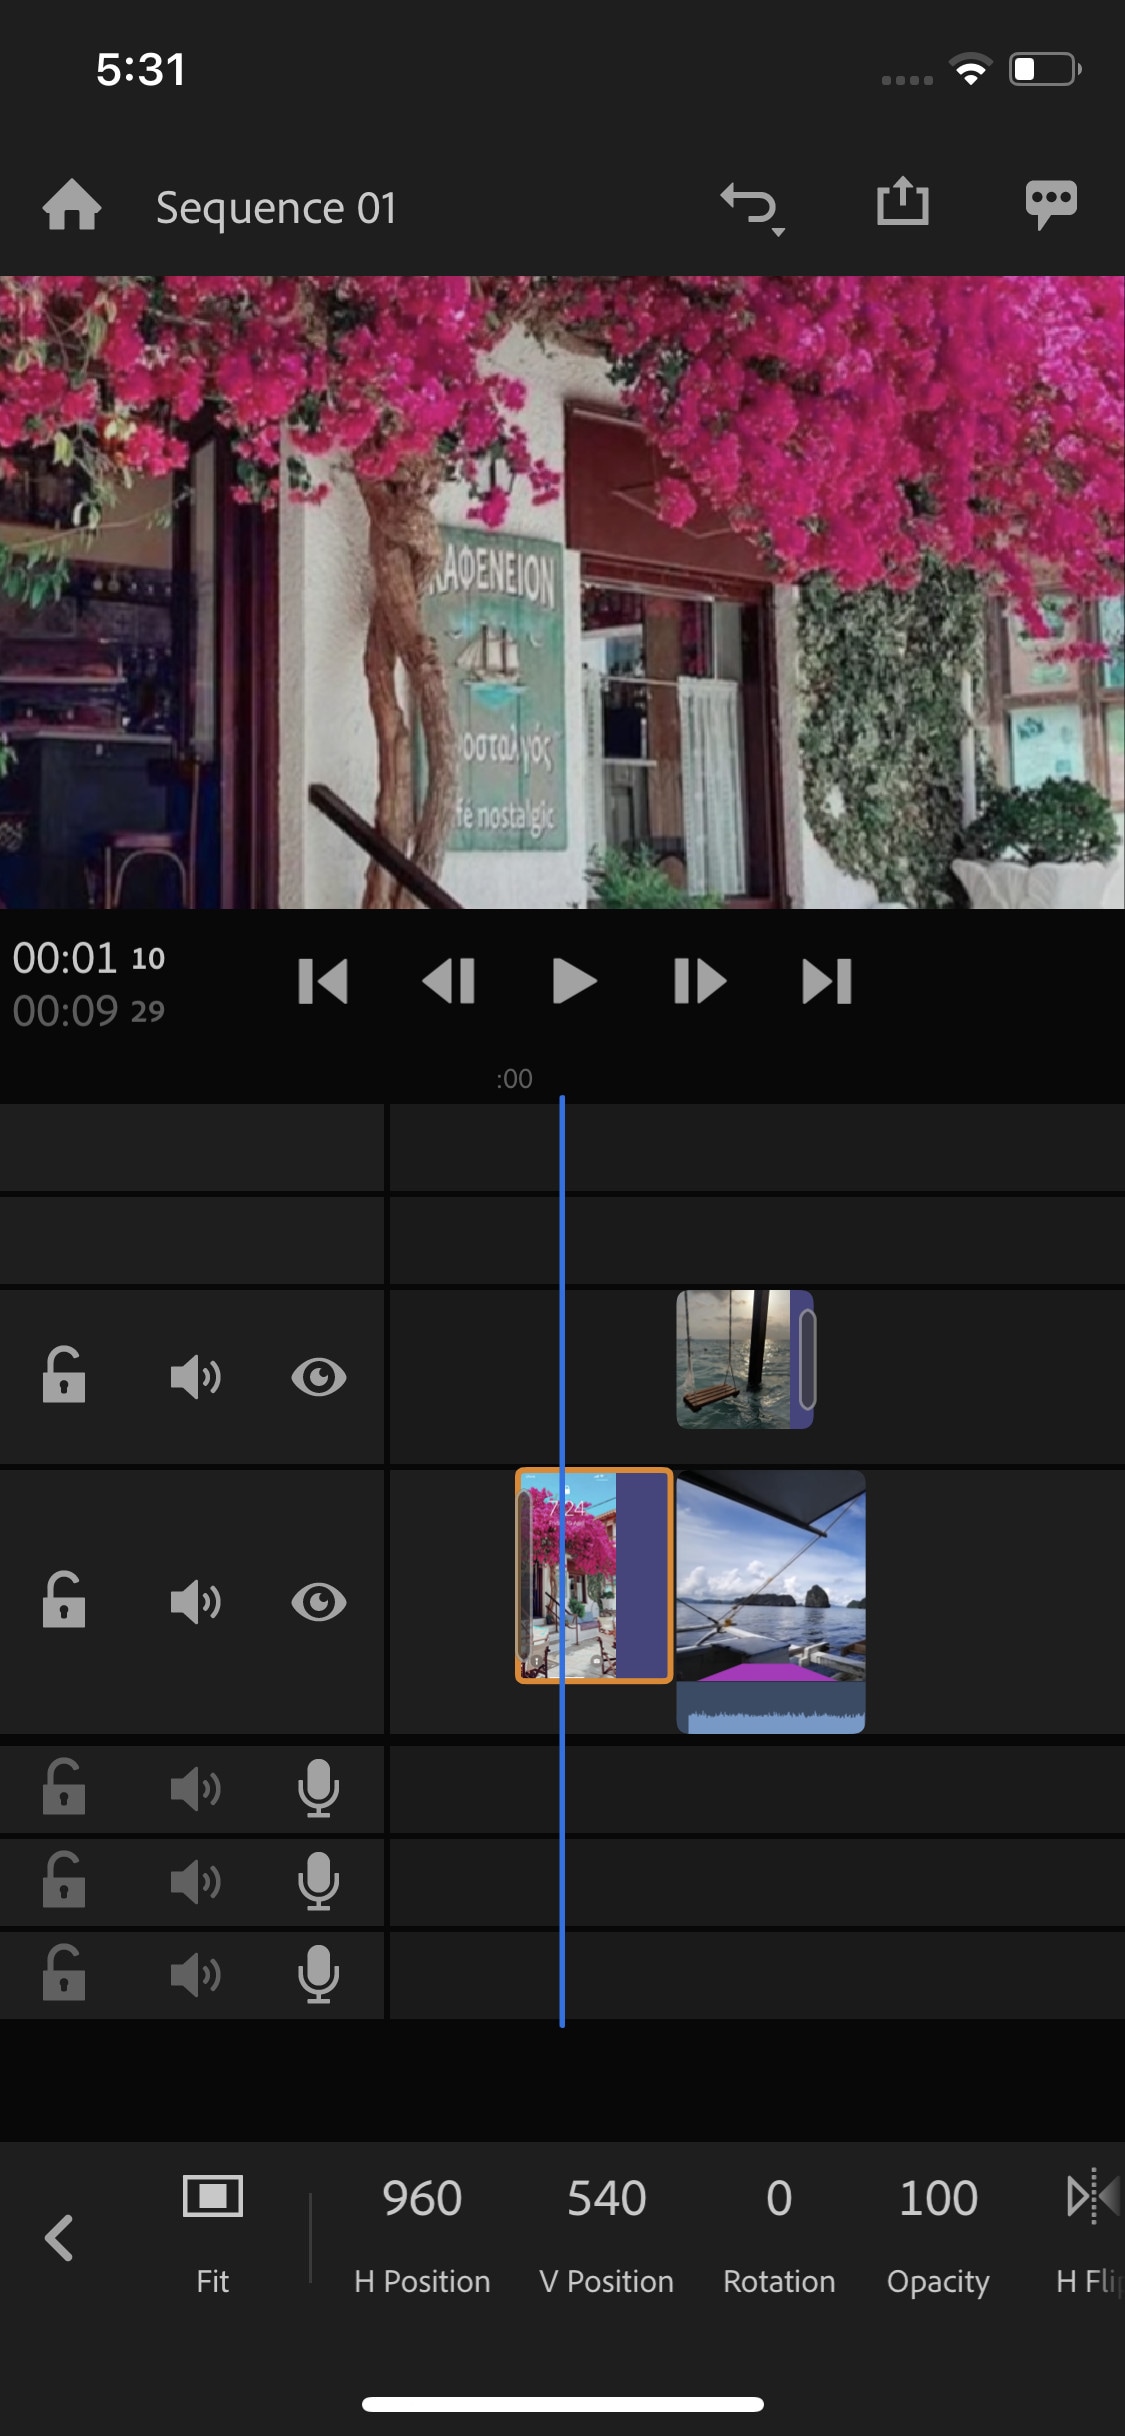
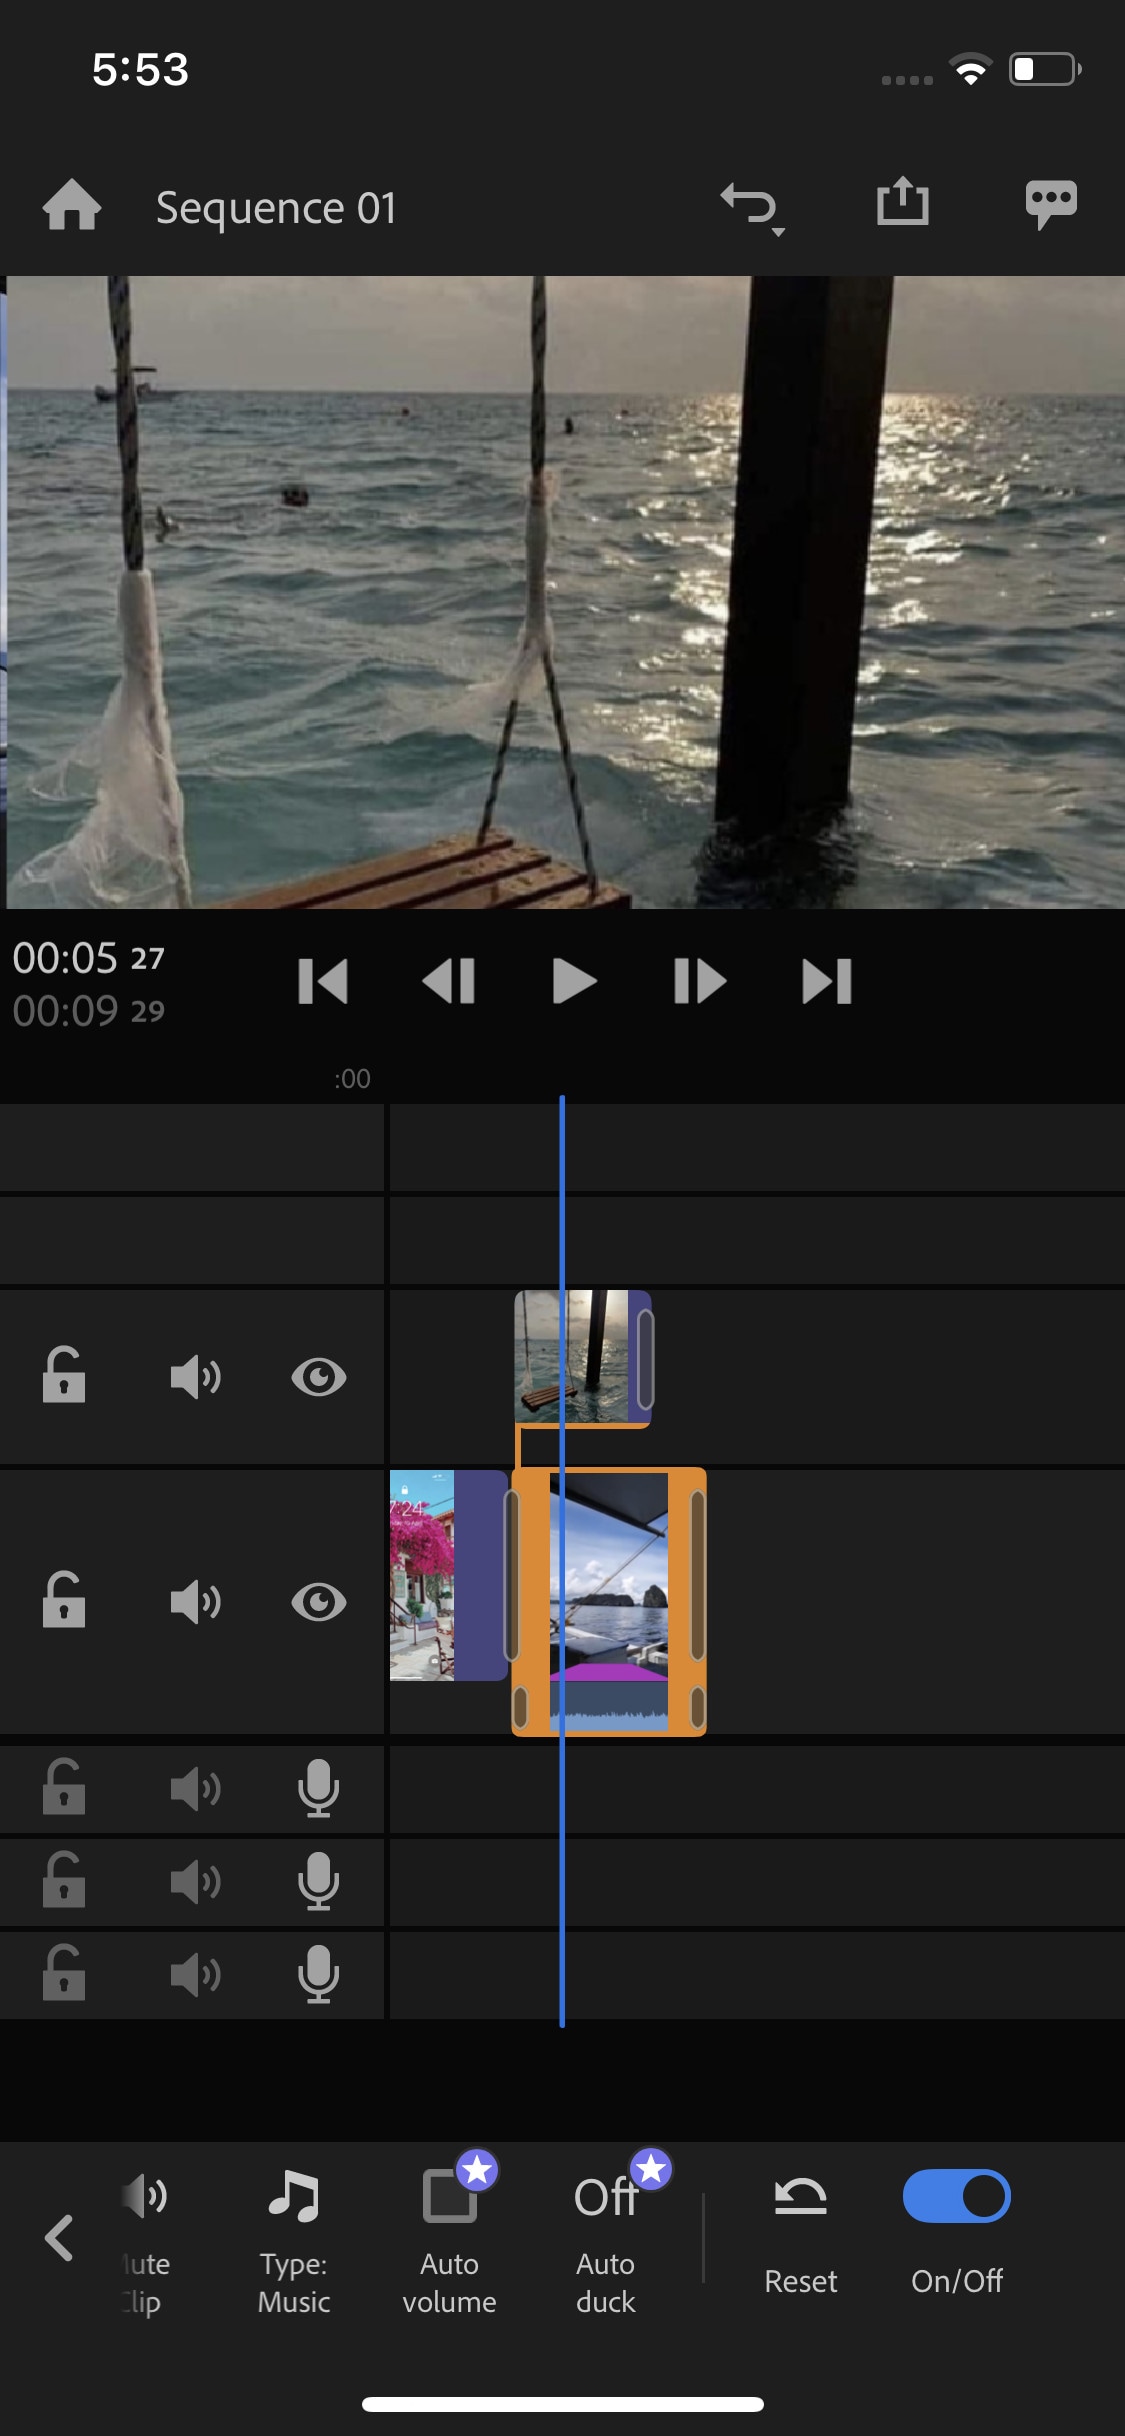
Whether you are a beginner or a content creator using mobile phones or PCs for editing, you may have heard of Adobe softwares. It is a computer software company which makes powerful softwares for different purposes. Like premiere pro, they have designed a compact version for phones named “Premiere Rush”. It is a free video editor that has all the tools needed for video editing, from video effects to color grading and audio editing. Its UI is a bit similar to PC video editors. It is a free video editor with no watermarks. Although it takes some time to understand it. But once mastered, you can do editing quickly.
~Features:
- It is a free video editor with no watermark.
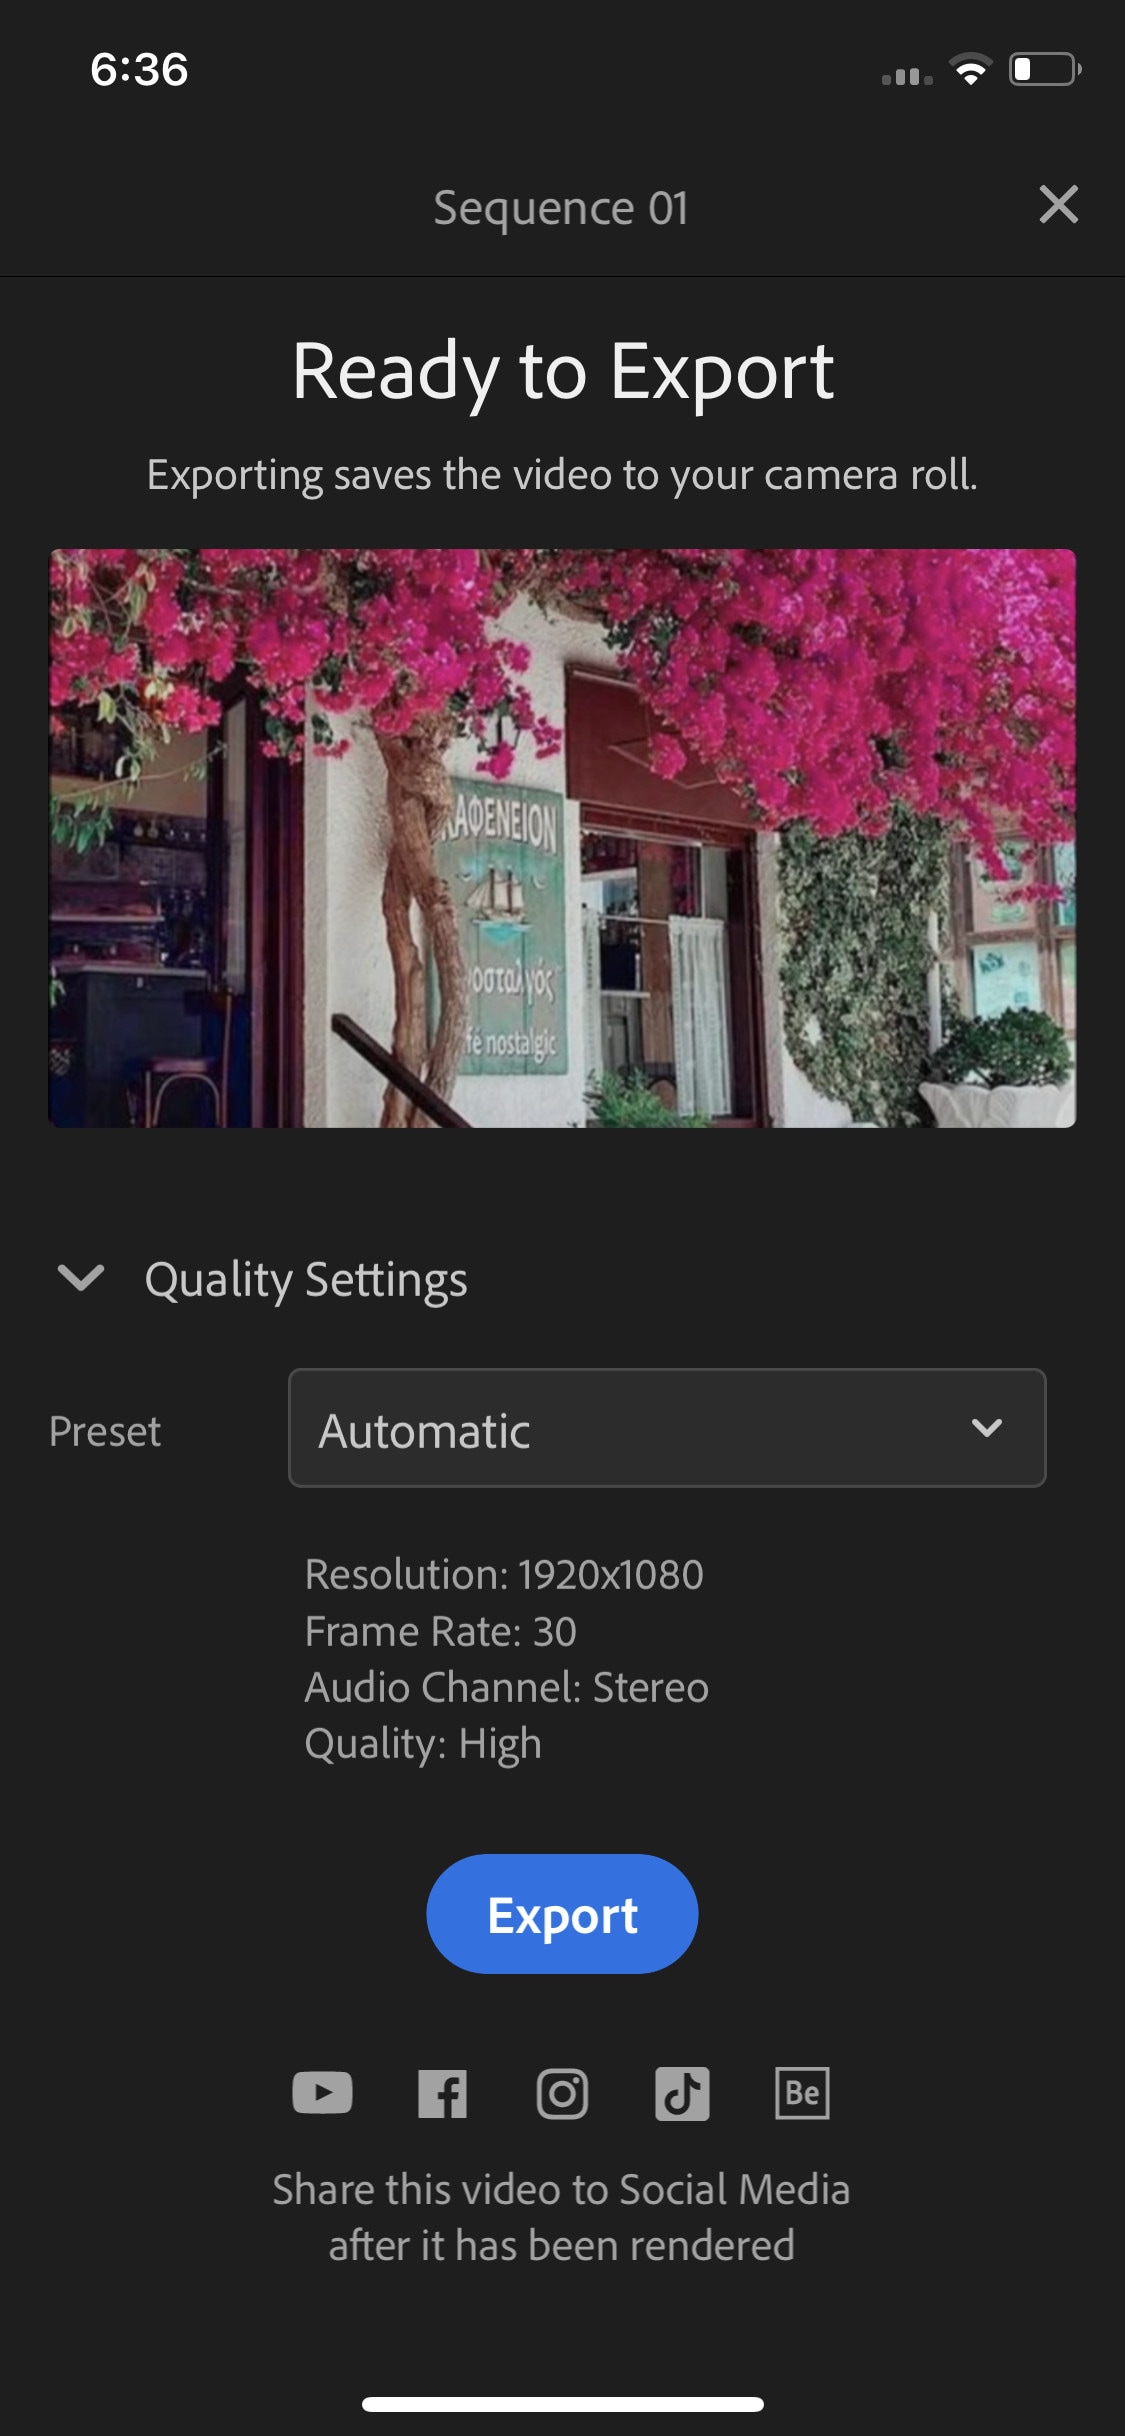
- It supports up to 4K resolution at 60fps.
- You can extract audio and can do voiceover directly from the software.
- It has hundreds of filters, overlays, and title designs.
- It has basic color grading tools.
- It also has a motion tracking feature. (in Paid version)
- It supports multiple audio, video, and text layers.
~Cons:
- It only runs on high-end devices. (It is not supported in most mid-range phones)
- Not suitable for beginners. Its UI is quite hard to understand.
- Doesn’t have common features like the chroma key, masking, e.t.c.
~Price:
Its Premium version is available for 9.99/month. It includes some premium features. Or you can purchase the “All Apps Bundle” at $54.99/month for the annual plan.
CapCut:
It is available on IOS and Android both.
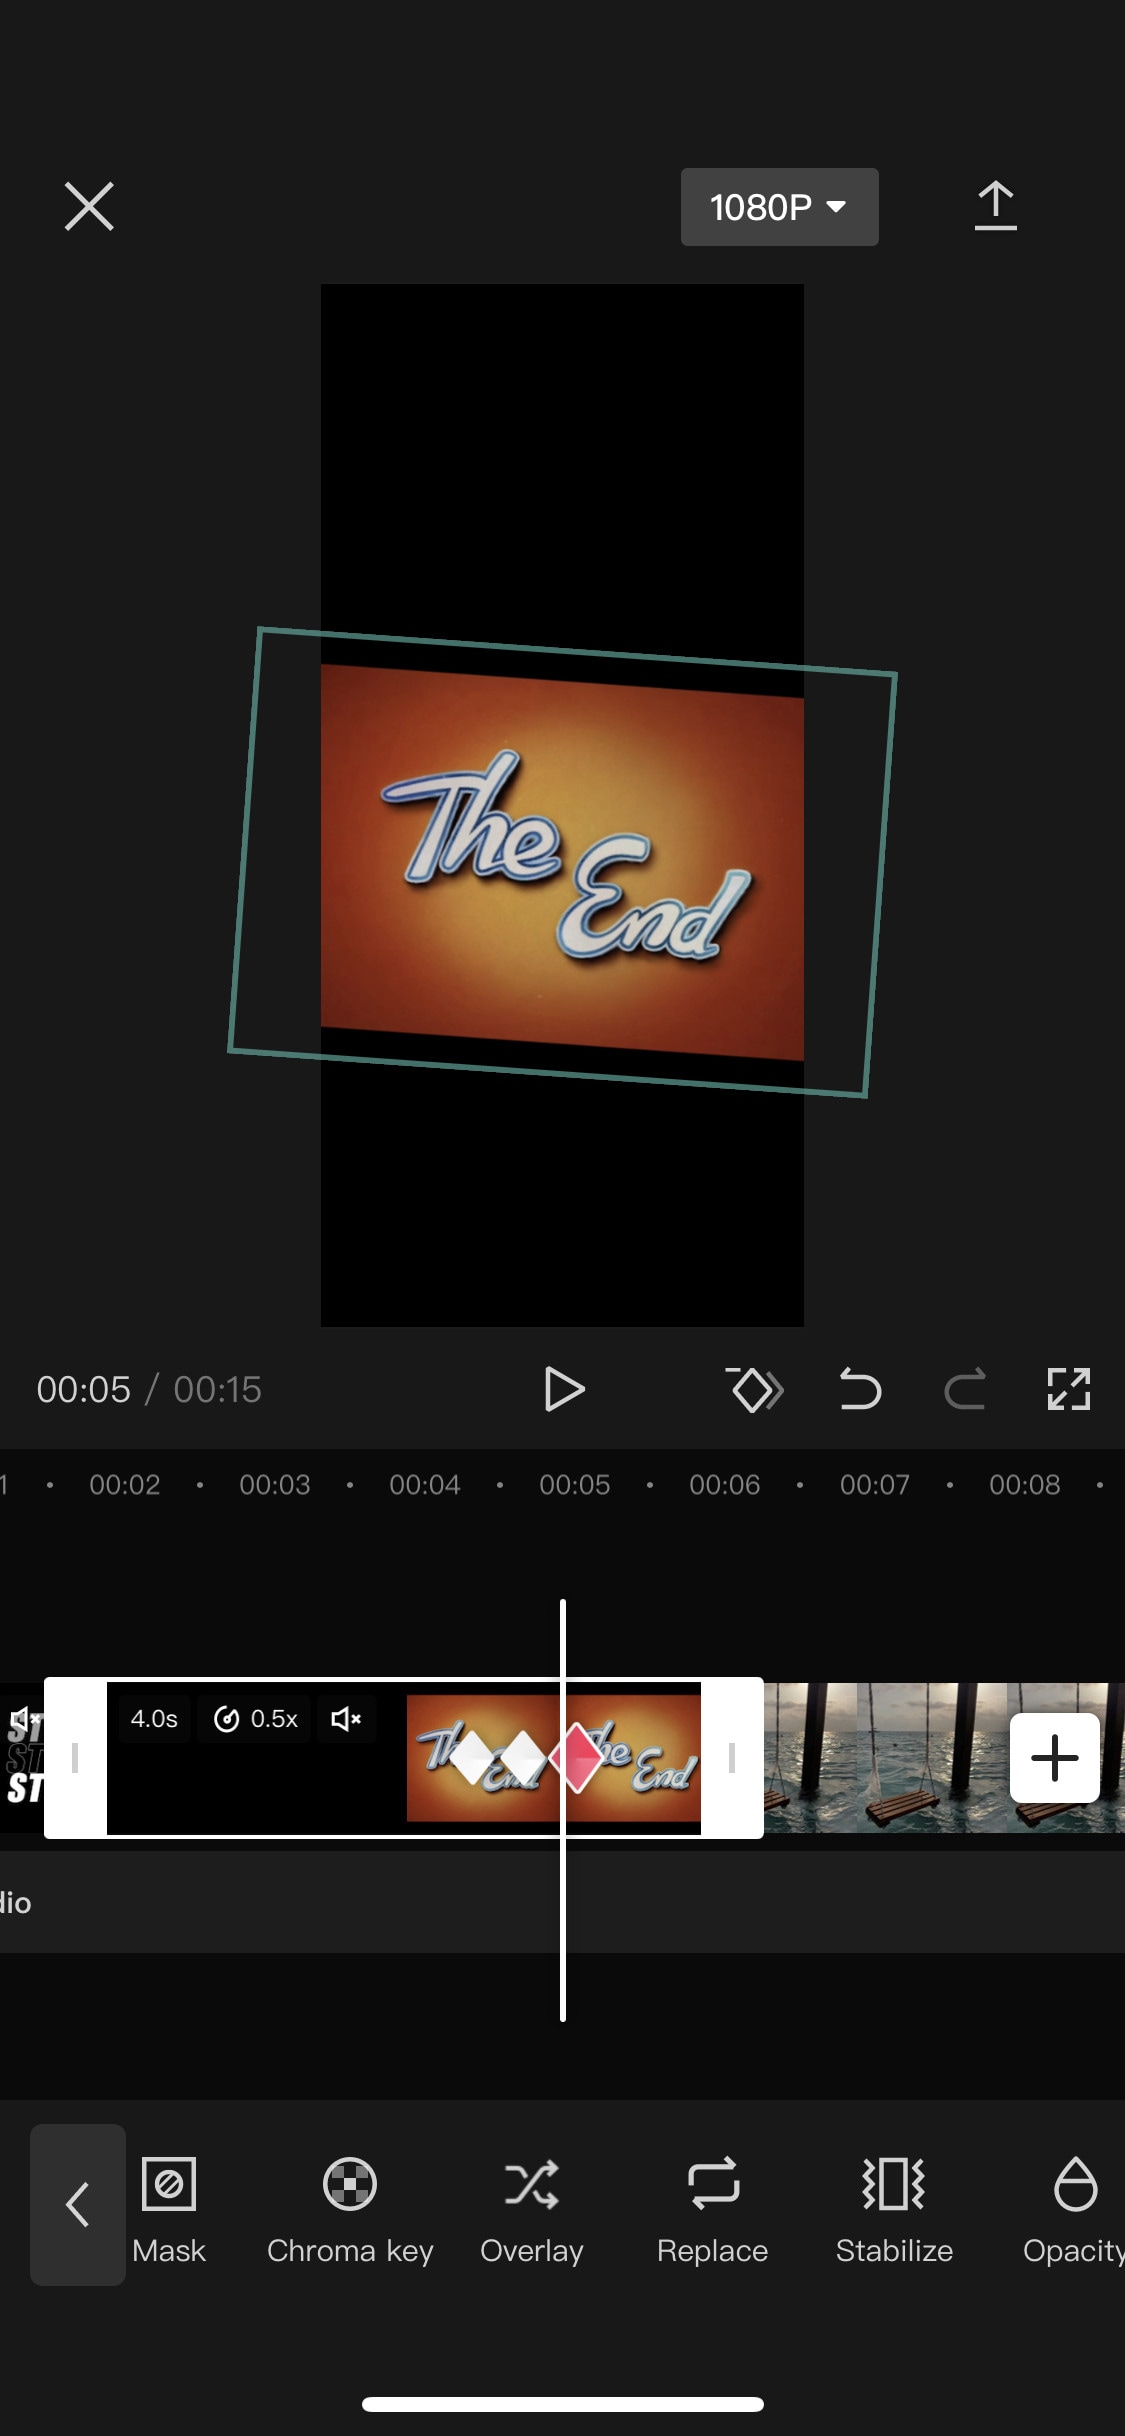
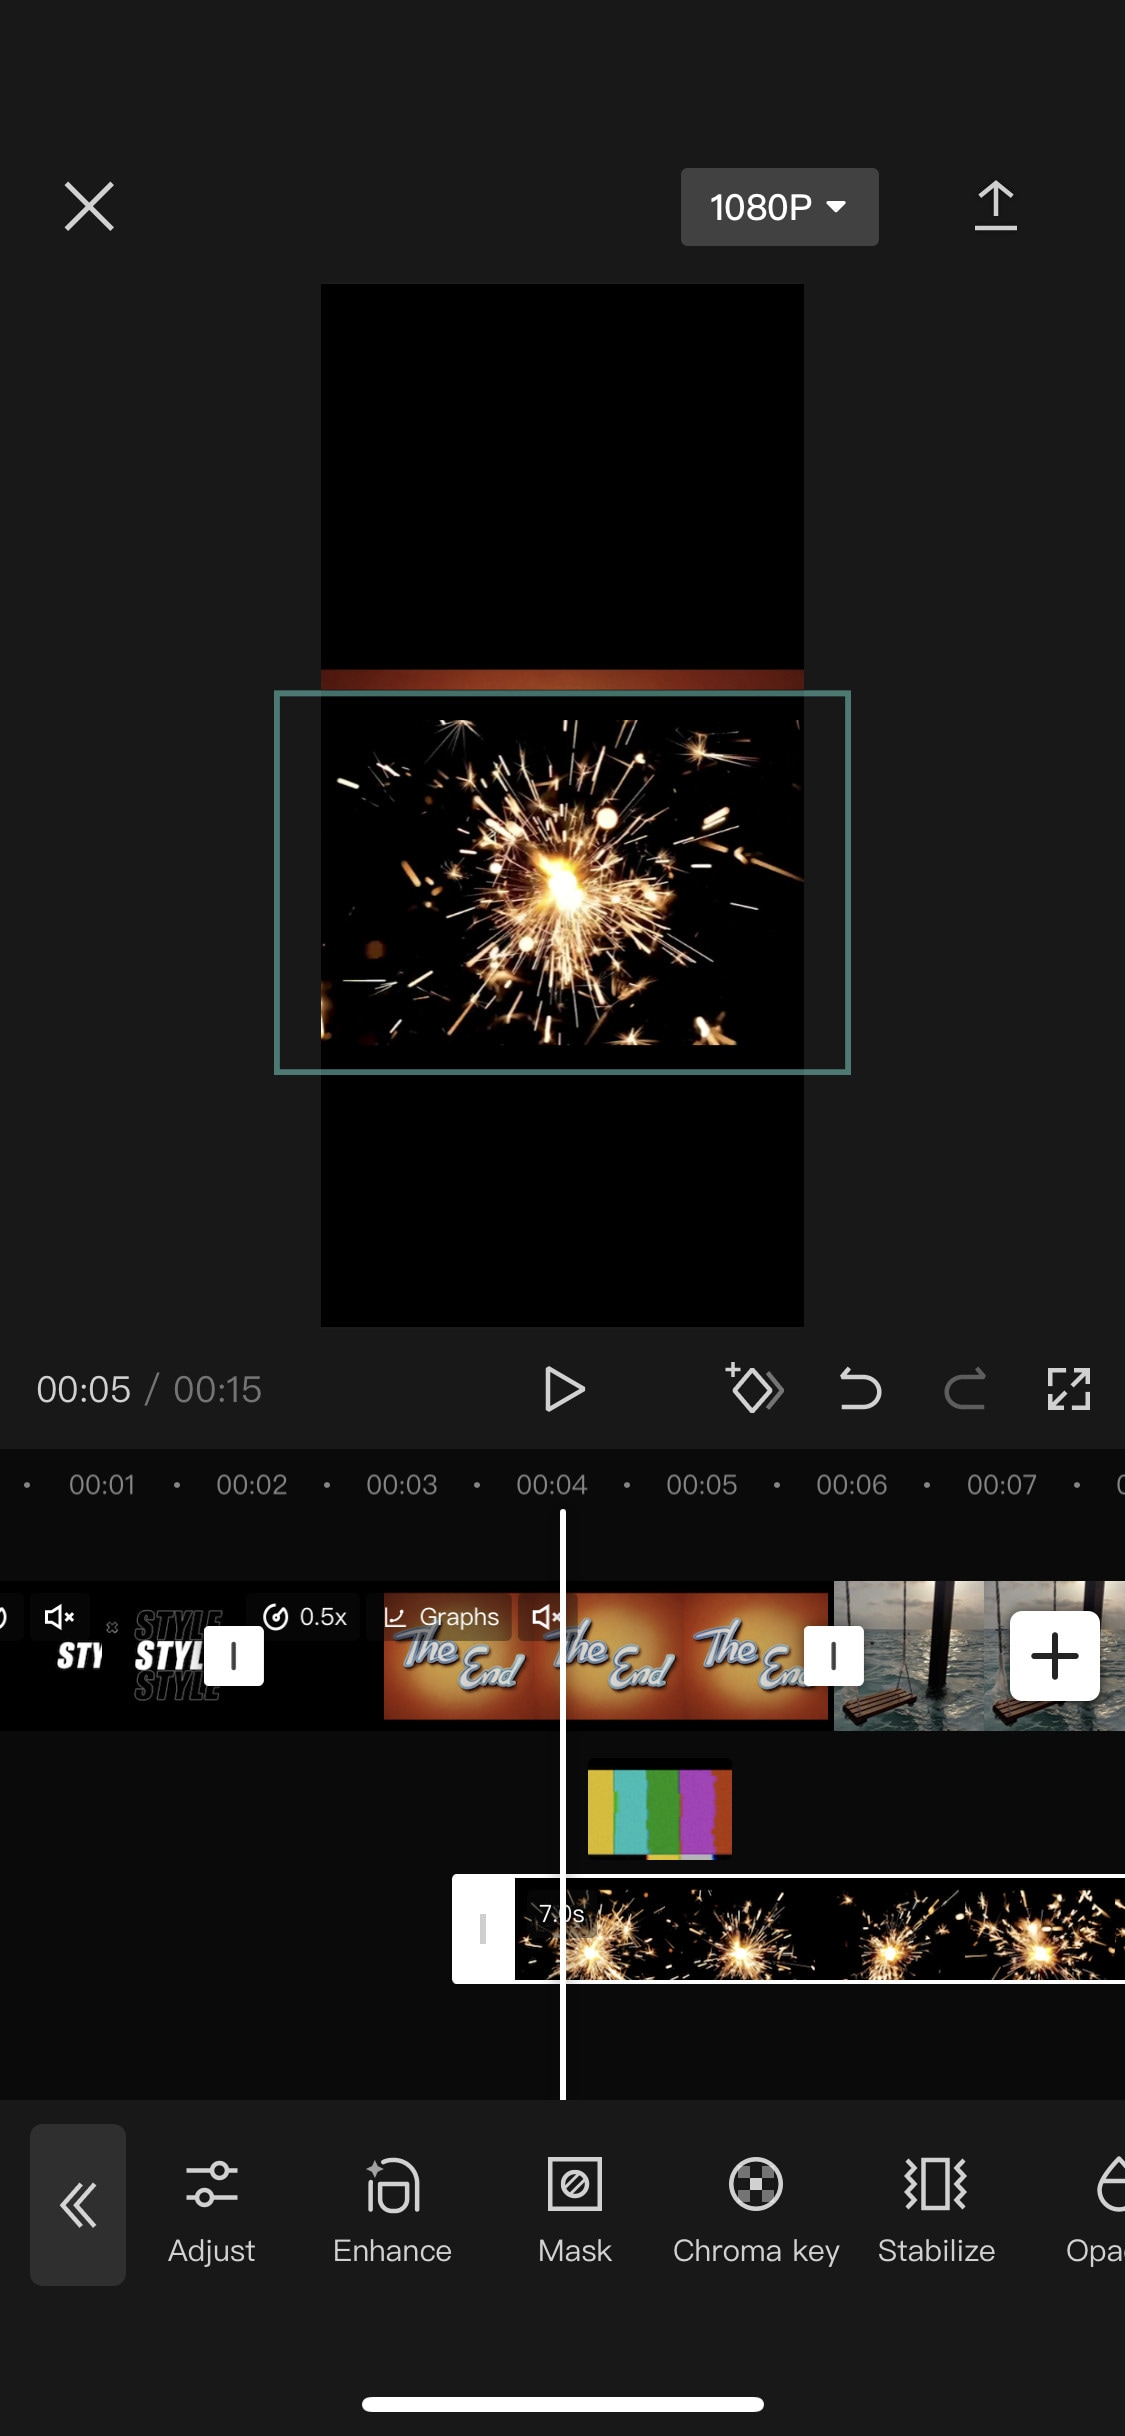
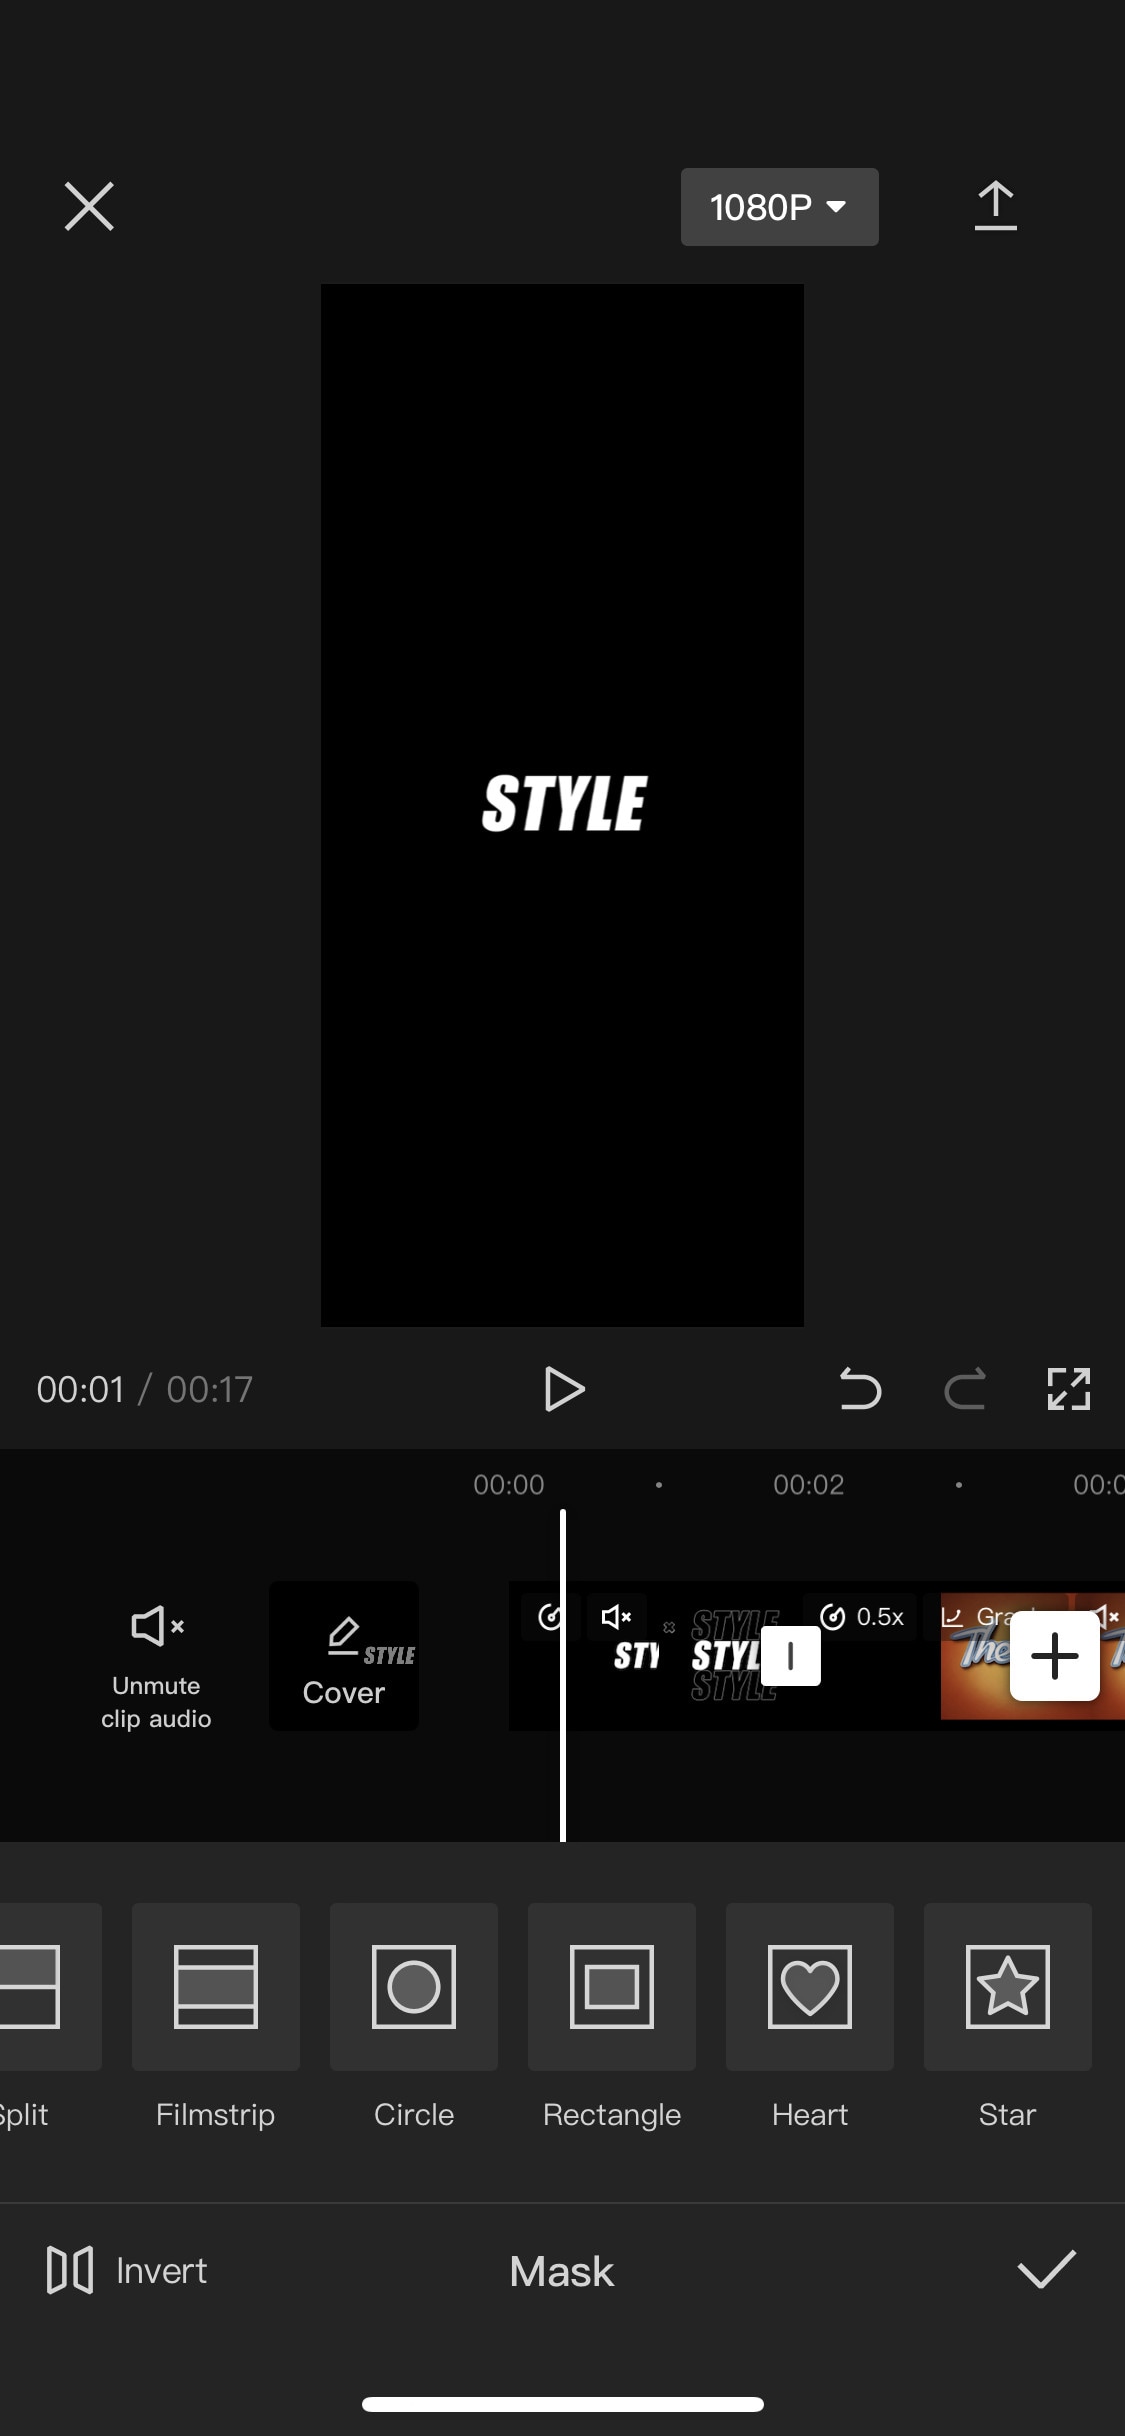
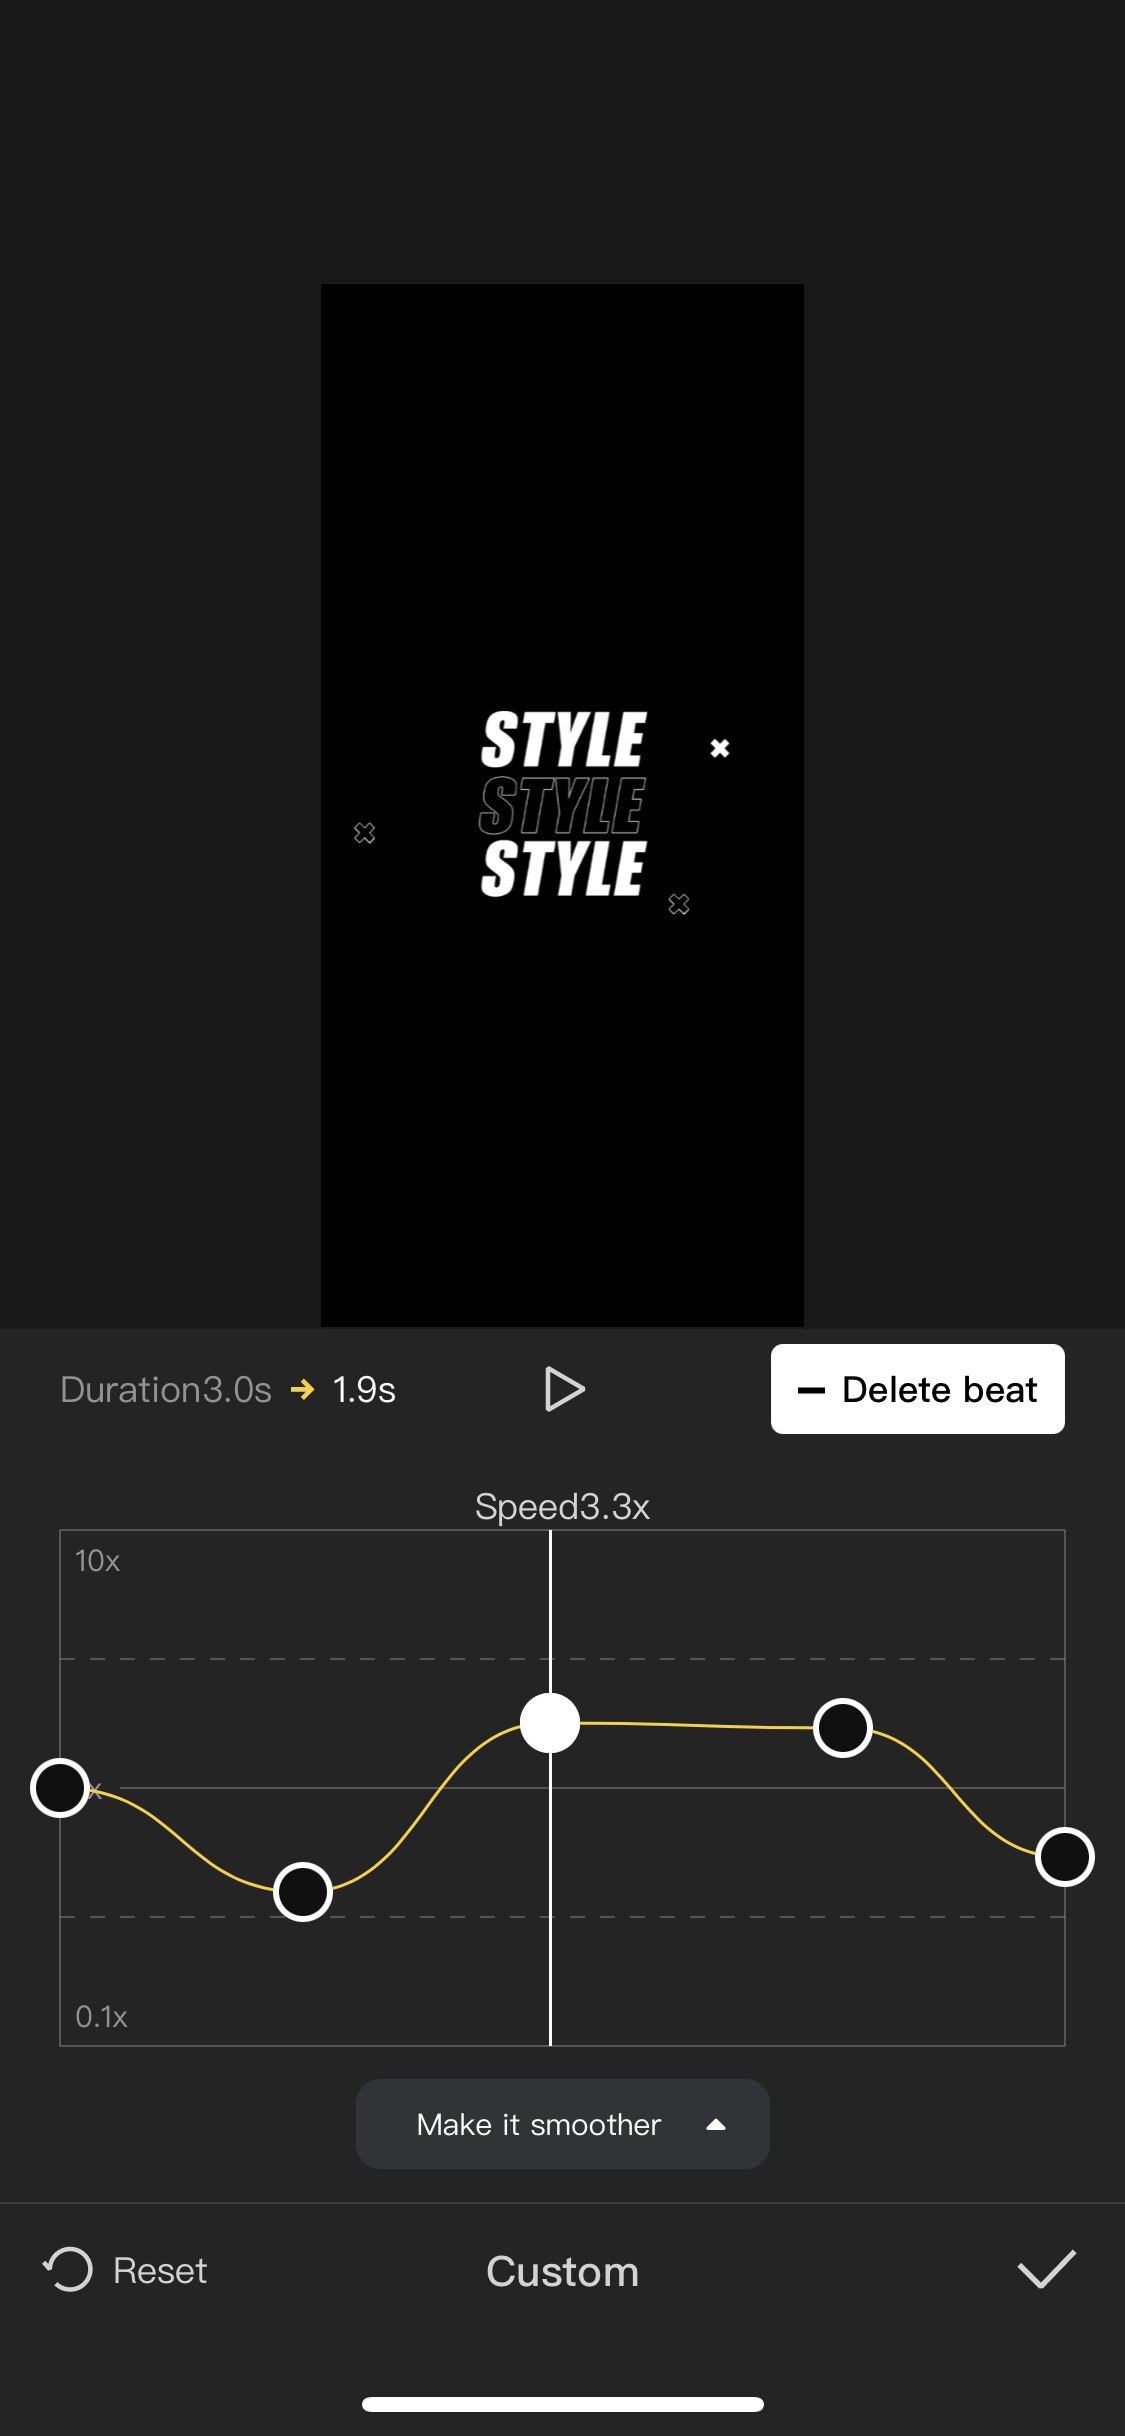
If you are looking for a free but good video editor to help you edit videos on the go, then you should get your hands on CapCut. It is a free mobile video editing software with many interesting features like keyframing, chroma-key, masking e.t.c. It also supports video and image layers. It has one of the best speed ramping features among other mobile video editors. It provides curves to smoothly speed ramp your clips. It can edit landscape, portrait, and even square video formats. It has many amazing effects and filters, it also has some stock clips.
~Features:
- It is completely free and has no watermarks.
- It supports up to 4K video resolution.
- Has curves for speed ramping.
- Has keyframes for animation.
- It has hundreds of effects, overlays, and titles.
~Cons:
- Its UI doesn’t support editing in landscape orientation.
- Lacks some common editing tools.
iMovie:
It is available on IOS and Mac.
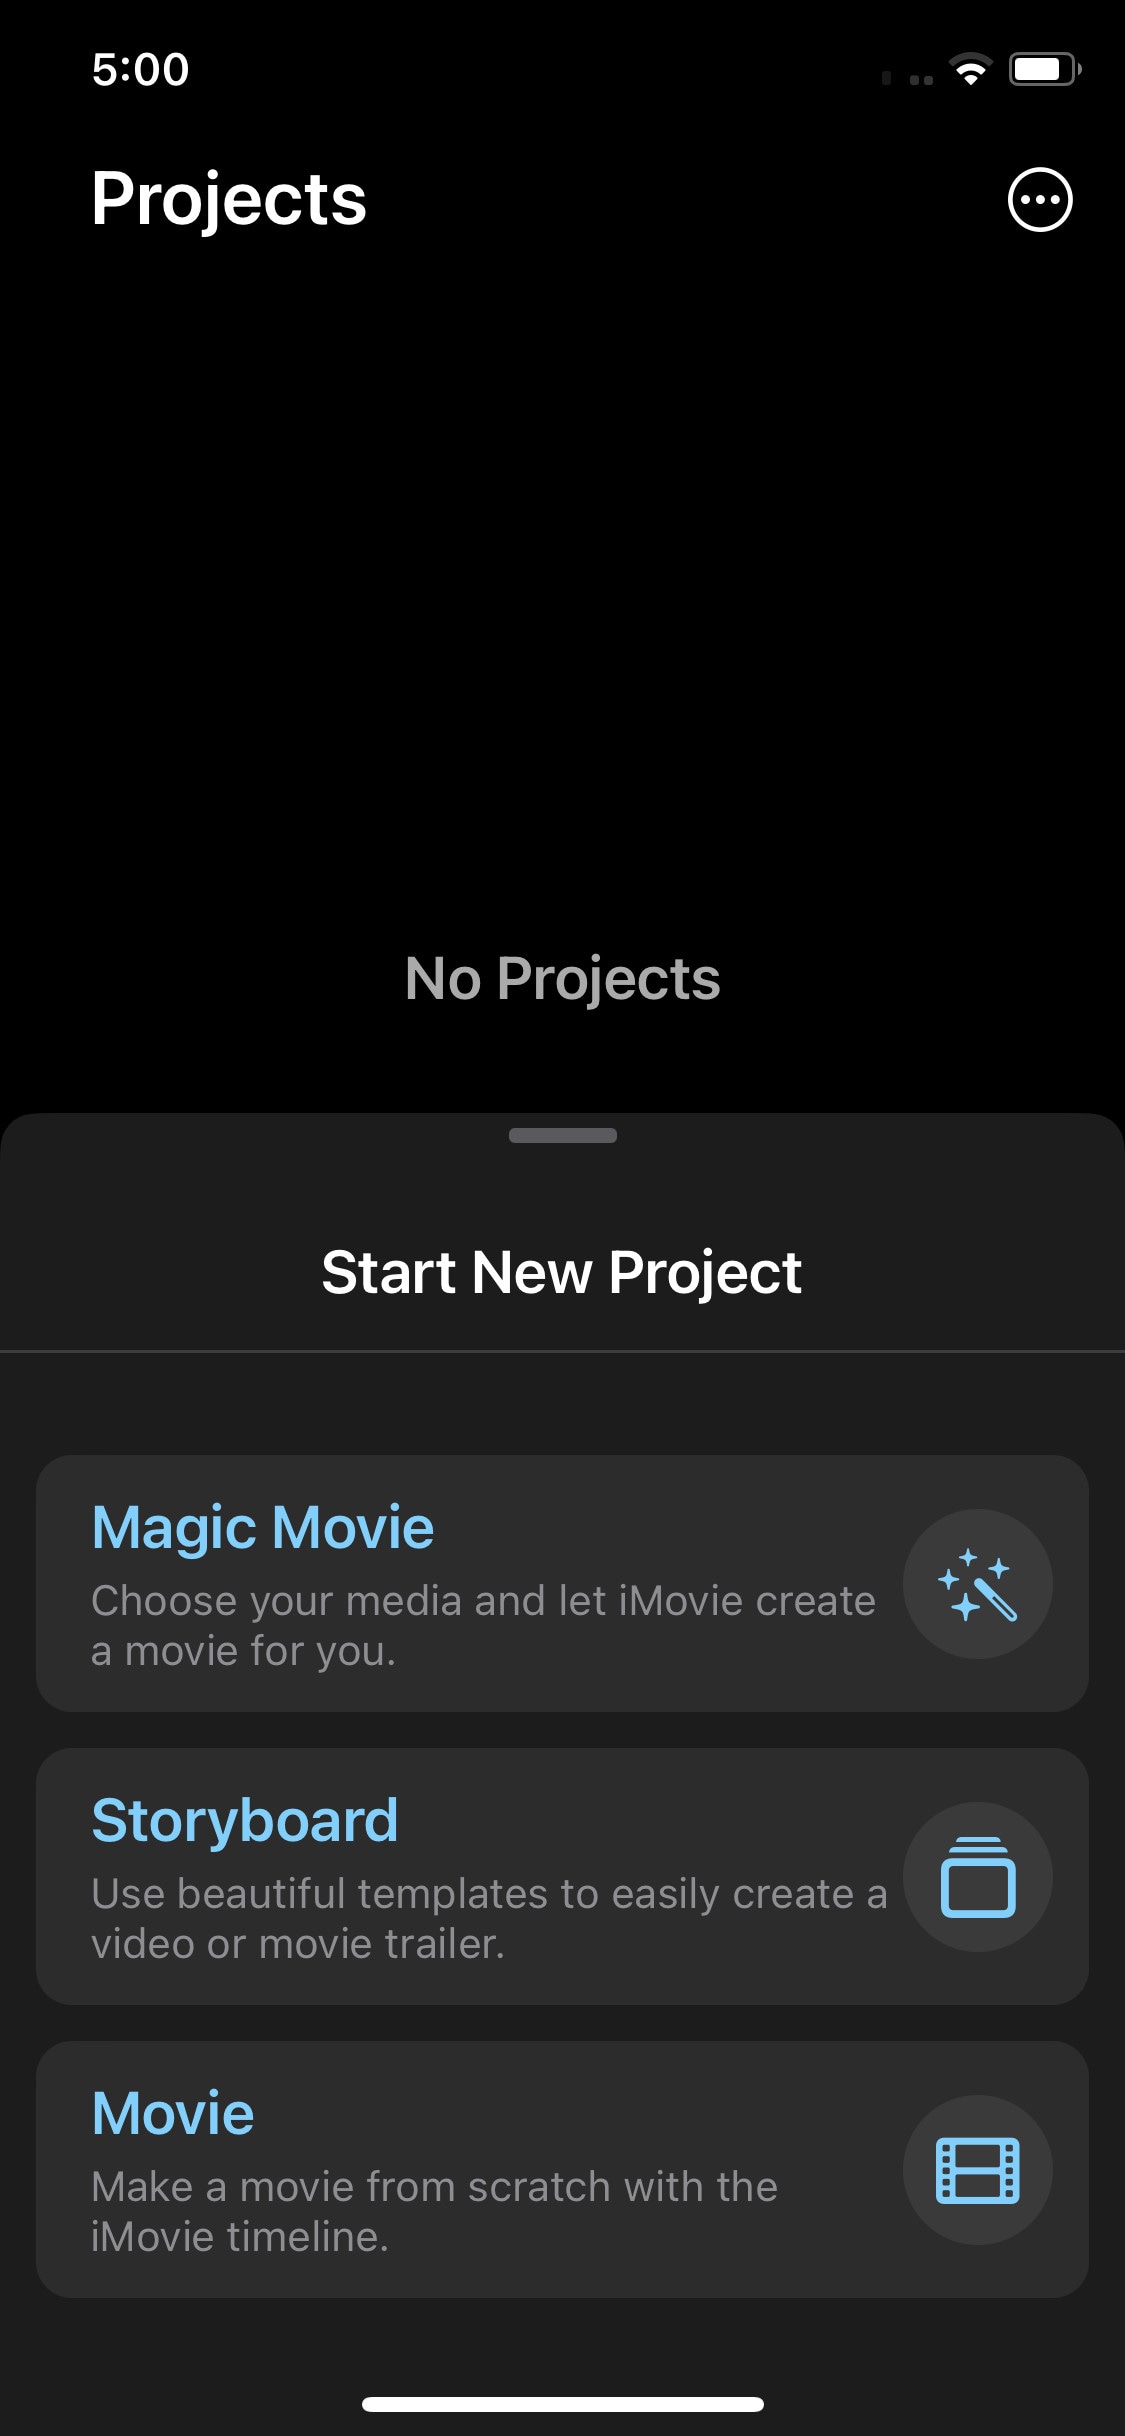
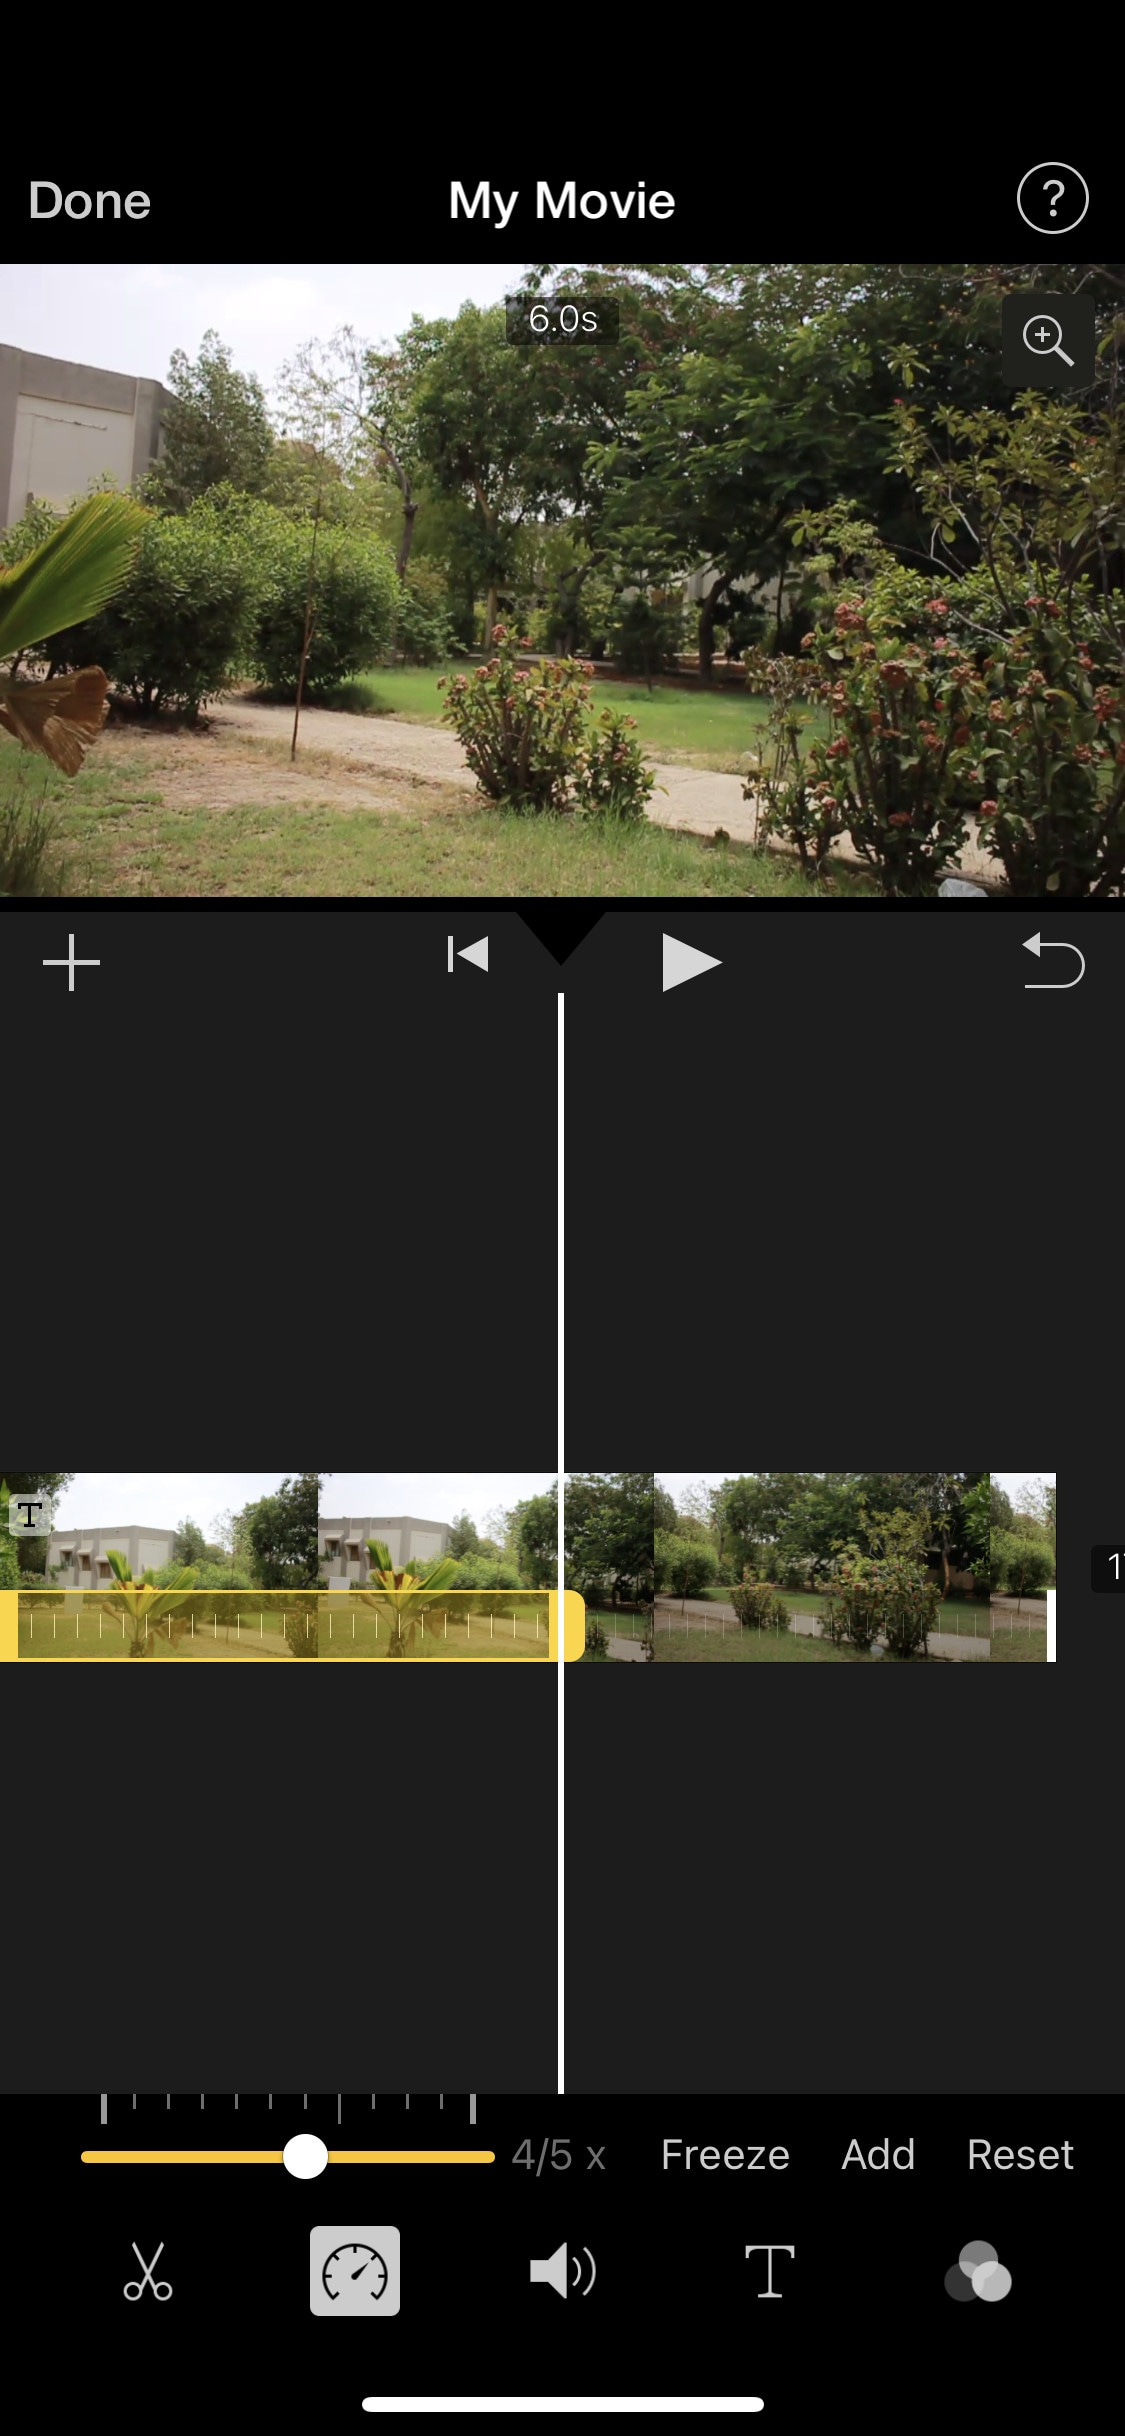
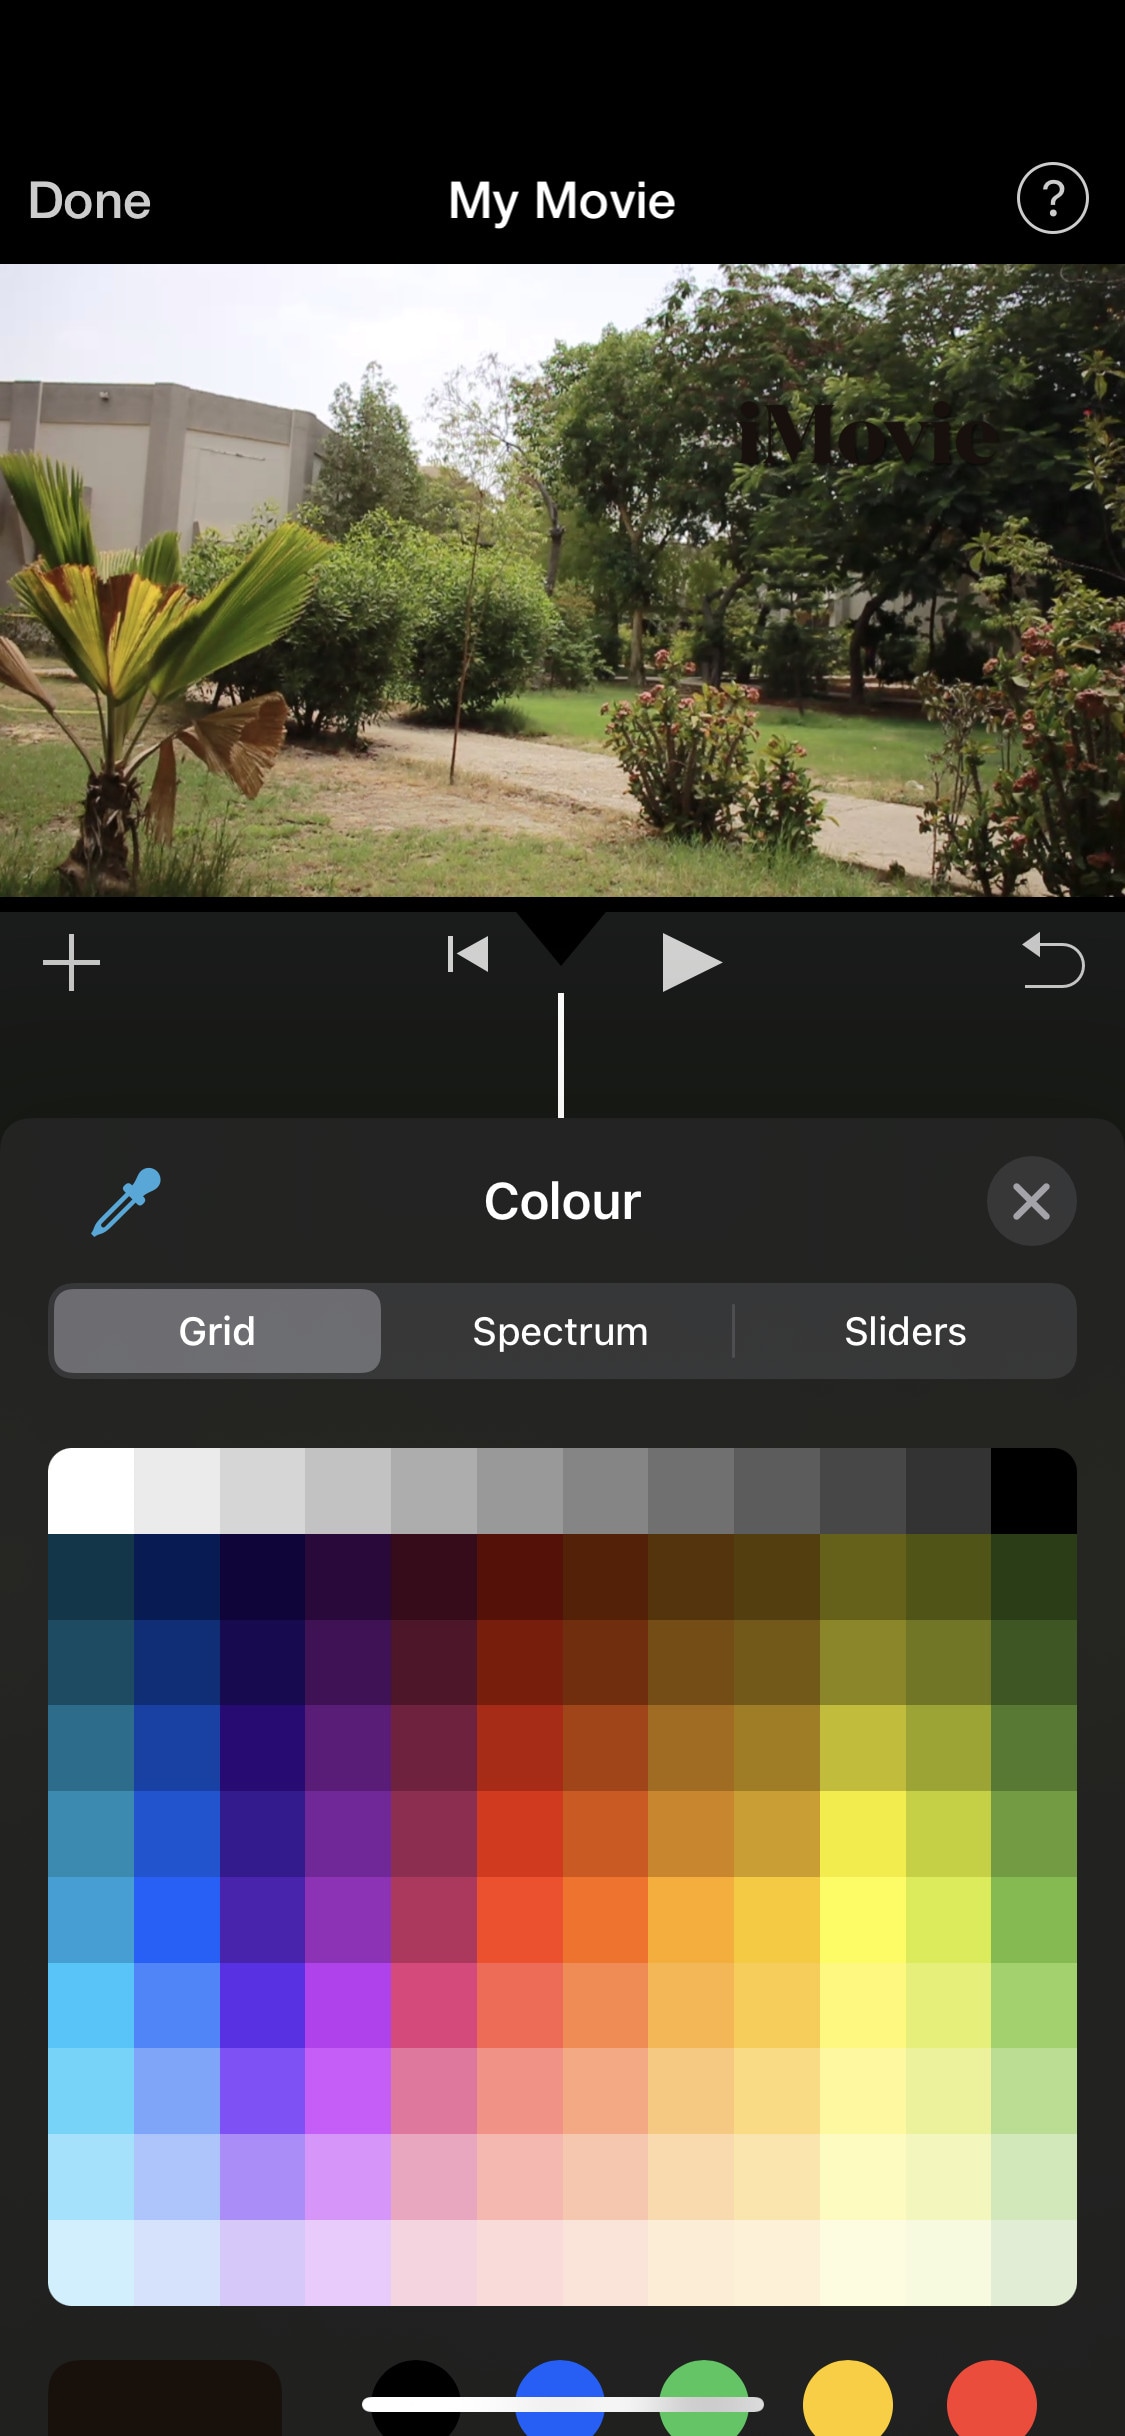
iMovie is a free video editing software designed by apple for their flagship products. It is simple and easy to use. It has all the basic editing tools to enhance your video like crop, trim, transitions, effects, e.t.c. It also has a speed ramping feature which let you change the speed at different points of a clip. It’s AI mode “Magic Movie” lets you select clips and a style and software will make the final product for you.
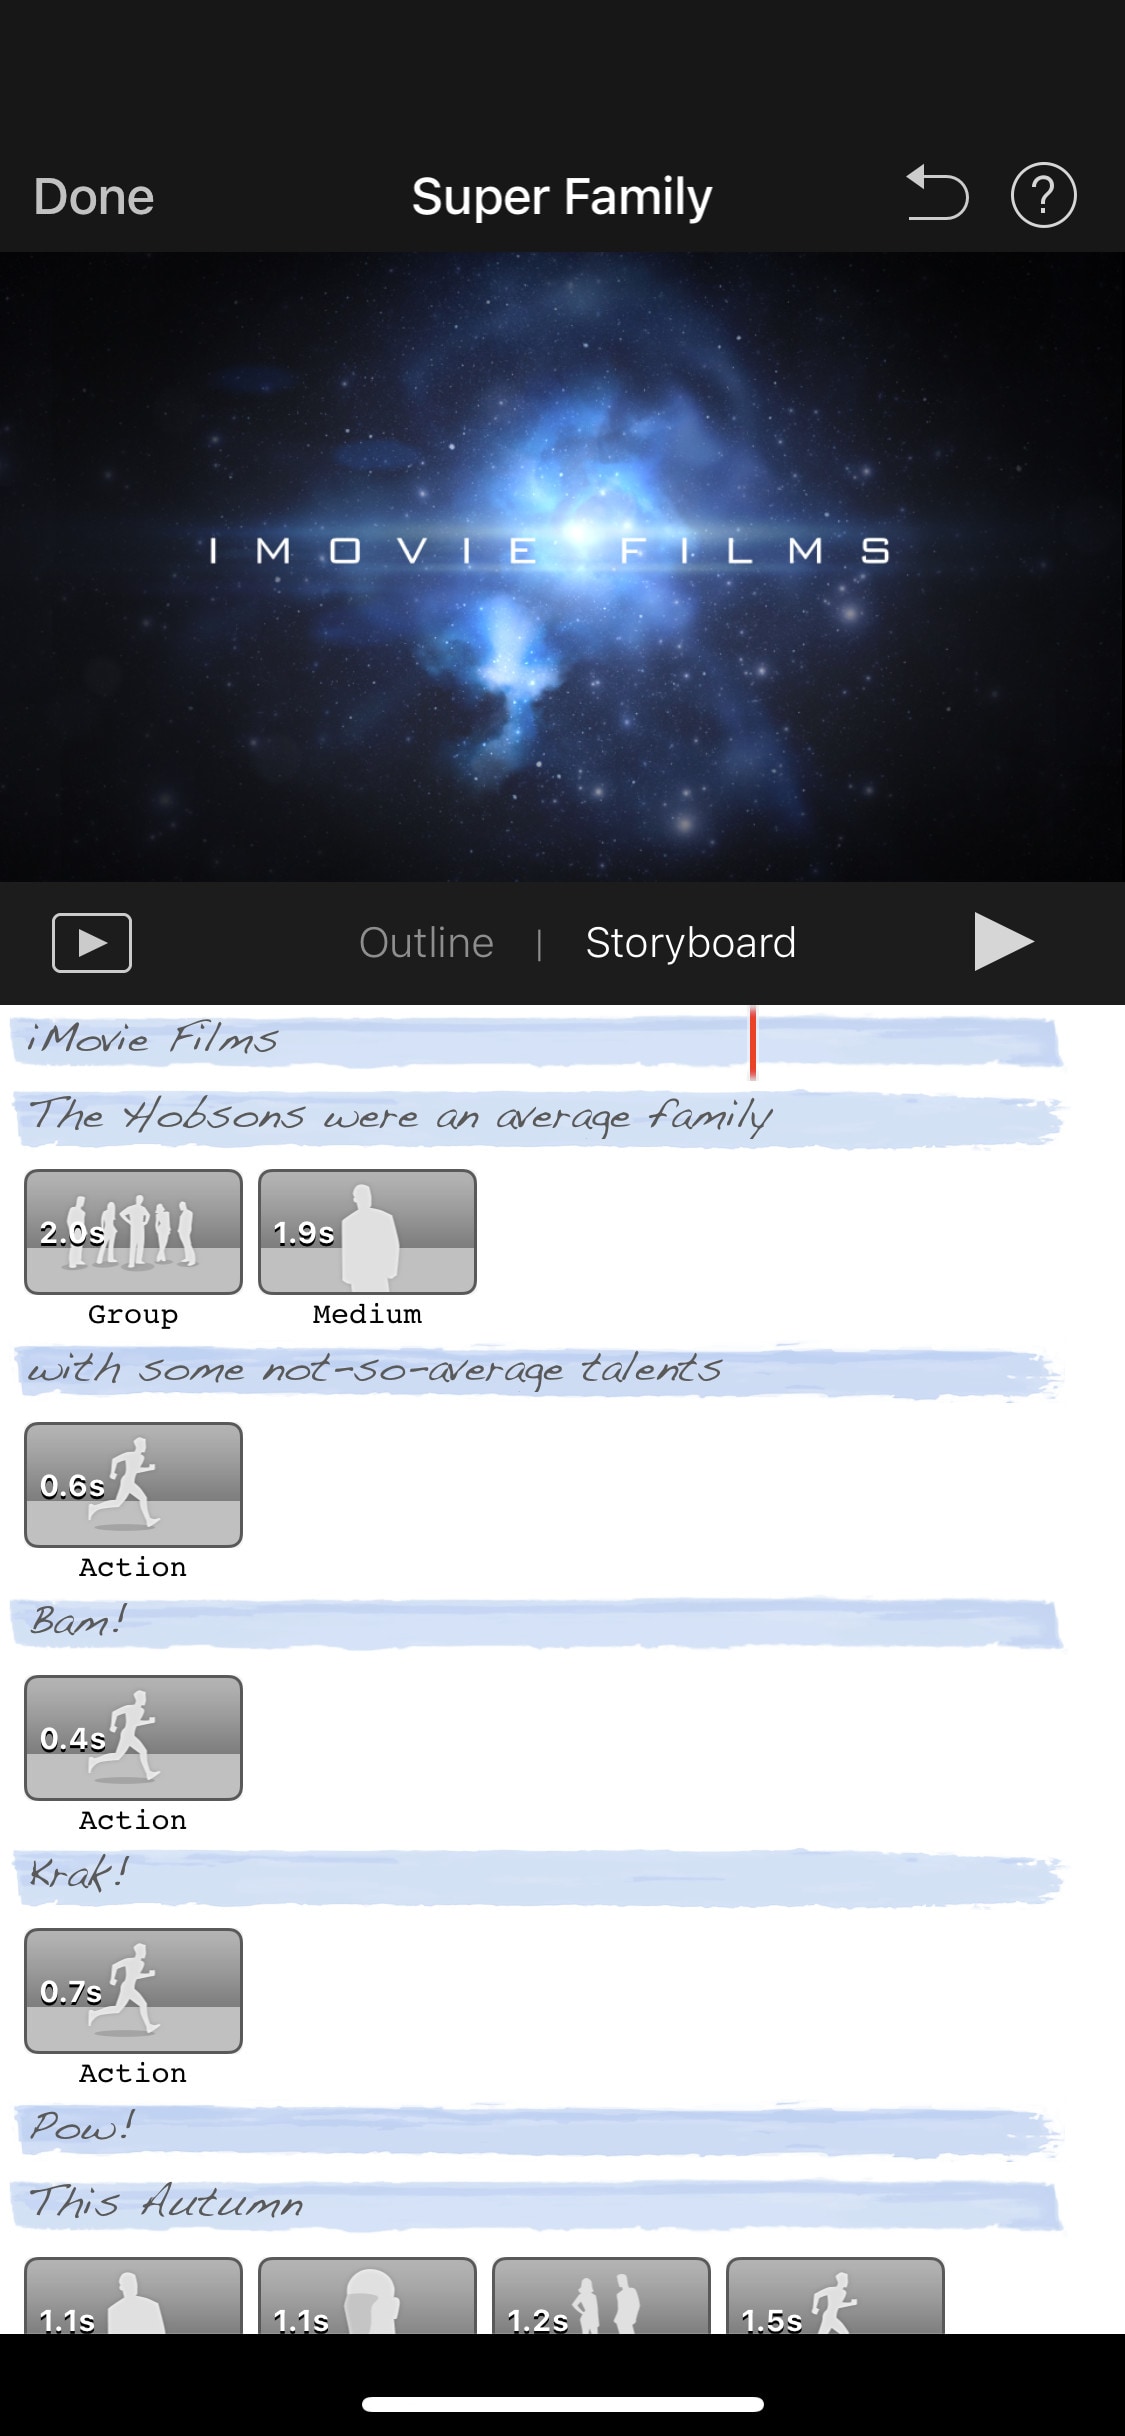
Its “Storyboards” mode is a creative way of learning production and post-production skills. It lets you choose a theme from many famous Genres available, then it will guide you through the production process like capturing footage, arranging your shots, and creating cinematic titles to enhance your story.
~Features:
- It is free and easy to use.
- Let you do speed ramping.
- Supports Raw files.
- It’s AI mode creates videos for you on its own.
- The “Storyboarding” feature helps you through the production process.
~Cons:
- It only works on ios and Mac.
- Not suitable for professional projects.
GoPro - Quik:
It is available on IOS and Android and windows also.
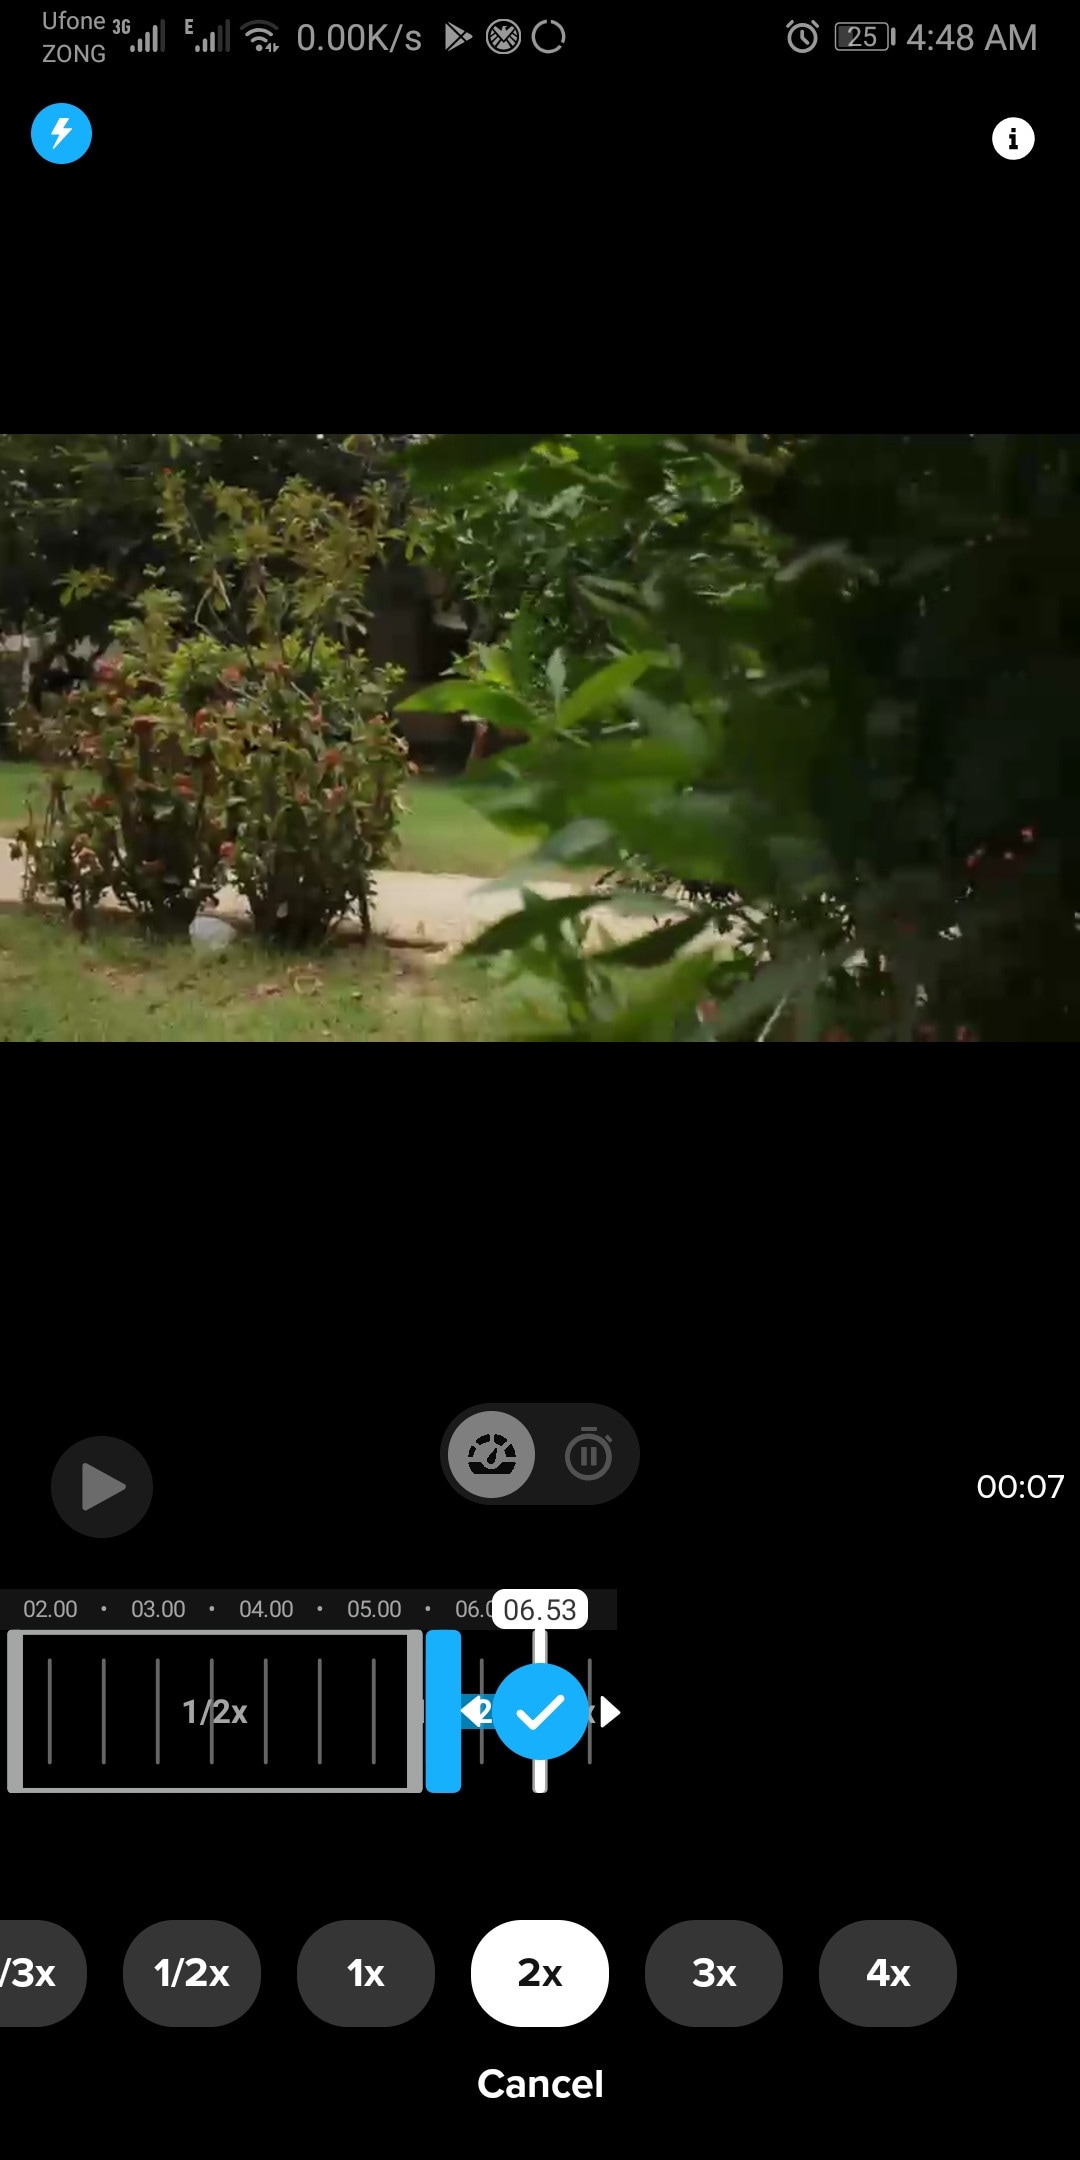
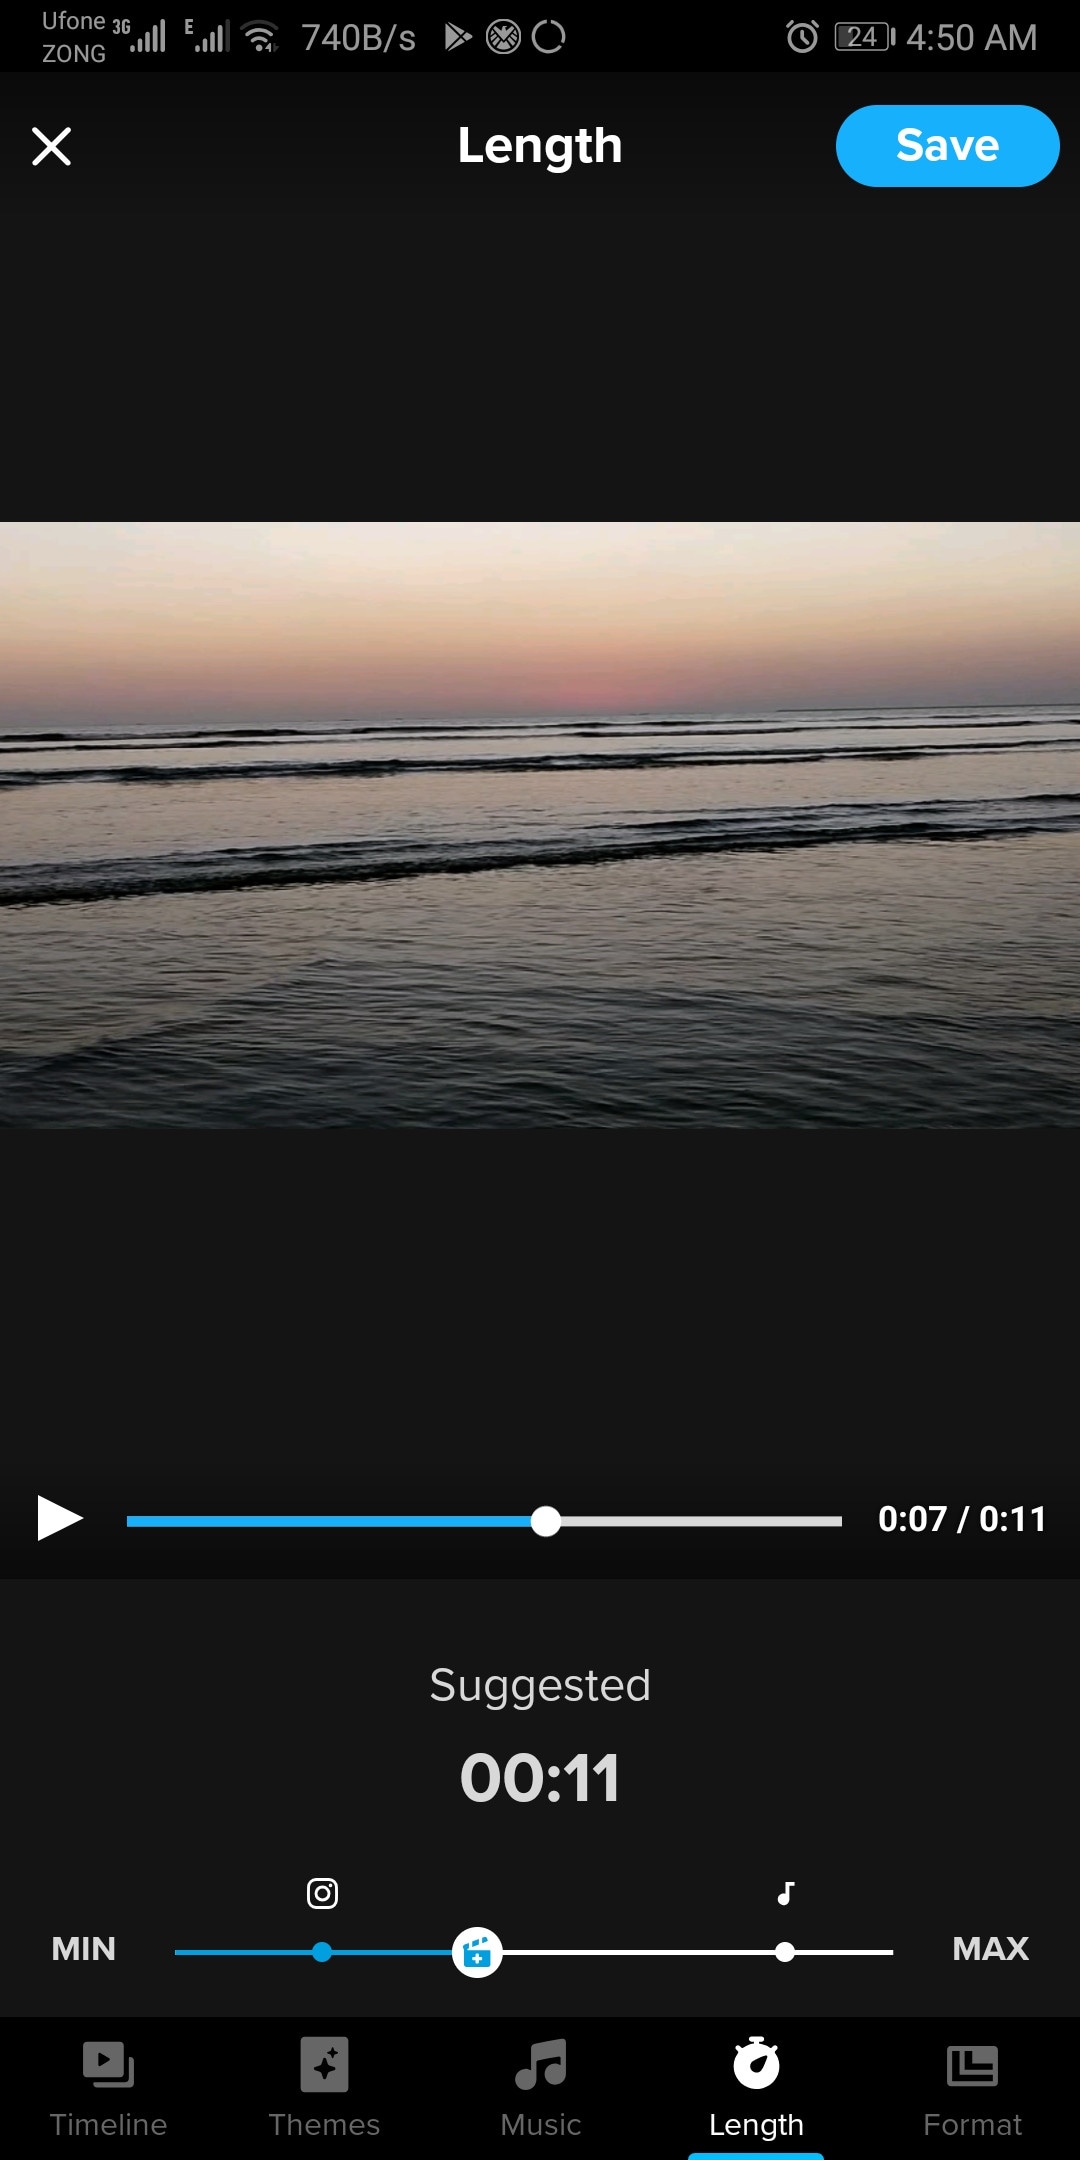
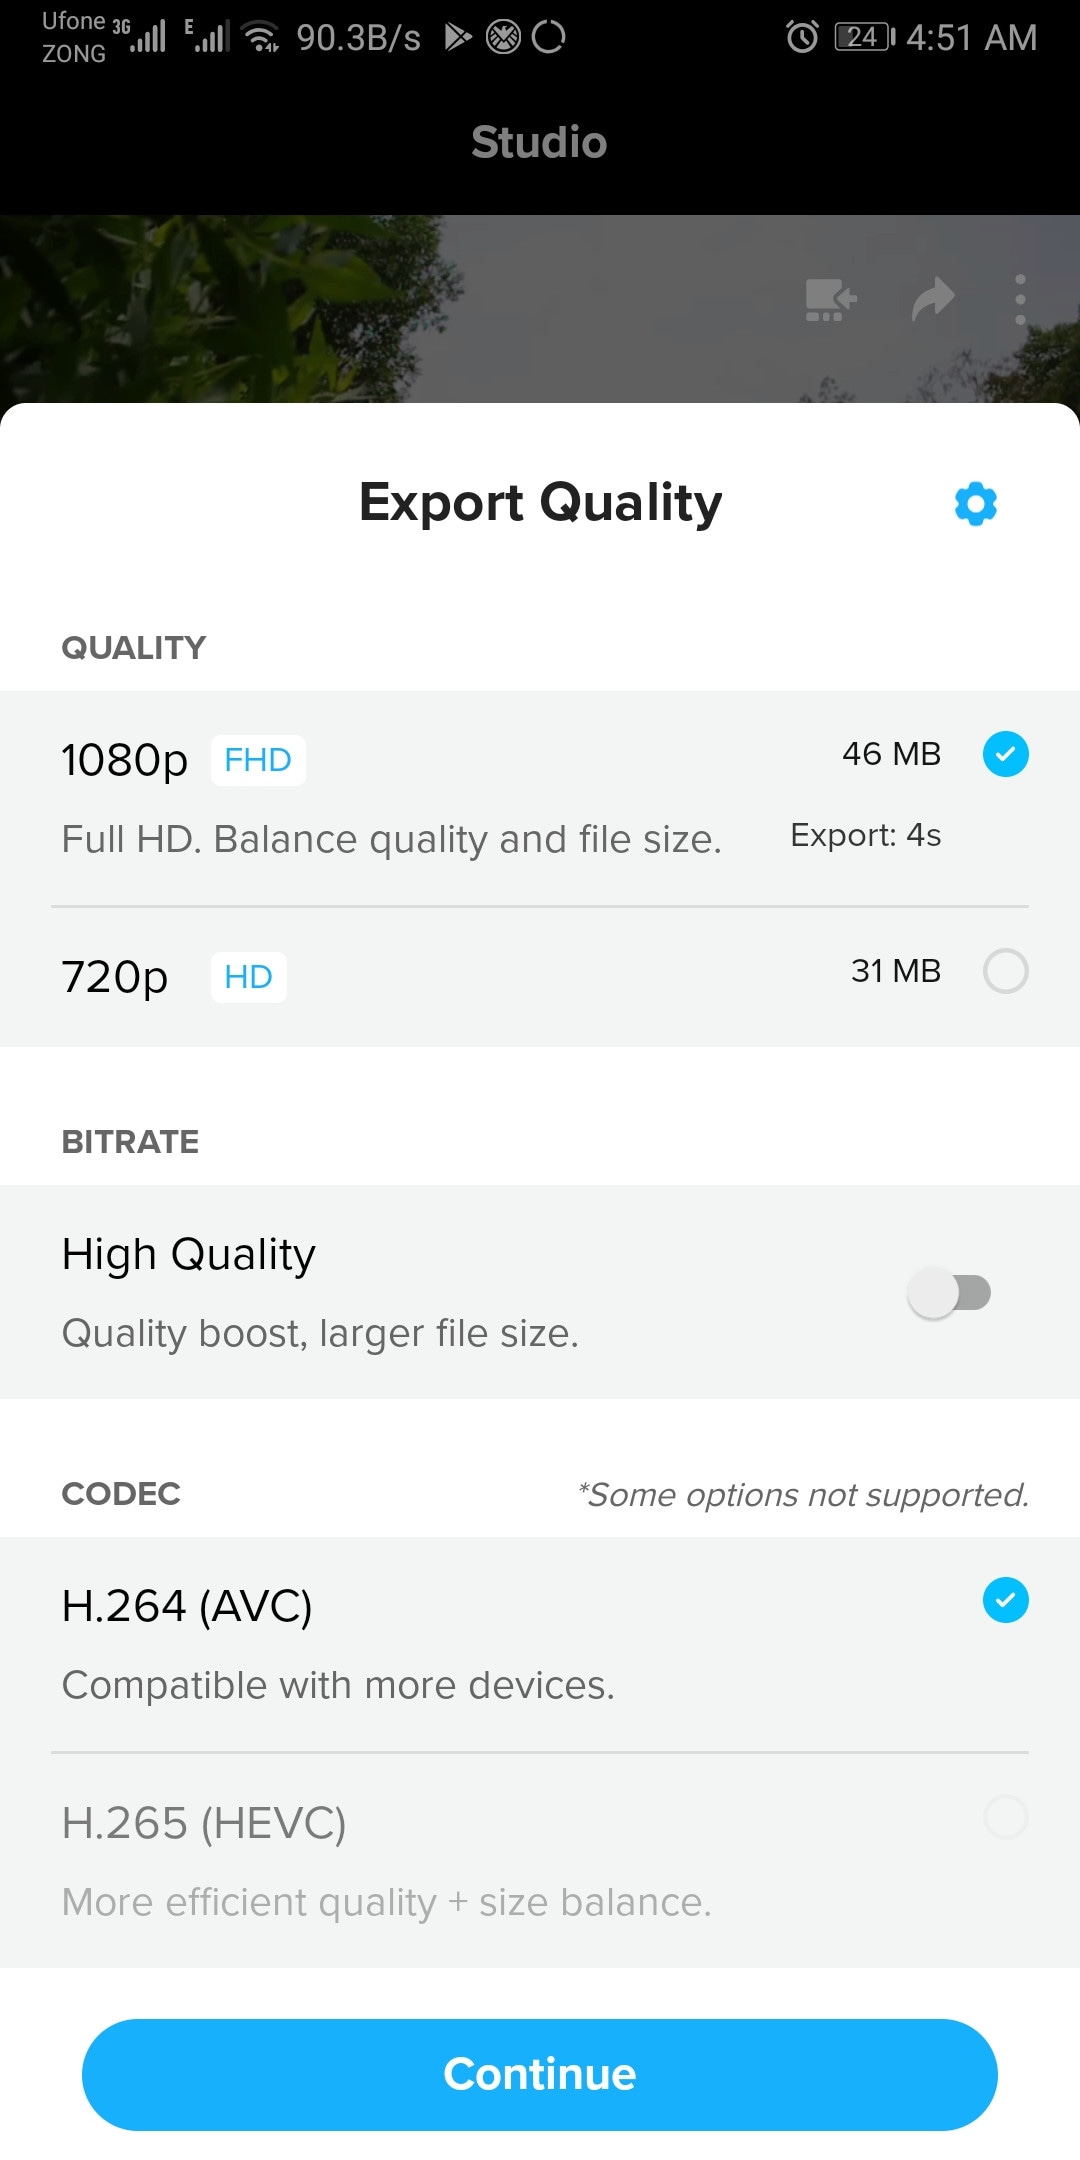
It is a free and easy-to-use software designed by GoPro. It can edit clips of your GoPro or any other device. It is a quick and easy way to enhance your clips before posting them on any social platform. It can do basic edits like trim, rotate, color correction, e.t.c. It can also make amazing speed ramps by changing the speed of different parts of the clip (available in the premium version only). It doesn’t produce any watermarks. Although its premium version unlocks more features like speed ramping, more themes, and unlimited backup space.
~Features:
- Its free version doesn’t leave a watermark.
- It is simple and easy to use.
- Can do basic color correction.
- Have pre-made themes for faster editing.
- Change the speed at different parts of the video to create smooth speed ramps. (Available in the premium version.)
- Has a free version with limited tools for basic editing.
~Cons:
- It lacks advanced tools therefore not suitable for large projects.
- Its free version has many limitations.
~Price: Its subscription is available at $1.99/month or at discount for an annual subscription having $9.99/year.
VN Video editor:
It is available on IOS and Android, Windows, and Mac.
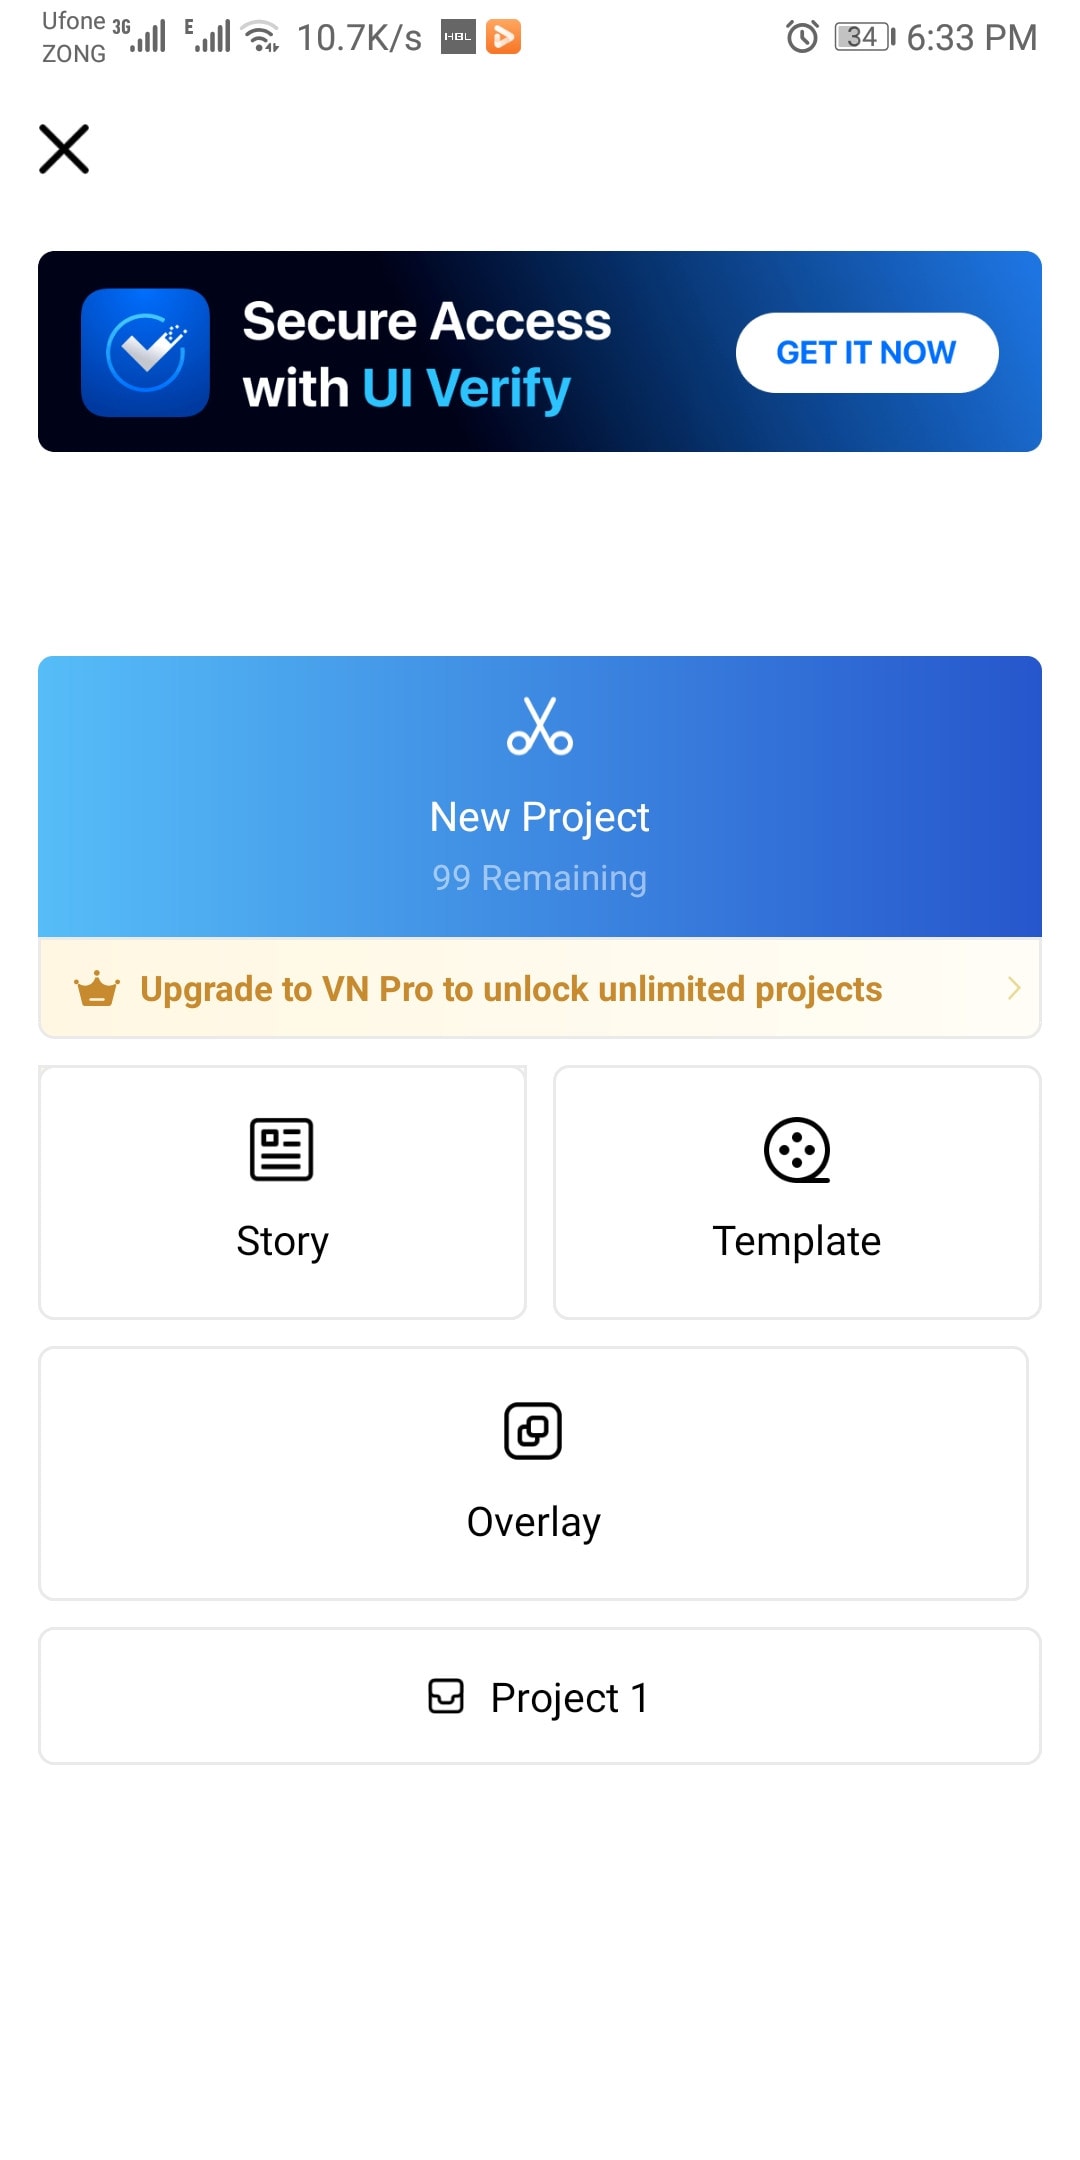
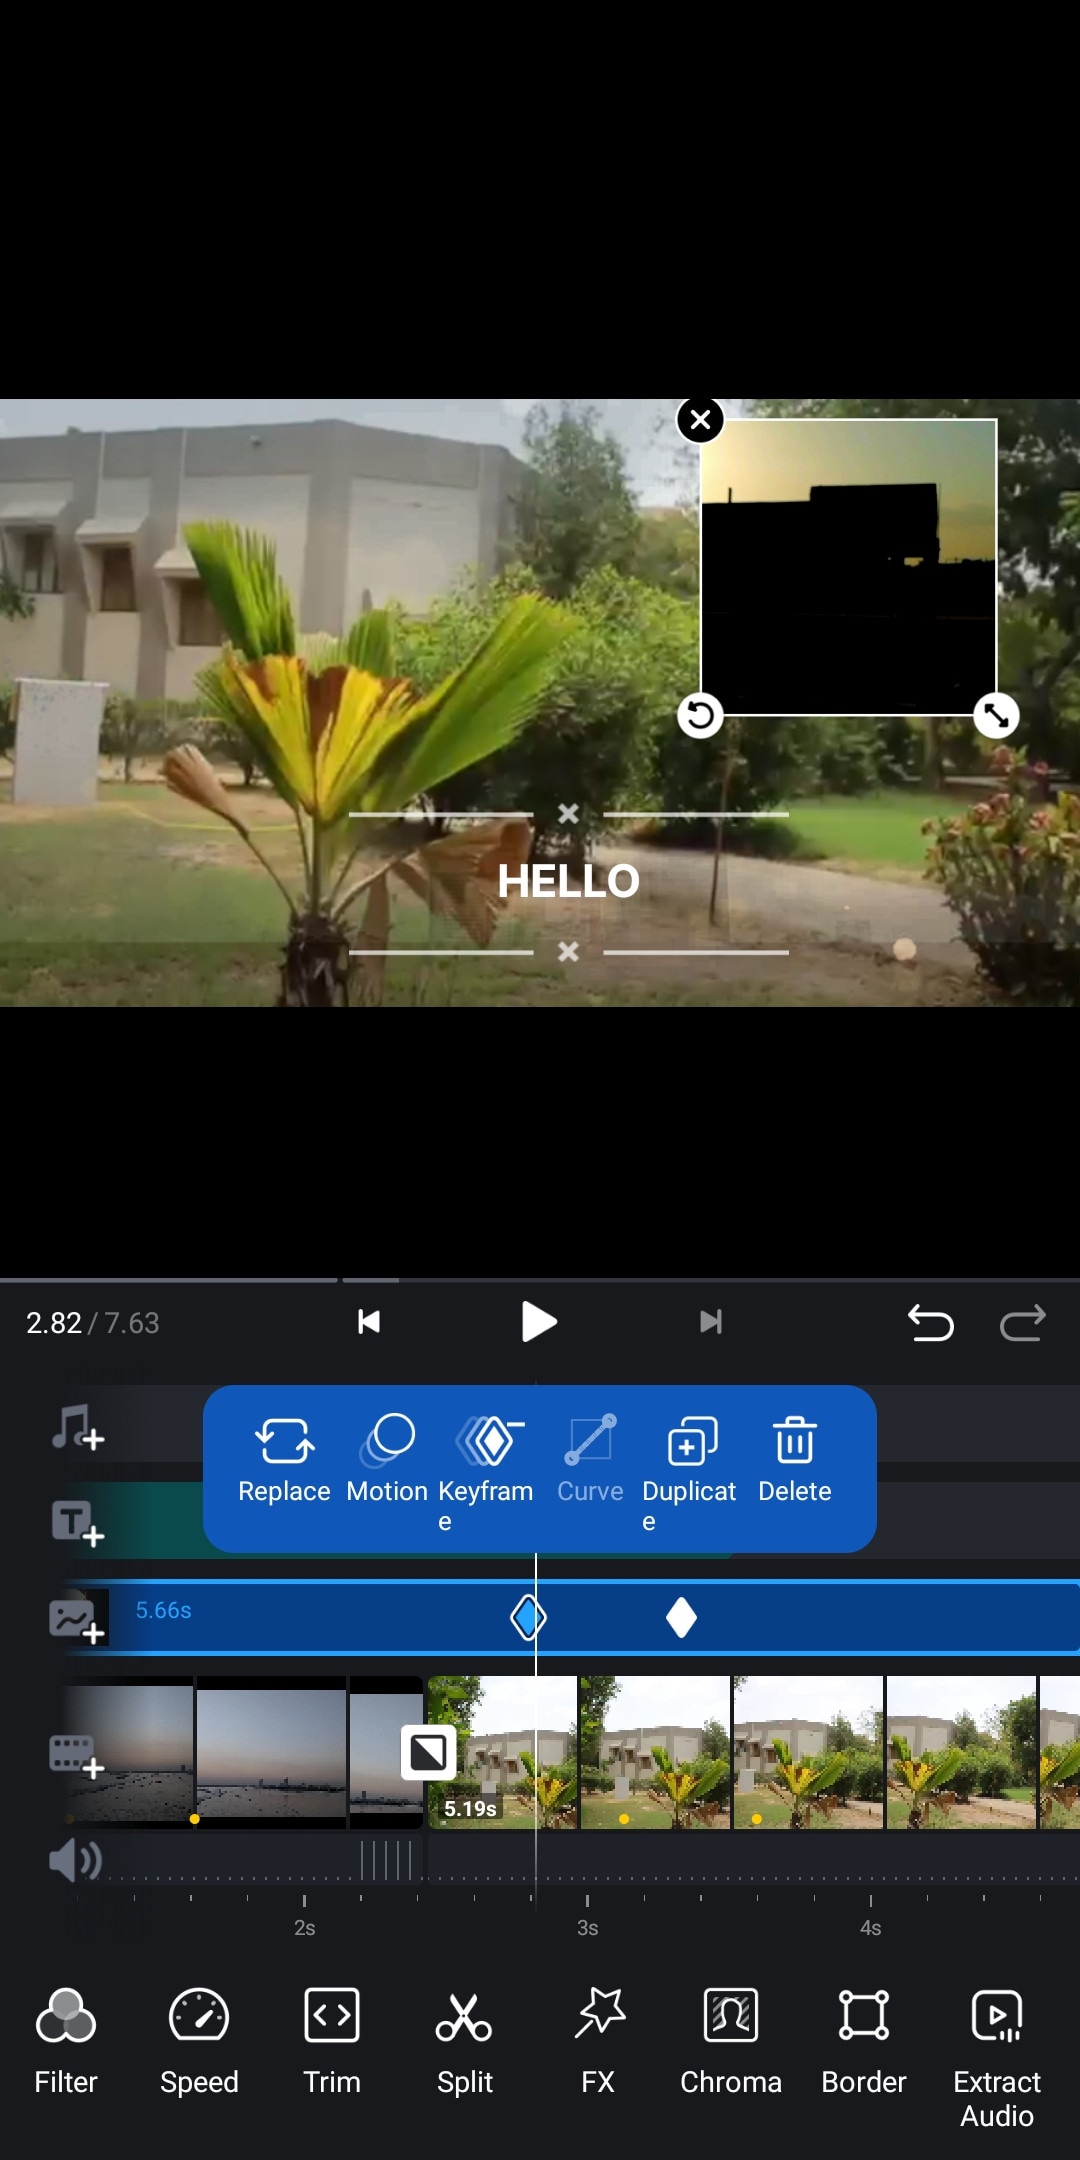
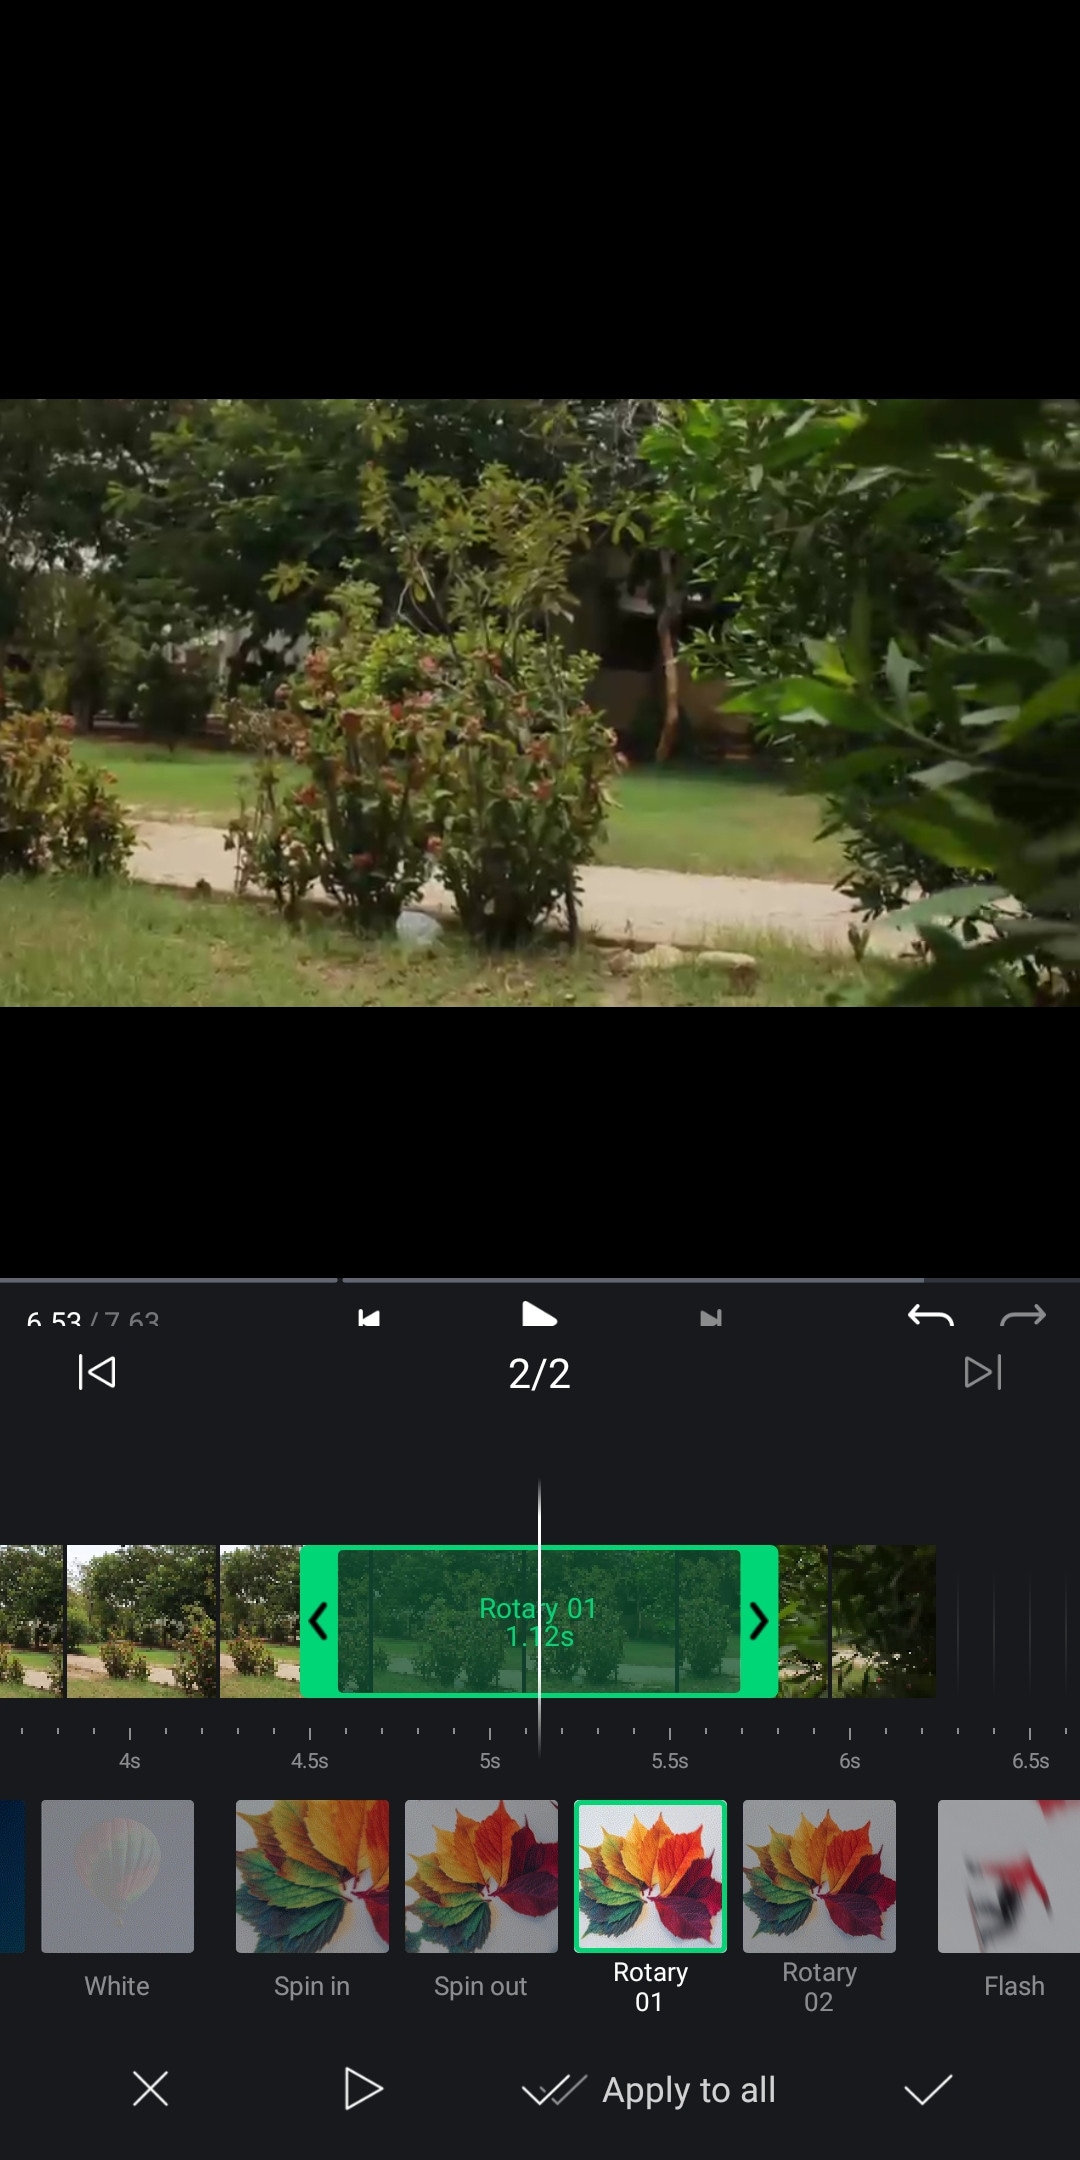
If you are looking for a video editor, which let you do fast but quality edits, then “VN video editor” is the right choice for you. It is free and easy-to-use software with many useful features like transitions, effects, speed ramps, PiP, chroma-key, keyframing, e.t.c. It supports different aspect ratios for all your social platforms.
It also has pre-made templates to speed up your editing process. Its Story mode let you manage your production and post-production work easily. It also has overlay mode, which can make awesome slide shows for you.
~Features:
- It is free software with no watermark.
- It supports up to 4K resolution at 60fps.
- Supports multi-layer editing.
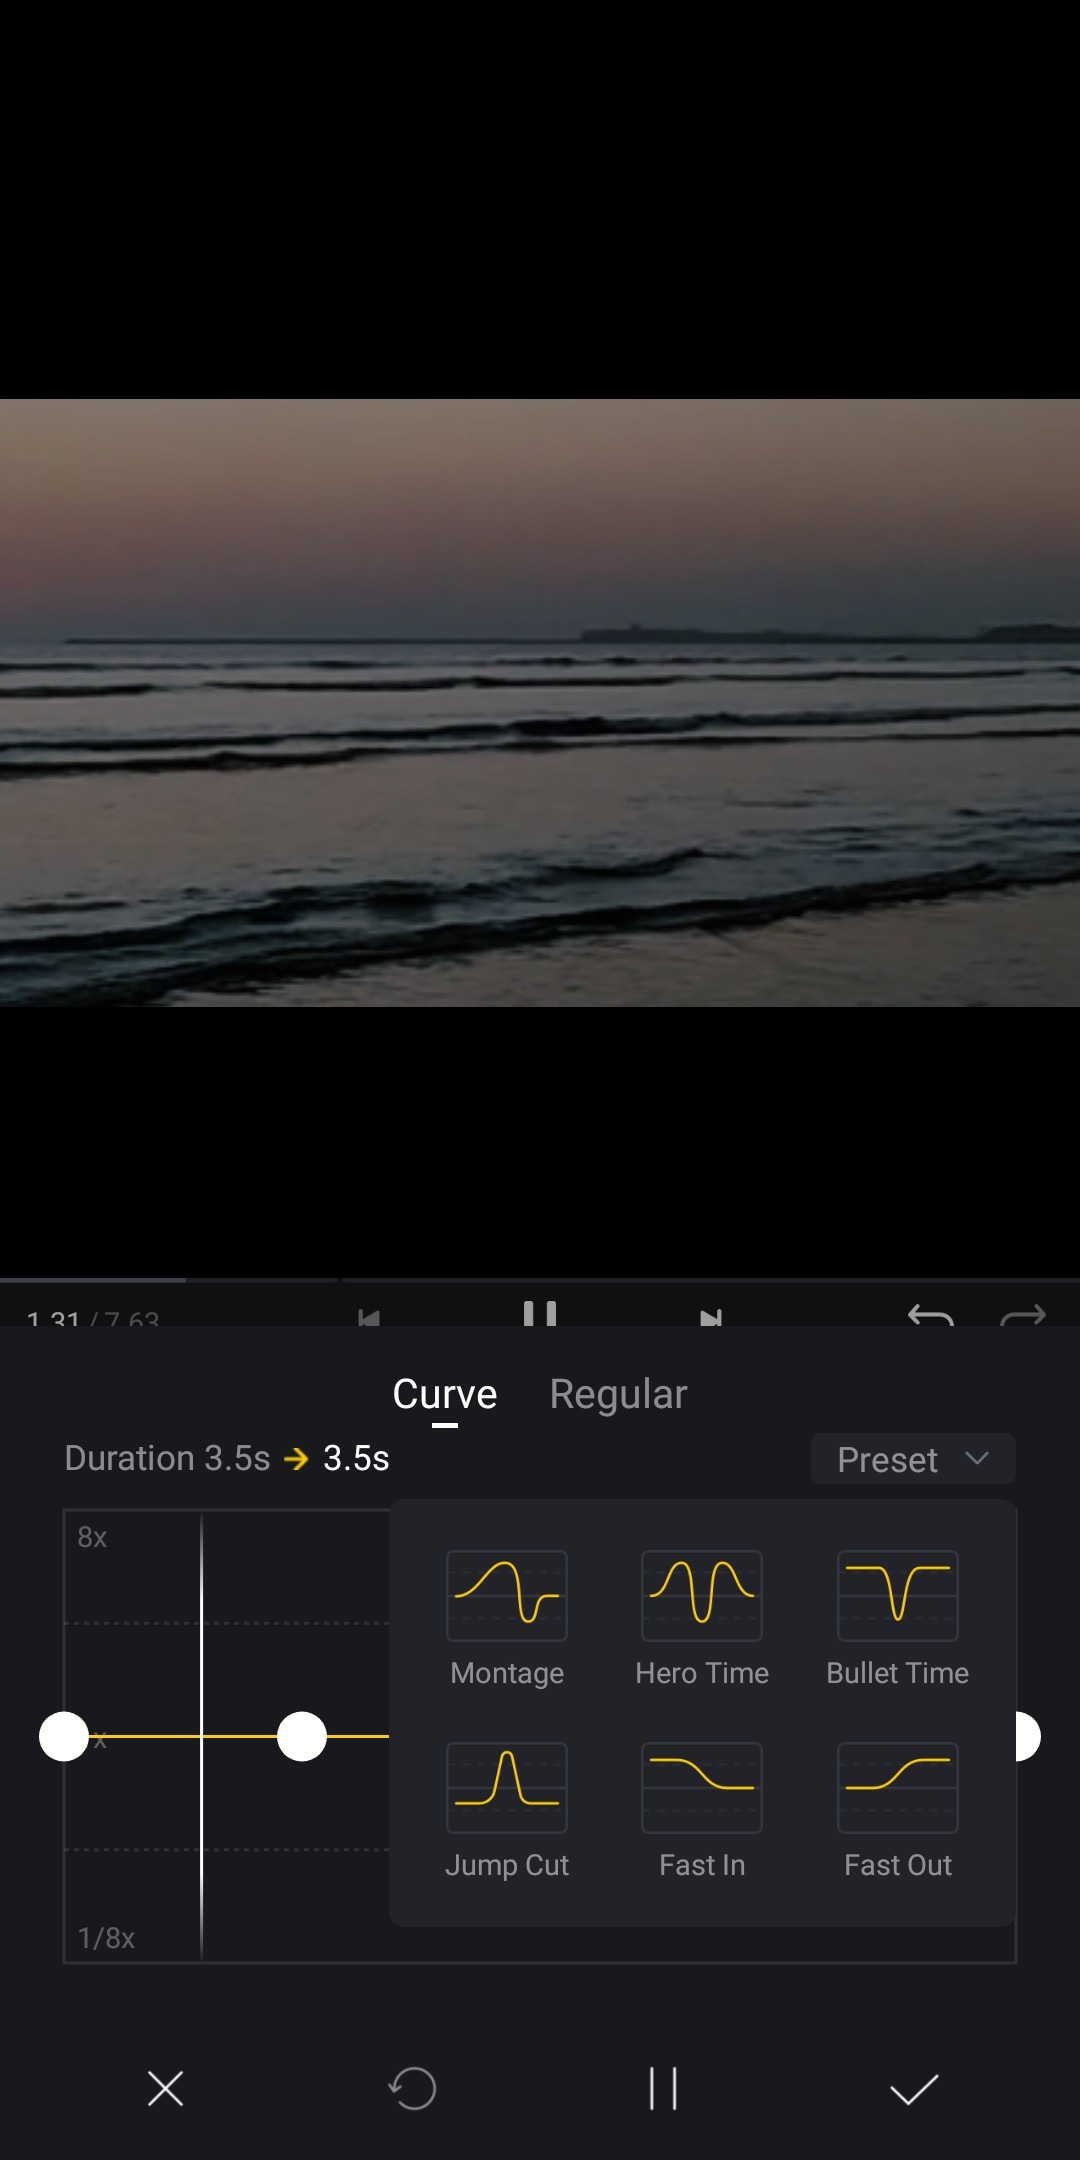
- Have keyframing curves to create smooth animations.
- Have speed curves for smooth speed ramping.
- Its Story mode let you manage your production work easily.
- Can extract audio from a video file.
~Cons:
- Its UI doesn’t support editing landscape orientation.
- Its free version has limitations of creating max 100 projects.
~Price:
Its Premium version is available for $3.9/month or $20.9/year.
Some Paid iPhone Video Editors:
If you want to move forward and get your hands on these paid softwares to try new features then you should buy these paid softwares. As most of these softwares are quite affordable but they pack the punch. And some of them can give you more in return than your investment. Then what are you waiting for? go and try them yourself.
Kinemaster:
It is available on IOS and Android both.
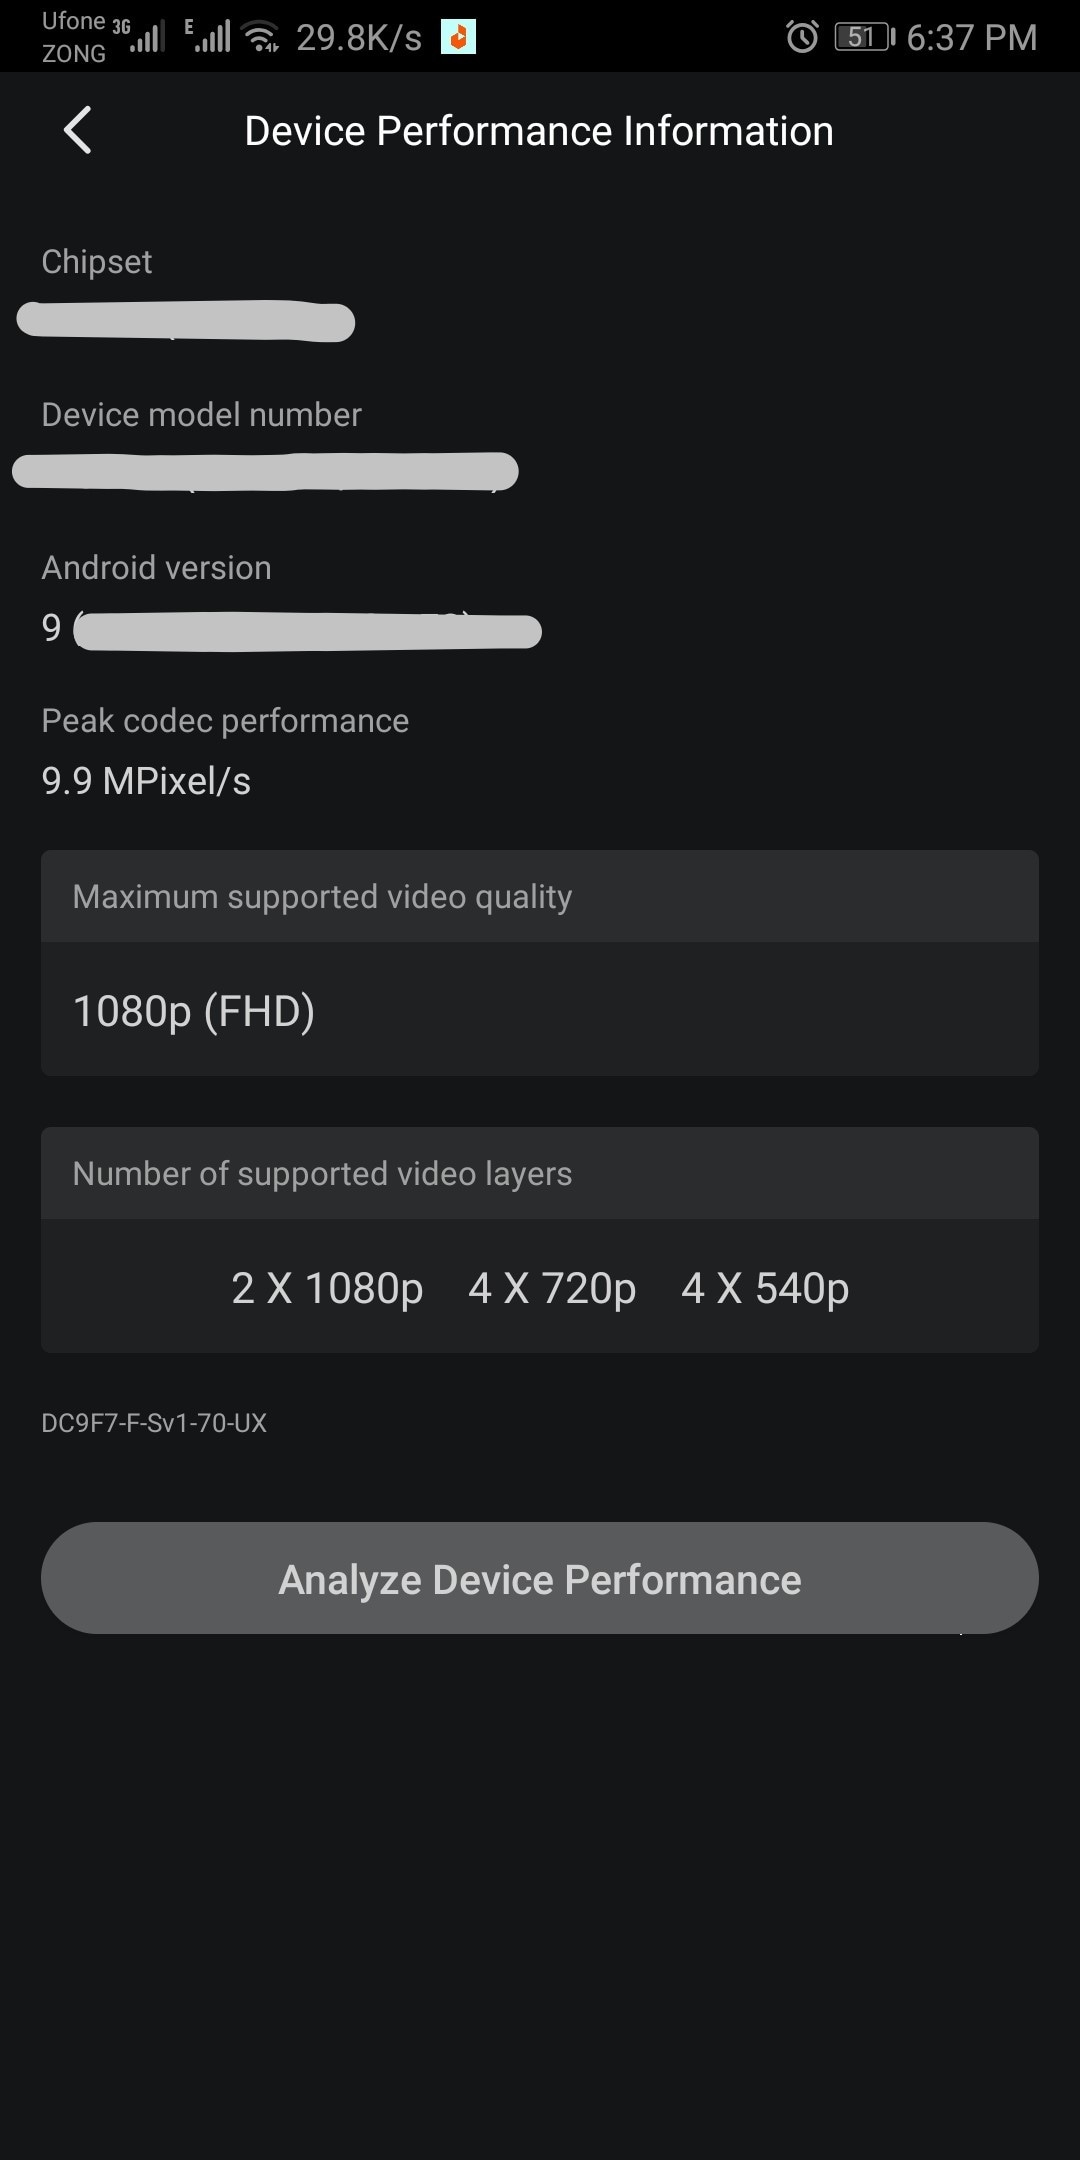
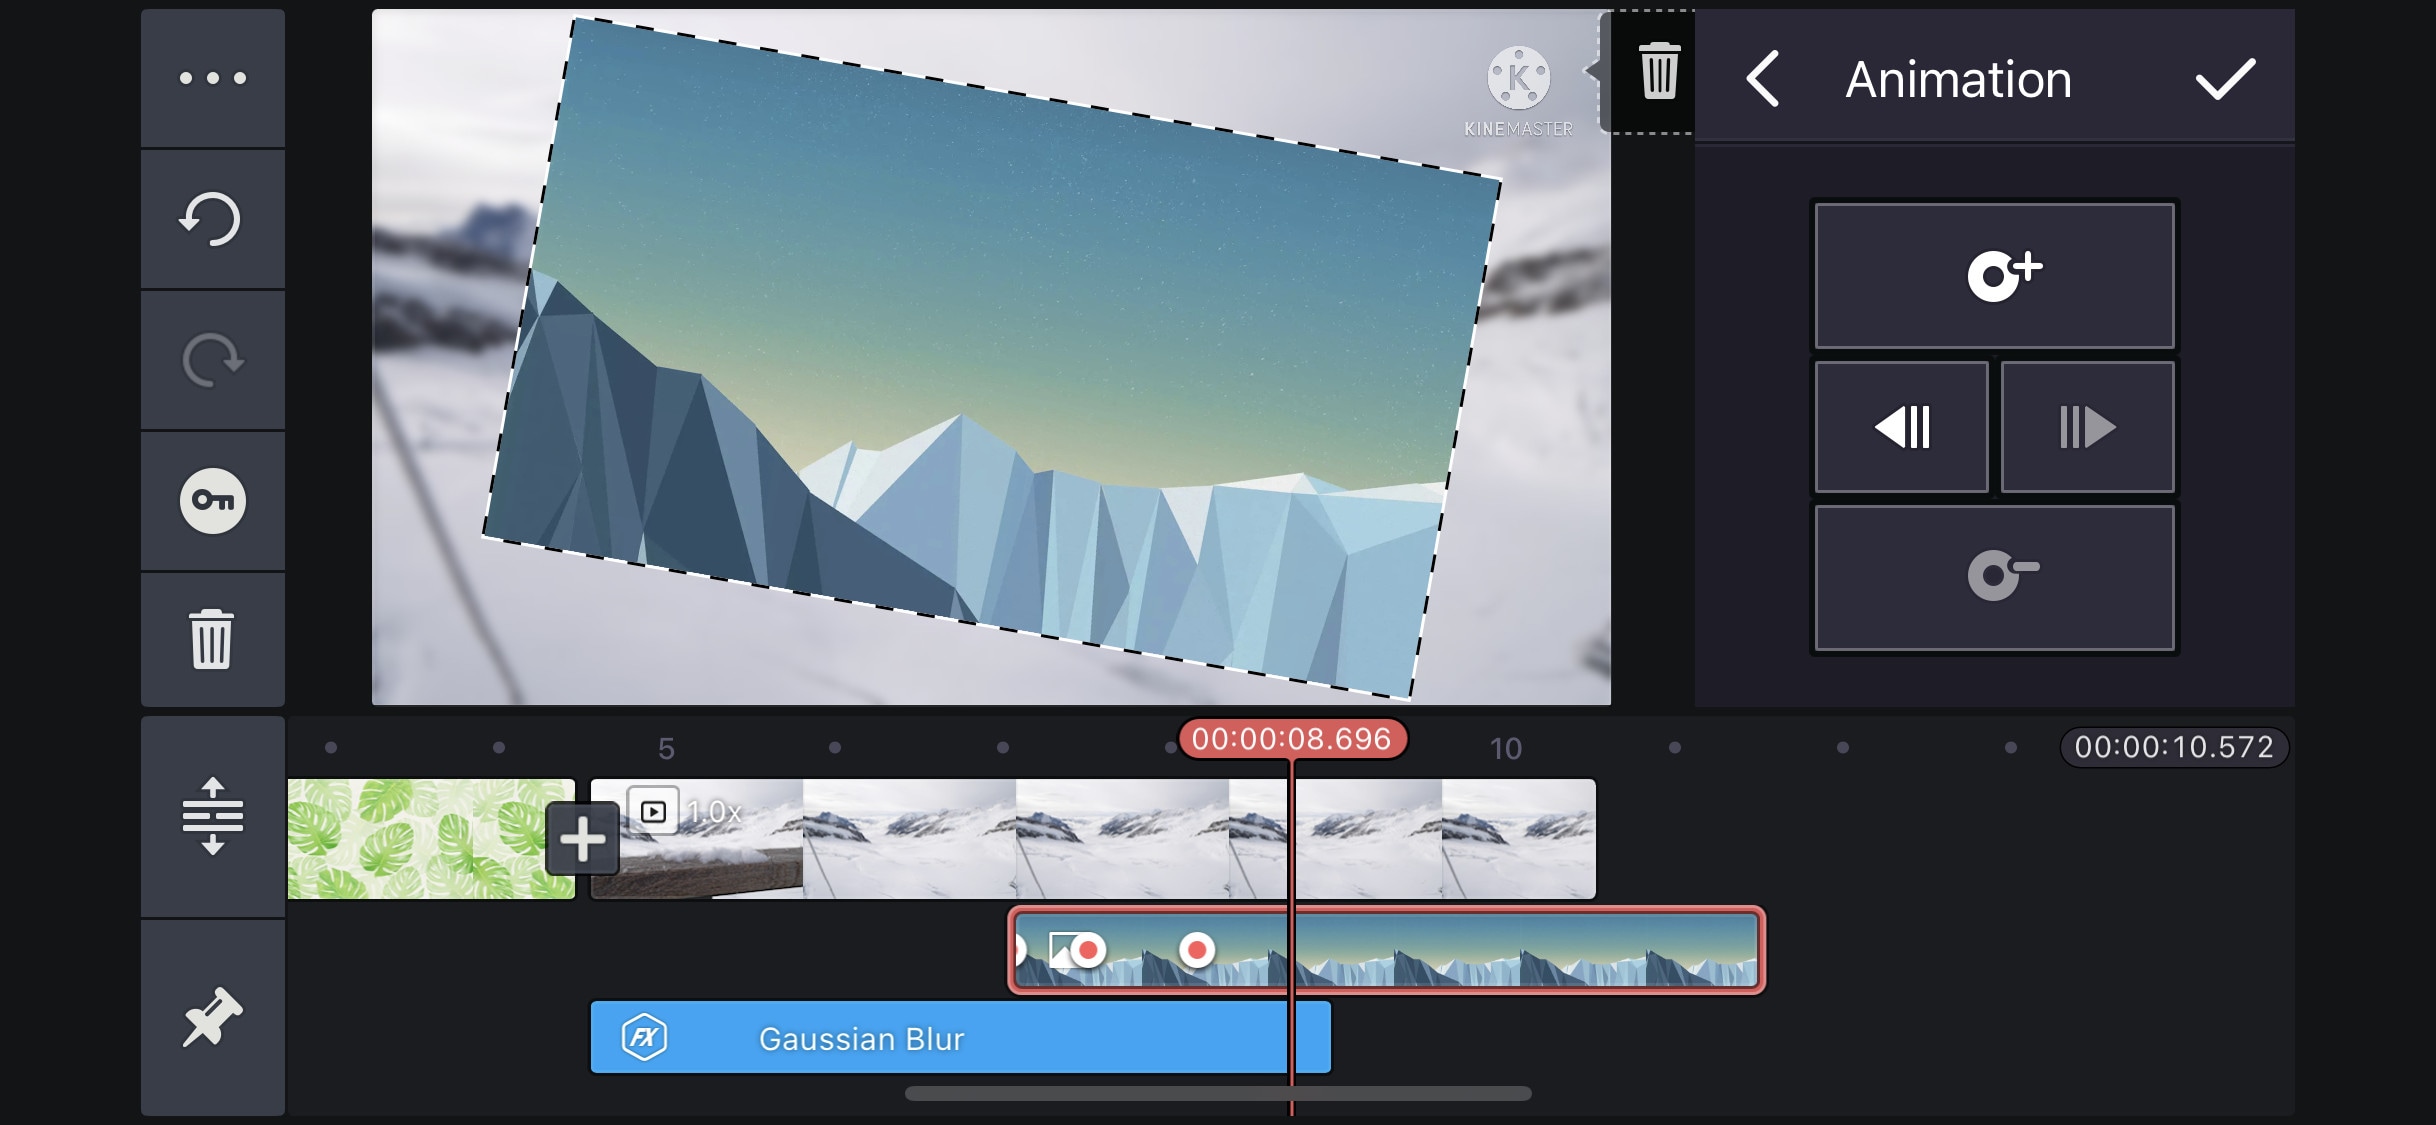
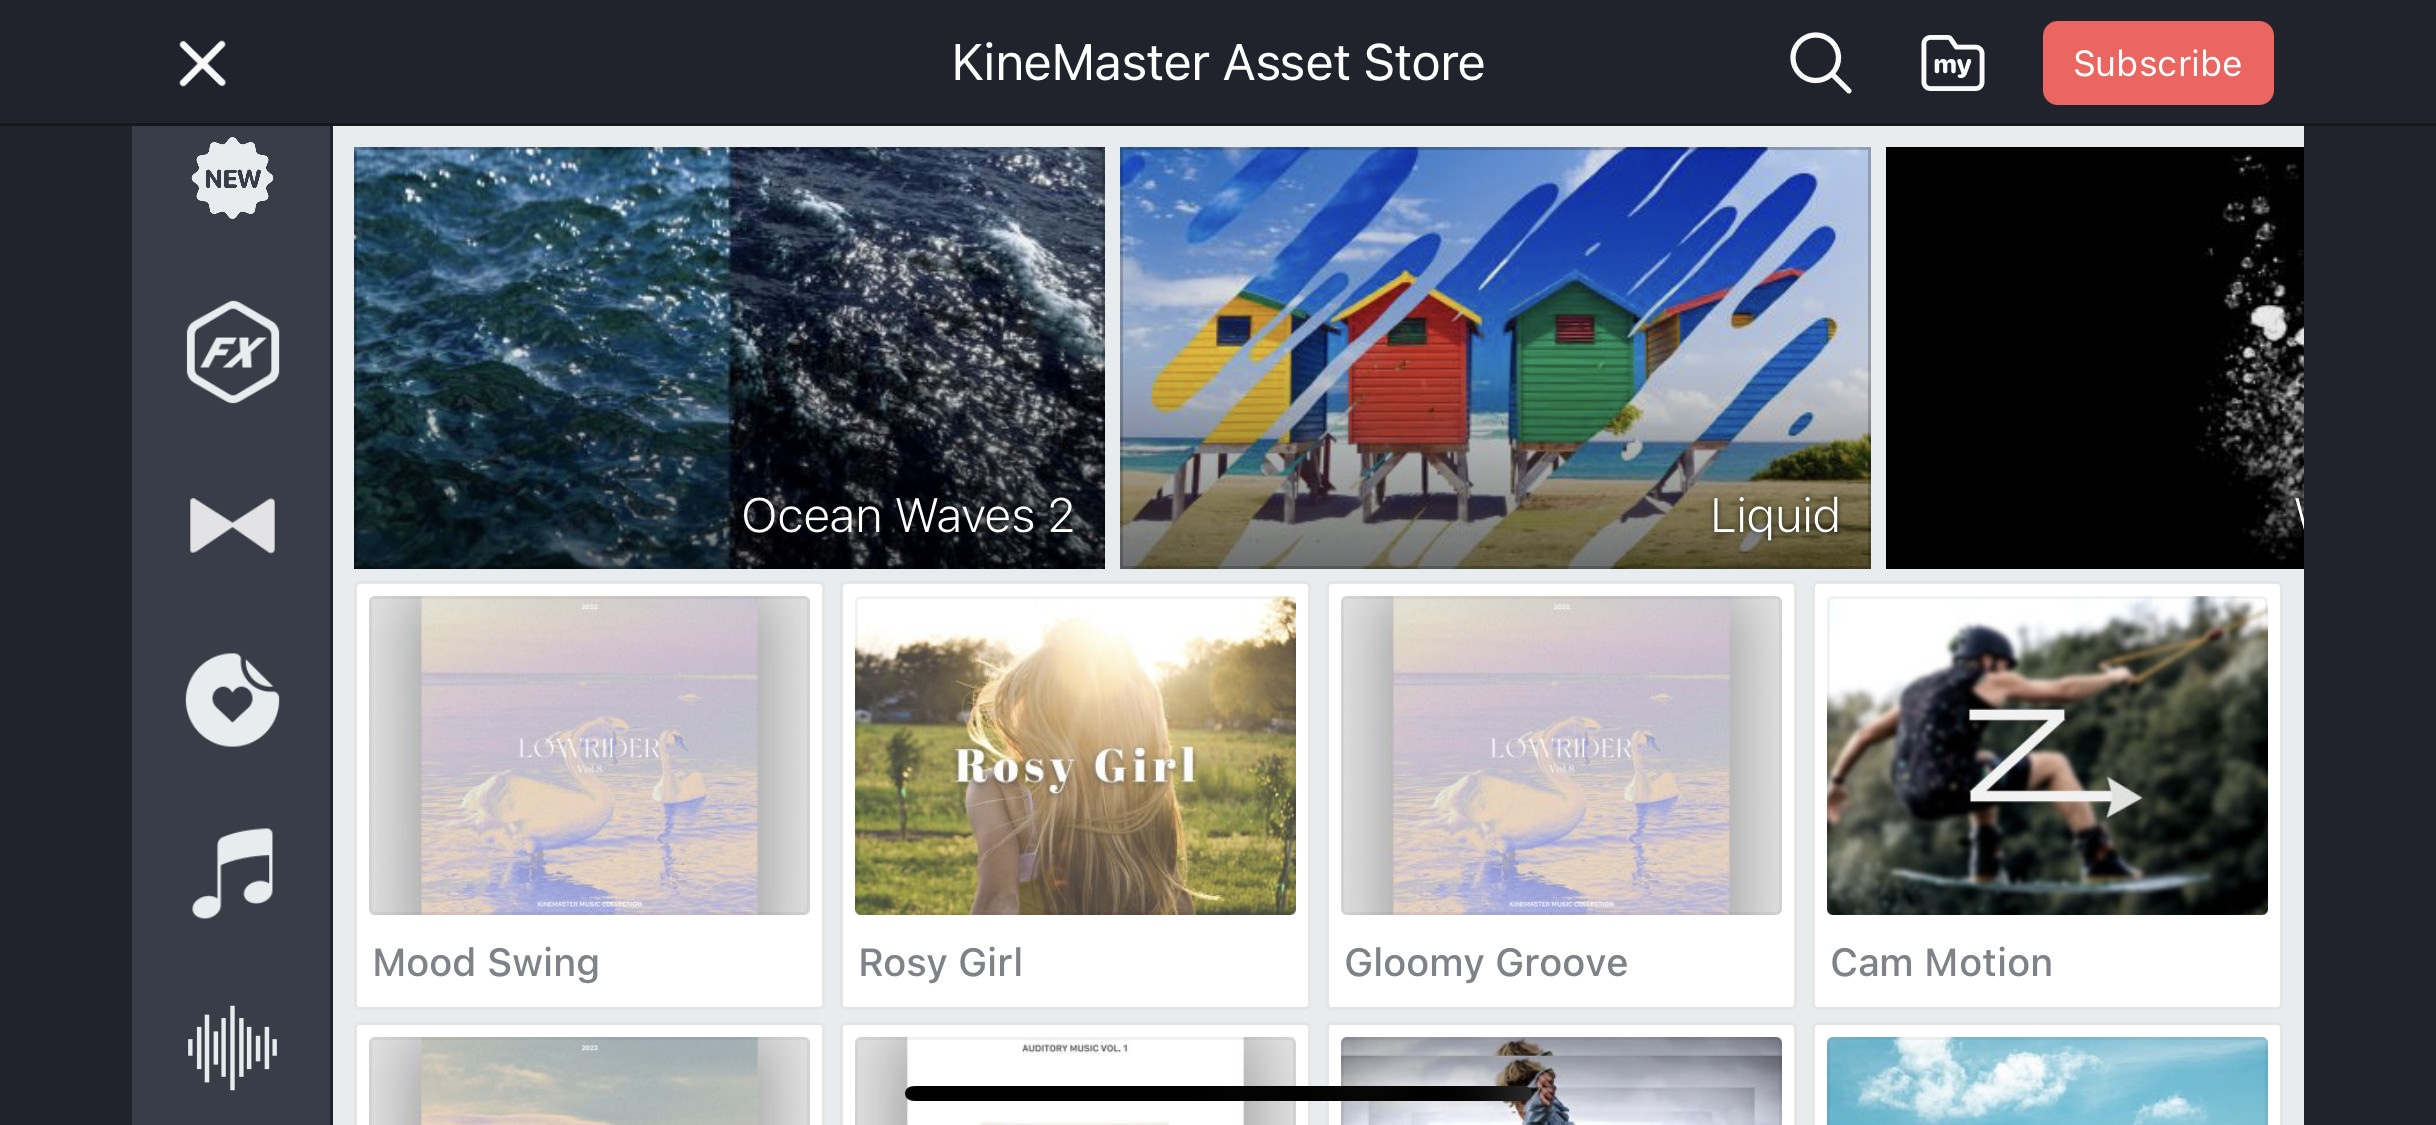
If you want to do more than just trimming and cropping to your videos then you should try Kinemaster. For editors, who want to do some advanced-level video editing on their phone, then you must have Kinemaster on your phone. It is a paid software, which is packed with many useful features. It has many video and audio effects. It also has an amazing audio editor. It also has many title designs and basic color correction tools. It has hundreds of effects and transitions + more can be downloaded from its asset store. Its UI is suitable for beginners and content creators both. It is a paid software, but all its features are completely free to use, but the free version leaves a watermark on export.
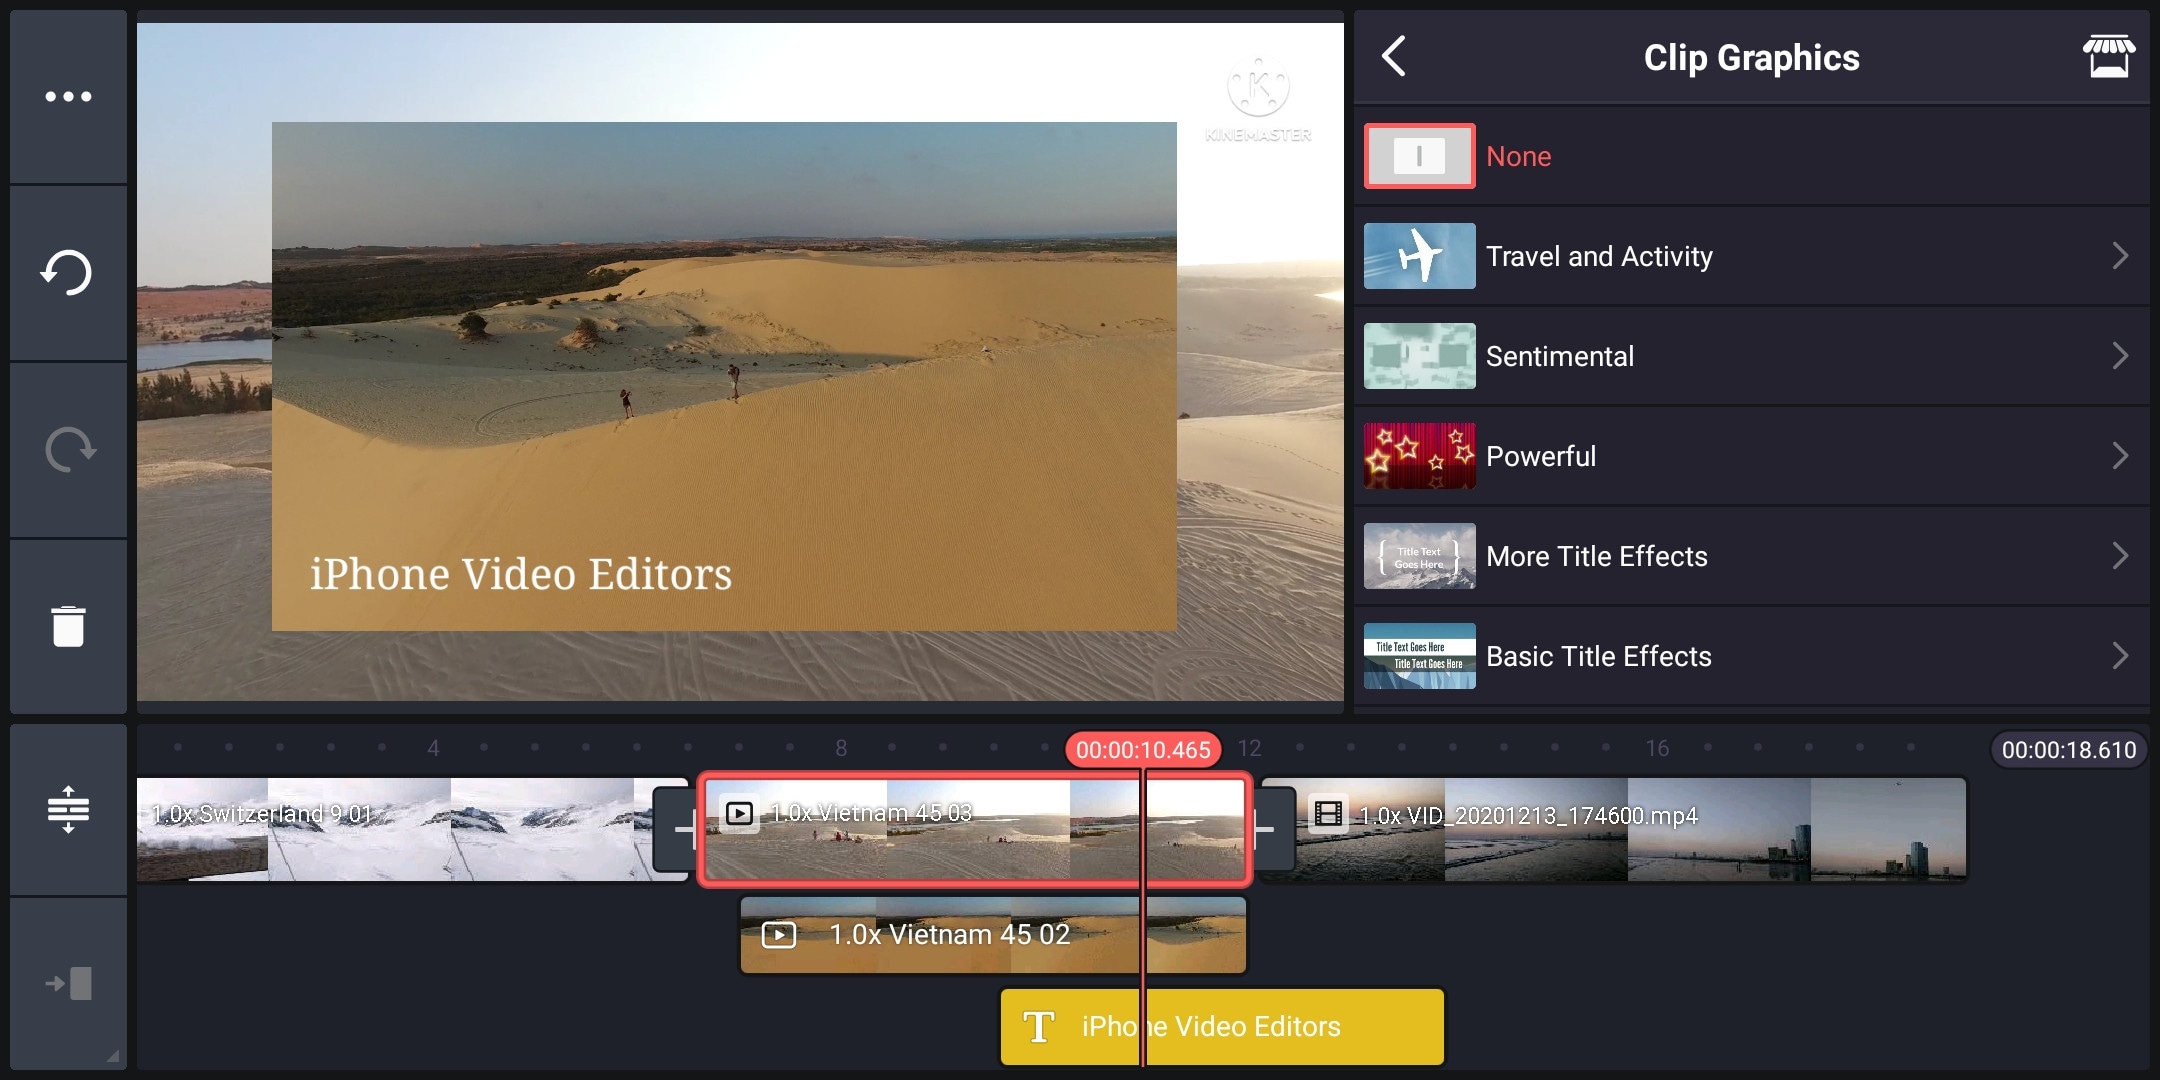
~Features:
- It supports up to 4K resolution at 60fps. (depending on mobile configuration)
- Have amazing features like chroma key, keyframing, blend e.t.c
- Has built-in audio and video recorder.
- Supports multiple texts and video layers with different resolutions depending on the capability of the mobile phone.
- Has UI like a PC video editor and supports landscape orientation for editing.
- Have an asset store with 100s of free effects, transitions, and stock material.
~Cons:
- Can’t export 4K videos on most devices.
- Can’t apply keyframes and chroma key to the main video. (can be done on layers only)
~Price:
Its Premium version is available for $4.9/month or $39.9/year. It also includes all the premium assets.
Power Director:
It is available on IOS and Android both.
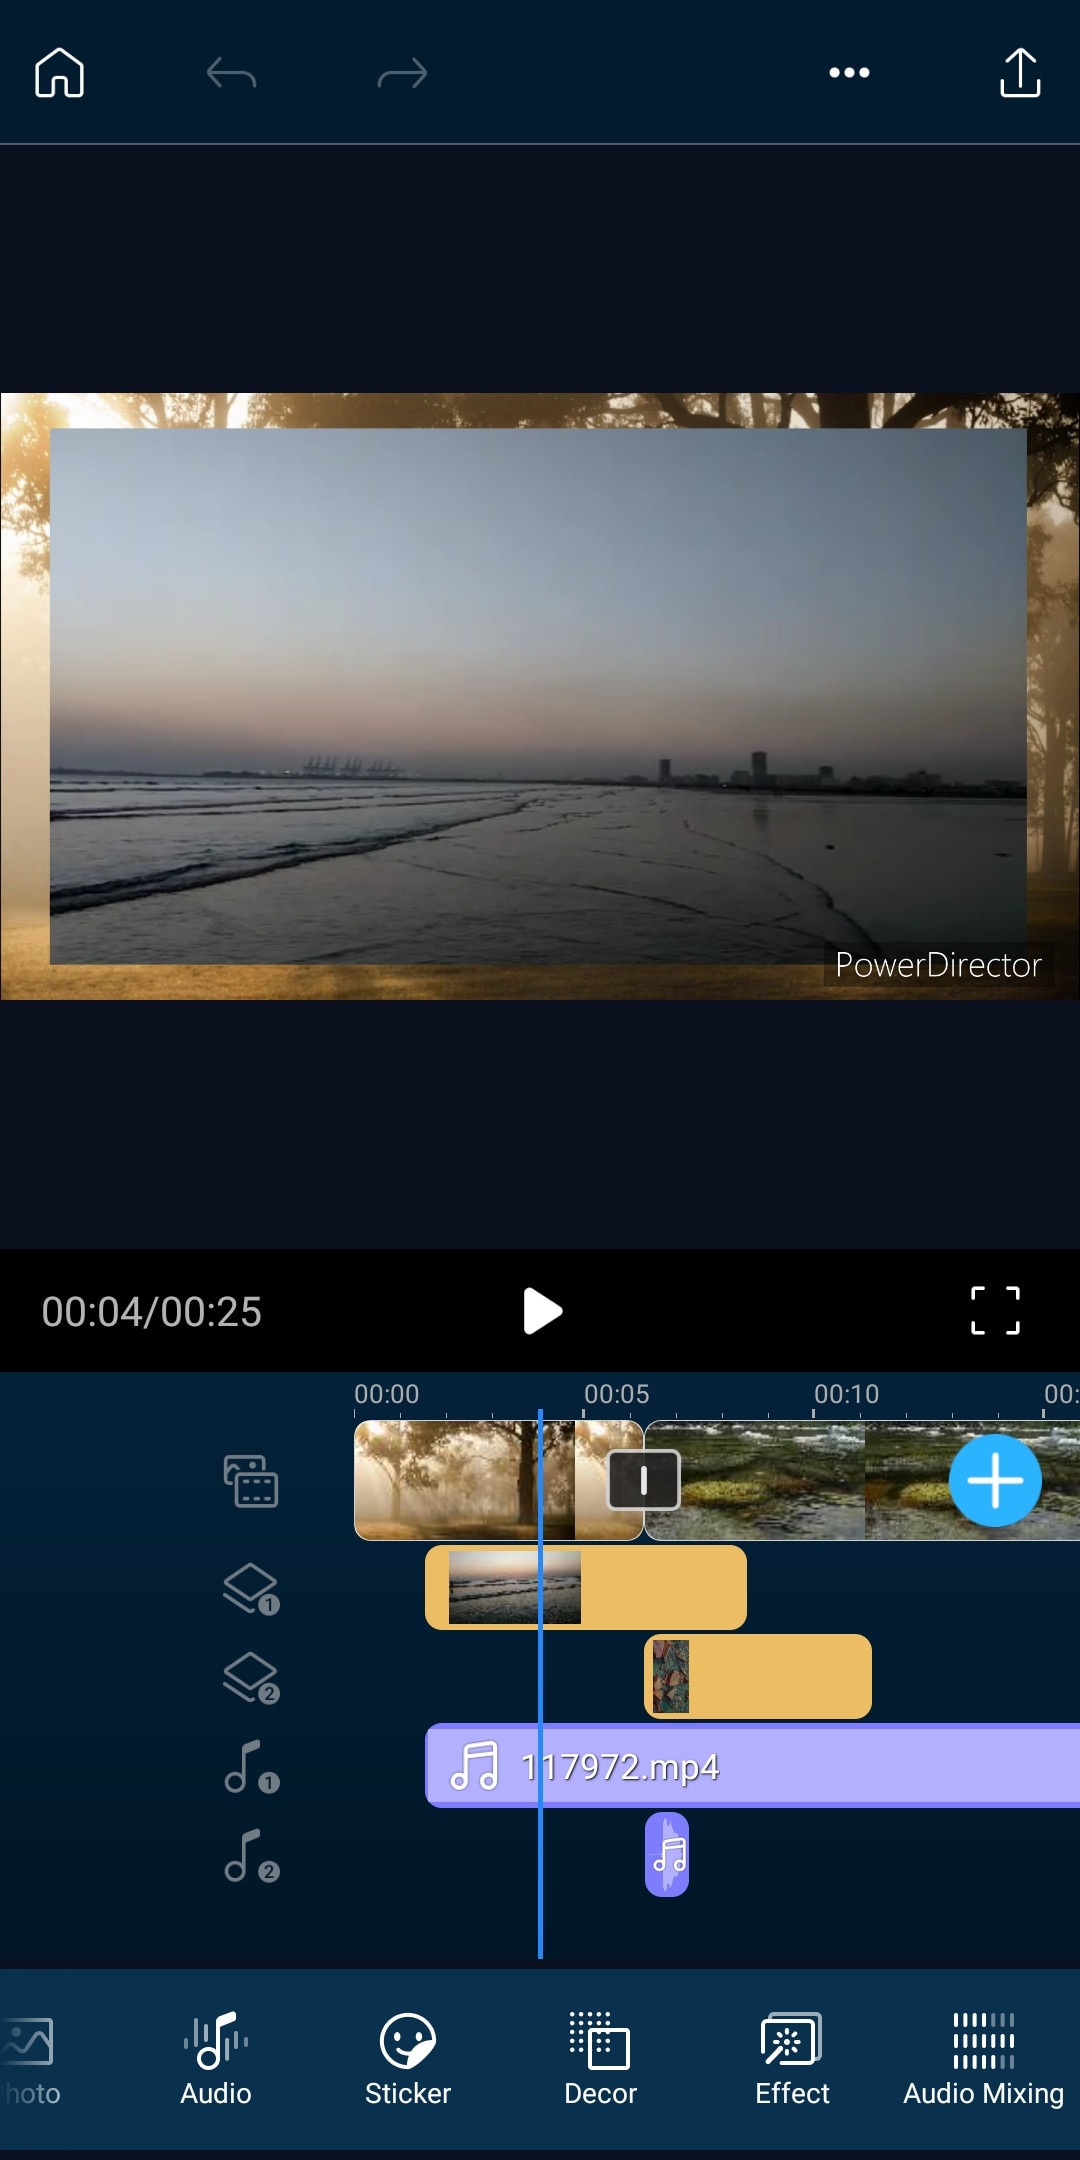
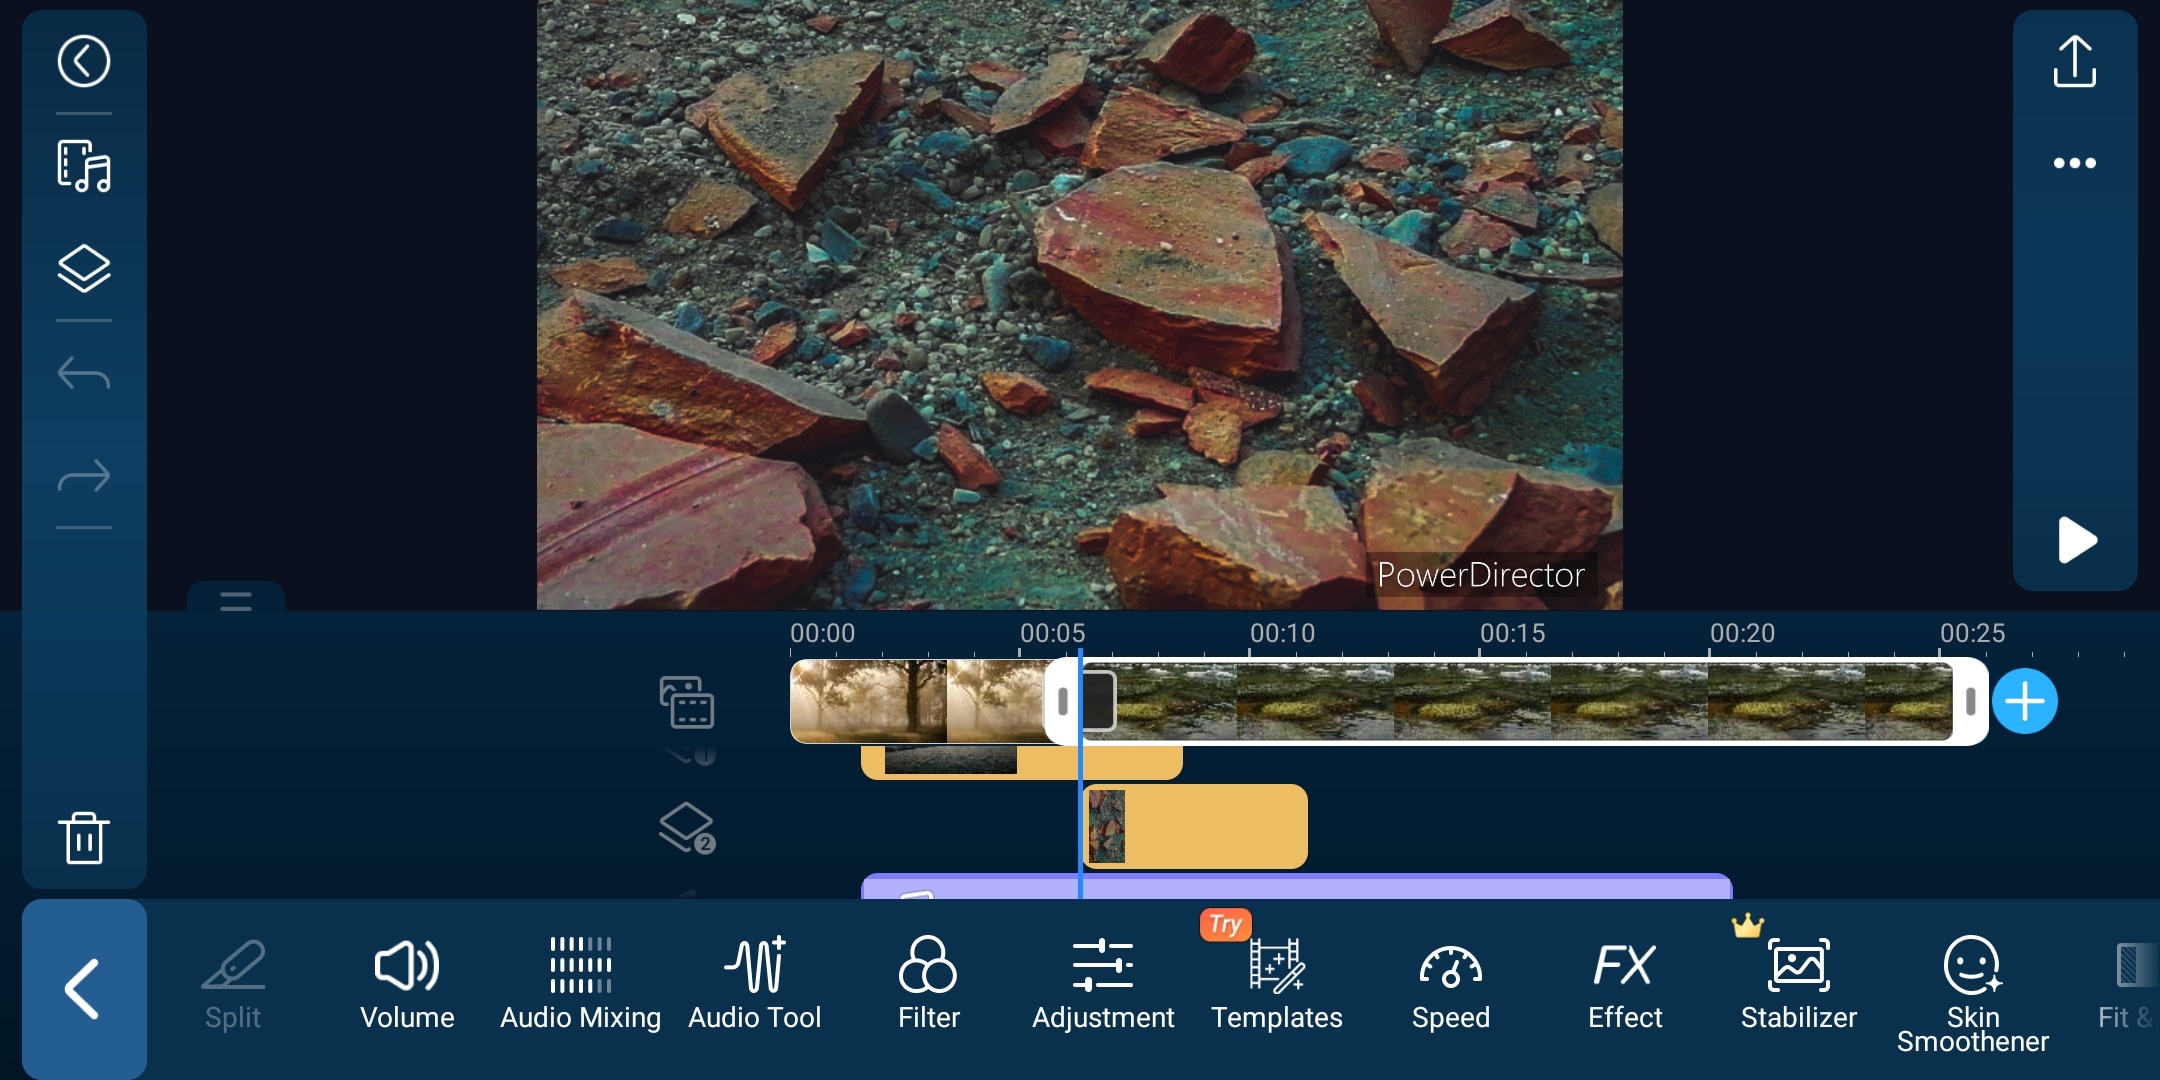
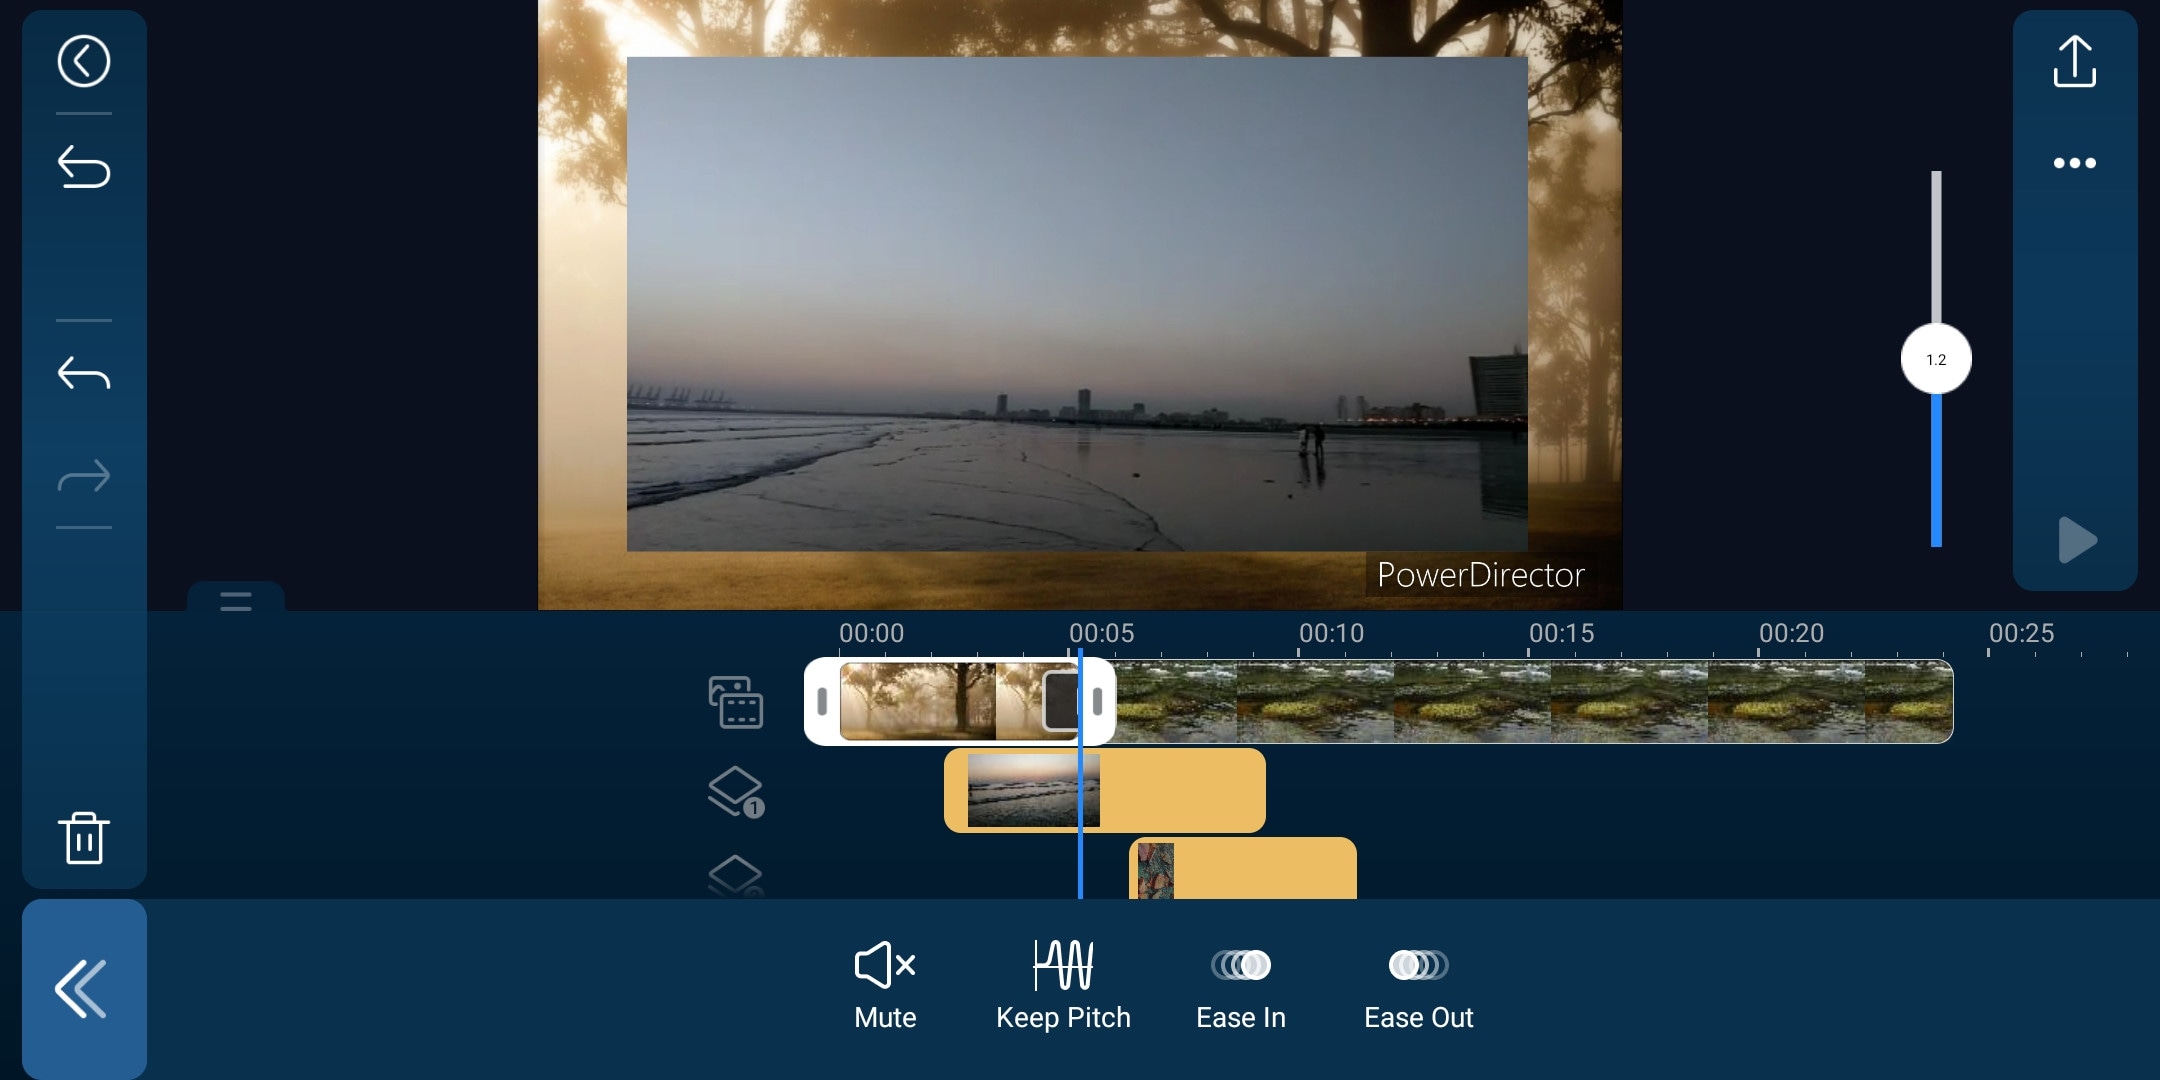
It is a paid but quite advanced video editor available for androids and IOS both. Like its PC version mobile version is also packed with many great features. It is compact and easy to use. It supports multiple video and audio layers. Have many cool filters and transitions. Can also do basic color corrections. To complete post-production work it also has audio editing tools and effects. It also has hundreds of title designs. Its UI is easy to use and supports both portrait and landscape orientation for editing. Most of its features can be used for free with a watermark on export. To remove the watermark you need to purchase the premium version.
~Features:
- It supports up to 4K resolution at 60fps. (compatible on most devices)
- Supports both Portrait and Landscape orientation for editing.
- Supports Key framing and video stabilization also.
- Supports multiple audio and video layers.
- Can edit videos in different aspect ratios.
- Have a vast stock library.
~Cons:
- Can’t export 4K videos on many devices.
- Can apply keyframing and chroma key to layers only.
- Software lags sometimes.
~Price:
Its Premium version is available for $4.9/month or $29.9/year.
LumaFusion:
It is available on IOS and Mac (with an m1 processor).
If you are a content creator and want to do professional-level video editing on your phone then you should get your hands on “LumaFusion”. It is of the most powerful and advanced video editors designed for a mobile phone. But it only works on iPhones and iPads. It is a multi-track video editor with many useful features like the Chroma key, keyframing, color grading, and color LUTs. Have powerful color grading tools and an audio editor. It also has a lock and load stabilizer. You have to purchase the software before using it. It doesn’t have any free version to try.
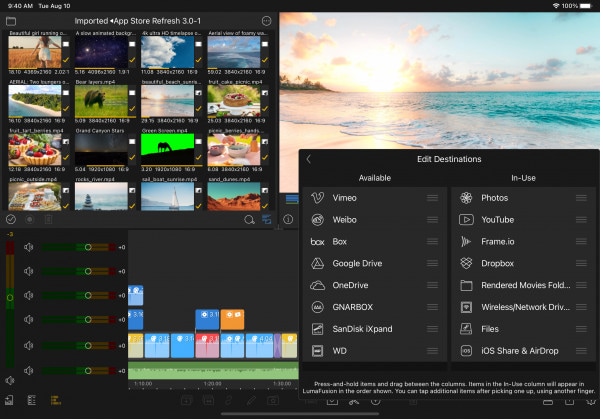
Credits: Pic by Luma touch website.
~Features:
- It supports up to 4K video resolution at a max of 240 fps.
- Can also edit and export 360 videos.
- Have powerful color correction tools. You can also import your own color LUTs.
- Supports Keyframing on almost all the editing tools within the software.
- You can add some third-party audio plugins.
- Supports up to 6 audio and video layers.
- Have “Storyblock” stock library. (Many of its contents are free to use)
- Supports external monitor for display.
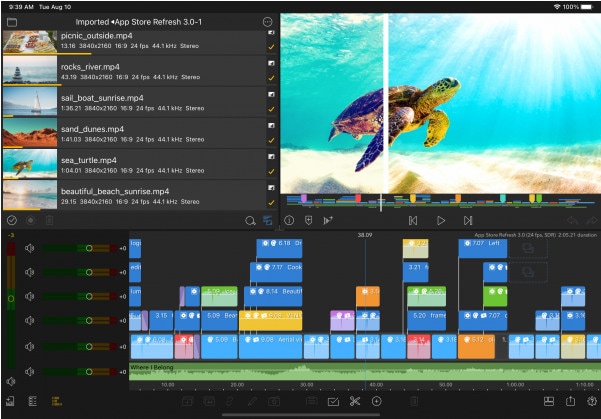
Credits: Pic by Luma touch website.
~Cons:
- Not available for Android devices.
- Being an advanced software, it doesn’t have masking and speed ramping features.
- Doesn’t have a free version to try on.
~Price:
It is available for purchase at $29.99.
InShot:
It is available on IOS and Android both.
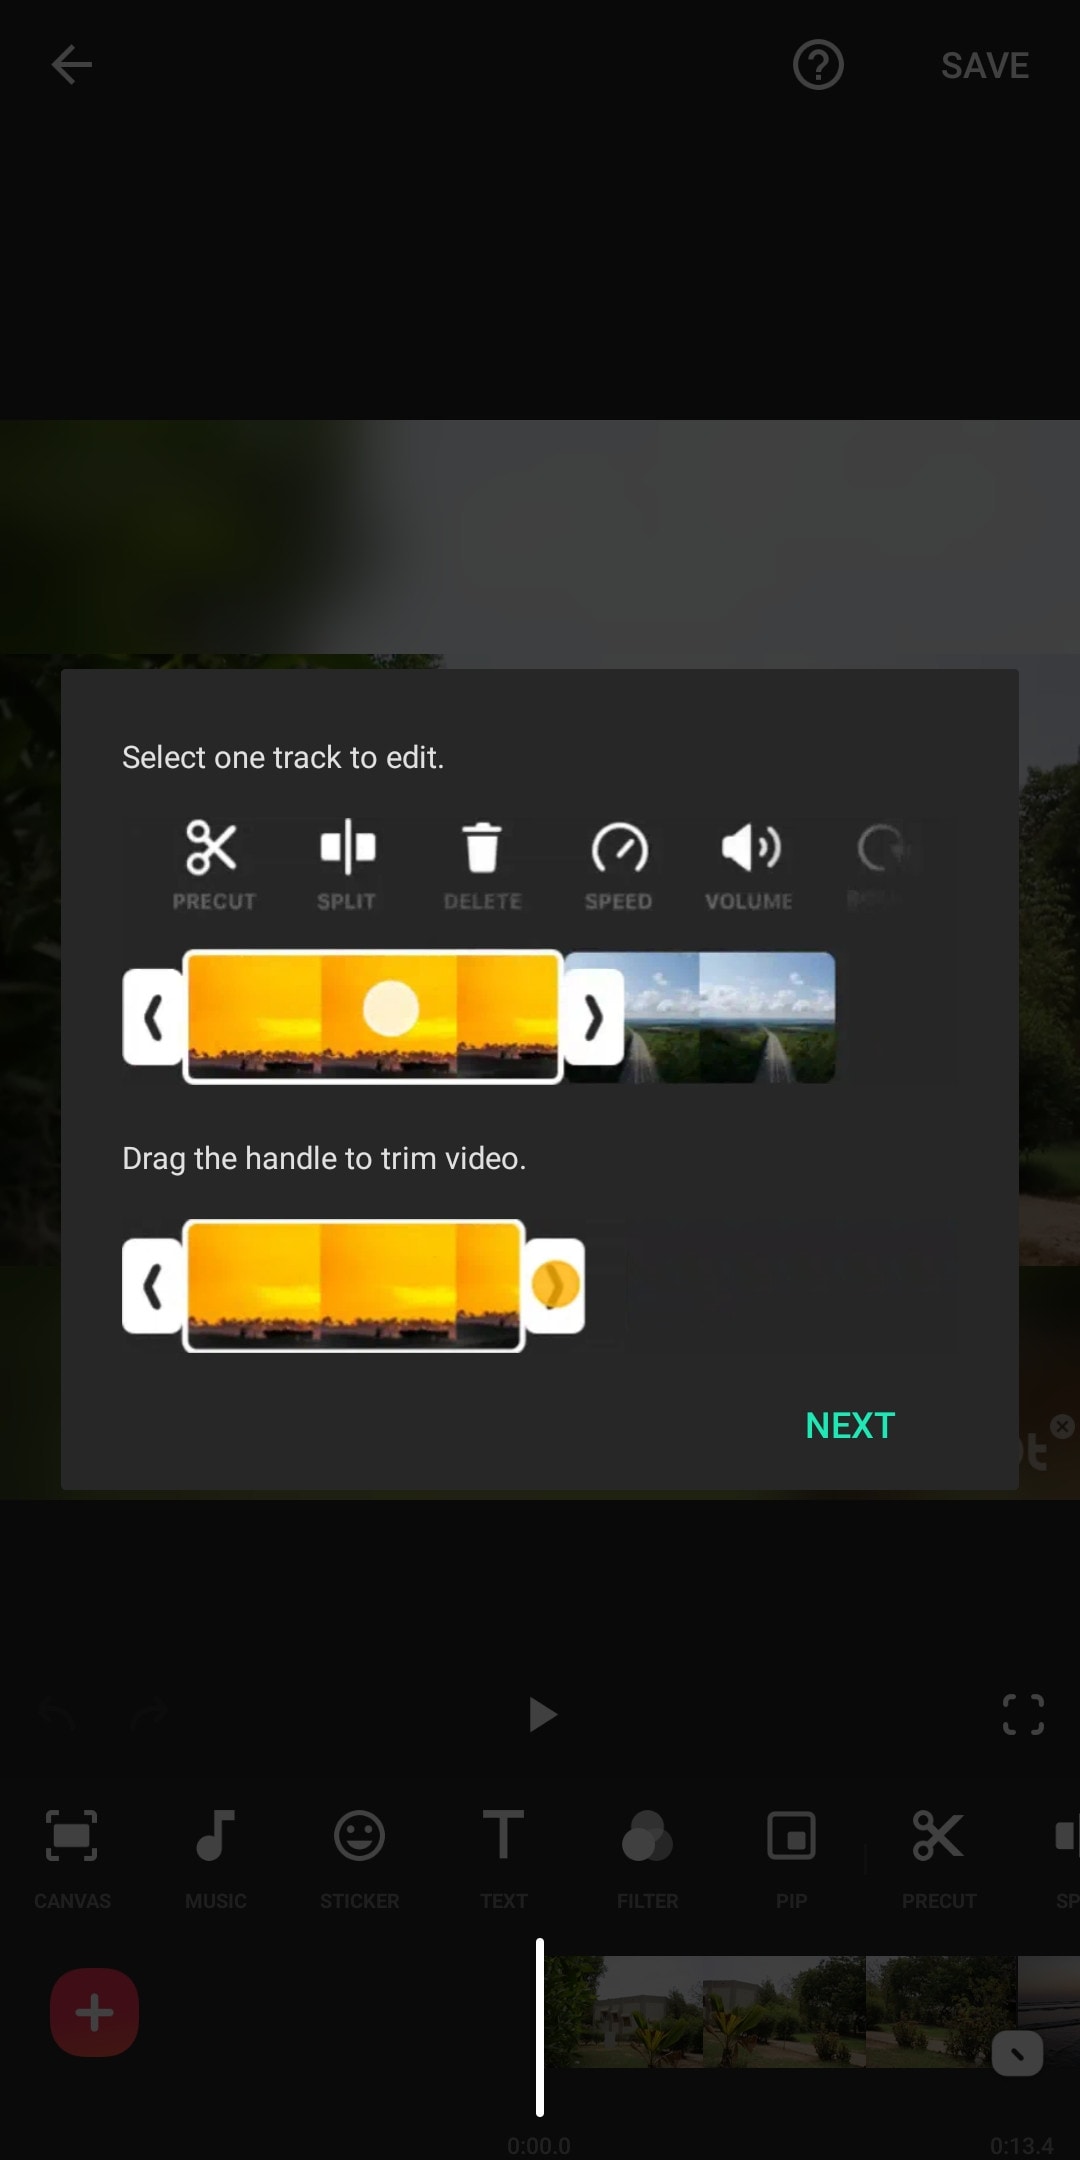
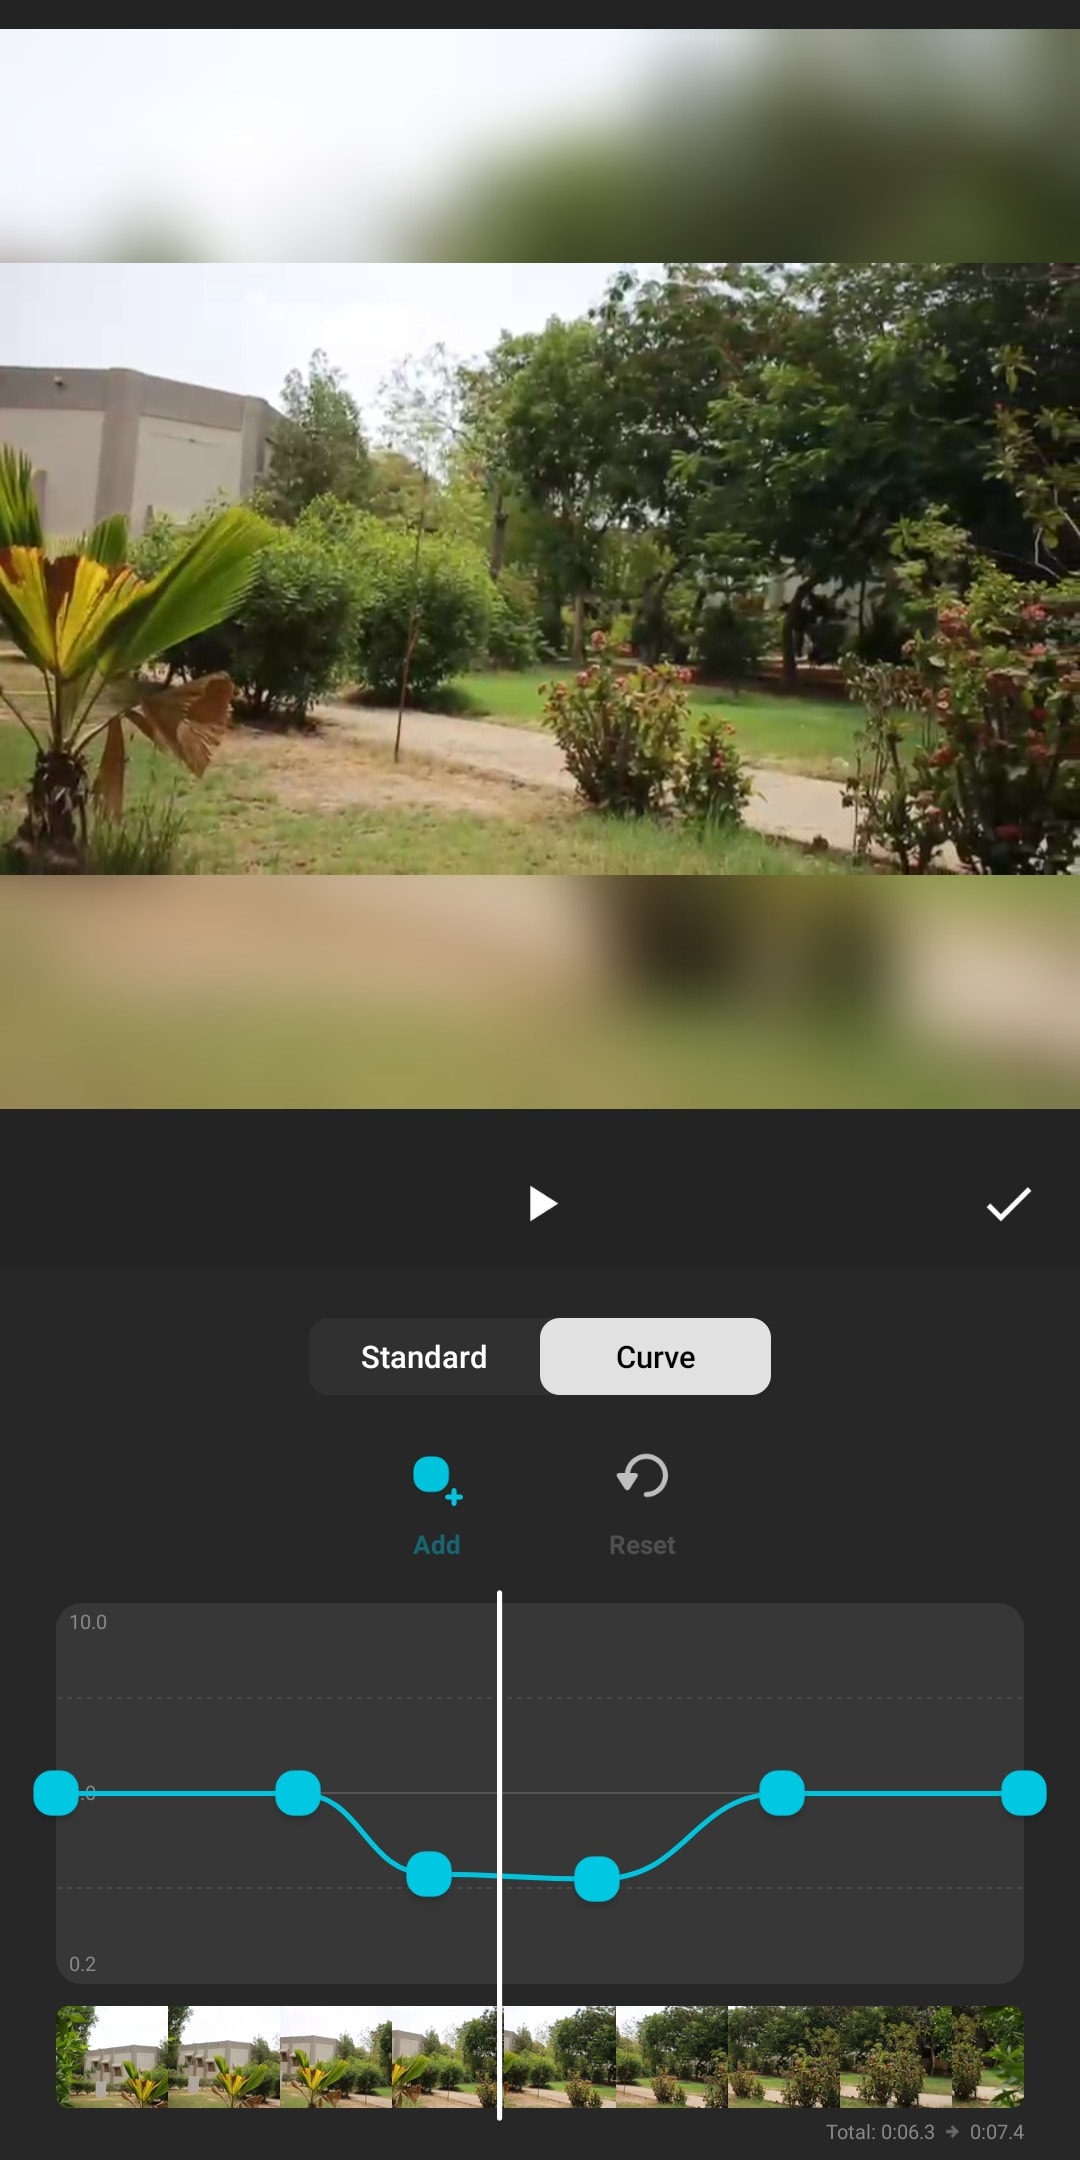
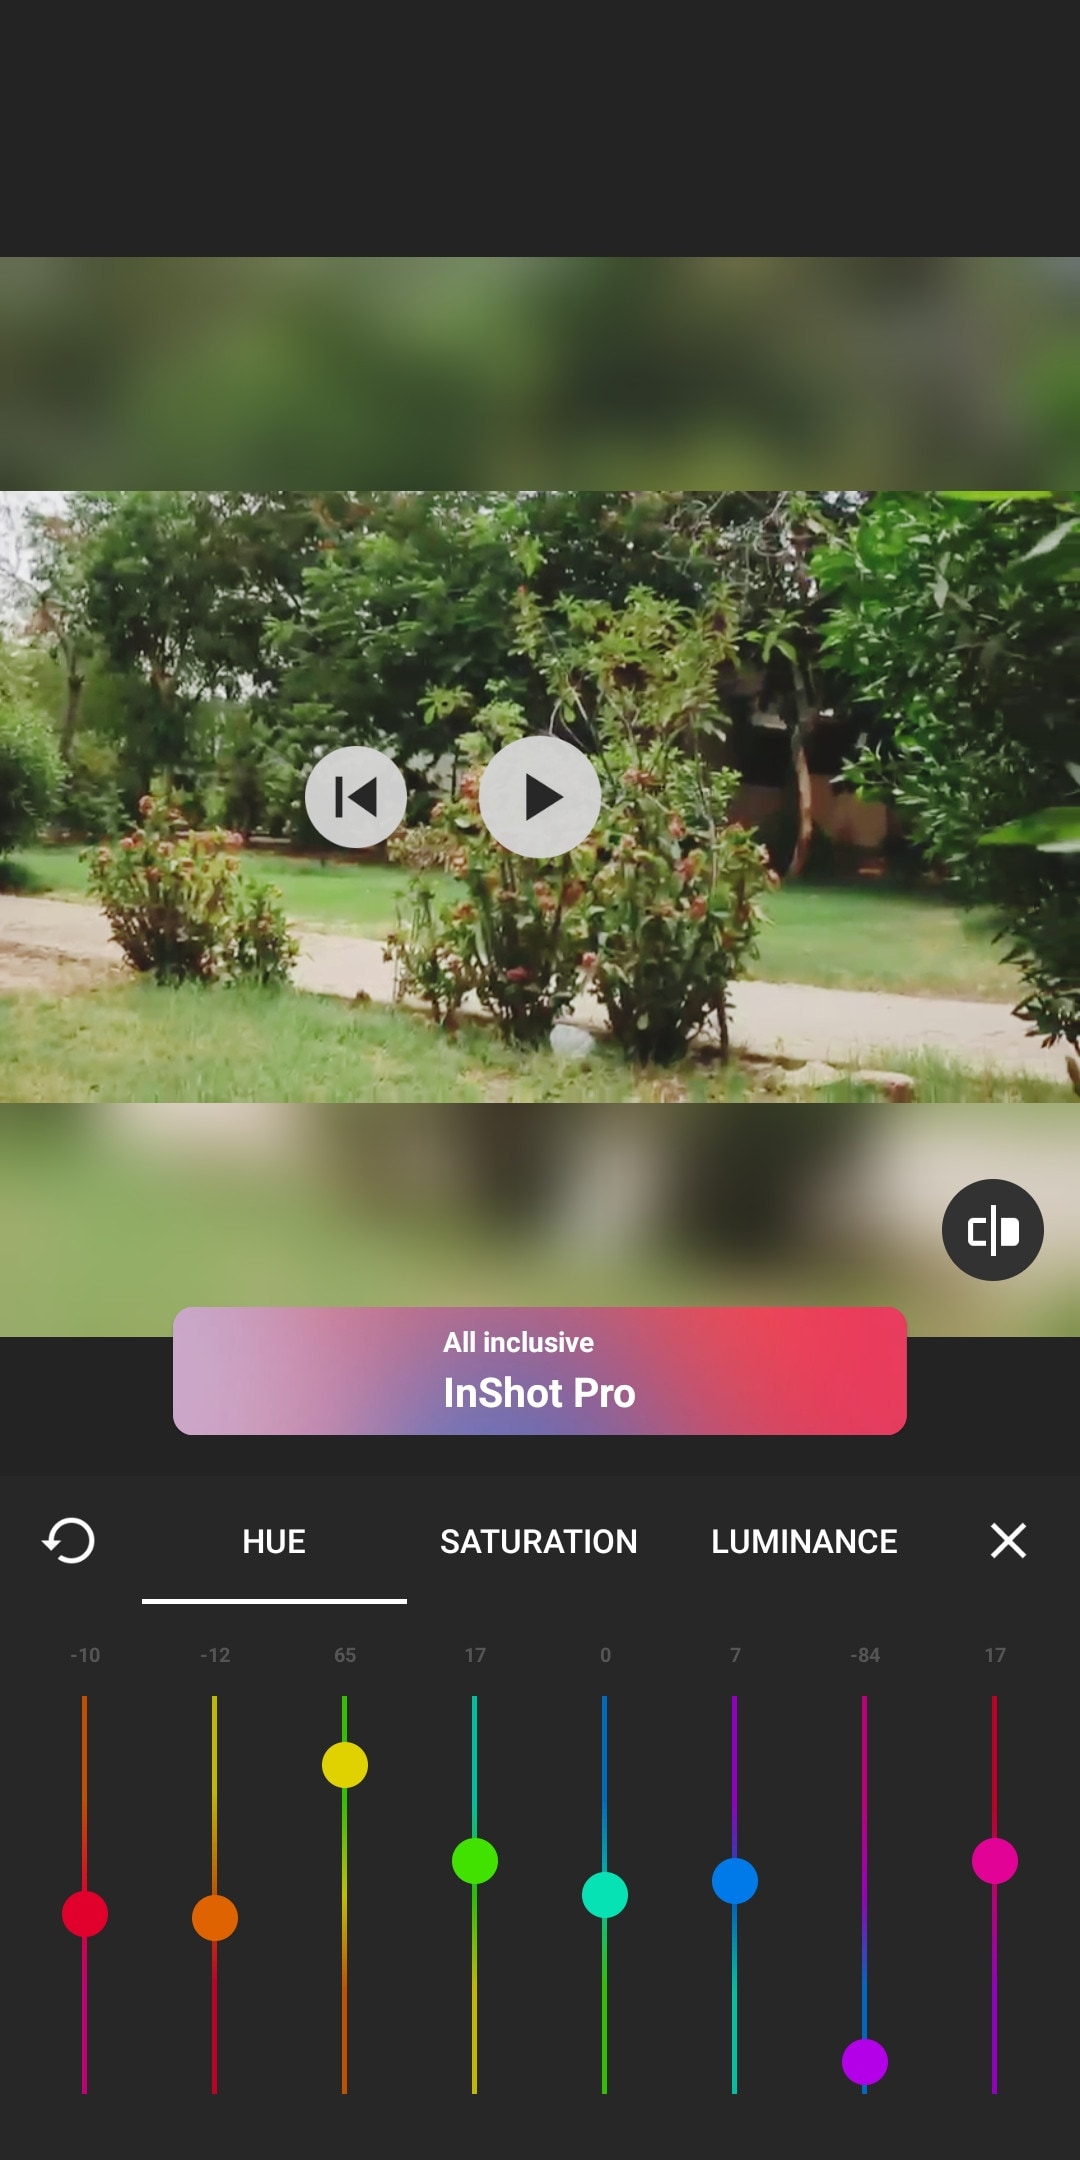
If you are new to video editing and want to do simple editing tasks then this software can be the right choice for you. It is simple and easy to use. Apart from just trimming and arranging your clips, it also has some cool features like speed ramping, chroma-key, mask e.t.c. It also has an HSL color grading tool. You can add multiple layers as PiP. It is a paid software but you can try it for free with the watermark on export.
~Features:
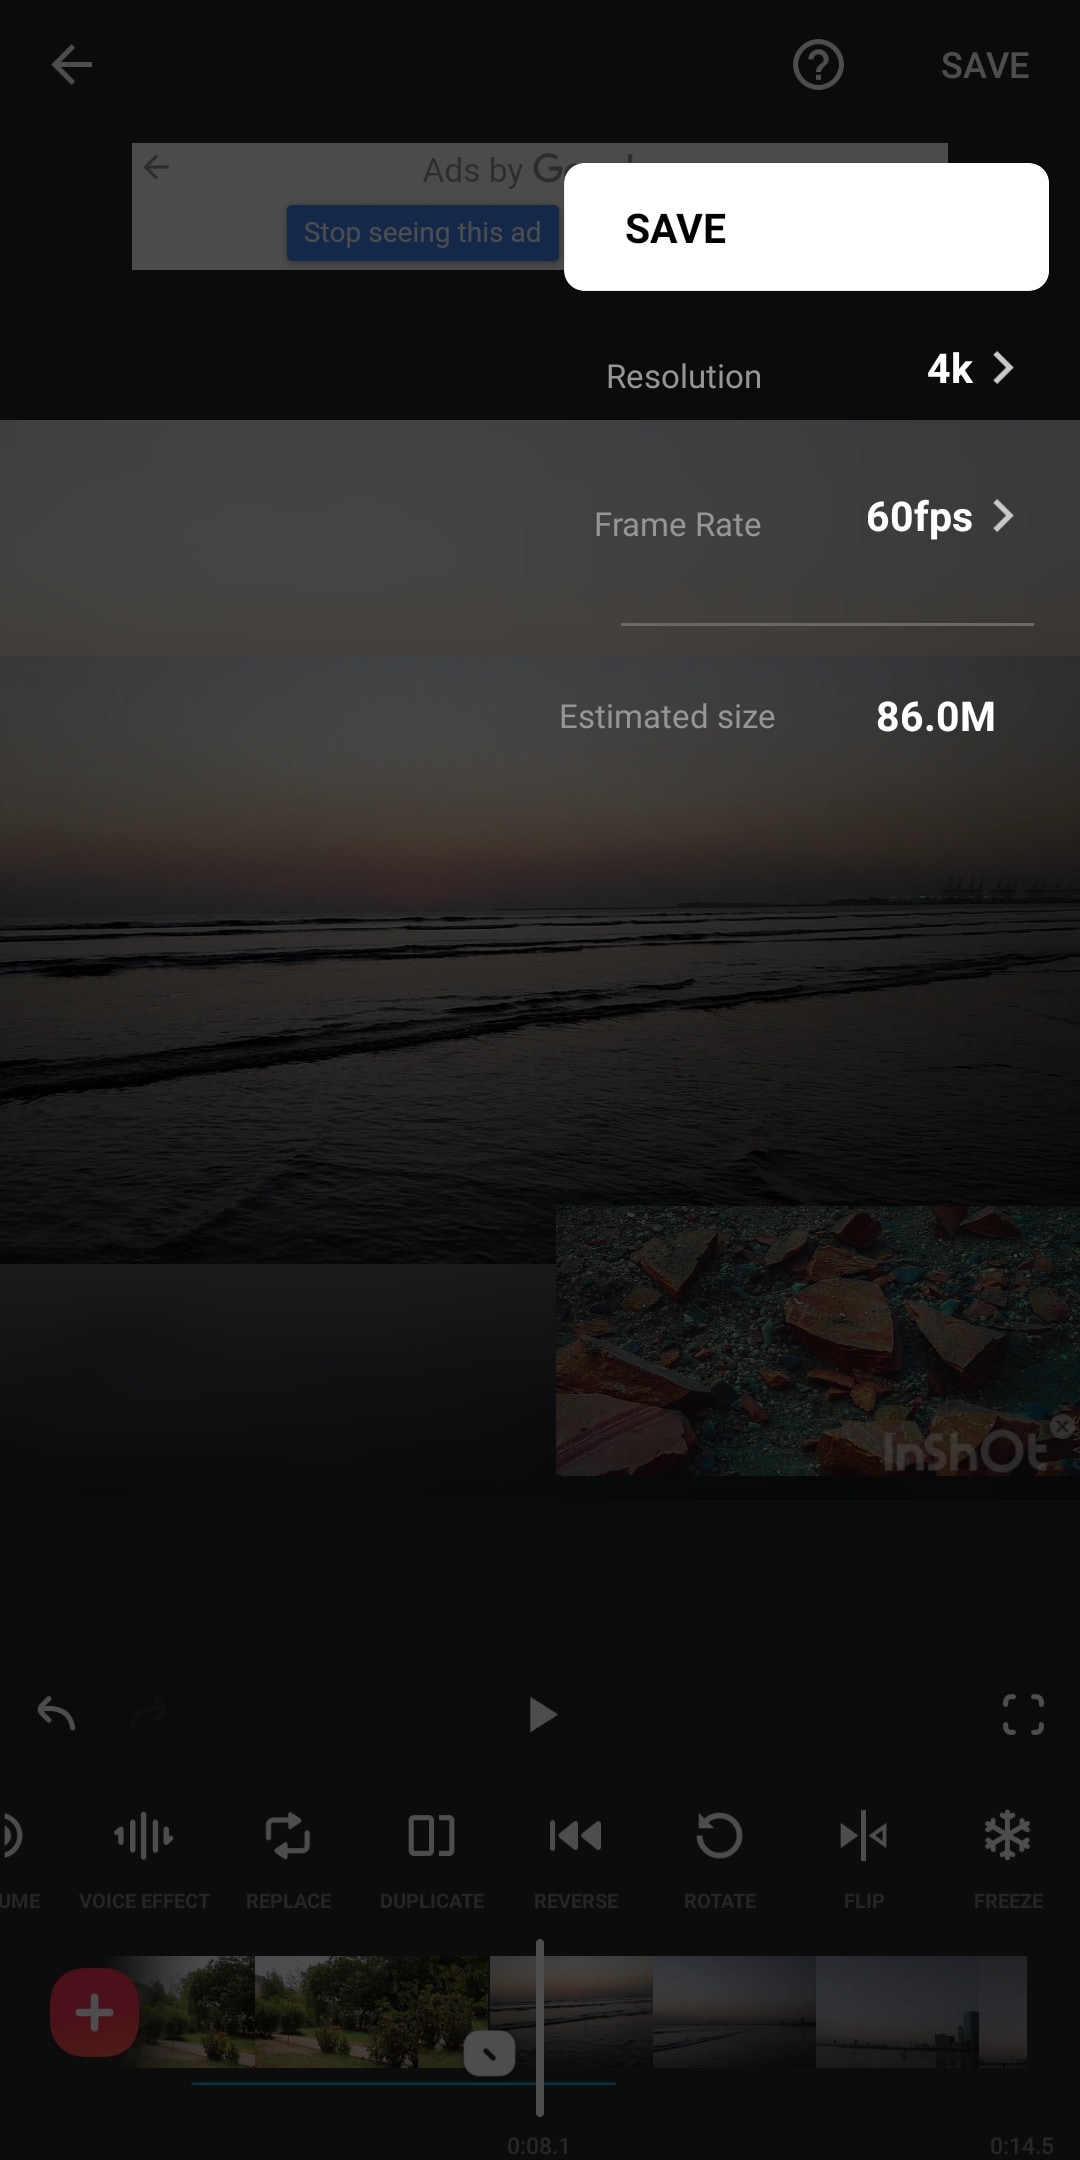
- It supports up to 4K resolution at 60fps.
- Its UI is beginner-friendly.
- Have some advanced color correction and grading tools.
- Supports multiple images and video layers as PiP.
- Have features like a mask, chroma key, and blend for layers.
- Can edit videos in different aspect ratios.
- Have speed curves for smooth speed ramping.
~Cons:
- Doesn’t have advanced tools.
- Its UI doesn’t support editing landscape orientation.
~Price:
It has 3 diff purchase plans. you can get its subscription for $3.9/month or $14.99/year. or you can purchase the software for lifetime at $34.99.
VivaCut:
It is available on IOS and Android both.
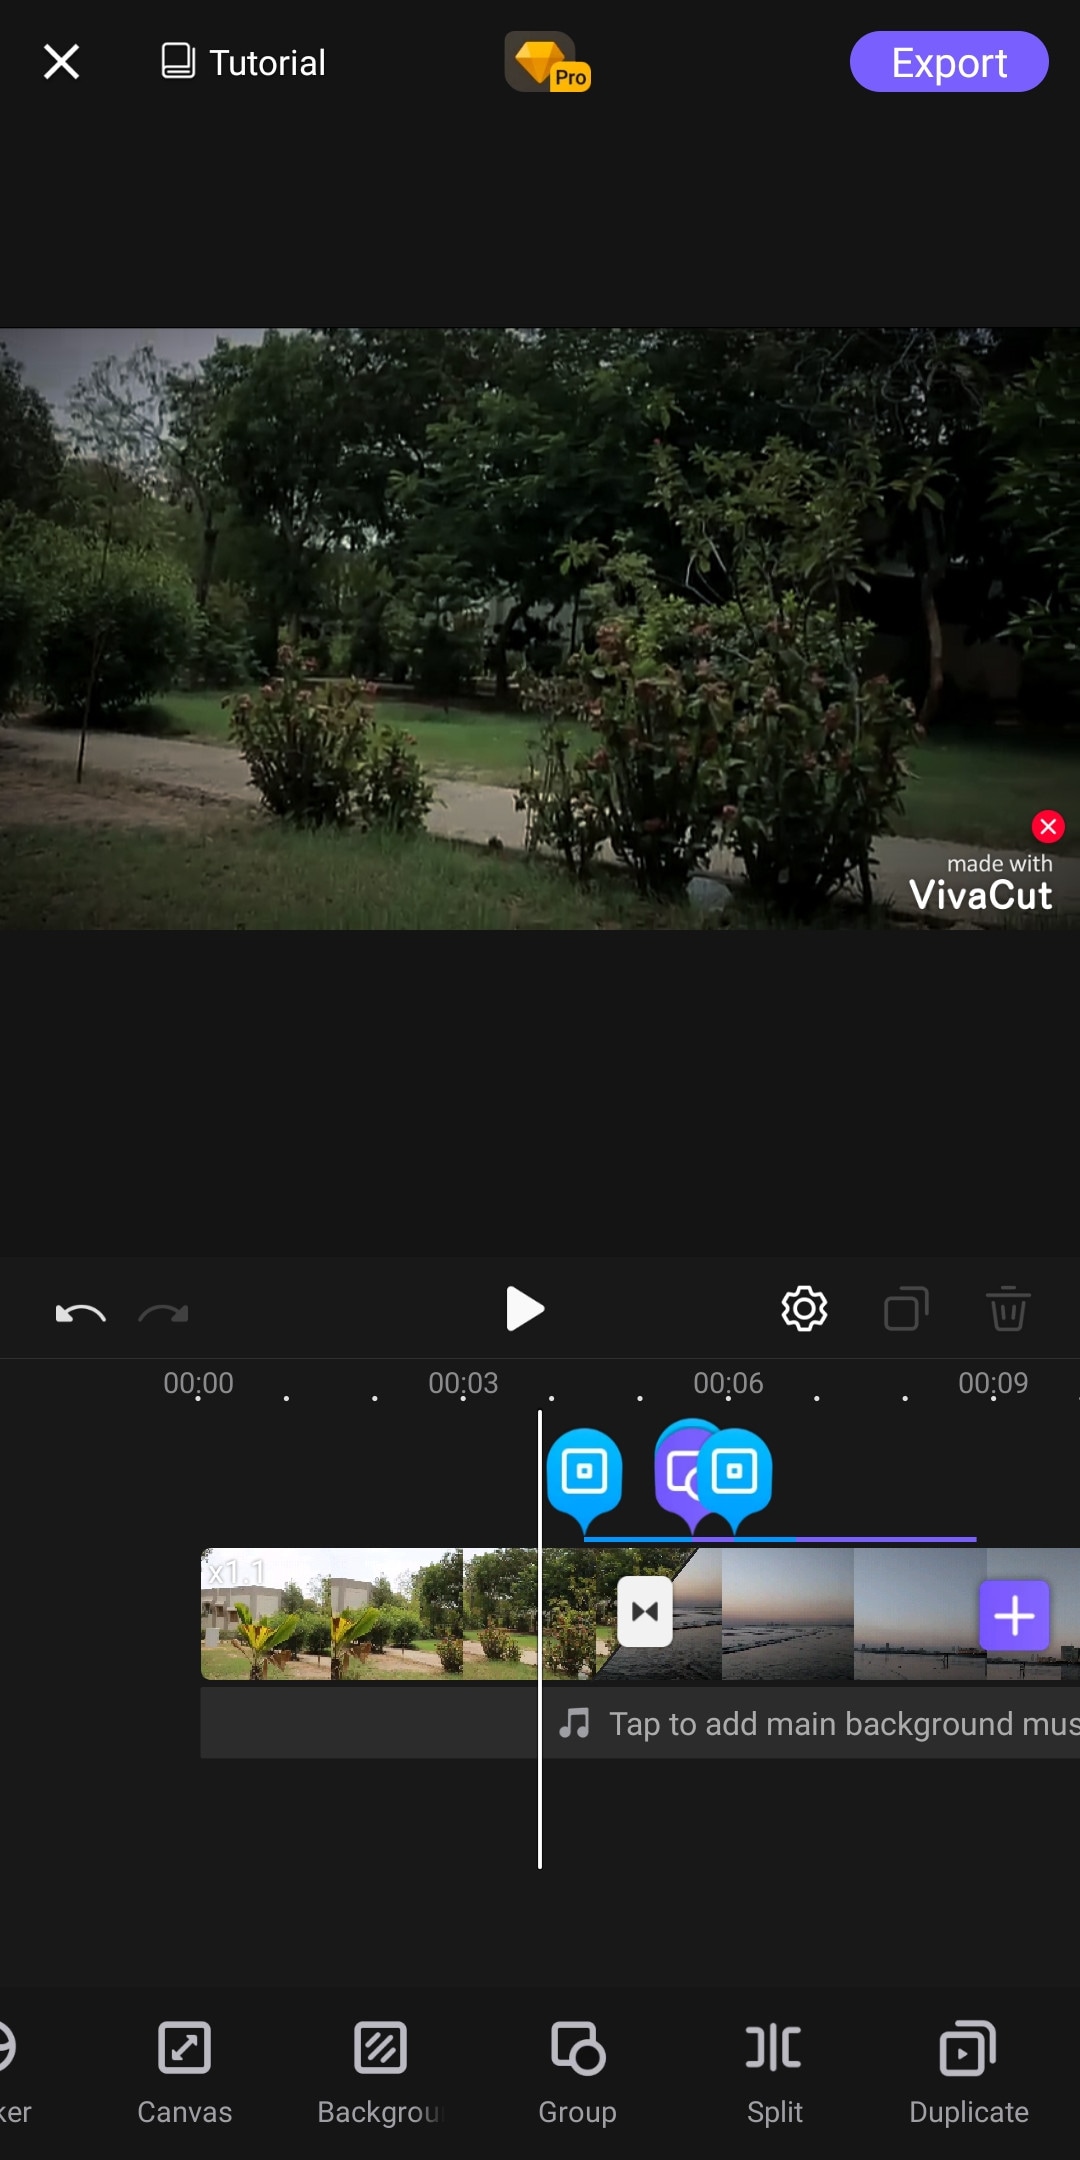
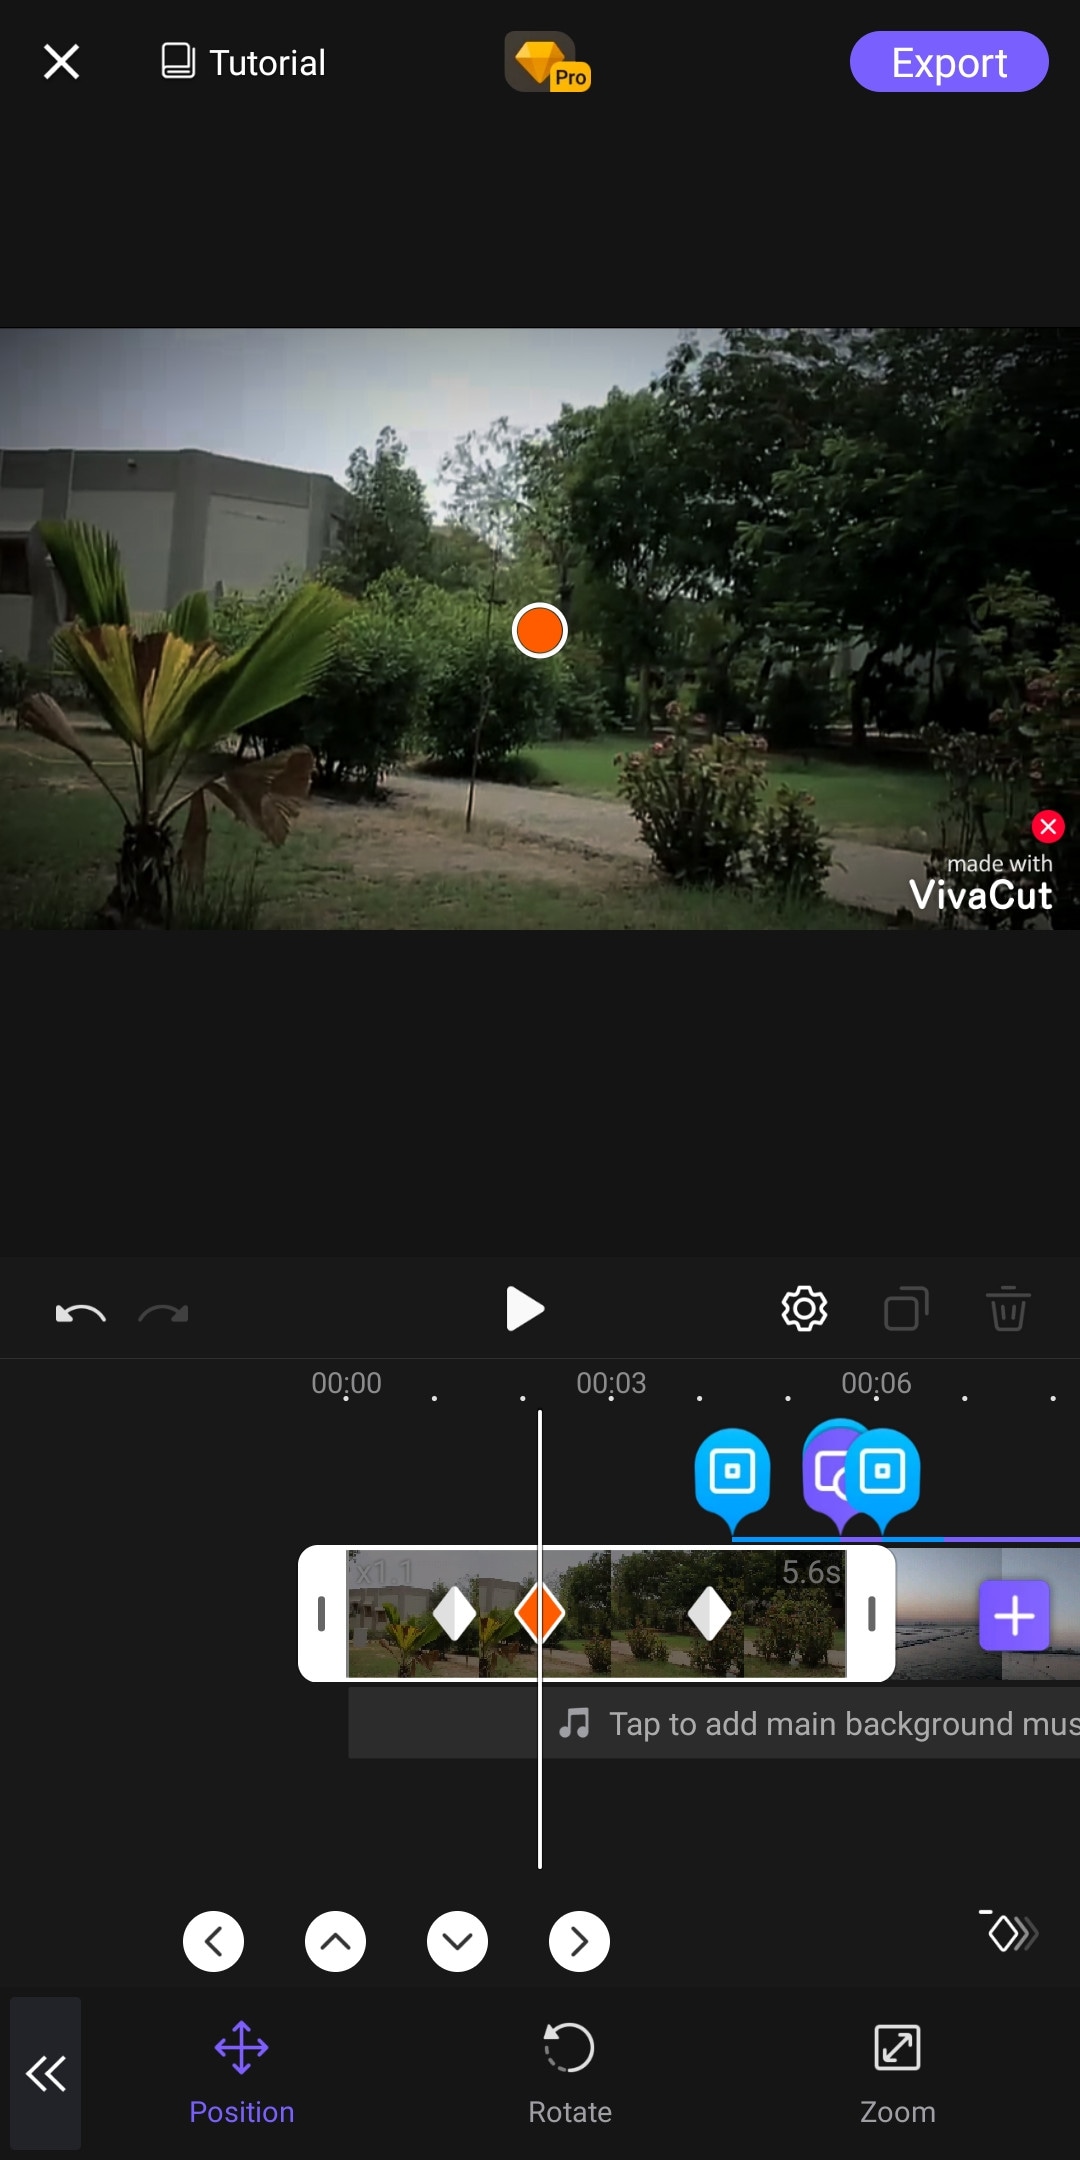
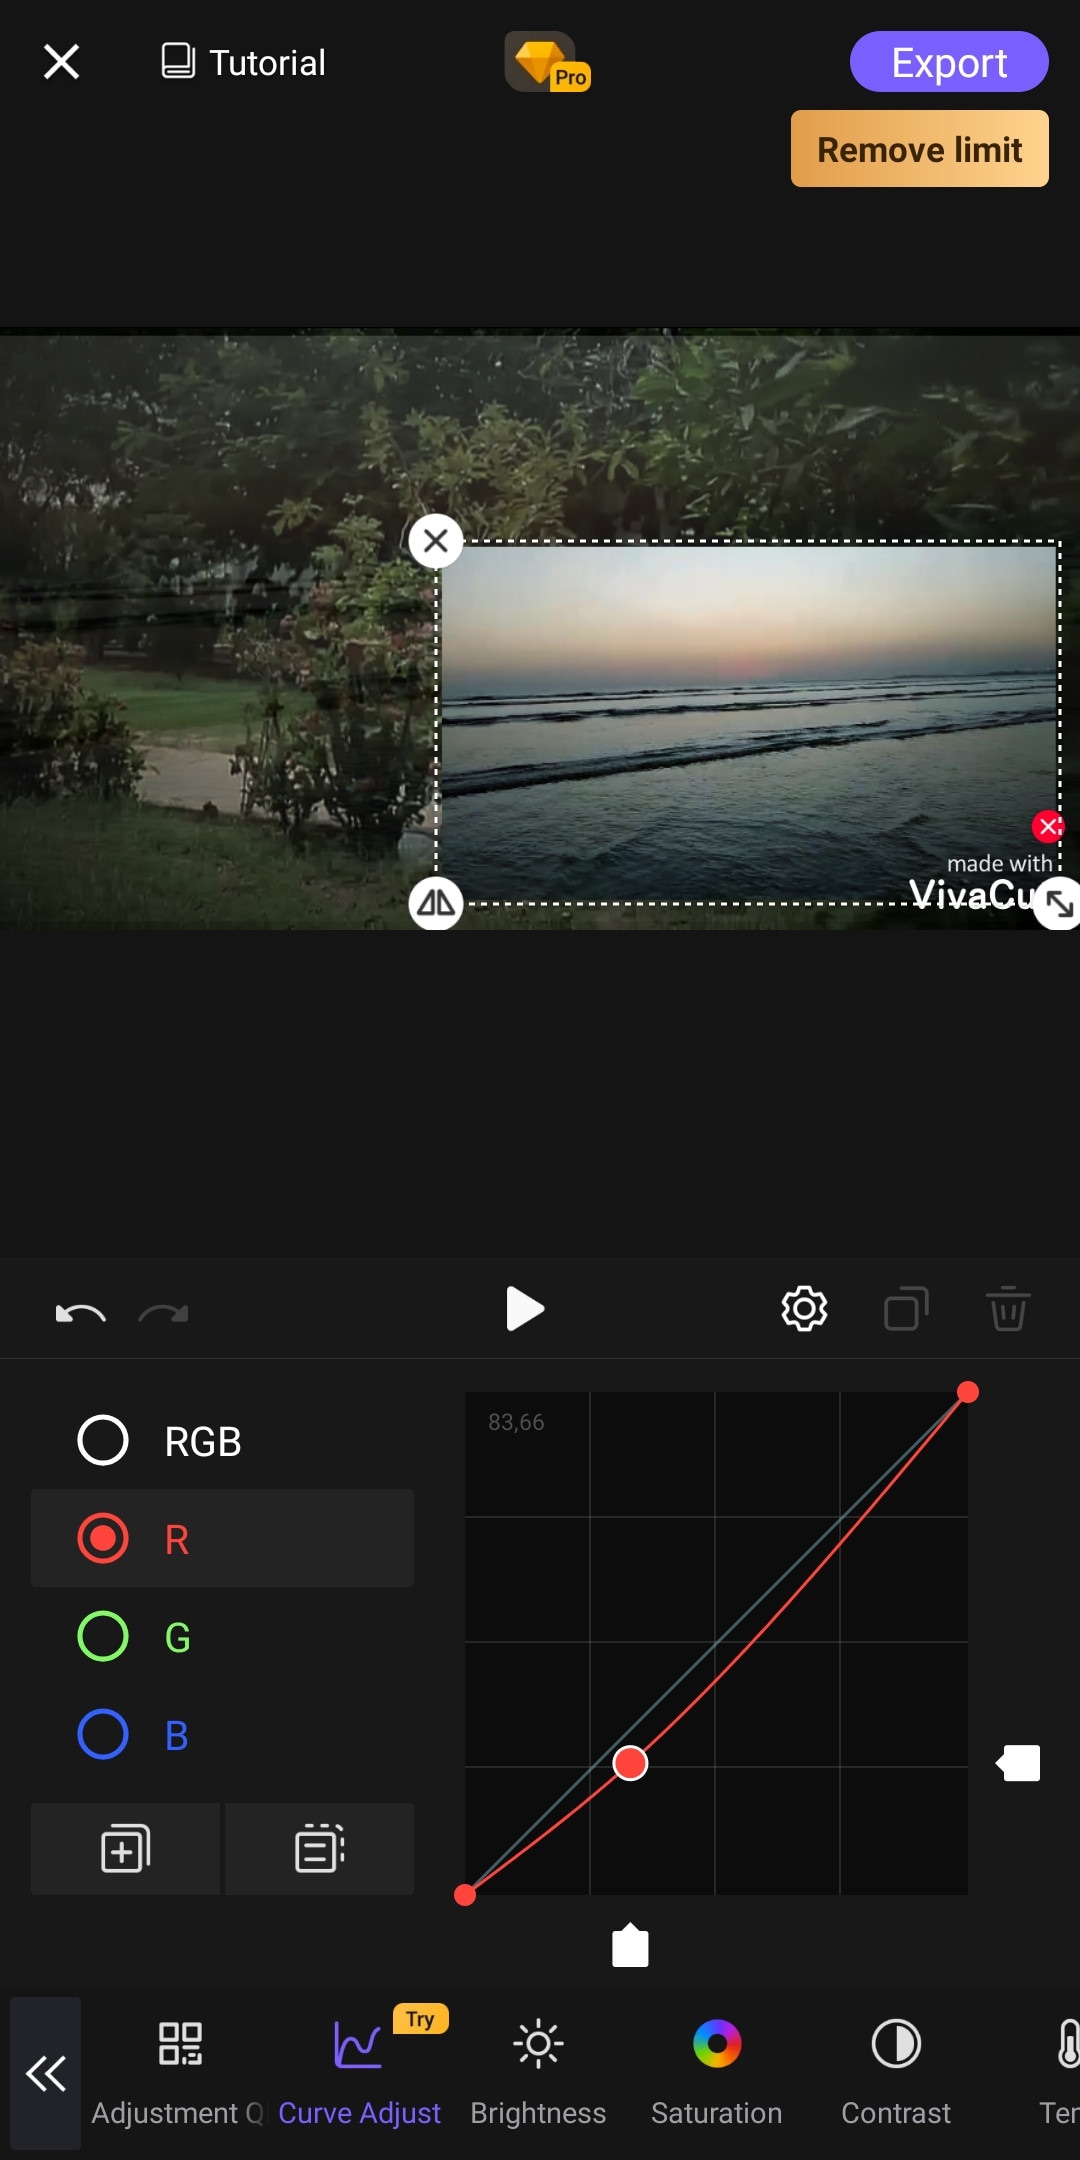
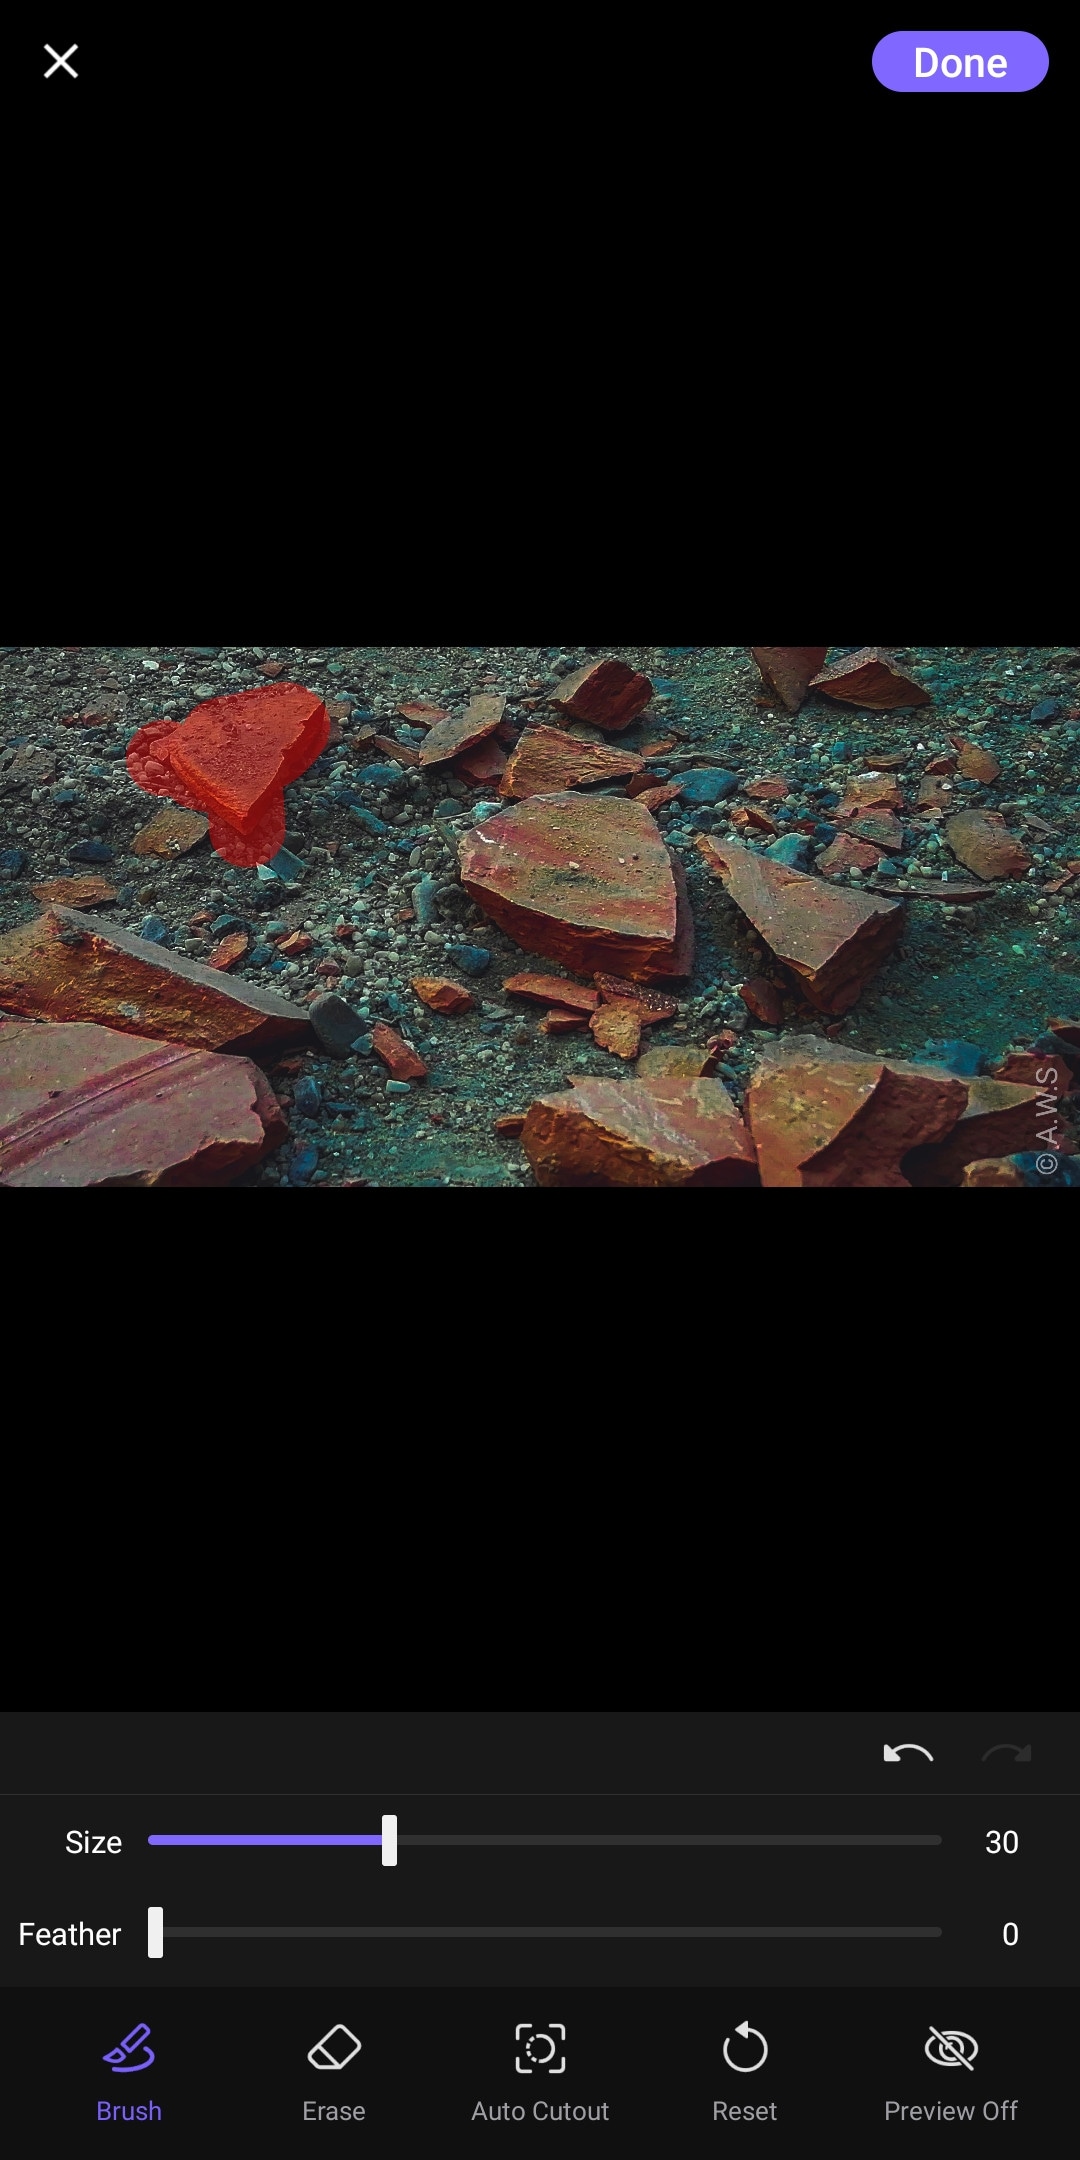
Almost every mobile video editor wished for doing PC-like video editing on their phone, but that was not possible due to software limitations and device compatibility. But now you can create PC-like videos on your phone through “VivaCut”. It is a paid software that is packed with many advanced features. Like 3D transform, overlay, Effects, Masking, e.t.c. It has one of the best color correction and grading tools among other mobile video editors. It has advanced keyframing and curve paths that can make splendid animations. It also supports multi-layer video editing. It also has a Grouping tool that let you combine several clips and texts into a single clip for easy editing. It also lets you import your presets. It is a paid software but you can try it for free with the watermark on export.
~Features:
- It supports multi-layer editing.
- Supports keyframing curves and 3D transform.
- Have advanced color correction and grading tools.
- Can Group multiple clips for easy editing.
- Let you import your presets.
- Can edit videos in different aspect ratios.
- Have an “FX plugin” library with many special effects that can be customized also.
~Cons:
- It doesn’t support 4K resolution.
- Its UI doesn’t support editing landscape orientation.
- It lags and crashes sometimes.
~Price:
Its premium version is available at $4.99/month or $19.99/year.
Which Should I Choose Free or Paid Video Editing Apps for iPhone:
If you do video editing once in a while or you don’t do more than just trimming and cropping then you shouldn’t purchase a paid video editing software. Because there are free video editors that can get your job done and even more than that. But if you are a content creator who doesn’t want to do editing on PCs or laptops, then you can get these paid video editors for your iPhone. These softwares are quite affordable and worthy of your investment. Some are cheaper than others. You can purchase the one, which meets your budget or fulfills your needs.
And if you are a beginner but want to move forward in this field then you should try free versions of these paid softwares. Select the one, which you are comfortable working on and once you are satisfied with the software then you can purchase its premium version.
- Free iPhone Video Editors
- Adobe Premiere Rush
- CapCut
- iMovie
- GoPro-Quik
- VN Video Editor
- Paid iPhone Video Editors
- Kinemaster
- Power Director
- LumaFusion
- InShot
- VivaCut
Filmora Go:
It is available on IOS and Android both.
Apart from having a professional video editor for PC, Wondershare has also introduced a video editor for mobile phones. Filmora Go is an amazing video editor, with many cool features such as chroma key, mask, keyframing, blending, e.t.c. It is fast and easy to use with built-in effects, transitions, and presets to speed up the editing process. It is a paid video editor but you can try it for free, free trial includes most of the features but it leaves a watermark on export.
~Features:
- Has speed curves for smooth speed ramping.
- Supports multiple images and video layers.
- Have many presets and filters for fast pace editing.
- Have cool features like chroma key, masking, keyframing, e.t.c.
- Supports “Pixabay’s” stock library.
~Cons:
- Its UI doesn’t support editing in landscape orientation.
- It doesn’t support 4k video resolution.


~Steps:
Import: Open Filmora Go, Click “New project” to start a new project, or Choose the previous one from the “Draft” portion. Select videos or images to import to your timeline. Hold and drag the clip to change its arrangement.
Edit: You can add text, effects, stickers, layers, e.t.c. by clicking their icon, present on the bar at the bottom.
Click the “PiP” icon to add image or video layers, you also can add multiple layers.
Select a clip to edit it. Different editing tools appear on the bottom bar. Here you can change its opacity, its speed, or add animations.
Effects: Click the “Effects” icon to open the effects menu. Select an effect to apply to your clip.
Click the white box between two clips to add transitions.
Export: Click the “Export” button to export your file. Select your desired resolution and frame rate to export your clip.


Some Free iPhone Video Editors:
If you do video editing rarely or do just basic video editing then it is useless to purchase paid video editors. Even if you are a content creator but tight on budget or new to this field, you can use free video editing softwares and save your cash for other pieces of equipment.
So, here we have mentioned some free video editors for you. Some of these are quite powerful and can do advanced editing while others are simple but easy to use.
Adobe Premiere Rush:
It is available on IOS and Android both.
Whether you are a beginner or a content creator using mobile phones or PCs for editing, you may have heard of Adobe softwares. It is a computer software company which makes powerful softwares for different purposes. Like premiere pro, they have designed a compact version for phones named “Premiere Rush”. It is a free video editor that has all the tools needed for video editing, from video effects to color grading and audio editing. Its UI is a bit similar to PC video editors. It is a free video editor with no watermarks. Although it takes some time to understand it. But once mastered, you can do editing quickly.
~Features:
- It is a free video editor with no watermark.
- It supports up to 4K resolution at 60fps.
- You can extract audio and can do voiceover directly from the software.
- It has hundreds of filters, overlays, and title designs.
- It has basic color grading tools.
- It also has a motion tracking feature. (in Paid version)
- It supports multiple audio, video, and text layers.


~Cons:
- It only runs on high-end devices. (It is not supported in most mid-range phones)
- Not suitable for beginners. Its UI is quite hard to understand.
- Doesn’t have common features like the chroma key, masking, e.t.c.

~Price:
Its Premium version is available for 9.99/month. It includes some premium features. Or you can purchase the “All Apps Bundle” at $54.99/month for the annual plan.
CapCut:
It is available on IOS and Android both.
If you are looking for a free but good video editor to help you edit videos on the go, then you should get your hands on CapCut. It is a free mobile video editing software with many interesting features like keyframing, chroma-key, masking e.t.c. It also supports video and image layers. It has one of the best speed ramping features among other mobile video editors. It provides curves to smoothly speed ramp your clips. It can edit landscape, portrait, and even square video formats. It has many amazing effects and filters, it also has some stock clips.


~Features:
- It is completely free and has no watermarks.
- It supports up to 4K video resolution.
- Has curves for speed ramping.
- Has keyframes for animation.
- It has hundreds of effects, overlays, and titles.


~Cons:
- Its UI doesn’t support editing in landscape orientation.
- Lacks some common editing tools.
iMovie:
It is available on IOS and Mac.
iMovie is a free video editing software designed by apple for their flagship products. It is simple and easy to use. It has all the basic editing tools to enhance your video like crop, trim, transitions, effects, e.t.c. It also has a speed ramping feature which let you change the speed at different points of a clip. It’s AI mode “Magic Movie” lets you select clips and a style and software will make the final product for you.
Its “Storyboards” mode is a creative way of learning production and post-production skills. It lets you choose a theme from many famous Genres available, then it will guide you through the production process like capturing footage, arranging your shots, and creating cinematic titles to enhance your story.


~Features:
- It is free and easy to use.
- Let you do speed ramping.
- Supports Raw files.
- It’s AI mode creates videos for you on its own.
- The “Storyboarding” feature helps you through the production process.


~Cons:
- It only works on ios and Mac.
- Not suitable for professional projects.
GoPro - Quik:
It is available on IOS and Android and windows also.
It is a free and easy-to-use software designed by GoPro. It can edit clips of your GoPro or any other device. It is a quick and easy way to enhance your clips before posting them on any social platform. It can do basic edits like trim, rotate, color correction, e.t.c. It can also make amazing speed ramps by changing the speed of different parts of the clip (available in the premium version only). It doesn’t produce any watermarks. Although its premium version unlocks more features like speed ramping, more themes, and unlimited backup space.


~Features:
- Its free version doesn’t leave a watermark.
- It is simple and easy to use.
- Can do basic color correction.
- Have pre-made themes for faster editing.
- Change the speed at different parts of the video to create smooth speed ramps. (Available in the premium version.)
- Has a free version with limited tools for basic editing.

~Cons:
- It lacks advanced tools therefore not suitable for large projects.
- Its free version has many limitations.
~Price: Its subscription is available at $1.99/month or at discount for an annual subscription having $9.99/year.
VN Video editor:
It is available on IOS and Android, Windows, and Mac.
If you are looking for a video editor, which let you do fast but quality edits, then “VN video editor” is the right choice for you. It is free and easy-to-use software with many useful features like transitions, effects, speed ramps, PiP, chroma-key, keyframing, e.t.c. It supports different aspect ratios for all your social platforms.
It also has pre-made templates to speed up your editing process. Its Story mode let you manage your production and post-production work easily. It also has overlay mode, which can make awesome slide shows for you.


~Features:
- It is free software with no watermark.
- It supports up to 4K resolution at 60fps.
- Supports multi-layer editing.
- Have keyframing curves to create smooth animations.
- Have speed curves for smooth speed ramping.
- Its Story mode let you manage your production work easily.
- Can extract audio from a video file.


~Cons:
- Its UI doesn’t support editing landscape orientation.
- Its free version has limitations of creating max 100 projects.
~Price:
Its Premium version is available for $3.9/month or $20.9/year.
Some Paid iPhone Video Editors:
If you want to move forward and get your hands on these paid softwares to try new features then you should buy these paid softwares. As most of these softwares are quite affordable but they pack the punch. And some of them can give you more in return than your investment. Then what are you waiting for? go and try them yourself.
Kinemaster:
It is available on IOS and Android both.
If you want to do more than just trimming and cropping to your videos then you should try Kinemaster. For editors, who want to do some advanced-level video editing on their phone, then you must have Kinemaster on your phone. It is a paid software, which is packed with many useful features. It has many video and audio effects. It also has an amazing audio editor. It also has many title designs and basic color correction tools. It has hundreds of effects and transitions + more can be downloaded from its asset store. Its UI is suitable for beginners and content creators both. It is a paid software, but all its features are completely free to use, but the free version leaves a watermark on export.


~Features:
- It supports up to 4K resolution at 60fps. (depending on mobile configuration)
- Have amazing features like chroma key, keyframing, blend e.t.c
- Has built-in audio and video recorder.
- Supports multiple texts and video layers with different resolutions depending on the capability of the mobile phone.
- Has UI like a PC video editor and supports landscape orientation for editing.
- Have an asset store with 100s of free effects, transitions, and stock material.


~Cons:
- Can’t export 4K videos on most devices.
- Can’t apply keyframes and chroma key to the main video. (can be done on layers only)
~Price:
Its Premium version is available for $4.9/month or $39.9/year. It also includes all the premium assets.
Power Director:
It is available on IOS and Android both.
It is a paid but quite advanced video editor available for androids and IOS both. Like its PC version mobile version is also packed with many great features. It is compact and easy to use. It supports multiple video and audio layers. Have many cool filters and transitions. Can also do basic color corrections. To complete post-production work it also has audio editing tools and effects. It also has hundreds of title designs. Its UI is easy to use and supports both portrait and landscape orientation for editing. Most of its features can be used for free with a watermark on export. To remove the watermark you need to purchase the premium version.


~Features:
- It supports up to 4K resolution at 60fps. (compatible on most devices)
- Supports both Portrait and Landscape orientation for editing.
- Supports Key framing and video stabilization also.
- Supports multiple audio and video layers.
- Can edit videos in different aspect ratios.
- Have a vast stock library.


~Cons:
- Can’t export 4K videos on many devices.
- Can apply keyframing and chroma key to layers only.
- Software lags sometimes.
~Price:
Its Premium version is available for $4.9/month or $29.9/year.
LumaFusion:
It is available on IOS and Mac (with an m1 processor).
If you are a content creator and want to do professional-level video editing on your phone then you should get your hands on “LumaFusion”. It is of the most powerful and advanced video editors designed for a mobile phone. But it only works on iPhones and iPads. It is a multi-track video editor with many useful features like the Chroma key, keyframing, color grading, and color LUTs. Have powerful color grading tools and an audio editor. It also has a lock and load stabilizer. You have to purchase the software before using it. It doesn’t have any free version to try.

Credits: Pic by Luma touch website.
~Features:
- It supports up to 4K video resolution at a max of 240 fps.
- Can also edit and export 360 videos.
- Have powerful color correction tools. You can also import your own color LUTs.
- Supports Keyframing on almost all the editing tools within the software.
- You can add some third-party audio plugins.
- Supports up to 6 audio and video layers.
- Have “Storyblock” stock library. (Many of its contents are free to use)
- Supports external monitor for display.

Credits: Pic by Luma touch website.
~Cons:
- Not available for Android devices.
- Being an advanced software, it doesn’t have masking and speed ramping features.
- Doesn’t have a free version to try on.
~Price:
It is available for purchase at $29.99.
InShot:
It is available on IOS and Android both.
If you are new to video editing and want to do simple editing tasks then this software can be the right choice for you. It is simple and easy to use. Apart from just trimming and arranging your clips, it also has some cool features like speed ramping, chroma-key, mask e.t.c. It also has an HSL color grading tool. You can add multiple layers as PiP. It is a paid software but you can try it for free with the watermark on export.


~Features:
- It supports up to 4K resolution at 60fps.
- Its UI is beginner-friendly.
- Have some advanced color correction and grading tools.
- Supports multiple images and video layers as PiP.
- Have features like a mask, chroma key, and blend for layers.
- Can edit videos in different aspect ratios.
- Have speed curves for smooth speed ramping.


~Cons:
- Doesn’t have advanced tools.
- Its UI doesn’t support editing landscape orientation.
~Price:
It has 3 diff purchase plans. you can get its subscription for $3.9/month or $14.99/year. or you can purchase the software for lifetime at $34.99.
VivaCut:
It is available on IOS and Android both.
Almost every mobile video editor wished for doing PC-like video editing on their phone, but that was not possible due to software limitations and device compatibility. But now you can create PC-like videos on your phone through “VivaCut”. It is a paid software that is packed with many advanced features. Like 3D transform, overlay, Effects, Masking, e.t.c. It has one of the best color correction and grading tools among other mobile video editors. It has advanced keyframing and curve paths that can make splendid animations. It also supports multi-layer video editing. It also has a Grouping tool that let you combine several clips and texts into a single clip for easy editing. It also lets you import your presets. It is a paid software but you can try it for free with the watermark on export.


~Features:
- It supports multi-layer editing.
- Supports keyframing curves and 3D transform.
- Have advanced color correction and grading tools.
- Can Group multiple clips for easy editing.
- Let you import your presets.
- Can edit videos in different aspect ratios.
- Have an “FX plugin” library with many special effects that can be customized also.


~Cons:
- It doesn’t support 4K resolution.
- Its UI doesn’t support editing landscape orientation.
- It lags and crashes sometimes.
~Price:
Its premium version is available at $4.99/month or $19.99/year.
Which Should I Choose Free or Paid Video Editing Apps for iPhone:
If you do video editing once in a while or you don’t do more than just trimming and cropping then you shouldn’t purchase a paid video editing software. Because there are free video editors that can get your job done and even more than that. But if you are a content creator who doesn’t want to do editing on PCs or laptops, then you can get these paid video editors for your iPhone. These softwares are quite affordable and worthy of your investment. Some are cheaper than others. You can purchase the one, which meets your budget or fulfills your needs.
And if you are a beginner but want to move forward in this field then you should try free versions of these paid softwares. Select the one, which you are comfortable working on and once you are satisfied with the software then you can purchase its premium version.
- Free iPhone Video Editors
- Adobe Premiere Rush
- CapCut
- iMovie
- GoPro-Quik
- VN Video Editor
- Paid iPhone Video Editors
- Kinemaster
- Power Director
- LumaFusion
- InShot
- VivaCut
Filmora Go:
It is available on IOS and Android both.
Apart from having a professional video editor for PC, Wondershare has also introduced a video editor for mobile phones. Filmora Go is an amazing video editor, with many cool features such as chroma key, mask, keyframing, blending, e.t.c. It is fast and easy to use with built-in effects, transitions, and presets to speed up the editing process. It is a paid video editor but you can try it for free, free trial includes most of the features but it leaves a watermark on export.
~Features:
- Has speed curves for smooth speed ramping.
- Supports multiple images and video layers.
- Have many presets and filters for fast pace editing.
- Have cool features like chroma key, masking, keyframing, e.t.c.
- Supports “Pixabay’s” stock library.
~Cons:
- Its UI doesn’t support editing in landscape orientation.
- It doesn’t support 4k video resolution.


~Steps:
Import: Open Filmora Go, Click “New project” to start a new project, or Choose the previous one from the “Draft” portion. Select videos or images to import to your timeline. Hold and drag the clip to change its arrangement.
Edit: You can add text, effects, stickers, layers, e.t.c. by clicking their icon, present on the bar at the bottom.
Click the “PiP” icon to add image or video layers, you also can add multiple layers.
Select a clip to edit it. Different editing tools appear on the bottom bar. Here you can change its opacity, its speed, or add animations.
Effects: Click the “Effects” icon to open the effects menu. Select an effect to apply to your clip.
Click the white box between two clips to add transitions.
Export: Click the “Export” button to export your file. Select your desired resolution and frame rate to export your clip.


Some Free iPhone Video Editors:
If you do video editing rarely or do just basic video editing then it is useless to purchase paid video editors. Even if you are a content creator but tight on budget or new to this field, you can use free video editing softwares and save your cash for other pieces of equipment.
So, here we have mentioned some free video editors for you. Some of these are quite powerful and can do advanced editing while others are simple but easy to use.
Adobe Premiere Rush:
It is available on IOS and Android both.
Whether you are a beginner or a content creator using mobile phones or PCs for editing, you may have heard of Adobe softwares. It is a computer software company which makes powerful softwares for different purposes. Like premiere pro, they have designed a compact version for phones named “Premiere Rush”. It is a free video editor that has all the tools needed for video editing, from video effects to color grading and audio editing. Its UI is a bit similar to PC video editors. It is a free video editor with no watermarks. Although it takes some time to understand it. But once mastered, you can do editing quickly.
~Features:
- It is a free video editor with no watermark.
- It supports up to 4K resolution at 60fps.
- You can extract audio and can do voiceover directly from the software.
- It has hundreds of filters, overlays, and title designs.
- It has basic color grading tools.
- It also has a motion tracking feature. (in Paid version)
- It supports multiple audio, video, and text layers.


~Cons:
- It only runs on high-end devices. (It is not supported in most mid-range phones)
- Not suitable for beginners. Its UI is quite hard to understand.
- Doesn’t have common features like the chroma key, masking, e.t.c.

~Price:
Its Premium version is available for 9.99/month. It includes some premium features. Or you can purchase the “All Apps Bundle” at $54.99/month for the annual plan.
CapCut:
It is available on IOS and Android both.
If you are looking for a free but good video editor to help you edit videos on the go, then you should get your hands on CapCut. It is a free mobile video editing software with many interesting features like keyframing, chroma-key, masking e.t.c. It also supports video and image layers. It has one of the best speed ramping features among other mobile video editors. It provides curves to smoothly speed ramp your clips. It can edit landscape, portrait, and even square video formats. It has many amazing effects and filters, it also has some stock clips.


~Features:
- It is completely free and has no watermarks.
- It supports up to 4K video resolution.
- Has curves for speed ramping.
- Has keyframes for animation.
- It has hundreds of effects, overlays, and titles.


~Cons:
- Its UI doesn’t support editing in landscape orientation.
- Lacks some common editing tools.
iMovie:
It is available on IOS and Mac.
iMovie is a free video editing software designed by apple for their flagship products. It is simple and easy to use. It has all the basic editing tools to enhance your video like crop, trim, transitions, effects, e.t.c. It also has a speed ramping feature which let you change the speed at different points of a clip. It’s AI mode “Magic Movie” lets you select clips and a style and software will make the final product for you.
Its “Storyboards” mode is a creative way of learning production and post-production skills. It lets you choose a theme from many famous Genres available, then it will guide you through the production process like capturing footage, arranging your shots, and creating cinematic titles to enhance your story.


~Features:
- It is free and easy to use.
- Let you do speed ramping.
- Supports Raw files.
- It’s AI mode creates videos for you on its own.
- The “Storyboarding” feature helps you through the production process.


~Cons:
- It only works on ios and Mac.
- Not suitable for professional projects.
GoPro - Quik:
It is available on IOS and Android and windows also.
It is a free and easy-to-use software designed by GoPro. It can edit clips of your GoPro or any other device. It is a quick and easy way to enhance your clips before posting them on any social platform. It can do basic edits like trim, rotate, color correction, e.t.c. It can also make amazing speed ramps by changing the speed of different parts of the clip (available in the premium version only). It doesn’t produce any watermarks. Although its premium version unlocks more features like speed ramping, more themes, and unlimited backup space.


~Features:
- Its free version doesn’t leave a watermark.
- It is simple and easy to use.
- Can do basic color correction.
- Have pre-made themes for faster editing.
- Change the speed at different parts of the video to create smooth speed ramps. (Available in the premium version.)
- Has a free version with limited tools for basic editing.

~Cons:
- It lacks advanced tools therefore not suitable for large projects.
- Its free version has many limitations.
~Price: Its subscription is available at $1.99/month or at discount for an annual subscription having $9.99/year.
VN Video editor:
It is available on IOS and Android, Windows, and Mac.
If you are looking for a video editor, which let you do fast but quality edits, then “VN video editor” is the right choice for you. It is free and easy-to-use software with many useful features like transitions, effects, speed ramps, PiP, chroma-key, keyframing, e.t.c. It supports different aspect ratios for all your social platforms.
It also has pre-made templates to speed up your editing process. Its Story mode let you manage your production and post-production work easily. It also has overlay mode, which can make awesome slide shows for you.


~Features:
- It is free software with no watermark.
- It supports up to 4K resolution at 60fps.
- Supports multi-layer editing.
- Have keyframing curves to create smooth animations.
- Have speed curves for smooth speed ramping.
- Its Story mode let you manage your production work easily.
- Can extract audio from a video file.


~Cons:
- Its UI doesn’t support editing landscape orientation.
- Its free version has limitations of creating max 100 projects.
~Price:
Its Premium version is available for $3.9/month or $20.9/year.
Some Paid iPhone Video Editors:
If you want to move forward and get your hands on these paid softwares to try new features then you should buy these paid softwares. As most of these softwares are quite affordable but they pack the punch. And some of them can give you more in return than your investment. Then what are you waiting for? go and try them yourself.
Kinemaster:
It is available on IOS and Android both.
If you want to do more than just trimming and cropping to your videos then you should try Kinemaster. For editors, who want to do some advanced-level video editing on their phone, then you must have Kinemaster on your phone. It is a paid software, which is packed with many useful features. It has many video and audio effects. It also has an amazing audio editor. It also has many title designs and basic color correction tools. It has hundreds of effects and transitions + more can be downloaded from its asset store. Its UI is suitable for beginners and content creators both. It is a paid software, but all its features are completely free to use, but the free version leaves a watermark on export.


~Features:
- It supports up to 4K resolution at 60fps. (depending on mobile configuration)
- Have amazing features like chroma key, keyframing, blend e.t.c
- Has built-in audio and video recorder.
- Supports multiple texts and video layers with different resolutions depending on the capability of the mobile phone.
- Has UI like a PC video editor and supports landscape orientation for editing.
- Have an asset store with 100s of free effects, transitions, and stock material.


~Cons:
- Can’t export 4K videos on most devices.
- Can’t apply keyframes and chroma key to the main video. (can be done on layers only)
~Price:
Its Premium version is available for $4.9/month or $39.9/year. It also includes all the premium assets.
Power Director:
It is available on IOS and Android both.
It is a paid but quite advanced video editor available for androids and IOS both. Like its PC version mobile version is also packed with many great features. It is compact and easy to use. It supports multiple video and audio layers. Have many cool filters and transitions. Can also do basic color corrections. To complete post-production work it also has audio editing tools and effects. It also has hundreds of title designs. Its UI is easy to use and supports both portrait and landscape orientation for editing. Most of its features can be used for free with a watermark on export. To remove the watermark you need to purchase the premium version.


~Features:
- It supports up to 4K resolution at 60fps. (compatible on most devices)
- Supports both Portrait and Landscape orientation for editing.
- Supports Key framing and video stabilization also.
- Supports multiple audio and video layers.
- Can edit videos in different aspect ratios.
- Have a vast stock library.


~Cons:
- Can’t export 4K videos on many devices.
- Can apply keyframing and chroma key to layers only.
- Software lags sometimes.
~Price:
Its Premium version is available for $4.9/month or $29.9/year.
LumaFusion:
It is available on IOS and Mac (with an m1 processor).
If you are a content creator and want to do professional-level video editing on your phone then you should get your hands on “LumaFusion”. It is of the most powerful and advanced video editors designed for a mobile phone. But it only works on iPhones and iPads. It is a multi-track video editor with many useful features like the Chroma key, keyframing, color grading, and color LUTs. Have powerful color grading tools and an audio editor. It also has a lock and load stabilizer. You have to purchase the software before using it. It doesn’t have any free version to try.

Credits: Pic by Luma touch website.
~Features:
- It supports up to 4K video resolution at a max of 240 fps.
- Can also edit and export 360 videos.
- Have powerful color correction tools. You can also import your own color LUTs.
- Supports Keyframing on almost all the editing tools within the software.
- You can add some third-party audio plugins.
- Supports up to 6 audio and video layers.
- Have “Storyblock” stock library. (Many of its contents are free to use)
- Supports external monitor for display.

Credits: Pic by Luma touch website.
~Cons:
- Not available for Android devices.
- Being an advanced software, it doesn’t have masking and speed ramping features.
- Doesn’t have a free version to try on.
~Price:
It is available for purchase at $29.99.
InShot:
It is available on IOS and Android both.
If you are new to video editing and want to do simple editing tasks then this software can be the right choice for you. It is simple and easy to use. Apart from just trimming and arranging your clips, it also has some cool features like speed ramping, chroma-key, mask e.t.c. It also has an HSL color grading tool. You can add multiple layers as PiP. It is a paid software but you can try it for free with the watermark on export.


~Features:
- It supports up to 4K resolution at 60fps.
- Its UI is beginner-friendly.
- Have some advanced color correction and grading tools.
- Supports multiple images and video layers as PiP.
- Have features like a mask, chroma key, and blend for layers.
- Can edit videos in different aspect ratios.
- Have speed curves for smooth speed ramping.


~Cons:
- Doesn’t have advanced tools.
- Its UI doesn’t support editing landscape orientation.
~Price:
It has 3 diff purchase plans. you can get its subscription for $3.9/month or $14.99/year. or you can purchase the software for lifetime at $34.99.
VivaCut:
It is available on IOS and Android both.
Almost every mobile video editor wished for doing PC-like video editing on their phone, but that was not possible due to software limitations and device compatibility. But now you can create PC-like videos on your phone through “VivaCut”. It is a paid software that is packed with many advanced features. Like 3D transform, overlay, Effects, Masking, e.t.c. It has one of the best color correction and grading tools among other mobile video editors. It has advanced keyframing and curve paths that can make splendid animations. It also supports multi-layer video editing. It also has a Grouping tool that let you combine several clips and texts into a single clip for easy editing. It also lets you import your presets. It is a paid software but you can try it for free with the watermark on export.


~Features:
- It supports multi-layer editing.
- Supports keyframing curves and 3D transform.
- Have advanced color correction and grading tools.
- Can Group multiple clips for easy editing.
- Let you import your presets.
- Can edit videos in different aspect ratios.
- Have an “FX plugin” library with many special effects that can be customized also.


~Cons:
- It doesn’t support 4K resolution.
- Its UI doesn’t support editing landscape orientation.
- It lags and crashes sometimes.
~Price:
Its premium version is available at $4.99/month or $19.99/year.
Which Should I Choose Free or Paid Video Editing Apps for iPhone:
If you do video editing once in a while or you don’t do more than just trimming and cropping then you shouldn’t purchase a paid video editing software. Because there are free video editors that can get your job done and even more than that. But if you are a content creator who doesn’t want to do editing on PCs or laptops, then you can get these paid video editors for your iPhone. These softwares are quite affordable and worthy of your investment. Some are cheaper than others. You can purchase the one, which meets your budget or fulfills your needs.
And if you are a beginner but want to move forward in this field then you should try free versions of these paid softwares. Select the one, which you are comfortable working on and once you are satisfied with the software then you can purchase its premium version.
- Free iPhone Video Editors
- Adobe Premiere Rush
- CapCut
- iMovie
- GoPro-Quik
- VN Video Editor
- Paid iPhone Video Editors
- Kinemaster
- Power Director
- LumaFusion
- InShot
- VivaCut
Filmora Go:
It is available on IOS and Android both.
Apart from having a professional video editor for PC, Wondershare has also introduced a video editor for mobile phones. Filmora Go is an amazing video editor, with many cool features such as chroma key, mask, keyframing, blending, e.t.c. It is fast and easy to use with built-in effects, transitions, and presets to speed up the editing process. It is a paid video editor but you can try it for free, free trial includes most of the features but it leaves a watermark on export.
~Features:
- Has speed curves for smooth speed ramping.
- Supports multiple images and video layers.
- Have many presets and filters for fast pace editing.
- Have cool features like chroma key, masking, keyframing, e.t.c.
- Supports “Pixabay’s” stock library.
~Cons:
- Its UI doesn’t support editing in landscape orientation.
- It doesn’t support 4k video resolution.


~Steps:
Import: Open Filmora Go, Click “New project” to start a new project, or Choose the previous one from the “Draft” portion. Select videos or images to import to your timeline. Hold and drag the clip to change its arrangement.
Edit: You can add text, effects, stickers, layers, e.t.c. by clicking their icon, present on the bar at the bottom.
Click the “PiP” icon to add image or video layers, you also can add multiple layers.
Select a clip to edit it. Different editing tools appear on the bottom bar. Here you can change its opacity, its speed, or add animations.
Effects: Click the “Effects” icon to open the effects menu. Select an effect to apply to your clip.
Click the white box between two clips to add transitions.
Export: Click the “Export” button to export your file. Select your desired resolution and frame rate to export your clip.


Some Free iPhone Video Editors:
If you do video editing rarely or do just basic video editing then it is useless to purchase paid video editors. Even if you are a content creator but tight on budget or new to this field, you can use free video editing softwares and save your cash for other pieces of equipment.
So, here we have mentioned some free video editors for you. Some of these are quite powerful and can do advanced editing while others are simple but easy to use.
Adobe Premiere Rush:
It is available on IOS and Android both.
Whether you are a beginner or a content creator using mobile phones or PCs for editing, you may have heard of Adobe softwares. It is a computer software company which makes powerful softwares for different purposes. Like premiere pro, they have designed a compact version for phones named “Premiere Rush”. It is a free video editor that has all the tools needed for video editing, from video effects to color grading and audio editing. Its UI is a bit similar to PC video editors. It is a free video editor with no watermarks. Although it takes some time to understand it. But once mastered, you can do editing quickly.
~Features:
- It is a free video editor with no watermark.
- It supports up to 4K resolution at 60fps.
- You can extract audio and can do voiceover directly from the software.
- It has hundreds of filters, overlays, and title designs.
- It has basic color grading tools.
- It also has a motion tracking feature. (in Paid version)
- It supports multiple audio, video, and text layers.


~Cons:
- It only runs on high-end devices. (It is not supported in most mid-range phones)
- Not suitable for beginners. Its UI is quite hard to understand.
- Doesn’t have common features like the chroma key, masking, e.t.c.

~Price:
Its Premium version is available for 9.99/month. It includes some premium features. Or you can purchase the “All Apps Bundle” at $54.99/month for the annual plan.
CapCut:
It is available on IOS and Android both.
If you are looking for a free but good video editor to help you edit videos on the go, then you should get your hands on CapCut. It is a free mobile video editing software with many interesting features like keyframing, chroma-key, masking e.t.c. It also supports video and image layers. It has one of the best speed ramping features among other mobile video editors. It provides curves to smoothly speed ramp your clips. It can edit landscape, portrait, and even square video formats. It has many amazing effects and filters, it also has some stock clips.


~Features:
- It is completely free and has no watermarks.
- It supports up to 4K video resolution.
- Has curves for speed ramping.
- Has keyframes for animation.
- It has hundreds of effects, overlays, and titles.


~Cons:
- Its UI doesn’t support editing in landscape orientation.
- Lacks some common editing tools.
iMovie:
It is available on IOS and Mac.
iMovie is a free video editing software designed by apple for their flagship products. It is simple and easy to use. It has all the basic editing tools to enhance your video like crop, trim, transitions, effects, e.t.c. It also has a speed ramping feature which let you change the speed at different points of a clip. It’s AI mode “Magic Movie” lets you select clips and a style and software will make the final product for you.
Its “Storyboards” mode is a creative way of learning production and post-production skills. It lets you choose a theme from many famous Genres available, then it will guide you through the production process like capturing footage, arranging your shots, and creating cinematic titles to enhance your story.


~Features:
- It is free and easy to use.
- Let you do speed ramping.
- Supports Raw files.
- It’s AI mode creates videos for you on its own.
- The “Storyboarding” feature helps you through the production process.


~Cons:
- It only works on ios and Mac.
- Not suitable for professional projects.
GoPro - Quik:
It is available on IOS and Android and windows also.
It is a free and easy-to-use software designed by GoPro. It can edit clips of your GoPro or any other device. It is a quick and easy way to enhance your clips before posting them on any social platform. It can do basic edits like trim, rotate, color correction, e.t.c. It can also make amazing speed ramps by changing the speed of different parts of the clip (available in the premium version only). It doesn’t produce any watermarks. Although its premium version unlocks more features like speed ramping, more themes, and unlimited backup space.


~Features:
- Its free version doesn’t leave a watermark.
- It is simple and easy to use.
- Can do basic color correction.
- Have pre-made themes for faster editing.
- Change the speed at different parts of the video to create smooth speed ramps. (Available in the premium version.)
- Has a free version with limited tools for basic editing.

~Cons:
- It lacks advanced tools therefore not suitable for large projects.
- Its free version has many limitations.
~Price: Its subscription is available at $1.99/month or at discount for an annual subscription having $9.99/year.
VN Video editor:
It is available on IOS and Android, Windows, and Mac.
If you are looking for a video editor, which let you do fast but quality edits, then “VN video editor” is the right choice for you. It is free and easy-to-use software with many useful features like transitions, effects, speed ramps, PiP, chroma-key, keyframing, e.t.c. It supports different aspect ratios for all your social platforms.
It also has pre-made templates to speed up your editing process. Its Story mode let you manage your production and post-production work easily. It also has overlay mode, which can make awesome slide shows for you.


~Features:
- It is free software with no watermark.
- It supports up to 4K resolution at 60fps.
- Supports multi-layer editing.
- Have keyframing curves to create smooth animations.
- Have speed curves for smooth speed ramping.
- Its Story mode let you manage your production work easily.
- Can extract audio from a video file.


~Cons:
- Its UI doesn’t support editing landscape orientation.
- Its free version has limitations of creating max 100 projects.
~Price:
Its Premium version is available for $3.9/month or $20.9/year.
Some Paid iPhone Video Editors:
If you want to move forward and get your hands on these paid softwares to try new features then you should buy these paid softwares. As most of these softwares are quite affordable but they pack the punch. And some of them can give you more in return than your investment. Then what are you waiting for? go and try them yourself.
Kinemaster:
It is available on IOS and Android both.
If you want to do more than just trimming and cropping to your videos then you should try Kinemaster. For editors, who want to do some advanced-level video editing on their phone, then you must have Kinemaster on your phone. It is a paid software, which is packed with many useful features. It has many video and audio effects. It also has an amazing audio editor. It also has many title designs and basic color correction tools. It has hundreds of effects and transitions + more can be downloaded from its asset store. Its UI is suitable for beginners and content creators both. It is a paid software, but all its features are completely free to use, but the free version leaves a watermark on export.


~Features:
- It supports up to 4K resolution at 60fps. (depending on mobile configuration)
- Have amazing features like chroma key, keyframing, blend e.t.c
- Has built-in audio and video recorder.
- Supports multiple texts and video layers with different resolutions depending on the capability of the mobile phone.
- Has UI like a PC video editor and supports landscape orientation for editing.
- Have an asset store with 100s of free effects, transitions, and stock material.


~Cons:
- Can’t export 4K videos on most devices.
- Can’t apply keyframes and chroma key to the main video. (can be done on layers only)
~Price:
Its Premium version is available for $4.9/month or $39.9/year. It also includes all the premium assets.
Power Director:
It is available on IOS and Android both.
It is a paid but quite advanced video editor available for androids and IOS both. Like its PC version mobile version is also packed with many great features. It is compact and easy to use. It supports multiple video and audio layers. Have many cool filters and transitions. Can also do basic color corrections. To complete post-production work it also has audio editing tools and effects. It also has hundreds of title designs. Its UI is easy to use and supports both portrait and landscape orientation for editing. Most of its features can be used for free with a watermark on export. To remove the watermark you need to purchase the premium version.


~Features:
- It supports up to 4K resolution at 60fps. (compatible on most devices)
- Supports both Portrait and Landscape orientation for editing.
- Supports Key framing and video stabilization also.
- Supports multiple audio and video layers.
- Can edit videos in different aspect ratios.
- Have a vast stock library.


~Cons:
- Can’t export 4K videos on many devices.
- Can apply keyframing and chroma key to layers only.
- Software lags sometimes.
~Price:
Its Premium version is available for $4.9/month or $29.9/year.
LumaFusion:
It is available on IOS and Mac (with an m1 processor).
If you are a content creator and want to do professional-level video editing on your phone then you should get your hands on “LumaFusion”. It is of the most powerful and advanced video editors designed for a mobile phone. But it only works on iPhones and iPads. It is a multi-track video editor with many useful features like the Chroma key, keyframing, color grading, and color LUTs. Have powerful color grading tools and an audio editor. It also has a lock and load stabilizer. You have to purchase the software before using it. It doesn’t have any free version to try.

Credits: Pic by Luma touch website.
~Features:
- It supports up to 4K video resolution at a max of 240 fps.
- Can also edit and export 360 videos.
- Have powerful color correction tools. You can also import your own color LUTs.
- Supports Keyframing on almost all the editing tools within the software.
- You can add some third-party audio plugins.
- Supports up to 6 audio and video layers.
- Have “Storyblock” stock library. (Many of its contents are free to use)
- Supports external monitor for display.

Credits: Pic by Luma touch website.
~Cons:
- Not available for Android devices.
- Being an advanced software, it doesn’t have masking and speed ramping features.
- Doesn’t have a free version to try on.
~Price:
It is available for purchase at $29.99.
InShot:
It is available on IOS and Android both.
If you are new to video editing and want to do simple editing tasks then this software can be the right choice for you. It is simple and easy to use. Apart from just trimming and arranging your clips, it also has some cool features like speed ramping, chroma-key, mask e.t.c. It also has an HSL color grading tool. You can add multiple layers as PiP. It is a paid software but you can try it for free with the watermark on export.


~Features:
- It supports up to 4K resolution at 60fps.
- Its UI is beginner-friendly.
- Have some advanced color correction and grading tools.
- Supports multiple images and video layers as PiP.
- Have features like a mask, chroma key, and blend for layers.
- Can edit videos in different aspect ratios.
- Have speed curves for smooth speed ramping.


~Cons:
- Doesn’t have advanced tools.
- Its UI doesn’t support editing landscape orientation.
~Price:
It has 3 diff purchase plans. you can get its subscription for $3.9/month or $14.99/year. or you can purchase the software for lifetime at $34.99.
VivaCut:
It is available on IOS and Android both.
Almost every mobile video editor wished for doing PC-like video editing on their phone, but that was not possible due to software limitations and device compatibility. But now you can create PC-like videos on your phone through “VivaCut”. It is a paid software that is packed with many advanced features. Like 3D transform, overlay, Effects, Masking, e.t.c. It has one of the best color correction and grading tools among other mobile video editors. It has advanced keyframing and curve paths that can make splendid animations. It also supports multi-layer video editing. It also has a Grouping tool that let you combine several clips and texts into a single clip for easy editing. It also lets you import your presets. It is a paid software but you can try it for free with the watermark on export.


~Features:
- It supports multi-layer editing.
- Supports keyframing curves and 3D transform.
- Have advanced color correction and grading tools.
- Can Group multiple clips for easy editing.
- Let you import your presets.
- Can edit videos in different aspect ratios.
- Have an “FX plugin” library with many special effects that can be customized also.


~Cons:
- It doesn’t support 4K resolution.
- Its UI doesn’t support editing landscape orientation.
- It lags and crashes sometimes.
~Price:
Its premium version is available at $4.99/month or $19.99/year.
Which Should I Choose Free or Paid Video Editing Apps for iPhone:
If you do video editing once in a while or you don’t do more than just trimming and cropping then you shouldn’t purchase a paid video editing software. Because there are free video editors that can get your job done and even more than that. But if you are a content creator who doesn’t want to do editing on PCs or laptops, then you can get these paid video editors for your iPhone. These softwares are quite affordable and worthy of your investment. Some are cheaper than others. You can purchase the one, which meets your budget or fulfills your needs.
And if you are a beginner but want to move forward in this field then you should try free versions of these paid softwares. Select the one, which you are comfortable working on and once you are satisfied with the software then you can purchase its premium version.
Backup and Organize Your Tons of Footage in Minutes
Backing up your data is deemed significantly necessary among video editing communities. Files get corrupted easily. Having a backup drive can save your day and countless hours. You can back up your data any way you deem fit. However, it will do you right if you follow the advice of professionals.
The article is written explicitly after due consideration and suggestions from the professional video editor. You can follow the steps in it to make backup files. Let us start with very straightforward steps to help you understand the professional way of backing up and organizing your footage.
Part 1. Back Up Your Files
Backing up your files gives you peace of mind. If one file is lost, the whole project becomes vulnerable to failure. Therefore, every effort must be made to ensure the protection of files. The best way to protect the files from any misfortune is to back them up.
Remember, there is no specific way to back up your files. Depending on the project’s requirements, you can do that differently. The following steps will light up how you can back up your files.
Step1Back up your files in two different places
It is crucial to do that. If one backup drive corrupts, you have the second option. It gives you an opportunity to back up files.
- You can make two different external backup hard drives.

- You can also use your internal and external devices as two backup options.

Step2Make specific folders for each purpose of the video
The next step is how you back up your files properly and safely. Make separate folders for the different formats you are importing in your drive. Always use the primary source to make a copy of your files.
Follow the steps below to understand how to back up your files in two drives.
- Create a folder in your drive.
- Name it. You can name it according to the given format. The choice is yours.

- Your backup folder is created.
- Make new folders based on the files that are imported into the file. We are making two folders for the project, 01 Footage, and 02 Audio.
- 01 Footage is for the original footage.
- 02 Audio is for audio files provided by the music artist.

Step3Repeat the same process in your second backup drive
- Make the same folders and sub-folders in your secondary backup drive.

Step4Transfer files to your primary and secondary folders
- Transfer files to folders and sub-folders in your first backup drive.
- Transfer files to folders and sub-folders in your secondary backup drive.
![]()
Note: Most people make the mistake of making a backup drive and then using the same drive to make the second backup. The approach needs to be corrected.
We are done with backing up our files. It is time to organize the files in your drive.
Part 2. Organize Your Files in Filmora
Organizing your files is vital for any operation in video and editing. It makes everything streamlined. The risk of losing your data become negligible. Let us enlighten you on how you can organize your files.
Free Download For Win 7 or later(64-bit)
Free Download For macOS 10.14 or later
Step1Create new folders to lay the foundation for your video editing project
You can imitate the format we have chosen. However, you can choose any way you deem fit.
- Create 02 Project Files and 03 Exports.
- 02 Project contains the files that we will edit in Filmora .
- 03 Exports will have files that will be exported out of Filmora.

- In the 01 Media folder, create a new folder, 03 Graphics. It will contain graphics the artist will provide, such as a logo. You can also add your graphics to the folder if you want.

The format will help you if you move files from one device to the next case. In that case, you will only have to move one folder with the artist’s name.

Step2Create a new project
In this step, we will organize our files in Filmora. It will help us to keep discipline and order in file organization. It makes work easy and fun.
- Create a new project when you open Filmora on your PC or Mac.

- Save the project in any name you want. We have saved the project in the format explained above.
- Save the file in 02 Project Files.

Step3Edit your workspace if you want
Users can edit the workspace in Filmora. You can customize it to your liking. Also, it is entirely optional.
- Go to layout mode. Change the layout if you want.

- You can manually change the panels by simply dragging them across the screen.

The workspace settings will be saved automatically. The next time you start Filmora, you will not need to readjust the panels.
- Save the file
Step4Recreate the file structure in your 02 project files
Now, you create folders in your project. For that, you can follow our structure, or you can follow your instincts.
- Create the folders in Filmora, as you have created them in your drive. The folders will be created in your 02 Project Files.
These new folders are the exact copies of your media files that you have got from the producer and music artist.

- Import the files into respective folders. Footage should include all the original videos given to your producers.

Step5Save the project
You can save the file using the button on Filmora, as shown below.

- You can save the files using short keys.

Conclusion
Making a backup file for your project is crucial. For a video editor, it is quite painful to learn that the final product has a missing file. Therefore, one must ensure that all the files are backed up before beginning the editing phase.
Apart from that, one must also keep updating the files in Filmora . You performed some editing. Make sure to save the file then and there. Any minor mistake can cause great worry for the professional editor. Thus, it is better to take proactive actions.
Free Download For Win 7 or later(64-bit)
Free Download For macOS 10.14 or later
We are done with backing up our files. It is time to organize the files in your drive.
Part 2. Organize Your Files in Filmora
Organizing your files is vital for any operation in video and editing. It makes everything streamlined. The risk of losing your data become negligible. Let us enlighten you on how you can organize your files.
Free Download For Win 7 or later(64-bit)
Free Download For macOS 10.14 or later
Step1Create new folders to lay the foundation for your video editing project
You can imitate the format we have chosen. However, you can choose any way you deem fit.
- Create 02 Project Files and 03 Exports.
- 02 Project contains the files that we will edit in Filmora .
- 03 Exports will have files that will be exported out of Filmora.

- In the 01 Media folder, create a new folder, 03 Graphics. It will contain graphics the artist will provide, such as a logo. You can also add your graphics to the folder if you want.

The format will help you if you move files from one device to the next case. In that case, you will only have to move one folder with the artist’s name.

Step2Create a new project
In this step, we will organize our files in Filmora. It will help us to keep discipline and order in file organization. It makes work easy and fun.
- Create a new project when you open Filmora on your PC or Mac.

- Save the project in any name you want. We have saved the project in the format explained above.
- Save the file in 02 Project Files.

Step3Edit your workspace if you want
Users can edit the workspace in Filmora. You can customize it to your liking. Also, it is entirely optional.
- Go to layout mode. Change the layout if you want.

- You can manually change the panels by simply dragging them across the screen.

The workspace settings will be saved automatically. The next time you start Filmora, you will not need to readjust the panels.
- Save the file
Step4Recreate the file structure in your 02 project files
Now, you create folders in your project. For that, you can follow our structure, or you can follow your instincts.
- Create the folders in Filmora, as you have created them in your drive. The folders will be created in your 02 Project Files.
These new folders are the exact copies of your media files that you have got from the producer and music artist.

- Import the files into respective folders. Footage should include all the original videos given to your producers.

Step5Save the project
You can save the file using the button on Filmora, as shown below.

- You can save the files using short keys.

Conclusion
Making a backup file for your project is crucial. For a video editor, it is quite painful to learn that the final product has a missing file. Therefore, one must ensure that all the files are backed up before beginning the editing phase.
Apart from that, one must also keep updating the files in Filmora . You performed some editing. Make sure to save the file then and there. Any minor mistake can cause great worry for the professional editor. Thus, it is better to take proactive actions.
Free Download For Win 7 or later(64-bit)
Free Download For macOS 10.14 or later
8 Top Premiere Pro Slideshow Templates
Best 8 Top Premiere Pro Slideshow Templates
An easy yet powerful editor
Numerous effects to choose from
Detailed tutorials provided by the official channel
Making slideshows quickly is the demand of modern professional world. Here you can go through top 8 Premiere pro Slideshow Templates available online. The slideshow template premiere pro free download versions are ready for media to be inserted for creating beautiful slideshows.
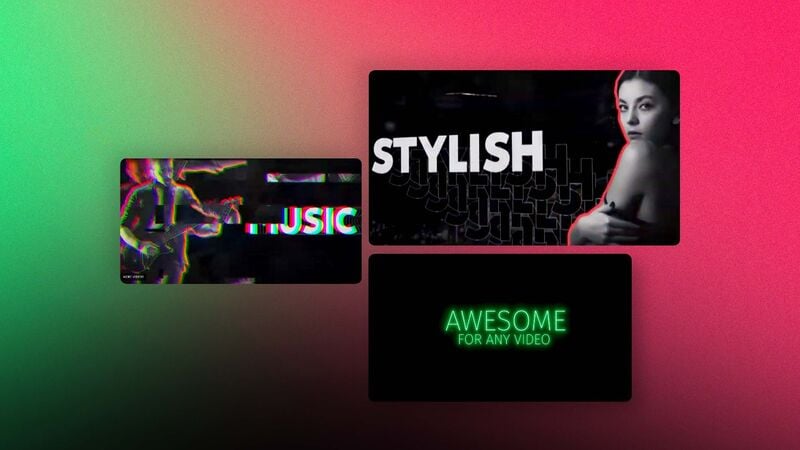
In this article
01 [Top 9 Premiere Pro Slideshow Templates worth utilizing](#Part 1)
02 [How Do I Create a Slideshow Template in Premiere Pro?](#Part 2)
03 [FAQ of Premiere Pro Slideshow Templates](#Part 3)
Part 1 Top 8 Premiere Pro Slideshow Templates worth Utilizing
01Square Photo
If you are looking for a really awesome slideshow premiere pro which can make your square-shaped photos more attractive, you can employ slideshow – Square Photo. The presentation of pictures in this slideshow occurs like scrolling an album full of family clicks. You will love the way it presents calm pictures with your friends and family. It**’**s satisfying, nostalgic and fun to use this slideshow.
02Vintage by motion shape
Want to give your slideshow a vintage touch? Well, vintage slideshow premiere template free by Motionshape is particularly for you. It makes your creation memorable and provides an exciting template full of flickers, dust, scratch and light effects. Ultimately, the project seems to run on historical timeline. All you need to do is adding photos and putting new captions as per your picture collection.
03Digital Slideshow by Zorrin
You will be in love with this slideshow for sure. Digital slideshow by Zorrin is a beautiful way to represent you. Whether you want to create a corporate slideshow or you are interested in promotion and broadcasting of your products, you can use this slideshow without any doubt. It possesses 50 places for the photos and 25 places for text as well. You will love the creative transitions between the slides.
04Emotional memory slideshow
Planning to create an emotional and memory based slideshow? If yes, this is the best slideshow premiere pro template free that you can use. It will enhance the importance of pictures which are close to your heart and full of passion. The analogous aesthetics of this slideshow hits your mind and replays your special memories.
05Corporate slideshow
So, you are working for a company and making a corporate slideshow for presentation? If yes, this corporate premiere slideshow template is for you. It gives a classic look to the pictures and put the story of your business in an exciting manner. You can use the timeline smartly and describe the establishment and progress of your company, management and teamwork, research and production and client base etc.
06Inspire slideshow by Quartz
Inspire is a good slideshow full of custom options in color palette and you can even make the changes directly while using its pro version. It involves a simple way to move slide-wise and is really a well organized template to insert your own media and move further.
07Transmaxx’s Education Slideshow
Never bother about creating your own free premiere pro slideshow template regarding education when you can already access this exclusive education slideshow. It is based upon the theme around education and has lots of places for pictures, videos and texts. You can add captions and additional write-ups wherever required.
08Motion Media Group’s Family Slideshow
You can choose any of the four versions of this wonderful free slideshow template premiere pro that provides platform for adding your family pictures. Whether you want to make a slideshow of celebrations in your family or making a digital collage of family photos, this is the best template you can go with. The romantic and calm pace is really touchy to be used as a wedding slideshow as well.
09** Wondershare Filmora Video Editor
One more interesting video editor and slideshow template is Filmora by wondershare which promises to meet all your editorial demands while making a slideshow. As the slideshow template premiere pro free version offers high end motion graphic, you can use it for making highly professional videos. Make creative presentations on Filmora and give your projects a technical finishing with best outcome.
For Win 7 or later (64-bit)
For macOS 10.12 or later
Part 2 How Do I Create a Slideshow Template in Premiere Pro?
Creating a slideshow template in premiere pro is not at all tough, even it is really fun. You need nothing much to do and have all the controls of customizing the presentation as per your preference. Just follow the steps mentioned below –
Step 1 Download the app and install it in your device.
Step 2 Open the adobe premiere pro slideshow templates free and select ‘new project‘ by clicking on it. The term can differ in different versions of premiere. For instance, may be you will find the way to start a new project by clicking on ‘file‘ and then ‘new‘ or something like that. So follow the path accordingly.
Step 3 It**’**s time to understand workspace in premiere. A blank workspace will be provided to you to start with your new project. There will be a set of insert and editing options, buttons and information to get help in the form of panels. You can select a panel to work on your project with the help of that particular panel. For instance, to insert your videos and pictures in the timeline, you can select ‘insert‘ panel and proceed.
Step 4 Create your project with the help of panels in adobe premiere pro slideshow template free. In the lower left of the project, you will see your sequence of videos and picture which can be controlled by you. For example, if you want to change the sequence, apply filters and effects or add text on the video clips and photos, you can do the same by clicking on that particular clip. Then choose the operation you want to apply from the project panel and edit your project as per your choice.
Step 5 In the menu bar, you can see file. Select ‘file‘ and go to ‘new‘, then ‘sequence‘. Add the audio of your choice, select the frame you want and set resolution as per your preference from here. You can also control color, depth, warmth and speed of the video etc. from this task bar.
Step 6 Once ready, you can proceed to save your project. Various resolutions will be available when you click on ‘download or save‘. Choose the resolution you prefer and save your free premiere pro templates slideshow for future use. Don**’**t forget to enter a name to describe your project such as ‘my company‘, ‘holidays 2022‘ etc.
Part 3 FAQ of Premiere Pro Slideshow Templates 
Can I have Premiere Pro slideshow templates for free?
Yes, you can definitely have a premiere pro slideshow templates free download version. All you need to do is downloading the free premiere pro app from Motion Array, run and install it in your device and it**’**s ready to be used.
How many placeholders are there in Premiere Pro slideshow templates?
The no. of placeholders varies editor to editor. In Premiere pro slideshow templates, you can have more than 30 placeholders for photos and approx 23 placeholders for texts. The number is enough to create a calm, gentle slideshow without much load of content for distraction.
What are the main features of Premiere Pro slideshow templates?
The best thing to know about premiere pro slideshow template is that it is so easy to use that even a beginner can create a good slideshow on it. The user friendly interface of the app provides custom operational functions such as changing the font, color and speed of slideshow. Directly drag and drop feature is there to insert media in the slideshow and also you can control the transitions and effects. The most important thing is that all this you can get for free also.
Can I use Premiere Pro slideshow templates for making promotional videos?
Of course, you can create impressive adobe premiere slideshow templates with the help of premiere pro slideshow template. Just choose the pictures and videos of your business/company wisely and generate high tech content to catch attention. Write touchy content on your company and upload in the slideshow in the form of text use beautiful font, catchy captions and subtle background colors to make it more interesting.
How to remove watermark in Premiere Pro slideshow templates?
In the premium version, you won**’t have to employ your efforts for removing watermark as you won‘**t find it there while in the free version, you will have to remove the watermark by applying a watermark removing app or watching a small promo video shown by the app.
When should I use Premiere Pro slideshow templates?
You can use premiere slideshow template free whenever you feel the need of making a slideshow. When you come back from a vacation and want to compile all the pictures; when there is an important business meeting and you want to represent your project, when you want to make a family or friends**’** slideshow on special occasions and even personal slideshows can be created to wish someone happy birthday.
● Ending Thoughts →
● The trend of ‘ready-to-use‘ slideshow makers is on its peak as nobody have enough time to create a complete slideshow by its own nowadays. In such condition, you should choose a premiere pro slideshow template free wisely to go well with your theme.
● The procedure of slideshow making varies app to app. You should first understand the interface of a slideshow maker before putting your head into slideshow making. It**’**s better to choose a slideshow maker with user friendly interface.
● Don**’**t go with the professional version or a slideshow maker created to be used by expert only. Pick one with simple operations and quick assistance if are not so well-versed in slideshow making.
Making slideshows quickly is the demand of modern professional world. Here you can go through top 8 Premiere pro Slideshow Templates available online. The slideshow template premiere pro free download versions are ready for media to be inserted for creating beautiful slideshows.

In this article
01 [Top 9 Premiere Pro Slideshow Templates worth utilizing](#Part 1)
02 [How Do I Create a Slideshow Template in Premiere Pro?](#Part 2)
03 [FAQ of Premiere Pro Slideshow Templates](#Part 3)
Part 1 Top 8 Premiere Pro Slideshow Templates worth Utilizing
01Square Photo
If you are looking for a really awesome slideshow premiere pro which can make your square-shaped photos more attractive, you can employ slideshow – Square Photo. The presentation of pictures in this slideshow occurs like scrolling an album full of family clicks. You will love the way it presents calm pictures with your friends and family. It**’**s satisfying, nostalgic and fun to use this slideshow.
02Vintage by motion shape
Want to give your slideshow a vintage touch? Well, vintage slideshow premiere template free by Motionshape is particularly for you. It makes your creation memorable and provides an exciting template full of flickers, dust, scratch and light effects. Ultimately, the project seems to run on historical timeline. All you need to do is adding photos and putting new captions as per your picture collection.
03Digital Slideshow by Zorrin
You will be in love with this slideshow for sure. Digital slideshow by Zorrin is a beautiful way to represent you. Whether you want to create a corporate slideshow or you are interested in promotion and broadcasting of your products, you can use this slideshow without any doubt. It possesses 50 places for the photos and 25 places for text as well. You will love the creative transitions between the slides.
04Emotional memory slideshow
Planning to create an emotional and memory based slideshow? If yes, this is the best slideshow premiere pro template free that you can use. It will enhance the importance of pictures which are close to your heart and full of passion. The analogous aesthetics of this slideshow hits your mind and replays your special memories.
05Corporate slideshow
So, you are working for a company and making a corporate slideshow for presentation? If yes, this corporate premiere slideshow template is for you. It gives a classic look to the pictures and put the story of your business in an exciting manner. You can use the timeline smartly and describe the establishment and progress of your company, management and teamwork, research and production and client base etc.
06Inspire slideshow by Quartz
Inspire is a good slideshow full of custom options in color palette and you can even make the changes directly while using its pro version. It involves a simple way to move slide-wise and is really a well organized template to insert your own media and move further.

07Transmaxx’s Education Slideshow
Never bother about creating your own free premiere pro slideshow template regarding education when you can already access this exclusive education slideshow. It is based upon the theme around education and has lots of places for pictures, videos and texts. You can add captions and additional write-ups wherever required.
08Motion Media Group’s Family Slideshow
You can choose any of the four versions of this wonderful free slideshow template premiere pro that provides platform for adding your family pictures. Whether you want to make a slideshow of celebrations in your family or making a digital collage of family photos, this is the best template you can go with. The romantic and calm pace is really touchy to be used as a wedding slideshow as well.
09** Wondershare Filmora Video Editor
One more interesting video editor and slideshow template is Filmora by wondershare which promises to meet all your editorial demands while making a slideshow. As the slideshow template premiere pro free version offers high end motion graphic, you can use it for making highly professional videos. Make creative presentations on Filmora and give your projects a technical finishing with best outcome.
For Win 7 or later (64-bit)
For macOS 10.12 or later
Part 2 How Do I Create a Slideshow Template in Premiere Pro?
Creating a slideshow template in premiere pro is not at all tough, even it is really fun. You need nothing much to do and have all the controls of customizing the presentation as per your preference. Just follow the steps mentioned below –

Step 1 Download the app and install it in your device.
Step 2 Open the adobe premiere pro slideshow templates free and select ‘new project‘ by clicking on it. The term can differ in different versions of premiere. For instance, may be you will find the way to start a new project by clicking on ‘file‘ and then ‘new‘ or something like that. So follow the path accordingly.
Step 3 It**’**s time to understand workspace in premiere. A blank workspace will be provided to you to start with your new project. There will be a set of insert and editing options, buttons and information to get help in the form of panels. You can select a panel to work on your project with the help of that particular panel. For instance, to insert your videos and pictures in the timeline, you can select ‘insert‘ panel and proceed.
Step 4 Create your project with the help of panels in adobe premiere pro slideshow template free. In the lower left of the project, you will see your sequence of videos and picture which can be controlled by you. For example, if you want to change the sequence, apply filters and effects or add text on the video clips and photos, you can do the same by clicking on that particular clip. Then choose the operation you want to apply from the project panel and edit your project as per your choice.
Step 5 In the menu bar, you can see file. Select ‘file‘ and go to ‘new‘, then ‘sequence‘. Add the audio of your choice, select the frame you want and set resolution as per your preference from here. You can also control color, depth, warmth and speed of the video etc. from this task bar.
Step 6 Once ready, you can proceed to save your project. Various resolutions will be available when you click on ‘download or save‘. Choose the resolution you prefer and save your free premiere pro templates slideshow for future use. Don**’**t forget to enter a name to describe your project such as ‘my company‘, ‘holidays 2022‘ etc.
Part 3 FAQ of Premiere Pro Slideshow Templates 
Can I have Premiere Pro slideshow templates for free?
Yes, you can definitely have a premiere pro slideshow templates free download version. All you need to do is downloading the free premiere pro app from Motion Array, run and install it in your device and it**’**s ready to be used.
How many placeholders are there in Premiere Pro slideshow templates?
The no. of placeholders varies editor to editor. In Premiere pro slideshow templates, you can have more than 30 placeholders for photos and approx 23 placeholders for texts. The number is enough to create a calm, gentle slideshow without much load of content for distraction.
What are the main features of Premiere Pro slideshow templates?
The best thing to know about premiere pro slideshow template is that it is so easy to use that even a beginner can create a good slideshow on it. The user friendly interface of the app provides custom operational functions such as changing the font, color and speed of slideshow. Directly drag and drop feature is there to insert media in the slideshow and also you can control the transitions and effects. The most important thing is that all this you can get for free also.
Can I use Premiere Pro slideshow templates for making promotional videos?
Of course, you can create impressive adobe premiere slideshow templates with the help of premiere pro slideshow template. Just choose the pictures and videos of your business/company wisely and generate high tech content to catch attention. Write touchy content on your company and upload in the slideshow in the form of text use beautiful font, catchy captions and subtle background colors to make it more interesting.
How to remove watermark in Premiere Pro slideshow templates?
In the premium version, you won**’t have to employ your efforts for removing watermark as you won‘**t find it there while in the free version, you will have to remove the watermark by applying a watermark removing app or watching a small promo video shown by the app.
When should I use Premiere Pro slideshow templates?
You can use premiere slideshow template free whenever you feel the need of making a slideshow. When you come back from a vacation and want to compile all the pictures; when there is an important business meeting and you want to represent your project, when you want to make a family or friends**’** slideshow on special occasions and even personal slideshows can be created to wish someone happy birthday.
● Ending Thoughts →
● The trend of ‘ready-to-use‘ slideshow makers is on its peak as nobody have enough time to create a complete slideshow by its own nowadays. In such condition, you should choose a premiere pro slideshow template free wisely to go well with your theme.
● The procedure of slideshow making varies app to app. You should first understand the interface of a slideshow maker before putting your head into slideshow making. It**’**s better to choose a slideshow maker with user friendly interface.
● Don**’**t go with the professional version or a slideshow maker created to be used by expert only. Pick one with simple operations and quick assistance if are not so well-versed in slideshow making.
Making slideshows quickly is the demand of modern professional world. Here you can go through top 8 Premiere pro Slideshow Templates available online. The slideshow template premiere pro free download versions are ready for media to be inserted for creating beautiful slideshows.

In this article
01 [Top 9 Premiere Pro Slideshow Templates worth utilizing](#Part 1)
02 [How Do I Create a Slideshow Template in Premiere Pro?](#Part 2)
03 [FAQ of Premiere Pro Slideshow Templates](#Part 3)
Part 1 Top 8 Premiere Pro Slideshow Templates worth Utilizing
01Square Photo
If you are looking for a really awesome slideshow premiere pro which can make your square-shaped photos more attractive, you can employ slideshow – Square Photo. The presentation of pictures in this slideshow occurs like scrolling an album full of family clicks. You will love the way it presents calm pictures with your friends and family. It**’**s satisfying, nostalgic and fun to use this slideshow.
02Vintage by motion shape
Want to give your slideshow a vintage touch? Well, vintage slideshow premiere template free by Motionshape is particularly for you. It makes your creation memorable and provides an exciting template full of flickers, dust, scratch and light effects. Ultimately, the project seems to run on historical timeline. All you need to do is adding photos and putting new captions as per your picture collection.
03Digital Slideshow by Zorrin
You will be in love with this slideshow for sure. Digital slideshow by Zorrin is a beautiful way to represent you. Whether you want to create a corporate slideshow or you are interested in promotion and broadcasting of your products, you can use this slideshow without any doubt. It possesses 50 places for the photos and 25 places for text as well. You will love the creative transitions between the slides.
04Emotional memory slideshow
Planning to create an emotional and memory based slideshow? If yes, this is the best slideshow premiere pro template free that you can use. It will enhance the importance of pictures which are close to your heart and full of passion. The analogous aesthetics of this slideshow hits your mind and replays your special memories.
05Corporate slideshow
So, you are working for a company and making a corporate slideshow for presentation? If yes, this corporate premiere slideshow template is for you. It gives a classic look to the pictures and put the story of your business in an exciting manner. You can use the timeline smartly and describe the establishment and progress of your company, management and teamwork, research and production and client base etc.
06Inspire slideshow by Quartz
Inspire is a good slideshow full of custom options in color palette and you can even make the changes directly while using its pro version. It involves a simple way to move slide-wise and is really a well organized template to insert your own media and move further.

07Transmaxx’s Education Slideshow
Never bother about creating your own free premiere pro slideshow template regarding education when you can already access this exclusive education slideshow. It is based upon the theme around education and has lots of places for pictures, videos and texts. You can add captions and additional write-ups wherever required.
08Motion Media Group’s Family Slideshow
You can choose any of the four versions of this wonderful free slideshow template premiere pro that provides platform for adding your family pictures. Whether you want to make a slideshow of celebrations in your family or making a digital collage of family photos, this is the best template you can go with. The romantic and calm pace is really touchy to be used as a wedding slideshow as well.
09** Wondershare Filmora Video Editor
One more interesting video editor and slideshow template is Filmora by wondershare which promises to meet all your editorial demands while making a slideshow. As the slideshow template premiere pro free version offers high end motion graphic, you can use it for making highly professional videos. Make creative presentations on Filmora and give your projects a technical finishing with best outcome.
For Win 7 or later (64-bit)
For macOS 10.12 or later
Part 2 How Do I Create a Slideshow Template in Premiere Pro?
Creating a slideshow template in premiere pro is not at all tough, even it is really fun. You need nothing much to do and have all the controls of customizing the presentation as per your preference. Just follow the steps mentioned below –

Step 1 Download the app and install it in your device.
Step 2 Open the adobe premiere pro slideshow templates free and select ‘new project‘ by clicking on it. The term can differ in different versions of premiere. For instance, may be you will find the way to start a new project by clicking on ‘file‘ and then ‘new‘ or something like that. So follow the path accordingly.
Step 3 It**’**s time to understand workspace in premiere. A blank workspace will be provided to you to start with your new project. There will be a set of insert and editing options, buttons and information to get help in the form of panels. You can select a panel to work on your project with the help of that particular panel. For instance, to insert your videos and pictures in the timeline, you can select ‘insert‘ panel and proceed.
Step 4 Create your project with the help of panels in adobe premiere pro slideshow template free. In the lower left of the project, you will see your sequence of videos and picture which can be controlled by you. For example, if you want to change the sequence, apply filters and effects or add text on the video clips and photos, you can do the same by clicking on that particular clip. Then choose the operation you want to apply from the project panel and edit your project as per your choice.
Step 5 In the menu bar, you can see file. Select ‘file‘ and go to ‘new‘, then ‘sequence‘. Add the audio of your choice, select the frame you want and set resolution as per your preference from here. You can also control color, depth, warmth and speed of the video etc. from this task bar.
Step 6 Once ready, you can proceed to save your project. Various resolutions will be available when you click on ‘download or save‘. Choose the resolution you prefer and save your free premiere pro templates slideshow for future use. Don**’**t forget to enter a name to describe your project such as ‘my company‘, ‘holidays 2022‘ etc.
Part 3 FAQ of Premiere Pro Slideshow Templates 
Can I have Premiere Pro slideshow templates for free?
Yes, you can definitely have a premiere pro slideshow templates free download version. All you need to do is downloading the free premiere pro app from Motion Array, run and install it in your device and it**’**s ready to be used.
How many placeholders are there in Premiere Pro slideshow templates?
The no. of placeholders varies editor to editor. In Premiere pro slideshow templates, you can have more than 30 placeholders for photos and approx 23 placeholders for texts. The number is enough to create a calm, gentle slideshow without much load of content for distraction.
What are the main features of Premiere Pro slideshow templates?
The best thing to know about premiere pro slideshow template is that it is so easy to use that even a beginner can create a good slideshow on it. The user friendly interface of the app provides custom operational functions such as changing the font, color and speed of slideshow. Directly drag and drop feature is there to insert media in the slideshow and also you can control the transitions and effects. The most important thing is that all this you can get for free also.
Can I use Premiere Pro slideshow templates for making promotional videos?
Of course, you can create impressive adobe premiere slideshow templates with the help of premiere pro slideshow template. Just choose the pictures and videos of your business/company wisely and generate high tech content to catch attention. Write touchy content on your company and upload in the slideshow in the form of text use beautiful font, catchy captions and subtle background colors to make it more interesting.
How to remove watermark in Premiere Pro slideshow templates?
In the premium version, you won**’t have to employ your efforts for removing watermark as you won‘**t find it there while in the free version, you will have to remove the watermark by applying a watermark removing app or watching a small promo video shown by the app.
When should I use Premiere Pro slideshow templates?
You can use premiere slideshow template free whenever you feel the need of making a slideshow. When you come back from a vacation and want to compile all the pictures; when there is an important business meeting and you want to represent your project, when you want to make a family or friends**’** slideshow on special occasions and even personal slideshows can be created to wish someone happy birthday.
● Ending Thoughts →
● The trend of ‘ready-to-use‘ slideshow makers is on its peak as nobody have enough time to create a complete slideshow by its own nowadays. In such condition, you should choose a premiere pro slideshow template free wisely to go well with your theme.
● The procedure of slideshow making varies app to app. You should first understand the interface of a slideshow maker before putting your head into slideshow making. It**’**s better to choose a slideshow maker with user friendly interface.
● Don**’**t go with the professional version or a slideshow maker created to be used by expert only. Pick one with simple operations and quick assistance if are not so well-versed in slideshow making.
Making slideshows quickly is the demand of modern professional world. Here you can go through top 8 Premiere pro Slideshow Templates available online. The slideshow template premiere pro free download versions are ready for media to be inserted for creating beautiful slideshows.

In this article
01 [Top 9 Premiere Pro Slideshow Templates worth utilizing](#Part 1)
02 [How Do I Create a Slideshow Template in Premiere Pro?](#Part 2)
03 [FAQ of Premiere Pro Slideshow Templates](#Part 3)
Part 1 Top 8 Premiere Pro Slideshow Templates worth Utilizing
01Square Photo
If you are looking for a really awesome slideshow premiere pro which can make your square-shaped photos more attractive, you can employ slideshow – Square Photo. The presentation of pictures in this slideshow occurs like scrolling an album full of family clicks. You will love the way it presents calm pictures with your friends and family. It**’**s satisfying, nostalgic and fun to use this slideshow.
02Vintage by motion shape
Want to give your slideshow a vintage touch? Well, vintage slideshow premiere template free by Motionshape is particularly for you. It makes your creation memorable and provides an exciting template full of flickers, dust, scratch and light effects. Ultimately, the project seems to run on historical timeline. All you need to do is adding photos and putting new captions as per your picture collection.
03Digital Slideshow by Zorrin
You will be in love with this slideshow for sure. Digital slideshow by Zorrin is a beautiful way to represent you. Whether you want to create a corporate slideshow or you are interested in promotion and broadcasting of your products, you can use this slideshow without any doubt. It possesses 50 places for the photos and 25 places for text as well. You will love the creative transitions between the slides.
04Emotional memory slideshow
Planning to create an emotional and memory based slideshow? If yes, this is the best slideshow premiere pro template free that you can use. It will enhance the importance of pictures which are close to your heart and full of passion. The analogous aesthetics of this slideshow hits your mind and replays your special memories.
05Corporate slideshow
So, you are working for a company and making a corporate slideshow for presentation? If yes, this corporate premiere slideshow template is for you. It gives a classic look to the pictures and put the story of your business in an exciting manner. You can use the timeline smartly and describe the establishment and progress of your company, management and teamwork, research and production and client base etc.
06Inspire slideshow by Quartz
Inspire is a good slideshow full of custom options in color palette and you can even make the changes directly while using its pro version. It involves a simple way to move slide-wise and is really a well organized template to insert your own media and move further.

07Transmaxx’s Education Slideshow
Never bother about creating your own free premiere pro slideshow template regarding education when you can already access this exclusive education slideshow. It is based upon the theme around education and has lots of places for pictures, videos and texts. You can add captions and additional write-ups wherever required.
08Motion Media Group’s Family Slideshow
You can choose any of the four versions of this wonderful free slideshow template premiere pro that provides platform for adding your family pictures. Whether you want to make a slideshow of celebrations in your family or making a digital collage of family photos, this is the best template you can go with. The romantic and calm pace is really touchy to be used as a wedding slideshow as well.
09** Wondershare Filmora Video Editor
One more interesting video editor and slideshow template is Filmora by wondershare which promises to meet all your editorial demands while making a slideshow. As the slideshow template premiere pro free version offers high end motion graphic, you can use it for making highly professional videos. Make creative presentations on Filmora and give your projects a technical finishing with best outcome.
For Win 7 or later (64-bit)
For macOS 10.12 or later
Part 2 How Do I Create a Slideshow Template in Premiere Pro?
Creating a slideshow template in premiere pro is not at all tough, even it is really fun. You need nothing much to do and have all the controls of customizing the presentation as per your preference. Just follow the steps mentioned below –

Step 1 Download the app and install it in your device.
Step 2 Open the adobe premiere pro slideshow templates free and select ‘new project‘ by clicking on it. The term can differ in different versions of premiere. For instance, may be you will find the way to start a new project by clicking on ‘file‘ and then ‘new‘ or something like that. So follow the path accordingly.
Step 3 It**’**s time to understand workspace in premiere. A blank workspace will be provided to you to start with your new project. There will be a set of insert and editing options, buttons and information to get help in the form of panels. You can select a panel to work on your project with the help of that particular panel. For instance, to insert your videos and pictures in the timeline, you can select ‘insert‘ panel and proceed.
Step 4 Create your project with the help of panels in adobe premiere pro slideshow template free. In the lower left of the project, you will see your sequence of videos and picture which can be controlled by you. For example, if you want to change the sequence, apply filters and effects or add text on the video clips and photos, you can do the same by clicking on that particular clip. Then choose the operation you want to apply from the project panel and edit your project as per your choice.
Step 5 In the menu bar, you can see file. Select ‘file‘ and go to ‘new‘, then ‘sequence‘. Add the audio of your choice, select the frame you want and set resolution as per your preference from here. You can also control color, depth, warmth and speed of the video etc. from this task bar.
Step 6 Once ready, you can proceed to save your project. Various resolutions will be available when you click on ‘download or save‘. Choose the resolution you prefer and save your free premiere pro templates slideshow for future use. Don**’**t forget to enter a name to describe your project such as ‘my company‘, ‘holidays 2022‘ etc.
Part 3 FAQ of Premiere Pro Slideshow Templates 
Can I have Premiere Pro slideshow templates for free?
Yes, you can definitely have a premiere pro slideshow templates free download version. All you need to do is downloading the free premiere pro app from Motion Array, run and install it in your device and it**’**s ready to be used.
How many placeholders are there in Premiere Pro slideshow templates?
The no. of placeholders varies editor to editor. In Premiere pro slideshow templates, you can have more than 30 placeholders for photos and approx 23 placeholders for texts. The number is enough to create a calm, gentle slideshow without much load of content for distraction.
What are the main features of Premiere Pro slideshow templates?
The best thing to know about premiere pro slideshow template is that it is so easy to use that even a beginner can create a good slideshow on it. The user friendly interface of the app provides custom operational functions such as changing the font, color and speed of slideshow. Directly drag and drop feature is there to insert media in the slideshow and also you can control the transitions and effects. The most important thing is that all this you can get for free also.
Can I use Premiere Pro slideshow templates for making promotional videos?
Of course, you can create impressive adobe premiere slideshow templates with the help of premiere pro slideshow template. Just choose the pictures and videos of your business/company wisely and generate high tech content to catch attention. Write touchy content on your company and upload in the slideshow in the form of text use beautiful font, catchy captions and subtle background colors to make it more interesting.
How to remove watermark in Premiere Pro slideshow templates?
In the premium version, you won**’t have to employ your efforts for removing watermark as you won‘**t find it there while in the free version, you will have to remove the watermark by applying a watermark removing app or watching a small promo video shown by the app.
When should I use Premiere Pro slideshow templates?
You can use premiere slideshow template free whenever you feel the need of making a slideshow. When you come back from a vacation and want to compile all the pictures; when there is an important business meeting and you want to represent your project, when you want to make a family or friends**’** slideshow on special occasions and even personal slideshows can be created to wish someone happy birthday.
● Ending Thoughts →
● The trend of ‘ready-to-use‘ slideshow makers is on its peak as nobody have enough time to create a complete slideshow by its own nowadays. In such condition, you should choose a premiere pro slideshow template free wisely to go well with your theme.
● The procedure of slideshow making varies app to app. You should first understand the interface of a slideshow maker before putting your head into slideshow making. It**’**s better to choose a slideshow maker with user friendly interface.
● Don**’**t go with the professional version or a slideshow maker created to be used by expert only. Pick one with simple operations and quick assistance if are not so well-versed in slideshow making.
Also read:
- New 10 Catchy Pixel Art Wallpapers and How to Custom Your Own
- New Make Your Presentation More Attractive with Best Google Slideshows Templates. How to Make a Google Slideshow in Simple Step? Do You Know How to Create Google Images Slideshow?
- 2024 Approved Top Way to Freeze-Frame in Final Cut Pro
- Updated In 2024, Easily Combine Videos and Audios with 5 Simple Online Tools
- Exploring Tools to Integrate Special Mask Effects Into Your Content. Read the Following Article to Master some Tools Experts in Mask Tracking
- DaVinci Resolve Scopes Have Undergone Significant Improvements. Find Out How to Use These Scopes and Improve Your Video Editing Skills for 2024
- How to Create a Slideshow with Movavi Slideshow Maker
- Updated 2024 Approved Shotcut Video Editor Review
- How to Make Fortnite Thumbnail with Motion Blur?
- Updated In 2024, How to Create a Slideshow GIF?
- Updated 15 Best CapCut Templates for Slow Motion Editing
- In 2024, How to Create a Slideshow on iPhone
- Splitting Video in VSDC Step by Step
- How to Make a Smooth Speed Ramping in Premiere Pro?
- Updated Creating Video Testimonials
- New Zoom In and Out on Discord
- Updated 2024 Approved Best 6 WebM to GIF Converters
- New 2024 Approved 4 Ways to Rotate Videos on Windows PC
- Updated How to Create a Dynamic Text Animation in Filmora — Step-By-Step for 2024
- New 2024 Approved How to Create a Slideshow with Movavi Slideshow Maker
- Updated In 2024, What Slideshow Templates Can Teach You About Aesthetic
- Top 9 Sparkle Effects Photo and Video Editors You Should Know for 2024
- Blender - A Video Editor for All Professor
- New Best iOS Slow Motion Apps To Work With
- In 2024, Are You Trying to Make Your Video Pause on a Specific Frame? Learn How to Do so Quickly and with Ease by Adding a Freeze-Frame Effect in These Freeze-Frame Video Editing Apps
- Spooky Halloween Best 15+ Halloween Countdown Video Clips for 2024
- Updated In 2024, Focusing On The Best Ways To Convert Slow-Motion Video to Normal
- 2024 Approved Best Phantom Slow-Mo Camera For Recording Slow Motion Videos
- In 2024, Top 6 Best Alternatives to Clownfish Voice Changer
- New How to Add Freeze Frame to Your Video From Any Device?
- Updated How To Mirror a Video Clip in Premiere Pro
- How To Change Your Apple ID on iPhone XS With or Without Password | Dr.fone
- In 2024, Will Pokémon Go Ban the Account if You Use PGSharp On Poco C51 | Dr.fone
- The Best 8 VPN Hardware Devices Reviewed On Apple iPhone 8 | Dr.fone
- Overview of the Best ZTE Nubia Flip 5G Screen Mirroring App | Dr.fone
- How to Update iPhone XR without Losing Anything? | Dr.fone
- Tecno Spark 20C Not Connecting to Wi-Fi? 12 Quick Ways to Fix | Dr.fone
- In 2024, How to Transfer Contacts from Vivo Y100i Power 5G To Phone | Dr.fone
- In 2024, How to Reset Gmail Password on Vivo Y27s Devices
- In 2024, How to Cast Oppo Reno 8T 5G Screen to PC Using WiFi | Dr.fone
- How To Fake GPS On OnePlus Nord N30 SE For Mobile Legends? | Dr.fone
- Still Using Pattern Locks with Vivo Y17s? Tips, Tricks and Helpful Advice
- Best Android Data Recovery - Retrieve Lost Contacts from Hot 30 5G.
- How to Access Your Apple iPhone 14 Plus When You Forget the Passcode?
- Best Video Repair tool to Fix and Repair Corrupt MP4,MOV,AVI video files of Meizu 21
- How Can I Catch the Regional Pokémon without Traveling On Oppo A56s 5G | Dr.fone
- Fix App Not Available in Your Country Play Store Problem on Honor 90 Pro | Dr.fone
- How To Change Your Apple ID Password On your iPhone 8 | Dr.fone
- Title: New Looking For The Best Slow Motion Effect in Premiere Pro for 2024
- Author: Chloe
- Created at : 2024-06-26 06:23:54
- Updated at : 2024-06-27 06:23:54
- Link: https://ai-editing-video.techidaily.com/new-looking-for-the-best-slow-motion-effect-in-premiere-pro-for-2024/
- License: This work is licensed under CC BY-NC-SA 4.0.

