
:max_bytes(150000):strip_icc():format(webp)/GettyImages-515810476-aabe0e5a88b44bb1ae49a5bfa97bec62.jpg)
New Making Slow Motion Videos in Premiere Pro A Review on The Best Methods for 2024
Making Slow Motion Videos in Premiere Pro: A Review on The Best Methods
Slow-motion videos can give your videos more depth, drama, and emotion. Your viewers will find your films more interesting if you use slow-motion effects. It can bring attention to a shot, produce an artistic effect, or relive a memorable scene. Slow-motion video has been used for decades to add dramatic effects to films and videos.
If you’re interested in how to do slow-mo in Premiere Pro, this article is your ultimate solution. Read the article and add artistic to dramatic slow-mo to your videos. You will eventually come to know how to do slow mo on Premiere Pro with ease.
Slow Motion Video Maker Slow your video’s speed with better control of your keyframes to create unique cinematic effects!
Make A Slow Motion Video Make A Slow Motion Video More Features

Part 1: What Are Some Potential Real-Life Use Cases of Having Slow Motion Videos?
Slow-motion movies can be utilized to record and examine events in greater depth. Before delving into how to make a slow-motion video in Premiere Pro, learn its use cases. Thus, below are a few applications of the slow motion in real life:
- Medical Research and Imaging: Slow-motion videos are used in medical research and education. They thoroughly examine surgical methods and practices. This promotes medical practice improvement and student’s better comprehension of concepts.
- Cinematography and Filmmaking: Filmmakers use slow motion to add dramatic and creative effects. It can arouse feelings, highlight particular movements, or produce a dreamlike mood. In commercials, these videos create sequences of the message you want to convey.
- Wildlife Observation: Slow-motion recordings can be very useful in animal research. They can be used to watch and record animal activity more closely. It gives researchers a better knowledge of the animal’s habits.
- Sports analysis: Slow-motion effect can analyze an athlete’s movement mechanics and give reviews. Coaches and athletes pinpoint areas where their technique needs to be improved.
- Product Testing and Quality Control: Video effects also prove useful in industries. It allows engineers to inspect high-speed operations and identify any flaws or malfunctions.
- **Crash Test Analysis:**Analyzing slow-motion video is essential for examining vehicle crash tests. It aids in improving car designs and evaluating the performance of safety systems.
Part 2: Performing Slow Mo in Adobe Premiere Pro: Using A Good Option
Adobe Premiere Pro’s editing interface makes its reputation high in the market. It is known as the industry standard tool because of its unparalleled features. Content developers and filmmakers can arrange and edit video files on it. It can also improve audio and image quality with its extensive editing toolkit.
Premier Pro offers many more functions than basic video editing. It offers some features that can change your content creation journey. Following are some of its basic features that you should know before learning Premiere Pro how to slow motion:
- Auto Reframe: This feature keeps the object of the image in the frame no matter which frame you choose. You can easily auto-frame a single clip or go for the entire video.
- Text-Based Editing: Text-based editing can give you more control over the transcript. It can deal with multi-channel audio recordings and remove gaps with a single click.
- Color Settings: Color settings allow you to adjust colors quickly and easily. It can check the result by combining multiple color selections into a single tab.
- Audio Auto-Tagging: This feature classifies audio files as either dialogue, music, or ambiance. It then provides access to the most useful tools for producing high-quality audio.
This guide will tell you how to make a slow-motion video on Premiere Pro. Follow the steps below to decrease the speed of your video across Adobe Premiere Pro:
Step 1
Import your video into the timeline and right-click on the icon you see with the video file on the timeline. From here, go to “Time-Remapping” and click on “Speed.” You will know the function has been activated when you see the white line on your timeline.

Step 2
Expand the timeline to see the ramping line. Now click on the ramping line by using the “Ctrl + click” command. You can also add keyframes by going to the toolkit on the left side of the screen and selecting the “Add Keyframe” button. Another option is the time remapping speed settings from the top and activating the keyframe.

Step 3
Move the timeline cursor to the right side and add another keyframe there. Now, double-click on the first keyframe and drag it to the right side just a bit. After that, drag the speed ramping line downwards to create a ramp. To change the length of keyframes more precisely, go to “Effects Control” from the top and manage its length.

Part 3: Quick Alternative: Wondershare Filmora and Slow-Motion Clips
You might have gotten the answer to “how to make slow-motion video in Premiere Pro” until now. But another question comes into mind: “How to make slow-mo videos easily ?” Using Adobe Premiere Pro can be tricky for starters, so they look for alternative tools. Filmora is a great option if you struggle with using Adobe Premier Pro.
The tool is easy to use and can process heavy videos, keeping its quality intact. With its AI features, the edits that used to take hours can now be done within minutes. The tool has amazing options for all kinds of media editing.
Step-by-Step Guide to Perform Slow Motion in Filmora Using Different Methods
Remarkable features of Filmora do not end here. If you want to know more about Filmora, you should download it, but first, learn how to add slow motion in reels. In this read, follow the guide below:
Free Download For Win 7 or later(64-bit)
Free Download For macOS 10.14 or later
Method 1: Using Uniform Speed
Using this method, you can slow down your video smartly with the help of AI. Some options in uniform speed will help you to automate the process while ensuring the quality of the content. Look at the steps below to add slo-mo to your video like a pro:
Step 1Import Media to the Timeline and Explore Uniform Speed
Install Filmora 13 on your device and open it to access “New Project” from the main interface. When you enter the editing window, import your file into the media panel.

Step 2Adjust the Speed and Other Use Advanced Options
Later, drag that file to the timeline and right-click on it to get a list. Select the “Uniform Speed” option from that list and head to the editing panel opened to the right. Under the “Speed,” there will be a slider. You have to move it to the left for slow-motion video. While adjusting speed with that slider, track video duration from the “Duration” section. Below that option, you can toggle the “Reverse Speed” option if required.

Otherwise, check the “Ripple Edit” and “Maintain Pitch” option for good. Now, extend the “AI Interpolation” menu and choose “Optical Flow.” It will let AI automatically adjust the video speed in slow motion with high quality.

Method 2: Using Speed Ramping
If you want to bring a professional look to Slow-motion videos, use Speed Ramping. It will ensure a smooth change in video speed when it increases or decreases. To add this refined touch to videos, look at the given steps:
Step 1Access the Speed Ramping Option in 2 Ways
Tap the “Speed Ramping” next to the “Uniform Speed” in the right-side panel. Optionally, you can right-click on your videos in the timeline. There, you will find the “Speed Ramping” option below the “Uniform Speed” option in the list.

Step 2Speed Ramping Your Videos and Get Render Preview
In the Speed Ramping Section, you will get 6 templates. Pick one or hit the “Customize” to design your own speed ramping in videos. Later, move to the toolbar of the timeline section and choose “Render Preview” next to the “Copilot” icon. It will bring a smooth playback of your speed ramping in videos.

Matchless Features of Wondershare Filmora
Wondershare Filmora offers a creative editing experience. It has a number of important features, some of which are discussed below:
AI Copilot: You can speed up your video editing process with the AI Copilot Editing function. It offers AI assistance anytime you need it and gives a quick response. This feature directs you towards the required feature with a button. To get assistance, users just have to prompt questions in natural language.
AI Text-Based Editing: You can edit your video content with the AI Text-Based Editing tool. This feature can transcribe your spoken words into editable text. Afterward, you can edit the text based on your preferences, and the changes in the video will be added. Moreover, Filmora allows you to save the generated text to reuse it in articles and blogs later.
AI Copywriting: If you are stuck creating a unique script, get help from AI copywriting in Filmora. It gives several video ideas to generate YouTube video titles and descriptions. This creative personal assistant will bring content aligning with your video goals. The generated script can be used to make videos from Filmora’s text-to-video feature.
Conclusion
Regular videos do not always generate the same level of response from viewers. Slow-mo videos can make a video more entertaining and improve the film’s narrative. It’s good to use when you want to draw attention to the most significant shot in a video. This article shows how to make slow motion in Premiere Pro and offers an amazing alternative. Thus, try to use Filmora and improve your editing experiences with ease.
Make A Slow Motion Video Make A Slow Motion Video More Features
Part 1: What Are Some Potential Real-Life Use Cases of Having Slow Motion Videos?
Slow-motion movies can be utilized to record and examine events in greater depth. Before delving into how to make a slow-motion video in Premiere Pro, learn its use cases. Thus, below are a few applications of the slow motion in real life:
- Medical Research and Imaging: Slow-motion videos are used in medical research and education. They thoroughly examine surgical methods and practices. This promotes medical practice improvement and student’s better comprehension of concepts.
- Cinematography and Filmmaking: Filmmakers use slow motion to add dramatic and creative effects. It can arouse feelings, highlight particular movements, or produce a dreamlike mood. In commercials, these videos create sequences of the message you want to convey.
- Wildlife Observation: Slow-motion recordings can be very useful in animal research. They can be used to watch and record animal activity more closely. It gives researchers a better knowledge of the animal’s habits.
- Sports analysis: Slow-motion effect can analyze an athlete’s movement mechanics and give reviews. Coaches and athletes pinpoint areas where their technique needs to be improved.
- Product Testing and Quality Control: Video effects also prove useful in industries. It allows engineers to inspect high-speed operations and identify any flaws or malfunctions.
- **Crash Test Analysis:**Analyzing slow-motion video is essential for examining vehicle crash tests. It aids in improving car designs and evaluating the performance of safety systems.
Part 2: Performing Slow Mo in Adobe Premiere Pro: Using A Good Option
Adobe Premiere Pro’s editing interface makes its reputation high in the market. It is known as the industry standard tool because of its unparalleled features. Content developers and filmmakers can arrange and edit video files on it. It can also improve audio and image quality with its extensive editing toolkit.
Premier Pro offers many more functions than basic video editing. It offers some features that can change your content creation journey. Following are some of its basic features that you should know before learning Premiere Pro how to slow motion:
- Auto Reframe: This feature keeps the object of the image in the frame no matter which frame you choose. You can easily auto-frame a single clip or go for the entire video.
- Text-Based Editing: Text-based editing can give you more control over the transcript. It can deal with multi-channel audio recordings and remove gaps with a single click.
- Color Settings: Color settings allow you to adjust colors quickly and easily. It can check the result by combining multiple color selections into a single tab.
- Audio Auto-Tagging: This feature classifies audio files as either dialogue, music, or ambiance. It then provides access to the most useful tools for producing high-quality audio.
This guide will tell you how to make a slow-motion video on Premiere Pro. Follow the steps below to decrease the speed of your video across Adobe Premiere Pro:
Step 1
Import your video into the timeline and right-click on the icon you see with the video file on the timeline. From here, go to “Time-Remapping” and click on “Speed.” You will know the function has been activated when you see the white line on your timeline.
Step 2
Expand the timeline to see the ramping line. Now click on the ramping line by using the “Ctrl + click” command. You can also add keyframes by going to the toolkit on the left side of the screen and selecting the “Add Keyframe” button. Another option is the time remapping speed settings from the top and activating the keyframe.
Step 3
Move the timeline cursor to the right side and add another keyframe there. Now, double-click on the first keyframe and drag it to the right side just a bit. After that, drag the speed ramping line downwards to create a ramp. To change the length of keyframes more precisely, go to “Effects Control” from the top and manage its length.
Part 3: Quick Alternative: Wondershare Filmora and Slow-Motion Clips
You might have gotten the answer to “how to make slow-motion video in Premiere Pro” until now. But another question comes into mind: “How to make slow-mo videos easily ?” Using Adobe Premiere Pro can be tricky for starters, so they look for alternative tools. Filmora is a great option if you struggle with using Adobe Premier Pro.
The tool is easy to use and can process heavy videos, keeping its quality intact. With its AI features, the edits that used to take hours can now be done within minutes. The tool has amazing options for all kinds of media editing.
Step-by-Step Guide to Perform Slow Motion in Filmora Using Different Methods
Remarkable features of Filmora do not end here. If you want to know more about Filmora, you should download it, but first, learn how to add slow motion in reels. In this read, follow the guide below:
Free Download For Win 7 or later(64-bit)
Free Download For macOS 10.14 or later
Method 1: Using Uniform Speed
Using this method, you can slow down your video smartly with the help of AI. Some options in uniform speed will help you to automate the process while ensuring the quality of the content. Look at the steps below to add slo-mo to your video like a pro:
Step 1Import Media to the Timeline and Explore Uniform Speed
Install Filmora 13 on your device and open it to access “New Project” from the main interface. When you enter the editing window, import your file into the media panel.
Step 2Adjust the Speed and Other Use Advanced Options
Later, drag that file to the timeline and right-click on it to get a list. Select the “Uniform Speed” option from that list and head to the editing panel opened to the right. Under the “Speed,” there will be a slider. You have to move it to the left for slow-motion video. While adjusting speed with that slider, track video duration from the “Duration” section. Below that option, you can toggle the “Reverse Speed” option if required.
Otherwise, check the “Ripple Edit” and “Maintain Pitch” option for good. Now, extend the “AI Interpolation” menu and choose “Optical Flow.” It will let AI automatically adjust the video speed in slow motion with high quality.
Method 2: Using Speed Ramping
If you want to bring a professional look to Slow-motion videos, use Speed Ramping. It will ensure a smooth change in video speed when it increases or decreases. To add this refined touch to videos, look at the given steps:
Step 1Access the Speed Ramping Option in 2 Ways
Tap the “Speed Ramping” next to the “Uniform Speed” in the right-side panel. Optionally, you can right-click on your videos in the timeline. There, you will find the “Speed Ramping” option below the “Uniform Speed” option in the list.
Step 2Speed Ramping Your Videos and Get Render Preview
In the Speed Ramping Section, you will get 6 templates. Pick one or hit the “Customize” to design your own speed ramping in videos. Later, move to the toolbar of the timeline section and choose “Render Preview” next to the “Copilot” icon. It will bring a smooth playback of your speed ramping in videos.
Matchless Features of Wondershare Filmora
Wondershare Filmora offers a creative editing experience. It has a number of important features, some of which are discussed below:
AI Copilot: You can speed up your video editing process with the AI Copilot Editing function. It offers AI assistance anytime you need it and gives a quick response. This feature directs you towards the required feature with a button. To get assistance, users just have to prompt questions in natural language.
AI Text-Based Editing: You can edit your video content with the AI Text-Based Editing tool. This feature can transcribe your spoken words into editable text. Afterward, you can edit the text based on your preferences, and the changes in the video will be added. Moreover, Filmora allows you to save the generated text to reuse it in articles and blogs later.
AI Copywriting: If you are stuck creating a unique script, get help from AI copywriting in Filmora. It gives several video ideas to generate YouTube video titles and descriptions. This creative personal assistant will bring content aligning with your video goals. The generated script can be used to make videos from Filmora’s text-to-video feature.
Conclusion
Regular videos do not always generate the same level of response from viewers. Slow-mo videos can make a video more entertaining and improve the film’s narrative. It’s good to use when you want to draw attention to the most significant shot in a video. This article shows how to make slow motion in Premiere Pro and offers an amazing alternative. Thus, try to use Filmora and improve your editing experiences with ease.
Splitting the Clips in Adobe After Effects [Step by Step]
Adobe After Effects is a complete software that is helpful in composition and animations, particularly for designers, web developers and animators. You can depend on Adobe After Effects to apply a number of effects and the availability of templates related to the motion graphics. It is among the tools of Adobe Creative Cloud and declared as the standard in videography.
Being a user offers a number of amazing effects that bring your images and videos into reality. This article is regarding the guideline for splitting the video clips in Adobe After Effects. Here, you will also know about the most appropriate substitute, Wondershare Filmora. Being economical, you can also use it practically.
How you can split the video clips in After Effects
The After Effects is versatile in terms of tools and complete potential for creating high-quality content. It can be the addition of the animation, making the effects of virtual reality, immersion of the graphics and improvement in the text input.
It is challenging to do editing in After Effects, but the tool kit is indeed powerful. You need to use this to create beautiful effects, and still, you need proper guidelines for several functionalities. Such as trimming and splitting of the video clips. Following are the easy steps to split the videos in the After Effects:
Step 1: After Effects, the main menu appears on the screen that consists of different projects. Now, you can proceed towards the number of settings after selecting “New Composition”. Adjust the frame rate, duration, resolution, background colour, and various options available to create your composition.

You can import the required video file. Simply click on “File”à ImportàFile. Now, this is the time to drag your video file on the timeline.

Step 2: After the first step, you need to drag the video file from the file box of “Project” that is on the top-left to the “Composition” box. Now, the video clip is visible on the new layer on the frame of the “Composition”.

Step 4: This is the actual step of selecting that point in the timings where you are looking for splitting the clip in After Effects. If you are using a PC, simply press CTRL +SHIFT+D. According to the selection, your required split video clip is now in two layers.

One more technique for splitting the videos in After Effects:
Splitting the video clips is also easily possible by duplicating and pressing CTRL+D. Do this action when it is in your timeline. Now there are similar copies of the clips and present in two layers. To cut down the layer according to the timeline marker, press ALT + or [ either].
An easier way to split the video clips
After Effects is, of course, a wonderful tool for editing videos and images, but the users are finding the pricing of After Effects unsuitable. Luckily, similar software is available that Filmora Video Editor considered an alternative.
It is capable of splitting the videos without losing their quality. The most important point about Wondershare Filmora is its assistance in completing all the tasks in a perfect manner. Apart from being a powerful tool, Wondershare Filmora can also split the video into different famous formats such as MP4, AVI, MPG, FLV and others. Export the videos after adding the effects of your own choice.
For Win 7 or later (64-bit)
For macOS 10.14 or later
Features:
- Editing of the text from advanced tools
- Controls available for controlling the speed of video and audio
- Importing the files to the social networking websites
- Splitting and layering of the video clips
- Mixing of the audio
- Recording of the screen and removing the noise
Wondershare Filmora is a proper selection if you are looking for trimming or want to split your videos. Following are the steps in complete detail regarding cutting the videos simply and a short time:
Step 1: Your video clips are on your timeline when you click on “Import” and drag them.
Step 2: In this step, selecting the clip is essential after dragging the video on the timeline. Keep moving the play head at the correct location from the ending of the first area and the starting of the other one. Now, you need to click on the “Split” button (the scissor icon is visible on the toolbar). It is for separating the videos into parts. You can also use this step with even larger video clips to make small video clips.

Step 3: After splitting the video, select any part of it and click on the Delete icon present on the toolbar for removing. Even, you can also add transitional effects at this stage.

Step 4: Save the video in the format of your choice. Select the format from the list available on the export window. After saving the clips from the complete video, it is easier to load the project again and export it individually.

Even though a number of editing software are available, Wondershare Filmora is the first choice for every user. No matter whether you are using it at the beginner or professional level. This is just due to the simplicity of the Wondershare Filmora. It also has advanced features that fulfil the demands and requirements of the user.
The whole interface is easy, straightforward, and suitable for Windows and Mac operating systems. There are a number of tools present in the Wondershare Filmora that is helpful in deleting the particular video clips, crop, changing the speed, and much more. Even, you can export your videos on your YouTube channels directly through the Wondershare Filmora. You can start using it without any assistance and proceed towards your editing tasks.
You can import the required video file. Simply click on “File”à ImportàFile. Now, this is the time to drag your video file on the timeline.
Step 2: After the first step, you need to drag the video file from the file box of “Project” that is on the top-left to the “Composition” box. Now, the video clip is visible on the new layer on the frame of the “Composition”.
Step 4: This is the actual step of selecting that point in the timings where you are looking for splitting the clip in After Effects. If you are using a PC, simply press CTRL +SHIFT+D. According to the selection, your required split video clip is now in two layers.
One more technique for splitting the videos in After Effects:
Splitting the video clips is also easily possible by duplicating and pressing CTRL+D. Do this action when it is in your timeline. Now there are similar copies of the clips and present in two layers. To cut down the layer according to the timeline marker, press ALT + or [ either].
An easier way to split the video clips
After Effects is, of course, a wonderful tool for editing videos and images, but the users are finding the pricing of After Effects unsuitable. Luckily, similar software is available that Filmora Video Editor considered an alternative.
It is capable of splitting the videos without losing their quality. The most important point about Wondershare Filmora is its assistance in completing all the tasks in a perfect manner. Apart from being a powerful tool, Wondershare Filmora can also split the video into different famous formats such as MP4, AVI, MPG, FLV and others. Export the videos after adding the effects of your own choice.
For Win 7 or later (64-bit)
For macOS 10.14 or later
Features:
- Editing of the text from advanced tools
- Controls available for controlling the speed of video and audio
- Importing the files to the social networking websites
- Splitting and layering of the video clips
- Mixing of the audio
- Recording of the screen and removing the noise
Wondershare Filmora is a proper selection if you are looking for trimming or want to split your videos. Following are the steps in complete detail regarding cutting the videos simply and a short time:
Step 1: Your video clips are on your timeline when you click on “Import” and drag them.
Step 2: In this step, selecting the clip is essential after dragging the video on the timeline. Keep moving the play head at the correct location from the ending of the first area and the starting of the other one. Now, you need to click on the “Split” button (the scissor icon is visible on the toolbar). It is for separating the videos into parts. You can also use this step with even larger video clips to make small video clips.
Step 3: After splitting the video, select any part of it and click on the Delete icon present on the toolbar for removing. Even, you can also add transitional effects at this stage.
Step 4: Save the video in the format of your choice. Select the format from the list available on the export window. After saving the clips from the complete video, it is easier to load the project again and export it individually.
Even though a number of editing software are available, Wondershare Filmora is the first choice for every user. No matter whether you are using it at the beginner or professional level. This is just due to the simplicity of the Wondershare Filmora. It also has advanced features that fulfil the demands and requirements of the user.
The whole interface is easy, straightforward, and suitable for Windows and Mac operating systems. There are a number of tools present in the Wondershare Filmora that is helpful in deleting the particular video clips, crop, changing the speed, and much more. Even, you can export your videos on your YouTube channels directly through the Wondershare Filmora. You can start using it without any assistance and proceed towards your editing tasks.
Are You Curious About the Functionality of LUTs in LumaFusion? This Article Will Satisfy Your Queries with Ease
LumaFusion is one of the best-known apps to enhance video quality without impacting the overlays. With this app, you can modify the video in several ways, such as applying LUTs to videos and synchronizing MultiCam clips. Yet, many users find it challenging to use LumaFusion to color grade the clips.
In this discussion, we will discuss color grading in LumaFusion and the procedure to use it. Moreover, we will also introduce an app that can streamline your workflow efficiency. The name of this app is Wondershare Filmora, and it will also help you to apply LUTs on computers.
Part 1: How Do LUTs Make Work Operation Easy?
Before getting into the free LUTs for LumaFusion, it is important to know the higher functionality of LUTs. If you are new to the field of video editing, you may have no idea how LUTs can improve your work operation. This section will help you to understand it without complications:
- Modern Styles and Looks: LUTs offers predefined and modernized styles and look that are created by specialists. As these LUTs have prebuilt color grading techniques along with file emulation, you can use them to increase the attractiveness of videos.
- Higher Workflow Efficiency: The prebuilt LUTs can make your work easier than ever. You can apply the LUTs to the videos in the simplest manner, along with saving time and effort.
- Compatibility of LUTs: There are no such device restrictions in LUTs, as you can use them on computers or mobile devices. Above all, LUTs are also compatible with several video editing software.
- Customization and Experimentation: While using the LUTs, you can customize them as per your needs without any problem. Other than this, you can also experiment the creativity and visual styles with LUTs.
Empower your videos with a new mood using different LUTs. Filmora now offers 100+ top-quality 3D LUTs cover a broad range of scenarios. Transform your videos with Filmora’s powerful 3D LUTs.
Apply LUT on Videos Apply LUT on Videos Learn More


Part 2: What Are the Potential Ways to Apply LUTs for LumaFusion?
There are considerable ways to apply LUTs in LumaFusion, but we plan to introduce the most straightforward ways. Don’t fret if you have no video editing skills. By following the below-given steps, you can experience the LumaFusion color grading:
Way 1: Apply LUTs Through Sharing
Step 1: Initially, import the video to LumaFusion and double-tap on a video in “Timeline.” Select the “Color and Effect” icon from the bottom and redirect to the “Cube” icon on the top.

Step 2: Next, tap on the “Import” button, and once you are on the “Thank You” page, select the “Download Link” button. Following this, hit “Copy to ZIP,” and after this, the ZIP folders will be loaded in the app.

Step 3: To proceed, you have to “Unzip the Folder” and locate the LUTs of your choice. Once you find the LUT, press the “Share” icon and tap “Open in LumaFusion.” Following this, the LUT will be added in LumaFusion.

Way 2: Apply LUTs Through LUT Name
Step 1: Open the video with LumaFusion and select “Timeline.” Tap on the “Color and Effect” sign and select the “Import” button. Following this, you need to select a tool for importing LUTs from the options of Box, Dropbox, Google Drive, Files, or Add/Edit Source.

Step 2: After selecting the source, tap on “LUT name” to add it to LumaFusion. To proceed, press the “Share” button and wait a few moments. Once the LUT is added, you can manage its intensity from the “Blend” sliders.

Part 3: Some Best LUTs To Discover For Using in LumaFusion
Now that you know the higher functionality of LUTs and their application procedure, you must be wondering what LUTs are best for LumaFusion. There is no need to be anxious, as this part will introduce some of the free LUTs for LumaFusion. Look below to learn more about these exceptional video editing elements:
1. Color Grading Central Free LUTs
If you want to add the best color grading LumaFusion LUTs, you need to seek help from the color specialist. Thus, you can use the Color Grading free LUTs designed by CGC. Their site is enriched with high definition and optimized color combinate LUTs. You will never get disappointed by using these LUTs as they never impact the content of the videos.

2. Frank Glencairn Free LUT
If you are still a fan of vintage films in this modernized and vibrant-colored world, this LUT is for you. With this, you can add a fantastic and realistic vintage look to any video. Other than this, it is very popular among filmmakers for introducing a backstory scene in films. Not only professional, but you can also use it to give a retro look to your videos.

3. Reverse Tree Media Free LUTs
With this absolutely free LUT, you can upgrade the quality of your videos with little effort. It also has very modernized LUTs utility, such as the Black Bar layer. You can use this to enhance the video quality of several types of videos, such as TV series or movies. It is quite a perfect pick for sad or backstory scenes. In addition to this, it also has 8mm, 16mm, and 35mm overlays.

4. Kodachrome-K-Tone LUT
With the help of this LUT, you can feel yourself in the era of the early 90s. It has mass-marketed colors along with a subtractive method, which makes it a better option. Moreover, this LUT can also escalate the captivity of promotional videos. You can also use it for magazine photo editing. If you are working on a video captured in low light, this can also fix all the coloring issues for you.

5. SmallHD Free LUTs
Another frequently used LumaFusion LUTs is SmallHD-free LUTs which can maximize your video productivity effectively. It can enhance the classical appearance of the videos. You can use it for both pre and postproduction enhancements. These LUTs give you both dramatic and cinematic vibes. You can apply it to action, thriller, melodramatic or other videos.

Part 4: Wondershare Filmora: Apply LUTs Easily on the Computer
Wondershare Filmora is a tool that gives you freedom of creativity without any complications. With this tool, you can modify your videos in several ways on Mac, Windows, or mobile devices. Filmora also has versatile video editing software to help new video editors in their professional journey. The AI tools present in Filmora have stunning effects on every user, as they can make your work easier than ever.
Add LUTs on Video For Win 7 or later(64-bit)
Add LUTs on Video For macOS 10.14 or later
For example, by using its AI Image, you can turn simple words into images. You can also split the screen and manage the keyframes of your video. One of the best things about Filmora is it lets you edit videos with full customization.

Key Features of Wondershare Filmora
- If you want to track the moments of the objects in the video, the Motion Tracking feature of Filmora got you covered. You can also add Mosaic effects to moving characters or objects in a video.
- There are diversified preset templates in Filmora through which you can make the video with a few taps. You are also free to create your own video template and share it with the world.
- With Filmora, you can edit multiple videos at once, as it supports the batch edit feature. Moreover, you can also add adjustment layers in the video to make non-destructive edits.
Conclusion
As this article states, you can turn simple videos into attractive ones with color-grading LumaFusion LUTs. There are several things that define the higher functionality of LUTs, and you can see the points above. Moreover, the instructions to apply LUTs with LumaFusion are also discussed above for the ease of users.
There are two ways available to achieve color grading, out of which you can select any one of your preferences. The other tool that can help you to apply LUTs on the computer is Wondershare Filmora . You can learn more about this from the above discussion.
Add LUTs on Video For Win 7 or later(64-bit)
Add LUTs on Video For macOS 10.14 or later
Apply LUT on Videos Apply LUT on Videos Learn More
Part 2: What Are the Potential Ways to Apply LUTs for LumaFusion?
There are considerable ways to apply LUTs in LumaFusion, but we plan to introduce the most straightforward ways. Don’t fret if you have no video editing skills. By following the below-given steps, you can experience the LumaFusion color grading:
Way 1: Apply LUTs Through Sharing
Step 1: Initially, import the video to LumaFusion and double-tap on a video in “Timeline.” Select the “Color and Effect” icon from the bottom and redirect to the “Cube” icon on the top.
Step 2: Next, tap on the “Import” button, and once you are on the “Thank You” page, select the “Download Link” button. Following this, hit “Copy to ZIP,” and after this, the ZIP folders will be loaded in the app.
Step 3: To proceed, you have to “Unzip the Folder” and locate the LUTs of your choice. Once you find the LUT, press the “Share” icon and tap “Open in LumaFusion.” Following this, the LUT will be added in LumaFusion.
Way 2: Apply LUTs Through LUT Name
Step 1: Open the video with LumaFusion and select “Timeline.” Tap on the “Color and Effect” sign and select the “Import” button. Following this, you need to select a tool for importing LUTs from the options of Box, Dropbox, Google Drive, Files, or Add/Edit Source.
Step 2: After selecting the source, tap on “LUT name” to add it to LumaFusion. To proceed, press the “Share” button and wait a few moments. Once the LUT is added, you can manage its intensity from the “Blend” sliders.
Part 3: Some Best LUTs To Discover For Using in LumaFusion
Now that you know the higher functionality of LUTs and their application procedure, you must be wondering what LUTs are best for LumaFusion. There is no need to be anxious, as this part will introduce some of the free LUTs for LumaFusion. Look below to learn more about these exceptional video editing elements:
1. Color Grading Central Free LUTs
If you want to add the best color grading LumaFusion LUTs, you need to seek help from the color specialist. Thus, you can use the Color Grading free LUTs designed by CGC. Their site is enriched with high definition and optimized color combinate LUTs. You will never get disappointed by using these LUTs as they never impact the content of the videos.
2. Frank Glencairn Free LUT
If you are still a fan of vintage films in this modernized and vibrant-colored world, this LUT is for you. With this, you can add a fantastic and realistic vintage look to any video. Other than this, it is very popular among filmmakers for introducing a backstory scene in films. Not only professional, but you can also use it to give a retro look to your videos.
3. Reverse Tree Media Free LUTs
With this absolutely free LUT, you can upgrade the quality of your videos with little effort. It also has very modernized LUTs utility, such as the Black Bar layer. You can use this to enhance the video quality of several types of videos, such as TV series or movies. It is quite a perfect pick for sad or backstory scenes. In addition to this, it also has 8mm, 16mm, and 35mm overlays.
4. Kodachrome-K-Tone LUT
With the help of this LUT, you can feel yourself in the era of the early 90s. It has mass-marketed colors along with a subtractive method, which makes it a better option. Moreover, this LUT can also escalate the captivity of promotional videos. You can also use it for magazine photo editing. If you are working on a video captured in low light, this can also fix all the coloring issues for you.
5. SmallHD Free LUTs
Another frequently used LumaFusion LUTs is SmallHD-free LUTs which can maximize your video productivity effectively. It can enhance the classical appearance of the videos. You can use it for both pre and postproduction enhancements. These LUTs give you both dramatic and cinematic vibes. You can apply it to action, thriller, melodramatic or other videos.
Part 4: Wondershare Filmora: Apply LUTs Easily on the Computer
Wondershare Filmora is a tool that gives you freedom of creativity without any complications. With this tool, you can modify your videos in several ways on Mac, Windows, or mobile devices. Filmora also has versatile video editing software to help new video editors in their professional journey. The AI tools present in Filmora have stunning effects on every user, as they can make your work easier than ever.
Add LUTs on Video For Win 7 or later(64-bit)
Add LUTs on Video For macOS 10.14 or later
For example, by using its AI Image, you can turn simple words into images. You can also split the screen and manage the keyframes of your video. One of the best things about Filmora is it lets you edit videos with full customization.
Key Features of Wondershare Filmora
- If you want to track the moments of the objects in the video, the Motion Tracking feature of Filmora got you covered. You can also add Mosaic effects to moving characters or objects in a video.
- There are diversified preset templates in Filmora through which you can make the video with a few taps. You are also free to create your own video template and share it with the world.
- With Filmora, you can edit multiple videos at once, as it supports the batch edit feature. Moreover, you can also add adjustment layers in the video to make non-destructive edits.
Conclusion
As this article states, you can turn simple videos into attractive ones with color-grading LumaFusion LUTs. There are several things that define the higher functionality of LUTs, and you can see the points above. Moreover, the instructions to apply LUTs with LumaFusion are also discussed above for the ease of users.
There are two ways available to achieve color grading, out of which you can select any one of your preferences. The other tool that can help you to apply LUTs on the computer is Wondershare Filmora . You can learn more about this from the above discussion.
Add LUTs on Video For Win 7 or later(64-bit)
Add LUTs on Video For macOS 10.14 or later
How D AI Video Games Act More Human Than Human?
How Did AI Video Games Act More Human Than Human?
An easy yet powerful editor
Numerous effects to choose from
Detailed tutorials provided by the official channel
The gaming world is ever-changing, with developers looking to create innovative ways to immerse players into their digital worlds. One such technology that has begun to sweep is AI in the game industry.
AI is a powerful tool in many ways to improve the gaming experience. It can make artificial intelligence in computer games more believable and add replayability and immersion to games, and we can expect to see even more impressive applications in the future.
In this article
01 [What Is AI in Gaming?](#Part 1)
02 [Why Does AI in Gaming Matter?](#Part 2)
03 [How AI Will Completely Change Video Games](#Part 3)
04 [8 Games with Incredible Artificial Intelligence](#Part 4)
05 [What AI Video Games Assets Do Filmora Have?](#Part 5)
Part 1 What Is AI in Gaming?
In simple terms, AI is a set of algorithms that allow a computer to learn and improve from experience. Although you can apply it in many ways, artificial intelligence in video games is usually helpful to create more intelligent and more believable non-player characters (NPCs).
For example, an AI system might be helpful to determine how an NPC reacts to the player’s actions. If the player tries to steal from an NPC, the AI might make the NPC angry and more likely to attack the player. Alternatively, if the player is friendly to an NPC, the AI game playing might make the NPC more likely to help the player in future interactions.
Part 2 Why Does AI in Gaming Matter?
One of the most vital aspects of AI in video games is that it can make games more believable and immersive for players. When games can convincingly simulate human-like behavior, it can be a much more enjoyable experience for gamers. AI can make NPCs seem more lifelike and make the game world feel more believable.
AI is also becoming increasingly important for creating procedural content. This is where the game generates content on its own, rather than relying on pre-made assets. For example, a game might use procedural generation to create random dungeons or quests that the player can explore. This can add a lot of replayability to a game, as the player never knows what they will encounter next.
Part 3 How AI Will Completely Change Video Games
It is not a secret that AI is changing the world as we know it. With its ability to enable computers to learn and improve from experience, AI is paving the way for a future where machines can handle more complex tasks. And nowhere is this more apparent than in the world of video gaming.
In the past, developers brought in AI primarily for simple things like making certain NPCs (non-player characters) move and act realistically. But now, artificial intelligence in video games is being used for much more complex tasks like generating procedural content and creating believable human-like behavior. This results in a new generation of AI game playing that are more immersive and playable.
Part 4 Games with Incredible Artificial Intelligence
Now, we will look into eight video games that signify why we need the best ai in video games.
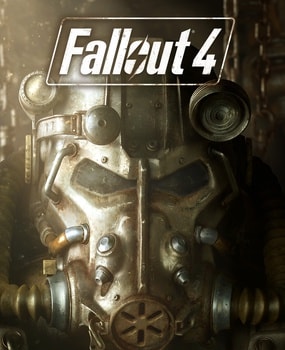
01Fallout 4
One of the most attractive examples of AI in video gaming is Fallout 4. This post-apocalyptic RPG features some of the most believable NPCs ever seen in a game. Each character is fully voiced, and they all have their unique personalities and backstories. The AI generates procedural content, meaning that the game world is always different each time you play.
02The Witcher 3: Wild Hunt
The Witcher 3: Wild Hunt is one more great example of an AI video game. This open-world RPG features a vast array of believable NPCs, each with unique personality traits and motivations. The AI is also used to generate procedural content, resulting in a different game world every time you play.

03Grand Theft Auto V
Grand Theft Auto V is yet another example of AI being used to create believable human-like behavior. The NPCs in this play are some of the most lifelike and realistic ever seen. They react to the player’s actions in believable ways, and the AI is used to generate procedural content, resulting in a game world that is always different.

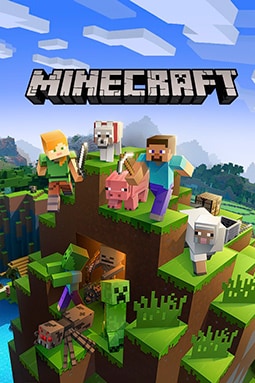
04Minecraft
Minecraft is a game that heavily uses procedural generation to create its content. The terrain and structures in the game are all generated on the fly by the AI, resulting in a different game world every time you play. What’s more, AI is also used to generate the behaviors of mobs (hostile creatures), making them more believable and lifelike.
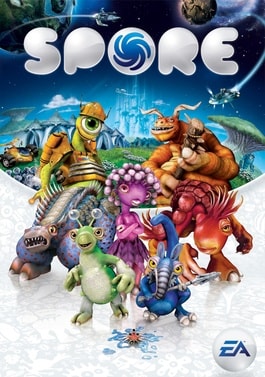
05Spore
Spore is an AI game play that is all about procedural generation. Every creature in the game is generated by AI, meaning that there are many possible creature designs. What’s more, AI is used to create creatures’ behaviors, making them more believable and lifelike.
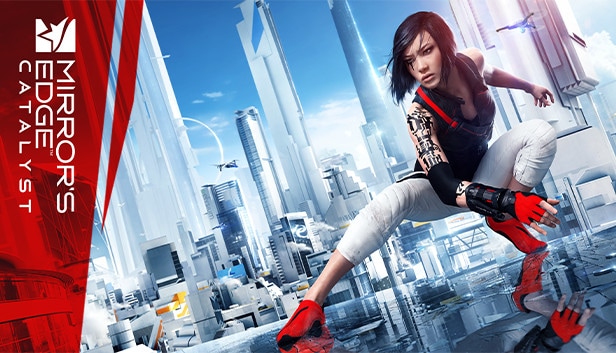
06Mirror’s Edge Catalyst
Mirror’s Edge Catalyst is a game that heavily uses AI to create its content. The levels in the game are all procedurally generated, meaning that they are different every time you play. This is made possible by the game’s AI, which produces the level layouts and obstacles on the fly.
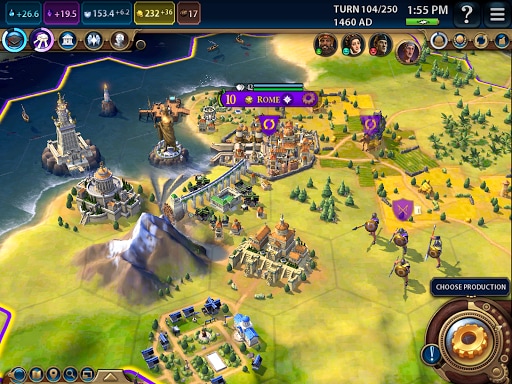
07Civilization VI
One of the most incredible examples of AI in video gaming is Civilization VI. This turn-based strategy game features some of the most believable NPCs ever seen in a game. Each character has its voice fully, and they all have unique personalities and backstories.
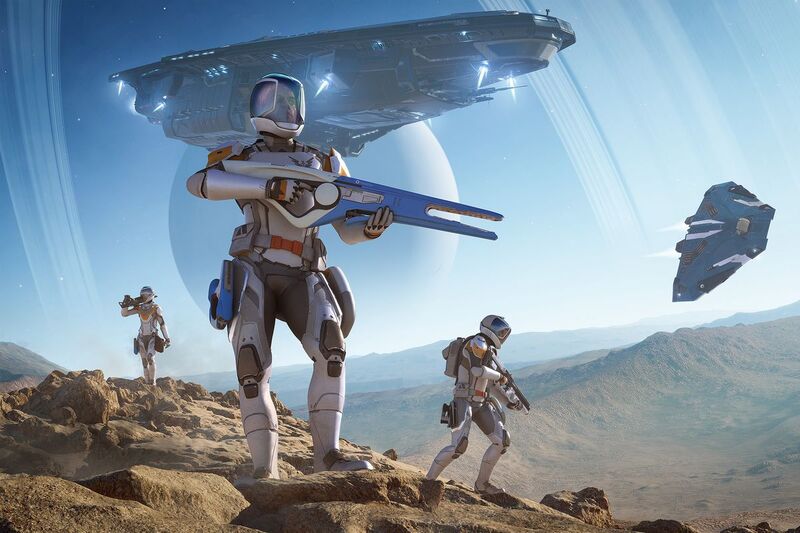
08Elite Dangerous
Elite Dangerous is a space simulation game that uses advanced AI to create believable and realistic human-like behavior. The NPCs in the game are some of the most lifelike and realistic ever seen. They react to the player’s actions in believable ways, and the AI is used to generate procedural content, resulting in a game world that is always different.
Part 5 What AI Video Games Assets Do Wondershare Filmora Video Editor Have?
With the increased use of AI in video games, most gamers have found gaming more enjoyable. However, an outstanding video editor has some assets that can significantly make AI video games better and more human. This video editor is one of the most sorted for and is called Filmora. Filmora is a great video editing software for creating stunning videos. It’s effortless to use and has various features to create professional-looking videos. It’s perfect for making videos for social media, YouTube, and other online platforms.
Its many features have a touch of artificial intelligence, making this program stand out from the other video editors and valuable for editing during ai video games creation.
Screen Recording
The Filmora screen recorder allows the user to concurrently record the screen and camera and the system and microphone audio. You can quickly record games, tutorials, YouTube videos, and other videos and then export them to YouTube, Vimeo, and other devices.
AI Portrait
The AI portrait function in Filmora video editor allows you to locate the human in your movie effortlessly and erase the background with a simple drag and click. There are also several portrait effects and AR stickers to add to your video editing enjoyment.
For Win 7 or later (64-bit)
For macOS 10.12 or later
Video Effects
Filmora customers can choose from various effects to utilize in their video editing software. It’s simple to create whatever effect you want with over 900 free effects, including drag-and-drop transitions, titles, filters, and motion components.
Do visit Wondershare Filmora exclusive website to know more about its latest upgrade and new features launch.
● Ending Thoughts →
● Thus, that was about what an ai video game is and why the characters act more like humans.
● So, as a video game lover, you can now explore the best of ai playing video games to have a personal experience of this new video gaming trend. Also, do try the Filmora software to see how you can change the looks and feel of your video game creation.
The gaming world is ever-changing, with developers looking to create innovative ways to immerse players into their digital worlds. One such technology that has begun to sweep is AI in the game industry.
AI is a powerful tool in many ways to improve the gaming experience. It can make artificial intelligence in computer games more believable and add replayability and immersion to games, and we can expect to see even more impressive applications in the future.
In this article
01 [What Is AI in Gaming?](#Part 1)
02 [Why Does AI in Gaming Matter?](#Part 2)
03 [How AI Will Completely Change Video Games](#Part 3)
04 [8 Games with Incredible Artificial Intelligence](#Part 4)
05 [What AI Video Games Assets Do Filmora Have?](#Part 5)
Part 1 What Is AI in Gaming?
In simple terms, AI is a set of algorithms that allow a computer to learn and improve from experience. Although you can apply it in many ways, artificial intelligence in video games is usually helpful to create more intelligent and more believable non-player characters (NPCs).
For example, an AI system might be helpful to determine how an NPC reacts to the player’s actions. If the player tries to steal from an NPC, the AI might make the NPC angry and more likely to attack the player. Alternatively, if the player is friendly to an NPC, the AI game playing might make the NPC more likely to help the player in future interactions.
Part 2 Why Does AI in Gaming Matter?
One of the most vital aspects of AI in video games is that it can make games more believable and immersive for players. When games can convincingly simulate human-like behavior, it can be a much more enjoyable experience for gamers. AI can make NPCs seem more lifelike and make the game world feel more believable.
AI is also becoming increasingly important for creating procedural content. This is where the game generates content on its own, rather than relying on pre-made assets. For example, a game might use procedural generation to create random dungeons or quests that the player can explore. This can add a lot of replayability to a game, as the player never knows what they will encounter next.
Part 3 How AI Will Completely Change Video Games
It is not a secret that AI is changing the world as we know it. With its ability to enable computers to learn and improve from experience, AI is paving the way for a future where machines can handle more complex tasks. And nowhere is this more apparent than in the world of video gaming.
In the past, developers brought in AI primarily for simple things like making certain NPCs (non-player characters) move and act realistically. But now, artificial intelligence in video games is being used for much more complex tasks like generating procedural content and creating believable human-like behavior. This results in a new generation of AI game playing that are more immersive and playable.
Part 4 Games with Incredible Artificial Intelligence
Now, we will look into eight video games that signify why we need the best ai in video games.
01Fallout 4
One of the most attractive examples of AI in video gaming is Fallout 4. This post-apocalyptic RPG features some of the most believable NPCs ever seen in a game. Each character is fully voiced, and they all have their unique personalities and backstories. The AI generates procedural content, meaning that the game world is always different each time you play.
02The Witcher 3: Wild Hunt
The Witcher 3: Wild Hunt is one more great example of an AI video game. This open-world RPG features a vast array of believable NPCs, each with unique personality traits and motivations. The AI is also used to generate procedural content, resulting in a different game world every time you play.
03Grand Theft Auto V
Grand Theft Auto V is yet another example of AI being used to create believable human-like behavior. The NPCs in this play are some of the most lifelike and realistic ever seen. They react to the player’s actions in believable ways, and the AI is used to generate procedural content, resulting in a game world that is always different.
04Minecraft
Minecraft is a game that heavily uses procedural generation to create its content. The terrain and structures in the game are all generated on the fly by the AI, resulting in a different game world every time you play. What’s more, AI is also used to generate the behaviors of mobs (hostile creatures), making them more believable and lifelike.
05Spore
Spore is an AI game play that is all about procedural generation. Every creature in the game is generated by AI, meaning that there are many possible creature designs. What’s more, AI is used to create creatures’ behaviors, making them more believable and lifelike.
06Mirror’s Edge Catalyst
Mirror’s Edge Catalyst is a game that heavily uses AI to create its content. The levels in the game are all procedurally generated, meaning that they are different every time you play. This is made possible by the game’s AI, which produces the level layouts and obstacles on the fly.
07Civilization VI
One of the most incredible examples of AI in video gaming is Civilization VI. This turn-based strategy game features some of the most believable NPCs ever seen in a game. Each character has its voice fully, and they all have unique personalities and backstories.
08Elite Dangerous
Elite Dangerous is a space simulation game that uses advanced AI to create believable and realistic human-like behavior. The NPCs in the game are some of the most lifelike and realistic ever seen. They react to the player’s actions in believable ways, and the AI is used to generate procedural content, resulting in a game world that is always different.
Part 5 What AI Video Games Assets Do Wondershare Filmora Video Editor Have?
With the increased use of AI in video games, most gamers have found gaming more enjoyable. However, an outstanding video editor has some assets that can significantly make AI video games better and more human. This video editor is one of the most sorted for and is called Filmora. Filmora is a great video editing software for creating stunning videos. It’s effortless to use and has various features to create professional-looking videos. It’s perfect for making videos for social media, YouTube, and other online platforms.
Its many features have a touch of artificial intelligence, making this program stand out from the other video editors and valuable for editing during ai video games creation.
Screen Recording
The Filmora screen recorder allows the user to concurrently record the screen and camera and the system and microphone audio. You can quickly record games, tutorials, YouTube videos, and other videos and then export them to YouTube, Vimeo, and other devices.
AI Portrait
The AI portrait function in Filmora video editor allows you to locate the human in your movie effortlessly and erase the background with a simple drag and click. There are also several portrait effects and AR stickers to add to your video editing enjoyment.
For Win 7 or later (64-bit)
For macOS 10.12 or later
Video Effects
Filmora customers can choose from various effects to utilize in their video editing software. It’s simple to create whatever effect you want with over 900 free effects, including drag-and-drop transitions, titles, filters, and motion components.
Do visit Wondershare Filmora exclusive website to know more about its latest upgrade and new features launch.
● Ending Thoughts →
● Thus, that was about what an ai video game is and why the characters act more like humans.
● So, as a video game lover, you can now explore the best of ai playing video games to have a personal experience of this new video gaming trend. Also, do try the Filmora software to see how you can change the looks and feel of your video game creation.
Also read:
- 6 Free Tools To Radial Blur Photos Online
- New 2024 Approved Color Correction Basics (S-LOG Footage)
- New 3 In-Camera Transitions Tricks To Make Videos
- New 2024 Approved Best Practical Tips to Improve Your Lighting in the Sun
- New Best 5 Tools to Help You Know More Freeze-Frame Video Editing Skills for 2024
- 2024 Approved If You Do Not Know How to Blur Faces in a Video on iPhone, You Are in the Right Place. We Have Provided You with All the Details You Need to Learn How to Blur Part of Your Video on Your iOS Device
- How to Select and Use The Best BRAW LUTs
- Updated In 2024, How to Make Vintage Film Effect 1950S
- This Article Will Reveal the Secrets of Choosing a Location to Shoot Your Viral Music Video. As Well as Tips to Make an Energetic Schedule for Shooting Days
- In 2024, Transform Your Videos Into 90S VHS Nostalgia for Free! Learn Where to Get Overlays and Use Filmoras Built-In Presets. Dive Into the Retro Realm Now
- How to Get Motion Blur in Roblox, In 2024
- New In 2024, How to Rotate AVI in Vertical/Portrait Orientation Windows, Mac,Android, iPhone & Online
- Updated 2024 Approved Easy Way to Add Transitions to Videos
- Updated Top Best Free LUTs For Premiere Pro
- Updated How Does the YouTube AI Algorithm Work - AI EXPLAINED for 2024
- New In 2024, Using the Best Templates to Create Slow Motion Videos on CapCut
- New In 2024, Bandicut Video Editor Review
- New 2024 Approved Detailed Tutorial to Resize Your Video in VLC
- Updated 8 Tips to Apply Cinematic Color Grading to Your Video
- New In 2024, 10 Apps to Make Videos with Pictures and Music
- Updated In 2024, Guide To Creating The Perfect VHS Effect Look in Premiere Pro
- 2024 Approved In This Article, We Are Going to Learn the Simplest Procedure on How to Cut And/Or Trim Videos Using VLC Media Player. Each Step Is Carefully Explained, with Screenshots Attached
- Updated 10 Top Free GIF Background Remover for PC and Online for 2024
- 2024 Approved Wondering About Vimeo Slideshow Maker? Know Everything About the Platform Which Is Gaining Much Popularity. Also, Browse some Tips to Create Appealing Video Slideshows
- Updated 15 Free Cinematic LUTs for Your Film for 2024
- New In 2024, Secret Tips & Tricks to Use in Filmora
- In 2024, 8 Tips to Apply Cinematic Color Grading to Your Videos
- In 2024, Learn About How You Can Create a Smooth Speed Ramp with Premiere Pro. Also, Find Alternative Software “WonderShare Filmora” For the Same Purpose with a Much Easier User Interface
- In 2024, How to Add a Slideshow in PowerPoint
- New Best Practical Tips to Improve Your Lighting in the Sun for 2024
- Updated In 2024, Things You Need to Know About Transparent PNG Remove and Convert
- How to Remove Audio From Videos with FFmpeg for 2024
- Ways to Make Sure Your Recording Slideshow in Powerpoint Is Not Wrong for 2024
- In 2024, How to Shoot Cinematic Footage with Phone
- 2024 Approved Why Your Transparent GIF Is Hard to Remove and How to Do With It
- Read This Article to Learn How to Convert Your Slow-Motion Videos Into Normal-Speed Videos in a Few Simple Steps and Methods. So, Stick to the End for 2024
- How to Make A Fantastic Café Vlog for 2024
- Updated 2024 Approved Free Drone LUTs For Perfect Drone Footage
- New In 2024, Steps to Rotate Videos in Lightworks
- 2024 Approved Find a Video Background Change Online that Works for You. This Article Contains Tools that Can Edit Video Backgrounds Online with Little Effort
- In 2024, How To Use Slow Zoom Effect in Your Video?
- New Best 10 Crazy-Cool Examples of AR Video
- New How to Add Subtitles in QuickTime Player for 2024
- New 2024 Approved How to Add Green Screen Effects In Phhotoshop
- 2 Ways to Monitor Vivo Y100A Activity | Dr.fone
- In 2024, What Pokémon Evolve with A Dawn Stone For Honor X50i? | Dr.fone
- In 2024, How to Reset a Infinix GT 10 Pro Phone that is Locked?
- For People Wanting to Mock GPS on Itel P55 Devices | Dr.fone
- 5 Best Route Generator Apps You Should Try On OnePlus Ace 3 | Dr.fone
- The Ultimate Guide to Vivo Y36 Pattern Lock Screen Everything You Need to Know
- How to Transfer Photos From Motorola Moto G04 to Samsung Galaxy S21 Ultra | Dr.fone
- In 2024, How Do I SIM Unlock My Apple iPhone XR?
- How to play HEVC H.265 video on Xiaomi 13 Ultra?
- How To Fake GPS On Samsung Galaxy A14 4G For Mobile Legends? | Dr.fone
- How to Recover Files after iPhone 8 Factory Reset? | Stellar
- In 2024, Ultimate Guide on Vivo Y100 FRP Bypass
- In 2024, Mastering Android Device Manager The Ultimate Guide to Unlocking Your Infinix Zero 5G 2023 Turbo Device
- In 2024, The Ultimate Guide to Get the Rare Candy on Pokemon Go Fire Red On Motorola Moto G04 | Dr.fone
- In 2024, How To Change Your SIM PIN Code on Your Nokia C110 Phone
- In 2024, How to Transfer Contacts from Vivo V27 to Other Android Devices Using Bluetooth? | Dr.fone
- New 2024 Approved Looking for Love Animated GIFs? Here Are 5 Free Sources For You
- In 2024, How to Unlock Xiaomi Redmi Note 12 5G Phone without Google Account?
- The Ultimate Guide to Get the Rare Candy on Pokemon Go Fire Red On Tecno Spark Go (2023) | Dr.fone
- How to remove Google FRP Lock on Itel P55 5G
- Top 10 Password Cracking Tools For Poco C50
- In 2024, How to Reset Apple ID and Apple Password From iPhone SE (2020)
- New Access All Matches Free World Cup Live Streaming Options
- Guide on How To Erase Apple iPhone 8 Plus Data Completely | Dr.fone
- Simple and Effective Ways to Change Your Country on YouTube App Of your Honor X9b | Dr.fone
- How to Unlock Nubia Red Magic 9 Pro+ Phone without Google Account?
- What are Location Permissions Life360 On Vivo G2? | Dr.fone
- In 2024, Complete Tutorial to Use GPS Joystick to Fake GPS Location On Samsung Galaxy S21 FE 5G (2023) | Dr.fone
- Title: New Making Slow Motion Videos in Premiere Pro A Review on The Best Methods for 2024
- Author: Chloe
- Created at : 2024-04-24 07:08:37
- Updated at : 2024-04-25 07:08:37
- Link: https://ai-editing-video.techidaily.com/new-making-slow-motion-videos-in-premiere-pro-a-review-on-the-best-methods-for-2024/
- License: This work is licensed under CC BY-NC-SA 4.0.
