
New Step by Step to Split Clips in VLC for 2024
Step by Step to Split Clips in VLC
The VLC media player is top-rated as it is freely available and operates on different platforms efficiently. Its framework helps play almost all the audios, videos, DVDs and various resources available on your systems. Even optimizing the videos and audio as the playback from your devices is possible. There is also a possibility of integrating a number of programs along with the streaming services.
You can even search the album covers. With the functionality of the playlist, you can play a number of films one after the other. This feature is helpful when you have downloaded the whole film in parts or watched different short films. The best part is to know it is not just a video player. It is an editor; yes, you heard it right. VLC is the correct choice for splitting or cutting your videos without facing any difficulties.
The article is a guide about the split of the videos in VLC. There is also a particular description of its alternative: Wondershare Filmora. It is suitable as well as reasonable.
How can you split the video clips in VLC?
VLC Media player has all the amazing tools for playing back the audios and videos regardless of the format. It is still on top of all the media players because of its simple interface. Below are the very easy steps to split the videos in the VLC media player.
Step 1: After completing the download, install the updated version of the VLC media player if it is not on your PC. Once it is installed, you need to double click on its icon for launching it.
Step 2: This step is the activation of the advanced controls in the media player. Click on “View” visible on the menu bar. Click on the “Advanced Controls” and appears the menu of four additional buttons more than the button for play or pause.

Step 3: Now, you can easily play the video simply by clicking the “Open File” option present in the media menu. The drag and drop option is available inside the VLC media player.
You should start playing the video now and recording the parts with the help of a decoder. Look for the position from where you want to begin the recording and press both Play and Pause buttons one after the other.
Even the Frame-by-Frame button is also available. It is the last one in the advance controls for navigating the actual frame from where you want to begin the recording.

Step 4:
Press the button “Record” again whenever you want the recording to stop. This is the final step for cutting the videos in VLC. The split video from the actual video saves automatically as the MP4 video file in the folder of Libraries or Videos if you are using Windows operating system.
Almost all, playing any video and audio format is possible in VLC media player. It includes AVI, MP4, FLV, WMV, RMVB and Quick time. You can even play the videos partially or preview them even before completing the downloads.

An easier way to split the video
The whole process of splitting the video into a VLC media player is extremely easy for managing and handling without any requirement of technical knowledge. But unfortunately, you can apply the frame-by-frame technique on the short videos. Monitoring is essential during the split and looking at the complete process whenever the recording is in VLC.
This causes the loss of quality. Here, the substitute that is also available is Filmora Video Editor . It is the recommendation of the graphic designers, web developers and videographers because it is freely available and lightweight software for the systems. You can apply its features to your images and videos. This includes the cutting, rotating and resizing of your videos along with the images.
For Win 7 or later (64-bit)
For macOS 10.14 or later
Features:
- There are 300+ special effects available
- Splitting of the screens and video clips
- Adding and tracking the motion graphics
- Unlimitedly sharing of the videos
- Addition of the transitional effects
- Dragging and dropping the video contents
- Customization of the effects
You can easily split and cut the large videos in Wondershare Filmora simply. There is no loss of video quality. Follow the steps below for splitting the video from Wondershare Filmora:
Step 1:
Import your videos to Filmora Video Cutter After installing the video cutter, launch it and select New Project to enter the video editing interface. Now, you need to import the video that needs to cut into several parts.

Step 2:
Drag and drop the videos in the timeline to start the splitting. Click the Split icon (scissor icon) on the toolbar or the Split button on the playhead to split the video

Apart from splitting the videos, you can even combine and merge different videos into one. Even the rotation of the videos is possible.
Therefore, Wondershare Filmora has received recognition due to its simple features. It is available for everyone, whether for individual, educational, or business purposes. It can help you in changing the look of your brand completely. Even adding the logos in the videos is also possible, along with adjusting the sizes. There is a huge range of features without any watermark, and all the upgrades are freely available.
Also, tech support is available for any assistance you need. Edit your images and videos on the social media platforms with ease, along with the adjusting tool. The perfect video editor is Wondershare Filmora, as it has compatibility with both Windows and Mac users. Correct and match the colour with the customization tools. Start using the Wondershare Filmora today without being concerned regarding the format of the video clips. You will definitely enjoy using it.
Step 3: Now, you can easily play the video simply by clicking the “Open File” option present in the media menu. The drag and drop option is available inside the VLC media player.
You should start playing the video now and recording the parts with the help of a decoder. Look for the position from where you want to begin the recording and press both Play and Pause buttons one after the other.
Even the Frame-by-Frame button is also available. It is the last one in the advance controls for navigating the actual frame from where you want to begin the recording.
Step 4:
Press the button “Record” again whenever you want the recording to stop. This is the final step for cutting the videos in VLC. The split video from the actual video saves automatically as the MP4 video file in the folder of Libraries or Videos if you are using Windows operating system.
Almost all, playing any video and audio format is possible in VLC media player. It includes AVI, MP4, FLV, WMV, RMVB and Quick time. You can even play the videos partially or preview them even before completing the downloads.
An easier way to split the video
The whole process of splitting the video into a VLC media player is extremely easy for managing and handling without any requirement of technical knowledge. But unfortunately, you can apply the frame-by-frame technique on the short videos. Monitoring is essential during the split and looking at the complete process whenever the recording is in VLC.
This causes the loss of quality. Here, the substitute that is also available is Filmora Video Editor . It is the recommendation of the graphic designers, web developers and videographers because it is freely available and lightweight software for the systems. You can apply its features to your images and videos. This includes the cutting, rotating and resizing of your videos along with the images.
For Win 7 or later (64-bit)
For macOS 10.14 or later
Features:
- There are 300+ special effects available
- Splitting of the screens and video clips
- Adding and tracking the motion graphics
- Unlimitedly sharing of the videos
- Addition of the transitional effects
- Dragging and dropping the video contents
- Customization of the effects
You can easily split and cut the large videos in Wondershare Filmora simply. There is no loss of video quality. Follow the steps below for splitting the video from Wondershare Filmora:
Step 1:
Import your videos to Filmora Video Cutter After installing the video cutter, launch it and select New Project to enter the video editing interface. Now, you need to import the video that needs to cut into several parts.
Step 2:
Drag and drop the videos in the timeline to start the splitting. Click the Split icon (scissor icon) on the toolbar or the Split button on the playhead to split the video
Apart from splitting the videos, you can even combine and merge different videos into one. Even the rotation of the videos is possible.
Therefore, Wondershare Filmora has received recognition due to its simple features. It is available for everyone, whether for individual, educational, or business purposes. It can help you in changing the look of your brand completely. Even adding the logos in the videos is also possible, along with adjusting the sizes. There is a huge range of features without any watermark, and all the upgrades are freely available.
Also, tech support is available for any assistance you need. Edit your images and videos on the social media platforms with ease, along with the adjusting tool. The perfect video editor is Wondershare Filmora, as it has compatibility with both Windows and Mac users. Correct and match the colour with the customization tools. Start using the Wondershare Filmora today without being concerned regarding the format of the video clips. You will definitely enjoy using it.
Top Animated Title Makers
You know that your video needs a title, but rather than just type in some bland text to introduce the video, you can create an animated title page that is far more attractive. Animated titles make a video more attractive and when done correctly, they can even guarantee that your target audience will stick around long enough to watch the entire video. They can also be very useful for introducing the content of the video.
But to make an effective animated title, you need a tool that is designed to do just that. In this article, we look at some of the top animated title makers that you can use to create the perfect animated title for your video.
Part 1. Animated Title Maker Online
If you don’t want to install software on your computer to create the animated title, the following are the top online tools to choose from;
Animaker
Link: https://www.animaker.com/text-animation-maker
Rating: 4.5/5
Animaker is an online tool that is specifically designed to help you create text animations that you can then add to your video project. Available online on all browsers, Animaker has a simple user interface that makes it easy to create text animations in a matter of minutes. It is so easy to use that even the average beginner can create stunning text animations.
If you don’t want to create the animations from scratch, Animaker has numerous pre-designed templates for you to choose from that you can then just edit to fit your design. It also has a lot of customizable infographics that you can repurpose.

Animatron Studio
Link: https://www.animatron.com/studio
Rating: 4.5/5
The Animatron Studio is a one-stop solution for generating all types of animated texts. You can use it to create the perfect animated title for your video, but its numerous features also mean that it is one of the best ways to create attention-grabbing animated banner ads that can be posted on various ad sites,
It has a wealth of resources that you can use to create the title including more than 500,000 royalty-free images, videos, and audio to include in your project. If you don’t want to build the animated content from the ground up, you can select from the 200 pre-animated sets that Animatron Studio provides.
Kapwing Title Maker
Link: https://www.kapwing.com/animated-text-video-maker
Rating: 4.5/5
If your goal is to do more than just create an animated title for your video, Kapwing is a good solution. It is a complete online video editor that can also be used to create animated titles. As such, you can expect Kapwing to have more advanced features that allow you to customize the animated title in various ways.
For instance, it has a huge selection of animations that you can apply to the text. But you also get the option to upload your own animations, colors, and fonts. But please note that the free version of Kapwing will add a watermark to the video.

Biteable Animated Text Maker
Link: https://biteable.com/animated/text/
Rating: 4.5/5
Biteable is one of the most popular solutions that you can use to create all kinds of animated texts. It is simple enough to use that it is useful to both professionals and amateur video creators. It has numerous useful features including custom scenes, foundations, backgrounds, and characters all of which can work together to create the perfect animated title.
One of the main benefits of choosing Biteable is that you can share the videos you edit directly on social media without having to download the video.

Flexclip Video Maker
Link: https://www.flexclip.com/editor/
Rating: 4.5/5
Flexclip is another very easy-to-use and easily accessible solution to create animated texts for videos. Rather than create the texts from scratch, Flexclip allows you to create stunning animated texts just by selecting several parameters.
There are also a lot of pre-made designer text templates that are fully customizable. All you have to do is select one of the templates, and change the text, font, and any images to make it unique to you and your video.

Part 2. Animated Title Maker for Computer
Online tools can be useful, especially since they are more easily accessible. But if you want additional features and more ways to customize your animated title, the following desktop solutions may be more applicable to you;
Filmora
Rating: 4.5/5
Wondershare Filmora is a complete suite of video editing tools that can also come in handy when creating animated titles for videos. It is a very simple video editor with a simple user interface, making it an ideal solution even for beginner users. Adding a title to your video is easy and you get to choose from more than 200 different animations that you can apply to bring the text to life.
Filmora is also very useful because it comes with advanced editing features for the professional editor. You can use it to edit all aspects of the video including the clips and even any audio that may be on the project.

Adobe Animate
Rating: 4.5/5
Adobe Animate is a great option to create various animations for your video project, including animated texts. Used by animators to create 2D animated content, Adobe Animate has a lot of features designed to facilitate this kind of animation and is, therefore, one of the go-to solutions for designers looking to create illustrations like logos and infographics.
But like other Adobe programs, Adobe Animate is not very easy to use and the beginner may find that it takes quite a long time to figure out how it works. But once you figure it out, the 800+ web fonts can make it very easy for you to customize your animated title in various ways.

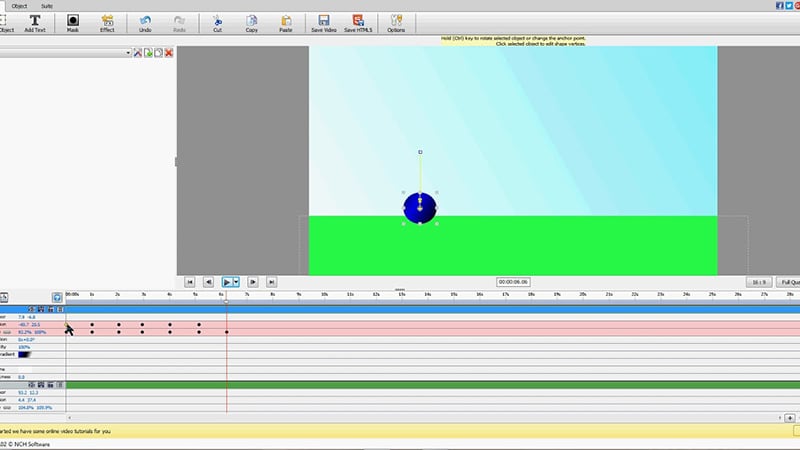
Express Animate
Rating: 4.5/5
Express Animate is a completely free program that you can download on your computer. It is a complete video editor which means that you can use it to animate text and characters, but it is also a great way to edit other aspects of the video including the audio tracks and adding digital effects.
With a simple user interface, Express Animate allows users to create 2D animations that can be used to create unique videos. It is also a good way to create GIFs and memes.
Movavi Video Editor
Rating: 4.5/5
Movavi Video Editor is another complete suite of editing tools that can also come in handy when you want to create an animated title for your video. Designed for both professionals and beginners, this video has all the advanced features you will need to edit all aspects of your video, including a built-in audio editor.
When it comes to animation, Movavi has a lot of effects and transitions as well as pre-made title templates to choose from. Once you have selected the title, you can easily customize the font and color to fit into your project.

Windows Movie Maker
Rating: 4.5/5
For PC users Windows Movie Maker is a simple to use and free way to edit videos. Included with the Windows OS, you likely don’t need to install any software to use and even though it is a free solution, Windows Movie Maker does have the necessary features to create and add animated titles to any video.
It comes with numerous effects, transitions, and templates to choose from when animating text. And it can also be used to edit videos in other ways including trimming and merging clips.

Part 3. Animated Title Maker Apps
If you are editing your videos on your mobile device, the following are the top animated title-making apps to choose from;
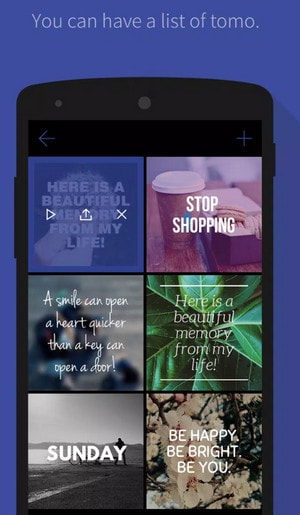
Tomo
Rating: 4.5/5
Link: https://m.apkpure.com/tomo-animate-text-in-video/com.entzeners.app.tomo
Tomo is one of the best apps that you can use to animate text in a video. It has robust features that allow you to easily add text to the video and then animate the text using various transitions and effects. Once the edits are complete, Tomo allows you to share the completed video directly on social media apps like Instagram and Twitter.
Adobe Spark
Rating: 4.5/5
Link:https://apps.apple.com/us/app/adobe-spark-post-design-maker/id1051937863
Available for both Android and iOS devices, Adobe Spark is a video editing tool that has numerous tools to add and edit texts on videos. You can use the professionally designed templates that you have access to when using Adobe Spark to create stunning animation titles. And since it easily integrates with other apps on the device, sharing the videos is very easy.
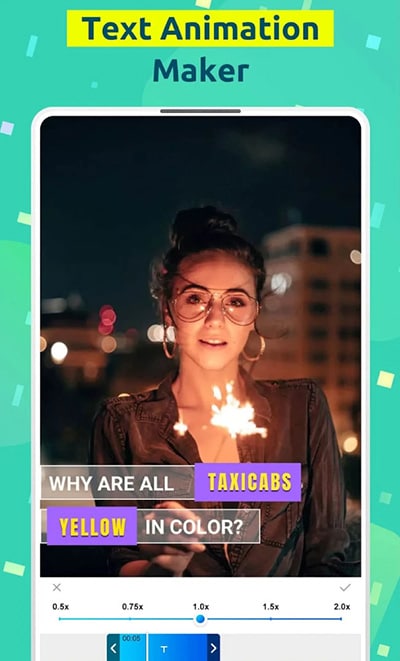
Quik
Rating: 4.5/5
Link: https://play.google.com/store/apps/details?id=com.gopro.smarty&hl=en&gl=US
Quik is an app that is dedicated to text animations and therefore one of the best solutions when you want to add and edit texts on videos. It is available for both iOS and Android and although the free version of the app is slightly limited, its basic editing features are still better than what you find on other more expensive solutions.
Hyper-type Animated Text Videos
Rating: 4.5/5
Link: https://itunes.apple.com/us/app/hype-type-animated-text-videos
This app gives you two options when it comes to animating the text on your video; auto-motion and typography. It focuses on just adding and editing text on a video and as such may not have any of the other video editing features you will find on some of the other apps. But if your goal is to create an interactive animated video title, Hyper-type Animated Text Videos is a great solution.
Vimeo
Rating: 4.5/5
Link: https://play.google.com/store/apps/details?id=com.vimeo.android.videoapp&hl=en&gl=US
Also available for both iOS and Android devices, Vimeo can also be a handy solution for the creation and editing of animated titles for videos. It has a lot of features to edit not just the text in videos, but also all other elements including audio. You even get a wide selection of royalty-free music that you can add to the video and motion stickers to make your title stand out even more. But the free version of Vimeo will add a watermark to the video.

Free Download For Win 7 or later(64-bit)
Free Download For macOS 10.14 or later
YouTube Algorithm Hacks 2024
Every day, more than 1 billion hours of YouTube videos are seen by users worldwide, including cat videos and videos for cats. The YouTube algorithm determines the videos YouTube recommends to its more than 2 billion human users (and untold numbers of feline users).

The subject of how to encourage YouTube’s algorithm to promote your videos and give you more likes is crucial for marketers, influencers, and creators alike.
We’ll discuss what the algorithm is (and isn’t), the most recent updates for 2022, and how experts use
YouTube’s search and discovery tools to push their videos in front of viewers in this blog post.
Let’s start!
Part 1. YouTube’s algorithm’s history
The YouTube algorithm: What is it? Let’s take a quick look at how YouTube’s algorithm has evolved through time and how it functions now in order to respond to your question.
2005 to 2011: Click-and-view optimization
In order to crowdsource footage of Janet Jackson and Justin Timberlake’s infamous Superbowl performance, according to YouTube founder Jawed Karim (a.k.a. the star of Me at the Zoo), YouTube was established in 2005. Therefore, it should not be surprising that YouTube’s algorithm for many years displayed suggested videos that had the most views or clicks. Unfortunately, this resulted in an increase in deceptive titles and thumbnails, or clickbait. User experience suffered as a result of videos that made viewers feel duped, dissatisfied, or just plain irritated.
2012: Watch time optimization
YouTube made changes to its recommendation engine in 2012 to account for the amount of time spent watching each video as well as the total amount of time spent on the site. According to theory, when people find videos important and engaging, they watch them for a longer period of time, possibly all the way through. Due to this, some creators tried to make their movies shorter to enhance the likelihood that viewers would watch them through, while others made their videos longer to boost overall viewing time. YouTube maintained the official line—create content your audience wants to watch, and the algorithm will reward you—while refusing to support either of these strategies. However, as anyone who has used the internet for any length of time can attest, not all time spent online is created equal. YouTube has adopted a new strategy.
2015–2016: maximizing fulfillment
In addition to emphasizing direct reaction metrics like Shares, Likes, and Dislikes (and, of course, the extremely cruel “not interested” button), YouTube started monitoring viewer happiness directly using user surveys in 2005. YouTube published a whitepaper titled Deep Neural Networks for YouTube Recommendations in 2016 that detailed some of the inner workings of its AI.
2016-present: demonetization, and brand safety
The size and popularity of YouTube have led to an increase in content moderation difficulties over time, and what the algorithm suggests is now a major topic for news outlets and the government in addition to creators and advertisers.
YouTube has stated that it takes seriously its obligation to promote a variety of viewpoints while limiting the spread of damaging false material. For instance, algorithm modifications implemented in the beginning of 2019 have reduced consumption of questionable content by 70%. (According to YouTube, borderline content is that which is harmful or misleading but doesn’t quite go against community standards. On the other hand, offensive material is taken down right away.)
Creators are impacted by this problem because they worry about unintentionally breaking the constantly evolving community rules and getting punished with strikes, demonetization, or worse. (In fact, enhancing openness for community norms for artists is one of YouTube’s priorities for 2021, according to CEO Susan Wojcicki.) Brands and advertisers are also impacted since they don’t want their name and logo to be associated with white nationalists.
Politicians in America are growing more concerned about the societal impact of social media algorithms like YouTube’s. Democrats introduced the “Protecting Americans from Dangerous Algorithms Act” in early 2021, and YouTube (and other platforms) have been called to testify before Senate committees about their algorithms. Let’s now discuss what is known about this hazardous beast’s mechanism.
Part 2. How will YouTube’s algorithm function in 2022?
The YouTube algorithm chooses videos for users with the intention of finding the most relevant content for them and keeping them interested. When we refer to “the algorithm,” we mean one of three selection or discovery techniques that are related but slightly different: three different algorithms: one that chooses videos for YouTube’s main page, one that ranks the results of any given search, and one that chooses what videos users should watch next are used.
According to YouTube, in 2022 the majority of channels’ top traffic sources would often be their homepage and suggested videos. With the exception of explainer or instructional films, which frequently receive the most traffic via search (e.g., “how to tune up a bicycle”)
Part 3. How is the algorithm set up on YouTube?
What ranking factors does YouTube consider when deciding which videos to display to users? Every traffic source varies a little. But in the end, a combination of factors including customization (the history and preferences of the viewer) performance (the success of the video) external variables (the overall audience or market)
Part 4. How YouTube determines its homepage algorithm
The YouTube algorithm presents a wide selection of videos that it thinks a user might like to view every time they open the YouTube app or type in youtube.com. Because the computer hasn’t yet determined what the viewer wants—acoustic versions of popular songs, for example—this selection is frequently broad. talks that are motivating against procrastination? to watch their preferred possum vlogger? Two categories of ranking signals are used to determine which videos appear on the homepage:
Performance:
YouTube gauges performance using indicators including the click-through rate, typical viewing time, typical percentage of views, likes, and disapproval ratings from viewers. After you upload a video, the algorithm initially displays it to a small number of users on their homepage. If it appeals to, engages, and satisfies those viewers (i.e., they click on it, watch it through, like it, share it, etc.), then it is then presented to an increasing number of users on their homepages.
Personalization:
However, the trending tab does not include YouTube. According to their past activity, also known as their watch history, or personalization, YouTube suggests videos to users based on what it believes are relevant to their interests. More of the same will be presented to a user if they frequently watch a particular channel or show they have an interest in. This element is also responsive to behavioral alterations throughout time as a person’s affinities and interests change.
Conclusion
It’s a fallacy that the algorithm would penalize you for publishing too regularly or insufficiently frequently, even if YouTube undoubtedly promotes the idea of uploading constantly in order to develop and maintain a relationship with your audience. The growth of the audience is unrelated to the interval between uploads. The zeitgeist can change quickly, but by keeping an eye on Google Trends and giving yourself opportunity to explore, you won’t fall behind.
Free Download For Win 7 or later(64-bit)
Free Download For macOS 10.14 or later
Free Download For macOS 10.14 or later
M31 LUT (Teal and Orange LUT) Free Download
Today’s article will be fascinating for all those who want to shoot their films at home and become a filmmaker. As upon M31, LUT (teal and orange) is one of the most used LUTs in various films. It was first introduced in Hollywood, and there are many movies that use this style for color correction, such as the well-known Transformers, Star Trek, Mad Max, and Wonder Woman. The spectator can rapidly comprehend the information in the image and quickly tell the topic from the backdrop thanks to the two contrasting hues of teal and orange, which are more common in nature. These colors can also merge more smoothly with the rest of the image. In this article, we will discuss how to use it and other amazing LUTs in your videos. So let’s begin!
Part 1. What is M31 LUT (Teal & Orange LUT)?
M31 LUT (Teal & Orange Lut) is one of the most used LUTs in Hollywood and other cinematic industries. This LUT help to get your video the cinematic colors of teal and orange. The contrast between the two colors teal and orange is clear, but there are also other colors present in nature. For example, human skin is mostly composed of the colors yellow, red, and brown. Because blue is the complement of these colors, teal is their contrast color.

Other quality features are Color Remapping, Skin Toning, Saturation, etc. In other words, it helps your videos look like popular Hollywood films as they also use this same LUT in their movies. Its popularity in Hollywood films may be due to a number of factors, but one of the most crucial ones is that it gives the scene a cohesive mood by allowing disparate aspects to mirror one another and emphasize the overall qualities of the scene.

Why is it necessary to discuss the Teal & Orange LUT separately since they are now so popular? The fact that you may utilize this approach for a very long time to enhance the color quality of your own work and your own use of color is what matters most.
The following sections discuss downloading and using these LUTs in your videos.
Part 2. M31 LUT (Teal & Orange LUT) free download
1. Orange and Teal Lightroom Presets by SparkleStock (Lite)
SparkleStock is well-known for its variety of LUTs with its featured appearance on many brands. This Sparkle stock pack contains the M31 Teal and Orange LUT with seven other LUTs.
The download link of the LUT is here .
2. Orange-and-Teal-LUTs-Pack-by-Navpreet-Singh-ShareAE.com
Navpreet Singh is a growing designer. However, he offers some good packs of LUTs. One of which is the Orange and Teal LUTs pack. There are eight variations of M31 LUT available in the pack.
The download link of the LUT is here .
3. Orange and Teal - Kevin Aryal Tutorial
This pack also has nearly six various M31 Orange and Teal LUT. Kevin Aryal Tutorial, a source of many effects and LUTs, offers this pack.
The download link of the LUT is here .
4. DaVinci Resolve 18
DaVinci Resolve 18 also has a good name in providing LUTs and effects. They also offer the M31 Orange and Teal LUT with a variety of many more effects.
The download link of the LUT is here .
5. FG-Free-Cine-LUTs-Pack-v2
Filtergrade is another trusted source to get different LUT packs. This pack by Filtergrade has various cinematic effects, including the M31 Teal and Orange LUT.
The download link of the LUT is here .
Part 3. How to use LUTs in Filmora Video Editor?
In addition to M31 LUTs, Filmora offers more than 100 LUT packages to pick from when color grading your videos. Select the LUT that best suits your video, then use Filmora to add it. To add a sophisticated effect to your clips, follow these steps:
- Once your video clips have been imported, select LUT from the Effects tab. Here, you may view more than 100 different LUT styles to match various themes and moods.

- Or you can just click on the “Tools > Color > Color correction”. You may improve the picture quality by adjusting the color details, contrast, light, and shadows here.


- If you want to use other preset LUTs, click on the drop-down menu and select the Load LUT option. Then, choose the downloaded LUT and click OK button.

Conclusion
Therefore, to help those who want to add amazing LUTs like M31 (teal and orange) in their videos to give them a cinematic look, we hope this article will be helpful. You can use the traditional LUTs that we suggest, and if you’re still having some difficulty with color grading, you’re welcome to try Filmora’s color grading tool to help you out.
Free Download For Win 7 or later(64-bit)
Free Download For macOS 10.14 or later
Free Download For macOS 10.14 or later
Also read:
- [New] Smile with These Top Funny TikTok Videos and Jokes
- [Updated] Note to Call How To Convert Tamil Songs Into Ringtones
- All About Factory Reset, What Is It and What It Does to Your Honor 70 Lite 5G? | Dr.fone
- Easy Ways to Stream MKV Video Formats on iOS Devices
- Exploring the New MacBook Pro Model M3: Release Date Insights, Price Points & Tech Specs Unveiled
- Guide: Solving Windows Media Player Connection Errors Effectively
- How to Use a Stabilization Tool in Filmora for 2024
- In 2024, Do You Want to Excel at Using Adobe Premiere Pro Software for Splitting Videos and Audio? Learn About Splitting a Video and Audio Using Different Tools and Add a New Skill to Your Skillset with a Step-by-Step Guide in This Article
- In 2024, How to Loop Video in Canva
- In 2024, Is Fake GPS Location Spoofer a Good Choice On OnePlus 11R? | Dr.fone
- In 2024, Learn How to Convert MP4 Videos to 60 FPS GIFs with This Easy-to-Follow Tutorial. Get Smooth and Crisp Motion in Your GIFs in Just a Few Simple Steps
- Install Oculus Headset Support on Your PC: Driver Downloads for Win11/10/8/7
- Mastering Fluid Gameplay: Optimize FPS and Reduce Lag in Fall Guys
- New 2024 Approved How To Add Motion Blur On CapCut? (IPhone & Android)
- New How To Make a Video by Mouse in Filmora for 2024
- Title: New Step by Step to Split Clips in VLC for 2024
- Author: Chloe
- Created at : 2025-02-26 17:02:09
- Updated at : 2025-03-04 09:06:31
- Link: https://ai-editing-video.techidaily.com/new-step-by-step-to-split-clips-in-vlc-for-2024/
- License: This work is licensed under CC BY-NC-SA 4.0.