:max_bytes(150000):strip_icc():format(webp)/GettyImages-1353420724-65161751b9924195880d3273e327cb54.jpg)
New The Best 10 GIF to JPGPNG Converters for 2024

The Best 10 GIF to JPGPNG Converters
A GIF to JPG converter software is responsible for altering files in the animated GIF format to static JPG or PNG image format. Since GIFs are not compatible with some sites, platforms, or documentation types, this is a safer alternative.
JPG, PNG, and even APNG formats are easier to download, work on most device/OS types, and are simpler to print. They have a lesser size as well.
If you are looking for a stable converter, we present the top tools for that here, no matter what kind of devices you use! Read to know which ones you can use based on their features, usability, and support.
10 Best Tools to convert GIF into JPG/PNG/APNG
The following are the best converters for turning GIF into JPG, APNG, or PNG formats.
1. OnlineConvert
One of the simplest GIF to JPG converter types is OnlineConvert. It has diverse customization settings. For example, you can choose the image size and quality or use AI-powered optimization support.
How to download: iOS , Android , Online tool , Chrome extension , Firefox extension
Rating: 3.7 stars out of 5 (Google Play Store)
Compatible OS: web-based, iOS, Android
Price: Free
Main Features:
- Advanced features like Equalize, Stabilize, etc.
- Decide the black/white threshold limits.
- Activate AI enable for optimized conversion.
- Set cropping limits.
Pros
- Decide the image quality.
- Choose image width/height.
- Add an example file.
Cons
- The maximum size of the file is 100 MB.
- It cannot convert encrypted files.
2. Ezgif
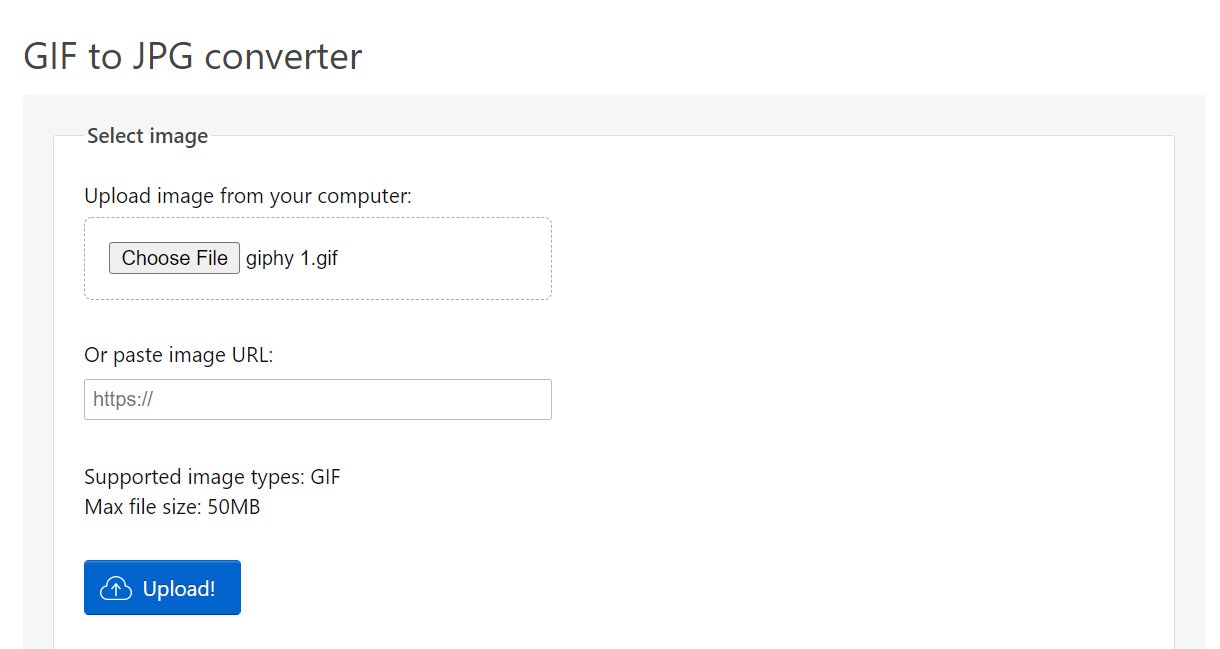
Ezgif is another simple-to-use online tool with substantial image conversion benefits. You can add your GIF files from the Cloud account or computer and directly get JPG files. PNG does not have a direct conversion here, though.
How to download: Online tool
Rating: 100 out of 100 (Scam Detector)
Compatible OS: web-based browsers
Price: Free
Main Features:
- Support a maximum of 50 MB file size for images.
- Direct converter to JPG.
- Set background color to white.
- Add URL link of online GIF files.
Pros
- Instant conversion.
- No changes to original file quality.
- Add from the device.
Cons
- Upload and convert files one by one.
- No cloud support.
3. CloudConvert
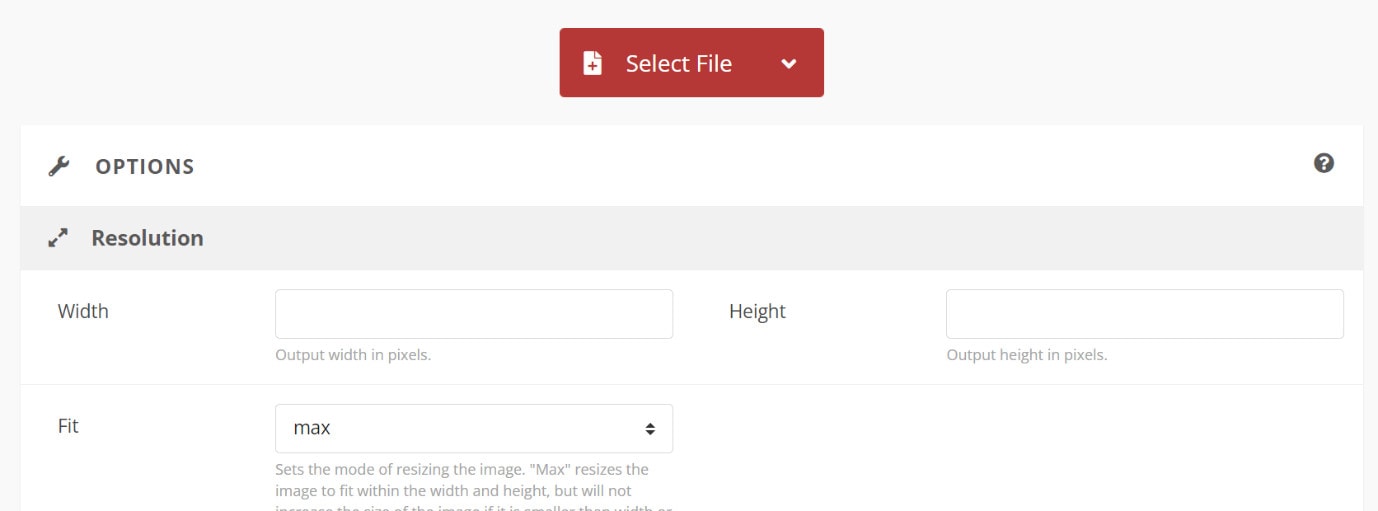
CloudConvert is a high-quality online GIF to PNG converter that people can use to convert high-quality image files with no quality loss. First, choose your files, go for settings, and then the converting will be finished in minutes.
How to download: Online tool
Rating: 4.5 stars of 5 (Capterra)
Compatible OS: web-based
Price: Packages/Subscriptions- Costs start at USD 8 per conversion minute.
Main Features:
- Select a file from various formats, like URL, Device, or cloud accounts.
- Set crop/scape adjustments.
- Note image width and height.
- Select to strip or vice versa.
Pros
- Customize output file type.
- Support watermark security feature. It protects your images and graphic files from being stolen, used, or altered without the owner’s permission.
- High-quality image resolution is available.
Cons
- Slightly complex for beginners to understand or use initially.
- Bigger files take a longer time to load.
4. Convertio
Convertio is another top-grade GIF to JPGF converter which people can utilize to prepare high-definition image files from animated pictures. You can make multiple conversions and get high-priority customer support.

How to download: Online tool
Rating: 4.9 stars of 5 (Capterra)
Compatible OS: web-based
Price: Light- USD 9.99/month, Basic- USD 14.99/month, Unlimited- USD 25.99/month
Main Features:
- Get at least 25 concurrent conversion benefits with paid plans.
- Adfree pages.
- Unlimited conversions are only supported by the highest-paid plan.
- Unlimited allowed conversion minutes for users daily.
Pros
- The drag and drop function is smooth to use.
- Add files with at least 100 MB file size.
- Multiple formats are supported.
Cons
- Signup is necessary for a higher file size allowance.
- More limited service for free.
5. Soda PDF
This GIF to PNG converter is top-notch and used for changing big and small-sized GIF files into static PNG or JPG formats. However, no issues with image quality would be noticeable. You can use it for multiple conversions.

How to download: Online tool
Rating: 3.4 stars of 5 (Capterra)
Compatible OS: Online, Mac, Windows, Linux
Price: Standard- USD 6.73/month, Pro- USD 8.23/month, Business- USD 16.63/month
Main Features:
- Add GIF files from the computer, Dropbox, or Google Drive.
- Files are stored for a full day.
- Direct download button available.
- Redo conversion in case of issues.
Pros
- A desktop version with offline usage is available.
- The drag and drop function makes the converting process more convenient.
- Quick file saving.
Cons
- Cannot access old converted files from servers.
- Ads are available.
6. FreeConvert.com
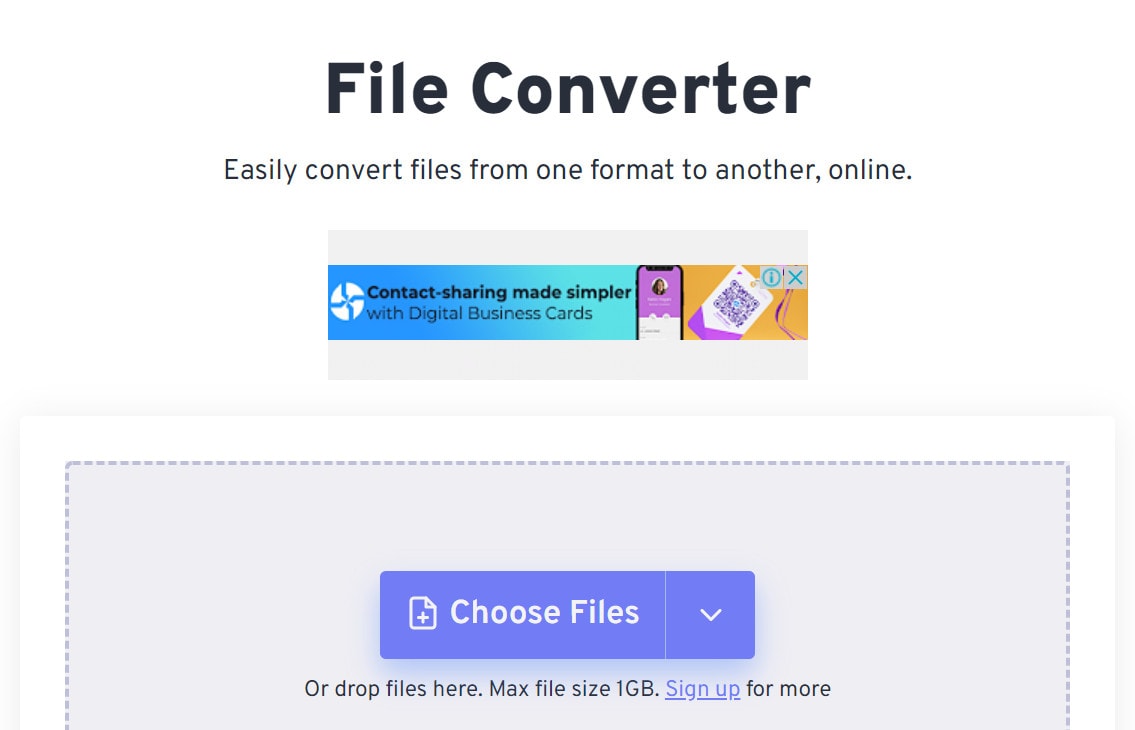
FreeConvert is operable for multiple types of file conversions. In addition, you can store your files in the cloud and handle various tasks simultaneously, depending on your plan.
How to download: Online tool , Chrome extension
Rating: 58.40 out of 100 (Scam Detector)
Compatible OS: Windows, Mac, Linux
Price: 24-hour Pass- USD 12.99, Pro- USD 25.99/month, Basic- USD 9.99/month, Standard- USD 14.99/month.
Main Features:
- Max 1GB of size allows for free conversion.
- Auto-orientation setting available.
- Choose to compress the file or not.
- Insert from device or cloud.
Pros
- You can add files from the computer, Dropbox, Google Drive, or URL.
- It enables you to strip attached metadata.
- Adjust image size freely.
Cons
- Limited customizations.
- No free plan.
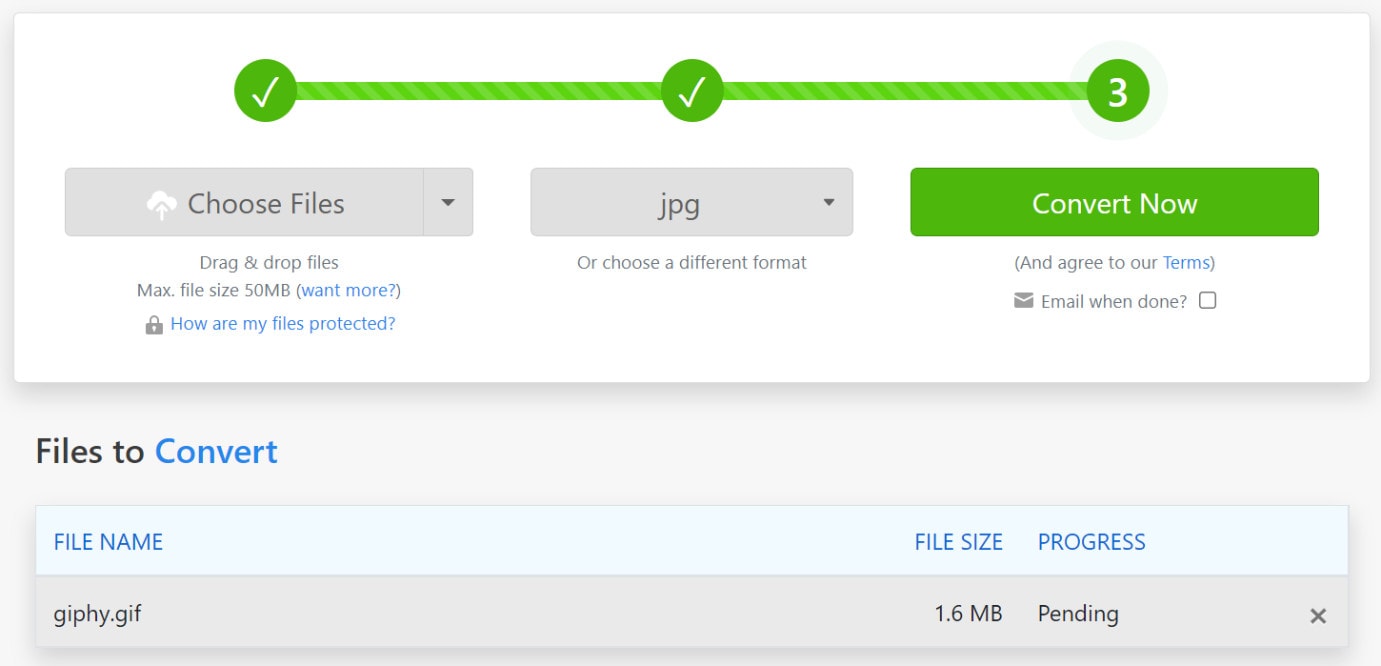
7. Zamzar
You can efficiently utilize this online tool to convert different file formats into another, like GIF into PNG. You can access the files you created for at least 24 hours after the conversion. For more time, upgrade your account.
How to download: Online tool
Rating: 4.5 stars out of 5 (Capterra)
Compatible OS: web-based
Price: Basic- USD 8.60/month, Pro- USD 15.18/month, Business- USD 24.04/month
Main Features:
- It supports multiple file formats for converting.
- Add a file from the device or cloud.
- Insert online URL of files.
- 50 MB is the maximum file size.
Pros
- All saved files for free users can be saved for 24 hours.
- Paid users can decide to remove files from storage.
- Email notification for downloading is possible.
Cons
- Convert/save only two files per day for free.
- You need to register an account when using.
8. Browserling
Browserling is one of the most accessible and high-quality conversion tools for turning GIFs into PNG, JPG, or any other format. The settings are simple to understand and use, and one can convert multiple files.

How to download: Online tool
Rating: 4 stars out of 5 (G2)
Compatible OS: web-based, Windows/Android devices.
Price: Free, Developer- USD 19/month, Team- USD 29+/month
Main Features:
- Insert from the device.
- You can add GIFs of any size.
- Drag and drop functionality is available.
- Automatically saves to the device.
Pros
- Quick conversion.
- Zero complex steps.
- Easy to use for all users at different stages.
Cons
- No batch processing is allowed.
- The free version is only web-based and not compatible with most OS/devices/browsers.
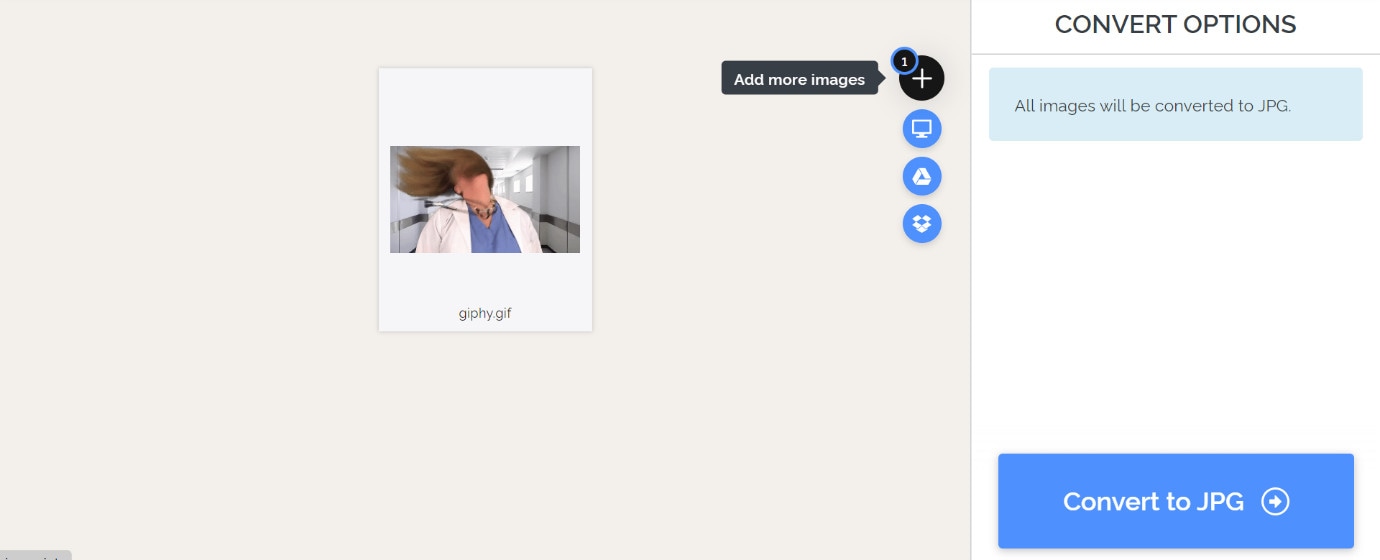
9. iLoveIMG
Another top-notch online GIF to PNG converter is iLoveIMG, with which you can add and alter multiple GIF files simultaneously. Then, after the conversion, share to social media accounts from Facebook or others easily.
How to download: Online tool
Rating: 3.6 stars out of 5 (TrustPilot)
Compatible OS: web-based
Price: Free, Business- custom price, Premium- USD 3.79
Main Features:
- Insert from a folder, Dropbox, or Google Drive.
- Add multiple images.
- Rotate the files.
- Share to social media.
Pros
- Add from the device.
- Cloud support is available.
- Align files alphabetically.
Cons
- Does not work offline.
- Limited batch process for free users.
10. Convertfiles
This online tool can easily include and change GIFs into PNG files. The conversions occur quickly, and you can add your email account to get quick alerts for the completion of the process.

How to download: Online tool
Rating: 4.6 stars out of 5 (mywot.com)
Compatible OS: web-based
Price: Free
Main Features:
- Add specific input format.
- Include the preferred output format.
- Insert email for notifications.
- Support files to be added from the device library.
Pros
- Quicker process of conversion.
- A variety of file formats are compatible.
- Categorized list of formats like documents, images, videos, etc.
Cons
- Can include third-party unauthorized sites that transfer users to other pages.
- No video formats for output.
Pro Tips: How to Convert GIF to Video for Free?
Besides utilizing suitable tools to convert GIFs into PNG or other image files, you can also use the best GIF to video converters. For example, with Wondershare Filmora , you can easily convert GIFs or other image files into video files. In addition, some editing options, like GIFs, allow users to create videos after merging image files.
Free Download For Win 7 or later(64-bit)
Free Download For macOS 10.14 or later
Step1Launch the Filmora software.
Step2Press the “New Project” section and then access “Click to import media files.”
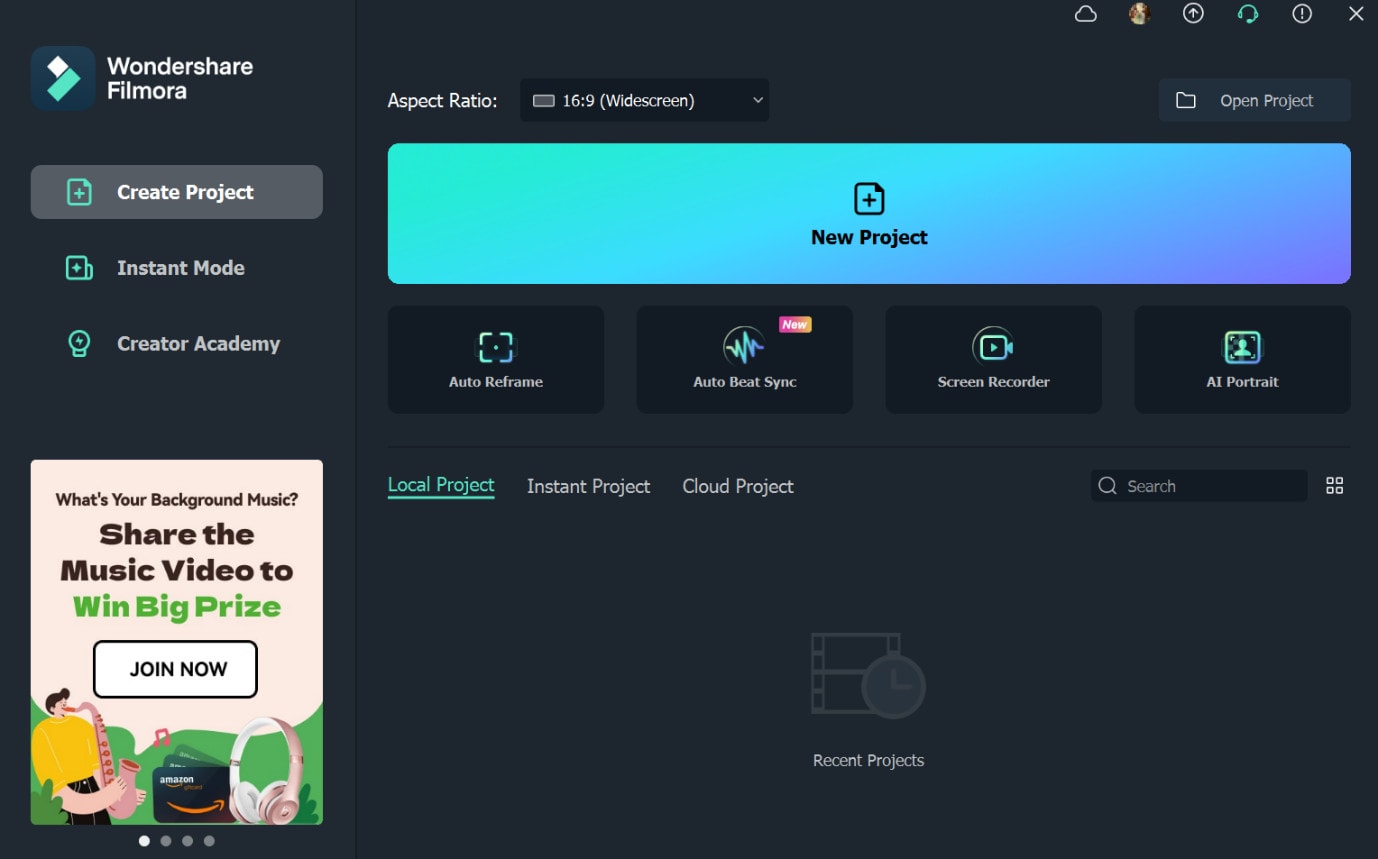
Add the image files, like GIFs, into the editor.
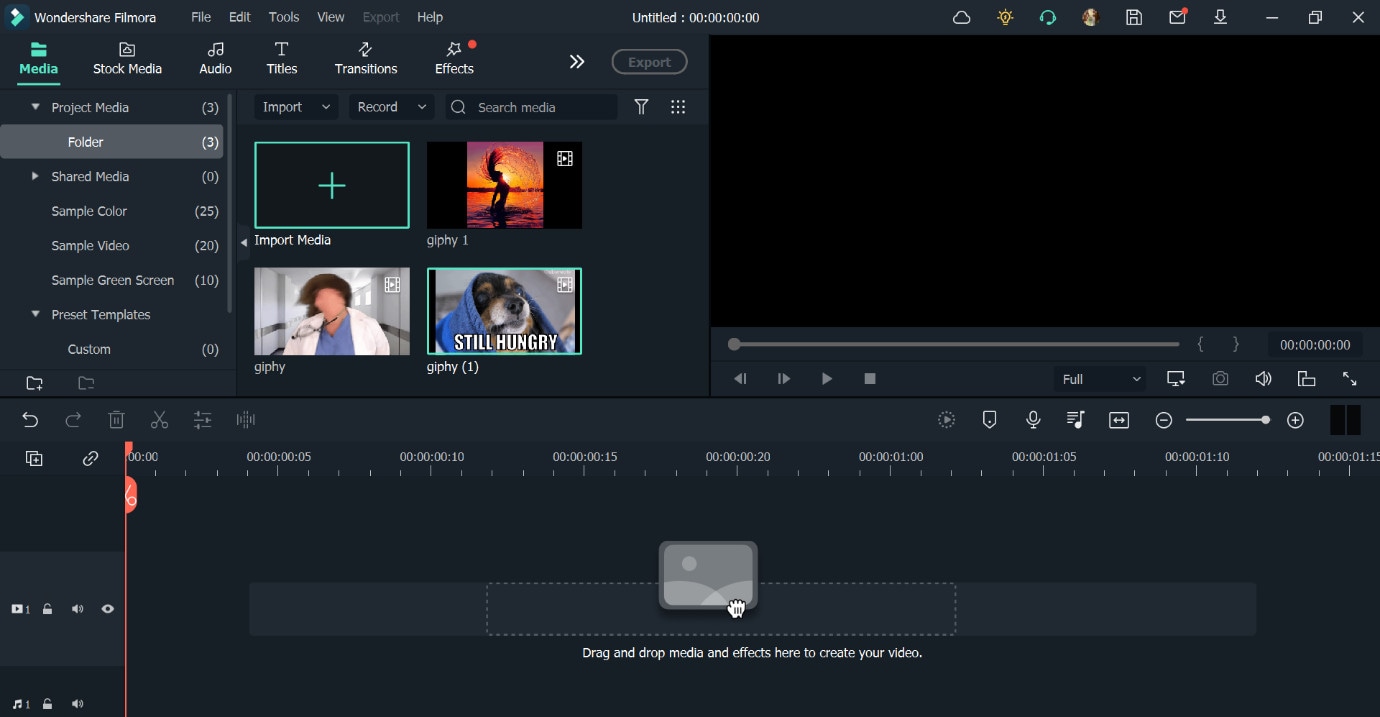
Step3Drag the files to the editing timeline. Use customization settings like Speed, Animation, Audio, Effects, etc., to edit the file.
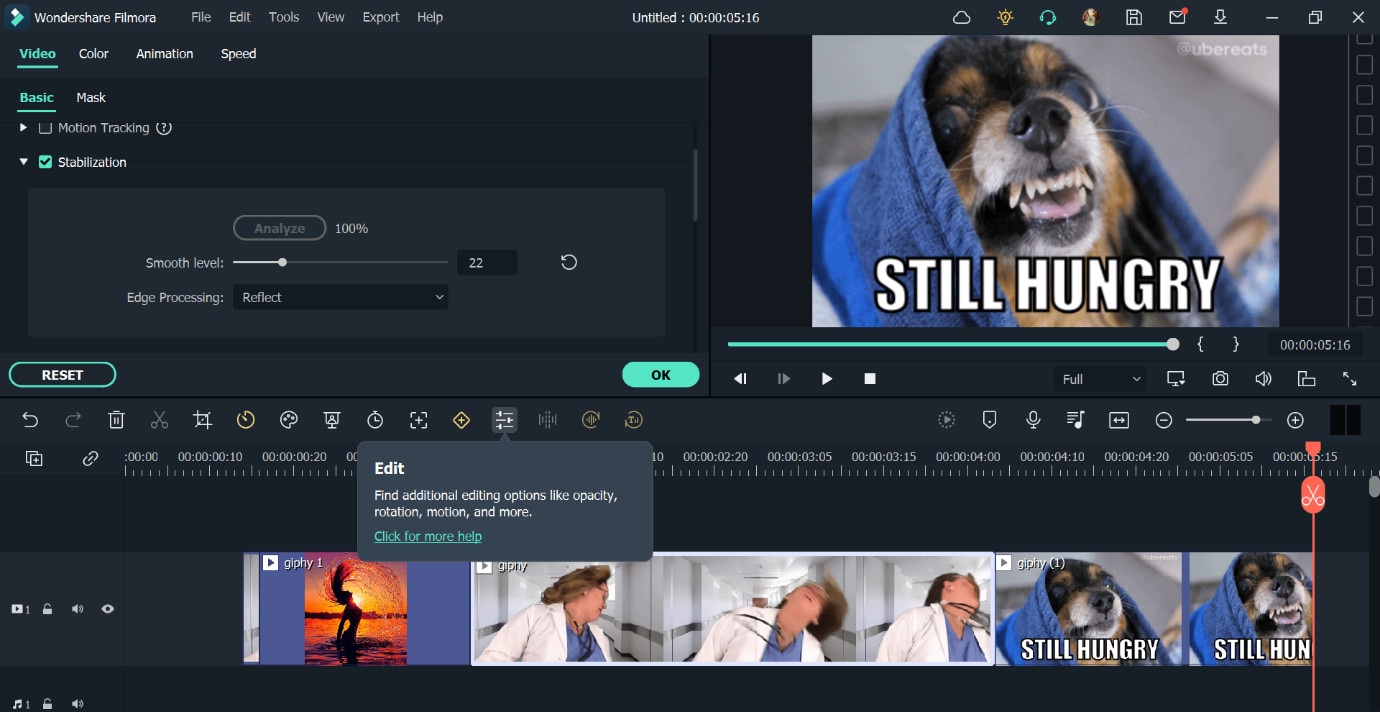
Step4Click on Export > Local > Mp4. You can choose other video formats too.
Step5Add file information like saving location, name, and formatting specification.
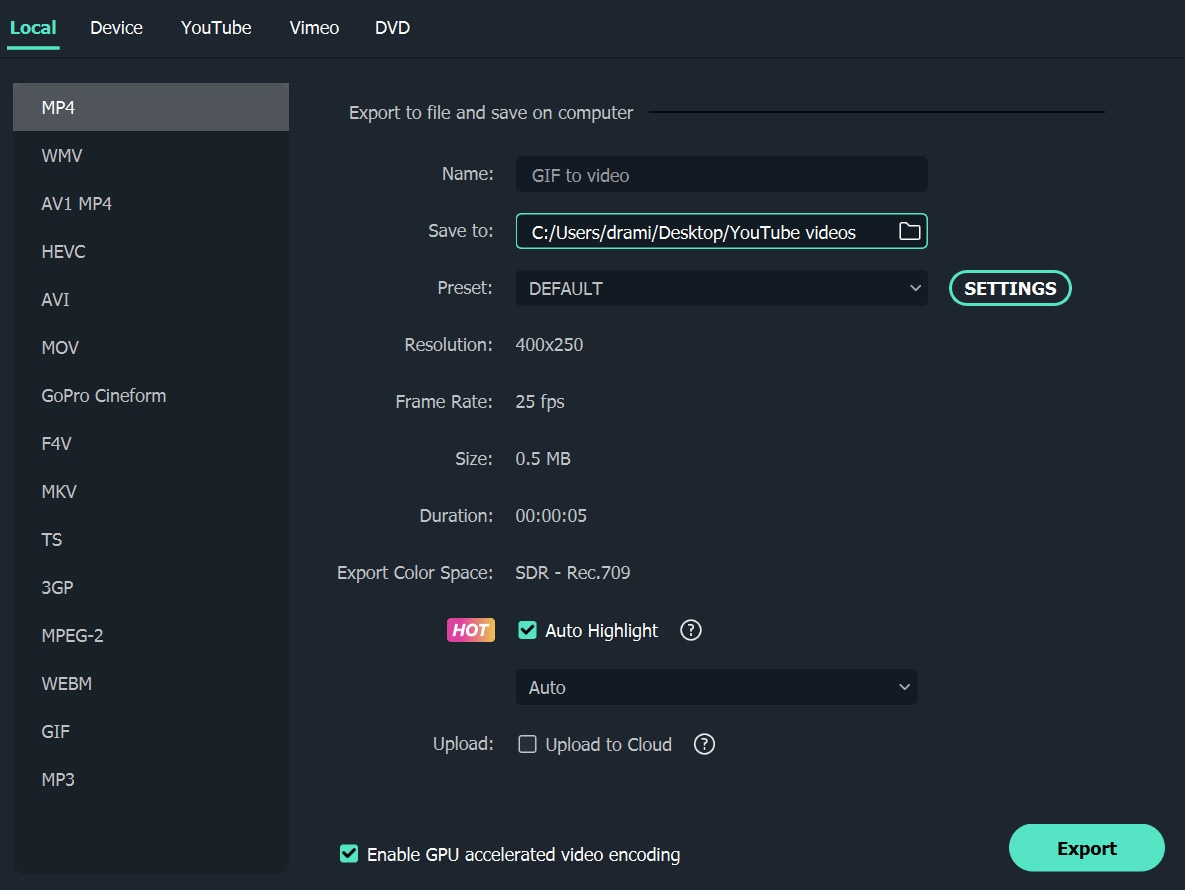
Step6Click on the Export button.
Final Words
You can easily use one of the given tools to convert GIF files into varying image file types. There are fully online options like CloudConvert, and certain choices with a software version, like Online Convert. Try each at least once for the best results to know which fits your needs perfectly.
2. Ezgif
Ezgif is another simple-to-use online tool with substantial image conversion benefits. You can add your GIF files from the Cloud account or computer and directly get JPG files. PNG does not have a direct conversion here, though.

How to download: Online tool
Rating: 100 out of 100 (Scam Detector)
Compatible OS: web-based browsers
Price: Free
Main Features:
- Support a maximum of 50 MB file size for images.
- Direct converter to JPG.
- Set background color to white.
- Add URL link of online GIF files.
Pros
- Instant conversion.
- No changes to original file quality.
- Add from the device.
Cons
- Upload and convert files one by one.
- No cloud support.
3. CloudConvert
CloudConvert is a high-quality online GIF to PNG converter that people can use to convert high-quality image files with no quality loss. First, choose your files, go for settings, and then the converting will be finished in minutes.

How to download: Online tool
Rating: 4.5 stars of 5 (Capterra)
Compatible OS: web-based
Price: Packages/Subscriptions- Costs start at USD 8 per conversion minute.
Main Features:
- Select a file from various formats, like URL, Device, or cloud accounts.
- Set crop/scape adjustments.
- Note image width and height.
- Select to strip or vice versa.
Pros
- Customize output file type.
- Support watermark security feature. It protects your images and graphic files from being stolen, used, or altered without the owner’s permission.
- High-quality image resolution is available.
Cons
- Slightly complex for beginners to understand or use initially.
- Bigger files take a longer time to load.
4. Convertio
Convertio is another top-grade GIF to JPGF converter which people can utilize to prepare high-definition image files from animated pictures. You can make multiple conversions and get high-priority customer support.

How to download: Online tool
Rating: 4.9 stars of 5 (Capterra)
Compatible OS: web-based
Price: Light- USD 9.99/month, Basic- USD 14.99/month, Unlimited- USD 25.99/month
Main Features:
- Get at least 25 concurrent conversion benefits with paid plans.
- Adfree pages.
- Unlimited conversions are only supported by the highest-paid plan.
- Unlimited allowed conversion minutes for users daily.
Pros
- The drag and drop function is smooth to use.
- Add files with at least 100 MB file size.
- Multiple formats are supported.
Cons
- Signup is necessary for a higher file size allowance.
- More limited service for free.
5. Soda PDF
This GIF to PNG converter is top-notch and used for changing big and small-sized GIF files into static PNG or JPG formats. However, no issues with image quality would be noticeable. You can use it for multiple conversions.

How to download: Online tool
Rating: 3.4 stars of 5 (Capterra)
Compatible OS: Online, Mac, Windows, Linux
Price: Standard- USD 6.73/month, Pro- USD 8.23/month, Business- USD 16.63/month
Main Features:
- Add GIF files from the computer, Dropbox, or Google Drive.
- Files are stored for a full day.
- Direct download button available.
- Redo conversion in case of issues.
Pros
- A desktop version with offline usage is available.
- The drag and drop function makes the converting process more convenient.
- Quick file saving.
Cons
- Cannot access old converted files from servers.
- Ads are available.
6. FreeConvert.com
FreeConvert is operable for multiple types of file conversions. In addition, you can store your files in the cloud and handle various tasks simultaneously, depending on your plan.

How to download: Online tool , Chrome extension
Rating: 58.40 out of 100 (Scam Detector)
Compatible OS: Windows, Mac, Linux
Price: 24-hour Pass- USD 12.99, Pro- USD 25.99/month, Basic- USD 9.99/month, Standard- USD 14.99/month.
Main Features:
- Max 1GB of size allows for free conversion.
- Auto-orientation setting available.
- Choose to compress the file or not.
- Insert from device or cloud.
Pros
- You can add files from the computer, Dropbox, Google Drive, or URL.
- It enables you to strip attached metadata.
- Adjust image size freely.
Cons
- Limited customizations.
- No free plan.
7. Zamzar
You can efficiently utilize this online tool to convert different file formats into another, like GIF into PNG. You can access the files you created for at least 24 hours after the conversion. For more time, upgrade your account.

How to download: Online tool
Rating: 4.5 stars out of 5 (Capterra)
Compatible OS: web-based
Price: Basic- USD 8.60/month, Pro- USD 15.18/month, Business- USD 24.04/month
Main Features:
- It supports multiple file formats for converting.
- Add a file from the device or cloud.
- Insert online URL of files.
- 50 MB is the maximum file size.
Pros
- All saved files for free users can be saved for 24 hours.
- Paid users can decide to remove files from storage.
- Email notification for downloading is possible.
Cons
- Convert/save only two files per day for free.
- You need to register an account when using.
8. Browserling
Browserling is one of the most accessible and high-quality conversion tools for turning GIFs into PNG, JPG, or any other format. The settings are simple to understand and use, and one can convert multiple files.

How to download: Online tool
Rating: 4 stars out of 5 (G2)
Compatible OS: web-based, Windows/Android devices.
Price: Free, Developer- USD 19/month, Team- USD 29+/month
Main Features:
- Insert from the device.
- You can add GIFs of any size.
- Drag and drop functionality is available.
- Automatically saves to the device.
Pros
- Quick conversion.
- Zero complex steps.
- Easy to use for all users at different stages.
Cons
- No batch processing is allowed.
- The free version is only web-based and not compatible with most OS/devices/browsers.
9. iLoveIMG
Another top-notch online GIF to PNG converter is iLoveIMG, with which you can add and alter multiple GIF files simultaneously. Then, after the conversion, share to social media accounts from Facebook or others easily.

How to download: Online tool
Rating: 3.6 stars out of 5 (TrustPilot)
Compatible OS: web-based
Price: Free, Business- custom price, Premium- USD 3.79
Main Features:
- Insert from a folder, Dropbox, or Google Drive.
- Add multiple images.
- Rotate the files.
- Share to social media.
Pros
- Add from the device.
- Cloud support is available.
- Align files alphabetically.
Cons
- Does not work offline.
- Limited batch process for free users.
10. Convertfiles
This online tool can easily include and change GIFs into PNG files. The conversions occur quickly, and you can add your email account to get quick alerts for the completion of the process.

How to download: Online tool
Rating: 4.6 stars out of 5 (mywot.com)
Compatible OS: web-based
Price: Free
Main Features:
- Add specific input format.
- Include the preferred output format.
- Insert email for notifications.
- Support files to be added from the device library.
Pros
- Quicker process of conversion.
- A variety of file formats are compatible.
- Categorized list of formats like documents, images, videos, etc.
Cons
- Can include third-party unauthorized sites that transfer users to other pages.
- No video formats for output.
Pro Tips: How to Convert GIF to Video for Free?
Besides utilizing suitable tools to convert GIFs into PNG or other image files, you can also use the best GIF to video converters. For example, with Wondershare Filmora , you can easily convert GIFs or other image files into video files. In addition, some editing options, like GIFs, allow users to create videos after merging image files.
Free Download For Win 7 or later(64-bit)
Free Download For macOS 10.14 or later
Step1Launch the Filmora software.
Step2Press the “New Project” section and then access “Click to import media files.”

Add the image files, like GIFs, into the editor.

Step3Drag the files to the editing timeline. Use customization settings like Speed, Animation, Audio, Effects, etc., to edit the file.

Step4Click on Export > Local > Mp4. You can choose other video formats too.
Step5Add file information like saving location, name, and formatting specification.

Step6Click on the Export button.
Final Words
You can easily use one of the given tools to convert GIF files into varying image file types. There are fully online options like CloudConvert, and certain choices with a software version, like Online Convert. Try each at least once for the best results to know which fits your needs perfectly.
Are You Looking for Cool Ideas to Use Green Screen and How Setting up Your Green Screen? Keep Reading Since We Have the Answer for You
Green screener chroma key is commonly used in film, tv shows, and social media videos nowadays. This article will show you how to light film and edit a green screen. Additionally, you can have some fun ideas with a chroma key. Therefore, keep reading this article to know all the information.
Part 1: Cool Ideas to Use Green Screen
1. The Magic Box
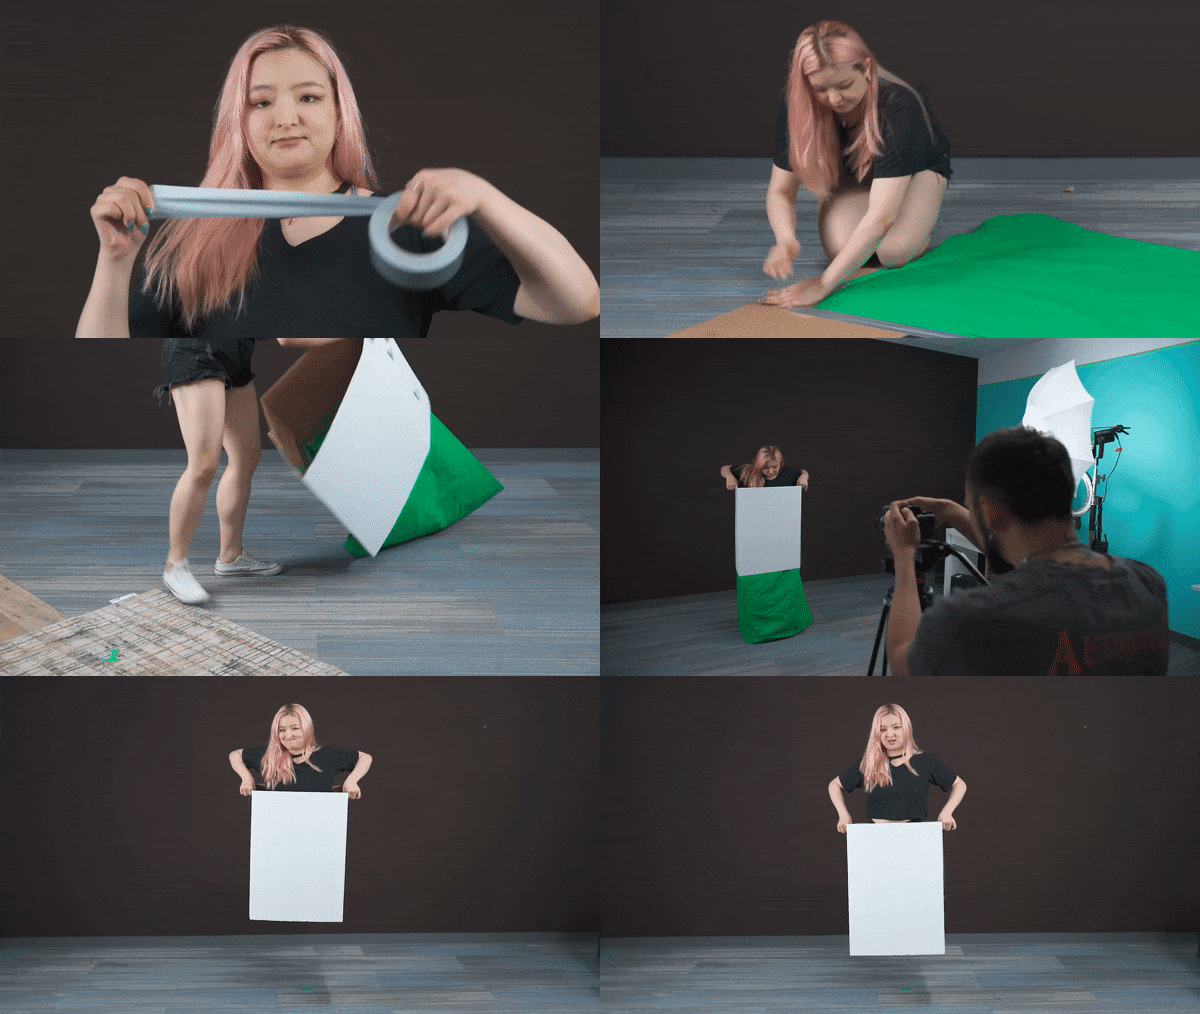
2. Liquid Transformation

3. Key Out a Body Part

4. T-shirt TV Screen

Part 2: Setting Up The Green Screen
Filming with the green screen is getting easier and easier. Anyone can do it, but before you get started, we will share some do’s and don’ts to help you get the best results.
In fact, there are many ways to set up a green screen, but the most cost-efficient way is with a green screen fabric. If you are using a green fabric as a DIY green screen, make sure you steam or iron it out, whether taping it to a wall or hanging it off the rack. Keep in mind the green screen should not leave any wrinkles.
It is because wrinkles will make lighting the green screen a nightmare, and uneven lighting will leave you with shadows and disappointing results. It would help if you also pulled the green screen tight to get a seamless background. The better you do with the setup, the easier it will be the key it out later
Part 3: Lighting a Green Screen
It doesn’t matter how nice your green screen is. You won’t get good results if you don’t light it properly. When you light a green screen, be aware of these things.
- Make sure there are at least six feet of space between you and your green screen; therefore, you’re not casting a shadow that cannot be keyed out later.
- Remember, any shadow on the green screen is bad. The lighting on the screen should be flat, even, and one-dimensional meaning. Please don’t place the screen leaning at an angle since they’ll make it harder to light evenly.
- Do light yourself and your background separately. It will ensure your subject wouldn’t bleed into the green, which will create a halo around them.
- After you key out the green screen and lighting, your subjects should emulate the lighting from your final footage. For example, if you know sunlight is coming from the left light, your subject is from the left direction as well.
Part 4. Keying out your green screen
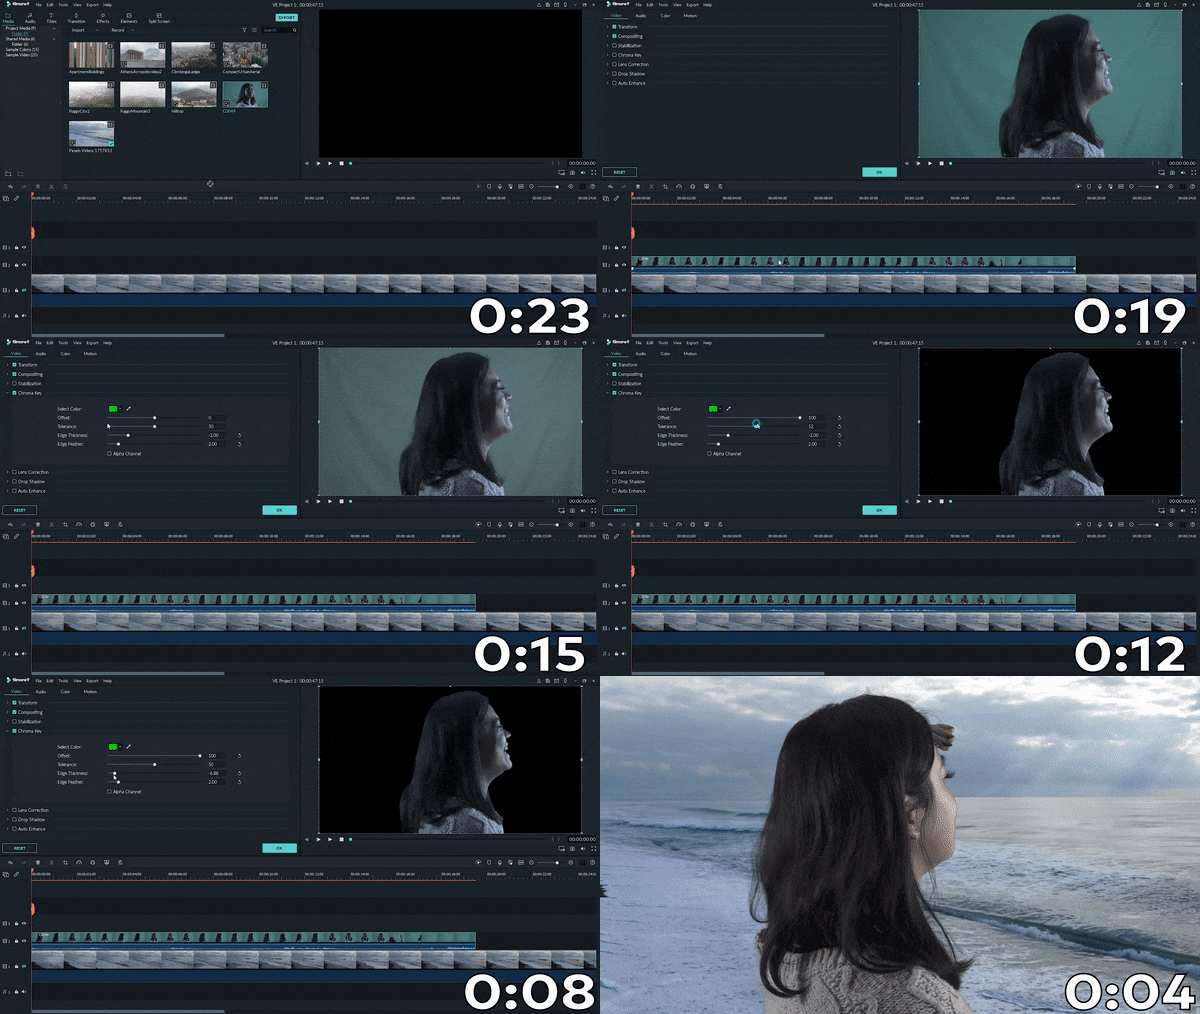
Once your footage is good, go into Filmora and import it into your timeline, then double-click it to find the chroma key menu. However, don’t stop there. Clicking the chroma key button is not enough to guarantee perfectly keyed footage, so play around with the offset tolerance edge thickness and edge feather. Lastly, adjust it to make sure your edit looks as good as possible.
Free Download For Win 7 or later(64-bit)
Free Download For macOS 10.14 or later
Summary
Aside from a video background, there are many things you can use chrome key effects on. For example, you can make liquid transformation, you can make a magic box, etc. In the meantime, it doesn’t matter how good your green screen, it won’t have a good results if are not light it properly. You can use Filmora to keying out your green screen. It just take a few clicks to be able keying out your green screen by following the tutorial above.
Free Download For macOS 10.14 or later

Summary
Aside from a video background, there are many things you can use chrome key effects on. For example, you can make liquid transformation, you can make a magic box, etc. In the meantime, it doesn’t matter how good your green screen, it won’t have a good results if are not light it properly. You can use Filmora to keying out your green screen. It just take a few clicks to be able keying out your green screen by following the tutorial above.
Here, You Will Learn How to Add a Realistic Fire Effect Using Wondershare Filmora. That Will Help to Boost Your Channel and Decorate Your YouTube Channel with Creative and Unique Effects
Do you know that many cinema films and big-budget companies use visual effects to create realistic fires? It saves them from potential danger in production and helps them manage the time required to create a project. In this article, you will get pro tips and easy ways to add Fire effects by Wondershare Filmora.
![]()
Note: let’s not count Michael Bay and Christopher Nolan productions because their movies have a higher budget, and creating fake fire is easy.
Part 1. What do you need to create fire effects?
Using simple tools such as Filmora and visual effects, you can create a realistic fire effect with an easy setup. For filming the effect, we will need
- A good camera
- A light source
- Video editing software - Wondershare Filmora
- Basic editing skills
However, the light source is key to the fire effects. It will be beneficial if you have a warmer color light or a light that can change its temperature. You can use tungsten light bulbs or small circular LEDs that are pretty famous with Vloggers and tick-tock users.
Part 2. How to make a realistic effect fire?
After getting prepared, it’s time to do the real things. Follow the steps below to create a realistic fire effect like a pro.
Step1 Record your footage
While recording the video, you can slightly shake your light source, which will give it the flickering effect of the flame. Here, you can do this in two ways.
Shaking the light manually
Just make sure when you are shaking the light, it is not shaken aggressively, or it will lose its realism to a real fire.

Shaking the light using a dimmer
You can also use some skills to create the flickering effect of the fire without literally shaking the LED light. Dimmers come to help. A dimmer is a device that enables you to change the temperature of the LED light. If you have a dimmer, your work will be more accessible.
A regulator on the dimmer will help you switch between low and high tones. It will flicker the light on the object like a flame and make it look like it was placed in front of a real fire.

Step2 Record the object
Our next step will be to record the object on which the effect is taking place. Ensure the camera is placed under a good light source so that the picture is not dim and the object is exposed. Make sure the camera is placed at the level of the eye so that it will help you record your video clearly and accurately.
Also, keep in mind to zoom out the camera lens, which will fix the frame of the video so that the object or the person is entirely on the screen. Another tip for creating a realistic fire effect would be the person acting as the object. The more natural the acting is, the more realistic would be the fire effect.
Step3 Edit the footage
We are being safe and saving time by not using actual fire. The goal of creating a fake fire would be the effect and reaction of the object or the actor.
1. Download a professional video editing software - Wondershare Filmora
Visit Wondershare Filmora official site if you haven’t already downloaded it.
![]()
Note: download the latest version of filmora. It will give you a pro version and help you to create more realistic fire effects.
2. Create a new project and import the recorded clips
Before adding the fire effects to your video, you must ensure that you are familiar with the editing software. Your first step would be to add your clips to the timeline. Drag the footage from the library and enter it into the timeline.

3. create the fire effect more realistic by adding smoke
The next step would be to add smoke to the fire. As it is only fair that the fire makes the smoke so. Adding the smoke will create the fire effect more realistic. Follow the below steps to get your cinematic video!
#Step1 Search for smoke effects
To add the smoke effect, click on the element’s icon on the bar above and search for smokescreen 2.
#Step2 Add a smoke effect
Once you have searched and found the smoke screen 2 effects, then import that effect onto your timeline so that you can begin editing.

Once you’ve added the fire effect, you will notice the change on the screen in the top right corner.
#Step3 Add duration
The next step would be to set the duration of the smokescreen effect so that it matches the length of the video. To do so,
- Click on the edge of the smoke screen effect.
- Drag it to the right if the effect appears smaller than the video clip.
- And drag it to the left if it is larger than the video clip.
- As soon as it matches the length of the video, leave the drag, and it will fit right into place.
#Step4 Make some changes to the smoke effect
Once you have matched the duration of the smoke screen effect to the video clip, our next step would be to make some changes. These changes will make the smokescreen appear more pleasing—double-click on the smokescreen effect, which will open the transform menu.
We would first focus on the transform panel. Here you would have many options, but our focus would be on rotation, scale, and position.
![]()
Note: make sure to rotate the smoke screen effect by simply sliding the slider or dragging the slider right or left to your desire.
- You would have created an angle of the smokescreen to make it more natural.
- Now, we would have to adjust the scale of the smokescreen effect.
- Drag the slider to the right to expand the smoke to spread on the screen. It will help the smoke screen do appear more natural.
- You can adjust how much the smoke screen is visible on the screen by decreasing the opacity.
Adjust the slider to the left so it blends in with the flickering of the light we created. Now playback the video from the big screen to get an idea of the effect you added. And here are our parameters for reference.

Cool, isn’t it? Now we have added smoke to our timeline. Combined with the flickering light effect, we are closer to our goal.
Step4 Add flames or sparks
To mimic a real fire, we also have one more element that is missing, And that will be the sparks and the flames. And if you want to bring the fire effect of your video to the pro level, we would have to use the film stock effects. Flames and sparks are also available in the Wondershare Filmora.
#Step1 Search for Fire Tab

- To do so, click on the bar above the element’s icon.
- Once you have opened the elements tab, look to your left window, where further options are available.
- From these options, click on the fire tab.
- A new window will pop up in the library panel.
#Step2 Add the flame to the timeline
Click on a large scale 14 and drag it into your timeline above the smoke effect and the clip. Doing so would have created two extra layers after the video tab.

#Step3 Adjust the flame effect
Now, we have to do steps similar to the ones above the first job. But first, you have to click on the edges of the effect. Then, match it to the length of your video.
Now, remember if the length of the effect is more than that of the video clip. You can adjust it by clicking on the edge and dragging it to the left. And if it appears to be smaller than the video clip, drag the edge to the right to match the length.
#Step4 Blend the video
When you look at the effect as you play the video from the start, you will notice that the effect is a little more intense than we want. To change it to your desires, you can follow the following steps.
- First of all, double-click and open the transform
- Experiment with the rotation and the scale and position; make your choice.
- Then move on to the compositing panel and focus on the blending mode.
- Here, you will notice a drop-down panel and select the screen option from all the other options.
- Doing so would help you blend the spark effect video much better.
If you focus on the spark effect that appears on the screen, you will notice that it seems to be much more intense than we require. If you want to blend it further, you can use the opacity adjuster and decrease the transparency. Then, adjust the slider till you feel it to be just right.
And the following are ideal parameters of our adjustment just for you to refer to.

Final results
Now can easily create a realistic-looking fire effect by Wondershare Filmora.

Best editing views
See how easy it was to create a fire effect without using real fire. A fire effect you can use:
- To make your car catch on fire.
- You are screaming at the top of your lungs in a yard where your garden is on fire.
- Act like your husband forgot to watch the stove on with the dish in the kitchen.
You can create all these scenarios by using camera tricks and lighting effects. And a few skills in video editing, easily! How cool is that?
If you are a beginner or a frequent user of Wondershare Filmora, following the steps explained above will help you quickly get the hang of how to add fire effects to your videos.
Also, if you have a YouTube channel or a content creator, adding these effects will add unique creativity to your videos and ultimately boost your approach.
Free Download For Win 7 or later(64-bit)
Free Download For macOS 10.14 or later
Part 1. What do you need to create fire effects?
Using simple tools such as Filmora and visual effects, you can create a realistic fire effect with an easy setup. For filming the effect, we will need
- A good camera
- A light source
- Video editing software - Wondershare Filmora
- Basic editing skills
However, the light source is key to the fire effects. It will be beneficial if you have a warmer color light or a light that can change its temperature. You can use tungsten light bulbs or small circular LEDs that are pretty famous with Vloggers and tick-tock users.
Part 2. How to make a realistic effect fire?
After getting prepared, it’s time to do the real things. Follow the steps below to create a realistic fire effect like a pro.
Step1 Record your footage
While recording the video, you can slightly shake your light source, which will give it the flickering effect of the flame. Here, you can do this in two ways.
Shaking the light manually
Just make sure when you are shaking the light, it is not shaken aggressively, or it will lose its realism to a real fire.

Shaking the light using a dimmer
You can also use some skills to create the flickering effect of the fire without literally shaking the LED light. Dimmers come to help. A dimmer is a device that enables you to change the temperature of the LED light. If you have a dimmer, your work will be more accessible.
A regulator on the dimmer will help you switch between low and high tones. It will flicker the light on the object like a flame and make it look like it was placed in front of a real fire.

Step2 Record the object
Our next step will be to record the object on which the effect is taking place. Ensure the camera is placed under a good light source so that the picture is not dim and the object is exposed. Make sure the camera is placed at the level of the eye so that it will help you record your video clearly and accurately.
Also, keep in mind to zoom out the camera lens, which will fix the frame of the video so that the object or the person is entirely on the screen. Another tip for creating a realistic fire effect would be the person acting as the object. The more natural the acting is, the more realistic would be the fire effect.
Step3 Edit the footage
We are being safe and saving time by not using actual fire. The goal of creating a fake fire would be the effect and reaction of the object or the actor.
1. Download a professional video editing software - Wondershare Filmora
Visit Wondershare Filmora official site if you haven’t already downloaded it.
![]()
Note: download the latest version of filmora. It will give you a pro version and help you to create more realistic fire effects.
2. Create a new project and import the recorded clips
Before adding the fire effects to your video, you must ensure that you are familiar with the editing software. Your first step would be to add your clips to the timeline. Drag the footage from the library and enter it into the timeline.

3. create the fire effect more realistic by adding smoke
The next step would be to add smoke to the fire. As it is only fair that the fire makes the smoke so. Adding the smoke will create the fire effect more realistic. Follow the below steps to get your cinematic video!
#Step1 Search for smoke effects
To add the smoke effect, click on the element’s icon on the bar above and search for smokescreen 2.
#Step2 Add a smoke effect
Once you have searched and found the smoke screen 2 effects, then import that effect onto your timeline so that you can begin editing.

Once you’ve added the fire effect, you will notice the change on the screen in the top right corner.
#Step3 Add duration
The next step would be to set the duration of the smokescreen effect so that it matches the length of the video. To do so,
- Click on the edge of the smoke screen effect.
- Drag it to the right if the effect appears smaller than the video clip.
- And drag it to the left if it is larger than the video clip.
- As soon as it matches the length of the video, leave the drag, and it will fit right into place.
#Step4 Make some changes to the smoke effect
Once you have matched the duration of the smoke screen effect to the video clip, our next step would be to make some changes. These changes will make the smokescreen appear more pleasing—double-click on the smokescreen effect, which will open the transform menu.
We would first focus on the transform panel. Here you would have many options, but our focus would be on rotation, scale, and position.
![]()
Note: make sure to rotate the smoke screen effect by simply sliding the slider or dragging the slider right or left to your desire.
- You would have created an angle of the smokescreen to make it more natural.
- Now, we would have to adjust the scale of the smokescreen effect.
- Drag the slider to the right to expand the smoke to spread on the screen. It will help the smoke screen do appear more natural.
- You can adjust how much the smoke screen is visible on the screen by decreasing the opacity.
Adjust the slider to the left so it blends in with the flickering of the light we created. Now playback the video from the big screen to get an idea of the effect you added. And here are our parameters for reference.

Cool, isn’t it? Now we have added smoke to our timeline. Combined with the flickering light effect, we are closer to our goal.
Step4 Add flames or sparks
To mimic a real fire, we also have one more element that is missing, And that will be the sparks and the flames. And if you want to bring the fire effect of your video to the pro level, we would have to use the film stock effects. Flames and sparks are also available in the Wondershare Filmora.
#Step1 Search for Fire Tab

- To do so, click on the bar above the element’s icon.
- Once you have opened the elements tab, look to your left window, where further options are available.
- From these options, click on the fire tab.
- A new window will pop up in the library panel.
#Step2 Add the flame to the timeline
Click on a large scale 14 and drag it into your timeline above the smoke effect and the clip. Doing so would have created two extra layers after the video tab.

#Step3 Adjust the flame effect
Now, we have to do steps similar to the ones above the first job. But first, you have to click on the edges of the effect. Then, match it to the length of your video.
Now, remember if the length of the effect is more than that of the video clip. You can adjust it by clicking on the edge and dragging it to the left. And if it appears to be smaller than the video clip, drag the edge to the right to match the length.
#Step4 Blend the video
When you look at the effect as you play the video from the start, you will notice that the effect is a little more intense than we want. To change it to your desires, you can follow the following steps.
- First of all, double-click and open the transform
- Experiment with the rotation and the scale and position; make your choice.
- Then move on to the compositing panel and focus on the blending mode.
- Here, you will notice a drop-down panel and select the screen option from all the other options.
- Doing so would help you blend the spark effect video much better.
If you focus on the spark effect that appears on the screen, you will notice that it seems to be much more intense than we require. If you want to blend it further, you can use the opacity adjuster and decrease the transparency. Then, adjust the slider till you feel it to be just right.
And the following are ideal parameters of our adjustment just for you to refer to.

Final results
Now can easily create a realistic-looking fire effect by Wondershare Filmora.

Best editing views
See how easy it was to create a fire effect without using real fire. A fire effect you can use:
- To make your car catch on fire.
- You are screaming at the top of your lungs in a yard where your garden is on fire.
- Act like your husband forgot to watch the stove on with the dish in the kitchen.
You can create all these scenarios by using camera tricks and lighting effects. And a few skills in video editing, easily! How cool is that?
If you are a beginner or a frequent user of Wondershare Filmora, following the steps explained above will help you quickly get the hang of how to add fire effects to your videos.
Also, if you have a YouTube channel or a content creator, adding these effects will add unique creativity to your videos and ultimately boost your approach.
Free Download For Win 7 or later(64-bit)
Free Download For macOS 10.14 or later
Wondershare Filmora Tutorial | Using The AI Auto Reframe Feature
If you’ve struggled with adjusting the frame of your videos, there is a solution for you. The solution is to change the video aspect ratio, which is a game-changer in the world of video editing. It is a powerful feature that automatically adjusts the frame to fit different aspect ratios. With this feature, you don’t have to manually resize and reposition your video. The Auto Reframe feature will do all the work for you.
Additionally, it ensures that your videos look great on any screen by frame adjustment. It will keep your subject in focus and eliminate any unnecessary cropping. As we all know, the utility of auto reframe is undeniable. So, share your videos, knowing that they will look their best. The good part is that you can view your video at its best regardless of the device on which they are viewed.
Part 1: How Has AI Been Helping Video Editors?
With AI’s help, video editors’ jobs have become more accessible. You can change the aspect ratio of video with this feature to reduce your time and effort. Some of these ways are mentioned below, benefiting the video editors.
1. Automation in Video Editing
AI tools can help you analyze your video content and generate automated edited versions. This feature use algorithm to identify key moments in your video. Additionally, it improves your video by doing basic edits on it. These edits include basic trimming, color correction, and other options.
2. Content Analysis
This AI-based technology can help you to analyze your content in both video and image form. You can extract valuable information using AI, like facial recognition and sentiment analysis. With the help of this analysis, the editors can make precise decisions regarding editing and more.
3. Automated Captions
AI technology also recognizes speech which is very helpful for transcribing videos automatically. This feature is helping many video editors to add a professional touch to videos. Additionally, speech recognition tools add attention-grabbing subtitles with good accuracy. This saves the editors a lot of time and effort compared to manual transcription.
4. Noise Enhancement
If you have a problem with background noise and distortion, AI tools can help. AI algorithms can help you to improve your noise quality and reduce background noise. For this, you will need the original footage so that AI can work well on it. Furthermore, this will also improve the overall experience of the viewer.
5. Changing Background
With the help of AI, you can even remove unwanted elements or objects in your video. These AI tools allow you to replace objects from video frames. Also, it makes your video’s background look more appealing. In scenarios where removing logos and replacing the green screen background, this feature helps you a lot.
6. Professional Video Effects
Additionally, you can add artistic filters, effects, and appealing filters to your video with these tools. Such AI tools use deep learning algorithms to analyze the video and suggest you some corrections. This allows editors to add desired visual aesthetic effects to their content to look more attractive.
7. Content Recommendation
Using deep learning algorithms, AI can give you recommendations for your video content. These recommendations are based on user preferences and viewing patterns. This can help content creators understand their audience preferences and trends to create better video content.
Auto Reframe Video in 1-Click
Automatically resize videos in the fastest way. No editing skills are required!
Resize Video for Free Resize Video for Free Learn More >

Part 2: Understanding The Auto Reframe Feature in Wondershare Filmora
Wondershare Filmora embeds high-profile features into its video editing ecosystem. The platform integrates artificial intelligence into its video editing system to bring some of the best features. The Auto Reframe feature is one of the AI-integrated features of Wondershare Filmora. The video editing platform resizes the videos in the quickest possible ways.
Using this feature, you can easily involve a single video for all available platforms for posting videos. With a single click, you can save all the time and effort required to resize videos manually. The videos are easily adjusted across different aspect ratios using the efficient AI feature offered by Filmora.
Part 3: Other Prominent AI Features Offered by Wondershare Filmora
Wondershare Filmora offers many advanced and unique features. However, its newly incorporated AI features are some of the best. Here are the top 5 AI features Filmora offers, as discussed in the portion below.
1. AI Smart Cutout
Wondershare Filmora introduced an extraordinary feature of the smart cutout. This feature is a straightforward approach for creators who want to delete undesired items from a video. It uses AI to quickly and accurately find and separate people or objects from the background in videos. Users can easily make cool effects with a few steps, like having a green screen or changing the background effortlessly.
2. AI Copywriting
Filmora offers an AI copywriting feature that directly integrates with ChatGPT. It can generate video text and can also write titles and descriptions of YouTube Videos. The AI copywriting function saves a lot of time. It allows users to easily create professional-looking videos by incorporating AI into their platform.
3. AI Audio Stretch
Any audio track can be quickly re-timed to match the length of your video. AI Audio Stretch can be used with all kinds of music tracks. It works well for various types of videos, whether a casual vlog or a professional video. AI Audio Stretch can recognize and analyze music’s singing or vocal parts. It then remixes the audio clip to match the patterns.
4. AI Portrait
By using this feature of Filmora, users can easily remove backgrounds from images and videos. It offers over 70 different AI effects for portraits and stickers. Moreover, it can automatically detect faces and apply augmented reality (AR) stickers to them. Users don’t need any professional skills to use its portrait effects. Simply select the effect you like and click to add it to your video.
5. AI Audio Denoise
This feature automatically detects noise in any audio or video file and removes unwanted noise. It uses AI to detect background distortion in a video or audio file . Then, it further eliminates the distortion from your video project. This feature allows you to experience your video in quality and crisp sound.
Part 4: Using The Auto Reframe Feature in Wondershare Filmora
After covering an overview of Wondershare Filmora, we will work on the Auto Reframe feature. Look ahead into the steps to figure out how to auto-reframe a video using Filmora:
Convert Text-to-Speech For Win 7 or later(64-bit)
Convert Text-to-Speech For macOS 10.14 or later
Filmora Tutorial -Auto Reframe Filmora Tutorial
Step 1Start Using Auto Reframe Feature
Open Wondershare Filmora on your computer and proceed to select the “Auto Reframe” feature from the options available on the home screen.

Step 2Import The Video
This opens a new window where you can proceed with auto reframing of the video. Click the “Import” button on the top-right of the window to add the video you wish to reframe.

Step 3Change Parameters and Export
After adding the video, adjust the “Aspect Ratio” and “Motion Speed” with the available parameters. Click “Analyze” to observe the changes in reframing as provided. In this way, you can change the aspect ratio of your video using the auto reframe feature. Once completed, save your video project in the system.

Conclusion
In conclusion, auto reframe is a remarkable feature that simplifies video editing. This feature aims to ensure that your videos look great on any screen. If you seek a way to explain how to change the aspect ratio of a video, many video editing tools are now offering this feature to provide a better editing experience. Wondershare Filmora has this feature available for its users. You can easily download and install this tool to auto-reframe your video project.
Resize Video for Free Resize Video for Free Learn More >

Part 2: Understanding The Auto Reframe Feature in Wondershare Filmora
Wondershare Filmora embeds high-profile features into its video editing ecosystem. The platform integrates artificial intelligence into its video editing system to bring some of the best features. The Auto Reframe feature is one of the AI-integrated features of Wondershare Filmora. The video editing platform resizes the videos in the quickest possible ways.
Using this feature, you can easily involve a single video for all available platforms for posting videos. With a single click, you can save all the time and effort required to resize videos manually. The videos are easily adjusted across different aspect ratios using the efficient AI feature offered by Filmora.
Part 3: Other Prominent AI Features Offered by Wondershare Filmora
Wondershare Filmora offers many advanced and unique features. However, its newly incorporated AI features are some of the best. Here are the top 5 AI features Filmora offers, as discussed in the portion below.
1. AI Smart Cutout
Wondershare Filmora introduced an extraordinary feature of the smart cutout. This feature is a straightforward approach for creators who want to delete undesired items from a video. It uses AI to quickly and accurately find and separate people or objects from the background in videos. Users can easily make cool effects with a few steps, like having a green screen or changing the background effortlessly.
2. AI Copywriting
Filmora offers an AI copywriting feature that directly integrates with ChatGPT. It can generate video text and can also write titles and descriptions of YouTube Videos. The AI copywriting function saves a lot of time. It allows users to easily create professional-looking videos by incorporating AI into their platform.
3. AI Audio Stretch
Any audio track can be quickly re-timed to match the length of your video. AI Audio Stretch can be used with all kinds of music tracks. It works well for various types of videos, whether a casual vlog or a professional video. AI Audio Stretch can recognize and analyze music’s singing or vocal parts. It then remixes the audio clip to match the patterns.
4. AI Portrait
By using this feature of Filmora, users can easily remove backgrounds from images and videos. It offers over 70 different AI effects for portraits and stickers. Moreover, it can automatically detect faces and apply augmented reality (AR) stickers to them. Users don’t need any professional skills to use its portrait effects. Simply select the effect you like and click to add it to your video.
5. AI Audio Denoise
This feature automatically detects noise in any audio or video file and removes unwanted noise. It uses AI to detect background distortion in a video or audio file . Then, it further eliminates the distortion from your video project. This feature allows you to experience your video in quality and crisp sound.
Part 4: Using The Auto Reframe Feature in Wondershare Filmora
After covering an overview of Wondershare Filmora, we will work on the Auto Reframe feature. Look ahead into the steps to figure out how to auto-reframe a video using Filmora:
Convert Text-to-Speech For Win 7 or later(64-bit)
Convert Text-to-Speech For macOS 10.14 or later
Filmora Tutorial -Auto Reframe Filmora Tutorial
Step 1Start Using Auto Reframe Feature
Open Wondershare Filmora on your computer and proceed to select the “Auto Reframe” feature from the options available on the home screen.

Step 2Import The Video
This opens a new window where you can proceed with auto reframing of the video. Click the “Import” button on the top-right of the window to add the video you wish to reframe.

Step 3Change Parameters and Export
After adding the video, adjust the “Aspect Ratio” and “Motion Speed” with the available parameters. Click “Analyze” to observe the changes in reframing as provided. In this way, you can change the aspect ratio of your video using the auto reframe feature. Once completed, save your video project in the system.

Conclusion
In conclusion, auto reframe is a remarkable feature that simplifies video editing. This feature aims to ensure that your videos look great on any screen. If you seek a way to explain how to change the aspect ratio of a video, many video editing tools are now offering this feature to provide a better editing experience. Wondershare Filmora has this feature available for its users. You can easily download and install this tool to auto-reframe your video project.
Also read:
- Updated In 2024, Change Aspect Ratio of Video
- New 2024 Approved A Complete Guideline To Better Use QuickTime Player
- 2024 Approved Best Audio Waveform Generator
- New 2024 Approved Is Augmented Reality Conferencing the Future of Workplace Collaboration?
- The Ultimate Guide to Make a Text Collage
- New 2024 Approved 6 Best Text to Speech Generators for YouTube Videos Windows, Mac, Android, iPhone & Online
- In 2024, 6 Instant Ways to Create Windows 10 Slideshow
- Detailed Tutorial to Crop a Video Using Openshot?
- Updated Back up and Organize Your Files to Protect Any Misfortune Befalling Them. The Article Will Guide You on How to Back up and Manage Your Footage
- 2024 Approved Are You Looking for Different Solutions to Add VHS Effects to Your Videos? Dont Worry; This Article Will Provide Easy Solutions to Apply VHS
- Updated Replacing Sky Background Using Adobe Photoshop A Comprehensive Guide for 2024
- 2024 Approved Easiest Fix Included! Top 5 Ways to Convert HDR to SDR Videos
- New In 2024, Guide To Using Free Luts for OBS
- New In 2024, Doable Ways to Create Transparent Background in Procreate
- In 2024, The Ultimate Guide for the 10 Leading Slow-Motion Cameras
- In 2024, Best 6 WebM to GIF Converters
- How to Create Your Own LUTs for Your Video with Filmora for 2024
- New In 2024, Frame Rates, Speed, and Wondershare Filmora An Overview
- In 2024, Create Realistic Fire Effects by Filmora
- New 6 Best Methods to Make a Video Longer
- Updated In 2024, 10 Best Free Text to Speech Software Windows, Mac,Android, iPhone & Online
- Updated On the Tiktok App, You Can Make a Photo Video Slideshow. You Can Make Photo Video Slideshow with Music, Animated Tiktok Templates, and Can Also Add Text to Slideshow Video
- In 2024, How To Add Motion Blur In Davinci Resolve?
- New An Ultimate Guide to Edit a Music Video Aspect Ratio and First Cut for 2024
- New In 2024, Deep Learning of AI Video Recognition - Guide
- 2024 Approved How to Trim Video in Quicktime Player on Mac
- What Is HDRI? Everything You Need to Know About HDRI
- 3 Effective Methods to Correct Color Distortion in Videos for 2024
- 2024 Approved Have You Ever Used Premiere Pro to Create Slow-Motion Effects? This Article Will Provide a Guide on Producing Slow-Motion Effects by Using Adobe Premiere Pro
- In 2024, How to Add Text in Adobe Rush
- How to Rotate Video in iMovie with Alternative
- If You Want to Record Video Streams on Windows or Mac Using FFmpeg, Read Our Guide and Learn How to Do This with Easy Step-by-Step Instructions
- Updated How to Shoot Cinematic Footage From a Smartphone for 2024
- Updated What Is the Best FPS for YouTube Videos?
- Pattern Locks Are Unsafe Secure Your Vivo Y28 5G Phone Now with These Tips
- How to Change GPS Location on Oppo A1 5G Easily & Safely | Dr.fone
- In 2024, Here are Some Pro Tips for Pokemon Go PvP Battles On Poco C55 | Dr.fone
- In 2024, How to Fix Pokemon Go Route Not Working On Realme 12 Pro+ 5G? | Dr.fone
- Recover your pictures after Lava Blaze 2 5G has been deleted.
- Complete Tutorial to Use GPS Joystick to Fake GPS Location On Vivo S17e | Dr.fone
- How to unlock Vivo
- In 2024, How to Migrate Android Data From Vivo V30 to New Android Phone? | Dr.fone
- Recover Apple iPhone 13 Pro Data From iOS iTunes | Dr.fone
- In 2024, How to Unlock Apple iPhone 6s Plus?
- In 2024, Guide to Mirror Your Infinix Smart 8 Plus to Other Android devices | Dr.fone
- In 2024, What is the best Pokemon for pokemon pvp ranking On Honor 90 GT? | Dr.fone
- In 2024, Complete Tutorial to Use GPS Joystick to Fake GPS Location On Nubia Z50S Pro | Dr.fone
- In 2024, Two Ways to Track My Boyfriends Apple iPhone 12 Pro without Him Knowing | Dr.fone
- In 2024, Easy Guide to Honor Magic5 Ultimate FRP Bypass With Best Methods
- In 2024, 3 Methods to Mirror Itel P55 5G to Roku | Dr.fone
- In 2024, Trouble with iPhone 15 Pro Swipe-Up? Try These 11 Solutions
- Play HEVC H.265 on Xiaomi Redmi 12, is it possible?
- Apple iPhone 6s Backup Password Never Set But Still Asking? Heres the Fix
- In 2024, How to Transfer Contacts from Tecno Spark 20 Pro to Outlook | Dr.fone
- Delete Gmail Account With/Without Password On OnePlus Nord 3 5G
- How to Factory Reset ZTE Blade A73 5G without Losing Data | Dr.fone
- How to rescue lost call logs from Nokia 105 Classic
- In 2024, How To Remove or Bypass Knox Enrollment Service On Infinix Smart 7
- 6 Solutions to Fix Error 505 in Google Play Store on Honor X50i | Dr.fone
- The Ultimate Guide to Itel P55+ Pattern Lock Screen Everything You Need to Know
- In 2024, What is the best Pokemon for pokemon pvp ranking On Apple iPhone 14 Pro? | Dr.fone
- Top ways to unlock iPhone 15 screen lock
- Ultimate Guide to Catch the Regional-Located Pokemon For Vivo Y100 5G | Dr.fone
- In 2024, Overview of the Best Nokia C02 Screen Mirroring App | Dr.fone
- 21 Top Free Anime Websites to Watch Anime Online-Anime
- Will Pokémon Go Ban the Account if You Use PGSharp On Honor X9b | Dr.fone
- Updated 2024 Approved Create An AI Avatar Video
- Title: New The Best 10 GIF to JPGPNG Converters for 2024
- Author: Chloe
- Created at : 2024-04-24 07:08:38
- Updated at : 2024-04-25 07:08:38
- Link: https://ai-editing-video.techidaily.com/new-the-best-10-gif-to-jpgpng-converters-for-2024/
- License: This work is licensed under CC BY-NC-SA 4.0.


