
:max_bytes(150000):strip_icc():format(webp)/GettyImages-1342255561-483b636ee00f40a1b3d91d1969b1aaf6.jpg)
New Thousands Already Know What Ezgif Is and So Can You
Thousands Already Know What Ezgif Is and So Can You
Thousands Already Know Ezgif and So Can You
An easy yet powerful editor
Numerous effects to choose from
Detailed tutorials provided by the official channel
Everything about the know-how of Ezgif creator is here!
In this article
01 [How to Make a GIF on Ezgif](#Part 1)
02 [Video to GIF Made Easy Only With Ezgif](#Part 2)
03 [How to Crop a Video With Ezgif & Filmora](#Part 3)
Part 1 How to Make a GIF on Ezgif
GIFs take you to an exciting journey of expression and impact. With the introduction of GIF keyboards and a variety of creator tools, you are granted the liberty to use pre made GIFs as well as create stirring ones of your own to deliver your messages in unique and impactful ways. When it comes to creating GIFs, the online market is always ready with a heap of creator choices. While each of these tools is distinctive in its own way, some of them are leaders in making the mark among users.
About the Ezgif GIF Maker
Ezgif online GIF maker tool is amongst the most preferred GIF creators in today’s times. This one is a free and super convenient online tool that lets you create and convert animated GIFs in just a few clicks. Compatible with your Windows or MacOS devices, this tool is evidently among the fastest GIF creators of its time.
Apart from creating GIFs, you can also use this tool to cut, crop, trim and resize videos, ass and remove GIF backgrounds and much more. The tool is compatible with almost all common video and image formats; hence you can easily escape the glitch of sticking to a particular format for using this tool.
Here’s how you can use this tool for making next level GIFs:
Step 1: Launch the Tool
Open the Ezgif maker tool in your favorite browser. In the site’s welcome page, tap on ‘GIF Maker’ from the top toolbar.

Step 2: Upload Your Media
Click on ‘Browse’ to select your desired video or a set of still captures from your device and upload the same to the GIF maker timeline. You can choose from a manually or an alphabetically ordered upload. Ensure that the total file size is restricted within 100 MB.


Step 3: Let’s Create!
Click on ‘Upload and Make a GIF’. You will be shown a preview of your creation. At this point, you can customize the GIF with effects, filters and texts.

Step 4: Visual Adjustments
When using still images, consider arranging them in a particular order with the ‘Drag and Drop method’. You can skip this step if you are satisfied with the default arrangement. If you are creating a GIF from a video, pay attention to adjust its play duration.

Step 5: Beautify and Save Your Artwork
When you are satisfied with your work, tap ‘Make a GIF’. You can see your final creation appear. Click on ‘Save’ to add your artwork to your device memory. You can also customize your creation from the toolbar below the created GIF before saving it.

Part 2 Video to GIF Made Easy Only With Ezgif
As stated earlier, you can create GIFs from images and convert videos to GIFs using the Ezgif converter. What’s interesting is that the conversion process is quite fast and you are allowed to play with your editing skills to your heart’s content while customizing your artwork. Given below is a quick guide to convert videos in any common file format into impressive GIFs:
● Step 1
Visit ezgif.com, the official site of the Ezgif creator tool, in any suitable browser of your choice. In the homepage of the tool’s website, navigate to the toolbar at the top and click on ‘Video to GIF’.
Ezgif Video to GIF Converter Link:

● Step 2
In the converter interface, you can either upload a locally saved video from your device by clicking on ‘Browse’ or copy-paste a desired video URL in the address box and tap ‘Upload Video’.

● Step 3
In the tool’s editing interface, set required play duration for your video by setting the start and end points of the clip.
● Step 4
When you are done, click on ‘Convert to GIF’ and wait for the conversion process to finish. You can now see your created GIF in the pop up window that appears next. Click on ‘Save’ option in the toolbar beneath the created GIF to download your creation to your device.
Part 3 How to Crop a Video With Ezgif & Filmora
Ezgif is a multi faceted online tool that allows you to take up a variety of tasks in addition to just creating classy GIFs. Video to GIF conversion is one thing, besides that, you can also crop your videos using this tool. Wondering how to go about the process? Here’s a quick, stepwise tutorial to answer this for you. Follow the steps given below to crop your videos with a blink:
● Step 1: Launch the Ezgif Crop Tool
Open the official Ezgif website and navigate to the ‘Crop Video’ tab on the top toolbar in the welcome page. You can alternatively click on the link given below to reach the ‘Crop Video’ interface directly.
● Step 2: Upload Your Video
To upload a locally saved video, click on the ‘Choose File’ button. You will see the file name appear beside it. You can alternatively, copy-paste the URL of a desired video in the address box. Click on ‘Upload Video’ for the file to get uploaded.

● Step 3: Adjust Video Borders
To crop the video to a desired part, you need to set its borders within the required section. To do this, ‘Hold and Drag’ the mouse to highlight a desired section. Now leave the mouse to see the highlighted section within a frame.

● Step 4: Final Touches
After you have the desired section, scroll down to find some adjustment options. Here, you can resize, set aspect ratio and make frame adjustments to your cropping clip. When selecting the output video format, you can either choose to stick with the original file format or change to mp4.
Tap on ‘Crop Video’ when you are done making the changes. The conversion process may take a few seconds. You can enjoy looking at the swaying kitten in the meantime.

● Step 5: Download and Save
Once the conversion finishes, you will see your cropped video appear on the screen. Click on ‘Save’ from the toolbar below the video to download the sane to your device.

Ezgif is certainly an affordable GIF creator and video cropper tool, no doubt about that, but if you are looking for an alternative, you can consider using the Filmora GIF creator software for cropping a video to your favorite part. This one is a free to use, quick and smart tool with the most convenient user interface.
The huge audio-visual effects library of this software allows you to add sound, music and overlays to your clips and intensify them with text and filters. Here’s a quick tutorial on cropping videos with this software:
● Step 1
Download and install Filmora in your device. When finished, launch the software to reach its editor timeline.
Filmora Crop Video Tool Direct Link:
● Step 2
Within the timeline, select and right click on a desired video. Select ‘Crop and Zoom’ for the drop down menu. You can alternatively click on the ‘Crop’ icon.
● Step 3
In the pop-up window that follows, either choose a preset aspect ratio, or click on ‘Custom’ and navigate the rectangle to select a clip area to crop.

Wondershare Filmora - Best Video Editor for Mac/Windows
5,481,435 people have downloaded it.
Build unique custom animations without breaking a sweat.
Focus on creating epic stories and leave the details to Filmora’s auto features.
Start a creative adventure with drag & drop effects and endless possibilities.
Filmora simplifies advanced features to save you time and effort.
Filmora cuts out repetition so you can move on to your next creative breakthrough.
● Key Takeaways from This Episode →
● Ezgif is one of the most suitable GIF creator and converter tools available online that allows you to explore your skills and create top quality GIFs, convert videos to GIFs and crop video clips, all at one place.
●This one is a quick and hassle free solution to your video and GIF editing concerns. When browsing through its feasible alternatives, you can safely count upon the Filmora video editor and GIF creator software for making and customizing GIFs and video clips.
Everything about the know-how of Ezgif creator is here!
In this article
01 [How to Make a GIF on Ezgif](#Part 1)
02 [Video to GIF Made Easy Only With Ezgif](#Part 2)
03 [How to Crop a Video With Ezgif & Filmora](#Part 3)
Part 1 How to Make a GIF on Ezgif
GIFs take you to an exciting journey of expression and impact. With the introduction of GIF keyboards and a variety of creator tools, you are granted the liberty to use pre made GIFs as well as create stirring ones of your own to deliver your messages in unique and impactful ways. When it comes to creating GIFs, the online market is always ready with a heap of creator choices. While each of these tools is distinctive in its own way, some of them are leaders in making the mark among users.
About the Ezgif GIF Maker
Ezgif online GIF maker tool is amongst the most preferred GIF creators in today’s times. This one is a free and super convenient online tool that lets you create and convert animated GIFs in just a few clicks. Compatible with your Windows or MacOS devices, this tool is evidently among the fastest GIF creators of its time.
Apart from creating GIFs, you can also use this tool to cut, crop, trim and resize videos, ass and remove GIF backgrounds and much more. The tool is compatible with almost all common video and image formats; hence you can easily escape the glitch of sticking to a particular format for using this tool.
Here’s how you can use this tool for making next level GIFs:
Step 1: Launch the Tool
Open the Ezgif maker tool in your favorite browser. In the site’s welcome page, tap on ‘GIF Maker’ from the top toolbar.
Step 2: Upload Your Media
Click on ‘Browse’ to select your desired video or a set of still captures from your device and upload the same to the GIF maker timeline. You can choose from a manually or an alphabetically ordered upload. Ensure that the total file size is restricted within 100 MB.
Step 3: Let’s Create!
Click on ‘Upload and Make a GIF’. You will be shown a preview of your creation. At this point, you can customize the GIF with effects, filters and texts.
Step 4: Visual Adjustments
When using still images, consider arranging them in a particular order with the ‘Drag and Drop method’. You can skip this step if you are satisfied with the default arrangement. If you are creating a GIF from a video, pay attention to adjust its play duration.
Step 5: Beautify and Save Your Artwork
When you are satisfied with your work, tap ‘Make a GIF’. You can see your final creation appear. Click on ‘Save’ to add your artwork to your device memory. You can also customize your creation from the toolbar below the created GIF before saving it.
Part 2 Video to GIF Made Easy Only With Ezgif
As stated earlier, you can create GIFs from images and convert videos to GIFs using the Ezgif converter. What’s interesting is that the conversion process is quite fast and you are allowed to play with your editing skills to your heart’s content while customizing your artwork. Given below is a quick guide to convert videos in any common file format into impressive GIFs:
● Step 1
Visit ezgif.com, the official site of the Ezgif creator tool, in any suitable browser of your choice. In the homepage of the tool’s website, navigate to the toolbar at the top and click on ‘Video to GIF’.
Ezgif Video to GIF Converter Link:
● Step 2
In the converter interface, you can either upload a locally saved video from your device by clicking on ‘Browse’ or copy-paste a desired video URL in the address box and tap ‘Upload Video’.
● Step 3
In the tool’s editing interface, set required play duration for your video by setting the start and end points of the clip.
● Step 4
When you are done, click on ‘Convert to GIF’ and wait for the conversion process to finish. You can now see your created GIF in the pop up window that appears next. Click on ‘Save’ option in the toolbar beneath the created GIF to download your creation to your device.
Part 3 How to Crop a Video With Ezgif & Filmora
Ezgif is a multi faceted online tool that allows you to take up a variety of tasks in addition to just creating classy GIFs. Video to GIF conversion is one thing, besides that, you can also crop your videos using this tool. Wondering how to go about the process? Here’s a quick, stepwise tutorial to answer this for you. Follow the steps given below to crop your videos with a blink:
● Step 1: Launch the Ezgif Crop Tool
Open the official Ezgif website and navigate to the ‘Crop Video’ tab on the top toolbar in the welcome page. You can alternatively click on the link given below to reach the ‘Crop Video’ interface directly.
● Step 2: Upload Your Video
To upload a locally saved video, click on the ‘Choose File’ button. You will see the file name appear beside it. You can alternatively, copy-paste the URL of a desired video in the address box. Click on ‘Upload Video’ for the file to get uploaded.
● Step 3: Adjust Video Borders
To crop the video to a desired part, you need to set its borders within the required section. To do this, ‘Hold and Drag’ the mouse to highlight a desired section. Now leave the mouse to see the highlighted section within a frame.
● Step 4: Final Touches
After you have the desired section, scroll down to find some adjustment options. Here, you can resize, set aspect ratio and make frame adjustments to your cropping clip. When selecting the output video format, you can either choose to stick with the original file format or change to mp4.
Tap on ‘Crop Video’ when you are done making the changes. The conversion process may take a few seconds. You can enjoy looking at the swaying kitten in the meantime.
● Step 5: Download and Save
Once the conversion finishes, you will see your cropped video appear on the screen. Click on ‘Save’ from the toolbar below the video to download the sane to your device.
Ezgif is certainly an affordable GIF creator and video cropper tool, no doubt about that, but if you are looking for an alternative, you can consider using the Filmora GIF creator software for cropping a video to your favorite part. This one is a free to use, quick and smart tool with the most convenient user interface.
The huge audio-visual effects library of this software allows you to add sound, music and overlays to your clips and intensify them with text and filters. Here’s a quick tutorial on cropping videos with this software:
● Step 1
Download and install Filmora in your device. When finished, launch the software to reach its editor timeline.
Filmora Crop Video Tool Direct Link:
● Step 2
Within the timeline, select and right click on a desired video. Select ‘Crop and Zoom’ for the drop down menu. You can alternatively click on the ‘Crop’ icon.
● Step 3
In the pop-up window that follows, either choose a preset aspect ratio, or click on ‘Custom’ and navigate the rectangle to select a clip area to crop.
Wondershare Filmora - Best Video Editor for Mac/Windows
5,481,435 people have downloaded it.
Build unique custom animations without breaking a sweat.
Focus on creating epic stories and leave the details to Filmora’s auto features.
Start a creative adventure with drag & drop effects and endless possibilities.
Filmora simplifies advanced features to save you time and effort.
Filmora cuts out repetition so you can move on to your next creative breakthrough.
● Key Takeaways from This Episode →
● Ezgif is one of the most suitable GIF creator and converter tools available online that allows you to explore your skills and create top quality GIFs, convert videos to GIFs and crop video clips, all at one place.
●This one is a quick and hassle free solution to your video and GIF editing concerns. When browsing through its feasible alternatives, you can safely count upon the Filmora video editor and GIF creator software for making and customizing GIFs and video clips.
Blender - A Video Editor for Every Professional
Video editing has become one of the most necessary steps in designing quality content because of the rise in popularity of video streaming platforms. There are nearly hundreds of video editing applications available in the market that facilitate video enhancement tools. And one such application is the Blender, which is available on both macOS and Windows. However, what makes this application stand out from others is its feature-loaded interface that can modify any ordinary video into cinematic clips.
Blender editor is a professional software used even by filmmakers to create stunning visual content as well as animated videos that can attract the attention of a larger audience. Its interface is very simple and easy to use which enables the new users to interact and learn with the different tools available in the application.
1. How to download and install Blender?
Blender is believed to be one of the most advanced and very capable video editors that have been used for over a decade now by content creators. The variety of options for import and export quality of any video content is what attracts most users. The tools are also very useful to all kinds of video content creators no matter the scale of their project. And if you want Blender download and installation on your device, then here is how you can do it:
First, go to the search bar of your web browser and type “Download Blender for Windows” or “Download Blender for macOS” depending on your PC operating system.
Then from the search results, click on the first result and navigate to the official website of Blender where you will see “Download Blender to Windows device” for Windows users.

For the macOS users, they will find the option to “Download Blender to Mac device”.
Click on that and the file will be downloaded to your PC over a short time. Then click on it and with the help of the installation wizard, allow the permissions for installation.

The installation will take some time and when it is finished, you will be able to edit videos using Blender without any difficulty.

2. Key Features of Blender
Some of the key features of Blender are as follows:
- Blender is an open-source application ready for your customization
- Easy-to-use interface with tutorial videos for different tools
- Real-time viewport availability with luma waveform
- Blender video editing provides the availability of both CPU & GPU rendering
- Multiple format support for both imports and export
- VR video editing support for 360° video contents
- Syncing, scrubbing, and easy audio mixing
- Powerful color grading tools for a cinematic look
3. How to edit videos with Blender?
Blender has an intuitive user interface that allows its users to interact with the different video editing tools to edit videos. It also provides tutorials for beginners who don’t know how to edit the videos. But sometimes all these varieties of tools may seem overwhelming. And if you are looking for a guide to editing videos using Blender, then you can follow these steps:
**Stepwise process

First, open the Blender application and when the interface opens, you will see the video preview mode on the top. At the bottom, you will find the video sequencing tool.

Now, drag and drop any media file that you want to edit and the cyan color will appear as an audio strip and the video strip will have a blue color.

Here, you can play the clip to view it, and then you are available with tools to cut, split, trim, and crop the video clips according to your preference. The green bar at the start and end of video clips is the intro and outro and dragging it you will be able to adjust the duration of your clips.
After you are done with the individual clips, you can sequence them as per your needs on the sequence bar available at the bottom of your screen.
You can change the default audio of your media files by clicking on the “Audio” option given in the menu bar and then selecting any audio track according to your preference.
After you are done with all the necessary modifications to your clips, you will need to click on the “Output” option on the left. Here you can change the path for your saved projects.
From the output menu, click on the “Animation’ option and then save your video. This will export your video to the desired location on your device.
4. Blender Alternative to Edit Videos
Blender is one of the most amazing video editors of all time and most video creators use it daily to edit their content. But for some reason, if you are looking at alternatives to Blender video editor, then Filmora can be a great replacement for this application. Filmora features some of the best video editing tools that are easy yet effective to use. And Filmora also comes with a free trial for you to test run the application and its several features.

Here is how you can download and install Filmora on your device:
For Win 7 or later (64-bit)
For macOS 10.12 or later
**Stepwise process
- First, go to your web browser and then search “Download Filmora for Windows” if you are using a Windows device. And if you are using an Apple device, then you will need to search for “Download Filmora for macOS”.
- Then you need to click on the first search result which will take you to the official website of Filmora. There you will see “Filmora for Windows” or “Filmora for macOS” depending on your device. Then click on that and you will be asked to choose between “Free trial” or “Buy Filmora” fordownloading the application.
- Choose the version you want to download for your device and after the application is downloaded to your PC. After that install the application and open it.
- Inside the Filmora interface, you will need to first click on “Create project” where you can import any media file to edit.
- The video clips will be shown on a timeline as thumbnails at the bottom of your screen. You can trim or crop the video clips from there. You are also available with the option to rearrange the clips according to your preference.
- After you are done with the sequence of the clips, you can add transitions, effects, and presets to the video clips to make them more attractive.
- Now you can add a music track or voice-over to the video and select the span of timeline for which you want the audio to be played.
- Before exporting you will have the option to change the video quality and framerate and when done, the changes will be saved. When you are done with all the changes, you need to click on the “Export” project to save it to your device.
5. FAQs about Blender
1.Is Blender video editor free to use?
Yes, Blender video editor is completely free to use and it doesn’t need any special payment for accessing any of its tools. You can search for the official Blender installation package and download it for free to edit your videos.
2.Can Blender edit 4K quality videos?
There are multiple quality and framerate support to import media files to Blender video editor and export them. And you can edit your 4K video contents by changing the settings inside the Blender application.
3.Is Blender good for beginners?
Yes, Blender video editor is very good for beginners since it features an easy-to-use intuitive user interface that can be used by almost anyone. And it also features tutorials that can help beginners understand the different tools of the Blender video editor.
Conclusion
The popularity of video streaming platforms has made the quality of content in videos very demanding. And this rise in demand for high-quality videos needs an appropriate video editor. The article discussed the downloading and installation process of Blender and the complete procedure of how you can use it to edit videos. Also, if you are looking for alternatives to Blender, then we have discussed the Filmora application and a complete stepwise guide about how you can use it.
3. How to edit videos with Blender?
Blender has an intuitive user interface that allows its users to interact with the different video editing tools to edit videos. It also provides tutorials for beginners who don’t know how to edit the videos. But sometimes all these varieties of tools may seem overwhelming. And if you are looking for a guide to editing videos using Blender, then you can follow these steps:
**Stepwise process
First, open the Blender application and when the interface opens, you will see the video preview mode on the top. At the bottom, you will find the video sequencing tool.
Now, drag and drop any media file that you want to edit and the cyan color will appear as an audio strip and the video strip will have a blue color.
Here, you can play the clip to view it, and then you are available with tools to cut, split, trim, and crop the video clips according to your preference. The green bar at the start and end of video clips is the intro and outro and dragging it you will be able to adjust the duration of your clips.
After you are done with the individual clips, you can sequence them as per your needs on the sequence bar available at the bottom of your screen.
You can change the default audio of your media files by clicking on the “Audio” option given in the menu bar and then selecting any audio track according to your preference.
After you are done with all the necessary modifications to your clips, you will need to click on the “Output” option on the left. Here you can change the path for your saved projects.
From the output menu, click on the “Animation’ option and then save your video. This will export your video to the desired location on your device.
4. Blender Alternative to Edit Videos
Blender is one of the most amazing video editors of all time and most video creators use it daily to edit their content. But for some reason, if you are looking at alternatives to Blender video editor, then Filmora can be a great replacement for this application. Filmora features some of the best video editing tools that are easy yet effective to use. And Filmora also comes with a free trial for you to test run the application and its several features.
Here is how you can download and install Filmora on your device:
For Win 7 or later (64-bit)
For macOS 10.12 or later
**Stepwise process
- First, go to your web browser and then search “Download Filmora for Windows” if you are using a Windows device. And if you are using an Apple device, then you will need to search for “Download Filmora for macOS”.
- Then you need to click on the first search result which will take you to the official website of Filmora. There you will see “Filmora for Windows” or “Filmora for macOS” depending on your device. Then click on that and you will be asked to choose between “Free trial” or “Buy Filmora” fordownloading the application.
- Choose the version you want to download for your device and after the application is downloaded to your PC. After that install the application and open it.
- Inside the Filmora interface, you will need to first click on “Create project” where you can import any media file to edit.
- The video clips will be shown on a timeline as thumbnails at the bottom of your screen. You can trim or crop the video clips from there. You are also available with the option to rearrange the clips according to your preference.
- After you are done with the sequence of the clips, you can add transitions, effects, and presets to the video clips to make them more attractive.
- Now you can add a music track or voice-over to the video and select the span of timeline for which you want the audio to be played.
- Before exporting you will have the option to change the video quality and framerate and when done, the changes will be saved. When you are done with all the changes, you need to click on the “Export” project to save it to your device.
5. FAQs about Blender
1.Is Blender video editor free to use?
Yes, Blender video editor is completely free to use and it doesn’t need any special payment for accessing any of its tools. You can search for the official Blender installation package and download it for free to edit your videos.
2.Can Blender edit 4K quality videos?
There are multiple quality and framerate support to import media files to Blender video editor and export them. And you can edit your 4K video contents by changing the settings inside the Blender application.
3.Is Blender good for beginners?
Yes, Blender video editor is very good for beginners since it features an easy-to-use intuitive user interface that can be used by almost anyone. And it also features tutorials that can help beginners understand the different tools of the Blender video editor.
Conclusion
The popularity of video streaming platforms has made the quality of content in videos very demanding. And this rise in demand for high-quality videos needs an appropriate video editor. The article discussed the downloading and installation process of Blender and the complete procedure of how you can use it to edit videos. Also, if you are looking for alternatives to Blender, then we have discussed the Filmora application and a complete stepwise guide about how you can use it.
15 Must-Use Gifs Editors
15 Must-Use Gifs Editors in 2024
An easy yet powerful editor
Numerous effects to choose from
Detailed tutorials provided by the official channel
Several websites and companies use the graphics interchange format that is the GIF. It can be seen to be used by a wide number of people on the internet and its format is supported by all platforms. The common goal of all the users can be satisfied.
Are you looking to create and edit gifs online or on your laptop but cannot find a suitable way out?
Finding the best and most user friendly GIF maker is not very hard, especially considering that free gif editor software is offered by so many providers. But if you’re only starting your journey with apps to make GIFs, it can be a difficult choice.
In this article
01 [How to Make GIF Interesting?](#Part 1)
02 [Top 5 Editors for Windows](#Part 2)
03 [Top 5 Editors for iPhone/Android](#Part 3)
04 [Top 5 Editors for Animated GIF Editing](#Part 4)
Part 1 How to Make GIF Interesting?
There are several ways by which a GIF can be made interesting. You can use colorful graphics and drop duplicate frames. Using fewer colors lets you make longer and more involved gifs.
Part 2 Top 5 Editors for Windows
Below are the top 5 editors which will help you to form GIFs for Windows: -
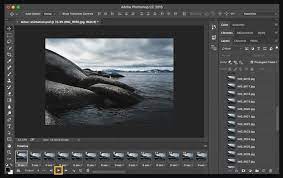
01Adobe Photoshop
Adobe Photoshop could be a useful device for making videos, image redaction, and GIF editing. This GIF code for Windows can allow you to import a GIF file so begin with the modification process.
Therefore, GIF editing is a breeze as you’ll alter the effects, modification the frame animation within the Timeline section, and do plenty a lot with this tool. You’ll simply utilize the free trial version to urge accustomed to the tool initial and then opt for the premium version to try to a lot more.
02EaseUS Video Editor
In the context of GIF makers, EaseUS Video Editor can also be said as one of the best. Free templates of texts, filters, elements, overlays, transitions, and music are available here which its users create GIF images with easily. You can also create lively and fully animated images, convert MP4 to GIFs and share it on YouTube, or other social media platforms.
The capabilities of this animated GIF maker for Windows are not restrained to this alone, as it can be used to edit all kinds of images, audio, and videos.
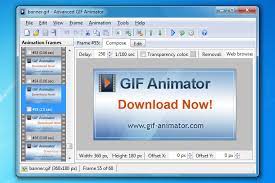
03GIF Animator
GIF animator editor is one of the first-rate GIF makers and is an awesome device for you if you desire to create GIF images, banners, buttons, and GIF videos. The device is very convenient to use and is a favorite of animators and designers.
The measurement of the photo can be modified and alongside that, it is feasible to control the frames, hastily cross texts, and enhance. Corrections to the movies can be brought and the built-in photograph editor can be used to rectify photographs and pictures, you can draw on them and you can convert movies to GIFs by the usage of the fragmented section of the video files.
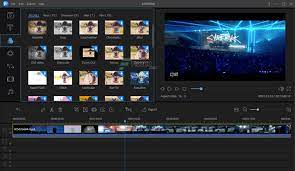
04**Wondershare Filmora Video Editor **
If you are searching for nice animated GIF makers for Windows computers, then Wondershare Filmora’s animated movies and GIF editor device may want to be a brilliant choice. That’s due to the fact with this GIF maker Windows device lets you add a video, convert it to the GIF structure and then edit it later with its super features.
The interactive UI helps customers manner greater than one hundred fifty file codecs easily. With this device, you can crop, pace up a video, alter the body size, and caption it. Additionally, you add texts, add animation consequences to the images, and alter the pictures and movies in a few steps.
Wondershare Filmora - Best Video Editor for Mac/Windows
5,481,435 people have downloaded it.
Build unique custom animations without breaking a sweat.
Focus on creating epic stories and leave the details to Filmora’s auto features.
Start a creative adventure with drag & drop effects and endless possibilities.
Filmora simplifies advanced features to save you time and effort.
Filmora cuts out repetition so you can move on to your next creative breakthrough.
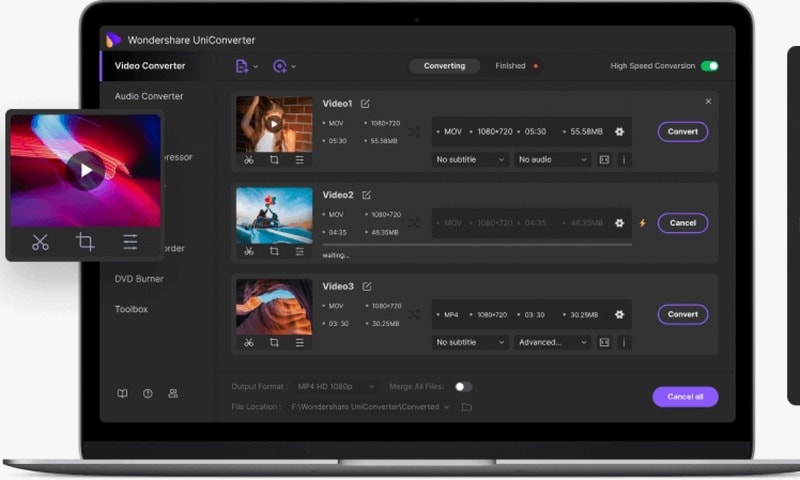
05Wondershare UniConverter
Wondershare UniConverter is one of the fine image, audio, and video editor and converter out there, and ranked the excellent GIF maker here. This GIF editor app is easy for customers and will furnish a pleasant platform for novices to operate their tasks. And when performed to create and edit GIF files, a person can export the GIF archives to both Android or iPhone barring having to use iTunes.
Part 3 Top 5 Editors for iPhone/Android
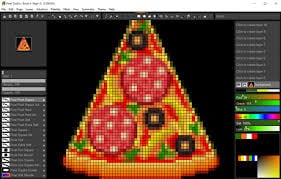
01PixelStudio
Pixel Studio is an animation app for pixel artwork fans. You can draw your little creations with pixel art. It additionally comes with a textual content tool, aid for matters like Samsung S-Pen, and it auto-saves so you don’t lose work. You can export your creations to GIF as nicely and that makes Pixel Studio one of the quality apps for customized GIFs. It’s normally an artwork app so meme lords may additionally want to put in a little greater effort than usual, however, the consequences are normally well worth it.
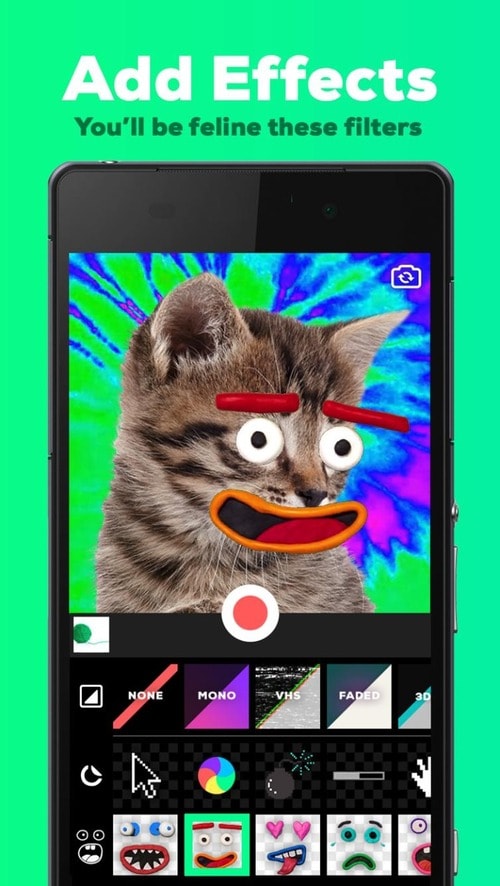
02Giphy Cam
Giphy Cam is one of the more recent gif editing apps. The digicam data is a brief phase of video. You can alter that video with lots of filters, different effects, stickers, text, and more. It additionally has a five-shot burst mode alongside its video mode. This is likely the excellent GIF/camera app hybrid. It doesn’t have any digital camera features; however, it does GIFs higher than the others by way of a large margin. It’s free with no in-app purchases.
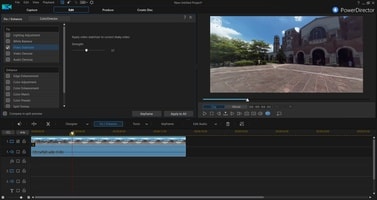
03PowerDirector
PowerDirector is one of many videos modifying apps with GIF support. This one simply takes place to be higher than most of the different ones. It’s a video editor app. Thus, it’ll have comparable features. However, two of the export codecs encompass GIF nonetheless pix and animated GIFs. This will work first-class for turning a video into a shorter GIF. The app is free to download and play with. You may additionally want to buy extra aspects by using in-app purchases.
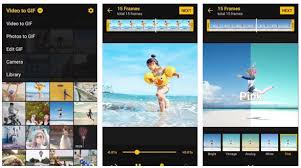
04ImgPlay – GIF Maker
ImgPlay is a popular GIF editing app that is available for Android and iOS. You have the option of using an existing video or shooting one using your phone’s camera. In GIFs, you can apply 30 effects, crop a portion of your choice, and modify the frame rate.
05Motion Stills
Motion Stills is a Google app that allows you to record short films and turn them into looping GIFs. You can use the app to take a short 3s clip with a single tap or utilize the Fast Forward feature to condense an existing video into a short one. To make yips GIFs even better, you may add motion text and emoticons. After that, save it as a GIF and send it to your friends.
Part 4 Top 5 Editors for Animated GIF Editing
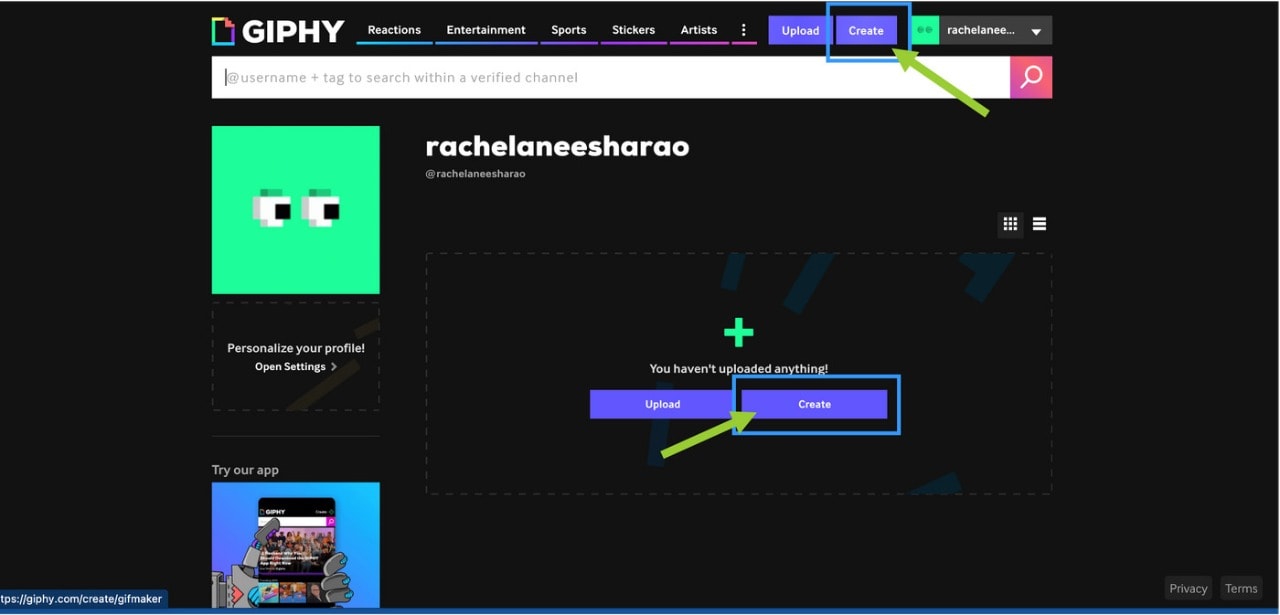
01Giphy
GIPHY is a designing tool that helps customers to create extraordinary GIFs, stickers, and backdrops. You can edit your plan with filters, captions, stickers, and different plan elements. The popular codecs for GIF uploads are JPG, PNG, GIF, MP4, or MOV, whilst the conventional file codecs to convert to stickers are JPG or PNG.
GIPHY permits you to paste URLs from specific sources such as Vimeo, YouTube, GIPHY, and others. The animated GIF maker software program makes it convenient for customers to edit and organize the uploaded archives in the favored order.
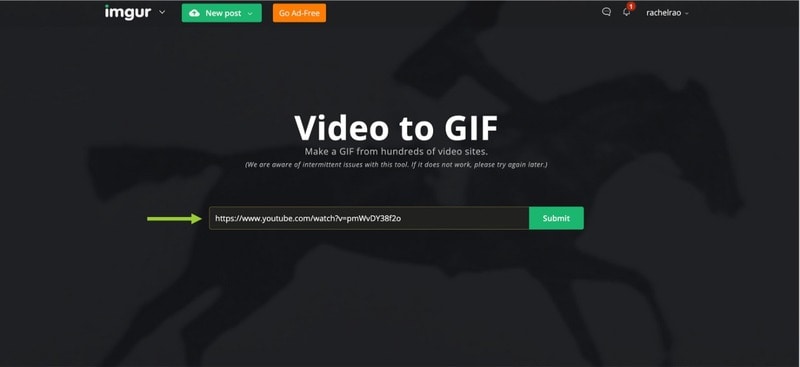
02Imgur
It’s a website that makes it simple to make GIFs. Simply paste the video URL into the web app and wait for it to process. After that, all you must do now is set the start time and duration of your GIF.
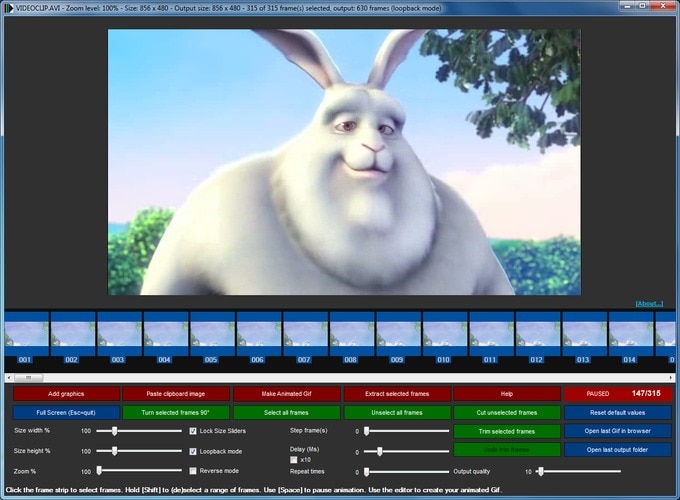
03KickMyGraphics
The utility comes with a humble person interface and it approves you to create animated GIFs from neighborhood images. In addition, you can additionally paste snapshots from your clipboard at once to the application. The utility additionally helps video files; however, you want to convert the video earlier than you can edit it. The utility affords a stay preview so you can see how your animation appears at any time. You can additionally see all handy frames and dispose of useless frames with ease.
As for editing, you can’t add your textual content or alter the brightness of your frames, however, you can trade their width, peak, and zoom level. You can additionally allow Loopback or Reverse mode and set delay, step frames, and a variety of repeats. You can additionally configure output first-class right from the application.
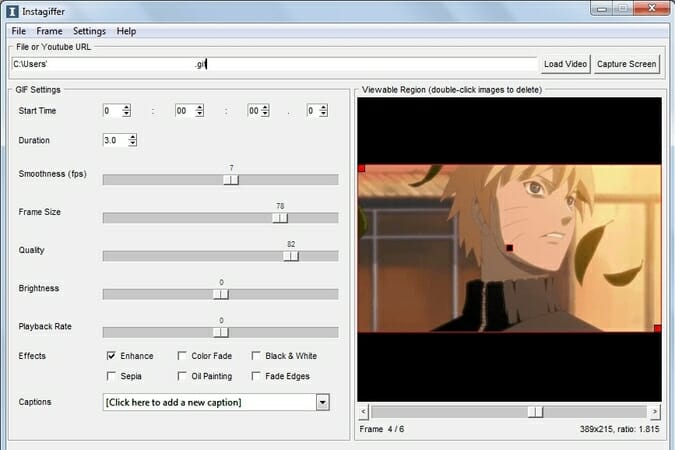
04Instagiffer
Instagiffer is some other easy software that lets you create animated GIFs on your PC. This utility affords a humble consumer interface; however, it makes up for it with an extensive variety of features. The software approves you to convert nearby movies to GIFs, however, you can additionally paste a YouTube URL and convert an online video to GIF with ease. According to the developer, the software additionally works with different video web hosting websites.
05GIMP
The software is free, so you can download and use it except for any restrictions. GIMP is best for picture designers and it comes with all preferences that an image editor needs. You can without problems edit your images, exchange their color, hue, saturation, or brightness, and add exceptional outcomes to them.
In addition, you can create special creations thanks to the built-in layer system. It’s worth citing that the software additionally helps programming algorithms so you can effortlessly edit your photos with the use of scripts.

● Key Takeaways from This Episode →
● If you are typically worried about how you can be able to come up with fascinating GIFs, you ought to hold in thought that you don’t have to create them from scratch.
● You can be capable to advance inspiring GIFs from current movies and photos eight after GIF editor software program free download.
● Hopefully, you are now capable to pick out a perfect GIF creator to use for your modifying tasks.
Several websites and companies use the graphics interchange format that is the GIF. It can be seen to be used by a wide number of people on the internet and its format is supported by all platforms. The common goal of all the users can be satisfied.
Are you looking to create and edit gifs online or on your laptop but cannot find a suitable way out?
Finding the best and most user friendly GIF maker is not very hard, especially considering that free gif editor software is offered by so many providers. But if you’re only starting your journey with apps to make GIFs, it can be a difficult choice.
In this article
01 [How to Make GIF Interesting?](#Part 1)
02 [Top 5 Editors for Windows](#Part 2)
03 [Top 5 Editors for iPhone/Android](#Part 3)
04 [Top 5 Editors for Animated GIF Editing](#Part 4)
Part 1 How to Make GIF Interesting?
There are several ways by which a GIF can be made interesting. You can use colorful graphics and drop duplicate frames. Using fewer colors lets you make longer and more involved gifs.
Part 2 Top 5 Editors for Windows
Below are the top 5 editors which will help you to form GIFs for Windows: -
01Adobe Photoshop
Adobe Photoshop could be a useful device for making videos, image redaction, and GIF editing. This GIF code for Windows can allow you to import a GIF file so begin with the modification process.
Therefore, GIF editing is a breeze as you’ll alter the effects, modification the frame animation within the Timeline section, and do plenty a lot with this tool. You’ll simply utilize the free trial version to urge accustomed to the tool initial and then opt for the premium version to try to a lot more.
02EaseUS Video Editor
In the context of GIF makers, EaseUS Video Editor can also be said as one of the best. Free templates of texts, filters, elements, overlays, transitions, and music are available here which its users create GIF images with easily. You can also create lively and fully animated images, convert MP4 to GIFs and share it on YouTube, or other social media platforms.
The capabilities of this animated GIF maker for Windows are not restrained to this alone, as it can be used to edit all kinds of images, audio, and videos.
03GIF Animator
GIF animator editor is one of the first-rate GIF makers and is an awesome device for you if you desire to create GIF images, banners, buttons, and GIF videos. The device is very convenient to use and is a favorite of animators and designers.
The measurement of the photo can be modified and alongside that, it is feasible to control the frames, hastily cross texts, and enhance. Corrections to the movies can be brought and the built-in photograph editor can be used to rectify photographs and pictures, you can draw on them and you can convert movies to GIFs by the usage of the fragmented section of the video files.
04**Wondershare Filmora Video Editor **
If you are searching for nice animated GIF makers for Windows computers, then Wondershare Filmora’s animated movies and GIF editor device may want to be a brilliant choice. That’s due to the fact with this GIF maker Windows device lets you add a video, convert it to the GIF structure and then edit it later with its super features.
The interactive UI helps customers manner greater than one hundred fifty file codecs easily. With this device, you can crop, pace up a video, alter the body size, and caption it. Additionally, you add texts, add animation consequences to the images, and alter the pictures and movies in a few steps.
Wondershare Filmora - Best Video Editor for Mac/Windows
5,481,435 people have downloaded it.
Build unique custom animations without breaking a sweat.
Focus on creating epic stories and leave the details to Filmora’s auto features.
Start a creative adventure with drag & drop effects and endless possibilities.
Filmora simplifies advanced features to save you time and effort.
Filmora cuts out repetition so you can move on to your next creative breakthrough.
05Wondershare UniConverter
Wondershare UniConverter is one of the fine image, audio, and video editor and converter out there, and ranked the excellent GIF maker here. This GIF editor app is easy for customers and will furnish a pleasant platform for novices to operate their tasks. And when performed to create and edit GIF files, a person can export the GIF archives to both Android or iPhone barring having to use iTunes.
Part 3 Top 5 Editors for iPhone/Android
01PixelStudio
Pixel Studio is an animation app for pixel artwork fans. You can draw your little creations with pixel art. It additionally comes with a textual content tool, aid for matters like Samsung S-Pen, and it auto-saves so you don’t lose work. You can export your creations to GIF as nicely and that makes Pixel Studio one of the quality apps for customized GIFs. It’s normally an artwork app so meme lords may additionally want to put in a little greater effort than usual, however, the consequences are normally well worth it.
02Giphy Cam
Giphy Cam is one of the more recent gif editing apps. The digicam data is a brief phase of video. You can alter that video with lots of filters, different effects, stickers, text, and more. It additionally has a five-shot burst mode alongside its video mode. This is likely the excellent GIF/camera app hybrid. It doesn’t have any digital camera features; however, it does GIFs higher than the others by way of a large margin. It’s free with no in-app purchases.
03PowerDirector
PowerDirector is one of many videos modifying apps with GIF support. This one simply takes place to be higher than most of the different ones. It’s a video editor app. Thus, it’ll have comparable features. However, two of the export codecs encompass GIF nonetheless pix and animated GIFs. This will work first-class for turning a video into a shorter GIF. The app is free to download and play with. You may additionally want to buy extra aspects by using in-app purchases.
04ImgPlay – GIF Maker
ImgPlay is a popular GIF editing app that is available for Android and iOS. You have the option of using an existing video or shooting one using your phone’s camera. In GIFs, you can apply 30 effects, crop a portion of your choice, and modify the frame rate.
05Motion Stills
Motion Stills is a Google app that allows you to record short films and turn them into looping GIFs. You can use the app to take a short 3s clip with a single tap or utilize the Fast Forward feature to condense an existing video into a short one. To make yips GIFs even better, you may add motion text and emoticons. After that, save it as a GIF and send it to your friends.
Part 4 Top 5 Editors for Animated GIF Editing
01Giphy
GIPHY is a designing tool that helps customers to create extraordinary GIFs, stickers, and backdrops. You can edit your plan with filters, captions, stickers, and different plan elements. The popular codecs for GIF uploads are JPG, PNG, GIF, MP4, or MOV, whilst the conventional file codecs to convert to stickers are JPG or PNG.
GIPHY permits you to paste URLs from specific sources such as Vimeo, YouTube, GIPHY, and others. The animated GIF maker software program makes it convenient for customers to edit and organize the uploaded archives in the favored order.
02Imgur
It’s a website that makes it simple to make GIFs. Simply paste the video URL into the web app and wait for it to process. After that, all you must do now is set the start time and duration of your GIF.
03KickMyGraphics
The utility comes with a humble person interface and it approves you to create animated GIFs from neighborhood images. In addition, you can additionally paste snapshots from your clipboard at once to the application. The utility additionally helps video files; however, you want to convert the video earlier than you can edit it. The utility affords a stay preview so you can see how your animation appears at any time. You can additionally see all handy frames and dispose of useless frames with ease.
As for editing, you can’t add your textual content or alter the brightness of your frames, however, you can trade their width, peak, and zoom level. You can additionally allow Loopback or Reverse mode and set delay, step frames, and a variety of repeats. You can additionally configure output first-class right from the application.
04Instagiffer
Instagiffer is some other easy software that lets you create animated GIFs on your PC. This utility affords a humble consumer interface; however, it makes up for it with an extensive variety of features. The software approves you to convert nearby movies to GIFs, however, you can additionally paste a YouTube URL and convert an online video to GIF with ease. According to the developer, the software additionally works with different video web hosting websites.
05GIMP
The software is free, so you can download and use it except for any restrictions. GIMP is best for picture designers and it comes with all preferences that an image editor needs. You can without problems edit your images, exchange their color, hue, saturation, or brightness, and add exceptional outcomes to them.
In addition, you can create special creations thanks to the built-in layer system. It’s worth citing that the software additionally helps programming algorithms so you can effortlessly edit your photos with the use of scripts.
● Key Takeaways from This Episode →
● If you are typically worried about how you can be able to come up with fascinating GIFs, you ought to hold in thought that you don’t have to create them from scratch.
● You can be capable to advance inspiring GIFs from current movies and photos eight after GIF editor software program free download.
● Hopefully, you are now capable to pick out a perfect GIF creator to use for your modifying tasks.
How to Create a Slideshow GIF?
How to Make a Slideshow GIF?
An easy yet powerful editor
Numerous effects to choose from
Detailed tutorials provided by the official channel
In this world of advanced technology and inventions, nothing is impossible. And we have found different exciting ways of making the world around us a more interesting a fun place to live. And all this is because of the rapidly advancing technology.
The simplest things around us have become more exciting and fun to deal with. The mere mode of communication has shifted to the digital platform and has improved so much than before. We can now express how we feel through the different emotions as precisely as possible.
And adding to that, now, we have the GIFs to make our conversation funnier and more engaging. So, what if we integrate these gifs in slideshows? It will be much more exciting and a huge plus point. So, let us look into what are GIFs, how can we use them and lastly, what tool is the best for creating some fantastic and amazing GIFs and videos.
So, let us now start our discussion without any further delay!
In this article
01 [What Is a GIF and When to Use a GIF?](#Part 1)
02 [How to Edit a GIF in Google Slides?](#Part 2)
03 [How to Make a Slideshow GIF?](#Part 3)
Part 1 What Is a GIF and When to Use a GIF?
It is essential that we discuss what a GIF is? Firstly, GIF is the abbreviation for Graphics Interchange Format. Steve Wilhite, an American computer scantiest, was responsible for developing this bitmap image format with the team at the online services provider CompuServe.
The GIFs are images and animations whose sizes are reduced. The animations are much shorter in duration than the regular animation videos. It makes the animations look more expressive. The message, information, or expression to be portrayed through the animation gets better expressed due to its speed.
Therefore, the GIFs’ animations are much more exciting and engaging. A question might arise t you: Why should you use GIFs in slideshows, or how can they be beneficial. Let us put forth some benefits of GIFs that will help you know and understand their importance. Here are the benefits of using Gifs.
● Gifs slideshow slides tend to engage the audience much more. Firstly, they are one of the most unique ways of presenting a slideshow or any other content. So, being unique will automatically positively attract more attention.
● Your content and slideshow will stand out among the crowd. Firstly, GIFs are some of the most inimitable components to fit in a slideshow. Additionally, each GIF has its characteristic features different from the others. Each of them is interesting and engaging in their way. So, you always have the chance of being better than the rest when you use GIFs in slideshows.
● As google slides spread, a sensation of laughter, which, consequently, prevails in a positive environment. This, in turn, helps make your slideshow more appealing and more enjoyable. The more fun you add to anything, the more attractive it will be. And adding GIFs in slideshows can be the best way of doing so.
Now, let us discuss the next important question about using the GIFs: when should we use them? You must know that gifs on google slides can be used in a limited way. So, here are the different ways you can really and readily integrate GIFs in your slideshows.
● Use them in the first slide as a title slide. Whenever you use a GIF in the first or the introductory slide, you automatically initiate your presentation with something unique. And as a result, you successfully grab the audience’ leave a good impression. Additionally, from the first slide itself, you tend to have a comfortable and positive environment to continue your presentation more impeccably.
● Use URL GIFs. There are plenty of them; therefore, you can have abundant choices and choose the best among them, especially the more relatable and engaging ones. The URL GIFs are plentily used in chat. So, adding them to your slides makes it more interesting, relatable and praiseworthy. However, it would be best to be careful about the copyright aspect. Ensure not to use URL GIFs that can face you with copyright issues.
● You can also use the screengrabs; you can easily pull the attention of your audience to different parts of your content, one after the another, most systematically and effectively. As a result, you can explain and express your content in the most detailed way possible.
● Either type of GIF that you can use are charts and graphs. In the first place, putting graphs and charts tend to make your presentation more organised, factual and professional. So, when you include GIFs of charts and graphs, you take the beneficial qualities of your display a notch higher.
Part 2 How to Edit a GIF in Google Slides?
There are numerous ways to edit the GIFs in google slides. If you want to edit a GIF in google slides, you will have to follow specific steps. It is alright if you are unaware of the steps because we will discuss the actions that will help you edit gifs in google slides.
01For cropping the GIFs
Sometimes, you may not want the entire Gif to be in your slideshow. And for that, you need to cut off the unnecessary portion of the GIF. You can ideally do so with the help of cropping the GIF, and it helps attain better focus on the part of the GIF that is relatable and, therefore, makes your slide enhanced and improved.
How to crop a GIF in google slide?
Step 1: Tap on the GIF twice and then pull the black tabs in the size you want your GIF to be.
Step 2: Press “Enter” to crop the GIF in your selected size.
02For cropping GIFs in a particular shape
You might want to make your GIFs into a particular shape, and it can be a triangle, square or even a heart shape. This will make your slideshow look more eye-catching and worked on.
How to crop the GIFs in a particular shape in google slides?
Step 1: Select the arrow present next to the “Crop” option.
Step 2: Select the option “shape”.
Step 3: A list of shapes will be shown. Choose the one you would want your GIF to have.

03For putting borders in the GIFs
To make your gifs more countered, eye-catching and prominent, you can put a border around them. You can readily do so in google slides in the simplest way possible.
How to put borders in GIFs in google slides?
Step 1: Select your GIF. Head to the “Menu Bar”.
Step 2: go to “Border Colour” and select the colour of the border you want to put around your GIF.
Step 3: Go to the “Border Weight” option and select the thickness of the border your GIF would have.

04For formatting your GIFs
GIFs can be readily formatted in google slides, which is in the following ways.
Rotating the GIFs
If you want to rotate your GIFs vertically or horizontally, you have to-
Step 1: Select the GIF and go to the “Format” options in the toolbar.
Step 2: Select the option “Rotate” and select to rotate it vertically or horizontally.
Recolouring the GIFs
You might want to match the colours of your GIFs with your presentation. And you can do so by-.
Step 1: Select the GIF and go to the “Recolour” option.
Step 2: Select the colour that you want.
Part 1 How to Make a Slideshow GIF?
As we had mentioned earlier, we will be introducing you to the best tool that will help you make the most incredible GIFs as well as video edits; it is the Filmora. It includes plenty of features that will help the professionals nurture their skills and the beginners.
But, how can you use Wondershare Filmora Video Editor for making google slides animated gifs? Here are the steps for it.
Wondershare Filmora - Best Video Editor for Mac/Windows
5,481,435 people have downloaded it.
Build unique custom animations without breaking a sweat.
Focus on creating epic stories and leave the details to Filmora’s auto features.
Start a creative adventure with drag & drop effects and endless possibilities.
Filmora simplifies advanced features to save you time and effort.
Filmora cuts out repetition so you can move on to your next creative breakthrough.
Step 1: import the media files that you want
Step 2: Drag the media files to the times to edit the animation of it.

Step 3: Edit the media files the way you want. Crop, rotate, recolour the way you want it to appear.
Step 4: You can integrate some texts into it if you want.

Step 5: Save the edit and export it for further use.

● Key Takeaways from This Episode →
● Therefore, in the above discussion, we have enveloped numerous important aspects about GIFs and their utility in the google slides. We started with discussing and underrating what a GIF is and why is slider gif essential for us.
● Next, discuss the various ways you can edit the GIFs in your slideshows, along with the steps accordingly. Lastly, we introduced and discussed the best tool you can use for editing videos making GIFs and videos.
● So, if you are a beginner or a professional who wants to use the more advanced features of editing videos, Filmora is the best platform and tool for you. Access it for free through its free trial options. And once you find how amazing it is, you can readily access its paid features to enjoy the sphere of editing more profoundly!
In this world of advanced technology and inventions, nothing is impossible. And we have found different exciting ways of making the world around us a more interesting a fun place to live. And all this is because of the rapidly advancing technology.
The simplest things around us have become more exciting and fun to deal with. The mere mode of communication has shifted to the digital platform and has improved so much than before. We can now express how we feel through the different emotions as precisely as possible.
And adding to that, now, we have the GIFs to make our conversation funnier and more engaging. So, what if we integrate these gifs in slideshows? It will be much more exciting and a huge plus point. So, let us look into what are GIFs, how can we use them and lastly, what tool is the best for creating some fantastic and amazing GIFs and videos.
So, let us now start our discussion without any further delay!
In this article
01 [What Is a GIF and When to Use a GIF?](#Part 1)
02 [How to Edit a GIF in Google Slides?](#Part 2)
03 [How to Make a Slideshow GIF?](#Part 3)
Part 1 What Is a GIF and When to Use a GIF?
It is essential that we discuss what a GIF is? Firstly, GIF is the abbreviation for Graphics Interchange Format. Steve Wilhite, an American computer scantiest, was responsible for developing this bitmap image format with the team at the online services provider CompuServe.
The GIFs are images and animations whose sizes are reduced. The animations are much shorter in duration than the regular animation videos. It makes the animations look more expressive. The message, information, or expression to be portrayed through the animation gets better expressed due to its speed.
Therefore, the GIFs’ animations are much more exciting and engaging. A question might arise t you: Why should you use GIFs in slideshows, or how can they be beneficial. Let us put forth some benefits of GIFs that will help you know and understand their importance. Here are the benefits of using Gifs.
● Gifs slideshow slides tend to engage the audience much more. Firstly, they are one of the most unique ways of presenting a slideshow or any other content. So, being unique will automatically positively attract more attention.
● Your content and slideshow will stand out among the crowd. Firstly, GIFs are some of the most inimitable components to fit in a slideshow. Additionally, each GIF has its characteristic features different from the others. Each of them is interesting and engaging in their way. So, you always have the chance of being better than the rest when you use GIFs in slideshows.
● As google slides spread, a sensation of laughter, which, consequently, prevails in a positive environment. This, in turn, helps make your slideshow more appealing and more enjoyable. The more fun you add to anything, the more attractive it will be. And adding GIFs in slideshows can be the best way of doing so.
Now, let us discuss the next important question about using the GIFs: when should we use them? You must know that gifs on google slides can be used in a limited way. So, here are the different ways you can really and readily integrate GIFs in your slideshows.
● Use them in the first slide as a title slide. Whenever you use a GIF in the first or the introductory slide, you automatically initiate your presentation with something unique. And as a result, you successfully grab the audience’ leave a good impression. Additionally, from the first slide itself, you tend to have a comfortable and positive environment to continue your presentation more impeccably.
● Use URL GIFs. There are plenty of them; therefore, you can have abundant choices and choose the best among them, especially the more relatable and engaging ones. The URL GIFs are plentily used in chat. So, adding them to your slides makes it more interesting, relatable and praiseworthy. However, it would be best to be careful about the copyright aspect. Ensure not to use URL GIFs that can face you with copyright issues.
● You can also use the screengrabs; you can easily pull the attention of your audience to different parts of your content, one after the another, most systematically and effectively. As a result, you can explain and express your content in the most detailed way possible.
● Either type of GIF that you can use are charts and graphs. In the first place, putting graphs and charts tend to make your presentation more organised, factual and professional. So, when you include GIFs of charts and graphs, you take the beneficial qualities of your display a notch higher.
Part 2 How to Edit a GIF in Google Slides?
There are numerous ways to edit the GIFs in google slides. If you want to edit a GIF in google slides, you will have to follow specific steps. It is alright if you are unaware of the steps because we will discuss the actions that will help you edit gifs in google slides.
01For cropping the GIFs
Sometimes, you may not want the entire Gif to be in your slideshow. And for that, you need to cut off the unnecessary portion of the GIF. You can ideally do so with the help of cropping the GIF, and it helps attain better focus on the part of the GIF that is relatable and, therefore, makes your slide enhanced and improved.
How to crop a GIF in google slide?
Step 1: Tap on the GIF twice and then pull the black tabs in the size you want your GIF to be.
Step 2: Press “Enter” to crop the GIF in your selected size.
02For cropping GIFs in a particular shape
You might want to make your GIFs into a particular shape, and it can be a triangle, square or even a heart shape. This will make your slideshow look more eye-catching and worked on.
How to crop the GIFs in a particular shape in google slides?
Step 1: Select the arrow present next to the “Crop” option.
Step 2: Select the option “shape”.
Step 3: A list of shapes will be shown. Choose the one you would want your GIF to have.
03For putting borders in the GIFs
To make your gifs more countered, eye-catching and prominent, you can put a border around them. You can readily do so in google slides in the simplest way possible.
How to put borders in GIFs in google slides?
Step 1: Select your GIF. Head to the “Menu Bar”.
Step 2: go to “Border Colour” and select the colour of the border you want to put around your GIF.
Step 3: Go to the “Border Weight” option and select the thickness of the border your GIF would have.
04For formatting your GIFs
GIFs can be readily formatted in google slides, which is in the following ways.
Rotating the GIFs
If you want to rotate your GIFs vertically or horizontally, you have to-
Step 1: Select the GIF and go to the “Format” options in the toolbar.
Step 2: Select the option “Rotate” and select to rotate it vertically or horizontally.
Recolouring the GIFs
You might want to match the colours of your GIFs with your presentation. And you can do so by-.
Step 1: Select the GIF and go to the “Recolour” option.
Step 2: Select the colour that you want.
Part 1 How to Make a Slideshow GIF?
As we had mentioned earlier, we will be introducing you to the best tool that will help you make the most incredible GIFs as well as video edits; it is the Filmora. It includes plenty of features that will help the professionals nurture their skills and the beginners.
But, how can you use Wondershare Filmora Video Editor for making google slides animated gifs? Here are the steps for it.
Wondershare Filmora - Best Video Editor for Mac/Windows
5,481,435 people have downloaded it.
Build unique custom animations without breaking a sweat.
Focus on creating epic stories and leave the details to Filmora’s auto features.
Start a creative adventure with drag & drop effects and endless possibilities.
Filmora simplifies advanced features to save you time and effort.
Filmora cuts out repetition so you can move on to your next creative breakthrough.
Step 1: import the media files that you want
Step 2: Drag the media files to the times to edit the animation of it.
Step 3: Edit the media files the way you want. Crop, rotate, recolour the way you want it to appear.
Step 4: You can integrate some texts into it if you want.
Step 5: Save the edit and export it for further use.
● Key Takeaways from This Episode →
● Therefore, in the above discussion, we have enveloped numerous important aspects about GIFs and their utility in the google slides. We started with discussing and underrating what a GIF is and why is slider gif essential for us.
● Next, discuss the various ways you can edit the GIFs in your slideshows, along with the steps accordingly. Lastly, we introduced and discussed the best tool you can use for editing videos making GIFs and videos.
● So, if you are a beginner or a professional who wants to use the more advanced features of editing videos, Filmora is the best platform and tool for you. Access it for free through its free trial options. And once you find how amazing it is, you can readily access its paid features to enjoy the sphere of editing more profoundly!
Also read:
- 2024 Approved Got No Luck with MP4 Video Joining Software? Try These 6 Best MP4 Mergers to Combine Videos on Your MAC and Windows
- New 2024 Approved Camtasia Review – Is It The Best Video Editor?
- New 15 Best Video Editing Courses Online with Certificate Free $ Paid for 2024
- New 8 Tips to Apply Cinematic Color Grading to Your Video
- Updated 2024 Approved How to Create a DIY Green Screen Video Effect?
- 2024 Approved Rules of Three or Thirds Is a Classic Trick in Photography, and the Result of Video and Photo Is Really Great. This Article Will Show You How to Use Rule of Thirds to Make a Better Video
- Updated In 2024, 2 Easy Methods | How To Zoom In On TikTok Videos?
- Updated EasyHDR Review Is This a Good Choice to Create HDR for 2024
- In 2024, Steps to Create Makeup Videos
- New Gimp Green Screen for 2024
- Updated In 2024, Best Guide of 8 Photo Collage Apps for PC
- New How Can You Create Outstanding Educational Teaching Videos for 2024
- New Boost the Pace of Your Instagram Reels Videos with These Simple Tricks for 2024
- Updated How Important It Is to Perform Color Correction to Your Video? Here Is a Solution with After Effects Color Correction with Illustrative Videos
- Updated In 2024, Add Motion Blur in After Effects
- In 2024, Dubbing Videos With Voiceovers | Using Wondershare Filmora
- How to Add VHS Effects to Videos for Free 2024
- Updated Deleting White Background in Photoshop Is Hard, In 2024
- Top 5 Video Filter Software Improve Your Videos with Filters for 2024
- Do You Want to Blur Faces in Your Videos? Read This Article to Find Out the Easiest Way to Blur the Faces in Videos Using Adobe Premiere Pro
- New 6 Best Methods to Make a Video Longer
- New 15 Free Cinematic LUTs for Your Film for 2024
- 2024 Approved Do You Need a Royalty-Free 5 Seconds Countdown Video for Your Video but Dont Not Where to Find One? We Will Introduce You to the Best HD and 4K Clips that You Can Always Try Anytime
- Do You Know Adding Subtitles Can Benefit Video Content? Meanwhile, for Adding Subtitles to a Video, Wondershare Filmora Can Help You for 2024
- In 2024, Guaranteed 10 Storyboard Creators To Make Animation Easier For You
- Updated How to Create Intro Video with KineMaster
- 2024 Approved Here Are the Steps to Crop a Video in Sony Vegas Pro Step 1 Click on Import and Import the Video to Be Edited. Click on It and Drag-Drop to Timeline
- New How to Make Cool COD Warzone Thumbnail
- New Best Animated Text Generator
- Best Slow Motion Camera Apps for Best Content Creation for 2024
- Have You Ever Applied the Gaussian Blur Effect to Your Videos? Read This Article to Find a Reliable and Convenient Tool to Generate the Gaussian Blur Effect for 2024
- Updated Best 9 Amv Makers for Computer
- Updated In 2024, Want Make a Slide Show Video? Heres How
- In 2024, The Most Useful Tips for Pokemon Go Ultra League On Realme 12 Pro+ 5G | Dr.fone
- All Things You Need to Know about Wipe Data/Factory Reset For Lava Storm 5G | Dr.fone
- In 2024, Tips And Tricks To Tell if Your iPhone 11 Pro Max Is Unlocked
- Looking For A Location Changer On Realme Narzo 60 5G? Look No Further | Dr.fone
- The Ultimate Guide to Generating Speech in Different Languages With the Best Tools
- In 2024, The Complete Guide to Xiaomi Redmi Note 13 5G FRP Bypass Everything You Need to Know
- 3 Things You Must Know about Fake Snapchat Location On Xiaomi Redmi K70 Pro | Dr.fone
- In 2024, 3 Ways for Android Pokemon Go Spoofing On Oppo Reno 10 5G | Dr.fone
- Home Button Not Working on OnePlus Open? Here Are Real Fixes | Dr.fone
- 3 Solutions to Find Your Vivo V27 Current Location of a Mobile Number | Dr.fone
- How To Transfer Data From iPhone 11 To Other iPhone 15 devices? | Dr.fone
- In 2024, Fixing Foneazy MockGo Not Working On Apple iPhone 6s | Dr.fone
- In 2024, Is Fake GPS Location Spoofer a Good Choice On Itel P40? | Dr.fone
- Top 15 Apps To Hack WiFi Password On Realme Narzo N53
- 10 Fake GPS Location Apps on Android Of your Xiaomi 13T Pro | Dr.fone
- In 2024, The Top 5 Android Apps That Use Fingerprint Sensor to Lock Your Apps On Infinix Note 30i
- Three Ways to Sim Unlock Vivo Y02T
- How to Retrieve deleted photos on Motorola Razr 40 Ultra
- In 2024, The Best iSpoofer Alternative to Try On Samsung Galaxy A05 | Dr.fone
- Easy Ways to Manage Your Infinix Note 30i Location Settings | Dr.fone
- How To Repair Apple iPhone 11 iOS? | Dr.fone
- In 2024, Ultimate Guide to Catch the Regional-Located Pokemon For Tecno Phantom V Fold | Dr.fone
- Title: New Thousands Already Know What Ezgif Is and So Can You
- Author: Chloe
- Created at : 2024-04-24 07:08:15
- Updated at : 2024-04-25 07:08:15
- Link: https://ai-editing-video.techidaily.com/new-thousands-already-know-what-ezgif-is-and-so-can-you/
- License: This work is licensed under CC BY-NC-SA 4.0.
