

New Top 6 Text to Speech Generators for YouTube Videos Windows, Mac, And
Top 6 Text to Speech Generators for YouTube Videos [Windows, Mac, And
Best Text To Speech Converter and Video Editor
Filmora’s Text to Speech (TTS) function allows you to convert your text files to voiceover and bring more elements to enrich your video.
Free Download Free Download Free Download Learn More >

Speech has a significant impact on the success rate of the entire YouTube adventure, whether storytelling or a standard sales pitch. It helps to have a decent voice and speaking abilities. However, not everyone gets both simultaneously; many individuals employ voice artists to provide voice-overs.
Some freelancers charge $5-$100 for a 5-minute voice-over. However, not everyone can afford an expensive voice artist, especially for longer films or just starting. Here are other options that I discovered as the most acceptable free text to voice generators for YouTube videos.
Let’s take a deeper look at the most excellent free text to speech software for YouTube videos.
Getting Started
Text to speech is a speech synthesis software that speaks aloud digital and textual content. The software offers a wide range of applications and is utilized by everyone from professionals and students to toddlers and adults.
Viewers are emotionally attached to documents such as PDFs, books, novels, and e-learning courses when they hear narration with a human voice. Text-to-speech systems are ideal for multitasking by busy professionals.
It’s no surprise that there are numerous text-to-speech options available. Audiobooks are also becoming more popular for the same reasons.
We’ll go over the best text-to-speech tools available in this guide. We’ve gathered a detailed list of the most exemplary free and commercial text-to-speech applications to help you choose the best option for your needs:
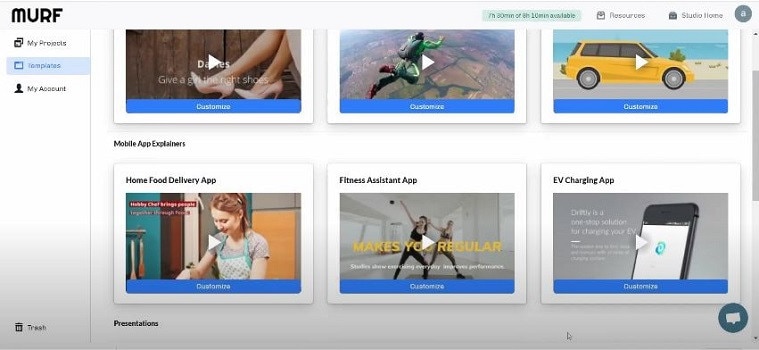
#1: Murf
It is available on Windows, Mac, Android, iPhone, and Online
Murf is a text-based voice-over maker. You can either compose your script or submit a voice clip to convert it into hyper-realistic AI voices. Murf delivers expert voice-over artists with experienced voices. You can check multiple parameters in the voices. You can use Murf to signify a brand, a product, a company, a presentation, and many more.
Features:
- Murf allows you to create voice-overs from the text. It also allows you to transform your speech into editable text, which you can subsequently edit or convert into AI voice.
- Murf Studio provides the ability to synchronize your speech with visuals.
- Murf provides over 100 authentic voices in 19 languages.
- It also gives options for inserting pauses, altering narration tempo, and emphasizing certain points.
- It also includes features such as script checking with grammar assistance, free background music, video and music cutting, and more.
- Murf offers comprehensive communication and collaboration tools, access control, a pronunciation library, and a service level agreement (SLA) for enterprises wishing to develop voice-overs in bulk.
Price
| Free | Basic | Pro | Enterprise |
|---|---|---|---|
| $0 / Month | $13 / Month | $26 / Month | $166 / Month |
| Try all 120+ voices 10 mins of voice generation 10 mins of transcription Share link for audio/video output No downloads Single User No credit card required | Unlimited Downloads 24 hours of voice generation/year Access to 60 voices (10 languages) Commercial Usage rights Chat and Email support Single User | Unlimited Downloads 96 hours of voice generation/year 48 hours of transcription/year Access 120+ voices (20 languages) Commercial Usage rights Recorded voice editing Voice changer Up to 3 users Priority Support | 5+ Users Unlimited Voice Generation Time Unlimited Transcription time Custom Voices Single-sign on (SSO) Collaboration and Access Control Dedicated Account Representative Centralized invoicing Service Agreement Deletion recovery Unlimited Storage |
Cons
- You may experience frequent technical glitches.
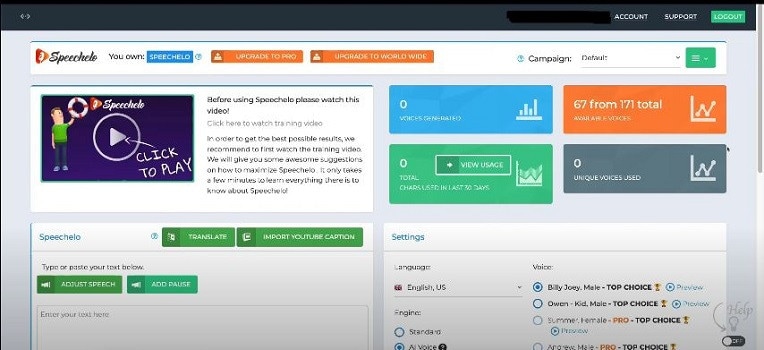
#2: Speechelo
It is available on Windows, Mac, Android, iPhone, and Online
Speechelo gives a realistic voice tone and expressions. This gets people more interested in voice-overs. You can use Speechelo to create sales videos, training films, and instructive videos, among other things. It includes attributes such as breathing and pauses, vocal tones, changing speed and pitch, and compatibility for 23 languages.
Features
- The text-to-speech engine in Speechelo can add intonation to the voice.
- It contains over 30 voices that sound natural.
- It has both male and female voices.
- It works with various video editing tools, including Camatasia, Adobe, Premier, and iMovie.
- Ordinary tone, cheerful tone, and serious tone are the three tones you may use to read your text.
Price
| Premium |
|---|
| $47 (Discount price) |
| One-time payment With 60-day money-back guarantee |
Cons
- The output of Speechelo will be 48kbps. If you’re familiar with sound production, you’ll see that this is a very low output.
- It might produce inaccurate output if you input long voice-overs.
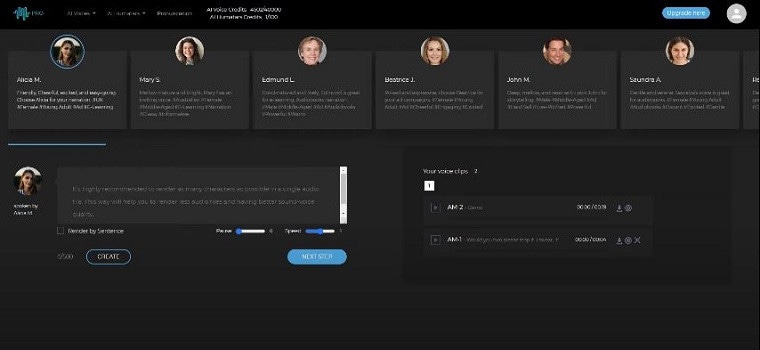
#3: Synthesys
It is available on Windows, Mac, Android, iPhone, and Online
Synthesys helps to convert text into a natural-sounding voice. With Synthesis, you can choose from various tones, accents, male and female voices, languages, and reading speeds. Moreover, It simply takes three steps to create a natural-sounding artificial speech that you may use for a variety of commercial applications.
- To begin, select the gender, style, accent, and tone you want the created voice to have.
- You can paste or type the content you want to turn into speech into Synthesys’ AI voice-producing platform.
- Lastly, click ‘create’ to start creating your artificial speech in minutes. You may adjust the reading speed and pause length from here.
Features
- Cloud-based software.
- Expert and natural-sounding voices are available in an extensive collection.
- There are over 35 female voices and 30 male voices.
- You can create and sell unlimited voices.
- Extremely user-friendly interface.
Price
| Audio Synthesys | Human Studio Synthesys | Audio and Human Studio Synthesys |
|---|---|---|
| $29 / Month | #39 / Month | $59 / Month |
| Unlimited voice-overs downloads Access to 30 Real Human Voices Access to 66 Languages & 254 General Voices Fully Web-Based | Unlimited Videos Access to 73 Humatars (Extra Outfits included) Access to 66 Languages & 254 General Voices Upload Your Own Voice Full Video Customization Fully Web-Based | Unlimited Videos & Voice Overs Access to both Software All features included 20% OFF |
Cons
- It has character limitations when making a voice-over.
- It does not have a free trial version.
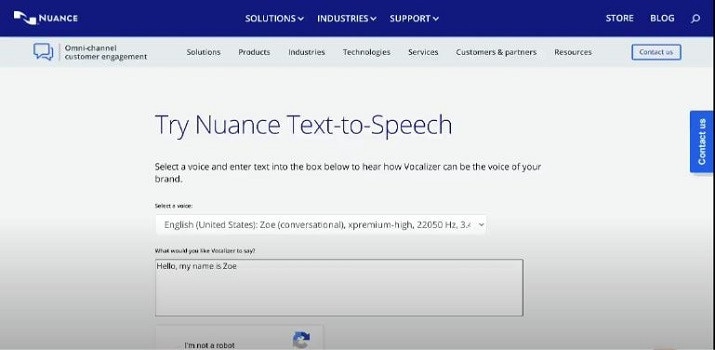
#4: Nuance Dragon
It is available in Windows only
Nuance Dragon is an artificial intelligence-powered voice recognition system. It offers both residential and commercial solutions. It spans across various data centers and delivers cloud services.
Its hosting platform is Microsoft Azure, which is HITRUST CSF-approved. All of their solutions follow industry-standard guidelines. Nuance Dragon protects data in transit and at rest with 256-bit encryption.
Features
- Nuance Dragon complies with HIPAA regulations, which are critical for public sector security and confidentiality.
- It applies to a wide range of professions.
- It offers complete protection.
Price
| Home | Professional |
|---|---|
| $200 | $500 |
| It has 99% recognition accuracy Immediate access to your dictation. One-time payment. | It has 99% recognition accuracy Share documents Sync custom words and commands Immediate access to your dictation. One-time payment. |
Cons
- It works only on Windows, and it is not available on Mac.
- It does not have a free trial version.
- It does not include Premium Consulting or Integration Services.
#5: Notevibes
It is available on Windows, Mac, Android, iPhone, and Online
Notevibes is a tremendous text-to-speech tool that comes in both a free and a commercial edition with many features. It offers customers over five hundred translation characters while also allowing them to modify the pronunciation.
As a result, users have access to all of their resources to learn a new language and significantly increase their reading skills. Furthermore, Notevibes features 177 distinct voices speaking in 18 different languages.
Users appreciate the natural-sounding voices that assist them in pronouncing words correctly. Users from many walks of life can profit from the tool because it has many functions.
Features
- Realistic voice generator
- Aloud Speaking
- Make an MP3 of your audio speech.
- 47 Individual Voices
- Characters: 200 – 1,000,000
Price
| Personal Pack | Commercial Pack | Corporate Pack |
|---|---|---|
| $9 / Month ($107 per year) | $90 / Month ($1080 per year) | $4,000 / Year |
| For personal use only: private listening, personal e-learning 1,200,000 characters pack per year 201 Premium Voices available 18 Languages (EN, ES, DE, FR, VT, RU, PT, IT, NL, TR, JP, KO, HI and etc) MP3 Download 1 Account License | For Commercial use: YouTube, broadcasts, TV, IVR voiceover and other businesses 12,000,000 characters pack per year Advanced voice editor new 201 Premium Voices available 18 Languages (EN, ES, DE, FR, VT, RU, PT, IT, NL, TR, JP, KO, HI and etc.) SSML tags support MP3, Wav Download Audio files history You 100% own intellectual property for all files | For Corporate Users All in Commercial and 50,000,000 characters pack per year Master account for management Team License (up to 10 users) Priority email support |
Cons
- It does not have a preview. You have to generate the voice-over to listen.
- You can’t combine a single audio file out of many audio files.
- The Voiceover & Editor Page is unique in that it has two sections: one for creating the voice-over and another for obtaining audio files. Switching between them will take some time. If you’re working on a large project, moving between bot sites will be a hassle.
- No project-based organization
#6: Natural Reader
It is available on Windows, Mac, Android, iPhone, and Online
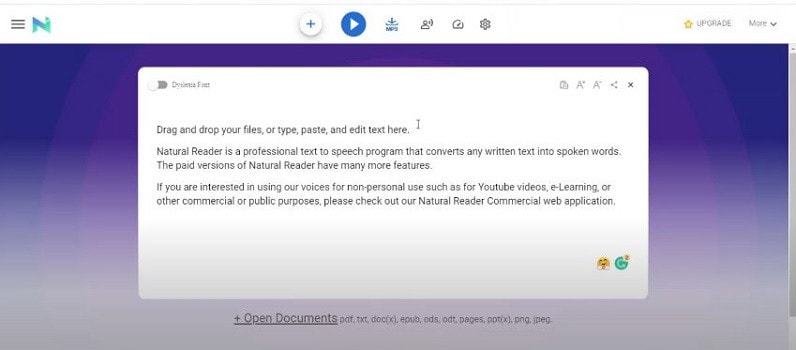
Natural Reader is among the few free text-to-speech programs with several exciting features. It’s pretty easy to use, and you can get started right away by loading texts into its library.
Furthermore, the tool allows users to manage several files in various formats. Lastly, the built-in OCR will enable you to submit images or text scans and have them read aloud.
Features
- Built-in OCR
- Choice of interfaces
- Built-in browser
- Dyslexic-friendly font
Price
| Free | Personal | Professional | Ultimate |
|---|---|---|---|
| $0 (Free to use) | $99.50 (One-time payment) | $129.50 (One-time payment) | $199.50 (One-time payment) |
| Unlimited use with Free Voices Miniboard to read text in other applications Pronunciation Editor Works with PDF, Docx, TXT and ePub | 2 natural voices included All features of Free Version included Convert to MP3 | 4 natural voices included All features of Personal Version included | 6 natural voices included All features of Professional Version included 5000 images/year for OCR to read from images & scanned PDFs |
Cons
- There is no way to skip or jump around any text on the page.
- You will need internet access in the free software to access the voices.
- The paid version is very expensive in comparison to others.
- Long-term use is complex.
Pro Tip:
If you just use text-to-speech software sometimes, it’s best to utilize one of the many free options available. On the other hand, paid versions are great if you want extensive functionality and don’t mind limitations on usage.
You should check for text-to-speech software with natural voices enabled in commercial applications. A top-rated system should include real-time speech capabilities and a user-friendly UI.
Text to Speech Services’ Advantages
TTS systems can help content owners such as corporations, YouTubers, institutions, media houses, mobile app developers, e-learning solution providers, and others in comparable fields in the following ways:
- Global Reach: TTS voices that sound human, are clear, and can be customized can let you communicate with people worldwide. You can even incorporate translations in multiple languages to read the text in their own language.
- Improve User Experience: Allowing speech in pre-sales and after-sales can reduce human agent burden, provide individualized services, lower operating expenses, and speed up productivity.
- Saves Money and Time: Companies can quickly and easily implement TTS systems with little maintenance.
- Improves Productivity: E-learning experts and HR departments can create learning modules for staff training using TTS. This will allow employees to learn the information while working anywhere and at any time.
Text to speech solutions can also help online students, researchers, teachers, device users, app users, website visitors, machine users, and others in the following ways:
- People with Reading Difficulties: A considerable portion of the global population suffers from learning or reading disabilities, including language-based learning disabilities. TTS solutions in your documents might assist them in better understanding the document. It can also aid persons with vision problems and literacy issues.
- Multitasking: Listening to something allows you to execute multiple physical duties at once, such as cooking, cleaning, exercising, etc. It’s a welcome break for busy professionals who can’t find time to read the stacks of books that have accumulated on their desks for years. They can just put on their headphones and listen to them while doing other things.
- Great for Kids: Instead of being glued to their computers or phones all day, your children can listen to audio files, including their books and other study materials. It will safeguard their priceless sight. It will also increase word recognition, cognitive skills, make finding and correcting problems in their writing easier.
- Journey Mate: People can listen to information while traveling by using speech to text. You may always listen to the noises and enjoy them while riding without having to strain your eyes, regardless of how rocky the road is.
Frequently Asked Questions
What is Text to Speech Software?
TTS (text-to-speech) is an assistive technology that reads text aloud. TTS systems provide computer-generated sound, and we may vary the reading speed by increasing the speed or slowing things down.
Is Text-To-Speech Technology Handy?
According to studies, text-to-speech technology helps viewers concentrate on the content rather than the process of reading, resulting in a greater understanding of the topic and more engagement.
While some argue that audiobooks, or scripts read by paid voice actors, are superior to computer-generated voices, there is compelling proof that text to speech can be a handy tool for YouTube content creators.
Is The Voice Quality Consistent Across All Text to Speech Programs?
Voice quality ultimately depends on the service. However, some use human voices, while premium solutions employ the voices of well-known narrators like David Attenborough and Morgan Freeman.
You can even mimic the sound of youngsters speaking. Many gadgets, particularly online web page scanners and even audiobooks emphasize the text they are scanning.
What Are the Benefits of Using Text to Speech Software?
You can use this type of technology in a variety of ways. Some programs read text from a digital document or an interactive online page for users. Some programs can even convert handwritten text into speech using modern technology such as Optical Character Recognition (OCR).
Text-to-speech software is compatible with various devices and applies to all kinds of individual digital devices, including laptops, PCs, tablets, and smartphones.
What Is the Process of Converting Speech in Text to Speech Software?
The majority of text-to-speech software works in the same way. Users can either upload or input the content to convert to audio. Then they choose from the different voices to evaluate which sound is best for the voice-over.
Many TTS solutions rely on OCR technology in some form. OCR allows us to obtain text from documents and photos by recognizing written and digital text. If you click an image of a street sign, the program will read the words printed on it.
Is it possible to use Text to Speech on YouTube?
Absolutely, you can get them in YouTube videos, but to prevent advertising strikes, make sure you post videos with authentic human voices somewhere between.
What Text-To-Speech Software Does YouTube Content Creators Use?
To incorporate voice-overs on their sales pitches and informative videos, most YouTubers pay for text-to-speech software like Synthesys and Speechelo.
Is It Possible to Monetize YouTube Videos Using Text to Speech?
It varies on the text to speech engine you’re using; some TTS engines support YouTube monetization while others don’t.
Speech has a significant impact on the success rate of the entire YouTube adventure, whether storytelling or a standard sales pitch. It helps to have a decent voice and speaking abilities. However, not everyone gets both simultaneously; many individuals employ voice artists to provide voice-overs.
Some freelancers charge $5-$100 for a 5-minute voice-over. However, not everyone can afford an expensive voice artist, especially for longer films or just starting. Here are other options that I discovered as the most acceptable free text to voice generators for YouTube videos.
Let’s take a deeper look at the most excellent free text to speech software for YouTube videos.
Getting Started
Text to speech is a speech synthesis software that speaks aloud digital and textual content. The software offers a wide range of applications and is utilized by everyone from professionals and students to toddlers and adults.
Viewers are emotionally attached to documents such as PDFs, books, novels, and e-learning courses when they hear narration with a human voice. Text-to-speech systems are ideal for multitasking by busy professionals.
It’s no surprise that there are numerous text-to-speech options available. Audiobooks are also becoming more popular for the same reasons.
We’ll go over the best text-to-speech tools available in this guide. We’ve gathered a detailed list of the most exemplary free and commercial text-to-speech applications to help you choose the best option for your needs:
#1: Murf
It is available on Windows, Mac, Android, iPhone, and Online
Murf is a text-based voice-over maker. You can either compose your script or submit a voice clip to convert it into hyper-realistic AI voices. Murf delivers expert voice-over artists with experienced voices. You can check multiple parameters in the voices. You can use Murf to signify a brand, a product, a company, a presentation, and many more.
Features:
- Murf allows you to create voice-overs from the text. It also allows you to transform your speech into editable text, which you can subsequently edit or convert into AI voice.
- Murf Studio provides the ability to synchronize your speech with visuals.
- Murf provides over 100 authentic voices in 19 languages.
- It also gives options for inserting pauses, altering narration tempo, and emphasizing certain points.
- It also includes features such as script checking with grammar assistance, free background music, video and music cutting, and more.
- Murf offers comprehensive communication and collaboration tools, access control, a pronunciation library, and a service level agreement (SLA) for enterprises wishing to develop voice-overs in bulk.
Price
| Free | Basic | Pro | Enterprise |
|---|---|---|---|
| $0 / Month | $13 / Month | $26 / Month | $166 / Month |
| Try all 120+ voices 10 mins of voice generation 10 mins of transcription Share link for audio/video output No downloads Single User No credit card required | Unlimited Downloads 24 hours of voice generation/year Access to 60 voices (10 languages) Commercial Usage rights Chat and Email support Single User | Unlimited Downloads 96 hours of voice generation/year 48 hours of transcription/year Access 120+ voices (20 languages) Commercial Usage rights Recorded voice editing Voice changer Up to 3 users Priority Support | 5+ Users Unlimited Voice Generation Time Unlimited Transcription time Custom Voices Single-sign on (SSO) Collaboration and Access Control Dedicated Account Representative Centralized invoicing Service Agreement Deletion recovery Unlimited Storage |
Cons
- You may experience frequent technical glitches.
#2: Speechelo
It is available on Windows, Mac, Android, iPhone, and Online
Speechelo gives a realistic voice tone and expressions. This gets people more interested in voice-overs. You can use Speechelo to create sales videos, training films, and instructive videos, among other things. It includes attributes such as breathing and pauses, vocal tones, changing speed and pitch, and compatibility for 23 languages.
Features
- The text-to-speech engine in Speechelo can add intonation to the voice.
- It contains over 30 voices that sound natural.
- It has both male and female voices.
- It works with various video editing tools, including Camatasia, Adobe, Premier, and iMovie.
- Ordinary tone, cheerful tone, and serious tone are the three tones you may use to read your text.
Price
| Premium |
|---|
| $47 (Discount price) |
| One-time payment With 60-day money-back guarantee |
Cons
- The output of Speechelo will be 48kbps. If you’re familiar with sound production, you’ll see that this is a very low output.
- It might produce inaccurate output if you input long voice-overs.
#3: Synthesys
It is available on Windows, Mac, Android, iPhone, and Online
Synthesys helps to convert text into a natural-sounding voice. With Synthesis, you can choose from various tones, accents, male and female voices, languages, and reading speeds. Moreover, It simply takes three steps to create a natural-sounding artificial speech that you may use for a variety of commercial applications.
- To begin, select the gender, style, accent, and tone you want the created voice to have.
- You can paste or type the content you want to turn into speech into Synthesys’ AI voice-producing platform.
- Lastly, click ‘create’ to start creating your artificial speech in minutes. You may adjust the reading speed and pause length from here.
Features
- Cloud-based software.
- Expert and natural-sounding voices are available in an extensive collection.
- There are over 35 female voices and 30 male voices.
- You can create and sell unlimited voices.
- Extremely user-friendly interface.
Price
| Audio Synthesys | Human Studio Synthesys | Audio and Human Studio Synthesys |
|---|---|---|
| $29 / Month | #39 / Month | $59 / Month |
| Unlimited voice-overs downloads Access to 30 Real Human Voices Access to 66 Languages & 254 General Voices Fully Web-Based | Unlimited Videos Access to 73 Humatars (Extra Outfits included) Access to 66 Languages & 254 General Voices Upload Your Own Voice Full Video Customization Fully Web-Based | Unlimited Videos & Voice Overs Access to both Software All features included 20% OFF |
Cons
- It has character limitations when making a voice-over.
- It does not have a free trial version.
#4: Nuance Dragon
It is available in Windows only
Nuance Dragon is an artificial intelligence-powered voice recognition system. It offers both residential and commercial solutions. It spans across various data centers and delivers cloud services.
Its hosting platform is Microsoft Azure, which is HITRUST CSF-approved. All of their solutions follow industry-standard guidelines. Nuance Dragon protects data in transit and at rest with 256-bit encryption.
Features
- Nuance Dragon complies with HIPAA regulations, which are critical for public sector security and confidentiality.
- It applies to a wide range of professions.
- It offers complete protection.
Price
| Home | Professional |
|---|---|
| $200 | $500 |
| It has 99% recognition accuracy Immediate access to your dictation. One-time payment. | It has 99% recognition accuracy Share documents Sync custom words and commands Immediate access to your dictation. One-time payment. |
Cons
- It works only on Windows, and it is not available on Mac.
- It does not have a free trial version.
- It does not include Premium Consulting or Integration Services.
#5: Notevibes
It is available on Windows, Mac, Android, iPhone, and Online
Notevibes is a tremendous text-to-speech tool that comes in both a free and a commercial edition with many features. It offers customers over five hundred translation characters while also allowing them to modify the pronunciation.
As a result, users have access to all of their resources to learn a new language and significantly increase their reading skills. Furthermore, Notevibes features 177 distinct voices speaking in 18 different languages.
Users appreciate the natural-sounding voices that assist them in pronouncing words correctly. Users from many walks of life can profit from the tool because it has many functions.
Features
- Realistic voice generator
- Aloud Speaking
- Make an MP3 of your audio speech.
- 47 Individual Voices
- Characters: 200 – 1,000,000
Price
| Personal Pack | Commercial Pack | Corporate Pack |
|---|---|---|
| $9 / Month ($107 per year) | $90 / Month ($1080 per year) | $4,000 / Year |
| For personal use only: private listening, personal e-learning 1,200,000 characters pack per year 201 Premium Voices available 18 Languages (EN, ES, DE, FR, VT, RU, PT, IT, NL, TR, JP, KO, HI and etc) MP3 Download 1 Account License | For Commercial use: YouTube, broadcasts, TV, IVR voiceover and other businesses 12,000,000 characters pack per year Advanced voice editor new 201 Premium Voices available 18 Languages (EN, ES, DE, FR, VT, RU, PT, IT, NL, TR, JP, KO, HI and etc.) SSML tags support MP3, Wav Download Audio files history You 100% own intellectual property for all files | For Corporate Users All in Commercial and 50,000,000 characters pack per year Master account for management Team License (up to 10 users) Priority email support |
Cons
- It does not have a preview. You have to generate the voice-over to listen.
- You can’t combine a single audio file out of many audio files.
- The Voiceover & Editor Page is unique in that it has two sections: one for creating the voice-over and another for obtaining audio files. Switching between them will take some time. If you’re working on a large project, moving between bot sites will be a hassle.
- No project-based organization
#6: Natural Reader
It is available on Windows, Mac, Android, iPhone, and Online
Natural Reader is among the few free text-to-speech programs with several exciting features. It’s pretty easy to use, and you can get started right away by loading texts into its library.
Furthermore, the tool allows users to manage several files in various formats. Lastly, the built-in OCR will enable you to submit images or text scans and have them read aloud.
Features
- Built-in OCR
- Choice of interfaces
- Built-in browser
- Dyslexic-friendly font
Price
| Free | Personal | Professional | Ultimate |
|---|---|---|---|
| $0 (Free to use) | $99.50 (One-time payment) | $129.50 (One-time payment) | $199.50 (One-time payment) |
| Unlimited use with Free Voices Miniboard to read text in other applications Pronunciation Editor Works with PDF, Docx, TXT and ePub | 2 natural voices included All features of Free Version included Convert to MP3 | 4 natural voices included All features of Personal Version included | 6 natural voices included All features of Professional Version included 5000 images/year for OCR to read from images & scanned PDFs |
Cons
- There is no way to skip or jump around any text on the page.
- You will need internet access in the free software to access the voices.
- The paid version is very expensive in comparison to others.
- Long-term use is complex.
Pro Tip:
If you just use text-to-speech software sometimes, it’s best to utilize one of the many free options available. On the other hand, paid versions are great if you want extensive functionality and don’t mind limitations on usage.
You should check for text-to-speech software with natural voices enabled in commercial applications. A top-rated system should include real-time speech capabilities and a user-friendly UI.
Text to Speech Services’ Advantages
TTS systems can help content owners such as corporations, YouTubers, institutions, media houses, mobile app developers, e-learning solution providers, and others in comparable fields in the following ways:
- Global Reach: TTS voices that sound human, are clear, and can be customized can let you communicate with people worldwide. You can even incorporate translations in multiple languages to read the text in their own language.
- Improve User Experience: Allowing speech in pre-sales and after-sales can reduce human agent burden, provide individualized services, lower operating expenses, and speed up productivity.
- Saves Money and Time: Companies can quickly and easily implement TTS systems with little maintenance.
- Improves Productivity: E-learning experts and HR departments can create learning modules for staff training using TTS. This will allow employees to learn the information while working anywhere and at any time.
Text to speech solutions can also help online students, researchers, teachers, device users, app users, website visitors, machine users, and others in the following ways:
- People with Reading Difficulties: A considerable portion of the global population suffers from learning or reading disabilities, including language-based learning disabilities. TTS solutions in your documents might assist them in better understanding the document. It can also aid persons with vision problems and literacy issues.
- Multitasking: Listening to something allows you to execute multiple physical duties at once, such as cooking, cleaning, exercising, etc. It’s a welcome break for busy professionals who can’t find time to read the stacks of books that have accumulated on their desks for years. They can just put on their headphones and listen to them while doing other things.
- Great for Kids: Instead of being glued to their computers or phones all day, your children can listen to audio files, including their books and other study materials. It will safeguard their priceless sight. It will also increase word recognition, cognitive skills, make finding and correcting problems in their writing easier.
- Journey Mate: People can listen to information while traveling by using speech to text. You may always listen to the noises and enjoy them while riding without having to strain your eyes, regardless of how rocky the road is.
Frequently Asked Questions
What is Text to Speech Software?
TTS (text-to-speech) is an assistive technology that reads text aloud. TTS systems provide computer-generated sound, and we may vary the reading speed by increasing the speed or slowing things down.
Is Text-To-Speech Technology Handy?
According to studies, text-to-speech technology helps viewers concentrate on the content rather than the process of reading, resulting in a greater understanding of the topic and more engagement.
While some argue that audiobooks, or scripts read by paid voice actors, are superior to computer-generated voices, there is compelling proof that text to speech can be a handy tool for YouTube content creators.
Is The Voice Quality Consistent Across All Text to Speech Programs?
Voice quality ultimately depends on the service. However, some use human voices, while premium solutions employ the voices of well-known narrators like David Attenborough and Morgan Freeman.
You can even mimic the sound of youngsters speaking. Many gadgets, particularly online web page scanners and even audiobooks emphasize the text they are scanning.
What Are the Benefits of Using Text to Speech Software?
You can use this type of technology in a variety of ways. Some programs read text from a digital document or an interactive online page for users. Some programs can even convert handwritten text into speech using modern technology such as Optical Character Recognition (OCR).
Text-to-speech software is compatible with various devices and applies to all kinds of individual digital devices, including laptops, PCs, tablets, and smartphones.
What Is the Process of Converting Speech in Text to Speech Software?
The majority of text-to-speech software works in the same way. Users can either upload or input the content to convert to audio. Then they choose from the different voices to evaluate which sound is best for the voice-over.
Many TTS solutions rely on OCR technology in some form. OCR allows us to obtain text from documents and photos by recognizing written and digital text. If you click an image of a street sign, the program will read the words printed on it.
Is it possible to use Text to Speech on YouTube?
Absolutely, you can get them in YouTube videos, but to prevent advertising strikes, make sure you post videos with authentic human voices somewhere between.
What Text-To-Speech Software Does YouTube Content Creators Use?
To incorporate voice-overs on their sales pitches and informative videos, most YouTubers pay for text-to-speech software like Synthesys and Speechelo.
Is It Possible to Monetize YouTube Videos Using Text to Speech?
It varies on the text to speech engine you’re using; some TTS engines support YouTube monetization while others don’t.
Discover How You Can Use Vectorscope to Adjust Luminance, Color Grading, and More in Your Video Editing Projects
Our eyes process colors differently. When two people look at the same picture, they may see different shades of colors. In post-production, Vectorscopes help to color grade and make sure you get your images exactly right. This means that you will process the exact color that you want across devices. Premiere Vectorscope is a great choice for anyone looking to correct and grade colors. Using Vectorscope Premiere allows you to get quantitative data about your image for a more accurate assessment of colors within the film. In this article, we explore what comprises Premiere Pro Vectorscope and how to use them in video editing.
Color Correction Editor An easy-to-use video editor helps you make color correction and color grading experience for videos  Use Vectorscope in Filmora Try Color Correction

Part 1. Vectorscope: What is It and How to Read
Vectorscopes provide a great post-production way for color correction. It is video scope that provides greater data about the color properties of an image. Another way to look at it is that a Vectorscope is a circular graph, which monitors the following information of an image. By looking at it, you can measure saturation outward from the center while hue is measured in a circular pattern.
The Vectorscope contains markings indicating the degree of saturation and hue in an image. The distance of the markings from the center indicates how saturated the color is in your image. In simple terms, the further the markings, the more saturated the color. The two main options of Vectorscope are HLS and YUV. The HLS displays the hue, lightness, saturation, and signal information at a glance. On the other hand, the YUV mode contains several color boxes, giving accurate levels of hue and saturation.

Vectorscopes are useful to filmmakers and editors to ensure greater conformity in a film as they transition from one shot to the next. When the camera captures an image with too much saturation, using a Vectorscope helps to reduce the said saturation. This makes Vectorscope a useful feature for color correction and color grading. Color correction involves altering the colors of an image within a film to provide consistency and tone for the film. On the other hand, color grading is more like a supercharged version of color correction. It refers to altering a film so that it matches a tone or theme. Since the two, grading and correction are important, more video editing will use a combination of both.
How to Read a Vectorscope
Learning how to read a Vectorscope will make your video editing fun and easier. The best way is to view the Vectorscope in relation to the color wheel. When using Premiere Vectorscope, the colors are nicely labeled for anyone to understand. You only need to understand the primary colors of saturation and hue to accurately read a Vectorscope.

The hue color is the direction to which the marketer points. For instance, a marker pointing toward the boxes labeled “R” indicates that the hue is predominantly red. On the other hand, the saturation correlates to the length of the marker. The image is more saturated when the marker is furthest from the center of the wheel.
Keep note of the two boxes in each main color. The box that is close to the center indicates 75%, and you will normally avoid the marker extending beyond this first box. Any marketer that extends beyond this is known as non-broadcast safe or illegal colors. Although you may need to go beyond the first box in some projects for stylistic reasons, the general rule of thumb is to avoid that.
Without proper calibration, your images may end up looking too red or too blue. They will not look natural at all and will affect the overall quality of your video. Therefore, using the features within the vectorsope will help you color-grade your images to perfection.
Part 2. ** Vectorscope in Premiere Pro
Just like many other video editing software, Adobe Premiere Pro offers Vectorscope to help in post-production. The best way to look at Vectorscope in Premiere Pro is to use the Color Correction workspace. Once you have launched the software, Click Window, followed by Workspace, and then Color Correction. Access the reference monitor directly to deliver the program.
The reference monitor will first display composite video. Clicking on the setting icon allows you to access the panel and choose the video scope you want to use. Now, this is how you use the Vectorscope in Premiere Pro:
1. Reading a Vectorscope on Premiere Pro
A Vectorscope is similar to a color wheel. It displays colors in the same places as the wheel, with cyan to the bottom right and red to the top left. When you see a dot or line in the Vectorscope, you can tell it is giving you information about the color or chrominance of a shot. Essentially, this information is the hue (specific color) and the saturation (the strength of that hue).

As you examine the Vectorscope, you get to see how strong a particular color is by the length of the line from the center of the wheel. A longer line indicates that the color is more saturated. However, all Vectorscopes have small color targets. The Vectorscope points are lined with a drop-down used to read the scope. The default is set to 75%, which is a good limit for a typical broadcast system.

2. Adjusting Skin Tones
A commonly used feature of the Premier Pro Vectorscope is the Skin Tone Line. With this feature, you get the line on the scope between the Yellow and the Red sections at about 10.30 or 11 o’clock position.

The Vectorscope skin tone line represents the color of blood flowing through the skin. You can use this line to check the accuracy of skin tone color representation regardless of the ethnicity of the person you’re filming. In particular, video images are more accurate
The major problem is figuring out how to look at skin tones in a shot with many other colors. With the skin tons line in Premiere Pro, color correction becomes easy and quick. You only need to use a garbage matte, which is found under video effects then keying. Adjust the points so that they cover the skin of the person on the shot, then look at the Premiere Pro Vectorscope to see your end results.

Part 3. **How to Use Vectorscope in Filmora
The choice of video editing software can have an impact on how well you use your Vectorscopes. Wondershare Filmora is a great choice for anyone who wants to achieve great results with their videos. The versatile video editing software offers four types of video scopes, including the Vectorscope. This gives you more flexibility in video editing and achieving accurate results in color correction and grading. With the recent V13, you also get access to a range of AI features that make video editing quicker and easier.
Free Download For Win 7 or later(64-bit)
Free Download For macOS 10.14 or later
Access Vectorscope on Filmora
Accessing Vectorscope in Filmora is straightforward. As part of the four available video scopes, Filmora has made it easy to use Vectorscope during video editing. Here is a step-by-step guide to follow:
Step 1Create a New Project on Filmora
Once you have downloaded and installed the Filmora software on your desktop, launch it and click Create a New Project.

Step 2Access Video Scopes
After starting a new project, head to the top right corner of the main interface. Click on the Video Scope button to launch the video scope bar on the preview screen.

Step 3Customize Video Scopes Layout Bar
Customizing the layout of the video scope bar allows you to have more freedom in using the feature. You have the option to choose from four layouts or expand the button to display the video scope’s name. The purpose of this step is to modify the display option of the video scopes, allowing you to have a clear view of what you are editing.

Step 4Manage the Vectorscope as Desired
On the preview screen, choose the Vectorscope option. This video scope allows you to define the skin tone indication for better color grading and correction.

Step 5Change Other Video Scopes
To achieve more accurate and better results, explore the other video scopes in the same window. View the color changes in your image through parade, histogram, and waveform video scopes. You can also change the color channels to view specific color changes across the video.

Conclusion
Vectorscopes are great for post-production color correction. Although lesser-known features to many people, they are widely used in video production. They ensure that the colors in your video are consistent across all clips or shots of your film. Since filming will often involve different shots and settings, we recommend using Wondershare Filmora for your video editing. It comes with an easy-to-use Vectorscope and other video scopes that help you achieve great results with color correction and grading.
Free Download Use Vectorscope in Filmora Try Color Correction
Part 1. Vectorscope: What is It and How to Read
Vectorscopes provide a great post-production way for color correction. It is video scope that provides greater data about the color properties of an image. Another way to look at it is that a Vectorscope is a circular graph, which monitors the following information of an image. By looking at it, you can measure saturation outward from the center while hue is measured in a circular pattern.
The Vectorscope contains markings indicating the degree of saturation and hue in an image. The distance of the markings from the center indicates how saturated the color is in your image. In simple terms, the further the markings, the more saturated the color. The two main options of Vectorscope are HLS and YUV. The HLS displays the hue, lightness, saturation, and signal information at a glance. On the other hand, the YUV mode contains several color boxes, giving accurate levels of hue and saturation.
Vectorscopes are useful to filmmakers and editors to ensure greater conformity in a film as they transition from one shot to the next. When the camera captures an image with too much saturation, using a Vectorscope helps to reduce the said saturation. This makes Vectorscope a useful feature for color correction and color grading. Color correction involves altering the colors of an image within a film to provide consistency and tone for the film. On the other hand, color grading is more like a supercharged version of color correction. It refers to altering a film so that it matches a tone or theme. Since the two, grading and correction are important, more video editing will use a combination of both.
How to Read a Vectorscope
Learning how to read a Vectorscope will make your video editing fun and easier. The best way is to view the Vectorscope in relation to the color wheel. When using Premiere Vectorscope, the colors are nicely labeled for anyone to understand. You only need to understand the primary colors of saturation and hue to accurately read a Vectorscope.
The hue color is the direction to which the marketer points. For instance, a marker pointing toward the boxes labeled “R” indicates that the hue is predominantly red. On the other hand, the saturation correlates to the length of the marker. The image is more saturated when the marker is furthest from the center of the wheel.
Keep note of the two boxes in each main color. The box that is close to the center indicates 75%, and you will normally avoid the marker extending beyond this first box. Any marketer that extends beyond this is known as non-broadcast safe or illegal colors. Although you may need to go beyond the first box in some projects for stylistic reasons, the general rule of thumb is to avoid that.
Without proper calibration, your images may end up looking too red or too blue. They will not look natural at all and will affect the overall quality of your video. Therefore, using the features within the vectorsope will help you color-grade your images to perfection.
Part 2. ** Vectorscope in Premiere Pro
Just like many other video editing software, Adobe Premiere Pro offers Vectorscope to help in post-production. The best way to look at Vectorscope in Premiere Pro is to use the Color Correction workspace. Once you have launched the software, Click Window, followed by Workspace, and then Color Correction. Access the reference monitor directly to deliver the program.
The reference monitor will first display composite video. Clicking on the setting icon allows you to access the panel and choose the video scope you want to use. Now, this is how you use the Vectorscope in Premiere Pro:
1. Reading a Vectorscope on Premiere Pro
A Vectorscope is similar to a color wheel. It displays colors in the same places as the wheel, with cyan to the bottom right and red to the top left. When you see a dot or line in the Vectorscope, you can tell it is giving you information about the color or chrominance of a shot. Essentially, this information is the hue (specific color) and the saturation (the strength of that hue).
As you examine the Vectorscope, you get to see how strong a particular color is by the length of the line from the center of the wheel. A longer line indicates that the color is more saturated. However, all Vectorscopes have small color targets. The Vectorscope points are lined with a drop-down used to read the scope. The default is set to 75%, which is a good limit for a typical broadcast system.
2. Adjusting Skin Tones
A commonly used feature of the Premier Pro Vectorscope is the Skin Tone Line. With this feature, you get the line on the scope between the Yellow and the Red sections at about 10.30 or 11 o’clock position.
The Vectorscope skin tone line represents the color of blood flowing through the skin. You can use this line to check the accuracy of skin tone color representation regardless of the ethnicity of the person you’re filming. In particular, video images are more accurate
The major problem is figuring out how to look at skin tones in a shot with many other colors. With the skin tons line in Premiere Pro, color correction becomes easy and quick. You only need to use a garbage matte, which is found under video effects then keying. Adjust the points so that they cover the skin of the person on the shot, then look at the Premiere Pro Vectorscope to see your end results.
Part 3. **How to Use Vectorscope in Filmora
The choice of video editing software can have an impact on how well you use your Vectorscopes. Wondershare Filmora is a great choice for anyone who wants to achieve great results with their videos. The versatile video editing software offers four types of video scopes, including the Vectorscope. This gives you more flexibility in video editing and achieving accurate results in color correction and grading. With the recent V13, you also get access to a range of AI features that make video editing quicker and easier.
Free Download For Win 7 or later(64-bit)
Free Download For macOS 10.14 or later
Access Vectorscope on Filmora
Accessing Vectorscope in Filmora is straightforward. As part of the four available video scopes, Filmora has made it easy to use Vectorscope during video editing. Here is a step-by-step guide to follow:
Step 1Create a New Project on Filmora
Once you have downloaded and installed the Filmora software on your desktop, launch it and click Create a New Project.
Step 2Access Video Scopes
After starting a new project, head to the top right corner of the main interface. Click on the Video Scope button to launch the video scope bar on the preview screen.
Step 3Customize Video Scopes Layout Bar
Customizing the layout of the video scope bar allows you to have more freedom in using the feature. You have the option to choose from four layouts or expand the button to display the video scope’s name. The purpose of this step is to modify the display option of the video scopes, allowing you to have a clear view of what you are editing.
Step 4Manage the Vectorscope as Desired
On the preview screen, choose the Vectorscope option. This video scope allows you to define the skin tone indication for better color grading and correction.
Step 5Change Other Video Scopes
To achieve more accurate and better results, explore the other video scopes in the same window. View the color changes in your image through parade, histogram, and waveform video scopes. You can also change the color channels to view specific color changes across the video.
Conclusion
Vectorscopes are great for post-production color correction. Although lesser-known features to many people, they are widely used in video production. They ensure that the colors in your video are consistent across all clips or shots of your film. Since filming will often involve different shots and settings, we recommend using Wondershare Filmora for your video editing. It comes with an easy-to-use Vectorscope and other video scopes that help you achieve great results with color correction and grading.
Top 8 Video Editor with Useful Masking
Create High-Quality Video - Wondershare Filmora
An easy and powerful YouTube video editor
Numerous video and audio effects to choose from
Detailed tutorials are provided by the official channel
Masking video editing is the process of hiding or obscuring certain elements in a video clip. This can be done for aesthetic purposes and is often used to remove unwanted objects or blemishes from the footage. Masking can be accomplished using a variety of methods, including rotoscoping, chroma-keying, and motion tracking.
In this article
02 Top 8 Video Editor with Useful Masking
What is Masking?
Masks are a feature of editing software that allows you to choose a particular portion of the video or utilize video overlays to hide, duplicate, reveal, or change your footage. The mask is the portion of the video you’ve chosen to pick, either with a template or a custom frame. The mask then becomes isolated, and you may modify it as desired to produce your intended effect.
Masks may be used to do some fantastic things with your videos. You can clone people or objects, overlay several pictures, create glitch effects, blur faces out, etc. Masks add a lot of excitement and color to videos, making them more dynamic, enjoyable to watch, and professional. It can draw attention - and keep it!
Different types of masking
There are three primary types of masking: rotoscoping, chroma-keying, and motion tracking.
Rotoscoping: Rotoscoping is the process of manually tracing an object in a video frame by frame to create a mask. This can be a time-consuming process, but it allows for very precise control over the masked area.
Chroma-keying: Chroma-keying is a type of masking that makes use of color to isolate a particular area of the frame. For example, this is often used to remove a green or blue screen from the footage, but can also be used to isolate other colors.
Motion tracking: Motion tracking is a masking technique that allows you to track the movement of an object in a video clip. This is often used to add special effects, such as explosions, to a video.

Top 8 Video Editor with Useful Masking

Here is the list of Top 8 Video Editors with useful masking Features
1. Adobe Premiere Pro
Adobe Premiere Pro is a professional video editing software with a wide range of features and precise masking controls. It allows you to create custom masks or use the built-in rotoscope tool to isolate objects in your footage quickly.

How to Create a Mask in Premiere Pro
Do you understand how to construct a mask in Adobe Premiere? Shape tools and pen tools may be used to make the Adobe premiere mask.
By Using Shape Tools:
Select the shape tool you’d like to utilize from the Tools panel.
Then, create a mask by drawing a shape on the video clip in the Timeline.
By Using Pen Tools:
Click the pen tool icon in the Tools panel.
Click and drag to draw a path around the object you wish to isolate.
After drawing your path, click the “Mask” button in the Tools panel.
2. Final Cut Pro X
Final Cut Pro X is a proficient video editing software with powerful masking tools. It allows you to create custom masks or isolate objects in your footage.

How to Create a Mask in Final Cut Pro X
With little effort, the Shape Mask tool allows you to make a mask in any shape on the continuum, ranging from an ellipse to a rectangle.
The Shape Mask is a simple mask that may be changed to editable control points in order to create complex bespoke masks (converting it into a Draw Mask).
- Open the Final Cut Pro project and select the clip you wish to mask.
Note: You can’t composite a clip over another one while using isolated clips. Final Cut Pro has this option, which you may find in the Comping window. - To make a clip transparent, select it in the timeline and place the play head at a point within the video clip that shows the portion you wish to make transparent.
- Click the Effects button in the top-right corner of the timeline (or press Command-5) to display the Effects browser.
- Select the Shape Mask effect in the Effects Browser.
Tip: Type “shape” in the Effects browser search bar to quickly locate the Shape Mask effect.
To apply the masking effect to the clip in the timeline, choose one of the following options:
- Drag the effect to the timeline clip.
- Double-click the effect thumbnail in the Effects browser to apply it.
- Use the on-screen controls to modify the shape mask if necessary.
The controls for the Shape Mask appear in the viewer, overlaid on top of the video image. In addition, the Effects area of the Video inspector displays the Shape Mask options. By default, the Shape Mask is set to a partially feathered ellipse shape in the center of the frame.
3. Wondershare Filmora
Filmora 11 is an easy to use video editor with useful masking features. It provides various of masking presets to make masking easy for you. If you are looking for Green Screen, Filmora also covers you. Its Chroma Key allows you to remove the background of almost any color.
Masking in Filmora 11
Filmora 11 has been modified to allow for the masking of keyframes. First, double-click the clip on your timeline to open a settings window in the library. Then, in the videos area, select the “Mask” option. Multiple forms may be selected here.
We picked the ‘Star’ form for this project. After selecting it, you may drag the shape to your clip in the preview area.
Scrolling down in the Windows category will take you to more options where you can change the scale, position, width, height, and radius of your chosen shape. You may also lessen the strength of the form and rotate it to make it blend in better with the other elements you’re trying to hide in your window.
To add the keyframe, simply hit the “Add” button after completing it. You may then modify the mask’s form to match the added frame.
For Win 7 or later (64-bit)
For macOS 10.12 or later
4. Avid Media Composer
Avid Media Composer has a comprehensive masking feature for video editors of different levels. You can either use the built-in masking tools or make your own one.

Masking in Avid Media Composer
In the Masking Effect window, you can choose to either create a new mask or use an existing one. First, select the “Create Mask” option and then click on the “Draw Mask” button to create a new mask.
This will open up the Draw Mask window, where you can draw your mask using the various tools provided. To apply the mask, simply click the “Apply” button.
If you want to use an existing mask, select the “Use Mask” option and then choose the mask you want to use from the drop-down menu.
5. Sony Vegas Pro
Sony Vegas Pro is a professional video editing software with robust masking tools. The interface of the editor may looks complicated for beginners, yet once you get familiar with it, you will be amazed by what you can achieve with the Vegas Pro.

Masking in Sony Vegas Pro
Step 1: Drag the clip from the Explorer or Project Media windows and drop it on the timeline. Then, look for another video that is quite distinct from the first.
Step 2: Drag it to the timeline below the first video event. A new track will be created. Place the original event directly beneath the video occurrence.
The Video Preview window does not display the second video because it is covered by the first video, which resembles one photo sitting on top of another in a stack. So to view the lower clip, we’ll need to add a mask.
6. Magix Movie Edit Pro
Magix Movie Edit Pro is another video editor that is great for adding masks to your video. It is famous for its ease-of-learn and stable rendering. When it comes to masking, it is also quite powerful.

Masking in Magix Movie Edit Pro
They let you apply special effects to only certain parts of a video. You may dramatically improve the aspect of your movies with this Magix Movie Edit Pro Plus feature.
When you apply color effects to the software’s template, it appears that you can only use color effects.
To add additional effects to specific portions of the shot, simply import an image and apply the Alpha Mask property from the Chroma Key menu. Then you must duplicate the video section and place it on a lower track, while keeping the alpha mask picture in between the two videos (click the graphic above for a visual guide).
7. Studio
Studio is a pro-level video editing software. It is preloaded with pro-caliber tool and premium effects to help you create the videos you want. We will show you how to apply masking in Studio in the following paragraphs.

Masking in Studio
Select the clip you want to overlay your media on, then click the ‘Mask’ button on the editing toolbar. After that, open the mask creation window by clicking ‘Create Mask.
First, click “Create Panel” to create a video mask panel.
To make a panel, use the panel of tools on the left side of the preview window. They’ll only be shown in your video when you add assets later if they’re inside this panel. Keep in mind that you may modify the size and placement of your asset within the panel and the panel itself; therefore, you might need to.
To access the media selection possibilities, click on the ‘Asset’ tab of the mask creation window. To discover the picture or video you want to include in your panel, go through your imported files by selecting ‘Select media.’ After that, select the media to be included in your panel video mask and hit ‘Apply.’
Use the left-hand slider or the resizing box in the preview window on the right to change the size and placement of your media in your panel video mask.
To adjust the 3D position of your panel video mask, go to the ‘3D’ tab of the mask creation window.
8. CyberLink PowerDirector
CyberLink PowerDirector has recently enhanced its mask & blend feature to help you create artistic scenes. If you are interested in the feature, you can try it out.

Masking in CyberLink PowerDirector
Drag and drop a photo from the media room into track 2 of your timeline, then drag the background image into track 1.
Then, go to the Quick Settings menu (press the Menu button at the bottom of your screen), select Cloud Print from the drop-down menu, and then select your photo. Then open up the design interface by selecting Mask Designer from the drop-down menu.
You may select from a variety of templates in the Mask Designer. If you want to make your own mask shape, the Mask Designer has three alternatives for you to create new mask types.
Create an image mask: You may use any picture or video, and it will be resized to fit the shape.
Create a text mask: Enter the text you’d like to appear in your photo. Then, go to the left side of the panel under Font/Paragraph on the left side for font style, size, and other options. To alter the text mask itself, go to the preview window and resize it on the left panel.
Conclusion
● Maybe you want to add a picture-in-picture effect, or maybe you want to replace the background with a new image. Whatever the reason, it’s easy to do with most video editing software. We’ve shown you how to mask videos in eight different editors in this article. So now you can get started creating your own custom videos Try It Free
Masking video editing is the process of hiding or obscuring certain elements in a video clip. This can be done for aesthetic purposes and is often used to remove unwanted objects or blemishes from the footage. Masking can be accomplished using a variety of methods, including rotoscoping, chroma-keying, and motion tracking.
In this article
02 Top 8 Video Editor with Useful Masking
What is Masking?
Masks are a feature of editing software that allows you to choose a particular portion of the video or utilize video overlays to hide, duplicate, reveal, or change your footage. The mask is the portion of the video you’ve chosen to pick, either with a template or a custom frame. The mask then becomes isolated, and you may modify it as desired to produce your intended effect.
Masks may be used to do some fantastic things with your videos. You can clone people or objects, overlay several pictures, create glitch effects, blur faces out, etc. Masks add a lot of excitement and color to videos, making them more dynamic, enjoyable to watch, and professional. It can draw attention - and keep it!
Different types of masking
There are three primary types of masking: rotoscoping, chroma-keying, and motion tracking.
Rotoscoping: Rotoscoping is the process of manually tracing an object in a video frame by frame to create a mask. This can be a time-consuming process, but it allows for very precise control over the masked area.
Chroma-keying: Chroma-keying is a type of masking that makes use of color to isolate a particular area of the frame. For example, this is often used to remove a green or blue screen from the footage, but can also be used to isolate other colors.
Motion tracking: Motion tracking is a masking technique that allows you to track the movement of an object in a video clip. This is often used to add special effects, such as explosions, to a video.
Top 8 Video Editor with Useful Masking
Here is the list of Top 8 Video Editors with useful masking Features
1. Adobe Premiere Pro
Adobe Premiere Pro is a professional video editing software with a wide range of features and precise masking controls. It allows you to create custom masks or use the built-in rotoscope tool to isolate objects in your footage quickly.
How to Create a Mask in Premiere Pro
Do you understand how to construct a mask in Adobe Premiere? Shape tools and pen tools may be used to make the Adobe premiere mask.
By Using Shape Tools:
Select the shape tool you’d like to utilize from the Tools panel.
Then, create a mask by drawing a shape on the video clip in the Timeline.
By Using Pen Tools:
Click the pen tool icon in the Tools panel.
Click and drag to draw a path around the object you wish to isolate.
After drawing your path, click the “Mask” button in the Tools panel.
2. Final Cut Pro X
Final Cut Pro X is a proficient video editing software with powerful masking tools. It allows you to create custom masks or isolate objects in your footage.
How to Create a Mask in Final Cut Pro X
With little effort, the Shape Mask tool allows you to make a mask in any shape on the continuum, ranging from an ellipse to a rectangle.
The Shape Mask is a simple mask that may be changed to editable control points in order to create complex bespoke masks (converting it into a Draw Mask).
- Open the Final Cut Pro project and select the clip you wish to mask.
Note: You can’t composite a clip over another one while using isolated clips. Final Cut Pro has this option, which you may find in the Comping window. - To make a clip transparent, select it in the timeline and place the play head at a point within the video clip that shows the portion you wish to make transparent.
- Click the Effects button in the top-right corner of the timeline (or press Command-5) to display the Effects browser.
- Select the Shape Mask effect in the Effects Browser.
Tip: Type “shape” in the Effects browser search bar to quickly locate the Shape Mask effect.
To apply the masking effect to the clip in the timeline, choose one of the following options:
- Drag the effect to the timeline clip.
- Double-click the effect thumbnail in the Effects browser to apply it.
- Use the on-screen controls to modify the shape mask if necessary.
The controls for the Shape Mask appear in the viewer, overlaid on top of the video image. In addition, the Effects area of the Video inspector displays the Shape Mask options. By default, the Shape Mask is set to a partially feathered ellipse shape in the center of the frame.
3. Wondershare Filmora
Filmora 11 is an easy to use video editor with useful masking features. It provides various of masking presets to make masking easy for you. If you are looking for Green Screen, Filmora also covers you. Its Chroma Key allows you to remove the background of almost any color.
Masking in Filmora 11
Filmora 11 has been modified to allow for the masking of keyframes. First, double-click the clip on your timeline to open a settings window in the library. Then, in the videos area, select the “Mask” option. Multiple forms may be selected here.
We picked the ‘Star’ form for this project. After selecting it, you may drag the shape to your clip in the preview area.
Scrolling down in the Windows category will take you to more options where you can change the scale, position, width, height, and radius of your chosen shape. You may also lessen the strength of the form and rotate it to make it blend in better with the other elements you’re trying to hide in your window.
To add the keyframe, simply hit the “Add” button after completing it. You may then modify the mask’s form to match the added frame.
For Win 7 or later (64-bit)
For macOS 10.12 or later
4. Avid Media Composer
Avid Media Composer has a comprehensive masking feature for video editors of different levels. You can either use the built-in masking tools or make your own one.
Masking in Avid Media Composer
In the Masking Effect window, you can choose to either create a new mask or use an existing one. First, select the “Create Mask” option and then click on the “Draw Mask” button to create a new mask.
This will open up the Draw Mask window, where you can draw your mask using the various tools provided. To apply the mask, simply click the “Apply” button.
If you want to use an existing mask, select the “Use Mask” option and then choose the mask you want to use from the drop-down menu.
5. Sony Vegas Pro
Sony Vegas Pro is a professional video editing software with robust masking tools. The interface of the editor may looks complicated for beginners, yet once you get familiar with it, you will be amazed by what you can achieve with the Vegas Pro.
Masking in Sony Vegas Pro
Step 1: Drag the clip from the Explorer or Project Media windows and drop it on the timeline. Then, look for another video that is quite distinct from the first.
Step 2: Drag it to the timeline below the first video event. A new track will be created. Place the original event directly beneath the video occurrence.
The Video Preview window does not display the second video because it is covered by the first video, which resembles one photo sitting on top of another in a stack. So to view the lower clip, we’ll need to add a mask.
6. Magix Movie Edit Pro
Magix Movie Edit Pro is another video editor that is great for adding masks to your video. It is famous for its ease-of-learn and stable rendering. When it comes to masking, it is also quite powerful.
Masking in Magix Movie Edit Pro
They let you apply special effects to only certain parts of a video. You may dramatically improve the aspect of your movies with this Magix Movie Edit Pro Plus feature.
When you apply color effects to the software’s template, it appears that you can only use color effects.
To add additional effects to specific portions of the shot, simply import an image and apply the Alpha Mask property from the Chroma Key menu. Then you must duplicate the video section and place it on a lower track, while keeping the alpha mask picture in between the two videos (click the graphic above for a visual guide).
7. Studio
Studio is a pro-level video editing software. It is preloaded with pro-caliber tool and premium effects to help you create the videos you want. We will show you how to apply masking in Studio in the following paragraphs.
Masking in Studio
Select the clip you want to overlay your media on, then click the ‘Mask’ button on the editing toolbar. After that, open the mask creation window by clicking ‘Create Mask.
First, click “Create Panel” to create a video mask panel.
To make a panel, use the panel of tools on the left side of the preview window. They’ll only be shown in your video when you add assets later if they’re inside this panel. Keep in mind that you may modify the size and placement of your asset within the panel and the panel itself; therefore, you might need to.
To access the media selection possibilities, click on the ‘Asset’ tab of the mask creation window. To discover the picture or video you want to include in your panel, go through your imported files by selecting ‘Select media.’ After that, select the media to be included in your panel video mask and hit ‘Apply.’
Use the left-hand slider or the resizing box in the preview window on the right to change the size and placement of your media in your panel video mask.
To adjust the 3D position of your panel video mask, go to the ‘3D’ tab of the mask creation window.
8. CyberLink PowerDirector
CyberLink PowerDirector has recently enhanced its mask & blend feature to help you create artistic scenes. If you are interested in the feature, you can try it out.
Masking in CyberLink PowerDirector
Drag and drop a photo from the media room into track 2 of your timeline, then drag the background image into track 1.
Then, go to the Quick Settings menu (press the Menu button at the bottom of your screen), select Cloud Print from the drop-down menu, and then select your photo. Then open up the design interface by selecting Mask Designer from the drop-down menu.
You may select from a variety of templates in the Mask Designer. If you want to make your own mask shape, the Mask Designer has three alternatives for you to create new mask types.
Create an image mask: You may use any picture or video, and it will be resized to fit the shape.
Create a text mask: Enter the text you’d like to appear in your photo. Then, go to the left side of the panel under Font/Paragraph on the left side for font style, size, and other options. To alter the text mask itself, go to the preview window and resize it on the left panel.
Conclusion
● Maybe you want to add a picture-in-picture effect, or maybe you want to replace the background with a new image. Whatever the reason, it’s easy to do with most video editing software. We’ve shown you how to mask videos in eight different editors in this article. So now you can get started creating your own custom videos!
Separate Audio From Video in DaVinci Resolve [Step by Step]
The DaVinci Resolve is an excellent software for editing videos; that’s why it attracts users. They also enjoy using it due to its simplicity and availability of features. One of them is separating the audio from the video that most people are looking for. It is easy to extract from this software. But, to avail of this feature, you need to follow proper steps, and this article is all about it. There are also details regarding the Wondershare Filmora as the most appropriate alternative and simpler solution provider.
How can you separate audio from the video clips in DaVinci resolve?
The DaVinci resolve is the complete package to solve your different issues. It is a solution provider regarding the editing of the videos, extraction of audio from videos, matching, correction of the colours and many more. It also includes modification of the lens that helps analyse and correct the distortion. Even the lens analysis is also available to deliver high-quality results.
Step 1: Launch the DaVinci Resolve in your system after its installation. Import the media file from the library in your timeline from which you have to separate the audio.

Step 2: Select the Edit tab in the timeline of your project if it isn’t selected by default. You need to choose the video clip by pointing the cursor or dragging the mouse towards it.

Step 3: After its selection, untick all the clips, and this step is for separating the audio from the video just from one file. Click the video file for deselection.

Step 4: Now it is easy to select the video and click on it. Select the audio and video clips separately. Simply edit, delete or move your audio whenever you want it to.
An easier way to separate the audio from the video
However, the DaVinci Resolve is the software of advanced level and the best choice for professionals. But its pricing that is $299, is quite disturbing for most of the users. So, they are always searching for a suitable approach and reasonable as well. And that is the first and foremost Filmora Video Editor . You can split the audio and listen to your favourite track on any media player.
All the tools are readily available, and they are used without facing any issue. After editing and applying all the effects, it is easy to upload on social network platforms. it is very simple to create fast or slow-motion videos with speed controls. This software is highly supportive of editing videos of any kind. There is no need to look for the reasons to choose Wondershare Filmora; instead, it is not to choose it for editing tasks.
For Win 7 or later (64-bit)
For macOS 10.14 or later
Features:
- Extracting the audio from videos
- Controls available for videos and audios
- Number of ways to split the clips and screens
- All the functions are performed by just drag and drop
- Sharing of the videos unlimitedly on Vimeo, YouTube and others
- mixing the audio and removing the noise
To extract the audio from the video clip in Wondershare Filmora, go through the following easy steps and get your task done.
Step 1: After completing the installation of Wondershare Filmora, selection of the ratio is required whether it is 4:3 or 16:9. It is your choice and dependent on the requirements of your project. Import the video from the folder of your computer when you will click “Import”. As the default, all the files are all together in one place with no gap.

Step 2: This step separates the audio from the video in a single click. You need to right-click on the video from which you have to split the audio and select “Detach Audio”. Instantly, an audio file will appear on the screen on the audio track. Yes, you have received the original audio final from the source file.
Successfully the audio is separate from the video. Wondershare Filmora also offers to replace the audio file you want to add to the video. It can provide a few instructions, some narrations or personal, funny tunes for sharing with family and friends.
Step 3: After step2, it is simple to delete the audio clips or video that isn’t needed anymore and add your own choice. Click on “Export” to save the audio file into the new MP3 file and select “iPod” presenting to play. Even, you can save it as your project file on your system. After the completion of exporting the audio track, load the project file again with the video frame and export it as the new file of your video.

Wondershare Filmora is the most user-friendly editing software for all. Whether you want to make complex or straightforward videos, all is done in just a few steps. The best part of this software is that all the features are easily accessible to all types of users. It is very simple to start and show your creative skills and share easily if you are unfamiliar with video editing.
There is a massive range of tools in Wondershare Filmora that you are looking for in any video editor. 800+ video effects are built-in, such as effects for the text, transitions, filters, stickers, motion graphics, and overlays.
In Wondershare Filmora, there are templates for the spilt screens as well. It is best for you to handle your YouTube channels or your Instagram account. It doesn’t record screen only but as well voice-over. Even capturing the videos from frame to frame is also possible. So, what are you waiting for? Download Wondershare Filmora today and start your editing done in just a few clicks.
Step 2: Select the Edit tab in the timeline of your project if it isn’t selected by default. You need to choose the video clip by pointing the cursor or dragging the mouse towards it.
Step 3: After its selection, untick all the clips, and this step is for separating the audio from the video just from one file. Click the video file for deselection.
Step 4: Now it is easy to select the video and click on it. Select the audio and video clips separately. Simply edit, delete or move your audio whenever you want it to.
An easier way to separate the audio from the video
However, the DaVinci Resolve is the software of advanced level and the best choice for professionals. But its pricing that is $299, is quite disturbing for most of the users. So, they are always searching for a suitable approach and reasonable as well. And that is the first and foremost Filmora Video Editor . You can split the audio and listen to your favourite track on any media player.
All the tools are readily available, and they are used without facing any issue. After editing and applying all the effects, it is easy to upload on social network platforms. it is very simple to create fast or slow-motion videos with speed controls. This software is highly supportive of editing videos of any kind. There is no need to look for the reasons to choose Wondershare Filmora; instead, it is not to choose it for editing tasks.
For Win 7 or later (64-bit)
For macOS 10.14 or later
Features:
- Extracting the audio from videos
- Controls available for videos and audios
- Number of ways to split the clips and screens
- All the functions are performed by just drag and drop
- Sharing of the videos unlimitedly on Vimeo, YouTube and others
- mixing the audio and removing the noise
To extract the audio from the video clip in Wondershare Filmora, go through the following easy steps and get your task done.
Step 1: After completing the installation of Wondershare Filmora, selection of the ratio is required whether it is 4:3 or 16:9. It is your choice and dependent on the requirements of your project. Import the video from the folder of your computer when you will click “Import”. As the default, all the files are all together in one place with no gap.
Step 2: This step separates the audio from the video in a single click. You need to right-click on the video from which you have to split the audio and select “Detach Audio”. Instantly, an audio file will appear on the screen on the audio track. Yes, you have received the original audio final from the source file.
Successfully the audio is separate from the video. Wondershare Filmora also offers to replace the audio file you want to add to the video. It can provide a few instructions, some narrations or personal, funny tunes for sharing with family and friends.
Step 3: After step2, it is simple to delete the audio clips or video that isn’t needed anymore and add your own choice. Click on “Export” to save the audio file into the new MP3 file and select “iPod” presenting to play. Even, you can save it as your project file on your system. After the completion of exporting the audio track, load the project file again with the video frame and export it as the new file of your video.
Wondershare Filmora is the most user-friendly editing software for all. Whether you want to make complex or straightforward videos, all is done in just a few steps. The best part of this software is that all the features are easily accessible to all types of users. It is very simple to start and show your creative skills and share easily if you are unfamiliar with video editing.
There is a massive range of tools in Wondershare Filmora that you are looking for in any video editor. 800+ video effects are built-in, such as effects for the text, transitions, filters, stickers, motion graphics, and overlays.
In Wondershare Filmora, there are templates for the spilt screens as well. It is best for you to handle your YouTube channels or your Instagram account. It doesn’t record screen only but as well voice-over. Even capturing the videos from frame to frame is also possible. So, what are you waiting for? Download Wondershare Filmora today and start your editing done in just a few clicks.
Also read:
- Updated In 2024, 4 Ways to Add White Border to Video on Mobile and Desktop
- Updated 7 Solutions to Cut Video on Mac without Using FFmpeg for 2024
- Updated How To Blur Background in Adobe Premiere Pro Detailed Guide for 2024
- New Best Cloud Storage Service for Videos for 2024
- The Ultimate Guide to Using Shotcut To Rotate Videos
- New Final Cut Pro - How to Download and Install It, In 2024
- Updated Best 16 Motion Blur Apps for Videos & Photos for 2024
- Best 8 Online GIF to APNG Converters
- New 2024 Approved How to Speed Up Pictures on TikTok Slideshow
- Updated 2024 Approved How to Create The Best Video Collages ?
- Updated How to Speed Up and Slow Down a Video
- New Recording Video in Slow Motion Some Considerable Points
- Updated How Can Filmora Create an Audio Visualizer Project for a Song? All Steps, From Launching the App to Editing the Text, Are Detailed Here
- Motion Tracking Never Goes Out of Trend, so Do You Wish to Make Your Videos Trendy with This? No Issue because Here We Will Guide You on How to Do Motion Tracking for 2024
- How Long Does It Take To Edit A Video
- In 2024, How to Apply Video Filters Mobile and Desktop
- Updated Do You Wish to Convert GIF to Animated PNG? Then, You Need to Know About Using a GIF to APNG Converter to Help You Carry This Process Out in No Time. Read On
- The Ultimate Guide to Get the Rare Candy on Pokemon Go Fire Red On Oppo Find X7 Ultra | Dr.fone
- In 2024, How To Change Your SIM PIN Code on Your Samsung Galaxy S24+ Phone
- App Wont Open on Your Motorola Razr 40 Ultra? Here Are All Fixes | Dr.fone
- Video Fixer Software for all Corrupt Videos of Realme 11X 5G
- In 2024, Which Pokémon can Evolve with a Moon Stone For Asus ROG Phone 8? | Dr.fone
- How to Unlock Infinix Hot 30i Phone Pattern Lock without Factory Reset
- Recover Permanently Deleted or Erased Excel 2013 Files for Free | Stellar
- How do you play MP4 files on 13T?
- Thinking About Changing Your Netflix Region Without a VPN On Xiaomi Redmi Note 13 Pro+ 5G? | Dr.fone
- Three Solutions to Hard Reset Honor Magic V2? | Dr.fone
- In 2024, Detailed Review of doctorSIM Unlock Service For Apple iPhone 13 Pro Max | Dr.fone
- In 2024, Getting the Pokemon Go GPS Signal Not Found 11 Error in Xiaomi Civi 3 | Dr.fone
- How To Change Your Apple ID Password On your iPhone 6s | Dr.fone
- Undelete lost photos from Motorola Moto G14.
- Title: New Top 6 Text to Speech Generators for YouTube Videos Windows, Mac, And
- Author: Chloe
- Created at : 2024-06-26 06:24:19
- Updated at : 2024-06-27 06:24:19
- Link: https://ai-editing-video.techidaily.com/new-top-6-text-to-speech-generators-for-youtube-videos-windows-mac-and/
- License: This work is licensed under CC BY-NC-SA 4.0.
