
:max_bytes(150000):strip_icc():format(webp)/E-reader-57b936e05f9b58cdfd3e07e1.jpg)
New Top Animated Title Makers
Top Animated Title Makers
You know that your video needs a title, but rather than just type in some bland text to introduce the video, you can create an animated title page that is far more attractive. Animated titles make a video more attractive and when done correctly, they can even guarantee that your target audience will stick around long enough to watch the entire video. They can also be very useful for introducing the content of the video.
But to make an effective animated title, you need a tool that is designed to do just that. In this article, we look at some of the top animated title makers that you can use to create the perfect animated title for your video.
Part 1. Animated Title Maker Online
If you don’t want to install software on your computer to create the animated title, the following are the top online tools to choose from;
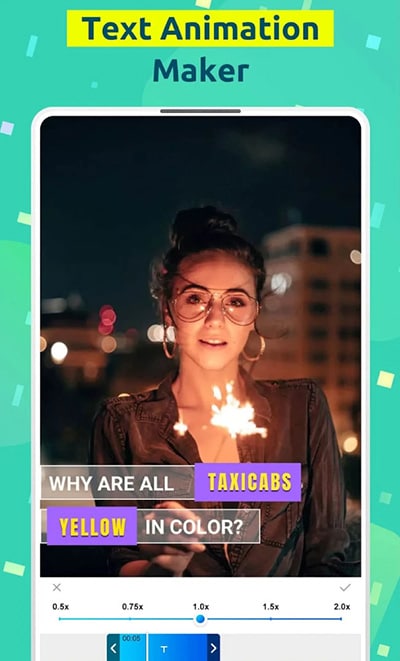
Animaker
Link: https://www.animaker.com/text-animation-maker
Rating: 4.5/5
Animaker is an online tool that is specifically designed to help you create text animations that you can then add to your video project. Available online on all browsers, Animaker has a simple user interface that makes it easy to create text animations in a matter of minutes. It is so easy to use that even the average beginner can create stunning text animations.
If you don’t want to create the animations from scratch, Animaker has numerous pre-designed templates for you to choose from that you can then just edit to fit your design. It also has a lot of customizable infographics that you can repurpose.

Animatron Studio
Link: https://www.animatron.com/studio
Rating: 4.5/5
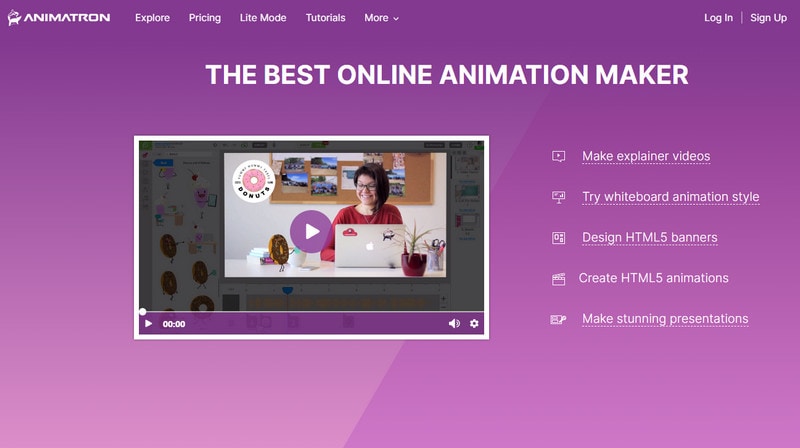
The Animatron Studio is a one-stop solution for generating all types of animated texts. You can use it to create the perfect animated title for your video, but its numerous features also mean that it is one of the best ways to create attention-grabbing animated banner ads that can be posted on various ad sites,
It has a wealth of resources that you can use to create the title including more than 500,000 royalty-free images, videos, and audio to include in your project. If you don’t want to build the animated content from the ground up, you can select from the 200 pre-animated sets that Animatron Studio provides.
Kapwing Title Maker
Link: https://www.kapwing.com/animated-text-video-maker
Rating: 4.5/5
If your goal is to do more than just create an animated title for your video, Kapwing is a good solution. It is a complete online video editor that can also be used to create animated titles. As such, you can expect Kapwing to have more advanced features that allow you to customize the animated title in various ways.
For instance, it has a huge selection of animations that you can apply to the text. But you also get the option to upload your own animations, colors, and fonts. But please note that the free version of Kapwing will add a watermark to the video.

Biteable Animated Text Maker
Link: https://biteable.com/animated/text/
Rating: 4.5/5
Biteable is one of the most popular solutions that you can use to create all kinds of animated texts. It is simple enough to use that it is useful to both professionals and amateur video creators. It has numerous useful features including custom scenes, foundations, backgrounds, and characters all of which can work together to create the perfect animated title.
One of the main benefits of choosing Biteable is that you can share the videos you edit directly on social media without having to download the video.

Flexclip Video Maker
Link: https://www.flexclip.com/editor/
Rating: 4.5/5
Flexclip is another very easy-to-use and easily accessible solution to create animated texts for videos. Rather than create the texts from scratch, Flexclip allows you to create stunning animated texts just by selecting several parameters.
There are also a lot of pre-made designer text templates that are fully customizable. All you have to do is select one of the templates, and change the text, font, and any images to make it unique to you and your video.

Part 2. Animated Title Maker for Computer
Online tools can be useful, especially since they are more easily accessible. But if you want additional features and more ways to customize your animated title, the following desktop solutions may be more applicable to you;
Filmora
Rating: 4.5/5
Wondershare Filmora is a complete suite of video editing tools that can also come in handy when creating animated titles for videos. It is a very simple video editor with a simple user interface, making it an ideal solution even for beginner users. Adding a title to your video is easy and you get to choose from more than 200 different animations that you can apply to bring the text to life.
Filmora is also very useful because it comes with advanced editing features for the professional editor. You can use it to edit all aspects of the video including the clips and even any audio that may be on the project.

Adobe Animate
Rating: 4.5/5
Adobe Animate is a great option to create various animations for your video project, including animated texts. Used by animators to create 2D animated content, Adobe Animate has a lot of features designed to facilitate this kind of animation and is, therefore, one of the go-to solutions for designers looking to create illustrations like logos and infographics.
But like other Adobe programs, Adobe Animate is not very easy to use and the beginner may find that it takes quite a long time to figure out how it works. But once you figure it out, the 800+ web fonts can make it very easy for you to customize your animated title in various ways.

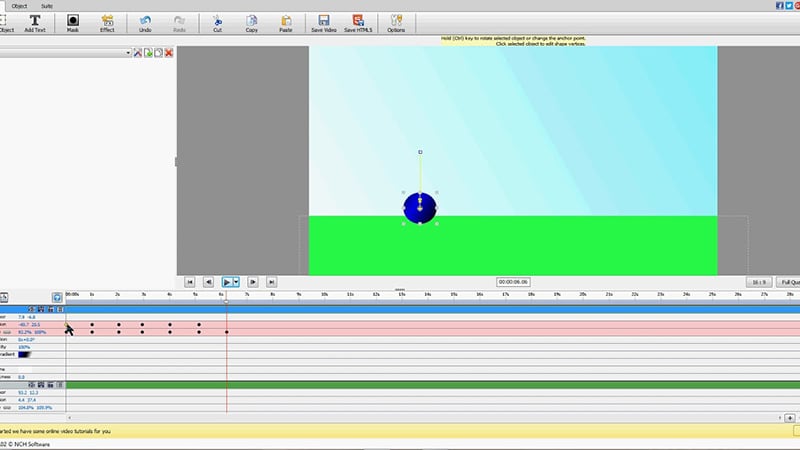
Express Animate
Rating: 4.5/5
Express Animate is a completely free program that you can download on your computer. It is a complete video editor which means that you can use it to animate text and characters, but it is also a great way to edit other aspects of the video including the audio tracks and adding digital effects.
With a simple user interface, Express Animate allows users to create 2D animations that can be used to create unique videos. It is also a good way to create GIFs and memes.
Movavi Video Editor
Rating: 4.5/5
Movavi Video Editor is another complete suite of editing tools that can also come in handy when you want to create an animated title for your video. Designed for both professionals and beginners, this video has all the advanced features you will need to edit all aspects of your video, including a built-in audio editor.
When it comes to animation, Movavi has a lot of effects and transitions as well as pre-made title templates to choose from. Once you have selected the title, you can easily customize the font and color to fit into your project.

Windows Movie Maker
Rating: 4.5/5
For PC users Windows Movie Maker is a simple to use and free way to edit videos. Included with the Windows OS, you likely don’t need to install any software to use and even though it is a free solution, Windows Movie Maker does have the necessary features to create and add animated titles to any video.
It comes with numerous effects, transitions, and templates to choose from when animating text. And it can also be used to edit videos in other ways including trimming and merging clips.

Part 3. Animated Title Maker Apps
If you are editing your videos on your mobile device, the following are the top animated title-making apps to choose from;
Tomo
Rating: 4.5/5
Link: https://m.apkpure.com/tomo-animate-text-in-video/com.entzeners.app.tomo
Tomo is one of the best apps that you can use to animate text in a video. It has robust features that allow you to easily add text to the video and then animate the text using various transitions and effects. Once the edits are complete, Tomo allows you to share the completed video directly on social media apps like Instagram and Twitter.

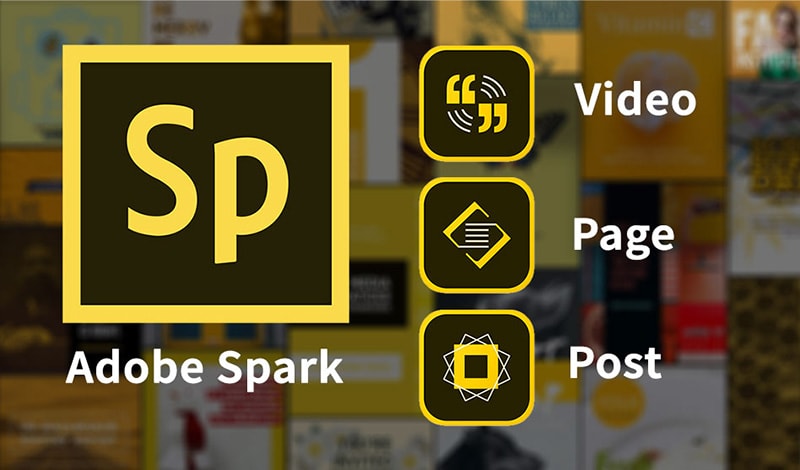
Adobe Spark
Rating: 4.5/5
Link:https://apps.apple.com/us/app/adobe-spark-post-design-maker/id1051937863
Available for both Android and iOS devices, Adobe Spark is a video editing tool that has numerous tools to add and edit texts on videos. You can use the professionally designed templates that you have access to when using Adobe Spark to create stunning animation titles. And since it easily integrates with other apps on the device, sharing the videos is very easy.
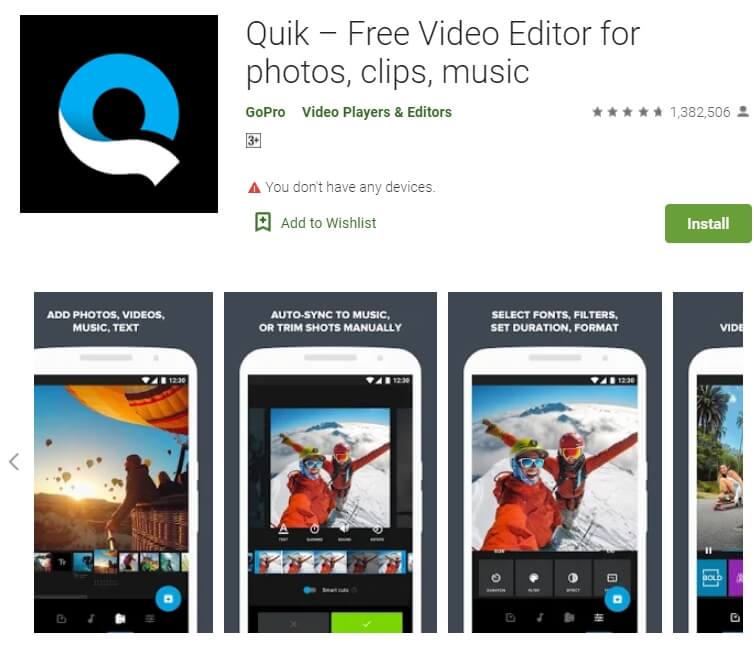
Quik
Rating: 4.5/5
Link: https://play.google.com/store/apps/details?id=com.gopro.smarty&hl=en&gl=US
Quik is an app that is dedicated to text animations and therefore one of the best solutions when you want to add and edit texts on videos. It is available for both iOS and Android and although the free version of the app is slightly limited, its basic editing features are still better than what you find on other more expensive solutions.
Hyper-type Animated Text Videos
Rating: 4.5/5
Link: https://itunes.apple.com/us/app/hype-type-animated-text-videos
This app gives you two options when it comes to animating the text on your video; auto-motion and typography. It focuses on just adding and editing text on a video and as such may not have any of the other video editing features you will find on some of the other apps. But if your goal is to create an interactive animated video title, Hyper-type Animated Text Videos is a great solution.
Vimeo
Rating: 4.5/5
Link: https://play.google.com/store/apps/details?id=com.vimeo.android.videoapp&hl=en&gl=US
Also available for both iOS and Android devices, Vimeo can also be a handy solution for the creation and editing of animated titles for videos. It has a lot of features to edit not just the text in videos, but also all other elements including audio. You even get a wide selection of royalty-free music that you can add to the video and motion stickers to make your title stand out even more. But the free version of Vimeo will add a watermark to the video.

Free Download For Win 7 or later(64-bit)
Free Download For macOS 10.14 or later
How to Crop a Video in Windows Media Player
In this generation, we are so much engaged in social media forms. We loved to upload and post some pictures and videos. To show the happiness that we had. But sometimes, we are not satisfied with our videos and photos. That is why we gave time to edit, put some effects , transitions and other forms of editing. It is such a big help, especially if you are running some online business. To get and gain the interest and attention of your viewers and costumers, your videos and pictures must be catchy and have some good edits. By doing some basic editing skills can help you boost your social media platform. And also by taking away some unwanted things in your videos and pictures can improved the focus of your video.
One of the basic way of editing is cropping.
Need to modify the point of interest of your video clipped? you don’t need to re-shoot your footage. The crop device can help!
Cropping is the manner of shifting or adjusting the rims of a photograph or video clip.Often used for image modifying, it’s also useful whilst modifying video. With cropping, you may take away pointless or distracting quantities of a video clip or alternate its dimensions to in shape inside a positive area.Whether you’re running with pictures from a digital digicam or display video, you’ll in all likelihood run into instances whilst you want to crop those clips.
In this article you will learn how to crop a video through windows media player and with Filmora Wondershare. Here are ways to crop your video clip.
How to crop a video in Windows Media Player
Actually, Windows Media Player can not crop a video directly. However plug-ins including the SolveigMM WMP Trimmer may be set up and used to cut or edit videos in Windows Media Player for free. Detailed steps are furnished right here to train you a way to deployation and use this unique plug-in.
As said earlier, the Windows Media Player isn’t always a video editor and can not be used immediately to trim or crop your films until with the assist of plug-ins. However, the stages underneath offer info on how to use Windows Media Player to make the edit. Please follow carefully with the steps below and use the SolveigMM WMP Trimmer to your device/Windows Media Player to make an easy edits in your video file.
Step 1: Download and install the SolveigMM WMP Trimmer plug-in. To download the plugin, click this link: https://www.solveigmm.com/en/products/wmp-trimmer-plugin/
Step 3: On Windows Media Player, click on the principle menu object and navigate to Tools Plug-ins SolveigMM WMP Trimmer Plugin.

Your plug-in will be enabled after selecting it from the menu.
Step 4: While playingthe document you need to edit, flow the blue slider to the segment of the film you need to trim/reduce and click “Start”. Manually type the time of the video you need to begin deciding on into the Start box in case you discover the usage of the slider difficult. Click the “End” button on the factor you need the trimming to end.

Step 5: Find and press the “In” button to trim the chosen component; The “Out” button to reduce the chosen component out of the authentic media document.
Note that SolveigMM WMP Trimmer Plugin supports to edit videos including cutting or trimming, however, it doesn’t offer an option to crop video.
An alternative way to crop video on Windows by Wondershare Filmora
Wondershare Filmora Video Editor is one of the great video enhancing software program with cool functions that compares to different competing video enhancing Softwares program. Many video enhancing applications claimed to provide expert results; Filmora is one in every of some consumer-stage equipment that definitely delivers.
For Win 7 or later (64-bit)
For macOS 10.14 or later
Here in Filmora, it is not just trimming but this tool can help you to adjust the focus of your video clip. Here are steps on how to crop a video using wondershare filmora.
1. Install and launch your Filmora Wondershare app.

2. Find the import media. Click it and choose your preferred video fromyour files that you want to edit. Wait a second until the video is finished importing.

3. Drag the video to the lower left side. After dragging ,right-click yourmouse and choose video and then click “crop and zoom.”


4. Now, you can adjust the focus of your video.

5. After cropping, if you are satisfied with your edit you can now save your project by clicking the save project icon.

Conclusion
In this guide, you have acquired some knowledge about using crop on a video clip. Though this process or step could be very difficult but using Filmora Wondershare you can easily follow the steps provided above.
Therefore, cropping video is necessary. It is one of the basic editing skill that you need to know. It is functional to your online business, work projects, school projects and other related stuffs. Cropping will help you to emphasize more about your subject.
It is easier for you to do the edit if you used some software programs. You can used Filmora Wondershare or any of the best editing software programs. While you are giving the best videos and photos of your costumer and viewers you are also improving and enhancing your editing skills.
However, you also need to be careful in doing some edits. Before you save your project you need to make sure that you are cropping the right portion of your video.
Your plug-in will be enabled after selecting it from the menu.
Step 4: While playingthe document you need to edit, flow the blue slider to the segment of the film you need to trim/reduce and click “Start”. Manually type the time of the video you need to begin deciding on into the Start box in case you discover the usage of the slider difficult. Click the “End” button on the factor you need the trimming to end.
Step 5: Find and press the “In” button to trim the chosen component; The “Out” button to reduce the chosen component out of the authentic media document.
Note that SolveigMM WMP Trimmer Plugin supports to edit videos including cutting or trimming, however, it doesn’t offer an option to crop video.
An alternative way to crop video on Windows by Wondershare Filmora
Wondershare Filmora Video Editor is one of the great video enhancing software program with cool functions that compares to different competing video enhancing Softwares program. Many video enhancing applications claimed to provide expert results; Filmora is one in every of some consumer-stage equipment that definitely delivers.
For Win 7 or later (64-bit)
For macOS 10.14 or later
Here in Filmora, it is not just trimming but this tool can help you to adjust the focus of your video clip. Here are steps on how to crop a video using wondershare filmora.
1. Install and launch your Filmora Wondershare app.
2. Find the import media. Click it and choose your preferred video fromyour files that you want to edit. Wait a second until the video is finished importing.
3. Drag the video to the lower left side. After dragging ,right-click yourmouse and choose video and then click “crop and zoom.”
4. Now, you can adjust the focus of your video.
5. After cropping, if you are satisfied with your edit you can now save your project by clicking the save project icon.
Conclusion
In this guide, you have acquired some knowledge about using crop on a video clip. Though this process or step could be very difficult but using Filmora Wondershare you can easily follow the steps provided above.
Therefore, cropping video is necessary. It is one of the basic editing skill that you need to know. It is functional to your online business, work projects, school projects and other related stuffs. Cropping will help you to emphasize more about your subject.
It is easier for you to do the edit if you used some software programs. You can used Filmora Wondershare or any of the best editing software programs. While you are giving the best videos and photos of your costumer and viewers you are also improving and enhancing your editing skills.
However, you also need to be careful in doing some edits. Before you save your project you need to make sure that you are cropping the right portion of your video.
Some Facts About GIF Background You Didn’t Know
Some Facts About GIF Background You Didn’t Know
An easy yet powerful editor
Numerous effects to choose from
Detailed tutorials provided by the official channel
Once you start using GIFs in your everyday conversations, there’s no going back. GIFs make the conversation more immersive and enjoyable and add a sense of emotion that is not possible with ordinary text. You probably loved some gifs more than others, or there were moments when you wanted to turn them into gifs and wished you could use them as a gif background on your device or presentation but couldn’t figure out how to do it. But, now you don’t have to bury your wish any longer. During this article, you will learn everything there is to know about all the different ways you can use gifs as your background and many more. In addition, you will learn how to use them as your background and how to create them.
In this article
01 [How to Use a GIF as Your Desktop Background on Windows](#Part 1)
02 [How to Make GIF Background on Windows/Mac/Android/iPhone](#Part 2)
03 [How to Make GIF Powerpoint Background](#Part 3)
04 [How to Make GIF Without Background - Free & Efficiently?](#Part 4)
Part 1 How to Use a GIF as Your Desktop Background on Windows?
Although Windows doesn’t have native support to keep animated gif backgrounds, you can use third-party services to keep gifs as background images.
Using Plastuer or BioniX wallpaper changer as a 3rd party software is the best way to use animated gifs for your desktop.
As a starting point, we’ll cover plastuer, which uses WebGL and chromium-browser to make gifs as your background.

The software includes selecting different screens where you want the wallpaper to appear, making it possible to apply it to different screens at once.
To select the gif you want:
● You can paste the URL of the gif you want to use.
● You can also use the “create playlist” field to add multiple gifs as your background.
● You can select a file from your device using the “select file” option.
● Or you can choose from hundreds of gifs present in the plastuer library.
● You can disable the wallpaper whenever you wish by clicking on the “disable wallpaper” option.

How to use the bioniX wallpaper changer?
BioniX comes with several options that one may need to apply to their Windows device’s background, and animated gif backgrounds are one of them.

You will need to download the software and once it is installed, launch it on your PC to apply cool gif backgrounds. To choose files from the device itself, you will have to use the shortcut command “CTRL+F”, or you can also choose to insert the URL of the gif you want to use as your background.
Once your image gets uploaded into the software, double click on it to set it as your windows wallpaper. You can also choose a launch of gifs, create a playlist, and select the timer to change wallpaper regularly.
Part 2 How to Make GIF Background on Windows/Mac/Android/iPhone?
So, how can you create moving background gifs on your different devices like Windows/Mac/Android/iPhone?
In case you thought that was hard, you were entirely mistaken. Now, you can easily create or customize cool background gifs for your computer, tablet, phone, or other devices that you own. The best part is that you don’t need any technical skills to use different tools.
You can create gifs with the help of many tools such as Giphy and share them with your family, friends, and coworkers.
01Giphy
Giphy is a one-stop destination for all of your gifs needs. You can create or choose from thousands of gifs present in their library. Furthermore, one can make personalized gifs with all the tools they provide and add custom stickers, texts or different filters. There is also a live wallpaper section present in giphy, from where you can download hundreds of cool gif backgrounds and make your old machine look fabulous again.

02Pinterest
It’s no secret that Pinterest has a lot of great images, but did you know you can also find gif backgrounds here in various genres that you like and then download them?
It’s straightforward to use, and you can also find anime gif backgrounds on Pinterest if you are an anime fan.

03Tenor
This site offers online gif backgrounds. One may choose from a wide selection of wallpapers and backgrounds available on this site. Online Library is filled up with all sorts of aesthetic gif backgrounds and other types of background that people like.
A few more tools fit the need, but most of them are not reliable, and the tools mentioned above are currently the best ones available for you to use.

Part 3 How to Make a GIF Powerpoint Background?
If you make PowerPoint presentations, you can use various tools to modify your presentation. But did you know that you can also include an aesthetic gif background as part of your presentation?
The steps to creating a gif PowerPoint background are very simple, and below you will find all the steps you need to follow:
● You’ll need to choose the PPTx file that you want to use the GIF background on to get started. Then you can choose the specific slide.
● Navigate to the “design” tab, then to the “background” section. You will see a “background styles” option where you will have to select “format background” to complete the process.
● Select “fill” in the left-hand side panel of the appeared window. Now, select “picture or texture fill” and choose the “file” button, which will lead to another window.
● In the “look in” menu, find the folder or file where the required gif is present. Go on to select the “ok” option. You can either select “close” to apply the gif to a particular slide or “apply to all” to use the gif background in the whole presentation.
Part 4 How to Make GIF Without Background - Free & Efficiently?
One may also look for transparent gif maker websites that will help them make gifs without background and use them on different devices they own.
Here are a few websites that are best for this job; they won’t only help you make transparent gifs but also edit various features like delay time, animation speed etc.
01Using EzGif
Using EzGif is probably one of the best options available in the market at the moment. You can go to their website and create a transparent gif background of high resolution.
Doing that is easy; you need to upload PNG type images that don’t have a background or combine transparent background to form a gif. You can choose up to 2000 images with a maximum file size of 100 MB for all images combined.
To create a gif, go on their site, then to the “gif maker” section to upload the images, and click on “make a gif” to make a transparent gif from the selected images. Once the gif is created, you can use it as a moving gif background and share it with friends or family.
02Use animizer.net to create a gif without background
It is effortless to use software to create transparent gifs by uploading multiple transparent PNG images and combining them to form a gif.
You can use unlimited images for your gif and animated gif background. It also lets you adjust various settings for your transparent gifs like loops, animation speed and much more.
03Use filmora for making gifs without background easily
Wondershare Filmora Video Editor is an all in one tool that will help you create all sorts of gifs, including transparent gifs. You can take advantage of their easy to use tools that are fir for people who have no technical skills at all.
You can easily upload the images and remove their background in the software itself and later use it in the gif you are willing to create.

Wondershare Filmora - Best Video Editor for Mac/Windows
5,481,435 people have downloaded it.
Build unique custom animations without breaking a sweat.
Focus on creating epic stories and leave the details to Filmora’s auto features.
Start a creative adventure with drag & drop effects and endless possibilities.
Filmora simplifies advanced features to save you time and effort.
Filmora cuts out repetition so you can move on to your next creative breakthrough.
This is probably one of the best options if you are looking for an all in one tool for all your needs.
● Ending Thoughts →
● The techniques that we have talked about in this guide may help you discover things about gif backgrounds you have not known before.
● They are incredible and can help you utilize gifs in ways you hadn’t even considered.
● Create a moving gif background and apply it to any device easily.
● Of course, a simple background won’t provide the same type of effect as a moving gif. With this guide, you’ll learn about every tool that you may use and how to apply or create a cool gif background on your own.
Once you start using GIFs in your everyday conversations, there’s no going back. GIFs make the conversation more immersive and enjoyable and add a sense of emotion that is not possible with ordinary text. You probably loved some gifs more than others, or there were moments when you wanted to turn them into gifs and wished you could use them as a gif background on your device or presentation but couldn’t figure out how to do it. But, now you don’t have to bury your wish any longer. During this article, you will learn everything there is to know about all the different ways you can use gifs as your background and many more. In addition, you will learn how to use them as your background and how to create them.
In this article
01 [How to Use a GIF as Your Desktop Background on Windows](#Part 1)
02 [How to Make GIF Background on Windows/Mac/Android/iPhone](#Part 2)
03 [How to Make GIF Powerpoint Background](#Part 3)
04 [How to Make GIF Without Background - Free & Efficiently?](#Part 4)
Part 1 How to Use a GIF as Your Desktop Background on Windows?
Although Windows doesn’t have native support to keep animated gif backgrounds, you can use third-party services to keep gifs as background images.
Using Plastuer or BioniX wallpaper changer as a 3rd party software is the best way to use animated gifs for your desktop.
As a starting point, we’ll cover plastuer, which uses WebGL and chromium-browser to make gifs as your background.
The software includes selecting different screens where you want the wallpaper to appear, making it possible to apply it to different screens at once.
To select the gif you want:
● You can paste the URL of the gif you want to use.
● You can also use the “create playlist” field to add multiple gifs as your background.
● You can select a file from your device using the “select file” option.
● Or you can choose from hundreds of gifs present in the plastuer library.
● You can disable the wallpaper whenever you wish by clicking on the “disable wallpaper” option.
How to use the bioniX wallpaper changer?
BioniX comes with several options that one may need to apply to their Windows device’s background, and animated gif backgrounds are one of them.
You will need to download the software and once it is installed, launch it on your PC to apply cool gif backgrounds. To choose files from the device itself, you will have to use the shortcut command “CTRL+F”, or you can also choose to insert the URL of the gif you want to use as your background.
Once your image gets uploaded into the software, double click on it to set it as your windows wallpaper. You can also choose a launch of gifs, create a playlist, and select the timer to change wallpaper regularly.
Part 2 How to Make GIF Background on Windows/Mac/Android/iPhone?
So, how can you create moving background gifs on your different devices like Windows/Mac/Android/iPhone?
In case you thought that was hard, you were entirely mistaken. Now, you can easily create or customize cool background gifs for your computer, tablet, phone, or other devices that you own. The best part is that you don’t need any technical skills to use different tools.
You can create gifs with the help of many tools such as Giphy and share them with your family, friends, and coworkers.
01Giphy
Giphy is a one-stop destination for all of your gifs needs. You can create or choose from thousands of gifs present in their library. Furthermore, one can make personalized gifs with all the tools they provide and add custom stickers, texts or different filters. There is also a live wallpaper section present in giphy, from where you can download hundreds of cool gif backgrounds and make your old machine look fabulous again.
02Pinterest
It’s no secret that Pinterest has a lot of great images, but did you know you can also find gif backgrounds here in various genres that you like and then download them?
It’s straightforward to use, and you can also find anime gif backgrounds on Pinterest if you are an anime fan.
03Tenor
This site offers online gif backgrounds. One may choose from a wide selection of wallpapers and backgrounds available on this site. Online Library is filled up with all sorts of aesthetic gif backgrounds and other types of background that people like.
A few more tools fit the need, but most of them are not reliable, and the tools mentioned above are currently the best ones available for you to use.
Part 3 How to Make a GIF Powerpoint Background?
If you make PowerPoint presentations, you can use various tools to modify your presentation. But did you know that you can also include an aesthetic gif background as part of your presentation?
The steps to creating a gif PowerPoint background are very simple, and below you will find all the steps you need to follow:
● You’ll need to choose the PPTx file that you want to use the GIF background on to get started. Then you can choose the specific slide.
● Navigate to the “design” tab, then to the “background” section. You will see a “background styles” option where you will have to select “format background” to complete the process.
● Select “fill” in the left-hand side panel of the appeared window. Now, select “picture or texture fill” and choose the “file” button, which will lead to another window.
● In the “look in” menu, find the folder or file where the required gif is present. Go on to select the “ok” option. You can either select “close” to apply the gif to a particular slide or “apply to all” to use the gif background in the whole presentation.
Part 4 How to Make GIF Without Background - Free & Efficiently?
One may also look for transparent gif maker websites that will help them make gifs without background and use them on different devices they own.
Here are a few websites that are best for this job; they won’t only help you make transparent gifs but also edit various features like delay time, animation speed etc.
01Using EzGif
Using EzGif is probably one of the best options available in the market at the moment. You can go to their website and create a transparent gif background of high resolution.
Doing that is easy; you need to upload PNG type images that don’t have a background or combine transparent background to form a gif. You can choose up to 2000 images with a maximum file size of 100 MB for all images combined.
To create a gif, go on their site, then to the “gif maker” section to upload the images, and click on “make a gif” to make a transparent gif from the selected images. Once the gif is created, you can use it as a moving gif background and share it with friends or family.
02Use animizer.net to create a gif without background
It is effortless to use software to create transparent gifs by uploading multiple transparent PNG images and combining them to form a gif.
You can use unlimited images for your gif and animated gif background. It also lets you adjust various settings for your transparent gifs like loops, animation speed and much more.
03Use filmora for making gifs without background easily
Wondershare Filmora Video Editor is an all in one tool that will help you create all sorts of gifs, including transparent gifs. You can take advantage of their easy to use tools that are fir for people who have no technical skills at all.
You can easily upload the images and remove their background in the software itself and later use it in the gif you are willing to create.
Wondershare Filmora - Best Video Editor for Mac/Windows
5,481,435 people have downloaded it.
Build unique custom animations without breaking a sweat.
Focus on creating epic stories and leave the details to Filmora’s auto features.
Start a creative adventure with drag & drop effects and endless possibilities.
Filmora simplifies advanced features to save you time and effort.
Filmora cuts out repetition so you can move on to your next creative breakthrough.
This is probably one of the best options if you are looking for an all in one tool for all your needs.
● Ending Thoughts →
● The techniques that we have talked about in this guide may help you discover things about gif backgrounds you have not known before.
● They are incredible and can help you utilize gifs in ways you hadn’t even considered.
● Create a moving gif background and apply it to any device easily.
● Of course, a simple background won’t provide the same type of effect as a moving gif. With this guide, you’ll learn about every tool that you may use and how to apply or create a cool gif background on your own.
Merging MP4 Videos Made Simple: Top 5 Online Tools
Welcome to the video editing world, where merging multiple MP4 files into one seamless video is a common task. Whether creating a montage or compiling footage from different cameras, merging videos can be time-consuming and challenging. However, it can be done quickly and easily with the right tools.
In this article, we’ll introduce you to 5 best online tools to merge MP4 files. These tools are user-friendly and easy to use, making merging videos a breeze. Whether you’re a professional videographer or a hobbyist, these tools will help you create professional-looking videos in no time. So let’s dive in and explore the options available to you.
- Merge MP4 Files Online Using Media.io
- Use Flixier To Combine MP4 Files Online
- Video Candy To Merge MP4 Files Online for Free
- Pixiko mp4 Joiner Online
- Join MP4 Files Online With Creatorkit
- Advantages and Disadvantages of MP4 Combiners Online
- It May Interest You – Join MP4 Videos Offline With Wondershare Filmora
- People Also Ask
5 Amazing Tools To Merge MP4 Online
There are many options available when it comes to merging MP4 files online. But to save you time and hassle, we’ve narrowed down the list to the top 5 tools that are easy to use and offer a variety of options. From basic editing to more advanced features, these tools will help you create the perfect video for any occasion.
1. Merge MP4 Files Online Using Media.io

Ratings from G2: 4.5 out of 5
Pricing:
- Free - $0
- Basic - $3.95 / monthly
- Pro - $6.66 / monthly
Pros
- Fast compression speeds
- No file limits
- No watermarks
- Smart output settings
Cons
- Lacks some functionality
Media.io is an all-in-one online tool that allows you to merge multiple videos and photos and convert audio and video formats. It’s easy to use and works on all major browsers, making it a great option for those who want a user-friendly and versatile tool.
This tool offers a wide range of output options, allowing you to export your merged video in your chosen format, making it a perfect solution for those looking for an online tool that’s easy to use and offers a wide range of features.
Merging videos and photos on Media.io is a simple process with just 3 steps:
Step1 Navigate to the Media.io video editor and select the “Upload“ button to add your videos to the media library.

Step2 Utilize the drag-and-drop feature to arrange the videos in the timeline.

Step3 Press the “Export“ button to download the newly merged video to your device.

2. Use Flixier To Combine MP4 Files Online

Ratings from G2: 4.6 out of 5
Pricing:
- Free - $0
- Basic - $14.00 / monthly
- Business - $30.00 / monthly
- Enterprise - $55.00 / monthly
Pros
- Unlimited video and audio tracks
- All future updates are included
- Video templates
- Easy for beginners
Cons
- The export hour/dollar ratio could be better
- Limited storage space
Flixier is another online tool that allows you to merge MP4 files online easily. With its user-friendly interface, you can quickly upload your videos and arrange them in the timeline using the drag-and-drop feature. You can also trim, crop, and adjust the videos to your liking. Once you are satisfied with the final output, you can export the merged video in the format of your choice.
Flixier also offers a wide range of customization options to enhance your video. This tool is a great option for those looking for an easy-to-use and versatile tool for merging MP4 files online.
Here’s how to merge mp4 online using Flixier:
Step1 Upload your videos from a computer, YouTube link, or cloud storage.

Step2 Drag videos to the timeline, trim, overlap, and add transitions.

Step3 Click the “Export and Download“ button, wait for processing and save to your computer.

3. Video Candy To Merge MP4 Files Online for Free

Ratings from G2: No rating
Pricing:
- Free - $0
Pros
- Free online tool
- User-friendly interface
- Provides a variety of output options
Cons
- Limited features
- Limited storage space
- Less advanced editing options
- Limited customer support
If you’re looking for a sweet treat for your video editing needs, look no further than Video Candy! This online tool lets you easily merge multiple MP4 files; it’s completely free to use. With its user-friendly interface, you can upload your videos, drag and drop them into the timeline, and voila! Your videos are now one cohesive masterpiece.
Not only that, but Video Candy also allows you to trim, crop, and adjust the videos to your liking before merging, giving you even more control over the final product. And once you’re happy with your creation, you can export it in various formats to be compatible with any platform. So here’s how to merge videos using Video Candy:
Step1 Upload the videos by clicking the “+Add Files“ button.

Step2 Arrange the videos you want to merge and add some transitions.

Step3 Click the “Export“ button and the “Download File“ to save the video on your device.

4. Pixiko mp4 Joiner Online

Ratings from G2: 4.8 out of 5
Pricing:
- Free - $0 with a watermark
- 1 Video - $4.89
- Monthly - $14.87
- Annually - $148.00
Pros
- The page has very good quality
- Easy to use
- Simple and brilliant
Cons
- With watermark
- Can’t change the font size
Looking for a tool to help you join your MP4 files with ease and precision? Look no further than Pixiko! This online MP4 Joiner is the perfect tool for merging multiple videos into one smooth, seamless masterpiece. With its easy-to-use interface and advanced editing options, you’ll have complete control over the final product.
To merge videos using Pixiko online tool, follow these steps:
Step1 Upload the videos you want to merge.

Step2 Click the “Merge“ button to combine all the videos

Step3 Wait for your video, then click “Download“ to save your merged video.

5. Join MP4 Files Online With Creatorkit

Ratings from G2: No Rating Yet
Pricing:
- Free - $0
- Pro - $29.00 per month
- Business - $149 per month
Pros
- User-friendly interface
- Easy to use
- Advanced editing options
Cons
- Limited features
- Limited storage capacity
This powerful platform makes it easy to combine multiple videos into one polished, professional-looking production. With its sleek and intuitive interface, you’ll be able to upload your videos, arrange them on the timeline, and tweak them to perfection with just a few clicks.
Here’s how to merge videos using Creatorkit:
Step1 Upload the videos that you want to merge.

Step2 Arrange the clips and add some transitions.

Step3 Click the “Export in HD“ button and input your email. Click the “Get the link to download.”

Advantages and Disadvantages of MP4 Combiners Online
Using an online MP4 combiner has several advantages and disadvantages.
Pros
- One of the main advantages is convenience, as you can easily access and use the tool from any device with an internet connection.
- Additionally, many online MP4 combiners are free to use, which makes them a cost-effective solution for those on a budget.
- They also provide a wide range of output options so that you can export your merged video in the format of your choice.
Cons
- One of the main disadvantages is that the tool may have limited storage capacity and file upload size, which could be a problem if you have large files to merge.
- Additionally, online MP4 combiners may have limited features compared to paid alternatives, which could limit the quality and customization of the final product.
- Some online MP4 combiners may also have a limit on the number of videos you can merge at once.
It May Interest You – Join MP4 Videos Offline With Wondershare Filmora
Free Download For Win 7 or later(64-bit)
Free Download For macOS 10.14 or later
If you prefer to merge MP4 videos offline, Wondershare Filmora is a great option. It is a powerful video editing software that offers a wide range of features to help you create professional-looking videos. One of the features it offers is the ability to merge multiple MP4 files into one cohesive video.
With Wondershare Filmora, you can easily import your MP4 files, drag and drop them into the timeline, and arrange them in the order you want. The software also allows you to trim, crop, and adjust the videos before merging, giving you complete control over the final product. Additionally, it offers a wide range of output options so that you can export your merged video in the format of your choice.
To merge videos using Wondershare Filmora Video Editor, follow these steps:
Step1 Open the software and select “New Project,” then go to “File“ > “Import Media“ > “Import Media Files“ to add the videos you want to merge.

Step2 Drag the video clips to the timeline and arrange it.

Step3 Press the “Play“ button to preview your video and edit the videos to your liking.

Step4 Once you are satisfied with the result, save your merged video.
People Also Ask
Here are some frequently asked questions about merging videos using online tools.
Q1. How To Combine 2 Videos Into 1?
Combining two or more videos into one is a common task for video editing. There are two main ways to do this: online and offline. Online tools such as Media.io, Flixier, Video Candy, Pixiko mp4 Joiner Online, and Creatorkit allow you to upload your videos, arrange them on a timeline, and merge them into one cohesive video. These tools are easy to use and accessible from any device with an internet connection.
On the other hand, offline tools, such as Wondershare Filmora, are powerful video editing software that can be installed on your computer. Additionally, these tools offer advanced video editing features like adding text, effects, and transitions.
Q2. What Is the Best Free App To Combine Videos ?
Some popular free apps to combine videos for Android include Video Joiner, AndroVid Video Editor, VideoShow, Video Merger Free, Video Merge, VidTrim, and InVideo. These apps offer a variety of features, such as the ability to trim, crop, and adjust videos before merging, as well as add text, effects, and transitions.
For iOS, some popular free apps to combine videos include Apple iMovie, Splice, Vimeo, Videorama, Filmmaker, and WeVideo. These apps offer similar features to the Android apps, such as trimming, cropping, and adjusting videos before merging and adding text, effects, and transitions. iMovie is a built-in app for iOS users which is user-friendly and offers a wide range of features.
Q3. How Can I Merge Videos on My Laptop Without Software?
You can use online tools to merge videos on your laptop without using the software. Some of the online tools recommended in the previous part are Media.io, Flixier, Video Candy, Pixiko mp4 Joiner Online, and Creatorkit.
These tools allow you to upload your videos, arrange them on a timeline, and merge them into one cohesive video. They are easy to use and accessible from any device with an internet connection. Additionally, these tools offer a wide range of output options so that you can export your merged video in the format of your choice.
Conclusion
Merging MP4 files is a common task for video editing, and many options are available for both online and offline tools. Online tools such as Media.io, Flixier, Video Candy, Pixiko mp4 Joiner Online, and Creatorkit are easy to use, accessible from any device with an internet connection, and offer a wide range of output options.
Offline tools such as Wondershare Filmora are powerful video editing software that offers advanced video editing features. No matter which tool you choose, you can easily create professional-looking videos.
5 Amazing Tools To Merge MP4 Online
There are many options available when it comes to merging MP4 files online. But to save you time and hassle, we’ve narrowed down the list to the top 5 tools that are easy to use and offer a variety of options. From basic editing to more advanced features, these tools will help you create the perfect video for any occasion.
1. Merge MP4 Files Online Using Media.io
Ratings from G2: 4.5 out of 5
Pricing:
- Free - $0
- Basic - $3.95 / monthly
- Pro - $6.66 / monthly
Pros
- Fast compression speeds
- No file limits
- No watermarks
- Smart output settings
Cons
- Lacks some functionality
Media.io is an all-in-one online tool that allows you to merge multiple videos and photos and convert audio and video formats. It’s easy to use and works on all major browsers, making it a great option for those who want a user-friendly and versatile tool.
This tool offers a wide range of output options, allowing you to export your merged video in your chosen format, making it a perfect solution for those looking for an online tool that’s easy to use and offers a wide range of features.
Merging videos and photos on Media.io is a simple process with just 3 steps:
Step1 Navigate to the Media.io video editor and select the “Upload“ button to add your videos to the media library.
Step2 Utilize the drag-and-drop feature to arrange the videos in the timeline.
Step3 Press the “Export“ button to download the newly merged video to your device.
2. Use Flixier To Combine MP4 Files Online
Ratings from G2: 4.6 out of 5
Pricing:
- Free - $0
- Basic - $14.00 / monthly
- Business - $30.00 / monthly
- Enterprise - $55.00 / monthly
Pros
- Unlimited video and audio tracks
- All future updates are included
- Video templates
- Easy for beginners
Cons
- The export hour/dollar ratio could be better
- Limited storage space
Flixier is another online tool that allows you to merge MP4 files online easily. With its user-friendly interface, you can quickly upload your videos and arrange them in the timeline using the drag-and-drop feature. You can also trim, crop, and adjust the videos to your liking. Once you are satisfied with the final output, you can export the merged video in the format of your choice.
Flixier also offers a wide range of customization options to enhance your video. This tool is a great option for those looking for an easy-to-use and versatile tool for merging MP4 files online.
Here’s how to merge mp4 online using Flixier:
Step1 Upload your videos from a computer, YouTube link, or cloud storage.
Step2 Drag videos to the timeline, trim, overlap, and add transitions.
Step3 Click the “Export and Download“ button, wait for processing and save to your computer.
3. Video Candy To Merge MP4 Files Online for Free
Ratings from G2: No rating
Pricing:
- Free - $0
Pros
- Free online tool
- User-friendly interface
- Provides a variety of output options
Cons
- Limited features
- Limited storage space
- Less advanced editing options
- Limited customer support
If you’re looking for a sweet treat for your video editing needs, look no further than Video Candy! This online tool lets you easily merge multiple MP4 files; it’s completely free to use. With its user-friendly interface, you can upload your videos, drag and drop them into the timeline, and voila! Your videos are now one cohesive masterpiece.
Not only that, but Video Candy also allows you to trim, crop, and adjust the videos to your liking before merging, giving you even more control over the final product. And once you’re happy with your creation, you can export it in various formats to be compatible with any platform. So here’s how to merge videos using Video Candy:
Step1 Upload the videos by clicking the “+Add Files“ button.
Step2 Arrange the videos you want to merge and add some transitions.
Step3 Click the “Export“ button and the “Download File“ to save the video on your device.
4. Pixiko mp4 Joiner Online
Ratings from G2: 4.8 out of 5
Pricing:
- Free - $0 with a watermark
- 1 Video - $4.89
- Monthly - $14.87
- Annually - $148.00
Pros
- The page has very good quality
- Easy to use
- Simple and brilliant
Cons
- With watermark
- Can’t change the font size
Looking for a tool to help you join your MP4 files with ease and precision? Look no further than Pixiko! This online MP4 Joiner is the perfect tool for merging multiple videos into one smooth, seamless masterpiece. With its easy-to-use interface and advanced editing options, you’ll have complete control over the final product.
To merge videos using Pixiko online tool, follow these steps:
Step1 Upload the videos you want to merge.
Step2 Click the “Merge“ button to combine all the videos
Step3 Wait for your video, then click “Download“ to save your merged video.
5. Join MP4 Files Online With Creatorkit
Ratings from G2: No Rating Yet
Pricing:
- Free - $0
- Pro - $29.00 per month
- Business - $149 per month
Pros
- User-friendly interface
- Easy to use
- Advanced editing options
Cons
- Limited features
- Limited storage capacity
This powerful platform makes it easy to combine multiple videos into one polished, professional-looking production. With its sleek and intuitive interface, you’ll be able to upload your videos, arrange them on the timeline, and tweak them to perfection with just a few clicks.
Here’s how to merge videos using Creatorkit:
Step1 Upload the videos that you want to merge.
Step2 Arrange the clips and add some transitions.
Step3 Click the “Export in HD“ button and input your email. Click the “Get the link to download.”
Advantages and Disadvantages of MP4 Combiners Online
Using an online MP4 combiner has several advantages and disadvantages.
Pros
- One of the main advantages is convenience, as you can easily access and use the tool from any device with an internet connection.
- Additionally, many online MP4 combiners are free to use, which makes them a cost-effective solution for those on a budget.
- They also provide a wide range of output options so that you can export your merged video in the format of your choice.
Cons
- One of the main disadvantages is that the tool may have limited storage capacity and file upload size, which could be a problem if you have large files to merge.
- Additionally, online MP4 combiners may have limited features compared to paid alternatives, which could limit the quality and customization of the final product.
- Some online MP4 combiners may also have a limit on the number of videos you can merge at once.
It May Interest You – Join MP4 Videos Offline With Wondershare Filmora
Free Download For Win 7 or later(64-bit)
Free Download For macOS 10.14 or later
If you prefer to merge MP4 videos offline, Wondershare Filmora is a great option. It is a powerful video editing software that offers a wide range of features to help you create professional-looking videos. One of the features it offers is the ability to merge multiple MP4 files into one cohesive video.
With Wondershare Filmora, you can easily import your MP4 files, drag and drop them into the timeline, and arrange them in the order you want. The software also allows you to trim, crop, and adjust the videos before merging, giving you complete control over the final product. Additionally, it offers a wide range of output options so that you can export your merged video in the format of your choice.
To merge videos using Wondershare Filmora Video Editor, follow these steps:
Step1 Open the software and select “New Project,” then go to “File“ > “Import Media“ > “Import Media Files“ to add the videos you want to merge.
Step2 Drag the video clips to the timeline and arrange it.
Step3 Press the “Play“ button to preview your video and edit the videos to your liking.
Step4 Once you are satisfied with the result, save your merged video.
People Also Ask
Here are some frequently asked questions about merging videos using online tools.
Q1. How To Combine 2 Videos Into 1?
Combining two or more videos into one is a common task for video editing. There are two main ways to do this: online and offline. Online tools such as Media.io, Flixier, Video Candy, Pixiko mp4 Joiner Online, and Creatorkit allow you to upload your videos, arrange them on a timeline, and merge them into one cohesive video. These tools are easy to use and accessible from any device with an internet connection.
On the other hand, offline tools, such as Wondershare Filmora, are powerful video editing software that can be installed on your computer. Additionally, these tools offer advanced video editing features like adding text, effects, and transitions.
Q2. What Is the Best Free App To Combine Videos ?
Some popular free apps to combine videos for Android include Video Joiner, AndroVid Video Editor, VideoShow, Video Merger Free, Video Merge, VidTrim, and InVideo. These apps offer a variety of features, such as the ability to trim, crop, and adjust videos before merging, as well as add text, effects, and transitions.
For iOS, some popular free apps to combine videos include Apple iMovie, Splice, Vimeo, Videorama, Filmmaker, and WeVideo. These apps offer similar features to the Android apps, such as trimming, cropping, and adjusting videos before merging and adding text, effects, and transitions. iMovie is a built-in app for iOS users which is user-friendly and offers a wide range of features.
Q3. How Can I Merge Videos on My Laptop Without Software?
You can use online tools to merge videos on your laptop without using the software. Some of the online tools recommended in the previous part are Media.io, Flixier, Video Candy, Pixiko mp4 Joiner Online, and Creatorkit.
These tools allow you to upload your videos, arrange them on a timeline, and merge them into one cohesive video. They are easy to use and accessible from any device with an internet connection. Additionally, these tools offer a wide range of output options so that you can export your merged video in the format of your choice.
Conclusion
Merging MP4 files is a common task for video editing, and many options are available for both online and offline tools. Online tools such as Media.io, Flixier, Video Candy, Pixiko mp4 Joiner Online, and Creatorkit are easy to use, accessible from any device with an internet connection, and offer a wide range of output options.
Offline tools such as Wondershare Filmora are powerful video editing software that offers advanced video editing features. No matter which tool you choose, you can easily create professional-looking videos.
Also read:
- How to Create Your Own Subscribe Channel Graphics
- New 2024 Approved Something That You Should Know About MP4 Video Format
- Motion Blur Photo With GIMP Step-By-Step Guide
- Updated 2024 Approved Quick Answer What Is a Transparent Logo and Why Do You Need It
- New Cropping Videos in VLC Step by Step
- New Learning Some Perfect Ways to Convert a Slow-Motion Video to Normal
- In 2024, In This Article, You Will Learn How to Create an Attractive and Engaging Slideshow Video Using Tools Available in the Wondershare Filmora
- New Want to Make Use of a Lovely Background for Your Image by Removing the Background or Making It Transparent? Here Is Something You Need to Cover
- Updated In 2024, Best 10 Fun Discord Bots You Need
- Updated The Article Shall Offer an Overview to Create a Promising Sports Intro and Edit a YouTube Outro for a Sports Channel. There Will Also Be Three Recommended Apps to Download Background Music for Exercise
- Updated In 2024, Experience Time Differently with The Top Slow-Motion Applications
- New Create a Movie with Windows Movie Maker
- Updated 2024 Approved Do You Know Anything About the Video Format Supported by WhatsApp? If Not, Then This Is the Right Time to Learn About WhatsApp-Supported Video Formats
- New Best Free Slow Motion Apps For Android and iPhone
- Top 10 Voice Over Generators Windows, Mac, Android, iPhone, and Onli
- Updated What You Should Know About Speech-to-Text Technology
- 2024 Approved Best Ever Ways Make Tiktok Slideshow Solved
- Updated In 2024, How to Do Masking in After Effects Alternative Provided
- Updated Learn How to Make Modern TikTok Velocity Dance Videos in Filmora Just Like the Ones You See on TikTok and Instagram Reels
- Updated 2024 Approved Working Through the Details of iMovie Slow Motion Video Making 100 Effective
- New In This Article, You Will Learn How to Make an Engaging and Creative YouTube Intro to Give a Hook and Recap Information to the Audience by Using Wondershare Filmora
- In 2024, Do You Want Your Photo and Video Edits to Look Like Peter McKinnons? Color-Grade Your Media Files with Peter McKinnon LUTs to Make Your Content Stand Out
- 2024 Approved How to Make a Slideshow GIF?
- 2024 Approved Can You Enhance Your Drone Footage with Cinematic Drone LUTs? This Article Discusses Top Drone LUTs Recommendations to Simplify Video Editing
- Updated How to Create Cinematic Style Videos, In 2024
- In 2024, Creating Testimonial Videos For Health And Wellness Business Industry
- Your Search for the Best GIF Creator Tools Ends Here for 2024
- How Can You Get VHS Filter and Glitch Filter to Your Images or Videos?
- New 2024 Approved Basic Introduction of LumaFusion Color Grading
- Updated In 2024, 4 Ways to Loop a Video on Vimeo
- In 2024, Review Video Is a Common Type Video and the First Impression Review Is Also Included. This Article Will Show You What Is First Impression Review Video and How to Create One by Yourself
- In 2024, How to Create Fantastic Glitch Effects with Filmora? Read This Guide to Find Out How to Apply Glitch Effects on Your Videos and Make Custom Glitch Effects
- New In 2024, How to Create Discord Emoji GIF
- New Zoom In and Out on Snapchat
- New Ultimate Guide on Magic Effects Video Making
- New How to Blur Faces in Your Video on iPhone for 2024
- Updated How to Rotate Video in iMovie with Alternative
- Updated 2024 Approved How to Add Adjustment Layer in Premiere Pro
- How to Google Meet Green Screen for 2024
- Updated Easiest Fix Included! Top 5 Ways to Convert HDR to SDR Videos
- Some MP4 won't play on my Galaxy S23 FE
- In 2024, About Xiaomi Redmi Note 13 5G FRP Bypass
- In 2024, Top 10 Telegram Spy Tools On Oppo A1 5G for Parents | Dr.fone
- In 2024, How To Unlock Nubia Red Magic 9 Pro+ Phone Without Password?
- How To Unlock Apple iPhone 7 Without Passcode? 4 Easy Methods
- How To Repair iOS System Issues of Apple iPhone XR? | Dr.fone
- How to Simulate GPS Movement in AR games On Oppo A1x 5G? | Dr.fone
- In 2024, How Do I Stop Someone From Tracking My Oppo Find X6 Pro? | Dr.fone
- In 2024, Fake Android Location without Rooting For Your Itel A70 | Dr.fone
- Guide How To Unbrick a Bricked Samsung Galaxy F34 5G Phone | Dr.fone
- What is Fake GPS Location Pro and Is It Good On Honor Play 8T? | Dr.fone
- Solutions to restore deleted files from Vivo Y78+ (T1) Edition
- Complete guide for recovering pictures files on V27e.
- How to Change Apple iPhone 13 Pro Max Location on Skout | Dr.fone
- New Top 8 Tools Tell You How to Make Slideshows for Instagram
- What is Geo-Blocking and How to Bypass it On Infinix Zero 5G 2023 Turbo? | Dr.fone
- In 2024, How Can Realme C53Mirror Share to PC? | Dr.fone
- Updated 2024 Approved How to Make an Animated Travel Map Video?
- Updated 2024 Approved 10 Great Apps for Turning Funny Animated Images Into Comics
- In 2024, Full Guide to Fix iToolab AnyGO Not Working On Honor Magic 5 Pro | Dr.fone
- In 2024, How to Spy on Text Messages from Computer & Realme C67 4G | Dr.fone
- How to Fix Unfortunately, Contacts Has Stopped Error on Tecno Pop 7 Pro | Dr.fone
- Read This Guide to Find a Reliable Alternative to Fake GPS On OnePlus Open | Dr.fone
- iSpoofer is not working On Xiaomi Redmi A2+? Fixed | Dr.fone
- Everything You Need To Know About Unlocked iPhone 12
- In 2024, Easiest Guide How to Clone Lava Blaze 2 Pro Phone? | Dr.fone
- Disabled iPhone 11 Pro Max How to Unlock a Disabled iPhone 11 Pro Max?
- In 2024, Dose Life360 Notify Me When Someone Checks My Location On Samsung Galaxy A54 5G? | Dr.fone
- 2024 Approved Top 10 Robotic Voice Generators (with Comparison Table)
- How to get the dragon scale and evolution-enabled pokemon On Realme 11 Pro? | Dr.fone
- New 2024 Approved How to Find & Make Animated Christmas GIFs?
- Easy steps to recover deleted data from Oppo Find X7
- Complete Tutorial for Honor 90 Lite Hard Reset | Dr.fone
- In 2024, Set Your Preferred Job Location on LinkedIn App of your Motorola Defy 2 | Dr.fone
- Title: New Top Animated Title Makers
- Author: Chloe
- Created at : 2024-04-24 07:08:15
- Updated at : 2024-04-25 07:08:15
- Link: https://ai-editing-video.techidaily.com/new-top-animated-title-makers/
- License: This work is licensed under CC BY-NC-SA 4.0.
