
:max_bytes(150000):strip_icc():format(webp)/how-to-set-up-a-ps5-5088641-1bcc6bca24cd460bb2b276fdeb6cb830.jpg)
New What Is the Best MP4 Cutter for YouTuber on Mac, In 2024
What Is the Best MP4 Cutter for YouTuber on Mac?
Most times, Youtubers need to cut out unnecessary parts from their videos while customizing intros and outros. A common reason is to ensure that videos are engaging and interactive while preventing any lagging. In addition, an aesthetically pleasing video keeps its viewers hooked throughout the video. That’s why cutting MP4 videos are essential for being a Youtuber. However, the question becomes, which is the best MP4 cutter for Youtubers on Mac? This article answers that question succinctly; let’s take a look.
What You Should Know About YouTube Video

YouTubers upload over 300 hours of video content to the platform every second. These videos cut across every niche and topic. There’s scarcely a topic you’re looking for that you won’t find a video or two discussing on YouTube. So as a YouTuber, you have to find ways to keep up and stand out from the crowd. You’ll need engaging videos that will hold your target audience’s attention so much that they will subscribe for more.
However, if the video is too long or your car doesn’t hit the right frame, it will disengage your audience. Additionally, you want a video seamlessly woven together to form a polished video. This makes MP4 cutting an essential part of the YouTube video creation process. There’s no need to purchase pricey editing equipment anymore; you can simply cut your MP4 videos from the comfort of your home. This article explores the best MP4 cutters for YouTubers on Mac; let’s take a look.
Best MP4 Cutter for YouTubers on Mac - Filmroa Video Editor

Supported System: Mac and Windows
Filmora Video Editor makes it relatively easy to cut and edit your videos like a professional. This MP4 cutter is a great option, even if you don’t have video editing skills. It offers an intuitive user interface that makes it an excellent choice for experts and novices. It also provides you with the crucial editing tools to create amazing YouTube videos after cutting your MP4 video files. With this editing tool, you’re sure to produce videos your subscribers enjoy.
With Filmora, you can add effects, color grades, and texts to your videos. There’s also a library filled with royalty-free audio you can explore. After cutting your MP4, you can use templates from this MP4 cutter to create an intro for your YouTube videos. Filmora has many features that will save you a lot of time, and using it to cut MP4 is relatively easy.
For Win 7 or later (64-bit)
For macOS 10.14 or later
Pros
- It offers an intuitive user interface
- There are several effects and overlays to utilize
- Fast rendering of videos
- Offers varying output formats
- Ideal for beginners and experts
Cons
- No DVD Menu
Steps to Cut MP4 Video for YouTubers on Mac Using Filmora
Cutting videos on Filmora is relatively easy. You have to first download and install Filmora on your device. Below are the steps to cut MP4 videos to your preference using Wondershare Filmora.
Step 1: Import MP4 Files
There are two ways you can add MP4 files to this MP4 cutter. You can either click the ‘import’ button and choose the file from your media library or drag the mp4 file to your album. After dragging to the album, drag from the album to the timeline.

Step 2: Cut MP4 Files

After importing your file, you’re ready to cut. First, simply move the indicator to the ideal position you want by dragging the top of the indicator and slider bar. Then, click the scissor button to cut once you move to your preferred time.
You can also delete any part of the MP4 file you don’t want by hitting the ‘delete’ option. If you cut various clips out of the MP4 file, you can rearrange them with the ‘drag and drop tool.
Step 3: Save and Share Cut MP4 File

Now, you can save your newly cut video file by clicking the ‘file’ button at the left corner of the Filmora software and selecting ‘save as’ from the options. The output window will appear, and you can choose the format and if you want to share directly to YouTube. Pick the option that meets your need, and you’re good to go.
More Free MP4 Cutter for YouTubers on Mac to Cut MP4 Videos
Although Wondershare Filmora is the best video cutter for YouTubers on Mac, there are free MP4 cutters you can utilize to cut your videos from the comfort of your home easily. Below, we’ve reviewed the top three options you should consider.
PowerDirector Essential

Supported System: Windows and Mac
If you’re looking for a free MP4 video cutter that ensures fast processing of videos, you should try PowerDirector Essential. This MP4 cutter allows you easily cut your YouTube videos irrespective of your experience level. You’ll be able to cut and edit your YouTube videos within a couple of minutes. In addition, PowerDirector Essential is versatile and allows you to either use the storyboard mode or timeline editor for your cutting needs.
Apart from splitting and cutting tools, you can also explore its library of stylized transitions if you want to significantly upgrade the appearance of your YouTube video professionally. YouTubers want a video cutter that offers video editing features to create your visual effects. This MP4 cutter is excellent for beginners because of its intuitive interface that you can master in minutes. You can also ensure your video has amazing audio and clear video before sharing it on YouTube. If you want high-quality, Hollywood-style videos, this is the best free MP4 cutter to achieve that.
Pros
- It supports several input and output video formats
- Easy cutting and exporting process
- Intuitive and user-friendly interface
- Ideal for beginners
- It offers various video editing tools to enhance your video
Cons
- Some features are only available on the Windows version
How to Cut Video for YouTube on Mac Using PowerDirector Essential
If you want to learn how to easily cut MP4 files using PowerDirector on a Mac computer, follow the steps below.
- Step 1: You have to download PowerDirector software on your Mac and install it. After installation, launch the software, and you’re ready to begin the cutting process.
- Step 2: Now, import the video into PowerDirector by clicking ‘import media file’ and choosing the ideal video file from your media library.

- Step 3: Add the video to your timeline and hover over the right or left edge of the video track. This would make an adjustment arrow appear on both sides of the video file.

- Step 4: Drag the arrows to the point you would like to cut and choose the ‘scissors’ button.

- Step 5: After cutting, go to the ‘produce’ tab and choose ‘online’ if you want to upload a video directly to YouTube. You can also choose to save to your Mac. Choose the output format and location and click ‘start’ to save your newly cut video.
iMovie

Supported System: Mac
iMovie is a free MP4 cutter that’s built into Mac. Therefore, there’s no need to carry out downloads or installation to utilize this editing software. Although it only offers basic editing features, it is excellent if you only want to cut MP4 video files. iMovie is great for beginners as it features a user-friendly interface that’s easy to navigate.
It is the best option for YouTubers because it allows you to crop, trim and arrange video clips in just a few minutes. Additionally, you can add visual effects to your video while also editing the audio file to enhance your video. It also allows you to link your YouTube account to share directly. Therefore, if you’re looking for an MP4 cutter to carry out quick trimming on your videos, iMovie is amongst the best free MP4 cutters.
Pros
- Easy to use and ideal for beginners
- It supports major video formats and allows you to change the output format
- Allows you to store videos in iCloud or share them directly to YouTube
- Free on Mac device
- It offers essential editing tools to enhance your video
Cons
- Editing features are limited
Steps to Cut MP4 Video for YouTube on Mac Using iMovie
This section will explain how you can cut a clip in iMovie within a few minutes. Below are the easy steps you have to follow.
- Step 1: Launch iMovie on Mac and choose ‘import file’ to select the video you want to cut.
- Step 2: To enter full-editing windows, double-click the project. At the end of the video editor, you’ll see the video editor.

- Step 3: Drag the playhead to the position you would like to cut from, and then click on it. Do this for both sides of the video.

- Step 4: Now, click ‘modify’ and choose the ‘split clip’ option to cut the selected part out.

You can delete the rest of the video by selecting it and hitting ‘delete’ on your keyboard.

- Step 5: Finally, save your newly cut video or export it to YouTube directly by clicking ‘export’ under the ‘file’ section.
OpenShot

Supported System: Windows, Mac, and Linux
OpenShot is another free, open-source MP4 cutter that you can easily use on your Mac device. It offers an intuitive interface that makes it easy to drag videos to the interface. Apart from cutting videos, other features are available like scaling, resizing, rotation, trimming, and many more. This YouTube video cutter also provides hundreds of transitions and effects to enhance your YouTube video and make it stand out amongst other Youtube videos. However, this video cutter is only an excellent choice for beginners because it lacks many advanced features.
Pros
- It is easy to use and ideal for beginners
- It offers a sleek interface for easy navigation
- Offers basic editing features
- Versatile and a cross-platform MP4 cutter
Cons
- No advanced features
- It crashes easily
Steps to Cut MP4 for YouTube on Mac Using OpenShot
OpenShot is relatively easy to use and only requires a few steps to cut your MP4 file and upload it to YouTube. Below are the easy steps to follow to cut MP4 for YouTube on Openshot.
- Step 1: First, download the MP4 cutter on your Mac and install it to begin.
- Step 2: Afterward, launch the app and add the video to cut by clicking’ import.’ Alternatively, you can simply drag the video into the app to begin.
- Step 3: Once you get the video on the timeline, drag the red line on both sides of the video to the position you want the video to start and begin.

- Step 4: Right-click on the marker and choose what you want to keep. Next, isolate the fragments from the clip you would like to keep.
- Step 5: Click the fragment you want to delete and press delete on your keyboard. You have to remove the fragments manually until your preferred result remains.
- Step 6: Choose ‘export video’ from the File tab to save your MP4 file. You can change the output format or save it as an MP4.

- Step 7: you can also share videos to your YouTube account; you have to link the YouTube account first.
More Paid MP4 Cutter for YouTubers on Mac to Cut MP4 Videos
Most times, free MP4 cutters offer limited features to enhance your YouTube video. However, there are paid MP4 cutters that will efficiently cut your MP4 files and provide advanced editing tools.
Adobe Premiere Pro

Supported System: Mac and Windows
Advanced editing software that supports different file types, including MP4, is Adobe Premier Pro. This MP4 cutter allows you to quickly trim, split, and cut your MP4. Its intuitive and fast-responding interface ensures that your video is ready within a few minutes. Beyond cutting, there are several other advanced editing features that the editing software offers you. Some include filters, chroma-key, VR editing, color adjustment, and audio editing tools to take your YouTube video to the next level.
Adobe Premiere Pro is not the best option for beginners because of its steep learning curve. However, if you have ample experience with video editing tools and want to professionally cut and edit your YouTube video, this paid MP4 cutter is worth the cost and effort. ‘
Pros
- Advanced video editing features
- Intuitive user interface
- Responsive speed
- Ideal for professional editing
Cons
- Steep learning curve
- Quite pricey
Step to Cut MP4 for YouTube on Mac Using Adobe Premiere Pro
Although Adobe Premiere Pro has an interface that’s quite intimidating to non-professionals, the steps below help simplify cutting your MP4 files for YouTube.
- Firstly, download Adobe Premiere Pro on your Mac and install it.
- After installation, launch the app and select ‘new project’ on the homepage. It will require you to name the new project and choose where you want to save it. Afterward, click ‘ok’ to begin.

- Next, go to ‘file’ and select ‘import from media’ to import the MP4 file you would like to cut. Alternatively, you can simply drag the file to the timeline.

- Next, pick the ripple edit tool and go to the beginning of the video. Drag the handle with the arrow to your desired point. Repeat this at the end of the video.

- Finally, press Q to cut the MP4 clip to the left of the blade. Next, press W to cut the clip to the right.

- Now you can save your file to your preferred file location.
Movavi Video Editor

Supported System: Mac and Windows
This is an efficient MP4 cutter that helps you remove unnecessary scenes from your YouTube videos. The timeline offers you markers that allow you easily locate the start and end scene of the video you would like to remove. Apart from cutting videos, this tool provides several premium features you can use to make your video look professional. Movavi offers a free trial you can use to determine if this editor is the best option for you. However, it comes with a Movavi watermark that you can only eliminate with the paid option.
Movavi Video Editor can add transitions, music tracks, chroma-key effects, special effects, and many more exciting features to ensure a top-quality result. Furthermore, its intuitive interface makes it relatively easy for beginners and professionals to use. Therefore, you don’t have to worry about a stiff learning curve. With Movavi, you can also change the output format to switch from MP4 to another commonly supported format.
Pros
- Simple and easy to use
- Supports various input and output formats
- Provides YouTubers with basic and advanced features
- Ideal for beginners and professionals
Cons
- Video rendering is slow for large files
- The trial version comes with a Movavi watermark
Steps to Cut MP4 for YouTube on Mac Using Movavi Video Editor
For cutting your video on Mac using Movavi video editor, you can follow the steps outlined below.
- First, download and install Movavi Video Editor on your Mac.
- After installing Movavi, launch the editor and click the ‘add files’ button to add your MP4 file.

- Once the file shows up in the media bin, drag it to the timeline to start editing your video.
- To cut your MP4 video, move the red marker at the beginning of the video to where you would like to cut. Repeat this process at the end of the video by moving to where you prefer your video to end.
- Next, click the split button to cut this clip from the rest of the video.

- Now, select the fragments you don’t want and hit the delete button to remove them immediately.

- You can also add several filters to your video if you would like to enhance your video.
- You can now save your video by hitting the ‘export’ button. You can choose different formats and video quality for your newly cut video. Select the folder to save to and click the ‘save’ button.

Davinci Resolve

Supported System: Windows and Mac
Davinci Resolve is a favorite for YouTubers who want their videos to look like Hollywood videos. However, this MP4 cutter is aimed at the professional market and supports different input and output formats for your video. Davinci Resolve offers you a variety of professional features and also supports 8k videos. In addition, it provides advanced video cutting features to ensure your video looks excellent even after cutting. You can also combine video clips after cutting without it looking unprofessional.
Although this video cutter software isn’t the best option for beginners, professional editors are sure to be satisfied with the features this editor offers. It also allows you to export directly to various social media platforms, including YouTube, to save space and time.
Pros
- Basic and advanced editing tools
- Fast rendering of videos
- Supports major video formats and video resolutions
- It offers several special effects to make your video more engaging
Cons
- Not the right option for amateurs
Steps to Cut MP4 for YouTube on Mac Using Davinci Resolve
Cutting your MP4 file on Davinci Resolve is relatively easy. The cut tool helps you cut your YouTube video within seconds. Simply follow the steps outlined below.
- First, download and install the Davinci Resolve on your Mac. After installation, launch the MP4 cutter to begin.
- Next, create a new timeline and choose the ‘edit’ mode to begin.

- Import your video by pressing ‘Command+I’ on your keyboard. Alternatively, you can simply drag the video on the timeline.
- Now, select the cut tool and drag the marker from the beginning to where you would like to cut. Repeat this process at the end of the video.
- Afterward, click the blade button to cut your file to your desired size.

- You can now save your file by hitting the ‘export’ button and choosing your preferred file location.
Which Should I Choose, Free or Paid MP4 Cutter?
You need to consider several factors when you’re choosing the right MP4 cutter. First, you have to consider the type of video you would be editing. For YouTube, you need an MP4 cutter that also offers several video editing features you can use to enhance your video. There’s also a need to consider the available formats and quality you can export in and if the MP4 cutter allows you to add visual effects to make your video stand out on YouTube.
Another factor to consider when choosing between a paid or free MP4 cutter for YouTubers on Mac is your experience level. Are you a professional, or you’re looking for some basic app to simply cut your video? Some paid options take you step-by-step through the process of cutting your MP4 file. This type of MP4 cutter helps you advance your skill. This feature is essential because the more you know, the more you’re willing to learn.
Note that most free MP4 cutters offer limited features. Alternatively, some paid MP4 cutters are only suitable for professionals or have a steep subscription to consider. Consider your budget and if any of the editors offer you the tools you need while being affordable. You need to carefully consider if a free tool is what you’re looking for or if you don’t mind paying for more functionality.
FAQs about cutting MP4 video
- What tools should I look for in an MP4 cutter? You should look for basic cutting tools like trimming, slicing and joining. However, you also want an MP4 cutter that offers several editing features to enhance your YouTube video.
- What do most YouTubers use in cutting their videos? From our experience, most YouTubers use the MP4 cutters provided below. You need to note that some are free while some are paid. Simply pick the cutter that fits your needs.
- How can I improve my video cutting and editing skills? You need a lot of practice to learn how to cut and edit videos professionally. It’s also vital to pick software that allows you to develop your editing and cutting skills with time.
- What is the best video cutting and editing software for YouTube novices? If you’re a novice on YouTube, you can start with any basic MP4 cutter on your device. However, we recommend Wondershare Filmora if you want to develop your cutting and editing skills.
Final Thoughts
Cutting MP4 for your YouTube content is a part of becoming a professional YouTuber. When looking for an MP4 cutter that’s reliable and versatile, the goal is to get the job done without any issue. We’ve reviewed the best MP4 cutters for YouTubers on Mac in this guide. You can choose between free or paid software, depending on your needs. However, the best MP4 cutter for YouTubers on Mac is Wondershare Filmore because it is ideal for beginners and professionals. It also offers you a variety of editing features at an affordable cost.
YouTubers upload over 300 hours of video content to the platform every second. These videos cut across every niche and topic. There’s scarcely a topic you’re looking for that you won’t find a video or two discussing on YouTube. So as a YouTuber, you have to find ways to keep up and stand out from the crowd. You’ll need engaging videos that will hold your target audience’s attention so much that they will subscribe for more.
However, if the video is too long or your car doesn’t hit the right frame, it will disengage your audience. Additionally, you want a video seamlessly woven together to form a polished video. This makes MP4 cutting an essential part of the YouTube video creation process. There’s no need to purchase pricey editing equipment anymore; you can simply cut your MP4 videos from the comfort of your home. This article explores the best MP4 cutters for YouTubers on Mac; let’s take a look.
Best MP4 Cutter for YouTubers on Mac - Filmroa Video Editor
Supported System: Mac and Windows
Filmora Video Editor makes it relatively easy to cut and edit your videos like a professional. This MP4 cutter is a great option, even if you don’t have video editing skills. It offers an intuitive user interface that makes it an excellent choice for experts and novices. It also provides you with the crucial editing tools to create amazing YouTube videos after cutting your MP4 video files. With this editing tool, you’re sure to produce videos your subscribers enjoy.
With Filmora, you can add effects, color grades, and texts to your videos. There’s also a library filled with royalty-free audio you can explore. After cutting your MP4, you can use templates from this MP4 cutter to create an intro for your YouTube videos. Filmora has many features that will save you a lot of time, and using it to cut MP4 is relatively easy.
For Win 7 or later (64-bit)
For macOS 10.14 or later
Pros
- It offers an intuitive user interface
- There are several effects and overlays to utilize
- Fast rendering of videos
- Offers varying output formats
- Ideal for beginners and experts
Cons
- No DVD Menu
Steps to Cut MP4 Video for YouTubers on Mac Using Filmora
Cutting videos on Filmora is relatively easy. You have to first download and install Filmora on your device. Below are the steps to cut MP4 videos to your preference using Wondershare Filmora.
Step 1: Import MP4 Files
There are two ways you can add MP4 files to this MP4 cutter. You can either click the ‘import’ button and choose the file from your media library or drag the mp4 file to your album. After dragging to the album, drag from the album to the timeline.
Step 2: Cut MP4 Files
After importing your file, you’re ready to cut. First, simply move the indicator to the ideal position you want by dragging the top of the indicator and slider bar. Then, click the scissor button to cut once you move to your preferred time.
You can also delete any part of the MP4 file you don’t want by hitting the ‘delete’ option. If you cut various clips out of the MP4 file, you can rearrange them with the ‘drag and drop tool.
Step 3: Save and Share Cut MP4 File
Now, you can save your newly cut video file by clicking the ‘file’ button at the left corner of the Filmora software and selecting ‘save as’ from the options. The output window will appear, and you can choose the format and if you want to share directly to YouTube. Pick the option that meets your need, and you’re good to go.
More Free MP4 Cutter for YouTubers on Mac to Cut MP4 Videos
Although Wondershare Filmora is the best video cutter for YouTubers on Mac, there are free MP4 cutters you can utilize to cut your videos from the comfort of your home easily. Below, we’ve reviewed the top three options you should consider.
PowerDirector Essential
Supported System: Windows and Mac
If you’re looking for a free MP4 video cutter that ensures fast processing of videos, you should try PowerDirector Essential. This MP4 cutter allows you easily cut your YouTube videos irrespective of your experience level. You’ll be able to cut and edit your YouTube videos within a couple of minutes. In addition, PowerDirector Essential is versatile and allows you to either use the storyboard mode or timeline editor for your cutting needs.
Apart from splitting and cutting tools, you can also explore its library of stylized transitions if you want to significantly upgrade the appearance of your YouTube video professionally. YouTubers want a video cutter that offers video editing features to create your visual effects. This MP4 cutter is excellent for beginners because of its intuitive interface that you can master in minutes. You can also ensure your video has amazing audio and clear video before sharing it on YouTube. If you want high-quality, Hollywood-style videos, this is the best free MP4 cutter to achieve that.
Pros
- It supports several input and output video formats
- Easy cutting and exporting process
- Intuitive and user-friendly interface
- Ideal for beginners
- It offers various video editing tools to enhance your video
Cons
- Some features are only available on the Windows version
How to Cut Video for YouTube on Mac Using PowerDirector Essential
If you want to learn how to easily cut MP4 files using PowerDirector on a Mac computer, follow the steps below.
- Step 1: You have to download PowerDirector software on your Mac and install it. After installation, launch the software, and you’re ready to begin the cutting process.
- Step 2: Now, import the video into PowerDirector by clicking ‘import media file’ and choosing the ideal video file from your media library.
- Step 3: Add the video to your timeline and hover over the right or left edge of the video track. This would make an adjustment arrow appear on both sides of the video file.
- Step 4: Drag the arrows to the point you would like to cut and choose the ‘scissors’ button.
- Step 5: After cutting, go to the ‘produce’ tab and choose ‘online’ if you want to upload a video directly to YouTube. You can also choose to save to your Mac. Choose the output format and location and click ‘start’ to save your newly cut video.
iMovie
Supported System: Mac
iMovie is a free MP4 cutter that’s built into Mac. Therefore, there’s no need to carry out downloads or installation to utilize this editing software. Although it only offers basic editing features, it is excellent if you only want to cut MP4 video files. iMovie is great for beginners as it features a user-friendly interface that’s easy to navigate.
It is the best option for YouTubers because it allows you to crop, trim and arrange video clips in just a few minutes. Additionally, you can add visual effects to your video while also editing the audio file to enhance your video. It also allows you to link your YouTube account to share directly. Therefore, if you’re looking for an MP4 cutter to carry out quick trimming on your videos, iMovie is amongst the best free MP4 cutters.
Pros
- Easy to use and ideal for beginners
- It supports major video formats and allows you to change the output format
- Allows you to store videos in iCloud or share them directly to YouTube
- Free on Mac device
- It offers essential editing tools to enhance your video
Cons
- Editing features are limited
Steps to Cut MP4 Video for YouTube on Mac Using iMovie
This section will explain how you can cut a clip in iMovie within a few minutes. Below are the easy steps you have to follow.
- Step 1: Launch iMovie on Mac and choose ‘import file’ to select the video you want to cut.
- Step 2: To enter full-editing windows, double-click the project. At the end of the video editor, you’ll see the video editor.
- Step 3: Drag the playhead to the position you would like to cut from, and then click on it. Do this for both sides of the video.
- Step 4: Now, click ‘modify’ and choose the ‘split clip’ option to cut the selected part out.
You can delete the rest of the video by selecting it and hitting ‘delete’ on your keyboard.
- Step 5: Finally, save your newly cut video or export it to YouTube directly by clicking ‘export’ under the ‘file’ section.
OpenShot
Supported System: Windows, Mac, and Linux
OpenShot is another free, open-source MP4 cutter that you can easily use on your Mac device. It offers an intuitive interface that makes it easy to drag videos to the interface. Apart from cutting videos, other features are available like scaling, resizing, rotation, trimming, and many more. This YouTube video cutter also provides hundreds of transitions and effects to enhance your YouTube video and make it stand out amongst other Youtube videos. However, this video cutter is only an excellent choice for beginners because it lacks many advanced features.
Pros
- It is easy to use and ideal for beginners
- It offers a sleek interface for easy navigation
- Offers basic editing features
- Versatile and a cross-platform MP4 cutter
Cons
- No advanced features
- It crashes easily
Steps to Cut MP4 for YouTube on Mac Using OpenShot
OpenShot is relatively easy to use and only requires a few steps to cut your MP4 file and upload it to YouTube. Below are the easy steps to follow to cut MP4 for YouTube on Openshot.
- Step 1: First, download the MP4 cutter on your Mac and install it to begin.
- Step 2: Afterward, launch the app and add the video to cut by clicking’ import.’ Alternatively, you can simply drag the video into the app to begin.
- Step 3: Once you get the video on the timeline, drag the red line on both sides of the video to the position you want the video to start and begin.
- Step 4: Right-click on the marker and choose what you want to keep. Next, isolate the fragments from the clip you would like to keep.
- Step 5: Click the fragment you want to delete and press delete on your keyboard. You have to remove the fragments manually until your preferred result remains.
- Step 6: Choose ‘export video’ from the File tab to save your MP4 file. You can change the output format or save it as an MP4.
- Step 7: you can also share videos to your YouTube account; you have to link the YouTube account first.
More Paid MP4 Cutter for YouTubers on Mac to Cut MP4 Videos
Most times, free MP4 cutters offer limited features to enhance your YouTube video. However, there are paid MP4 cutters that will efficiently cut your MP4 files and provide advanced editing tools.
Adobe Premiere Pro
Supported System: Mac and Windows
Advanced editing software that supports different file types, including MP4, is Adobe Premier Pro. This MP4 cutter allows you to quickly trim, split, and cut your MP4. Its intuitive and fast-responding interface ensures that your video is ready within a few minutes. Beyond cutting, there are several other advanced editing features that the editing software offers you. Some include filters, chroma-key, VR editing, color adjustment, and audio editing tools to take your YouTube video to the next level.
Adobe Premiere Pro is not the best option for beginners because of its steep learning curve. However, if you have ample experience with video editing tools and want to professionally cut and edit your YouTube video, this paid MP4 cutter is worth the cost and effort. ‘
Pros
- Advanced video editing features
- Intuitive user interface
- Responsive speed
- Ideal for professional editing
Cons
- Steep learning curve
- Quite pricey
Step to Cut MP4 for YouTube on Mac Using Adobe Premiere Pro
Although Adobe Premiere Pro has an interface that’s quite intimidating to non-professionals, the steps below help simplify cutting your MP4 files for YouTube.
- Firstly, download Adobe Premiere Pro on your Mac and install it.
- After installation, launch the app and select ‘new project’ on the homepage. It will require you to name the new project and choose where you want to save it. Afterward, click ‘ok’ to begin.
- Next, go to ‘file’ and select ‘import from media’ to import the MP4 file you would like to cut. Alternatively, you can simply drag the file to the timeline.
- Next, pick the ripple edit tool and go to the beginning of the video. Drag the handle with the arrow to your desired point. Repeat this at the end of the video.
- Finally, press Q to cut the MP4 clip to the left of the blade. Next, press W to cut the clip to the right.
- Now you can save your file to your preferred file location.
Movavi Video Editor
Supported System: Mac and Windows
This is an efficient MP4 cutter that helps you remove unnecessary scenes from your YouTube videos. The timeline offers you markers that allow you easily locate the start and end scene of the video you would like to remove. Apart from cutting videos, this tool provides several premium features you can use to make your video look professional. Movavi offers a free trial you can use to determine if this editor is the best option for you. However, it comes with a Movavi watermark that you can only eliminate with the paid option.
Movavi Video Editor can add transitions, music tracks, chroma-key effects, special effects, and many more exciting features to ensure a top-quality result. Furthermore, its intuitive interface makes it relatively easy for beginners and professionals to use. Therefore, you don’t have to worry about a stiff learning curve. With Movavi, you can also change the output format to switch from MP4 to another commonly supported format.
Pros
- Simple and easy to use
- Supports various input and output formats
- Provides YouTubers with basic and advanced features
- Ideal for beginners and professionals
Cons
- Video rendering is slow for large files
- The trial version comes with a Movavi watermark
Steps to Cut MP4 for YouTube on Mac Using Movavi Video Editor
For cutting your video on Mac using Movavi video editor, you can follow the steps outlined below.
- First, download and install Movavi Video Editor on your Mac.
- After installing Movavi, launch the editor and click the ‘add files’ button to add your MP4 file.
- Once the file shows up in the media bin, drag it to the timeline to start editing your video.
- To cut your MP4 video, move the red marker at the beginning of the video to where you would like to cut. Repeat this process at the end of the video by moving to where you prefer your video to end.
- Next, click the split button to cut this clip from the rest of the video.
- Now, select the fragments you don’t want and hit the delete button to remove them immediately.
- You can also add several filters to your video if you would like to enhance your video.
- You can now save your video by hitting the ‘export’ button. You can choose different formats and video quality for your newly cut video. Select the folder to save to and click the ‘save’ button.
Davinci Resolve
Supported System: Windows and Mac
Davinci Resolve is a favorite for YouTubers who want their videos to look like Hollywood videos. However, this MP4 cutter is aimed at the professional market and supports different input and output formats for your video. Davinci Resolve offers you a variety of professional features and also supports 8k videos. In addition, it provides advanced video cutting features to ensure your video looks excellent even after cutting. You can also combine video clips after cutting without it looking unprofessional.
Although this video cutter software isn’t the best option for beginners, professional editors are sure to be satisfied with the features this editor offers. It also allows you to export directly to various social media platforms, including YouTube, to save space and time.
Pros
- Basic and advanced editing tools
- Fast rendering of videos
- Supports major video formats and video resolutions
- It offers several special effects to make your video more engaging
Cons
- Not the right option for amateurs
Steps to Cut MP4 for YouTube on Mac Using Davinci Resolve
Cutting your MP4 file on Davinci Resolve is relatively easy. The cut tool helps you cut your YouTube video within seconds. Simply follow the steps outlined below.
- First, download and install the Davinci Resolve on your Mac. After installation, launch the MP4 cutter to begin.
- Next, create a new timeline and choose the ‘edit’ mode to begin.
- Import your video by pressing ‘Command+I’ on your keyboard. Alternatively, you can simply drag the video on the timeline.
- Now, select the cut tool and drag the marker from the beginning to where you would like to cut. Repeat this process at the end of the video.
- Afterward, click the blade button to cut your file to your desired size.
- You can now save your file by hitting the ‘export’ button and choosing your preferred file location.
Which Should I Choose, Free or Paid MP4 Cutter?
You need to consider several factors when you’re choosing the right MP4 cutter. First, you have to consider the type of video you would be editing. For YouTube, you need an MP4 cutter that also offers several video editing features you can use to enhance your video. There’s also a need to consider the available formats and quality you can export in and if the MP4 cutter allows you to add visual effects to make your video stand out on YouTube.
Another factor to consider when choosing between a paid or free MP4 cutter for YouTubers on Mac is your experience level. Are you a professional, or you’re looking for some basic app to simply cut your video? Some paid options take you step-by-step through the process of cutting your MP4 file. This type of MP4 cutter helps you advance your skill. This feature is essential because the more you know, the more you’re willing to learn.
Note that most free MP4 cutters offer limited features. Alternatively, some paid MP4 cutters are only suitable for professionals or have a steep subscription to consider. Consider your budget and if any of the editors offer you the tools you need while being affordable. You need to carefully consider if a free tool is what you’re looking for or if you don’t mind paying for more functionality.
FAQs about cutting MP4 video
- What tools should I look for in an MP4 cutter? You should look for basic cutting tools like trimming, slicing and joining. However, you also want an MP4 cutter that offers several editing features to enhance your YouTube video.
- What do most YouTubers use in cutting their videos? From our experience, most YouTubers use the MP4 cutters provided below. You need to note that some are free while some are paid. Simply pick the cutter that fits your needs.
- How can I improve my video cutting and editing skills? You need a lot of practice to learn how to cut and edit videos professionally. It’s also vital to pick software that allows you to develop your editing and cutting skills with time.
- What is the best video cutting and editing software for YouTube novices? If you’re a novice on YouTube, you can start with any basic MP4 cutter on your device. However, we recommend Wondershare Filmora if you want to develop your cutting and editing skills.
Final Thoughts
Cutting MP4 for your YouTube content is a part of becoming a professional YouTuber. When looking for an MP4 cutter that’s reliable and versatile, the goal is to get the job done without any issue. We’ve reviewed the best MP4 cutters for YouTubers on Mac in this guide. You can choose between free or paid software, depending on your needs. However, the best MP4 cutter for YouTubers on Mac is Wondershare Filmore because it is ideal for beginners and professionals. It also offers you a variety of editing features at an affordable cost.
A Detailed Guide to Do Color Correction in OBS
Create High-Quality Video - Wondershare Filmora
An easy and powerful YouTube video editor
Numerous video and audio effects to choose from
Detailed tutorials are provided by the official channel
Color Correction is an outstanding functionality that allows editing photos and videos by altering their consistency to match a particular standard. Besides, color correction is available in the premium tool and free applications. And one of the established free software tools with color correction is the OBS.
Even though the Open Broadcaster Software is mainly known for live streaming and offline video recording, it also offers color correction functionality from its open canvas. Read this article to completion and get to the bottom line of how to do color correction in OBS.
More about OBS
In this article
01 What is OBS?
What is OBS?
Open Broadcaster Software (OBS) is free and open-source software that allows users to record videos and live stream events right at their comfort. The software functions effectively on Mac, Windows, and Linux computers.
Open Broadcaster Software (OBS) is free and open-source software that allows users to record videos and live stream events right at their comfort. The software functions effectively on Mac, Windows, and Linux computers.
Since its initial launch in 2012, OBS has made tremendous moves – This is not only from the constant release of its new versions but also the relentless increase in the functionality features. Besides, OBS is equipped with a robust API that enables plugins and scripts which provide extensive customization to precisely suit one’s needs.
However, OBS being a free application can function to date due to enough support from sponsors and backers.
How to Apply Color Correction in OBS
When you carry out basic edits to your videos or images with OBS and realize that your project has poor shade, color, or tone, you don’t have to export it to another software to correct it. Instead, you can use filters for color correction in OBS.
Apart from using OBS filters to color correct video clips and images, you can correct games, browser sources, and video capture devices.
There are various aspects of color correction in OBS. It includes:
1. Gamma
Gamma is a fundamental aspect in OBS that functions by balancing the brightness of an image through contrast. To be precise, Gamma works almost similarly to change in brightness while simultaneously increasing or decreasing the contrast.
In editing, Gamma is applicable mainly for removing shiny foreheads and webcam footage in gaming and browsing.
High Gamma is represented by “L,” whereas low Gamm is represented by “R.”
2. Contrast
Contrast is the difference in the degree of colors and tones in an image. Usually, the low contrast image has a narrow color range, whereas the high contrast images have dark shadows and bright highlights.
“L” represents high contrast in OBS contrast, whereas “R” represents low contrast.
3. Brightness
Brightness is the degree to how light or dark a picture is. To be able to understand an image clearly, it is best to correct its brightness. A change in brightness of a picture has a simultaneous change in pixels of that image.
High brightness in OBS is denounced by the letter “L,” whereas Low brightness is denounced by “R.”
4. Saturation
Saturation is the intensity of colors in a video or an image. High saturated images are bright, strong, and are rich, whereas the low saturated photos appear washed out. Black and white (grayscale) photos have no color saturation. In OBS, high saturation and low saturation are represented as “L” and “R.”
5. Hue Shift
Hue shift is the change in an image’s saturation, lightness, and hue colors. Hue shifting occurs when highlighting or shading images. In OBS, you can use the hue shift functionality to reimage your image with a completely different color palette.
With the hue shift functionality in OBS, you can place the image on top of another and have an 80% opacity. It means that you will still see the first image when you place the second one on top of it.
The “L” sign in the OBS hue shift represents 50% opacity, while the “R” represents 100% Opacity.
Color Grade in OBS
Color grading is the process of enhancing the appearance of an image through attributes such as contrast, saturation, and color, making them enchanting for presentations. Color grading is not only done for still images but also for motion pictures and images.
Color grading functionality in OBS is encompassed with several tools – This includes:
1. Lift tool
As the name suggests, lift tools are used in lifting or removing specific colors from an image. It does so without necessarily affecting other colors in an image.
With this tool, you can selectively remove unwanted colors from your image or video, replace them with your desired ones, and create astonishing results.
2. Offset
Offset is another outstanding tool in OBS color grading that controls the blacks/Shadows of an image. It functions by altering the brightness levels and leaving the highlights and the mid-tones unaffected.
3. Gain
A gain is a tool in OBS color correction that functions by only adjusting the white levels in an image. With the gain tool, brighter colors become brighter or darker.
Many people, especially beginner editors, experience difficulty differentiating between the Gamma and Offset tools. Yes, there is a closer similarity between the two, and for you to be on the safe side, you need to know that Gamma goes with the mid-tones (middle gray levels) whereas the Gain goes with highlights/whites.
How to Apply LUTs in OBS
Look up tables (LUTs) is a functionality feature that allows editors, colorists, and filmmakers to save certain colors as their templates. Therefore, when working on a particular project, they don’t have to create new working color grades; instead, you pick it from your LUT.
Using LUTs OBS is not rocket science. With LUTs, you can create unique projects with a vibrant feel. Here are the simple steps of using LUTs in OBS.
Step 1. Prepare your LUT
First, check and establish whether you have your LUT ready. If you don’t have it, you can download one from the internet. Make sure you download it as a folder. Even though OBS has LUT, It has limited color grades; therefore, it is best to download one. You can extract it to an OBS folder if you downloaded it in a zip file.
Step 2. Add your project to the OBS timeline
Open your OBS software and add your project file. Drag and drop your file to the OBS timeline.

Step 3. Add LUTs to your project
Right-click on the area in your project that you wish to apply LUTs, then click on “Filters.” Select “Apply LUT” from the drop-down menu,” which is usually at the top of the list.

Step 4. Apply your LUT as a filter
On the LUTs section, click on the browser, then open your downloaded LUT folder. Usually, the LUT is in the form of a .cube file. You can adjust your LUT by simply clicking on the “Adjust” option.
Bonus! How to Apply Color Correction for Webcam and Camera
People who primarily use their computers for recording sessions often find it difficult to capture quality videos. It is because most computer cameras are not straightforward. To do away with purchasing a new camera due to poor quality video capture, they can freely use OBS LUTs. For their camera and webcam. LUTs for webcam play a vital role in correcting the quality of photos and videos by using filters.
Here are the simple steps on how to use LUTs for color correction in webcam and camera
Step 1. Check whether your camera has additional software
Most webcams and cameras are controlled by external software, so you first need to check whether yours is also controlled. A thing with these cameras are controlled by their software is that the software determines the color settings and the specific image.
Double click on camera source and select “Configure video.” Computers with external software cameras will have a pop-up window that displays various customizable settings. Here, you can adjust the different settings based on your preference.

Step 2. Download your LUTs
Download online the LUTs you want to use. Download them as folders and extract the files you downloaded as zip files. Save them in the OBS folder.
Step 3. Apply your LUTs
Still, in your OBS software, open your camera and then right-click on it. From the displayed menu, click on “Filters.”
On the bottom left corner of your interface, hit the “+” sign, then select “Apply LUTs” > “Browse.”
Open your already downloaded OBS files. Usually, there is an “Adjust” that allows you to regulate the intensity of the LUT by sliding it.

Step 4. Start recording with LUTs on
After turning on your LUT, you can start recording videos and taking photos. There is an eye icon on the left-hand side of your screen. You can use it to turn on or off LUT.
Conclusion
● And that is how to do color correction in OBS. Besides, you do not have to go to the extremes of getting a new camera because of your webcam faultiness. With OBS, you can correct your camera and webcam and get outstanding results.
● Download LUTs from the internet and use them as a template in OBS. Besides, you don’t have to pay for the LUTs, but you can use the free ones.
Color Correction is an outstanding functionality that allows editing photos and videos by altering their consistency to match a particular standard. Besides, color correction is available in the premium tool and free applications. And one of the established free software tools with color correction is the OBS.
Even though the Open Broadcaster Software is mainly known for live streaming and offline video recording, it also offers color correction functionality from its open canvas. Read this article to completion and get to the bottom line of how to do color correction in OBS.
More about OBS
In this article
01 What is OBS?
What is OBS?
Open Broadcaster Software (OBS) is free and open-source software that allows users to record videos and live stream events right at their comfort. The software functions effectively on Mac, Windows, and Linux computers.
Open Broadcaster Software (OBS) is free and open-source software that allows users to record videos and live stream events right at their comfort. The software functions effectively on Mac, Windows, and Linux computers.
Since its initial launch in 2012, OBS has made tremendous moves – This is not only from the constant release of its new versions but also the relentless increase in the functionality features. Besides, OBS is equipped with a robust API that enables plugins and scripts which provide extensive customization to precisely suit one’s needs.
However, OBS being a free application can function to date due to enough support from sponsors and backers.
How to Apply Color Correction in OBS
When you carry out basic edits to your videos or images with OBS and realize that your project has poor shade, color, or tone, you don’t have to export it to another software to correct it. Instead, you can use filters for color correction in OBS.
Apart from using OBS filters to color correct video clips and images, you can correct games, browser sources, and video capture devices.
There are various aspects of color correction in OBS. It includes:
1. Gamma
Gamma is a fundamental aspect in OBS that functions by balancing the brightness of an image through contrast. To be precise, Gamma works almost similarly to change in brightness while simultaneously increasing or decreasing the contrast.
In editing, Gamma is applicable mainly for removing shiny foreheads and webcam footage in gaming and browsing.
High Gamma is represented by “L,” whereas low Gamm is represented by “R.”
2. Contrast
Contrast is the difference in the degree of colors and tones in an image. Usually, the low contrast image has a narrow color range, whereas the high contrast images have dark shadows and bright highlights.
“L” represents high contrast in OBS contrast, whereas “R” represents low contrast.
3. Brightness
Brightness is the degree to how light or dark a picture is. To be able to understand an image clearly, it is best to correct its brightness. A change in brightness of a picture has a simultaneous change in pixels of that image.
High brightness in OBS is denounced by the letter “L,” whereas Low brightness is denounced by “R.”
4. Saturation
Saturation is the intensity of colors in a video or an image. High saturated images are bright, strong, and are rich, whereas the low saturated photos appear washed out. Black and white (grayscale) photos have no color saturation. In OBS, high saturation and low saturation are represented as “L” and “R.”
5. Hue Shift
Hue shift is the change in an image’s saturation, lightness, and hue colors. Hue shifting occurs when highlighting or shading images. In OBS, you can use the hue shift functionality to reimage your image with a completely different color palette.
With the hue shift functionality in OBS, you can place the image on top of another and have an 80% opacity. It means that you will still see the first image when you place the second one on top of it.
The “L” sign in the OBS hue shift represents 50% opacity, while the “R” represents 100% Opacity.
Color Grade in OBS
Color grading is the process of enhancing the appearance of an image through attributes such as contrast, saturation, and color, making them enchanting for presentations. Color grading is not only done for still images but also for motion pictures and images.
Color grading functionality in OBS is encompassed with several tools – This includes:
1. Lift tool
As the name suggests, lift tools are used in lifting or removing specific colors from an image. It does so without necessarily affecting other colors in an image.
With this tool, you can selectively remove unwanted colors from your image or video, replace them with your desired ones, and create astonishing results.
2. Offset
Offset is another outstanding tool in OBS color grading that controls the blacks/Shadows of an image. It functions by altering the brightness levels and leaving the highlights and the mid-tones unaffected.
3. Gain
A gain is a tool in OBS color correction that functions by only adjusting the white levels in an image. With the gain tool, brighter colors become brighter or darker.
Many people, especially beginner editors, experience difficulty differentiating between the Gamma and Offset tools. Yes, there is a closer similarity between the two, and for you to be on the safe side, you need to know that Gamma goes with the mid-tones (middle gray levels) whereas the Gain goes with highlights/whites.
How to Apply LUTs in OBS
Look up tables (LUTs) is a functionality feature that allows editors, colorists, and filmmakers to save certain colors as their templates. Therefore, when working on a particular project, they don’t have to create new working color grades; instead, you pick it from your LUT.
Using LUTs OBS is not rocket science. With LUTs, you can create unique projects with a vibrant feel. Here are the simple steps of using LUTs in OBS.
Step 1. Prepare your LUT
First, check and establish whether you have your LUT ready. If you don’t have it, you can download one from the internet. Make sure you download it as a folder. Even though OBS has LUT, It has limited color grades; therefore, it is best to download one. You can extract it to an OBS folder if you downloaded it in a zip file.
Step 2. Add your project to the OBS timeline
Open your OBS software and add your project file. Drag and drop your file to the OBS timeline.
Step 3. Add LUTs to your project
Right-click on the area in your project that you wish to apply LUTs, then click on “Filters.” Select “Apply LUT” from the drop-down menu,” which is usually at the top of the list.
Step 4. Apply your LUT as a filter
On the LUTs section, click on the browser, then open your downloaded LUT folder. Usually, the LUT is in the form of a .cube file. You can adjust your LUT by simply clicking on the “Adjust” option.
Bonus! How to Apply Color Correction for Webcam and Camera
People who primarily use their computers for recording sessions often find it difficult to capture quality videos. It is because most computer cameras are not straightforward. To do away with purchasing a new camera due to poor quality video capture, they can freely use OBS LUTs. For their camera and webcam. LUTs for webcam play a vital role in correcting the quality of photos and videos by using filters.
Here are the simple steps on how to use LUTs for color correction in webcam and camera
Step 1. Check whether your camera has additional software
Most webcams and cameras are controlled by external software, so you first need to check whether yours is also controlled. A thing with these cameras are controlled by their software is that the software determines the color settings and the specific image.
Double click on camera source and select “Configure video.” Computers with external software cameras will have a pop-up window that displays various customizable settings. Here, you can adjust the different settings based on your preference.
Step 2. Download your LUTs
Download online the LUTs you want to use. Download them as folders and extract the files you downloaded as zip files. Save them in the OBS folder.
Step 3. Apply your LUTs
Still, in your OBS software, open your camera and then right-click on it. From the displayed menu, click on “Filters.”
On the bottom left corner of your interface, hit the “+” sign, then select “Apply LUTs” > “Browse.”
Open your already downloaded OBS files. Usually, there is an “Adjust” that allows you to regulate the intensity of the LUT by sliding it.
Step 4. Start recording with LUTs on
After turning on your LUT, you can start recording videos and taking photos. There is an eye icon on the left-hand side of your screen. You can use it to turn on or off LUT.
Conclusion
● And that is how to do color correction in OBS. Besides, you do not have to go to the extremes of getting a new camera because of your webcam faultiness. With OBS, you can correct your camera and webcam and get outstanding results.
● Download LUTs from the internet and use them as a template in OBS. Besides, you don’t have to pay for the LUTs, but you can use the free ones.
[Best 10 Options] Slow Down Video Online with Perfection
Slowing down videos might seem like a simple technique, but it is all about precision. This process has been made accessible via slow-motion video online makers. This software requires no hard disk storage and an internet connection. The best part about creating a slow-mo video online is that you can access it at any time.
These video-to-slow-motion online creators slow down playback speed or enhance fps. In addition to functioning properly, some of these tools offer AI integration. This article revolves around the concept of online tools to create slow-motion videos. Along the way, you can find insights into the top 9 tools that create this effect. In addition, the 10th tool will be the top of its desktop alternative to these online tools.
Slow Motion Video Maker Slow your video’s speed with better control of your keyframes to create unique cinematic effects!
Make A Slow Motion Video Make A Slow Motion Video More Features

Part 1: Top-Rated Online Slow-Down Video Tools to Use
Video to slow motion online tools are taking over the market since the demand for slo-mos has increased. It is because this effect makes everything aesthetic and detailed. Moreover, it goes with almost every song, making slo-mo an important editing part. Explore some of the top online tools to create a slow-motion effect:
1. Kapwing
Are you seeking a smooth, slow-motion video online editor with multidevice support? Kapwing is an innovative tool with diverse speed editing options. Creating a slow motion is as easy as uploading a file. After import, the application shows multiple speed options from 1.0x to 0.25x. You can add this effect to a specific video part, as Kapwing has a timeline editing bar.

Key Features
- You can select a preferred ratio for your video from its portrait and landscape ratio options.
- This online video slow-motion maker collaborates with Google Drive and Photos to import media.
- The editing interface is basic and minimal, with an organized arrangement of diverse features.
Pricing
| Pricing Plan | Annual Pricing |
|---|---|
| Pro | $16/month |
| Business | $50/month |
| Enterprise | Contact Sales |
2. Ezgif
Want to slow down a video but on a budget? Use this free slow-mo video editor online with multiple speed features. The tool also speeds up a video; hence, you can do both for creative effect. The standard playback speed is 1.0x; lower values slow down a video and vice versa. In addition, the tool offers resize, audio, and cut settings with speed manipulation.

Key Features
- The tool supports all video formats for speed change, including MP4, WebM, and more.
- The file size limit for this slow-motion video player online is 100MB.
- To slow down the speed of an online video, you can just paste its URL and edit further.
Pricing
Free
3. Media.io
Can’t you find a suitable editor for slow-motion video online in different formats? Media.io offers seamless support with abundant video formats like MP3, MOV, and more. It is capable of reducing your video speed to 0.25x and is simple to employ. The slow speed alteration can be carried out by dragging the slider towards the left. You can also mute the video sound during speed change to save its quality.

Key Features
- You can slow down a video tutorial by simply pasting its URL.
- Along with slow-motion online, it also allows you to incorporate high-motion effects.
- There are numerous video, image, or audio-enhancing tools to improve the quality of a video.
Pricing
| Pricing Plan | Annual Pricing |
|---|---|
| Yearly Plan | $86.99 |
| Monthly Plan | $19.99 |
4. Flixier
Flixier is a reliable video editor with slo-mo online services for MP4, AVI, and MKV formats. Accessibility is its strong pursuit, and it offers two options for speed modification. You can use the slider or the buttons to slow down video speed. With its cloud collaboration, it makes a slow-mo in a brief period.

Key Features
- Along with video speed change, you can also change the speed of an audio track.
- Create time-lapse videos for those precious moments you spend using its high-speed effects.
- Publish your videos on social platforms like Facebook, Instagram, and TikTok.
Pricing
| Pricing Plan | Annual Pricing |
|---|---|
| Pro | $6/month |
| Business | $12/month |
| Enterprise | $55/month |
5. OnlineConverter.com
Everyone’s favorite is a tool that offers precise editing options, as you can personalize a video. This slow-motion video maker online offers speed modification at different durations. It has two options for a slow-mo; one is 50% of the original speed, and the other is 20% slower. In addition, you can set the duration to apply the effect at any time. Add a “Start Time” and “To the End” time, and the effect will apply.

Key Features
- The tool claims to support 16+ video formats, including popular and commonly used ones.
- The file size limit to make slow-motion videos online is 200 MB.
- Adjust the audio speed according to the video’s speed alteration.
Pricing
Free
6. InVideo AI
Do you want to change the speed of a larger file of 2GB file size online? While other editors support small file sizes, this slow-motion video editor online can do better. Creating a slow motion in it can occur in 3 simple steps. Just upload a video and set a speed among options like 0.75x, 0.5x, and more.

Key Features
- Within speed editing, you can use the cut, trim, and crop tools to enhance a video.
- The tool is a hub for generative AIs like Art, Avatar, Script, and Video generation.
- Offers diverse templates for seamless video editing in diverse contexts.
Pricing
| Pricing Plan | Annual Pricing |
|---|---|
| Business | $15/month |
| Unlimited | $30/month |
7. Neural Love
Do you want to start simply by making slow-motion video online? Slow down your video by 2 to 8 times more than its original speed. The results will amaze you as if you have used a professional camera. MOV and MP4 are popular video formats, and this tool supports both. The tool has a strict security policy as it understands the significance of data privacy.

Key Features
- Video speed change occurs in percentage; below 50% means a slow-motion video.
- You can manipulate and insert additional video frames up to 60fps for smooth results.
- Enable colorization and facial restoration features before starting the speed change.
Pricing
| Pricing Plan | Pricing Per 100 Credits |
|---|---|
| Subscription | $10/month |
| Pay As You Go | $19/month |
8. Abraia
What is better than finding an all-in-one slow-mo video online maker? With Abraia, experience slow-motion effect creation amongst other editing options. The process of changing video speed is as simple as dragging a slider. Whilst decreasing the video speed, use the cut tool to make sections and apply it to them.

Key Features
- Offers a Bulk Mode in which you can edit multiple files simultaneously to increase productivity.
- This slow-motion maker online features 16 screen ratios suitable for social site sharing.
- It also offers text, graphics, and visual adjustment features to complete editing.
Pricing
| Credits | Pricing |
|---|---|
| 2500 | $9 |
| 5000 | $12 |
| 10,000 | $18 |
9. Wave.video
Who doesn’t love creating slow-motion when it is a matter of a few clicks? Use this slow video speed online to change the playback speed with a click. It allows 3 video playback options: 0.75x, 0.5x, and 0.25x for right editing. It possesses a simple user interface and offers audio modification along with speed. Create a cinematic expression in your videos or add the time-lapse effect to enhance visuals.

Key Features
- This online slow-motion maker offers a range of template categories for editing.
- You can integrate unlimited video clips, audio tracks, and images from its stock library.
- The tool also offers creative assets like graphics or visual effects for advanced editing.
Pricing
| Pricing Plan | Annual Pricing |
|---|---|
| Streamer | $16/month |
| Creator | $24/month |
| Business | $48/month |
Part 2: Offline Alternative: Making Slow Motion Videos Quickly Using Filmora
All the mentioned slow-motion video online makers are remarkable in their field. However, they have certain drawbacks like internet connection requirements and more. Wondershare Filmora is a well-suited alternative to these leading online tools. It is because the platform doesn’t need an online connection to create a slow-mo. In addition, the software offers all the features in one place, so you don’t have to switch.
Creating a slow motion in this slow motion video online alternative is uncomplicated. Compared to its competitors, it has a simple method to make a slow-mo. The “Uniform Speed” option uses a slider to change the speed percentage. In addition, it has AI integration in the form of the “Optical Flow” feature. This allows the seamless creation of slow-motion video by enhancing the number of frames.
Free Download For Win 7 or later(64-bit)
Free Download For macOS 10.14 or later
Step-by-Step Guide to Creating a Slow Motion Video in Filmora
Once you know about Filmora and its advantages, you cannot stop using it. The accessible editing interface is what this generation opts for. It is because many of us start as freelance content creators, making on our own. To facilitate such creators, here is a detailed guide to creating slow motion in Filmora:
Step 1File Import and Speed Alteration
Launch Filmora to create a new project and import media with the “Ctrl + I” shortcut. After bringing this media to the timeline, use the playhead to mark a specific area. Further, go to the “Speed” > “Uniform Speed” tab in the settings panel. Change the speed of the video by dragging the slider and adjusting it accordingly.

Step 2Opt for AI Frame Interpolation
Navigate towards the bottom of the “Uniform Speed” tab and access “AI Frame Interpolation.” Further, expand the option using the navigation arrow and select the “Optical Flow” option.

Step 3Render Preview of the Video
To analyze the results, navigate toward the timeline toolbar and select the “Render Preview” option. After reviewing the final results, click on the “Export” button to save the video on the device.

Conclusion
This article has provided detailed insights on slow-motion video online tools for your access. Those who prefer to work online can benefit from these online editors. However, if you want to unlock the new secrets of slow motion, use Filmora. The software has AI-backed algorithms for maintaining slow motion. It has multiple benefits over the other 9 tools, which makes it our 10th yet top recommendation.
Make A Slow Motion Video Make A Slow Motion Video More Features
Part 1: Top-Rated Online Slow-Down Video Tools to Use
Video to slow motion online tools are taking over the market since the demand for slo-mos has increased. It is because this effect makes everything aesthetic and detailed. Moreover, it goes with almost every song, making slo-mo an important editing part. Explore some of the top online tools to create a slow-motion effect:
1. Kapwing
Are you seeking a smooth, slow-motion video online editor with multidevice support? Kapwing is an innovative tool with diverse speed editing options. Creating a slow motion is as easy as uploading a file. After import, the application shows multiple speed options from 1.0x to 0.25x. You can add this effect to a specific video part, as Kapwing has a timeline editing bar.
Key Features
- You can select a preferred ratio for your video from its portrait and landscape ratio options.
- This online video slow-motion maker collaborates with Google Drive and Photos to import media.
- The editing interface is basic and minimal, with an organized arrangement of diverse features.
Pricing
| Pricing Plan | Annual Pricing |
|---|---|
| Pro | $16/month |
| Business | $50/month |
| Enterprise | Contact Sales |
2. Ezgif
Want to slow down a video but on a budget? Use this free slow-mo video editor online with multiple speed features. The tool also speeds up a video; hence, you can do both for creative effect. The standard playback speed is 1.0x; lower values slow down a video and vice versa. In addition, the tool offers resize, audio, and cut settings with speed manipulation.
Key Features
- The tool supports all video formats for speed change, including MP4, WebM, and more.
- The file size limit for this slow-motion video player online is 100MB.
- To slow down the speed of an online video, you can just paste its URL and edit further.
Pricing
Free
3. Media.io
Can’t you find a suitable editor for slow-motion video online in different formats? Media.io offers seamless support with abundant video formats like MP3, MOV, and more. It is capable of reducing your video speed to 0.25x and is simple to employ. The slow speed alteration can be carried out by dragging the slider towards the left. You can also mute the video sound during speed change to save its quality.
Key Features
- You can slow down a video tutorial by simply pasting its URL.
- Along with slow-motion online, it also allows you to incorporate high-motion effects.
- There are numerous video, image, or audio-enhancing tools to improve the quality of a video.
Pricing
| Pricing Plan | Annual Pricing |
|---|---|
| Yearly Plan | $86.99 |
| Monthly Plan | $19.99 |
4. Flixier
Flixier is a reliable video editor with slo-mo online services for MP4, AVI, and MKV formats. Accessibility is its strong pursuit, and it offers two options for speed modification. You can use the slider or the buttons to slow down video speed. With its cloud collaboration, it makes a slow-mo in a brief period.
Key Features
- Along with video speed change, you can also change the speed of an audio track.
- Create time-lapse videos for those precious moments you spend using its high-speed effects.
- Publish your videos on social platforms like Facebook, Instagram, and TikTok.
Pricing
| Pricing Plan | Annual Pricing |
|---|---|
| Pro | $6/month |
| Business | $12/month |
| Enterprise | $55/month |
5. OnlineConverter.com
Everyone’s favorite is a tool that offers precise editing options, as you can personalize a video. This slow-motion video maker online offers speed modification at different durations. It has two options for a slow-mo; one is 50% of the original speed, and the other is 20% slower. In addition, you can set the duration to apply the effect at any time. Add a “Start Time” and “To the End” time, and the effect will apply.
Key Features
- The tool claims to support 16+ video formats, including popular and commonly used ones.
- The file size limit to make slow-motion videos online is 200 MB.
- Adjust the audio speed according to the video’s speed alteration.
Pricing
Free
6. InVideo AI
Do you want to change the speed of a larger file of 2GB file size online? While other editors support small file sizes, this slow-motion video editor online can do better. Creating a slow motion in it can occur in 3 simple steps. Just upload a video and set a speed among options like 0.75x, 0.5x, and more.
Key Features
- Within speed editing, you can use the cut, trim, and crop tools to enhance a video.
- The tool is a hub for generative AIs like Art, Avatar, Script, and Video generation.
- Offers diverse templates for seamless video editing in diverse contexts.
Pricing
| Pricing Plan | Annual Pricing |
|---|---|
| Business | $15/month |
| Unlimited | $30/month |
7. Neural Love
Do you want to start simply by making slow-motion video online? Slow down your video by 2 to 8 times more than its original speed. The results will amaze you as if you have used a professional camera. MOV and MP4 are popular video formats, and this tool supports both. The tool has a strict security policy as it understands the significance of data privacy.
Key Features
- Video speed change occurs in percentage; below 50% means a slow-motion video.
- You can manipulate and insert additional video frames up to 60fps for smooth results.
- Enable colorization and facial restoration features before starting the speed change.
Pricing
| Pricing Plan | Pricing Per 100 Credits |
|---|---|
| Subscription | $10/month |
| Pay As You Go | $19/month |
8. Abraia
What is better than finding an all-in-one slow-mo video online maker? With Abraia, experience slow-motion effect creation amongst other editing options. The process of changing video speed is as simple as dragging a slider. Whilst decreasing the video speed, use the cut tool to make sections and apply it to them.
Key Features
- Offers a Bulk Mode in which you can edit multiple files simultaneously to increase productivity.
- This slow-motion maker online features 16 screen ratios suitable for social site sharing.
- It also offers text, graphics, and visual adjustment features to complete editing.
Pricing
| Credits | Pricing |
|---|---|
| 2500 | $9 |
| 5000 | $12 |
| 10,000 | $18 |
9. Wave.video
Who doesn’t love creating slow-motion when it is a matter of a few clicks? Use this slow video speed online to change the playback speed with a click. It allows 3 video playback options: 0.75x, 0.5x, and 0.25x for right editing. It possesses a simple user interface and offers audio modification along with speed. Create a cinematic expression in your videos or add the time-lapse effect to enhance visuals.
Key Features
- This online slow-motion maker offers a range of template categories for editing.
- You can integrate unlimited video clips, audio tracks, and images from its stock library.
- The tool also offers creative assets like graphics or visual effects for advanced editing.
Pricing
| Pricing Plan | Annual Pricing |
|---|---|
| Streamer | $16/month |
| Creator | $24/month |
| Business | $48/month |
Part 2: Offline Alternative: Making Slow Motion Videos Quickly Using Filmora
All the mentioned slow-motion video online makers are remarkable in their field. However, they have certain drawbacks like internet connection requirements and more. Wondershare Filmora is a well-suited alternative to these leading online tools. It is because the platform doesn’t need an online connection to create a slow-mo. In addition, the software offers all the features in one place, so you don’t have to switch.
Creating a slow motion in this slow motion video online alternative is uncomplicated. Compared to its competitors, it has a simple method to make a slow-mo. The “Uniform Speed” option uses a slider to change the speed percentage. In addition, it has AI integration in the form of the “Optical Flow” feature. This allows the seamless creation of slow-motion video by enhancing the number of frames.
Free Download For Win 7 or later(64-bit)
Free Download For macOS 10.14 or later
Step-by-Step Guide to Creating a Slow Motion Video in Filmora
Once you know about Filmora and its advantages, you cannot stop using it. The accessible editing interface is what this generation opts for. It is because many of us start as freelance content creators, making on our own. To facilitate such creators, here is a detailed guide to creating slow motion in Filmora:
Step 1File Import and Speed Alteration
Launch Filmora to create a new project and import media with the “Ctrl + I” shortcut. After bringing this media to the timeline, use the playhead to mark a specific area. Further, go to the “Speed” > “Uniform Speed” tab in the settings panel. Change the speed of the video by dragging the slider and adjusting it accordingly.
Step 2Opt for AI Frame Interpolation
Navigate towards the bottom of the “Uniform Speed” tab and access “AI Frame Interpolation.” Further, expand the option using the navigation arrow and select the “Optical Flow” option.
Step 3Render Preview of the Video
To analyze the results, navigate toward the timeline toolbar and select the “Render Preview” option. After reviewing the final results, click on the “Export” button to save the video on the device.
Conclusion
This article has provided detailed insights on slow-motion video online tools for your access. Those who prefer to work online can benefit from these online editors. However, if you want to unlock the new secrets of slow motion, use Filmora. The software has AI-backed algorithms for maintaining slow motion. It has multiple benefits over the other 9 tools, which makes it our 10th yet top recommendation.
Create Glitch Text Effect
Glitch text effect is a trending video effect whereby the texts get distorted for a few seconds. The effect is comparable to the glitch you face when your screen starts to malfunction, and the screen appears to be wavy and disoriented. A glitch text effect is better than a regular animated text effect as it helps to get the attention of the viewers immediately and get the message across clearly.
The glitch effect can be applied to the entire video as well as the text as per your preference. There are several video editors available where the glitch text effect comes pre-loaded. All you need to do is to apply it to the text and get it done in a few steps. We will illustrate how to add glitch text effect Premiere Pro. But we recommend Filmora for the best glitter text effect that you can add to your video instantly.
Part 1. Create Glitch Text in Video with Filmora
We have already stated that Wondershare Filmora is the best video editor for the best glitch text effect download and apply to your video in simple steps. Filmora is a premium video editor that is widely used by amateur and professional video editors. You can get all glitch text effect After Effects and add them to your video conveniently in comparison to After Effects.
As a matter of fact, there are literally unlimited video and text effects available, and you can find different types of glitch text effects to apply to your titles and texts. Filmora is available for both Windows and mac users. Here are the steps to create glitch text in video with Filmora.
Free Download For Win 7 or later(64-bit)
Free Download For macOS 10.14 or later
Step1 Download and install Filmora on your computer. Go to File> New Project from the menu bar to start video editing project.

Step2 Go to File> Import Media > Import Media Files to import the video clips where you want to add glitch text effect. Drop the clip into the Timeline to get started.

Step3 Go to Titles tab located at the top. From the left panel, click on Titles option. Search “glitch” in the search field and you will see all the glitch text effects that you can apply to the text in your video.
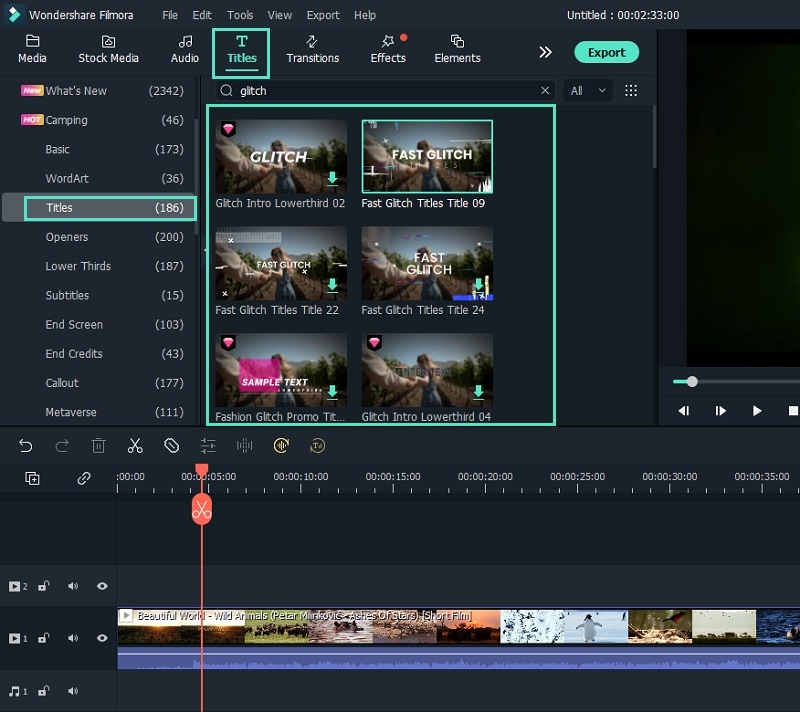
Step4 Select any glitch text effect and drop it into the Timeline above the video clip exactly where you want the text and the effect to appear.
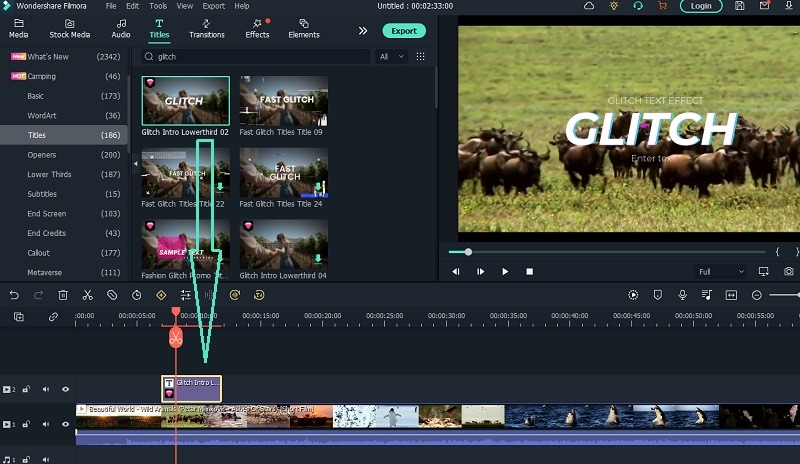
Step5 Double-click on the glitch text effect located on Timeline and edit the text, style, and other parameters as per your preference. Click on Ok and play the video to see your edited video with the glitch text effect.
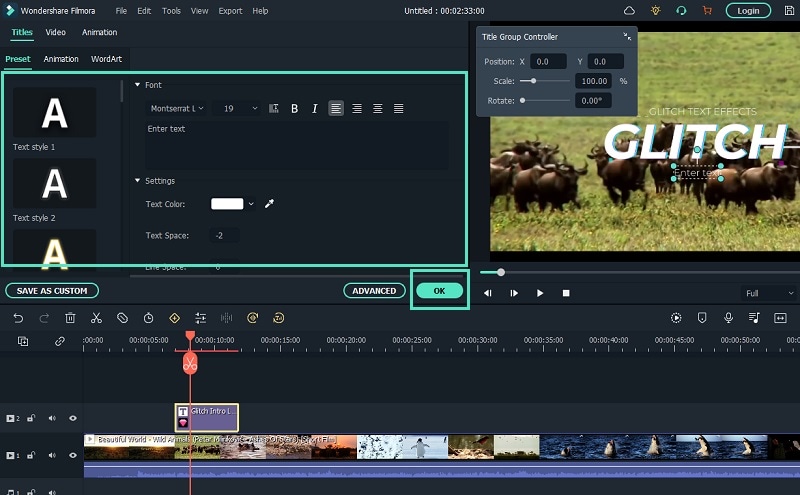
Part 2. How to Make Glitch Text Effect with Premiere Pro
Adobe Premiere Pro is another renowned video editor where you can add glitch text effect to your video. Premiere Pro is strictly for professional video editors as the user interface is not as intuitive as Filmora . The learning curve is steep, and therefore, you need to go through the steps to add glitch text effect Premiere Pro. There are several glitch text effect presets available that you can apply to any text on your video to make them engaging. Here are the steps to make glitch text effect with Premiere Pro.
Step1 Launch Adobe Premiere Pro and go to New> Project to get started. Import your video and drop it into Timeline.
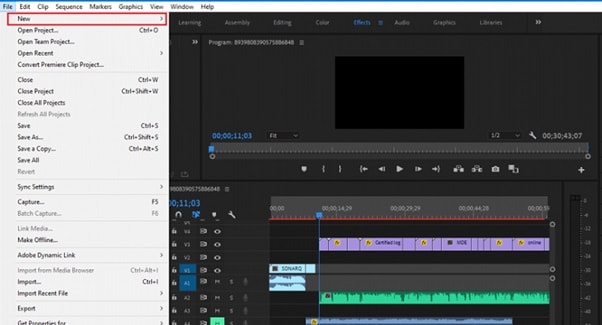
Step2 Use the Type tool to write any text on your video to add glitch text effect. You should have a text layer on Timeline.
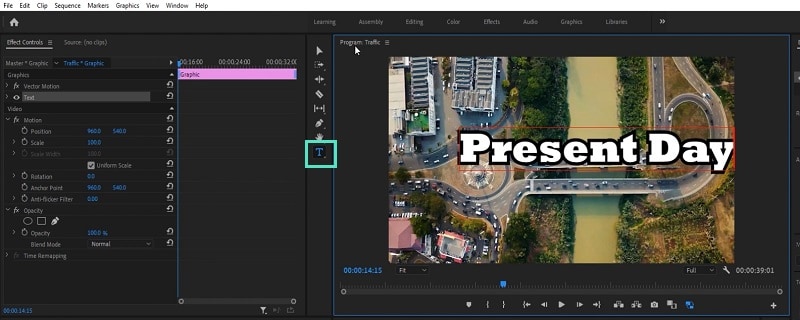
Step3 Go to Effects> Immersive Video> VR Digital Glitch option. Drag and drop the effect to text layer.
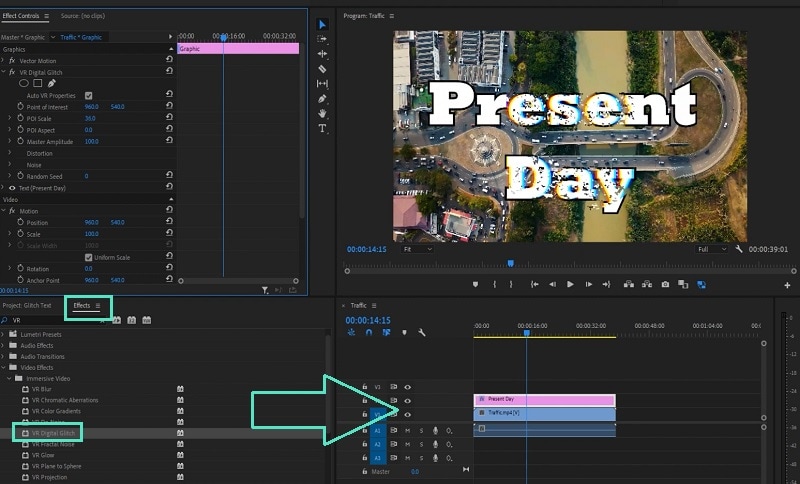
Step4 Under Effect Controls tab, you will find all the different parameters that you can adjust to get the glitch text effect perfectly.
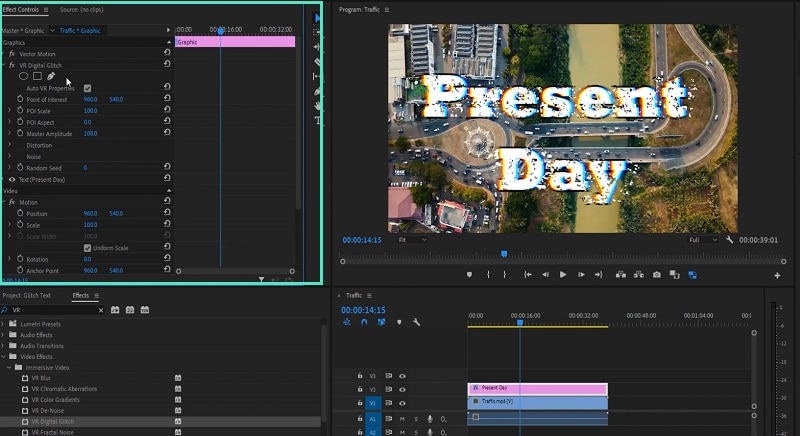
Step5 Turn on Master Amplitude and add multiple keyframes as different points in the Timeline and change the distortion value to make the effect prominent.
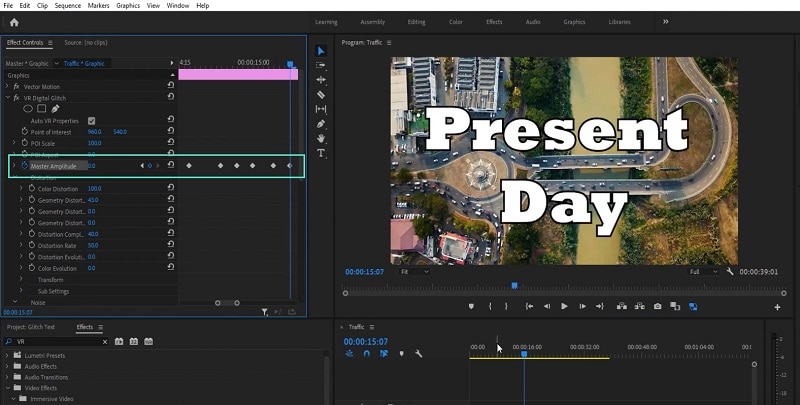
Step6 Go to the first keyframe and turn on Random Seed effect. Go to the last keyframe and turn on Random Seed effect and change the value to 75. Play the video to check the entire video with glitch text effect.
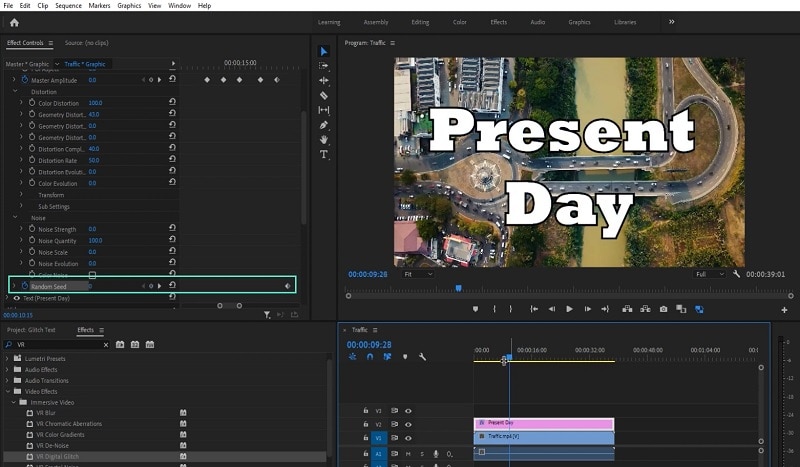
Part 3. Use VSDC Video Editor to Create Glitch Text
If you do not have any premium video editor on your computer and you do not want to purchase any premium video editor, you can still get glitter text effect free. You need to download and install VSDC free video editor on your computer. But the steps to create glitch text on VSDC video editor are slightly complicated as the user interface is not as intuitive as Filmora . Here are the steps to add free glitch text effect on your video.
Step1 Download and install VSDC video editor. Launch the editor and click on New Project to get started. Import your video to your project where you want to add glitch text effect.
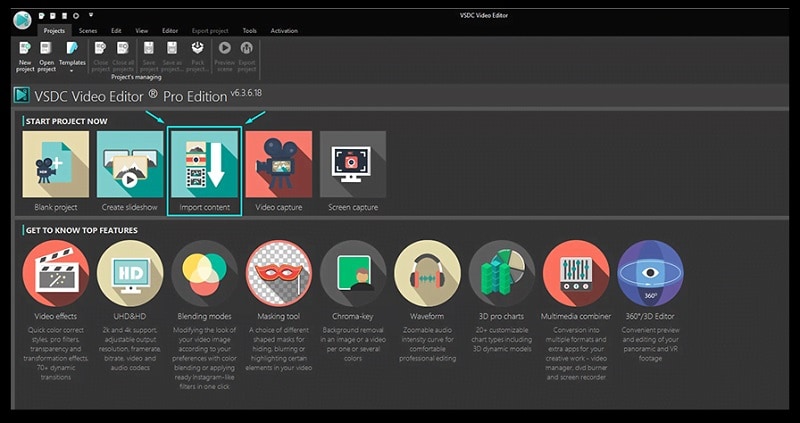
Step2 Use Type tool to write a text on the video. You can press Shift+T shortcut as well. After typing the text, adjust the text style as per your preference.
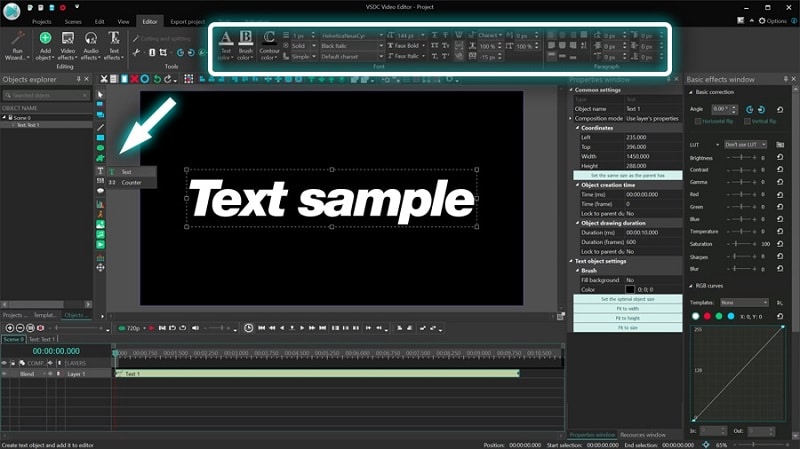
Step3 Double-click on the text layer on Timeline and go to Video Effects> Special FX and click on Glitch option.
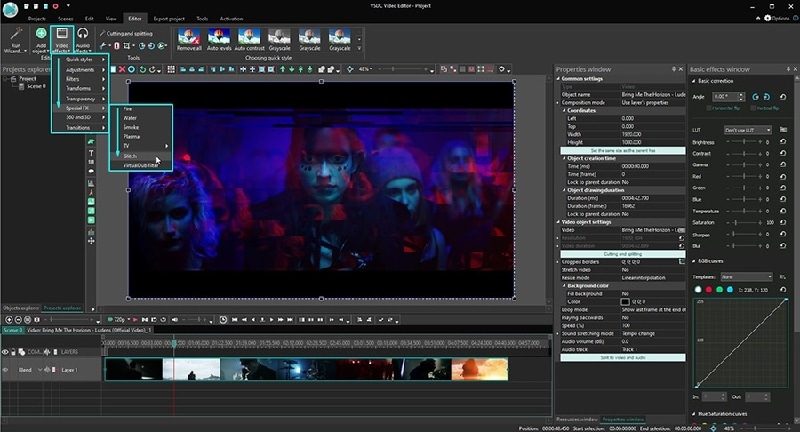
Step4 A window will appear where you can set the starting point, duration, and different parameters. Click on Ok button.
Step5 Go to Properties Windows and click on Presets to select different types of glitch text effects. You can also adjust the intensity of the text effects and other parameters as you feel.
Part 4. Related FAQs about Glitch Text
1. How do you animate glitch text?
If you want to animate glitch text for free, VSDC video editor is ideal as you can customize the effect on any text in simple steps. If you want to use a premium video editor, we recommend Filmora as there are various glitch text effects available to apply to any text on your video instantly.
2. How do you glitch text on video?
First, you have to import your video in your video editor. Type the desired text and set the style. Thereafter, go to glitch text effect presets available on the video editor and apply it to the text instantly. You can customize the glitch text effect as per your preference to make the animation more prominent.
3. How do you glitch text on Android?
You should first install Glitch Video Effect: Glitch FX app from Play Store. Edit your video on the app to add any text, and thereafter, add glitch text effect instantly. In fact, the glitch text effect is available in almost all popular video editor apps on Android due to the effect being trendy and viral.
Free Download For macOS 10.14 or later
Step1 Download and install Filmora on your computer. Go to File> New Project from the menu bar to start video editing project.
Step2 Go to File> Import Media > Import Media Files to import the video clips where you want to add glitch text effect. Drop the clip into the Timeline to get started.
Step3 Go to Titles tab located at the top. From the left panel, click on Titles option. Search “glitch” in the search field and you will see all the glitch text effects that you can apply to the text in your video.
Step4 Select any glitch text effect and drop it into the Timeline above the video clip exactly where you want the text and the effect to appear.
Step5 Double-click on the glitch text effect located on Timeline and edit the text, style, and other parameters as per your preference. Click on Ok and play the video to see your edited video with the glitch text effect.
Part 2. How to Make Glitch Text Effect with Premiere Pro
Adobe Premiere Pro is another renowned video editor where you can add glitch text effect to your video. Premiere Pro is strictly for professional video editors as the user interface is not as intuitive as Filmora . The learning curve is steep, and therefore, you need to go through the steps to add glitch text effect Premiere Pro. There are several glitch text effect presets available that you can apply to any text on your video to make them engaging. Here are the steps to make glitch text effect with Premiere Pro.
Step1 Launch Adobe Premiere Pro and go to New> Project to get started. Import your video and drop it into Timeline.
Step2 Use the Type tool to write any text on your video to add glitch text effect. You should have a text layer on Timeline.
Step3 Go to Effects> Immersive Video> VR Digital Glitch option. Drag and drop the effect to text layer.
Step4 Under Effect Controls tab, you will find all the different parameters that you can adjust to get the glitch text effect perfectly.
Step5 Turn on Master Amplitude and add multiple keyframes as different points in the Timeline and change the distortion value to make the effect prominent.
Step6 Go to the first keyframe and turn on Random Seed effect. Go to the last keyframe and turn on Random Seed effect and change the value to 75. Play the video to check the entire video with glitch text effect.
Part 3. Use VSDC Video Editor to Create Glitch Text
If you do not have any premium video editor on your computer and you do not want to purchase any premium video editor, you can still get glitter text effect free. You need to download and install VSDC free video editor on your computer. But the steps to create glitch text on VSDC video editor are slightly complicated as the user interface is not as intuitive as Filmora . Here are the steps to add free glitch text effect on your video.
Step1 Download and install VSDC video editor. Launch the editor and click on New Project to get started. Import your video to your project where you want to add glitch text effect.
Step2 Use Type tool to write a text on the video. You can press Shift+T shortcut as well. After typing the text, adjust the text style as per your preference.
Step3 Double-click on the text layer on Timeline and go to Video Effects> Special FX and click on Glitch option.
Step4 A window will appear where you can set the starting point, duration, and different parameters. Click on Ok button.
Step5 Go to Properties Windows and click on Presets to select different types of glitch text effects. You can also adjust the intensity of the text effects and other parameters as you feel.
Part 4. Related FAQs about Glitch Text
1. How do you animate glitch text?
If you want to animate glitch text for free, VSDC video editor is ideal as you can customize the effect on any text in simple steps. If you want to use a premium video editor, we recommend Filmora as there are various glitch text effects available to apply to any text on your video instantly.
2. How do you glitch text on video?
First, you have to import your video in your video editor. Type the desired text and set the style. Thereafter, go to glitch text effect presets available on the video editor and apply it to the text instantly. You can customize the glitch text effect as per your preference to make the animation more prominent.
3. How do you glitch text on Android?
You should first install Glitch Video Effect: Glitch FX app from Play Store. Edit your video on the app to add any text, and thereafter, add glitch text effect instantly. In fact, the glitch text effect is available in almost all popular video editor apps on Android due to the effect being trendy and viral.
Also read:
- 2024 Approved How to Create Discord Emoji GIF
- Know How to Make a Video Background Transparent? Export Transparent Background Video After Adding Effects. Steps to Remove White Background From Video for 2024
- Creating Video Testimonials for 2024
- Updated 2024 Approved How to Create Vintage Film Effect 1950S
- Updated Introduction to The Best Cinematic LUTs in The Market for 2024
- New In 2024, Add Text Animation to A Video Online
- In 2024, How to Add Filters on iMovie
- 2024 Approved How to Become a Youtuber?
- Updated 2024 Approved How to Add Filter to Video Online
- Updated Extracting Audio From Videos Is a Key to Better Storytelling. Learn How Filmoras Audio Removal Feature Can Enhance Your Video Stories
- Updated How To Add Motion Blur Effect To Photos in GIMP
- Updated Learn How to Blur the Background in Adobe Premiere Pro with Our Quick and Simple Step-by-Step Instructions to Make Your Subject More Attention-Grabbing
- Updated Guide To Slowing Down Videos in Snapchat Discussing the Details
- How to Convert SRT to DOCX
- New In 2024, 3 Ways To Stream And Record At The Same Time
- Why Your Transparent GIF Is Hard to Remove
- New How to Save As MP4 File on Windows Movie Maker?
- Updated What Does It Mean to Color Grade Your Images, and Why Is It so Important? Does It Mean the Same Thing as a Color Correction? Read on to Gather All the Information You Need on Color Grading Photography
- Updated In 2024, Best Jump Cut Editing Tricks
- Updated How to Create Cinematic Style Videos? Easy Guide for Beginners
- Discover the Various Techniques of Video Framing, Which Involve Capturing the Essence of a Subject While Eliminating Distractions in the Background, Andlearn How to Apply Them Skillfully to Achieve Desired Results
- New Are You Searching for the Best Cinematic LUTs for Premiere Pro? You Are in the Right Place because This Article Is Dedicated to LUTs
- New Free Ways To Split Video For Whatsapp Status On All Platforms
- Create Motion Effect with Path Blur In Photoshop
- In 2024, If You Want to Know How to Live Stream Pre-Recorded Video, You Are in the Right Place. We Will Give You a Complete Guide on 8 Ways You Can Live Stream Pre-Recorded Videos Successfully
- New In 2024, Learn to Use Montage with These Movies
- 2024 Approved A Comprehensive Review of LUTs Finding LUTs Made by Danny Gevirtz
- Tiktok Aspect Ratio Is a Crucial Element to Succeeding in the Tiktok Algorithm. Here Are some Suggestions to Improve Video Quality and Land on the for You Page for 2024
- Updated If You Are a Teacher or People Who Want to Share Their Ideas via Vides, You Can Always Make It on Your Own. This Article Will Share You 7 Tips to Create an Educational Video Easily
- In 2024, Want to Take Your Editing Creativity to the Next Level by Designing Top-Class, Professional-Quality Slideshows in Aquasoft? Rest Assured, You Have Landed at the Right Place
- Updated In 2024, How to Make GIFs From Videos on Mac
- New Mastering Video Marketing An Expert Playbook
- 2024 Approved Something About Skin Care Vlog Ideas
- In 2024, 10 Best Old Film Overlays to Make Your Videos Look Vintage
- If You Wish to Edit FLV Videos without Any Problems, You Should Utilize a Multipurpose Video Editor that Supports the FLV File Format for 2024
- New Looking for Simple Steps to Apply Fade in Effect to Your Text in Premiere Pro? Here Are Two Different Methods Along with an Alternative Way to Fade Text in Videos
- 2024 Approved How to Color-Correct an S-Log Footage
- How to Factory Reset Infinix Smart 8 If I Forgot Security Code or Password? | Dr.fone
- Why Your WhatsApp Live Location is Not Updating and How to Fix on your Apple iPhone 11 | Dr.fone
- In 2024, How To Fix Auto Lock Greyed Out on Apple iPhone 13 Pro Max | Dr.fone
- How To Unlock iPhone 13 Pro Without Passcode? 4 Easy Methods | Dr.fone
- Unlock Apple iPhone 15 With Forgotten Passcode Different Methods You Can Try | Dr.fone
- Spotify Keeps Crashing A Complete List of Fixes You Can Use on Realme GT Neo 5 | Dr.fone
- How to Change Google Play Location On Nokia G22 | Dr.fone
- How to Transfer Music from Motorola Razr 40 to iPod | Dr.fone
- 5 Ways to Restart Sony Xperia 1 V Without Power Button | Dr.fone
- Home Button Not Working on Nokia C12 Plus? Here Are Real Fixes | Dr.fone
- Guide to Mirror Your Vivo Y100A to Other Android devices | Dr.fone
- How to Remove MDM from iPhone 13 without Apple ID?
- Complete guide for recovering music files on ZTE Blade A73 5G
- In 2024, Overview of the Best Nubia Z50 Ultra Screen Mirroring App | Dr.fone
- Remove Google FRP lock on Oppo K11 5G
- In 2024, Best Anti Tracker Software For Motorola Razr 40 Ultra | Dr.fone
- Why is iPogo not working On Samsung Galaxy S23? Fixed | Dr.fone
- In 2024, A Perfect Guide To Remove or Disable Google Smart Lock On Itel P55
- How to Stop Google Chrome from Tracking Your Location On Poco C65? | Dr.fone
- Two Ways to Track My Boyfriends Oppo Reno 8T without Him Knowing | Dr.fone
- In 2024, Apple iPhone 6s Plus Asking for Passcode after iOS 17/14 Update, What to Do? | Dr.fone
- How to Downgrade iPhone 6s Plus without iTunes? | Dr.fone
- How To Activate and Use Life360 Ghost Mode On Realme C55 | Dr.fone
- Can I use iTools gpx file to catch the rare Pokemon On Itel P55T | Dr.fone
- How To Restore a Bricked Tecno Camon 20 Premier 5G Back to Operation | Dr.fone
- Updated How I Animate Discord Profile Pictures (& You Can Too) for 2024
- Title: New What Is the Best MP4 Cutter for YouTuber on Mac, In 2024
- Author: Chloe
- Created at : 2024-04-24 07:08:40
- Updated at : 2024-04-25 07:08:40
- Link: https://ai-editing-video.techidaily.com/new-what-is-the-best-mp4-cutter-for-youtuber-on-mac-in-2024/
- License: This work is licensed under CC BY-NC-SA 4.0.
