:max_bytes(150000):strip_icc():format(webp)/cq5dam.web.1280.1280-3-5c2a5dc746e0fb0001d115f0.jpeg)
Split a Clip in DaVinci Resolve Step by Step

Split a Clip in DaVinci Resolve [Step by Step]
The DaVinci resolve is an amazing video editing software that attracts professionals and beginners to work on it. You can also fulfil your wish to edit or split the video clips in it without facing any difficulty.
But, some of them are looking for guidance to work on DaVinci resolve correctly. This article discusses the splitting of the video clips in DaVinci Resolve explicitly. There is also a brief description of its best alternative, Wondershare Filmora. This is also practically relevant and reasonable as well.
How you can split the video clips in DaVinci resolve
DaVinci resolve is a comprehensive program that allows you to deliver different solutions. It can be related to editing the videos, correcting the colours, and producing the videos and audio. Just follow the simple steps below for splitting the videos in the DaVinci resolve:
Part 1 - Splitting of one clip:
Step 1: After installing the DaVinci resolve, launch it in your system.
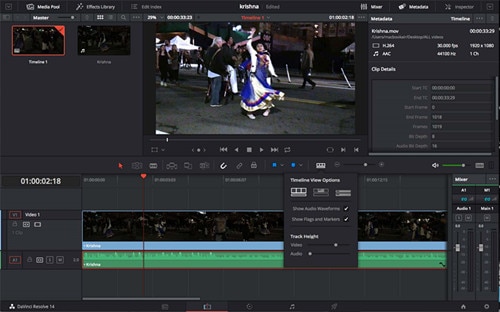
Step 2: Import and place the media file on the timeline from the library. This is the clip you want to split. Select the blade tool from where you want to split the clip. Use the timeline from the menu and go to Split Clip. Shortcut keys are also available that are Ctrl+\ or Cmd+\ or Cmd+B. Now the split clip is easily visible to you. You can use this clip wherever you want to use it.
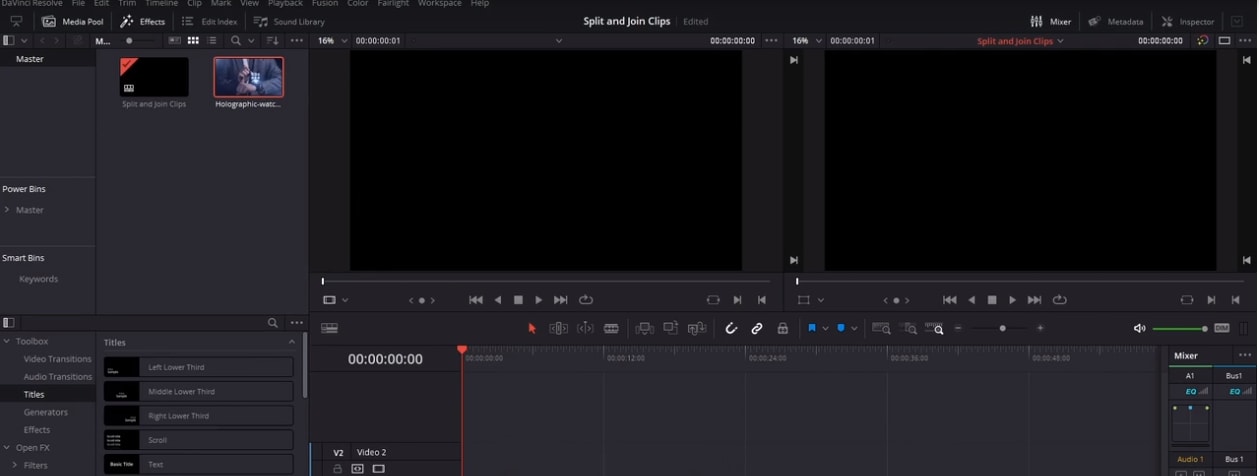
Part 2- Splitting of more than one clip on various tracks:
You can also split the number of video and audio clips at the exact timings in DaVinci resolve.
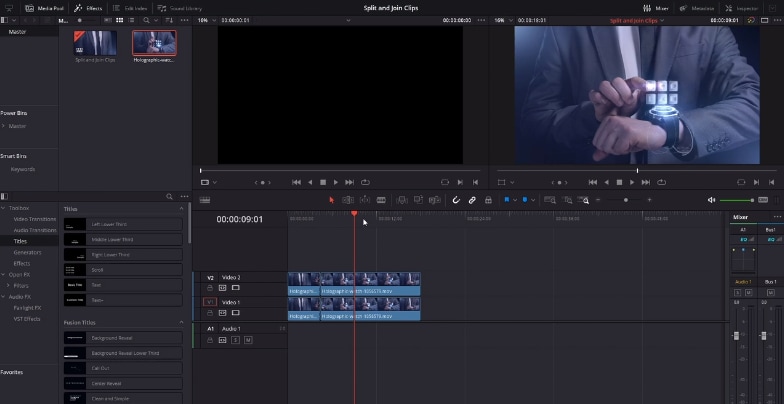
Step 1: When there are piles of clips one after the other, the selection of both of the clips is essential, which have to be split. Keep moving the playhead to the exact area where there is a requirement for the changes.
Step 2: Just keep pressing Command or Control + \ keys, or click on timeline> Split Clip. The selected clips of audio and video get split together now. No more slitting of the clips individually. This option is more appropriate for you when creating and managing different parts of massive projects.
An easier way to split the video clips
Without any doubt, DaVinci resolve is an advanced level software for video editing at the professional level. Moreover, the pricing of DaVinci resolve is $299, and it shows that it is quite expensive for many people. Due to this, you need an economical solution that is Filmora Video Editor .
Most graphic designers and video editors recommend Wondershare Fimora because it is lighter for the systems. All the tools are simplified in using like trimming or splitting the clips. You can convert split video clips into other formats in Wondershare Filmora. Add and apply all the special effects on your videos and export them wherever you want.
For Win 7 or later (64-bit)
For macOS 10.14 or later
Features:
- Splitting or trimming of the video clips
- Removing the noise
- Addition of the transition effects
- Availability of controls for the audio, sound and video
- Separating the audio from the video
Part 1 - Splitting the clips in Wondershare Filmora
If you want to split the clips or trim some parts of the videos, Wondershare Filmora is the right choice. Below are detailed steps for trimming the videos quickly and easily.
Step :1
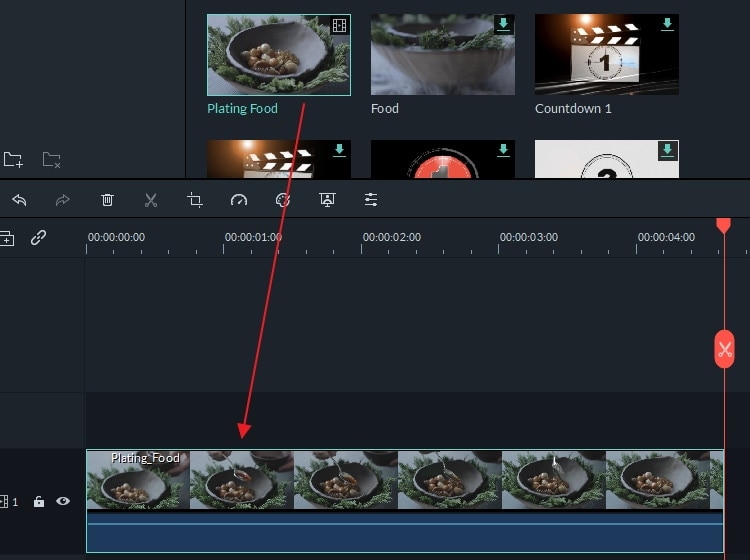
Drag or drop the files from Media Library or Click on “Import” after selecting the video clips to make the clip visible on the timeline. No need to worry regarding the formats as Wondershare Filmora is highly supportive towards it/
Step:2
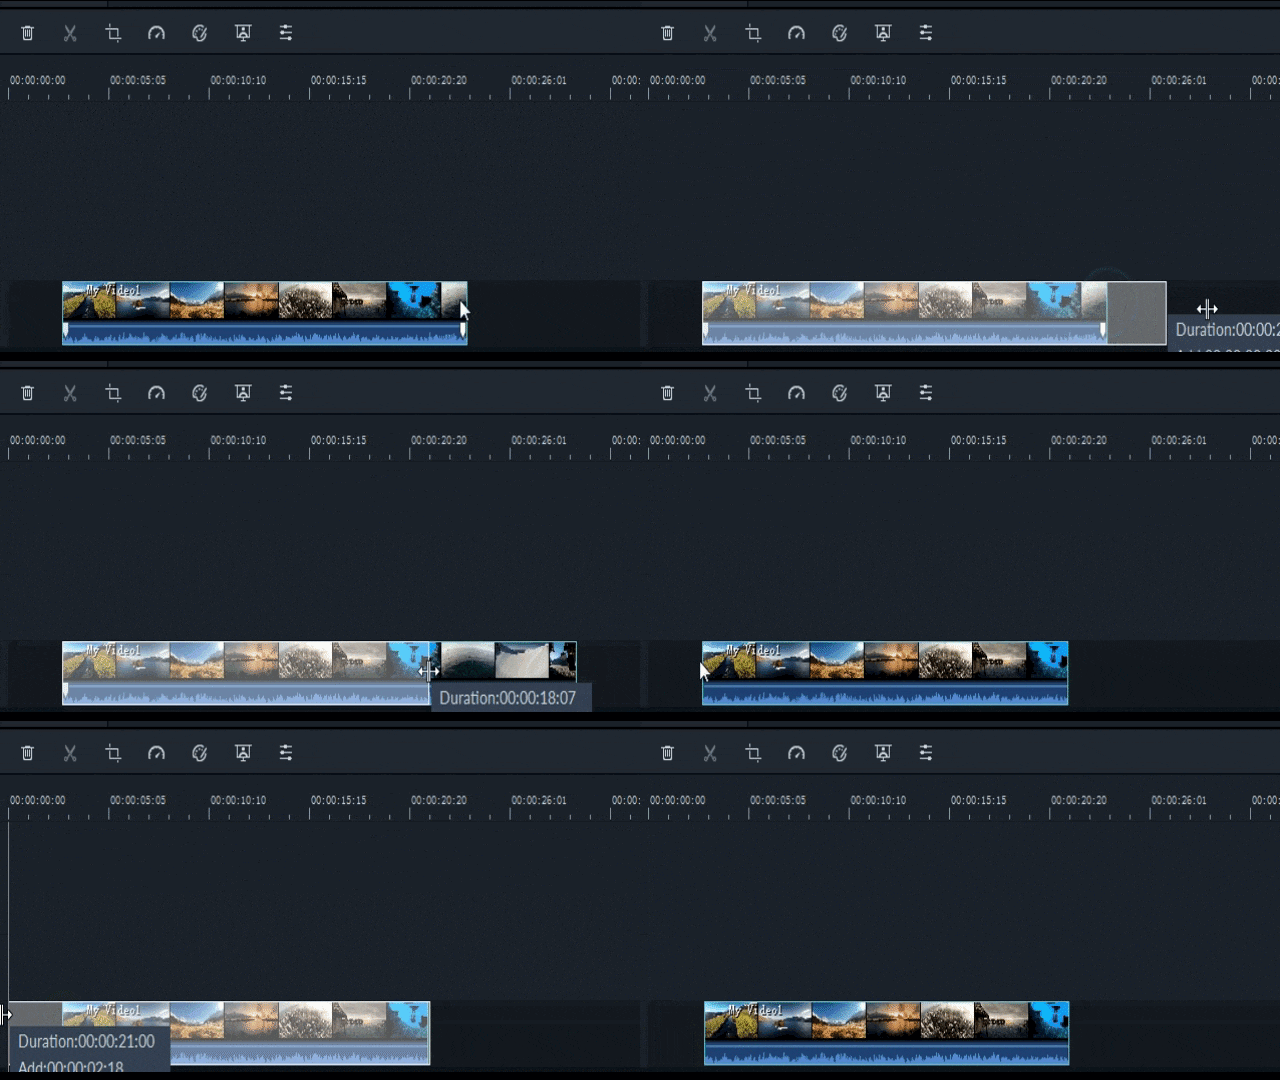
Keep hanging the mouse on the corner of the video until and unless the trimming icon appears. So, you can drag ahead or in a backward direction at the endpoints of the video you want to trim.
Step: 3
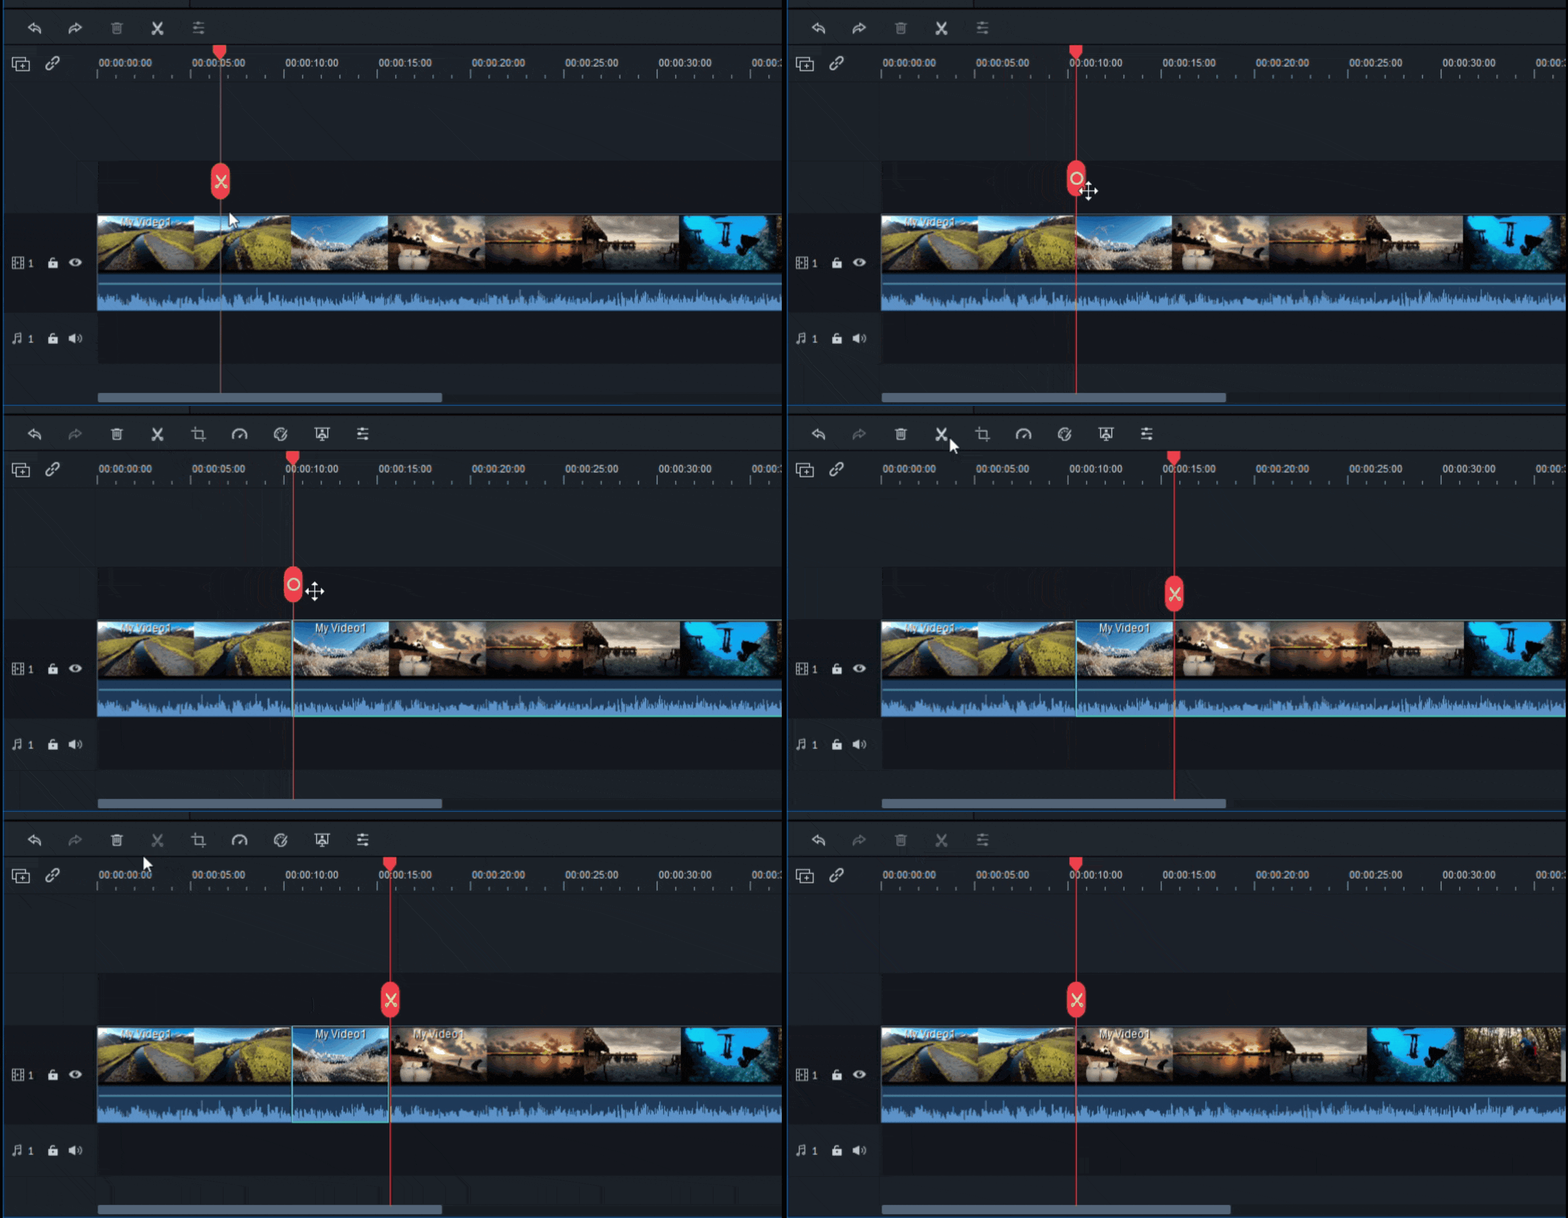
You don’t want the video parts in the centre of the video clips. First, split the video and delete it. For splitting the video, click on the icon of the scissor.
Step: 4
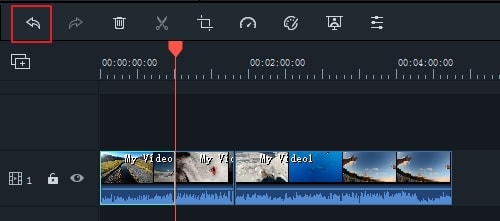
For deleting the part of the undesired part of the video, click on the dustbin icon. If there is any deletion by mistake, there is no need to worry about it. Click on the undo icon to make the video appear on the timeline again.
Part 2 - Splitting and trimming the clips in Wondershare Filmora:
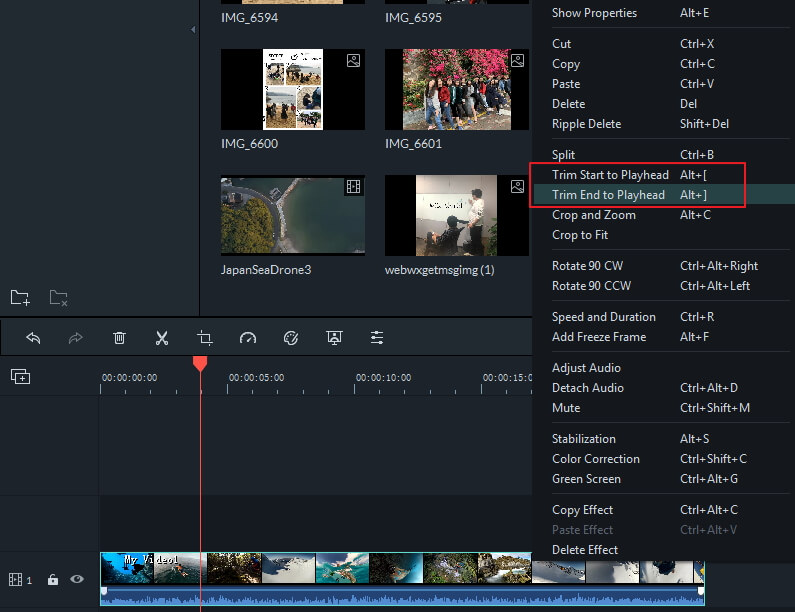
Apart from the above steps for trimming and splitting the videos in Wondershare Filmora, the position of the video has to be in the place head of the frame that you are willing to trim. Right-click on the clip and select the option of “Trim Start to Playhead or Trim End to Playhead “ for deleting the content of the video ahead or back of it.
In the latest version of the Wondershare Filmora, you can even trim the video without adding it to the timeline. A similar video can easily split multiple times and load only the required one. Go through the following steps to split the clips in a faster way:
- You can easily preview the video first from the library of your media files.
- Select the clip which you want to split or trim by selecting from the beginning till the end
- After dragging, you can view the trim section
- Keep repeating the steps mentioned above for splitting the videos

Although various editing software is available, Wondershare Filmora has to be on the top. It is the best choice to bring your imagination into reality, whether it is transitioning, applying the effects or importing/exporting the videos. All the options are suitable in front and visible on your timeline. Wondershare Filmora supports different operating systems as well. Even no proper training is required, so start using Wondershare Filmora today to get your editing done.
Step 2: Import and place the media file on the timeline from the library. This is the clip you want to split. Select the blade tool from where you want to split the clip. Use the timeline from the menu and go to Split Clip. Shortcut keys are also available that are Ctrl+\ or Cmd+\ or Cmd+B. Now the split clip is easily visible to you. You can use this clip wherever you want to use it.

Part 2- Splitting of more than one clip on various tracks:
You can also split the number of video and audio clips at the exact timings in DaVinci resolve.
Step 1: When there are piles of clips one after the other, the selection of both of the clips is essential, which have to be split. Keep moving the playhead to the exact area where there is a requirement for the changes.
Step 2: Just keep pressing Command or Control + \ keys, or click on timeline> Split Clip. The selected clips of audio and video get split together now. No more slitting of the clips individually. This option is more appropriate for you when creating and managing different parts of massive projects.

An easier way to split the video clips
Without any doubt, DaVinci resolve is an advanced level software for video editing at the professional level. Moreover, the pricing of DaVinci resolve is $299, and it shows that it is quite expensive for many people. Due to this, you need an economical solution that is Filmora Video Editor .
Most graphic designers and video editors recommend Wondershare Fimora because it is lighter for the systems. All the tools are simplified in using like trimming or splitting the clips. You can convert split video clips into other formats in Wondershare Filmora. Add and apply all the special effects on your videos and export them wherever you want.
For Win 7 or later (64-bit)
For macOS 10.14 or later
Features:
- Splitting or trimming of the video clips
- Removing the noise
- Addition of the transition effects
- Availability of controls for the audio, sound and video
- Separating the audio from the video
Part 1 - Splitting the clips in Wondershare Filmora
If you want to split the clips or trim some parts of the videos, Wondershare Filmora is the right choice. Below are detailed steps for trimming the videos quickly and easily.
Step :1
Drag or drop the files from Media Library or Click on “Import” after selecting the video clips to make the clip visible on the timeline. No need to worry regarding the formats as Wondershare Filmora is highly supportive towards it/

Step:2
Keep hanging the mouse on the corner of the video until and unless the trimming icon appears. So, you can drag ahead or in a backward direction at the endpoints of the video you want to trim.

Step: 3
You don’t want the video parts in the centre of the video clips. First, split the video and delete it. For splitting the video, click on the icon of the scissor.

Step: 4
For deleting the part of the undesired part of the video, click on the dustbin icon. If there is any deletion by mistake, there is no need to worry about it. Click on the undo icon to make the video appear on the timeline again.

Part 2 - Splitting and trimming the clips in Wondershare Filmora:
Apart from the above steps for trimming and splitting the videos in Wondershare Filmora, the position of the video has to be in the place head of the frame that you are willing to trim. Right-click on the clip and select the option of “Trim Start to Playhead or Trim End to Playhead “ for deleting the content of the video ahead or back of it.

In the latest version of the Wondershare Filmora, you can even trim the video without adding it to the timeline. A similar video can easily split multiple times and load only the required one. Go through the following steps to split the clips in a faster way:
- You can easily preview the video first from the library of your media files.
- Select the clip which you want to split or trim by selecting from the beginning till the end
- After dragging, you can view the trim section
- Keep repeating the steps mentioned above for splitting the videos

Although various editing software is available, Wondershare Filmora has to be on the top. It is the best choice to bring your imagination into reality, whether it is transitioning, applying the effects or importing/exporting the videos. All the options are suitable in front and visible on your timeline. Wondershare Filmora supports different operating systems as well. Even no proper training is required, so start using Wondershare Filmora today to get your editing done.
Step 2: Import and place the media file on the timeline from the library. This is the clip you want to split. Select the blade tool from where you want to split the clip. Use the timeline from the menu and go to Split Clip. Shortcut keys are also available that are Ctrl+\ or Cmd+\ or Cmd+B. Now the split clip is easily visible to you. You can use this clip wherever you want to use it.

Part 2- Splitting of more than one clip on various tracks:
You can also split the number of video and audio clips at the exact timings in DaVinci resolve.
Step 1: When there are piles of clips one after the other, the selection of both of the clips is essential, which have to be split. Keep moving the playhead to the exact area where there is a requirement for the changes.
Step 2: Just keep pressing Command or Control + \ keys, or click on timeline> Split Clip. The selected clips of audio and video get split together now. No more slitting of the clips individually. This option is more appropriate for you when creating and managing different parts of massive projects.

An easier way to split the video clips
Without any doubt, DaVinci resolve is an advanced level software for video editing at the professional level. Moreover, the pricing of DaVinci resolve is $299, and it shows that it is quite expensive for many people. Due to this, you need an economical solution that is Filmora Video Editor .
Most graphic designers and video editors recommend Wondershare Fimora because it is lighter for the systems. All the tools are simplified in using like trimming or splitting the clips. You can convert split video clips into other formats in Wondershare Filmora. Add and apply all the special effects on your videos and export them wherever you want.
For Win 7 or later (64-bit)
For macOS 10.14 or later
Features:
- Splitting or trimming of the video clips
- Removing the noise
- Addition of the transition effects
- Availability of controls for the audio, sound and video
- Separating the audio from the video
Part 1 - Splitting the clips in Wondershare Filmora
If you want to split the clips or trim some parts of the videos, Wondershare Filmora is the right choice. Below are detailed steps for trimming the videos quickly and easily.
Step :1
Drag or drop the files from Media Library or Click on “Import” after selecting the video clips to make the clip visible on the timeline. No need to worry regarding the formats as Wondershare Filmora is highly supportive towards it/

Step:2
Keep hanging the mouse on the corner of the video until and unless the trimming icon appears. So, you can drag ahead or in a backward direction at the endpoints of the video you want to trim.

Step: 3
You don’t want the video parts in the centre of the video clips. First, split the video and delete it. For splitting the video, click on the icon of the scissor.

Step: 4
For deleting the part of the undesired part of the video, click on the dustbin icon. If there is any deletion by mistake, there is no need to worry about it. Click on the undo icon to make the video appear on the timeline again.

Part 2 - Splitting and trimming the clips in Wondershare Filmora:
Apart from the above steps for trimming and splitting the videos in Wondershare Filmora, the position of the video has to be in the place head of the frame that you are willing to trim. Right-click on the clip and select the option of “Trim Start to Playhead or Trim End to Playhead “ for deleting the content of the video ahead or back of it.

In the latest version of the Wondershare Filmora, you can even trim the video without adding it to the timeline. A similar video can easily split multiple times and load only the required one. Go through the following steps to split the clips in a faster way:
- You can easily preview the video first from the library of your media files.
- Select the clip which you want to split or trim by selecting from the beginning till the end
- After dragging, you can view the trim section
- Keep repeating the steps mentioned above for splitting the videos

Although various editing software is available, Wondershare Filmora has to be on the top. It is the best choice to bring your imagination into reality, whether it is transitioning, applying the effects or importing/exporting the videos. All the options are suitable in front and visible on your timeline. Wondershare Filmora supports different operating systems as well. Even no proper training is required, so start using Wondershare Filmora today to get your editing done.
Step 2: Import and place the media file on the timeline from the library. This is the clip you want to split. Select the blade tool from where you want to split the clip. Use the timeline from the menu and go to Split Clip. Shortcut keys are also available that are Ctrl+\ or Cmd+\ or Cmd+B. Now the split clip is easily visible to you. You can use this clip wherever you want to use it.

Part 2- Splitting of more than one clip on various tracks:
You can also split the number of video and audio clips at the exact timings in DaVinci resolve.
Step 1: When there are piles of clips one after the other, the selection of both of the clips is essential, which have to be split. Keep moving the playhead to the exact area where there is a requirement for the changes.
Step 2: Just keep pressing Command or Control + \ keys, or click on timeline> Split Clip. The selected clips of audio and video get split together now. No more slitting of the clips individually. This option is more appropriate for you when creating and managing different parts of massive projects.

An easier way to split the video clips
Without any doubt, DaVinci resolve is an advanced level software for video editing at the professional level. Moreover, the pricing of DaVinci resolve is $299, and it shows that it is quite expensive for many people. Due to this, you need an economical solution that is Filmora Video Editor .
Most graphic designers and video editors recommend Wondershare Fimora because it is lighter for the systems. All the tools are simplified in using like trimming or splitting the clips. You can convert split video clips into other formats in Wondershare Filmora. Add and apply all the special effects on your videos and export them wherever you want.
For Win 7 or later (64-bit)
For macOS 10.14 or later
Features:
- Splitting or trimming of the video clips
- Removing the noise
- Addition of the transition effects
- Availability of controls for the audio, sound and video
- Separating the audio from the video
Part 1 - Splitting the clips in Wondershare Filmora
If you want to split the clips or trim some parts of the videos, Wondershare Filmora is the right choice. Below are detailed steps for trimming the videos quickly and easily.
Step :1
Drag or drop the files from Media Library or Click on “Import” after selecting the video clips to make the clip visible on the timeline. No need to worry regarding the formats as Wondershare Filmora is highly supportive towards it/

Step:2
Keep hanging the mouse on the corner of the video until and unless the trimming icon appears. So, you can drag ahead or in a backward direction at the endpoints of the video you want to trim.

Step: 3
You don’t want the video parts in the centre of the video clips. First, split the video and delete it. For splitting the video, click on the icon of the scissor.

Step: 4
For deleting the part of the undesired part of the video, click on the dustbin icon. If there is any deletion by mistake, there is no need to worry about it. Click on the undo icon to make the video appear on the timeline again.

Part 2 - Splitting and trimming the clips in Wondershare Filmora:
Apart from the above steps for trimming and splitting the videos in Wondershare Filmora, the position of the video has to be in the place head of the frame that you are willing to trim. Right-click on the clip and select the option of “Trim Start to Playhead or Trim End to Playhead “ for deleting the content of the video ahead or back of it.

In the latest version of the Wondershare Filmora, you can even trim the video without adding it to the timeline. A similar video can easily split multiple times and load only the required one. Go through the following steps to split the clips in a faster way:
- You can easily preview the video first from the library of your media files.
- Select the clip which you want to split or trim by selecting from the beginning till the end
- After dragging, you can view the trim section
- Keep repeating the steps mentioned above for splitting the videos

Although various editing software is available, Wondershare Filmora has to be on the top. It is the best choice to bring your imagination into reality, whether it is transitioning, applying the effects or importing/exporting the videos. All the options are suitable in front and visible on your timeline. Wondershare Filmora supports different operating systems as well. Even no proper training is required, so start using Wondershare Filmora today to get your editing done.
Best Animated Text Generator
Text in a video has become an essential part to highlight important points so that the viewers get the message you want to convey through your video. Showing static text may not always get the attention of the viewers immediately. Subconsciously, they may ignore or forget the text you have displayed in your video very quickly. That is where animated text can be impactful.
When you show animated text in your video, it grabs the attention of the viewers instantly and they get intrigued to see the text displayed. Besides, if the animation is eye-catching, it is very likely that they will remember the text shown in the video. In order to create animated text, you will need an animated text generator. Here is the list of the top 10 best animated text makers.
1. Filmora
Wondershare Filmora is an extremely popular text animation software where there are literally unlimited animated text templates available. The templates are categorized so that you can get the appropriate text animated depending on your video category. Most importantly, you will get all the latest and trendy text animations.

The user interface is extremely intuitive and hence, it is equally suitable for amateurs and professionals. The software is available for both Mac and Windows users. You can simply drag and drop the text animations on your video and edit them instantly to get the perfect outcome. Here are some key features of Wondershare Filmora.
- Wide range of text animation templates
- Different categories transitions and effects
- Choose from variety of graphical elements
- Easy to operate with intuitive user interface
- Record your screen and webcam with greenscreen
- Keyframing, motion tracking, and auto reframe
- Extensive audio editing, color matching and correction
- Edit 4K videos, export in any desired file format
2. Adobe Express
Adobe has a wide range of video editors and it is the most reliable brand among professional video editors. Adobe Express is a premium text animation online tool where you can add animated text to your photos instantly and export them as MP4 file. Therefore, the online tool is extremely useful for social media enthusiasts. However, the platform does not support adding animated text to video.

Adobe Express is labelled as the branding tool where you can create trendy images with templates and choose from different animated text presets. You can access the online tool from all devices from your web browser. Most importantly, it is a completely free animated text generator from Adobe and you can add animated text to your images within a few minutes.
- Funky and trendy animated text templates
- Wide range of text styles and effects
- Different color presets for colourful video
- Several text animation styles to choose from.
- Different aspect ratios for different videos
3. Animaker
Animaker is one of the leading animated text makers online. You can make short videos with animated text just by drag and drop technique. The user interface is super easy to operate and it is the reason behind its popularity. There are unlimited templates to choose from and get started with your animated text video. In fact, the platform has the best photo and video asset library that you can use in your video to make it more attractive.

You can publish your video in 4K resolution and resize them for different platforms where you are going to publish them. Unlike Adobe Express, you can add music to your animated text videos. There are also characters that you can use in your text animation for eye-catching video making. Here are the key features of Animaker.
- Drag and drop user interface
- Tons of ready-made templates
- Millions of stock photos and videos
- Access to stock music library
- Simple but powerful character builder
- Edit 4K videos and adjust aspect ratio
4. Textanim
Textanim is a true animated text generator GIF online. All you need to do is type your text and select a text style from the templates available. Thereafter, you can adjust certain text style and format such as background color, animation motion direction, animation duration and likewise. After setting all the parameters, click on Generate button and you will see the animated text generated on your screen. You can simply download the animated text in GIF format or you can get embed code to integrate anywhere including social media platforms. Here are the key features of Textanim.
- Create limited but beautiful text animations
- Tons of fonts and text styles to choose from
- Customize animation and background
- Supports different native language for text
- Export in GIF as well as get embed code

5. MakerMoon
MakerMoon comes with a dedicated animated text generator even though there is a full-featured video editor available online. The platform is suitable for creating animated text for websites that you can use for headers and titles. Choose from the available animated text templates and customize them as per your requirements. You can animate words as well as individual letters. You can save animated text video in GIF as well as get embed code. Here are the key features of MakerMoon.
- Different animation effects to select from
- Customize certain parameters of animation
- Different text shadow styles and formats
- Several fonts, animate letters and words
- Get multiple slides and shuffle animation

6. Loading.io
Loading.io is a dedicated animated text generator GIF online platform. There are demo effects available that you can choose and customize as per your preference. The user interface is as easy as it can get and hence, it is suitable for amateurs as well. Starting from color palette and background color to font style and speed of animation, you can edit everything so that you can personalize the animated text. You can save your animated text in different file formats including GIF. There are several advanced options available to customize the animation on the text. Here are the key features of Loading.io.
- Choose from different templates to get started
- Different types of text animations to pick from
- Customize almost every aspect of the templates
- Advanced options to edit animation and change parameters
- Different output file formats to save your animated text video
- Super intuitive user interface and embed animated text in websites

7. FlexClip Animated Text Generator
FlexClip is a renowned online video editor and it features a free animated text generator. You can create engaging and attractive animated text video conveniently. There are different categories of customizable text animation templates available to get started. In fact, there are different text styles available with animations that you can apply to your video and customize them instantly.
There is a wide array of stock photos and videos along with music that you can use on your video for better content and traction. There are also hundreds of fonts to choose from and you can create promo and storyboard videos instantly. Here are the key features of FlexClip Animated Text Generator.
- Wide array of animation text templates
- Different text styles in different categories
- Dynamic graphical elements to enhance text
- Free stock assets to enhance video content
- You can upload your customized fonts and styles

8. RenderForest Animated Text Generator
RenderForest is a stylish animated text generator that is highly useful for creating brand videos. There are different templates and packs available to pick from to get started. The templates are extremely trendy and eye-catching and there is a high chance that your video will get extremely high traction. You can create engaging promo for social media platforms. You can customize the templates and change font styles as well as add music to enhance the video content. Here are the key features of RenderForest Animated Text Generator.
- Several stunning animated text templates
- Stylish typography which you can personalize
- Add stock music to your video
- Add different scenes to the templates
- Change color presets and palettes
- Download HD videos in different file format

9. TextStudio
TextStudio is a popular 3D text animation generator platform. There are hundreds of text templates and fonts to pick from to get started with your animated text creation. There are not many dedicated and legitimate 3D text animation generators available online. In fact, you can also create 3D logos with the text generator for social media platforms.
There are literally unlimited 3D text animation templates. The user interface is easy to operate and you can customize the texts and animations quickly. The only issue is that the platform has annoying ads across the website. The platform supports many native languages in which you can create text animations. Here are the key features that stand out for TextStudio.
- Unlimited stunning 3D text templates
- Different text styles available to apply
- Choose from different animations
- Supports HD video creation with customized background
- Supports multiple native languages
- Save animated text video in different file formats

10. Kapwing
You can create stunning animated text videos with Kapwing animated text video editor. Kapwing is a full-featured online video editor and you can choose from various templates available. Thereafter, you can customize them as per your requirements. Alternatively, you can upload your video and add different animated text effects to enhance your video content. In fact, you can create animated text videos from scratch for different devices and platforms. Here are the key features of Kapwing animated text video editor.
- Choose from a wide range of animated text templates.
- Select from different text styles and add them to your video.
- Different categories of video elements and animations.
- Add audio effects to animated text for better impact.
- Wide range of graphical elements to enhance text content.

Editor’s Pick: Wondershare Filmora
If you are serious about adding animated text to your video so that your video gets attention and engagement, you have to opt for Filmora. No other animated text generator in the above list has as many animated text templates as Filmora. Most importantly, the templates are trendy and modern to get immediate attention from the viewers. You can customize them to fit seamlessly in your video.
You can create customized animated text with keyframing and motion tracking. Besides, you can add audio effects while showing animated text to make it more impactful. Moreover, there are unlimited effects and elements that will enhance your animated text. You can save you video in any resolution, aspect ratio, and file format. We highly recommend Wondershare Filmora as the text animation software for designing stunning animated text for your video.
The Verdict
Getting animated text for your video is no more a job of experts. You can generate animated texts and create short videos that you can upload on social media platforms. Besides, you can choose from ready-made templates and create professional videos instantly. If you want to add animated text to your video, we recommend Wondershare Filmora for its wide range of animated text effects and super intuitive user interface.
Free Download For Win 7 or later(64-bit)
Free Download For macOS 10.14 or later
Top 11 Best Video Editing Apps for iPhone
Videography is an art, whether done professionally or just for fun. It includes many phases from pre-production to post-production and video editing is one of its important aspects. It is a gamechanger, as most of the mistakes done during production can be fixed in editing.
Video editing is done on large scale for film industries which require expensive and powerful computers but we won’t about them now. As video editing doesn’t only depend on powerful softwares and expensive computers, Skills play a vital role in video editing. A skilled artist on a mobile phone can create better content than a beginner with an expensive PC.
Therefore, here we will talk about small-scale editing which can be done on mobile phones and especially iPhones. Considering iPhones as they are one of the most common devices used by vloggers and small filmmakers. As a mobile video editor, you can edit your clips anywhere you want. Therefore editing videos on a go is quite important. So we have selected some top iPhone video editors for you which are as following:
- Filmora Go
- Free iPhone Video Editors
- Adobe Premiere Rush
- CapCut
- iMovie
- GoPro-Quik
- VN Video Editor
- Paid iPhone Video Editors
- Kinemaster
- Power Director
- LumaFusion
- InShot
- VivaCut
Filmora Go:
It is available on IOS and Android both.
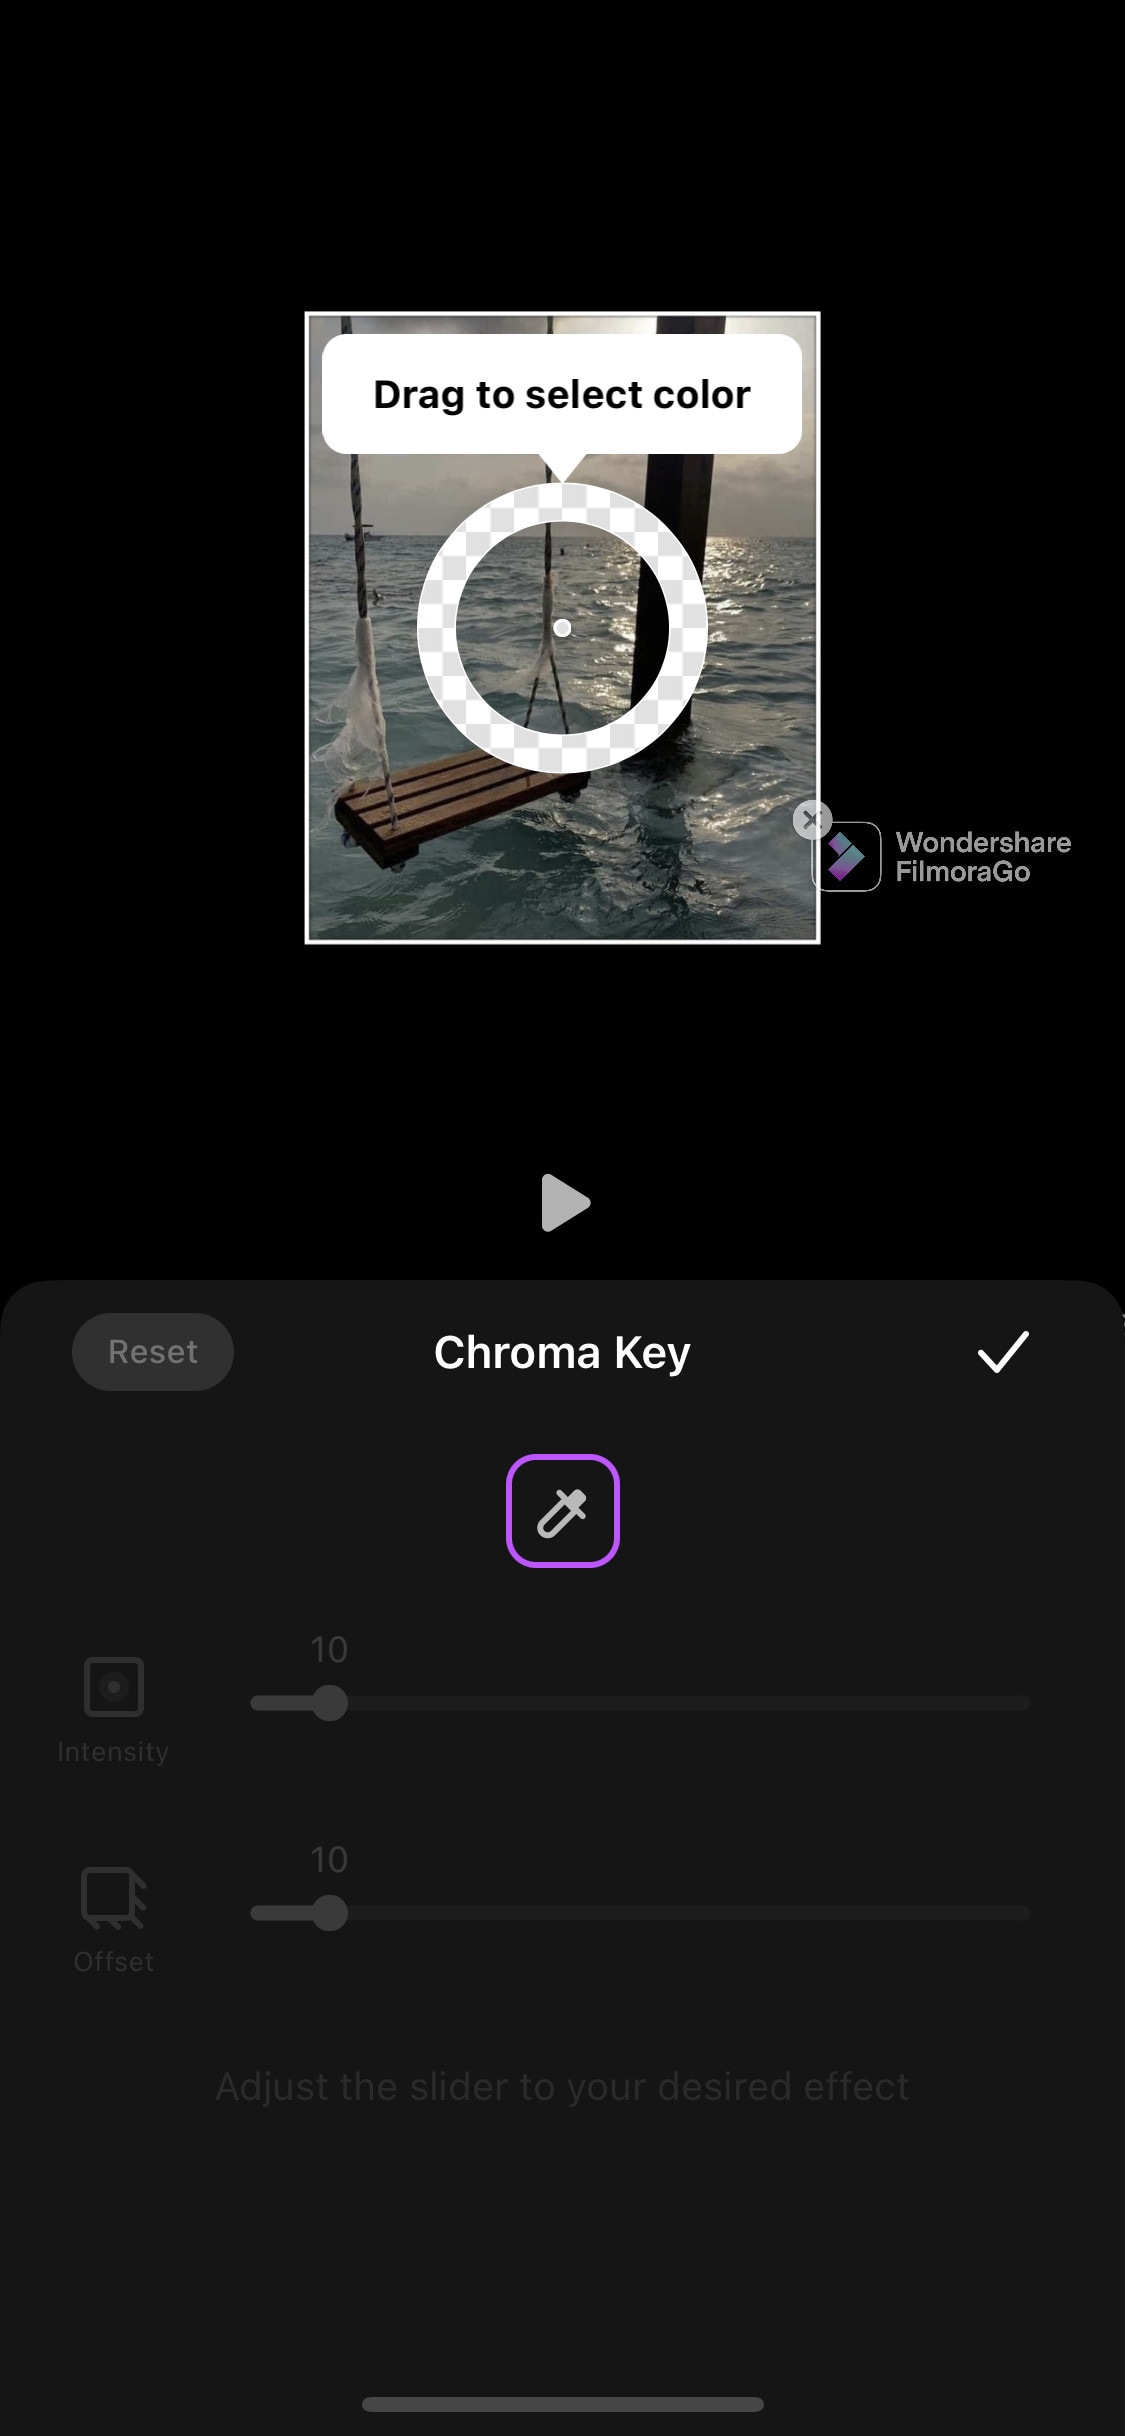
Apart from having a professional video editor for PC, Wondershare has also introduced a video editor for mobile phones. Filmora Go is an amazing video editor, with many cool features such as chroma key, mask, keyframing, blending, e.t.c. It is fast and easy to use with built-in effects, transitions, and presets to speed up the editing process. It is a paid video editor but you can try it for free, free trial includes most of the features but it leaves a watermark on export.
~Features:
- Has speed curves for smooth speed ramping.
- Supports multiple images and video layers.
- Have many presets and filters for fast pace editing.
- Have cool features like chroma key, masking, keyframing, e.t.c.
- Supports “Pixabay’s” stock library.
~Cons:
- Its UI doesn’t support editing in landscape orientation.
- It doesn’t support 4k video resolution.
~Steps:
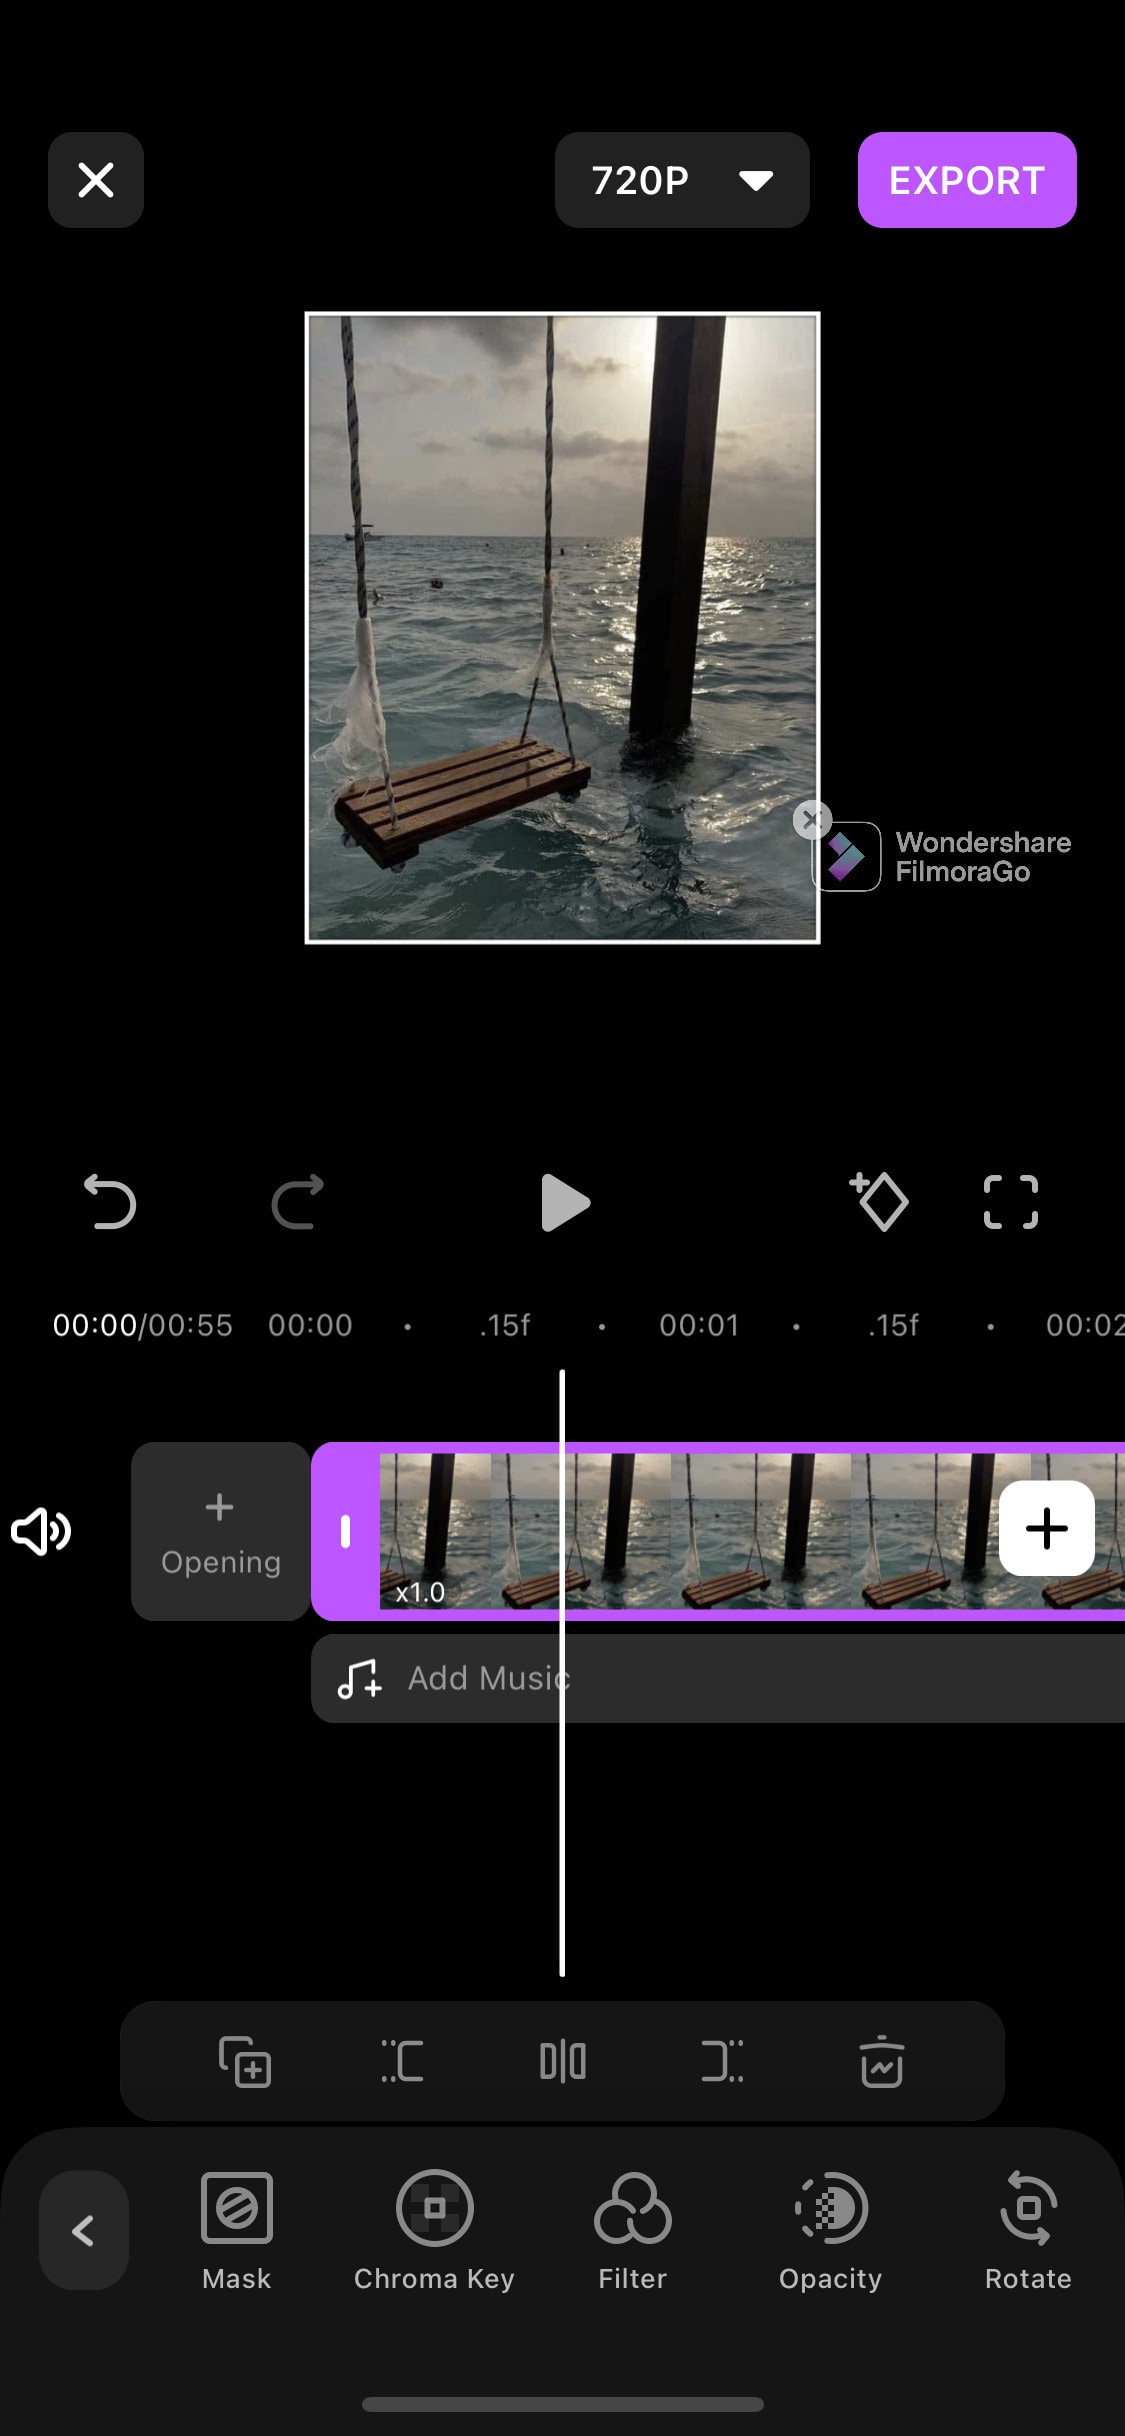
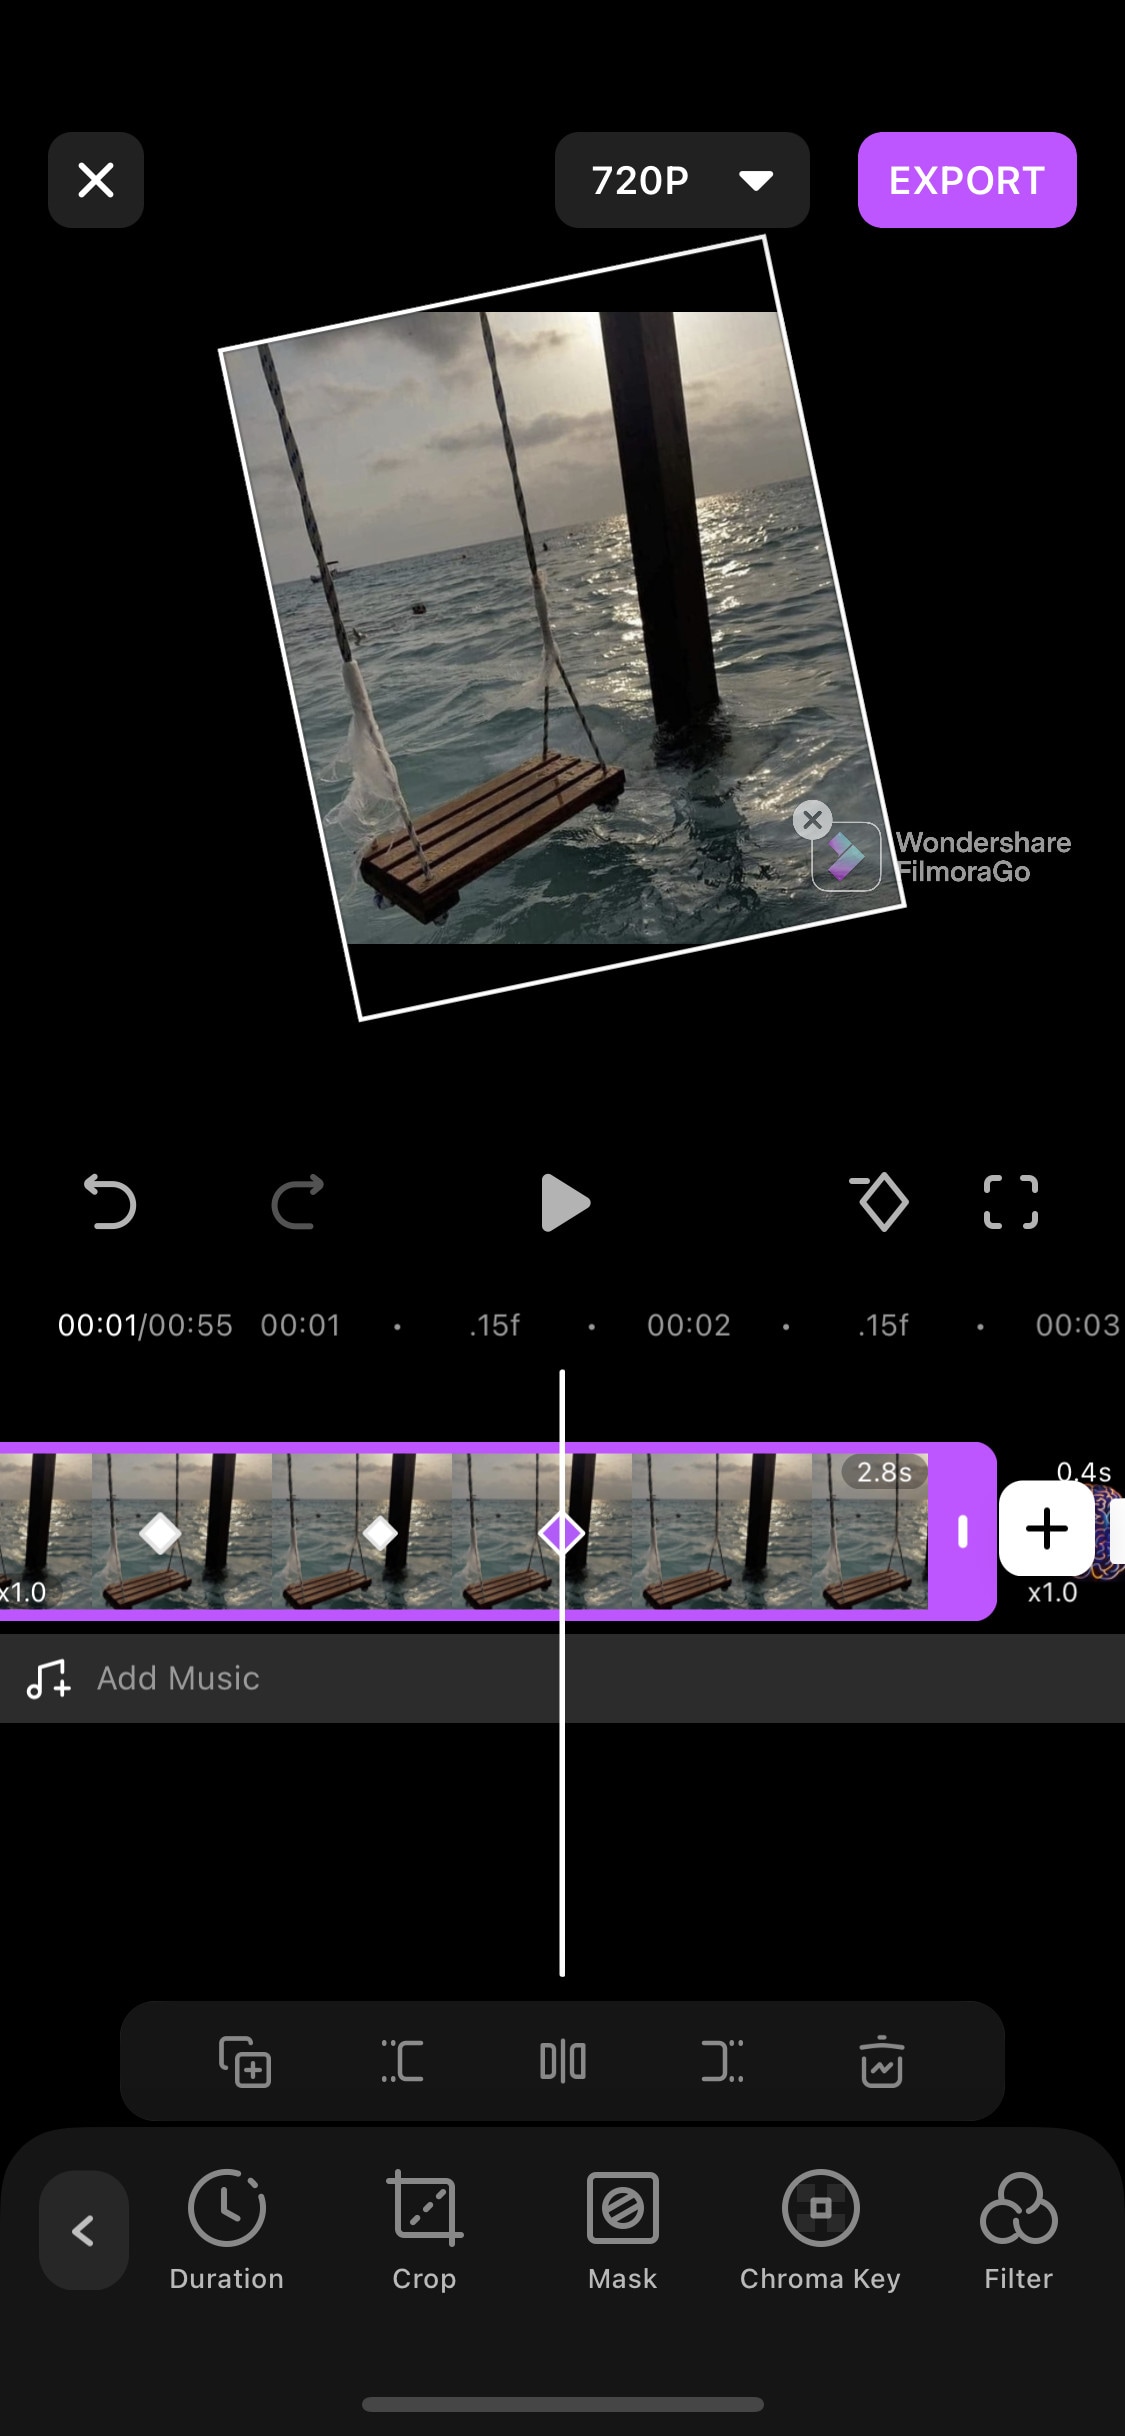
Import: Open Filmora Go, Click “New project” to start a new project, or Choose the previous one from the “Draft” portion. Select videos or images to import to your timeline. Hold and drag the clip to change its arrangement.
Edit: You can add text, effects, stickers, layers, e.t.c. by clicking their icon, present on the bar at the bottom.
Click the “PiP” icon to add image or video layers, you also can add multiple layers.
Select a clip to edit it. Different editing tools appear on the bottom bar. Here you can change its opacity, its speed, or add animations.
Effects: Click the “Effects” icon to open the effects menu. Select an effect to apply to your clip.
Click the white box between two clips to add transitions.
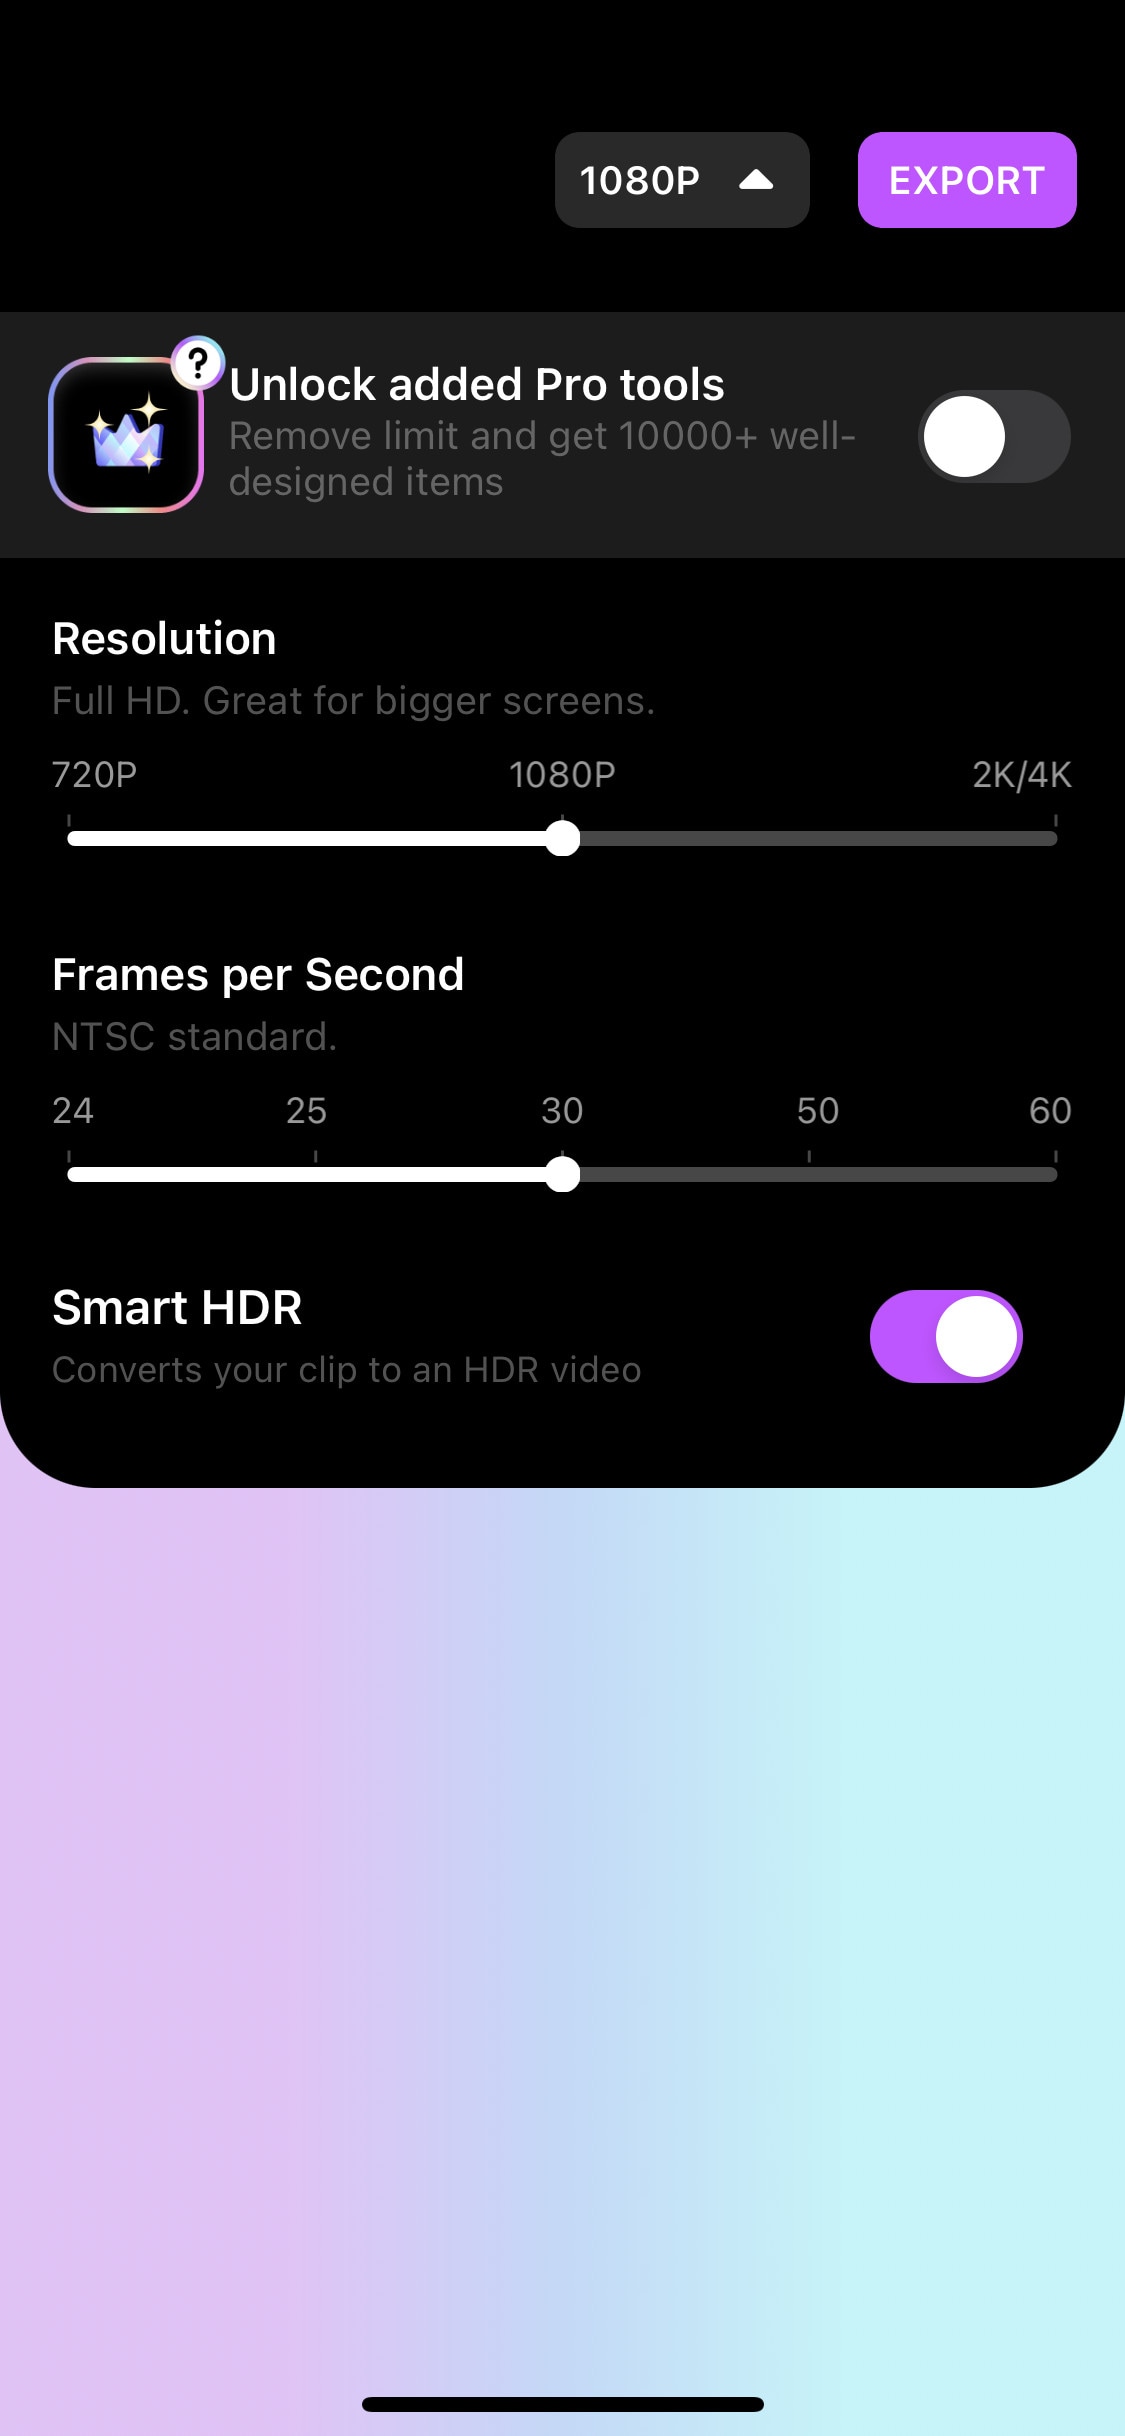
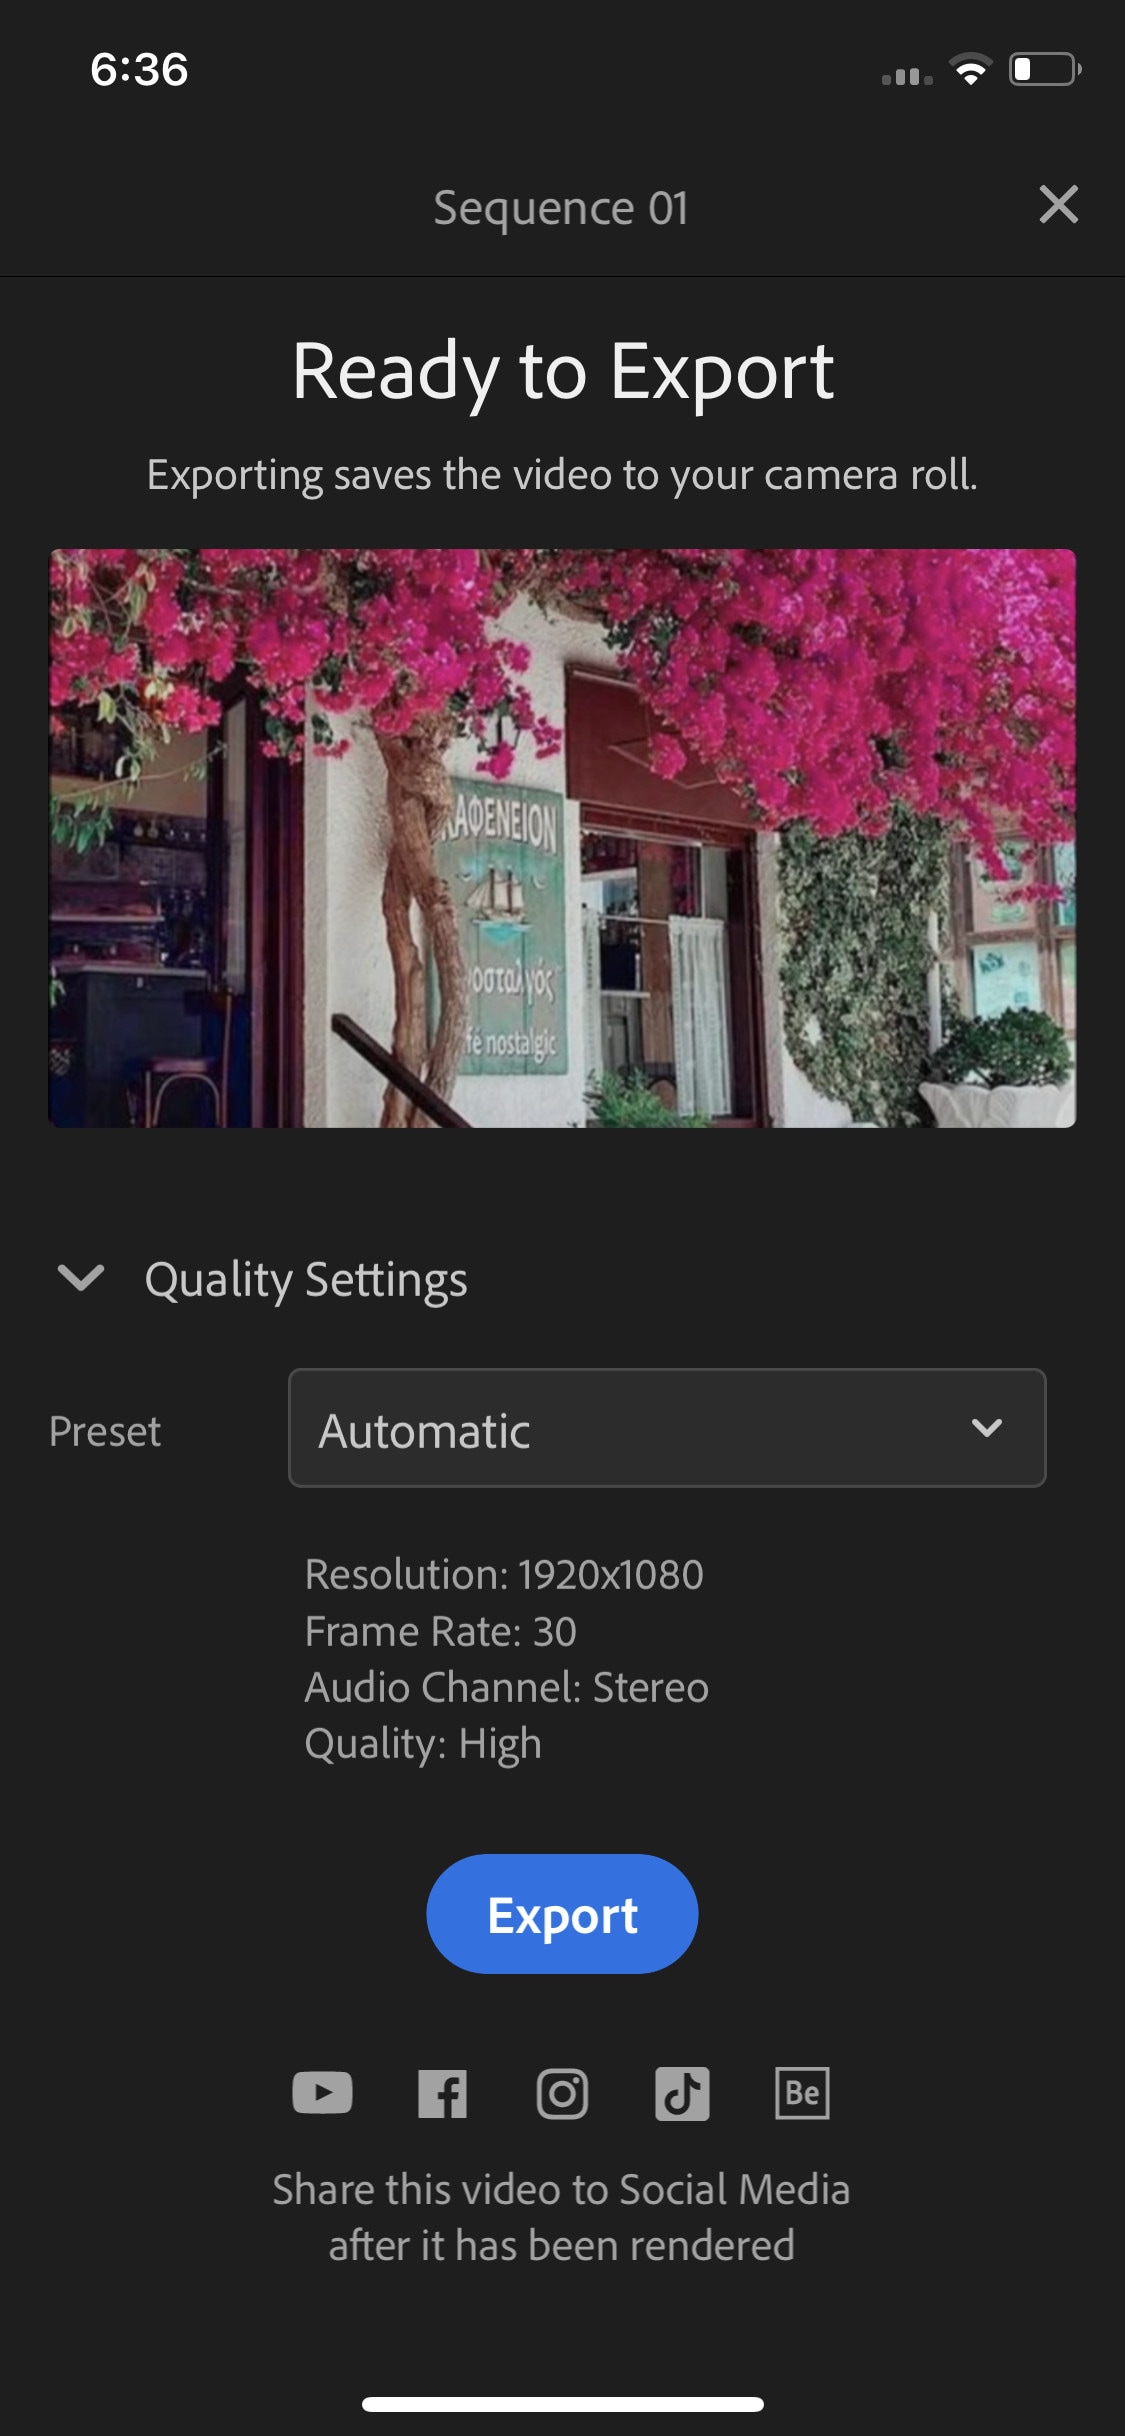
Export: Click the “Export” button to export your file. Select your desired resolution and frame rate to export your clip.
Some Free iPhone Video Editors:
If you do video editing rarely or do just basic video editing then it is useless to purchase paid video editors. Even if you are a content creator but tight on budget or new to this field, you can use free video editing softwares and save your cash for other pieces of equipment.
So, here we have mentioned some free video editors for you. Some of these are quite powerful and can do advanced editing while others are simple but easy to use.
Adobe Premiere Rush:
It is available on IOS and Android both.
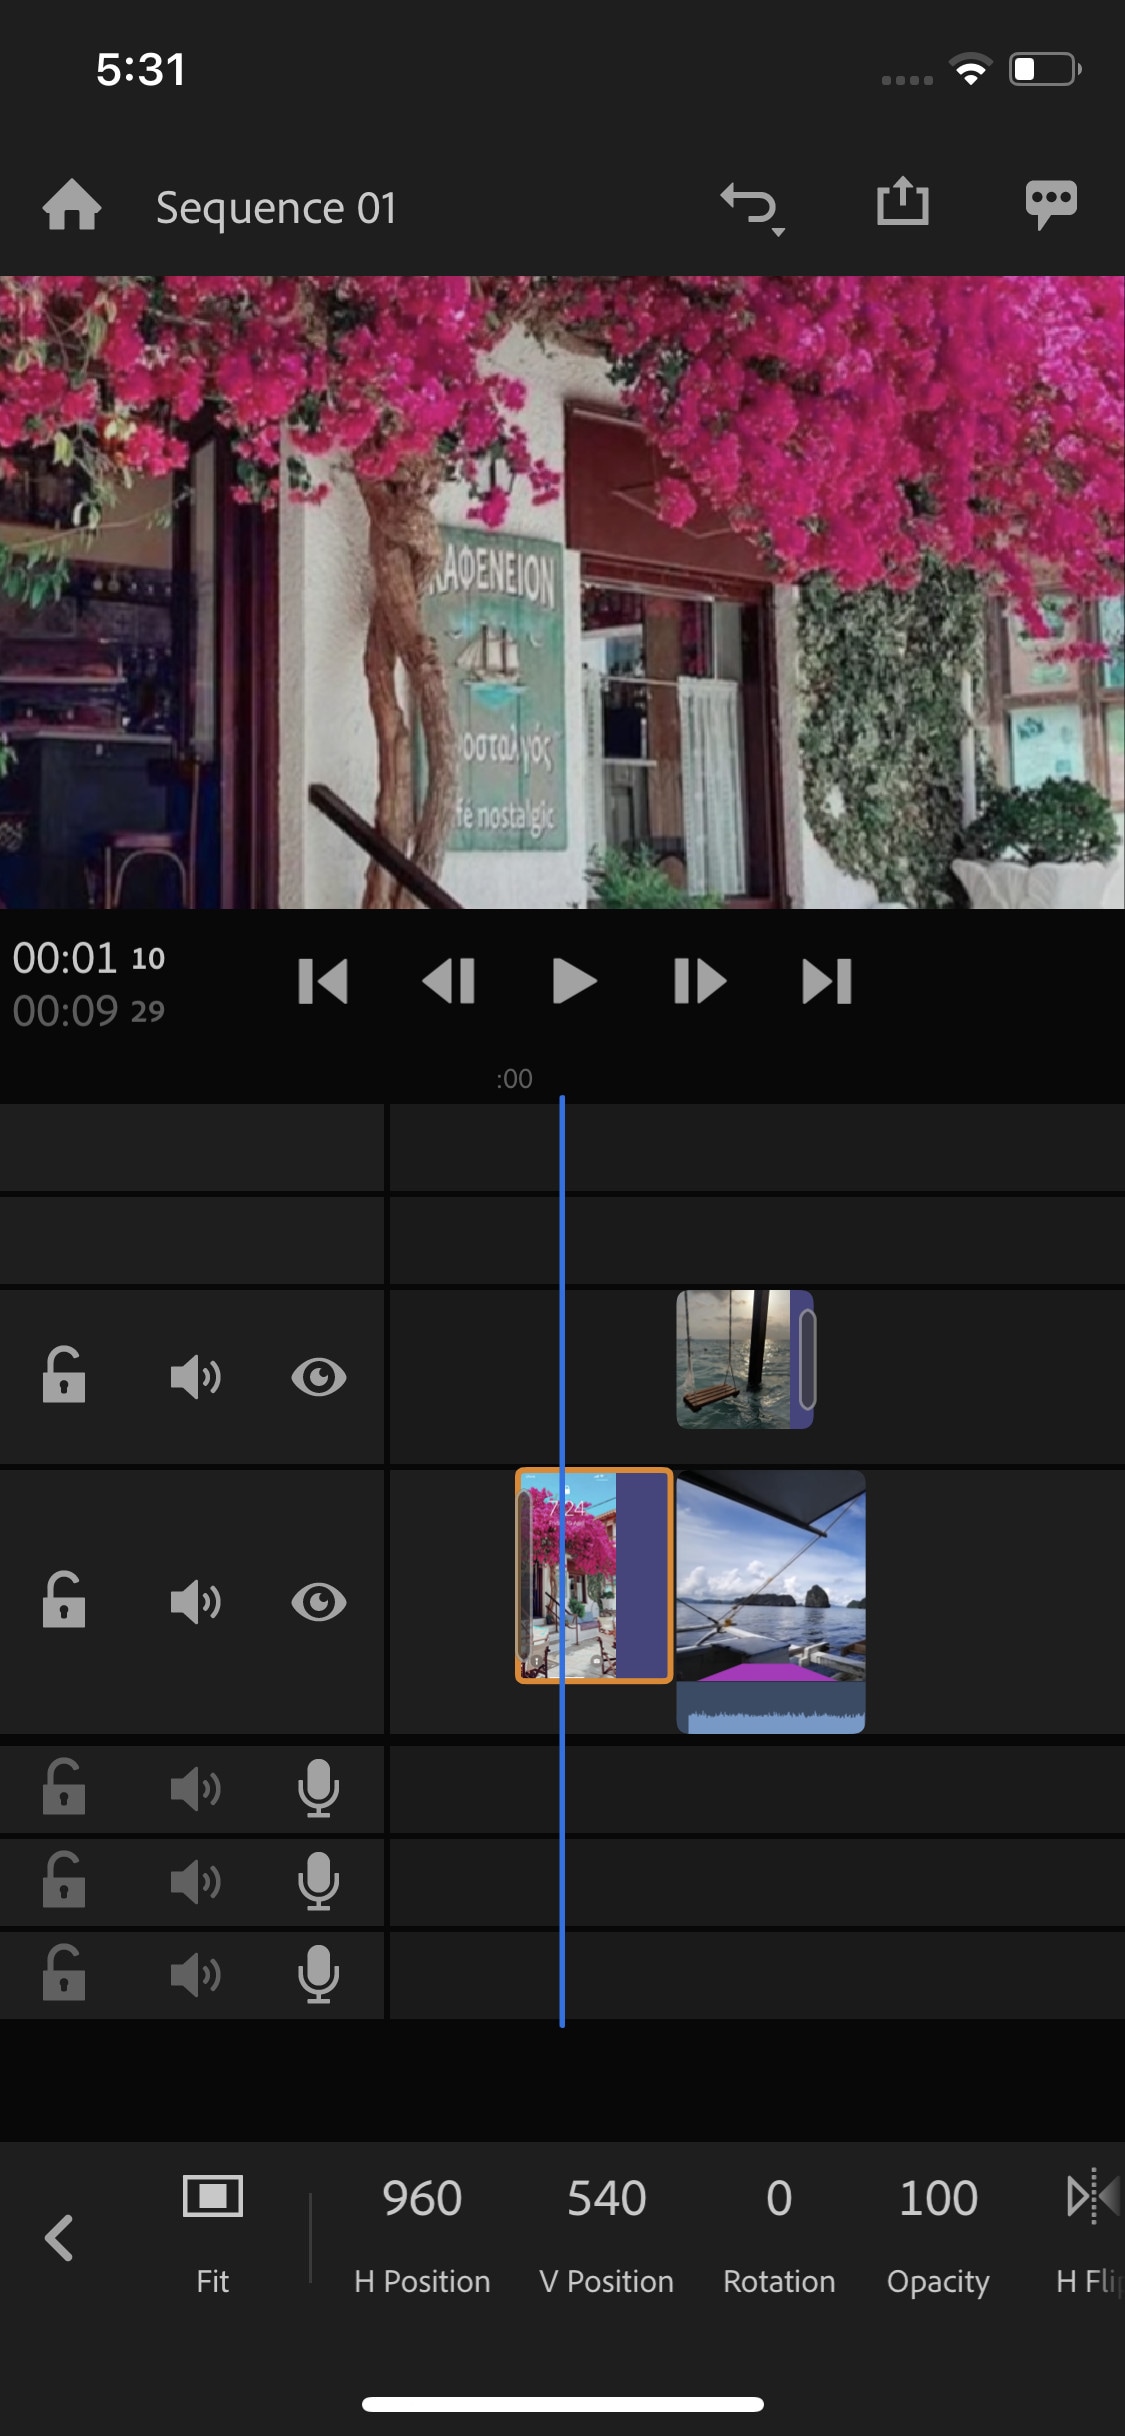
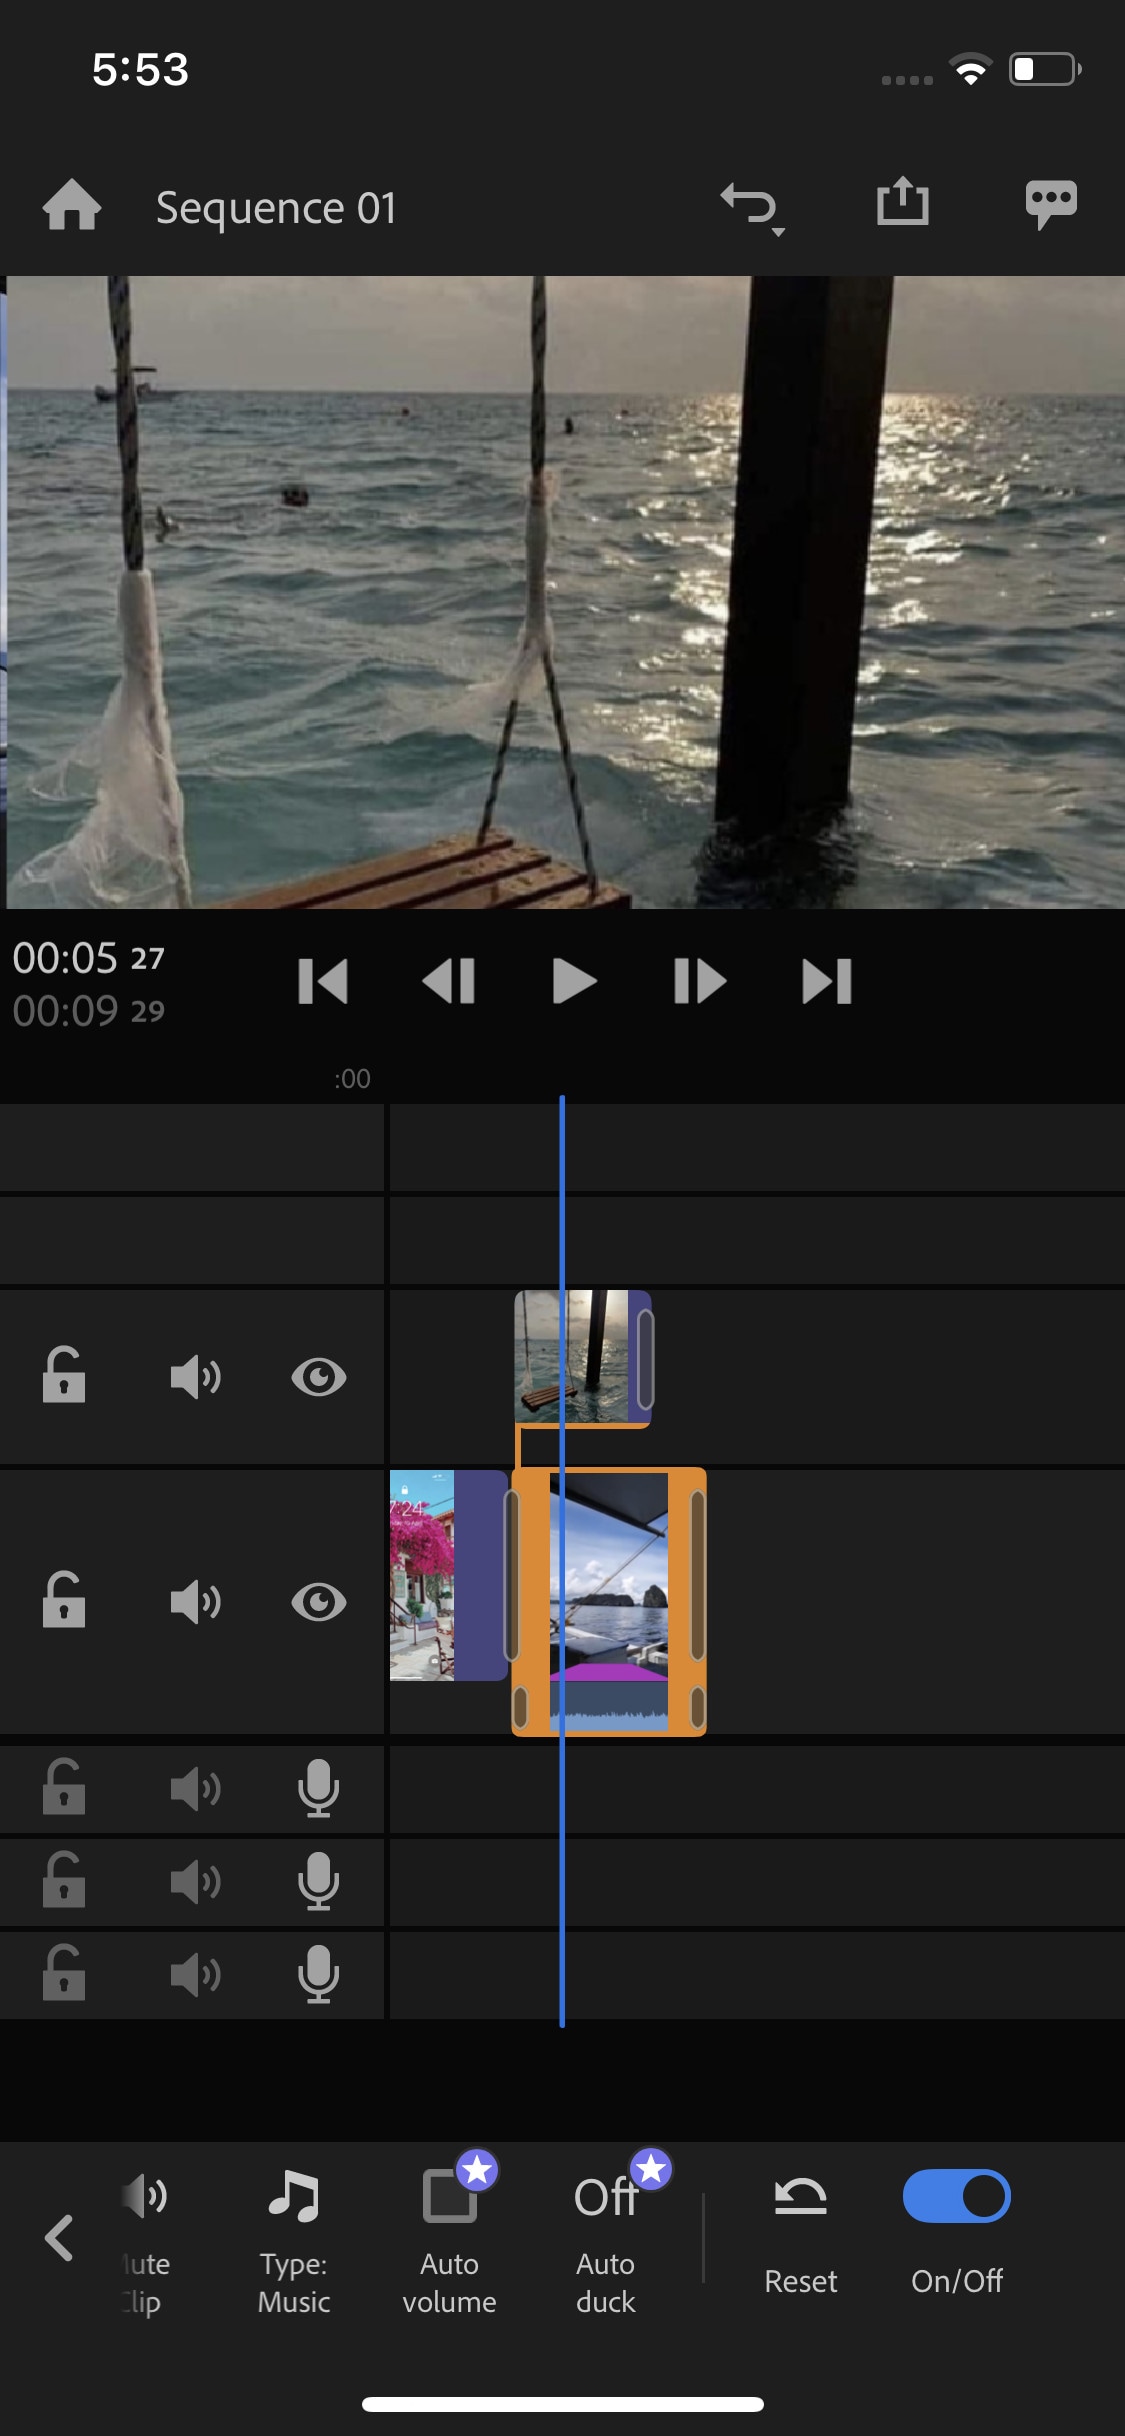
Whether you are a beginner or a content creator using mobile phones or PCs for editing, you may have heard of Adobe softwares. It is a computer software company which makes powerful softwares for different purposes. Like premiere pro, they have designed a compact version for phones named “Premiere Rush”. It is a free video editor that has all the tools needed for video editing, from video effects to color grading and audio editing. Its UI is a bit similar to PC video editors. It is a free video editor with no watermarks. Although it takes some time to understand it. But once mastered, you can do editing quickly.
~Features:
- It is a free video editor with no watermark.
- It supports up to 4K resolution at 60fps.
- You can extract audio and can do voiceover directly from the software.
- It has hundreds of filters, overlays, and title designs.
- It has basic color grading tools.
- It also has a motion tracking feature. (in Paid version)
- It supports multiple audio, video, and text layers.
~Cons:
- It only runs on high-end devices. ( It is not supported in most mid-range phones)
- Not suitable for beginners. Its UI is quite hard to understand.
- Doesn’t have common features like the chroma key, masking, e.t.c.
~Price:
Its Premium version is available for 9.99/month. It includes some premium features. Or you can purchase the “All Apps Bundle” at $54.99/month for the annual plan.
CapCut:
It is available on IOS and Android both.
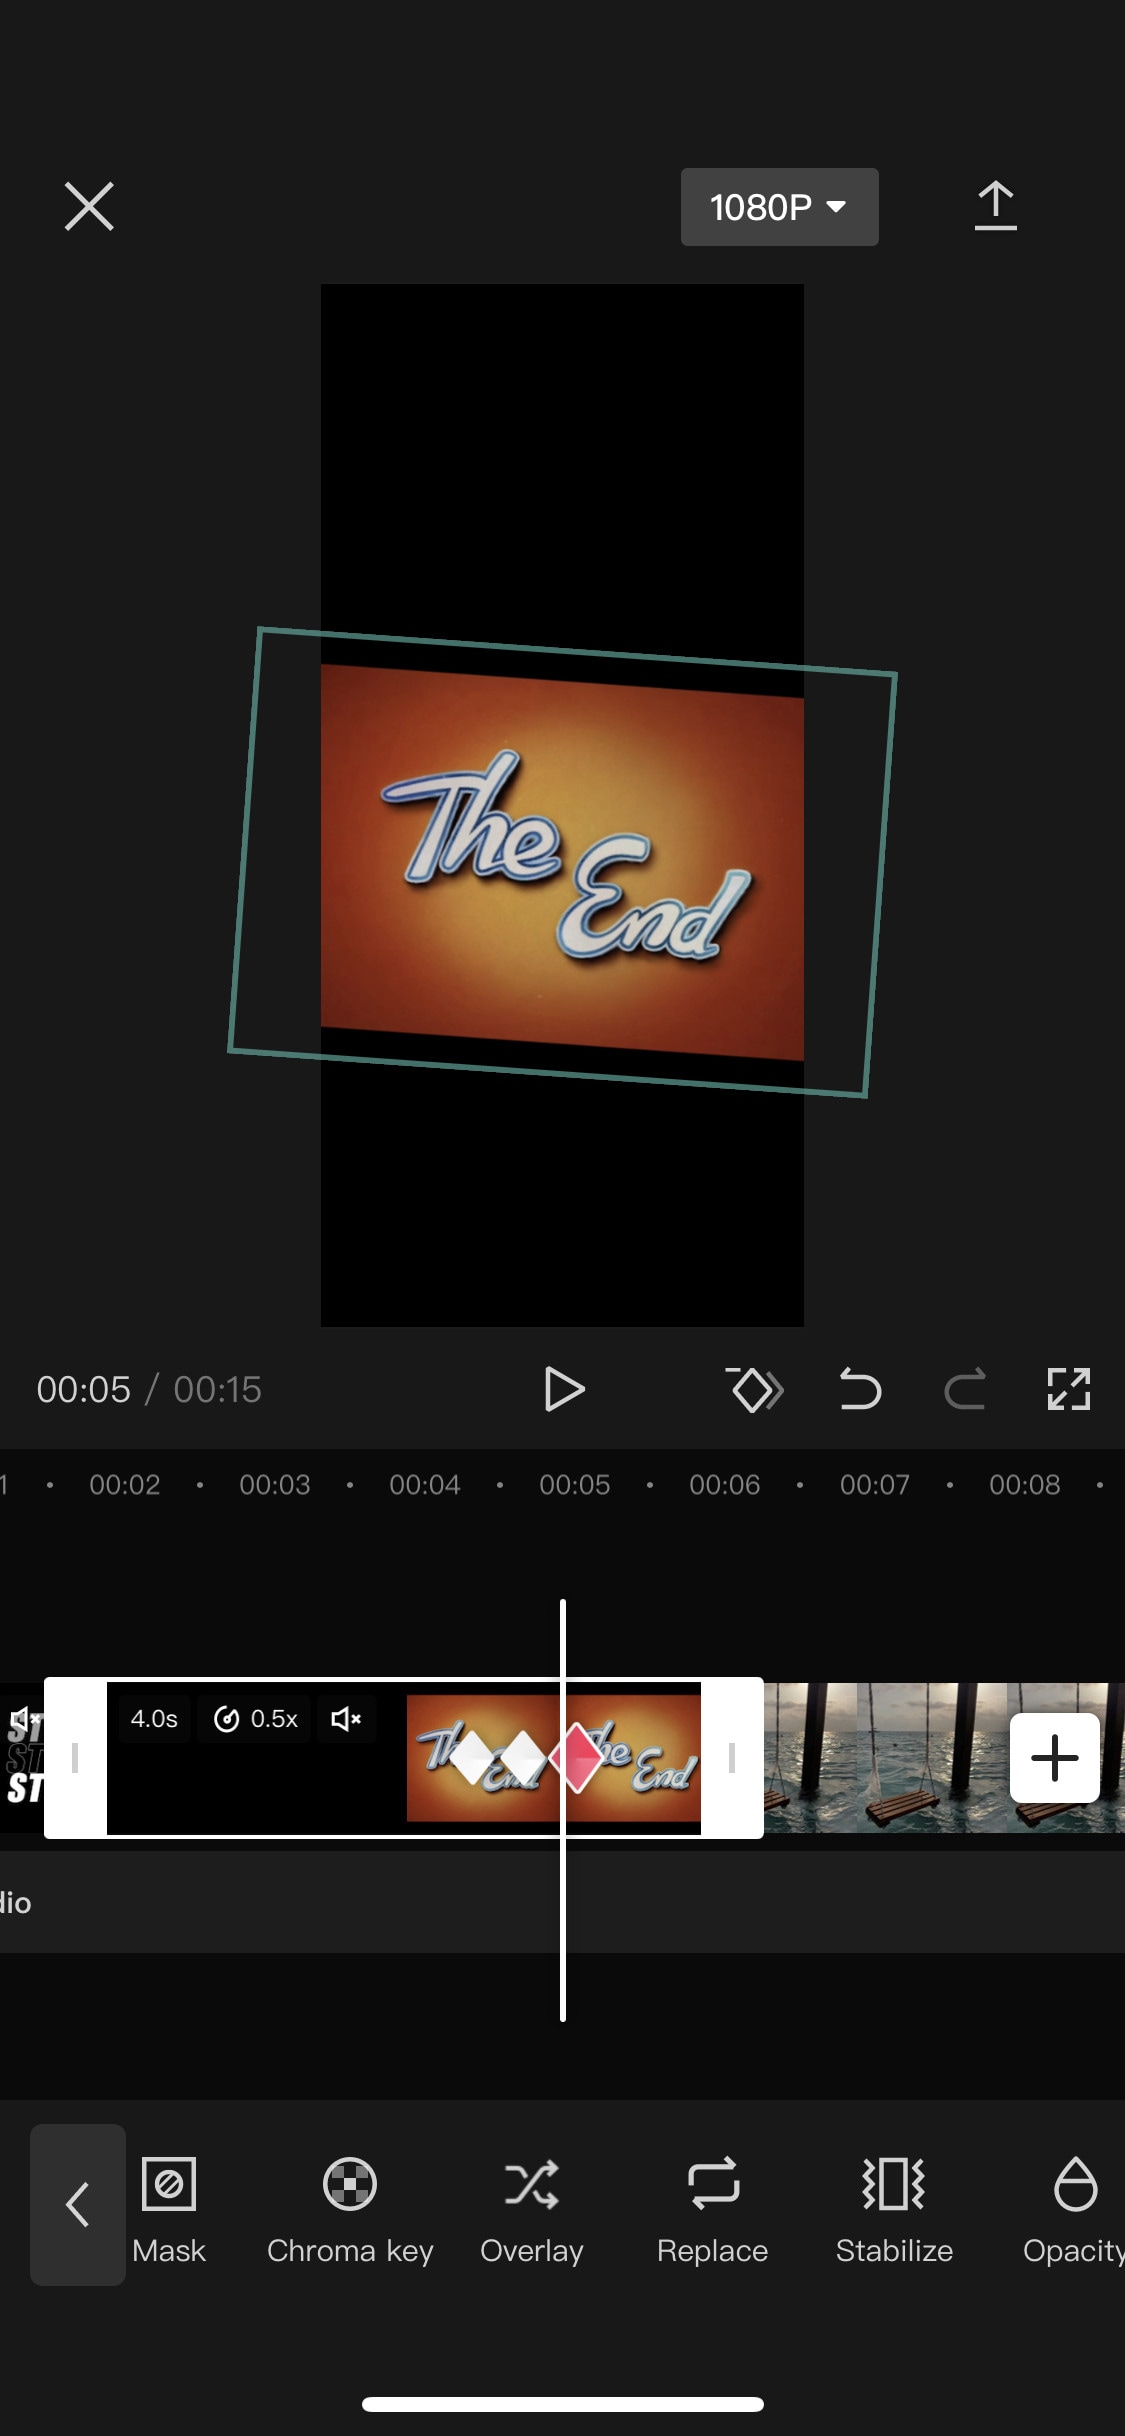
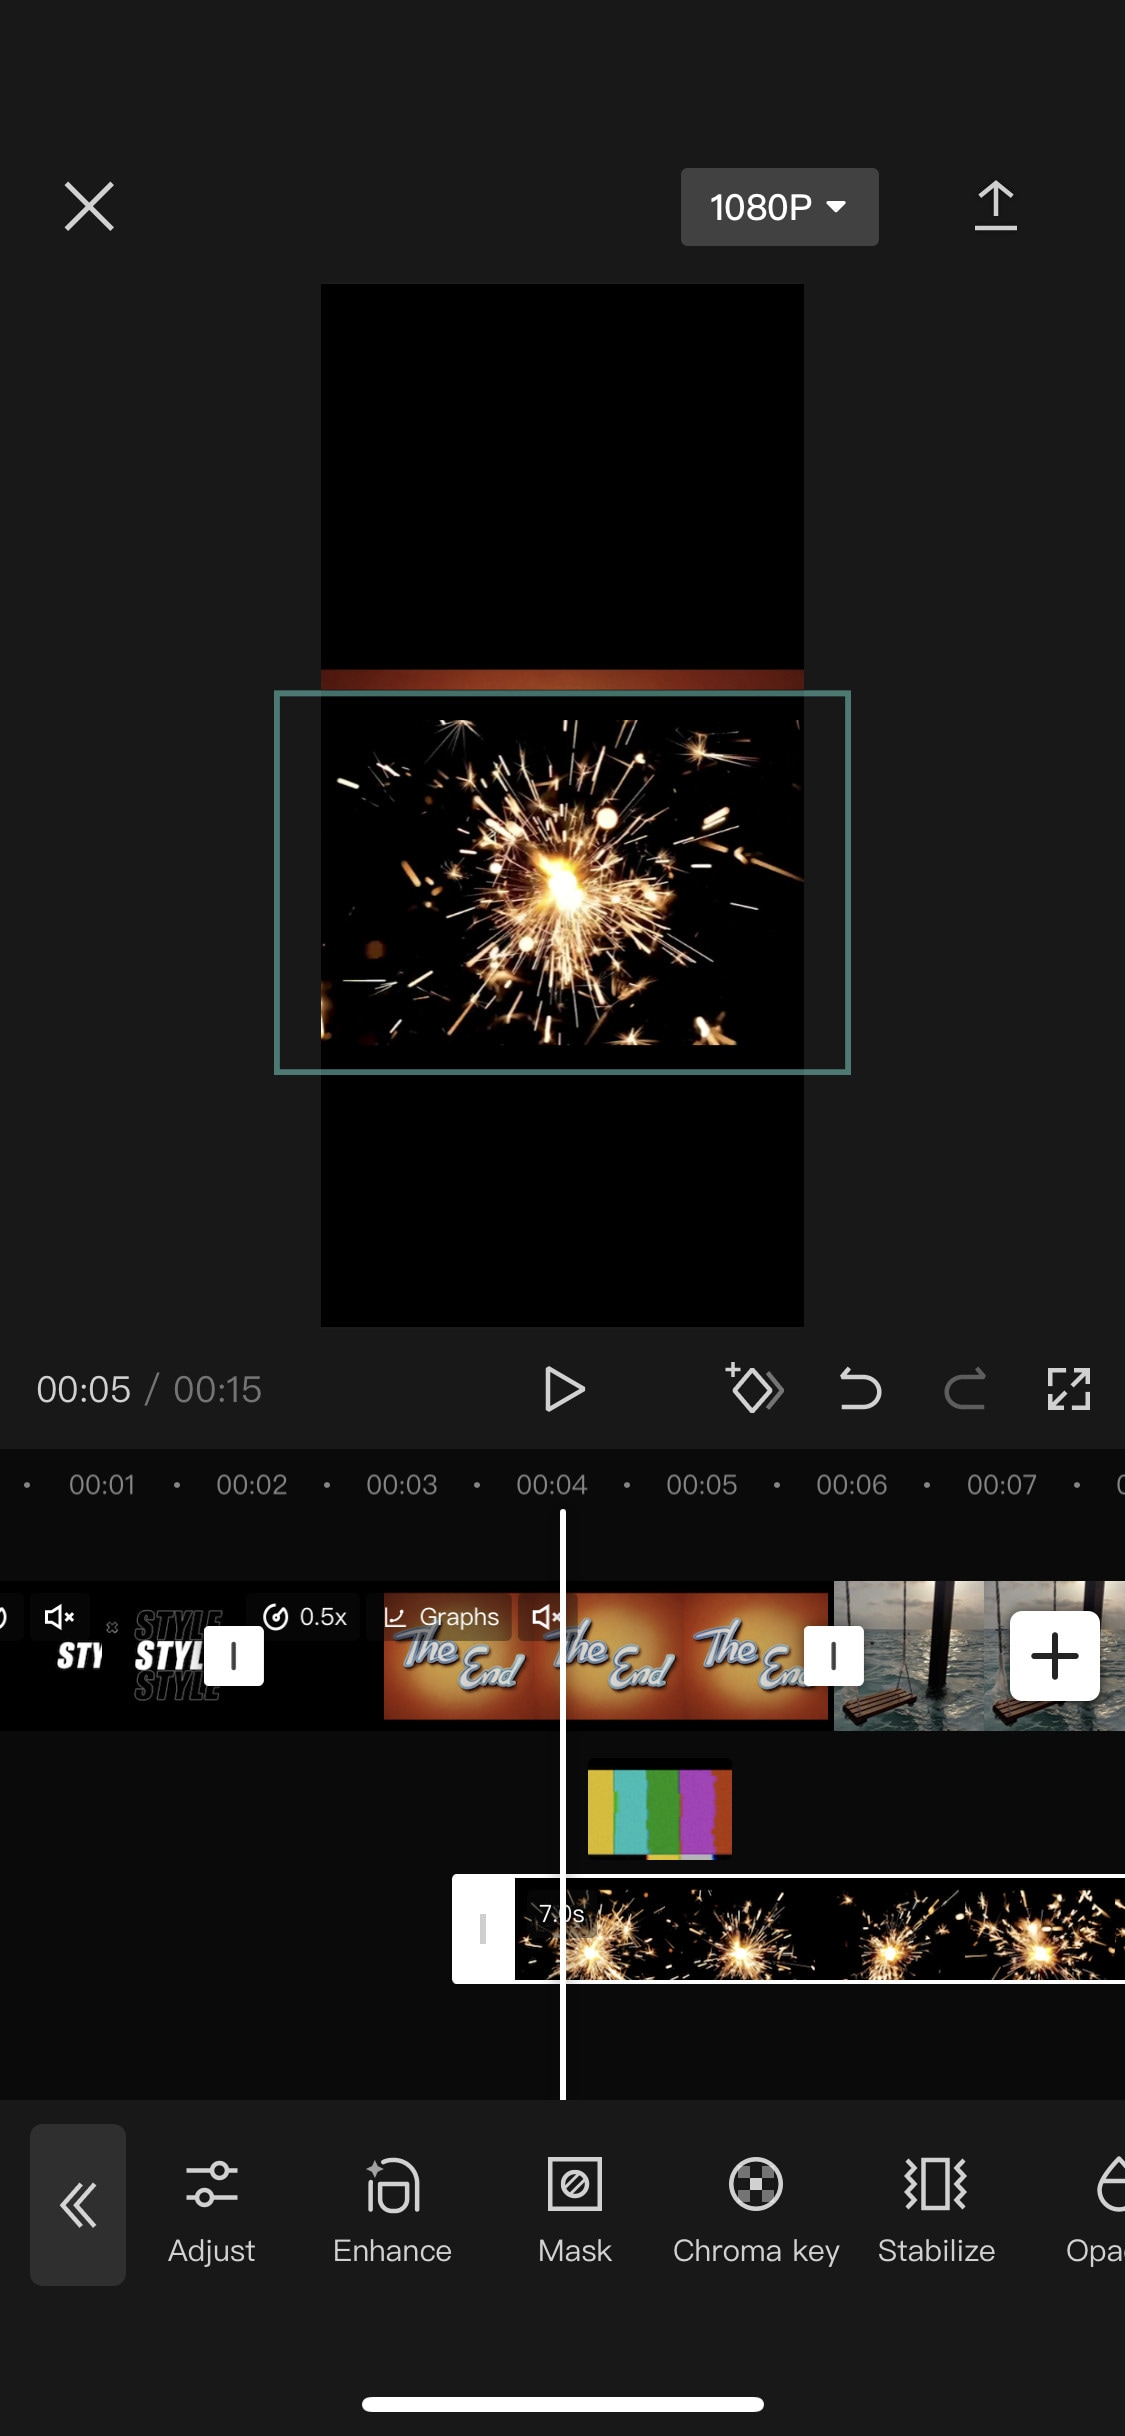
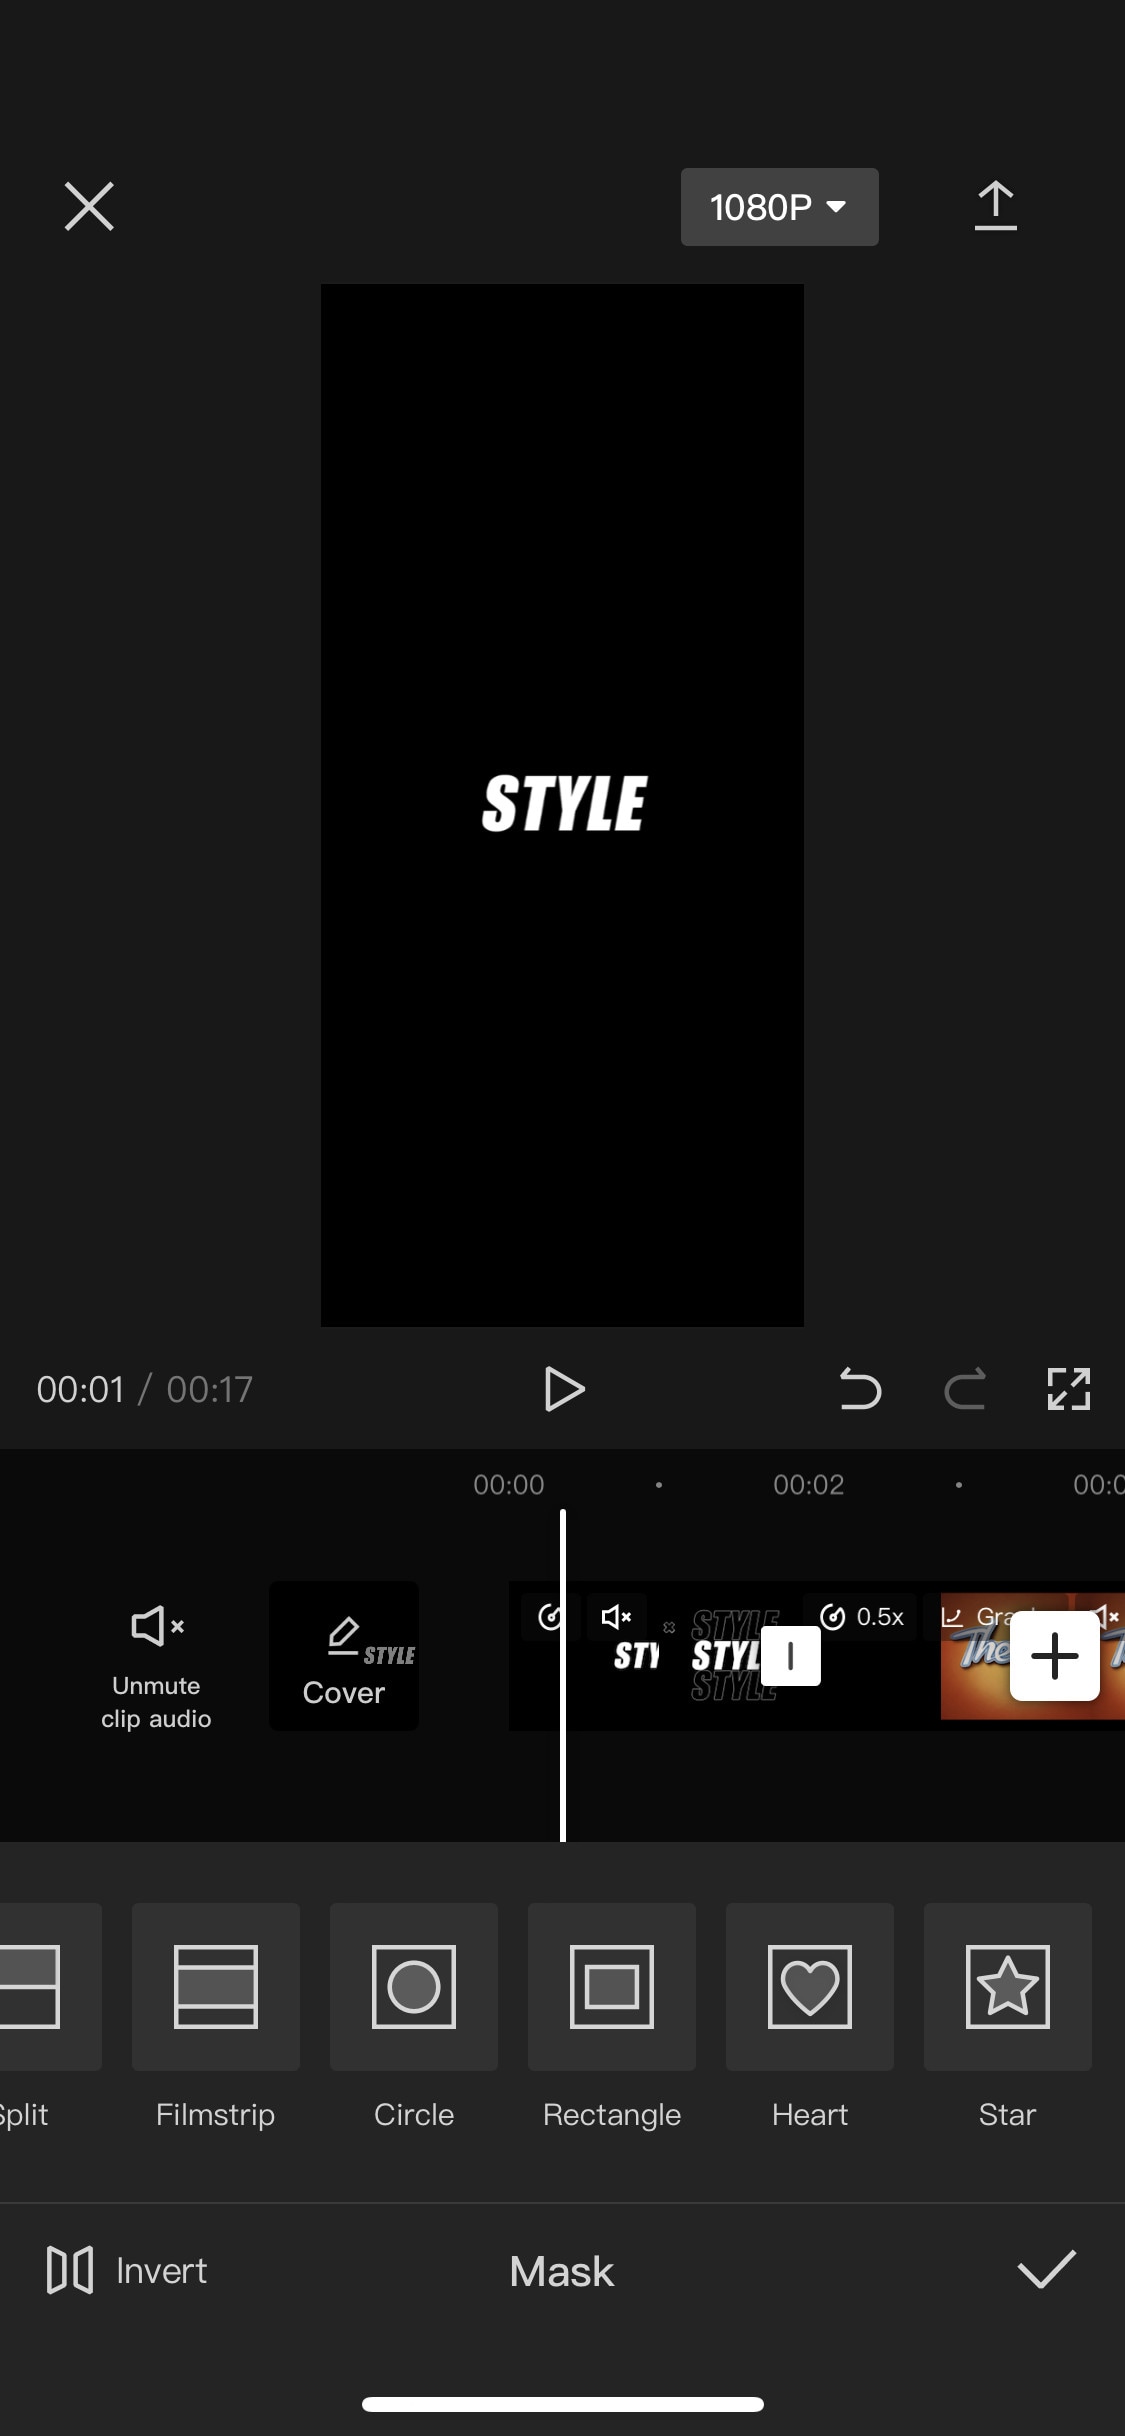
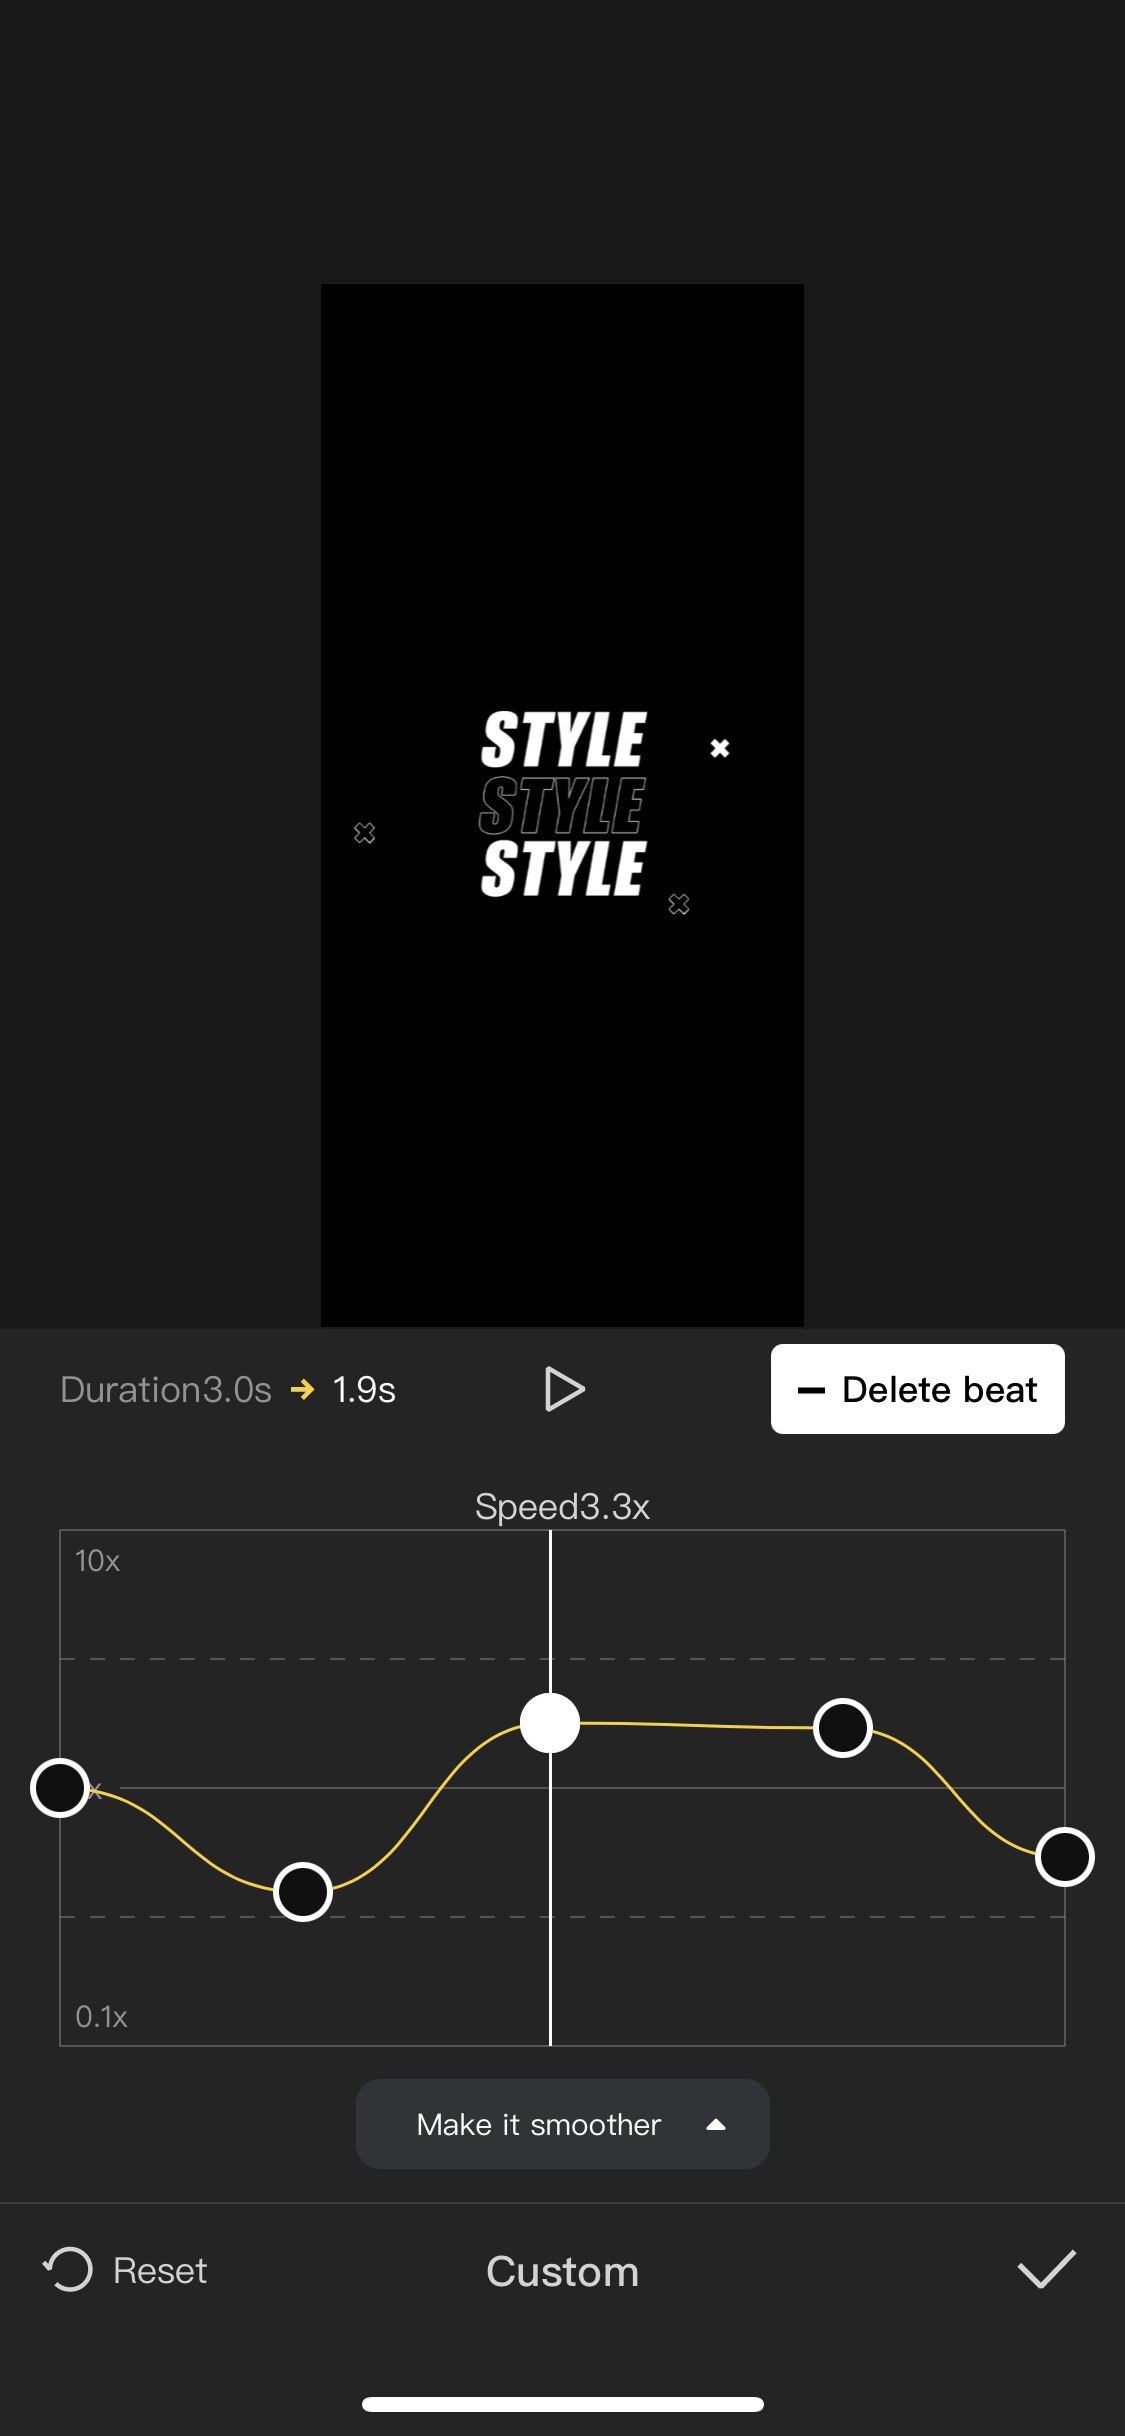
If you are looking for a free but good video editor to help you edit videos on the go, then you should get your hands on CapCut. It is a free mobile video editing software with many interesting features like keyframing, chroma-key, masking e.t.c. It also supports video and image layers. It has one of the best speed ramping features among other mobile video editors. It provides curves to smoothly speed ramp your clips. It can edit landscape, portrait, and even square video formats. It has many amazing effects and filters, it also has some stock clips.
~Features:
- It is completely free and has no watermarks.
- It supports up to 4K video resolution.
- Has curves for speed ramping.
- Has keyframes for animation.
- It has hundreds of effects, overlays, and titles.
~Cons:
- Its UI doesn’t support editing in landscape orientation.
- Lacks some common editing tools.
iMovie:
It is available on IOS and Mac.
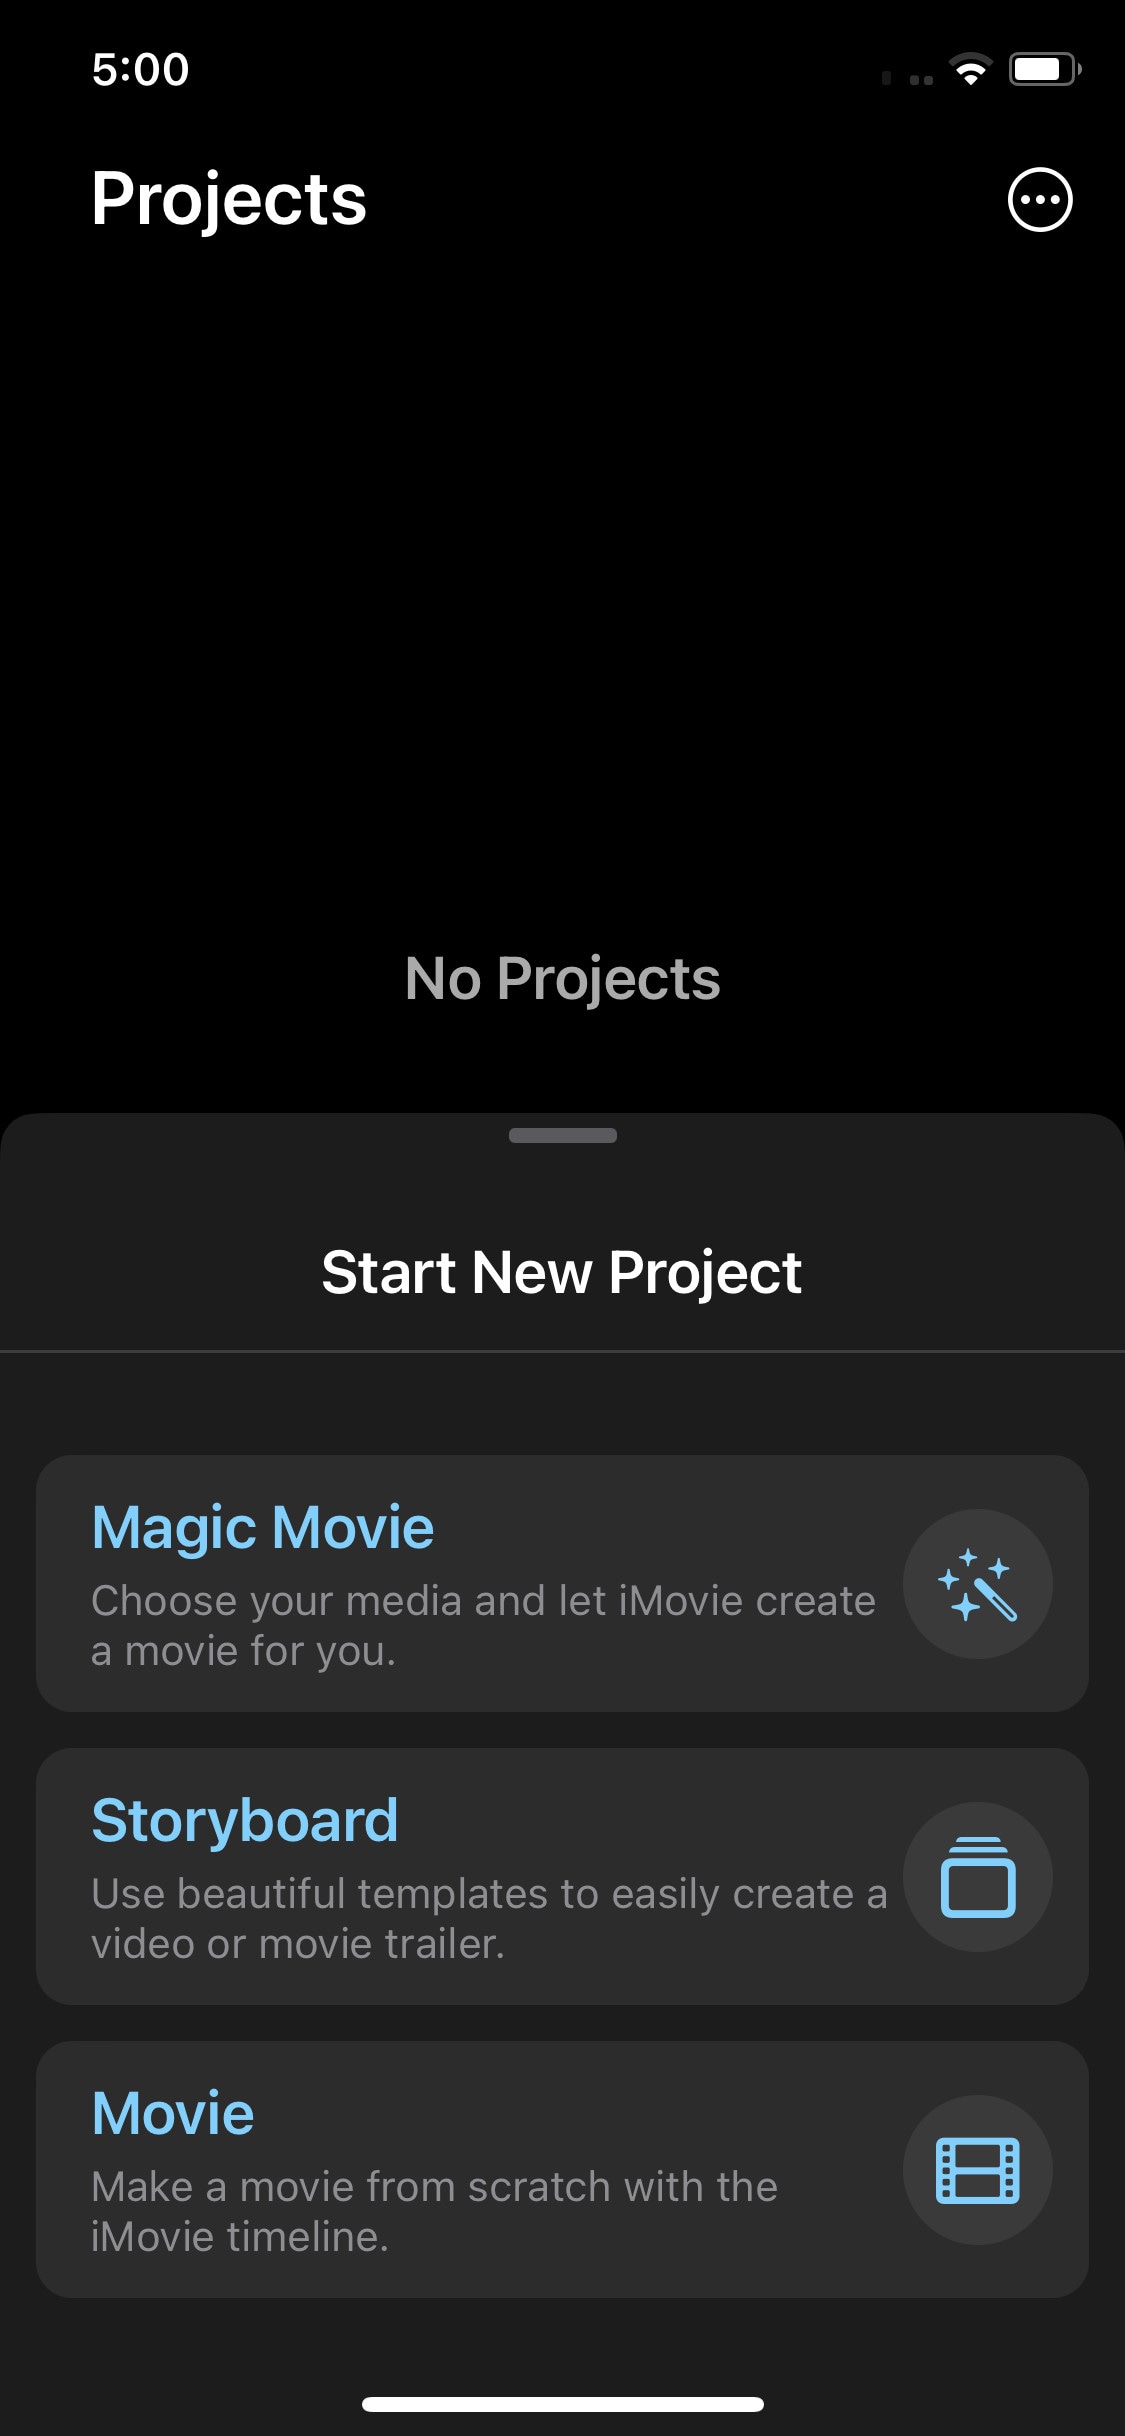
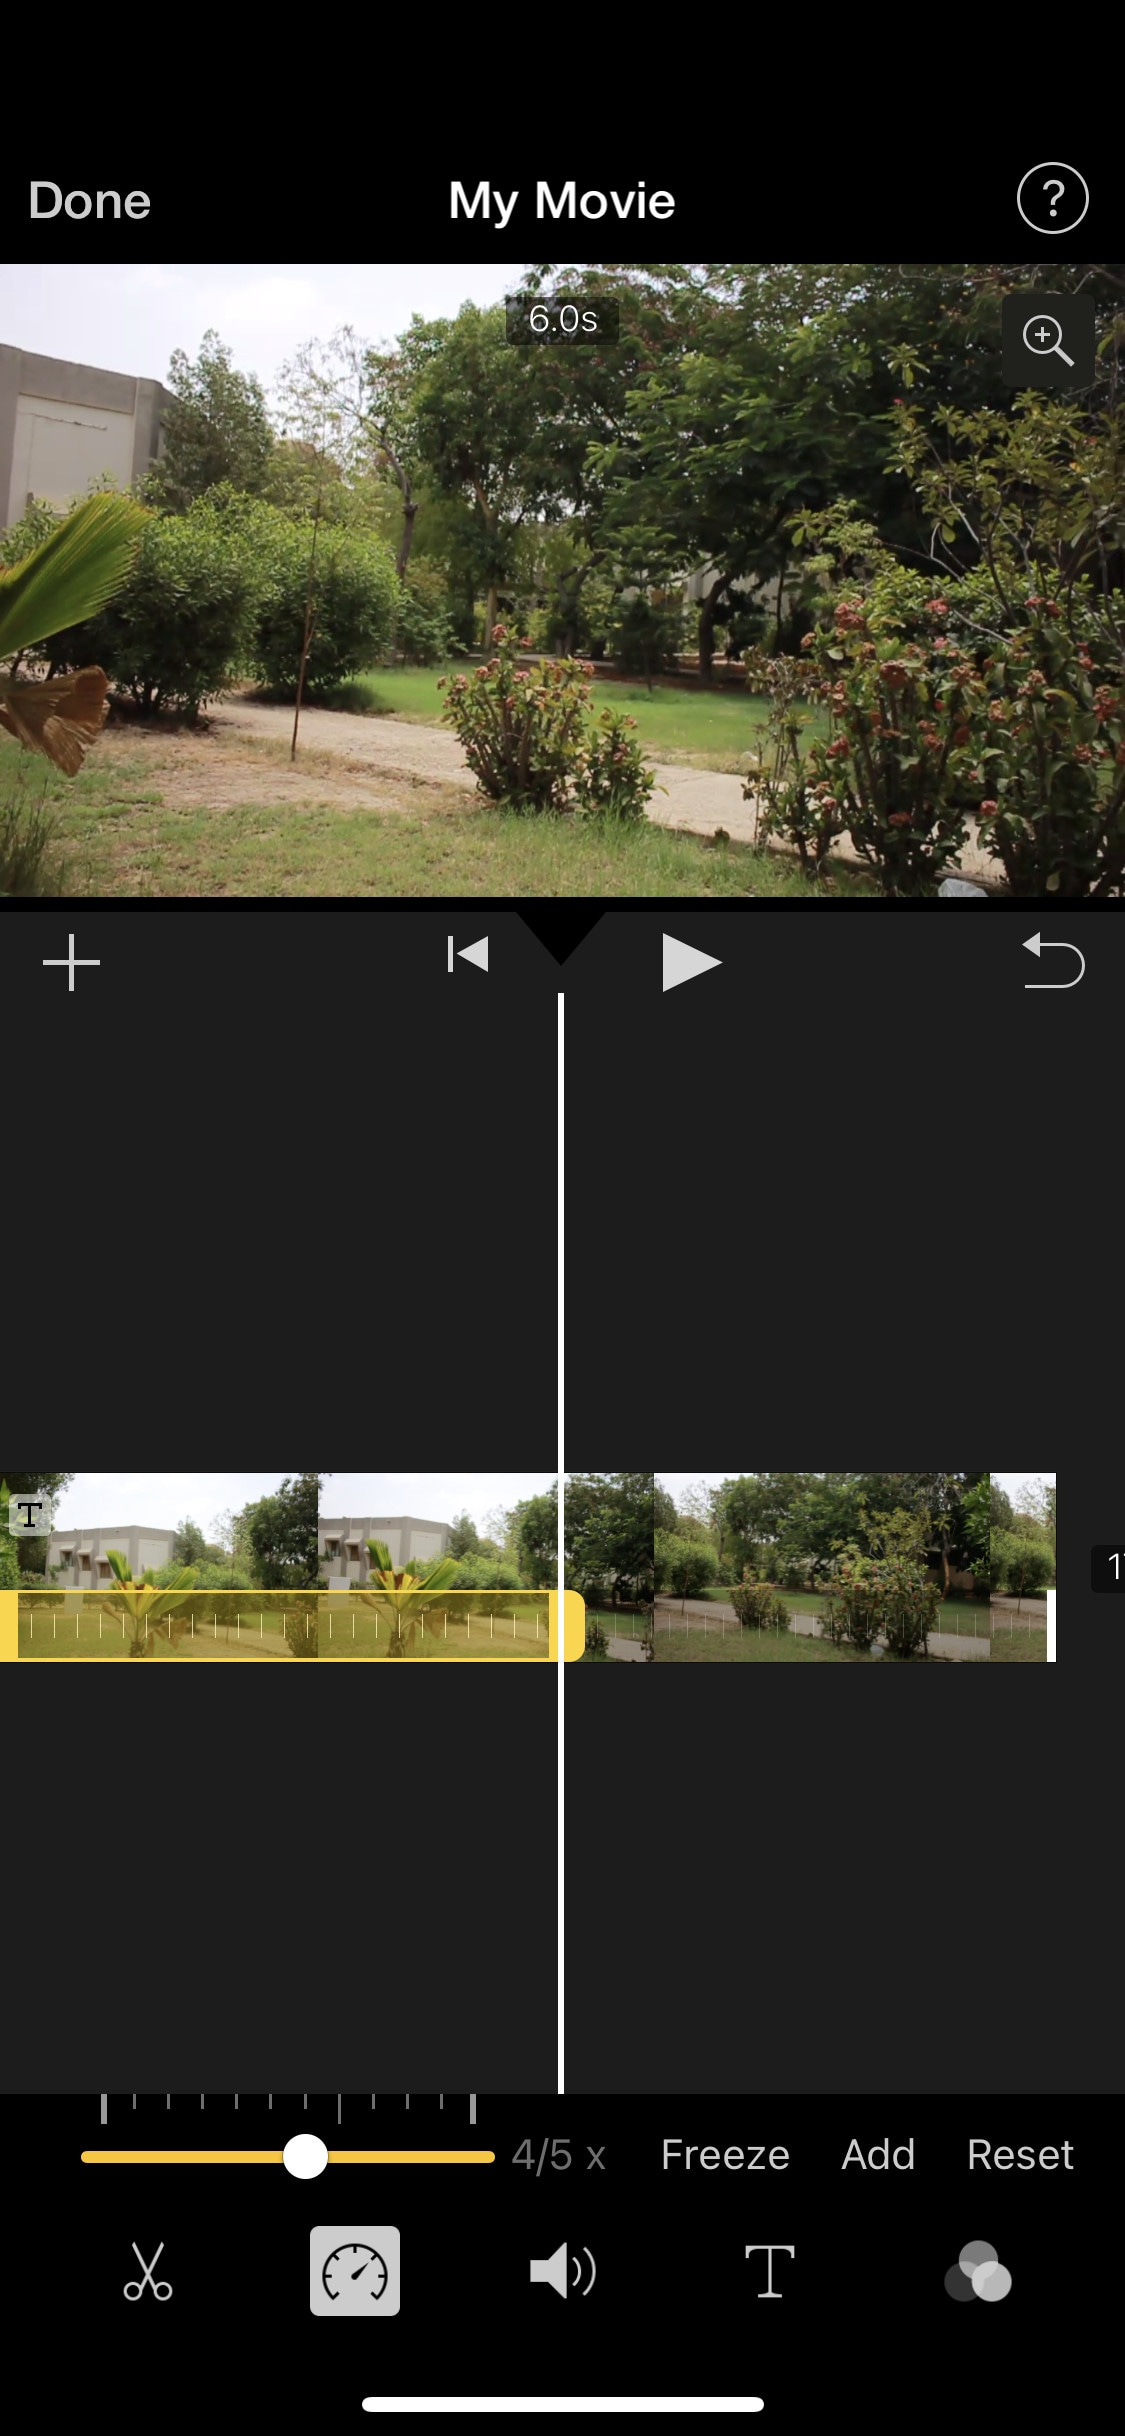
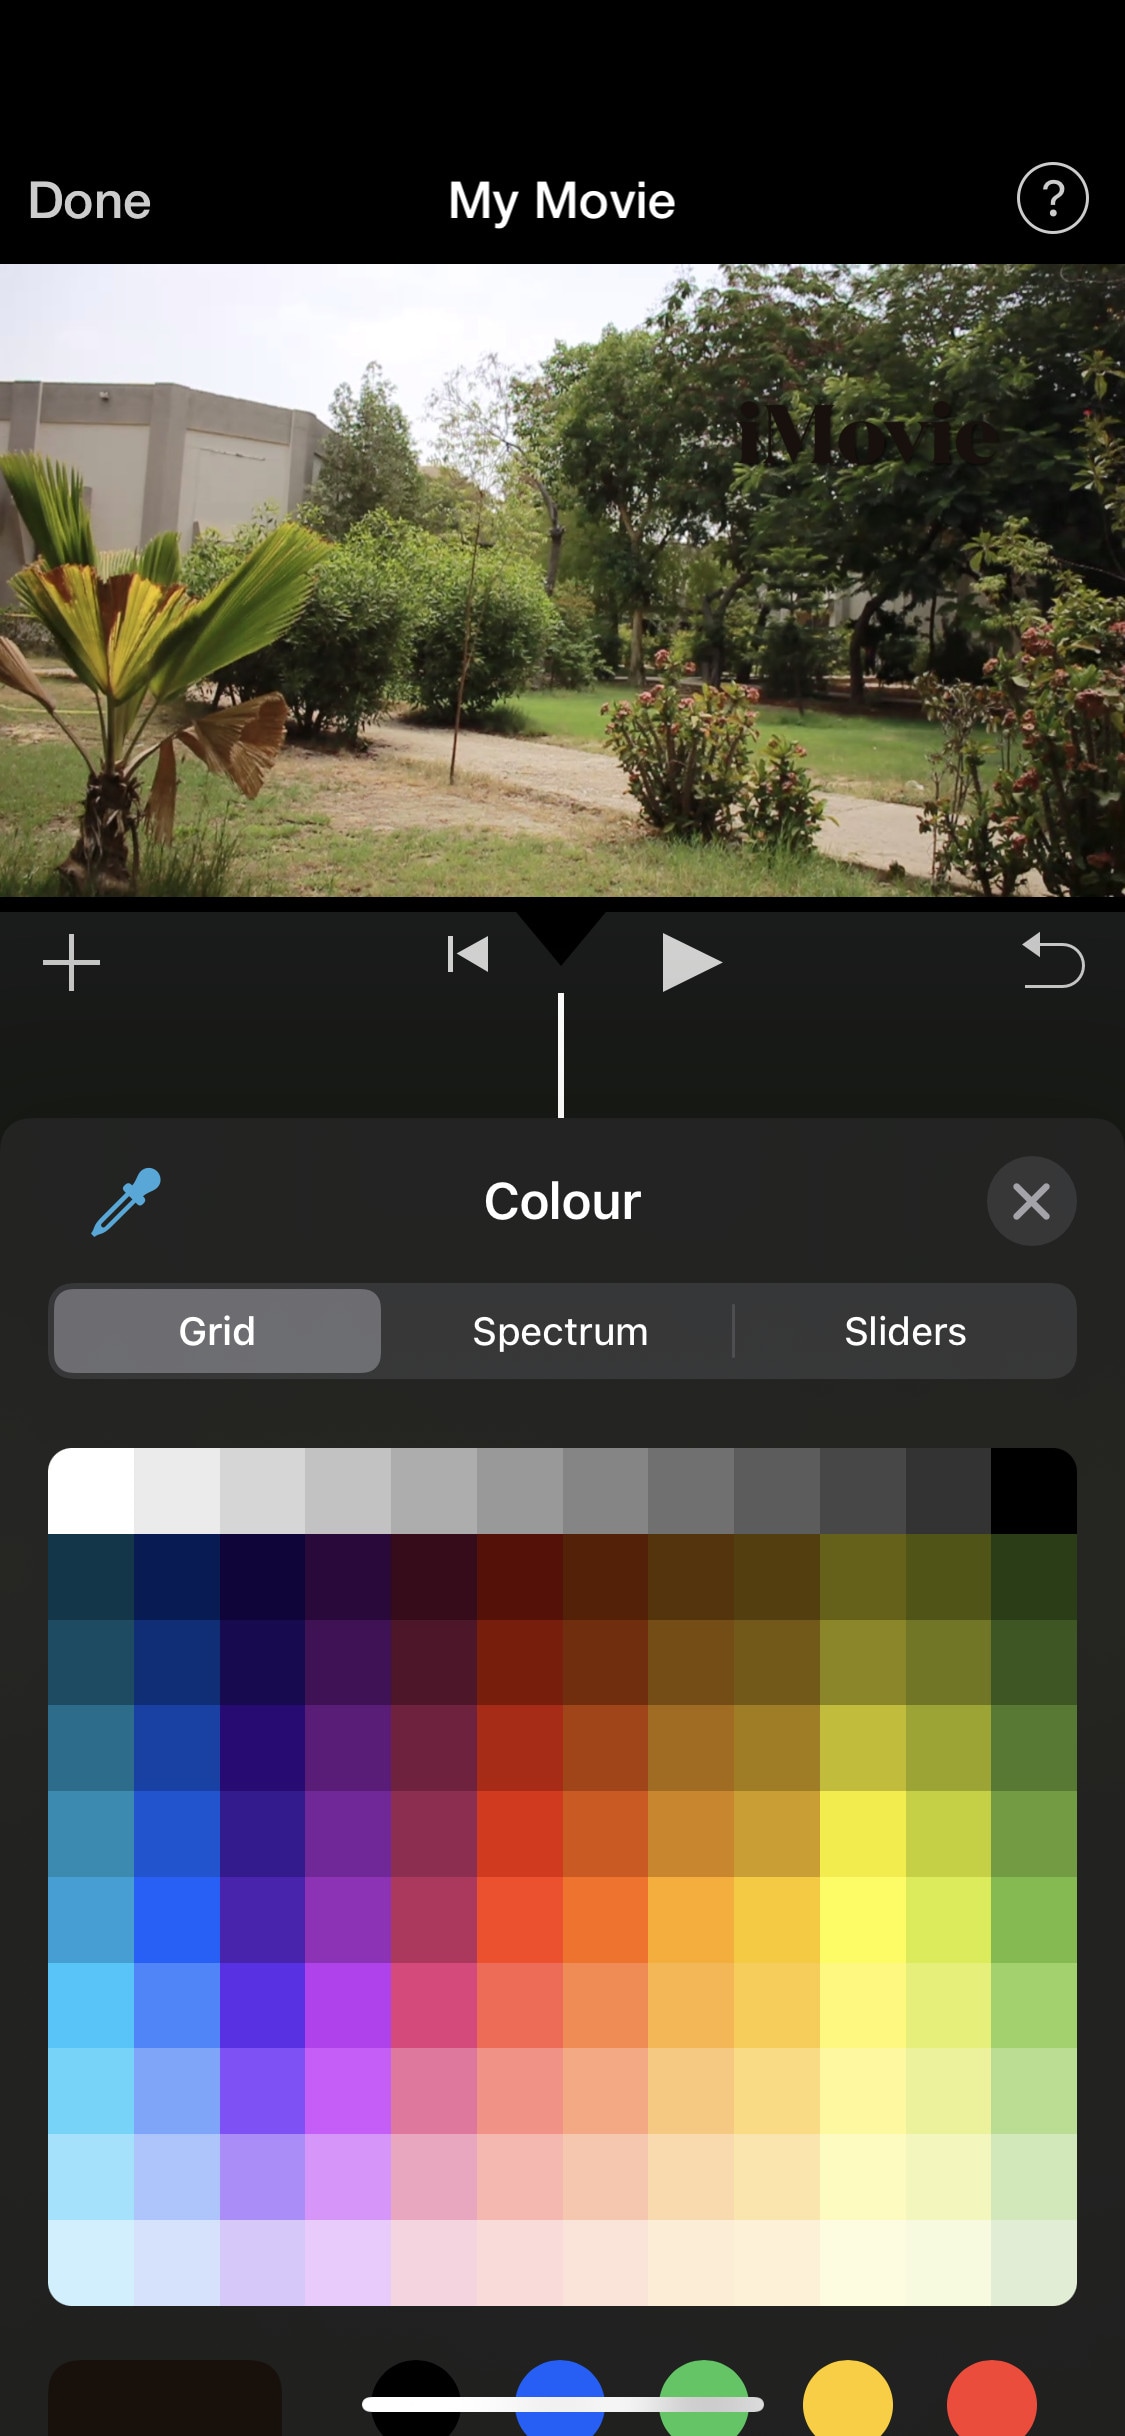
iMovie is a free video editing software designed by apple for their flagship products. It is simple and easy to use. It has all the basic editing tools to enhance your video like crop, trim, transitions, effects, e.t.c. It also has a speed ramping feature which let you change the speed at different points of a clip. It’s AI mode “Magic Movie” lets you select clips and a style and software will make the final product for you.
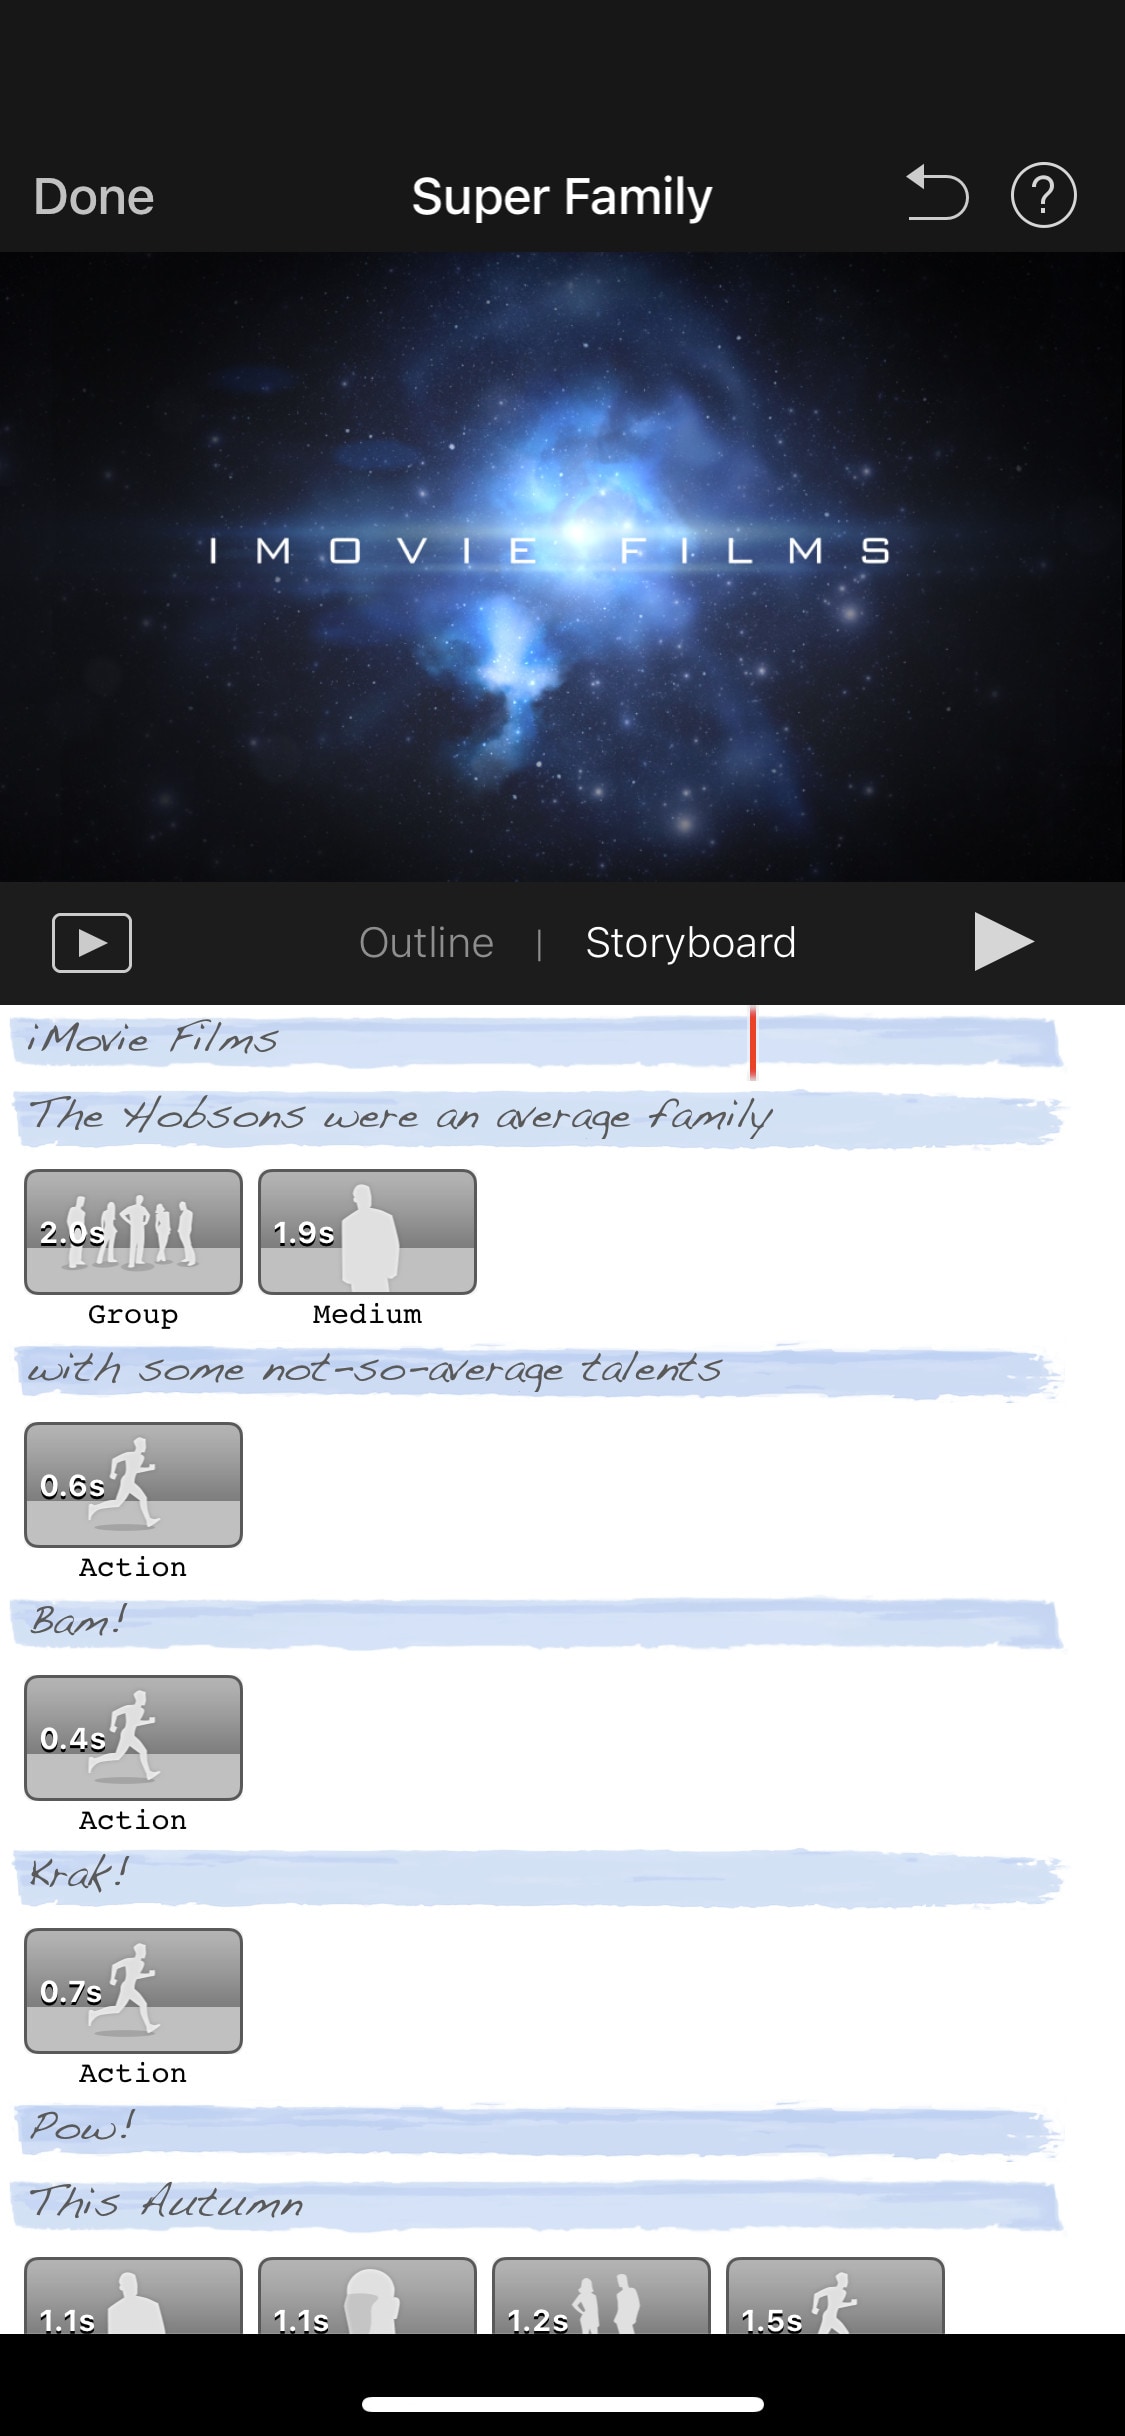
Its “Storyboards” mode is a creative way of learning production and post-production skills. It lets you choose a theme from many famous Genres available, then it will guide you through the production process like capturing footage, arranging your shots, and creating cinematic titles to enhance your story.
~Features:
- It is free and easy to use.
- Let you do speed ramping.
- Supports Raw files.
- It’s AI mode creates videos for you on its own.
- The “Storyboarding” feature helps you through the production process.
~Cons:
- It only works on ios and Mac.
- Not suitable for professional projects.
GoPro - Quik:
It is available on IOS and Android and windows also.
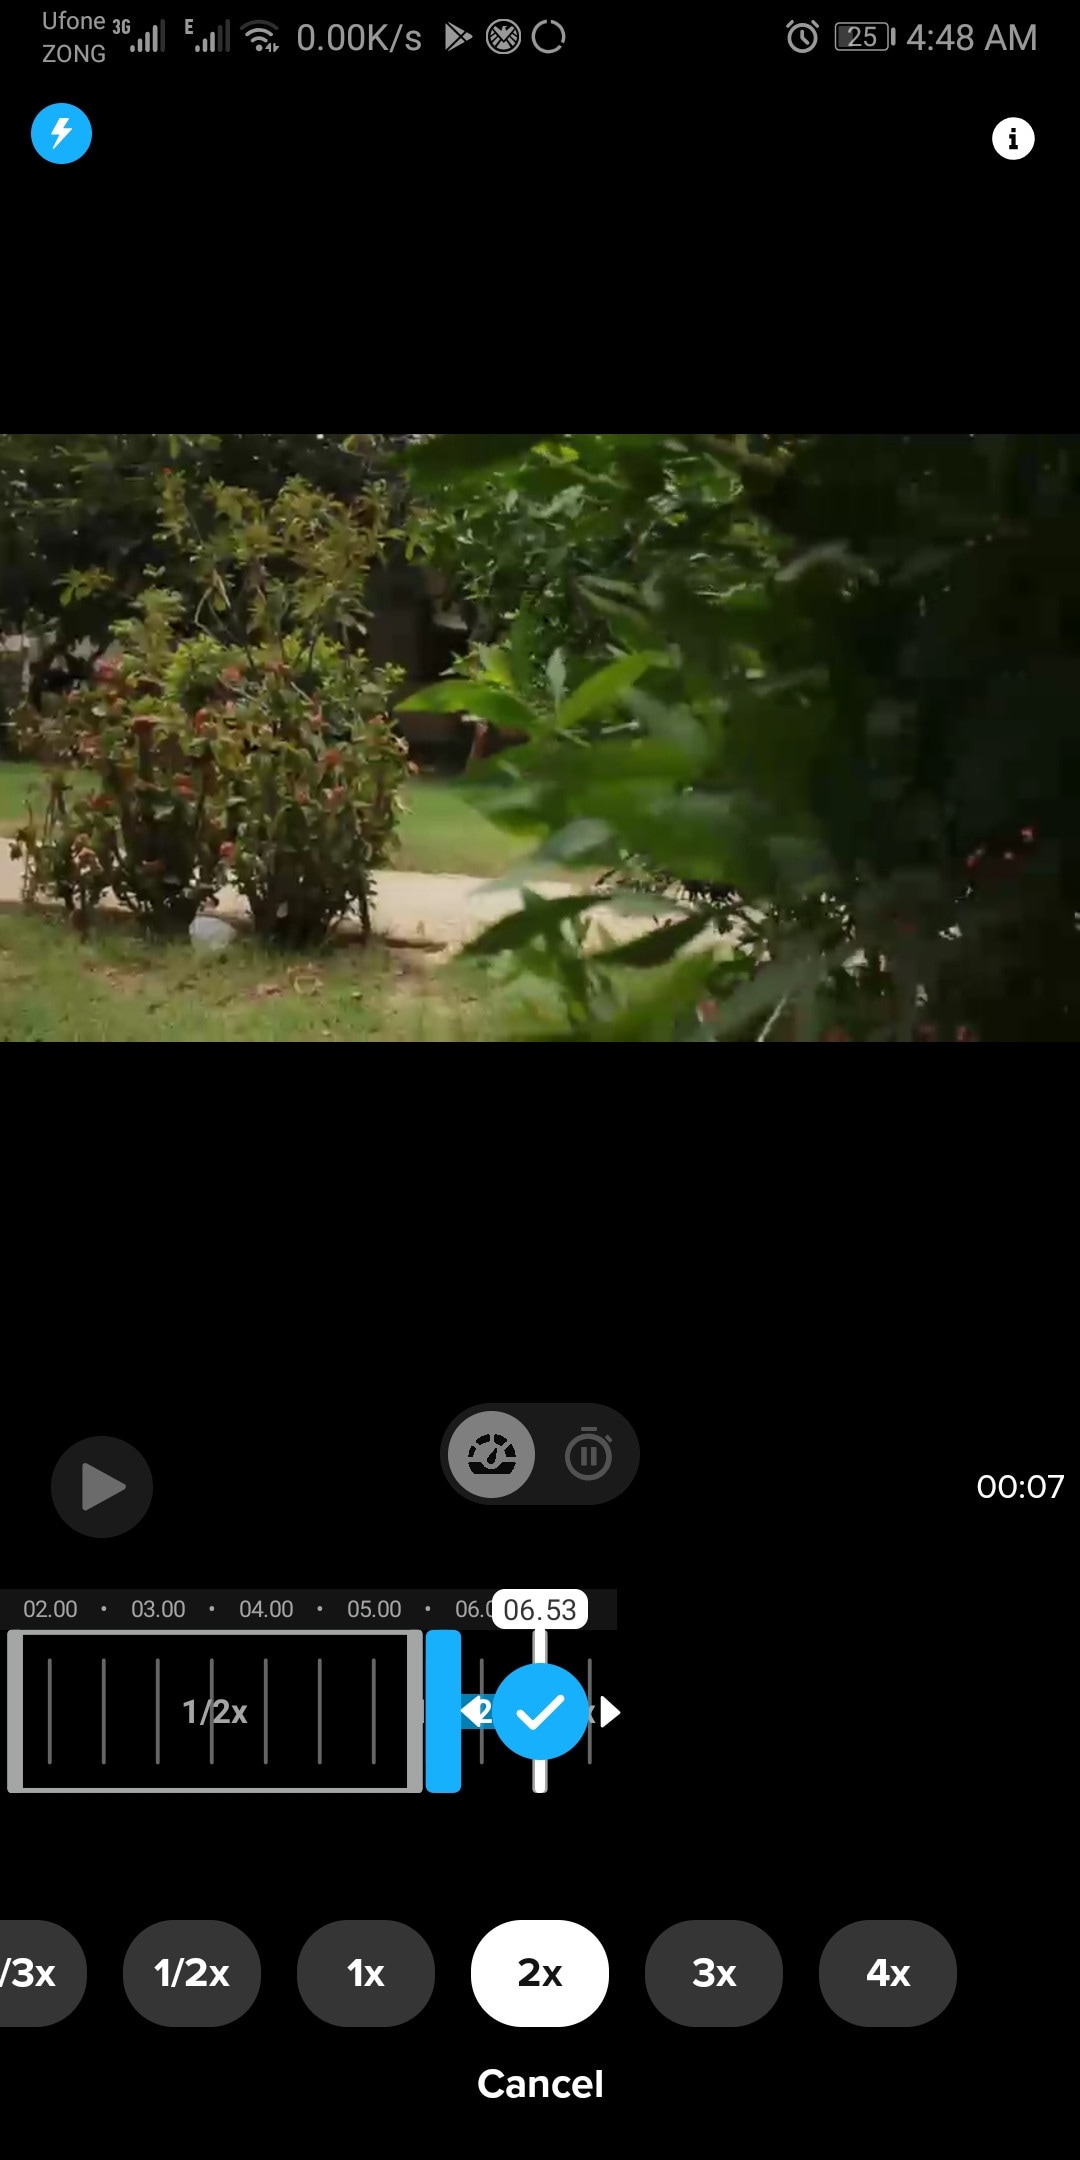
It is a free and easy-to-use software designed by GoPro. It can edit clips of your GoPro or any other device. It is a quick and easy way to enhance your clips before posting them on any social platform. It can do basic edits like trim, rotate, color correction, e.t.c. It can also make amazing speed ramps by changing the speed of different parts of the clip (available in the premium version only). It doesn’t produce any watermarks. Although its premium version unlocks more features like speed ramping, more themes, and unlimited backup space.
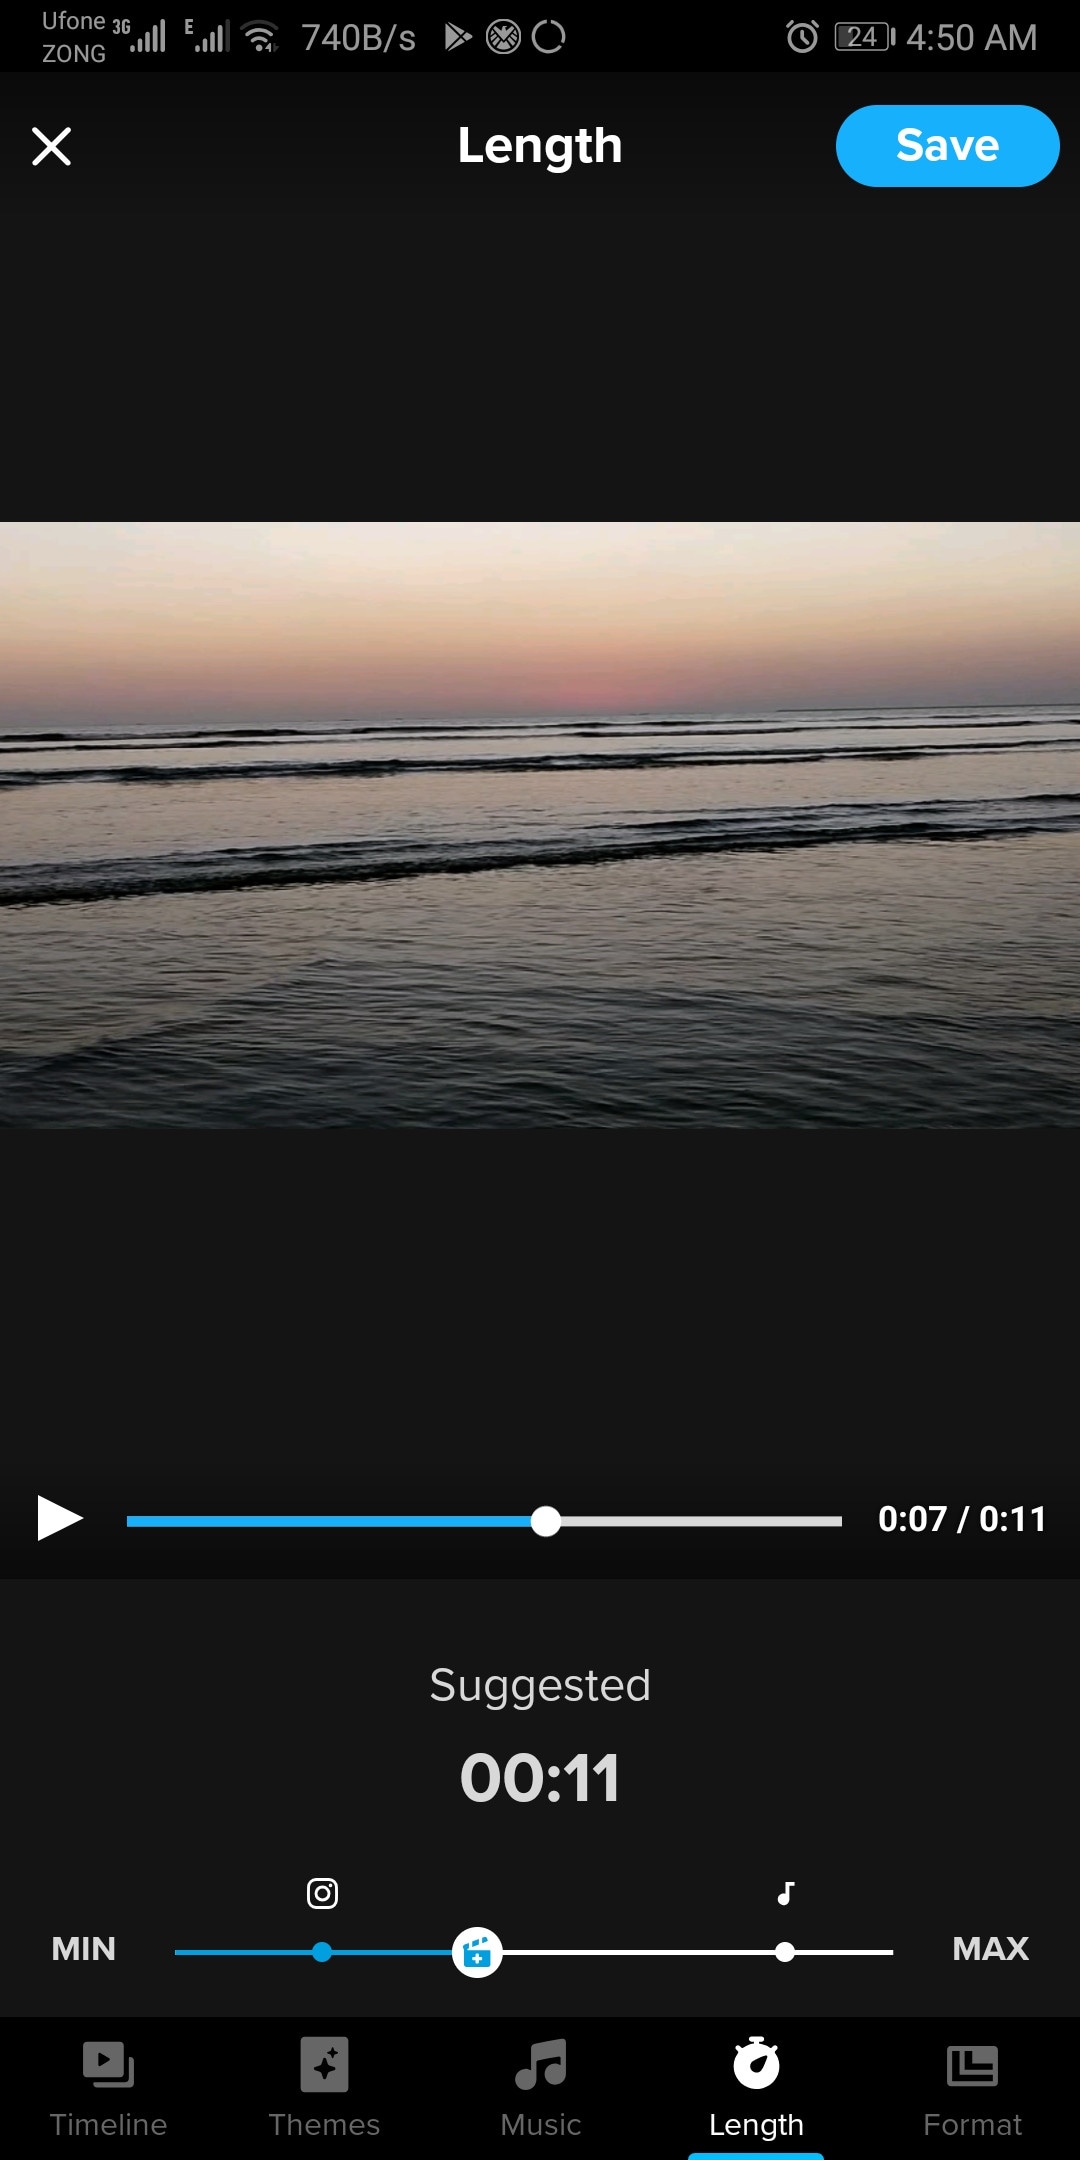
~Features:
- Its free version doesn’t leave a watermark.
- It is simple and easy to use.
- Can do basic color correction.
- Have pre-made themes for faster editing.
- Change the speed at different parts of the video to create smooth speed ramps. (Available in the premium version.)
- Has a free version with limited tools for basic editing.
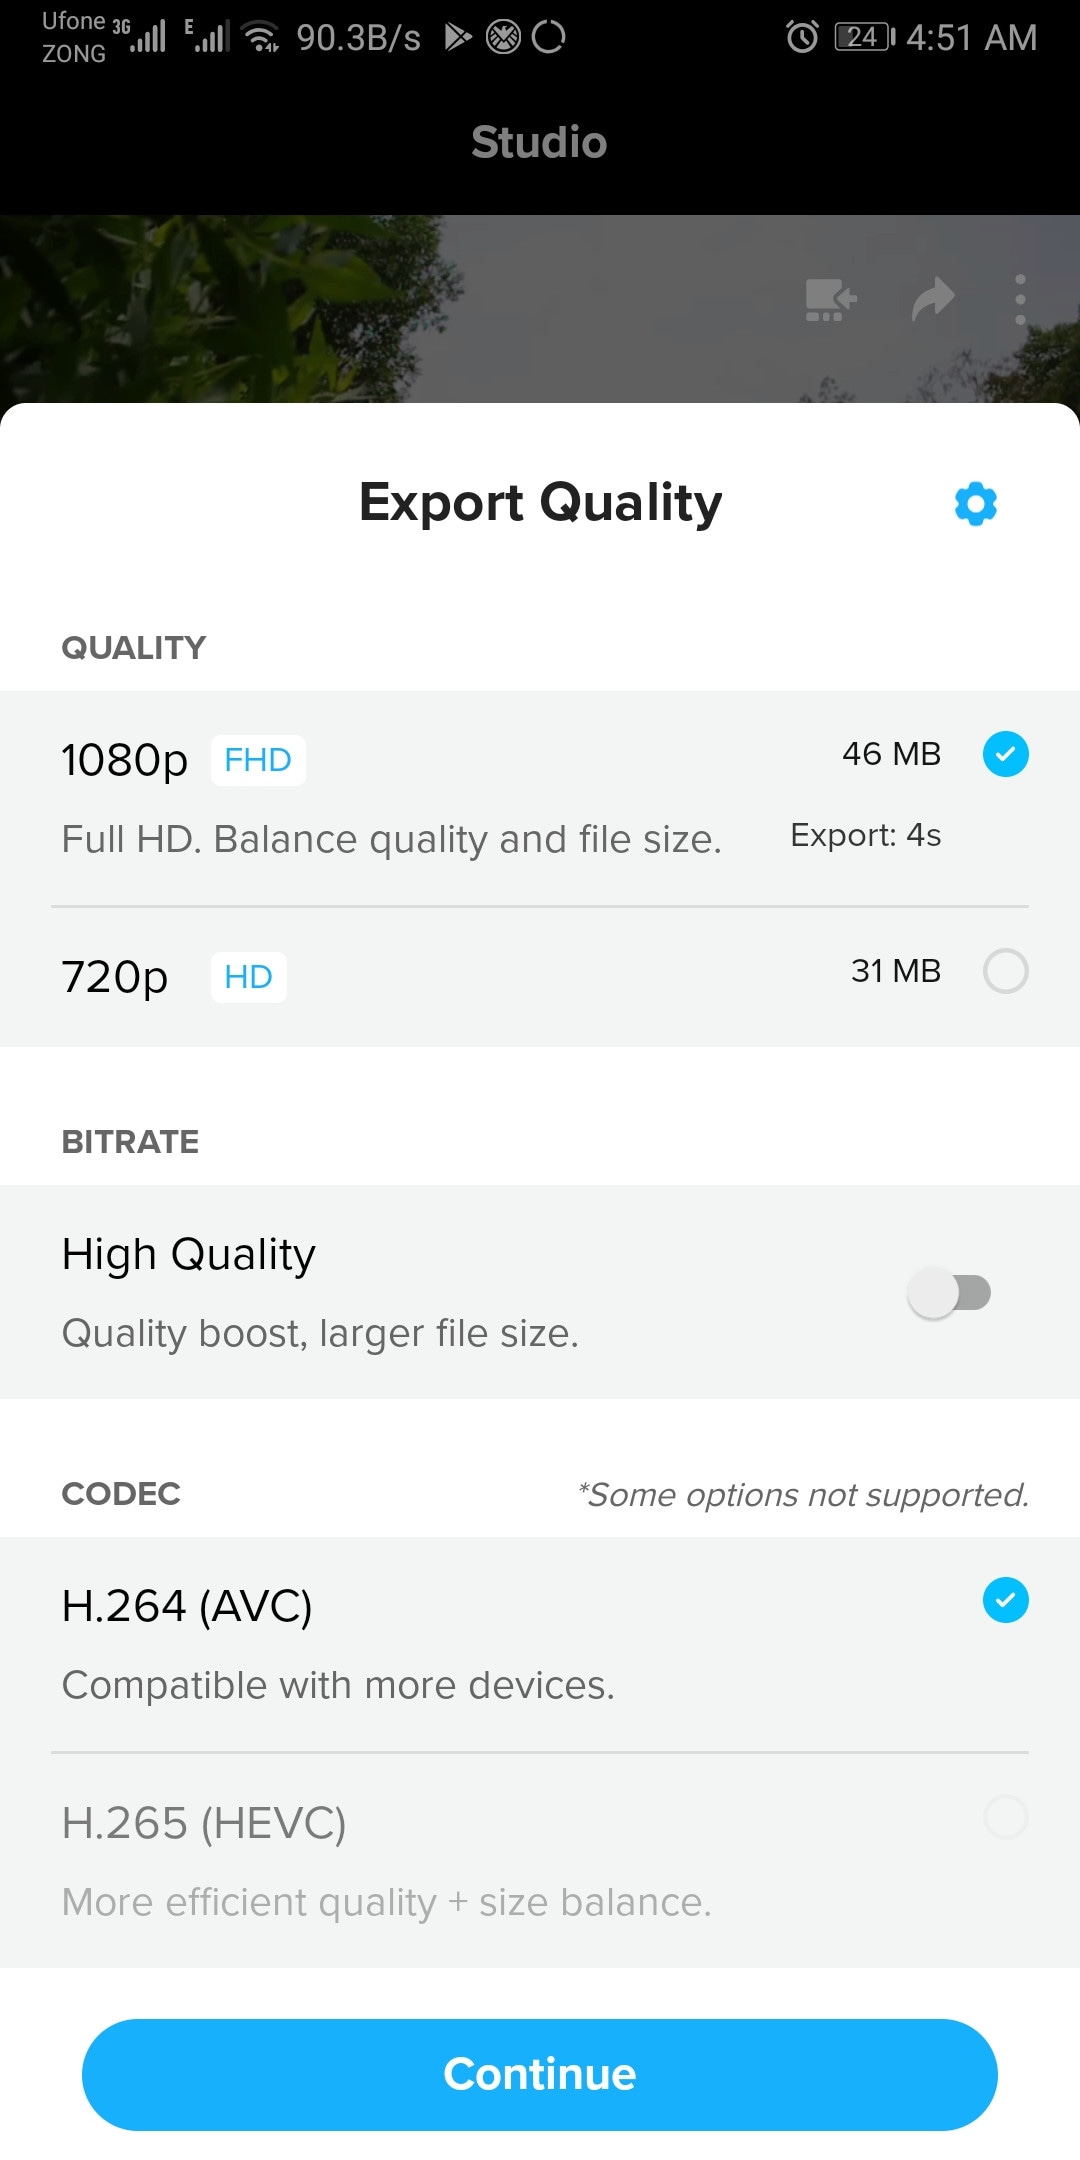
~Cons:
- It lacks advanced tools therefore not suitable for large projects.
- Its free version has many limitations.
~Price: Its subscription is available at $1.99/month or at discount for an annual subscription having $9.99/year.
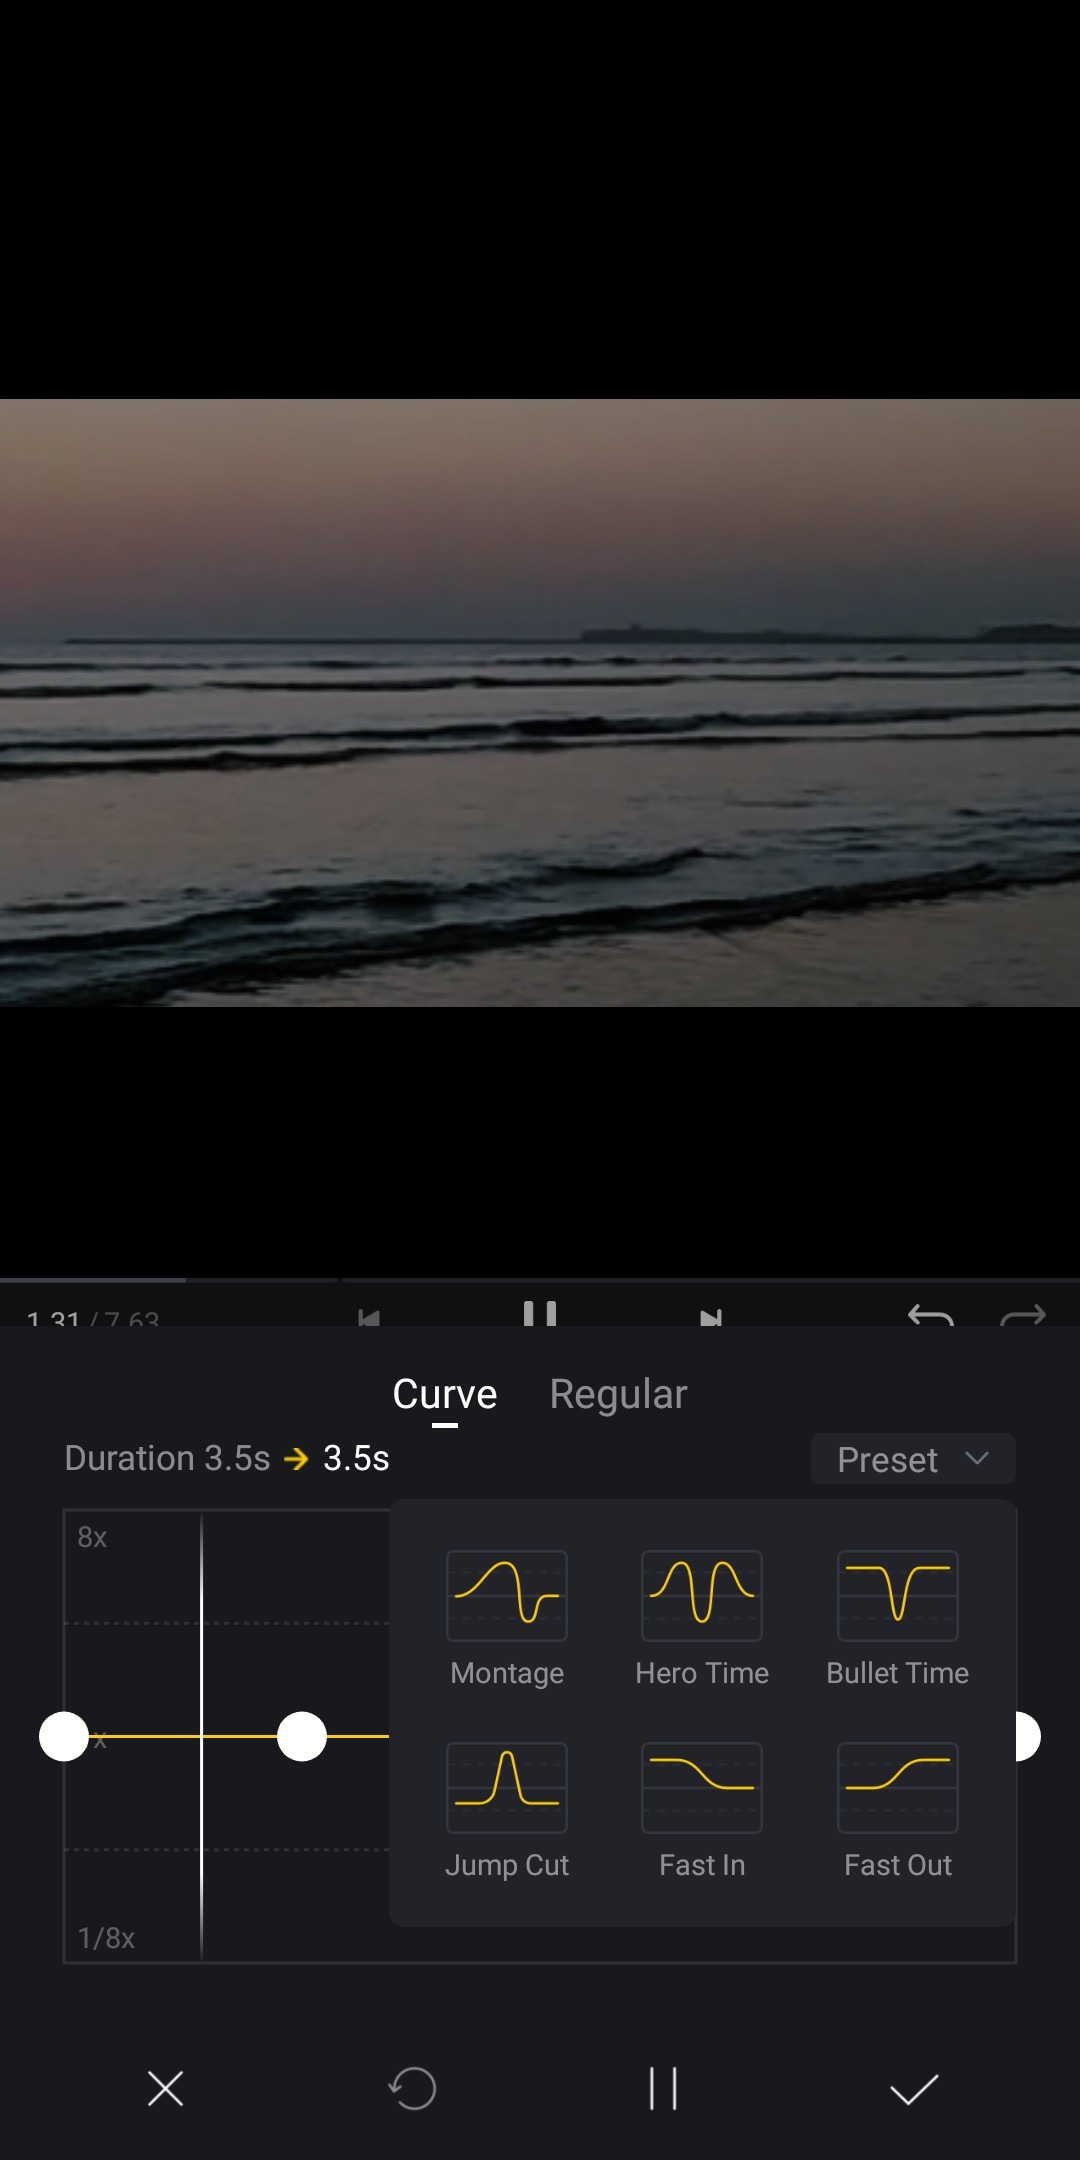
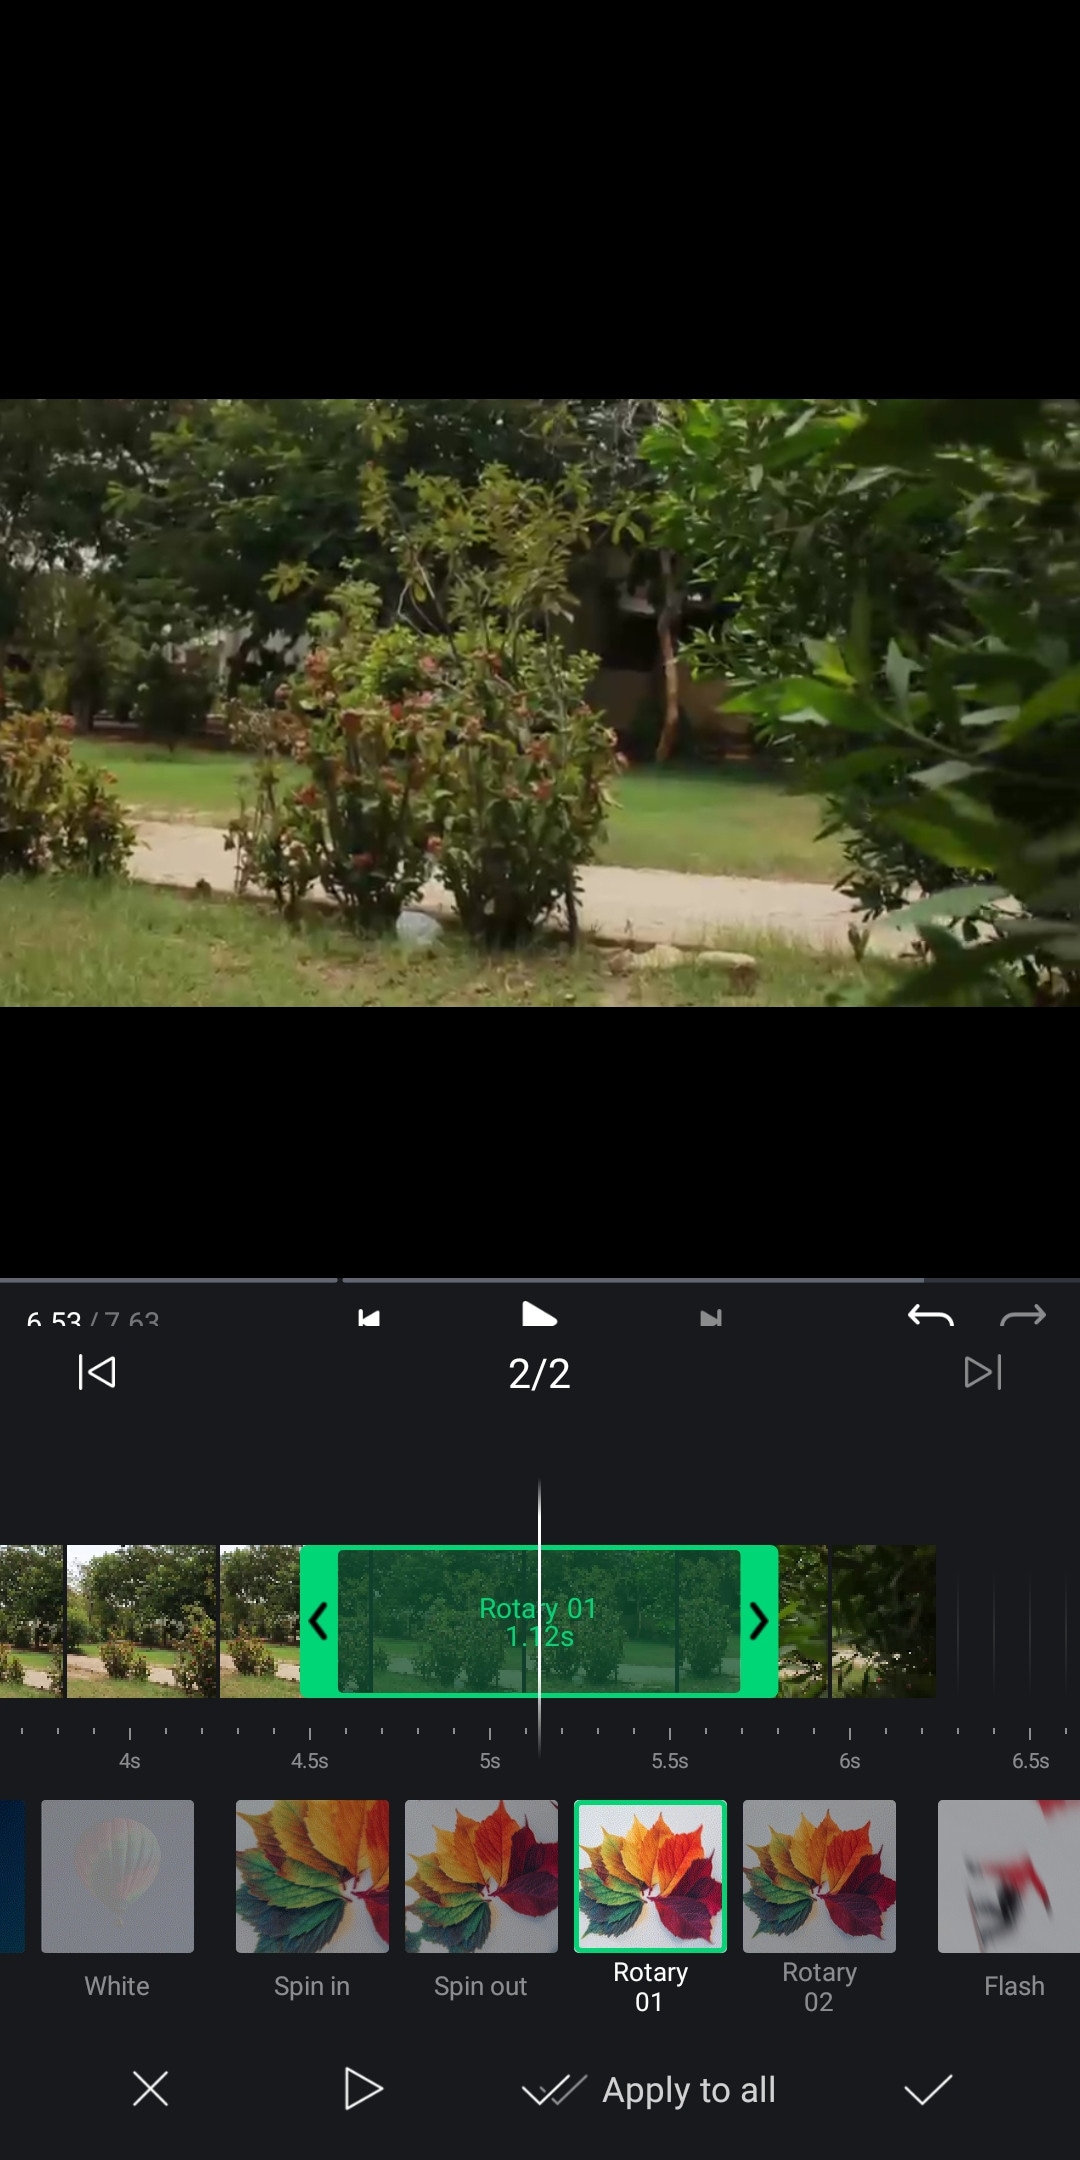
VN Video editor:
It is available on IOS and Android, Windows, and Mac.
If you are looking for a video editor, which let you do fast but quality edits, then “VN video editor” is the right choice for you. It is free and easy-to-use software with many useful features like transitions, effects, speed ramps, PiP, chroma-key, keyframing, e.t.c. It supports different aspect ratios for all your social platforms.
It also has pre-made templates to speed up your editing process. Its Story mode let you manage your production and post-production work easily. It also has overlay mode, which can make awesome slide shows for you.
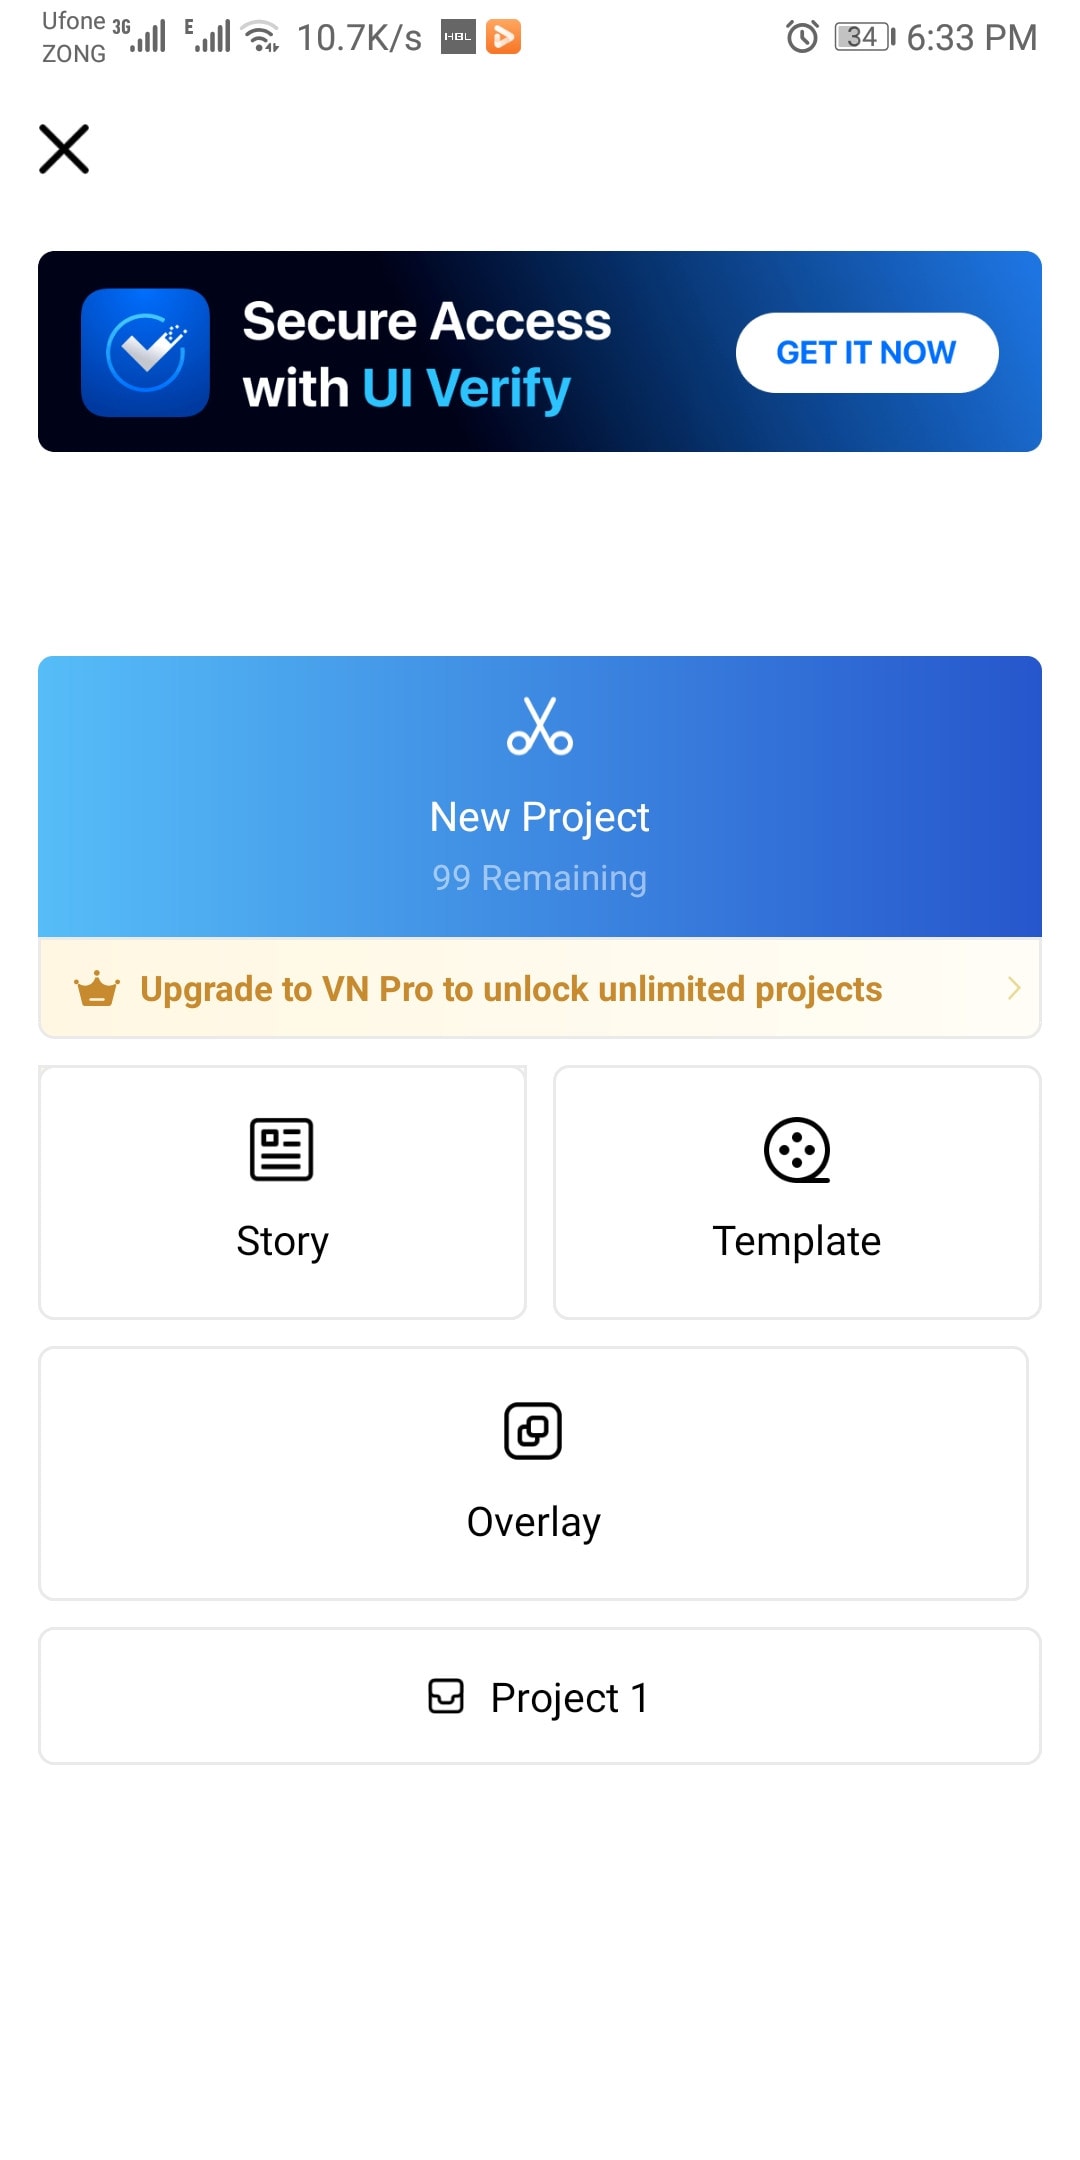
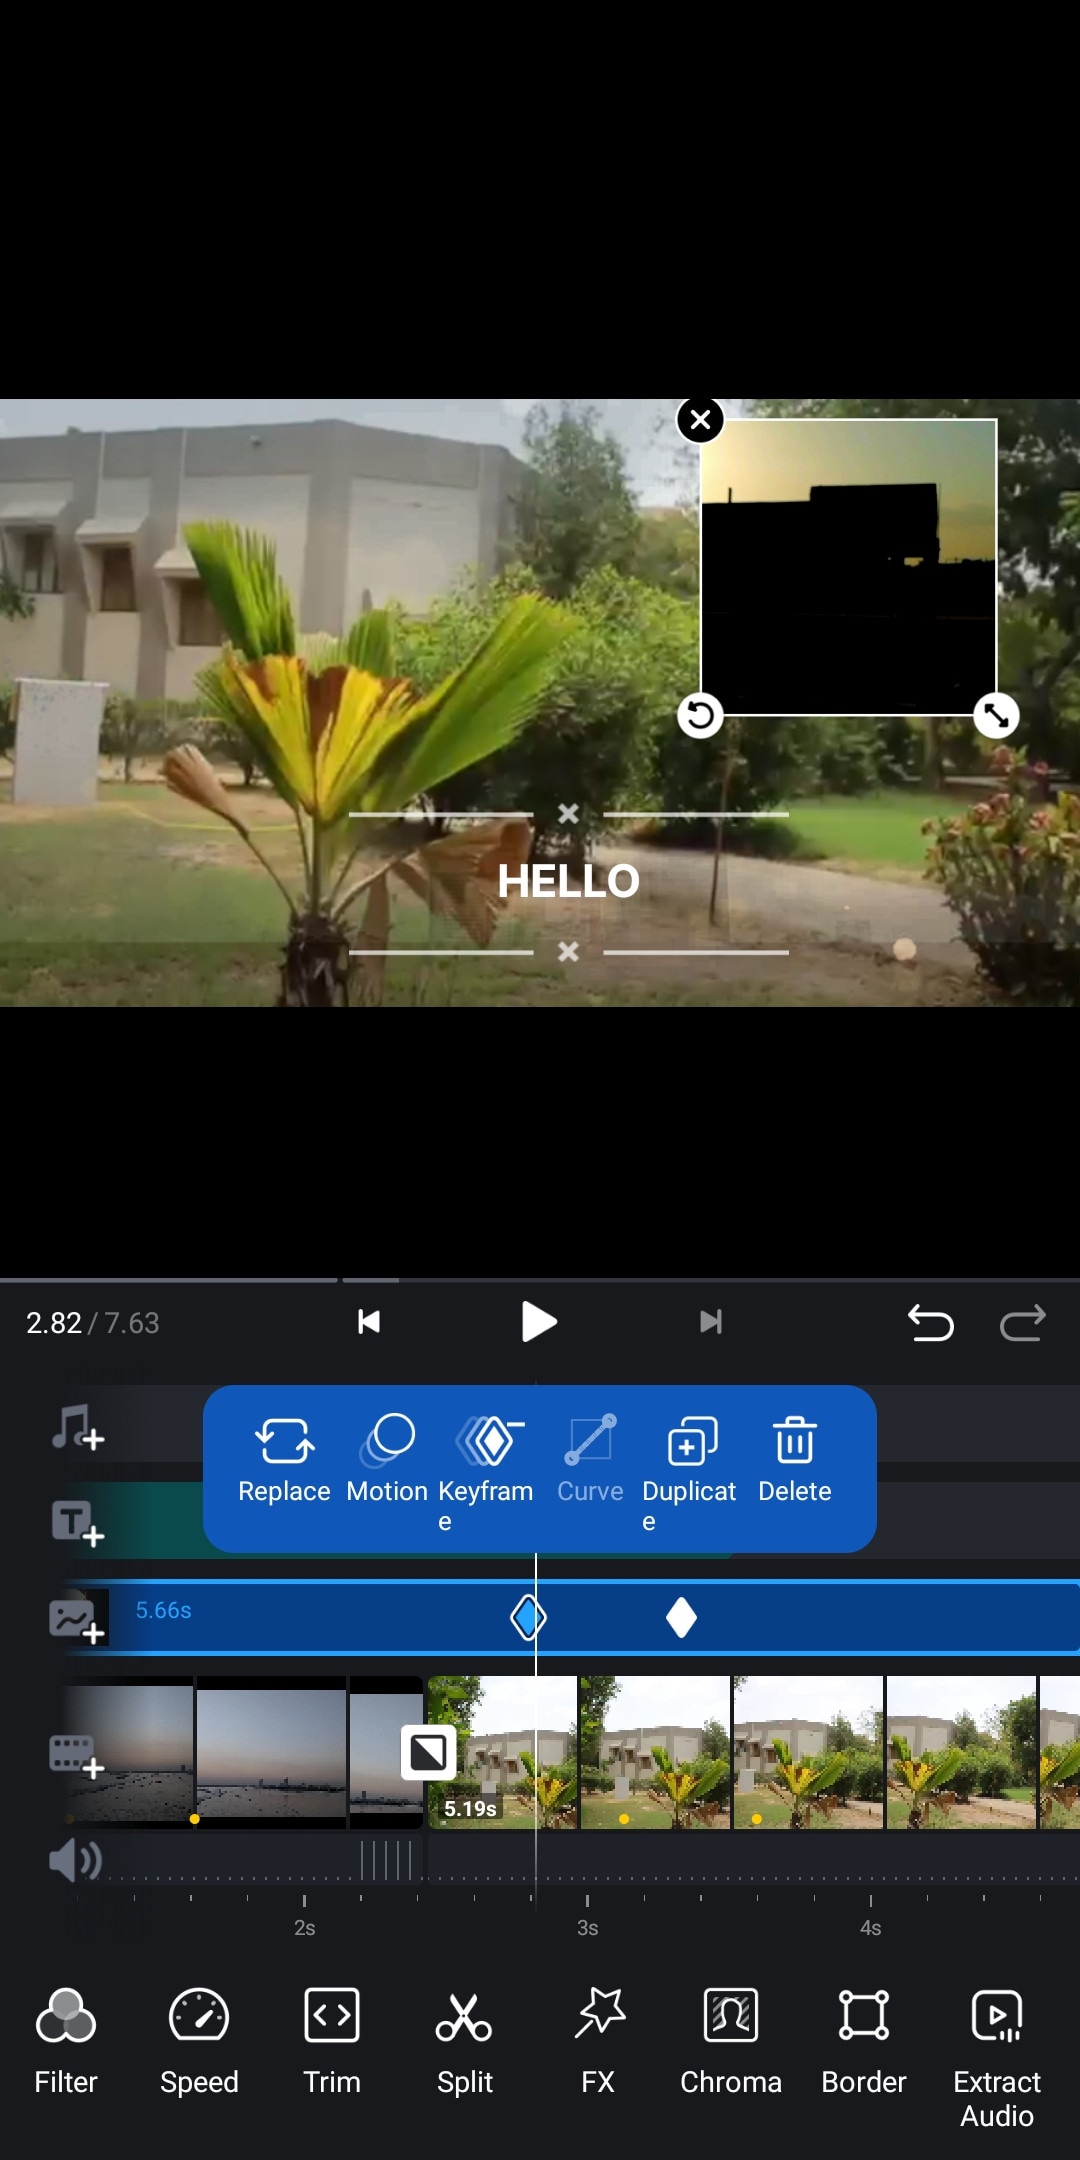
~Features:
- It is free software with no watermark.
- It supports up to 4K resolution at 60fps.
- Supports multi-layer editing.
- Have keyframing curves to create smooth animations.
- Have speed curves for smooth speed ramping.
- Its Story mode let you manage your production work easily.
- Can extract audio from a video file.
~Cons:
- Its UI doesn’t support editing landscape orientation.
- Its free version has limitations of creating max 100 projects.
~Price:
Its Premium version is available for $3.9/month or $20.9/year.
Some Paid iPhone Video Editors:
If you want to move forward and get your hands on these paid softwares to try new features then you should buy these paid softwares. As most of these softwares are quite affordable but they pack the punch. And some of them can give you more in return than your investment. Then what are you waiting for? go and try them yourself.
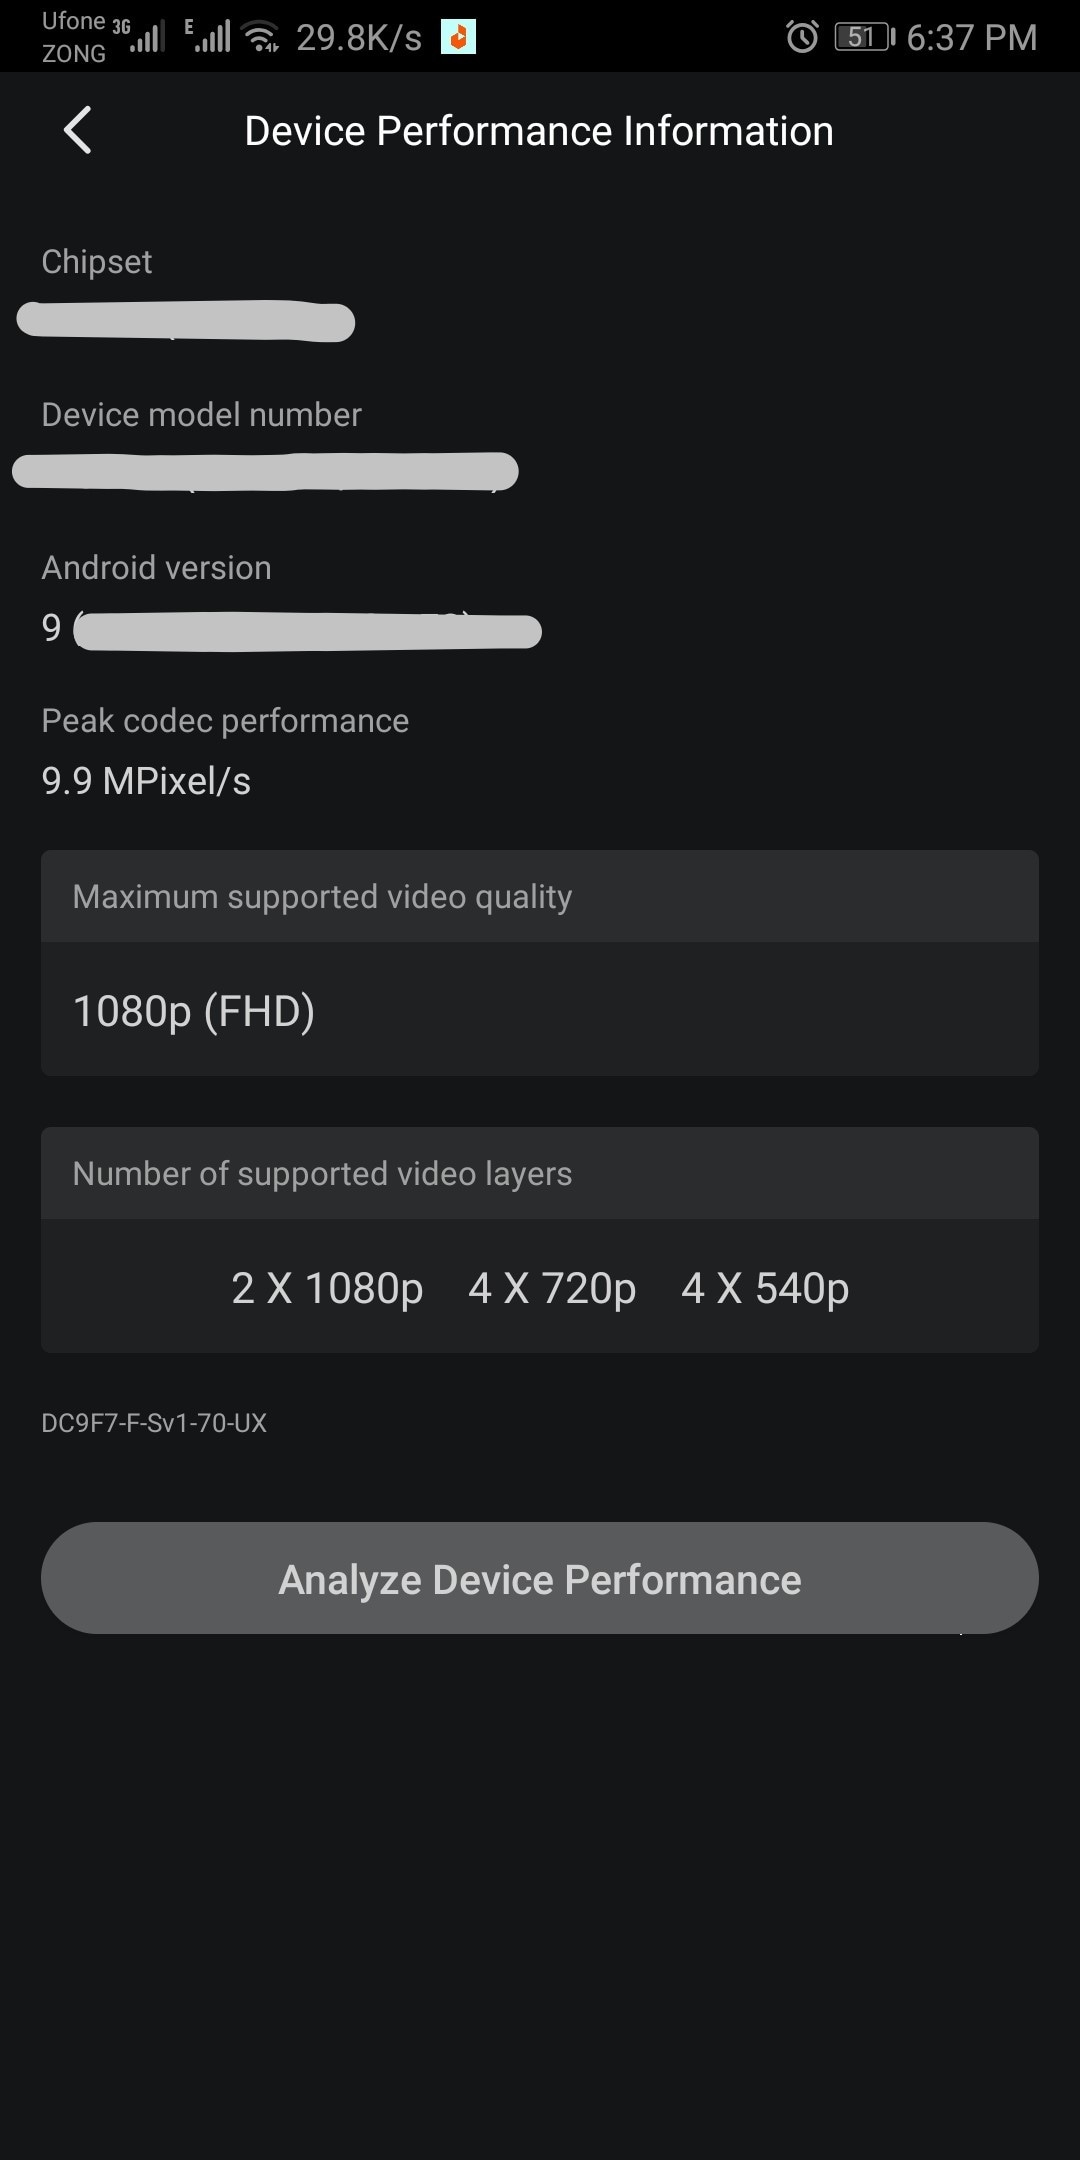
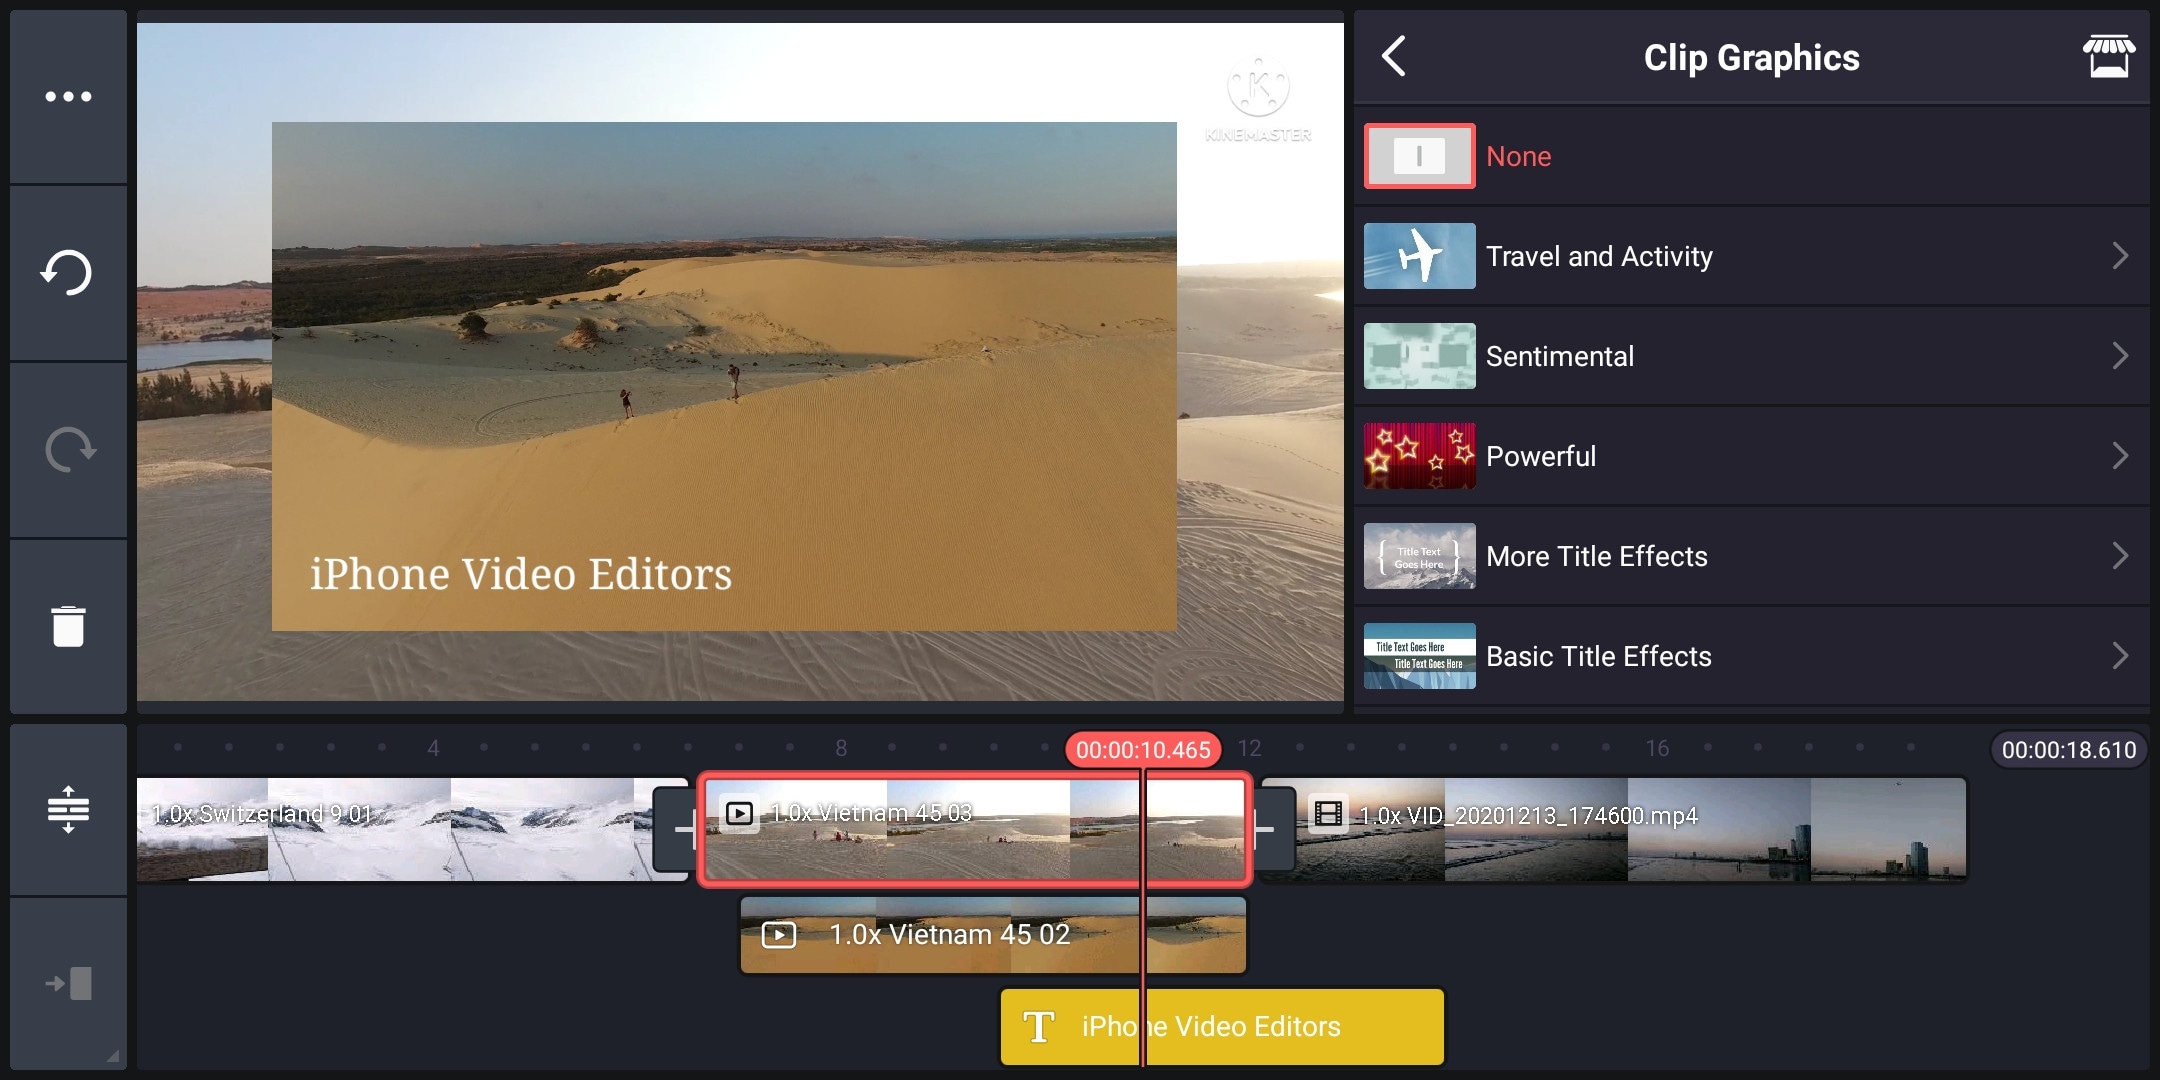
Kinemaster:
It is available on IOS and Android both.
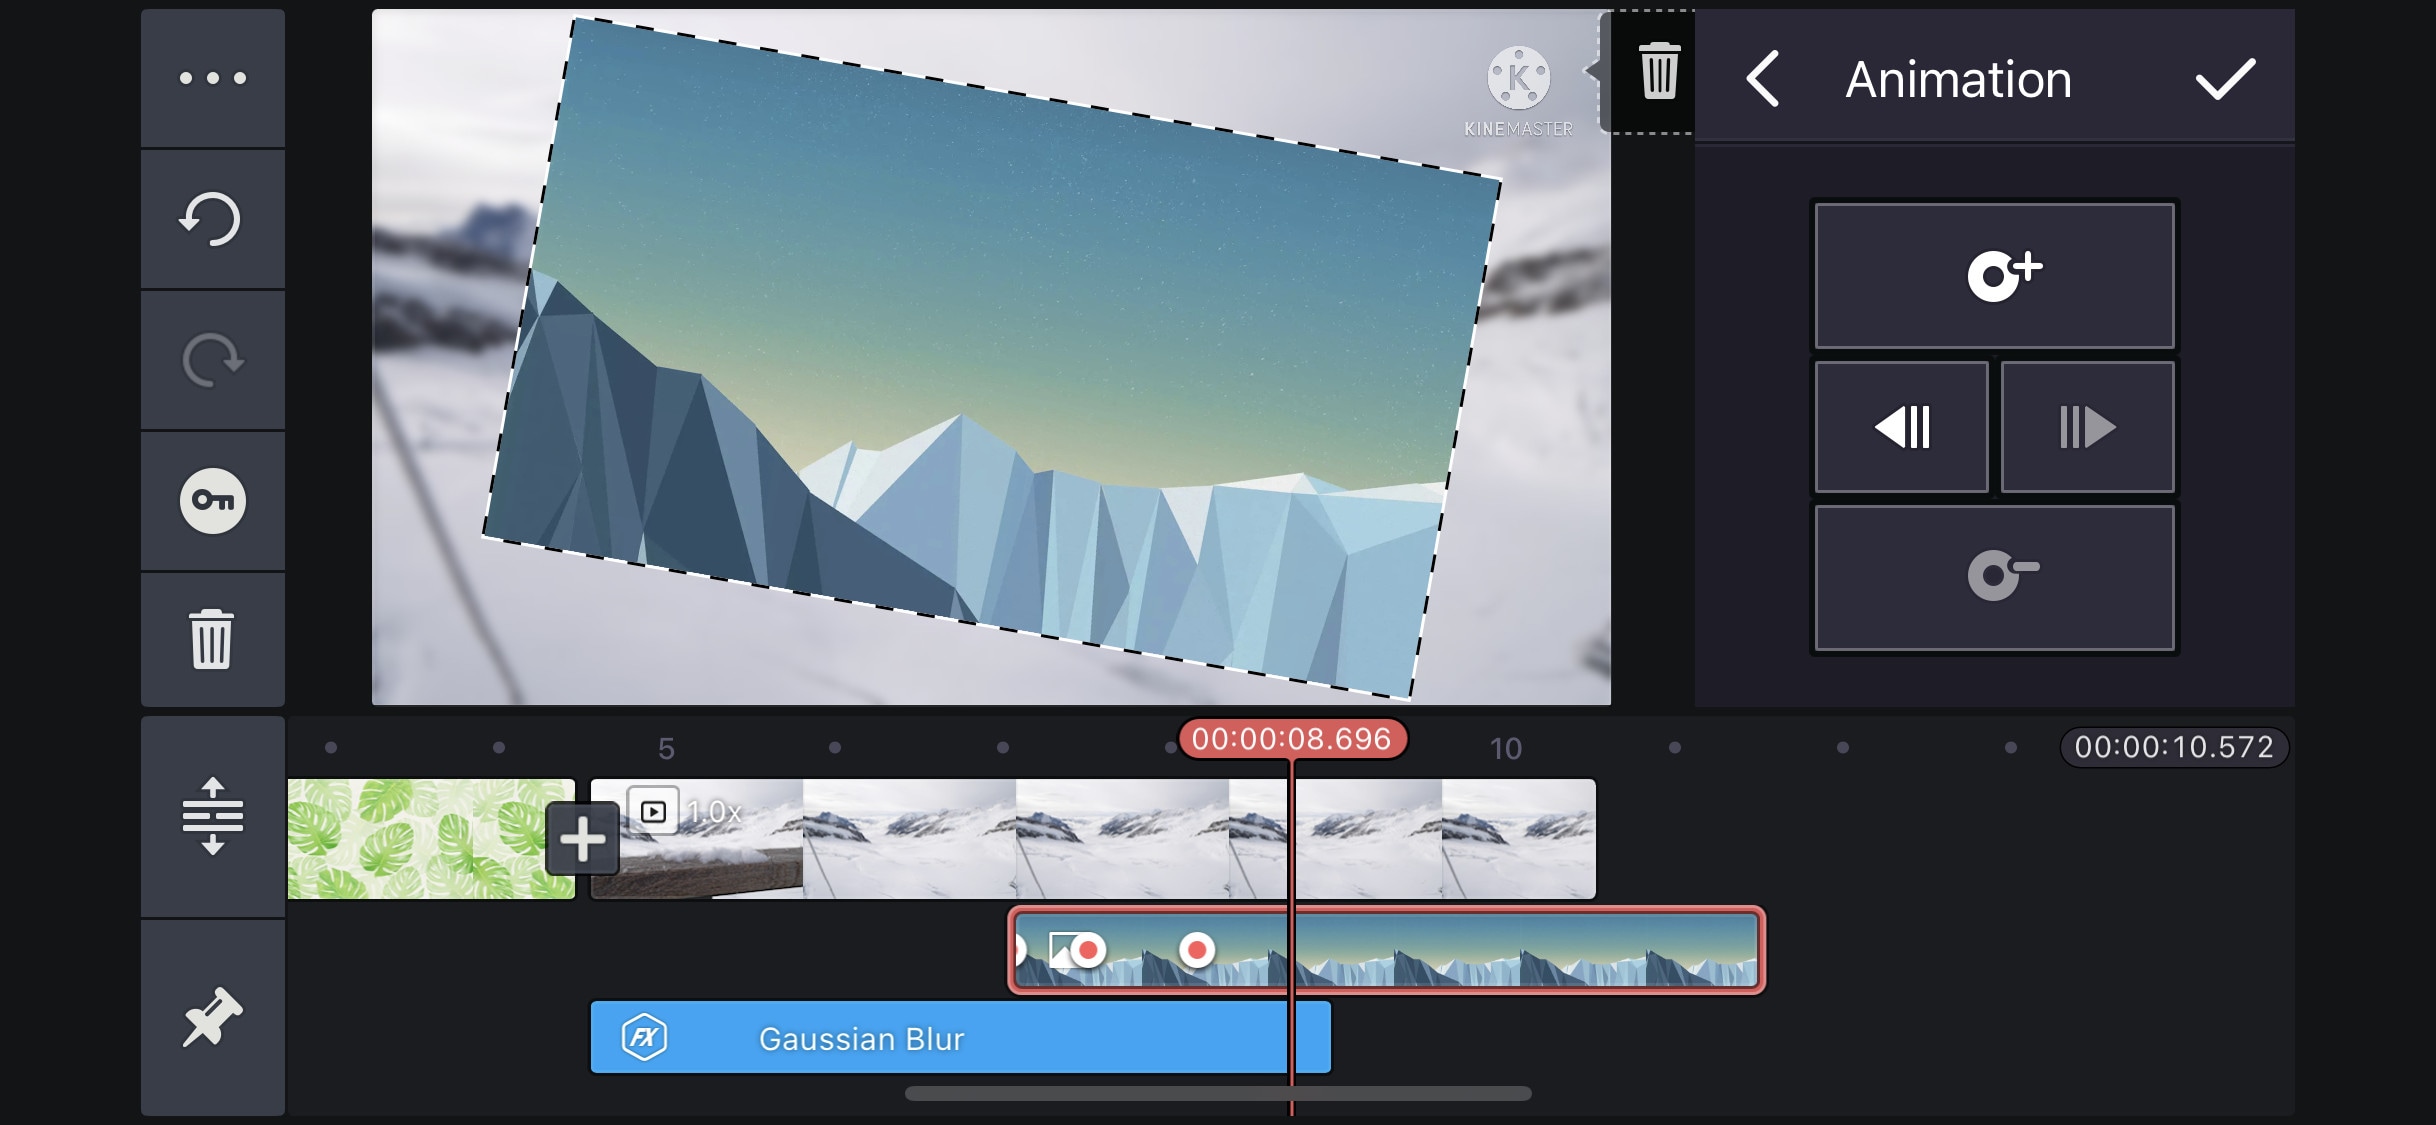
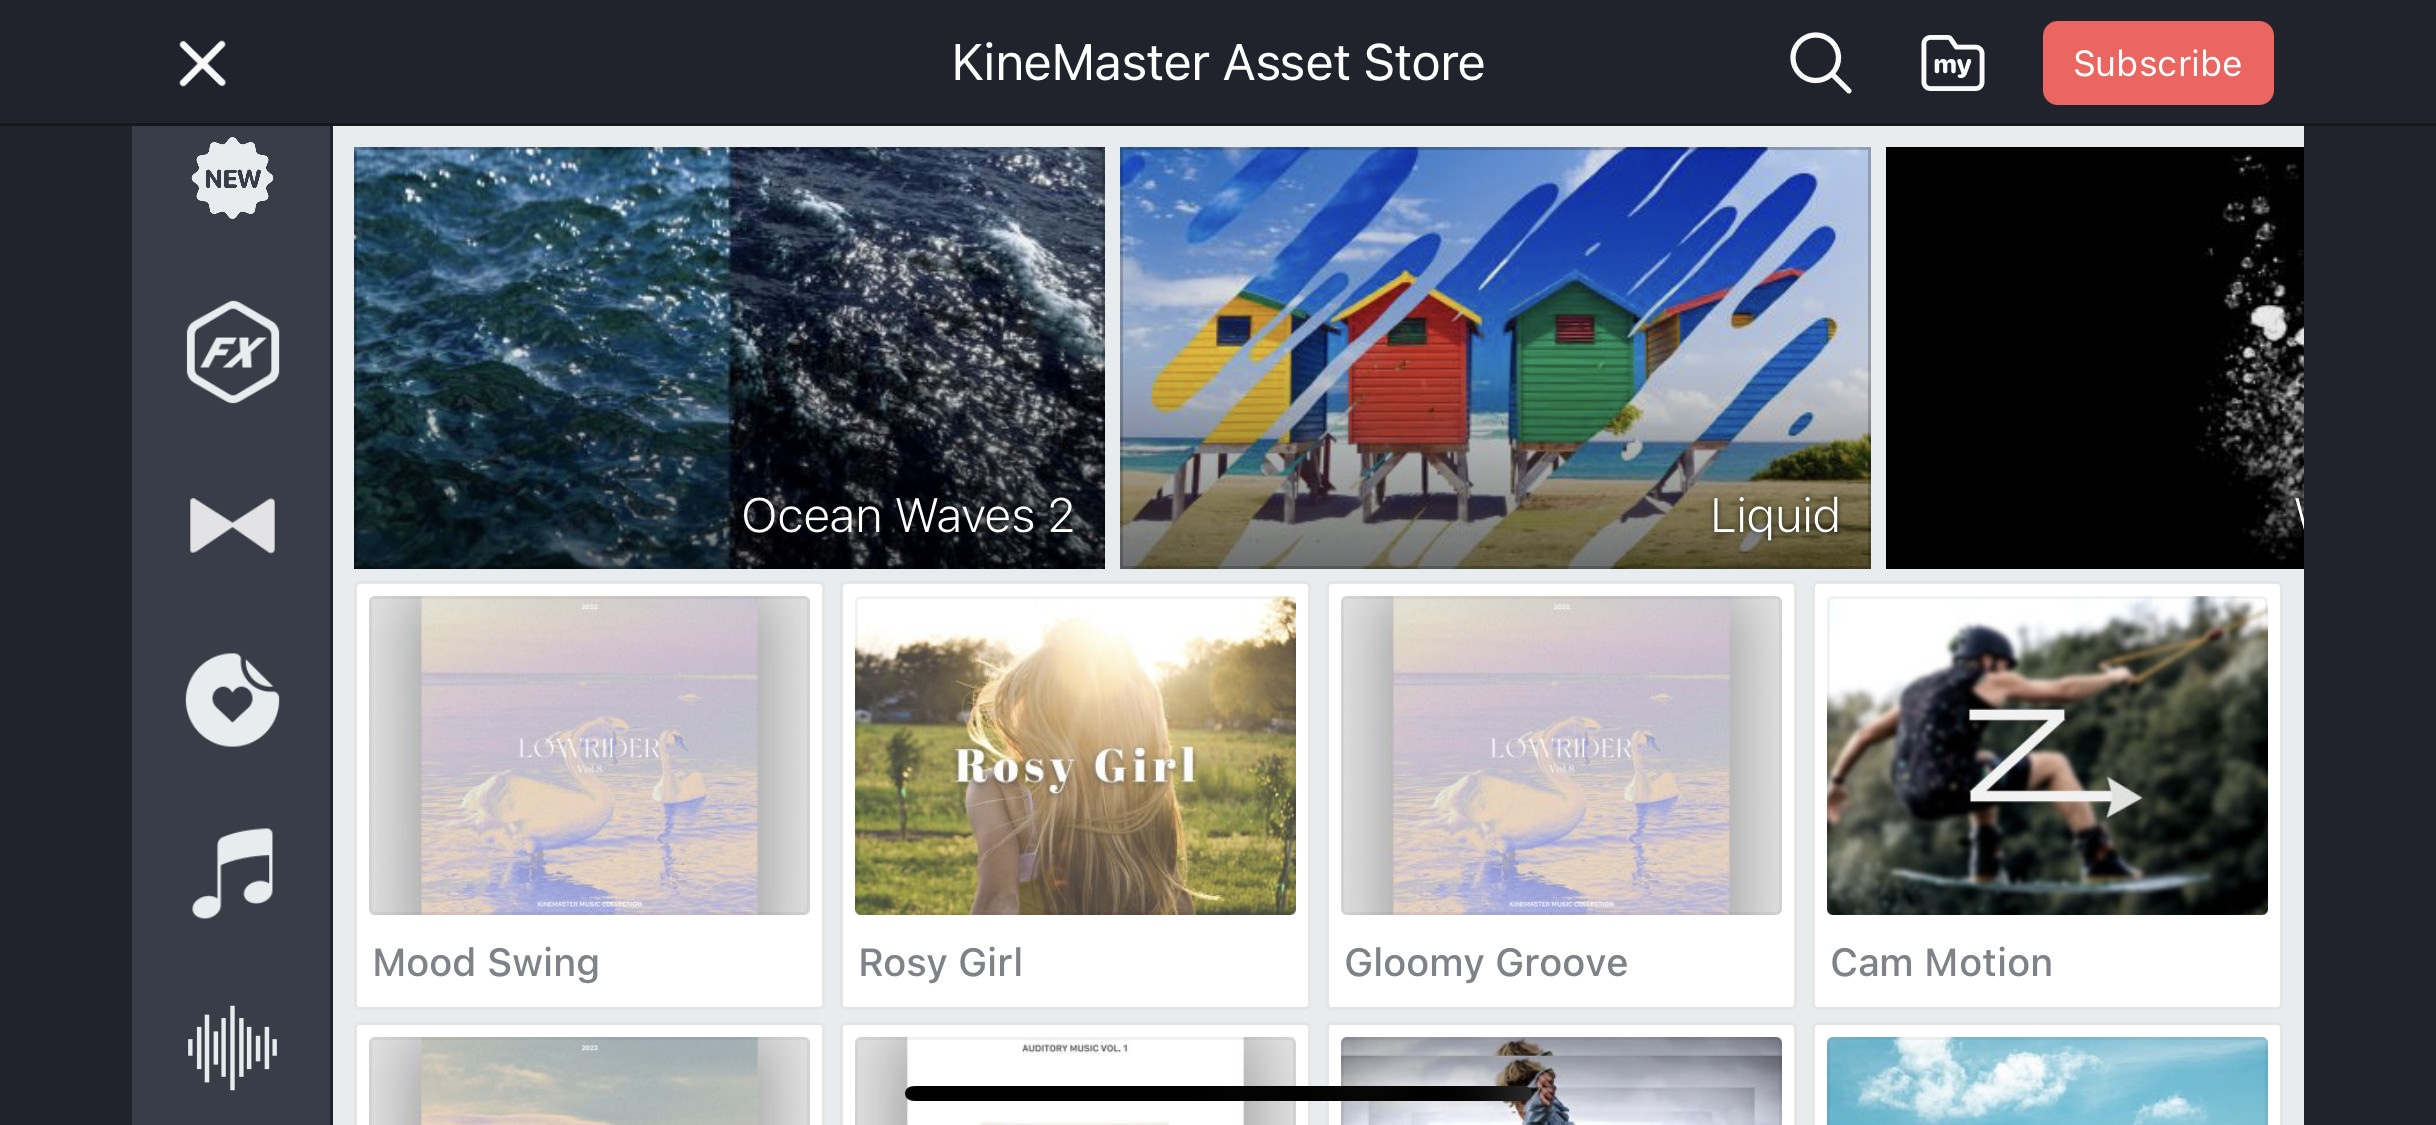
If you want to do more than just trimming and cropping to your videos then you should try Kinemaster. For editors, who want to do some advanced-level video editing on their phone, then you must have Kinemaster on your phone. It is a paid software, which is packed with many useful features. It has many video and audio effects. It also has an amazing audio editor. It also has many title designs and basic color correction tools. It has hundreds of effects and transitions + more can be downloaded from its asset store. Its UI is suitable for beginners and content creators both. It is a paid software, but all its features are completely free to use, but the free version leaves a watermark on export.
~Features:
- It supports up to 4K resolution at 60fps. (depending on mobile configuration)
- Have amazing features like chroma key, keyframing, blend e.t.c
- Has built-in audio and video recorder.
- Supports multiple texts and video layers with different resolutions depending on the capability of the mobile phone.
- Has UI like a PC video editor and supports landscape orientation for editing.
- Have an asset store with 100s of free effects, transitions, and stock material.
~Cons:
- Can’t export 4K videos on most devices.
- Can’t apply keyframes and chroma key to the main video. (can be done on layers only)
~Price:
Its Premium version is available for $4.9/month or $39.9/year. It also includes all the premium assets.
Power Director:
It is available on IOS and Android both.
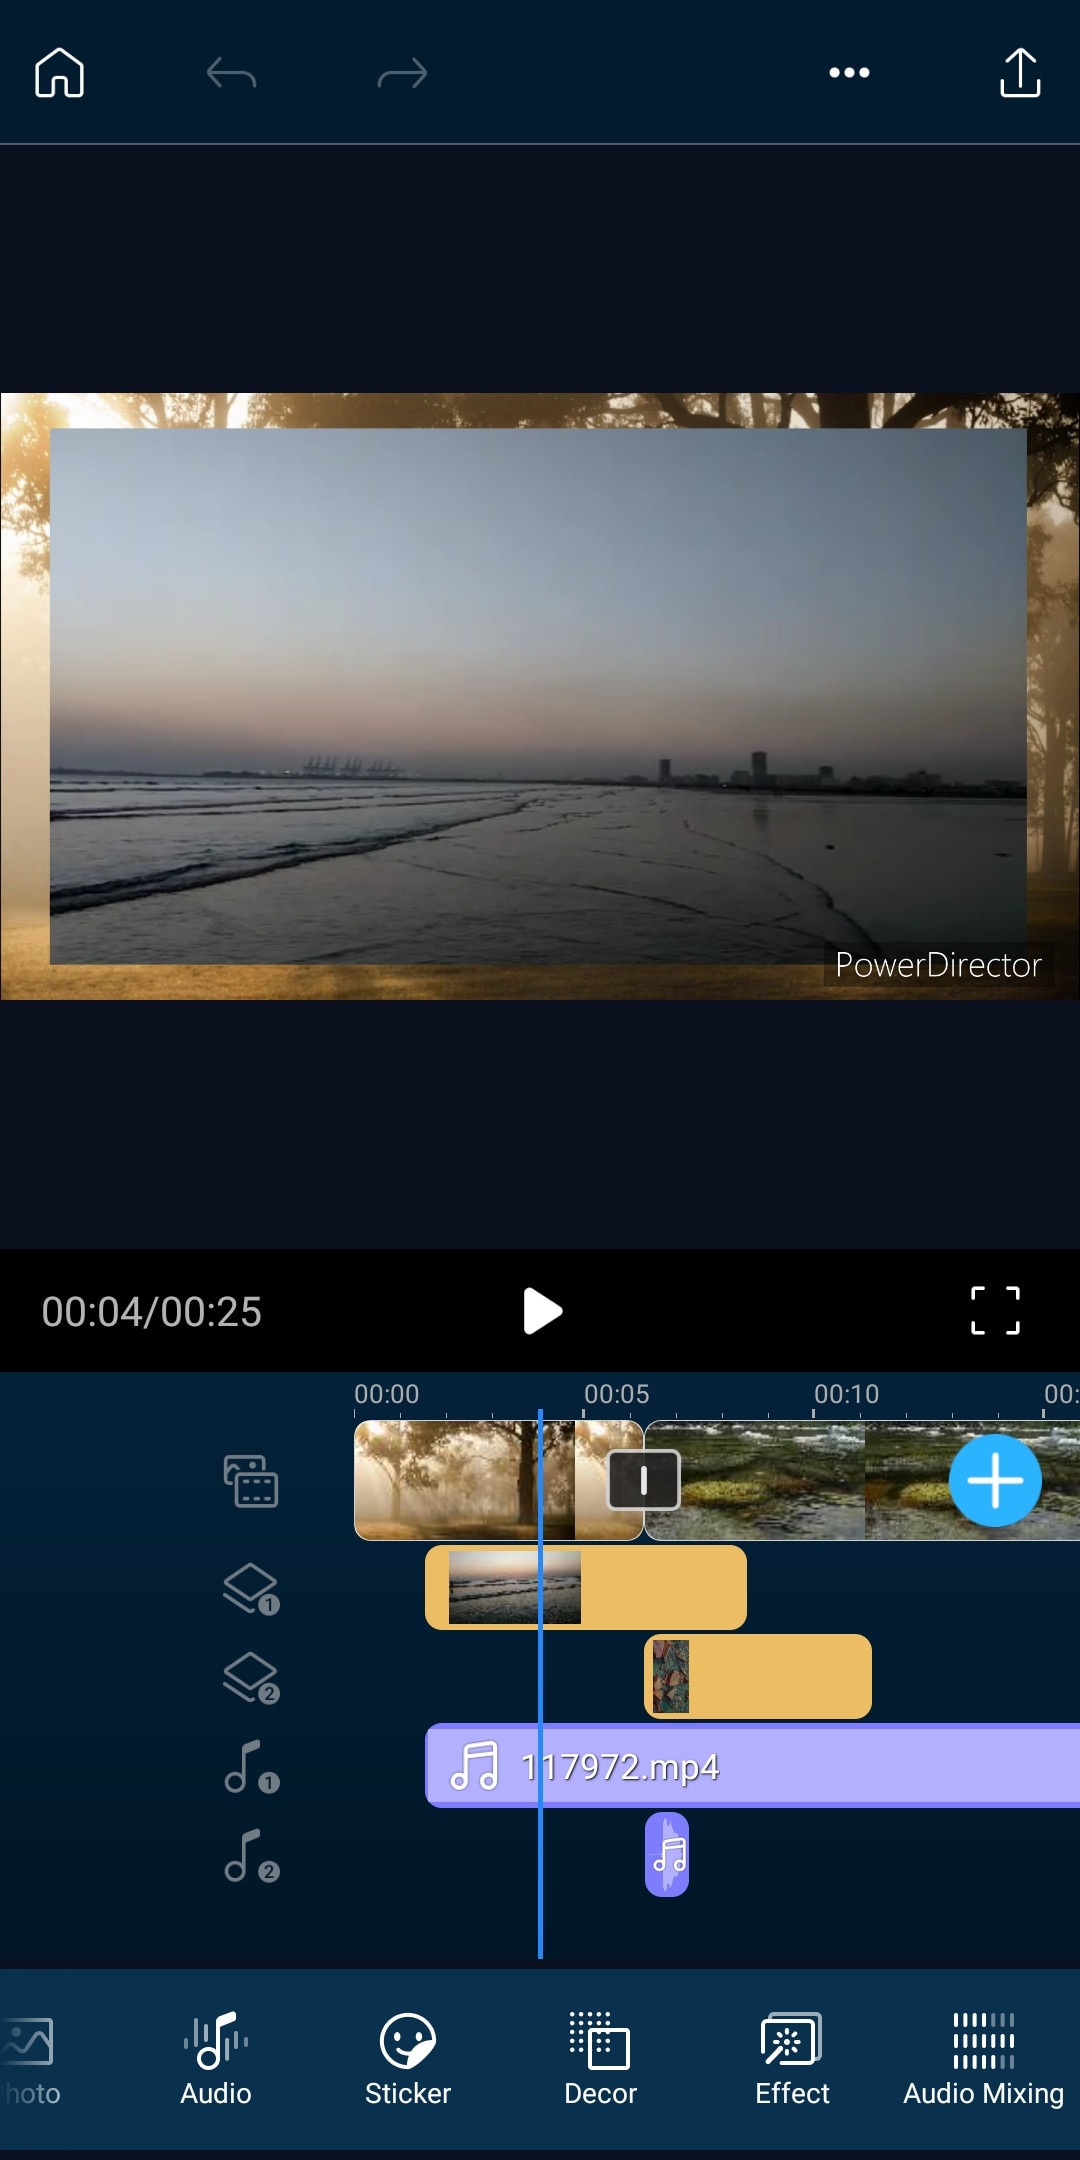
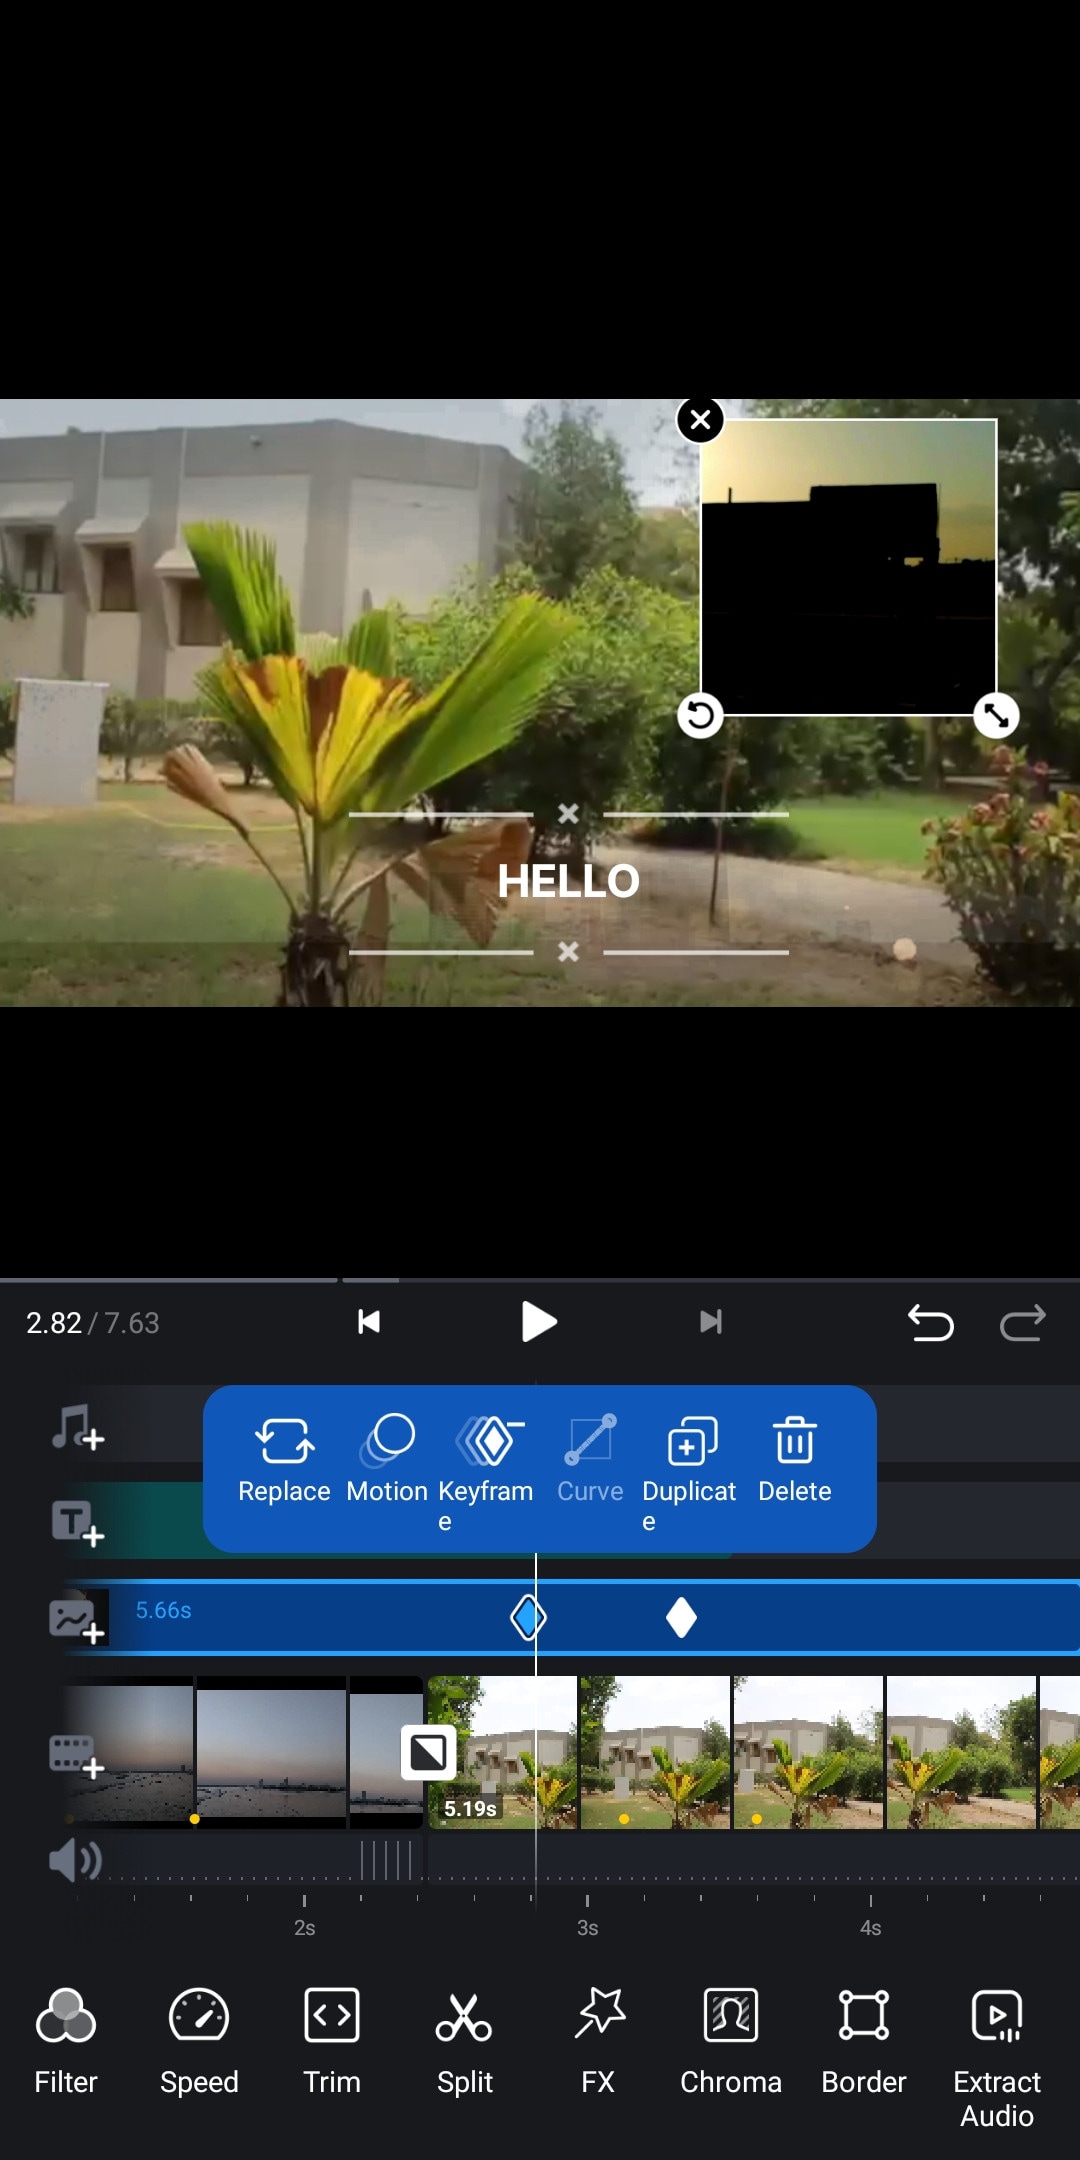
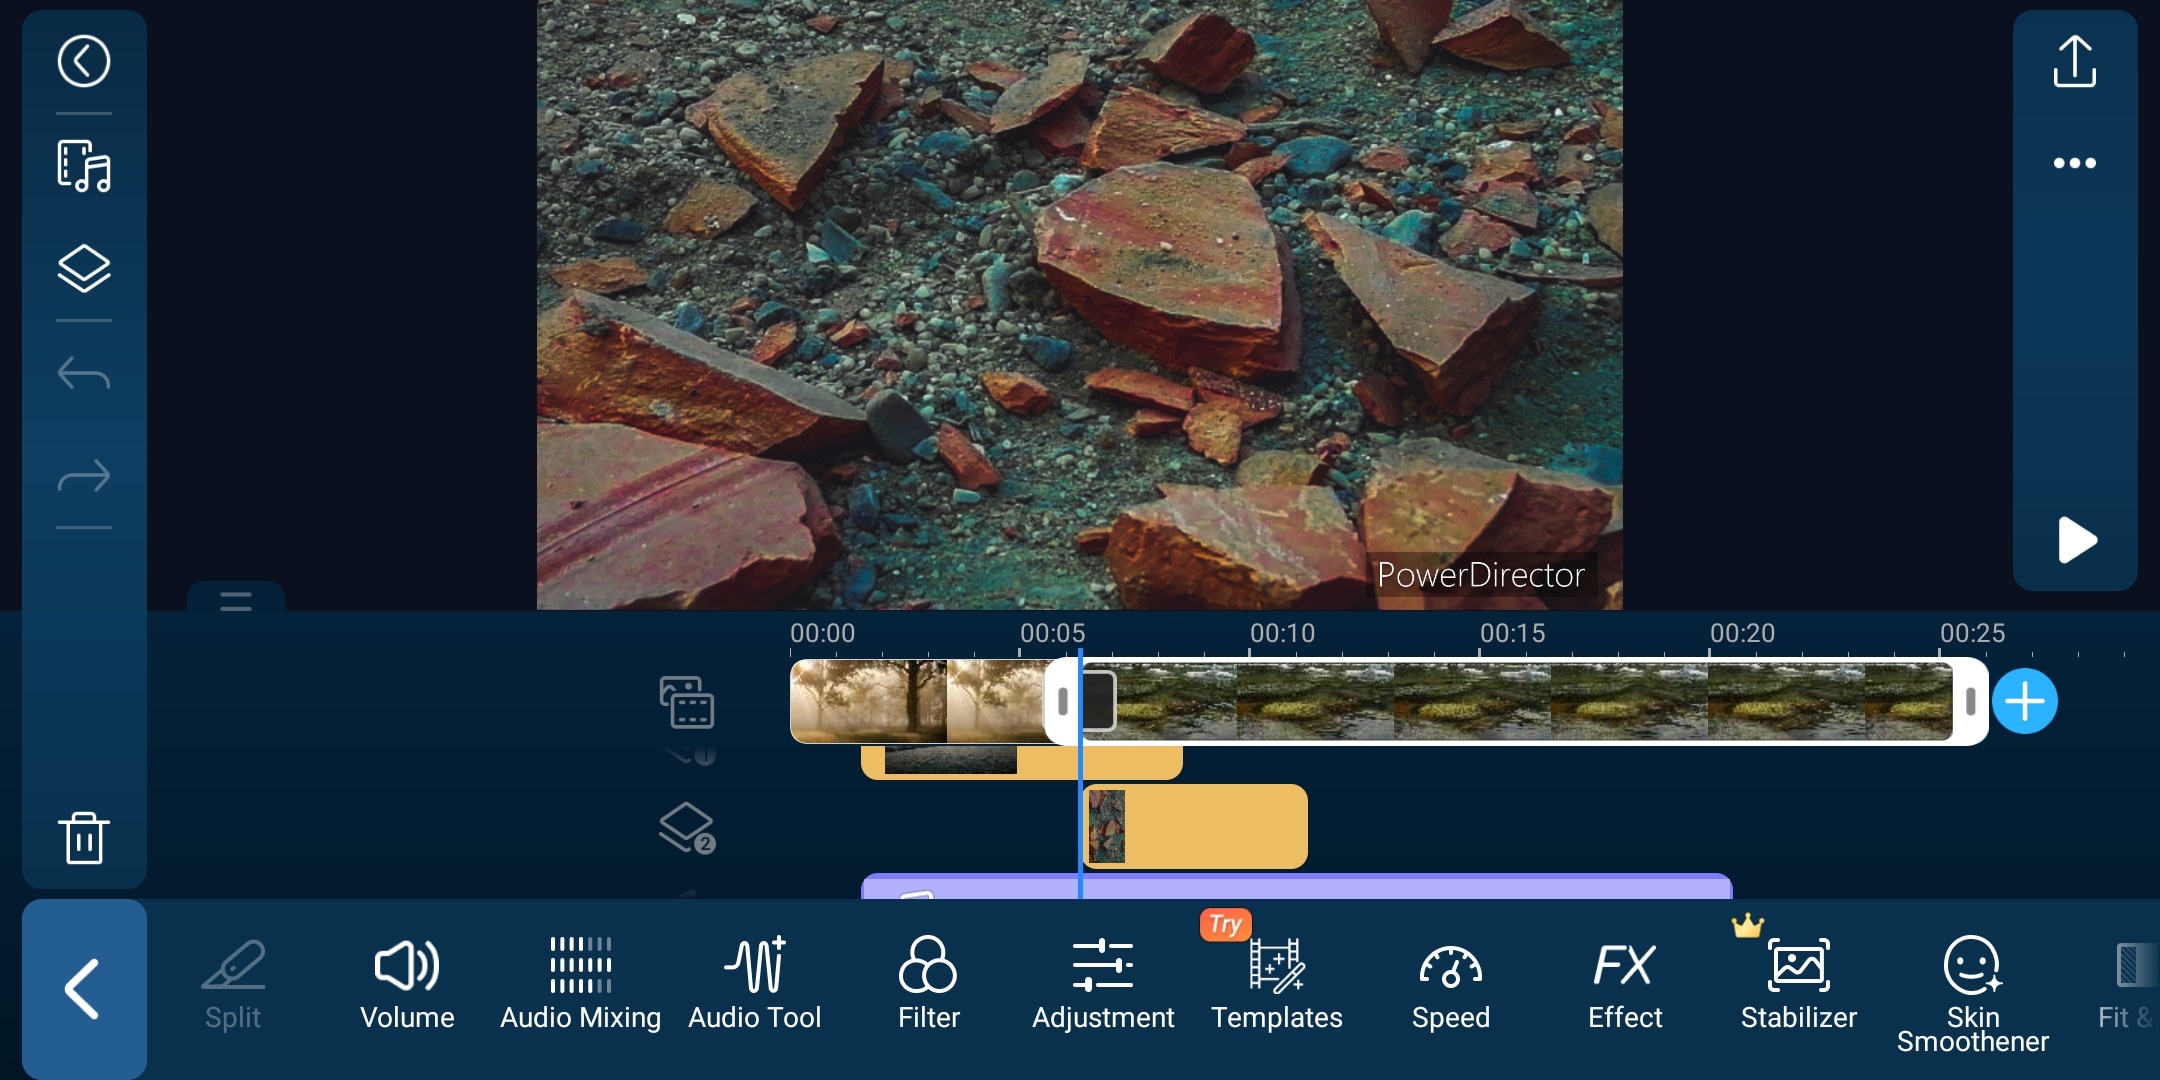
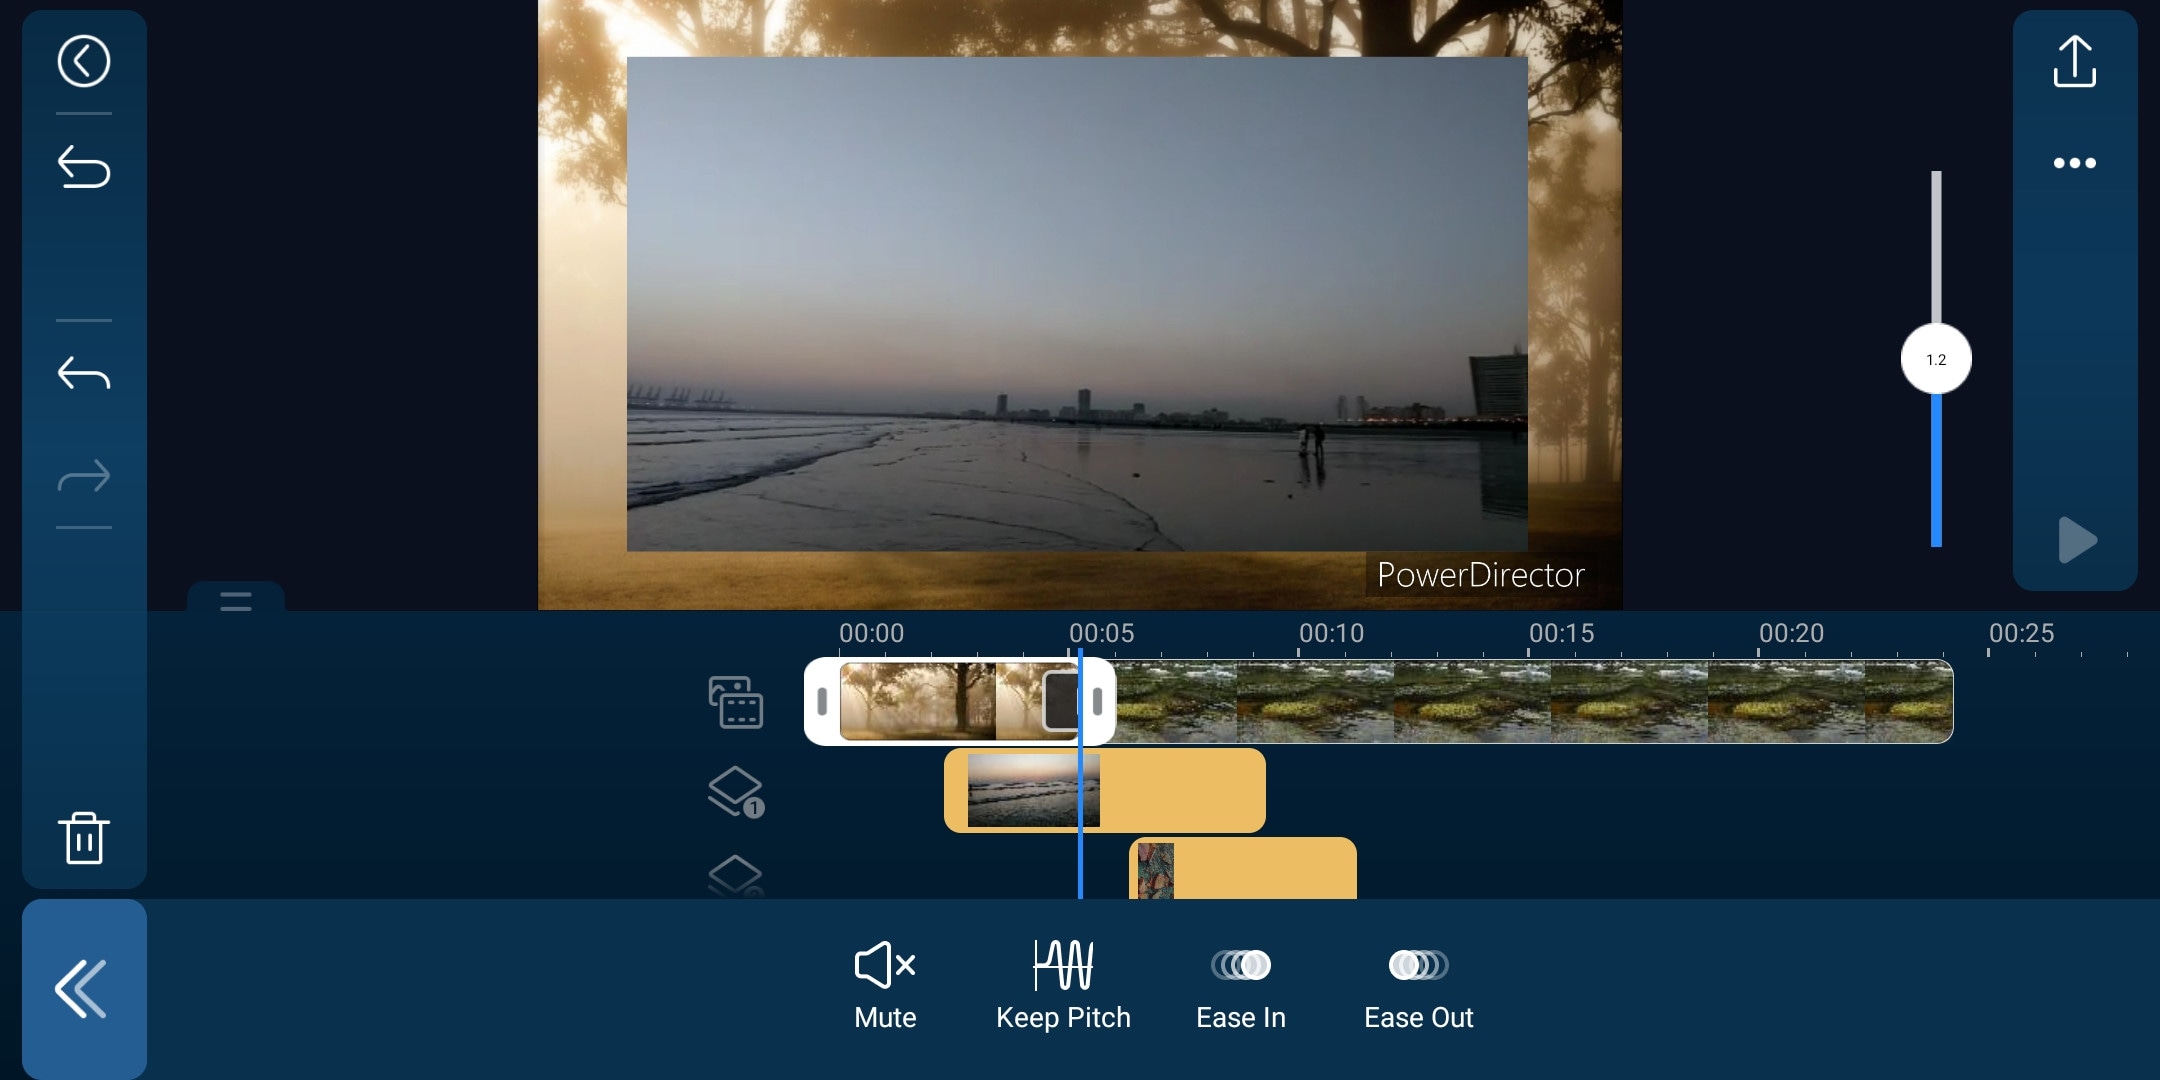
It is a paid but quite advanced video editor available for androids and IOS both. Like its PC version mobile version is also packed with many great features. It is compact and easy to use. It supports multiple video and audio layers. Have many cool filters and transitions. Can also do basic color corrections. To complete post-production work it also has audio editing tools and effects. It also has hundreds of title designs. Its UI is easy to use and supports both portrait and landscape orientation for editing. Most of its features can be used for free with a watermark on export. To remove the watermark you need to purchase the premium version.
~Features:
- It supports up to 4K resolution at 60fps. (compatible on most devices)
- Supports both Portrait and Landscape orientation for editing.
- Supports Key framing and video stabilization also.
- Supports multiple audio and video layers.
- Can edit videos in different aspect ratios.
- Have a vast stock library.
~Cons:
- Can’t export 4K videos on many devices.
- Can apply keyframing and chroma key to layers only.
- Software lags sometimes.
~Price:
Its Premium version is available for $4.9/month or $29.9/year.
LumaFusion:
It is available on IOS and Mac (with an m1 processor).
If you are a content creator and want to do professional-level video editing on your phone then you should get your hands on “LumaFusion”. It is of the most powerful and advanced video editors designed for a mobile phone. But it only works on iPhones and iPads. It is a multi-track video editor with many useful features like the Chroma key, keyframing, color grading, and color LUTs. Have powerful color grading tools and an audio editor. It also has a lock and load stabilizer. You have to purchase the software before using it. It doesn’t have any free version to try.
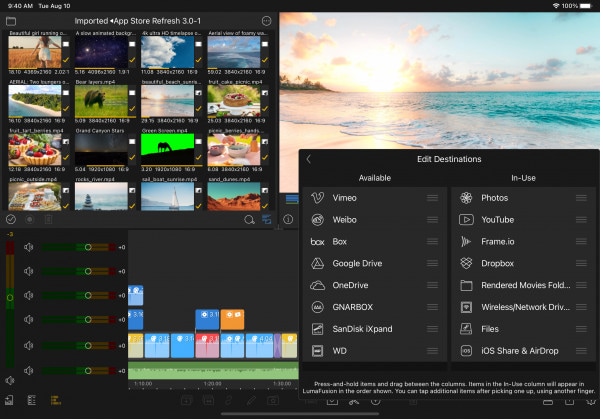
Credits: Pic by Luma touch website.
~Features:
- It supports up to 4K video resolution at a max of 240 fps.
- Can also edit and export 360 videos.
- Have powerful color correction tools. You can also import your own color LUTs.
- Supports Keyframing on almost all the editing tools within the software.
- You can add some third-party audio plugins.
- Supports up to 6 audio and video layers.
- Have “Storyblock” stock library. (Many of its contents are free to use)
- Supports external monitor for display.
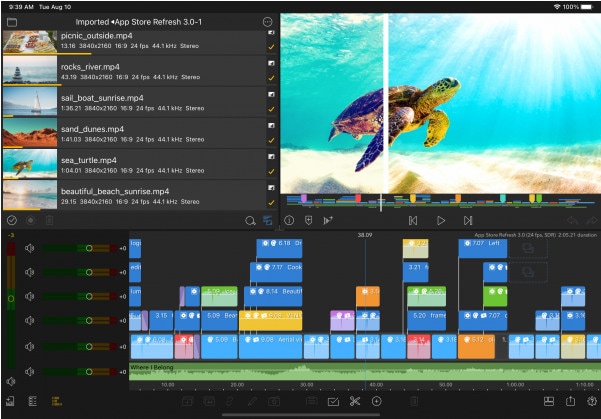
Credits: Pic by Luma touch website.
~Cons:
- Not available for Android devices.
- Being an advanced software, it doesn’t have masking and speed ramping features.
- Doesn’t have a free version to try on.
~Price:
It is available for purchase at $29.99.
InShot:
It is available on IOS and Android both.
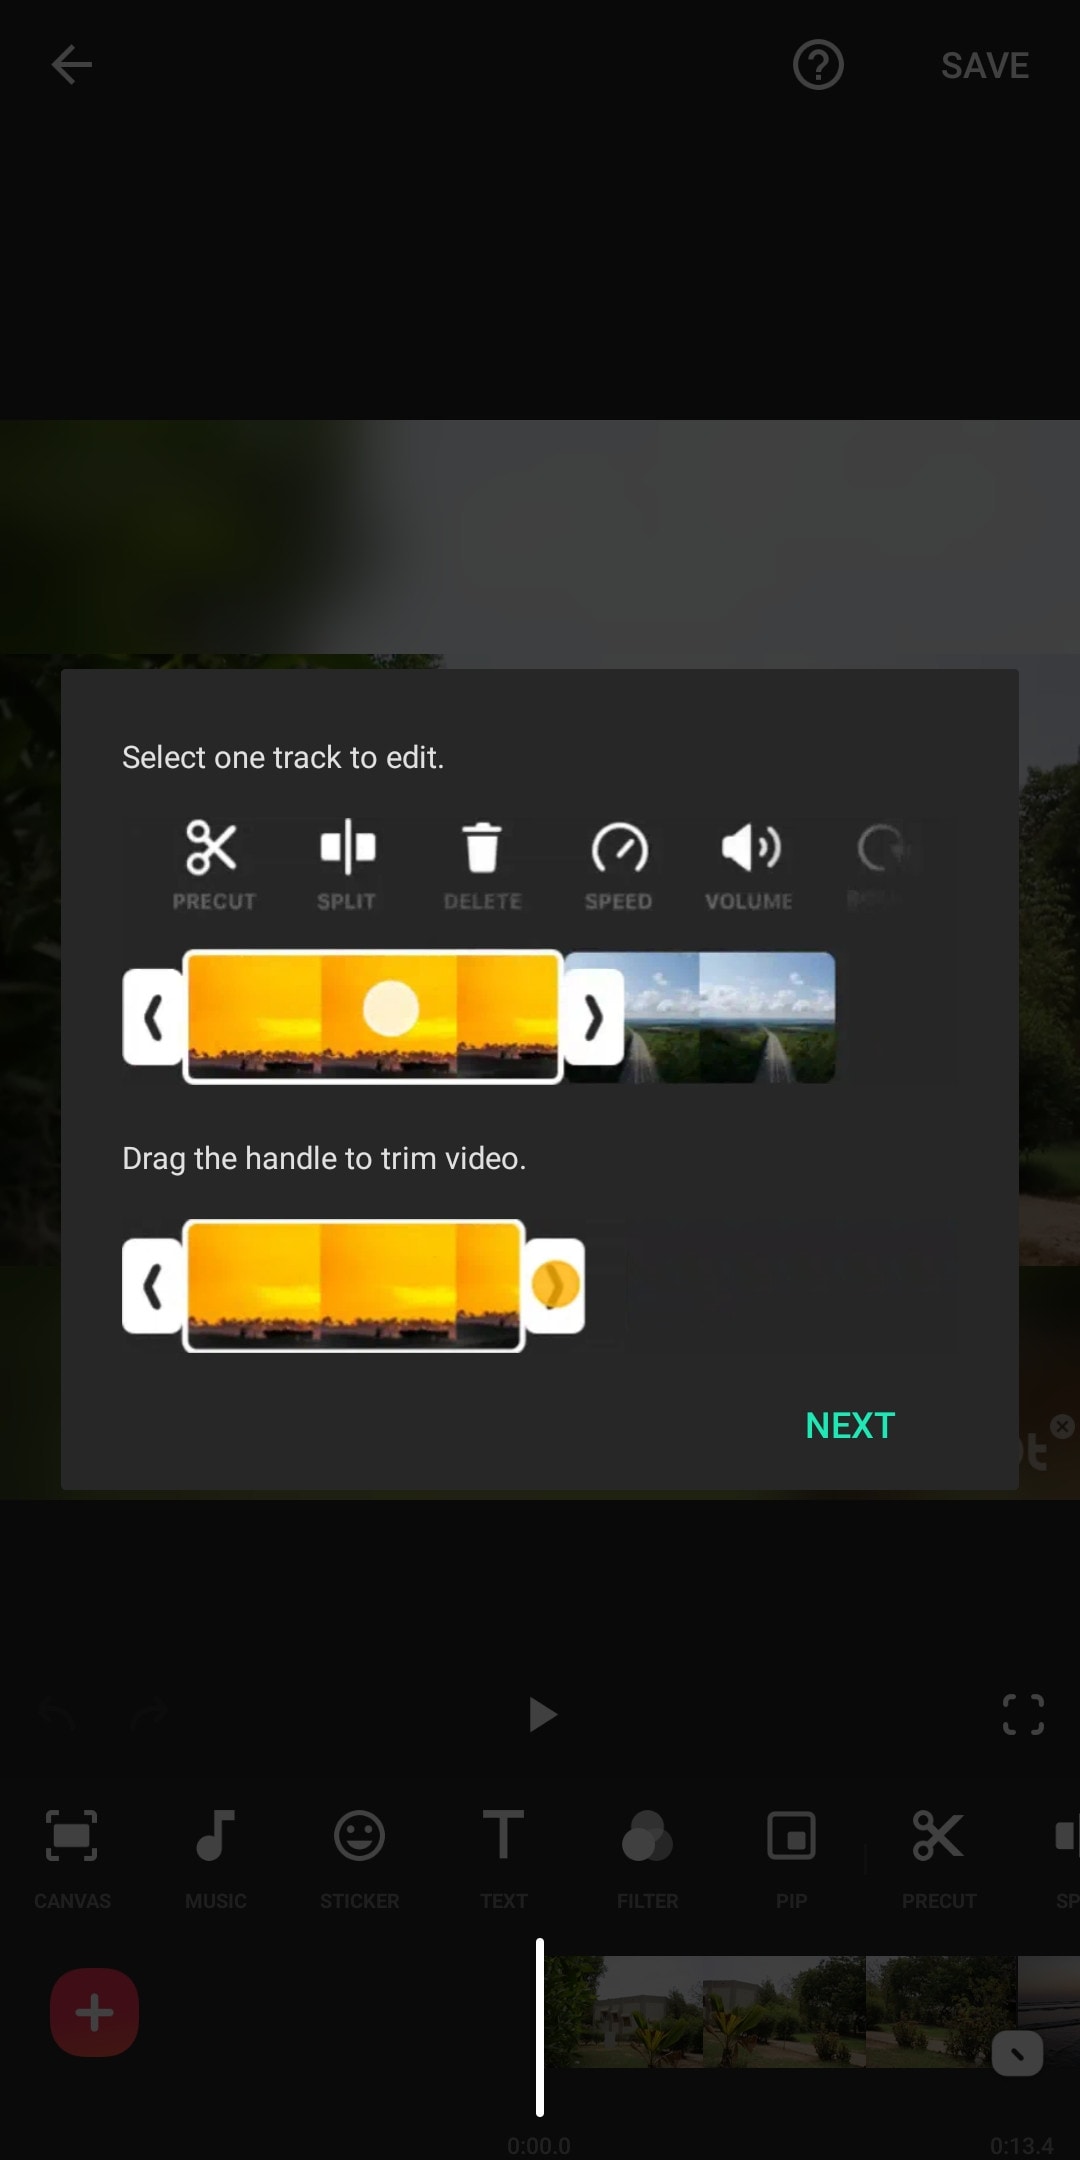
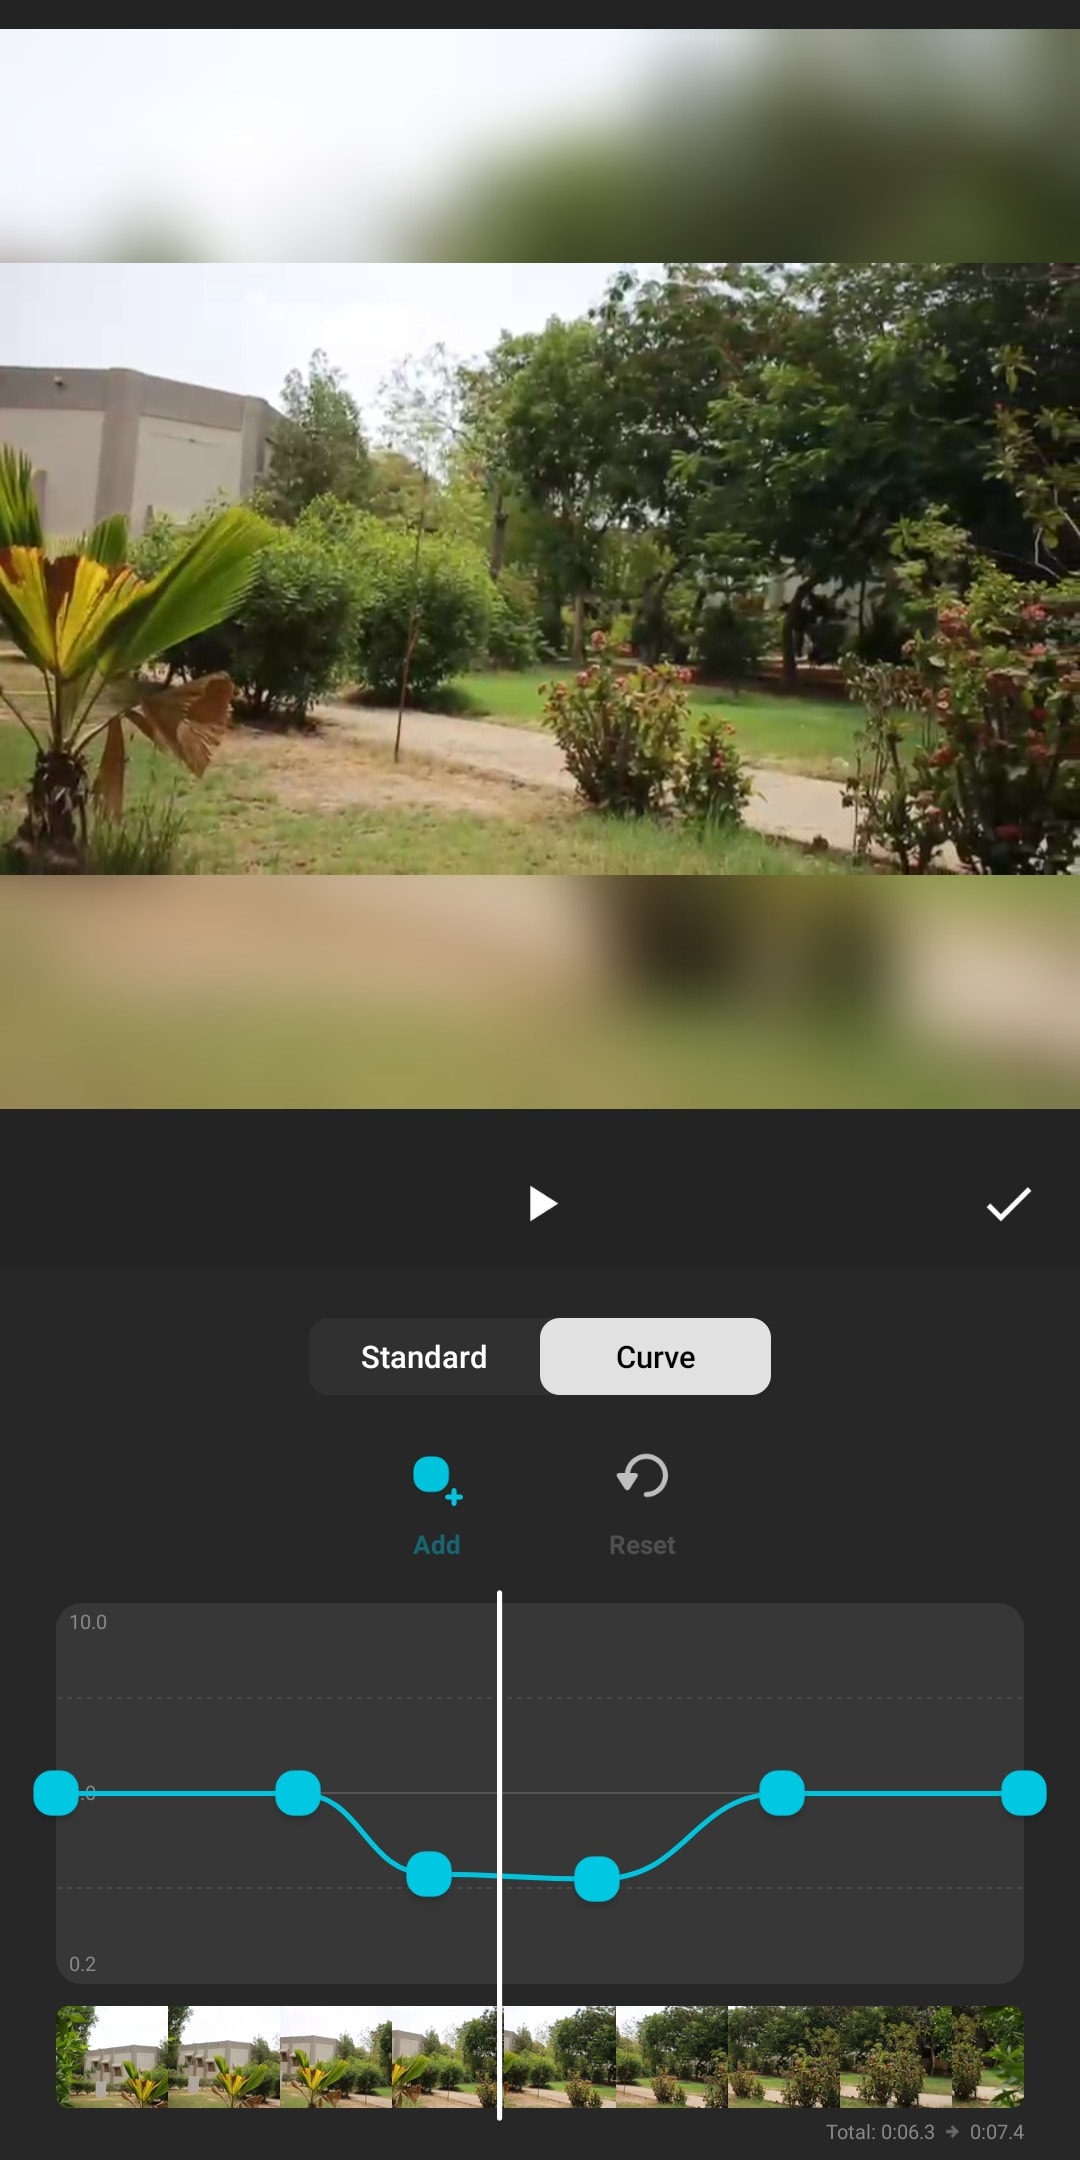
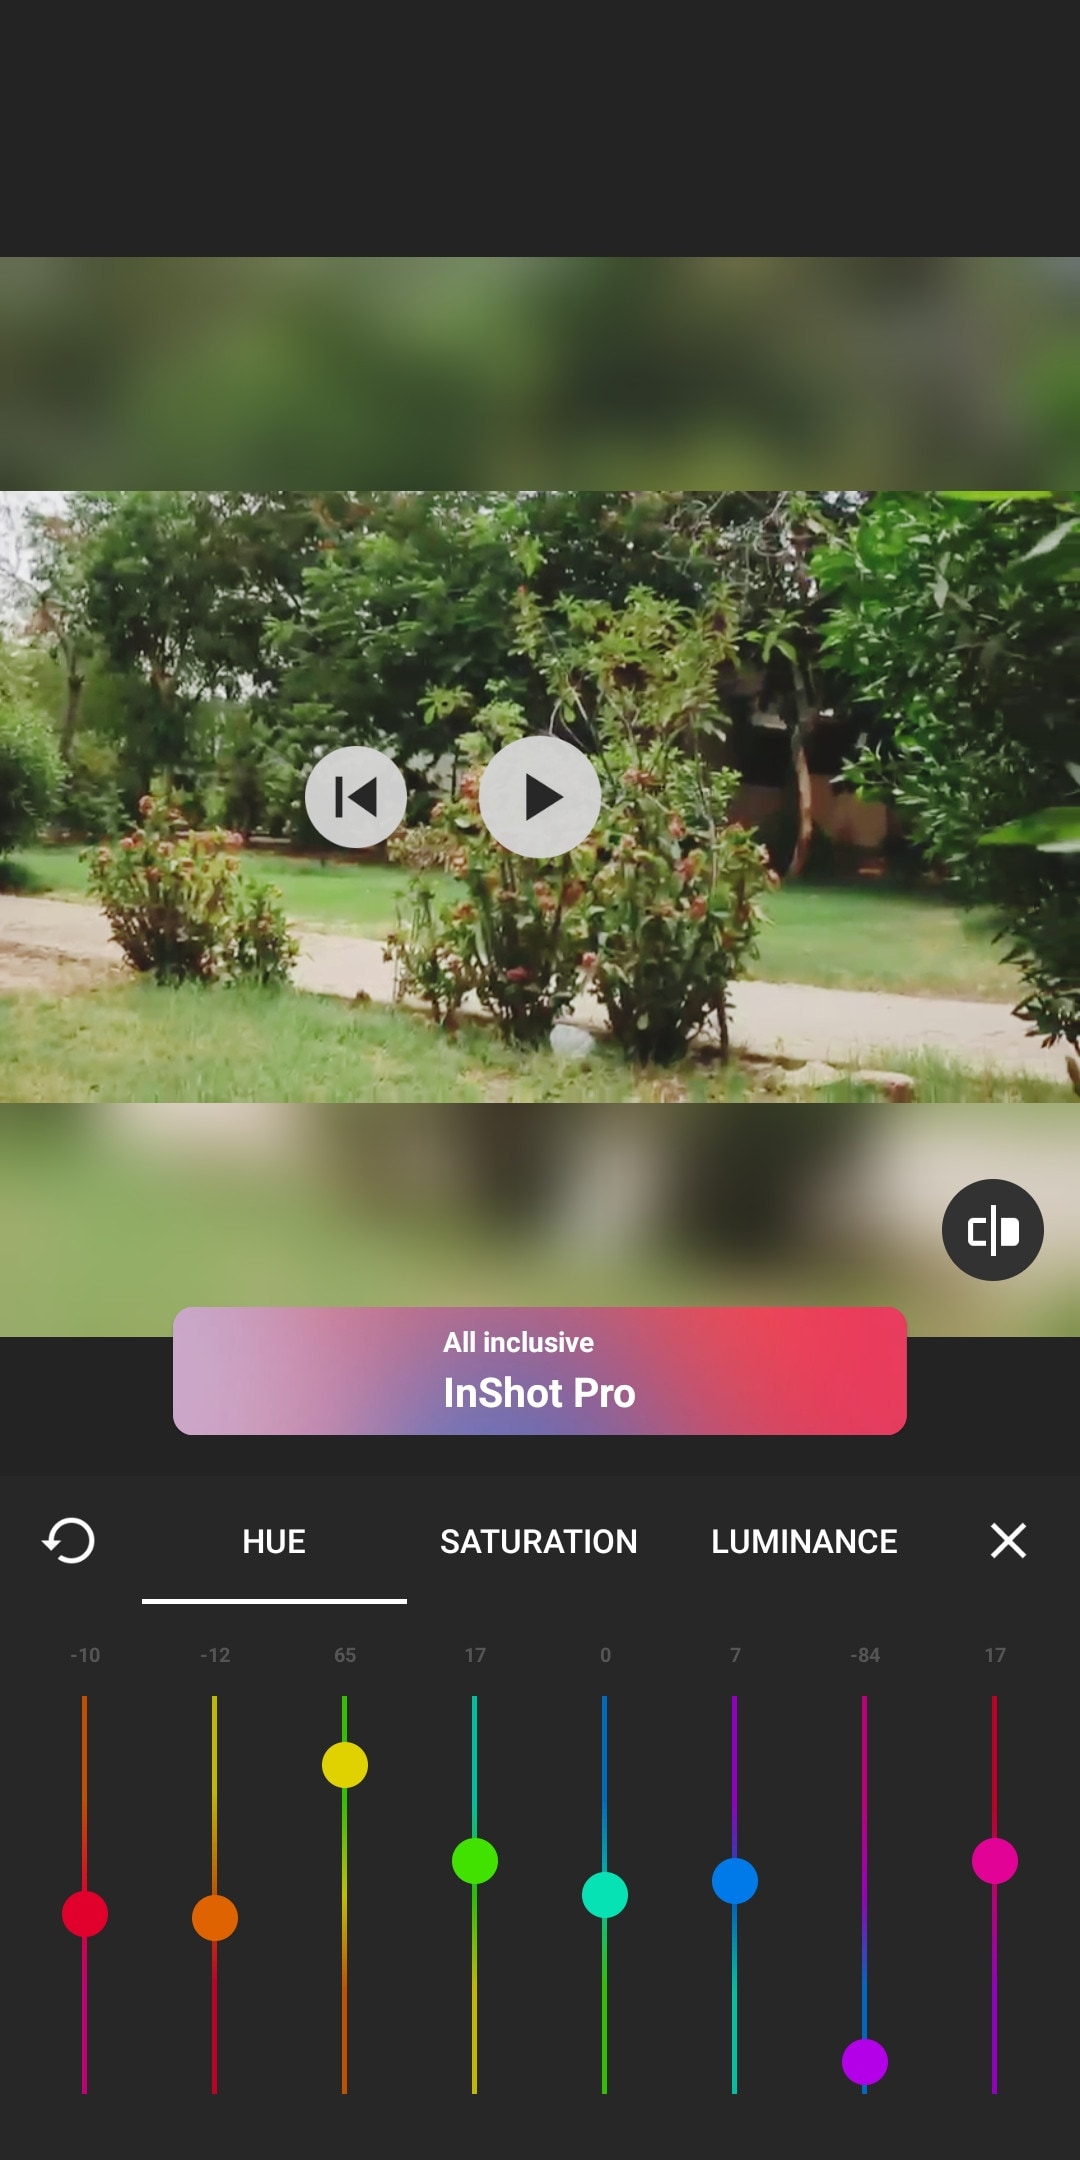
If you are new to video editing and want to do simple editing tasks then this software can be the right choice for you. It is simple and easy to use. Apart from just trimming and arranging your clips, it also has some cool features like speed ramping, chroma-key, mask e.t.c. It also has an HSL color grading tool. You can add multiple layers as PiP. It is a paid software but you can try it for free with the watermark on export.
~Features:
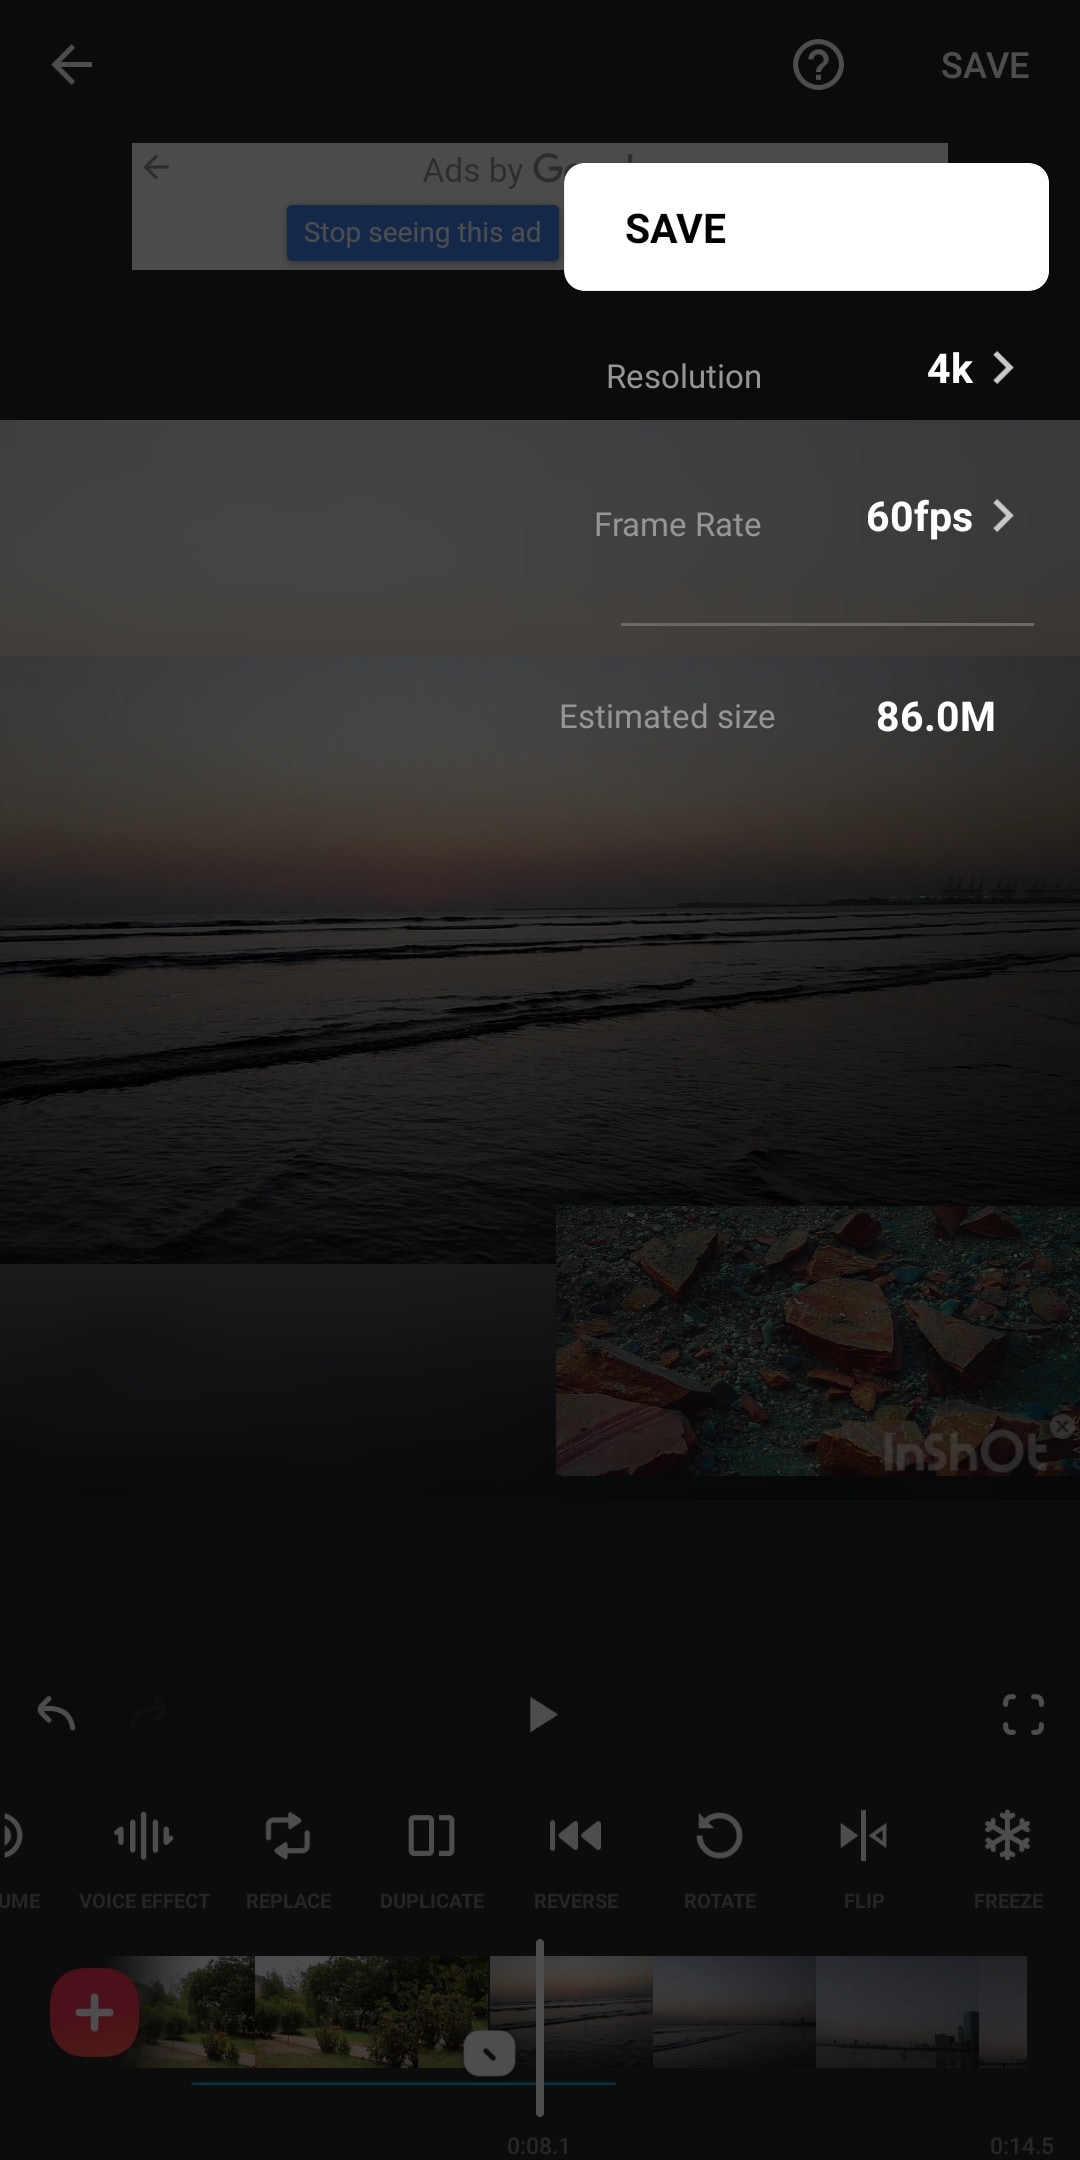
- It supports up to 4K resolution at 60fps.
- Its UI is beginner-friendly.
- Have some advanced color correction and grading tools.
- Supports multiple images and video layers as PiP.
- Have features like a mask, chroma key, and blend for layers.
- Can edit videos in different aspect ratios.
- Have speed curves for smooth speed ramping.
~Cons:
- Doesn’t have advanced tools.
- Its UI doesn’t support editing landscape orientation.
~Price:
It has 3 diff purchase plans. you can get its subscription for $3.9/month or $14.99/year. or you can purchase the software for lifetime at $34.99.
VivaCut:
It is available on IOS and Android both.
Almost every mobile video editor wished for doing PC-like video editing on their phone, but that was not possible due to software limitations and device compatibility. But now you can create PC-like videos on your phone through “VivaCut”. It is a paid software that is packed with many advanced features. Like 3D transform, overlay, Effects, Masking, e.t.c. It has one of the best color correction and grading tools among other mobile video editors. It has advanced keyframing and curve paths that can make splendid animations. It also supports multi-layer video editing. It also has a Grouping tool that let you combine several clips and texts into a single clip for easy editing. It also lets you import your presets. It is a paid software but you can try it for free with the watermark on export.
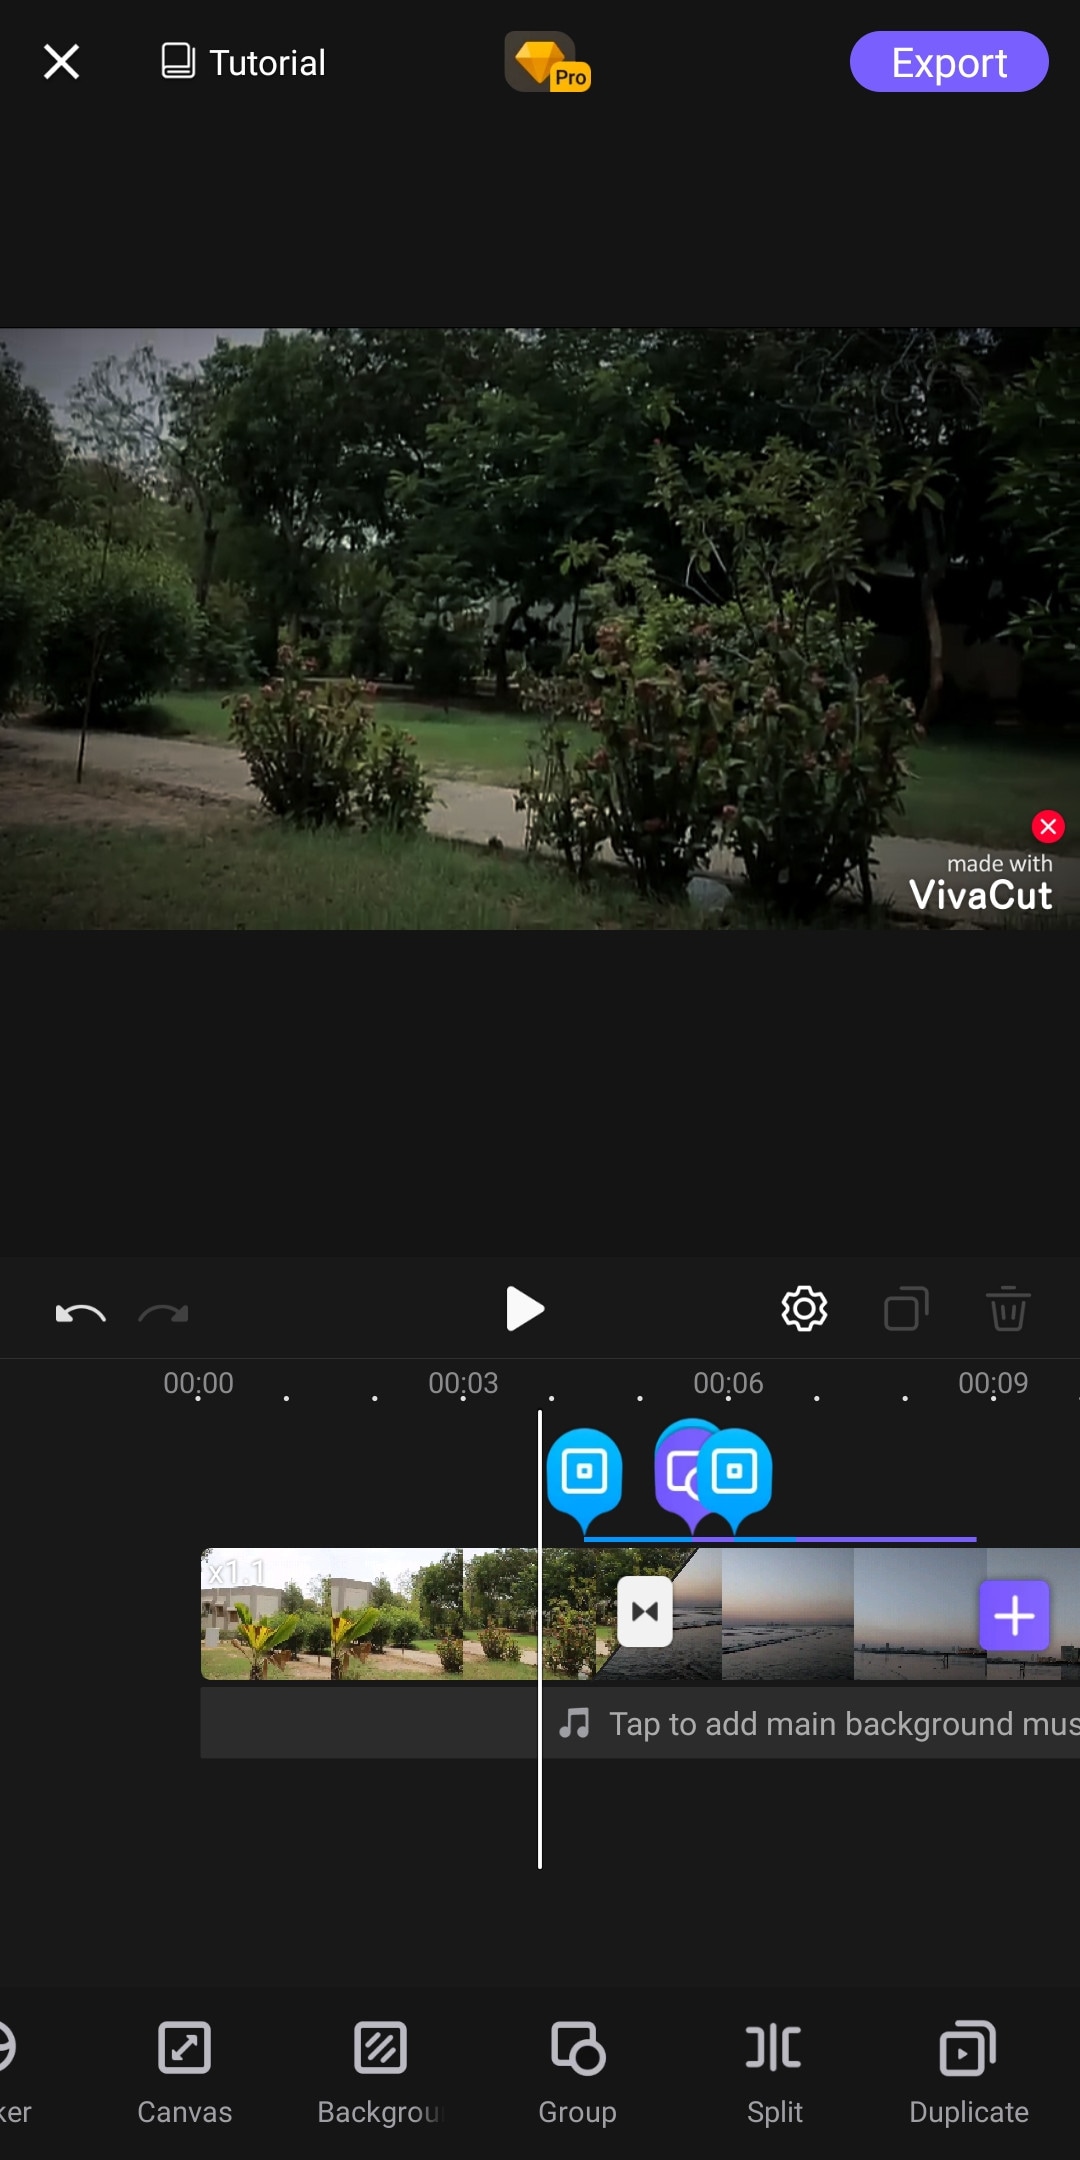
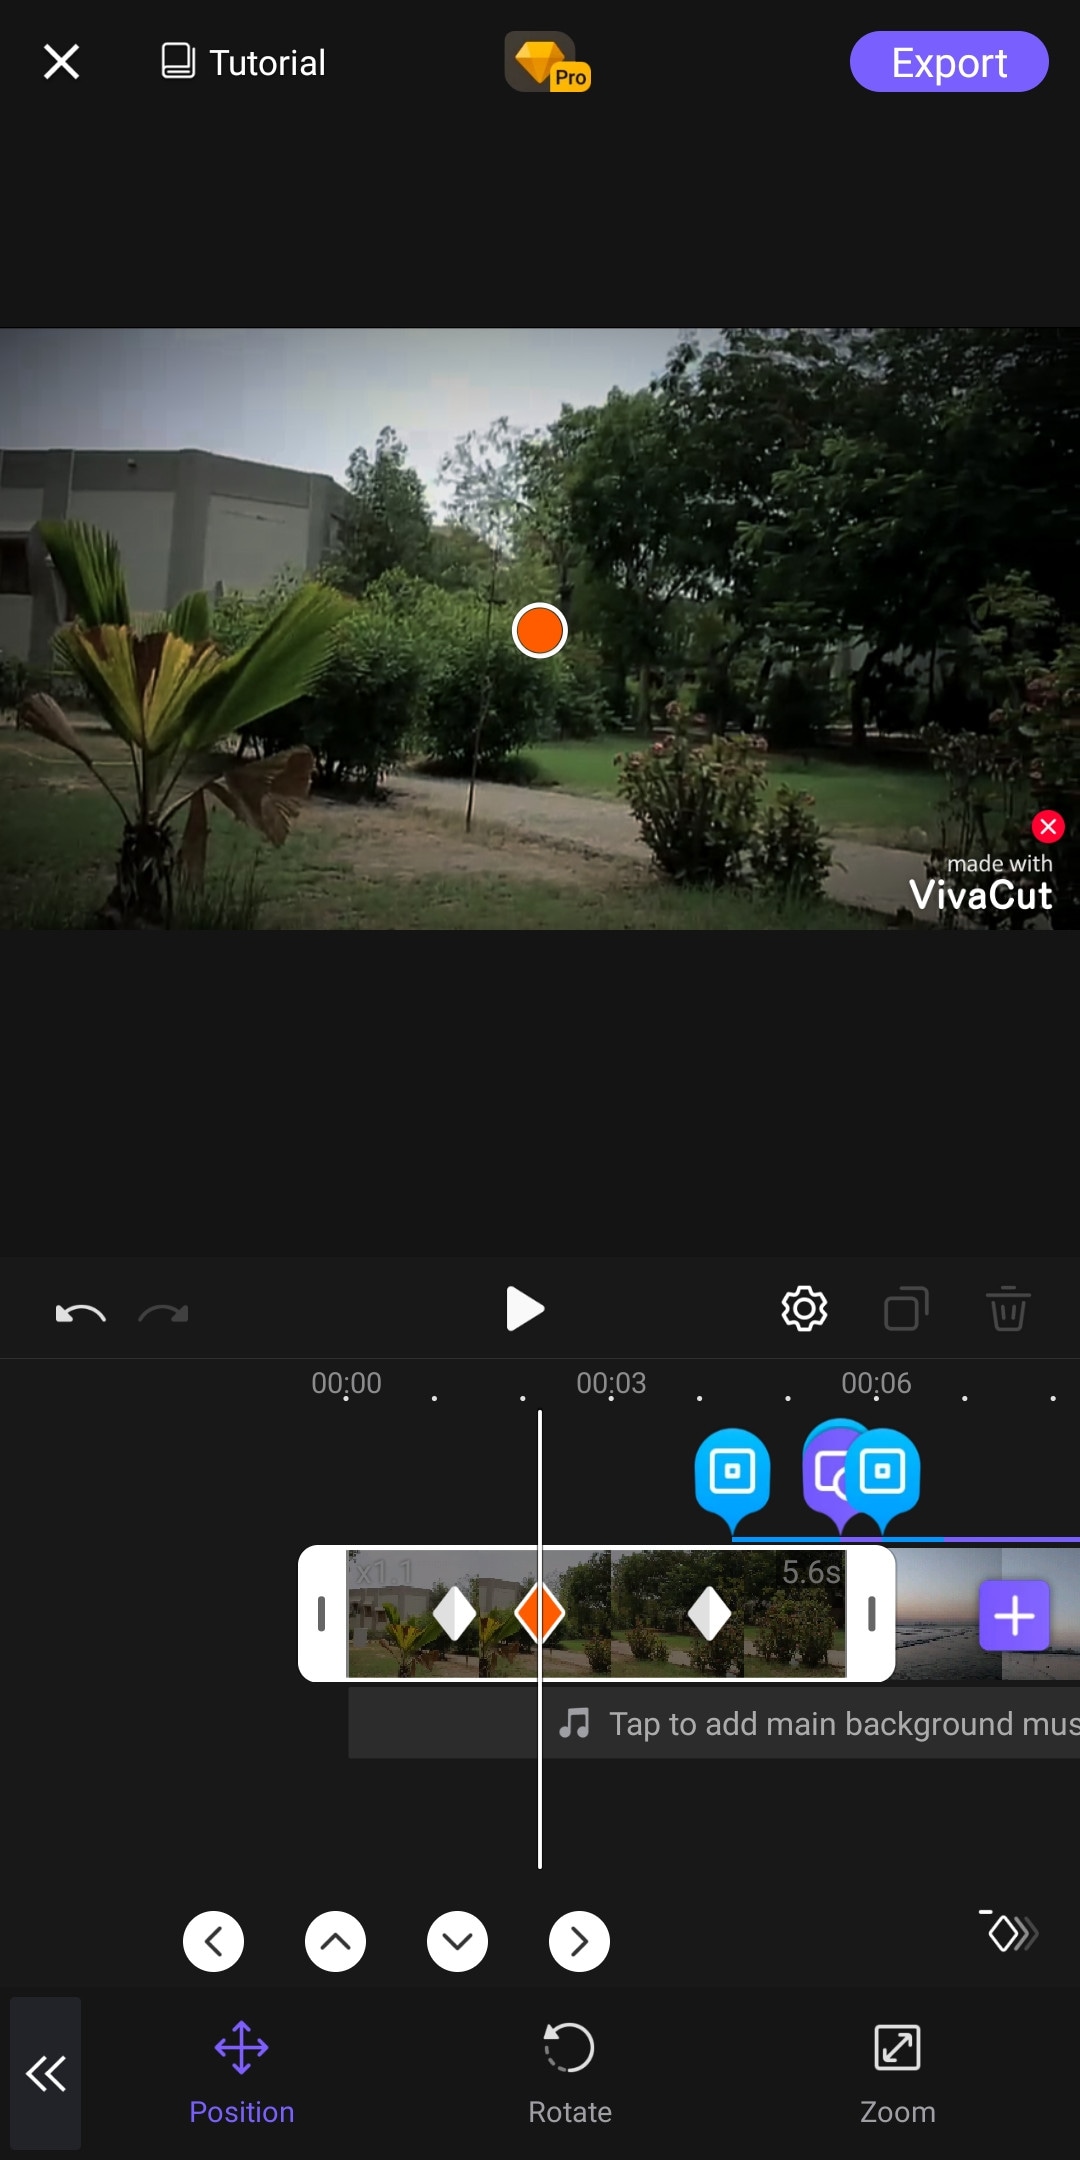
~Features:
- It supports multi-layer editing.
- Supports keyframing curves and 3D transform.
- Have advanced color correction and grading tools.
- Can Group multiple clips for easy editing.
- Let you import your presets.
- Can edit videos in different aspect ratios.
- Have an “FX plugin” library with many special effects that can be customized also.
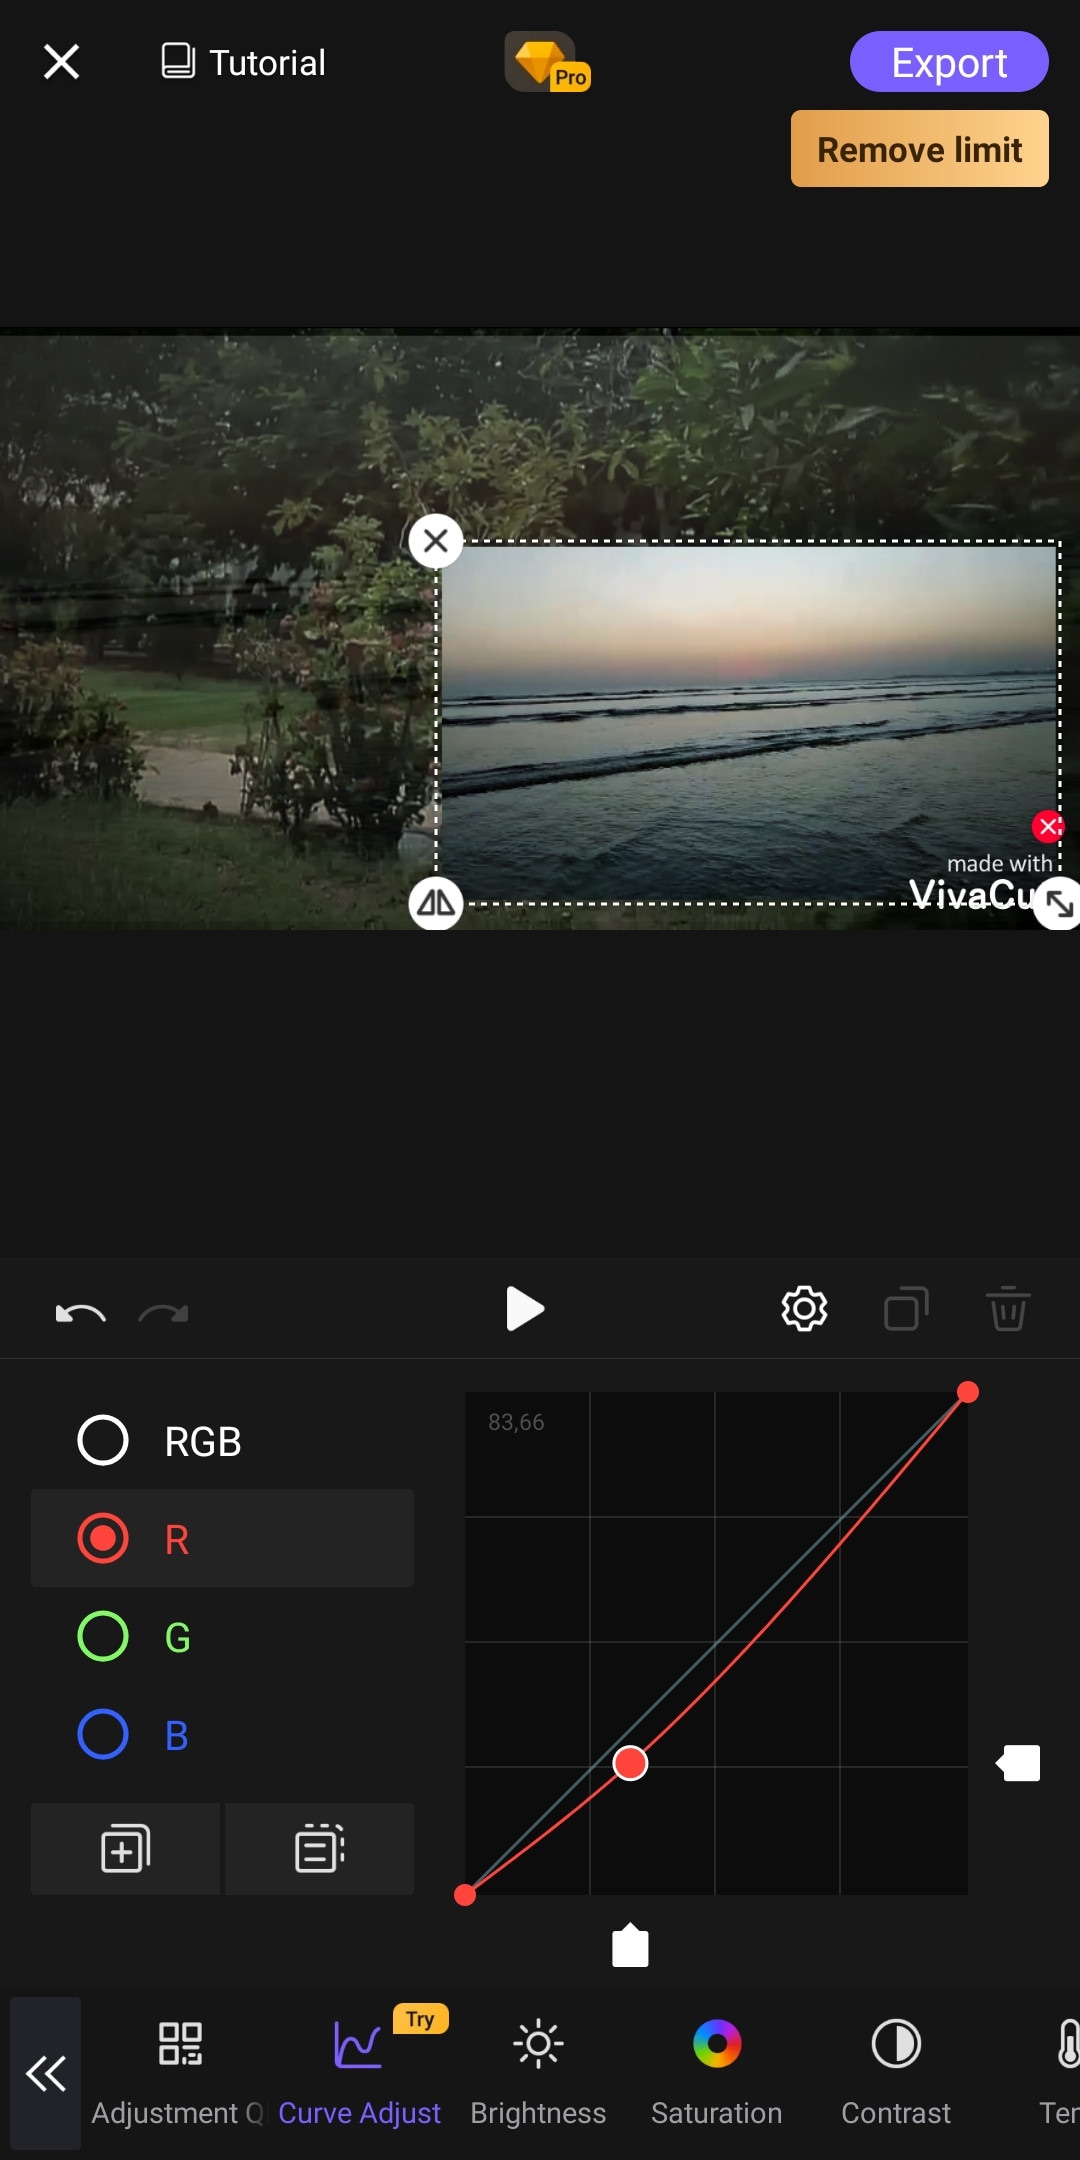

~Cons:
- It doesn’t support 4K resolution.
- Its UI doesn’t support editing landscape orientation.
- It lags and crashes sometimes.
~Price:
Its premium version is available at $4.99/month or $19.99/year.
Which Should I Choose Free or Paid Video Editing Apps for iPhone:
If you do video editing once in a while or you don’t do more than just trimming and cropping then you shouldn’t purchase a paid video editing software. Because there are free video editors that can get your job done and even more than that. But if you are a content creator who doesn’t want to do editing on PCs or laptops, then you can get these paid video editors for your iPhone. These softwares are quite affordable and worthy of your investment. Some are cheaper than others. You can purchase the one, which meets your budget or fulfills your needs.
And if you are a beginner but want to move forward in this field then you should try free versions of these paid softwares. Select the one, which you are comfortable working on and once you are satisfied with the software then you can purchase its premium version.
- Free iPhone Video Editors
- Adobe Premiere Rush
- CapCut
- iMovie
- GoPro-Quik
- VN Video Editor
- Paid iPhone Video Editors
- Kinemaster
- Power Director
- LumaFusion
- InShot
- VivaCut
Filmora Go:
It is available on IOS and Android both.
Apart from having a professional video editor for PC, Wondershare has also introduced a video editor for mobile phones. Filmora Go is an amazing video editor, with many cool features such as chroma key, mask, keyframing, blending, e.t.c. It is fast and easy to use with built-in effects, transitions, and presets to speed up the editing process. It is a paid video editor but you can try it for free, free trial includes most of the features but it leaves a watermark on export.
~Features:
- Has speed curves for smooth speed ramping.
- Supports multiple images and video layers.
- Have many presets and filters for fast pace editing.
- Have cool features like chroma key, masking, keyframing, e.t.c.
- Supports “Pixabay’s” stock library.
~Cons:
- Its UI doesn’t support editing in landscape orientation.
- It doesn’t support 4k video resolution.


~Steps:
Import: Open Filmora Go, Click “New project” to start a new project, or Choose the previous one from the “Draft” portion. Select videos or images to import to your timeline. Hold and drag the clip to change its arrangement.
Edit: You can add text, effects, stickers, layers, e.t.c. by clicking their icon, present on the bar at the bottom.
Click the “PiP” icon to add image or video layers, you also can add multiple layers.
Select a clip to edit it. Different editing tools appear on the bottom bar. Here you can change its opacity, its speed, or add animations.
Effects: Click the “Effects” icon to open the effects menu. Select an effect to apply to your clip.
Click the white box between two clips to add transitions.
Export: Click the “Export” button to export your file. Select your desired resolution and frame rate to export your clip.


Some Free iPhone Video Editors:
If you do video editing rarely or do just basic video editing then it is useless to purchase paid video editors. Even if you are a content creator but tight on budget or new to this field, you can use free video editing softwares and save your cash for other pieces of equipment.
So, here we have mentioned some free video editors for you. Some of these are quite powerful and can do advanced editing while others are simple but easy to use.
Adobe Premiere Rush:
It is available on IOS and Android both.
Whether you are a beginner or a content creator using mobile phones or PCs for editing, you may have heard of Adobe softwares. It is a computer software company which makes powerful softwares for different purposes. Like premiere pro, they have designed a compact version for phones named “Premiere Rush”. It is a free video editor that has all the tools needed for video editing, from video effects to color grading and audio editing. Its UI is a bit similar to PC video editors. It is a free video editor with no watermarks. Although it takes some time to understand it. But once mastered, you can do editing quickly.
~Features:
- It is a free video editor with no watermark.
- It supports up to 4K resolution at 60fps.
- You can extract audio and can do voiceover directly from the software.
- It has hundreds of filters, overlays, and title designs.
- It has basic color grading tools.
- It also has a motion tracking feature. (in Paid version)
- It supports multiple audio, video, and text layers.


~Cons:
- It only runs on high-end devices. ( It is not supported in most mid-range phones)
- Not suitable for beginners. Its UI is quite hard to understand.
- Doesn’t have common features like the chroma key, masking, e.t.c.

~Price:
Its Premium version is available for 9.99/month. It includes some premium features. Or you can purchase the “All Apps Bundle” at $54.99/month for the annual plan.
CapCut:
It is available on IOS and Android both.
If you are looking for a free but good video editor to help you edit videos on the go, then you should get your hands on CapCut. It is a free mobile video editing software with many interesting features like keyframing, chroma-key, masking e.t.c. It also supports video and image layers. It has one of the best speed ramping features among other mobile video editors. It provides curves to smoothly speed ramp your clips. It can edit landscape, portrait, and even square video formats. It has many amazing effects and filters, it also has some stock clips.


~Features:
- It is completely free and has no watermarks.
- It supports up to 4K video resolution.
- Has curves for speed ramping.
- Has keyframes for animation.
- It has hundreds of effects, overlays, and titles.


~Cons:
- Its UI doesn’t support editing in landscape orientation.
- Lacks some common editing tools.
iMovie:
It is available on IOS and Mac.
iMovie is a free video editing software designed by apple for their flagship products. It is simple and easy to use. It has all the basic editing tools to enhance your video like crop, trim, transitions, effects, e.t.c. It also has a speed ramping feature which let you change the speed at different points of a clip. It’s AI mode “Magic Movie” lets you select clips and a style and software will make the final product for you.
Its “Storyboards” mode is a creative way of learning production and post-production skills. It lets you choose a theme from many famous Genres available, then it will guide you through the production process like capturing footage, arranging your shots, and creating cinematic titles to enhance your story.


~Features:
- It is free and easy to use.
- Let you do speed ramping.
- Supports Raw files.
- It’s AI mode creates videos for you on its own.
- The “Storyboarding” feature helps you through the production process.


~Cons:
- It only works on ios and Mac.
- Not suitable for professional projects.
GoPro - Quik:
It is available on IOS and Android and windows also.
It is a free and easy-to-use software designed by GoPro. It can edit clips of your GoPro or any other device. It is a quick and easy way to enhance your clips before posting them on any social platform. It can do basic edits like trim, rotate, color correction, e.t.c. It can also make amazing speed ramps by changing the speed of different parts of the clip (available in the premium version only). It doesn’t produce any watermarks. Although its premium version unlocks more features like speed ramping, more themes, and unlimited backup space.


~Features:
- Its free version doesn’t leave a watermark.
- It is simple and easy to use.
- Can do basic color correction.
- Have pre-made themes for faster editing.
- Change the speed at different parts of the video to create smooth speed ramps. (Available in the premium version.)
- Has a free version with limited tools for basic editing.

~Cons:
- It lacks advanced tools therefore not suitable for large projects.
- Its free version has many limitations.
~Price: Its subscription is available at $1.99/month or at discount for an annual subscription having $9.99/year.
VN Video editor:
It is available on IOS and Android, Windows, and Mac.
If you are looking for a video editor, which let you do fast but quality edits, then “VN video editor” is the right choice for you. It is free and easy-to-use software with many useful features like transitions, effects, speed ramps, PiP, chroma-key, keyframing, e.t.c. It supports different aspect ratios for all your social platforms.
It also has pre-made templates to speed up your editing process. Its Story mode let you manage your production and post-production work easily. It also has overlay mode, which can make awesome slide shows for you.


~Features:
- It is free software with no watermark.
- It supports up to 4K resolution at 60fps.
- Supports multi-layer editing.
- Have keyframing curves to create smooth animations.
- Have speed curves for smooth speed ramping.
- Its Story mode let you manage your production work easily.
- Can extract audio from a video file.


~Cons:
- Its UI doesn’t support editing landscape orientation.
- Its free version has limitations of creating max 100 projects.
~Price:
Its Premium version is available for $3.9/month or $20.9/year.
Some Paid iPhone Video Editors:
If you want to move forward and get your hands on these paid softwares to try new features then you should buy these paid softwares. As most of these softwares are quite affordable but they pack the punch. And some of them can give you more in return than your investment. Then what are you waiting for? go and try them yourself.
Kinemaster:
It is available on IOS and Android both.
If you want to do more than just trimming and cropping to your videos then you should try Kinemaster. For editors, who want to do some advanced-level video editing on their phone, then you must have Kinemaster on your phone. It is a paid software, which is packed with many useful features. It has many video and audio effects. It also has an amazing audio editor. It also has many title designs and basic color correction tools. It has hundreds of effects and transitions + more can be downloaded from its asset store. Its UI is suitable for beginners and content creators both. It is a paid software, but all its features are completely free to use, but the free version leaves a watermark on export.


~Features:
- It supports up to 4K resolution at 60fps. (depending on mobile configuration)
- Have amazing features like chroma key, keyframing, blend e.t.c
- Has built-in audio and video recorder.
- Supports multiple texts and video layers with different resolutions depending on the capability of the mobile phone.
- Has UI like a PC video editor and supports landscape orientation for editing.
- Have an asset store with 100s of free effects, transitions, and stock material.


~Cons:
- Can’t export 4K videos on most devices.
- Can’t apply keyframes and chroma key to the main video. (can be done on layers only)
~Price:
Its Premium version is available for $4.9/month or $39.9/year. It also includes all the premium assets.
Power Director:
It is available on IOS and Android both.
It is a paid but quite advanced video editor available for androids and IOS both. Like its PC version mobile version is also packed with many great features. It is compact and easy to use. It supports multiple video and audio layers. Have many cool filters and transitions. Can also do basic color corrections. To complete post-production work it also has audio editing tools and effects. It also has hundreds of title designs. Its UI is easy to use and supports both portrait and landscape orientation for editing. Most of its features can be used for free with a watermark on export. To remove the watermark you need to purchase the premium version.


~Features:
- It supports up to 4K resolution at 60fps. (compatible on most devices)
- Supports both Portrait and Landscape orientation for editing.
- Supports Key framing and video stabilization also.
- Supports multiple audio and video layers.
- Can edit videos in different aspect ratios.
- Have a vast stock library.


~Cons:
- Can’t export 4K videos on many devices.
- Can apply keyframing and chroma key to layers only.
- Software lags sometimes.
~Price:
Its Premium version is available for $4.9/month or $29.9/year.
LumaFusion:
It is available on IOS and Mac (with an m1 processor).
If you are a content creator and want to do professional-level video editing on your phone then you should get your hands on “LumaFusion”. It is of the most powerful and advanced video editors designed for a mobile phone. But it only works on iPhones and iPads. It is a multi-track video editor with many useful features like the Chroma key, keyframing, color grading, and color LUTs. Have powerful color grading tools and an audio editor. It also has a lock and load stabilizer. You have to purchase the software before using it. It doesn’t have any free version to try.

Credits: Pic by Luma touch website.
~Features:
- It supports up to 4K video resolution at a max of 240 fps.
- Can also edit and export 360 videos.
- Have powerful color correction tools. You can also import your own color LUTs.
- Supports Keyframing on almost all the editing tools within the software.
- You can add some third-party audio plugins.
- Supports up to 6 audio and video layers.
- Have “Storyblock” stock library. (Many of its contents are free to use)
- Supports external monitor for display.

Credits: Pic by Luma touch website.
~Cons:
- Not available for Android devices.
- Being an advanced software, it doesn’t have masking and speed ramping features.
- Doesn’t have a free version to try on.
~Price:
It is available for purchase at $29.99.
InShot:
It is available on IOS and Android both.
If you are new to video editing and want to do simple editing tasks then this software can be the right choice for you. It is simple and easy to use. Apart from just trimming and arranging your clips, it also has some cool features like speed ramping, chroma-key, mask e.t.c. It also has an HSL color grading tool. You can add multiple layers as PiP. It is a paid software but you can try it for free with the watermark on export.


~Features:
- It supports up to 4K resolution at 60fps.
- Its UI is beginner-friendly.
- Have some advanced color correction and grading tools.
- Supports multiple images and video layers as PiP.
- Have features like a mask, chroma key, and blend for layers.
- Can edit videos in different aspect ratios.
- Have speed curves for smooth speed ramping.


~Cons:
- Doesn’t have advanced tools.
- Its UI doesn’t support editing landscape orientation.
~Price:
It has 3 diff purchase plans. you can get its subscription for $3.9/month or $14.99/year. or you can purchase the software for lifetime at $34.99.
VivaCut:
It is available on IOS and Android both.
Almost every mobile video editor wished for doing PC-like video editing on their phone, but that was not possible due to software limitations and device compatibility. But now you can create PC-like videos on your phone through “VivaCut”. It is a paid software that is packed with many advanced features. Like 3D transform, overlay, Effects, Masking, e.t.c. It has one of the best color correction and grading tools among other mobile video editors. It has advanced keyframing and curve paths that can make splendid animations. It also supports multi-layer video editing. It also has a Grouping tool that let you combine several clips and texts into a single clip for easy editing. It also lets you import your presets. It is a paid software but you can try it for free with the watermark on export.


~Features:
- It supports multi-layer editing.
- Supports keyframing curves and 3D transform.
- Have advanced color correction and grading tools.
- Can Group multiple clips for easy editing.
- Let you import your presets.
- Can edit videos in different aspect ratios.
- Have an “FX plugin” library with many special effects that can be customized also.


~Cons:
- It doesn’t support 4K resolution.
- Its UI doesn’t support editing landscape orientation.
- It lags and crashes sometimes.
~Price:
Its premium version is available at $4.99/month or $19.99/year.
Which Should I Choose Free or Paid Video Editing Apps for iPhone:
If you do video editing once in a while or you don’t do more than just trimming and cropping then you shouldn’t purchase a paid video editing software. Because there are free video editors that can get your job done and even more than that. But if you are a content creator who doesn’t want to do editing on PCs or laptops, then you can get these paid video editors for your iPhone. These softwares are quite affordable and worthy of your investment. Some are cheaper than others. You can purchase the one, which meets your budget or fulfills your needs.
And if you are a beginner but want to move forward in this field then you should try free versions of these paid softwares. Select the one, which you are comfortable working on and once you are satisfied with the software then you can purchase its premium version.
- Free iPhone Video Editors
- Adobe Premiere Rush
- CapCut
- iMovie
- GoPro-Quik
- VN Video Editor
- Paid iPhone Video Editors
- Kinemaster
- Power Director
- LumaFusion
- InShot
- VivaCut
Filmora Go:
It is available on IOS and Android both.
Apart from having a professional video editor for PC, Wondershare has also introduced a video editor for mobile phones. Filmora Go is an amazing video editor, with many cool features such as chroma key, mask, keyframing, blending, e.t.c. It is fast and easy to use with built-in effects, transitions, and presets to speed up the editing process. It is a paid video editor but you can try it for free, free trial includes most of the features but it leaves a watermark on export.
~Features:
- Has speed curves for smooth speed ramping.
- Supports multiple images and video layers.
- Have many presets and filters for fast pace editing.
- Have cool features like chroma key, masking, keyframing, e.t.c.
- Supports “Pixabay’s” stock library.
~Cons:
- Its UI doesn’t support editing in landscape orientation.
- It doesn’t support 4k video resolution.


~Steps:
Import: Open Filmora Go, Click “New project” to start a new project, or Choose the previous one from the “Draft” portion. Select videos or images to import to your timeline. Hold and drag the clip to change its arrangement.
Edit: You can add text, effects, stickers, layers, e.t.c. by clicking their icon, present on the bar at the bottom.
Click the “PiP” icon to add image or video layers, you also can add multiple layers.
Select a clip to edit it. Different editing tools appear on the bottom bar. Here you can change its opacity, its speed, or add animations.
Effects: Click the “Effects” icon to open the effects menu. Select an effect to apply to your clip.
Click the white box between two clips to add transitions.
Export: Click the “Export” button to export your file. Select your desired resolution and frame rate to export your clip.


Some Free iPhone Video Editors:
If you do video editing rarely or do just basic video editing then it is useless to purchase paid video editors. Even if you are a content creator but tight on budget or new to this field, you can use free video editing softwares and save your cash for other pieces of equipment.
So, here we have mentioned some free video editors for you. Some of these are quite powerful and can do advanced editing while others are simple but easy to use.
Adobe Premiere Rush:
It is available on IOS and Android both.
Whether you are a beginner or a content creator using mobile phones or PCs for editing, you may have heard of Adobe softwares. It is a computer software company which makes powerful softwares for different purposes. Like premiere pro, they have designed a compact version for phones named “Premiere Rush”. It is a free video editor that has all the tools needed for video editing, from video effects to color grading and audio editing. Its UI is a bit similar to PC video editors. It is a free video editor with no watermarks. Although it takes some time to understand it. But once mastered, you can do editing quickly.
~Features:
- It is a free video editor with no watermark.
- It supports up to 4K resolution at 60fps.
- You can extract audio and can do voiceover directly from the software.
- It has hundreds of filters, overlays, and title designs.
- It has basic color grading tools.
- It also has a motion tracking feature. (in Paid version)
- It supports multiple audio, video, and text layers.


~Cons:
- It only runs on high-end devices. ( It is not supported in most mid-range phones)
- Not suitable for beginners. Its UI is quite hard to understand.
- Doesn’t have common features like the chroma key, masking, e.t.c.

~Price:
Its Premium version is available for 9.99/month. It includes some premium features. Or you can purchase the “All Apps Bundle” at $54.99/month for the annual plan.
CapCut:
It is available on IOS and Android both.
If you are looking for a free but good video editor to help you edit videos on the go, then you should get your hands on CapCut. It is a free mobile video editing software with many interesting features like keyframing, chroma-key, masking e.t.c. It also supports video and image layers. It has one of the best speed ramping features among other mobile video editors. It provides curves to smoothly speed ramp your clips. It can edit landscape, portrait, and even square video formats. It has many amazing effects and filters, it also has some stock clips.


~Features:
- It is completely free and has no watermarks.
- It supports up to 4K video resolution.
- Has curves for speed ramping.
- Has keyframes for animation.
- It has hundreds of effects, overlays, and titles.


~Cons:
- Its UI doesn’t support editing in landscape orientation.
- Lacks some common editing tools.
iMovie:
It is available on IOS and Mac.
iMovie is a free video editing software designed by apple for their flagship products. It is simple and easy to use. It has all the basic editing tools to enhance your video like crop, trim, transitions, effects, e.t.c. It also has a speed ramping feature which let you change the speed at different points of a clip. It’s AI mode “Magic Movie” lets you select clips and a style and software will make the final product for you.
Its “Storyboards” mode is a creative way of learning production and post-production skills. It lets you choose a theme from many famous Genres available, then it will guide you through the production process like capturing footage, arranging your shots, and creating cinematic titles to enhance your story.


~Features:
- It is free and easy to use.
- Let you do speed ramping.
- Supports Raw files.
- It’s AI mode creates videos for you on its own.
- The “Storyboarding” feature helps you through the production process.


~Cons:
- It only works on ios and Mac.
- Not suitable for professional projects.
GoPro - Quik:
It is available on IOS and Android and windows also.
It is a free and easy-to-use software designed by GoPro. It can edit clips of your GoPro or any other device. It is a quick and easy way to enhance your clips before posting them on any social platform. It can do basic edits like trim, rotate, color correction, e.t.c. It can also make amazing speed ramps by changing the speed of different parts of the clip (available in the premium version only). It doesn’t produce any watermarks. Although its premium version unlocks more features like speed ramping, more themes, and unlimited backup space.


~Features:
- Its free version doesn’t leave a watermark.
- It is simple and easy to use.
- Can do basic color correction.
- Have pre-made themes for faster editing.
- Change the speed at different parts of the video to create smooth speed ramps. (Available in the premium version.)
- Has a free version with limited tools for basic editing.

~Cons:
- It lacks advanced tools therefore not suitable for large projects.
- Its free version has many limitations.
~Price: Its subscription is available at $1.99/month or at discount for an annual subscription having $9.99/year.
VN Video editor:
It is available on IOS and Android, Windows, and Mac.
If you are looking for a video editor, which let you do fast but quality edits, then “VN video editor” is the right choice for you. It is free and easy-to-use software with many useful features like transitions, effects, speed ramps, PiP, chroma-key, keyframing, e.t.c. It supports different aspect ratios for all your social platforms.
It also has pre-made templates to speed up your editing process. Its Story mode let you manage your production and post-production work easily. It also has overlay mode, which can make awesome slide shows for you.


~Features:
- It is free software with no watermark.
- It supports up to 4K resolution at 60fps.
- Supports multi-layer editing.
- Have keyframing curves to create smooth animations.
- Have speed curves for smooth speed ramping.
- Its Story mode let you manage your production work easily.
- Can extract audio from a video file.


~Cons:
- Its UI doesn’t support editing landscape orientation.
- Its free version has limitations of creating max 100 projects.
~Price:
Its Premium version is available for $3.9/month or $20.9/year.
Some Paid iPhone Video Editors:
If you want to move forward and get your hands on these paid softwares to try new features then you should buy these paid softwares. As most of these softwares are quite affordable but they pack the punch. And some of them can give you more in return than your investment. Then what are you waiting for? go and try them yourself.
Kinemaster:
It is available on IOS and Android both.
If you want to do more than just trimming and cropping to your videos then you should try Kinemaster. For editors, who want to do some advanced-level video editing on their phone, then you must have Kinemaster on your phone. It is a paid software, which is packed with many useful features. It has many video and audio effects. It also has an amazing audio editor. It also has many title designs and basic color correction tools. It has hundreds of effects and transitions + more can be downloaded from its asset store. Its UI is suitable for beginners and content creators both. It is a paid software, but all its features are completely free to use, but the free version leaves a watermark on export.


~Features:
- It supports up to 4K resolution at 60fps. (depending on mobile configuration)
- Have amazing features like chroma key, keyframing, blend e.t.c
- Has built-in audio and video recorder.
- Supports multiple texts and video layers with different resolutions depending on the capability of the mobile phone.
- Has UI like a PC video editor and supports landscape orientation for editing.
- Have an asset store with 100s of free effects, transitions, and stock material.


~Cons:
- Can’t export 4K videos on most devices.
- Can’t apply keyframes and chroma key to the main video. (can be done on layers only)
~Price:
Its Premium version is available for $4.9/month or $39.9/year. It also includes all the premium assets.
Power Director:
It is available on IOS and Android both.
It is a paid but quite advanced video editor available for androids and IOS both. Like its PC version mobile version is also packed with many great features. It is compact and easy to use. It supports multiple video and audio layers. Have many cool filters and transitions. Can also do basic color corrections. To complete post-production work it also has audio editing tools and effects. It also has hundreds of title designs. Its UI is easy to use and supports both portrait and landscape orientation for editing. Most of its features can be used for free with a watermark on export. To remove the watermark you need to purchase the premium version.


~Features:
- It supports up to 4K resolution at 60fps. (compatible on most devices)
- Supports both Portrait and Landscape orientation for editing.
- Supports Key framing and video stabilization also.
- Supports multiple audio and video layers.
- Can edit videos in different aspect ratios.
- Have a vast stock library.


~Cons:
- Can’t export 4K videos on many devices.
- Can apply keyframing and chroma key to layers only.
- Software lags sometimes.
~Price:
Its Premium version is available for $4.9/month or $29.9/year.
LumaFusion:
It is available on IOS and Mac (with an m1 processor).
If you are a content creator and want to do professional-level video editing on your phone then you should get your hands on “LumaFusion”. It is of the most powerful and advanced video editors designed for a mobile phone. But it only works on iPhones and iPads. It is a multi-track video editor with many useful features like the Chroma key, keyframing, color grading, and color LUTs. Have powerful color grading tools and an audio editor. It also has a lock and load stabilizer. You have to purchase the software before using it. It doesn’t have any free version to try.

Credits: Pic by Luma touch website.
~Features:
- It supports up to 4K video resolution at a max of 240 fps.
- Can also edit and export 360 videos.
- Have powerful color correction tools. You can also import your own color LUTs.
- Supports Keyframing on almost all the editing tools within the software.
- You can add some third-party audio plugins.
- Supports up to 6 audio and video layers.
- Have “Storyblock” stock library. (Many of its contents are free to use)
- Supports external monitor for display.

Credits: Pic by Luma touch website.
~Cons:
- Not available for Android devices.
- Being an advanced software, it doesn’t have masking and speed ramping features.
- Doesn’t have a free version to try on.
~Price:
It is available for purchase at $29.99.
InShot:
It is available on IOS and Android both.
If you are new to video editing and want to do simple editing tasks then this software can be the right choice for you. It is simple and easy to use. Apart from just trimming and arranging your clips, it also has some cool features like speed ramping, chroma-key, mask e.t.c. It also has an HSL color grading tool. You can add multiple layers as PiP. It is a paid software but you can try it for free with the watermark on export.


~Features:
- It supports up to 4K resolution at 60fps.
- Its UI is beginner-friendly.
- Have some advanced color correction and grading tools.
- Supports multiple images and video layers as PiP.
- Have features like a mask, chroma key, and blend for layers.
- Can edit videos in different aspect ratios.
- Have speed curves for smooth speed ramping.


~Cons:
- Doesn’t have advanced tools.
- Its UI doesn’t support editing landscape orientation.
~Price:
It has 3 diff purchase plans. you can get its subscription for $3.9/month or $14.99/year. or you can purchase the software for lifetime at $34.99.
VivaCut:
It is available on IOS and Android both.
Almost every mobile video editor wished for doing PC-like video editing on their phone, but that was not possible due to software limitations and device compatibility. But now you can create PC-like videos on your phone through “VivaCut”. It is a paid software that is packed with many advanced features. Like 3D transform, overlay, Effects, Masking, e.t.c. It has one of the best color correction and grading tools among other mobile video editors. It has advanced keyframing and curve paths that can make splendid animations. It also supports multi-layer video editing. It also has a Grouping tool that let you combine several clips and texts into a single clip for easy editing. It also lets you import your presets. It is a paid software but you can try it for free with the watermark on export.


~Features:
- It supports multi-layer editing.
- Supports keyframing curves and 3D transform.
- Have advanced color correction and grading tools.
- Can Group multiple clips for easy editing.
- Let you import your presets.
- Can edit videos in different aspect ratios.
- Have an “FX plugin” library with many special effects that can be customized also.


~Cons:
- It doesn’t support 4K resolution.
- Its UI doesn’t support editing landscape orientation.
- It lags and crashes sometimes.
~Price:
Its premium version is available at $4.99/month or $19.99/year.
Which Should I Choose Free or Paid Video Editing Apps for iPhone:
If you do video editing once in a while or you don’t do more than just trimming and cropping then you shouldn’t purchase a paid video editing software. Because there are free video editors that can get your job done and even more than that. But if you are a content creator who doesn’t want to do editing on PCs or laptops, then you can get these paid video editors for your iPhone. These softwares are quite affordable and worthy of your investment. Some are cheaper than others. You can purchase the one, which meets your budget or fulfills your needs.
And if you are a beginner but want to move forward in this field then you should try free versions of these paid softwares. Select the one, which you are comfortable working on and once you are satisfied with the software then you can purchase its premium version.
- Free iPhone Video Editors
- Adobe Premiere Rush
- CapCut
- iMovie
- GoPro-Quik
- VN Video Editor
- Paid iPhone Video Editors
- Kinemaster
- Power Director
- LumaFusion
- InShot
- VivaCut
Filmora Go:
It is available on IOS and Android both.
Apart from having a professional video editor for PC, Wondershare has also introduced a video editor for mobile phones. Filmora Go is an amazing video editor, with many cool features such as chroma key, mask, keyframing, blending, e.t.c. It is fast and easy to use with built-in effects, transitions, and presets to speed up the editing process. It is a paid video editor but you can try it for free, free trial includes most of the features but it leaves a watermark on export.
~Features:
- Has speed curves for smooth speed ramping.
- Supports multiple images and video layers.
- Have many presets and filters for fast pace editing.
- Have cool features like chroma key, masking, keyframing, e.t.c.
- Supports “Pixabay’s” stock library.
~Cons:
- Its UI doesn’t support editing in landscape orientation.
- It doesn’t support 4k video resolution.


~Steps:
Import: Open Filmora Go, Click “New project” to start a new project, or Choose the previous one from the “Draft” portion. Select videos or images to import to your timeline. Hold and drag the clip to change its arrangement.
Edit: You can add text, effects, stickers, layers, e.t.c. by clicking their icon, present on the bar at the bottom.
Click the “PiP” icon to add image or video layers, you also can add multiple layers.
Select a clip to edit it. Different editing tools appear on the bottom bar. Here you can change its opacity, its speed, or add animations.
Effects: Click the “Effects” icon to open the effects menu. Select an effect to apply to your clip.
Click the white box between two clips to add transitions.
Export: Click the “Export” button to export your file. Select your desired resolution and frame rate to export your clip.


Some Free iPhone Video Editors:
If you do video editing rarely or do just basic video editing then it is useless to purchase paid video editors. Even if you are a content creator but tight on budget or new to this field, you can use free video editing softwares and save your cash for other pieces of equipment.
So, here we have mentioned some free video editors for you. Some of these are quite powerful and can do advanced editing while others are simple but easy to use.
Adobe Premiere Rush:
It is available on IOS and Android both.
Whether you are a beginner or a content creator using mobile phones or PCs for editing, you may have heard of Adobe softwares. It is a computer software company which makes powerful softwares for different purposes. Like premiere pro, they have designed a compact version for phones named “Premiere Rush”. It is a free video editor that has all the tools needed for video editing, from video effects to color grading and audio editing. Its UI is a bit similar to PC video editors. It is a free video editor with no watermarks. Although it takes some time to understand it. But once mastered, you can do editing quickly.
~Features:
- It is a free video editor with no watermark.
- It supports up to 4K resolution at 60fps.
- You can extract audio and can do voiceover directly from the software.
- It has hundreds of filters, overlays, and title designs.
- It has basic color grading tools.
- It also has a motion tracking feature. (in Paid version)
- It supports multiple audio, video, and text layers.


~Cons:
- It only runs on high-end devices. ( It is not supported in most mid-range phones)
- Not suitable for beginners. Its UI is quite hard to understand.
- Doesn’t have common features like the chroma key, masking, e.t.c.

~Price:
Its Premium version is available for 9.99/month. It includes some premium features. Or you can purchase the “All Apps Bundle” at $54.99/month for the annual plan.
CapCut:
It is available on IOS and Android both.
If you are looking for a free but good video editor to help you edit videos on the go, then you should get your hands on CapCut. It is a free mobile video editing software with many interesting features like keyframing, chroma-key, masking e.t.c. It also supports video and image layers. It has one of the best speed ramping features among other mobile video editors. It provides curves to smoothly speed ramp your clips. It can edit landscape, portrait, and even square video formats. It has many amazing effects and filters, it also has some stock clips.


~Features:
- It is completely free and has no watermarks.
- It supports up to 4K video resolution.
- Has curves for speed ramping.
- Has keyframes for animation.
- It has hundreds of effects, overlays, and titles.


~Cons:
- Its UI doesn’t support editing in landscape orientation.
- Lacks some common editing tools.
iMovie:
It is available on IOS and Mac.
iMovie is a free video editing software designed by apple for their flagship products. It is simple and easy to use. It has all the basic editing tools to enhance your video like crop, trim, transitions, effects, e.t.c. It also has a speed ramping feature which let you change the speed at different points of a clip. It’s AI mode “Magic Movie” lets you select clips and a style and software will make the final product for you.
Its “Storyboards” mode is a creative way of learning production and post-production skills. It lets you choose a theme from many famous Genres available, then it will guide you through the production process like capturing footage, arranging your shots, and creating cinematic titles to enhance your story.


~Features:
- It is free and easy to use.
- Let you do speed ramping.
- Supports Raw files.
- It’s AI mode creates videos for you on its own.
- The “Storyboarding” feature helps you through the production process.


~Cons:
- It only works on ios and Mac.
- Not suitable for professional projects.
GoPro - Quik:
It is available on IOS and Android and windows also.
It is a free and easy-to-use software designed by GoPro. It can edit clips of your GoPro or any other device. It is a quick and easy way to enhance your clips before posting them on any social platform. It can do basic edits like trim, rotate, color correction, e.t.c. It can also make amazing speed ramps by changing the speed of different parts of the clip (available in the premium version only). It doesn’t produce any watermarks. Although its premium version unlocks more features like speed ramping, more themes, and unlimited backup space.


~Features:
- Its free version doesn’t leave a watermark.
- It is simple and easy to use.
- Can do basic color correction.
- Have pre-made themes for faster editing.
- Change the speed at different parts of the video to create smooth speed ramps. (Available in the premium version.)
- Has a free version with limited tools for basic editing.

~Cons:
- It lacks advanced tools therefore not suitable for large projects.
- Its free version has many limitations.
~Price: Its subscription is available at $1.99/month or at discount for an annual subscription having $9.99/year.
VN Video editor:
It is available on IOS and Android, Windows, and Mac.
If you are looking for a video editor, which let you do fast but quality edits, then “VN video editor” is the right choice for you. It is free and easy-to-use software with many useful features like transitions, effects, speed ramps, PiP, chroma-key, keyframing, e.t.c. It supports different aspect ratios for all your social platforms.
It also has pre-made templates to speed up your editing process. Its Story mode let you manage your production and post-production work easily. It also has overlay mode, which can make awesome slide shows for you.


~Features:
- It is free software with no watermark.
- It supports up to 4K resolution at 60fps.
- Supports multi-layer editing.
- Have keyframing curves to create smooth animations.
- Have speed curves for smooth speed ramping.
- Its Story mode let you manage your production work easily.
- Can extract audio from a video file.


~Cons:
- Its UI doesn’t support editing landscape orientation.
- Its free version has limitations of creating max 100 projects.
~Price:
Its Premium version is available for $3.9/month or $20.9/year.
Some Paid iPhone Video Editors:
If you want to move forward and get your hands on these paid softwares to try new features then you should buy these paid softwares. As most of these softwares are quite affordable but they pack the punch. And some of them can give you more in return than your investment. Then what are you waiting for? go and try them yourself.
Kinemaster:
It is available on IOS and Android both.
If you want to do more than just trimming and cropping to your videos then you should try Kinemaster. For editors, who want to do some advanced-level video editing on their phone, then you must have Kinemaster on your phone. It is a paid software, which is packed with many useful features. It has many video and audio effects. It also has an amazing audio editor. It also has many title designs and basic color correction tools. It has hundreds of effects and transitions + more can be downloaded from its asset store. Its UI is suitable for beginners and content creators both. It is a paid software, but all its features are completely free to use, but the free version leaves a watermark on export.


~Features:
- It supports up to 4K resolution at 60fps. (depending on mobile configuration)
- Have amazing features like chroma key, keyframing, blend e.t.c
- Has built-in audio and video recorder.
- Supports multiple texts and video layers with different resolutions depending on the capability of the mobile phone.
- Has UI like a PC video editor and supports landscape orientation for editing.
- Have an asset store with 100s of free effects, transitions, and stock material.


~Cons:
- Can’t export 4K videos on most devices.
- Can’t apply keyframes and chroma key to the main video. (can be done on layers only)
~Price:
Its Premium version is available for $4.9/month or $39.9/year. It also includes all the premium assets.
Power Director:
It is available on IOS and Android both.
It is a paid but quite advanced video editor available for androids and IOS both. Like its PC version mobile version is also packed with many great features. It is compact and easy to use. It supports multiple video and audio layers. Have many cool filters and transitions. Can also do basic color corrections. To complete post-production work it also has audio editing tools and effects. It also has hundreds of title designs. Its UI is easy to use and supports both portrait and landscape orientation for editing. Most of its features can be used for free with a watermark on export. To remove the watermark you need to purchase the premium version.


~Features:
- It supports up to 4K resolution at 60fps. (compatible on most devices)
- Supports both Portrait and Landscape orientation for editing.
- Supports Key framing and video stabilization also.
- Supports multiple audio and video layers.
- Can edit videos in different aspect ratios.
- Have a vast stock library.


~Cons:
- Can’t export 4K videos on many devices.
- Can apply keyframing and chroma key to layers only.
- Software lags sometimes.
~Price:
Its Premium version is available for $4.9/month or $29.9/year.
LumaFusion:
It is available on IOS and Mac (with an m1 processor).
If you are a content creator and want to do professional-level video editing on your phone then you should get your hands on “LumaFusion”. It is of the most powerful and advanced video editors designed for a mobile phone. But it only works on iPhones and iPads. It is a multi-track video editor with many useful features like the Chroma key, keyframing, color grading, and color LUTs. Have powerful color grading tools and an audio editor. It also has a lock and load stabilizer. You have to purchase the software before using it. It doesn’t have any free version to try.

Credits: Pic by Luma touch website.
~Features:
- It supports up to 4K video resolution at a max of 240 fps.
- Can also edit and export 360 videos.
- Have powerful color correction tools. You can also import your own color LUTs.
- Supports Keyframing on almost all the editing tools within the software.
- You can add some third-party audio plugins.
- Supports up to 6 audio and video layers.
- Have “Storyblock” stock library. (Many of its contents are free to use)
- Supports external monitor for display.

Credits: Pic by Luma touch website.
~Cons:
- Not available for Android devices.
- Being an advanced software, it doesn’t have masking and speed ramping features.
- Doesn’t have a free version to try on.
~Price:
It is available for purchase at $29.99.
InShot:
It is available on IOS and Android both.
If you are new to video editing and want to do simple editing tasks then this software can be the right choice for you. It is simple and easy to use. Apart from just trimming and arranging your clips, it also has some cool features like speed ramping, chroma-key, mask e.t.c. It also has an HSL color grading tool. You can add multiple layers as PiP. It is a paid software but you can try it for free with the watermark on export.


~Features:
- It supports up to 4K resolution at 60fps.
- Its UI is beginner-friendly.
- Have some advanced color correction and grading tools.
- Supports multiple images and video layers as PiP.
- Have features like a mask, chroma key, and blend for layers.
- Can edit videos in different aspect ratios.
- Have speed curves for smooth speed ramping.


~Cons:
- Doesn’t have advanced tools.
- Its UI doesn’t support editing landscape orientation.
~Price:
It has 3 diff purchase plans. you can get its subscription for $3.9/month or $14.99/year. or you can purchase the software for lifetime at $34.99.
VivaCut:
It is available on IOS and Android both.
Almost every mobile video editor wished for doing PC-like video editing on their phone, but that was not possible due to software limitations and device compatibility. But now you can create PC-like videos on your phone through “VivaCut”. It is a paid software that is packed with many advanced features. Like 3D transform, overlay, Effects, Masking, e.t.c. It has one of the best color correction and grading tools among other mobile video editors. It has advanced keyframing and curve paths that can make splendid animations. It also supports multi-layer video editing. It also has a Grouping tool that let you combine several clips and texts into a single clip for easy editing. It also lets you import your presets. It is a paid software but you can try it for free with the watermark on export.


~Features:
- It supports multi-layer editing.
- Supports keyframing curves and 3D transform.
- Have advanced color correction and grading tools.
- Can Group multiple clips for easy editing.
- Let you import your presets.
- Can edit videos in different aspect ratios.
- Have an “FX plugin” library with many special effects that can be customized also.


~Cons:
- It doesn’t support 4K resolution.
- Its UI doesn’t support editing landscape orientation.
- It lags and crashes sometimes.
~Price:
Its premium version is available at $4.99/month or $19.99/year.
Which Should I Choose Free or Paid Video Editing Apps for iPhone:
If you do video editing once in a while or you don’t do more than just trimming and cropping then you shouldn’t purchase a paid video editing software. Because there are free video editors that can get your job done and even more than that. But if you are a content creator who doesn’t want to do editing on PCs or laptops, then you can get these paid video editors for your iPhone. These softwares are quite affordable and worthy of your investment. Some are cheaper than others. You can purchase the one, which meets your budget or fulfills your needs.
And if you are a beginner but want to move forward in this field then you should try free versions of these paid softwares. Select the one, which you are comfortable working on and once you are satisfied with the software then you can purchase its premium version.
Are You Thinking of Learning Video Editing in the Final Cut Pro Software? In This Article, You Will Learn Different Ways of Splitting and Merging Multiple Videos at Once as a New Skill to Get Your Business to a New Level
If you are looking for a video splitting ad merging software and you want someone to recommend you, it is more likely that they will consider referring Final Cut Pro. People, especially video editors prefer using Final Cut Pro for multiple reasons. Final Cut Pro features the most advanced organizing tools out of all the professional video editing software. Create Smart Collections that automatically compile content based on a set of specified criteria and tag entire clips or clip ranges with metadata for searching.
Considering its importance, this guide is to introduce different ways to split and merge video and answer the question that has been raised in your mind about whether there is any other software program that can be used as a Final Cut Pro alternative.
Part 1. How to split a clip in Final Cut Pro?
A great video editor, Final Cut Pro (or Final Cut Pro X), offers a variety of capabilities to enhance videos and supports a wide range of video formats. You may create post-production video editing from a variety of angles thanks to it.
One of the most fundamental video editing skills you’ll need to master is how to split clips in Final Cut Pro. After being divided in two, you can modify or reorganize one half of your clip without affecting the other.
Way 1: Split a Clip in the Timeline (shortcut: Command+B)
You can follow these steps to split a clip in the timeline:
Step1The blade can be selected in Final Cut Pro by clicking the Tools pop-up menu in the timeline’s upper left corner (or press B).
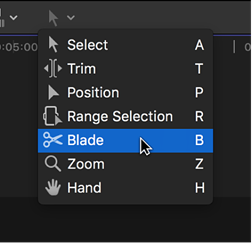
Step2Then click and move the skimmer to the frame in the video you wish to cut from.

Step3You can split the video by following these two methods:
- Choose Trim > Join Clips after selecting one or both sides of the edit point (or press Delete).
- Choose Trim > Join Clips after selecting the clips on either side of the edit.

Way 2. Split several clips at the same time
You can follow these steps to split several clips at the same time:
Step1Move the skimmer to the desired cutting frame in the Final Cut Pro timeline.

Step2Deciding on Trim > Blade All (or press Shift+Command+B). At the skimmer position, all clips are removed.
Way 3. Split all clips at once
The Blade command allows you to simultaneously cut selected core storyline segments and related clips.
You can follow these steps to split all clips at once:
Step1Choose the videos you wish to cut from the timeline in Final Cut Pro.
Step2The skimmer should be moved to the desired cutting frame.
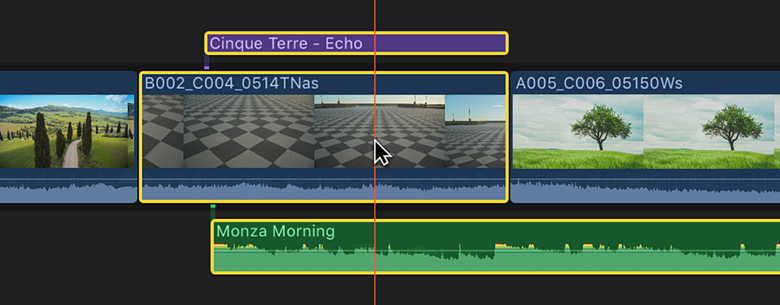
Step3Click Trim > Blade (or press Command+B). The skimmer position is used to cut the chosen clips.
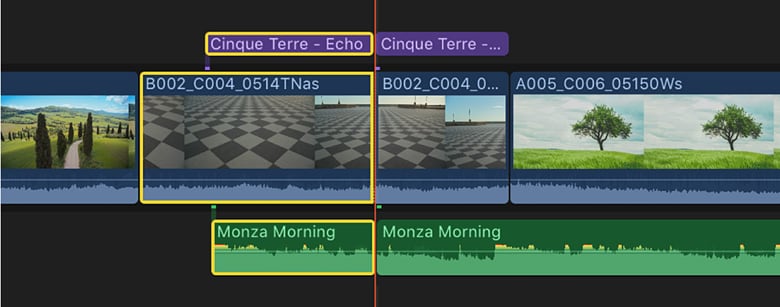
Tips: How to heal the sliced clips?
How should I recover if there is an error in the edited video? Here are 3 methods for you.
Way 1: Delete the cut point (by pressing Delete)
You can follow these steps to merge 2 clips by clicking delete:
Step1Move the mouse over the time point you want to remove, then select Delete directly to restore the original full video.

Way 2: Undo the action (by pressing Command + Z)
You can either click “Command + Z” to reverse the process if you want to link the clips back together to repair a clip in the timeline.
Way 3: merge 2 clips (by clicking " Join Clips")
Choose two neighboring portions, then select “Join Clips” from the drop-down option under “Trim” to join the individual clips together into one.
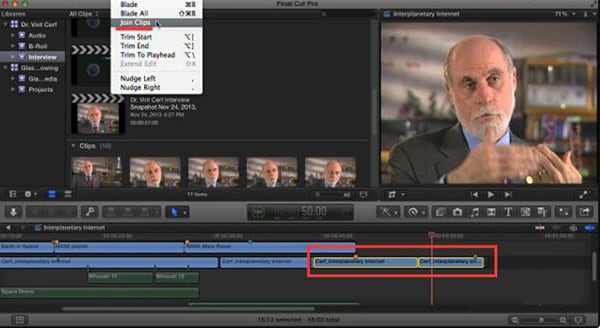
Tips: These 3 ways only work if the two clips come from the same clip.
Part 2. How to split a clip in alternative to Final Cut Pro?
Final Cut Pro is a more complex user to understand; It can sometimes corrupt your file if it isn’t saved properly, leading to all your work becoming lost. To save your work, you should do this every 5 minutes to ensure that your work doesn’t corrupt. There are limited export settings; you are limited in the formats and sizes you can export from FCPX; whereas before, you could export many codecs and formats out of FCP, you must complete more specific encoding in a compressor.
Therefore, the alternative to Final Cut Pro is Filmora because it allows you to edit, split or merge clips in one go.
Split a clip in the best alternative to FCP - Wondershare Filmora
Wondershare Filmora is a video editing program with a delightfully user-friendly interface that enables anyone to become an excellent video editor. With the help of a variety of strong editing tools and Wondershare Filmora, users may quickly and easily make outstanding videos.
To split audio and video without any problem, just follow these steps:
Step1To add video files to the Timeline for trimming, first click “Import“ on the main windows and choose the video files you want from your computer. You can also just drag and drop movies into the Media Library.
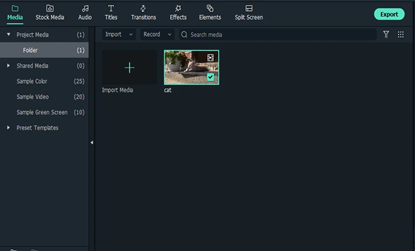
Step2Move the playhead over the unwanted section, then click the trash can symbol.
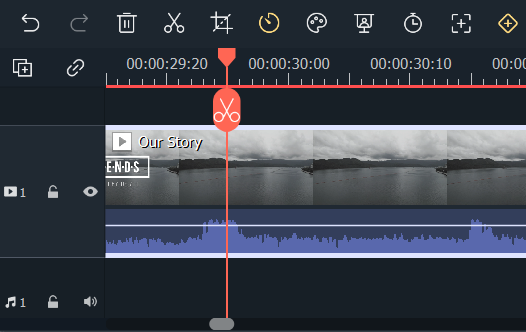
Step3Click “Export“ after you’re done trimming, then choose where you want to save the edited video.
Conclusion
We hope this article can help you learn how to split videos with Final Cut Pro, however, we still recommend more users choose Filmora . It is one of the widely preferred and commonly used video editing software programs as it introduces you to a world of editing tools allowing you in creating high-quality content. Although some of the features require in-app purchases, still Filmora provides access to a wide range of tools in the free version.
Free Download For Win 7 or later(64-bit)
Free Download For macOS 10.14 or later
Free Download For macOS 10.14 or later
Also read:
- Top 16 Motion Blur Apps for Videos & Photos for 2024
- Updated In 2024, How to Create Intro Video with KineMaster
- New 2024 Approved 10 Best Music Video Templates to Make Your Video Popular
- 2024 Approved Best Audio Plug-Ins For Video Editors
- Updated Want to Add the Amazing Video Text Effects that You Generally See on Video Streaming Platforms? Use Filmora to Add Popular Video Text Effects Instantly
- Updated How to Make A Jaw-Dropping Time Lapse Video, In 2024
- New Tips That Show Anybody How To Create Youtube Slideshow – Guaranteed
- In 2024, Guide To Scaling and Setting Videos in Filmora | Tutorial
- New Top Applications That Can Help Apply The Best VHS Camera Effect for 2024
- Updated 2024 Approved 20 Must-Have Graduation Songs
- How to Create Sports Intro and YouTube Endscreen?
- New 6 Instant Mp4 to GIF Online Tools
- Having Trouble with Black Backgrounds in After Effects? Land in Here to Know How You Can Quickly Escape This Glitch in the Simplest Ever Way Possible for 2024
- Updated How to Make a Slideshow GIF?
- 2024 Approved Right Tools for Converting 60FPS Frame Rate in Videos
- Updated Adobe Lightroom Color Grading Tutorial for 2024
- Create an Awesome Logo Reveal with Logo Intro Templates
- Turn Any Video Into a Paper Rip Effect with Filmora for 2024
- New In 2024, Top 10 Sony LUT for Different Purposes
- New How to to Mimic Professional Filming Gears for 2024
- Updated How to Build A Video Editing Career
- Video Editing Tips to Know Before Editing First Draft for 2024
- Guide Adding Audio in Wondershare Filmora
- Updated Learn About some of the Best Apps for Photo Collage for PC
- How to Get Motion Blur in Roblox?
- New Learn How to Slow Down Time-Lapse Videos on Your iPhone to Make Detailed Slow-Motion Effects in Your Time-Lapse Captures
- In 2024, Top 10 Free WhatsApp Video Converter 2023
- Updated In 2024, How to Add Photos to Tik Tok Video
- 2024 Approved Ultimate Guide on Converting Word to SRT
- Updated This Article Talks in Detail About How to Edit Videos with Windows Movie Maker 10, How to Download or Install It, and so On. It Further Involves the Use of an Alternative to This Tool. Check Out Now
- New In 2024, 7 Solutions to Edit GoPro Video on Mac
- In 2024, Latest way to get Shiny Meltan Box in Pokémon Go Mystery Box On Tecno Spark Go (2023) | Dr.fone
- Full Guide to Hard Reset Your Vivo V27 | Dr.fone
- 2024 Approved How to Make a Video for Your Babys First Year
- How to restore wiped videos on Motorola Razr 40
- The Best Android Unlock Software For Vivo V27e Device Top 5 Picks to Remove Android Locks
- Apple ID is Greyed Out From iPhone 12 How to Bypass?
- How To Track IMEI Number Of Samsung Galaxy S24 Ultra Through Google Earth?
- The Easiest Methods to Hard Reset Honor Magic 5 | Dr.fone
- Hacks to do pokemon go trainer battles For Tecno Spark 10 Pro | Dr.fone
- How To Upgrade or Downgrade iPhone 8 Plus Without Data Loss? | Dr.fone
- How to recover old music from your Tecno Camon 20 Premier 5G
- 7 Fixes for Unfortunately, Phone Has Stopped on HTC U23 Pro | Dr.fone
- How to Cast Motorola Edge 2023 to Computer for iPhone and Android? | Dr.fone
- In 2024, How To Fix Auto Lock Greyed Out on iPhone XR
- Everything You Need to Know about Lock Screen Settings on your ZTE Nubia Flip 5G
- How To Transfer WhatsApp From iPhone 7 to other iPhone 13 devices? | Dr.fone
- In 2024, How to Bypass FRP from Samsung Galaxy A05?
- In 2024, How to use Snapchat Location Spoofer to Protect Your Privacy On Xiaomi Redmi 13C 5G? | Dr.fone
- How to Transfer Data from Vivo X Flip to Any iOS Devices | Dr.fone
- Complete Tutorial to Use GPS Joystick to Fake GPS Location On Samsung Galaxy A05 | Dr.fone
- How to get the dragon scale and evolution-enabled pokemon On Realme GT 5? | Dr.fone
- Title: Split a Clip in DaVinci Resolve Step by Step
- Author: Chloe
- Created at : 2024-05-20 03:37:24
- Updated at : 2024-05-21 03:37:24
- Link: https://ai-editing-video.techidaily.com/split-a-clip-in-davinci-resolve-step-by-step/
- License: This work is licensed under CC BY-NC-SA 4.0.

