
:max_bytes(150000):strip_icc():format(webp)/samsungappstore-c0194a478ba54e90a798b3bb5ff4f6d5.jpg)
Stunning Glitch Effect and Its Creation Steps for Premiere Pro
Stunning Glitch Effect and Its Creation Steps for Premiere Pro
Glitch means errors and malfunction in the footage in software, games, videos, images, and audio. Presently, creative professionals are intentionally adding the glitch effect to their work to give a unique vibe to it. The effect appears as the pixels glitch organically, appearing to melt or duplicate onto the next scene.
The article takes Adobe Premiere Pro under consideration. First, glitch effect Premiere templates and then the step-by-step guide to add glitch transition Premiere Pro would be discussed. Time to begin!
In this article
01 Part 1: 8 Amazing Glitch Effect for Premiere Pro
02 Part 2: How Do You Do the Glitch Effect in Premiere Pro?
Part 1: 8 Amazing Glitch Effect for Premiere Pro
There are extensive websites in business that offer amazing templates to add glitch effects to your video. The subsection of this article shall come up with eight workable VHS effect Premiere, which would be perfectly compatible with Premiere Pro. These VHS effect Premiere Pro are HD quality, which means you do not have to worry about the output. So, let us start! Shall we?
The first VHS overlay Premiere is Digital Glitch Transitions. Envato Elements offers 20 glitch transitions that can be used in different video themes. The HD resolution of this distortion effect Premiere Pro is 1920x1080. There are noise effects as well.

Glitch Slideshow is another amazing glitch effect Premiere Pro free introduced by Envato Elements. If you are a photographer or a film director, this glitch transition Premiere gives you what you need. The HD resolution is offered, and no plugins are required.

3. Venus
Venus is the perfect choice to add an Adobe Premiere VHS effect by offering an adjustable duration of the video with effortless customization. The template is highly famous among YouTubers and content creators to leave a long-lasting impact on the audience via glitchy titles and effects.

Presenting another Premiere Pro template, Fast Glitch Transitions is a ready-to-use template. It offers ten fast-tracked transitions that add value to the project. Moreover, it brings versatile colors to the video with the glitches. This Premiere VHS effect is perfect for intros and travel videos.

Allow me to introduce you to another new and stylish static effect Premiere Pro known as Glitch Multiframe Opener. It is a dynamic template that needs no plugins. Be free to use the template for commercials, Facebook video openers, and teasers. Moreover, photos and videos can be added to make the glitch workable.

Glitch Urban Opener is an impeccable glitch effect for Premiere Pro, presenting trendy and creative designs. It brings smooth transitions to the video with 17 editable layers, 11 media holders, and one logo placeholder. All of these options make this VHS filter Premiereeasily customizable and operatable.

Another retro effect Premiere Pro from Motion Elements is 30 Glitch Transitions. The media industry uses this template to insert different glitch effects into the video and make it eye-catching for everyone. The effects are styled with interference, bad TV, distortions, VHS noise, and other fatal errors.

Last but not the least, Glitch Transitions can be counted upon to act as the best Adobe Premiere glitch effect. There are three transitions for different themes. The color controls help manage the video editing more effectively. Moreover, the templates offer horizontal and vertical directions to work better.

Part 2: How Do You Do the Glitch Effect in Premiere Pro?
Are you a Premiere Pro user? Do you need to add the Premiere glitch transition to the video? Worry no more! Follow this subsection vividly. Would you?
Adobe Premiere Pro is a video editing software that has got you covered. You can enhance the speed of the video to tell your story better and share the vision. With Premiere Pro in the frame, you can shift the colors, insert graphics and titles, and give a unique music effect to the video. All in one platform, a dream come true, don’t you agree?
If you want to perform a Premiere Pro VHS effect, allow us to walk you through the process. It is highly recommended that you follow the guide carefully to have desirable results. So, what are we waiting for? Time to start, right?
Step 1: Importing the Targeted Video
To begin the process, open Adobe Premiere Pro on your system. Import the targeted footage and drag it to the timeline. After the video is added, head to the “Effects” panel on the left side of the interface.

Step 2: Launching the VR Digital Glitch
Type away glitch in the search bar. The user will find VR Digital Glitch in the results. Drag the effect to the clip on the timeline. Now, it is time to navigate to the “Effect Controls.”

Step 3: Changing the Distortion Control
Scroll down to find “Distortion” in the controls and expand it. The user is suggested to increase the color distortion to give an RGB effect to the footage. After that, you should reduce the distortion rate to 0 so that different artifacts can be eliminated effortlessly.

Step 4: Changing the Noise Strength
Moving on, expand the “Noise” control section and increase the noise strength. It will give the footage a significant level of graininess.

Step 5: Animating the Glitch Effect
To animate the glitch, use the playhead on the top and drag it to the first position where the effect should start from. Hit the stopwatch located on the left of “Master Amplitude.” It will create a keyframe. Alter the “Master Amplitude” to 0 as we do not want the clip to begin with a glitch.

Step 6: Playing with the Playhead
Now, use your keyboard’s right arrow to move the playhead three frames forward. After that, set the “Master Amplitude” to 100. Again, move the playhead three frames forward and set the “Master Amplitude” to 0. The animation is produced on the RGB color distortion.

Step 7: Positioning the Video
Move back to the first keyframe and head to the top that shows “Scale” settings. Enhance the scale value so that the video position can be leveled. Click on the stopwatch next to “Position” to create a keyframe. Move the playhead one frame forward and adjust the position of the frame.

Step 8: Final Process
Again, move the playhead to the next frame and click on the “Reset” shaped icon to reset the position of the video. Move another frame forward and reposition the video. You can do this multiple times to give a glitchy effect to the clip. There you go! It is all done.

Conclusion
A raw video doesn’t send the message as the user wants. For this, creative professionals need to give some effects to the video, such as glitch effect Premiere. The article highlighted some famous glitch effects which were perfectly compatible with Adobe Premiere Pro. The whole procedure to add the Adobe Premiere glitch effect was also the crux of this write-up.
02 Part 2: How Do You Do the Glitch Effect in Premiere Pro?
Part 1: 8 Amazing Glitch Effect for Premiere Pro
There are extensive websites in business that offer amazing templates to add glitch effects to your video. The subsection of this article shall come up with eight workable VHS effect Premiere, which would be perfectly compatible with Premiere Pro. These VHS effect Premiere Pro are HD quality, which means you do not have to worry about the output. So, let us start! Shall we?
The first VHS overlay Premiere is Digital Glitch Transitions. Envato Elements offers 20 glitch transitions that can be used in different video themes. The HD resolution of this distortion effect Premiere Pro is 1920x1080. There are noise effects as well.
Glitch Slideshow is another amazing glitch effect Premiere Pro free introduced by Envato Elements. If you are a photographer or a film director, this glitch transition Premiere gives you what you need. The HD resolution is offered, and no plugins are required.
3. Venus
Venus is the perfect choice to add an Adobe Premiere VHS effect by offering an adjustable duration of the video with effortless customization. The template is highly famous among YouTubers and content creators to leave a long-lasting impact on the audience via glitchy titles and effects.
Presenting another Premiere Pro template, Fast Glitch Transitions is a ready-to-use template. It offers ten fast-tracked transitions that add value to the project. Moreover, it brings versatile colors to the video with the glitches. This Premiere VHS effect is perfect for intros and travel videos.
Allow me to introduce you to another new and stylish static effect Premiere Pro known as Glitch Multiframe Opener. It is a dynamic template that needs no plugins. Be free to use the template for commercials, Facebook video openers, and teasers. Moreover, photos and videos can be added to make the glitch workable.
Glitch Urban Opener is an impeccable glitch effect for Premiere Pro, presenting trendy and creative designs. It brings smooth transitions to the video with 17 editable layers, 11 media holders, and one logo placeholder. All of these options make this VHS filter Premiereeasily customizable and operatable.
Another retro effect Premiere Pro from Motion Elements is 30 Glitch Transitions. The media industry uses this template to insert different glitch effects into the video and make it eye-catching for everyone. The effects are styled with interference, bad TV, distortions, VHS noise, and other fatal errors.
Last but not the least, Glitch Transitions can be counted upon to act as the best Adobe Premiere glitch effect. There are three transitions for different themes. The color controls help manage the video editing more effectively. Moreover, the templates offer horizontal and vertical directions to work better.
Part 2: How Do You Do the Glitch Effect in Premiere Pro?
Are you a Premiere Pro user? Do you need to add the Premiere glitch transition to the video? Worry no more! Follow this subsection vividly. Would you?
Adobe Premiere Pro is a video editing software that has got you covered. You can enhance the speed of the video to tell your story better and share the vision. With Premiere Pro in the frame, you can shift the colors, insert graphics and titles, and give a unique music effect to the video. All in one platform, a dream come true, don’t you agree?
If you want to perform a Premiere Pro VHS effect, allow us to walk you through the process. It is highly recommended that you follow the guide carefully to have desirable results. So, what are we waiting for? Time to start, right?
Step 1: Importing the Targeted Video
To begin the process, open Adobe Premiere Pro on your system. Import the targeted footage and drag it to the timeline. After the video is added, head to the “Effects” panel on the left side of the interface.
Step 2: Launching the VR Digital Glitch
Type away glitch in the search bar. The user will find VR Digital Glitch in the results. Drag the effect to the clip on the timeline. Now, it is time to navigate to the “Effect Controls.”
Step 3: Changing the Distortion Control
Scroll down to find “Distortion” in the controls and expand it. The user is suggested to increase the color distortion to give an RGB effect to the footage. After that, you should reduce the distortion rate to 0 so that different artifacts can be eliminated effortlessly.
Step 4: Changing the Noise Strength
Moving on, expand the “Noise” control section and increase the noise strength. It will give the footage a significant level of graininess.
Step 5: Animating the Glitch Effect
To animate the glitch, use the playhead on the top and drag it to the first position where the effect should start from. Hit the stopwatch located on the left of “Master Amplitude.” It will create a keyframe. Alter the “Master Amplitude” to 0 as we do not want the clip to begin with a glitch.
Step 6: Playing with the Playhead
Now, use your keyboard’s right arrow to move the playhead three frames forward. After that, set the “Master Amplitude” to 100. Again, move the playhead three frames forward and set the “Master Amplitude” to 0. The animation is produced on the RGB color distortion.
Step 7: Positioning the Video
Move back to the first keyframe and head to the top that shows “Scale” settings. Enhance the scale value so that the video position can be leveled. Click on the stopwatch next to “Position” to create a keyframe. Move the playhead one frame forward and adjust the position of the frame.
Step 8: Final Process
Again, move the playhead to the next frame and click on the “Reset” shaped icon to reset the position of the video. Move another frame forward and reposition the video. You can do this multiple times to give a glitchy effect to the clip. There you go! It is all done.
Conclusion
A raw video doesn’t send the message as the user wants. For this, creative professionals need to give some effects to the video, such as glitch effect Premiere. The article highlighted some famous glitch effects which were perfectly compatible with Adobe Premiere Pro. The whole procedure to add the Adobe Premiere glitch effect was also the crux of this write-up.
8 Tips to Apply Cinematic Color Grading to Your Videos
Create High-Quality Video - Wondershare Filmora
An easy and powerful YouTube video editor
Numerous video and audio effects to choose from
Detailed tutorials are provided by the official channel
After a successful video shoot, video editing tends to wrap up the video production process. However, a video cannot be enlivened by using simple video editing tools, i.e., cut, crop, and trim, but rather tools such as cinematic color grading. Usually, directors want their video to evoke their intended ambiance and appear more realistic – This can only be achieved through cinematic color grading.
Color grading is the alteration and enhancement of color in a video, motion picture, or still image. Color grading is an essential tool for videographers since it enables them to enhance the mood or tone. Stick to this article and learn about the eight tips to apply cinematic color grading to your video.
In this article
02 8 Tips to Apply Cinematic Color Grading to Your Video
Don’t Make These Mistakes
Even though to err is human, there are some mistakes that colorists and video editors need to avoid at all costs. It is not only because they will make them look amateurish but also undermines the message and impact of the video.
Some people assume color grading is as simple as adding filters to their Instagram photos which they are absolutely wrong. Color grading is a long and frustrating process, and it only requires “persons with a thick skin.”
Some mistakes are not only committed by amateurs alone but also professional colorists who are in a rush to complete their projects on due time. Usually, these mistakes degrade the quality output. Some of the mistakes that one needs not make include:
1. Using a Poorly Calibrated Monitor
Almost every videographer and colorist’s goal is to design footages that distinctively display their primary colors and decipher the intended message. And this can only be achieved using a properly calibrated monitor.
Before working on a project, you ought to crosscheck your monitor calibration. Most people assume that the calibration is accurate since they possess a new, out-of-the-box monitor. It is utterly wrong since retailer shops usually adjust the monitor settings to overblown saturation and contrast to attract customers.
Furthermore, if you opt to edit your videos without adjusting your monitor calibration, you will have a poor footage.
2. Poor Prepping of the Video Footage
One major mistake that videographers often make is not prepping their video correctly. A poorly prepped footage is one that has a bad color space conversion. Usually, the outcome result of poorly prepped footage is an imbalanced image.
Prepping footage is not as easy as an apple pie. Besides, most videographers tend to follow a shortcut by starting messing with the gains and individual nodes, forgetting that a shortcut is often a wrong cut.
The best way of prepping a video is to start by making separate nodes and labeling them differently.
3. Imbalancing the Shadow
Have you ever seen video footage with partially opaque shadows? And when you look keenly, you see tinted greens and reds. Usually, this is a result of an imbalanced shadow.
This mistake is not only carried out by beginner videographers but also professionals who are always in a hurry to complete a project. When you look at your scope, you see the shadows are lifted or down in other scenarios – This is also a result of shadow imbalance.
4. Overusing LUTs
A mistake that beginner editors often make is overusing LUTs. Footages with overly used LUTs often appear to be dull. A thing that videographers need to observe when using LUTs is consistency.
When using LUTs, you need to ensure that your project has similar saturation, colors, and contrast throughout your video project. Moreover, it would be best to choose your LUTs based on the film color palette and your story.
5. Having Limited break
Having enough break enables one’s eyes to recalibrate. As a colorist, your eyes are often considered the main asset. Sitting for long periods in your workstation and staring for long hours at your monitor may cause one to add more saturation and contrast, thus making the video dull. Therefore the best remedy is to take a break from your monitor.
Besides, coming from a break enables one to have another different perspective about the color grading of the project.
8 Tips to Apply Cinematic Color Grading to Your Video
When it comes to creating cinematic looks in video footage, the camera type is usually non-essential. What matters is that you capture quality videos with the right angles then leave the rest to color grading.
For a video clip to look more cinematic, a couple of elements are put together. Here, we will look at those elements and create stunning videos.
1. Use Lumetri Color to adjust brightness, contrast, and saturation
The Lumeri color is an essential color grading functionality in most premiere software, including Wondershare Filmora, Adobe After Effects, and Davinci Resolve 17. With this functionality tool, you can carry out a wide range of customizable settings such as hue, saturation, contrasts, brightness, and tone.
The lumetri panel contains a histogram, vectorscope, parade scope, and waveform monitor. In your lumetri panel, you can measure the brightness and tonal values using a histogram, the light intensity with a waveform monitor, saturation and hue using vectorscope, and color channel using parade scope.
Adjusting the brightness, contrast, hue, saturation, and tone to moderate levels will give your video clip that cinematic look.

2. Use Cosmo functionality to adjust skin tones
Due to the light effect, shots taken during the day will have inconsistent color matches, especially skin tone. In the post-production process, one needs to make uniformity in skin tone and the clip. To rectify this, you need to involve a professional color grading functionality, Cosmo.
With cosmo, you can adjust the skin color, squeeze the skin, and soften the skin. Generally, Cosmo makes people in video clips look their best.

3. Use Highlights and Shadows adjustment
A clip will look more cinematic when the shadows and highlights are brought out as separate entities. The shadows become more vivid when adjusted to either teal, purple or blue. You can go a mile and adjust the highlights to become crystal clear by making the footage become yellow, red, or orange.
When carrying out color grading, you need to know the various video demands, such as the horror clips demand more of the dark shadow.

4. Use Vectorscope to get the accurate adjustment
Naked eyes cannot effectively see all the errors in a video project, which is the essence of having a vectorscope. A vectorscope provides all the quantitative information about a video image – This lessens work for video editors.
Vectorscope provides extensive details, such as how intense a given color is – This will help you make necessary adjustments to your footage.

5. Use the black and white functionality to change the opacity
Even though you can change your footage to black and white using the hue and saturation functionality, the black and white tool gives you more control.
This functionality feature can make your footage blend with the soft light part. Besides, it is best to first lower the contrast of your image or video to black and white to be able to highlight the unclear parts.

6. Use levels to unveil the whites, blacks, and mids of an image
Levels is a functionality feature that displays the blacks, whites, and mids of footage. With this functionality, you can make the highlight parts lighter and the shadows appear darker, which is essential in making cinematic videos.
In the levels histogram, the left slider defines the darkest part, the right defines the brightest part, and the top defines distributions.
In software such as Adobe After Effects, you can set this functionality to automatic or customize it based on your preference.

7. Use Vibrance to control other levels of saturation
The saturation of video footage or a clip can be regulated using vibrance functionality. With vibrance, you can alter the saturation levels of your clip while simultaneously minimizing clippings for the colors to approach complete saturation.
When you want to use this functionality in After Effects, you drag and drop it right on top of your footage – The exact part you want to apply it.

8. Use a Vignette to fade edges
To increase the point of focus, you need to fade your edges. In color grading, you can only fade your edges with a vignette.
This functionality allows you to center images or certain video parts and make the edges unclear. Your emphasis will be more on the central region.

Bottom line
● Color grading is not a piece of cake. Besides, you should not use it as an excuse for making simple mistakes such as the ones highlighted above. You need to pay close attention when color grading your films, and you will have your video project mapping out its intended meaning.
● Moreover, you need not be a pro to carry out cinematic color grading. You need to follow the above eight tips altogether to apply color grading to your video. You will create stunning video files that leave your viewers’ eyes gorged out.
After a successful video shoot, video editing tends to wrap up the video production process. However, a video cannot be enlivened by using simple video editing tools, i.e., cut, crop, and trim, but rather tools such as cinematic color grading. Usually, directors want their video to evoke their intended ambiance and appear more realistic – This can only be achieved through cinematic color grading.
Color grading is the alteration and enhancement of color in a video, motion picture, or still image. Color grading is an essential tool for videographers since it enables them to enhance the mood or tone. Stick to this article and learn about the eight tips to apply cinematic color grading to your video.
In this article
02 8 Tips to Apply Cinematic Color Grading to Your Video
Don’t Make These Mistakes
Even though to err is human, there are some mistakes that colorists and video editors need to avoid at all costs. It is not only because they will make them look amateurish but also undermines the message and impact of the video.
Some people assume color grading is as simple as adding filters to their Instagram photos which they are absolutely wrong. Color grading is a long and frustrating process, and it only requires “persons with a thick skin.”
Some mistakes are not only committed by amateurs alone but also professional colorists who are in a rush to complete their projects on due time. Usually, these mistakes degrade the quality output. Some of the mistakes that one needs not make include:
1. Using a Poorly Calibrated Monitor
Almost every videographer and colorist’s goal is to design footages that distinctively display their primary colors and decipher the intended message. And this can only be achieved using a properly calibrated monitor.
Before working on a project, you ought to crosscheck your monitor calibration. Most people assume that the calibration is accurate since they possess a new, out-of-the-box monitor. It is utterly wrong since retailer shops usually adjust the monitor settings to overblown saturation and contrast to attract customers.
Furthermore, if you opt to edit your videos without adjusting your monitor calibration, you will have a poor footage.
2. Poor Prepping of the Video Footage
One major mistake that videographers often make is not prepping their video correctly. A poorly prepped footage is one that has a bad color space conversion. Usually, the outcome result of poorly prepped footage is an imbalanced image.
Prepping footage is not as easy as an apple pie. Besides, most videographers tend to follow a shortcut by starting messing with the gains and individual nodes, forgetting that a shortcut is often a wrong cut.
The best way of prepping a video is to start by making separate nodes and labeling them differently.
3. Imbalancing the Shadow
Have you ever seen video footage with partially opaque shadows? And when you look keenly, you see tinted greens and reds. Usually, this is a result of an imbalanced shadow.
This mistake is not only carried out by beginner videographers but also professionals who are always in a hurry to complete a project. When you look at your scope, you see the shadows are lifted or down in other scenarios – This is also a result of shadow imbalance.
4. Overusing LUTs
A mistake that beginner editors often make is overusing LUTs. Footages with overly used LUTs often appear to be dull. A thing that videographers need to observe when using LUTs is consistency.
When using LUTs, you need to ensure that your project has similar saturation, colors, and contrast throughout your video project. Moreover, it would be best to choose your LUTs based on the film color palette and your story.
5. Having Limited break
Having enough break enables one’s eyes to recalibrate. As a colorist, your eyes are often considered the main asset. Sitting for long periods in your workstation and staring for long hours at your monitor may cause one to add more saturation and contrast, thus making the video dull. Therefore the best remedy is to take a break from your monitor.
Besides, coming from a break enables one to have another different perspective about the color grading of the project.
8 Tips to Apply Cinematic Color Grading to Your Video
When it comes to creating cinematic looks in video footage, the camera type is usually non-essential. What matters is that you capture quality videos with the right angles then leave the rest to color grading.
For a video clip to look more cinematic, a couple of elements are put together. Here, we will look at those elements and create stunning videos.
1. Use Lumetri Color to adjust brightness, contrast, and saturation
The Lumeri color is an essential color grading functionality in most premiere software, including Wondershare Filmora, Adobe After Effects, and Davinci Resolve 17. With this functionality tool, you can carry out a wide range of customizable settings such as hue, saturation, contrasts, brightness, and tone.
The lumetri panel contains a histogram, vectorscope, parade scope, and waveform monitor. In your lumetri panel, you can measure the brightness and tonal values using a histogram, the light intensity with a waveform monitor, saturation and hue using vectorscope, and color channel using parade scope.
Adjusting the brightness, contrast, hue, saturation, and tone to moderate levels will give your video clip that cinematic look.
2. Use Cosmo functionality to adjust skin tones
Due to the light effect, shots taken during the day will have inconsistent color matches, especially skin tone. In the post-production process, one needs to make uniformity in skin tone and the clip. To rectify this, you need to involve a professional color grading functionality, Cosmo.
With cosmo, you can adjust the skin color, squeeze the skin, and soften the skin. Generally, Cosmo makes people in video clips look their best.
3. Use Highlights and Shadows adjustment
A clip will look more cinematic when the shadows and highlights are brought out as separate entities. The shadows become more vivid when adjusted to either teal, purple or blue. You can go a mile and adjust the highlights to become crystal clear by making the footage become yellow, red, or orange.
When carrying out color grading, you need to know the various video demands, such as the horror clips demand more of the dark shadow.
4. Use Vectorscope to get the accurate adjustment
Naked eyes cannot effectively see all the errors in a video project, which is the essence of having a vectorscope. A vectorscope provides all the quantitative information about a video image – This lessens work for video editors.
Vectorscope provides extensive details, such as how intense a given color is – This will help you make necessary adjustments to your footage.
5. Use the black and white functionality to change the opacity
Even though you can change your footage to black and white using the hue and saturation functionality, the black and white tool gives you more control.
This functionality feature can make your footage blend with the soft light part. Besides, it is best to first lower the contrast of your image or video to black and white to be able to highlight the unclear parts.
6. Use levels to unveil the whites, blacks, and mids of an image
Levels is a functionality feature that displays the blacks, whites, and mids of footage. With this functionality, you can make the highlight parts lighter and the shadows appear darker, which is essential in making cinematic videos.
In the levels histogram, the left slider defines the darkest part, the right defines the brightest part, and the top defines distributions.
In software such as Adobe After Effects, you can set this functionality to automatic or customize it based on your preference.
7. Use Vibrance to control other levels of saturation
The saturation of video footage or a clip can be regulated using vibrance functionality. With vibrance, you can alter the saturation levels of your clip while simultaneously minimizing clippings for the colors to approach complete saturation.
When you want to use this functionality in After Effects, you drag and drop it right on top of your footage – The exact part you want to apply it.
8. Use a Vignette to fade edges
To increase the point of focus, you need to fade your edges. In color grading, you can only fade your edges with a vignette.
This functionality allows you to center images or certain video parts and make the edges unclear. Your emphasis will be more on the central region.
Bottom line
● Color grading is not a piece of cake. Besides, you should not use it as an excuse for making simple mistakes such as the ones highlighted above. You need to pay close attention when color grading your films, and you will have your video project mapping out its intended meaning.
● Moreover, you need not be a pro to carry out cinematic color grading. You need to follow the above eight tips altogether to apply color grading to your video. You will create stunning video files that leave your viewers’ eyes gorged out.
8 Top Premiere Pro Slideshow Templates
Best 8 Top Premiere Pro Slideshow Templates
An easy yet powerful editor
Numerous effects to choose from
Detailed tutorials provided by the official channel
Making slideshows quickly is the demand of modern professional world. Here you can go through top 8 Premiere pro Slideshow Templates available online. The slideshow template premiere pro free download versions are ready for media to be inserted for creating beautiful slideshows.

In this article
01 [Top 9 Premiere Pro Slideshow Templates worth utilizing](#Part 1)
02 [How Do I Create a Slideshow Template in Premiere Pro?](#Part 2)
03 [FAQ of Premiere Pro Slideshow Templates](#Part 3)
Part 1 Top 8 Premiere Pro Slideshow Templates worth Utilizing
01Square Photo
If you are looking for a really awesome slideshow premiere pro which can make your square-shaped photos more attractive, you can employ slideshow – Square Photo. The presentation of pictures in this slideshow occurs like scrolling an album full of family clicks. You will love the way it presents calm pictures with your friends and family. It**’**s satisfying, nostalgic and fun to use this slideshow.
02Vintage by motion shape
Want to give your slideshow a vintage touch? Well, vintage slideshow premiere template free by Motionshape is particularly for you. It makes your creation memorable and provides an exciting template full of flickers, dust, scratch and light effects. Ultimately, the project seems to run on historical timeline. All you need to do is adding photos and putting new captions as per your picture collection.
03Digital Slideshow by Zorrin
You will be in love with this slideshow for sure. Digital slideshow by Zorrin is a beautiful way to represent you. Whether you want to create a corporate slideshow or you are interested in promotion and broadcasting of your products, you can use this slideshow without any doubt. It possesses 50 places for the photos and 25 places for text as well. You will love the creative transitions between the slides.
04Emotional memory slideshow
Planning to create an emotional and memory based slideshow? If yes, this is the best slideshow premiere pro template free that you can use. It will enhance the importance of pictures which are close to your heart and full of passion. The analogous aesthetics of this slideshow hits your mind and replays your special memories.
05Corporate slideshow
So, you are working for a company and making a corporate slideshow for presentation? If yes, this corporate premiere slideshow template is for you. It gives a classic look to the pictures and put the story of your business in an exciting manner. You can use the timeline smartly and describe the establishment and progress of your company, management and teamwork, research and production and client base etc.
06Inspire slideshow by Quartz
Inspire is a good slideshow full of custom options in color palette and you can even make the changes directly while using its pro version. It involves a simple way to move slide-wise and is really a well organized template to insert your own media and move further.

07Transmaxx’s Education Slideshow
Never bother about creating your own free premiere pro slideshow template regarding education when you can already access this exclusive education slideshow. It is based upon the theme around education and has lots of places for pictures, videos and texts. You can add captions and additional write-ups wherever required.
08Motion Media Group’s Family Slideshow
You can choose any of the four versions of this wonderful free slideshow template premiere pro that provides platform for adding your family pictures. Whether you want to make a slideshow of celebrations in your family or making a digital collage of family photos, this is the best template you can go with. The romantic and calm pace is really touchy to be used as a wedding slideshow as well.
09**Wondershare Filmora Video Editor **
One more interesting video editor and slideshow template is Filmora by wondershare which promises to meet all your editorial demands while making a slideshow. As the slideshow template premiere pro free version offers high end motion graphic, you can use it for making highly professional videos. Make creative presentations on Filmora and give your projects a technical finishing with best outcome.
For Win 7 or later (64-bit)
For macOS 10.12 or later
Part 2 How Do I Create a Slideshow Template in Premiere Pro?
Creating a slideshow template in premiere pro is not at all tough, even it is really fun. You need nothing much to do and have all the controls of customizing the presentation as per your preference. Just follow the steps mentioned below –

Step 1 Download the app and install it in your device.
Step 2 Open the adobe premiere pro slideshow templates free and select ‘new project‘ by clicking on it. The term can differ in different versions of premiere. For instance, may be you will find the way to start a new project by clicking on ‘file‘ and then ‘new‘ or something like that. So follow the path accordingly.
Step 3 It**’**s time to understand workspace in premiere. A blank workspace will be provided to you to start with your new project. There will be a set of insert and editing options, buttons and information to get help in the form of panels. You can select a panel to work on your project with the help of that particular panel. For instance, to insert your videos and pictures in the timeline, you can select ‘insert‘ panel and proceed.
Step 4 Create your project with the help of panels in adobe premiere pro slideshow template free. In the lower left of the project, you will see your sequence of videos and picture which can be controlled by you. For example, if you want to change the sequence, apply filters and effects or add text on the video clips and photos, you can do the same by clicking on that particular clip. Then choose the operation you want to apply from the project panel and edit your project as per your choice.
Step 5 In the menu bar, you can see file. Select ‘file‘ and go to ‘new‘, then ‘sequence‘. Add the audio of your choice, select the frame you want and set resolution as per your preference from here. You can also control color, depth, warmth and speed of the video etc. from this task bar.
Step 6 Once ready, you can proceed to save your project. Various resolutions will be available when you click on ‘download or save‘. Choose the resolution you prefer and save your free premiere pro templates slideshow for future use. Don**’**t forget to enter a name to describe your project such as ‘my company‘, ‘holidays 2022‘ etc.
Part 3 FAQ of Premiere Pro Slideshow Templates

Can I have Premiere Pro slideshow templates for free?
Yes, you can definitely have a premiere pro slideshow templates free download version. All you need to do is downloading the free premiere pro app from Motion Array, run and install it in your device and it**’**s ready to be used.
How many placeholders are there in Premiere Pro slideshow templates?
The no. of placeholders varies editor to editor. In Premiere pro slideshow templates, you can have more than 30 placeholders for photos and approx 23 placeholders for texts. The number is enough to create a calm, gentle slideshow without much load of content for distraction.
What are the main features of Premiere Pro slideshow templates?
The best thing to know about premiere pro slideshow template is that it is so easy to use that even a beginner can create a good slideshow on it. The user friendly interface of the app provides custom operational functions such as changing the font, color and speed of slideshow. Directly drag and drop feature is there to insert media in the slideshow and also you can control the transitions and effects. The most important thing is that all this you can get for free also.
Can I use Premiere Pro slideshow templates for making promotional videos?
Of course, you can create impressive adobe premiere slideshow templates with the help of premiere pro slideshow template. Just choose the pictures and videos of your business/company wisely and generate high tech content to catch attention. Write touchy content on your company and upload in the slideshow in the form of text use beautiful font, catchy captions and subtle background colors to make it more interesting.
How to remove watermark in Premiere Pro slideshow templates?
In the premium version, you won**’t have to employ your efforts for removing watermark as you won‘**t find it there while in the free version, you will have to remove the watermark by applying a watermark removing app or watching a small promo video shown by the app.
When should I use Premiere Pro slideshow templates?
You can use premiere slideshow template free whenever you feel the need of making a slideshow. When you come back from a vacation and want to compile all the pictures; when there is an important business meeting and you want to represent your project, when you want to make a family or friends**’** slideshow on special occasions and even personal slideshows can be created to wish someone happy birthday.
● Ending Thoughts →
● The trend of ‘ready-to-use‘ slideshow makers is on its peak as nobody have enough time to create a complete slideshow by its own nowadays. In such condition, you should choose a premiere pro slideshow template free wisely to go well with your theme.
● The procedure of slideshow making varies app to app. You should first understand the interface of a slideshow maker before putting your head into slideshow making. It**’**s better to choose a slideshow maker with user friendly interface.
● Don**’**t go with the professional version or a slideshow maker created to be used by expert only. Pick one with simple operations and quick assistance if are not so well-versed in slideshow making.
Making slideshows quickly is the demand of modern professional world. Here you can go through top 8 Premiere pro Slideshow Templates available online. The slideshow template premiere pro free download versions are ready for media to be inserted for creating beautiful slideshows.
In this article
01 [Top 9 Premiere Pro Slideshow Templates worth utilizing](#Part 1)
02 [How Do I Create a Slideshow Template in Premiere Pro?](#Part 2)
03 [FAQ of Premiere Pro Slideshow Templates](#Part 3)
Part 1 Top 8 Premiere Pro Slideshow Templates worth Utilizing
01Square Photo
If you are looking for a really awesome slideshow premiere pro which can make your square-shaped photos more attractive, you can employ slideshow – Square Photo. The presentation of pictures in this slideshow occurs like scrolling an album full of family clicks. You will love the way it presents calm pictures with your friends and family. It**’**s satisfying, nostalgic and fun to use this slideshow.
02Vintage by motion shape
Want to give your slideshow a vintage touch? Well, vintage slideshow premiere template free by Motionshape is particularly for you. It makes your creation memorable and provides an exciting template full of flickers, dust, scratch and light effects. Ultimately, the project seems to run on historical timeline. All you need to do is adding photos and putting new captions as per your picture collection.
03Digital Slideshow by Zorrin
You will be in love with this slideshow for sure. Digital slideshow by Zorrin is a beautiful way to represent you. Whether you want to create a corporate slideshow or you are interested in promotion and broadcasting of your products, you can use this slideshow without any doubt. It possesses 50 places for the photos and 25 places for text as well. You will love the creative transitions between the slides.
04Emotional memory slideshow
Planning to create an emotional and memory based slideshow? If yes, this is the best slideshow premiere pro template free that you can use. It will enhance the importance of pictures which are close to your heart and full of passion. The analogous aesthetics of this slideshow hits your mind and replays your special memories.
05Corporate slideshow
So, you are working for a company and making a corporate slideshow for presentation? If yes, this corporate premiere slideshow template is for you. It gives a classic look to the pictures and put the story of your business in an exciting manner. You can use the timeline smartly and describe the establishment and progress of your company, management and teamwork, research and production and client base etc.
06Inspire slideshow by Quartz
Inspire is a good slideshow full of custom options in color palette and you can even make the changes directly while using its pro version. It involves a simple way to move slide-wise and is really a well organized template to insert your own media and move further.
07Transmaxx’s Education Slideshow
Never bother about creating your own free premiere pro slideshow template regarding education when you can already access this exclusive education slideshow. It is based upon the theme around education and has lots of places for pictures, videos and texts. You can add captions and additional write-ups wherever required.
08Motion Media Group’s Family Slideshow
You can choose any of the four versions of this wonderful free slideshow template premiere pro that provides platform for adding your family pictures. Whether you want to make a slideshow of celebrations in your family or making a digital collage of family photos, this is the best template you can go with. The romantic and calm pace is really touchy to be used as a wedding slideshow as well.
09**Wondershare Filmora Video Editor **
One more interesting video editor and slideshow template is Filmora by wondershare which promises to meet all your editorial demands while making a slideshow. As the slideshow template premiere pro free version offers high end motion graphic, you can use it for making highly professional videos. Make creative presentations on Filmora and give your projects a technical finishing with best outcome.
For Win 7 or later (64-bit)
For macOS 10.12 or later
Part 2 How Do I Create a Slideshow Template in Premiere Pro?
Creating a slideshow template in premiere pro is not at all tough, even it is really fun. You need nothing much to do and have all the controls of customizing the presentation as per your preference. Just follow the steps mentioned below –
Step 1 Download the app and install it in your device.
Step 2 Open the adobe premiere pro slideshow templates free and select ‘new project‘ by clicking on it. The term can differ in different versions of premiere. For instance, may be you will find the way to start a new project by clicking on ‘file‘ and then ‘new‘ or something like that. So follow the path accordingly.
Step 3 It**’**s time to understand workspace in premiere. A blank workspace will be provided to you to start with your new project. There will be a set of insert and editing options, buttons and information to get help in the form of panels. You can select a panel to work on your project with the help of that particular panel. For instance, to insert your videos and pictures in the timeline, you can select ‘insert‘ panel and proceed.
Step 4 Create your project with the help of panels in adobe premiere pro slideshow template free. In the lower left of the project, you will see your sequence of videos and picture which can be controlled by you. For example, if you want to change the sequence, apply filters and effects or add text on the video clips and photos, you can do the same by clicking on that particular clip. Then choose the operation you want to apply from the project panel and edit your project as per your choice.
Step 5 In the menu bar, you can see file. Select ‘file‘ and go to ‘new‘, then ‘sequence‘. Add the audio of your choice, select the frame you want and set resolution as per your preference from here. You can also control color, depth, warmth and speed of the video etc. from this task bar.
Step 6 Once ready, you can proceed to save your project. Various resolutions will be available when you click on ‘download or save‘. Choose the resolution you prefer and save your free premiere pro templates slideshow for future use. Don**’**t forget to enter a name to describe your project such as ‘my company‘, ‘holidays 2022‘ etc.
Part 3 FAQ of Premiere Pro Slideshow Templates
Can I have Premiere Pro slideshow templates for free?
Yes, you can definitely have a premiere pro slideshow templates free download version. All you need to do is downloading the free premiere pro app from Motion Array, run and install it in your device and it**’**s ready to be used.
How many placeholders are there in Premiere Pro slideshow templates?
The no. of placeholders varies editor to editor. In Premiere pro slideshow templates, you can have more than 30 placeholders for photos and approx 23 placeholders for texts. The number is enough to create a calm, gentle slideshow without much load of content for distraction.
What are the main features of Premiere Pro slideshow templates?
The best thing to know about premiere pro slideshow template is that it is so easy to use that even a beginner can create a good slideshow on it. The user friendly interface of the app provides custom operational functions such as changing the font, color and speed of slideshow. Directly drag and drop feature is there to insert media in the slideshow and also you can control the transitions and effects. The most important thing is that all this you can get for free also.
Can I use Premiere Pro slideshow templates for making promotional videos?
Of course, you can create impressive adobe premiere slideshow templates with the help of premiere pro slideshow template. Just choose the pictures and videos of your business/company wisely and generate high tech content to catch attention. Write touchy content on your company and upload in the slideshow in the form of text use beautiful font, catchy captions and subtle background colors to make it more interesting.
How to remove watermark in Premiere Pro slideshow templates?
In the premium version, you won**’t have to employ your efforts for removing watermark as you won‘**t find it there while in the free version, you will have to remove the watermark by applying a watermark removing app or watching a small promo video shown by the app.
When should I use Premiere Pro slideshow templates?
You can use premiere slideshow template free whenever you feel the need of making a slideshow. When you come back from a vacation and want to compile all the pictures; when there is an important business meeting and you want to represent your project, when you want to make a family or friends**’** slideshow on special occasions and even personal slideshows can be created to wish someone happy birthday.
● Ending Thoughts →
● The trend of ‘ready-to-use‘ slideshow makers is on its peak as nobody have enough time to create a complete slideshow by its own nowadays. In such condition, you should choose a premiere pro slideshow template free wisely to go well with your theme.
● The procedure of slideshow making varies app to app. You should first understand the interface of a slideshow maker before putting your head into slideshow making. It**’**s better to choose a slideshow maker with user friendly interface.
● Don**’**t go with the professional version or a slideshow maker created to be used by expert only. Pick one with simple operations and quick assistance if are not so well-versed in slideshow making.
How to Use Visual Effect for Zoom
Zoom, a video calling software, has been quite popular over the last several months and is still one of the most used videos calling applications by millions of people worldwide. The site is a favorite among working professionals, but it is also utilized by individuals to connect with their friends and loved ones. Additionally, despite the app’s abundance of practical built-in tools and functions, it lacks the fun filters and special effects that the majority of users are used to when using a camera. Zoom has ingrained itself in our vocabulary during the last year. It seemed almost inevitable given that everything, from meetings to parties, has moved online.
You don’t need to seek farther than Zoom visual effects to inject a little jazz into the routine Zoom meetings during these hard times. By making adjustments to your Video configuration either before or during a video call, you may add visual effects in Zoom. Zoom meetings may be tedious to conduct over extended periods of time. Additionally, it would be helpful if you recorded the condition of your room before any Zoom meetings. You wouldn’t want to reveal your disorganized space while in a meeting. In these situations, adding visual effects will keep your private area private while also making your Zoom meetings entertaining and exciting. It will also prevent others from seeing your filthy room. This tutorial will walk you through the process of adding visual effects to Zoom step-by-step. In addition, you will get acquainted with the numerous camera functions and visual effects that you may employ during a Zoom video conversation.
- 1. What apps can add visual effect on Zoom?
- 2. How do I add visual effects to Zoom in Mobile?
- 3. How do you download Zoom effects?
Part 1: Popular Visual Effects you can add to Zoom
You may apply one of four main graphic effects to your Zoom meetings. The visual effects that you may use in your next Zoom video chat are briefly summarized below.
1. Visual Backgrounds
Virtual backdrops may transform any plain wall into an artistic setting. Zoom provides you the choice to add photographs to your backdrop in addition to offering you a few pre-made backdrops. Zoom lets you add a movie to your backdrop in addition to simply photographs. With the help of this imaginative feature, gather your pals and enjoy your favorite meme or video. A presentation’s collection of photos, a video, or a single image may all serve as virtual backdrops. A green screen would often be used as your real backdrop and consistent lighting would be required.
To avoid having to reveal your real surroundings while in a conference, you may add any picture or video as a virtual backdrop in Zoom. You have the option of adding own photos and movies or selecting from the pre-existing backdrop films and images. The file type for video backgrounds should be MP4 or MOV, and the resolution should range from 360p to a maximum of 1080p. Ensure that the mirroring of your video is deselected in the Zoom’s Video settings if your backdrop picture has text that may be read. By using virtual backdrops, you may alter the background of your video as it appears to the audience member with whom you are speaking. During the video conference you’re in, the other participants will be able to view your face and body overlaid on the backdrop of your choice.
2. Filters
With these filters, you can have fun in all of your Zoom meetings! Filters are a fun way to spend time with loved ones who are far away, particularly at a period when maintaining social distance is crucial. Filters are the modifications you make to yourself during Zoom meetings (such as a mustache, beard, etc.). They enliven the proceedings and contribute to the fun and memorability of your Zoom meetings.
Your films’ colors may be changed, and video filters can also add new aspects. By selecting a filter appropriate for each event, like team meetings or game nights, you may create the right atmosphere. You may embellish your face in the video with flowers or animal traits by using Zoom’s various filters. Alternately, you might just convert your video’s color to black and white. The video filters from a different program, however, allow you to apply more vibrant filters and place a greater emphasis on special effects.
3. Lighting and Touch-ups
The Lighting function enhances lighting effects and makes adjustments for low light situations to make you seem more professional during a Zoom conference. Similar to this, Touch-up enhances your facial characteristics by making your skin shine, erasing wrinkles, and giving your face a radiant appearance.
On your Zoom videos, changing your lighting and applying touch-ups may improve how you seem. By adjusting your lighting, you can make even dim illumination look bright. By doing touch-ups, you may get a smoother skin texture and get rid of any obvious imperfections.
4. Studio Effects
Zoom has been developing on a new feature called Studio Effects that would give customers the option of using virtual cosmetics in their movies. They are still checking it out before formally releasing it since it is still in beta. However, it is still available to users under the Backgrounds & Filters area. You may adjust the opacity as you like. You have the option to choose a new color or one of the predefined colors. Additionally, you may decide to employ the face effects in all of your next meetings, albeit doing so might be problematic if you use Zoom for business. Don’t worry if you’re running late. Zoom can give your face a natural-looking cosmetic makeover in only one minute!
This function is intended for less formal settings, such as gatherings of friends or family. Anyone who wants to seem more professional during meetings has access to Studio Effects, which offers the choice of various eyebrow colors, beards, and lipsticks. These are a few recently added features. You may add mustaches, beards, and brows in a variety of designs, hues, and intensities. Additionally, you have the option of coloring your lips.
Part 2: How to Add Visual Effects to Zoom
Along with facilitating online meetings, the Zoom program also lets you play with its visual effects. You just need to make a few adjustments to the video settings or utilize another third-party program to be ready to go.
Step1Start a Zoom meeting
You can download Zoom, install it on your computer, and log into your account if you don’t already have it if you don’t already have it.
Step2Tap Background and Filters
After logging in to Zoom, use these settings. - Options > Camera > Video

Step3Faucet Filters
Here, you may play with a variety of visual effects and customize them to suit your tastes. Pick one of the numerous filters that are offered. To activate the filter, tap it.
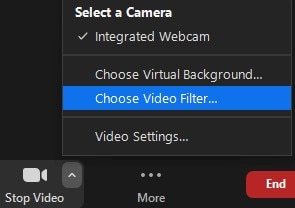
Step4Set Lighting Effects to on
Select “Adjust for low light” in the video options. For your lighting, you may choose between Auto and Manual effects. Zoom will automatically detect and adapt for the lighting in your room if you choose Auto.
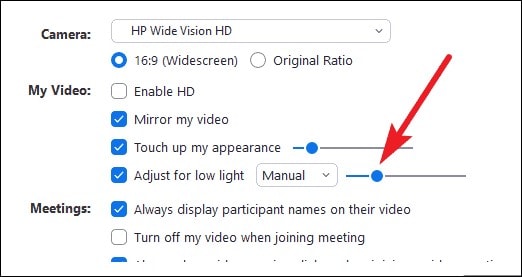
Use Zoom’s noise reduction option to keep your conversation focused during your video conference in addition to adding visual elements. To do this, go to “Audio Settings” and choose “High” under “Suppress background noise.” Once you start speaking during the video conference, this essentially cancels out any background noise.
Part 3: Related FAQs
1. What apps can add visual effect on Zoom?
Following is the list of top three apps that you can use to utilize visual effects Zoom application:
Snap Camera is regarded as the most user-friendly. It is a software that you can download for Windows or Mac that works with live broadcasts and video chats. Because it was created by the people who founded Snapchat, it shares a broad variety of filters with that platform.
Link: Snap Camera
The Mac is the only platform on which CamTwist may be used. You may also use it to give your movies additional filters and unique effects. This program lets you pick from a variety of pre-made effects while also allowing you to create your own.
Link: CamTwist
Another desktop application that lets you change and even blur your backdrop is ManyCam. It enables you to apply digital effects, filters, and 3-D masks to your face. Using this tool, you can also build layers and presets.
Link: ManyCam
2. How do I add visual effects to Zoom in Mobile?
Zoom includes a function that might be useful if you don’t want to tidy up or want to add some entertainment to your calls. You may utilize Zoom virtual backdrops to alter your surroundings and take you to a more pleasant location on both the desktop and mobile apps. After joining one on a mobile device, pick Virtual backdrop by tapping the More icon in the bottom right corner. Choose a photo from the list of choices, or click the plus sign (+) to add a photo or video from your gallery.
3. How do you download Zoom effects?
Pressing the Studio Effects button after installing Zoom for the first time will prompt a pop-up asking you to download the Studio Effects package. Several filters, suited for both business meetings and conversations with friends, let you customize the video and audio during your video calls. To start downloading the Effects bundle, click the Download button. The “Studio Effects” window will appear on the right-hand side of the Background & Filter page after the download is finished. All the face components and choices are available in this Studio Effects window.
Conclusion
The most popular video meeting tool worldwide is Zoom. Family, friends, coworkers, and any two people who want to video chat utilize it. Zoom visual effects are the ideal tool for injecting some humor into otherwise dull Zoom sessions and meetings. A few simple steps will get you a striking backdrop, a humorous filter, and some interesting effects. Since the majority of formal work is now completed from home, Zoom has taken over as the standard video conferencing program. Try out as many of the effects as you like, and use this page as a companion and a map to help you along the way.
- 1. What apps can add visual effect on Zoom?
- 2. How do I add visual effects to Zoom in Mobile?
- 3. How do you download Zoom effects?
Part 1: Popular Visual Effects you can add to Zoom
You may apply one of four main graphic effects to your Zoom meetings. The visual effects that you may use in your next Zoom video chat are briefly summarized below.
1. Visual Backgrounds
Virtual backdrops may transform any plain wall into an artistic setting. Zoom provides you the choice to add photographs to your backdrop in addition to offering you a few pre-made backdrops. Zoom lets you add a movie to your backdrop in addition to simply photographs. With the help of this imaginative feature, gather your pals and enjoy your favorite meme or video. A presentation’s collection of photos, a video, or a single image may all serve as virtual backdrops. A green screen would often be used as your real backdrop and consistent lighting would be required.
To avoid having to reveal your real surroundings while in a conference, you may add any picture or video as a virtual backdrop in Zoom. You have the option of adding own photos and movies or selecting from the pre-existing backdrop films and images. The file type for video backgrounds should be MP4 or MOV, and the resolution should range from 360p to a maximum of 1080p. Ensure that the mirroring of your video is deselected in the Zoom’s Video settings if your backdrop picture has text that may be read. By using virtual backdrops, you may alter the background of your video as it appears to the audience member with whom you are speaking. During the video conference you’re in, the other participants will be able to view your face and body overlaid on the backdrop of your choice.
2. Filters
With these filters, you can have fun in all of your Zoom meetings! Filters are a fun way to spend time with loved ones who are far away, particularly at a period when maintaining social distance is crucial. Filters are the modifications you make to yourself during Zoom meetings (such as a mustache, beard, etc.). They enliven the proceedings and contribute to the fun and memorability of your Zoom meetings.
Your films’ colors may be changed, and video filters can also add new aspects. By selecting a filter appropriate for each event, like team meetings or game nights, you may create the right atmosphere. You may embellish your face in the video with flowers or animal traits by using Zoom’s various filters. Alternately, you might just convert your video’s color to black and white. The video filters from a different program, however, allow you to apply more vibrant filters and place a greater emphasis on special effects.
3. Lighting and Touch-ups
The Lighting function enhances lighting effects and makes adjustments for low light situations to make you seem more professional during a Zoom conference. Similar to this, Touch-up enhances your facial characteristics by making your skin shine, erasing wrinkles, and giving your face a radiant appearance.
On your Zoom videos, changing your lighting and applying touch-ups may improve how you seem. By adjusting your lighting, you can make even dim illumination look bright. By doing touch-ups, you may get a smoother skin texture and get rid of any obvious imperfections.
4. Studio Effects
Zoom has been developing on a new feature called Studio Effects that would give customers the option of using virtual cosmetics in their movies. They are still checking it out before formally releasing it since it is still in beta. However, it is still available to users under the Backgrounds & Filters area. You may adjust the opacity as you like. You have the option to choose a new color or one of the predefined colors. Additionally, you may decide to employ the face effects in all of your next meetings, albeit doing so might be problematic if you use Zoom for business. Don’t worry if you’re running late. Zoom can give your face a natural-looking cosmetic makeover in only one minute!
This function is intended for less formal settings, such as gatherings of friends or family. Anyone who wants to seem more professional during meetings has access to Studio Effects, which offers the choice of various eyebrow colors, beards, and lipsticks. These are a few recently added features. You may add mustaches, beards, and brows in a variety of designs, hues, and intensities. Additionally, you have the option of coloring your lips.
Part 2: How to Add Visual Effects to Zoom
Along with facilitating online meetings, the Zoom program also lets you play with its visual effects. You just need to make a few adjustments to the video settings or utilize another third-party program to be ready to go.
Step1Start a Zoom meeting
You can download Zoom, install it on your computer, and log into your account if you don’t already have it if you don’t already have it.
Step2Tap Background and Filters
After logging in to Zoom, use these settings. - Options > Camera > Video
Step3Faucet Filters
Here, you may play with a variety of visual effects and customize them to suit your tastes. Pick one of the numerous filters that are offered. To activate the filter, tap it.
Step4Set Lighting Effects to on
Select “Adjust for low light” in the video options. For your lighting, you may choose between Auto and Manual effects. Zoom will automatically detect and adapt for the lighting in your room if you choose Auto.
Use Zoom’s noise reduction option to keep your conversation focused during your video conference in addition to adding visual elements. To do this, go to “Audio Settings” and choose “High” under “Suppress background noise.” Once you start speaking during the video conference, this essentially cancels out any background noise.
Part 3: Related FAQs
1. What apps can add visual effect on Zoom?
Following is the list of top three apps that you can use to utilize visual effects Zoom application:
Snap Camera is regarded as the most user-friendly. It is a software that you can download for Windows or Mac that works with live broadcasts and video chats. Because it was created by the people who founded Snapchat, it shares a broad variety of filters with that platform.
Link: Snap Camera
The Mac is the only platform on which CamTwist may be used. You may also use it to give your movies additional filters and unique effects. This program lets you pick from a variety of pre-made effects while also allowing you to create your own.
Link: CamTwist
Another desktop application that lets you change and even blur your backdrop is ManyCam. It enables you to apply digital effects, filters, and 3-D masks to your face. Using this tool, you can also build layers and presets.
Link: ManyCam
2. How do I add visual effects to Zoom in Mobile?
Zoom includes a function that might be useful if you don’t want to tidy up or want to add some entertainment to your calls. You may utilize Zoom virtual backdrops to alter your surroundings and take you to a more pleasant location on both the desktop and mobile apps. After joining one on a mobile device, pick Virtual backdrop by tapping the More icon in the bottom right corner. Choose a photo from the list of choices, or click the plus sign (+) to add a photo or video from your gallery.
3. How do you download Zoom effects?
Pressing the Studio Effects button after installing Zoom for the first time will prompt a pop-up asking you to download the Studio Effects package. Several filters, suited for both business meetings and conversations with friends, let you customize the video and audio during your video calls. To start downloading the Effects bundle, click the Download button. The “Studio Effects” window will appear on the right-hand side of the Background & Filter page after the download is finished. All the face components and choices are available in this Studio Effects window.
Conclusion
The most popular video meeting tool worldwide is Zoom. Family, friends, coworkers, and any two people who want to video chat utilize it. Zoom visual effects are the ideal tool for injecting some humor into otherwise dull Zoom sessions and meetings. A few simple steps will get you a striking backdrop, a humorous filter, and some interesting effects. Since the majority of formal work is now completed from home, Zoom has taken over as the standard video conferencing program. Try out as many of the effects as you like, and use this page as a companion and a map to help you along the way.
Also read:
- New How to Add the Popular Video Text Effects to Your Video for 2024
- Updated How To Film a Slow Motion Video for 2024
- New How to Make Text Reveal Effect for Your Video
- New 2024 Approved How To Make Ninja Jump Effect
- Are You Wondering How to Slow Down Videos or Speed Them up, Here Are Three Ways to Do It. Speed up or Slow Down Your Videos on PC, Online, and Phone for 2024
- New 2024 Approved Guide To Slowing Down Videos in Snapchat Discussing the Details
- Learn How to Create Inspiring Motivational Videos Using AI. Explore Tools Like Midjourney, Runway Gen2, Chat-GPT, and Filmora AI for Seamless Content Creation. Start Your Journey
- New Montage Makes It Easy to Create and Share Videos. This Article Will Explain What It Can Do and Show You Examples of Movies that Use Montage
- New How to Remove Echo From Videos with Adobe Audition
- Updated Looking For the Best VHS Video Effect Makers? Get To Know the Top List
- Steps to Make a Neon Dance Effect With Filmora for 2024
- Updated 2024 Approved How to Create an Adobe Slideshow the Easy Way
- Best Animated Text Generator
- 2024 Approved A Roster of 8 Best Color Match Generators
- In 2024, Do You Want to Edit a TikTok After Posting? This Article Will Provide Multiple Methods Through Which You Can Do It in No Time
- 2024 Approved Fixing The Slow Playback Issues in DaVinci Resolve
- Shoot Video with Virtual Green Screen for 2024
- How to Add Subtitles to Videos With Kapwing for 2024
- Updated How to Denoise in Final Cut Pro – Reduce Video and Audio Noise
- Top Animated Title Makers
- How to Zoom Webcam on PC for 2024
- New How to Use iMovie Text Effects
- How to Stabilize Videos for Free with Google Photos App for 2024
- New Best Online MPEG to GIF Converters for 2024
- In 2024, How I Transferred Messages from Vivo Y27 5G to iPhone 12/XS (Max) in Seconds | Dr.fone
- Mastering Lock Screen Settings How to Enable and Disable on Vivo Y36i
- In 2024, Unlock Your Nokia C12 Pro Phone with Ease The 3 Best Lock Screen Removal Tools
- In 2024, iSpoofer is not working On Nokia C32? Fixed | Dr.fone
- Is your Poco M6 Pro 5G working too slow? Heres how you can hard reset it | Dr.fone
- In 2024, How to Change Google Play Location On Vivo Y100i | Dr.fone
- In 2024, Ultimate guide to get the meltan box pokemon go For Oppo Reno 11 Pro 5G | Dr.fone
- In 2024, Here are Some of the Best Pokemon Discord Servers to Join On Apple iPhone 15 | Dr.fone
- Undelete lost contacts from Galaxy XCover 6 Pro Tactical Edition.
- In 2024, Pattern Locks Are Unsafe Secure Your Samsung Galaxy A23 5G Phone Now with These Tips
- In 2024, The Ultimate Guide to Motorola Edge 40 Neo Pattern Lock Screen Everything You Need to Know
- In 2024, How to Transfer Data from Nokia 150 (2023) to Any iOS Devices | Dr.fone
- Full Guide to Catch 100 IV Pokémon Using a Map On Nokia 130 Music | Dr.fone
- Tecno Spark 20 Pro support - Forgotten screen lock.
- In 2024, The Most Useful Tips for Pokemon Go Ultra League On Realme 11 Pro | Dr.fone
- How PGSharp Save You from Ban While Spoofing Pokemon Go On Samsung Galaxy A15 5G? | Dr.fone
- Title: Stunning Glitch Effect and Its Creation Steps for Premiere Pro
- Author: Chloe
- Created at : 2024-05-20 03:37:24
- Updated at : 2024-05-21 03:37:24
- Link: https://ai-editing-video.techidaily.com/stunning-glitch-effect-and-its-creation-steps-for-premiere-pro/
- License: This work is licensed under CC BY-NC-SA 4.0.
