
:max_bytes(150000):strip_icc():format(webp)/GettyImages-527847020-5b9edc17c9e77c0050ff9045.jpg)
Techniques You Never Heard of for Learning AI Marketing YouTube
Techniques You Never Heard of for Learning AI Marketing YouTube
Techniques You Never Heard of for Learning AI Marketing YouTube
An easy yet powerful editor
Numerous effects to choose from
Detailed tutorials provided by the official channel
YouTube is one of the largest entertainment websites, where you can watch, share, and create videos. Millions of active users on YouTube have taken premium subscriptions on YouTube to enjoy hassle-free entertainment. YouTube was launched back in 2005. With the passage of time and advancements in technology, YouTube has also evolved.

Artificial intelligence is one of the recent and most famous advancements in technology. The introduction of artificial intelligence in the industry has proved to be a boon. The introduction of artificial intelligence has made things easy to manage in every industry. AI can easily be applied in any industry be it manufacturing or the IT sector. Artificial intelligence has made work easier and increased the efficiency of people working in different areas. Even YouTube has started using AI techniques for many tasks. In this article, we have listed some of the applications of AI on YouTube.
In this article
01 [How Is YouTube Using Artificial Intelligence?](#Part 1)
02 [How Is YouTube Using AI to Recommend Videos?](#Part 2)
Part 1 How Is YouTube Using Artificial Intelligence?
Tools like artificial intelligence and machine learning have made things easier to manage. Even the introduction of Artificial Intelligence on YouTube has helped a lot to smoothen its procedure. YouTube being one of the most engaging websites has applied YouTube Intelligence to manage all its activities smoothly. Read further to know how YouTube is using artificial intelligence currently!

01Automatic Removal of Inappropriate Content
One of the main applications of AI on YouTube is to remove inappropriate content automatically. YouTube uses artificial intelligence and machine learning to remove the violative and inappropriate content from the platform. As this content was one of the main reasons for the rise in racism and terrorism. To avoid all these harmful after effects, YouTube introduced the “Trashy Video Classifier” to scan and examine the feedback.
Although these algorithms might not be 100% accurate, they can perform the task more easily and efficiently than the manual examination of the content. Due to these algorithms, it has become easier to automatically remove the controversial content from the platform immediately. AI aided feature helps in determining the inappropriate content faster. However, it doesn’t provide 100% accurate results. This is the reason why YouTube has a large team of human specialists to check the accuracy of determining violative content.
02Add New Video Effects
The introduction of artificial intelligence and machine learning in the market has made it easier to add new video effects without the use of any external equipment. You can now swap out backgrounds from videos with just one click due to the in-built AI features on YouTube. This AI neural feature is prepared by Google’s AI YouTube researchers to make it easier for the AI algorithms to understand video patterns. This feature makes it easier for the system to maintain the correct pace with the video.
03Maintain Age Restrictions
Being an online platform, YouTube is open to everyone. There are many creators and viewers on the platform with different interests. Moreover, it is accessible to all age groups, which makes it necessary to optimize the content according to the age groups. YouTube has always been very particular about the age-restricted content. A lot of content is published on the platform that can be harmful to the children’s minds and growth. YouTube uses different AI tools and algorithms to maintain the age restrictions of adult content.
YouTube has guaranteed that the mature content will not be accessible to the kids and youngsters aged below 13 years. It has also created a separate application for the kids to maintain the age restrictions from the matured content.
Earlier, the YouTubers used to flag their content as mature themselves, but now the platform is planning to flag the content using machine learning technology. YouTube had also used machine learning technology to thwart the age-restricted content automatically in 2017.
04”Up Next” Feature
The “Up Next” feature of YouTube is also a result of artificial intelligence. With many creators uploading a large number of videos every minute, it was becoming difficult for the platform to manage the suggestion engine properly. So, YouTube has introduced the AI technique to streamline the recommendation process to maintain the real-time and latest suggestion.
This feature is a mix of two algorithms, one is used to optimize the suggestion engine according to the search history and watch history of the user, and the other is to determine according to the ranking. As the main aim is to provide the content so that the user can spend his/her maximum time watching YouTube videos. This helps in creating a better sidebar full of user-specific recommendations. YouTube’s special recommendation feature ensures to recommend different videos to the different viewers as per their interests.
05Training on Depth Prediction
YouTube has a lot of data stored that provides easy knowledge of AI algorithms. According to the recent data and announcement, it is now clear that Google’s AI YouTube researchers used the “mannequin challenge” to understand depth predictions.
In this challenge, they researched around 2000 groups, with 1 group in each video. Video had many people standing still like they have been frozen and one person was going through the scene to shoot the video. A better understanding of depth prediction can further help in generating the development of Augmented Reality (AR).
06Tackle Fake News
Among the different features of the most engaging online platform comes the ability to detect and tackle fake news and misleading content. YouTube can understand and detect fake news. With so many users on different social media platforms, it has now become common to spread fake and false news. Unlike other platforms, YouTube is using artificial intelligence to detect and remove misleading content that is against YouTube’s privacy policy.
YouTube understands that this type of content can be harmful to the audience and can be the reason for disputes among different communities. Hence, giving rise to racism and terrorism. To reduce its wrong impact on society, YouTube is using AI technology and removing this type of fake and misleading content. Around 11 million videos were removed from the platform within a single quarter. The introduction of AI has also proved that the technology works more effectively and efficiently rather than the manual removal of such content.
Part 2 How Is YouTube Using AI to Recommend Videos?

YouTube aims at finding the perfect video for each user separately and anticipating the users to spend more time on the platform. Keeping both these things in mind, it decided to use AI technology to recommend videos and optimize the suggestion panel. Just like Netflix, AI technology makes it easier for the platform to determine the best suggestions for different viewers. It recommends the videos after researching the user’s age, interests, watch time, etc.
YouTube generally focuses on increasing the watch time of the viewer, that’s why it recommends the videos keeping the user’s interests on priority. The goal is to watch more rather than watch the best.
YouTube uses different AI algorithms to understand things and recommend optimized videos to stand out from the crowd. First of all, it uses AI algorithms to understand the user’s interest by scanning his/her search history and watching history. It creates a list based on the findings and then ranks the videos as per the google rankings. Each video on YouTube has a different ranking.
YouTube has been changing its algorithms over time. Earlier, it used to rank videos according to view counts. But soon people understood the technique and started using the eye-catchy title and thumbnail to gain a large number of views. Due to this, viewers even started complaining about the content and YouTube changed its algorithms to resolve this issue.
YouTube introduced AI and ML technology to customize the recommendations in 2016. This introduction has made things easier for YouTube as well as its viewers. It has now announced to ban the “borderline content”.
For Win 7 or later (64-bit)
For macOS 10.12 or later
● Ending Thoughts →
● Applying AI on YouTube has made it easier for the platform to manage activities more effectively and efficiently. As a result, many new features are added to enhance the convenience and maintain the quality of the user experience.
● Moreover, YouTube is now experimenting with AI and ML for automatically adding video chapters. This feature will be beneficial for the content creators.
● It will assist them in creating and uploading, resulting in the elimination of the time used in adding timestamps manually. Even the creators are uploading AI-generated YouTube videos that are created with the help of an AI YouTube video maker.
● You can even learn about the different applications of AI and ML from different YouTube channels. Many accessible YouTube channels for machine learning are available on the platform.
● YouTube intelligence can also be seen on the homepage, recommendations, notifications, and subscriptions. The latest trending videos are also ranked with the help of artificial intelligence and machine learning.
YouTube is one of the largest entertainment websites, where you can watch, share, and create videos. Millions of active users on YouTube have taken premium subscriptions on YouTube to enjoy hassle-free entertainment. YouTube was launched back in 2005. With the passage of time and advancements in technology, YouTube has also evolved.
Artificial intelligence is one of the recent and most famous advancements in technology. The introduction of artificial intelligence in the industry has proved to be a boon. The introduction of artificial intelligence has made things easy to manage in every industry. AI can easily be applied in any industry be it manufacturing or the IT sector. Artificial intelligence has made work easier and increased the efficiency of people working in different areas. Even YouTube has started using AI techniques for many tasks. In this article, we have listed some of the applications of AI on YouTube.
In this article
01 [How Is YouTube Using Artificial Intelligence?](#Part 1)
02 [How Is YouTube Using AI to Recommend Videos?](#Part 2)
Part 1 How Is YouTube Using Artificial Intelligence?
Tools like artificial intelligence and machine learning have made things easier to manage. Even the introduction of Artificial Intelligence on YouTube has helped a lot to smoothen its procedure. YouTube being one of the most engaging websites has applied YouTube Intelligence to manage all its activities smoothly. Read further to know how YouTube is using artificial intelligence currently!
01Automatic Removal of Inappropriate Content
One of the main applications of AI on YouTube is to remove inappropriate content automatically. YouTube uses artificial intelligence and machine learning to remove the violative and inappropriate content from the platform. As this content was one of the main reasons for the rise in racism and terrorism. To avoid all these harmful after effects, YouTube introduced the “Trashy Video Classifier” to scan and examine the feedback.
Although these algorithms might not be 100% accurate, they can perform the task more easily and efficiently than the manual examination of the content. Due to these algorithms, it has become easier to automatically remove the controversial content from the platform immediately. AI aided feature helps in determining the inappropriate content faster. However, it doesn’t provide 100% accurate results. This is the reason why YouTube has a large team of human specialists to check the accuracy of determining violative content.
02Add New Video Effects
The introduction of artificial intelligence and machine learning in the market has made it easier to add new video effects without the use of any external equipment. You can now swap out backgrounds from videos with just one click due to the in-built AI features on YouTube. This AI neural feature is prepared by Google’s AI YouTube researchers to make it easier for the AI algorithms to understand video patterns. This feature makes it easier for the system to maintain the correct pace with the video.
03Maintain Age Restrictions
Being an online platform, YouTube is open to everyone. There are many creators and viewers on the platform with different interests. Moreover, it is accessible to all age groups, which makes it necessary to optimize the content according to the age groups. YouTube has always been very particular about the age-restricted content. A lot of content is published on the platform that can be harmful to the children’s minds and growth. YouTube uses different AI tools and algorithms to maintain the age restrictions of adult content.
YouTube has guaranteed that the mature content will not be accessible to the kids and youngsters aged below 13 years. It has also created a separate application for the kids to maintain the age restrictions from the matured content.
Earlier, the YouTubers used to flag their content as mature themselves, but now the platform is planning to flag the content using machine learning technology. YouTube had also used machine learning technology to thwart the age-restricted content automatically in 2017.
04”Up Next” Feature
The “Up Next” feature of YouTube is also a result of artificial intelligence. With many creators uploading a large number of videos every minute, it was becoming difficult for the platform to manage the suggestion engine properly. So, YouTube has introduced the AI technique to streamline the recommendation process to maintain the real-time and latest suggestion.
This feature is a mix of two algorithms, one is used to optimize the suggestion engine according to the search history and watch history of the user, and the other is to determine according to the ranking. As the main aim is to provide the content so that the user can spend his/her maximum time watching YouTube videos. This helps in creating a better sidebar full of user-specific recommendations. YouTube’s special recommendation feature ensures to recommend different videos to the different viewers as per their interests.
05Training on Depth Prediction
YouTube has a lot of data stored that provides easy knowledge of AI algorithms. According to the recent data and announcement, it is now clear that Google’s AI YouTube researchers used the “mannequin challenge” to understand depth predictions.
In this challenge, they researched around 2000 groups, with 1 group in each video. Video had many people standing still like they have been frozen and one person was going through the scene to shoot the video. A better understanding of depth prediction can further help in generating the development of Augmented Reality (AR).
06Tackle Fake News
Among the different features of the most engaging online platform comes the ability to detect and tackle fake news and misleading content. YouTube can understand and detect fake news. With so many users on different social media platforms, it has now become common to spread fake and false news. Unlike other platforms, YouTube is using artificial intelligence to detect and remove misleading content that is against YouTube’s privacy policy.
YouTube understands that this type of content can be harmful to the audience and can be the reason for disputes among different communities. Hence, giving rise to racism and terrorism. To reduce its wrong impact on society, YouTube is using AI technology and removing this type of fake and misleading content. Around 11 million videos were removed from the platform within a single quarter. The introduction of AI has also proved that the technology works more effectively and efficiently rather than the manual removal of such content.
Part 2 How Is YouTube Using AI to Recommend Videos?
YouTube aims at finding the perfect video for each user separately and anticipating the users to spend more time on the platform. Keeping both these things in mind, it decided to use AI technology to recommend videos and optimize the suggestion panel. Just like Netflix, AI technology makes it easier for the platform to determine the best suggestions for different viewers. It recommends the videos after researching the user’s age, interests, watch time, etc.
YouTube generally focuses on increasing the watch time of the viewer, that’s why it recommends the videos keeping the user’s interests on priority. The goal is to watch more rather than watch the best.
YouTube uses different AI algorithms to understand things and recommend optimized videos to stand out from the crowd. First of all, it uses AI algorithms to understand the user’s interest by scanning his/her search history and watching history. It creates a list based on the findings and then ranks the videos as per the google rankings. Each video on YouTube has a different ranking.
YouTube has been changing its algorithms over time. Earlier, it used to rank videos according to view counts. But soon people understood the technique and started using the eye-catchy title and thumbnail to gain a large number of views. Due to this, viewers even started complaining about the content and YouTube changed its algorithms to resolve this issue.
YouTube introduced AI and ML technology to customize the recommendations in 2016. This introduction has made things easier for YouTube as well as its viewers. It has now announced to ban the “borderline content”.
For Win 7 or later (64-bit)
For macOS 10.12 or later
● Ending Thoughts →
● Applying AI on YouTube has made it easier for the platform to manage activities more effectively and efficiently. As a result, many new features are added to enhance the convenience and maintain the quality of the user experience.
● Moreover, YouTube is now experimenting with AI and ML for automatically adding video chapters. This feature will be beneficial for the content creators.
● It will assist them in creating and uploading, resulting in the elimination of the time used in adding timestamps manually. Even the creators are uploading AI-generated YouTube videos that are created with the help of an AI YouTube video maker.
● You can even learn about the different applications of AI and ML from different YouTube channels. Many accessible YouTube channels for machine learning are available on the platform.
● YouTube intelligence can also be seen on the homepage, recommendations, notifications, and subscriptions. The latest trending videos are also ranked with the help of artificial intelligence and machine learning.
How to Remove or Mute Audio in Video with Android Phones?
There are many situations where you need to remove or mute audio in the video. For example, you don’t want the audio in your video to be included, or you want to change it to another sound.
Whatever the reasons, you don’t always have to edit to remove them on PC. There are many adequate android apps that can remove audio from your video. Read on, and this article will show you how!
Method 1: Use Google Photos to mute a video
If you’re looking for a free way to edit a video, you can use the editing tools in Google Photos. Google Photos is the best free app that you can use to store, manage, and edit your photos and videos. It’s also compatible with many android devices.
The basic editing features that Google Photos offers include removing audio from videos on android devices, making videos shorter, or adding text to videos. You can also use it to improve the quality of your videos by editing the contrast, brightness, and saturation.

So, if you want to know how to mute audio in a video android using Google Photos, follow the steps below:
Step1 Launch Google Photos and select the video you want to edit
Step2 Open the video editing setting
After the video is shown, pause the video and tap the Edit button to see the setting.

Step3 Mute the audio
Now, you can click the speaker icon to mute the video audio, as seen in the picture.

Step4 Save the edited video
Once you’re finished making changes, tap the “Save copy” button to save your changes.

Method 2: Use Filmora to remove audio from a video
Although Google Photos is excellent enough for basic video editing, there are a variety of phones that have no access to Google Services. But worry not. There are still plenty of other tool options that can remove sound from video in android.
The Filmora video editor is another fantastic tool for mobile videographers. It’s very convenient and has a wide range of features, making it a superb choice for anyone looking to edit videos on their mobile device.
Free Download For Win 7 or later(64-bit)
Free Download For macOS 10.14 or later
App size: 67 MB
Rating: 4.8/5 (Google Playstore)

If you’re new to video editing, Filmora is a great place to start. The interface is easy to understand, with a reasonable learning curve and a built-in tutorial that will help you get up to speed quickly.
Once you’re familiar with the basics, you can start exploring more app features, like adding effects and transitions, trimming and splitting clips, and more.
Take a look at some of Filmora’s best features:
- Equipped with over 1000 templates and featured music
- Allows you to do keyframe on a phone
- Professional adjustments, such as voice enhancement and audio speed, or setting video brightness and contrast
- Export quickly in HD quality and custom resolution
Moreover, Filmora is in the top 10 ranking for video players and editors at Google Playstore. Whether you’re a seasoned pro or just getting started, Filmora is an excellent option for mobile video editing. You can edit your videos whenever and wherever you can.
Let’s start removing the audio from your videos by following the steps below:
Step1 Install Filmora on your device
You can find and download Filmora Go through Google Playstore. Just search for “Filmora-Video Editor & Maker) and click the Install button.

Step2 Open Filmora Go and click New Project
After running Filmora Go, you can click the New Project button and upload the video you want to edit from your gallery.

Step3 Extract audio from the video
Once the video has been uploaded, click the clip in the timeline and choose “extract audio.”

Step4 Remove audio from the video
Now that you have extracted the audio from your video, you can click the video soundtrack on the timeline, then click the delete button as seen in the picture below. By then, your audio will be removed.

Step5 Export the edited file
After you have deleted the audio and felt satisfied, it’s time to export the edited video. Click “Export” at the top right to see the export setting. Choose the resolution and frame rates output you want, then click the Export button.

Voila! The edited video without sound will be saved to your phone, and you can also share it immediately on your social media.
Method 3: Use InShot to remove sound from video android
There are many ways to remove sound from a video on android. In this part, we’ll show you another alternative tool that you can use to mute your videos, namely InShot Video Editor.
InShot is a video editing app for mobile phones with professional features. This app is a great tool for creating short and fancy video clips to share on social media or with friends and family. But to be aware, although you can use Inshot for free, but the app will display some ads.
App size: 168 MB
Rating: 4.9/5 (Google Playstore)

InShot is widely used by android users with more than 500M downloads on Google Playstore, making it one of the most popular video editors for mobile.
InShot offers a variety of features for its users, such as:
- Adding transition effects for videos
- Making a smooth slow motion
- Adding music and voice-overs
The method is a bit more tricky than the other tools mentioned above, but it should work for most people. Now, follow these steps carefully to remove the audio from your video:
Step1 Install InShot Video Editor on your phone
The app can take up your phone’s storage, so ensure you have enough space before downloading it. You can find and install the app from Google Playstore by searching “Video Editor & Maker - InShot.”
Step2 Open the InShot app and create a new video project

Step3 Extract audio from the video
After the video has been added, you should find and click the Volume setting.

Then, click the “Extract audio” button to separate the audio from the video. Tip: if you only want to mute it, you can slide the volume to zero for this step.

Step4 Remove the audio
Once you have extracted the audio, select the audio bar and click the delete button to remove it.

Step5 Save the changes
Now, you can save the edited video and choose the resolution you need, as well as the frame rate and output format. InShot will also show you the estimated size of the edited file before saving it.
Once done, click “Save,” and the video will be downloaded to your phone.

Conclusion
For video editing or audio removal, you don’t always have to do it on a PC. You can use android apps to remove sound from your video in any case. Among android video editors, some apps let you simply mute the audio, while others remove the audio track entirely.
The above-recommended apps are the best-chosen ones, including Google Photos, Filmora, and InShot. While not every android device supports Google service, you might want to consider Filmora, as it’s a sufficient alternative with a rather smaller size. Hence, it helps you edit your video with ease and smoothly.
Free Download For macOS 10.14 or later
App size: 67 MB
Rating: 4.8/5 (Google Playstore)
If you’re new to video editing, Filmora is a great place to start. The interface is easy to understand, with a reasonable learning curve and a built-in tutorial that will help you get up to speed quickly.
Once you’re familiar with the basics, you can start exploring more app features, like adding effects and transitions, trimming and splitting clips, and more.
Take a look at some of Filmora’s best features:
- Equipped with over 1000 templates and featured music
- Allows you to do keyframe on a phone
- Professional adjustments, such as voice enhancement and audio speed, or setting video brightness and contrast
- Export quickly in HD quality and custom resolution
Moreover, Filmora is in the top 10 ranking for video players and editors at Google Playstore. Whether you’re a seasoned pro or just getting started, Filmora is an excellent option for mobile video editing. You can edit your videos whenever and wherever you can.
Let’s start removing the audio from your videos by following the steps below:
Step1 Install Filmora on your device
You can find and download Filmora Go through Google Playstore. Just search for “Filmora-Video Editor & Maker) and click the Install button.
Step2 Open Filmora Go and click New Project
After running Filmora Go, you can click the New Project button and upload the video you want to edit from your gallery.
Step3 Extract audio from the video
Once the video has been uploaded, click the clip in the timeline and choose “extract audio.”
Step4 Remove audio from the video
Now that you have extracted the audio from your video, you can click the video soundtrack on the timeline, then click the delete button as seen in the picture below. By then, your audio will be removed.
Step5 Export the edited file
After you have deleted the audio and felt satisfied, it’s time to export the edited video. Click “Export” at the top right to see the export setting. Choose the resolution and frame rates output you want, then click the Export button.
Voila! The edited video without sound will be saved to your phone, and you can also share it immediately on your social media.
Method 3: Use InShot to remove sound from video android
There are many ways to remove sound from a video on android. In this part, we’ll show you another alternative tool that you can use to mute your videos, namely InShot Video Editor.
InShot is a video editing app for mobile phones with professional features. This app is a great tool for creating short and fancy video clips to share on social media or with friends and family. But to be aware, although you can use Inshot for free, but the app will display some ads.
App size: 168 MB
Rating: 4.9/5 (Google Playstore)
InShot is widely used by android users with more than 500M downloads on Google Playstore, making it one of the most popular video editors for mobile.
InShot offers a variety of features for its users, such as:
- Adding transition effects for videos
- Making a smooth slow motion
- Adding music and voice-overs
The method is a bit more tricky than the other tools mentioned above, but it should work for most people. Now, follow these steps carefully to remove the audio from your video:
Step1 Install InShot Video Editor on your phone
The app can take up your phone’s storage, so ensure you have enough space before downloading it. You can find and install the app from Google Playstore by searching “Video Editor & Maker - InShot.”
Step2 Open the InShot app and create a new video project
Step3 Extract audio from the video
After the video has been added, you should find and click the Volume setting.
Then, click the “Extract audio” button to separate the audio from the video. Tip: if you only want to mute it, you can slide the volume to zero for this step.
Step4 Remove the audio
Once you have extracted the audio, select the audio bar and click the delete button to remove it.
Step5 Save the changes
Now, you can save the edited video and choose the resolution you need, as well as the frame rate and output format. InShot will also show you the estimated size of the edited file before saving it.
Once done, click “Save,” and the video will be downloaded to your phone.
Conclusion
For video editing or audio removal, you don’t always have to do it on a PC. You can use android apps to remove sound from your video in any case. Among android video editors, some apps let you simply mute the audio, while others remove the audio track entirely.
The above-recommended apps are the best-chosen ones, including Google Photos, Filmora, and InShot. While not every android device supports Google service, you might want to consider Filmora, as it’s a sufficient alternative with a rather smaller size. Hence, it helps you edit your video with ease and smoothly.
How to Use Kahoot! On Zoom
In the educational game Kahoot! participants respond to multiple-choice questions based on trivia. Each participant uses their own controller to answer questions in the online game. There are several question kinds to pick from, allowing for complete customization of the test. Each player needs their own controller for Kahoot! The game questions will be shown in the Zoom/Google Meet window, but the answers must be entered using the controller. With the Kahoot!! app for Zoom, presenters may use play and friendly rivalry to increase participant engagement. Users may organize knowledge- and feedback-gathering pulse checks with staff members, encourage original thought with word clouds, and empower participants’ voices with surveys, open-ended questions, and other tools. Utilizing the brainstorm tool, organizations may crowdsource ideas and advance teamwork.
Engagement has emerged as a crucial component of successful learning, collaboration, and connection as the globe has increased the use of video communications in social and professional situations. Users may access, host, and play Kahoot!! games and educational information with other meeting participants using the Kahoot!! app for Zoom without ever leaving the Zoom Meeting or requiring a second device. Corporate executives may motivate their staff via speeches, meetings, and online activities. Meeting hosts will have immediate access to data and statistics from their Kahoot!! experience, allowing them to respond in real time to audience engagement with the material. Additionally, hosts may email the Kahoot!! games to all participants so they can practice and improve their scores, which will increase participant engagement and learning retention. Hosts can also distribute the Kahoot!! games as self-paced challenges with individuals who couldn’t attend in person.
Part 1: Key Features of Kahoot
What more is there to discuss, Kahoot!? Every pupil adores it. Many instructors and educators use it all around the world to make learning simple, enjoyable, and interesting. Everyone may use it since it is free and extremely simple to use. These are some of its attributes:
- Quizzes may be made in a matter of minutes.
- Develop games based on the abilities of the kids. Playing at home or in the Zoom is simple for them.
- Various templates are offered. You can choose one of them with confidence.
- Kahoot! has the ability to be organized into many folders according to topics or subjects.
- Additionally, multiple choice questions may be included by quiz makers.
- Teachers using Kahoot! may combine different questions into one format, such as quizzes, polls, riddles, and slides.
- Use Apple Schoolwork, Google Zooms, and Microsoft Teams to share student-centered tasks.
Part 2: How to Host a Kahoot! Session within a Zoom Meeting
With the Zoom app, Kahoot! may be viewed, hosted, and used. It’s amazing that Kahoot!!, one of the most well-known brands in quiz-based learning, still provides a free-to-use platform, making it very accessible to both instructors and students. It’s also a useful resource for a hybrid class that combines online and classroom instruction. Most devices will be able to use the cloud-based service using a web browser. This implies that students using computers, tablets, and cellphones in class or at home may access this. Participants in Zoom Meetings may play games and learn without having to leave the Zoom meeting or bring a second device.
Step1Sign up for Zoom ahead of time and get ready. On the other hand, launch the Kahoot! test in your web browser, then be ready to share your screen in Zoom.
Step2As the participants come, allow them in and check to see whether you and they can both hear each other. To access the Kahoot! quiz, make sure they have a device or another browser tab open.
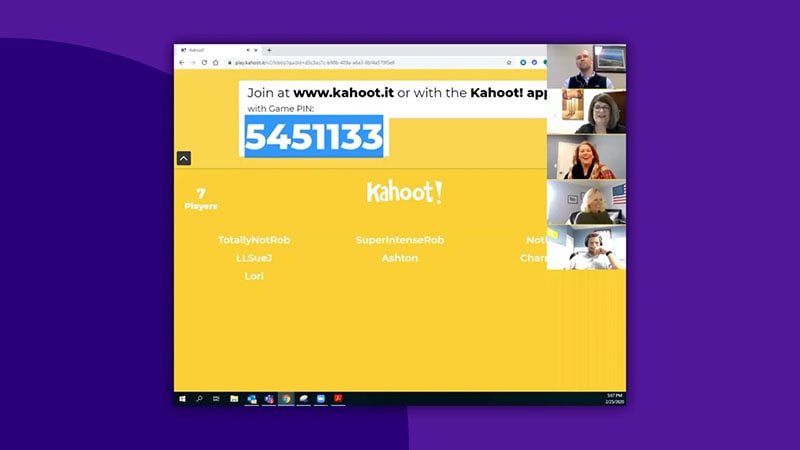
Step3Open the Kahoot! test and share it using Zoom’s “Share Screen” feature. While your screen is shared, continue to host the Kahoot! as normal. To view participants next to your shared screen, we advise selecting Side-by-Side Mode.
Part 3: How to Participate in Kahoot! Sessions within a Zoom Meeting
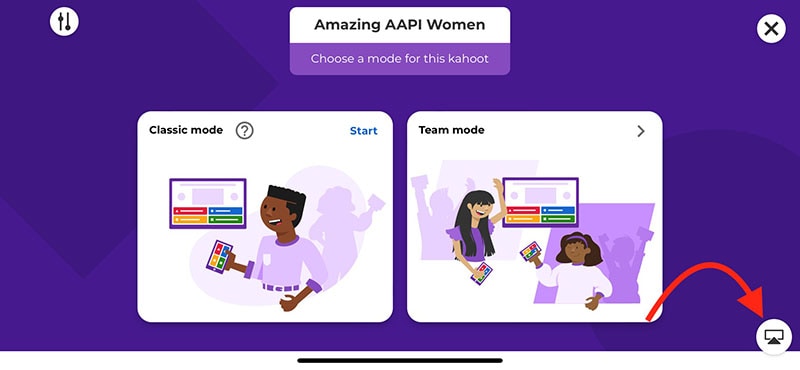
With more than 40 million ready-made games available on Kahoot!!, getting started is fast and simple. When time and resources are limited, hybrid or distant learning is ideal. After linking the Kahoot! to your Zoom account, you may utilize it. Use this app and start a meeting. Go to Apps on the toolbar and choose the program you wish to use. Select Who is Hosting to locate their host or to join a Kahoot! session being hosted by a friend or another player. Players may post a question to a shared screen on the Kahoot! platform. Kahoot!! just needs an account to be made in order to use it since it is free. Most devices may be used by students to access Kahoot!! from wherever there is an internet connection. This is how:
Step1Take the time to check that Zoom, Skype, Cisco Webex, or Google Hangout are operating and that your camera, microphone, and speaker are all operational.
Step2In the right-side panel, add the Kahoot!! app to your list of apps and click Join.
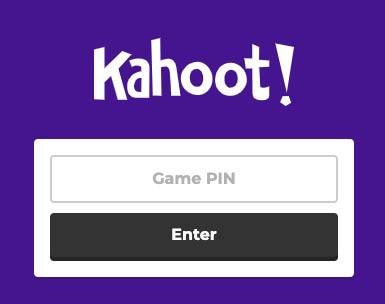
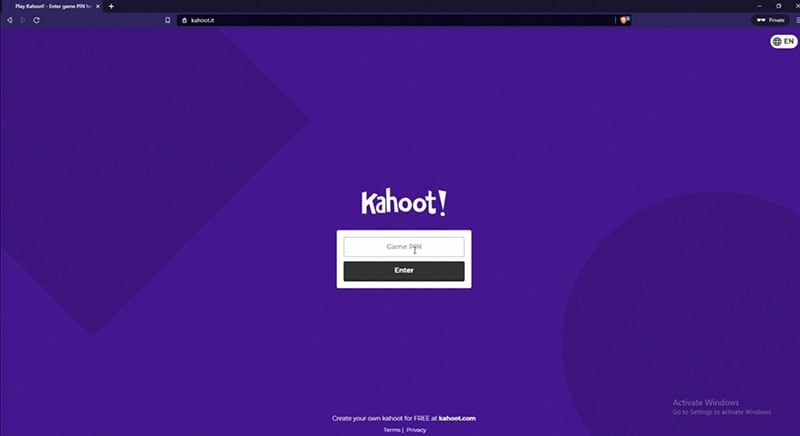
Step3The lobby will reveal your game PIN when you click the Play button, allowing the computer to show you a Kahoot! You may enter the game PIN and press Enter to join the Kahoot! session once the host shows their screen with you. To participate in a Kahoot! session, you don’t need a Kahoot! account.
Part 4: How to Record Zoom Meetings
Zoom is a conference tool that enables real-time, high-quality, low-latency communication. Filmora is an excellent video recorder for that reason, enabling users to capture on-screen activity such Zoom audio tracks and video conversations. Wondershare One of the most versatile and portable Zoom voice recorders is the Filmora. Even novices may easily utilize it due to its user-friendly UI. All you have to do is click the record button after choosing the proper audio source in the settings. The all-in-one video editing program Filmora allows you to record your screen with audio, a facecam, and a green screen effect. You can record the entire screen or just a portion of it, and you can perform a number of quick edits on your video using tools like trimming, cropping, changing the audio track’s volume, and so on.
How to Use Filmora to Record Zoom Lectures
Having said that, Filmora is a great Zoom recorder that can capture games, audio, and video conversations. This video recorder may be used to make video clip lessons in addition to recording movies, video games, and webcam footage. In addition to Zoom, it can also capture internet streaming audio. Here is information on how to record Zoom meetings using this software:
Step1Download and Install Filmora on your PC
To use this program for a number of tasks, including screen recording and recording editing, you must first download and install it on your computer. To achieve this, download the recording program by clicking the link below. Launch the program as soon as the download is finished to start the installation process, and then adhere to the on-screen directions to install and make this software available for usage.
Step2Choose the Record’s Ideal Position in the Zoom
Use it on your PC at this point. As soon as you start the program, a window interface with two choices for screen recording, editing already recorded videos, and generating videos will display. Choose the Recording option from the menu. When you click the record button, the program will direct you to the recording interface, where you can easily adjust the settings for your camera and audio. To add the microphone or Zoom sound in that particular field, use the necessary buttons as described below:
Step3Press the Record Button
It goes without saying that you must test your recording tools to ensure they are functional and capturing the highest quality audio. But once you’re ready, click the record button, which will allow you 3-5 seconds before starting to record the personalized screen of your PC as seen below:
Step4Export and Save Your Zoom Recording
You may now save the Zoom video for sharing on social media after making and modifying it. The following file types may be used to save the document: MP4, WMV, AVI, MOV, GIF, and MP3. The finest feature of Wondershare Filmora is the direct export and sharing of Zoom video recordings to YouTube; the only need is that you must be signed in to your YouTube account inside the application:
Because the MOV format is only available for online movies, you may also export your Zoom recordings to MP4 if you want to publish them to your YouTube channel. You are free to choose the format that best suits your needs. You may choose the encoder from a drop-down menu in the export options.
Conclusion
With the aid of several interesting tools and programs made accessible in this virtual environment, learning has now become enjoyable. Of them is Kahoot! In Zoom. It is an application that acts as a learning tool by providing fun games, tests, and a variety of other chances. In only a few minutes, quizzes may be made and distributed. Games and quizzes may be planned using this platform quite easily. The Kahoot! with Zoom will make it simpler than ever for corporate leaders to engage and encourage their team members with Kahoot!! engaging game-based learning experiences at a time when many organizations are staying virtual or planning for a hybrid model. Head towards recording Kahoot with Filmora to experience a smooth Kahoot! usage on Zoom. Plus, you can also share the gameplay afterwards.
In the educational game Kahoot! participants respond to multiple-choice questions based on trivia. Each participant uses their own controller to answer questions in the online game. There are several question kinds to pick from, allowing for complete customization of the test. Each player needs their own controller for Kahoot! The game questions will be shown in the Zoom/Google Meet window, but the answers must be entered using the controller. With the Kahoot!! app for Zoom, presenters may use play and friendly rivalry to increase participant engagement. Users may organize knowledge- and feedback-gathering pulse checks with staff members, encourage original thought with word clouds, and empower participants’ voices with surveys, open-ended questions, and other tools. Utilizing the brainstorm tool, organizations may crowdsource ideas and advance teamwork.
Engagement has emerged as a crucial component of successful learning, collaboration, and connection as the globe has increased the use of video communications in social and professional situations. Users may access, host, and play Kahoot!! games and educational information with other meeting participants using the Kahoot!! app for Zoom without ever leaving the Zoom Meeting or requiring a second device. Corporate executives may motivate their staff via speeches, meetings, and online activities. Meeting hosts will have immediate access to data and statistics from their Kahoot!! experience, allowing them to respond in real time to audience engagement with the material. Additionally, hosts may email the Kahoot!! games to all participants so they can practice and improve their scores, which will increase participant engagement and learning retention. Hosts can also distribute the Kahoot!! games as self-paced challenges with individuals who couldn’t attend in person.
Part 1: Key Features of Kahoot
What more is there to discuss, Kahoot!? Every pupil adores it. Many instructors and educators use it all around the world to make learning simple, enjoyable, and interesting. Everyone may use it since it is free and extremely simple to use. These are some of its attributes:
- Quizzes may be made in a matter of minutes.
- Develop games based on the abilities of the kids. Playing at home or in the Zoom is simple for them.
- Various templates are offered. You can choose one of them with confidence.
- Kahoot! has the ability to be organized into many folders according to topics or subjects.
- Additionally, multiple choice questions may be included by quiz makers.
- Teachers using Kahoot! may combine different questions into one format, such as quizzes, polls, riddles, and slides.
- Use Apple Schoolwork, Google Zooms, and Microsoft Teams to share student-centered tasks.
Part 2: How to Host a Kahoot! Session within a Zoom Meeting
With the Zoom app, Kahoot! may be viewed, hosted, and used. It’s amazing that Kahoot!!, one of the most well-known brands in quiz-based learning, still provides a free-to-use platform, making it very accessible to both instructors and students. It’s also a useful resource for a hybrid class that combines online and classroom instruction. Most devices will be able to use the cloud-based service using a web browser. This implies that students using computers, tablets, and cellphones in class or at home may access this. Participants in Zoom Meetings may play games and learn without having to leave the Zoom meeting or bring a second device.
Step1Sign up for Zoom ahead of time and get ready. On the other hand, launch the Kahoot! test in your web browser, then be ready to share your screen in Zoom.
Step2As the participants come, allow them in and check to see whether you and they can both hear each other. To access the Kahoot! quiz, make sure they have a device or another browser tab open.
Step3Open the Kahoot! test and share it using Zoom’s “Share Screen” feature. While your screen is shared, continue to host the Kahoot! as normal. To view participants next to your shared screen, we advise selecting Side-by-Side Mode.
Part 3: How to Participate in Kahoot! Sessions within a Zoom Meeting
With more than 40 million ready-made games available on Kahoot!!, getting started is fast and simple. When time and resources are limited, hybrid or distant learning is ideal. After linking the Kahoot! to your Zoom account, you may utilize it. Use this app and start a meeting. Go to Apps on the toolbar and choose the program you wish to use. Select Who is Hosting to locate their host or to join a Kahoot! session being hosted by a friend or another player. Players may post a question to a shared screen on the Kahoot! platform. Kahoot!! just needs an account to be made in order to use it since it is free. Most devices may be used by students to access Kahoot!! from wherever there is an internet connection. This is how:
Step1Take the time to check that Zoom, Skype, Cisco Webex, or Google Hangout are operating and that your camera, microphone, and speaker are all operational.
Step2In the right-side panel, add the Kahoot!! app to your list of apps and click Join.
Step3The lobby will reveal your game PIN when you click the Play button, allowing the computer to show you a Kahoot! You may enter the game PIN and press Enter to join the Kahoot! session once the host shows their screen with you. To participate in a Kahoot! session, you don’t need a Kahoot! account.
Part 4: How to Record Zoom Meetings
Zoom is a conference tool that enables real-time, high-quality, low-latency communication. Filmora is an excellent video recorder for that reason, enabling users to capture on-screen activity such Zoom audio tracks and video conversations. Wondershare One of the most versatile and portable Zoom voice recorders is the Filmora. Even novices may easily utilize it due to its user-friendly UI. All you have to do is click the record button after choosing the proper audio source in the settings. The all-in-one video editing program Filmora allows you to record your screen with audio, a facecam, and a green screen effect. You can record the entire screen or just a portion of it, and you can perform a number of quick edits on your video using tools like trimming, cropping, changing the audio track’s volume, and so on.
How to Use Filmora to Record Zoom Lectures
Having said that, Filmora is a great Zoom recorder that can capture games, audio, and video conversations. This video recorder may be used to make video clip lessons in addition to recording movies, video games, and webcam footage. In addition to Zoom, it can also capture internet streaming audio. Here is information on how to record Zoom meetings using this software:
Step1Download and Install Filmora on your PC
To use this program for a number of tasks, including screen recording and recording editing, you must first download and install it on your computer. To achieve this, download the recording program by clicking the link below. Launch the program as soon as the download is finished to start the installation process, and then adhere to the on-screen directions to install and make this software available for usage.
Step2Choose the Record’s Ideal Position in the Zoom
Use it on your PC at this point. As soon as you start the program, a window interface with two choices for screen recording, editing already recorded videos, and generating videos will display. Choose the Recording option from the menu. When you click the record button, the program will direct you to the recording interface, where you can easily adjust the settings for your camera and audio. To add the microphone or Zoom sound in that particular field, use the necessary buttons as described below:
Step3Press the Record Button
It goes without saying that you must test your recording tools to ensure they are functional and capturing the highest quality audio. But once you’re ready, click the record button, which will allow you 3-5 seconds before starting to record the personalized screen of your PC as seen below:
Step4Export and Save Your Zoom Recording
You may now save the Zoom video for sharing on social media after making and modifying it. The following file types may be used to save the document: MP4, WMV, AVI, MOV, GIF, and MP3. The finest feature of Wondershare Filmora is the direct export and sharing of Zoom video recordings to YouTube; the only need is that you must be signed in to your YouTube account inside the application:
Because the MOV format is only available for online movies, you may also export your Zoom recordings to MP4 if you want to publish them to your YouTube channel. You are free to choose the format that best suits your needs. You may choose the encoder from a drop-down menu in the export options.
Conclusion
With the aid of several interesting tools and programs made accessible in this virtual environment, learning has now become enjoyable. Of them is Kahoot! In Zoom. It is an application that acts as a learning tool by providing fun games, tests, and a variety of other chances. In only a few minutes, quizzes may be made and distributed. Games and quizzes may be planned using this platform quite easily. The Kahoot! with Zoom will make it simpler than ever for corporate leaders to engage and encourage their team members with Kahoot!! engaging game-based learning experiences at a time when many organizations are staying virtual or planning for a hybrid model. Head towards recording Kahoot with Filmora to experience a smooth Kahoot! usage on Zoom. Plus, you can also share the gameplay afterwards.
Are You Looking for Ways to Add Background to Green Screen Video Online? Worry Not, as in This Article; We Shall Discuss Using a Green Screen Background Adder in Filmora
Versatile Video Editor - Wondershare Filmora
An easy yet powerful editor
Numerous effects to choose from
Detailed tutorials provided by the official channel
Video’s background is the most crucial part of video editing. When filming, the backgrounds cannot be more attractive with the natural background, so editors use background effects to change the background of the video and make it more appealing. Wondershare Filmora is a fantastic software to add background to a video without a green screen. The good news is that Filmora offers various tools to remove background from a video, add a background, add transition effects, and all these by using virtual reality to complete the task. It has several effects and themes and has tools to remove background effectively. Many editors are available in the market for background effects but with limitations. Filmora offers an effective way to add background without a green screen and with a green screen. You will also be able to add a background to the green screen photo online.
Let us discuss the finest tools available in Filmora to change the background easily and quickly. This article will concentrate on two methods to edit background.
● How to put a background on a video without a green screen.
● How to add background to video with green screen.
If you wonder how to add a background to a green screen in after effects, it involves a very long step and quality footage to remove the background.
In this article
01 [Add background to green screen video](#Part 1)
02 [Add background to video without a green screen.](#Part 2)
Part 1 Add background to green screen video
The green screen effect is the advanced feature in overlays. It makes the background of the clips transparent. If you want to add background to green screen video online, there are many websites available but always with some limitations in resolutions and quality while exporting the video. Filmora is a useful tool in video editing to create animatic and superimpose backgrounds like any jet craft or a bird flying. You can easily make these changes to the video using Filmora by using a green screen footage clip or a plain green screen in the background while creating the footage. We will focus on putting a background on a green screen in this part.
Let us discuss how to add background to green screen are pretty simple using Filmora.
Step1 Add Overlay clip to timeline
Select “Create New Project” to start the editing. At first, you have to choose both the overlay clip and background clip and add them to the timeline. You can either import from the library or drag the files to the timeline in the positions shown in the picture.
You can edit the overlay clip individually by adding animation, effects, filterers, mask frame, and blending modes (multiply, darken, or color burn). Let us move to the next step, how to put the background on the green screen.
Step2 Make a Green Screen
Let’s get into the first step to add background to the green screen video. In this part, you will be using a green screen to remove the background. So, import the green screen clips to the media library. Now, add the background green screen to the timeline above the video track as shown in the picture.

● Move the cursor to the green screen on the timeline and double-click on it.
● The settings box will appear on the left.
● You have to tick the Chroma key there.
The green screen effects will be applied automatically.

The video can be refined with many additional tools like Tolerance, Offset, and Alpha channel to make the video background clear. Once satisfied with the results, click on OK. Now that we have discussed how to add background to green screen video with the help of Filmora let’s now discuss how to add a background to a video without a green screen.
Part 2 Add background to video without a green screen
Let us learn how to add a background to a video without a green screen. In Filmora, there is a special effect called the Human segmentation effect to isolate people from the backgrounds without a green screen. All it takes is a few clicks. Once you remove the surround, you can add an image or a video clip to go well with your original video. Another unique feature is that after removing the background from the video clip, you can add it to the overlay of another video clip. It works well when it has a natural and single person in front of the camera.
Let’s discuss how to add background without a green screen.
Wondershare Filmora
Get started easily with Filmora’s powerful performance, intuitive interface, and countless effects!
Try It Free Try It Free Try It Free Learn More about Filmora>

Step1 Import Media to Timeline
Import the video clip from the device. You can also drag the video clip from the timeline. You can use other effects from Filmora to make necessary changes like editing, cutting, trimming, filter and transition.

Step2 Adding Human Segmentation Effect
To see the options to add background to video without a green screen, go to Effects – AI Portrait, and you can see a list of all AI portrait effects here. You can see the human segmentation effect, drag and place it on the top of your video clip in the timeline.

Step3 Preview and Adjust
After the human segmentation effect, the people will be isolated separately from the background, shown in the picture. Double click on the effects in the timeline where you can edit, adjust, thickness, feather, and preview.

Step4 Replace and change video background
If you wish to change the background, import an image or video below your main track. Now, that is how to add a background without a green screen.

Thus, you learned to create your green screen backgrounds and add a background to a green screen video using the favorite video effect software, Filmora.
Conclusion
Thus, in this guide, you learned how to add a background to a video without a green screen, and we hope this will be useful. You can find multiple software online for adding a background to a green screen with additional background effects. However, the Human segmentation available in Filmora is the easiest way to change scenes and clone people. With support to over 100 video tracks, Filmora is by far the best tool that allows you to change the setting with and without a green screen.
Video’s background is the most crucial part of video editing. When filming, the backgrounds cannot be more attractive with the natural background, so editors use background effects to change the background of the video and make it more appealing. Wondershare Filmora is a fantastic software to add background to a video without a green screen. The good news is that Filmora offers various tools to remove background from a video, add a background, add transition effects, and all these by using virtual reality to complete the task. It has several effects and themes and has tools to remove background effectively. Many editors are available in the market for background effects but with limitations. Filmora offers an effective way to add background without a green screen and with a green screen. You will also be able to add a background to the green screen photo online.
Let us discuss the finest tools available in Filmora to change the background easily and quickly. This article will concentrate on two methods to edit background.
● How to put a background on a video without a green screen.
● How to add background to video with green screen.
If you wonder how to add a background to a green screen in after effects, it involves a very long step and quality footage to remove the background.
In this article
01 [Add background to green screen video](#Part 1)
02 [Add background to video without a green screen.](#Part 2)
Part 1 Add background to green screen video
The green screen effect is the advanced feature in overlays. It makes the background of the clips transparent. If you want to add background to green screen video online, there are many websites available but always with some limitations in resolutions and quality while exporting the video. Filmora is a useful tool in video editing to create animatic and superimpose backgrounds like any jet craft or a bird flying. You can easily make these changes to the video using Filmora by using a green screen footage clip or a plain green screen in the background while creating the footage. We will focus on putting a background on a green screen in this part.
Let us discuss how to add background to green screen are pretty simple using Filmora.
Step1 Add Overlay clip to timeline
Select “Create New Project” to start the editing. At first, you have to choose both the overlay clip and background clip and add them to the timeline. You can either import from the library or drag the files to the timeline in the positions shown in the picture.
You can edit the overlay clip individually by adding animation, effects, filterers, mask frame, and blending modes (multiply, darken, or color burn). Let us move to the next step, how to put the background on the green screen.
Step2 Make a Green Screen
Let’s get into the first step to add background to the green screen video. In this part, you will be using a green screen to remove the background. So, import the green screen clips to the media library. Now, add the background green screen to the timeline above the video track as shown in the picture.
● Move the cursor to the green screen on the timeline and double-click on it.
● The settings box will appear on the left.
● You have to tick the Chroma key there.
The green screen effects will be applied automatically.
The video can be refined with many additional tools like Tolerance, Offset, and Alpha channel to make the video background clear. Once satisfied with the results, click on OK. Now that we have discussed how to add background to green screen video with the help of Filmora let’s now discuss how to add a background to a video without a green screen.
Part 2 Add background to video without a green screen
Let us learn how to add a background to a video without a green screen. In Filmora, there is a special effect called the Human segmentation effect to isolate people from the backgrounds without a green screen. All it takes is a few clicks. Once you remove the surround, you can add an image or a video clip to go well with your original video. Another unique feature is that after removing the background from the video clip, you can add it to the overlay of another video clip. It works well when it has a natural and single person in front of the camera.
Let’s discuss how to add background without a green screen.
Wondershare Filmora
Get started easily with Filmora’s powerful performance, intuitive interface, and countless effects!
Try It Free Try It Free Try It Free Learn More about Filmora>
Step1 Import Media to Timeline
Import the video clip from the device. You can also drag the video clip from the timeline. You can use other effects from Filmora to make necessary changes like editing, cutting, trimming, filter and transition.
Step2 Adding Human Segmentation Effect
To see the options to add background to video without a green screen, go to Effects – AI Portrait, and you can see a list of all AI portrait effects here. You can see the human segmentation effect, drag and place it on the top of your video clip in the timeline.
Step3 Preview and Adjust
After the human segmentation effect, the people will be isolated separately from the background, shown in the picture. Double click on the effects in the timeline where you can edit, adjust, thickness, feather, and preview.
Step4 Replace and change video background
If you wish to change the background, import an image or video below your main track. Now, that is how to add a background without a green screen.
Thus, you learned to create your green screen backgrounds and add a background to a green screen video using the favorite video effect software, Filmora.
Conclusion
Thus, in this guide, you learned how to add a background to a video without a green screen, and we hope this will be useful. You can find multiple software online for adding a background to a green screen with additional background effects. However, the Human segmentation available in Filmora is the easiest way to change scenes and clone people. With support to over 100 video tracks, Filmora is by far the best tool that allows you to change the setting with and without a green screen.
Also read:
- New 3 Ways to Make Time-Lapse Video on MacBook
- How to Create Simple Slideshow Word for 2024
- New In 2024, Best Online GIF to Image (PNG/JPG) Converter
- New Use This Color Match Paint Technique to Find the Exact Shade of Any Hue You Have in Mind for Your Paint Project. Match the Paint to Your Desired Color Even without Knowing the Paint Name or Brand with Automotive Paint Matching
- AVI Editors for Windows 11/10/8.1/8/7 Easily Edit AVI Files on PC
- In 2024, Create Kinetice Typography Text Effect in Filmora
- Updated Movavi Video Editor Plus Review
- New Learn How to Make Your CSGO Montage Impressive
- Updated How to Use Rule of Thirds in Video
- How to Use LUTs in Adobe Premiere Pro for 2024
- New Step-by-Step Guide to Storyboard
- New Is Windows Movie Maker Still Available?
- In 2024, How to Make Text Reveal Effect for Your Video
- How to Do Censor Effects with Filmora
- New 2024 Approved How To Change Speed of Video in Final Cut Pro?
- New Have You Ever Wanted to Speed up or Slow Down a Video? Maybe It Was Too Long, or You Wanted to Draw Out an Exciting Part of the Video without Having to Watch the Boring Parts
- Are You Working on Editing a Video and Youd Like to Add Text to It? Learn the Various Ways that You Can Add Text to a Video
- In 2024, Different Ways To Trim Video In Premiere Pro
- Best Image (JPG/PNG) to GIF Converters for 2024
- Do You Want to Create a Motion Blur Effect in Your Videos? Read This Well-Described Guide to Learn How to Add Motion Blur on CapCut on iPhone and Android Devices
- 6 Instant Ways to Create Windows 10 Slideshow
- Updated Guide To Using Free Luts for OBS
- Do You Want to Slow Down Your TikTok Video and Zoom on a Specific Part? This Is No Longer a Difficult Task as This Video Comes up with the Right Set of Methods that Can Be Used to Implement the Slow Zoom Effect TikTok
- Something About Skin Care Vlog Ideas
- New How Windows Movie Maker Save MP4 File
- 2024 Approved Learn How to Create Custom Titles in Filmora and Add a Unique Lower Third Animation Effect in Six Simple Steps
- In 2024, The Best Cinematic LUTs in The Market
- New 2024 Approved How to Create a Light Sweep (Shine) Effect with Filmora
- If You Want to Record Video Streams on Windows or Mac Using FFmpeg, Read Our Guide and Learn How to Do This with Easy Step-by-Step Instructions for 2024
- Updated 2024 Approved How to Create Vintage Film Effect 1950S
- 2024 Approved Want to Capture Captivating, Detailed Videos? If Yes, Then You Need to Learn the Recording of Super Slow Motion Videos. In This Article, I Will Show You How to Record a Super Slow-Motion Video on Your Android and iPhone
- New 2024 Approved Best 5 Solutions on How to Add Emojis to iPhone
- How to Create Glowing Edge Effect in TikTok Dancing Video for 2024
- How To Check if Your Samsung Galaxy M14 5G Is Unlocked
- Updated 20 Free After Effects Logo Reveal Templates
- In 2024, A Guide Lenovo ThinkPhone Wireless and Wired Screen Mirroring | Dr.fone
- How To Enable USB Debugging on a Locked Oppo A38 Phone
- In 2024, Is GSM Flasher ADB Legit? Full Review To Bypass Your Vivo Y77tFRP Lock
- Is your Infinix Smart 7 working too slow? Heres how you can hard reset it | Dr.fone
- In 2024, 3 Ways to Erase Apple iPhone 14 Pro When Its Locked Within Seconds
- How to Transfer Data After Switching From Honor 100 to Latest Samsung | Dr.fone
- How To Unlock SIM Cards Of Samsung Galaxy S23 Tactical Edition Without PUK Codes
- Effective Ways To Fix Checkra1n Error 31 From iPhone 8
- Complete guide for recovering contacts files on Samsung Galaxy A05.
- What To Do if Your Infinix Hot 40i Auto Does Not Work | Dr.fone
- The way to get back lost data from Infinix Note 30
- Title: Techniques You Never Heard of for Learning AI Marketing YouTube
- Author: Chloe
- Created at : 2024-05-20 03:37:24
- Updated at : 2024-05-21 03:37:24
- Link: https://ai-editing-video.techidaily.com/techniques-you-never-heard-of-for-learning-ai-marketing-youtube/
- License: This work is licensed under CC BY-NC-SA 4.0.
