
:max_bytes(150000):strip_icc():format(webp)/best-instagram-captions-4171697-ae21b04e6866470c80a50c9bef1cc26e.png)
Track Mattes The Ultimate Guide For After Effects for 2024
Track Mattes: The Ultimate Guide For After Effects
Are you wondering what Track Mattes is? In After Effects, this tool adds an invisible layer that is used to mask or reveal parts of a layer, including video, graphics, text, shapes, and images. This feature is in the arsenal of any visual effects artist or motion graphic designer.
For After Effects editors, Track Mattes can be an incredibly helpful tool for managing multiple layers and creating complex animations.
In this article, we’ll explore everything you need to know about Track Mattes. We’ll cover topics like the difference between a mask and Track Matte, finding this tool in After Effects, and its four options: Alpha Matter, Alpha Inverted Matte, Luma Matte, and Luma Inverted Matte.
- Alpha Matte
- Alpha Inverted Matte
- Luma Matte
- Luma Inverted Matte
- Differences Between Alpha Channel and Luma Channel
Part 1. What Are Track Mattes In After Effects?
A Track Matte is an element used in video editing to control the opacity of a layer. Essentially, it lets you create a “hole” in a layer so that underlying layers can show through. This tool can be used with video and audio layers, which is essential for creating complex composites in After Effects.
You can use Track Mattes to generate shapes, reveal part of a layer, or keying outs. Interestingly, it remains independent of all layers in your projects, which means you can get visual effects and animations more efficiently than with the masks tool.
Moreover, Track Mattes uses Alpha or Luma channels as a layer mask to determine what parts of the layer to reveal. For instance, you can make a top layer that provides an Alpha or Luminous effect and a bottom layer consisting of the image that will be revealed or shown.
Thus, if you want to use an image to hide your video until you want to unveil it or add a picture in your text, Track Mattes will help you to shape the appearance of a layer above it.
Part 2. Differences Between A Mask And A Track Matte
In Adobe After Effects, there are two types of masking tools: Masks and Track Mattes. Both are used to hide or reveal a portion of a layer.
Here’re some key differences between a Mask and a Track Matte:
- A mask is dependent on a specific layer, while the Track Matter is independent of any layer.
- A mask is applied directly to a layer having an image or a video and transforms with the layers. On the other hand, Track Matte is a stationary mask applied to the composition rather than a layer.
Part 3. Finding The Track Matte Tool In After Effects
Track Matte is located by default in the Timeline Window of the After Effects interface, but if it is unavailable there for some reason, toggle the Transfer Control Pane button on the bottom-left of the timeline.

If you are still unable to find the Track Matte option, press the F1 key or do the following steps in sequence:
- Right-click on the area above your layers and select “Columns.”
- Scroll down and click the “Modes” option to enable it.

- Track Matte mode, Preserve Underlying Transparency, and Blending Modes will be available now.
Under Track Matte’s drop-down menu, you can find four further options, two with Alpha and two with Luma. We’ll discuss these options in detail in the next section.
Part 4. All Four Track Matte Options In After Effects
After Effects provides four types of Track Matte options: Alpha Matte, Alpha Inverted Matte, Luma Matte, and Luma Inverted Matte, each has its own specific use case. But first, you need to understand what Alpha and Luma are:
Alpha: This Track Matte type uses the layer’s Alpha channel to determine the layer’s opacity.
Luma: This Track Matte type uses the top layer’s brightness to mask the bottom layer.

Let’s find out the functions of each option one by one:
Alpha Matte
Alpha Matte is an important option under the Track Matte menu, as it allows you to create a mask based on the transparency of the layer you are using it on. Like the mask, it will use any pixel above 0% opacity and can be useful for various purposes, such as creating a vignette or isolating a certain area of the frame.
Alpha Inverted Matte
The Alpha Inverted Matte option is quite the opposite of the Alpha Matte, and around the Alpha channel, it uses negative space from the above layer and will therefore use pixels with 0% opacity as it had 100% opacity.
Luma Matte
Instead of using the Alpha channel, Luma Mattes uses the brightness level or Luma channel of the upper layer to create a mask for the bottom layer.
Luma Inverted Matte
Opposite of the Luma Matte, the Luma Inverted Matte uses dark or low luminance areas of the upper layer to create a mask for the lower layer.
Differences Between Alpha Channel and Luma Channel
When altering the opacity of a layer, it may look like the brightness settings are changed. This might confuse some users, as both Alpha and Luma channels carry the same information. However, they differ in how they are used.
Alpha channel is a type of Track Matte that stores transparency information. This information determines how opaque or transparent a layer will be when superimposed over another layer.

On the other hand, a Luma channel is a video track that stores brightness information. This information is used to determine how bright or dark an image will be and is further divided into three channels, i.e., Red, Green, and Blue (RGB). Their value ranges from 0 to 255, where 0 represents the darkest value while 255 represents the brightest value.

Video – How to use Track Mattes in Adobe After Effects - Tutorial
Conclusion
In this article, we’ve discussed what Track Matte is in After Effects and how it differs from the mask tool. We also explored where to find the Track Matter option and its four options, i.e., Alpha Matte, Alpha Inverted Matte, Luma Matte, and Luma Inverted Matte. In the end, we discussed the difference between the Alpha and Luma channels to provide a clear view of the two.
Hopefully, this guide resolves your queries, and you now have a better understanding of the Track Matte tool in After Effects.
Free Download For Win 7 or later(64-bit)
Free Download For macOS 10.14 or later
Part 1. What Are Track Mattes In After Effects?
A Track Matte is an element used in video editing to control the opacity of a layer. Essentially, it lets you create a “hole” in a layer so that underlying layers can show through. This tool can be used with video and audio layers, which is essential for creating complex composites in After Effects.
You can use Track Mattes to generate shapes, reveal part of a layer, or keying outs. Interestingly, it remains independent of all layers in your projects, which means you can get visual effects and animations more efficiently than with the masks tool.
Moreover, Track Mattes uses Alpha or Luma channels as a layer mask to determine what parts of the layer to reveal. For instance, you can make a top layer that provides an Alpha or Luminous effect and a bottom layer consisting of the image that will be revealed or shown.
Thus, if you want to use an image to hide your video until you want to unveil it or add a picture in your text, Track Mattes will help you to shape the appearance of a layer above it.
Part 2. Differences Between A Mask And A Track Matte
In Adobe After Effects, there are two types of masking tools: Masks and Track Mattes. Both are used to hide or reveal a portion of a layer.
Here’re some key differences between a Mask and a Track Matte:
- A mask is dependent on a specific layer, while the Track Matter is independent of any layer.
- A mask is applied directly to a layer having an image or a video and transforms with the layers. On the other hand, Track Matte is a stationary mask applied to the composition rather than a layer.
Part 3. Finding The Track Matte Tool In After Effects
Track Matte is located by default in the Timeline Window of the After Effects interface, but if it is unavailable there for some reason, toggle the Transfer Control Pane button on the bottom-left of the timeline.
If you are still unable to find the Track Matte option, press the F1 key or do the following steps in sequence:
- Right-click on the area above your layers and select “Columns.”
- Scroll down and click the “Modes” option to enable it.
- Track Matte mode, Preserve Underlying Transparency, and Blending Modes will be available now.
Under Track Matte’s drop-down menu, you can find four further options, two with Alpha and two with Luma. We’ll discuss these options in detail in the next section.
Part 4. All Four Track Matte Options In After Effects
After Effects provides four types of Track Matte options: Alpha Matte, Alpha Inverted Matte, Luma Matte, and Luma Inverted Matte, each has its own specific use case. But first, you need to understand what Alpha and Luma are:
Alpha: This Track Matte type uses the layer’s Alpha channel to determine the layer’s opacity.
Luma: This Track Matte type uses the top layer’s brightness to mask the bottom layer.
Let’s find out the functions of each option one by one:
Alpha Matte
Alpha Matte is an important option under the Track Matte menu, as it allows you to create a mask based on the transparency of the layer you are using it on. Like the mask, it will use any pixel above 0% opacity and can be useful for various purposes, such as creating a vignette or isolating a certain area of the frame.
Alpha Inverted Matte
The Alpha Inverted Matte option is quite the opposite of the Alpha Matte, and around the Alpha channel, it uses negative space from the above layer and will therefore use pixels with 0% opacity as it had 100% opacity.
Luma Matte
Instead of using the Alpha channel, Luma Mattes uses the brightness level or Luma channel of the upper layer to create a mask for the bottom layer.
Luma Inverted Matte
Opposite of the Luma Matte, the Luma Inverted Matte uses dark or low luminance areas of the upper layer to create a mask for the lower layer.
Differences Between Alpha Channel and Luma Channel
When altering the opacity of a layer, it may look like the brightness settings are changed. This might confuse some users, as both Alpha and Luma channels carry the same information. However, they differ in how they are used.
Alpha channel is a type of Track Matte that stores transparency information. This information determines how opaque or transparent a layer will be when superimposed over another layer.
On the other hand, a Luma channel is a video track that stores brightness information. This information is used to determine how bright or dark an image will be and is further divided into three channels, i.e., Red, Green, and Blue (RGB). Their value ranges from 0 to 255, where 0 represents the darkest value while 255 represents the brightest value.
Video – How to use Track Mattes in Adobe After Effects - Tutorial
Conclusion
In this article, we’ve discussed what Track Matte is in After Effects and how it differs from the mask tool. We also explored where to find the Track Matter option and its four options, i.e., Alpha Matte, Alpha Inverted Matte, Luma Matte, and Luma Inverted Matte. In the end, we discussed the difference between the Alpha and Luma channels to provide a clear view of the two.
Hopefully, this guide resolves your queries, and you now have a better understanding of the Track Matte tool in After Effects.
Free Download For Win 7 or later(64-bit)
Free Download For macOS 10.14 or later
How To Fade Audio In Kinemaster
If you have been looking for video and audio editing tools then you have probably heard of Kinemaster. It is a great video editing app that allows users to edit all aspects of the video including any audio or music that may accompany the video. It has a lot of very useful features and the user interface is fairly easy to use.
One of the things that you can do with Kinemaster is to fade out audio, a useful feature that can help the ending of any video appear more authentic. In this article, we will be looking at how you can use Kinemaster to fade audio.
Kinemaster Fade Audio Steps
The following steps show you how you can easily fade audio in Kinemaster;
Step1If you don’t have Kinemaster already, start by downloading and installing the video editor on your computer.
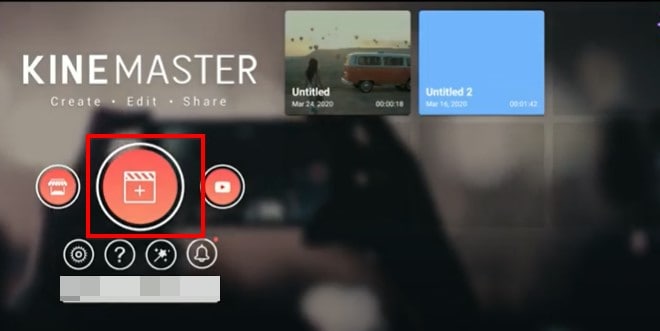
Step2Open Kinemaster on your computer and then click on the “New Project” icon to start. Select the aspect ratio that you would like to use. If you are not sure, we recommend choosing the “16:9” aspect ratio.
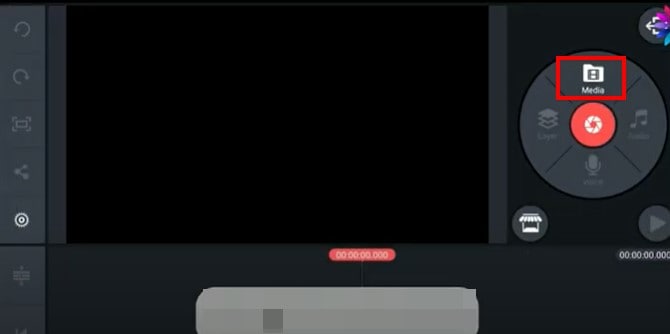
Step3In the next window, click on “Media” to select the clip you would like to add to the Kinemaster project that you have just created.
Step4To fade in and fade out the audio in the project, click on the gear icon from the options to the left of the screen.
![]()
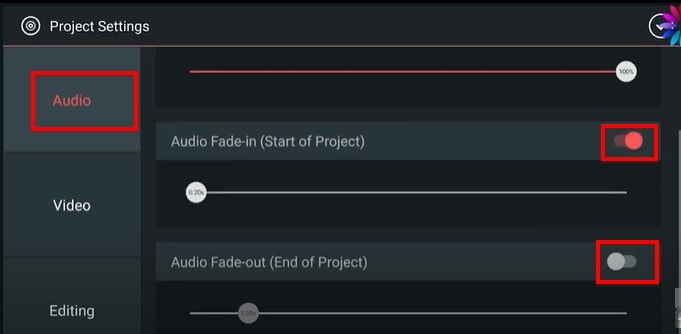
Step5Select the “Audio” tab on the next screen and then turn on the switch next to “Audio Fade-in (Start of Project)” and “Audio Fade-out (End of Project).” This will add a fade-in and fade-out effect at the beginning of the audio and at the end of it.
Step6You can then easily set the duration of the “Audio fade-in” and “Audio fade-out” by dragging the slider below each option. We recommend setting the duration to just a few seconds.
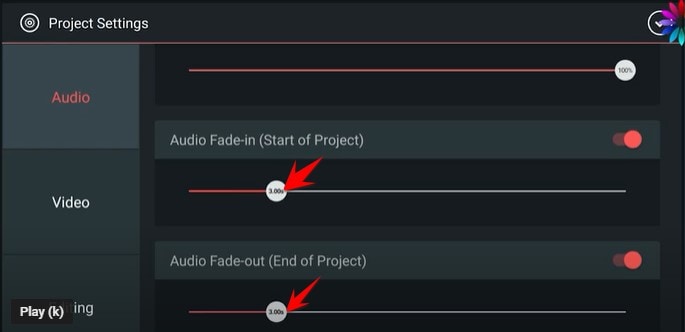
Don’t forget to save the project when you’re done.
Kinemaster Alternative to Edit Audio
Kinemaster is a good way to edit both audio and video on your computer, but the following options are just as good;
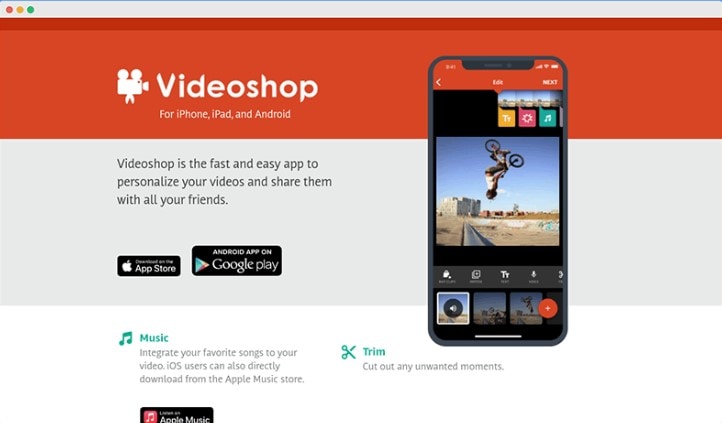
1. VideoShop
VideoShop is a simple to use and highly effective program that you can use to create and edit videos on your computer. The interface makes it easy to import any video project that you have into the program and the wealth of very useful features can help you edit the video in various ways.
For example, you can change the speed of the video, add transitions at various points in the video, add and remove text, add and remove music and so much more. Although there is a free trial version, you will only be able to access some of the more useful features when you purchase the premium version.
The Pro version of VideoShop goes for $3.99 a month, but you can get lifetime access to the program for only $39.99. One thing that VideoShop has over Kinemaster is that it is very easy to use, even beginner users find video editing a breeze with this tool.
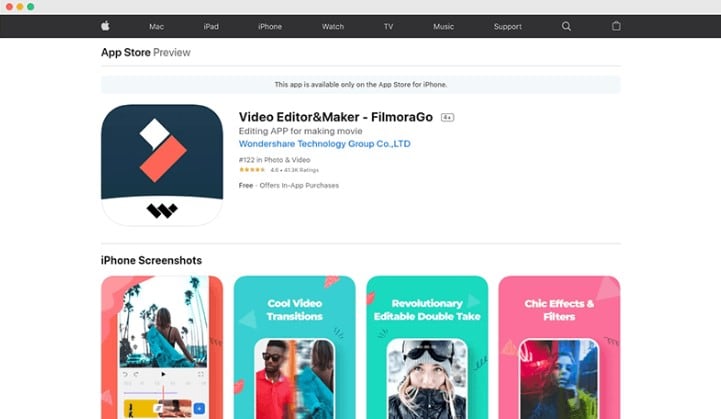
2. Filmora
If you are looking for a simple way to edit videos on Android or iOS devices, Filmora is one of the best options in the market. This mobile version of the very popular Filmora video editor is just as easy to use as its parent program. You can use it to create video projects from scratch or upload a video and make changes to it.
It offers you a lot of choices when it comes to editing features including trimming sections of the video, adding filters, adding music, adding or removing text, and even changing the canvas or the background of the video. Advanced options such as changing the speed of the video are also available.
One of the things that we love about Filmora is that you don’t even have to create an account to use it or remove the watermark added to the completed video project, watching a video ad can be enough. But this option is only available once every 24 hours, meaning that you can only remove a watermark on the free version once a day. Filmora is available for both iOS and Android and the yearly premium plan will cost you just $19.90.
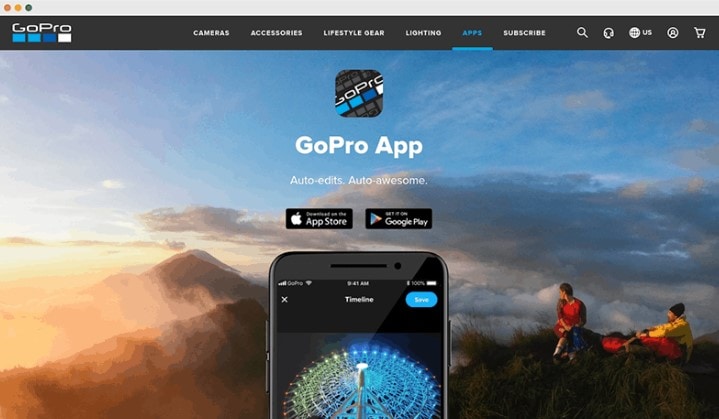
3. Quik
Quik is a video editing program created by GoPro for the purpose of editing GoPro videos, but that doesn’t mean that you will not be able to use it to edit other types of videos. You can use Quik to create a new project or edit an existing video and gives users a lot of different options when it comes to video editing.
One of the main benefits of using Quik is that you can easily add music, audio, and special effects to a video as well as change the length of the video, fade audio in and out and even change when the music starts. It is also one of the best ways to use images to create collages and slideshows very easily. There are a lot of slideshow and collage templates to choose from, and you can edit them easily by adding your music and images. Quik is completely free to use and you can upload your creation to the cloud ad share the link with others.
Conclusion
Kinemaster is one of the most popular video editing tools, especially since it simplifies the video editing process to make it very easy. All the alternative tools we have outlined here in this article are selected because they can make video editing quite simple.
Free Download For Win 7 or later(64-bit)
Free Download For macOS 10.14 or later
How to Create Chroma Key Written Text Effects in Filmora
Did you know it only takes a few clicks to key out the color in Filmora? It means that you can add green screen effects to many other objects. This article will show a cool chroma key effect you can try using written text.
Part 1. What Is Chroma Key Text Effect?
Composing of the chroma key effect is widely used in the gaming and newscasting industries. In this technique, you can make layering images and videos for the text together based on color hues.

Video editors can eliminate the basis from a picture by automatically choosing a certain hue in post-production. An interactive animation results by adding different color schemes; it’s an easy way to make 3D motion videos.
To make the effects on text, we have to film the subject writing on white paper. For this, follow the below instructions:
Part 2. Filming Tips for Written Texts
To write a key text before adding the chroma effect, we have to film the writing process to understand your next project better. You can create your own by following these tips. We are just concluding a single example here.
Tip 1. A Pen and a White Paper
We need blank white paper with no boundaries and lines for writing a text. Because the chroma effect will embellish the other lines if present on paper. Make sure to choose a prominent color for writing a text.
We are using a purple color pen here for writing an essential text to make it more prominent, as shown below:

It all depends upon the contrast, and you can choose another color too but ensure that it’s more apparent during filming.
Tip 2. Different Color Paper
There are many chances that you don’t have only white paper in your studio, or your requirement is not going with a blank white sheet. Then you don’t need to worry because you can use different color papers too.
But always try to use clearer paper and a prominent pen or highlighter. See the below example of a different color paper with a different highlighter.

![]()
Note: Ensure that the colored pens have good contrast with colored paper. Don’t use dull color pens with bright color paper.
Tip 3. Camera Angles
While filming a writing process for a video, you have to take care of the alignment of the camera. First, ensure the camera is at a suitable angle so it will not block the writing letters from the left side.
Sometimes, the writer’s hand blocks the letters on the left side during writing. Take note of this tip during filming a professional video, as shown below.

After checking the alignment of the camera, it’s time to look at what size we have to use for writing!
Tip 4. Larger Size of Letters
As we already said about the prominence of written text, we have to follow one more instruction related to the structure of the letters. Use the larger size and bold words when writing from a highlighter.
It is because the effect we insert during editing will be more standing and give a professional look to the video.

![]()
Note: You can create more shots till you get the right angle for a final video. Just focus on the camera alignment and highlighted words, then it will be all set.
After filming all the clips, you must edit those shots on the Filmora to get the chroma effect. Scroll more to get the step-by-step process!
Part 3. Editing the Chroma Key Text With Filmora
We need software that will give great setting choices and stock videos for a more professional look. For this, Wondershare Filmora will work more than a robot and give high-resolution results. To do the editing process on Filmora, follow the steps below and enjoy yourself with your followers.
Free Download For Win 7 or later(64-bit)
Free Download For macOS 10.14 or later
Step1 Download and install Wondershare Filmora
Launch Wondershare Filmora on your PC or Mac after downloading.
![]()
Note: If you want to enjoy its unlimited effect, you get its premium version quickly.

Step2 Import the clips to the Filmora
First, import the best footage into the filmora which you have shot. Ensure that the clip should have the best recording angle and that every word will be prominent on the page.
For this, click on Import Media and choose from the PC library what you want to edit.

Step3 Drag the clip to the timeline
Drag and drop the clip into the timeline from the import section. If you have more clips, choose first according to your script.
Add the text-written clip into the second video track because we have to insert the background into the first video track later.

After inserting the clip into the timeline, it’s time to edit it. For this, keep following the below-mentioned steps!
Step4 Chroma key settings
To edit the chroma key, you need to open the settings. For this, follow the below instructions:
- First, double-click on the clip in the timeline of the Filmora.
- Then, the setting section of the video will pop up at the top left side.
- Mark the tick in front of the Chroma Key section, and it will show the list of different features as shown below.

Step5 Color key out
To key out the specific color for changing its background, you have to perform the following actions:
- First, find the Select color option in the settings of the clip.
- Then click on the color dropper in front of the color tab.
- After that, pick the color dropper and move it on the video to select the color from the text.
![]()
Note: Ensure to select the color from the middle of the text for better key-out accuracy.

You have to adjust the size and thickness after selecting the key-out. For this, follow the next step!
Step6 Adjust the settings
To adjust the Chroma Key’s settings, set the offset, tolerance, edge thickness, and edge feather. Increase or decrease according to your range and that suits you the best.
Then click on Alpha Channel to mark the tick in front of the option. It is due to that chroma key effects will be more clearly shown.

Now, it’s time to set the background after fixing all the settings of the chroma key effect. To perform this, scroll more to get to the next step.
Step7 Import background clips
You have to add an excellent motion background in the handwritten text video. For this, you must first import the background clip into the filmora. Then, click on Import Media and choose what you want from your PC.

Step8 Add a background clip to the timeline
After importing the background clip, now drag and drop the clip into the timeline. Finally, add the background clip to the first video track at the bottom.

Step9 Turn off the alpha channel
The last step is merging the background clip with the first clip. For this, follow the below guidelines:
- First, double-click on the handwritten text video.
- It will show the settings section at the top left corner.
- Find the chroma key section and turn Alpha Channel

Final Results
You have all done with the steps and got such a fascinating result. Following the above tricks, you can easily make your vlogs and daily videos more professional and creative. Make sure to add a great and colorful background clip.

You can also use any other motion video of scenes rather than colorful videos to give a striking look.
Conclusion
Create more attractive looks and share them with your subscribers. Mainly, vloggers can attract many viewers by making the introductory part with this effect. Then, choose hundreds of other videos from the stock media and create different looks daily.
See how you can get editing tricks on Wondershare Filmora and use them in a few clicks to get an attractive look!
Tip 3. Camera Angles
While filming a writing process for a video, you have to take care of the alignment of the camera. First, ensure the camera is at a suitable angle so it will not block the writing letters from the left side.
Sometimes, the writer’s hand blocks the letters on the left side during writing. Take note of this tip during filming a professional video, as shown below.
After checking the alignment of the camera, it’s time to look at what size we have to use for writing!
Tip 4. Larger Size of Letters
As we already said about the prominence of written text, we have to follow one more instruction related to the structure of the letters. Use the larger size and bold words when writing from a highlighter.
It is because the effect we insert during editing will be more standing and give a professional look to the video.
![]()
Note: You can create more shots till you get the right angle for a final video. Just focus on the camera alignment and highlighted words, then it will be all set.
After filming all the clips, you must edit those shots on the Filmora to get the chroma effect. Scroll more to get the step-by-step process!
Part 3. Editing the Chroma Key Text With Filmora
We need software that will give great setting choices and stock videos for a more professional look. For this, Wondershare Filmora will work more than a robot and give high-resolution results. To do the editing process on Filmora, follow the steps below and enjoy yourself with your followers.
Free Download For Win 7 or later(64-bit)
Free Download For macOS 10.14 or later
Step1 Download and install Wondershare Filmora
Launch Wondershare Filmora on your PC or Mac after downloading.
![]()
Note: If you want to enjoy its unlimited effect, you get its premium version quickly.
Step2 Import the clips to the Filmora
First, import the best footage into the filmora which you have shot. Ensure that the clip should have the best recording angle and that every word will be prominent on the page.
For this, click on Import Media and choose from the PC library what you want to edit.
Step3 Drag the clip to the timeline
Drag and drop the clip into the timeline from the import section. If you have more clips, choose first according to your script.
Add the text-written clip into the second video track because we have to insert the background into the first video track later.
After inserting the clip into the timeline, it’s time to edit it. For this, keep following the below-mentioned steps!
Step4 Chroma key settings
To edit the chroma key, you need to open the settings. For this, follow the below instructions:
- First, double-click on the clip in the timeline of the Filmora.
- Then, the setting section of the video will pop up at the top left side.
- Mark the tick in front of the Chroma Key section, and it will show the list of different features as shown below.
Step5 Color key out
To key out the specific color for changing its background, you have to perform the following actions:
- First, find the Select color option in the settings of the clip.
- Then click on the color dropper in front of the color tab.
- After that, pick the color dropper and move it on the video to select the color from the text.
![]()
Note: Ensure to select the color from the middle of the text for better key-out accuracy.
You have to adjust the size and thickness after selecting the key-out. For this, follow the next step!
Step6 Adjust the settings
To adjust the Chroma Key’s settings, set the offset, tolerance, edge thickness, and edge feather. Increase or decrease according to your range and that suits you the best.
Then click on Alpha Channel to mark the tick in front of the option. It is due to that chroma key effects will be more clearly shown.
Now, it’s time to set the background after fixing all the settings of the chroma key effect. To perform this, scroll more to get to the next step.
Step7 Import background clips
You have to add an excellent motion background in the handwritten text video. For this, you must first import the background clip into the filmora. Then, click on Import Media and choose what you want from your PC.
Step8 Add a background clip to the timeline
After importing the background clip, now drag and drop the clip into the timeline. Finally, add the background clip to the first video track at the bottom.
Step9 Turn off the alpha channel
The last step is merging the background clip with the first clip. For this, follow the below guidelines:
- First, double-click on the handwritten text video.
- It will show the settings section at the top left corner.
- Find the chroma key section and turn Alpha Channel
Final Results
You have all done with the steps and got such a fascinating result. Following the above tricks, you can easily make your vlogs and daily videos more professional and creative. Make sure to add a great and colorful background clip.
You can also use any other motion video of scenes rather than colorful videos to give a striking look.
Conclusion
Create more attractive looks and share them with your subscribers. Mainly, vloggers can attract many viewers by making the introductory part with this effect. Then, choose hundreds of other videos from the stock media and create different looks daily.
See how you can get editing tricks on Wondershare Filmora and use them in a few clicks to get an attractive look!
Top 10 Old Film Overlays to Make Your Videos Look Vintage
Versatile Video Editor - Wondershare Filmora
An easy yet powerful editor
Numerous effects to choose from
Detailed tutorials provided by the official channel
If you like the old film mood in your videos and films, then this guide is for you. In this article, we will go through the best old film overlays to make your videos look vintage.
In this article
01 What is the Old Film Effect Called?
02 10 Amazing Old Film Overlays that Deserve a Try
03 How to Make a Video Look Old?
04 Pro Tips to Create Stunning Retro Video
Part 1: What is the Old Film Effect Called?
The old film effect that has been getting popular over the past years is called film grain and is defined as a random optical texture due to small particles appearing in the film. It is usually described as having a grainy effect and appearing old.
Part 2: 10 Amazing Old Film Overlays that Deserve a Try
In this list, we will present you with some great options that deserve your attention if you are looking to add old film aspects to your videos.
1. The Super 8 Film Grain Overlays Collection
With this collection, you have at your disposal 82 high-resolution clips of a real Super 8 film grain. With features that are easy to use in your videos, like 20-second loopable duration, 1080P Quicktime Pro resolution, each overlay has a small difference in texture and tint, and you also get 37 clips that show you visible areas with sprocket holes.
2. The Old Film Look Collection
This collection brings a large variety of film elements. From flash frames, film clutter, light leaks, countdown leader, film sprockets, 16mm and Super 8mm film. Plus, with this collection, you also get 29 video files and ProRes 1080P.
3. The Damaged 35mm Film Collection
With this collection, you have animated scans of damaged slides of 35mm film. The transparency effects are easy to use because of the white areas. You can add a file that you choose over an existing video and “darken” or “multiply” blending modes. Apart from those features, the Damaged 35mm Film Collection comes with 10 ProRes HD files.

4. The 4K 16 mm Film Overlays Collection
These overlays come from Authentic Old 16mm film, and inside this collection, you can find many effects of film dirt, scratches or dust to bring that old vintage look to your videos. It also comes with 79 ProRes video files, 4K (ULTRA HD) 3840 x 2160, 24fps resolution.
5. The Film Dirt and Scratches Collection
This collection comes with a variety of scratches and dirt textures. From authentic 16mm and Super 8mm film to give you a great old film look effect to your videos. The Film Dirt and Scratches collection comes with 28 video files, 13 minutes of footage, and ProRes 1080P.
6. 4K Super 8 Film Burn Overlays Collection - Kodak 50D
A collection like this is rare to come across. These easy-to-use effects are great for any level of expertise in editing videos. Just place them over the video and click “screen” or “lighten” modes. This collection pack comes with 47 ProRes files, 4 minutes of footage, and 4K High-Quality Scans.
7. 4K 16mm Film Grain Overlays
This collection has three great files of real film grain with dust and grain at your disposal. They use a 16mm camera for a better quality of overlays. This amazing package comes with three video files of 16mm film grain plus three bonus files.
8. 4K Film Burn Effects on 16mm
Shot in an authentic 16mm, this collection has real film burning in a projector. It has close-ups that fit a width of 16/9 screen. It also comes with 33 ProRes Files and 4 minutes of footage.
9. The VHS Effects Collection
This collection has real VHS effects to give your videos an old 80’s tape look to your videos. The collection contains many analog textures, tracking problems, and glitches. It also contains 10 minutes of footage, Quicktime ProRes 1080P file support, and 94 HD files of authentic VHS Retro Effects.
10. The Film Leaders Collection - Super 8mm and 16mm Effects
With authentic vintage countdowns, tail leaders, and old retro heads, this bundle offer you a great range of choices to add an old look to your films and videos.
Part 3: How to Make a Video Look Old?
In Filmora, you can make your videos have that old effect with simple steps.
Wondershare Filmora
Get started easily with Filmora’s powerful performance, intuitive interface, and countless effects!
Try It Free Try It Free Try It Free Learn More >

Step 1: Open Filmora and remove all the pieces of the footage. Then arrange the rest of the footage as you see fit. Click on “Effects” on the upper left corner of your screen and then on “Filters”. Click on the Old Video effect and then drop it. After you add the filter on the segment of your video, you can drag the end of it to cover the whole duration of the movies. Click twice on the filter if you want to adjust the filter settings. Enter the desired values on the “Fade” parameter, “Frequency”, and “Alpha” options. Press “OK”, and this step is concluded.

Step 2: You can apply the black and white filters to any project in Filmora. It is very simple. Add one of the filters above the video you want to add the effect and drag one of the corners to adjust the duration. You can change the intensity through the alpha slider.

Step 3: In Filmora, you can add sepia tone rise or sun-kissed filters to your video. You are able to add desaturated filters while keeping colors like blue and green and with that create the old film style. If you want more brown and red tones, you can use the Sun-Kisser filter that highlights those colors. Adjust the filters with the alpha slider to change intensity.

Step 4: Under the black and white subcategory, you can find Ash and Willow filters. What these do is desaturate the contrast or exposure values as well as preset brightness and bring an older tone to your videos.
Step 5: You can correct any kind of filter. With the Advanced Color Correction Tab, you can navigate through features like Preset and Adjustment and desaturate your video. By clicking on the “Preset tab,” you can open a larger variety of presets, including the Old Film and Black & White presets.

Part 4: Pro Tips to Create Stunning Retro Video
You can make your video look retro with a few simple tips:
- Use several vintage apps like Retro VHS, 8mm Camcorder, and others.
- Keep low highlights and low contrasts.
- Keep low saturation and control the hue, saturation, and luminance of your video.
- Film Overlays. With this, you can bring the mood just right. If you add a soft light overall to start with, it will instantly look slightly more vintage.
- By decreasing contrast, you are darkening your videos and giving them a grainier old look.
- If you bring up the black levels, you will leave more space for other tones to shine and turn the mood around your videos.
- In contrast, if you bring down the whites in your videos, making even the brightest colors turn grey.
Conclusion
There are various ways to turn your videos into old relics. Using Filmora, you have a powerful tool in your hands to change any desired media, and with this step-by-step guide, you will get there in no time.
If you like the old film mood in your videos and films, then this guide is for you. In this article, we will go through the best old film overlays to make your videos look vintage.
In this article
01 What is the Old Film Effect Called?
02 10 Amazing Old Film Overlays that Deserve a Try
03 How to Make a Video Look Old?
04 Pro Tips to Create Stunning Retro Video
Part 1: What is the Old Film Effect Called?
The old film effect that has been getting popular over the past years is called film grain and is defined as a random optical texture due to small particles appearing in the film. It is usually described as having a grainy effect and appearing old.
Part 2: 10 Amazing Old Film Overlays that Deserve a Try
In this list, we will present you with some great options that deserve your attention if you are looking to add old film aspects to your videos.
1. The Super 8 Film Grain Overlays Collection
With this collection, you have at your disposal 82 high-resolution clips of a real Super 8 film grain. With features that are easy to use in your videos, like 20-second loopable duration, 1080P Quicktime Pro resolution, each overlay has a small difference in texture and tint, and you also get 37 clips that show you visible areas with sprocket holes.
2. The Old Film Look Collection
This collection brings a large variety of film elements. From flash frames, film clutter, light leaks, countdown leader, film sprockets, 16mm and Super 8mm film. Plus, with this collection, you also get 29 video files and ProRes 1080P.
3. The Damaged 35mm Film Collection
With this collection, you have animated scans of damaged slides of 35mm film. The transparency effects are easy to use because of the white areas. You can add a file that you choose over an existing video and “darken” or “multiply” blending modes. Apart from those features, the Damaged 35mm Film Collection comes with 10 ProRes HD files.
4. The 4K 16 mm Film Overlays Collection
These overlays come from Authentic Old 16mm film, and inside this collection, you can find many effects of film dirt, scratches or dust to bring that old vintage look to your videos. It also comes with 79 ProRes video files, 4K (ULTRA HD) 3840 x 2160, 24fps resolution.
5. The Film Dirt and Scratches Collection
This collection comes with a variety of scratches and dirt textures. From authentic 16mm and Super 8mm film to give you a great old film look effect to your videos. The Film Dirt and Scratches collection comes with 28 video files, 13 minutes of footage, and ProRes 1080P.
6. 4K Super 8 Film Burn Overlays Collection - Kodak 50D
A collection like this is rare to come across. These easy-to-use effects are great for any level of expertise in editing videos. Just place them over the video and click “screen” or “lighten” modes. This collection pack comes with 47 ProRes files, 4 minutes of footage, and 4K High-Quality Scans.
7. 4K 16mm Film Grain Overlays
This collection has three great files of real film grain with dust and grain at your disposal. They use a 16mm camera for a better quality of overlays. This amazing package comes with three video files of 16mm film grain plus three bonus files.
8. 4K Film Burn Effects on 16mm
Shot in an authentic 16mm, this collection has real film burning in a projector. It has close-ups that fit a width of 16/9 screen. It also comes with 33 ProRes Files and 4 minutes of footage.
9. The VHS Effects Collection
This collection has real VHS effects to give your videos an old 80’s tape look to your videos. The collection contains many analog textures, tracking problems, and glitches. It also contains 10 minutes of footage, Quicktime ProRes 1080P file support, and 94 HD files of authentic VHS Retro Effects.
10. The Film Leaders Collection - Super 8mm and 16mm Effects
With authentic vintage countdowns, tail leaders, and old retro heads, this bundle offer you a great range of choices to add an old look to your films and videos.
Part 3: How to Make a Video Look Old?
In Filmora, you can make your videos have that old effect with simple steps.
Wondershare Filmora
Get started easily with Filmora’s powerful performance, intuitive interface, and countless effects!
Try It Free Try It Free Try It Free Learn More >
Step 1: Open Filmora and remove all the pieces of the footage. Then arrange the rest of the footage as you see fit. Click on “Effects” on the upper left corner of your screen and then on “Filters”. Click on the Old Video effect and then drop it. After you add the filter on the segment of your video, you can drag the end of it to cover the whole duration of the movies. Click twice on the filter if you want to adjust the filter settings. Enter the desired values on the “Fade” parameter, “Frequency”, and “Alpha” options. Press “OK”, and this step is concluded.
Step 2: You can apply the black and white filters to any project in Filmora. It is very simple. Add one of the filters above the video you want to add the effect and drag one of the corners to adjust the duration. You can change the intensity through the alpha slider.
Step 3: In Filmora, you can add sepia tone rise or sun-kissed filters to your video. You are able to add desaturated filters while keeping colors like blue and green and with that create the old film style. If you want more brown and red tones, you can use the Sun-Kisser filter that highlights those colors. Adjust the filters with the alpha slider to change intensity.
Step 4: Under the black and white subcategory, you can find Ash and Willow filters. What these do is desaturate the contrast or exposure values as well as preset brightness and bring an older tone to your videos.
Step 5: You can correct any kind of filter. With the Advanced Color Correction Tab, you can navigate through features like Preset and Adjustment and desaturate your video. By clicking on the “Preset tab,” you can open a larger variety of presets, including the Old Film and Black & White presets.
Part 4: Pro Tips to Create Stunning Retro Video
You can make your video look retro with a few simple tips:
- Use several vintage apps like Retro VHS, 8mm Camcorder, and others.
- Keep low highlights and low contrasts.
- Keep low saturation and control the hue, saturation, and luminance of your video.
- Film Overlays. With this, you can bring the mood just right. If you add a soft light overall to start with, it will instantly look slightly more vintage.
- By decreasing contrast, you are darkening your videos and giving them a grainier old look.
- If you bring up the black levels, you will leave more space for other tones to shine and turn the mood around your videos.
- In contrast, if you bring down the whites in your videos, making even the brightest colors turn grey.
Conclusion
There are various ways to turn your videos into old relics. Using Filmora, you have a powerful tool in your hands to change any desired media, and with this step-by-step guide, you will get there in no time.
Also read:
- Updated In 2024, How to Animate Designs With Canva GIF
- Making Slow Motion Videos in Premiere Pro A Review on The Best Method
- In 2024, Some Facts That Few People Know on How to Make Transparent Background in Canva
- Create Your Slow Zoom TikTok in Minutes
- Updated Top 10 Free WhatsApp Video Converter
- 2024 Approved Do You Want to Use a Professional Tool to Add Subtitles? Read This Article to Discover the Best Reliable Tool to Create Subtitles in Your Desired Manner
- New Best Online GIF to Image (PNG/JPG) Converter
- New 2024 Approved 2 Actionable Ways to Extract Subtitles From MKV Videos without Quality Loss
- Updated Learn How Video Montages Were Used over Film History with Examples and the Types of Videos for Shorter Montages. Plus, Learn About the Best Software for It
- Updated Are You a Gaming YouTuber or Content Creator Whose Main Game Is COD Warzone? How Kickass Are Your Warzone Thumbnails? Heres a Guide on How to Make One for Free
- In 2024, Do You Want to Know About Efficient Motion Blur Plugins for Adobe Effects? Read This Article to Find Out How to Use Motion Blur Plugins for Enhanced Results
- New 2024 Approved A Roster of 8 Top Color Match Generators
- New Customize PowerPoint Slideshow Icon in 8 Simple Ways
- 2024 Approved Splice App for Android - How to Download & Use
- New In 2024, Add Flesh to Your Video Content Before Posting Them for Your Audience to See Using Meme Texts. Use the Tutorial Guide Shared in This Post
- Updated How to Record Super Slow Motion Videos on Your Huawei/Samsung/iPhone?
- Updated Top Online Video Background Changers Transform Your Videos with Ease
- Updated Mastering DaVinci Resolve Scopes A Comprehensive Guide for 2024
- In 2024, Creative Ways to Add Green Screen Effects In Photoshop
- Adobe Photoshop Is the Best Photo Editor to Add Green Screen Effect to Your Photo While Wondershare Filmora Is the Best Video Editor to Add Green Screen Effect to Your Video
- How Windows Movie Maker Save MP4 File
- In 2024, Want to Add the Amazing Video Text Effects that You Generally See on Video Streaming Platforms? Use Filmora to Add Popular Video Text Effects Instantly
- New How to Remove Audio From Video Without Watermark?
- Find a Video Background Change Online that Works for You. This Article Contains Tools that Can Edit Video Backgrounds Online with Little Effort
- In 2024, To Closely Observe the Content on Screen, We Often Zoom in to Catch the Details. This Article Will Provide You with a Brief Note on How to Zoom in on YouTube Videos Quickly on Your Devices
- Guide Cropping and Combining Content in Wondershare Filmora Latest for 2024
- 2024 Approved Create Dynamic Text Animation in Filmora
- New In 2024, Best 7 Color Match Paint Apps
- Updated Some Facts That Few People Know on How to Make Transparent Background in Canva
- New Explore a Variety of Inexpensive Camera Models Suitable for Making Slow-Motion Footage without Compromising Quality
- In 2024, 3 Facts You Need to Know about Screen Mirroring Nokia C12 Pro | Dr.fone
- Ultimate guide to get the meltan box pokemon go For Apple iPhone XS | Dr.fone
- In 2024, 3 Ways to Track Nokia 150 (2023) without Them Knowing | Dr.fone
- How to Unlock Vivo S17t Phone without Google Account?
- Updated What Is an AI Tool for 2024
- Prevent Cross-Site Tracking on Samsung Galaxy M14 5G and Browser | Dr.fone
- New How to Make an Adorable Video for Your Babys First Year
- In 2024, FRP Hijacker by Hagard Download and Bypass your Infinix Smart 8 FRP Locks
- Updated Master Amazon Live Features, Pro Tips and Future Trends for 2024
- Does Life360 Notify When You Log Out On Motorola Edge 2023? | Dr.fone
- Recover your pictures after X6 Pro has been deleted.
- How to Rescue Lost Videos from Motorola Edge+ (2023)
- In 2024, How to Bypass Google FRP Lock from Infinix Smart 8 Pro Devices
- In 2024, Troubleshooting Error Connecting to the Apple ID Server On Apple iPhone 15
- Title: Track Mattes The Ultimate Guide For After Effects for 2024
- Author: Chloe
- Created at : 2024-04-24 07:08:15
- Updated at : 2024-04-25 07:08:15
- Link: https://ai-editing-video.techidaily.com/track-mattes-the-ultimate-guide-for-after-effects-for-2024/
- License: This work is licensed under CC BY-NC-SA 4.0.
