

Updated 2024 Approved A Guide to Use Distortion Effect in Premeiere Pro
A Complete Guide to Use Distortion Effect in Premiere Pro
Create High-Quality Video - Wondershare Filmora
An easy and powerful YouTube video editor
Numerous video and audio effects to choose from
Detailed tutorials are provided by the official channel
Premiere Pro is one of the most popular timeline-based video editing software, with over 9 million users. It’s the successor to Adobe Premiere, and it comes with cool distortion effects. We’ll look at Premiere Pro distortion effects and how to use them.
In this article
01 How to Use Distortion Effect in Premiere Pro?
02 Bonus! Free Distortion Effects for Premiere Pro
Adobe Premiere Pro offers a wide variety of beneficial editing tools and effects. Below are some of the impressive distortion effects you’ll find in Premiere Pro and how to use them in your project.
1. Corner Pin Effect
This effect distorts your image by simply changing the position of its corners. You can use the Corner pin effect to twist, skew, shrink, or stretch an image. Additionally, you can use it to simulate movement or perspective pivoting from the edge of your clip like a door opening.
You can directly manipulate the properties of the Corner Pin effect in the Program monitor by clicking the Transform right next to Corner Pin. To adjust the properties, drag one of the corner handles.
- To use this effect, open Premiere Pro and click File. Choose Import from the drop-down menu. The File Explorer window will open and allow you to find your footage. Select the video file you want to import, then click Open.
- Go to Effects Control and click Distortion. Choose Corner Pin Effect from the drop-down menu.

- You can now pin each corner from its original point to another specific point by adjusting the slider on the Upper Left, Upper Right, Lower Left, and Lower Right. You can also highlight your selection tool when working with the Corner Pin effect.

2. Lens Distortion Effect
This distortion effect Premiere Pro simulates the distorted lens through which people view the clip.
1. Go to Effects Control>Distortion>Lens Distortion Effect.
2. Choose the settings you want to use from the available options and adjust the slider.
- The Vertical and Horizontal Decentering control displaces the lens’ focal and makes the image bend and smear. The image will wrap in on itself at extreme settings.
- The Curvature setting alters the curvature of the lens. You can specify a positive value to make the image convex, while the negative value makes the image concave.
- The Vertical and Horizontal Prism FX setting created results similar to horizontal decentering and vertical, but the image does not wrap in on itself at extreme values.
- Use the Fill Color option to specify the background color, and Fill Alpha to make your background transparent.

3. Magnify Effect
This effect allows you to enlarge a selected area of your clip. The Magnify effect acts as a magnifying glass set over an area of an image. You can also use this effect to scale the whole image far beyond 100 percent and still maintain resolution.
1. To use this effect, go to Effect Control>Distortion>Magnify.
2. Next, go to the left side of the Effects Control panel and make the necessary adjustments to suit your preferences.
- Shape: This control specifies the magnified area shape.
- Center: The Center control allows you to specify the center of the magnified section.
- Magnification: This setting lets users specify the percentage of the magnification of the area they have selected, while the values represent the scale percentage.
- Link: The Link control allows you to specify how the effect will link the Size, Feather, and Magnification amount, to enable them to decrease or increase proportionally. You will disable the Resize Layer option if you set the Link control to any of the available settings except None. Setting the Link control to any setting except None disables Resize Layer. Size & Feather To Magnification allows you to specify that the edge feather and size of the magnified section decrease or increase proportionally regarding the magnification adjustment.
- Size: This control allows you to specify the magnified area size in pixels.
- Feather: With the Feather option, you can specify the amount of feather the effect applies to the magnified area edge. Lower values will sharpen the edge. Higher values will soften the edge while blending the edge with the layer that’s behind it.
- Opacity: This control allows you to specify the transparency of the magnified region.
- Scaling: Use this option to specify the kind of scaling the effect is using to magnify an image.
- Blending Mode: Use this control to specify the blend mode the effect will use to combine the original clip with the magnified area. The None option shows transparent pixels around the magnified section.
- Resize Layer: Selecting this option means the effect will only use the boundaries as the clip’s edge when the magnified region extends beyond the original boundaries of the clip. Deselecting the Resize Layer means that the boundaries of the clip will crop any area of your image outside the bounding box of the original clip.

4. Mirror Effect
This distortion Premiere Pro effect splits an image along a line while reflecting one side onto the other. Where the reflection appears and which side will be reflected is determined by the reflection angles.
1. Head over to Effect Control>Distortion>Mirror to use this effect.
2. Adjust the controls until you get the results you desire.
- Reflection Angle: With the Reflection Angle control, you can specify the angle of reflection and where it appears on the clip. A zero-degree angle reflects the left-hand side on the right.
- Reflection Center: This control allows you to specify the position of the line. You need to click the box, then drag the resulting crosshair up to the area in the image where you would like to place the line.

5. Offset Effect
This effect pans your image within a clip, and visual details pushed off one side of this image will appear on the opposite side. You have to perform the offset with subpixel precision at the best quality.
Also, you can use Offset with a combination of other effects. Head over to Effect Control>Distortion>Offset to use this effect.

6. Spherize Effect
The Spherize effect allows users to wrap a video clip around a spherical shape. You can use it to give texts and objects a three-dimensional effect. Go to Effect Control>Distortion>Spherize and adjust the radius and center of the sphere.

7. Transform Effect
This effect applies 2-dimensional geometric transformations to your clip. You can use this effect to skew clips along any axis.
1. Go to Effect Control>Distortion>Transform to apply this effect to your clip.
2. Use Transform settings to adjust Opacity, Skew, Rotation, Scale, Anchor Point, and more.

8. Turbulent Displace Effect
This fun effect utilizes fractal noise to create turbulent Premiere Pro distortion effects in your image. You can use the Turbulent Displace effect to add movement to your clip.
1. Head to Effect Control>Distortion>Turbulent Displace.
2. Adjust the following controls:
- Displacement
- Amount
- Size
- Offset (Turbulence)
- Complexity
- Evolution
- Pinning
- Resize Layer
- Antialiasing For Best Quality

9. Twirl Effect
The Twirl effect allows you to rotate your clip around its center. It rotates the image more sharply in the middle than at the edge. You can use it on faces to make a funny clip. Navigate to Effect Control>Distortion>Twirl to start using this effect. Next, use the settings to adjust how much angle it twirls and the radius.

10. Wave Warp Effect
This effect is one of the most popular Premiere Pro distortion effects. It generates the appearance of a wave as it’s traveling across an image. The Wave Warp effect allows you to produce various wave shapes, including sine, circular, and square waves.
It’s automatically animated at a steady speed across the time range, and that’s without frames. You need to set keyframes to vary speeds.
1. Head to Effect Control>Distortion>Wave Warp to apply this effect in your video clip.
2. Now, change the wave speed, direction, height, width, and type to suit your preference.

Bonus! Free Distortion Effects for Premiere Pro
1. Liquid Distortion Effect
This effect can distort the content in a clip and can be used to shift into the next clip. It could be utilized in editing or used as a transition.

2. Earthquake Effect
This effect adds a shaking motion to the video clip you add it to; it works as a transition but could also be a useful editing tool.

3. Glass Effect
This effect can add various blurs to the video clip and be used to transition from one clip to the next.

4. TV Effect
This effect imitates the view of a television being turned on or off. You can use it to introduce a new video clip. It would also be a great start or end to the entire video.

5. Glitch Effect
This effect adds a glitch to the video clip. You can use it in editing or as a transition from one clip to the next.

Conclusion
● You can add any of these Premiere Pro distortion effects to make your videos more catchy. In turn, they will get more attention and views. Premiere Pro comes with tons of distortion effects and a responsive interface.
Premiere Pro is one of the most popular timeline-based video editing software, with over 9 million users. It’s the successor to Adobe Premiere, and it comes with cool distortion effects. We’ll look at Premiere Pro distortion effects and how to use them.
In this article
01 How to Use Distortion Effect in Premiere Pro?
02 Bonus! Free Distortion Effects for Premiere Pro
Adobe Premiere Pro offers a wide variety of beneficial editing tools and effects. Below are some of the impressive distortion effects you’ll find in Premiere Pro and how to use them in your project.
1. Corner Pin Effect
This effect distorts your image by simply changing the position of its corners. You can use the Corner pin effect to twist, skew, shrink, or stretch an image. Additionally, you can use it to simulate movement or perspective pivoting from the edge of your clip like a door opening.
You can directly manipulate the properties of the Corner Pin effect in the Program monitor by clicking the Transform right next to Corner Pin. To adjust the properties, drag one of the corner handles.
- To use this effect, open Premiere Pro and click File. Choose Import from the drop-down menu. The File Explorer window will open and allow you to find your footage. Select the video file you want to import, then click Open.
- Go to Effects Control and click Distortion. Choose Corner Pin Effect from the drop-down menu.
- You can now pin each corner from its original point to another specific point by adjusting the slider on the Upper Left, Upper Right, Lower Left, and Lower Right. You can also highlight your selection tool when working with the Corner Pin effect.
2. Lens Distortion Effect
This distortion effect Premiere Pro simulates the distorted lens through which people view the clip.
1. Go to Effects Control>Distortion>Lens Distortion Effect.
2. Choose the settings you want to use from the available options and adjust the slider.
- The Vertical and Horizontal Decentering control displaces the lens’ focal and makes the image bend and smear. The image will wrap in on itself at extreme settings.
- The Curvature setting alters the curvature of the lens. You can specify a positive value to make the image convex, while the negative value makes the image concave.
- The Vertical and Horizontal Prism FX setting created results similar to horizontal decentering and vertical, but the image does not wrap in on itself at extreme values.
- Use the Fill Color option to specify the background color, and Fill Alpha to make your background transparent.
3. Magnify Effect
This effect allows you to enlarge a selected area of your clip. The Magnify effect acts as a magnifying glass set over an area of an image. You can also use this effect to scale the whole image far beyond 100 percent and still maintain resolution.
1. To use this effect, go to Effect Control>Distortion>Magnify.
2. Next, go to the left side of the Effects Control panel and make the necessary adjustments to suit your preferences.
- Shape: This control specifies the magnified area shape.
- Center: The Center control allows you to specify the center of the magnified section.
- Magnification: This setting lets users specify the percentage of the magnification of the area they have selected, while the values represent the scale percentage.
- Link: The Link control allows you to specify how the effect will link the Size, Feather, and Magnification amount, to enable them to decrease or increase proportionally. You will disable the Resize Layer option if you set the Link control to any of the available settings except None. Setting the Link control to any setting except None disables Resize Layer. Size & Feather To Magnification allows you to specify that the edge feather and size of the magnified section decrease or increase proportionally regarding the magnification adjustment.
- Size: This control allows you to specify the magnified area size in pixels.
- Feather: With the Feather option, you can specify the amount of feather the effect applies to the magnified area edge. Lower values will sharpen the edge. Higher values will soften the edge while blending the edge with the layer that’s behind it.
- Opacity: This control allows you to specify the transparency of the magnified region.
- Scaling: Use this option to specify the kind of scaling the effect is using to magnify an image.
- Blending Mode: Use this control to specify the blend mode the effect will use to combine the original clip with the magnified area. The None option shows transparent pixels around the magnified section.
- Resize Layer: Selecting this option means the effect will only use the boundaries as the clip’s edge when the magnified region extends beyond the original boundaries of the clip. Deselecting the Resize Layer means that the boundaries of the clip will crop any area of your image outside the bounding box of the original clip.
4. Mirror Effect
This distortion Premiere Pro effect splits an image along a line while reflecting one side onto the other. Where the reflection appears and which side will be reflected is determined by the reflection angles.
1. Head over to Effect Control>Distortion>Mirror to use this effect.
2. Adjust the controls until you get the results you desire.
- Reflection Angle: With the Reflection Angle control, you can specify the angle of reflection and where it appears on the clip. A zero-degree angle reflects the left-hand side on the right.
- Reflection Center: This control allows you to specify the position of the line. You need to click the box, then drag the resulting crosshair up to the area in the image where you would like to place the line.
5. Offset Effect
This effect pans your image within a clip, and visual details pushed off one side of this image will appear on the opposite side. You have to perform the offset with subpixel precision at the best quality.
Also, you can use Offset with a combination of other effects. Head over to Effect Control>Distortion>Offset to use this effect.
6. Spherize Effect
The Spherize effect allows users to wrap a video clip around a spherical shape. You can use it to give texts and objects a three-dimensional effect. Go to Effect Control>Distortion>Spherize and adjust the radius and center of the sphere.
7. Transform Effect
This effect applies 2-dimensional geometric transformations to your clip. You can use this effect to skew clips along any axis.
1. Go to Effect Control>Distortion>Transform to apply this effect to your clip.
2. Use Transform settings to adjust Opacity, Skew, Rotation, Scale, Anchor Point, and more.
8. Turbulent Displace Effect
This fun effect utilizes fractal noise to create turbulent Premiere Pro distortion effects in your image. You can use the Turbulent Displace effect to add movement to your clip.
1. Head to Effect Control>Distortion>Turbulent Displace.
2. Adjust the following controls:
- Displacement
- Amount
- Size
- Offset (Turbulence)
- Complexity
- Evolution
- Pinning
- Resize Layer
- Antialiasing For Best Quality
9. Twirl Effect
The Twirl effect allows you to rotate your clip around its center. It rotates the image more sharply in the middle than at the edge. You can use it on faces to make a funny clip. Navigate to Effect Control>Distortion>Twirl to start using this effect. Next, use the settings to adjust how much angle it twirls and the radius.
10. Wave Warp Effect
This effect is one of the most popular Premiere Pro distortion effects. It generates the appearance of a wave as it’s traveling across an image. The Wave Warp effect allows you to produce various wave shapes, including sine, circular, and square waves.
It’s automatically animated at a steady speed across the time range, and that’s without frames. You need to set keyframes to vary speeds.
1. Head to Effect Control>Distortion>Wave Warp to apply this effect in your video clip.
2. Now, change the wave speed, direction, height, width, and type to suit your preference.
Bonus! Free Distortion Effects for Premiere Pro
1. Liquid Distortion Effect
This effect can distort the content in a clip and can be used to shift into the next clip. It could be utilized in editing or used as a transition.
2. Earthquake Effect
This effect adds a shaking motion to the video clip you add it to; it works as a transition but could also be a useful editing tool.
3. Glass Effect
This effect can add various blurs to the video clip and be used to transition from one clip to the next.
4. TV Effect
This effect imitates the view of a television being turned on or off. You can use it to introduce a new video clip. It would also be a great start or end to the entire video.
5. Glitch Effect
This effect adds a glitch to the video clip. You can use it in editing or as a transition from one clip to the next.
Conclusion
● You can add any of these Premiere Pro distortion effects to make your videos more catchy. In turn, they will get more attention and views. Premiere Pro comes with tons of distortion effects and a responsive interface.
How to Make Simple Slideshow Word
How to Create Simple Slideshow Word
An easy yet powerful editor
Numerous effects to choose from
Detailed tutorials provided by the official channel
Working with the MS Office Suite may often present forward a need to create a slideshow in Word. Stay here to learn about the easiest ways of making slideshow in MS Word.
In this article
01 [Easy Steps to Create Simple Slideshow Word](#Part 1)
02 [Top 5 Microsoft Word Slideshow Maker Alternatives](#Part 2)
03 [FAQs of Creating Simple Slideshow Word](#Part 3)
Part 1 Easy Steps to Create Simple Slideshow Word
Slideshow presentations easily land among the commonest forms of information delivery in the corporate sector and business world. Be it a product promotion, or the upcoming inline company strategy, slideshow presentations address it all in the simplest and the most expressive manner.
When the talk is about creating these graphic snippets in the MS Office Suite, the latter’s PowerPoint application is affordably the first tool that comes into the picture. However, you may well be surprised to know that the MS Word application is no less in addressing the aforesaid concern.
Creating slideshow presentations in Microsoft Word comes handy when there is a need to quickly supplement product documentations with expressive and precise graphical explanations. Adding to the credibility, such presentations are easily converted to PDFs for addressing inline export concerns.
Discussing about the same, let us dive into the stepwise process of working towards making slideshow presentations in the Microsoft Word application in what follows next:
User’s Guide to Create an MS Word Slideshow Presentation
Step 1: Launch the Application
To begin creating a Microsoft Word slideshow, start with navigating to the MS Office package in your preferred device and launching the MS Word application.
Step 2: Select the Outline View
Navigate to and hit the ‘View’ tab at the topmost ribbon to select the ‘Outline’ presentation view.

Step 3: Insert Images and Tables
Within the slide navigation pane that appears at the left in the ‘Outline’ view, select the first slide and begin entering your desired text. If you wish to supplement the text with graphic elements, MS Word allows including pictures, tables, clip arts, equations, and many more objects within the slides.
For instance, you can insert an image or graph in a slide by heading to the ‘Insert’ tab in the ribbon at the top and clicking on the ‘Insert Picture from File’ icon. Following this, you will need to browse for the desired image within your device’s gallery and open the same in the presentation you are working at.
Likewise, if you desire to complement the slideshow title with an apt table, click on the ‘Table’ icon within the ‘Insert’ tab. MS Word offers a range of preset table dimensions along with granting you the liberty to include a customized table dimension of your own.

Step 4: Some More Decoration Ahead!
When creating a professional slideshow presentation to promote your brand and address a series of likewise concerns, the customary inclusion of tables and images does not seem enough. Rest assured, MS Word is here to help you create an elaborative slideshow with its explanatory charts and decorative clip arts. You will easily find all these elements within the ‘Insert’ tab at the top of the working screen.
To add charts and clip arts in your slideshow, head to and hit the ‘Insert’ tab, followed by selecting the ‘Chart’ and ‘Clip Art’ options respectively, from the dropdown menu that appears next.

Step 5: Craft the Successive Presentation Slides
When you are done with creating the title slide of your presentation, proceed with crafting the rest of the presentation in a similar manner. While images and the other elements discussed above are a luxury to any version of the MS Word tool you prefer, adding video elements becomes a limitation for the 2007 and 2010 versions of the application.

If you are working in MS Word versions of 2013 and above, select the ‘Online Video’ option within the ‘Insert’ tab’s dropdown menu. You will henceforth be presented with the ‘Insert Video’ dialog box, where you can choose the most suitable insertion option from the 3 choices available.

Step 6: Exporting the Presentation to PowerPoint
When you are done with everything, navigate to the ‘File’ tab in the topmost ribbon and select ‘Options’ from the drop down menu that follows. The ‘Options’ window pops up, wherein you are required to click on the ‘Quick Access Toolbar’.
Making the aforesaid selection will open the ‘Choose Commands From’ menu, where you will have to select the ‘All Commands’ option. In the list of options that appears next, click on the ‘Send to Microsoft PowerPoint’. Lastly, tap ‘OK’ to confirm your choice. The slideshow presentation that you have just created will now be sent to MS PowerPoint.
Part 2 Top 5 Microsoft Word Slideshow Maker Alternatives
While creating slideshow presentations in the MS Word application is quite handy, you may often land across a need to design presentation pieces with advanced customizations that involve an extra bit of detailing. Speaking in the light of high end professional concerns, the MS Word tool may sometimes fall short of meeting the precise and diverse slideshow creation needs.
In such a case, you can conveniently rely on the hoard of online and software based programs available in the IT market as well as across the web. Moving in the line of addressing the most sophisticated slideshow design concerns, let us look through some of the most feasible alternatives to create professionally sound graphic presentations in the following section:
01Icecream Slideshow Maker
The Icecream slideshow maker easily lands among the most reliable and modernized software alternatives to design slideshow presentations with utmost ease. Talking of program interface and user accessibility, the program conveniently earns appreciable scores. Moving ahead, the latter’s elegant workspace transforms the monotonous slideshow design process into a fun activity that you will love to indulge in.
Throwing light on the app’s creation utilities, you are allowed to supplement your presentations with all the latest audio-visual effects and customizations. You can add images, videos and music to the presentations, while choosing to save them either on your device or export to online storage accounts, like, Dropbox, YouTube and Google Drive, or burn to DVDs. You can either use the software for free or prefer a paid subscription to avail the premium features.

02PhotoStage Slideshow Software
This one is an all-purpose slideshow creator program designed for addressing every creation need ranging from personal, fun-filled entertainment movies to high end professional and business oriented presentations. Talking of customization flexibilities, the software allows you to explore your graphic creativity on the widest canvas with a range of preset templates, audio tracks, transitions, videos, photos and a variety of additional media integrations.
What adds to the usage credibility of this slideshow creator program is the latter’s in-built image editor, which effectively dedicates itself towards adding life to your otherwise customary still captures. You can further, drop all your output quality concerns when working with the aforesaid program as the software has the most expanded range of output features. The software however, comes with a bit outdated interface and is limited to a 30-day free usage.

03Slideshow Maker
The 4K slideshow maker is an affordable freeware utility to create image centered presentations. All you need to do is, upload your selected images in the software’s editing timeline and begin a customization spree with the diversity of available effects, features and tools. To mention a few, you can work with selecting the perfect video quality and aspect ratio for the presentation, or make manual adjustments to transition flow and slide screen timings.
When it comes to adding background audio, you can either select a matching music piece from the software’s preset audio library, or pick one from the media gallery of your device in the WAV, MP3, M4A, OGG and other audio formats. The program caters to generate high quality slideshow output in the FLV, M4V, MP4 and AVI file formats. The software however, works to create slideshows exclusively from JPG images and has a series of features that are seldom used.

04Proshow Gold
Another entry into the list of alternatives to MS Word slideshow maker is the aforesaid software that comes with a free user access. The program allows you to design high end professional presentations with the longest list of customization features and tools. Working with the program, you can include the most cohesive media integrations within your presentations to create a stunning slideshow.
You can choose between adding the images, music and videos either from your device or import them from social media platforms. The software additionally, permits you to work with the most elusive and integrated slideshow themes and a never ending series of royalty-free music. The program further houses an extensive range of automated utilities that are equally appreciated by beginners and experienced users, however for a limited period free trial.

05Kizoa
Last sin the list is the Kizoa slideshow maker program that is highly appreciated for its user cohesive working interface. The software attempts to guide you at every step of the slideshow creation process with on screen pop-ups that contain tips and tricks for a hassle free working experience with the program. Working with the program, you are allowed to use the vast library of categorized premade templates for creating manual masterpieces of slideshow presentations.
Talking of customization features, you can choose to add images to the presentation, both from your device gallery, or through a Facebook import. The program library has a decent set of 48 transition and 58 image effects to amplify the appearance of the added photos. You can work to modify the image size to a screen fit to ward off blank spaces at the sides.
The slides can further be supplemented with premade music, GIFs and customizable text annotations. The software however, demands an account creation to address slideshow export needs to different media sharing platforms, like, Facebook, YouTube, DVD burning, etc.

Part 3 FAQs of Creating Simple Slideshow Word
01What is the 10/20/30 rule of slideshow presentations?
The 10/20/30 rule sets counted limitations on slideshow elements to generate high quality presentation outputs. The rule states that the perfect slideshow presentation consists of a maximum of 10 slides, has a run time of approximately 20 minutes and has minimum font size of 30 points.
02What is the 6 x 6 bullet rule of slideshow presentations?
The 6 x 6 bullet point rule states that you should include a maximum of 6 bullet points within each slide, along with limiting the bullet description to 6 words at the most. Abiding by this rule, your presentations slides will never look cluttered, while you can convey the desired information in a precise manner.
03Why should the presentation slides have a limited amount of text?
Creating a crowded slideshow with a bundled text annotations are a downside to audience interests. Add only essential contents in text, while warding off unnecessary words, lest you may lose the uninterrupted attention of your viewers towards the presentation.
04What is the perfect screen time of each slide within a presentation?
Keeping a slide screen time between 2 to 3 minutes is a smart strategy to captivate viewer attention. To get an appreciable response from the audience, you should aim at coming directly at the point, instead of beating about the bush. In an otherwise case of longer lengths, you may end up distracting your audience.
05What is the affordable word limit of each slide within a presentation?
To ensure a decent and professional look of your slideshow, restrict the latter’s text content to a maximum of 30 words within 6 to 8 lines. Add precise bullet points and avoid including lengthy paragraphs to create an engaging impact on the audience, instead of forcing them to read the presentation content as if it were a news article.
06Creating Microsoft Word Presentations in Wondershare Filmora
Wondershare Filmora Video Editor is a professional standard graphic editor package that caters to the most diverse slideshow creation needs with utmost ease. Regardless of the platform you choose to work with for creating a slideshow presentation, the aforesaid program is ready to supplement your artwork with the best and most advanced editing effects and features. When the talk is about creating and editing slideshows in the MS Office Suite, the software easily claims the title of being the best image slider for Wordpress.
For Win 7 or later (64-bit)
For macOS 10.12 or later
Elaborating a bit on the feature rich library of the software program, you get to access a plethora of audio-visual effects and tools, preset presentation themes and templates, background music tracks, transitions and text styles, etc., that combine together to deliver a jaw dropping presentation output. The software greets you with the most interactive, responsive and clean interface to work with and is available absolutely free of cost.
● Ending Thoughts →
● Creating a slideshow presentation in Microsoft Word is quite easy and involves just a few simple steps to design elementary presentation snippets.
● Browsing through the software market, you will come across a diversity of slideshow creation tools and applications that are feasible alternatives to the MS Word tool.
● When aiming to pick the best slideshow creator program from the hoard of available choices, you can stay with Wondershare Filmora without having to think twice.
Working with the MS Office Suite may often present forward a need to create a slideshow in Word. Stay here to learn about the easiest ways of making slideshow in MS Word.
In this article
01 [Easy Steps to Create Simple Slideshow Word](#Part 1)
02 [Top 5 Microsoft Word Slideshow Maker Alternatives](#Part 2)
03 [FAQs of Creating Simple Slideshow Word](#Part 3)
Part 1 Easy Steps to Create Simple Slideshow Word
Slideshow presentations easily land among the commonest forms of information delivery in the corporate sector and business world. Be it a product promotion, or the upcoming inline company strategy, slideshow presentations address it all in the simplest and the most expressive manner.
When the talk is about creating these graphic snippets in the MS Office Suite, the latter’s PowerPoint application is affordably the first tool that comes into the picture. However, you may well be surprised to know that the MS Word application is no less in addressing the aforesaid concern.
Creating slideshow presentations in Microsoft Word comes handy when there is a need to quickly supplement product documentations with expressive and precise graphical explanations. Adding to the credibility, such presentations are easily converted to PDFs for addressing inline export concerns.
Discussing about the same, let us dive into the stepwise process of working towards making slideshow presentations in the Microsoft Word application in what follows next:
User’s Guide to Create an MS Word Slideshow Presentation
Step 1: Launch the Application
To begin creating a Microsoft Word slideshow, start with navigating to the MS Office package in your preferred device and launching the MS Word application.
Step 2: Select the Outline View
Navigate to and hit the ‘View’ tab at the topmost ribbon to select the ‘Outline’ presentation view.
Step 3: Insert Images and Tables
Within the slide navigation pane that appears at the left in the ‘Outline’ view, select the first slide and begin entering your desired text. If you wish to supplement the text with graphic elements, MS Word allows including pictures, tables, clip arts, equations, and many more objects within the slides.
For instance, you can insert an image or graph in a slide by heading to the ‘Insert’ tab in the ribbon at the top and clicking on the ‘Insert Picture from File’ icon. Following this, you will need to browse for the desired image within your device’s gallery and open the same in the presentation you are working at.
Likewise, if you desire to complement the slideshow title with an apt table, click on the ‘Table’ icon within the ‘Insert’ tab. MS Word offers a range of preset table dimensions along with granting you the liberty to include a customized table dimension of your own.
Step 4: Some More Decoration Ahead!
When creating a professional slideshow presentation to promote your brand and address a series of likewise concerns, the customary inclusion of tables and images does not seem enough. Rest assured, MS Word is here to help you create an elaborative slideshow with its explanatory charts and decorative clip arts. You will easily find all these elements within the ‘Insert’ tab at the top of the working screen.
To add charts and clip arts in your slideshow, head to and hit the ‘Insert’ tab, followed by selecting the ‘Chart’ and ‘Clip Art’ options respectively, from the dropdown menu that appears next.
Step 5: Craft the Successive Presentation Slides
When you are done with creating the title slide of your presentation, proceed with crafting the rest of the presentation in a similar manner. While images and the other elements discussed above are a luxury to any version of the MS Word tool you prefer, adding video elements becomes a limitation for the 2007 and 2010 versions of the application.
If you are working in MS Word versions of 2013 and above, select the ‘Online Video’ option within the ‘Insert’ tab’s dropdown menu. You will henceforth be presented with the ‘Insert Video’ dialog box, where you can choose the most suitable insertion option from the 3 choices available.
Step 6: Exporting the Presentation to PowerPoint
When you are done with everything, navigate to the ‘File’ tab in the topmost ribbon and select ‘Options’ from the drop down menu that follows. The ‘Options’ window pops up, wherein you are required to click on the ‘Quick Access Toolbar’.
Making the aforesaid selection will open the ‘Choose Commands From’ menu, where you will have to select the ‘All Commands’ option. In the list of options that appears next, click on the ‘Send to Microsoft PowerPoint’. Lastly, tap ‘OK’ to confirm your choice. The slideshow presentation that you have just created will now be sent to MS PowerPoint.
Part 2 Top 5 Microsoft Word Slideshow Maker Alternatives
While creating slideshow presentations in the MS Word application is quite handy, you may often land across a need to design presentation pieces with advanced customizations that involve an extra bit of detailing. Speaking in the light of high end professional concerns, the MS Word tool may sometimes fall short of meeting the precise and diverse slideshow creation needs.
In such a case, you can conveniently rely on the hoard of online and software based programs available in the IT market as well as across the web. Moving in the line of addressing the most sophisticated slideshow design concerns, let us look through some of the most feasible alternatives to create professionally sound graphic presentations in the following section:
01Icecream Slideshow Maker
The Icecream slideshow maker easily lands among the most reliable and modernized software alternatives to design slideshow presentations with utmost ease. Talking of program interface and user accessibility, the program conveniently earns appreciable scores. Moving ahead, the latter’s elegant workspace transforms the monotonous slideshow design process into a fun activity that you will love to indulge in.
Throwing light on the app’s creation utilities, you are allowed to supplement your presentations with all the latest audio-visual effects and customizations. You can add images, videos and music to the presentations, while choosing to save them either on your device or export to online storage accounts, like, Dropbox, YouTube and Google Drive, or burn to DVDs. You can either use the software for free or prefer a paid subscription to avail the premium features.
02PhotoStage Slideshow Software
This one is an all-purpose slideshow creator program designed for addressing every creation need ranging from personal, fun-filled entertainment movies to high end professional and business oriented presentations. Talking of customization flexibilities, the software allows you to explore your graphic creativity on the widest canvas with a range of preset templates, audio tracks, transitions, videos, photos and a variety of additional media integrations.
What adds to the usage credibility of this slideshow creator program is the latter’s in-built image editor, which effectively dedicates itself towards adding life to your otherwise customary still captures. You can further, drop all your output quality concerns when working with the aforesaid program as the software has the most expanded range of output features. The software however, comes with a bit outdated interface and is limited to a 30-day free usage.
03Slideshow Maker
The 4K slideshow maker is an affordable freeware utility to create image centered presentations. All you need to do is, upload your selected images in the software’s editing timeline and begin a customization spree with the diversity of available effects, features and tools. To mention a few, you can work with selecting the perfect video quality and aspect ratio for the presentation, or make manual adjustments to transition flow and slide screen timings.
When it comes to adding background audio, you can either select a matching music piece from the software’s preset audio library, or pick one from the media gallery of your device in the WAV, MP3, M4A, OGG and other audio formats. The program caters to generate high quality slideshow output in the FLV, M4V, MP4 and AVI file formats. The software however, works to create slideshows exclusively from JPG images and has a series of features that are seldom used.
04Proshow Gold
Another entry into the list of alternatives to MS Word slideshow maker is the aforesaid software that comes with a free user access. The program allows you to design high end professional presentations with the longest list of customization features and tools. Working with the program, you can include the most cohesive media integrations within your presentations to create a stunning slideshow.
You can choose between adding the images, music and videos either from your device or import them from social media platforms. The software additionally, permits you to work with the most elusive and integrated slideshow themes and a never ending series of royalty-free music. The program further houses an extensive range of automated utilities that are equally appreciated by beginners and experienced users, however for a limited period free trial.
05Kizoa
Last sin the list is the Kizoa slideshow maker program that is highly appreciated for its user cohesive working interface. The software attempts to guide you at every step of the slideshow creation process with on screen pop-ups that contain tips and tricks for a hassle free working experience with the program. Working with the program, you are allowed to use the vast library of categorized premade templates for creating manual masterpieces of slideshow presentations.
Talking of customization features, you can choose to add images to the presentation, both from your device gallery, or through a Facebook import. The program library has a decent set of 48 transition and 58 image effects to amplify the appearance of the added photos. You can work to modify the image size to a screen fit to ward off blank spaces at the sides.
The slides can further be supplemented with premade music, GIFs and customizable text annotations. The software however, demands an account creation to address slideshow export needs to different media sharing platforms, like, Facebook, YouTube, DVD burning, etc.
Part 3 FAQs of Creating Simple Slideshow Word
01What is the 10/20/30 rule of slideshow presentations?
The 10/20/30 rule sets counted limitations on slideshow elements to generate high quality presentation outputs. The rule states that the perfect slideshow presentation consists of a maximum of 10 slides, has a run time of approximately 20 minutes and has minimum font size of 30 points.
02What is the 6 x 6 bullet rule of slideshow presentations?
The 6 x 6 bullet point rule states that you should include a maximum of 6 bullet points within each slide, along with limiting the bullet description to 6 words at the most. Abiding by this rule, your presentations slides will never look cluttered, while you can convey the desired information in a precise manner.
03Why should the presentation slides have a limited amount of text?
Creating a crowded slideshow with a bundled text annotations are a downside to audience interests. Add only essential contents in text, while warding off unnecessary words, lest you may lose the uninterrupted attention of your viewers towards the presentation.
04What is the perfect screen time of each slide within a presentation?
Keeping a slide screen time between 2 to 3 minutes is a smart strategy to captivate viewer attention. To get an appreciable response from the audience, you should aim at coming directly at the point, instead of beating about the bush. In an otherwise case of longer lengths, you may end up distracting your audience.
05What is the affordable word limit of each slide within a presentation?
To ensure a decent and professional look of your slideshow, restrict the latter’s text content to a maximum of 30 words within 6 to 8 lines. Add precise bullet points and avoid including lengthy paragraphs to create an engaging impact on the audience, instead of forcing them to read the presentation content as if it were a news article.
06Creating Microsoft Word Presentations in Wondershare Filmora
Wondershare Filmora Video Editor is a professional standard graphic editor package that caters to the most diverse slideshow creation needs with utmost ease. Regardless of the platform you choose to work with for creating a slideshow presentation, the aforesaid program is ready to supplement your artwork with the best and most advanced editing effects and features. When the talk is about creating and editing slideshows in the MS Office Suite, the software easily claims the title of being the best image slider for Wordpress.
For Win 7 or later (64-bit)
For macOS 10.12 or later
Elaborating a bit on the feature rich library of the software program, you get to access a plethora of audio-visual effects and tools, preset presentation themes and templates, background music tracks, transitions and text styles, etc., that combine together to deliver a jaw dropping presentation output. The software greets you with the most interactive, responsive and clean interface to work with and is available absolutely free of cost.
● Ending Thoughts →
● Creating a slideshow presentation in Microsoft Word is quite easy and involves just a few simple steps to design elementary presentation snippets.
● Browsing through the software market, you will come across a diversity of slideshow creation tools and applications that are feasible alternatives to the MS Word tool.
● When aiming to pick the best slideshow creator program from the hoard of available choices, you can stay with Wondershare Filmora without having to think twice.
Merging Videos Like a Pro: A Step-by-Step Guide to Use FFmpeg
Video editing is a crucial aspect of creating content for many people. Whether you’re a YouTuber, a marketer, or just someone who wants to share videos with friends and family, being able to edit and manipulate your videos is key. One of the most basic video editing tasks is concatenating videos, which combines multiple files to create one cohesive video.
FFmpeg is a powerful tool that allows you to do just that, and in this guide, we’ll walk you through the process of FFmpeg concatenate videos. Whether a beginner or an experienced video editor, this guide will provide you with all the information you need to seamlessly merge your videos. From installation to execution, we’ll cover it all so you can streamline your video editing process.

Overview and Installation of FFmpeg
FFmpeg is free, open-source project that allows you to record, convert, and stream digital audio and video. It is a command-line tool widely used in video editing and transcoding. FFmpeg can be used to concatenate videos and other tasks, such as adding subtitles, changing video resolution, and more. It is available for Windows, Mac, and Linux, making it a versatile and accessible tool for anyone to use.
Here’s how to install FFmpeg:
Step1 Log in to your Ubuntu server via SSH and update the package index.
$ sudo apt update
Step2 Install FFmpeg and all the required dependencies
$ sudo apt install ffmpeg
Step3 Verify the version of FFmpeg that you’ve installed.
$ ffmpeg -version
Prerequisite
Before we merge videos using FFmpeg, we must understand the various methods available to us. FFmpeg offers three ways to concatenate videos: a demuxer, a filter, or a protocol. However, each method has its own set of considerations, and the best method for you will depend on the properties of the videos you’re working with.
It’s crucial to ensure that all encoding-related properties align with your chosen method. This includes the timebase, height and width, codecs, and pixel format. Some methods require the videos you’re merging to have the same encoding, while others allow for different encodings. It’s essential to keep this in mind to ensure that the final video is seamless without any breaks. Remember that these prerequisites will help you have a smooth process.
Concatenate Videos With Same Codecs Using FFmpeg
If the videos you want to concatenate have the same codec, you can use the FFmpeg “concat” demuxer or protocol to join them together. This simple and efficient method doesn’t require re-encoding the videos, saving time and preserving the original quality. This section will review the steps to concatenate videos using the “concat” demuxer and “concat” protocols in FFmpeg.
Merge Videos With the “Concat” Demuxer
The concat demuxer in FFmpeg allows you to join together multiple video files with the same codecs by reading a list of file paths from a text file and demuxing them in sequence. Each video starts where the previous one finishes without needing to re-encode the videos. Here’s how to do it:
Step1 Create a .txt file and list the paths of the video files you want to merge.
Join_video.txt
file /Users/Video/input1.mp4
file /Users/Video/input2.mp4
![]()
Note: You can add more than two video files.
Step2 Run the FFmpeg command:
ffmpeg -f concat -safe 0 -i join_video.txt -c copy output_demuxer.mp4
![]()
Note: -safe 0 is added to accept any file name.
-c copy will copy all the streams.
As this method allows you to “stream copy” the files instead of re-encoding them, the concatenation is very fast. This can be a good option if you have videos with the same codecs and want to join them quickly without losing quality.
Join Videos With the “Concat” Protocol
The concat protocol in FFmpeg allows you to join together multiple video files in a specific format that supports file-level concatenation, such as MPEG-2 TS. However, it cannot be used for other video formats like MP4 and WEBM.
Here’s how to use the “concat protocol:
Step1 Run the FFmpeg command:
ffmpeg -i “concat:input1.ts|input2.ts” -c copy output_protocol.ts
![]()
Note: The concat protocol allows you to “stream copy” the files by adding the option -c copy.
Step2 Input the file name of the video using this code:
ffmpeg -i “concat:input1.mp4|input2.mp4” -c copy output_protocol.mp4
![]()
Note: If you try to use this method on video formats that are not supported, only the first input video will be saved in the output video. And the video ends after the first video.
Although this method is limited in terms of supported video formats, it’s very easy to use if you merge videos in the supported formats. It’s a single command in the terminal without needing a text file. Additionally, using the -c copy option makes it efficient as it doesn’t require re-encoding, saving time.
Concatenate MP4 Video Files of Different Codecs & Resolutions Using FFmpeg
If the videos you want to concatenate have different codecs or resolutions, you can still use FFmpeg to join them together. However, this method requires re-encoding the videos, which can take longer and may result in a loss of quality. This section will cover the steps to concatenate videos with different codecs or resolutions using FFmpeg.
Here’s how to do it:
Step1 Provide the names of the input files to FFmpeg.
ffmpeg -i file1.mp4 -i file2.mp4 -i file3.mp4 \
Step2 Use the filter_complex filtergraph parameter to instruct FFmpeg from where to take the audio and video.
-filter_complex “[0:v] [0:a] [1:v] [1:a] [2:v] [2:a]
![]()
Note: [0:v][0:a] means FFmpeg needs to take the video and audio from the 0th video (file1.mp4).
Step3 Tell FFmpeg to concatenate three files (n=3).
concat=n=3:v=1:a=1 [vv] [aa]“ \
![]()
Note: The v=1:a=1 implies one stream for the audio and one stream for the video.
Step4 Map these audio and video outputs to the final video container. This is done as follows:
-map “[vv]“ -map “[aa]“ mergedVideo.mp4
It is important to note that this method requires re-encoding the videos, which can take more time and may result in a loss of quality. However, it offers the flexibility of filtering the videos before concatenating them. The filter_complex method in FFmpeg allows you to concatenate videos of different codecs and resolutions. The final step is to map the audio and video outputs to the final video container. This can be done using the -map command.
Concatenate Videos With Multiple Audio Streams Using FFmpeg
Concatenating videos with multiple audio streams can be more complex than concatenating videos with a single audio stream. This section will cover the steps to concatenate videos with multiple audio streams using FFmpeg. We’ll be using the filter_complex method in FFmpeg, which allows you to manipulate and concatenate multiple audio and video streams in a single command. This method is more advanced but allows you to join videos with different audio streams and create a final video with multiple audio tracks.
Step1 Specify the input files and opening.mkv, episode.mkv, and ending.mkv:
$ ffmpeg -i opening.mkv -i episode.mkv -i ending.mkv -filter_complex
Step2 Use the filter_complex parameter in FFmpeg to specify the input streams for the video and audio.
[0:0] [0:1] [0:2] [1:0] [1:1] [1:2] [2:0] [2:1] [2:2]
![]()
Note: Single video stream ([0:0], [1:0], [2:0])
Dual audio streams ([0:1][0:2], [1:1][1:2], [2:1][2:2])
Step3 Use the concat filter to specify that you want to concatenate 3 files (n=3) with 1 video stream (v=1) and 2 audio streams (a=2). Specify the output streams as [v], [a1], [a2]:
concat=n=3:v=1:a=2 [v] [a1] [a2]
Step4 Use the -map option to map the output streams to the final video container:
-map ‘[v]‘ -map ‘[a1]‘ -map ‘[a2]‘ output.mkv
[Bonus] Join Videos Together With Filmora
While FFmpeg offers a wide range of options for joining videos together, it can have a steep learning curve for some users. An alternative method for joining videos is using Filmora. Wondershare Filmora is a user-friendly video editing software that allows you to easily join multiple videos. It’s a great option for users new to video editing or needing experience with command-line tools like FFmpeg.
Free Download For Win 7 or later(64-bit)
Free Download For macOS 10.14 or later
Filmora has a simple drag-and-drop interface, making adding, arranging, and editing videos and audio tracks easy. Additionally, it offers various features like split, trim, crop, merge, and more. It also has various effects, transitions, and animations to enhance the overall look of your video. With Filmora, you can create professional-looking videos with minimal effort.
How-to Steps
Here’s how to merge videos using Filmora:
Step1 Open Filmora and click “New Project.”

Step2 Go to “File“ > “Import Media“ > “Import Media Files“ to add your video files to the media library.

Step3 Drag and drop the files you want to merge from the media library to the timeline, and then you’ll get the merged video seamlessly.

Step4 Edit your video.

Step5 After editing, click the “Export“ tab to save your videos.

Conclusion
FFmpeg is a powerful tool that allows you to concatenate videos in various ways. Whether you’re working with videos of the same codecs and resolutions or videos with multiple audio streams, FFmpeg can handle it. However, for users new to video editing or needing experience with command-line tools, using Filmora can be a more user-friendly option. It offers a simple drag-and-drop interface and a variety of features and effects to enhance the overall look of your video.
Step2 Run the FFmpeg command:
ffmpeg -f concat -safe 0 -i join_video.txt -c copy output_demuxer.mp4
![]()
Note: -safe 0 is added to accept any file name.
-c copy will copy all the streams.
As this method allows you to “stream copy” the files instead of re-encoding them, the concatenation is very fast. This can be a good option if you have videos with the same codecs and want to join them quickly without losing quality.
Join Videos With the “Concat” Protocol
The concat protocol in FFmpeg allows you to join together multiple video files in a specific format that supports file-level concatenation, such as MPEG-2 TS. However, it cannot be used for other video formats like MP4 and WEBM.
Here’s how to use the “concat protocol:
Step1 Run the FFmpeg command:
ffmpeg -i “concat:input1.ts|input2.ts” -c copy output_protocol.ts
![]()
Note: The concat protocol allows you to “stream copy” the files by adding the option -c copy.
Step2 Input the file name of the video using this code:
ffmpeg -i “concat:input1.mp4|input2.mp4” -c copy output_protocol.mp4
![]()
Note: If you try to use this method on video formats that are not supported, only the first input video will be saved in the output video. And the video ends after the first video.
Although this method is limited in terms of supported video formats, it’s very easy to use if you merge videos in the supported formats. It’s a single command in the terminal without needing a text file. Additionally, using the -c copy option makes it efficient as it doesn’t require re-encoding, saving time.
Concatenate MP4 Video Files of Different Codecs & Resolutions Using FFmpeg
If the videos you want to concatenate have different codecs or resolutions, you can still use FFmpeg to join them together. However, this method requires re-encoding the videos, which can take longer and may result in a loss of quality. This section will cover the steps to concatenate videos with different codecs or resolutions using FFmpeg.
Here’s how to do it:
Step1 Provide the names of the input files to FFmpeg.
ffmpeg -i file1.mp4 -i file2.mp4 -i file3.mp4 \
Step2 Use the filter_complex filtergraph parameter to instruct FFmpeg from where to take the audio and video.
-filter_complex “[0:v] [0:a] [1:v] [1:a] [2:v] [2:a]
![]()
Note: [0:v][0:a] means FFmpeg needs to take the video and audio from the 0th video (file1.mp4).
Step3 Tell FFmpeg to concatenate three files (n=3).
concat=n=3:v=1:a=1 [vv] [aa]“ \
![]()
Note: The v=1:a=1 implies one stream for the audio and one stream for the video.
Step4 Map these audio and video outputs to the final video container. This is done as follows:
-map “[vv]“ -map “[aa]“ mergedVideo.mp4
It is important to note that this method requires re-encoding the videos, which can take more time and may result in a loss of quality. However, it offers the flexibility of filtering the videos before concatenating them. The filter_complex method in FFmpeg allows you to concatenate videos of different codecs and resolutions. The final step is to map the audio and video outputs to the final video container. This can be done using the -map command.
Concatenate Videos With Multiple Audio Streams Using FFmpeg
Concatenating videos with multiple audio streams can be more complex than concatenating videos with a single audio stream. This section will cover the steps to concatenate videos with multiple audio streams using FFmpeg. We’ll be using the filter_complex method in FFmpeg, which allows you to manipulate and concatenate multiple audio and video streams in a single command. This method is more advanced but allows you to join videos with different audio streams and create a final video with multiple audio tracks.
Step1 Specify the input files and opening.mkv, episode.mkv, and ending.mkv:
$ ffmpeg -i opening.mkv -i episode.mkv -i ending.mkv -filter_complex
Step2 Use the filter_complex parameter in FFmpeg to specify the input streams for the video and audio.
[0:0] [0:1] [0:2] [1:0] [1:1] [1:2] [2:0] [2:1] [2:2]
![]()
Note: Single video stream ([0:0], [1:0], [2:0])
Dual audio streams ([0:1][0:2], [1:1][1:2], [2:1][2:2])
Step3 Use the concat filter to specify that you want to concatenate 3 files (n=3) with 1 video stream (v=1) and 2 audio streams (a=2). Specify the output streams as [v], [a1], [a2]:
concat=n=3:v=1:a=2 [v] [a1] [a2]
Step4 Use the -map option to map the output streams to the final video container:
-map ‘[v]‘ -map ‘[a1]‘ -map ‘[a2]‘ output.mkv
[Bonus] Join Videos Together With Filmora
While FFmpeg offers a wide range of options for joining videos together, it can have a steep learning curve for some users. An alternative method for joining videos is using Filmora. Wondershare Filmora is a user-friendly video editing software that allows you to easily join multiple videos. It’s a great option for users new to video editing or needing experience with command-line tools like FFmpeg.
Free Download For Win 7 or later(64-bit)
Free Download For macOS 10.14 or later
Filmora has a simple drag-and-drop interface, making adding, arranging, and editing videos and audio tracks easy. Additionally, it offers various features like split, trim, crop, merge, and more. It also has various effects, transitions, and animations to enhance the overall look of your video. With Filmora, you can create professional-looking videos with minimal effort.
How-to Steps
Here’s how to merge videos using Filmora:
Step1 Open Filmora and click “New Project.”
Step2 Go to “File“ > “Import Media“ > “Import Media Files“ to add your video files to the media library.
Step3 Drag and drop the files you want to merge from the media library to the timeline, and then you’ll get the merged video seamlessly.
Step4 Edit your video.
Step5 After editing, click the “Export“ tab to save your videos.
Conclusion
FFmpeg is a powerful tool that allows you to concatenate videos in various ways. Whether you’re working with videos of the same codecs and resolutions or videos with multiple audio streams, FFmpeg can handle it. However, for users new to video editing or needing experience with command-line tools, using Filmora can be a more user-friendly option. It offers a simple drag-and-drop interface and a variety of features and effects to enhance the overall look of your video.
Add Text Animation to A Video Online
Do you want to make a creative video? Do you want your presentation or video to be easy to follow and entertaining? You can take the video to another level with the help of text animation. This article will discuss how to add text animation to online videos. You can use a good video editor from where you can select fresh styles and make the best video from there. One of the simplest ways to elevate your movie from good to excellent is with understandable text animation.
Text animation and short captions can broaden the audience for your content as more consumers view videos without sound these days. It matters what fonts you use in the videos, and they establish the mood and facilitate interaction with most viewers who rely on video captions. Add text, alter the font, add transitions, and use text effects to draw the user’s attention as they scroll. Please continue reading to discover how simple it is to make interactive video titles, words, and supers.
1. Use Kapwing animation text editor
(https://www.kapwing.com/animated-text-video-maker )
You can use the potent online editor Kapwing to add animated text to videos online, utilizing music, videos, GIFs, and images. There are no downloads required because everything is already present inside the browser. Kapwing is a capable tool for content production that is simple enough for everyone to use. The majority of video formats, GIF and image, including avi, png, jpg, gif, MOV, mp4, and more, are supported by Kapwing.
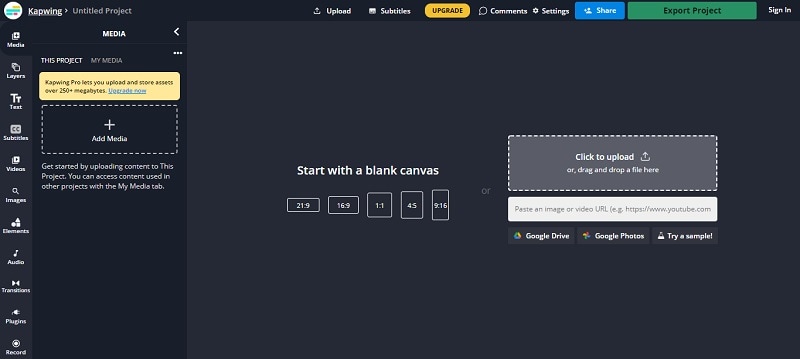
Step1 Upload the Video to Kapwing
You can open Kapwing with the device and tap on “Start Editing” to open up Kapwimg studio. After that, one can use the drag and drop option to upload the video in the studio. You can click on upload or use the link to upload.
If you have a more than 250 MB video, then you will require the Pro version.
Step2 Add the Text
When the video gets uploaded, now you can add your text. You must click the “Text” option on the left and type the text. After that, you can pick your favorite color, background, and color to add style.
You will always want that your text to get animated, but it doesn’t mean that you will have to use explosive fonts or funky or bright, which are very funky. The animation will make your text look attractive, and you can experiment with the colors and fonts to find the best combination.
Step3 Animate the Text
Now the fun part starts; choose the text box present on the right side and click on the “Animate” tab. It will allow the user to select animations like fade, flicker, hue rotates, and many more. Choose the speed according to your requirement, and if you want to change the background and color, you can do it too.
Use “Apply To” for applying this animation in the outro, intro, or both. It will help you to make the text fade out, fade in, or transition out and in with animation. Now the animation library has nine options:
- Drop: It appears on top of the text box
- Flicker: This one is like a candle’s flicker, and text flashes disappear and appear before staying.
- Fade: Opacity can be changed from 0% to 100%.
- Pop:- This grows the text more extensive than the text box and shrinks back to the place.
- Reveal:- Rolls from the left side to the right side
- Wipe:- Rolls from the left side to the right side with a colored background.
- Vibrate: The text box shakes in every direction.
- Hue rotates:- Colour of text cycles through the hue values..
You can use a timeline to adjust the animation’s termination when you set text animation. You can even drag that layer after the start time or use it on end/start time sliders to decrease or increase the time of your video. Text animation can get started when the cursor reaches the start time.
Step4 Export
The video with animated text is now ready to boom. You can click on “Export Video” present at the top and wait for the process. After that, you can download that video and use the links to share it on your social media platform.
2. Use veed.io text video editor
(https://www.veed.io/create/text-video-maker )
Veed is one of the best video editor text effects online, which allows you to add text to online videos. You can easily add style, color, text, and font in a few clicks. You can upload the video and tap the text to get started. Add title and text or select handwriting font. One can select it from templates. Change transparency, alignment, and font size of the text.
This online software is perfect for creating attractive videos on social media. This is free, which omits the usage of expensive software. It is much easier to avoid many complex video editor apps. With the help of VEED, you can create an excellent video without any experience and do it with a few clicks. Let’s see how to add animated text to photos online.
Step1 Upload the video
Tap on “Choose Video” and choose the file you want to upload on VEED. One can even use the drag and drop option from the folder to the editor.
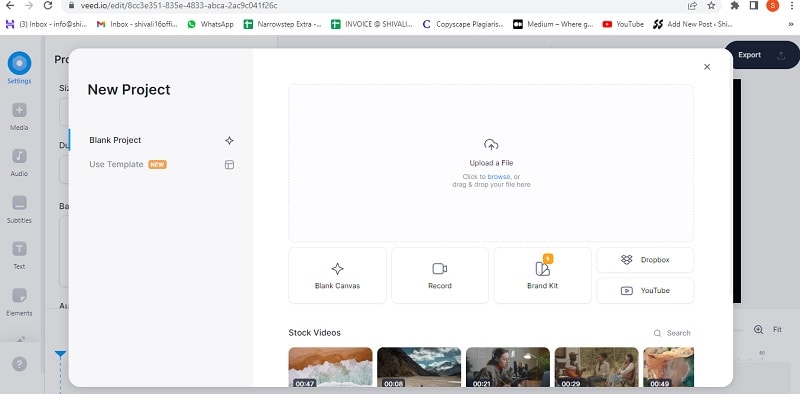
Step2 Add text
After that, you can add the text by tapping on the “Text” option on the left menu. You can select the text style and start typing.
Step3 Export
Save the video with the text you placed by tapping on “Export.” The video gets saved in an MP4 file.
3. Use Animaker text maker
(https://www.animaker.com/text-animation-maker )
The Animaker is one of the best-animated video makers. This app offers the best collection of charts, BGs, and animated characters. With the help of Animaker, you can make the text disappear or appear off-screen in the best way. After you finish your video, you can download the format in MP4.
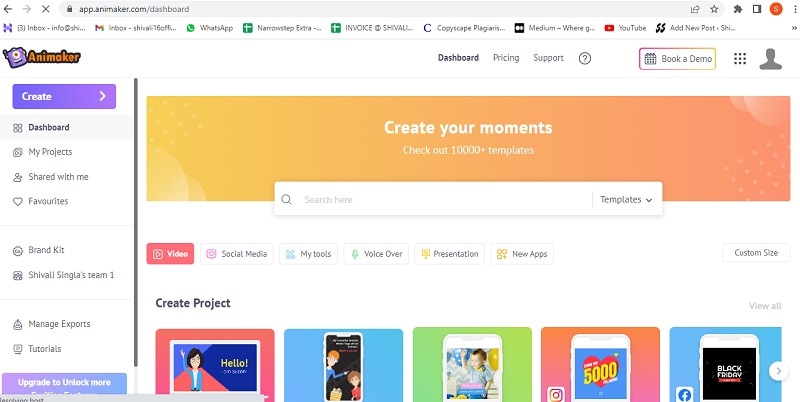
Step1 Upload the video clip
First, you can upload your video clip present on top that you wish to add text animation.
- Tap on the “Upload section” on the bottom left. You can upload your video where you wish to add the animated text.
- The video will get uploaded to “My Files.”
- Click on the uploaded video in the library to load it on the workspace.
Step2 Add text to the video
- You can add text in their text section
- In the next section, one can find two different text types. At the top, you will discover plain text options, and at the bottom, you can find pre-designed boxes seasoned at Animaker.
Let’s see how you can use pre-built text boxes.
- Tap on pre-built designs for your text animation. One can see the text appearing in the center of the workspace, and you can click it and type new text if you want to customize it.
- You can notice widespread options appearing with your text. It is known as the item menu. It will allow the user to modify their text. One can change font size, color, style, etc. Your text will come with pre-defined effects, which will help you to animate text instantly.
- You must have noticed that the purple color bar appears on the timeline, representing the duration of the text visible in the video. For example, if you want that text to get visible between 4rth to 8th seconds, then you will have to drag the edges of that purple bar to the same duration.
To see the scene, you must click on the play button on top of the timeline.
Let’s check the other ways of adding animated text to the video. In the previous one, you have seen how you can add text animation using pre-built boxes. Now you will get to know about doing it by using blank boxes.
- Start tapping the “text section”. Select the bank textbox.
- Click on them and then opt to add new text.
- Opt for clicking the cog icon that is there in the item menu.
- You will notice the settings tab that is on the screen’s right side.
- You can easily opt for the customization of the text in the way you wish. You can start by modifying the style of the font. One can change the size and color of the font as well.
- Use these options and opt for the application of enter and/or exit effects to text. Now, opt to click on the effect option to get more than 50 options. You can select the effect from there.
- Once the animation effect is applied to your timeline, you can notice the pink part in the bar i.e. purple. This completes creating text animation by using Animaker.
Step3 Download the Video
- You can visit the publish option in the right window to download the video.
- Tap on the “download video” option for downloading.
Conclusion
Now, you are aware of how to add text animation to video online and the three best video editors that will help you add animated text to your videos. At this point, you can choose the best one according to your needs and usage. These steps will help you create a unique and good video that will be easy to understand and entertaining.
Free Download For Win 7 or later(64-bit)
Free Download For macOS 10.14 or later
Free Download For macOS 10.14 or later
Also read:
- Updated In 2024, Steps to Rotate Videos in Lightworks
- Updated Attaining Slow Motion Video Trend Finding The Best CapCut Templates for 2024
- Do You Still Waste Time Making Transparent Background in Paint
- Updated Understanding The Best Tools for Changing Sky Background
- Updated Looking for a Way to Learn How to Merge Videos in HandBrake? Theres a Better Solution Waiting for You Inside
- Updated Best Ai Generated Memes for 2024
- How to DIY VHS Overlay in After Effects?
- In 2024, How to Make OBS Slideshow
- Updated 2024 Approved How to Create a Light Sweep (Shine) Effect with Filmora
- 2024 Approved Searching for the Best Video Editor to Make Your Video More Attractive? This Article Introduce You Everything About Choosing a Video Editing Software
- New Top 10 Free Text to Speech Software Windows, Mac,Android, iPhone & O
- Updated In 2024, AVI Editor for Windows 11/10/8.1/8/7 Easily Edit AVI Files on PC
- 2024 Approved Top 5 Online Video Converter for Instagram
- 2024 Approved Basic Introduction of LumaFusion Color Grading
- Easy Steps to Export Video in Filmora for 2024
- New In 2024, How To Add Motion Blur On CapCut? (IPhone & Android)
- In 2024, Detailed Steps to Rotate Videos Using Kdenlive
- Want to Immediately Know All About Discord GIF, In 2024
- Steps to Remove Background Noise From Video Sony Vegas for 2024
- Updated What Is the Best MP4 Cutters for YouTubers on Mac?
- New 2024 Approved Comprehensive Guide to Add LUTs in Premiere Pro with Ease
- New In 2024, A Comprehensive Review of LUTs Finding LUTs Made by Danny Gevirtz
- In 2024, Create Slow Motion Videos Using Final Cut Pro with Ease
- In 2024, 3 Ways To Stream And Record At The Same Time
- 4K Videos Are the in Thing because of Their Flexibility and High Resolution. Stick Around to Learn How to Choose the Best Frame Rate for 4K Videos for 2024
- Guide How To Unbrick a Bricked Oppo Find X6 Phone | Dr.fone
- In 2024, How To Fix Apple ID Verification Code Not Working On iPhone 15 Pro Max
- How To Fix Part of the Touch Screen Not Working on Motorola Edge+ (2023) | Dr.fone
- Easy steps to recover deleted videos from Motorola Moto G14
- Easy Guide to Vivo G2 FRP Bypass With Best Methods
- In 2024, Full Guide to Bypass Motorola G24 Power FRP
- In 2024, How to Mirror Nokia C12 to Mac? | Dr.fone
- In 2024, Best Pokemons for PVP Matches in Pokemon Go For Tecno Spark 20C | Dr.fone
- How To Revive Your Bricked Vivo V27 Pro in Minutes | Dr.fone
- How To Simulate GPS Movement With Location Spoofer On Tecno Spark 10 5G? | Dr.fone
- In 2024, How to Change Lock Screen Wallpaper on Realme 11 5G
- New In 2024, Little Known Techniques of Motion Graphics in Premiere Pro
- How to Bypass iCloud Lock on iPhone 14 Pro
- How to Change/Add Location Filters on Snapchat For your Meizu 21 Pro | Dr.fone
- How To Fix Unresponsive Touch Screen on Oppo A38 | Dr.fone
- List of Pokémon Go Joysticks On Motorola Defy 2 | Dr.fone
- Title: Updated 2024 Approved A Guide to Use Distortion Effect in Premeiere Pro
- Author: Chloe
- Created at : 2024-06-18 14:30:51
- Updated at : 2024-06-19 14:30:51
- Link: https://ai-editing-video.techidaily.com/updated-2024-approved-a-guide-to-use-distortion-effect-in-premeiere-pro/
- License: This work is licensed under CC BY-NC-SA 4.0.
