
:max_bytes(150000):strip_icc():format(webp)/GettyImages-678913139-58a4ece73df78c345bcd781b.jpg)
Updated 2024 Approved Backup and Organize Your Tons of Footage in Minutes
Backup and Organize Your Tons of Footage in Minutes
Backing up your data is deemed significantly necessary among video editing communities. Files get corrupted easily. Having a backup drive can save your day and countless hours. You can back up your data any way you deem fit. However, it will do you right if you follow the advice of professionals.
The article is written explicitly after due consideration and suggestions from the professional video editor. You can follow the steps in it to make backup files. Let us start with very straightforward steps to help you understand the professional way of backing up and organizing your footage.
Part 1. Back Up Your Files
Backing up your files gives you peace of mind. If one file is lost, the whole project becomes vulnerable to failure. Therefore, every effort must be made to ensure the protection of files. The best way to protect the files from any misfortune is to back them up.
Remember, there is no specific way to back up your files. Depending on the project’s requirements, you can do that differently. The following steps will light up how you can back up your files.
Step1Back up your files in two different places
It is crucial to do that. If one backup drive corrupts, you have the second option. It gives you an opportunity to back up files.
- You can make two different external backup hard drives.

- You can also use your internal and external devices as two backup options.

Step2Make specific folders for each purpose of the video
The next step is how you back up your files properly and safely. Make separate folders for the different formats you are importing in your drive. Always use the primary source to make a copy of your files.
Follow the steps below to understand how to back up your files in two drives.
- Create a folder in your drive.
- Name it. You can name it according to the given format. The choice is yours.

- Your backup folder is created.
- Make new folders based on the files that are imported into the file. We are making two folders for the project, 01 Footage, and 02 Audio.
- 01 Footage is for the original footage.
- 02 Audio is for audio files provided by the music artist.

Step3Repeat the same process in your second backup drive
- Make the same folders and sub-folders in your secondary backup drive.

Step4Transfer files to your primary and secondary folders
- Transfer files to folders and sub-folders in your first backup drive.
- Transfer files to folders and sub-folders in your secondary backup drive.
![]()
Note: Most people make the mistake of making a backup drive and then using the same drive to make the second backup. The approach needs to be corrected.
We are done with backing up our files. It is time to organize the files in your drive.
Part 2. Organize Your Files in Filmora
Organizing your files is vital for any operation in video and editing. It makes everything streamlined. The risk of losing your data become negligible. Let us enlighten you on how you can organize your files.
Free Download For Win 7 or later(64-bit)
Free Download For macOS 10.14 or later
Step1Create new folders to lay the foundation for your video editing project
You can imitate the format we have chosen. However, you can choose any way you deem fit.
- Create 02 Project Files and 03 Exports.
- 02 Project contains the files that we will edit in Filmora .
- 03 Exports will have files that will be exported out of Filmora.

- In the 01 Media folder, create a new folder, 03 Graphics. It will contain graphics the artist will provide, such as a logo. You can also add your graphics to the folder if you want.

The format will help you if you move files from one device to the next case. In that case, you will only have to move one folder with the artist’s name.

Step2Create a new project
In this step, we will organize our files in Filmora. It will help us to keep discipline and order in file organization. It makes work easy and fun.
- Create a new project when you open Filmora on your PC or Mac.

- Save the project in any name you want. We have saved the project in the format explained above.
- Save the file in 02 Project Files.

Step3Edit your workspace if you want
Users can edit the workspace in Filmora. You can customize it to your liking. Also, it is entirely optional.
- Go to layout mode. Change the layout if you want.

- You can manually change the panels by simply dragging them across the screen.

The workspace settings will be saved automatically. The next time you start Filmora, you will not need to readjust the panels.
- Save the file
Step4Recreate the file structure in your 02 project files
Now, you create folders in your project. For that, you can follow our structure, or you can follow your instincts.
- Create the folders in Filmora, as you have created them in your drive. The folders will be created in your 02 Project Files.
These new folders are the exact copies of your media files that you have got from the producer and music artist.

- Import the files into respective folders. Footage should include all the original videos given to your producers.

Step5Save the project
You can save the file using the button on Filmora, as shown below.

- You can save the files using short keys.

Conclusion
Making a backup file for your project is crucial. For a video editor, it is quite painful to learn that the final product has a missing file. Therefore, one must ensure that all the files are backed up before beginning the editing phase.
Apart from that, one must also keep updating the files in Filmora . You performed some editing. Make sure to save the file then and there. Any minor mistake can cause great worry for the professional editor. Thus, it is better to take proactive actions.
Free Download For Win 7 or later(64-bit)
Free Download For macOS 10.14 or later
We are done with backing up our files. It is time to organize the files in your drive.
Part 2. Organize Your Files in Filmora
Organizing your files is vital for any operation in video and editing. It makes everything streamlined. The risk of losing your data become negligible. Let us enlighten you on how you can organize your files.
Free Download For Win 7 or later(64-bit)
Free Download For macOS 10.14 or later
Step1Create new folders to lay the foundation for your video editing project
You can imitate the format we have chosen. However, you can choose any way you deem fit.
- Create 02 Project Files and 03 Exports.
- 02 Project contains the files that we will edit in Filmora .
- 03 Exports will have files that will be exported out of Filmora.
- In the 01 Media folder, create a new folder, 03 Graphics. It will contain graphics the artist will provide, such as a logo. You can also add your graphics to the folder if you want.
The format will help you if you move files from one device to the next case. In that case, you will only have to move one folder with the artist’s name.
Step2Create a new project
In this step, we will organize our files in Filmora. It will help us to keep discipline and order in file organization. It makes work easy and fun.
- Create a new project when you open Filmora on your PC or Mac.
- Save the project in any name you want. We have saved the project in the format explained above.
- Save the file in 02 Project Files.
Step3Edit your workspace if you want
Users can edit the workspace in Filmora. You can customize it to your liking. Also, it is entirely optional.
- Go to layout mode. Change the layout if you want.
- You can manually change the panels by simply dragging them across the screen.
The workspace settings will be saved automatically. The next time you start Filmora, you will not need to readjust the panels.
- Save the file
Step4Recreate the file structure in your 02 project files
Now, you create folders in your project. For that, you can follow our structure, or you can follow your instincts.
- Create the folders in Filmora, as you have created them in your drive. The folders will be created in your 02 Project Files.
These new folders are the exact copies of your media files that you have got from the producer and music artist.
- Import the files into respective folders. Footage should include all the original videos given to your producers.
Step5Save the project
You can save the file using the button on Filmora, as shown below.
- You can save the files using short keys.
Conclusion
Making a backup file for your project is crucial. For a video editor, it is quite painful to learn that the final product has a missing file. Therefore, one must ensure that all the files are backed up before beginning the editing phase.
Apart from that, one must also keep updating the files in Filmora . You performed some editing. Make sure to save the file then and there. Any minor mistake can cause great worry for the professional editor. Thus, it is better to take proactive actions.
Free Download For Win 7 or later(64-bit)
Free Download For macOS 10.14 or later
Add Text Animation to A Video Online
Do you want to make a creative video? Do you want your presentation or video to be easy to follow and entertaining? You can take the video to another level with the help of text animation. This article will discuss how to add text animation to online videos. You can use a good video editor from where you can select fresh styles and make the best video from there. One of the simplest ways to elevate your movie from good to excellent is with understandable text animation.
Text animation and short captions can broaden the audience for your content as more consumers view videos without sound these days. It matters what fonts you use in the videos, and they establish the mood and facilitate interaction with most viewers who rely on video captions. Add text, alter the font, add transitions, and use text effects to draw the user’s attention as they scroll. Please continue reading to discover how simple it is to make interactive video titles, words, and supers.
1. Use Kapwing animation text editor
(https://www.kapwing.com/animated-text-video-maker )
You can use the potent online editor Kapwing to add animated text to videos online, utilizing music, videos, GIFs, and images. There are no downloads required because everything is already present inside the browser. Kapwing is a capable tool for content production that is simple enough for everyone to use. The majority of video formats, GIF and image, including avi, png, jpg, gif, MOV, mp4, and more, are supported by Kapwing.
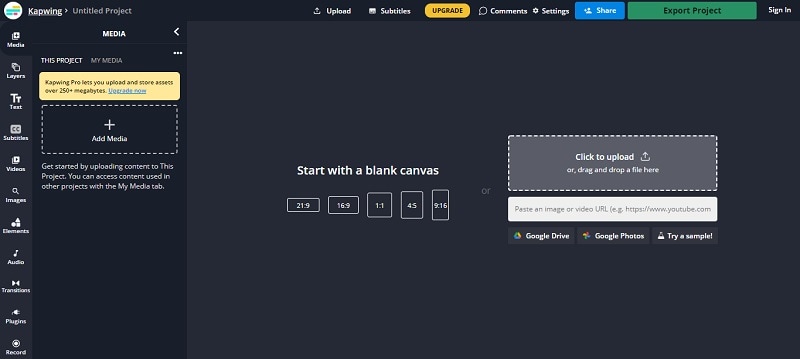
Step1 Upload the Video to Kapwing
You can open Kapwing with the device and tap on “Start Editing” to open up Kapwimg studio. After that, one can use the drag and drop option to upload the video in the studio. You can click on upload or use the link to upload.
If you have a more than 250 MB video, then you will require the Pro version.
Step2 Add the Text
When the video gets uploaded, now you can add your text. You must click the “Text” option on the left and type the text. After that, you can pick your favorite color, background, and color to add style.
You will always want that your text to get animated, but it doesn’t mean that you will have to use explosive fonts or funky or bright, which are very funky. The animation will make your text look attractive, and you can experiment with the colors and fonts to find the best combination.
Step3 Animate the Text
Now the fun part starts; choose the text box present on the right side and click on the “Animate” tab. It will allow the user to select animations like fade, flicker, hue rotates, and many more. Choose the speed according to your requirement, and if you want to change the background and color, you can do it too.
Use “Apply To” for applying this animation in the outro, intro, or both. It will help you to make the text fade out, fade in, or transition out and in with animation. Now the animation library has nine options:
- Drop: It appears on top of the text box
- Flicker: This one is like a candle’s flicker, and text flashes disappear and appear before staying.
- Fade: Opacity can be changed from 0% to 100%.
- Pop:- This grows the text more extensive than the text box and shrinks back to the place.
- Reveal:- Rolls from the left side to the right side
- Wipe:- Rolls from the left side to the right side with a colored background.
- Vibrate: The text box shakes in every direction.
- Hue rotates:- Colour of text cycles through the hue values..
You can use a timeline to adjust the animation’s termination when you set text animation. You can even drag that layer after the start time or use it on end/start time sliders to decrease or increase the time of your video. Text animation can get started when the cursor reaches the start time.
Step4 Export
The video with animated text is now ready to boom. You can click on “Export Video” present at the top and wait for the process. After that, you can download that video and use the links to share it on your social media platform.
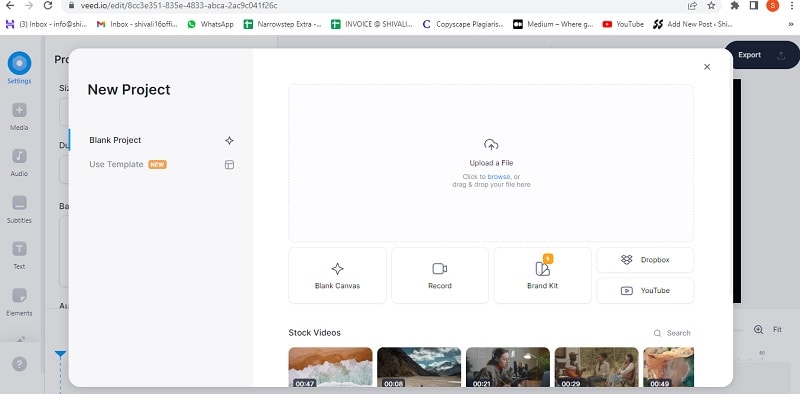
2. Use veed.io text video editor
(https://www.veed.io/create/text-video-maker )
Veed is one of the best video editor text effects online, which allows you to add text to online videos. You can easily add style, color, text, and font in a few clicks. You can upload the video and tap the text to get started. Add title and text or select handwriting font. One can select it from templates. Change transparency, alignment, and font size of the text.
This online software is perfect for creating attractive videos on social media. This is free, which omits the usage of expensive software. It is much easier to avoid many complex video editor apps. With the help of VEED, you can create an excellent video without any experience and do it with a few clicks. Let’s see how to add animated text to photos online.
Step1 Upload the video
Tap on “Choose Video” and choose the file you want to upload on VEED. One can even use the drag and drop option from the folder to the editor.
Step2 Add text
After that, you can add the text by tapping on the “Text” option on the left menu. You can select the text style and start typing.
Step3 Export
Save the video with the text you placed by tapping on “Export.” The video gets saved in an MP4 file.
3. Use Animaker text maker
(https://www.animaker.com/text-animation-maker )
The Animaker is one of the best-animated video makers. This app offers the best collection of charts, BGs, and animated characters. With the help of Animaker, you can make the text disappear or appear off-screen in the best way. After you finish your video, you can download the format in MP4.
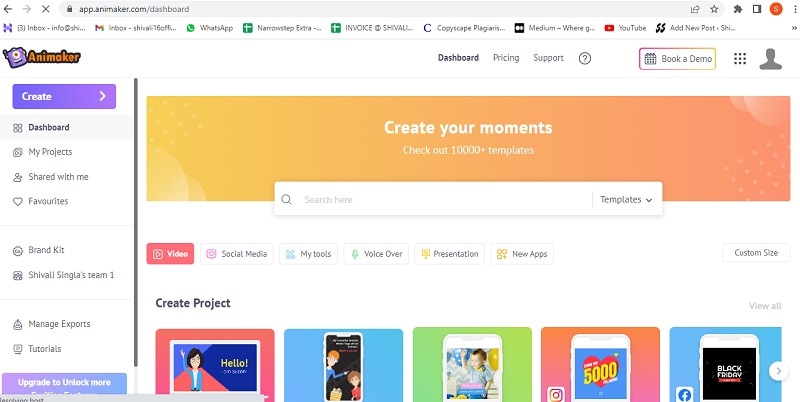
Step1 Upload the video clip
First, you can upload your video clip present on top that you wish to add text animation.
- Tap on the “Upload section” on the bottom left. You can upload your video where you wish to add the animated text.
- The video will get uploaded to “My Files.”
- Click on the uploaded video in the library to load it on the workspace.
Step2 Add text to the video
- You can add text in their text section
- In the next section, one can find two different text types. At the top, you will discover plain text options, and at the bottom, you can find pre-designed boxes seasoned at Animaker.
Let’s see how you can use pre-built text boxes.
- Tap on pre-built designs for your text animation. One can see the text appearing in the center of the workspace, and you can click it and type new text if you want to customize it.
- You can notice widespread options appearing with your text. It is known as the item menu. It will allow the user to modify their text. One can change font size, color, style, etc. Your text will come with pre-defined effects, which will help you to animate text instantly.
- You must have noticed that the purple color bar appears on the timeline, representing the duration of the text visible in the video. For example, if you want that text to get visible between 4rth to 8th seconds, then you will have to drag the edges of that purple bar to the same duration.
To see the scene, you must click on the play button on top of the timeline.
Let’s check the other ways of adding animated text to the video. In the previous one, you have seen how you can add text animation using pre-built boxes. Now you will get to know about doing it by using blank boxes.
- Start tapping the “text section”. Select the bank textbox.
- Click on them and then opt to add new text.
- Opt for clicking the cog icon that is there in the item menu.
- You will notice the settings tab that is on the screen’s right side.
- You can easily opt for the customization of the text in the way you wish. You can start by modifying the style of the font. One can change the size and color of the font as well.
- Use these options and opt for the application of enter and/or exit effects to text. Now, opt to click on the effect option to get more than 50 options. You can select the effect from there.
- Once the animation effect is applied to your timeline, you can notice the pink part in the bar i.e. purple. This completes creating text animation by using Animaker.
Step3 Download the Video
- You can visit the publish option in the right window to download the video.
- Tap on the “download video” option for downloading.
Conclusion
Now, you are aware of how to add text animation to video online and the three best video editors that will help you add animated text to your videos. At this point, you can choose the best one according to your needs and usage. These steps will help you create a unique and good video that will be easy to understand and entertaining.
Free Download For Win 7 or later(64-bit)
Free Download For macOS 10.14 or later
Free Download For macOS 10.14 or later
Easy Steps to Make Glitch Effect with Filmora
You don’t need outdated VCRs or any other broken technology to produce glitch effects. Instead, you can use a video editing program for Mac and PCs, such as Filmora , to transform your videos into glitch-effect masterpieces. You can also use the glitch effects to provide striking shot transitions or opening titles. Keep reading this article on how to apply various glitch video effects in Filmora 11:
Part 1: What is a Glitch Effect?
A glitch effect occurs when a section of your video temporarily changes look or “glitches” for a short while. Although transient glitches are typical, they can occasionally linger for a few seconds or more.

You can use a glitch effect to temporarily change the appearance of the image in the video to give the impression that a machine is processing it. Additionally, it gives your finished piece a fantastic, dreamlike aspect.
Part 2: When Should you Apply a Glitch Effect?
A few years back, we had no choice but to watch glitchy movies on rusty VCR devices. Nowadays, retro video effects are very popular in TV movies and even games. You can use these effects in many ways, like making fake vintage footage or emulating a glitching computer.
Filmmakers frequently employ glitching in their videos to give the impression that a character has been affected by a technical abnormality, is having a flashback, or is being watched by someone else via a digital camera system. Something happens when the person or image flashes, often without their knowledge. In addition, you can apply the glitch effect to a composition to evoke a feeling of dramatic irony.
Part 3: Tutorial to Chromatic Aberration Effect
Chromatic aberration refers to how old lenses tend to split colors. This effect is very common in Old media like VHS or LaserDisc.

Here is a complete breakdown of each component of the Retro look and how you can make your glitch effects in Filmora 11:
Step1 Download Wondersshare Filmora 11 on your Pc by visiting filmora.wondershare.com.

Step2 Open Filmora and click on the Effects tab.
Step3 Search Chromatic aberration and drag the effect right onto your clip. It will give you a fantastic pre-made version of the effect.
Part 4: How to Customize Glitch Effect with Filmora
You can add final touches to your video clips by customizing Filmora’s effects to take your glitch effect to the next level. You can mix and match different effects in your video to create your custom glitch effect in Filmora 11.
Free Download For Win 7 or later(64-bit)
Free Download For macOS 10.14 or later
Step1 Once you have your clip on the timeline, select your clip and click on Edit. Now choose Duplicate to create two more copies.

Step2 Put the new copies on the layer above the others and make sure everything is lined up exactly. To create the glitch effect, separate the color channels on your Clips into the primary colors red, green, and blue.

Step3 Double-click on the top clip.

Go to Color and open the White Balance option to make this layer completely red. Next, drag both Temperature and Tint sliders to a hundred.

Step4 Now click the little eye icon on the timeline to hide the top layer and move on to the middle layer.
Step5 Double-click on your middle clip and go to Color, then select White Balance and set your Temperature to -100 and your Tint to 100.

Step6 Finally, hide this layer just like before. Repeat the same steps for the last clip but make this clip the blue layer by leaving the Temperature at zero and setting the Tint to -100.

Step7 Double-click the clip in the top layer, click the Video Tab, and open the Compositing options. Set the Blending Mode of this top layer to Soft Light.

Now click on the clip in your preview window and move the image over by pressing the left Arrow key on your keyboard a few times. Once you’re happy with the top clip, hide that layer by clicking the eye icon.

Step8 To make the middle layer visible, double-click the clip in your mid layer and set the Blending Mode of this layer to Screen.

Now click on your clip in the preview window and press the Right key as many times as you did before. Finally, make all the layers visible by clicking the eye icon.

Vignette
A vignette is a dark border that fades around the frame’s edges in Filmora. You can easily add a vignette effect to your video by using these steps:
Step1 First, click the Effects Tab and type in Vignette.
Step2 Next, drag the Vignette Radius effect to a layer above your previous three layers.
Step3 Now adjust the length to match the other clips.
VHS static effects
A VHS effect is a grainy distortion that resembles an old analog video cassette recording. To apply the VHS static effects:
Step1 Click the Effects tab.
Step2 Search for the VHS static and drag it to a new layer above everything else.
Step3 Extend one of the effects to match the length of your previous clips.
VCR Distortion
VCR Distortion effect will make your video look highly glitched. To apply this effect:
Step1 Click on the Effects tab.
Step2 Search for VCR Distortion, then drag and drop this effect over your previous layer.
Part 5: Tips to Create Awesome Glitch Effects
- One of the best ways to use the VCR Distortion effect is to cut it short and intersperse it around your video in random parts.
- The glitch Distortion effect is very intense, so we recommend cutting this effect very short and dropping it at random parts of your video.
- You can also use these effects as a sneaky way to hide Cuts in your video.
Summary
You can use glitch effects created or inspired by faulty video equipment as a powerful storytelling tool. These effects can help you change the tone of the entire video by adding a specific visual aesthetic and making the narrative simpler to convey and more approachable for the audience.
We recommend using Filmora 11 for adding built-in glitch effects. You can also use this app to create custom glitch effects within a few minutes.
Free Download For macOS 10.14 or later
Step1 Once you have your clip on the timeline, select your clip and click on Edit. Now choose Duplicate to create two more copies.
Step2 Put the new copies on the layer above the others and make sure everything is lined up exactly. To create the glitch effect, separate the color channels on your Clips into the primary colors red, green, and blue.
Step3 Double-click on the top clip.
Go to Color and open the White Balance option to make this layer completely red. Next, drag both Temperature and Tint sliders to a hundred.
Step4 Now click the little eye icon on the timeline to hide the top layer and move on to the middle layer.
Step5 Double-click on your middle clip and go to Color, then select White Balance and set your Temperature to -100 and your Tint to 100.
Step6 Finally, hide this layer just like before. Repeat the same steps for the last clip but make this clip the blue layer by leaving the Temperature at zero and setting the Tint to -100.
Step7 Double-click the clip in the top layer, click the Video Tab, and open the Compositing options. Set the Blending Mode of this top layer to Soft Light.
Now click on the clip in your preview window and move the image over by pressing the left Arrow key on your keyboard a few times. Once you’re happy with the top clip, hide that layer by clicking the eye icon.
Step8 To make the middle layer visible, double-click the clip in your mid layer and set the Blending Mode of this layer to Screen.
Now click on your clip in the preview window and press the Right key as many times as you did before. Finally, make all the layers visible by clicking the eye icon.
Vignette
A vignette is a dark border that fades around the frame’s edges in Filmora. You can easily add a vignette effect to your video by using these steps:
Step1 First, click the Effects Tab and type in Vignette.
Step2 Next, drag the Vignette Radius effect to a layer above your previous three layers.
Step3 Now adjust the length to match the other clips.
VHS static effects
A VHS effect is a grainy distortion that resembles an old analog video cassette recording. To apply the VHS static effects:
Step1 Click the Effects tab.
Step2 Search for the VHS static and drag it to a new layer above everything else.
Step3 Extend one of the effects to match the length of your previous clips.
VCR Distortion
VCR Distortion effect will make your video look highly glitched. To apply this effect:
Step1 Click on the Effects tab.
Step2 Search for VCR Distortion, then drag and drop this effect over your previous layer.
Part 5: Tips to Create Awesome Glitch Effects
- One of the best ways to use the VCR Distortion effect is to cut it short and intersperse it around your video in random parts.
- The glitch Distortion effect is very intense, so we recommend cutting this effect very short and dropping it at random parts of your video.
- You can also use these effects as a sneaky way to hide Cuts in your video.
Summary
You can use glitch effects created or inspired by faulty video equipment as a powerful storytelling tool. These effects can help you change the tone of the entire video by adding a specific visual aesthetic and making the narrative simpler to convey and more approachable for the audience.
We recommend using Filmora 11 for adding built-in glitch effects. You can also use this app to create custom glitch effects within a few minutes.
Basic Introduction for LumaFusion Color Grading
Create High-Quality Video - Wondershare Filmora
An easy and powerful YouTube video editor
Numerous video and audio effects to choose from
Detailed tutorials provided by the official channel
There are many reasons why video editing is essential for content creators. Regardless of your reasons for putting up video content, you’ll achieve little progress without manipulating and structuring your shots. Video editing is what helps to create an emotional connection to your content. That, in turn, is what spurs your viewers to take the action you desire.
Maybe you already know a thing or two about video editing? Good for you! However, there’s always more to learn. For example, only a few people understand the intricacies of luma fusion color grading. Meanwhile, that’s one of the significant differentiating factors between a regular video editor and a pro.
Are you tired of video editing at a basic level? Then this article is for you. It will introduce you to the basics of LumaFusion color grading. Are you ready?
In this article
02 Essential Things You Should Know About Color Grading in LumaFusion
03 Does LumaFusion Have a Desktop Version?
What Is LumaFusion?
Are you a filmmaker, video producer, or editor? Then you’ll need LumaFusion at some point in your editing journey. Whether you are a professional or not, you can use LumaFusion to tell exciting stories through your videos. It has numerous essential features to produce the precise effects you wish to achieve. What’s more, you can use this effective multitrack video editor on iPads and iPhones.
One thing you will love about LumaFusion is its user-friendliness. Even as an aspiring videographer with little experience, you can understand how to use this video editing powerhouse in an instant and with minimal supervision.

LumaFusion is affordable, especially non-linear editors (NLEs) with similar details. When it comes to robust features, LumaFusion retakes the spotlight. This video editor will become your favorite tool in no time.
Here are some exciting things you can do using LumaFusion:
● Enjoy a Simplified SSD and Cloud Storage Importing Process
One of the best things about LumaFusion is your ability to import from SSD and cloud storage seamlessly. If you’re using an external SSD for playback media, this feature will excite you. LumaFusion automatically imports media from your SSD whenever you add video clips to the timeline. There’s no need to waste time importing media by yourself.
● Switch Between Six Workspace Layouts
LumaFusion features six workspace layouts. So you can choose whatever one works best for the project you are working on. With the layout button, you can scramble the source viewer, browser, and timeline to your preference. LumaFusion also gives you the option of viewing the content in portrait or landscape modes. It’s a truly customizable and advanced multitrack video editing app for everyone who loves ease.
● Access Seamless Final Cut Pro Exporting
Do you work with Final Cut Pro X? Then there’s exciting news for you. Lumafusion allows you to export specific project files so that you can work on the NLE. Even though this feature is only available for a fee, it offers excellent value for its $20 price. You can hardly have it cheaper with other NLEs.
● Leverage Its Intuitive UI/UX
This is no hoax—LumaFusion’s intuitive design will blow your mind. If you’ve got prior knowledge or experience using other editing platforms (especially NLEs), you find LumaFusion easy to use. If not, their comprehensive reference guide can help you get acquainted with the app quickly. LumaFusion’s design gives you absolute control.
● Explore Flexibility and Amazing Effects
LumaFusion has numerous fantastic effects to appreciate. These features offer you top-notch flexibility and functionality. The clip editor’s preview window comprises four different editors—the frame and fit editor, audio editors, speed editors, and the color and effects editor. From the timeline navigator to the audio mixer and clip editor, there’s a lot to explore on LumaFusion.
● Enjoy the Automated Audio Ducking Feature
Audio ducking involves temporarily lowering a specified audio signal’s volume when another one comes up. Having to do this manually can be tiring. Fortunately, with LumaFusion’s automatic audio ducking feature, you don’t have to worry about that anymore. All you need to do is assign speakers and music tracks as master and auto track. The audio ducking feature takes it up from there.

● Easy and Direct Exportation to Youtube and Vimeo
LumaFusion comes with an option that allows you to export your edited videos directly to YouTube or Vimeo. When exporting directly to YouTube, the app will enable you to write titles and descriptions or set categories and tags. If you choose to upload your videos to YouTube directly, you can transfer it to your file folder first.
Essential Things You Should Know About Color Grading in LumaFusion
Color grading is an essential post-production process that gives your footage’s color scheme a distinctive appearance and character. This technique gives your videos some cinematic impression by painting over them.
With color grading, you can adjust your video’s color balance, saturation, contrast, luminance, black level, etc. It helps to evoke the particular emotions or moods that you want your videos to exude.
These are the essential things to note about color grading in LumaFusion:
1. Does LumaFusion Have Color Grading?
In answering this question, it’s essential to understand the difference between color correction and color grading. Both editing techniques have vital differentiating characteristics, so it’s wrong to use them interchangeably.
Color correction ensures that videos look as natural to the human eye as possible. If there’s a technical color error, for example, due to bad lighting, color correction helps fix that.
However, the aim of color grading isn’t fixing color mistakes but using colors to convey a mood, atmosphere, or style. Some videographers classify color correction as the first phase in the color grading process.
Generally, you can use LumaFusion to color correct your footage. However, you can’t color grade with the app except you decide to tamper with the color presets tab’s color sliders. Even at that, you wouldn’t get the perfect results you want.
Fortunately, LumaFusion allows you to import and apply LUT (look-up tables). With LumaFusion LUTs, you can color grade your footage to your satisfaction.
2. How To Color Grade in LumaFusion
This is how to color grade your videos:
○ First, Color Correct
When attempting to color grade your footage, it’s essential that you color correct it first. Color correction ensures that your video doesn’t remain flat or unexciting.
○ Create Your LUTs
LUT allows you to save specific color grades to use anytime you need them. This helps to save time by ensuring that you don’t develop color spaces all over again when working on various footage. You can also download as many free LUTs as you like.
○ Bring In a LUT
After creating LUTs, import and apply them to your LumaFusion. Next, blend or adjust your LUt by shifting the slider to get your desired effects. It’s that simple!
3. Can I Use Multiple LUTs in LumaFusion?
The short answer is a big YES. You can apply multiple LUTs in LumaFusion.
Here’s how t go o about it:
- Apply your first LUT
- Export the LUT
- Access rendered movies
- Apply the second LUT
There is numerous manipulation you can do with LUT. For example, you can merge two or more LUTs into one.
Does LumaFusion Have a Desktop Version?
Do you own a PC or desktop[, and you’re wondering how to access LumaFusion’s unique features on it? Unfortunately, LumaFusion is only available for iOS users and not Android or Windows PC.
However, all hope is not lost as Filmora has come to the rescue. Filmora’s video editor provides you with color matching/grading options to create the cinematic effects you want for your footage. You can use the features on your computer.
Let’s talk about Filmora’s Video Editor for Windows features in some detail:
For Win 7 or later (64-bit)
For macOS 10.12 or later
● Color Match
Do you want to achieve a similar color or consistent look for multiple clips? Then Filmora’s video editor is your best bet. The color match feature ensures color consistency throughout your video. It’s easy to use, aids efficiency, and saves your time.
● Color Correction
Color correction is one of the easiest ways to make your footage look extraordinary. With over 40 fantastic drag-and-color presets available to you, your color correction game is about to get lit. Filmora’s color correction feature also allows you to make 3D LUTs conveniently.
Filmora offers free online tools for videographers and unique products for computer software and mobile apps. You can check here to get more information about the Lumafusion alternatives on Mac .
Conclusion
● What’s worth doing is worth doing well? That’s why, as a videographer, you shouldn’t be comfortable with uploading flat, ordinary videos. It’ll help if you take your craft a notch higher by considering color grading for your footage.
● Did you fall in love with LumaFusion’s video editing app? That’s great. With your iPhone or iPad, you can get the best out of the video editor.
● Filmora offers you cool video editing features for color correcting and grading if you’re working on a desktop. There are also amazing Filmora apps for iOS and Android devices. Visit their website for more information on how these video editing features can improve your project’s quality.
There are many reasons why video editing is essential for content creators. Regardless of your reasons for putting up video content, you’ll achieve little progress without manipulating and structuring your shots. Video editing is what helps to create an emotional connection to your content. That, in turn, is what spurs your viewers to take the action you desire.
Maybe you already know a thing or two about video editing? Good for you! However, there’s always more to learn. For example, only a few people understand the intricacies of luma fusion color grading. Meanwhile, that’s one of the significant differentiating factors between a regular video editor and a pro.
Are you tired of video editing at a basic level? Then this article is for you. It will introduce you to the basics of LumaFusion color grading. Are you ready?
In this article
02 Essential Things You Should Know About Color Grading in LumaFusion
03 Does LumaFusion Have a Desktop Version?
What Is LumaFusion?
Are you a filmmaker, video producer, or editor? Then you’ll need LumaFusion at some point in your editing journey. Whether you are a professional or not, you can use LumaFusion to tell exciting stories through your videos. It has numerous essential features to produce the precise effects you wish to achieve. What’s more, you can use this effective multitrack video editor on iPads and iPhones.
One thing you will love about LumaFusion is its user-friendliness. Even as an aspiring videographer with little experience, you can understand how to use this video editing powerhouse in an instant and with minimal supervision.
LumaFusion is affordable, especially non-linear editors (NLEs) with similar details. When it comes to robust features, LumaFusion retakes the spotlight. This video editor will become your favorite tool in no time.
Here are some exciting things you can do using LumaFusion:
● Enjoy a Simplified SSD and Cloud Storage Importing Process
One of the best things about LumaFusion is your ability to import from SSD and cloud storage seamlessly. If you’re using an external SSD for playback media, this feature will excite you. LumaFusion automatically imports media from your SSD whenever you add video clips to the timeline. There’s no need to waste time importing media by yourself.
● Switch Between Six Workspace Layouts
LumaFusion features six workspace layouts. So you can choose whatever one works best for the project you are working on. With the layout button, you can scramble the source viewer, browser, and timeline to your preference. LumaFusion also gives you the option of viewing the content in portrait or landscape modes. It’s a truly customizable and advanced multitrack video editing app for everyone who loves ease.
● Access Seamless Final Cut Pro Exporting
Do you work with Final Cut Pro X? Then there’s exciting news for you. Lumafusion allows you to export specific project files so that you can work on the NLE. Even though this feature is only available for a fee, it offers excellent value for its $20 price. You can hardly have it cheaper with other NLEs.
● Leverage Its Intuitive UI/UX
This is no hoax—LumaFusion’s intuitive design will blow your mind. If you’ve got prior knowledge or experience using other editing platforms (especially NLEs), you find LumaFusion easy to use. If not, their comprehensive reference guide can help you get acquainted with the app quickly. LumaFusion’s design gives you absolute control.
● Explore Flexibility and Amazing Effects
LumaFusion has numerous fantastic effects to appreciate. These features offer you top-notch flexibility and functionality. The clip editor’s preview window comprises four different editors—the frame and fit editor, audio editors, speed editors, and the color and effects editor. From the timeline navigator to the audio mixer and clip editor, there’s a lot to explore on LumaFusion.
● Enjoy the Automated Audio Ducking Feature
Audio ducking involves temporarily lowering a specified audio signal’s volume when another one comes up. Having to do this manually can be tiring. Fortunately, with LumaFusion’s automatic audio ducking feature, you don’t have to worry about that anymore. All you need to do is assign speakers and music tracks as master and auto track. The audio ducking feature takes it up from there.
● Easy and Direct Exportation to Youtube and Vimeo
LumaFusion comes with an option that allows you to export your edited videos directly to YouTube or Vimeo. When exporting directly to YouTube, the app will enable you to write titles and descriptions or set categories and tags. If you choose to upload your videos to YouTube directly, you can transfer it to your file folder first.
Essential Things You Should Know About Color Grading in LumaFusion
Color grading is an essential post-production process that gives your footage’s color scheme a distinctive appearance and character. This technique gives your videos some cinematic impression by painting over them.
With color grading, you can adjust your video’s color balance, saturation, contrast, luminance, black level, etc. It helps to evoke the particular emotions or moods that you want your videos to exude.
These are the essential things to note about color grading in LumaFusion:
1. Does LumaFusion Have Color Grading?
In answering this question, it’s essential to understand the difference between color correction and color grading. Both editing techniques have vital differentiating characteristics, so it’s wrong to use them interchangeably.
Color correction ensures that videos look as natural to the human eye as possible. If there’s a technical color error, for example, due to bad lighting, color correction helps fix that.
However, the aim of color grading isn’t fixing color mistakes but using colors to convey a mood, atmosphere, or style. Some videographers classify color correction as the first phase in the color grading process.
Generally, you can use LumaFusion to color correct your footage. However, you can’t color grade with the app except you decide to tamper with the color presets tab’s color sliders. Even at that, you wouldn’t get the perfect results you want.
Fortunately, LumaFusion allows you to import and apply LUT (look-up tables). With LumaFusion LUTs, you can color grade your footage to your satisfaction.
2. How To Color Grade in LumaFusion
This is how to color grade your videos:
○ First, Color Correct
When attempting to color grade your footage, it’s essential that you color correct it first. Color correction ensures that your video doesn’t remain flat or unexciting.
○ Create Your LUTs
LUT allows you to save specific color grades to use anytime you need them. This helps to save time by ensuring that you don’t develop color spaces all over again when working on various footage. You can also download as many free LUTs as you like.
○ Bring In a LUT
After creating LUTs, import and apply them to your LumaFusion. Next, blend or adjust your LUt by shifting the slider to get your desired effects. It’s that simple!
3. Can I Use Multiple LUTs in LumaFusion?
The short answer is a big YES. You can apply multiple LUTs in LumaFusion.
Here’s how t go o about it:
- Apply your first LUT
- Export the LUT
- Access rendered movies
- Apply the second LUT
There is numerous manipulation you can do with LUT. For example, you can merge two or more LUTs into one.
Does LumaFusion Have a Desktop Version?
Do you own a PC or desktop[, and you’re wondering how to access LumaFusion’s unique features on it? Unfortunately, LumaFusion is only available for iOS users and not Android or Windows PC.
However, all hope is not lost as Filmora has come to the rescue. Filmora’s video editor provides you with color matching/grading options to create the cinematic effects you want for your footage. You can use the features on your computer.
Let’s talk about Filmora’s Video Editor for Windows features in some detail:
For Win 7 or later (64-bit)
For macOS 10.12 or later
● Color Match
Do you want to achieve a similar color or consistent look for multiple clips? Then Filmora’s video editor is your best bet. The color match feature ensures color consistency throughout your video. It’s easy to use, aids efficiency, and saves your time.
● Color Correction
Color correction is one of the easiest ways to make your footage look extraordinary. With over 40 fantastic drag-and-color presets available to you, your color correction game is about to get lit. Filmora’s color correction feature also allows you to make 3D LUTs conveniently.
Filmora offers free online tools for videographers and unique products for computer software and mobile apps. You can check here to get more information about the Lumafusion alternatives on Mac .
Conclusion
● What’s worth doing is worth doing well? That’s why, as a videographer, you shouldn’t be comfortable with uploading flat, ordinary videos. It’ll help if you take your craft a notch higher by considering color grading for your footage.
● Did you fall in love with LumaFusion’s video editing app? That’s great. With your iPhone or iPad, you can get the best out of the video editor.
● Filmora offers you cool video editing features for color correcting and grading if you’re working on a desktop. There are also amazing Filmora apps for iOS and Android devices. Visit their website for more information on how these video editing features can improve your project’s quality.
Also read:
- 2024 Approved Convert Your Videos to 60 FPS Using These Excellent Tools
- Updated 2024 Approved How to Create One Click Video Reverse Effect in Filmora
- In 2024, Looking for a Free Video Editor to Edit Videos on Mac? IMovie by Apple Is a Great Choice? But Is It the Best Video Editor or Is There a Better Alternative Available? Check Out Our iMovie Review
- Updated How Important It Is to Perform Color Correction to Your Video? Here Is a Solution with After Effects Color Correction with Illustrative Videos
- 8 Best Free Title Maker You Must Try and Put to Use
- New How to Create Sports Intro and Outro for YouTube Video, In 2024
- Discover How You Can Use Vectorscope to Adjust Luminance, Color Grading, and More in Your Video Editing Projects
- New Best 5 Solutions on How to Add Emojis to iPhone
- New In 2024, Voice Changer for Discord | Use Voicemod on Discord
- How Can You DIY VHS Overlay in After Effects for 2024
- Steps to Denoise in Final Cut Pro – Reduce Video and Audio Noise
- Updated How To Make a Video by Mouse in Filmora, In 2024
- Do You Want to Watch Videos in QuickTime with Subtitles in Your Desired Language? Here Are Different Ways to Add Subtitles in QuickTime Player
- Updated How To Change Speed of Video in Final Cut Pro for 2024
- How to Create Glowing Edge Effect in TikTok Dancing Video for 2024
- With Looping Videos, People Stay on Your Site Longer, Boosting Engagement. With Video Being Watched on Mobile over 3X More than Any Other Content, Its an Essential Part of Mobile Advertising
- Updated 2024 Approved General Knowledge About MP4 Format and Best MP4 Video Editor
- How To Export Video in Filmora for 2024
- In 2024, Practical Ways to Resize Video in Handbrake
- Tutorial Guides for Video Maker with Song for 2024
- Updated Have You Ever Wondered How Those PowerPoint, Looping Slideshows You See in Conferences and Reception Areas Display and Move to the Next Slide Automatically without Clicking a Mouse? You Dont Have to Be Amazed at This
- New 2024 Approved 8 Free Photo Collage with Music Video Maker
- New How to Make a PowerPoint Looping Slideshow
- New 2024 Approved How to Put Emoji on Mac That Take Less Than 10 Mins
- Updated Troubleshoot Snapchat Camera Zoomed in Issue
- New 2024 Approved 4 Methods to Crop a Video on Android Easily
- Updated 2024 Approved How to Make GIFs From Videos on Mac
- New Some Leading AI Tools to Replace Sky Backgrounds
- New In 2024, Replacing Sky in Your Pictures Using Online and Offline Tools
- 2024 Approved Free Ways To Split Video For Whatsapp Status On All Platforms
- Updated Understanding The Best Tools for Changing Sky Background
- How to Make a PowerPoint Looping Slideshow
- How to Add Custom Subtitles to Netflix for 2024
- New AVI Editor for Windows 11/10/8.1/8/7 Easily Edit AVI Files on PC
- The Best Jump Cut Editing Tricks Make Your Videos Snappy!
- New Do You Want to Know About the DaVinci Resolve Adjustment Layer? Read This Article to Learn How to Use an Adjustment Layer (Clip) in DaVinci Resolve to Edit Videos
- New 3 Different Methods to Correct Color Distortion in Videos
- In 2024, Synchronizing Videos Can Be Hectic, but Do You Wish to Know a Good Tool for This Purpose? This Article Will Discuss Wondershare Filmora, Which Is Perfect for This
- How to Perfectly Use Canva Color Match, In 2024
- 2024 Approved How to Resize FLV Video EfficientlyWindows, Mac, Android, iPhone &
- New Benefits of Live Streaming on YouTube for 2024
- New 2024 Approved Voice Changer for Discord | Use Voicemod on Discord
- Have You Been Looking for Online YouTube Video Trimmer? You Will Be Introduced to Different Ways to Trim YouTube Videos as Introduced by YouTube Itself and some Online and Desktop Software to Help You Learn Video Trimming in This Article
- New How to to Mimic Professional Filming Gears
- New How To Brighten Video In Premiere Pro | Step By Step Guide for 2024
- New 2024 Approved | Change Speed of a Video on iPhone
- Making Creative and Engaging Youtube Videos Is Now Easy with Several Tools. Now, YouTube Also Offers You Its Own Built-In Video Editor Through Which You Can Edit and Enhance the Video Quality for 2024
- Updated In 2024, How to Make a Slideshow GIF?
- How can I get more stardust in pokemon go On Xiaomi Redmi A2+? | Dr.fone
- In 2024, The Updated Method to Bypass Oppo A59 5G FRP
- Ways to trade pokemon go from far away On Motorola Edge 40? | Dr.fone
- Is GSM Flasher ADB Legit? Full Review To Bypass Your Samsung Galaxy Z Flip 5 Phone FRP Lock
- In 2024, How to Check Distance and Radius on Google Maps For your Motorola Razr 40 | Dr.fone
- How To Recover iPhone 13 Pro Max Data From iTunes? | Dr.fone
- In 2024, A Step-by-Step Guide on Using ADB and Fastboot to Remove FRP Lock on your Infinix Hot 30i
- Thinking About Changing Your Netflix Region Without a VPN On Tecno Spark 20? | Dr.fone
- In 2024, How to Track Meizu 21 Location by Number | Dr.fone
- How To Use Allshare Cast To Turn On Screen Mirroring On Lava Blaze 2 Pro | Dr.fone
- Which is the Best Fake GPS Joystick App On Realme Narzo 60 Pro 5G? | Dr.fone
- In 2024, Full Guide on Mirroring Your Oppo Reno 11 5G to Your PC/Mac | Dr.fone
- Step-by-Step Tutorial How To Bypass Vivo Y17s FRP
- How to Fix Vivo V27e Find My Friends No Location Found? | Dr.fone
- 5 Ways to Reset Oppo Reno 8T 5G Without Volume Buttons | Dr.fone
- How to Unlock SIM Card on Samsung Galaxy A14 4G online without jailbreak
- In 2024, How to Reset your Vivo V30 Lock Screen Password
- Identify malfunctioning your drivers with Windows Device Manager on Windows 10 & 7
- In 2024, Top 10 AirPlay Apps in Itel A70 for Streaming | Dr.fone
- How to Check Distance and Radius on Google Maps For your Xiaomi Redmi Note 13 Pro+ 5G | Dr.fone
- In 2024, 8 Ways to Transfer Photos from Realme C53 to iPhone Easily | Dr.fone
- Calls on Realme V30 Go Straight to Voicemail? 12 Fixes | Dr.fone
- In 2024, How to Mirror ZTE Nubia Flip 5G to Mac? | Dr.fone
- Guide How To Unbrick a Bricked Oppo Find X6 Pro Phone | Dr.fone
- How to Unlock Vivo T2 5G Phone Pattern Lock without Factory Reset
- Complete guide for recovering music files on Oppo Reno 11 5G
- 3 Ways to Change Location on Facebook Marketplace for Honor Magic 5 | Dr.fone
- In 2024, Edit and Send Fake Location on Telegram For your Motorola G54 5G in 3 Ways | Dr.fone
- In 2024, How To Factory Unlock Your Telstra Apple iPhone 14 Plus
- Possible solutions to restore deleted pictures from Honor Magic 6 Pro.
- A Working Guide For Pachirisu Pokemon Go Map On Apple iPhone X | Dr.fone
- In 2024, 3 Methods to Mirror Vivo Y78 5G to Roku | Dr.fone
- In 2024, How to Screen Mirroring Motorola Moto G84 5G to PC? | Dr.fone
- 3 Easy Solutions to Hard Reset Infinix Smart 8 Plus | Dr.fone
- In 2024, Top IMEI Unlokers for Your Vivo Y02T Phone
- How to Change Your Tecno Spark 20 Location on life360 Without Anyone Knowing? | Dr.fone
- Detailed guide of ispoofer for pogo installation On Xiaomi Redmi Note 12 Pro 5G | Dr.fone
- A Detailed Guide on Faking Your Location in Mozilla Firefox On Poco X6 Pro | Dr.fone
- New In 2024, The Essential Guide to Emoji, Memoji, Animoji, and Bitmoji
- In 2024, How To Convert Video Voice to Text Online for Free?
- How to Fix Pokemon Go Route Not Working On Motorola Moto G14? | Dr.fone
- 2024 Approved Top 5 AI-Powered Script to Video Makers
- New In 2024, The Best Boxing Streaming Websites for the Latest Match Coverage
- In 2024, How To Unlock Any Motorola G24 Power Phone Password Using Emergency Call
- How To Unlock Any Vivo Y78 5G Phone Password Using Emergency Call
- In 2024, 15 Best Strongest Pokémon To Use in Pokémon GO PvP Leagues For Oppo Reno 11 Pro 5G | Dr.fone
- In 2024, Top Apps and Online Tools To Track Itel P55T Phone With/Without IMEI Number
- In 2024, How To Transfer Messages From Apple iPhone 12 Pro to other iPhone All iOS Versions | Dr.fone
- Title: Updated 2024 Approved Backup and Organize Your Tons of Footage in Minutes
- Author: Chloe
- Created at : 2024-04-24 07:08:32
- Updated at : 2024-04-25 07:08:32
- Link: https://ai-editing-video.techidaily.com/updated-2024-approved-backup-and-organize-your-tons-of-footage-in-minutes/
- License: This work is licensed under CC BY-NC-SA 4.0.
