
:max_bytes(150000):strip_icc():format(webp)/removerokuchannel-c354faa0f712495384a4d5888017e30c.png)
Updated 2024 Approved Best 22 Video Editing Tips to Know
Best 22 Video Editing Tips to Know
Whether your video is short or long, you may want to make it better and appealing. Video editing involves the manipulation of your videos through which the desired transformation is achieved and you can flaunt every move of your video in a more preferable way. Video editing involves cutting the video short, changing the speed, organizing the video in a seamless flow. In short, the better the cuts of your videos, the better your message/story is conveyed.
Part 1: Things to Learn Before Editing First Draft
You have shot your video and now you’re stuck on the post-processing of that video. Don’t worry! We got you covered through this article which will guide you through the different things which you must learn before editing the first draft of your video.
Start a video project
Your smartphone and digital camera can let you record multiple videos but what now? You head out to edit your first draft by choosing a suitable platform or software and then you can surely lay back and see the software doing wonders to your raw videos. By starting off with editing, you choose your video editing preferences and then you just let the video editing tools do the magic.
Get to know the video editing software workspace
Video editing software offer customizable workspaces for different editing tasks. The software workspace streamlines routine actions you take with clips, like editing clips, making DVD and Blu-ray menus, and sharing movies. By placing panels in the layout that best matches your working style, you can personalize your workspace. The additional panels adjust automatically to fit the window as you rearrange them. For various jobs, such as one for editing and one for preview, you can build and store multiple workspaces.
Understand the timeline
The timeline of your video is the backbone of your digital video editing process. It’s called a timeline because the various pieces of video will be lined up horizontally. In a video editing software, the timeline is where you arrange your video clips and plan out all the modifications you want to do. As you work, you will see every single one of your video and audio clips, effects, and transitions sorted chronologically from beginning to end. All the fundamentals of video editing, including reordering, trimming, and enhancing your footage, are available. To preview how your adjustments will turn out, you can also play your project at any point in the timeline.
Add clips to timeline
When you have grasped the idea behind a timeline, the next step you need to follow is to add clips into your timeline. Before adding clips to your timeline, it is suggested that you label each clip. Although it does seem like a lot of work, it will be easier to locate all of the clips later on if you’re working on a large project. after the footages are gathered and named, add important clips in the beginning of the timeline to begin establishing the video’s overall structure and order.
Editing tools
Besides basic cutting, trimming and cropping, video editing software offer multiple professional editing tools which enhance the outlook your videos and make them 10x better. For example, instead of cutting up a clip into a bunch of small clips and unwanted gaps, use the Ripple Edit tool keep your timeline clean. This means when a clip is trimmed, it causes a ripple effect throughout the rest of your timeline, shifting all other clips into a new timeline position.
Similarly, when working with lengthy timelines, the Razor tool is also really helpful because you can select the clip you wish to cut by dragging your razor over it. So, the Razor cut is the tool to use if you need to make a lot of cuts in your videos quickly.
Syncing audio and video
You already know how annoying it can be if audio and video don’t sync while you’re listening to a podcast or viewing a YouTube vlog. The video editing software offer helpful manual and auto sync tools. It can be though a bit of hard work for beginners, but the ‘Lights, Camera, Action’ approach works best in syncing your audio with your video. To sync audio, you need to record audio first and then through matching the wavelengths displayed on your timeline, you can sync the audio with your video.
Edit download talking head/interview footage
Now with professional video editing tools, you can make ‘talking head videos’ if you want to share your expertise as a YouTube vlogger or if you want to do employee training. Talking head films are a fantastic way to stimulate the mind and the heart while increasing learner retention in this digital age.
Additionally, with other video editing tools, you can edit your interview footages and for that, you don’t have to mess with timestamps, cutting or splicing videos, or creating transitions between clips, you just edit the transcript of the video and the video edits itself to match.
Video properties: Scale, position, opacity
Any screen recording, camera-based video, imported video clips, and text picture clips can have their visuals altered using video properties. In video editing software, multiple video properties are offered which include scaling, positioning, rotating, changing the opacity, changing level of reflection and shadow. Additionally, Video properties also include editing the video as a whole or just altering a clip from the video.
Types of cuts: Straight, J-Cut, L-Cut etc
The different types of cuts used in the video editing process is an effective way to make the transitions in your video pop. Basically, these cuts join two or more clips together via audio. Professional editors call these cuts as ‘split edits. The most common cuts are called J-Cut and L-Cut. They help to mix the content’s flow and keep the on-screen narrative in motion. In essence, these edits are necessary to make your scenes feel warm and more authentic.
Part 2: Practical Video Editing Tips
Choose right software
The push start of video editing for beginners is based on one common step: know your software or workspace. Selecting the appropriate software for editing your video is the first step in streamlining your video editing process. Although all software often includes the tools that you need to make ordinary video edits, you could favor one over the others based on its usefulness, digital interface, and features. Instead of just using the latest and trending video editing software available, the key is to choose what functions for you and your editing style.
Use a fast computer
Slow rendering hinders video editing process and other commands given to a computer. From a practical point of view, it is recommended that irrespective of the model of the computer or version of your software; your computer must be efficient to help you to access your files and software easily and to speed up your export time. With a slow computer, you will definitely feel stuck and the video editing complications will haunt you in your dreams.
Watch video editing tutorials
None of us is a pro until we’ve practiced something enough to know everything about it. Video editing requires both; technical knowledge as well as your creativity, so it is better not to do try things on your own. A little guidance can surely help you get through the basics of the video editing process. There are tons of helpful tutorials for making excellent videos on YouTube, vlogs, and educational websites. The majority of tutorials you’ll discover online are free, making the readily available at the tip of your fingers.
Get the project files
Most of the beginner video editors prefer to use the same project files as the tutorial instructors when they are following along. Your work will exactly resemble the demo’s sample, which will aid in your understanding of the steps. For precisely this reason, many tutorials let you download the project files. You can repeat a process with your own video files once you’ve mastered this technique.
Edit for a story
Remembering your creative objective to create a wonderful story or message through your edited video is one of the most crucial lessons you should learn from this article. It is critically important that you make your film visually appealing and dramatically engaging to effectively evoke the right emotions and to communicate your desired message. Instead of merely adding a huge amount of effects to wow your audience, use your practical and technical skills to do this.
Maintain an efficient workflow
You’ll need to be systematic and organized in addition to having an editing software if you want to become a more competent editor. Putting your projects and files in folders that you may use repeatedly is one method to streamline your process. Besides this, organizing your projects and files into an external hard drive or USB is recommended in case of losing access to your intricately designed projects.
Utilize keyboard shortcuts
Keyboard shortcuts speed up the process of video editing and save you ample time. Different keyboard shortcuts are compatible with different video editing software; leaving a few which are mutual in every software. Don’t attempt to put all of these shortcuts into action at once. Pick a small number to begin with, and as they become instinctive, add more. You’ll progress more quickly if you use less mouse while editing your video.
Learn important terms
As a beginner, you may not want to feel a lump in the throat caused by the complicated dictionary of video editing software. There are some broad video editing terms that refer to videography as a whole as well as video editing terms specific to the process of editing footage. You must first learn what these terms means for example you may want to know what the terms like ‘aspect ratio, B-roll, bit rate, close up, compression, crop and compositing’ mean.
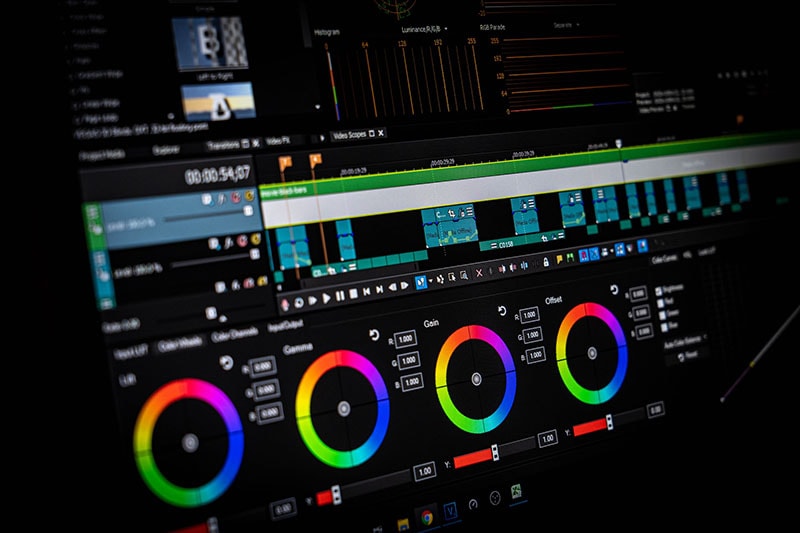
Color correct your clips
Do you own a rather boring video? Perhaps it’s a little too dull or the colors don’t stand out as much as they should? A crucial step is to modify the video’s color. This will assist in reducing the saturation and revive your video. Yet, there are some color correcting presets which can be easily accessed in different video editing apps.
Select good music
You ever saw an ad on YouTube or other social media platforms without an audio background. You may just want to skip it because the video, which may apparently be appealing, fails to strike you. Coordinating and complimenting your video with a music in the background is like cherry on top. It’s a huge plus to attract viewers’ attention. Though it is necessary that the music you choose must be relevant to your video file and should target the majority. So, choose good music to adorn your videos and trigger emotions in your target audience.
Add text and graphics
Some people are attracted more towards textual descriptions rather visual representation of content. It is crucial that considering the preferences of majority, you add significant details to your video which can target your audience in a multidimension. You might need to include more text in addition to the title, opening/closing billboards (for broadcasting), and film credits, depending on the type of film you’re making. However, you can make dazzling visuals using your editing program if you feel the urge to do so.
Export web versions
When your film is finished and is ready to be exported, you would have a natural urge to export it at the highest video resolution possible. If it’s going to be shown in theatres and on ultra-HD screens, this is unquestionably the best course of action. However, you should also export smaller, higher-quality versions for simpler viewing in the modern day where video projects are typically promoted online and on social media.
The objective of creating a file for the web is to keep its high quality while not making it too large for upload and online viewing. Don’t worry if you’re unsure of the export settings to utilize. Websites like Facebook, YouTube, and Vimeo all provide suggested export settings to assist you in correctly resizing your content.
Part 3: 10 Advanced Editing Tips for Professionals
We all definitely have experimented with video editing tools to some extent. But now, it is definitely time to become a pro. Don’t worry, the process isn’t as scary as we imagine it to be. This article is your best stop to grab some fine guidelines about how to become a video editor, in fact, a Pro video editor.
- Make titles stand out
You’re skilled in video editing, but do your titles seem a little…unfinished? Do those lower thirds strike you as being monotonous and boring? Is your typography competing for attention against your pictures? It appears that you would benefit from some basic title design advice, and lucky for you, we have some. Your title must be readable by majority and always choose your safe way in selecting texts for example, a sans-serif typeface is usually going to be a safe choice for video. You can also animate text to highlight it so that it is more captivating.
- Put video inside text or logos effects
Videos resonate with your brand and content if you add a specific logo or text effects to it. Almost all the video editors allow this featuring so that the identification of your work is maintained and copyright claim can be imposed if you see your content being copied or manipulated.
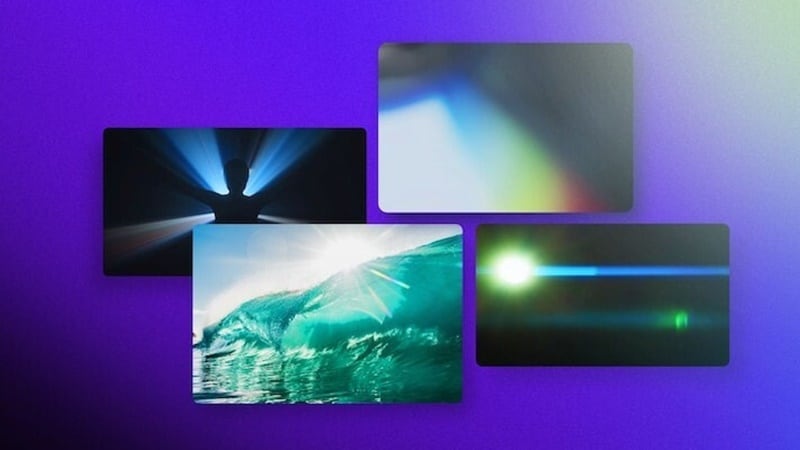
- Add light leaks, film burns and lens flares
Incorporating unique transitions into your monotonous videos can get you your viewer’s attention in a go. Lens flares, light leaks, and film burns can result in a unique look, but are not always easy to add naturally in-camera. Some of the best video editing software which allow access to adding lens flares, light leaks and film burns include: Free 4K Light Leaks – RocketStock, Motion Array Free Light Leaks, WZZLY Free Light Leaks, LIGHT LEAK FILM OVERLAY and many more.
- Add the vintage old film look
The quick Instagram-category of filters are common today but what makes your videos more natural and appealing is the addition of some presets which almost every video editor offers. These presets add a classic vintage old film look to your videos by manipulating color correction effects, framerate settings, overlays, and aspect ratio hacks. Some popular vintage old film effects are found in software namely VSDC, VEED, Adobe Premium Pro and many others in list.
- Add type-on effect
A type-on effect added to your videos comprehend your content more firmly. Simply by tabbing on ‘Add text effect’ in any video editor, you can add type-on effect to your videos and to add ravishing component to the overall structure of your video.
- Zoom in or out effect
The zoom-in or out feature (if available) in your video editing software can allow you to magnify any part of your video quickly and easily. Some of the best video editors featuring this specification include: Wondershare DemoCreator Zoom in Video Effect, DaVinci Resolve, Wondershare Filmora , Windows Movie Maker and Apowersoft Screen Recorder.
- Custom wipe on/off reveal effect
The wipe on/off reveal transition or effect is one of the earliest ways of transitioning from one scene to another. An object (usually a line) moves across the screen, revealing the next scene, while simultaneously removing (or wiping) the previous scene and when used properly, they can create a very powerful effect. It involves creative fading in and out transitions to give a more dramatic look.
- 4k, 8k, HD resolution
The latest video editing software offer the export your edited video in multiple formats, out of which 4k, 8k and HD resolution formats are preferable for majority of the professional video editors. It is necessary that even after the video is uploaded to a platform, the pixels do not decrease and the quality of the video is maintained. Although attractive to the viewers, the higher the resolution, the more the data with which you must deal. It is suggested that a standard or default resolution is chosen to play and replay the video in different computers.

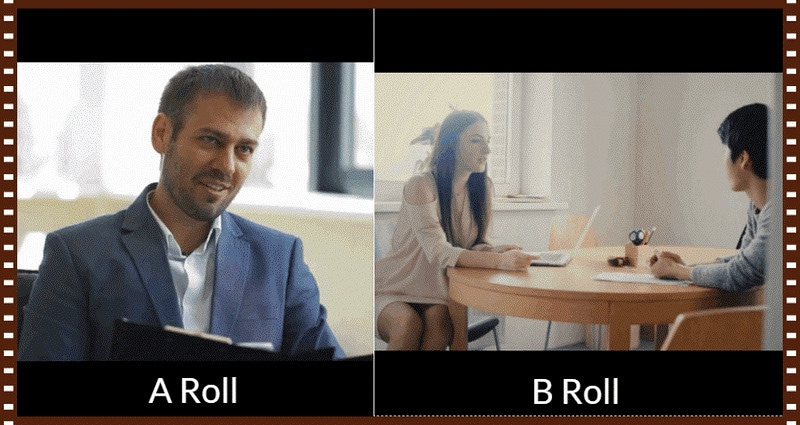
- B-roll
B-roll is secondary video that is frequently used as cutaway video to add context and visual interest to your story. The term is originated from the early days of Hollywood when there used to be an A-roll which was the primary video and B-roll which served as a secondary video footage. This can help you visualize your video from different dimensions, giving it a more realistic look for captivating viewers.
- Compression rate, bit depth, bit
The amount of data the camera records each second is referred to as bit rate. Every single second of a video is subject to significant data processing by cameras. The higher the quality of the video, the more is the bit rate. Bit depth refers to the number of colors your camera can read per pixel. Common bit depths are 8-bit and 10-bit, which enable a camera to read 256 million or 1.07 billion colors respectively. To upload your edited video, a compression is usually required to convert your resolution to internet quality so that the upload can be made simpler, without distorting the video resolution.
Whether your video is short or long, you may want to make it better and appealing. Video editing involves the manipulation of your videos through which the desired transformation is achieved and you can flaunt every move of your video in a more preferable way. Video editing involves cutting the video short, changing the speed, organizing the video in a seamless flow. In short, the better the cuts of your videos, the better your message/story is conveyed.
Part 1: Things to Learn Before Editing First Draft
You have shot your video and now you’re stuck on the post-processing of that video. Don’t worry! We got you covered through this article which will guide you through the different things which you must learn before editing the first draft of your video.
Start a video project
Your smartphone and digital camera can let you record multiple videos but what now? You head out to edit your first draft by choosing a suitable platform or software and then you can surely lay back and see the software doing wonders to your raw videos. By starting off with editing, you choose your video editing preferences and then you just let the video editing tools do the magic.
Get to know the video editing software workspace
Video editing software offer customizable workspaces for different editing tasks. The software workspace streamlines routine actions you take with clips, like editing clips, making DVD and Blu-ray menus, and sharing movies. By placing panels in the layout that best matches your working style, you can personalize your workspace. The additional panels adjust automatically to fit the window as you rearrange them. For various jobs, such as one for editing and one for preview, you can build and store multiple workspaces.
Understand the timeline
The timeline of your video is the backbone of your digital video editing process. It’s called a timeline because the various pieces of video will be lined up horizontally. In a video editing software, the timeline is where you arrange your video clips and plan out all the modifications you want to do. As you work, you will see every single one of your video and audio clips, effects, and transitions sorted chronologically from beginning to end. All the fundamentals of video editing, including reordering, trimming, and enhancing your footage, are available. To preview how your adjustments will turn out, you can also play your project at any point in the timeline.
Add clips to timeline
When you have grasped the idea behind a timeline, the next step you need to follow is to add clips into your timeline. Before adding clips to your timeline, it is suggested that you label each clip. Although it does seem like a lot of work, it will be easier to locate all of the clips later on if you’re working on a large project. after the footages are gathered and named, add important clips in the beginning of the timeline to begin establishing the video’s overall structure and order.
Editing tools
Besides basic cutting, trimming and cropping, video editing software offer multiple professional editing tools which enhance the outlook your videos and make them 10x better. For example, instead of cutting up a clip into a bunch of small clips and unwanted gaps, use the Ripple Edit tool keep your timeline clean. This means when a clip is trimmed, it causes a ripple effect throughout the rest of your timeline, shifting all other clips into a new timeline position.
Similarly, when working with lengthy timelines, the Razor tool is also really helpful because you can select the clip you wish to cut by dragging your razor over it. So, the Razor cut is the tool to use if you need to make a lot of cuts in your videos quickly.
Syncing audio and video
You already know how annoying it can be if audio and video don’t sync while you’re listening to a podcast or viewing a YouTube vlog. The video editing software offer helpful manual and auto sync tools. It can be though a bit of hard work for beginners, but the ‘Lights, Camera, Action’ approach works best in syncing your audio with your video. To sync audio, you need to record audio first and then through matching the wavelengths displayed on your timeline, you can sync the audio with your video.
Edit download talking head/interview footage
Now with professional video editing tools, you can make ‘talking head videos’ if you want to share your expertise as a YouTube vlogger or if you want to do employee training. Talking head films are a fantastic way to stimulate the mind and the heart while increasing learner retention in this digital age.
Additionally, with other video editing tools, you can edit your interview footages and for that, you don’t have to mess with timestamps, cutting or splicing videos, or creating transitions between clips, you just edit the transcript of the video and the video edits itself to match.
Video properties: Scale, position, opacity
Any screen recording, camera-based video, imported video clips, and text picture clips can have their visuals altered using video properties. In video editing software, multiple video properties are offered which include scaling, positioning, rotating, changing the opacity, changing level of reflection and shadow. Additionally, Video properties also include editing the video as a whole or just altering a clip from the video.
Types of cuts: Straight, J-Cut, L-Cut etc
The different types of cuts used in the video editing process is an effective way to make the transitions in your video pop. Basically, these cuts join two or more clips together via audio. Professional editors call these cuts as ‘split edits. The most common cuts are called J-Cut and L-Cut. They help to mix the content’s flow and keep the on-screen narrative in motion. In essence, these edits are necessary to make your scenes feel warm and more authentic.
Part 2: Practical Video Editing Tips
Choose right software
The push start of video editing for beginners is based on one common step: know your software or workspace. Selecting the appropriate software for editing your video is the first step in streamlining your video editing process. Although all software often includes the tools that you need to make ordinary video edits, you could favor one over the others based on its usefulness, digital interface, and features. Instead of just using the latest and trending video editing software available, the key is to choose what functions for you and your editing style.
Use a fast computer
Slow rendering hinders video editing process and other commands given to a computer. From a practical point of view, it is recommended that irrespective of the model of the computer or version of your software; your computer must be efficient to help you to access your files and software easily and to speed up your export time. With a slow computer, you will definitely feel stuck and the video editing complications will haunt you in your dreams.
Watch video editing tutorials
None of us is a pro until we’ve practiced something enough to know everything about it. Video editing requires both; technical knowledge as well as your creativity, so it is better not to do try things on your own. A little guidance can surely help you get through the basics of the video editing process. There are tons of helpful tutorials for making excellent videos on YouTube, vlogs, and educational websites. The majority of tutorials you’ll discover online are free, making the readily available at the tip of your fingers.
Get the project files
Most of the beginner video editors prefer to use the same project files as the tutorial instructors when they are following along. Your work will exactly resemble the demo’s sample, which will aid in your understanding of the steps. For precisely this reason, many tutorials let you download the project files. You can repeat a process with your own video files once you’ve mastered this technique.
Edit for a story
Remembering your creative objective to create a wonderful story or message through your edited video is one of the most crucial lessons you should learn from this article. It is critically important that you make your film visually appealing and dramatically engaging to effectively evoke the right emotions and to communicate your desired message. Instead of merely adding a huge amount of effects to wow your audience, use your practical and technical skills to do this.
Maintain an efficient workflow
You’ll need to be systematic and organized in addition to having an editing software if you want to become a more competent editor. Putting your projects and files in folders that you may use repeatedly is one method to streamline your process. Besides this, organizing your projects and files into an external hard drive or USB is recommended in case of losing access to your intricately designed projects.
Utilize keyboard shortcuts
Keyboard shortcuts speed up the process of video editing and save you ample time. Different keyboard shortcuts are compatible with different video editing software; leaving a few which are mutual in every software. Don’t attempt to put all of these shortcuts into action at once. Pick a small number to begin with, and as they become instinctive, add more. You’ll progress more quickly if you use less mouse while editing your video.
Learn important terms
As a beginner, you may not want to feel a lump in the throat caused by the complicated dictionary of video editing software. There are some broad video editing terms that refer to videography as a whole as well as video editing terms specific to the process of editing footage. You must first learn what these terms means for example you may want to know what the terms like ‘aspect ratio, B-roll, bit rate, close up, compression, crop and compositing’ mean.
Color correct your clips
Do you own a rather boring video? Perhaps it’s a little too dull or the colors don’t stand out as much as they should? A crucial step is to modify the video’s color. This will assist in reducing the saturation and revive your video. Yet, there are some color correcting presets which can be easily accessed in different video editing apps.
Select good music
You ever saw an ad on YouTube or other social media platforms without an audio background. You may just want to skip it because the video, which may apparently be appealing, fails to strike you. Coordinating and complimenting your video with a music in the background is like cherry on top. It’s a huge plus to attract viewers’ attention. Though it is necessary that the music you choose must be relevant to your video file and should target the majority. So, choose good music to adorn your videos and trigger emotions in your target audience.
Add text and graphics
Some people are attracted more towards textual descriptions rather visual representation of content. It is crucial that considering the preferences of majority, you add significant details to your video which can target your audience in a multidimension. You might need to include more text in addition to the title, opening/closing billboards (for broadcasting), and film credits, depending on the type of film you’re making. However, you can make dazzling visuals using your editing program if you feel the urge to do so.
Export web versions
When your film is finished and is ready to be exported, you would have a natural urge to export it at the highest video resolution possible. If it’s going to be shown in theatres and on ultra-HD screens, this is unquestionably the best course of action. However, you should also export smaller, higher-quality versions for simpler viewing in the modern day where video projects are typically promoted online and on social media.
The objective of creating a file for the web is to keep its high quality while not making it too large for upload and online viewing. Don’t worry if you’re unsure of the export settings to utilize. Websites like Facebook, YouTube, and Vimeo all provide suggested export settings to assist you in correctly resizing your content.
Part 3: 10 Advanced Editing Tips for Professionals
We all definitely have experimented with video editing tools to some extent. But now, it is definitely time to become a pro. Don’t worry, the process isn’t as scary as we imagine it to be. This article is your best stop to grab some fine guidelines about how to become a video editor, in fact, a Pro video editor.
- Make titles stand out
You’re skilled in video editing, but do your titles seem a little…unfinished? Do those lower thirds strike you as being monotonous and boring? Is your typography competing for attention against your pictures? It appears that you would benefit from some basic title design advice, and lucky for you, we have some. Your title must be readable by majority and always choose your safe way in selecting texts for example, a sans-serif typeface is usually going to be a safe choice for video. You can also animate text to highlight it so that it is more captivating.
- Put video inside text or logos effects
Videos resonate with your brand and content if you add a specific logo or text effects to it. Almost all the video editors allow this featuring so that the identification of your work is maintained and copyright claim can be imposed if you see your content being copied or manipulated.
- Add light leaks, film burns and lens flares
Incorporating unique transitions into your monotonous videos can get you your viewer’s attention in a go. Lens flares, light leaks, and film burns can result in a unique look, but are not always easy to add naturally in-camera. Some of the best video editing software which allow access to adding lens flares, light leaks and film burns include: Free 4K Light Leaks – RocketStock, Motion Array Free Light Leaks, WZZLY Free Light Leaks, LIGHT LEAK FILM OVERLAY and many more.
- Add the vintage old film look
The quick Instagram-category of filters are common today but what makes your videos more natural and appealing is the addition of some presets which almost every video editor offers. These presets add a classic vintage old film look to your videos by manipulating color correction effects, framerate settings, overlays, and aspect ratio hacks. Some popular vintage old film effects are found in software namely VSDC, VEED, Adobe Premium Pro and many others in list.
- Add type-on effect
A type-on effect added to your videos comprehend your content more firmly. Simply by tabbing on ‘Add text effect’ in any video editor, you can add type-on effect to your videos and to add ravishing component to the overall structure of your video.
- Zoom in or out effect
The zoom-in or out feature (if available) in your video editing software can allow you to magnify any part of your video quickly and easily. Some of the best video editors featuring this specification include: Wondershare DemoCreator Zoom in Video Effect, DaVinci Resolve, Wondershare Filmora , Windows Movie Maker and Apowersoft Screen Recorder.
- Custom wipe on/off reveal effect
The wipe on/off reveal transition or effect is one of the earliest ways of transitioning from one scene to another. An object (usually a line) moves across the screen, revealing the next scene, while simultaneously removing (or wiping) the previous scene and when used properly, they can create a very powerful effect. It involves creative fading in and out transitions to give a more dramatic look.
- 4k, 8k, HD resolution
The latest video editing software offer the export your edited video in multiple formats, out of which 4k, 8k and HD resolution formats are preferable for majority of the professional video editors. It is necessary that even after the video is uploaded to a platform, the pixels do not decrease and the quality of the video is maintained. Although attractive to the viewers, the higher the resolution, the more the data with which you must deal. It is suggested that a standard or default resolution is chosen to play and replay the video in different computers.
- B-roll
B-roll is secondary video that is frequently used as cutaway video to add context and visual interest to your story. The term is originated from the early days of Hollywood when there used to be an A-roll which was the primary video and B-roll which served as a secondary video footage. This can help you visualize your video from different dimensions, giving it a more realistic look for captivating viewers.
- Compression rate, bit depth, bit
The amount of data the camera records each second is referred to as bit rate. Every single second of a video is subject to significant data processing by cameras. The higher the quality of the video, the more is the bit rate. Bit depth refers to the number of colors your camera can read per pixel. Common bit depths are 8-bit and 10-bit, which enable a camera to read 256 million or 1.07 billion colors respectively. To upload your edited video, a compression is usually required to convert your resolution to internet quality so that the upload can be made simpler, without distorting the video resolution.
Camtasia vs Final Cut Pro
With many available video editing solutions in the market today, it is a bit hard to choose the best video editing software for your unique needs. Remember, it’s all about investing money. In every purchase, you need to be sure about purchasing no matter the amount. In the case of video editing software, the concern is just significant as you should find software that perfectly suits your requirements. A video editing software may be having excellent features, but become complex when working with. On the other hand, the software may be quite user-friendly, but its range of tools is not as large.
Implementing tools such as Camtasia or Final Cut Pro requires a great deal of contemplating and comparison of crucial factors. You may be wondering, when you compare Camtasia vs Final cut pro, which is the best to use. To make a clear comparison between these two video editing programs, one has to judge all the crucial elements. Though the two programs share some degree of similarity, this article will help you understand if Final Cut Pro is better than Camtasia. We are going to compare Final Cut Pro X vs Techsmith Camtasia using their features, pros, and Cons, market prices, functionality, and customer support to help you fully understand them.
Overall Comparison
This table will help you compare Camtasia vs Final cut pro.
674 reviews341 reviews$ 249.99 for a user license$139.99 upgrade$299.99 per licenseRelatively easy to use A bit complicated for beginners</6h>
| | Camtasia | Final Cut Pro | |
| ——————— | ————————————————————————————————————————- | ————————————————————————————————————————— |
| Overall rating | 674 reviews | 341 reviews |
| Entry-level Price | $ 249.99 for a user license $139.99 upgrade | $299.99 per license |
| Ease of use | Relatively easy to use | A bit complicated for beginners |
| Market share | Small-Business (50.5% of reviews) Mid-Market (26.0% of reviews) Enterprise (23.4% of reviews) | Small-Business (71.0% of reviews) Mid-Market (17.05 reviews) Enterprise (11.9% of reviews) |
| Value of money | 2/10 – low cost | 4/10 – average cost |
| Customer support | Provide Email Languages supported; English, French, Germany, Japanese. | Email Languages supported; English |
| Functionality | Speed is a bit slow Various exporting settings. Enough editing capability. Does not support live recording from a camera. | Speed is higher than its comparison Exporting settings are limited Not as efficient as its comparison Has DV camera support |
| Support system | Desktop, Cloud | Desktop, Cloud, Mobile |
As you can see in the table above there is no great deference seen when comparing Final cut pro X vs Techsmith Camtasia, but it can tell you if is Final cut pro better than Camtasia or reverse is the case.
Final Cut Pro
Final Cut Pro is the perfect macOS video editing software that can help you achieve a professional-looking video. This software is built with the latest and most powerful tools that make it an effortless tool for video editing. It has impressive filters, graphics, and a range of other cool video editing features. Its coolest part is its ability to enable 360-degree video editing for VR and VR headset playback. This program uses multi-core multi-thread machines quickly to allow you to import the videos in different formats faster than others.

Like any other software, Final Cut Pro possesses some pros and cons as listed below;
Pros:
- It is a stable program that can be very useful in small businesses.
- It has a powerful architecture for your complex and heavy projects.
- Its fast rendering speed can allow you to conduct Multicam editing.
- It has classic GPU utilization and powerful media organization to allow you to organize assets such as audio and video carefully.
- Its easy audio modification capabilities can allow you to create impeccable VR videos.
- It has a customizable and streamlined share interface that makes high-quality file delivery easy and fast.
- It can edit videos offline.
- It is tailored with real-time graphics and cool effects like text and blurs that are easy to apply.
Cons:
- It is complex and thus difficult for beginners.
- It has limited export options.
- It only works on Mac computers.
Editing video with Final Cut Pro is not a complicated process. Here are the steps to help a beginner get started.
Step1: Create a new project & import media
When you Launch the Final Cut Pro interface, Libraries and Events are automatically created. You only need to create a new project.
At the top menu bar, click File > New > Project to create a new project. Here you will have to type in a new name of the project and then select ‘Use Automatic Settings’.
At the top menu bar again, click File > Import > Media to enable the program to bring up the Media Import window where you can select the video and audio files you want to import into your new project.
After selecting all the media you want to include in your project press ‘Import Selected’ and then close the media window.
Step 2: Add your trimmed clips to the timeline.
The thumbnails of all the media you have imported will be appearing in the browser. For you to create a new video you need to arrange and trim that media in the timeline.
In your browser, you can set the ‘In and Out’ points for each video clip by holding ‘_Option_’. To do this you will have to click the thumbnail and drag it. The yellow timeline that appears on the clip represents the range that will be added to your video timeline.
After arranging them in the order that you want them to play, trim your clips by moving the mouse cursor to the edge of its thumbnail. This is done by using the ‘Trim tool’. Drag forward or backward to adjust the clip’s endings.
If you are arranging the clips in your sequence, you need to drag and drop any of the clips from the timeline into a different position. Final Cut Pro has a tool known as Magnetic timeline that will automatically insert and arrange the clips for you. You just need to ensure that your clips do not overlap or lay on top of each other.
To preview your video in the viewer, press the space bar on your keyboard or the Play icon in your software interface.
Step 3: Add Title, Texts, Transitions, and Effects
Title and Texts: Final Cut Pro has many Titles located in the browser where you imported your media. You can add them by dragging them into your video’s timeline. To access those titles you can press the ‘Title and Generators’ icon in the sidebar to open it.
Transitions: When adding Transitions, there is nothing wrong with a “hard cut_” between 2 clips. Use the transitions only where they make sense so as not to ruin your video. To add these transitions, you need to open the ‘_Transition browser’ by clicking on its indicated icon.
The transition’s length can be adjusted by dragging inwards or outwards. To customize your transition you can open the inspector by pressing ‘Command + 4’ and make the adjustments.
Effects: With Final Cut Pro inbuilt Effects, you can add some more value to your video after you are done with basic arrangements in the timeline. To add the effects click on the ‘Effects browser’ icon to open it.
Next to the effects browser icon, choose your preferred effect and add it between any 2 clips. By doing this you will have added animation effect between them.
Step 4: Add Audio, Music, and Color.
Audio & Music: At this point, you can import and add your music. Photos and Audio sidebar icon is located above the browser and you can click to open, and then select Sound Effects.
To see all the songs available in Final Cut Pro, you can type the word ‘Jingle‘ and you can preview them by pressing the small play button.
Color correction: By highlighting all the video clips in your video timeline, you can see a yellow outline around them.
Then open the drop-down menu by clicking the ‘_Enhancement_’ icon situated below the Viewer.
To improve the color and contrast, select Balance Color or ‘Option + Cmd + B’.
Now that you are done editing your video, you can save and share as you prefer.
Camtasia
Camtasia is a perfect all-in-one video editing and screen recording program. If you compare Camtasia vs Final cut pro, Camtasia is quite easy to use even for beginners. It can work in both Windows and macOS and provides the user with a demonstration and education video platform. It contains cool features to help you capture and edit your videos and audios appropriately.

Here are some pros and cons of Camtasia.
Pros:
- It is easy to learn.
- It has a good capture feature.
- Impressive cursor effects.
- It has Interactivity features.
- It has a good asset library
- Availability of mobile version.
- It offers great customer service.
- Available at a low cost.
Cons:
- Constant crashes and bugs.
- Limited customization
- No key tracking.
Here are key steps to follow when editing a video with Camtasia.
Step 1: Break up steps of a process with lower thirds.
Break any long multi-step video to help lower the viewer’s cognitive load.
Step 2: Reinforce texts with video.
Remove any mistakes and extra content such as unnecessary footage from the ends of your recording. If you trim too much drag the clip back to restore. This process is known as trimming.
You can zoom in on the most important section to focus your viewer’s attention there.
Step 3: Add narrative to video
Alternative Way to Edit Videos
Getting an appropriate video editing software is quite challenging as the makers of these software sometimes get confused about if the programs needed are for home videos or professional-quality work such as Hollywood movies. This is why you will find that some programs are complex to use while others lack essential features to make your work efficient.
Filmora video editor is one of the most efficient for video editing. This software is powerful and easy to use and it is built with many features to make your vision come true. It is fit for small scale, medium scale and large businesses.
For Win 7 or later (64-bit)
For macOS 10.12 or later
These steps will help you to know how to edit video with Filmora software;
Step 1: Start a new project.

After making sure that you have Filmora video editor installed on your computer, start a new project. Open the app then choose a dropdown option from the Select Project Aspect Ratio.
Step 2: Import your media

The footage, photos, and audios you use in your video are the key basic aspects of your video. Organizing all the files you are going to use in a single file. You can do this by browsing the file menu. Click the ‘File > Import Media Folder’ menu in Filmora and select the folder that contains your video files.
After importing your video files the thumbnails for each file will appear in one half of the application. Double-click on the thumbnails for a preview.
These thumbnails prove that all your captured video clips are already in the application and ready to be edited. Click on the Filmora video editing guide to get to help you know what to do.
Step 3: Add clips to the timeline, trim, adjust appropriately and sequence them.

Now that you have reviewed your video library and seen that they are there, you need to add them to the video editing timeline at the bottom of your app. This is quite easy as you can view all your video clips and determine which is to be added first.
Drag and drop each video or photo in the timeline to add it to your project.
After adding the clips, you can trim and adjust them appropriately. Click on the right or left edges of the clip you want to shorten in the timeline and drag it to shorten.
If you want to split a clip in the timeline, pick the scissors by clicking on the ‘_Scissors_’ icon.
When working on your video footage, click the spacebar of your computer keyboard to preview. By doing this, you will be able to see how your clips are joined together.
Trim appropriately and perfect the runtime of every single clip and re-order your clips where there is a need to do so. This can be done by clicking on the targeted clip and dragging it to where you want it to be.
Step 4: Add video Effects, Transmissions between the clips, and Text overlays

Click on the Effect icon at the top of the app and a deep visual library of effects will be visible. If you want to add a certain effect to your active clip, just double-click it.
Add transitions in your video timeline to cut the scene-to-scene. They are quite necessary as they help establish your audience’s attention.
The next thing after adding the transmissions will be adding the overlays and exporting your video by clicking on the ‘Export‘ button.
Step 5: Export your finished video.

You can click the ‘Export’ button and switch to the platform you want your video to be exported.
Conclusion
Choosing an appropriate video editing tool is equally as important as the video itself. And with the availability of so many of these video editing tools, choosing among them is quite hard. You can easily get confused especially if you are a beginner in the video editing industry. To avoid the complications you need to know what editing software is the best for your project.
As you can see in the table above there is no great deference seen when comparing Final cut pro X vs Techsmith Camtasia, but it can tell you if is Final cut pro better than Camtasia or reverse is the case.
Final Cut Pro
Final Cut Pro is the perfect macOS video editing software that can help you achieve a professional-looking video. This software is built with the latest and most powerful tools that make it an effortless tool for video editing. It has impressive filters, graphics, and a range of other cool video editing features. Its coolest part is its ability to enable 360-degree video editing for VR and VR headset playback. This program uses multi-core multi-thread machines quickly to allow you to import the videos in different formats faster than others.
Like any other software, Final Cut Pro possesses some pros and cons as listed below;
Pros:
- It is a stable program that can be very useful in small businesses.
- It has a powerful architecture for your complex and heavy projects.
- Its fast rendering speed can allow you to conduct Multicam editing.
- It has classic GPU utilization and powerful media organization to allow you to organize assets such as audio and video carefully.
- Its easy audio modification capabilities can allow you to create impeccable VR videos.
- It has a customizable and streamlined share interface that makes high-quality file delivery easy and fast.
- It can edit videos offline.
- It is tailored with real-time graphics and cool effects like text and blurs that are easy to apply.
Cons:
- It is complex and thus difficult for beginners.
- It has limited export options.
- It only works on Mac computers.
Editing video with Final Cut Pro is not a complicated process. Here are the steps to help a beginner get started.
Step1: Create a new project & import media
When you Launch the Final Cut Pro interface, Libraries and Events are automatically created. You only need to create a new project.
At the top menu bar, click File > New > Project to create a new project. Here you will have to type in a new name of the project and then select ‘Use Automatic Settings’.
At the top menu bar again, click File > Import > Media to enable the program to bring up the Media Import window where you can select the video and audio files you want to import into your new project.
After selecting all the media you want to include in your project press ‘Import Selected’ and then close the media window.
Step 2: Add your trimmed clips to the timeline.
The thumbnails of all the media you have imported will be appearing in the browser. For you to create a new video you need to arrange and trim that media in the timeline.
In your browser, you can set the ‘In and Out’ points for each video clip by holding ‘_Option_’. To do this you will have to click the thumbnail and drag it. The yellow timeline that appears on the clip represents the range that will be added to your video timeline.
After arranging them in the order that you want them to play, trim your clips by moving the mouse cursor to the edge of its thumbnail. This is done by using the ‘Trim tool’. Drag forward or backward to adjust the clip’s endings.
If you are arranging the clips in your sequence, you need to drag and drop any of the clips from the timeline into a different position. Final Cut Pro has a tool known as Magnetic timeline that will automatically insert and arrange the clips for you. You just need to ensure that your clips do not overlap or lay on top of each other.
To preview your video in the viewer, press the space bar on your keyboard or the Play icon in your software interface.
Step 3: Add Title, Texts, Transitions, and Effects
Title and Texts: Final Cut Pro has many Titles located in the browser where you imported your media. You can add them by dragging them into your video’s timeline. To access those titles you can press the ‘Title and Generators’ icon in the sidebar to open it.
Transitions: When adding Transitions, there is nothing wrong with a “hard cut_” between 2 clips. Use the transitions only where they make sense so as not to ruin your video. To add these transitions, you need to open the ‘_Transition browser’ by clicking on its indicated icon.
The transition’s length can be adjusted by dragging inwards or outwards. To customize your transition you can open the inspector by pressing ‘Command + 4’ and make the adjustments.
Effects: With Final Cut Pro inbuilt Effects, you can add some more value to your video after you are done with basic arrangements in the timeline. To add the effects click on the ‘Effects browser’ icon to open it.
Next to the effects browser icon, choose your preferred effect and add it between any 2 clips. By doing this you will have added animation effect between them.
Step 4: Add Audio, Music, and Color.
Audio & Music: At this point, you can import and add your music. Photos and Audio sidebar icon is located above the browser and you can click to open, and then select Sound Effects.
To see all the songs available in Final Cut Pro, you can type the word ‘Jingle‘ and you can preview them by pressing the small play button.
Color correction: By highlighting all the video clips in your video timeline, you can see a yellow outline around them.
Then open the drop-down menu by clicking the ‘_Enhancement_’ icon situated below the Viewer.
To improve the color and contrast, select Balance Color or ‘Option + Cmd + B’.
Now that you are done editing your video, you can save and share as you prefer.
Camtasia
Camtasia is a perfect all-in-one video editing and screen recording program. If you compare Camtasia vs Final cut pro, Camtasia is quite easy to use even for beginners. It can work in both Windows and macOS and provides the user with a demonstration and education video platform. It contains cool features to help you capture and edit your videos and audios appropriately.
Here are some pros and cons of Camtasia.
Pros:
- It is easy to learn.
- It has a good capture feature.
- Impressive cursor effects.
- It has Interactivity features.
- It has a good asset library
- Availability of mobile version.
- It offers great customer service.
- Available at a low cost.
Cons:
- Constant crashes and bugs.
- Limited customization
- No key tracking.
Here are key steps to follow when editing a video with Camtasia.
Step 1: Break up steps of a process with lower thirds.
Break any long multi-step video to help lower the viewer’s cognitive load.
Step 2: Reinforce texts with video.
Remove any mistakes and extra content such as unnecessary footage from the ends of your recording. If you trim too much drag the clip back to restore. This process is known as trimming.
You can zoom in on the most important section to focus your viewer’s attention there.
Step 3: Add narrative to video
Alternative Way to Edit Videos
Getting an appropriate video editing software is quite challenging as the makers of these software sometimes get confused about if the programs needed are for home videos or professional-quality work such as Hollywood movies. This is why you will find that some programs are complex to use while others lack essential features to make your work efficient.
Filmora video editor is one of the most efficient for video editing. This software is powerful and easy to use and it is built with many features to make your vision come true. It is fit for small scale, medium scale and large businesses.
For Win 7 or later (64-bit)
For macOS 10.12 or later
These steps will help you to know how to edit video with Filmora software;
Step 1: Start a new project.
After making sure that you have Filmora video editor installed on your computer, start a new project. Open the app then choose a dropdown option from the Select Project Aspect Ratio.
Step 2: Import your media
The footage, photos, and audios you use in your video are the key basic aspects of your video. Organizing all the files you are going to use in a single file. You can do this by browsing the file menu. Click the ‘File > Import Media Folder’ menu in Filmora and select the folder that contains your video files.
After importing your video files the thumbnails for each file will appear in one half of the application. Double-click on the thumbnails for a preview.
These thumbnails prove that all your captured video clips are already in the application and ready to be edited. Click on the Filmora video editing guide to get to help you know what to do.
Step 3: Add clips to the timeline, trim, adjust appropriately and sequence them.
Now that you have reviewed your video library and seen that they are there, you need to add them to the video editing timeline at the bottom of your app. This is quite easy as you can view all your video clips and determine which is to be added first.
Drag and drop each video or photo in the timeline to add it to your project.
After adding the clips, you can trim and adjust them appropriately. Click on the right or left edges of the clip you want to shorten in the timeline and drag it to shorten.
If you want to split a clip in the timeline, pick the scissors by clicking on the ‘_Scissors_’ icon.
When working on your video footage, click the spacebar of your computer keyboard to preview. By doing this, you will be able to see how your clips are joined together.
Trim appropriately and perfect the runtime of every single clip and re-order your clips where there is a need to do so. This can be done by clicking on the targeted clip and dragging it to where you want it to be.
Step 4: Add video Effects, Transmissions between the clips, and Text overlays
Click on the Effect icon at the top of the app and a deep visual library of effects will be visible. If you want to add a certain effect to your active clip, just double-click it.
Add transitions in your video timeline to cut the scene-to-scene. They are quite necessary as they help establish your audience’s attention.
The next thing after adding the transmissions will be adding the overlays and exporting your video by clicking on the ‘Export‘ button.
Step 5: Export your finished video.
You can click the ‘Export’ button and switch to the platform you want your video to be exported.
Conclusion
Choosing an appropriate video editing tool is equally as important as the video itself. And with the availability of so many of these video editing tools, choosing among them is quite hard. You can easily get confused especially if you are a beginner in the video editing industry. To avoid the complications you need to know what editing software is the best for your project.
Blender Tips - How to Make Blender Render Transparent Background
Blender Tips - How to Make Blender Render Transparent Background
An easy yet powerful editor
Numerous effects to choose from
Detailed tutorials provided by the official channel
Want to explore open source 2D/3D content creation through Blender? Stay here to embark your graphic creations with over the top dimensional detailing!
In this article
01 [What’s Blender and What’s Its Advantages?](#Part 1)
02 [How to Make a Material Transparent in Blender](#Part 2)
03 [How to Make a Background Transparent in Blender](#Part 3)
Part 1 What’s Blender and What’s Its Advantages?
When landing into the world of 3D graphic design, the Blender software suite is a one stop access to everything you would possibly think of exploring with. Right from modeling, animation, rendering and compositing to rigging, motion tracking and simulation; the software is a complete video editor and game developer kit.
Some high rated professional applications of the software include, API based Python and allied tool scripting to customize different applications, most of which are a part of the suite’s later releases. The software further supports a common graphic pipeline; compatible to studio based professional as well as individual usage and undergoes continuous upgrade to ascertain maximum graphic productivity.
Talking of the software’s platform compatibility, you are free to use Blender on any of your Windows, Mac and Linux supported devices with utmost ease. The suite works on the OpenGL platform for the most responsive user experience and quick output response.
You can further, conveniently regard the software as your personal 3D graphic designer, owing to the fact that the software’s General Public License grants the liberty of minor and major code alterations to its users, which often results in making the suite additively responsive, with the inclusion of improved features, receptive bug fixes and interactive usage.
Potential Advantages
Choosing the Blender 3D design suite for dimensional and motion graphic editing, you are entitled to benefit from the following advantages:
01A Free Graphic Suite
Almost every software user has the obvious habit of prioritizing financial equity before all other program credibility. However, you should be relieved to realize that the Blender 3D Suite is available to you without a price tag. Loyal users of the software claim the product to outshine its priced counterparts in terms of features and responsive flexibility.
If you are at the shore of graphic design and 3D modeling, there’s absolutely no better software to jump with, in the creation pool. Talking of the concerns of long term free usage and hidden feature blocking pay walls, there’s no cause to worry.
The software earns most of it financial credits through sales merchandise, donations and Cloud Service, which is a reasonably priced and optional graphic design assistant and application resource.
02Open Source Software
Essentially programmed and developed by an expert and skilled core team, the software is liberal enough to entertain open source modifications. Public users of the suite are permitted to make functionality alterations with Python coding. This flexibility of the Blender software is the underlying reason to a community driven increment to the existing top class suite functionalities.
While the public user creativity is responsible for adding a heap of free and paid software functionalities, the suite offers a sale of the specific feature scripts at marketplaces like, Blendermarket.com as a developer support initiative to promote the creation of highly productive graphic tools.
03Extensive Pipeline Support
As already stated, the software supports a plethora of creative utilities ranging from still and motion image graphics, movie developments, dimensional modeling, gaming, studio VFX and lots more. What’s best is, you are entitled to all this without having to spend a single penny from your pocket.
While most creators take up Blender graphic designing as a full time earning source, the bottom line is, if you are wondering, whether or not Blender supports a particular design task, most of the times it possibly can!
04Rendering Flexibility
You can work with two rendering options, viz., Eevee and Cycles within Blender. Using the Eevee render option, users can render their design models in physical, real time outputs in a quick time span. T5her biggest advantage of this rendering engine happens to be its working speed. While it does not require you wait for tedious rendering durations, you can additionally escape individual frame renders.
The Cycles is a physical, path tracing render engine, using light rays to interpret design looks. Compatible to GPU and CPU rendering, this one is a bit slow, but delivers a much precise image than Eevee.
Part 2 How to Make a Material Transparent in Blender
Blender is a top class graphic modulation tool; you can use to play with your editing creativity to your heart’s content, catering to a variety of design requirements, while adhering to a distinguished professional outlook. If you are pondering over the perfect task choice to start your editing journey with Blender, you can begin with making a material transparent in the software.
When beginning to create transparent artworks in Blender, you need to be familiar with the Transparent BSDF node. Here’s a quick explanation:
Transparent BSDF Node
When working with Blender, you get to access a variety of graphic nodes that cater to specific design purposes. Likewise, the transparent BSDF, as the name suggests, is an exclusive transparency creation graphic node that is essential to make materials transparent in Blender. Talking of the specific node function, it is there to facilitate the control of different transparency modes, in cohesion with specific user requirements.
Browse through the following section for a guided tutorial to make a material transparent using Blender:
Step 1:
Prepare a suitable BSDF material by selecting any image from your device and applying it to the object in the Blender’s viewport.
Step 2:
To start working with the Transparent BSDF node, you first need to insert the same into the node tree amongst the Principle BSDF and the Mix Shader nodes. To do this, you need to select ‘Add’ or press ‘Ctrl + A’, followed by locating the same in the ‘Shader’ submenu. Do not forget to add the ‘Mix Shader’ node, which is again, present in the ‘Shader’ submenu, to the node tree.
Step 3:
Plug in the Transparent BSDF output into the top Shader input of the Mix Shader, while dragging the latter into the connecting link between the Material Output and Principle BSDF nodes. This enables the Mix Shader node to pass through the two output generating nodes. The resultant ‘Transparency Effect’ can be seen on the viewpoint object within a few seconds.
Step 4:
Make an additional connection of two fresh nodes into the node tree as follows:
● Transparent BSDF output to the Mix Shader input
● Principal BSDF output to the Mix Shader input
● Mix Shader output to the Surface input
This will finally fetch a transparent material output for the selected image object.

Part 3 How to Make a Background Transparent in Blender
Having experimented with object material transparency in Blender, you can try hands at taking your creativity to the next level by creating Blender render transparent backgrounds in the software. Here’s what you need to do to take up the creation process:

Step 1:
Begin with choosing a suitable image to create a transparent background in either of the Eevee or Cycles render engines, followed by navigating to the ‘Render Properties’ tab in the software’s main interface. Click on the same to get a related drop down menu for activating selected image effects.

Step 2:
From the dropdown that appears, reach to the ‘Film’ option and click on the ‘Transparency’ checkbox to activate it.

You will now observe the image background in the Blender object viewport to disappear.

Step 3:
Press F12 to receive the render output. You can now save the transparent background image in your device. Take note use a transparency compatible image format, preferably PNG.
Blender is undoubtedly a viable graphic editing software to create transparent background images, but if you are in search of a different editor alternative, the Filmora Image Creator and Editor software to take up the aforesaid task with utmost ease.

Wondershare Filmora Video Editor
Essentially a Wondershare software utility, Filmora is conveniently regarded as one among the finest and top curated image editor software. Adhering to the particular interest of transparent background creation, Filmora’s exclusive ‘Green Screen’ attribute is a viable solution to create masterpieces of professional quality, transparent background images. The huge effects library of the software is there to infuse the additional tint of class to your creative excellence.
Making Transparent Background Images in Filmora
Follow the stepwise guided tutorial given below to create images with excellent quality transparent background in Filmora:
Step 1: Software Download and Installation
Log in to your favorite web browser in a Mac or Windows device to download Filmora from its official site and proceed with the software installation process.
For Win 7 or later (64-bit)
For macOS 10.12 or later
Step 2: Import Image File
When you are done with the installation, launch the software and navigate to the ’Import’ tab in its welcome interface. Click and tap ‘Import Media File’ from the dropdown that appears to import the desired image to Filmora’s media library.

Step 3: Drag to Timeline
The next step is to drag your image selection from the software’s media library to its editor timeline. Either right click the image and select ‘Insert’ option from the submenu that appears, or use the conventional ‘Drag and Drop’ method to accomplish this task.

Step 4: Transparency Adjustments
Once the image reaches the timeline, tap the same to see the ‘Settings’ tab get opened. Navigate through the tab options until you find ‘Chroma Key Settings’. Enable the ‘Chroma Key’ with a right side toggle to see your selected image get transparent with a ‘Green’ color in the background.
An alternative to the above method is to hit the ‘Color Picker’ option to the right of the ‘Select Color’ tab and navigate to a desired section of the image to make it transparent with a single click.

If you observe partial transparency in the resultant image background, consider making additional adjustments in ’Chroma Key’ setting parameters like, offset, edge thickness, tolerance, edge feather, etc., to ensure that the image background is totally transparent. When the final artwork makes you happy, tap ‘OK’.

**Step 4: Time to Export!**Your creation is now all set for a media export to your favorite social media handles. Just click on the ‘Export’ tab in the top right of the software timeline and that’s it!

● Ending Thoughts →
● Exploring your creative abilities with different graphic design tools and editing variations is an absolute fun. Among the various design alternatives, playing with dimensional graphic creativity is a remarkable craft that can be mastered with convenient market based software like Blender.
● However, if you are keen on trying other alternatives, you can prefer the Filmora Image Editor software for top class, professional quality image and video creation.
Want to explore open source 2D/3D content creation through Blender? Stay here to embark your graphic creations with over the top dimensional detailing!
In this article
01 [What’s Blender and What’s Its Advantages?](#Part 1)
02 [How to Make a Material Transparent in Blender](#Part 2)
03 [How to Make a Background Transparent in Blender](#Part 3)
Part 1 What’s Blender and What’s Its Advantages?
When landing into the world of 3D graphic design, the Blender software suite is a one stop access to everything you would possibly think of exploring with. Right from modeling, animation, rendering and compositing to rigging, motion tracking and simulation; the software is a complete video editor and game developer kit.
Some high rated professional applications of the software include, API based Python and allied tool scripting to customize different applications, most of which are a part of the suite’s later releases. The software further supports a common graphic pipeline; compatible to studio based professional as well as individual usage and undergoes continuous upgrade to ascertain maximum graphic productivity.
Talking of the software’s platform compatibility, you are free to use Blender on any of your Windows, Mac and Linux supported devices with utmost ease. The suite works on the OpenGL platform for the most responsive user experience and quick output response.
You can further, conveniently regard the software as your personal 3D graphic designer, owing to the fact that the software’s General Public License grants the liberty of minor and major code alterations to its users, which often results in making the suite additively responsive, with the inclusion of improved features, receptive bug fixes and interactive usage.
Potential Advantages
Choosing the Blender 3D design suite for dimensional and motion graphic editing, you are entitled to benefit from the following advantages:
01A Free Graphic Suite
Almost every software user has the obvious habit of prioritizing financial equity before all other program credibility. However, you should be relieved to realize that the Blender 3D Suite is available to you without a price tag. Loyal users of the software claim the product to outshine its priced counterparts in terms of features and responsive flexibility.
If you are at the shore of graphic design and 3D modeling, there’s absolutely no better software to jump with, in the creation pool. Talking of the concerns of long term free usage and hidden feature blocking pay walls, there’s no cause to worry.
The software earns most of it financial credits through sales merchandise, donations and Cloud Service, which is a reasonably priced and optional graphic design assistant and application resource.
02Open Source Software
Essentially programmed and developed by an expert and skilled core team, the software is liberal enough to entertain open source modifications. Public users of the suite are permitted to make functionality alterations with Python coding. This flexibility of the Blender software is the underlying reason to a community driven increment to the existing top class suite functionalities.
While the public user creativity is responsible for adding a heap of free and paid software functionalities, the suite offers a sale of the specific feature scripts at marketplaces like, Blendermarket.com as a developer support initiative to promote the creation of highly productive graphic tools.
03Extensive Pipeline Support
As already stated, the software supports a plethora of creative utilities ranging from still and motion image graphics, movie developments, dimensional modeling, gaming, studio VFX and lots more. What’s best is, you are entitled to all this without having to spend a single penny from your pocket.
While most creators take up Blender graphic designing as a full time earning source, the bottom line is, if you are wondering, whether or not Blender supports a particular design task, most of the times it possibly can!
04Rendering Flexibility
You can work with two rendering options, viz., Eevee and Cycles within Blender. Using the Eevee render option, users can render their design models in physical, real time outputs in a quick time span. T5her biggest advantage of this rendering engine happens to be its working speed. While it does not require you wait for tedious rendering durations, you can additionally escape individual frame renders.
The Cycles is a physical, path tracing render engine, using light rays to interpret design looks. Compatible to GPU and CPU rendering, this one is a bit slow, but delivers a much precise image than Eevee.
Part 2 How to Make a Material Transparent in Blender
Blender is a top class graphic modulation tool; you can use to play with your editing creativity to your heart’s content, catering to a variety of design requirements, while adhering to a distinguished professional outlook. If you are pondering over the perfect task choice to start your editing journey with Blender, you can begin with making a material transparent in the software.
When beginning to create transparent artworks in Blender, you need to be familiar with the Transparent BSDF node. Here’s a quick explanation:
Transparent BSDF Node
When working with Blender, you get to access a variety of graphic nodes that cater to specific design purposes. Likewise, the transparent BSDF, as the name suggests, is an exclusive transparency creation graphic node that is essential to make materials transparent in Blender. Talking of the specific node function, it is there to facilitate the control of different transparency modes, in cohesion with specific user requirements.
Browse through the following section for a guided tutorial to make a material transparent using Blender:
Step 1:
Prepare a suitable BSDF material by selecting any image from your device and applying it to the object in the Blender’s viewport.
Step 2:
To start working with the Transparent BSDF node, you first need to insert the same into the node tree amongst the Principle BSDF and the Mix Shader nodes. To do this, you need to select ‘Add’ or press ‘Ctrl + A’, followed by locating the same in the ‘Shader’ submenu. Do not forget to add the ‘Mix Shader’ node, which is again, present in the ‘Shader’ submenu, to the node tree.
Step 3:
Plug in the Transparent BSDF output into the top Shader input of the Mix Shader, while dragging the latter into the connecting link between the Material Output and Principle BSDF nodes. This enables the Mix Shader node to pass through the two output generating nodes. The resultant ‘Transparency Effect’ can be seen on the viewpoint object within a few seconds.
Step 4:
Make an additional connection of two fresh nodes into the node tree as follows:
● Transparent BSDF output to the Mix Shader input
● Principal BSDF output to the Mix Shader input
● Mix Shader output to the Surface input
This will finally fetch a transparent material output for the selected image object.
Part 3 How to Make a Background Transparent in Blender
Having experimented with object material transparency in Blender, you can try hands at taking your creativity to the next level by creating Blender render transparent backgrounds in the software. Here’s what you need to do to take up the creation process:
Step 1:
Begin with choosing a suitable image to create a transparent background in either of the Eevee or Cycles render engines, followed by navigating to the ‘Render Properties’ tab in the software’s main interface. Click on the same to get a related drop down menu for activating selected image effects.
Step 2:
From the dropdown that appears, reach to the ‘Film’ option and click on the ‘Transparency’ checkbox to activate it.
You will now observe the image background in the Blender object viewport to disappear.
Step 3:
Press F12 to receive the render output. You can now save the transparent background image in your device. Take note use a transparency compatible image format, preferably PNG.
Blender is undoubtedly a viable graphic editing software to create transparent background images, but if you are in search of a different editor alternative, the Filmora Image Creator and Editor software to take up the aforesaid task with utmost ease.
Wondershare Filmora Video Editor
Essentially a Wondershare software utility, Filmora is conveniently regarded as one among the finest and top curated image editor software. Adhering to the particular interest of transparent background creation, Filmora’s exclusive ‘Green Screen’ attribute is a viable solution to create masterpieces of professional quality, transparent background images. The huge effects library of the software is there to infuse the additional tint of class to your creative excellence.
Making Transparent Background Images in Filmora
Follow the stepwise guided tutorial given below to create images with excellent quality transparent background in Filmora:
Step 1: Software Download and Installation
Log in to your favorite web browser in a Mac or Windows device to download Filmora from its official site and proceed with the software installation process.
For Win 7 or later (64-bit)
For macOS 10.12 or later
Step 2: Import Image File
When you are done with the installation, launch the software and navigate to the ’Import’ tab in its welcome interface. Click and tap ‘Import Media File’ from the dropdown that appears to import the desired image to Filmora’s media library.
Step 3: Drag to Timeline
The next step is to drag your image selection from the software’s media library to its editor timeline. Either right click the image and select ‘Insert’ option from the submenu that appears, or use the conventional ‘Drag and Drop’ method to accomplish this task.
Step 4: Transparency Adjustments
Once the image reaches the timeline, tap the same to see the ‘Settings’ tab get opened. Navigate through the tab options until you find ‘Chroma Key Settings’. Enable the ‘Chroma Key’ with a right side toggle to see your selected image get transparent with a ‘Green’ color in the background.
An alternative to the above method is to hit the ‘Color Picker’ option to the right of the ‘Select Color’ tab and navigate to a desired section of the image to make it transparent with a single click.
If you observe partial transparency in the resultant image background, consider making additional adjustments in ’Chroma Key’ setting parameters like, offset, edge thickness, tolerance, edge feather, etc., to ensure that the image background is totally transparent. When the final artwork makes you happy, tap ‘OK’.
**Step 4: Time to Export!**Your creation is now all set for a media export to your favorite social media handles. Just click on the ‘Export’ tab in the top right of the software timeline and that’s it!
● Ending Thoughts →
● Exploring your creative abilities with different graphic design tools and editing variations is an absolute fun. Among the various design alternatives, playing with dimensional graphic creativity is a remarkable craft that can be mastered with convenient market based software like Blender.
● However, if you are keen on trying other alternatives, you can prefer the Filmora Image Editor software for top class, professional quality image and video creation.
The Top 10 Effective SRT Editors Online
Have you created the subtitles to be added to the video or audio file, but the time codes do not match the screenplay?
Do you want to create subtitles with different font sizes and colors, but the regular notepad does not allow you to do so?
If yes, you need something more than just a text editor. Creating an SRT file is super easy because you only need a text editor and the knowledge of time codes or stamps. But when you want to edit the same and add a visual appeal, you need feature-rich editors, especially if the subtitle file has .srt format. With an SRT editor online, you can quickly finish editing the subtitles in a snap and synchronize the same with the concerned multimedia file.
As many online SRT file editors are available on the market, we have rounded up the top ten browser-based applications that can make your job easier and stress-free.
Part 1: The Top 10 Effective SRT Editors Online Without Any Download
While third-party tools are there to solve your problems, the online editors allow you to fix an issue or edit the subtitles without downloading quickly. They also make the editing process much easier and less time-consuming, ensuring you finish the job quickly. Read this below section to learn more about our comprehensive list of top online SRT editors.
1. Adobe CC Express
Adobe CC Express allows you to edit SRT file and add subtitles to different videos for multiple social media channels. You can easily change the text file, time codes, font style and color.

Key features
- Easy-to-use interface
- Helps add the SRT file to different video files
- Highly stable browser-based tool
- Supports different SRT file size
Pros
- Best for professionals
- Does not come with any advertisement
- Additional video editing tool
Cons
- Beginners need to learn the tool first
Supported OS: Windows and Mac
Ratings: 4.5 out of 5 stars (G2)
Supported language translation: N/A
2. HappyScribe
HappyScribe is one of the best online platforms to edit SRT file online in an interactive manner. Once you upload the SRT file, the text blocks and the concerned time stamps will be displayed on the right-hand side of the screen. You can change the duration of each subtitle to synchronize it with the video. For example, you can customize maximum characters per line and minimum gap between adjacent captions for better visibility and readability.

Key features
- Supports different file size
- Helps you change starting timecode
- Sharable subtitle file in editing or view-only mode
- Subtitle preview in comparison with Soundwave
Pros
- Keeps the subtitles protected and confidential
- Allows subtitle translation to multiple languages
- Helps you adjust the readability
Cons
- Isn’t free completely
Supported OS: Mac and Windows
Ratings: 4.5 out of 5 stars (Tech Radar)
Supported language translation: English, German, Italian, Mandarin, Japanese, Polish, and Spanish
3. Nikse.DK
Nikse.DK is an open-source SRT file opener online that helps you adjust the time frames and subtitle texts according to the video requirements. You can upload the SRT file from any local location or use an URL. It is highly stable and keeps your subtitles unchanged.

Key features
- Allows you to edit SRT files with ease
- Stable and intuitive UI
- Supports different file sizes
- Open-source platform
Pros
- Helps you share your ideas with others
- Easy-to-use interface
- Doesn’t have any ad
Cons
- Does not feature an advanced editing option
Supported OS: Mac and Windows
Ratings: 4out of 5 stars (Trust Pilot)
Supported language translation: NIL
4. Kapwing
One of the best online editors for SRT files is Kapwing. Its easy-to-use interface and the AI-powered automatic subtitle generator help you add and synchronize captions with the video. You can edit the subtitles by changing their position, font size, and font color according to your preferences. In addition, you can also add full or no background or a simple text shadow to the subtitles.

Key features
- Comes with multiple font style options
- Supports large-sized SRT files
- Allows changing text positions
- Preview option makes subtitle editing easier
Pros
- Free online editor
- Doesn’t stream ads in between
- Easy user interface
Cons
- Can change font automatically
Supported OS: Mac and Windows
Ratings: 4.6 out of 5 stars (Trust Pilot)
Supported language translation: 60 different languages, including English, Arabic, Chinese, and Spanish
5. VEED
Whether you want to get more likes and comments on your Facebook videos or increase user engagement on your YouTube channel, using Veed’s online SRT editor will ease all your stress. You can easily edit the time duration of each text in the SRT file and synchronize it with the video. Apart from this, you can also edit the font style, color, text content, and alignment.

Key features
- Displays the edited subtitles in real-time in the video
- Helps you change the timing for each text block
- Synchronizes the subtitles and audio perfectly
- Allows exporting of the edited SRT file
Pros
- Helps you edit the SRT file in a few steps
- Features multiple font styles and colors
- Intuitive user interface
Cons
- Subtitle transcription feature might not work properly
Supported OS: Mac and Windows
Ratings: 3.8 out of 5 stars (Capterra)
Supported language translation: 100 languages like English, Spanish, Chinese, and French
6. Flixier
Flixier is an excellent SRT editing app with which you can edit an already existing subtitle file and add SRT to MP4 online or any other video format. It has an intuitive user interface to make editing work easier for beginners.

Key features
- Supports over 1000 font styles
- Allows you to add custom font
- Features are timeline window for subtitle preview
- Allows transcription to multiple languages
Pros
- Easy-to-use interface
- Fast rendering
- Allows font customization
Cons
- Doesn’t support free plans
Supported OS: Windows
Ratings: 4.7 out of 5 stars (G2)
Supported language translation: English, German, French, Chinese, and more
7. Subtitle Horse
Subtitle horse is one of the best options for editing SRT files without paying any price. First, it offers real-time validation to ensure you have a clear idea about the synchronization between the subtitle text and video. The timeline is entirely interactive and helps you edit the subtitles in a breeze. With excellent frame accuracy and various subtitle file fields like read-only and annotation, Subtitle Horse is the best SRT file editor online.

Key features
- Ideal for both beginners and professionals
- You can even customize shortcuts for faster editing
- You can also translate the language
- Timeline can be zoomed in for better adjustments
Pros
- Makes search and replace functions easier
- Allows you to merge multiple subtitles
- Comes with a restore history option
Cons
- Doesn’t come with much guidance
Supported OS: Windows and Mac
Ratings: N/A
Supported language translation: supports multiple language translations
8. Keevi
You can now make your videos more readable with Keevi and an existing SRT file. You can easily change the subtitles’ font, size, style, and position to make them more understandable and impressive. One of the best features is downloading videos with edited SRT subtitles.

Key features
- Allows you to add animations and emojis to the subtitle text
- Change the time code to synchronize video and subtitle
- Helps you translate the subtitle language
- Features an interactive timeline
Pros
- Add punctuation marks automatically to the subtitle file
- Helps you to adjust the frame rate
- Validates the subtitles in real-time
Cons
- Does not support closed caption subtitle
Supported OS: Windows and Mac
Ratings: N/A
Supported language translation: English, Spanish, German, French, etc.
9. SubShifter
With SubShifter, you can easily synchronize the subtitle and the video automatically if there is any offset or difference in the time frame. Just upload the file, choose the start and end time, and click the resync button to align the subtitle text with the video.

Key features
- Automatically synchronizes the subtitle text and video
- Does not change any front automatically
- Sync multiple subtitle timing by changing the end/start timings for two files consecutively
- Share and save as you prefer
Pros
- Remove offset between the SRT file and video
- Use this offline as well
- No ads at all
Cons
- Doesn’t allow to edit the fonts manually
Supported OS: Mac and Windows
Ratings: 4.4 out of 5 stars (Mac App Store)
Supported language translation: N/A
Part 2: How to pick the best SRT editor online website?
Finding the best online SRT editor is not easy with so many options available. You should consider many different aspects to avoid ending up with the wrong software. Keeping this in mind, we have explained the three most crucial factors you should consider at any cost.
Ease of editing
Choose an online editor that offers a smooth and streamlined editing process. For instance, it should not have advertisements or sudden pop-up windows. These reduce the editing time and cause a lot of hurdles.
Customization support
You should be able to customize different features of the subtitles with the SRT online editor. It can be the frame rate, emojis, annotations, shortcut keys, etc.
Stability
The editor needs to be stable and virus free. Plus, it also needs to keep your subtitles confidential and private.
Bonus Tip: The Best SRT Editing Software You Don’t Wanna Miss
Now that we have established the top SRT editors online one can use, it is time to consider some of the drawbacks. First of all, there is a matter of output quality. Sometimes, the editor tool can change the text, causing discrepancies between the original and edited SRT files.
Therefore, one of the best options will be to choose a tool that is able to deliver consistent performance and help edit the SRT files with ease. Wondershare Filmora is one such tool that you can use to work on the subtitles you have created or downloaded.
Following are the steps to use Filmora for SRT editing.
Free Download For Win 7 or later(64-bit)
Free Download For macOS 10.14 or later
1. Download Filmora from the official website and install it on your PC or Mac.

2. Start the Filmora program and import the SRT file that you’re looking to edit from your PC. Alternatively, you can just drag-n-drop the file.

3. Then right-click on it and select ‘Advanced Edit’ from the pop-up list.

4. You can easily change the time codes for the subtitles, edit the texts, split and merge them accordingly. In addition, you can also make changes to the font style and color.

5. Once you are done with all the edits, save the file and right click on the timeline where the SRT file is present.
6. Click on Export and choose a convenient location where you would like to download the file.

Conclusion
In this brief, we have introduced the best browser-based tools to open SRT file online and edit the subtitles according to the video requirements. These will help you make the texts more readable and understandable. You can easily synchronize the video and the subtitle texts to prevent offset.
NB: The 10th online tool, Media.io is an auto subtitle generator. It isn’t an SRT editor program.
- Ease of editing
- Customization support
- Stability
- Bonus Tip: The Best SRT Editing Software You Don’t Wanna Miss
Part 1: The Top 10 Effective SRT Editors Online Without Any Download
While third-party tools are there to solve your problems, the online editors allow you to fix an issue or edit the subtitles without downloading quickly. They also make the editing process much easier and less time-consuming, ensuring you finish the job quickly. Read this below section to learn more about our comprehensive list of top online SRT editors.
1. Adobe CC Express
Adobe CC Express allows you to edit SRT file and add subtitles to different videos for multiple social media channels. You can easily change the text file, time codes, font style and color.
Key features
- Easy-to-use interface
- Helps add the SRT file to different video files
- Highly stable browser-based tool
- Supports different SRT file size
Pros
- Best for professionals
- Does not come with any advertisement
- Additional video editing tool
Cons
- Beginners need to learn the tool first
Supported OS: Windows and Mac
Ratings: 4.5 out of 5 stars (G2)
Supported language translation: N/A
2. HappyScribe
HappyScribe is one of the best online platforms to edit SRT file online in an interactive manner. Once you upload the SRT file, the text blocks and the concerned time stamps will be displayed on the right-hand side of the screen. You can change the duration of each subtitle to synchronize it with the video. For example, you can customize maximum characters per line and minimum gap between adjacent captions for better visibility and readability.
Key features
- Supports different file size
- Helps you change starting timecode
- Sharable subtitle file in editing or view-only mode
- Subtitle preview in comparison with Soundwave
Pros
- Keeps the subtitles protected and confidential
- Allows subtitle translation to multiple languages
- Helps you adjust the readability
Cons
- Isn’t free completely
Supported OS: Mac and Windows
Ratings: 4.5 out of 5 stars (Tech Radar)
Supported language translation: English, German, Italian, Mandarin, Japanese, Polish, and Spanish
3. Nikse.DK
Nikse.DK is an open-source SRT file opener online that helps you adjust the time frames and subtitle texts according to the video requirements. You can upload the SRT file from any local location or use an URL. It is highly stable and keeps your subtitles unchanged.
Key features
- Allows you to edit SRT files with ease
- Stable and intuitive UI
- Supports different file sizes
- Open-source platform
Pros
- Helps you share your ideas with others
- Easy-to-use interface
- Doesn’t have any ad
Cons
- Does not feature an advanced editing option
Supported OS: Mac and Windows
Ratings: 4out of 5 stars (Trust Pilot)
Supported language translation: NIL
4. Kapwing
One of the best online editors for SRT files is Kapwing. Its easy-to-use interface and the AI-powered automatic subtitle generator help you add and synchronize captions with the video. You can edit the subtitles by changing their position, font size, and font color according to your preferences. In addition, you can also add full or no background or a simple text shadow to the subtitles.
Key features
- Comes with multiple font style options
- Supports large-sized SRT files
- Allows changing text positions
- Preview option makes subtitle editing easier
Pros
- Free online editor
- Doesn’t stream ads in between
- Easy user interface
Cons
- Can change font automatically
Supported OS: Mac and Windows
Ratings: 4.6 out of 5 stars (Trust Pilot)
Supported language translation: 60 different languages, including English, Arabic, Chinese, and Spanish
5. VEED
Whether you want to get more likes and comments on your Facebook videos or increase user engagement on your YouTube channel, using Veed’s online SRT editor will ease all your stress. You can easily edit the time duration of each text in the SRT file and synchronize it with the video. Apart from this, you can also edit the font style, color, text content, and alignment.
Key features
- Displays the edited subtitles in real-time in the video
- Helps you change the timing for each text block
- Synchronizes the subtitles and audio perfectly
- Allows exporting of the edited SRT file
Pros
- Helps you edit the SRT file in a few steps
- Features multiple font styles and colors
- Intuitive user interface
Cons
- Subtitle transcription feature might not work properly
Supported OS: Mac and Windows
Ratings: 3.8 out of 5 stars (Capterra)
Supported language translation: 100 languages like English, Spanish, Chinese, and French
6. Flixier
Flixier is an excellent SRT editing app with which you can edit an already existing subtitle file and add SRT to MP4 online or any other video format. It has an intuitive user interface to make editing work easier for beginners.
Key features
- Supports over 1000 font styles
- Allows you to add custom font
- Features are timeline window for subtitle preview
- Allows transcription to multiple languages
Pros
- Easy-to-use interface
- Fast rendering
- Allows font customization
Cons
- Doesn’t support free plans
Supported OS: Windows
Ratings: 4.7 out of 5 stars (G2)
Supported language translation: English, German, French, Chinese, and more
7. Subtitle Horse
Subtitle horse is one of the best options for editing SRT files without paying any price. First, it offers real-time validation to ensure you have a clear idea about the synchronization between the subtitle text and video. The timeline is entirely interactive and helps you edit the subtitles in a breeze. With excellent frame accuracy and various subtitle file fields like read-only and annotation, Subtitle Horse is the best SRT file editor online.
Key features
- Ideal for both beginners and professionals
- You can even customize shortcuts for faster editing
- You can also translate the language
- Timeline can be zoomed in for better adjustments
Pros
- Makes search and replace functions easier
- Allows you to merge multiple subtitles
- Comes with a restore history option
Cons
- Doesn’t come with much guidance
Supported OS: Windows and Mac
Ratings: N/A
Supported language translation: supports multiple language translations
8. Keevi
You can now make your videos more readable with Keevi and an existing SRT file. You can easily change the subtitles’ font, size, style, and position to make them more understandable and impressive. One of the best features is downloading videos with edited SRT subtitles.
Key features
- Allows you to add animations and emojis to the subtitle text
- Change the time code to synchronize video and subtitle
- Helps you translate the subtitle language
- Features an interactive timeline
Pros
- Add punctuation marks automatically to the subtitle file
- Helps you to adjust the frame rate
- Validates the subtitles in real-time
Cons
- Does not support closed caption subtitle
Supported OS: Windows and Mac
Ratings: N/A
Supported language translation: English, Spanish, German, French, etc.
9. SubShifter
With SubShifter, you can easily synchronize the subtitle and the video automatically if there is any offset or difference in the time frame. Just upload the file, choose the start and end time, and click the resync button to align the subtitle text with the video.
Key features
- Automatically synchronizes the subtitle text and video
- Does not change any front automatically
- Sync multiple subtitle timing by changing the end/start timings for two files consecutively
- Share and save as you prefer
Pros
- Remove offset between the SRT file and video
- Use this offline as well
- No ads at all
Cons
- Doesn’t allow to edit the fonts manually
Supported OS: Mac and Windows
Ratings: 4.4 out of 5 stars (Mac App Store)
Supported language translation: N/A
Part 2: How to pick the best SRT editor online website?
Finding the best online SRT editor is not easy with so many options available. You should consider many different aspects to avoid ending up with the wrong software. Keeping this in mind, we have explained the three most crucial factors you should consider at any cost.
Ease of editing
Choose an online editor that offers a smooth and streamlined editing process. For instance, it should not have advertisements or sudden pop-up windows. These reduce the editing time and cause a lot of hurdles.
Customization support
You should be able to customize different features of the subtitles with the SRT online editor. It can be the frame rate, emojis, annotations, shortcut keys, etc.
Stability
The editor needs to be stable and virus free. Plus, it also needs to keep your subtitles confidential and private.
Bonus Tip: The Best SRT Editing Software You Don’t Wanna Miss
Now that we have established the top SRT editors online one can use, it is time to consider some of the drawbacks. First of all, there is a matter of output quality. Sometimes, the editor tool can change the text, causing discrepancies between the original and edited SRT files.
Therefore, one of the best options will be to choose a tool that is able to deliver consistent performance and help edit the SRT files with ease. Wondershare Filmora is one such tool that you can use to work on the subtitles you have created or downloaded.
Following are the steps to use Filmora for SRT editing.
Free Download For Win 7 or later(64-bit)
Free Download For macOS 10.14 or later
1. Download Filmora from the official website and install it on your PC or Mac.
2. Start the Filmora program and import the SRT file that you’re looking to edit from your PC. Alternatively, you can just drag-n-drop the file.
3. Then right-click on it and select ‘Advanced Edit’ from the pop-up list.
4. You can easily change the time codes for the subtitles, edit the texts, split and merge them accordingly. In addition, you can also make changes to the font style and color.
5. Once you are done with all the edits, save the file and right click on the timeline where the SRT file is present.
6. Click on Export and choose a convenient location where you would like to download the file.
Conclusion
In this brief, we have introduced the best browser-based tools to open SRT file online and edit the subtitles according to the video requirements. These will help you make the texts more readable and understandable. You can easily synchronize the video and the subtitle texts to prevent offset.
NB: The 10th online tool, Media.io is an auto subtitle generator. It isn’t an SRT editor program.
Also read:
- Updated In 2024, How Did AI Video Games Act More Human Than Human?
- New How To Edit Youtube Videos In Easy Steps
- New An Ultimate Guide to Edit a Music Video Aspect Ratio and First Cut for 2024
- How to Use Deep Fried Meme Maker for 2024
- New A Comprehensive Guide on Converting Slo-Mo Videos to Normal Speed Videos On iPhone
- Top LUTs for Sony HLG to Download
- Updated 2024 Approved How to Create The Best Video Collages ?
- New Step by Step to Resize Video in Davinci Resolve for 2024
- 2024 Approved Phone Aspect Ratio Vertical Definition, Types and Tips
- In 2024, Boost Your Spirit Creating Motivational Status Videos
- New How to Create a Glitch Text Effect?
- New 7 Solutions to Cut Video on Mac without Using FFmpeg for 2024
- Updated Steps to Add Subtitles in Canva
- 2024 Approved How to Create a Slideshow on iPhone
- 2024 Approved How Do You Create In-Camera Transitions in Your Videos? A Complete Guide for Beginners to Create These Transitions Using Their Camera at Home
- Want to Learn How to Trim Videos in Premiere Pro. Read on; Our Guide Will Help You Trim Videos with This Timeline-Based Video Editing Software Application to Make Them Engaging to Viewers
- New 4 Solutions to Add White Border to Video on Mobile and Desktop for 2024
- Updated Easy Ways to Change Aspect Ratio in iMovie for 2024
- Updated How Can You Create Outstanding Educational Teaching Videos for 2024
- 2024 Approved In This Article, You Will Learn About the Top 5 Editors for Windows, Top 5 Editors for iPhone/Android, and Top 5 Editors for Animated GIF Editing
- New How To Fade Audio With Movavi Editor
- New In 2024, Practical Way to Resize Video in Handbrake
- Updated Splice App for Android - Guide to Download & Use
- Updated 2024 Approved Top 5 Free Online Video Filter Editors Improve Your Videos with Filters
- New 2024 Approved How to Make a Smooth Speed Ramping in Premiere Pro?
- Find The Best Free Canon LUTs
- Updated 2024 Approved Best Tips for Better Event Videography
- Updated In 2024, Expolring Top 6 Best Alternatives to Clownfish Voice Changer
- Want to Make Your Canva Slideshow More Attractive? Follow the Given Discussion to Know Everything About Making the Best Slideshows with Canva for 2024
- New Top Online Video Background Changers Transform Your Videos with Ease
- Updated Zoom In and Out on Discord
- Tips & Tricks To Perfectly Use the Audio Mixer in Filmora for 2024
- 2024 Approved 4 Methods How To Make a Recap Video
- Updated How to Get Zoom on TV Easy Solutions
- Updated 12 Top Picks of Video Enhancer Software
- Updated How to Make Boring Videos Look Cool By B Rolls
- Updated How to Make Tutorial Video with Filmora
- In 2024, The Ultimate Guide to Using AR Emoji Stickers in Your Videos
- Updated Video Maker with Song for 2024
- Best 8 AR Apps for Android and iOS | Help You See the World of AR
- In 2024, How to Stabilize Videos with Google Photos App for Free
- Easily Sync Audio With Video With Filmora
- 2024 Approved In This Article Let Me Share with You How to Start a Vlog? Ideas and Any Tips for You to Start Your Own Vlogging Channel
- In 2024, Top 6 Apps/Services to Trace Any Oppo A58 4G Location By Mobile Number | Dr.fone
- In 2024, Ultimate Guide on Lava Blaze Pro 5G FRP Bypass
- Fix Unfortunately Settings Has Stopped on Vivo V30 Quickly | Dr.fone
- In 2024, Everything You Need to Know about Lock Screen Settings on your Oppo Find N3
- 6 Proven Ways to Unlock Huawei Phone When You Forget the Password
- In 2024, Here Are Some Reliable Ways to Get Pokemon Go Friend Codes For Samsung Galaxy A05 | Dr.fone
- In 2024, How to Transfer Contacts from Google Pixel 8 to Other Android Devices Using Bluetooth? | Dr.fone
- What are Location Permissions Life360 On Xiaomi Redmi Note 12 Pro+ 5G? | Dr.fone
- How To Deal With the Oppo A38 Screen Black But Still Works? | Dr.fone
- What are Location Permissions Life360 On Samsung Galaxy A25 5G? | Dr.fone
- In 2024, Fixing Foneazy MockGo Not Working On Huawei P60 | Dr.fone
- In 2024, Apple ID is Greyed Out From Apple iPhone 7 How to Bypass?
- In 2024, Sony Xperia 1 V ADB Format Tool for PC vs. Other Unlocking Tools Which One is the Best?
- How to Bypass Activation Lock from Apple iPhone 12 or iPad?
- Everything You Need to Know about Lock Screen Settings on your Vivo S17t
- In 2024, How to Screen Mirroring Honor X9a? | Dr.fone
- In 2024, Guide to Mirror Your Tecno Pova 6 Pro 5G to Other Android devices | Dr.fone
- Best Anti Tracker Software For Realme 12 5G | Dr.fone
- In 2024, For People Wanting to Mock GPS on Vivo Y27s Devices | Dr.fone
- Still Using Pattern Locks with Realme Narzo 60x 5G? Tips, Tricks and Helpful Advice
- How To Deal With the Honor Play 40C Screen Black But Still Works? | Dr.fone
- In 2024, How to Check Distance and Radius on Google Maps For your Vivo S17 Pro | Dr.fone
- 9 Solutions to Fix Process System Isnt Responding Error on Honor 100 | Dr.fone
- Title: Updated 2024 Approved Best 22 Video Editing Tips to Know
- Author: Chloe
- Created at : 2024-04-24 07:08:40
- Updated at : 2024-04-25 07:08:40
- Link: https://ai-editing-video.techidaily.com/updated-2024-approved-best-22-video-editing-tips-to-know/
- License: This work is licensed under CC BY-NC-SA 4.0.
