Updated 2024 Approved Create a Kickass COD Warzone Thumbnail for Free
Create a Kickass COD Warzone Thumbnail for Free
Gaming is a popular video category. And COD: Warzone is one of the most popular games nowadays. That said, many gamers flock to video streaming websites to watch Warzone gameplays. And there are so many of them, and the competition for views is tough. So you must use all you can to win that battle. Your Warzone thumbnails, titles, and videos themselves must be on point.
With kickass thumbnails, the eyes of users searching for Call of Duty: Warzone videos will be attracted to your content. If your content is good, that will convert to an increase in views and subscribers.

How To Make an Impressive Warzone Thumbnail for Free
We have clarified how important a Warzone thumbnail that pop is. But how to make one? That’s what this article is for. Here, you will learn how to create impressive Warzone thumbnails for free. That’s right - FOR FREE.
Without further ado, here are the steps that you should follow:
Step1 Download & Install an Excellent Warzone Thumbnail Maker
Of course, the first step is to find good software for making thumbnails. But there is no thumbnail maker specifically made for Warzone. So, the best choice is a thumbnail maker that is also a video editor - like Wondershare Filmora .
Free Download For Win 7 or later(64-bit)
Free Download For macOS 10.14 or later
Admittedly, Wondershare Filmora has premium plans. But you can download it for free. Additionally, you can use the free trial version to create video thumbnails without upgrading to the paid version. So essentially, Wondershare Filmora is a free Warzone thumbnail maker. The best part is that you can use some of Filmora’s other features to make the thumbnail as cool as possible.
Step2 Take a Snapshot of Your Call of Duty Warzone Game
Using in-game screenshots is recommended. That way, the image is personalized and can’t be found anywhere else. Unfortunately, COD: Warzone does not have an in-game functionality for screenshots. So, you have to get the image using other means. You can use the following keyboard shortcuts to grab a screenshot:
- Using Windows’ Game Bar - Windows key + ALT + PrintScreen
- NVIDIA’s Shadow Play - ALT + Z
- Windows Screenshot - Windows + PrintScreen
Step3 Create a Project, Set Project Ratio & Import the Snapshot
- Download and launch Wondershare Filmora.
- Click “New Project.”

- Click “File” button. In the drop-down menu, select “Project Settings.”

- In the pop-up window, set the resolution to 1280*720, which is the recommended resolution of YouTube Thumbnail.
- Drag and drop the screenshot you took into the Filmora window. Alternatively, click the “Click here to import media” link to locate and import it.

Step4 Drag the Media to the Timeline, Add Effects, Stickers & Texts
- Drag the image from the Project Media section into the timeline.

- Click “Effects.” Select an effect to use and drag it into the timeline.
- Click “Stickers.” Select stickers to use and drag them into the timeline.

- Add Text overlays to the video. To do so, click “Titles.” Select the text style and drag it into the timeline. Double-click it to edit the written text.
Step5 Find a Desired Frame and Take a Screenshot
- Play the video preview.
- Pause the video when you see the best frame to use as the thumbnail.
- Click the “Camera” icon below the video preview to take a snapshot.

- Select a file format and a target destination folder for the image.

- Click “Ok.”
Step6 Use the Screenshot as Your New COD Warzone Thumbnail
- The screenshot will appear in the Project Media section in Filmora. Right-click the image.
- Click “Reveal in Explorer.” It will open the folder where the screenshot is saved.

- Use the screenshot as your video thumbnail.

![]()
Note: The free version of Wondershare Filmora will add a watermark to saved videos. But it will not add a watermark to a snapshot. Indeed, it is a free Warzone thumbnail creator.
If you want to know more tricks about creating a nice Warzone thumbnail, please check the video below:
Tips for a Superb Call of Duty: Warzone Thumbnail
A thumbnail is useless if it does not look good on YouTube. But how can you ensure it looks good on YouTube? That’s a good question. Actually, the YouTube help center gave pointers on how your video thumbnail should be. These are the five important things you should know about:
- The Warzone thumbnail size should be at least 640 pixels wide.
- YouTube thumbnail dimensions use an aspect ratio of 16:9.
- Your Warzone thumbnail should not exceed 2MB.
- The best size for YouTube video thumbnails is 1280 pixels by 720 pixels.
- The supported image formats are JPG, PNG, and GIF.
The next question is how the actual thumbnail image should look. There’s only one rule for that. Make it as cool as possible. Call of Duty: Warzone is a first-person shooter/battle royale game. People who are into these games are drawn to this aesthetic.
5 Best Call of Duty: Warzone Thumbnails on YouTube That May Inspire You
Research is always key to accomplishing something. If you want to create kickass COD: Warzone video thumbnails, you should look at the ones that worked. Visit YouTube and find videos that have great success. That will help you get some ideas for your thumbnails.
Let us help you with that. Here are 5 Call of Duty: Warzone thumbnails you should check out.
1. Call of Duty Warzone: THE BATTLE OF VERDANSK GAMEPLAY! (No Commentary)

This video from the channel NoAnnoyingCommentary has 3.3 million views. It shows the player pointing their gun upwards. Flying in the sky are many fighter planes (obviously edited.) Then, a sepia filter is applied to make it look like a shot from past real-world wars. It is cool and sure to attract the attention of the COD: Warzone demographics.
2. TOP 300 FUNNIEST FAILS IN WARZONE

This video is made by Red Arcade . It has attracted more than 12 million views. Admittedly, the title and the video concept are already enough to attract many viewers. But we can’t say that the thumbnail did not help. It’s actually really good.
The thumbnail shows a screenshot from Warzone. A player’s character is in the middle, with his back facing the camera. The words “AFK. Don’t shoot!” are written on the wall he is facing. The character is viewed through a sniper scope. It’s more “funny” than cool. But for what the video is about, it works fantastic.
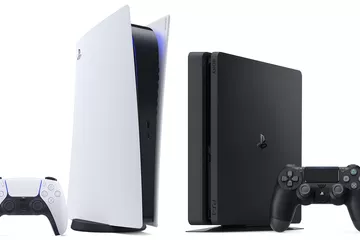
3. Clean House [PS5 UHD 4K] Next-Gen Ultra Realistic Graphics PlayStation 5 Call of Duty Gameplay

This video from HEDGEHOG ヅ has a whopping 12 million views. Again, the title likely is the main reason why it got that many views. But for sure, people did not read that long title at first. They were drawn to it by the thumbnail.
The thumbnail shows a clear-as-crystal screenshot of a team of 4 players on the battlefield. At the top left corner is the PS5 logo. Then, at the bottom left is an icon that says the video is in 4K UHD. If you’re also uploading 4K Warzone videos, you can try doing this. Users are attracted to videos that are eye-pleasing.
4. Call of Duty: Warzone Battle Royale | RTX 3080 10GB (4K Maximum Settings Ray Tracing OFF)

The thumbnail for this video (made by GTX 1050 Ti ), with 5.2 million views, is just an in-game screenshot. At the top-right is a large logo of GEFORCE RTX 3080 and at the bottom left is an Intel logo. Like the previous one, it attracts viewers by stating the visual appeal of the video.
5. NEW RECORD! 64 KILL GAME in CoD WARZONE! (Best Classes / Loadouts)

Like most Warzone thumbnails, this thumbnail from a Vikkstar123 video features a gun. At the top right is the victory banner, and at the bottom is the logo for kills with the number 64 next to it. The top right shows the logo of COD Warzone.
Players are attracted to amazing gameplay. Unsurprisingly, the player who got 64 kills got 3.1 million views in his video. The gist is that if you have achieved something amazing, try to incorporate it into the thumbnail.
Conclusion
Using in-game screenshots is recommended for making amazing COD Warzone thumbnails. But you should not use raw photos. You must edit them to ensure they have visual appeal. Of course, that means you need a good thumbnail maker.
Your best option is Wondershare Filmora. Why? Because it is a thumbnail maker and video editing software in one. Also, it allows you to make thumbnails for free! What could be better than that?
Free Download For macOS 10.14 or later
Admittedly, Wondershare Filmora has premium plans. But you can download it for free. Additionally, you can use the free trial version to create video thumbnails without upgrading to the paid version. So essentially, Wondershare Filmora is a free Warzone thumbnail maker. The best part is that you can use some of Filmora’s other features to make the thumbnail as cool as possible.
Step2 Take a Snapshot of Your Call of Duty Warzone Game
Using in-game screenshots is recommended. That way, the image is personalized and can’t be found anywhere else. Unfortunately, COD: Warzone does not have an in-game functionality for screenshots. So, you have to get the image using other means. You can use the following keyboard shortcuts to grab a screenshot:
- Using Windows’ Game Bar - Windows key + ALT + PrintScreen
- NVIDIA’s Shadow Play - ALT + Z
- Windows Screenshot - Windows + PrintScreen
Step3 Create a Project, Set Project Ratio & Import the Snapshot
- Download and launch Wondershare Filmora.
- Click “New Project.”
- Click “File” button. In the drop-down menu, select “Project Settings.”
- In the pop-up window, set the resolution to 1280*720, which is the recommended resolution of YouTube Thumbnail.
- Drag and drop the screenshot you took into the Filmora window. Alternatively, click the “Click here to import media” link to locate and import it.
Step4 Drag the Media to the Timeline, Add Effects, Stickers & Texts
- Drag the image from the Project Media section into the timeline.
- Click “Effects.” Select an effect to use and drag it into the timeline.
- Click “Stickers.” Select stickers to use and drag them into the timeline.
- Add Text overlays to the video. To do so, click “Titles.” Select the text style and drag it into the timeline. Double-click it to edit the written text.
Step5 Find a Desired Frame and Take a Screenshot
- Play the video preview.
- Pause the video when you see the best frame to use as the thumbnail.
- Click the “Camera” icon below the video preview to take a snapshot.
- Select a file format and a target destination folder for the image.
- Click “Ok.”
Step6 Use the Screenshot as Your New COD Warzone Thumbnail
- The screenshot will appear in the Project Media section in Filmora. Right-click the image.
- Click “Reveal in Explorer.” It will open the folder where the screenshot is saved.
- Use the screenshot as your video thumbnail.
![]()
Note: The free version of Wondershare Filmora will add a watermark to saved videos. But it will not add a watermark to a snapshot. Indeed, it is a free Warzone thumbnail creator.
If you want to know more tricks about creating a nice Warzone thumbnail, please check the video below:
Tips for a Superb Call of Duty: Warzone Thumbnail
A thumbnail is useless if it does not look good on YouTube. But how can you ensure it looks good on YouTube? That’s a good question. Actually, the YouTube help center gave pointers on how your video thumbnail should be. These are the five important things you should know about:
- The Warzone thumbnail size should be at least 640 pixels wide.
- YouTube thumbnail dimensions use an aspect ratio of 16:9.
- Your Warzone thumbnail should not exceed 2MB.
- The best size for YouTube video thumbnails is 1280 pixels by 720 pixels.
- The supported image formats are JPG, PNG, and GIF.
The next question is how the actual thumbnail image should look. There’s only one rule for that. Make it as cool as possible. Call of Duty: Warzone is a first-person shooter/battle royale game. People who are into these games are drawn to this aesthetic.
5 Best Call of Duty: Warzone Thumbnails on YouTube That May Inspire You
Research is always key to accomplishing something. If you want to create kickass COD: Warzone video thumbnails, you should look at the ones that worked. Visit YouTube and find videos that have great success. That will help you get some ideas for your thumbnails.
Let us help you with that. Here are 5 Call of Duty: Warzone thumbnails you should check out.
1. Call of Duty Warzone: THE BATTLE OF VERDANSK GAMEPLAY! (No Commentary)
This video from the channel NoAnnoyingCommentary has 3.3 million views. It shows the player pointing their gun upwards. Flying in the sky are many fighter planes (obviously edited.) Then, a sepia filter is applied to make it look like a shot from past real-world wars. It is cool and sure to attract the attention of the COD: Warzone demographics.
2. TOP 300 FUNNIEST FAILS IN WARZONE
This video is made by Red Arcade . It has attracted more than 12 million views. Admittedly, the title and the video concept are already enough to attract many viewers. But we can’t say that the thumbnail did not help. It’s actually really good.
The thumbnail shows a screenshot from Warzone. A player’s character is in the middle, with his back facing the camera. The words “AFK. Don’t shoot!” are written on the wall he is facing. The character is viewed through a sniper scope. It’s more “funny” than cool. But for what the video is about, it works fantastic.
3. Clean House [PS5 UHD 4K] Next-Gen Ultra Realistic Graphics PlayStation 5 Call of Duty Gameplay
This video from HEDGEHOG ヅ has a whopping 12 million views. Again, the title likely is the main reason why it got that many views. But for sure, people did not read that long title at first. They were drawn to it by the thumbnail.
The thumbnail shows a clear-as-crystal screenshot of a team of 4 players on the battlefield. At the top left corner is the PS5 logo. Then, at the bottom left is an icon that says the video is in 4K UHD. If you’re also uploading 4K Warzone videos, you can try doing this. Users are attracted to videos that are eye-pleasing.
4. Call of Duty: Warzone Battle Royale | RTX 3080 10GB (4K Maximum Settings Ray Tracing OFF)
The thumbnail for this video (made by GTX 1050 Ti ), with 5.2 million views, is just an in-game screenshot. At the top-right is a large logo of GEFORCE RTX 3080 and at the bottom left is an Intel logo. Like the previous one, it attracts viewers by stating the visual appeal of the video.
5. NEW RECORD! 64 KILL GAME in CoD WARZONE! (Best Classes / Loadouts)
Like most Warzone thumbnails, this thumbnail from a Vikkstar123 video features a gun. At the top right is the victory banner, and at the bottom is the logo for kills with the number 64 next to it. The top right shows the logo of COD Warzone.
Players are attracted to amazing gameplay. Unsurprisingly, the player who got 64 kills got 3.1 million views in his video. The gist is that if you have achieved something amazing, try to incorporate it into the thumbnail.
Conclusion
Using in-game screenshots is recommended for making amazing COD Warzone thumbnails. But you should not use raw photos. You must edit them to ensure they have visual appeal. Of course, that means you need a good thumbnail maker.
Your best option is Wondershare Filmora. Why? Because it is a thumbnail maker and video editing software in one. Also, it allows you to make thumbnails for free! What could be better than that?
What’s The Best Laptops For Video Editing
Choosing the right laptop for video editing can be quite scary, but it doesn’t mean you have to spend a fortune to start out. A few years ago, desktop computers were more appropriate for running top video editing software like Adobe Premiere Pro, DaVinci Resolve, VEGAS Pro because they need more powerful hardware.
Times have changed and a lightweight, powerful laptop is now a perfect alternative for a desktop computer.

The Best Laptops For Video Editing
1. Acer Predator Triton 300 SE

Acer Predator Triton 300 SE
![]()
Tips: This powerful Acer laptop is perfect for everyday tasks and will run your video editing software super smooth. With its powerful Intel i7 processor that holds a 3.30 GHz speed, editing video content will feel like never before.
It holds a GeForce RTX 3060 graphics card that has a 6 GB memory capacity for fluent playback, along with 16 GB of DDR4 SDRAM memory so you have no problem running other programs in the background besides your video editing application. This laptop is equipped with a 1 TB solid state drive for your storage. The monitor has a 1920x1080 resolution with a whopping 144Hz refresh rate.
Reasons to Buy
- Gorgeous, slim design.
- Solid battery life.
- Great overall and gaming performance.
2. Dell XPS 17 (2021)

Dell XPS 17 (2021)
When it comes to Dell, people tend to make jokes about the brand, but they have really stepped up their game hardware-wise. This laptop doesn’t standardly hold factory components meaning that you can completely customize your configuration on the specifications. Your options for your solid state drive are 512 GB or 1 TB capacity. Your options for processors are an Intel i5-11400H, an Intel i7-11800H or an Intel i9-11900H.
![]()
Tips: For the RAM memory, you can choose between 8, 16 or 32 GB. Besides the hardware specifications, your options for the operating system are Windows 10 Home, Windows 10 Professional, Windows 11 Home or Windows 11 Professional.
3. Apple MacBook Pro M1 (2022)

Apple MacBook Pro M1 (2022)
The workstation we will list next is one of the most powerful devices out there. The Apple MacBook Pro M1 holds a powerful M1 Pro chip, has an 8-core CPU with 6 performance cores and 2 efficiency cores. GPU-wise, you got 14 cores. A 16-core Neutral Engine and 2000GB/s memory bandwidth.
![]()
Tips: You have different options for your RAM memory, starting at 16 which is configurable all the way up to 32 GB with the M1 Pro or M1 Max, and 64 GB for the M1 Max. In terms of the graphics card.
Reasons to Buy
- High-res display can go very bright.
- Long battery life.
- Comfortable keyboard.
- Robust speakers.
4. Microsoft Surface Book 3

Microsoft Surface Book 3
Meet the laptop that will meet your big demands! This Microsoft Surface Book 3 holds the speed, visual aspects and also gaming options easily! This model is available in both 13.5” and 15’. The display specifications are a 3000x2000 resolution, or a 3240x2160 with either 267 PPI, or 260 PPI. It holds a Intel i5 1035G7 or an i7 1065G7 processor depending on your wishes.
![]()
Tips: The RAM capacity is 16 GB and is upgradable to 32 GB for more heavy projects and needs. Depending on which model you buy, the solid state drive holds 256 GB, 512 GB, or 1 TB, or even up to 2 TB on the 15” model.
Reasons to Buy
- Good audio.
- Long battery life.
- Powerful performance.
- Elegant design.
5. Razer Blade 15

Razer Blade 15
![]()
Tips: The Razer Blade 15 has excellent build quality. Not only is Razer known for robust hardware quality for keyboards and mice, but they also have great and powerful laptops. This Razer Blade 15 features two M.2 ports. So if you’re able to remove the laptop’s bottom panel and solid state drive cover, inserting another drive should be quite easy to do.
Just keep in mind that you should use single-sided modules because double-sided M.2 sticks will not fit. It comes with a 15.6-inch 240Hz QHD display, which gives you a great balance of size and resolution. Razer offers the most recent 12th-gen Intel H-series processors and the Nvidia RTX 30-series graphics cards. The display resolution is.
Reasons to Buy
- Supercharged performance.
- Below-average battery life.
- Exorbitantly expensive.
6. Asus ProArt Studiobook 16 OLED

Asus ProArt Studiobook 16 OLED
Let’s talk Asus. It’s absolutely a considerable option. This laptop comes with an Intel Xeon W-11955M 8x2.6 GHz. The graphics card equipped is a Nvidia RTX A5000 Laptop GPU. The monitor resolution is 3840x2400 pixels with a whopping 283 PPI.
![]()
Tips: You can upgrade your RAM up to 64 GB of DDR4 depending on your wants and needs. We believe that this is a very solid option as it will be able to handle all your projects very effortlessly.
Reasons to Buy
- Attractive looks and premium feel.
- Excellent performance.
- Bright and colorful display.
It holds a GeForce RTX 3060 graphics card that has a 6 GB memory capacity for fluent playback, along with 16 GB of DDR4 SDRAM memory so you have no problem running other programs in the background besides your video editing application. This laptop is equipped with a 1 TB solid state drive for your storage. The monitor has a 1920x1080 resolution with a whopping 144Hz refresh rate.
Reasons to Buy
- Gorgeous, slim design.
- Solid battery life.
- Great overall and gaming performance.
2. Dell XPS 17 (2021)
Dell XPS 17 (2021)
When it comes to Dell, people tend to make jokes about the brand, but they have really stepped up their game hardware-wise. This laptop doesn’t standardly hold factory components meaning that you can completely customize your configuration on the specifications. Your options for your solid state drive are 512 GB or 1 TB capacity. Your options for processors are an Intel i5-11400H, an Intel i7-11800H or an Intel i9-11900H.
![]()
Tips: For the RAM memory, you can choose between 8, 16 or 32 GB. Besides the hardware specifications, your options for the operating system are Windows 10 Home, Windows 10 Professional, Windows 11 Home or Windows 11 Professional.
3. Apple MacBook Pro M1 (2022)
Apple MacBook Pro M1 (2022)
The workstation we will list next is one of the most powerful devices out there. The Apple MacBook Pro M1 holds a powerful M1 Pro chip, has an 8-core CPU with 6 performance cores and 2 efficiency cores. GPU-wise, you got 14 cores. A 16-core Neutral Engine and 2000GB/s memory bandwidth.
![]()
Tips: You have different options for your RAM memory, starting at 16 which is configurable all the way up to 32 GB with the M1 Pro or M1 Max, and 64 GB for the M1 Max. In terms of the graphics card.
Reasons to Buy
- High-res display can go very bright.
- Long battery life.
- Comfortable keyboard.
- Robust speakers.
4. Microsoft Surface Book 3
Microsoft Surface Book 3
Meet the laptop that will meet your big demands! This Microsoft Surface Book 3 holds the speed, visual aspects and also gaming options easily! This model is available in both 13.5” and 15’. The display specifications are a 3000x2000 resolution, or a 3240x2160 with either 267 PPI, or 260 PPI. It holds a Intel i5 1035G7 or an i7 1065G7 processor depending on your wishes.
![]()
Tips: The RAM capacity is 16 GB and is upgradable to 32 GB for more heavy projects and needs. Depending on which model you buy, the solid state drive holds 256 GB, 512 GB, or 1 TB, or even up to 2 TB on the 15” model.
Reasons to Buy
- Good audio.
- Long battery life.
- Powerful performance.
- Elegant design.
5. Razer Blade 15
Razer Blade 15
![]()
Tips: The Razer Blade 15 has excellent build quality. Not only is Razer known for robust hardware quality for keyboards and mice, but they also have great and powerful laptops. This Razer Blade 15 features two M.2 ports. So if you’re able to remove the laptop’s bottom panel and solid state drive cover, inserting another drive should be quite easy to do.
Just keep in mind that you should use single-sided modules because double-sided M.2 sticks will not fit. It comes with a 15.6-inch 240Hz QHD display, which gives you a great balance of size and resolution. Razer offers the most recent 12th-gen Intel H-series processors and the Nvidia RTX 30-series graphics cards. The display resolution is.
Reasons to Buy
- Supercharged performance.
- Below-average battery life.
- Exorbitantly expensive.
6. Asus ProArt Studiobook 16 OLED
Asus ProArt Studiobook 16 OLED
Let’s talk Asus. It’s absolutely a considerable option. This laptop comes with an Intel Xeon W-11955M 8x2.6 GHz. The graphics card equipped is a Nvidia RTX A5000 Laptop GPU. The monitor resolution is 3840x2400 pixels with a whopping 283 PPI.
![]()
Tips: You can upgrade your RAM up to 64 GB of DDR4 depending on your wants and needs. We believe that this is a very solid option as it will be able to handle all your projects very effortlessly.
Reasons to Buy
- Attractive looks and premium feel.
- Excellent performance.
- Bright and colorful display.
How to Add Echo Effect to Video
If you are alone in a large empty room and you speak something, your words get echoed across the room. It will seem as if you are speaking the same words multiple times but with less volume every single time. When you have a video where you are reading out poems or giving an important message, adding an echo effect to the video makes the audio impactful and engaging.
You will need a video editor where you can add echo effect to video in simple steps. Not many video editors are available where you can add the echo effect instantly from the available sound effects and presets. That is why we have handpicked the best video editors for Windows PC and Mac users. You can also add echo effect to video online from any device directly from your web browser.
Part 1. How to Add Echo Effect to Video Online
If you want to add echo effect to your video one time only, there is no need to download any video editor uselessly. You can use an online audio editor to add echo effect and combine the modified audio and video files together. TwistedWave is one of the few online video editors that allow you to add echo effect to your video. Here are the steps how to add echo effect in video online.
Step 1Open your web browser and visit “twistedwave.com/online”. Click on Upload a file button to upload your video file.

Step 2After successful uploading, TwistedWave will separate the audio portion from the uploaded video file and open it on its editor to add sound effects.

Step 3On the new editor window, go to Effects> VST Effects and click on mdaDelay.so.

Step 4From the pop-up window, you can adjust different parameters as per your preference for the enhanced echo effect. Click on Apply button.

Step 5Play the audio to check the echo effect and go to File and click on Download option. You can save the modified audio file on your device.

Part 2. How to Add Echo to Video on Windows PC
If you are a Windows PC user, there are only a few video editors available where you can add echo effect instant from the built-in option. Even the most popular video editors do not have the echo effect preset in the audio effects. We recommend Wondershare Filmora where you can add echo effect in a few steps instantly from the built-in echo effect.
Filmora Video Editor is a powerful application that simplifies adding echo effects to your videos. It has a comprehensive range of features that make it easy for even beginners to create stunning results in no time at all. To start adding a echo effect with Filmora, follow these few simple steps:
Free Download For Win 7 or later(64-bit)
Free Download For macOS 10.14 or later
Step 1Download and install Filmora. Launch the application and click on New Project option. You can go to File menu and click on New Project option.

Step 2Go to File> Import Media and click on Import Media Files option. Select your video file from your storage device. Otherwise, you can drag and drop the video on Project Media and drop the video on Timeline.
Step 3Click on Effects option located at the top and search for “echo”. Drag and drop the Echo effect on your video located on Timeline.

Step 4Double-click on the video file and click on Audio option at the top. Scroll down and go to Echo section. You can adjust the parameters to get the echo effect as per your preference. Click on Ok button.

Step 5Play the video and if you are satisfied, click on Export button to save the video in your desired file format.
Part 3. How to Add Echo to Video on Mac
If you are a Mac user and you are looking for a free video editor to add echo effect, you can use iMovie app. iMovie is a video editor by Apple and most Mac users know and might have used it. iMovie comes with a built-in echo delay effect that can get the job done for you. However, the effect is not customizable as it is in Filmora. Here are the steps on how to put echo on video using iMovie.
Step 1Launch iMovie from Applications folder as it comes pre-installed on Mac.
Step 2Go to File> Import Media to bring in your video file. Thereafter, drag and drop the file on the Timeline.

Step 3Click on the video clip on the Timeline and click on “Clip Filter and Audio Effects” icon in the top-right corner.

Step 4Click on Audio Effect – None option and “Choose Audio Effect” pop-up window will open. Click on Echo Delay option.

Step 5Play the video and go to File> Share> File option to export the edited video.

The Bottom Line
Adding echo effect to video is a common trend when you want to emphasize what you are speaking. The echo effect sounds different and hence, it grabs the attention of the audience instantly. We have illustrated how you can add echo effect to your video online as well as on your computer. We highly recommend Wondershare Filmora to instant put echo effect to your video on Windows PC and Mac.
Free Download For Win 7 or later(64-bit)
Free Download For macOS 10.14 or later
Free Download For macOS 10.14 or later
Step 1Download and install Filmora. Launch the application and click on New Project option. You can go to File menu and click on New Project option.
Step 2Go to File> Import Media and click on Import Media Files option. Select your video file from your storage device. Otherwise, you can drag and drop the video on Project Media and drop the video on Timeline.
Step 3Click on Effects option located at the top and search for “echo”. Drag and drop the Echo effect on your video located on Timeline.
Step 4Double-click on the video file and click on Audio option at the top. Scroll down and go to Echo section. You can adjust the parameters to get the echo effect as per your preference. Click on Ok button.
Step 5Play the video and if you are satisfied, click on Export button to save the video in your desired file format.
Part 3. How to Add Echo to Video on Mac
If you are a Mac user and you are looking for a free video editor to add echo effect, you can use iMovie app. iMovie is a video editor by Apple and most Mac users know and might have used it. iMovie comes with a built-in echo delay effect that can get the job done for you. However, the effect is not customizable as it is in Filmora. Here are the steps on how to put echo on video using iMovie.
Step 1Launch iMovie from Applications folder as it comes pre-installed on Mac.
Step 2Go to File> Import Media to bring in your video file. Thereafter, drag and drop the file on the Timeline.
Step 3Click on the video clip on the Timeline and click on “Clip Filter and Audio Effects” icon in the top-right corner.
Step 4Click on Audio Effect – None option and “Choose Audio Effect” pop-up window will open. Click on Echo Delay option.
Step 5Play the video and go to File> Share> File option to export the edited video.
The Bottom Line
Adding echo effect to video is a common trend when you want to emphasize what you are speaking. The echo effect sounds different and hence, it grabs the attention of the audience instantly. We have illustrated how you can add echo effect to your video online as well as on your computer. We highly recommend Wondershare Filmora to instant put echo effect to your video on Windows PC and Mac.
Free Download For Win 7 or later(64-bit)
Free Download For macOS 10.14 or later
How to Speed Up Video with Canva Online Tool?
Canva video speed-ups are getting popular daily, and so is the art of making viral content.

One of the crucial features that every editing software should have is the ability to adjust the video speed. This is great for those who are creating YouTube shorts or simply looking to play with the slow-motion effects in their content. Now while talking about such edits, Canva is one such name that comes to mind.
It is a popular video editor and graphic designer you probably have heard of. Canva has tons of built-in functions, accompanied by an intuitive layout that users can’t get enough of. However, in terms of things like video speed-ups, it can get a bit complicated.
That’s why today we will go through the Canva video editor in detail and figure out whether it is possible to speed up the video in Canva or not. In the end, you will also discover other alternatives that provide the same functionality without any strings attached. So, let’s get straight into the topic!
Part I. Basic Understanding of Canva
Before jumping to Canva video speed-ups, it’s best to know a little about this tool. So Canva is an online media designing tool that enables you to create amazing content without much technical knowledge. It was launched back in 2013 and, until then, has managed to empower millions of people globally.
Whether it’s image editing, CV creation, or graphic modification, Canva is the forefront of modern tools. They even have a built-in video optimization feature that lets you boost your content without compromising quality. Everything in Canva is clutter-free, and the layout of their main website is beginners friendly.
There are also tons of free templates that you can use in Canva and format according to your preferred size and needs. Besides that, Canva’s native application is now available for all major operating systems. This means you can enjoy this tool as long as you have iOS 10 or higher (<Android 4.1).
Features of Creating and Editing with Canva
Some amazing perks that you get with Filmora include:
- ✅Dozens of customizable templates
- ✅Available with its drag-and-drop layout
- ✅Ability to add custom elements and transitions
- ✅Precise graphic movement
- ✅Supports single-key shortcuts
- ✅Cut and trim access
- ✅On-site recording
- ✅Up-loadable third-party content
- ✅ Mobile phone compatibility
- ✅Wide range of download formats
Part II. How to Speed Up a Video in Canva?
Managing video duration on your preferred domain is so crucial these days, mainly because of our smaller attention spans. This is why you should be looking to change video speed in Canva as soon as you get your hands on the project. Unfortunately, at the time of writing, there are no known features in which you can speed up the video in Canva. However, there are some alternative methods for archiving sped-up videos.
An Ultimate Guide to Speed Up a Canva Video

Step1Create a New Video Project with Canva
- Head over to Canva’s official webpage and open a new video project through the “Create“ button in the top right corner.

Step2Upload Your Speed Up Canva Video on the Console
- Now, you can either upload your video project into the console through the “Upload“ tab or use the provided video templates from the “Videos“ section.

- Once that’s done, drag and drop your clip on the timeline and adjust it according to your requirements.

Hit preview once you are comfortable with video positioning
Step3Download the Non-speed Up Video in Canva
After previewing the clip, you will soon realize that your video is going too slow and needs to be adjusted. Unfortunately, no feature as of right now could directly fix the issue. It needs to be revamped in a third-party program requiring video download.
- To download the original video in Canva, move your cursor to the top and select the “share“ button.

- Before you download the file, make sure that you have the MP4 format selected.

Step4Use Third-Party Software (Eizgif) to Change Video Speed In Canva
- Once you’ve downloaded your video file onto the system, open a new browser tab and search for Eizgif (or related speed-up video in the Canva tool). Now upload the same video on the given window.

- After the clip has been uploaded, a new tab will open up. Here you will find an option named “multiplier.” Changing its value from greater than one will make your video move fast.

- Adjustust the desired multiplier value and select “change video speed.”

Eizgif also gives you the freedom to adjust sound, if your video has any
Step5Re-upload the Speed-Up Video In Canva Editor
- When you feel like your video has a perfect speed, save it in your system directory.

- Now re-upload your changed video speed in Canva and drag it onto the timeline through the “Videos“ tab.

- Review the clip and notice the enhanced video speed from the Canva editor when it’s done.

So technically, you can change video speed in Canva, but the process can be time-consuming, especially for starters.
Part III. Wondershare Filmora - The Best All-in-one Video Speed-Up Alternative to Canva
Canva is no doubt a great video and graphic editor, but there are a handful of features that it needs to provide. For once, it can’t store files without internet access. Similarly, you need third-party applications even to use the most basic features, such as video speed-ups.
To work on these downsides, dozens of alternatives are available on the market; one of the better ones is Wondershare Filmora . It’s a full-proof video and audio editing app with tons of customizations under its belt. Individuals can use this powerful tool to create unique media content.
Everything is seamless in Filmora, and it’s supported on all major operating systems. There is no technical jargon in its application, and even beginners will be able to enjoy its interface.
Highlights of Filmora Compared to Canva Video Speed-Ups
- ✅Work on your speed-up projects without an internet connection
- ✅Not limited to download formats
- ✅Lack of template limitation on the free version
- ✅Beginner to advanced level UI
Free Download For Win 7 or later(64-bit)
Free Download For macOS 10.14 or later
How to Speed Up a Video Using Filmora?
Step1Create a New Project With Filmora Video Editor
First, if you don’t have it already, download the latest version of this tool from the web .
Once it’s installed, open the app and upload your new project straight into its console.

Step2Change the Speed Or Duration of Your Clip
- Now that your video is in the timeline, right-click it and select the custom “Speed & duration“ button.

- In the new window, change the speed value greater than 1, just like you did in the case of Eizgif. You can also adjust the speed slider for better coverage.

- After finishing, click “Ok“ and preview your clip to see the fast video effect in-placed.
BONUS STEPEnable the Speed Ramping Effects
Speed ramp is a unique feature in Filmora which allows you to apply acceleration or deceleration at any point in your clip, creating unique effects. To use these settings, you need to:
- Select your timeline video and choose the “Speed“ button on the bottom bar. After that, click on “Speed Ramping.”

- You can now apply multiple speed ramping effects based on your preference. Select it (for example, flash-out effect), and it will be used for your whole video.

Step3Export the Final Speed-Up Video
- After changing the video speed in Filmora, save it on your desktop. For that, move to the top left corner and select “File<Save Project.”

- You can also use the “Export“ option to move it to a local folder.
Conclusion
This was our two cents on how you can speed up a video on Canva. In the end, speeding up a video is a great way to keep your audience engaged in video production. It lets you make your content short and precise or introduce dramatic effects. If you want to use such features in your videos, then Filmora is a great way to start. Not only do you get fast video effects, but you can also save them without any internet access. So, give it a try and see the difference yourself!
Free Download For macOS 10.14 or later
How to Speed Up a Video Using Filmora?
Step1Create a New Project With Filmora Video Editor
First, if you don’t have it already, download the latest version of this tool from the web .
Once it’s installed, open the app and upload your new project straight into its console.
Step2Change the Speed Or Duration of Your Clip
- Now that your video is in the timeline, right-click it and select the custom “Speed & duration“ button.
- In the new window, change the speed value greater than 1, just like you did in the case of Eizgif. You can also adjust the speed slider for better coverage.
- After finishing, click “Ok“ and preview your clip to see the fast video effect in-placed.
BONUS STEPEnable the Speed Ramping Effects
Speed ramp is a unique feature in Filmora which allows you to apply acceleration or deceleration at any point in your clip, creating unique effects. To use these settings, you need to:
- Select your timeline video and choose the “Speed“ button on the bottom bar. After that, click on “Speed Ramping.”
- You can now apply multiple speed ramping effects based on your preference. Select it (for example, flash-out effect), and it will be used for your whole video.
Step3Export the Final Speed-Up Video
- After changing the video speed in Filmora, save it on your desktop. For that, move to the top left corner and select “File<Save Project.”
- You can also use the “Export“ option to move it to a local folder.
Conclusion
This was our two cents on how you can speed up a video on Canva. In the end, speeding up a video is a great way to keep your audience engaged in video production. It lets you make your content short and precise or introduce dramatic effects. If you want to use such features in your videos, then Filmora is a great way to start. Not only do you get fast video effects, but you can also save them without any internet access. So, give it a try and see the difference yourself!
Also read:
- [New] Premium Photographic Archives
- [Updated] Free Facebook Management Smart Post Scheduling Tips for 2024
- 2024 Approved This Is a Recommendation About Bandicut. If You Are Confused, Please Check It Out
- 2024 Approved Unlocking Impressive HDR Potential with Our Tutorial
- Complete Solution for Fixing Avcodec.dll Not Detected or Lost Errors in Windows
- Fuse Sounds with Slides A Guide to MP3 Integration
- How to Do Masking in After Effects Alternative Provided for 2024
- How to play MOV files on Xiaomi Redmi A2+ ?
- How To Teleport Your GPS Location On Nokia XR21? | Dr.fone
- How to Transfer Photos from Samsung Galaxy XCover 7 to Laptop Without USB | Dr.fone
- In 2024, Best Guide for Setting TikTok Countdown Timer
- New 2024 Approved How to Add Freeze Frame to Your Video From Any Device?
- New Free Ways to Download Mobile Phone Green Screen Videos and Pictures No Copyright
- Troubleshooting Popcorn Time: Overcoming the 'Nothing Found' Hurdle Successfully
- Title: Updated 2024 Approved Create a Kickass COD Warzone Thumbnail for Free
- Author: Chloe
- Created at : 2025-02-26 19:05:03
- Updated at : 2025-03-03 18:11:23
- Link: https://ai-editing-video.techidaily.com/updated-2024-approved-create-a-kickass-cod-warzone-thumbnail-for-free/
- License: This work is licensed under CC BY-NC-SA 4.0.