
:max_bytes(150000):strip_icc():format(webp)/dns-wordcloud-lifewire-2-0c92c02113cb4832870891ac0e13ccbc.png)
Updated 2024 Approved General Information That You Need To Know About MKV Format
General Information That You Need To Know About MKV Format
MKV file format is a popularly adopted format. The format is easily accessible digital, and self-documented. The only problem people face with different formats is their compatibility. If you are trying to play an MKV video but facing problems, read the article below.
We will discuss the MKV video format, how it works, the way to play it, and other things you need to know. Stay with us; we are about to begin.
In this article
03 How to Play MKV Video Files on VLC Media Player?
04 How Can You Edit Video Files with Filmora Video Editor?
05 Which One Is Better? MKV or MOV?
Part 1: What is MKV format?
The MKV format, known as Matroska, was developed in 2002. This is an open standard video format. Different media files have different encoding, yet MKV stores various multimedia files as it is a container. Do you know what the format is widely used for? Well, the MKV file format is popularly used for online video streaming and also HD videos.

Typically, the format is used to store video clips, movies, and also TV shows. Among the list of audio and video codecs that MKV support, a few are VobSub subtitles, .SRT, .SSA, and .USF. The MKV container file format is famous in the anime fansubbing world. Many users create subtitles with this as the MKV video format supports various audio and subtitle tracks in one same file.
Part 2. How Does A MKV Video Work?
What do you know about the working of the MKV file? If you don’t have much knowledge, let’s share everything you need to know. The MKV format supports 3D objects and also subtitles. The file format is capable of running on both Windows and Mac. Interestingly, the MKV format supports all video and audio coding formats.
Let us clarify something, MKV file format is not an audio-video compression codec; it is a container format used to store subtitles, audio, video in a single file. Surprisingly, the MKV video format is also great for storing complete movies or CDs.
Do you know one amazing thing about MKV? It’s error-resilient; this means if your file is corrupted, it can recover the playback. The open-source format is great for describing technical information and commercial groups.
Part 3. How to Play MKV Video Files on VLC Media Player?
Different platforms support different formats like this MKV file format supported by Microsoft Movies & TV, VLC Media Player, and MPlayer. We will share how you can play MKV video files on VLC Media Player for the current article. If you don’t know, VLC is a cross-platform media player that supports most of the file formats, streaming protocols, DVDs, VCDs, Audio CDs, etc.
Interestingly, the media players work on all platforms like Windows, Mac, Linux, iOS, Android, etc. Do you know that the media playing software is free? Well, it is. It has no spyware and no user tracking. If you are interested in learning about how to play MKV video format on VLC, follow the steps below:
Step 1: Start by installing VLC Media Player on your respective device. It is possible you might have already installed VLC; what to do now? If this is the case, then open VLC and head over to the ‘Help’ option. There select the ‘Check for Updates’ option to update your VLC to the latest version for better performance.

Step 2: After you have either installed or updated VLC Media Player, launch it and move to the ‘Media’ option from the top bar. Next, select the ‘Open File’ option from the menu list and look for the MKV format video in your device to add to the media player. You can also add files to VLC by directly dragging them to the media player.

Step 3: Have you successfully imported the MKV file? If yes, then your video will start playing, and you can enjoy watching your videos with VLC.

Part 4. How Can You Edit Video Files with Filmora Video Editor?
You must have heard about Wondershare Filmora , as a great video editor. The software is used everywhere, by professionals, beginners, everyone. Do you not know much about it? Let us tell you! Whenever you plan to edit your MKV video format files, make sure you try Filmora. The video editor comes with uncountable features and offers limitless editing capabilities.
For Win 7 or later (64-bit)
For macOS 10.12 or later
While editing with Filmora, you never have to worry about video effects, transitions, titles, or anything. Do you know why? This is because Filmora provides every editing element. Let’s talk more about its features:
Audio Section
From the top menu bar on Filmora, you get an Audio section. This section can do wonders for your MVK format video. If you are looking for suitable audio to add to your video, try the audio collection from the audio section. You get sound effects of various types like Jazz, Rock, Happy, etc. You also get a wide variety of musical sounds, human sounds, etc.

Audio Editing Capacity
We must have mentioned above that apart from video editing; you get options for Audio Editing. Do you know what you can do? Start by accessing the Audio Editor by double-clicking on the audio file now, and you can do whatever you like.
For instance, the software offers features like Detach Audio from video, Mute video. Or even the advanced features offer Silence Detection, which automatically detects silence and crops the part.

Add Transitions and Titles
Like we said earlier, you don’t have to worry about transitions and titles with Filmora; this is because an independent section has been given to both the categories that are loaded with wide crazy options. Like if you head to the Transitions tab, you will get options like Speed Blur, Basic, Ripple & Dissolve, and others.

Whereas, if you open the Titles section, you will get various templates. The software offers Lower Thirds, Subtitles, Openers, etc. With Filmora, you get Titles and Transitions according to recent events and occasions.

Cool Elements
For video editing, effects and transitions are not everything. Although they play a vital role in setting and making a good video but do, you know what else matters? Let’s guide you. To make creative and eye-catching content, you need to add elements.

With Filmora, you get tons of great elements that can sustain your viewer’s interest. You can select between the various options like Subscribe Chanel, Share, Count Down, Metaverse, and much more than this. You can also get your hands-on Background Elements, Social Media Elements, etc.
Part 5. Which One Is Better? MKV or MOV?
MKV file format is not as commonly used as MOV because of its poor compatibility when it comes to mobile devices. If we talk about the file size, MKV tends to have a larger file size as compared to other used formats. MOV is a container file format that can store multiple media files of different tracks. Whereas MKV is an envelope format, even supporting to store complete movies with subtitles.
MKV format was developed by Matroska, whereas Apple developed the MOV file format. MKV format is good for storing HD videos, and MOV format is great for saving movies.
Last Words
MKV format is a container format that can store different files with different encodings. The article above has discussed the file format in detail. We talked about how you can use the format, play MKV video format, and also how to edit MKV videos. We will conclude the article by suggesting a great video editor, Wondershare Filmora.
Features like Keyframing, Motion Tracking are offered by the software. Along with this, some advanced-level features are also provided, like Advanced Color Tuning, Green Screen, Video Snapshot, and many others. So, for creating a nice video with great editing elements, Wondershare Filmora is a must.
For Win 7 or later (64-bit)
For macOS 10.12 or later
03 How to Play MKV Video Files on VLC Media Player?
04 How Can You Edit Video Files with Filmora Video Editor?
05 Which One Is Better? MKV or MOV?
Part 1: What is MKV format?
The MKV format, known as Matroska, was developed in 2002. This is an open standard video format. Different media files have different encoding, yet MKV stores various multimedia files as it is a container. Do you know what the format is widely used for? Well, the MKV file format is popularly used for online video streaming and also HD videos.
Typically, the format is used to store video clips, movies, and also TV shows. Among the list of audio and video codecs that MKV support, a few are VobSub subtitles, .SRT, .SSA, and .USF. The MKV container file format is famous in the anime fansubbing world. Many users create subtitles with this as the MKV video format supports various audio and subtitle tracks in one same file.
Part 2. How Does A MKV Video Work?
What do you know about the working of the MKV file? If you don’t have much knowledge, let’s share everything you need to know. The MKV format supports 3D objects and also subtitles. The file format is capable of running on both Windows and Mac. Interestingly, the MKV format supports all video and audio coding formats.
Let us clarify something, MKV file format is not an audio-video compression codec; it is a container format used to store subtitles, audio, video in a single file. Surprisingly, the MKV video format is also great for storing complete movies or CDs.
Do you know one amazing thing about MKV? It’s error-resilient; this means if your file is corrupted, it can recover the playback. The open-source format is great for describing technical information and commercial groups.
Part 3. How to Play MKV Video Files on VLC Media Player?
Different platforms support different formats like this MKV file format supported by Microsoft Movies & TV, VLC Media Player, and MPlayer. We will share how you can play MKV video files on VLC Media Player for the current article. If you don’t know, VLC is a cross-platform media player that supports most of the file formats, streaming protocols, DVDs, VCDs, Audio CDs, etc.
Interestingly, the media players work on all platforms like Windows, Mac, Linux, iOS, Android, etc. Do you know that the media playing software is free? Well, it is. It has no spyware and no user tracking. If you are interested in learning about how to play MKV video format on VLC, follow the steps below:
Step 1: Start by installing VLC Media Player on your respective device. It is possible you might have already installed VLC; what to do now? If this is the case, then open VLC and head over to the ‘Help’ option. There select the ‘Check for Updates’ option to update your VLC to the latest version for better performance.
Step 2: After you have either installed or updated VLC Media Player, launch it and move to the ‘Media’ option from the top bar. Next, select the ‘Open File’ option from the menu list and look for the MKV format video in your device to add to the media player. You can also add files to VLC by directly dragging them to the media player.
Step 3: Have you successfully imported the MKV file? If yes, then your video will start playing, and you can enjoy watching your videos with VLC.
Part 4. How Can You Edit Video Files with Filmora Video Editor?
You must have heard about Wondershare Filmora , as a great video editor. The software is used everywhere, by professionals, beginners, everyone. Do you not know much about it? Let us tell you! Whenever you plan to edit your MKV video format files, make sure you try Filmora. The video editor comes with uncountable features and offers limitless editing capabilities.
For Win 7 or later (64-bit)
For macOS 10.12 or later
While editing with Filmora, you never have to worry about video effects, transitions, titles, or anything. Do you know why? This is because Filmora provides every editing element. Let’s talk more about its features:
Audio Section
From the top menu bar on Filmora, you get an Audio section. This section can do wonders for your MVK format video. If you are looking for suitable audio to add to your video, try the audio collection from the audio section. You get sound effects of various types like Jazz, Rock, Happy, etc. You also get a wide variety of musical sounds, human sounds, etc.
Audio Editing Capacity
We must have mentioned above that apart from video editing; you get options for Audio Editing. Do you know what you can do? Start by accessing the Audio Editor by double-clicking on the audio file now, and you can do whatever you like.
For instance, the software offers features like Detach Audio from video, Mute video. Or even the advanced features offer Silence Detection, which automatically detects silence and crops the part.
Add Transitions and Titles
Like we said earlier, you don’t have to worry about transitions and titles with Filmora; this is because an independent section has been given to both the categories that are loaded with wide crazy options. Like if you head to the Transitions tab, you will get options like Speed Blur, Basic, Ripple & Dissolve, and others.
Whereas, if you open the Titles section, you will get various templates. The software offers Lower Thirds, Subtitles, Openers, etc. With Filmora, you get Titles and Transitions according to recent events and occasions.
Cool Elements
For video editing, effects and transitions are not everything. Although they play a vital role in setting and making a good video but do, you know what else matters? Let’s guide you. To make creative and eye-catching content, you need to add elements.
With Filmora, you get tons of great elements that can sustain your viewer’s interest. You can select between the various options like Subscribe Chanel, Share, Count Down, Metaverse, and much more than this. You can also get your hands-on Background Elements, Social Media Elements, etc.
Part 5. Which One Is Better? MKV or MOV?
MKV file format is not as commonly used as MOV because of its poor compatibility when it comes to mobile devices. If we talk about the file size, MKV tends to have a larger file size as compared to other used formats. MOV is a container file format that can store multiple media files of different tracks. Whereas MKV is an envelope format, even supporting to store complete movies with subtitles.
MKV format was developed by Matroska, whereas Apple developed the MOV file format. MKV format is good for storing HD videos, and MOV format is great for saving movies.
Last Words
MKV format is a container format that can store different files with different encodings. The article above has discussed the file format in detail. We talked about how you can use the format, play MKV video format, and also how to edit MKV videos. We will conclude the article by suggesting a great video editor, Wondershare Filmora.
Features like Keyframing, Motion Tracking are offered by the software. Along with this, some advanced-level features are also provided, like Advanced Color Tuning, Green Screen, Video Snapshot, and many others. So, for creating a nice video with great editing elements, Wondershare Filmora is a must.
For Win 7 or later (64-bit)
For macOS 10.12 or later
How Did AI Video Games Act More Human Than Human?
How Did AI Video Games Act More Human Than Human?
An easy yet powerful editor
Numerous effects to choose from
Detailed tutorials provided by the official channel
The gaming world is ever-changing, with developers looking to create innovative ways to immerse players into their digital worlds. One such technology that has begun to sweep is AI in the game industry.
AI is a powerful tool in many ways to improve the gaming experience. It can make artificial intelligence in computer games more believable and add replayability and immersion to games, and we can expect to see even more impressive applications in the future.
In this article
01 [What Is AI in Gaming?](#Part 1)
02 [Why Does AI in Gaming Matter?](#Part 2)
03 [How AI Will Completely Change Video Games](#Part 3)
04 [8 Games with Incredible Artificial Intelligence](#Part 4)
05 [What AI Video Games Assets Do Filmora Have?](#Part 5)
Part 1 What Is AI in Gaming?
In simple terms, AI is a set of algorithms that allow a computer to learn and improve from experience. Although you can apply it in many ways, artificial intelligence in video games is usually helpful to create more intelligent and more believable non-player characters (NPCs).
For example, an AI system might be helpful to determine how an NPC reacts to the player’s actions. If the player tries to steal from an NPC, the AI might make the NPC angry and more likely to attack the player. Alternatively, if the player is friendly to an NPC, the AI game playing might make the NPC more likely to help the player in future interactions.
Part 2 Why Does AI in Gaming Matter?
One of the most vital aspects of AI in video games is that it can make games more believable and immersive for players. When games can convincingly simulate human-like behavior, it can be a much more enjoyable experience for gamers. AI can make NPCs seem more lifelike and make the game world feel more believable.
AI is also becoming increasingly important for creating procedural content. This is where the game generates content on its own, rather than relying on pre-made assets. For example, a game might use procedural generation to create random dungeons or quests that the player can explore. This can add a lot of replayability to a game, as the player never knows what they will encounter next.
Part 3 How AI Will Completely Change Video Games
It is not a secret that AI is changing the world as we know it. With its ability to enable computers to learn and improve from experience, AI is paving the way for a future where machines can handle more complex tasks. And nowhere is this more apparent than in the world of video gaming.
In the past, developers brought in AI primarily for simple things like making certain NPCs (non-player characters) move and act realistically. But now, artificial intelligence in video games is being used for much more complex tasks like generating procedural content and creating believable human-like behavior. This results in a new generation of AI game playing that are more immersive and playable.
Part 4 Games with Incredible Artificial Intelligence
Now, we will look into eight video games that signify why we need the best ai in video games.
01Fallout 4
One of the most attractive examples of AI in video gaming is Fallout 4. This post-apocalyptic RPG features some of the most believable NPCs ever seen in a game. Each character is fully voiced, and they all have their unique personalities and backstories. The AI generates procedural content, meaning that the game world is always different each time you play.

02The Witcher 3: Wild Hunt
The Witcher 3: Wild Hunt is one more great example of an AI video game. This open-world RPG features a vast array of believable NPCs, each with unique personality traits and motivations. The AI is also used to generate procedural content, resulting in a different game world every time you play.

03Grand Theft Auto V
Grand Theft Auto V is yet another example of AI being used to create believable human-like behavior. The NPCs in this play are some of the most lifelike and realistic ever seen. They react to the player’s actions in believable ways, and the AI is used to generate procedural content, resulting in a game world that is always different.

04Minecraft
Minecraft is a game that heavily uses procedural generation to create its content. The terrain and structures in the game are all generated on the fly by the AI, resulting in a different game world every time you play. What’s more, AI is also used to generate the behaviors of mobs (hostile creatures), making them more believable and lifelike.

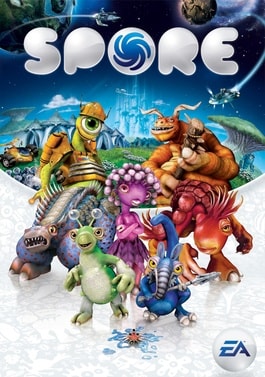
05Spore
Spore is an AI game play that is all about procedural generation. Every creature in the game is generated by AI, meaning that there are many possible creature designs. What’s more, AI is used to create creatures’ behaviors, making them more believable and lifelike.
06Mirror’s Edge Catalyst
Mirror’s Edge Catalyst is a game that heavily uses AI to create its content. The levels in the game are all procedurally generated, meaning that they are different every time you play. This is made possible by the game’s AI, which produces the level layouts and obstacles on the fly.

07Civilization VI
One of the most incredible examples of AI in video gaming is Civilization VI. This turn-based strategy game features some of the most believable NPCs ever seen in a game. Each character has its voice fully, and they all have unique personalities and backstories.

08Elite Dangerous
Elite Dangerous is a space simulation game that uses advanced AI to create believable and realistic human-like behavior. The NPCs in the game are some of the most lifelike and realistic ever seen. They react to the player’s actions in believable ways, and the AI is used to generate procedural content, resulting in a game world that is always different.

Part 5 What AI Video Games Assets Do Wondershare Filmora Video Editor Have?
With the increased use of AI in video games, most gamers have found gaming more enjoyable. However, an outstanding video editor has some assets that can significantly make AI video games better and more human. This video editor is one of the most sorted for and is called Filmora. Filmora is a great video editing software for creating stunning videos. It’s effortless to use and has various features to create professional-looking videos. It’s perfect for making videos for social media, YouTube, and other online platforms.
Its many features have a touch of artificial intelligence, making this program stand out from the other video editors and valuable for editing during ai video games creation.
Screen Recording
The Filmora screen recorder allows the user to concurrently record the screen and camera and the system and microphone audio. You can quickly record games, tutorials, YouTube videos, and other videos and then export them to YouTube, Vimeo, and other devices.
AI Portrait
The AI portrait function in Filmora video editor allows you to locate the human in your movie effortlessly and erase the background with a simple drag and click. There are also several portrait effects and AR stickers to add to your video editing enjoyment.
For Win 7 or later (64-bit)
For macOS 10.12 or later
Video Effects
Filmora customers can choose from various effects to utilize in their video editing software. It’s simple to create whatever effect you want with over 900 free effects, including drag-and-drop transitions, titles, filters, and motion components.
Do visit Wondershare Filmora exclusive website to know more about its latest upgrade and new features launch.
● Ending Thoughts →
● Thus, that was about what an ai video game is and why the characters act more like humans.
● So, as a video game lover, you can now explore the best of ai playing video games to have a personal experience of this new video gaming trend. Also, do try the Filmora software to see how you can change the looks and feel of your video game creation.
The gaming world is ever-changing, with developers looking to create innovative ways to immerse players into their digital worlds. One such technology that has begun to sweep is AI in the game industry.
AI is a powerful tool in many ways to improve the gaming experience. It can make artificial intelligence in computer games more believable and add replayability and immersion to games, and we can expect to see even more impressive applications in the future.
In this article
01 [What Is AI in Gaming?](#Part 1)
02 [Why Does AI in Gaming Matter?](#Part 2)
03 [How AI Will Completely Change Video Games](#Part 3)
04 [8 Games with Incredible Artificial Intelligence](#Part 4)
05 [What AI Video Games Assets Do Filmora Have?](#Part 5)
Part 1 What Is AI in Gaming?
In simple terms, AI is a set of algorithms that allow a computer to learn and improve from experience. Although you can apply it in many ways, artificial intelligence in video games is usually helpful to create more intelligent and more believable non-player characters (NPCs).
For example, an AI system might be helpful to determine how an NPC reacts to the player’s actions. If the player tries to steal from an NPC, the AI might make the NPC angry and more likely to attack the player. Alternatively, if the player is friendly to an NPC, the AI game playing might make the NPC more likely to help the player in future interactions.
Part 2 Why Does AI in Gaming Matter?
One of the most vital aspects of AI in video games is that it can make games more believable and immersive for players. When games can convincingly simulate human-like behavior, it can be a much more enjoyable experience for gamers. AI can make NPCs seem more lifelike and make the game world feel more believable.
AI is also becoming increasingly important for creating procedural content. This is where the game generates content on its own, rather than relying on pre-made assets. For example, a game might use procedural generation to create random dungeons or quests that the player can explore. This can add a lot of replayability to a game, as the player never knows what they will encounter next.
Part 3 How AI Will Completely Change Video Games
It is not a secret that AI is changing the world as we know it. With its ability to enable computers to learn and improve from experience, AI is paving the way for a future where machines can handle more complex tasks. And nowhere is this more apparent than in the world of video gaming.
In the past, developers brought in AI primarily for simple things like making certain NPCs (non-player characters) move and act realistically. But now, artificial intelligence in video games is being used for much more complex tasks like generating procedural content and creating believable human-like behavior. This results in a new generation of AI game playing that are more immersive and playable.
Part 4 Games with Incredible Artificial Intelligence
Now, we will look into eight video games that signify why we need the best ai in video games.
01Fallout 4
One of the most attractive examples of AI in video gaming is Fallout 4. This post-apocalyptic RPG features some of the most believable NPCs ever seen in a game. Each character is fully voiced, and they all have their unique personalities and backstories. The AI generates procedural content, meaning that the game world is always different each time you play.
02The Witcher 3: Wild Hunt
The Witcher 3: Wild Hunt is one more great example of an AI video game. This open-world RPG features a vast array of believable NPCs, each with unique personality traits and motivations. The AI is also used to generate procedural content, resulting in a different game world every time you play.
03Grand Theft Auto V
Grand Theft Auto V is yet another example of AI being used to create believable human-like behavior. The NPCs in this play are some of the most lifelike and realistic ever seen. They react to the player’s actions in believable ways, and the AI is used to generate procedural content, resulting in a game world that is always different.
04Minecraft
Minecraft is a game that heavily uses procedural generation to create its content. The terrain and structures in the game are all generated on the fly by the AI, resulting in a different game world every time you play. What’s more, AI is also used to generate the behaviors of mobs (hostile creatures), making them more believable and lifelike.
05Spore
Spore is an AI game play that is all about procedural generation. Every creature in the game is generated by AI, meaning that there are many possible creature designs. What’s more, AI is used to create creatures’ behaviors, making them more believable and lifelike.
06Mirror’s Edge Catalyst
Mirror’s Edge Catalyst is a game that heavily uses AI to create its content. The levels in the game are all procedurally generated, meaning that they are different every time you play. This is made possible by the game’s AI, which produces the level layouts and obstacles on the fly.
07Civilization VI
One of the most incredible examples of AI in video gaming is Civilization VI. This turn-based strategy game features some of the most believable NPCs ever seen in a game. Each character has its voice fully, and they all have unique personalities and backstories.
08Elite Dangerous
Elite Dangerous is a space simulation game that uses advanced AI to create believable and realistic human-like behavior. The NPCs in the game are some of the most lifelike and realistic ever seen. They react to the player’s actions in believable ways, and the AI is used to generate procedural content, resulting in a game world that is always different.
Part 5 What AI Video Games Assets Do Wondershare Filmora Video Editor Have?
With the increased use of AI in video games, most gamers have found gaming more enjoyable. However, an outstanding video editor has some assets that can significantly make AI video games better and more human. This video editor is one of the most sorted for and is called Filmora. Filmora is a great video editing software for creating stunning videos. It’s effortless to use and has various features to create professional-looking videos. It’s perfect for making videos for social media, YouTube, and other online platforms.
Its many features have a touch of artificial intelligence, making this program stand out from the other video editors and valuable for editing during ai video games creation.
Screen Recording
The Filmora screen recorder allows the user to concurrently record the screen and camera and the system and microphone audio. You can quickly record games, tutorials, YouTube videos, and other videos and then export them to YouTube, Vimeo, and other devices.
AI Portrait
The AI portrait function in Filmora video editor allows you to locate the human in your movie effortlessly and erase the background with a simple drag and click. There are also several portrait effects and AR stickers to add to your video editing enjoyment.
For Win 7 or later (64-bit)
For macOS 10.12 or later
Video Effects
Filmora customers can choose from various effects to utilize in their video editing software. It’s simple to create whatever effect you want with over 900 free effects, including drag-and-drop transitions, titles, filters, and motion components.
Do visit Wondershare Filmora exclusive website to know more about its latest upgrade and new features launch.
● Ending Thoughts →
● Thus, that was about what an ai video game is and why the characters act more like humans.
● So, as a video game lover, you can now explore the best of ai playing video games to have a personal experience of this new video gaming trend. Also, do try the Filmora software to see how you can change the looks and feel of your video game creation.
Simple Step by Step Tutorial on Creating a Lightroom Collage
Easy Step by Step Tutorial on Creating a Lightroom Collage
An easy yet powerful editor
Numerous effects to choose from
Detailed tutorials provided by the official channel
Do you love photography and taking pictures? The best way to make sure that your photos don’t end up on the hard drive is to hang them up in an artful, stylish photo lightroom collage.
Lightroom Collages are a great way to display a collection of your best photos in one place. They can also be an effective way of putting together a datebook or keeping track as you go through your full-time year.
In this article
01 [What’s Lightroom Used for?](#Part 1)
02 [The Value of a Lightroom Collage](#Part 2)
03 [Core Considerations for a Lightroom Collage](#Part 3)
04 [How to Create a Lightroom Collage](#Part 4)
Part 1 What’s Lightroom Used for?
Adobe Lightroom is one of the favorite non-linear editing tools for photographers. It offers a plenty of features for image manipulation and more. Get all the photography essentials with this software.
You can easily create beautiful photo collages in Lightroom and share them with your friends and loved ones. Moreover, it can be used for the storage and organization of photos after uploading them to the database.
Explore some amazing ways to bring out the best in your photographs, whether you’re perfecting one image or organizing thousands in Lightroom.
Part 2 The Value of a Lightroom Collage
In a single picture, you can only see part of a story, but collage lightroom tells you more about that. It helps by refreshing all the memories of a trip, function, and more in a single frame.
They have gained huge popularity in the last few years as the digital space has grown. You may have already seen social media users posting their photo collages on their timelines. Instagram is far ahead of the competition in this regard. It has played a crucial role in establishing the photo collage as a normal trend.
For the photographer
With a photo collage, a photographer can best showcase his talent. It shows that you can do a lot more than your capabilities, like representing stories by blending colors and elements perfectly. This will help you attract your prospects and convert them into your paying customers.
How do photo collages provide value to the clients?
A photo collage provides visual value to the clients by enhancing the creative process. It can have a profound effect on the way they perceive your art of photography. In fact, your clients will love to see all their memories collected in an attractive photo collage. There are a lot of people that even love to present collages to their loved ones.
Part 3 Core Considerations for a Lightroom Collage
The secret to designing an eye-catching lightroom collage is to know how to blend all the elements together properly. Professional Lightroom users concentrate on a few key graphic design considerations to keep their photo collage looking its best.In other words, every element should be in the right proportion, such as dimension, alignment, proximity, and theme.
Balance
Balance refers to the arrangement of all elements. It includes the division of pictures into equal or different dimensions according to the collage size. Maintaining balance enhances the overall appearance of a photo collage in lightroom. Some lightroom experts prefer symmetrical balance, but you can get better quality collages through asymmetrical balance.
Alignment
Don’t underestimate the importance of alignment in Lightroom collage. How your pictures are aligned can have a drastic effect on their overall look. It provides a definitive structure and delivers a well-finished product to the client.
In graphic design, two kinds of elements exist: edge and centre alignment. These are applied to visual design and text as well.
Proximity
Proximity signifies the relationship between various elements on the basis of the distance between them. It follows two basic principles:
● Realistic pictures should be put together.
● Unrelatable images should be separated.
Moreover, the border width needs to be consistent throughout, irrespective of the number of pictures.
Theme
The theme, also known as tone or style, matters when it comes to collage design. Each image must have a similar style, as this idea can personify all the captured memories. It will completely beautify your artistic perspective, but it’s not as measurable as others.
Part 4 How to Create a Lightroom Collage
Before introducing you to the ways of creating a lightroom collage, let’s meet Wondershare Filmora Video Editor . You can use it as an alternative to Lightroom for creating video collages. Recently, Wondershare has brought the latest update of Filmora to give some retouching to your videos.
Wondershare Filmora
Get started easily with Filmora’s powerful performance, intuitive interface, and countless effects!
Try It Free Try It Free Try It Free Learn More >

Now, you can narrate your story with incredible text and title templates in this full-featured video editor. It now features an animated split-screen effect that converts multiple videos into a single compelling collage. You only have to import the clips that you want in the split-screen preview window to make the video collage. But, for photo collages, the best tool ever is Adobe Lightroom.
You get two options for creating photo collages in Lightroom: using a pre-designed template or creating a new one. It will be a time-consuming process to make an original template, but we will still focus on both. If you want to create a lightroom collage of pictures, follow the steps given below.
Create a Photo Collage with a New Template
For a beginner, designing their own template can be a complex and hectic process. But, it’s worth it in the end because the final collage will be the result of all your hard work. In addition, you can show your own creative style by designing a new layout template. This way, you can also deliver a unique creation to your client. Maybe they will end up paying you more as a reward. If you are up for it, then go read the steps to do so.
Step 1: Import and Edit Photographs
Your first step should be to import the photos into your lightroom before proceeding further. Next, to get a perfect collage, your pictures deserve a final touch, which you can do conveniently with the batch editing feature.

Step 2: Establishing the Workspace
After importing and editing the photos, it’s time to create a workspace. Go to the “Print” panel and then to the “Print Job” menu. At this point, you can adjust the dimension of your collage. Make sure to provide ample space for the photos and borders.
Step 3: Create a Photo Layout
As you have photos in hand and space for distributing them, start forming individual spaces to place them. Try using individual boxes as per the required size or your choice with the “Add to Package” section. You can find it under the Cell of Print menu. Feel free to experiment with the size, placement, and more.
Step 4: Add Photos to the Layout
If you are satisfied with the collage template, now bring all your photos to the layout. It’s pretty easy to do because you just have to click on the photo and drag it to where you want. At the end, rearrange as you want until the final design doesn’t seem pleasing to your eyes.
Create a Photo Collage with a Pre-designed Template
Want to save some time without compromising on the final quality of the collage? Make a collage in Lightroom using a pre-designed template. But remember, you won’t get enough freedom to customize the template. If you are up for creating a collage in Lightroom using a pre-designed template, go through the following points.
Step 1: Import the photos into the program
Here also, you can’t create the collage without adding your photos to Lightroom. Simply click on “File” > “Add Photos” and choose the file location.
Step 2: Download the collage layout
Adobe Lightroom offers free as well as paid templates to make a photo collage in Lightroom. You are free to download any one that appeals to you.
Step 3: Bring in the Template
Click on the “Print” module > “Template Browser” > “Lightroom Templates” menu. Now, import the extracted Lightroom collage template using the “Import” button.

Step 4: Insert Photos
After finishing up the import of the template, start adding the photos to them. You can reposition them in whatever way you want. And now, you are done. Export the collage if you are satisfied with the position, color, and everything else.
● Key Takeaways from This Episode →
●Formatting the pictures is the easy part. The real struggle is in creating the collage. That takes a bit more time, but it’s worth it in the end.
●You can follow any of the above steps to get your desired photo collage. So now, you can reduce your burden with Adobe Lightroom or Wondershare Filmora .
●We hope you followed along with this tutorial and have enjoyed reading it. Thanks for your efforts and time.
Do you love photography and taking pictures? The best way to make sure that your photos don’t end up on the hard drive is to hang them up in an artful, stylish photo lightroom collage.
Lightroom Collages are a great way to display a collection of your best photos in one place. They can also be an effective way of putting together a datebook or keeping track as you go through your full-time year.
In this article
01 [What’s Lightroom Used for?](#Part 1)
02 [The Value of a Lightroom Collage](#Part 2)
03 [Core Considerations for a Lightroom Collage](#Part 3)
04 [How to Create a Lightroom Collage](#Part 4)
Part 1 What’s Lightroom Used for?
Adobe Lightroom is one of the favorite non-linear editing tools for photographers. It offers a plenty of features for image manipulation and more. Get all the photography essentials with this software.
You can easily create beautiful photo collages in Lightroom and share them with your friends and loved ones. Moreover, it can be used for the storage and organization of photos after uploading them to the database.
Explore some amazing ways to bring out the best in your photographs, whether you’re perfecting one image or organizing thousands in Lightroom.
Part 2 The Value of a Lightroom Collage
In a single picture, you can only see part of a story, but collage lightroom tells you more about that. It helps by refreshing all the memories of a trip, function, and more in a single frame.
They have gained huge popularity in the last few years as the digital space has grown. You may have already seen social media users posting their photo collages on their timelines. Instagram is far ahead of the competition in this regard. It has played a crucial role in establishing the photo collage as a normal trend.
For the photographer
With a photo collage, a photographer can best showcase his talent. It shows that you can do a lot more than your capabilities, like representing stories by blending colors and elements perfectly. This will help you attract your prospects and convert them into your paying customers.
How do photo collages provide value to the clients?
A photo collage provides visual value to the clients by enhancing the creative process. It can have a profound effect on the way they perceive your art of photography. In fact, your clients will love to see all their memories collected in an attractive photo collage. There are a lot of people that even love to present collages to their loved ones.
Part 3 Core Considerations for a Lightroom Collage
The secret to designing an eye-catching lightroom collage is to know how to blend all the elements together properly. Professional Lightroom users concentrate on a few key graphic design considerations to keep their photo collage looking its best.In other words, every element should be in the right proportion, such as dimension, alignment, proximity, and theme.
Balance
Balance refers to the arrangement of all elements. It includes the division of pictures into equal or different dimensions according to the collage size. Maintaining balance enhances the overall appearance of a photo collage in lightroom. Some lightroom experts prefer symmetrical balance, but you can get better quality collages through asymmetrical balance.
Alignment
Don’t underestimate the importance of alignment in Lightroom collage. How your pictures are aligned can have a drastic effect on their overall look. It provides a definitive structure and delivers a well-finished product to the client.
In graphic design, two kinds of elements exist: edge and centre alignment. These are applied to visual design and text as well.
Proximity
Proximity signifies the relationship between various elements on the basis of the distance between them. It follows two basic principles:
● Realistic pictures should be put together.
● Unrelatable images should be separated.
Moreover, the border width needs to be consistent throughout, irrespective of the number of pictures.
Theme
The theme, also known as tone or style, matters when it comes to collage design. Each image must have a similar style, as this idea can personify all the captured memories. It will completely beautify your artistic perspective, but it’s not as measurable as others.
Part 4 How to Create a Lightroom Collage
Before introducing you to the ways of creating a lightroom collage, let’s meet Wondershare Filmora Video Editor . You can use it as an alternative to Lightroom for creating video collages. Recently, Wondershare has brought the latest update of Filmora to give some retouching to your videos.
Wondershare Filmora
Get started easily with Filmora’s powerful performance, intuitive interface, and countless effects!
Try It Free Try It Free Try It Free Learn More >
Now, you can narrate your story with incredible text and title templates in this full-featured video editor. It now features an animated split-screen effect that converts multiple videos into a single compelling collage. You only have to import the clips that you want in the split-screen preview window to make the video collage. But, for photo collages, the best tool ever is Adobe Lightroom.
You get two options for creating photo collages in Lightroom: using a pre-designed template or creating a new one. It will be a time-consuming process to make an original template, but we will still focus on both. If you want to create a lightroom collage of pictures, follow the steps given below.
Create a Photo Collage with a New Template
For a beginner, designing their own template can be a complex and hectic process. But, it’s worth it in the end because the final collage will be the result of all your hard work. In addition, you can show your own creative style by designing a new layout template. This way, you can also deliver a unique creation to your client. Maybe they will end up paying you more as a reward. If you are up for it, then go read the steps to do so.
Step 1: Import and Edit Photographs
Your first step should be to import the photos into your lightroom before proceeding further. Next, to get a perfect collage, your pictures deserve a final touch, which you can do conveniently with the batch editing feature.
Step 2: Establishing the Workspace
After importing and editing the photos, it’s time to create a workspace. Go to the “Print” panel and then to the “Print Job” menu. At this point, you can adjust the dimension of your collage. Make sure to provide ample space for the photos and borders.
Step 3: Create a Photo Layout
As you have photos in hand and space for distributing them, start forming individual spaces to place them. Try using individual boxes as per the required size or your choice with the “Add to Package” section. You can find it under the Cell of Print menu. Feel free to experiment with the size, placement, and more.
Step 4: Add Photos to the Layout
If you are satisfied with the collage template, now bring all your photos to the layout. It’s pretty easy to do because you just have to click on the photo and drag it to where you want. At the end, rearrange as you want until the final design doesn’t seem pleasing to your eyes.
Create a Photo Collage with a Pre-designed Template
Want to save some time without compromising on the final quality of the collage? Make a collage in Lightroom using a pre-designed template. But remember, you won’t get enough freedom to customize the template. If you are up for creating a collage in Lightroom using a pre-designed template, go through the following points.
Step 1: Import the photos into the program
Here also, you can’t create the collage without adding your photos to Lightroom. Simply click on “File” > “Add Photos” and choose the file location.
Step 2: Download the collage layout
Adobe Lightroom offers free as well as paid templates to make a photo collage in Lightroom. You are free to download any one that appeals to you.
Step 3: Bring in the Template
Click on the “Print” module > “Template Browser” > “Lightroom Templates” menu. Now, import the extracted Lightroom collage template using the “Import” button.
Step 4: Insert Photos
After finishing up the import of the template, start adding the photos to them. You can reposition them in whatever way you want. And now, you are done. Export the collage if you are satisfied with the position, color, and everything else.
● Key Takeaways from This Episode →
●Formatting the pictures is the easy part. The real struggle is in creating the collage. That takes a bit more time, but it’s worth it in the end.
●You can follow any of the above steps to get your desired photo collage. So now, you can reduce your burden with Adobe Lightroom or Wondershare Filmora .
●We hope you followed along with this tutorial and have enjoyed reading it. Thanks for your efforts and time.
Steps to Denoise in Final Cut Pro – Reduce Video and Audio Noise
Whenever it comes to the term denoise, we usually get kind of “lost in translation” – does it mean to remove or reduce just the background noise in terms of audio, or does it intend noise effect on the actual scene which we see visually? Anyway, using video editors, denoising is possible in both ways. And why should we denoise at all? – to find out, we will touch upon both issues, and learn how to do those two things in Final Cut Pro.
How to remove background noise in Final Cut Pro?
It doesn’t really matter if you are preparing a video for youtube, a podcast, or any other content with audio in it – for your listeners to be engaged, you need a clear audio, but sometimes that is not the case. You might even find unnecessary background noise after recording the video or audio, and it can be really annoying – that kind of recording gives your audio tracks an unprofessional touch, which can lead to disengaged listeners, the viewers who just don’t want to listen to it anymore. But it’s always possible to turn the tables – and for it, using video editors might really give us a hand. So, Final Cut Pro, which is developed only for Macs (so, you will not be able to use this software on the PC), can solve this problem for you.
So, if you are using Final Cut Pro 10.6, it’s possible to achieve your goal without using any plug-ins. In such a case, there are special effects to use. First of all, let us say that you have an audio file which you want to be corrected because it has some echo, hum, background noise; so you import that one into the programme, namely, timeline.

You will need to first use Equalatization, which is under the Audio Enhancements.

You will need to check the square that opens the equalizer and shows graphics for it. The high frequencies are on the right, and the low ones you will find on the left. Lower the highs and raise the points a little on the left side.

Next step would be to level out the lows and highs of the voice using a Compressor. You will find this effect in Installed Effects, which you need to drag and drop on the audio, and it will raise the whispers and lower the shouts in the audio.

Some background noise will still be there, so you then can find Channel EQ effect you will find in the effects. You need to drag it on the clip, then click on the equalize button in the inspector, and this time, reduce the lower levels on the left, while you also lower the highs on the right.

Lastly, you will need to use the Noise Gate effect. This will cut out all of the sounds between words, so when someone in the audio is not speaking, there will be no background noise at all.

In case this kind of cutting noise out doesn’t sound natural, you can look into Noise Gate Parameters and concentrate on two of them – reduction and release. If you drag the latter right, the noise will raise, and reduction will also raise noise a little, in order to reduce the clipping.
How to denoise a video in Final Cut Pro?
But what is noise in terms of videos? It means that the video is not clear, but instead, the clip has grains on it, which is not so pleasant to see (unless you use noise/grain effect with some purpose!). the noise usually appear when the shot was taken in an environment with not enough white, or, in other cases, when the video was taken with small-sensory equipment, for example, smartphone or action camera.
And Final Cut Pro is one of the video editors where you can remove or reduce the noise and make your footage look clearer than it would have been originally, and it will guarantee that people who are interested and watch your clip will have a better experience. So, let’s learn step by step how to denoise the video in our beloved Final Cut Pro, which added this feature only starting from Final Cut Pro 10.4.4 – it means that before, the task was only done by using some expensive plug-ins, but starting from this version of the program, the software has video noise reduction effect itself.
So, choose the video which has some noise and grain and you wish to edit. Bring it in the program, and click on it in the timeline, in order to select it. The video should appear in the viewer, and you will be able to see the noise right away or whenever you zoom in a little. Then, you will need to find the Effects – you can just use the shortcut and click on Command and 5, or find the panel in the top-right corner of the timeline. Whenever Effects appear, you will need to select the Basic category, and then double-click the icon to apply the noise reduction filter, and close the window. It might take a while to analyze the clip for noise.


In the inspector, you will find the controls for noise reduction, which only include the Amount and Sharpness.

You might as well boost the amount to high, then you can take a look at the image to evaluate the result. One way to do the last step is to uncheck the box next to the Noise Reduction as well, which will disable the filter until you check the box again.
You can also change the Sharpness to Medium, which will compensate for the soft look the effect produces.
And, there is also a noise reduction effect dedicated to 360 viewers, which is called 360 Noise Reduction. As you can see, the effect removes a lot of noise and makes the grainy video look clearer and more enjoyable, besides, if you move around the sphere in the viewer, the effect seems quite seamless!


Bonus tip: how to remove audio noise in video with Filmora
In case you don’t own Mac or just want to operate in another computer program, then Wondershare Filmora would make a great alternative – it’s one of the software that can help you get rid of the background noise. How to do it there? Follow this guideline:
First off, of course, you need to drag and drop the video into the timeline. Then, in order to edit the audio of the video separately, you’ll need to right-click on the video and find Detach Audio.

Double-clicking on the audio track in the sequence will show the editing panel, where you can find – Remove background noise, which, as it is obvious, will remove the noise directly.

So, in this article, we learned how to denoise in Final Cut Pro – both in terms of audio background noise, and noise and grain on the video, and we learned how to get rid of audio noise in Wondershare Filmora in the easiest and fastest way!
You will need to first use Equalatization, which is under the Audio Enhancements.
You will need to check the square that opens the equalizer and shows graphics for it. The high frequencies are on the right, and the low ones you will find on the left. Lower the highs and raise the points a little on the left side.
Next step would be to level out the lows and highs of the voice using a Compressor. You will find this effect in Installed Effects, which you need to drag and drop on the audio, and it will raise the whispers and lower the shouts in the audio.
Some background noise will still be there, so you then can find Channel EQ effect you will find in the effects. You need to drag it on the clip, then click on the equalize button in the inspector, and this time, reduce the lower levels on the left, while you also lower the highs on the right.
Lastly, you will need to use the Noise Gate effect. This will cut out all of the sounds between words, so when someone in the audio is not speaking, there will be no background noise at all.
In case this kind of cutting noise out doesn’t sound natural, you can look into Noise Gate Parameters and concentrate on two of them – reduction and release. If you drag the latter right, the noise will raise, and reduction will also raise noise a little, in order to reduce the clipping.
How to denoise a video in Final Cut Pro?
But what is noise in terms of videos? It means that the video is not clear, but instead, the clip has grains on it, which is not so pleasant to see (unless you use noise/grain effect with some purpose!). the noise usually appear when the shot was taken in an environment with not enough white, or, in other cases, when the video was taken with small-sensory equipment, for example, smartphone or action camera.
And Final Cut Pro is one of the video editors where you can remove or reduce the noise and make your footage look clearer than it would have been originally, and it will guarantee that people who are interested and watch your clip will have a better experience. So, let’s learn step by step how to denoise the video in our beloved Final Cut Pro, which added this feature only starting from Final Cut Pro 10.4.4 – it means that before, the task was only done by using some expensive plug-ins, but starting from this version of the program, the software has video noise reduction effect itself.
So, choose the video which has some noise and grain and you wish to edit. Bring it in the program, and click on it in the timeline, in order to select it. The video should appear in the viewer, and you will be able to see the noise right away or whenever you zoom in a little. Then, you will need to find the Effects – you can just use the shortcut and click on Command and 5, or find the panel in the top-right corner of the timeline. Whenever Effects appear, you will need to select the Basic category, and then double-click the icon to apply the noise reduction filter, and close the window. It might take a while to analyze the clip for noise.
In the inspector, you will find the controls for noise reduction, which only include the Amount and Sharpness.
You might as well boost the amount to high, then you can take a look at the image to evaluate the result. One way to do the last step is to uncheck the box next to the Noise Reduction as well, which will disable the filter until you check the box again.
You can also change the Sharpness to Medium, which will compensate for the soft look the effect produces.
And, there is also a noise reduction effect dedicated to 360 viewers, which is called 360 Noise Reduction. As you can see, the effect removes a lot of noise and makes the grainy video look clearer and more enjoyable, besides, if you move around the sphere in the viewer, the effect seems quite seamless!
Bonus tip: how to remove audio noise in video with Filmora
In case you don’t own Mac or just want to operate in another computer program, then Wondershare Filmora would make a great alternative – it’s one of the software that can help you get rid of the background noise. How to do it there? Follow this guideline:
First off, of course, you need to drag and drop the video into the timeline. Then, in order to edit the audio of the video separately, you’ll need to right-click on the video and find Detach Audio.
Double-clicking on the audio track in the sequence will show the editing panel, where you can find – Remove background noise, which, as it is obvious, will remove the noise directly.
So, in this article, we learned how to denoise in Final Cut Pro – both in terms of audio background noise, and noise and grain on the video, and we learned how to get rid of audio noise in Wondershare Filmora in the easiest and fastest way!
Also read:
- Top-Rated Android Apps For Slowing Down Motion
- In 2024, Sometimes It May Happen to You that You Are Watching a Video that Has Very Low Graphics or, in Other Words, Low Visual Quality. You Might Wish to Change, Instead Improve the Video Quality. Here, AI Upscaling Video Comes to Use
- Updated 2024 Approved Splitting Video in VSDC Step by Step
- New 2024 Approved 8 Free Photo Collage with Music Video Maker
- Updated Add Stylish Text to Videos for 2024
- In 2024, Have You Ever Heard Hyperlapse and Tume Lapse Videos? Do You Know the Differences Between Them? This Article Will Introduce the Concepts, Features and Differnces of Them
- In 2024, If You Are Looking Forward to Make Attractive and Customized Slideshows, Lightroom Is One of the Best Options that You Can Consider
- Want to Play a Video on Loop on Vimeo so that It Plays Again and Again? Here Are All the Different Ways to Loop a Video on Vimeo in Simple Steps for 2024
- 2024 Approved Hitfilm Express Video Editor Review
- In 2024, Do You Need to Create a Video for Your Business Online but Feel You Do Not Have the Skill and Time to Do That? Try Out These AI Video Generators that Will Work for You to Carry Out Tasks Effectively
- New Bored of Extraneous Software Downloads and Program Installations to Edit Your Videos? The Best Video Editing Online Utilities Are Here at Your Rescue
- Updated Detailed Guide to Crop Videos in Sony Vegas Pro for 2024
- Want to Learn How to Make a Fortnite Montage? This Guide Will Give You the Low-Down on Creating Epic Montage Fortnite Videos that You Can Share with Other Players on Social Media Platforms
- 2024 Approved The Article Shall Offer an Overview to Create a Promising Sports Intro and Edit a YouTube Outro for a Sports Channel. There Will Also Be Three Recommended Apps to Download Background Music for Exercise
- Updated 2024 Approved How to Trim/Crop Video in Microsoft Powerpoint
- New Ideas to Make A Perfect Café Vlog for 2024
- New How to Add Subtitles to Videos With Kapwing for 2024
- In 2024, How to Make a TikTok Loop Video
- Updated 2024 Approved Step by Step to Cut Video in Adobe Premiere Pro
- Ideas That Help You Out in Making Transparent Image
- 2024 Approved Do You Want to Know About Phone Aspect Ratio Vertical? Trying to Learn About iPhone Vertical Video Dimensions? Read This Article to Get All Your Answers on Vertical Phone Aspect Ratio Definition, Types and Tips
- Does find my friends work on Oppo F23 5G | Dr.fone
- How to Change Spotify Location After Moving to Another Country On Motorola Moto G13 | Dr.fone
- How to Unlock Samsung Galaxy S23 Tactical Edition Pattern Lock if Forgotten? 6 Ways
- How To Use Allshare Cast To Turn On Screen Mirroring On Poco C50 | Dr.fone
- Still Using Pattern Locks with Oppo A79 5G? Tips, Tricks and Helpful Advice
- Unlock Apple ID without Phone Number On Apple iPhone 13 Pro Max
- In 2024, iPogo will be the new iSpoofer On Xiaomi Redmi Note 12 Pro 5G? | Dr.fone
- In 2024, How to Transfer Contacts from Lava Yuva 2 to Other Android Devices Using Bluetooth? | Dr.fone
- Where Is the Best Place to Catch Dratini On Vivo S17e | Dr.fone
- Fixing Persistent Pandora Crashes on Nokia C300 | Dr.fone
- Wondering the Best Alternative to Hola On Vivo S17? Here Is the Answer | Dr.fone
- How to Change Location on TikTok to See More Content On your Samsung Galaxy F15 5G | Dr.fone
- In 2024, How to Remove Apple ID from iPhone 6 without Password?
- In 2024, Unova Stone Pokémon Go Evolution List and How Catch Them For Apple iPhone 12 Pro | Dr.fone
- Title: Updated 2024 Approved General Information That You Need To Know About MKV Format
- Author: Chloe
- Created at : 2024-04-24 07:08:33
- Updated at : 2024-04-25 07:08:33
- Link: https://ai-editing-video.techidaily.com/updated-2024-approved-general-information-that-you-need-to-know-about-mkv-format/
- License: This work is licensed under CC BY-NC-SA 4.0.
