
:max_bytes(150000):strip_icc():format(webp)/Robothandholdinganapple-fbe6ff482ed641e188dd6650b9ac132e.jpg)
Updated 2024 Approved How to Trim/Crop Video in Microsoft Powerpoint
Learn How to Trim/Crop Video in Microsoft PowerPoint
Create High-Quality Video - Wondershare Filmora
An easy and powerful YouTube video editor
Numerous video and audio effects to choose from
Detailed tutorials provided by the official channel
PowerPoint allows you to trim or crop the length of your video and save it as a separate media file. Trimming/cropping video is a great way to remove distracting or unnecessary parts of your video or change its dimensions so that it fits within a certain area. Doing this will make your videos captivating, and more people will want to watch them. Keeping that in mind, we’ll explain how you can crop or trim video in PowerPoint. You will also learn some helpful tips that you can use when editing videos on this presentation program.
In this article
01 How to Trim Videos in PowerPoint
02 Bonus! Tips on Editing Videos in Powerpoint
How to Trim Videos in PowerPoint
Many people use Microsoft PowerPoint to prepare basic animated explainers and presentations, but you can learn how to trip or crop videos in this program with the tools that it provides. With that in mind, here is how to trim, reset, or edit videos in PowerPoint.
How to Trim a Video in PowerPoint
You can trip unnecessary content at the start or end of your video clip. However, you can only trim videos you have inserted from your PC, as this feature is not yet available for videos on the web. Follow the steps below to learn how to trim video in PowerPoint.
- If you are in a slide containing a media placeholder, click on Insert Video from File. A window will open; select the From a File option.
- Find the video file on your PC and select it. Then, click the arrow that’s right next to the Insert button. Choose either the Link to File or Insert option and your video will appear on the slide.
- If you are not using a slide that has a media placeholder, find the Insert tab and click Video on My PC. You will be able to locate the video file on your PC.
- You are now ready to trim video PowerPoint.
- Select your video, and the Playback tab will appear. Navigate to the Editing area of the ribbon and hit the Trim Video button.

- You’ll see a small editing window that allows you to trim video in PowerPoint.
- Enter the end and start times for the sections of the video you would like to keep. Alternatively, you can use the markers to choose the start and endpoints.

- To adjust the start and end times in smaller increments, you can use the arrows you see on the sides of those boxes. If you know the exact times, enter them into the corresponding boxes.
- You can also select the portion you would like to keep using the end and start time markers. In this case, sliding the red marker allows you to the end time while the green one lets you set the start time.

- If you want to use a combination of the tools above to pinpoint where to start and end the video, hit the Play button, then click the Pause button when you reach the time you want.

- Enter this time into the End Time or Start Time box, depending on the portion you would like to keep. Or you can move any of the markers to this spot.
- Hit the OK button once the portion of the video clip you want is all set. The video will appear on your slide update, and it will only play the section that you kept when trimming the video.
How to Reset or Edit a Trimmed Video in PowerPoint
If you trim video in PowerPoint and change your mind, you can always edit where you have trimmed it or reset the trimmed video back to its original state. Follow the steps below to learn how to edit to reset a trimmed video in PowerPoint.
- Select your video, and then find the Playback tab.

- Hit the Trim Video button, and the Trim Video Settings will be as they were when you were trimming the video. That means you can make the necessary adjustments.
- To reset a trimmed video back to its original length, slide the red end marker to the right and the green start maker to the left. The OK button allows you to play the whole video in your presentation.

How to Save a Trimmed Video
Now that you have trimmed your video in Microsoft PowerPoint, you might want to save it to use it outside this program. You can only save the video file after compressing it, then you can use the trimmed video as you want.
After compressing your trimmed video, only the trimmed section will show up on your slide. That said, follow the steps below to save your trimmed video:
- From the PowerPoint menu, select File > Info
- Next, select the Compress Media option.
- Next to Compress Media, you will see all media that are in your slideshow, including your trimmed video. If you’ve got other video files here, the compression process will apply to these files.
- Choose the suitable level of compression. A dialog box will pop up as the compression process takes place. Hit the Close button when this process completes.
- Go back to the slide that contains your trimmed video, which has now been compressed.
- Right-click the compressed video, and select the Save Media As option.

- Choose the location where you want to save your video. You can change its name if you want and click the Save button.
You have now successfully saved your trimmed video.
Bonus! Tips on Editing Videos in Powerpoint
Now that you know how to trim video PowerPoint, here are some helpful tips on editing videos on this application.
How to Crop Videos in PowerPoint
Once you have inserted your video in the slide, you have the option of cropping it. Follow these steps below to learn how to crop video PowerPoint.
- Open your presentation and then go to the slide where you have inserted your video clip.
- Double-click or select the video, and the two Video Tools tabs will appear in the ribbon: Playback and Format. Hit the Format tab option to activate it.

- Your slide may show a black rectangle after you insert your video.
- Add a Poster Frame to the video clip to get rid of the black rectangle.
- Click Crop in the Video Tools Format tab.

- On the edges of your video clip, you’ll see dark crop handles. If you use the Video Shape option, the crop handles will appear on the edge of that shape.
- Pressing the Ctrl key on your keyboard while you drag allows you to alter how you crop. Pressing Ctrl plus dragging the side cropping handles resizes two opposite sides, while Ctrl plus dragging the corner cropping handles resizes all the four sides.
- Pressing the Shift key on your keyboard while dragging will give you different results. You can also use the Shift and Ctrl keys simultaneously to combine both capabilities.
- You can reposition the crop by either moving the video itself or the crop area.
- Crop the unwanted portion by hitting the Crop button again or pressing the Enter key. You can also click on the Slide Area to apply the cropping changes.
- You can access more crop options by right-clicking the video, where a contextual menu will appear. Select the Format Video option.
- You’ll see the Format Video Task Pane; select the Crop option.

- You can crop sections of the video by specifying the Picture or Crop Position. You can also change other crop parameters, such as Top, Left, Offset Y, Offset X, Height, and Width.

How to Play Video Inside a Shape
If you want to edit your video and enhance its appearance, you can have it play inside a unique shape instead of the usual rectangle format that videos play in. In turn, you’ll draw attention to your video.
To play your video in an unusual shape, select your video and navigate to the Format tab. Then, go to the Video Shape menu, where you’ll see multiple shapes to choose from.

How to Apply Preset Video Styles
You can also liven up your video by applying one of the pre-designed styles that PowerPoints provides. These styles combine various effects, including bevels, reflections, shadows, tilts, and frames.
Applying preset video styles is a simple process. Select the video, then navigate to the Format tab. Click More under the Video Style section. You’ll see a gallery of preset styles; roll your mouse over it and hold the cursor over any style type. The program will apply a live preview of this style to your video.

Conclusion
● You can use PowerPoint to crop, trim, and add video styles to your videos to make them more attractive to your audience by following the steps above. In turn, they will get more views and attract more attention.
PowerPoint allows you to trim or crop the length of your video and save it as a separate media file. Trimming/cropping video is a great way to remove distracting or unnecessary parts of your video or change its dimensions so that it fits within a certain area. Doing this will make your videos captivating, and more people will want to watch them. Keeping that in mind, we’ll explain how you can crop or trim video in PowerPoint. You will also learn some helpful tips that you can use when editing videos on this presentation program.
In this article
01 How to Trim Videos in PowerPoint
02 Bonus! Tips on Editing Videos in Powerpoint
How to Trim Videos in PowerPoint
Many people use Microsoft PowerPoint to prepare basic animated explainers and presentations, but you can learn how to trip or crop videos in this program with the tools that it provides. With that in mind, here is how to trim, reset, or edit videos in PowerPoint.
How to Trim a Video in PowerPoint
You can trip unnecessary content at the start or end of your video clip. However, you can only trim videos you have inserted from your PC, as this feature is not yet available for videos on the web. Follow the steps below to learn how to trim video in PowerPoint.
- If you are in a slide containing a media placeholder, click on Insert Video from File. A window will open; select the From a File option.
- Find the video file on your PC and select it. Then, click the arrow that’s right next to the Insert button. Choose either the Link to File or Insert option and your video will appear on the slide.
- If you are not using a slide that has a media placeholder, find the Insert tab and click Video on My PC. You will be able to locate the video file on your PC.
- You are now ready to trim video PowerPoint.
- Select your video, and the Playback tab will appear. Navigate to the Editing area of the ribbon and hit the Trim Video button.
- You’ll see a small editing window that allows you to trim video in PowerPoint.
- Enter the end and start times for the sections of the video you would like to keep. Alternatively, you can use the markers to choose the start and endpoints.
- To adjust the start and end times in smaller increments, you can use the arrows you see on the sides of those boxes. If you know the exact times, enter them into the corresponding boxes.
- You can also select the portion you would like to keep using the end and start time markers. In this case, sliding the red marker allows you to the end time while the green one lets you set the start time.
- If you want to use a combination of the tools above to pinpoint where to start and end the video, hit the Play button, then click the Pause button when you reach the time you want.
- Enter this time into the End Time or Start Time box, depending on the portion you would like to keep. Or you can move any of the markers to this spot.
- Hit the OK button once the portion of the video clip you want is all set. The video will appear on your slide update, and it will only play the section that you kept when trimming the video.
How to Reset or Edit a Trimmed Video in PowerPoint
If you trim video in PowerPoint and change your mind, you can always edit where you have trimmed it or reset the trimmed video back to its original state. Follow the steps below to learn how to edit to reset a trimmed video in PowerPoint.
- Select your video, and then find the Playback tab.
- Hit the Trim Video button, and the Trim Video Settings will be as they were when you were trimming the video. That means you can make the necessary adjustments.
- To reset a trimmed video back to its original length, slide the red end marker to the right and the green start maker to the left. The OK button allows you to play the whole video in your presentation.
How to Save a Trimmed Video
Now that you have trimmed your video in Microsoft PowerPoint, you might want to save it to use it outside this program. You can only save the video file after compressing it, then you can use the trimmed video as you want.
After compressing your trimmed video, only the trimmed section will show up on your slide. That said, follow the steps below to save your trimmed video:
- From the PowerPoint menu, select File > Info
- Next, select the Compress Media option.
- Next to Compress Media, you will see all media that are in your slideshow, including your trimmed video. If you’ve got other video files here, the compression process will apply to these files.
- Choose the suitable level of compression. A dialog box will pop up as the compression process takes place. Hit the Close button when this process completes.
- Go back to the slide that contains your trimmed video, which has now been compressed.
- Right-click the compressed video, and select the Save Media As option.
- Choose the location where you want to save your video. You can change its name if you want and click the Save button.
You have now successfully saved your trimmed video.
Bonus! Tips on Editing Videos in Powerpoint
Now that you know how to trim video PowerPoint, here are some helpful tips on editing videos on this application.
How to Crop Videos in PowerPoint
Once you have inserted your video in the slide, you have the option of cropping it. Follow these steps below to learn how to crop video PowerPoint.
- Open your presentation and then go to the slide where you have inserted your video clip.
- Double-click or select the video, and the two Video Tools tabs will appear in the ribbon: Playback and Format. Hit the Format tab option to activate it.
- Your slide may show a black rectangle after you insert your video.
- Add a Poster Frame to the video clip to get rid of the black rectangle.
- Click Crop in the Video Tools Format tab.
- On the edges of your video clip, you’ll see dark crop handles. If you use the Video Shape option, the crop handles will appear on the edge of that shape.
- Pressing the Ctrl key on your keyboard while you drag allows you to alter how you crop. Pressing Ctrl plus dragging the side cropping handles resizes two opposite sides, while Ctrl plus dragging the corner cropping handles resizes all the four sides.
- Pressing the Shift key on your keyboard while dragging will give you different results. You can also use the Shift and Ctrl keys simultaneously to combine both capabilities.
- You can reposition the crop by either moving the video itself or the crop area.
- Crop the unwanted portion by hitting the Crop button again or pressing the Enter key. You can also click on the Slide Area to apply the cropping changes.
- You can access more crop options by right-clicking the video, where a contextual menu will appear. Select the Format Video option.
- You’ll see the Format Video Task Pane; select the Crop option.
- You can crop sections of the video by specifying the Picture or Crop Position. You can also change other crop parameters, such as Top, Left, Offset Y, Offset X, Height, and Width.
How to Play Video Inside a Shape
If you want to edit your video and enhance its appearance, you can have it play inside a unique shape instead of the usual rectangle format that videos play in. In turn, you’ll draw attention to your video.
To play your video in an unusual shape, select your video and navigate to the Format tab. Then, go to the Video Shape menu, where you’ll see multiple shapes to choose from.
How to Apply Preset Video Styles
You can also liven up your video by applying one of the pre-designed styles that PowerPoints provides. These styles combine various effects, including bevels, reflections, shadows, tilts, and frames.
Applying preset video styles is a simple process. Select the video, then navigate to the Format tab. Click More under the Video Style section. You’ll see a gallery of preset styles; roll your mouse over it and hold the cursor over any style type. The program will apply a live preview of this style to your video.
Conclusion
● You can use PowerPoint to crop, trim, and add video styles to your videos to make them more attractive to your audience by following the steps above. In turn, they will get more views and attract more attention.
Learn Topaz Video Enhance AI Review and Achieve Powerful Video Conversion
Learn Topaz Video Enhance AI Review and Achieve Powerful Video Conversion
An easy yet powerful editor
Numerous effects to choose from
Detailed tutorials provided by the official channel
Earlier, you might need a professional to help you with the AI video enhancing process, but now you can do it yourself using Topaz. This app has fascinating features to make your editing experience smooth and unique. This app was used only for photo enhancement earlier. Now with time, it has been updated, and now it can be used to do AI Enhancing of your video. This article is a Topaz Video Enhance AI review. Here in this article, we focus on the usage of Topaz and its effectiveness compared to other AI software.
In this article
01 [What Does Topaz Video Enhance AI Do?](#Part 1)
02 [How Do You Use Topaz Video Enhance AI?](#Part 2)
03 [Deep Learning: Topaz Video Enhance AI Review](#Part 3)
Part 1 What Does Topaz Video Enhance AI Do?
Topaz Video Enhance IA is an all-rounder in its field. This app is used to do AI upscaling in general and is used to improve the display quality of the footage. The AI technology used in this software is so advanced that it does not need any help and edits every frame with accuracy resulting in a natural and smooth visual. Topaz Video Enhance IA can be used to restore old or low-resolution footage. This video enhance AI app allows outstanding slow-motion editing of videos. This software can give your video upscaling experience a new turn.

Part 2 How Do You Use Topaz Video Enhance AI?
When we are talking about topaz labs video enhance AI review, it’s incomplete if we do not talk about the process of using it**.** The whole process of video enhance AI topaz labs can be divided into these parts:
01Importing of videos
To open a dialogue box showing your videos, click on the center of the screen. You can select more than one video or even drag those videos directly into the app from the dialogue box that has been shown.

The videos you have selected will be shown at the bottom of the screen. You can pick each video individually to edit, or you can do a batch edit of all the videos.

To remove a video or a video queue, you can click on the delete icon above the video list.
02Choosing AI Processing Models
You need to choose the suitable models to edit or enhance your video. Different AI Processing models will be available in the app itself; you can choose if you want to choose from those models.
03Settings of the output of the video
The app offers in-built standards to set your output, or you can create your custom settings.

For the output of the video, the app allows both picture and video sequence output.

Sometimes a black bar appears on the output video when non-standard-sized videos are converted to standard preset.
But there is a solution to this, you fill the frame by clicking on the “Crop to fill frame” option.
04Setting a name for your output
With the height, width, and scale of the output video, the current name will be shown by default. You can change this by unchecking the box and selecting the “Use default output name,” Then, there will be a dialogue box on your screen.
In that dialogue box, type the name of your output video, select the format or type of your output file, select the location where you want to save your output and then click on the “Save” option.
05Preview of the output video
You can see a short clip of 30 rendered framed of your output as a preview.
To preview the render, you need to select and drag the slider on your video’s timeline. Position the slider where you want to see the preview of your render or output.
You need to wait for a while so that the clips get processed. After the processing is complete, there will be a split-screen.
One part of the split shows the original video clip, and the other split shows the edited or rendered previews on loop.
06Trimming of the output video
To understand simply, the more your output size, the more time it takes to process.
To save the processing time, you can trim only that part of the rendered video you need.
To start with the trimming process, you need to drag the slider along the video’s timeline to select the starting timestamp of the video.
After you have positioned your slider, click on the “scissor” icon on your screen to trim the beginning of your rendered video.
To trim from the end of the rendered video, you have to drag the slider to the ending position of your video.
After your slider is perfectly positioned, click on the “scissor” icon on your screen to trim the end part of your rendered video.
A part of your timeline will be highlighted; this highlighted portion will be processed as you edit, enhanced output.

07Processing of the final output
To get the final output, you need to process the video.
To start with the processing, click on the “Start Processing” option at the bottom. Your video will be shown frame by frame until the processing of the video is complete.
Part 3 Deep Learning: Topaz Video Enhance AI Review
To make the topaz video enhance review, we need to throw light on these features.
01Cost
All the users are given a one-month free trial. However, the complete version of Topaz Video Enhance AI costs $199.9 (includes an update of one year), and the yearly upgrades run at $99. If you do not want to pay for yearly upgrades, you continue using your previous version or the version you bought previously. You can use coupons to have a discount on your payment.
02Design and Performance
The main designs and performance highlights of this software are:
● Default footage set to 4K resolution.
● This software cleans up old progressive footage
● The app interlaces footage to 4K
● This app cleans up old interlaced footage
● This app supports 400% slow motion and 60fps.
03Features
Topaz Video Enhance AI has several exciting features. The most iconic among those features were:
● Upscaling of video to 4Kor 8K resolution. This application can upgrade your video from SD to HD, from HD to 4K, and from 4K to 8K.
● Topaz Video Enhance AI works as a wonder to remove noise. This app has an excellent performance in removing high ISO noise. Topaz AI uses outstanding photo editing software, which results in wonderful outputs.
● The AI automatically converts your video frame rate from 25fps to 3fps. So, if you need your custom frame rate settings, you can set them in the app.
● Topaz Video Enhance AI acts as amind-blowing editing software when it is about deinterlacing video. Deinterlacing your video gives a smooth and natural finish to your video because there are almost no or very few artifacts in the final output.
04System Requirements
Video Enhance AI has certain system requirements. The features required are:
Windows: This software is not supported by Windows 7 or Windows 8. Appropriate for Windows 10 (build 19041 v2004 and above) and Windows 11.
Mac: 10.14 Mojave and above for CPU support 10.15 Catalina and above GPU support.
The hardware requirements are:
● Processor: Intel HD 5000 iGPU or above AMD CPUs from 2016
● System Memory: 8GB (16GB recommended for better performance)
● Graphics Card: Intel HD 5000 (on CPU DirectX 12, compatible in all Windows) and Mac 10.15 and above.
● Dedicated Graphics Memory: 2GB (8GB recommended for better performance)
05Interface
When Topaz Video Enhance AI is working, the screen is divided into different parts, that is:
● Clip selection or the clip selection bar can be used to select the exact portions that you want to render and export as the final footage.
● Video Processing Window can be used to select the AI model from the preset AI models on the app itself.
● A batch processing window is used to edit the batch by adding footage to the batch for batch editing.
● In this video output section, you can select one of the presets for your footage from an upscale percentage of 1.

06A Comparison to Other Video Enhance AI Software
| Topaz Video Enhance AI | Other Video Enhance AI |
|---|---|
| Preset video resolution is 4K | Most of the video enhance AI has a maximum resolution of 4K. |
| The preset fps rate is 30, and you can change it accordingly. | Other Video Enhance AI software has one preset fps rate and does not allow users to change it. |
| Supports any output format. | Supports only particular formats of output. |
Wondershare Filmora Video Editor is another app you can use to edit your footage and retain its quality. Most of the editing app ruins the quality. You can use this app to edit your own footage or photos. This application is one of the best editing apps because of its cool and user-friendly features. The most amazing part is this app is free and available on both Windows and Mac.
For Win 7 or later (64-bit)
For macOS 10.12 or later
● Ending Thoughts →
● Now you know what usages of Topaz Video Enhance IA are through the topaz video enhance review focused on in this article.
● The main features, minimum system requirements, and, most importantly, the procedure to use this app have been elaborated on in this article.
● Please let us know your views on this post and if you liked it, do share it with your friends and comment below.
Earlier, you might need a professional to help you with the AI video enhancing process, but now you can do it yourself using Topaz. This app has fascinating features to make your editing experience smooth and unique. This app was used only for photo enhancement earlier. Now with time, it has been updated, and now it can be used to do AI Enhancing of your video. This article is a Topaz Video Enhance AI review. Here in this article, we focus on the usage of Topaz and its effectiveness compared to other AI software.
In this article
01 [What Does Topaz Video Enhance AI Do?](#Part 1)
02 [How Do You Use Topaz Video Enhance AI?](#Part 2)
03 [Deep Learning: Topaz Video Enhance AI Review](#Part 3)
Part 1 What Does Topaz Video Enhance AI Do?
Topaz Video Enhance IA is an all-rounder in its field. This app is used to do AI upscaling in general and is used to improve the display quality of the footage. The AI technology used in this software is so advanced that it does not need any help and edits every frame with accuracy resulting in a natural and smooth visual. Topaz Video Enhance IA can be used to restore old or low-resolution footage. This video enhance AI app allows outstanding slow-motion editing of videos. This software can give your video upscaling experience a new turn.
Part 2 How Do You Use Topaz Video Enhance AI?
When we are talking about topaz labs video enhance AI review, it’s incomplete if we do not talk about the process of using it**.** The whole process of video enhance AI topaz labs can be divided into these parts:
01Importing of videos
To open a dialogue box showing your videos, click on the center of the screen. You can select more than one video or even drag those videos directly into the app from the dialogue box that has been shown.
The videos you have selected will be shown at the bottom of the screen. You can pick each video individually to edit, or you can do a batch edit of all the videos.
To remove a video or a video queue, you can click on the delete icon above the video list.
02Choosing AI Processing Models
You need to choose the suitable models to edit or enhance your video. Different AI Processing models will be available in the app itself; you can choose if you want to choose from those models.
03Settings of the output of the video
The app offers in-built standards to set your output, or you can create your custom settings.
For the output of the video, the app allows both picture and video sequence output.
Sometimes a black bar appears on the output video when non-standard-sized videos are converted to standard preset.
But there is a solution to this, you fill the frame by clicking on the “Crop to fill frame” option.
04Setting a name for your output
With the height, width, and scale of the output video, the current name will be shown by default. You can change this by unchecking the box and selecting the “Use default output name,” Then, there will be a dialogue box on your screen.
In that dialogue box, type the name of your output video, select the format or type of your output file, select the location where you want to save your output and then click on the “Save” option.
05Preview of the output video
You can see a short clip of 30 rendered framed of your output as a preview.
To preview the render, you need to select and drag the slider on your video’s timeline. Position the slider where you want to see the preview of your render or output.
You need to wait for a while so that the clips get processed. After the processing is complete, there will be a split-screen.
One part of the split shows the original video clip, and the other split shows the edited or rendered previews on loop.
06Trimming of the output video
To understand simply, the more your output size, the more time it takes to process.
To save the processing time, you can trim only that part of the rendered video you need.
To start with the trimming process, you need to drag the slider along the video’s timeline to select the starting timestamp of the video.
After you have positioned your slider, click on the “scissor” icon on your screen to trim the beginning of your rendered video.
To trim from the end of the rendered video, you have to drag the slider to the ending position of your video.
After your slider is perfectly positioned, click on the “scissor” icon on your screen to trim the end part of your rendered video.
A part of your timeline will be highlighted; this highlighted portion will be processed as you edit, enhanced output.
07Processing of the final output
To get the final output, you need to process the video.
To start with the processing, click on the “Start Processing” option at the bottom. Your video will be shown frame by frame until the processing of the video is complete.
Part 3 Deep Learning: Topaz Video Enhance AI Review
To make the topaz video enhance review, we need to throw light on these features.
01Cost
All the users are given a one-month free trial. However, the complete version of Topaz Video Enhance AI costs $199.9 (includes an update of one year), and the yearly upgrades run at $99. If you do not want to pay for yearly upgrades, you continue using your previous version or the version you bought previously. You can use coupons to have a discount on your payment.
02Design and Performance
The main designs and performance highlights of this software are:
● Default footage set to 4K resolution.
● This software cleans up old progressive footage
● The app interlaces footage to 4K
● This app cleans up old interlaced footage
● This app supports 400% slow motion and 60fps.
03Features
Topaz Video Enhance AI has several exciting features. The most iconic among those features were:
● Upscaling of video to 4Kor 8K resolution. This application can upgrade your video from SD to HD, from HD to 4K, and from 4K to 8K.
● Topaz Video Enhance AI works as a wonder to remove noise. This app has an excellent performance in removing high ISO noise. Topaz AI uses outstanding photo editing software, which results in wonderful outputs.
● The AI automatically converts your video frame rate from 25fps to 3fps. So, if you need your custom frame rate settings, you can set them in the app.
● Topaz Video Enhance AI acts as amind-blowing editing software when it is about deinterlacing video. Deinterlacing your video gives a smooth and natural finish to your video because there are almost no or very few artifacts in the final output.
04System Requirements
Video Enhance AI has certain system requirements. The features required are:
Windows: This software is not supported by Windows 7 or Windows 8. Appropriate for Windows 10 (build 19041 v2004 and above) and Windows 11.
Mac: 10.14 Mojave and above for CPU support 10.15 Catalina and above GPU support.
The hardware requirements are:
● Processor: Intel HD 5000 iGPU or above AMD CPUs from 2016
● System Memory: 8GB (16GB recommended for better performance)
● Graphics Card: Intel HD 5000 (on CPU DirectX 12, compatible in all Windows) and Mac 10.15 and above.
● Dedicated Graphics Memory: 2GB (8GB recommended for better performance)
05Interface
When Topaz Video Enhance AI is working, the screen is divided into different parts, that is:
● Clip selection or the clip selection bar can be used to select the exact portions that you want to render and export as the final footage.
● Video Processing Window can be used to select the AI model from the preset AI models on the app itself.
● A batch processing window is used to edit the batch by adding footage to the batch for batch editing.
● In this video output section, you can select one of the presets for your footage from an upscale percentage of 1.
06A Comparison to Other Video Enhance AI Software
| Topaz Video Enhance AI | Other Video Enhance AI |
|---|---|
| Preset video resolution is 4K | Most of the video enhance AI has a maximum resolution of 4K. |
| The preset fps rate is 30, and you can change it accordingly. | Other Video Enhance AI software has one preset fps rate and does not allow users to change it. |
| Supports any output format. | Supports only particular formats of output. |
Wondershare Filmora Video Editor is another app you can use to edit your footage and retain its quality. Most of the editing app ruins the quality. You can use this app to edit your own footage or photos. This application is one of the best editing apps because of its cool and user-friendly features. The most amazing part is this app is free and available on both Windows and Mac.
For Win 7 or later (64-bit)
For macOS 10.12 or later
● Ending Thoughts →
● Now you know what usages of Topaz Video Enhance IA are through the topaz video enhance review focused on in this article.
● The main features, minimum system requirements, and, most importantly, the procedure to use this app have been elaborated on in this article.
● Please let us know your views on this post and if you liked it, do share it with your friends and comment below.
Best Video Editors to Add Text to a Video
While it can be very easy to add text to an image, the same cannot be said when it comes to adding even the simplest text to a video. You will need video editing software that is designed with the necessary features to help you add text to your video.
There are very many programs in the market that can technically be used to add text to a video. But the ones we will look at are video editors that make the process easy, but also give you a wide range of options to customize your text in numerous ways.
Filmora
Filmora by Wondershare is one of the best video editors in the market. Its user interface is so easy to use that adding text to the video is a simple 3-step process. Aside from adding text to the video, Filmora also allows you to edit other aspects of the video including adding transitions, overlays, and animations to any section of the video.

Key Features:
- You can use Filmora to add text to any section of the video
- It gives you the freedom to move the text to any section of the video
- Customizing the text, you add to the video can be done in numerous ways including changing the color, and font and adding animations to the text.
- It offers numerous templates to choose from and different font styles that you can use
- It has a simple user interface that makes the video editing process very easy
- It has numerous other video editing capabilities that allow you to create and edit videos in different ways including splitting videos, trimming videos, and even merging videos clips into one
- You can upload the videos directly to YouTube after editing.
After Effects
Adobe After Effects is a motion picture editing program that you can also use to add text and other animations to your video. While you can use it to add simple text to the video, it is an ideal solution when your goal is to add advanced text animations. It is however by no means a simple solution, especially for beginners who may find it hard to get going with After Effects.

Key Features:
- You can add simple lines of text to any section of the video
- Text is easily customizable by changing the color, font, and size of the text
- You can also choose to change the entire text layer and add advanced animations and effects
- There are a lot of text, animations, and effects templates to choose from
- You can easily copy text from other Adobe applications to use in After Effects
Movavi Editor
Movavi video editor is another great video editor that you can use to add and edit text on a video. Like most similar tools it is designed to simplify the process, allowing you to add text to any section of the document, move the text to any location on the video and even add text effects to customize the text. It has a very simple user interface that allows you to do that quickly and easily.

Key Features:
- You can add text to any section of the video
- Customizing the text by changing the font, color and size is also very easy
- The user interface is very easy to use, allowing you to add even blocks of text very quickly
- You also have additional options to edit the video including splitting and merging the video or adjusting the brightness, saturation, and color.
iMovie
This is a built-in video editor that you will find on macOS and iOS devices. Even though it is free, iMovie has a lot of features that come in handy when you want to add and edit text on a video. The fact that it can be used on iOS devices is an added advantage when you want to edit videos on the go.

Key Features:
- It allows users to add transitions and effects to the text you add to the video
- It comes with a lot of title templates to choose from
- Adding animated text is also very simple including Sideways Drift, Lens Flare, and more
- You can customize the text in very many ways including adding fonts, drop shadows, changing the color, and even resizing or repositioning the text.
Camtasia
TechSmith Camtasia is one of the most popular tools to create and edit videos. Of the numerous features that you get when you choose to use Camtasia is adding and editing text to the video. It has numerous templates that can be used to customize the text you add in various ways.

Key Features:
- It gives you numerous options to add text to the images including text boxes, templates, and effects
- It has a speech-to-text feature that is perfect for adding captions and subtitles to the video
- You can easily customize the text by adding transitions and effects or even by simply changing the font, color, and size of the text
- The text can be moved to any section of the video
Typito
Typito is an online video editor with simple tools that can help you make changes to any video. designed to help YouTube content creators and video editors, Typito can be used to add all kinds of text and text effects to any video. It is accessible on all browsers and it is also very easy to use.
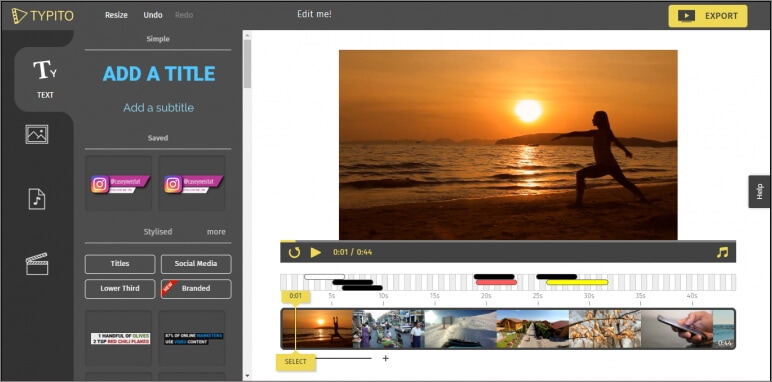
Key Features:
- It is very easy to use, allowing you to add text to any video in a few simple steps
- It has numerous templates to choose from
- Changing the font size, color, and style of the text is very easy
- You can publish videos directly to numerous video-sharing sites after editing
- It allows users to add animations, transitions, and effects to the text
Splice
Splice is an iOS app designed to help you add text to videos on iOS devices. Adding text to any video using Splice can be easily done using the overlay feature. It also has numerous other video editing features including allowing you to easily synchronize your videos and music, adding filters and transitions, and more.

Key Features:
- it has a simple user interface that makes adding text very easy
- You can customize the text in various ways including changing the font size, color and style or even adding various text effects
- Videos can be saved on the device or shared directly on social media apps like Facebook, Instagram, and YouTube
- It has numerous other video editing features including filters and animations
Clipomatic
If the text you want to add to the video is in the form of captions or subtitles, then Clipomatic is perhaps the best choice. It supports various languages including German, French, Portuguese, and even Chinese. You can also use it to add regular text to any video, reposition the text on any section of the video and customize the text in various ways.

Key Features:
- It is available for both Android and iOS
- Adding text to the video is very easy
- You can easily customize the text by changing the font color, and size and adding transitions and text effects
- It supports various languages, making it ideal for captions and subtitles
MySubtitle
MySubtitle is a simple but highly effective app that you can use to add text to your video. As the name suggests, this tool is ideal for adding subtitles and you can do that very easily by simply typing in the text and syncing the text to the video’s content.

Key Features:
- It is available for both iOS and Android devices
- You can type in your subtitles directly on the video
- Subtitles can then be paced to suit the video’s playback speed
- It is completely free to use
- You can share the videos you edit directly on various social media platforms
Free Download For Win 7 or later(64-bit)
Free Download For macOS 10.14 or later
Free Download For macOS 10.14 or later
Also read:
- In 2024, Some Top Methods to Create AI Slow Motion Videos
- In 2024, 3GP Video Format What Is 3GP Format And How To Open It?
- New In 2024, 2 Effective Ways to Add Text Behind Objects
- Updated How to Add VHS Green Screen to Your Video
- New How to Add Green Screen Effects In Phhotoshop for 2024
- Updated In 2024, Top LUTs for Sony HLG to Download
- Updated In 2024, Backup and Organize Your Tons of Footage in Minutes
- Updated In 2024, How Have Game Recording Software Improved Their Stature in the Market? An Overview
- New 6 Instant Mp4 to GIF Online Tools for 2024
- 2024 Approved Control Playback Speed in Premiere Pro
- Updated Make A Tattoo Disappear Like A Magic
- Updated Top List 20 Best LUTs for Music Videos for 2024
- 2024 Approved 4 Simple Methods for Making a High-Quality Recap Video
- In 2024, The Best Wedding LUTs for Premiere Pro
- How To Create A YouTube Intro for 2024
- Explore a Variety of Inexpensive Camera Models Suitable for Making Slow-Motion Footage without Compromising Quality
- 2024 Approved Ever Wondered About the Similarity You Bear with an Anime Character? If You Have Not yet Looked Into This Exciting Aspect of Motion Graphic Design, You Can Very Well Break the Ice Here
- New Replacing Sky Background Using Adobe Photoshop A Comprehensive Guide
- Updated How to Splice Videos Together on iPhone for 2024
- In 2024, A Complete Guide To OEM Unlocking on Xiaomi Redmi Note 12R
- In 2024, How to use iSpoofer on Samsung Galaxy F14 5G? | Dr.fone
- In 2024, Best Ways to Bypass iCloud Activation Lock from Apple iPhone 7 Plus/iPad/iPod
- In 2024, How To Unlock Any Oppo Find X7 Ultra Phone Password Using Emergency Call
- Proven Ways in How To Hide Location on Life360 For Vivo Y55s 5G (2023) | Dr.fone
- How to Fake Snapchat Location on Realme GT 5 | Dr.fone
- 3 Effective Ways to Unlock iCloud Account Without Password On Apple iPhone 15
- How to recover lost data from Oppo Reno 11 5G?
- 7 Fixes for Unfortunately, Phone Has Stopped on HTC U23 Pro | Dr.fone
- How to Factory Reset Honor Magic 6 Pro If I Forgot Security Code or Password? | Dr.fone
- OnePlus Nord CE 3 5G Video Recovery - Recover Deleted Videos from OnePlus Nord CE 3 5G
- A Step-by-Step Guide on Using ADB and Fastboot to Remove FRP Lock on your Nokia G22
- Updated 10 of the Best Disney Animated Shows
- Remove the Lock Screen Fingerprint Of Your Poco X6
- How Do You Get Sun Stone Evolutions in Pokémon For Samsung Galaxy M54 5G? | Dr.fone
- 9 Best Phone Monitoring Apps for Apple iPhone 12 Pro | Dr.fone
- Three Solutions to Hard Reset Oppo F23 5G? | Dr.fone
- Updated Maximize Your User Engagement With Instagram Live Shopping Expert Tips
- How to Recover Deleted Data from iPhone 13 Pro using Stellar Data Recovery for iPhone? | Stellar
- Title: Updated 2024 Approved How to Trim/Crop Video in Microsoft Powerpoint
- Author: Chloe
- Created at : 2024-04-24 07:08:37
- Updated at : 2024-04-25 07:08:37
- Link: https://ai-editing-video.techidaily.com/updated-2024-approved-how-to-trimcrop-video-in-microsoft-powerpoint/
- License: This work is licensed under CC BY-NC-SA 4.0.
