
:max_bytes(150000):strip_icc():format(webp)/dualsenseedge-749ef030e3c84376926d817913be924b.jpg)
Updated 2024 Approved Time Bending Brilliance The Ultimate Slow Motion Video Makers
Time Bending Brilliance: The Ultimate Slow Motion Video Makers
In 2024, people believe in effects and filters to elevate content instead of keeping it real. With the increasing demand for video editing, slow motion has gained both creator’s and viewers’ attention. Such videos are responsible for adding a creativity layer to content via slow-motion video editors.
In this article, we are going to discuss some leading slow-motion video editors and their features. Some of these tools are online and hence require internet access to operate. On the other hand, some slo-mo video editors are smartphone applications. All have their advantages and drawbacks; however, we’ll discuss a desktop tool that is more efficient than all and offers nothing but benefits.
Slow Motion Video Maker Slow your video’s speed with better control of your keyframes to create unique cinematic effects!
Make A Slow Motion Video Make A Slow Motion Video More Features

Part 1: Top 5 Online Slow-Motion Video Editors to Use in 2024
This section of the article discusses some slow -motion video makers that are available online. We’ll mention their pros and cons along with their prices. This will make selection easy for those who prefer computer editing over smartphones. Following are the top online tools to use if you want to create a slow-motion effect :
1. CapCut
Do you want a customized editing experience while creating slow-motion videos? CapCut is the right slow motion video editor for you, enabling you to set the slow-mo speed at any point. If there were any jitters in your recording, you can fix them by changing the playback speed. In addition, the tool offers post-production effects, AI visual enhancers, and more.

Pros
- It has a timeline panel for editing to ensure smooth and precise editing.
- The tool has a modest yet well-organized user interface to facilitate beginners and professionals.
Cons
- There is a limitation of advanced and upgraded features that are used these days.
Pricing
Free
2. Typito
Say goodbye to the long hours of waiting with your slow-mo editor ’s slow processing. Typito allows users to craft a slow-motion video in 3 steps and a high processing rate. The tool shows compatibility across 20+ video formats. In addition, you can also adjust the video ratio using its built-in ratio presets. In this editor, 1.5x is the normal playback speed, and below this are the slow-motion ones.

Pros
- The tool offers multiple video formats for editing videos while fitting the right context.
- With its cloud collaboration, you can access your incomplete and edited projects where you left off.
Cons
- The advanced features are not available in the free version, and some users don’t prefer that.
Pricing
| Pricing Plan | Annual Pricing |
|---|---|
| Solo | $15 |
| Pro | $29 |
3. InVideo.ai
Editing with a multifeatured tool is fun as you can do more than just one thing. As the name indicates, this is an AI-driven tool with speed change integration. You can adjust the playback speed and set duration preferences for your video. With its minimal user interface, you can do further cutting and trimming afterward across this slow-mo video editor.

Pros
- Its stock footage library has over 8M+ media to help with video creation.
- It has a removable watermark option that is very important for personal branding.
Cons
- The majority of the AI features are available in the paid version.
Pricing
| Pricing Plan | Annual Pricing |
|---|---|
| Business | $15/month |
| Unlimited | $30/month |
4. Video Candy
If you are looking for a slow-motion editor without having to log in or go through a technical procedure, this tool is for you. Interacting with the tool is easy as the user interface has an intuitive design, and you can start by uploading a file. It has 3 playback speed options: 0.75x, 0.5x, and 0.25x for creating a slomo. In addition, you can also incorporate a high playback speed option to unlock more creativity.

Pros
- It supports 4K resolution, which means high-quality content editing.
- The tool can support large files of 3GB size, which means you don’t have to split up results.
Cons
- The tool doesn’t ask for a Gmail account, which means no record of history and storage.
Pricing
| Pricing Plan | Annual Pricing |
|---|---|
| Yearly | $4/month |
| Month | $8/month |
| Lifetime | $99/pay once |
5. Wave.video
This online platform facilitates the alteration of video playback speed effortlessly. It features three distinct playback options, 0.75x, 0.5x, and 0.25x, to ensure precise editing capabilities. Possessing an uncomplicated user interface, the tool extends beyond speed adjustments, offering comprehensive audio modifications. If you want to elevate your videography, use its time-lapse effect to enrich the aesthetics.

Pros
- Continuously offers advanced features with an easy-to-understand interface.
- The drag-and-drop functionality makes it quick to edit videos and increases productivity.
Cons
- The watermark addition in the free version of the slow-mo editor is not good for personal branding and visuals.
Pricing
| Pricing Plan | Annual Pricing |
|---|---|
| Streamer | $16/month |
| Creator | $24/month |
| Business | $48/month |
Part 2: Top 5 Android Apps for Editing Slow-Motion Videos
While professionals prefer editing on a desktop, some people prefer Android editing. It is easier to use smartphones for editing because they come in handy. Moreover, let’s admit that we are on our phones half of the time, and a computer might seem out of our comfort zone. This section has gathered some of the slow-mo maker s to operate on your Android:
- [Slow Motion Video – Fast&Slow Mo](#android app1)
- [Slow Motion Video Maker](#android app2)
- [Video Editor and Maker – InShot](#android app3)
- [Video Editor and Maker – Vidma](#android app4)
- [VivaVideo – Video Editor&Maker](#android app5)
1. Slow Motion Video – Fast&Slow Mo
Becoming the favorite of many, this slow-motion video converter offers an interactive user interface. Editing a slow motion is all about dragging and setting the slider in the downward direction. To slow down a video, you can set its playback speed from 0.25x to 4.0x. In addition, you can also curate a specific portion of your video in slow or fast motion.

Key Features
- This slow-motion video creator offers a pre-built filter and special effects to improve aesthetics.
- This application maintains the video quality and can convert video resolution to HD.
- Never miss a chance to integrate good music in your videos with it, as it has built-in options.
2. Slow Motion Video Maker
This free slo-mo video editor regulates its algorithm to introduce advanced features. It features a timeline editing interface, making it easy to apply slow-motion effects on a definite video section. It displays 3 slow motion speed options: 0.5x, 0.3x, and 0.25x to achieve precision in creating a slomo.

Key Features
- You can fasten your video up to 4x, which is helpful in short-time learning, data compression, and more.
- The premium video trim feature and timeline editing help with the accurate parting of a video.
- This slow-motion video maker has pre-developed music tracks and effects for maximum creativity.
3. Video Editor & Maker – InShot
Step into the realm of this free slo-mo video editor for crafting slo-mos full of creativity. It proposes a simple method to slow down video speed by using a slider. The timeline editing and selective playhead options enable you to create beyond basic. You can alter the speed of specific parts of the video, which means you can do much more than just a plain slo-mo.

Key Features
- Take your vision up a notch by introducing its integral collection of animations and text in your content.
- Make your reels more interesting with its intuitive and numerous transition effects.
- The slow-motion edito r has AI abilities to help you remove image backgrounds with accuracy.
4. Video Editor & Maker – Vidma
This is for you if you are looking for a slow-motion video editor that generates as precise results as those in trending videos. The editing application offers a “Velocity Edit” option with detailed playback speed and positioning options. The application has a velocity graph-like interface for adjusting speed, and you can also see the time you are applying this effect.

Key Features
- Bids an automated “Keep Audio Pitch” option to maintain the audio quality during speed change.
- Infuse your pictures and videos with its immersive collection of text and stickers.
- Features multiple visual filters categorized according to contexts with custom intensities.
5. VivaVideo – Video Editor&Maker
If you are looking for a slow-motion video editor with additional features to elevate your content, use it. The tool has multiple speed setting presets to help you create a perfect slomo along with fast motion. Among Montage, Hero, Bullet, and other presets, it offers a Custom preset option to edit according to your imagination.

Key Features
- An extensive timeline editing interface with multiple tracks option for smooth transitions.
- The stock media has a wide array of texts, animations, themes, effects, and music.
- This slow-mo video maker also has a “Voice Editor” to maintain the quality of audio tracks afterward.
Part 3: Top 5 iOS Apps for Editing Slow Motion Videos
Multiple people prefer shooting and editing with an iPhone instead of a Mac or desktop. This is because it helps them keep up with the video quality without declining any pixels. In addition, you can share a video directly to social sites from your iPhone instead of transferring them first. This part of the article focuses on some iOS slow-mo video maker s applications here:
- [Velomingo: Velocity Edit Maker](#ios app1)
- [Vizmato: Velocity Edit Maker](#ios app2)
- [Slow Motion Video Editor SLOMO](#ios app3)
- [Slow Motion Video Editor](#ios app4)
- [SloMo Slow Motion Video Editor](#ios app5)
1. Velomingo: Velocity Edit Maker
Creating a slo-mo as a beginner has never been this easy with this slow-mo editor. Users have the opportunity to apply its built-in velocity presets on their videos for a slo-mo effect. Although you cannot customize these presets, the application handles slow-mo quality. Not only does it generate mesmerizing slo-mos, but it also brings them smoothness.

Key Features
- Trim feature for creating transitions or eliminating unnecessary parts of video.
- Make videos creative just by offering hundreds of modern templates.
- This slow-mo maker can feature your video straight to WhatsApp, Instagram, TikTok, and Facebook.
2. Vizmato: Video Editor & Filter
Vizmato is a versatile video editor providing slow-motion services along with other speed editing options. Along with creating a Slow-mo, you can also reverse a video speed to add dramatic effect or enable fast motion. Moreover, it offers a speed manipulation option to customize a video according to your taste.

Key Features
- This slow video editor’s asset collection includes 20+ themes and 40+ visual effects.
- Elevate your slo-mos with its pre-developed music collection featuring 140+ music tracks.
- Along with a slo-mo video converter, it also converts images into a video using the slideshow.
3. Slow Motion Video Editor SLOMO
Customize your slow-motion sequences according to background music and context with this slow-motion editor. The editor offers a timeline editing panel, which provides an organized editing experience. In addition, you can enhance the graphic quality of your slo-mo using its pre-assembled filters. To preserve the video quality, share your slo-mo videos on social applications using its share options.

Key Features
- Choose the text option from its toolbar to customize the color, size, and other elements of text.
- Add other graphical elements like stickers and emojis to express your video context or dialogues.
- Resize your video within this application to fit the requirements of social platforms.
4. Slow Motion Video Editor
Wondering about how to achieve a professional-level effect on your iPhone? This slow-motion video converter is full of speed custom setting options to help with that. It uses a timeline bar and velocity graph to adjust the speed settings. The downward slide dragging will slow down your video and vice versa. You can also adjust the video duration via timeline or reset it to set again.

Key Features
- Create a time-lapse or speed up your video by altering its playback speed to 10x, fast or slow.
- Collaborates with iTunes for a seamless integration of music tracks in videos.
- The slow-mo video editor is compatible with social platforms like Instagram, YouTube, and more.
5. SloMo Slow Motion Video Editor
Are you looking for an application just to create slow-mo with a creative user interface? This slow-motion video editor has been developed to help you with speed-alteration tasks. The interface is simple, and you can start creating a slomo just by importing a video. Designed to create professional and cinematic level slo-mos, it offers high video frame rates like 120 fps and 240 fps.

Key Features
- Along with the frame rate, you can manipulate the playback speed range to 12x for both slow and fast.
- With this slow-mo editor’s 40+ illustrative filter, you’ll never run out of creativity.
- Fit your video into different ratios for multiple social media platforms or to your preference.
Bonus Part: Get the Perfect Results of Slow-Motion Video with Wondershare Filmora - Desktop Solution
In this section, you have read about so many slow-mo editors that you might be bored by now. However, one common drawback that all of them had was versatility. They offered high-speed manipulation settings but with limited additional features. Wondershare Filmora is a world-class, all-in-one video editing software. Anyone can use it, from a beginner to a professional or from an Android user to an iOS user.
When you enter this slow-motion video converter, it displays two types of speed modification. One is the Uniform Speed option, while the other one is Speed Ramping. Both of them excel at their tasks and offer custom speed and duration settings. Filmora has recently introduced the “Optical Flow” option in its latest V13 upgrade. This helps to smoothen out a slo-mo video by adding frame rates.
Free Download For Win 7 or later(64-bit)
Free Download For macOS 10.14 or later
Steps to Slow Down Video in Filmora
In this section, we will discuss the Filmora Speed Ramping feature to create a slo-mo. If you are a beginner and have never edited before, this feature suits you the best. It has over 6-speed ramping templates for adding creative speed change effects. You can modify these models to fashion a slo-mo, and here is how to do it:
Step 1Access the Speed Feature
After opening Filmora and opening a project, select the clip in the timeline and go to the settings panel. From there, reach the “Speed” > “Speed Ramping” tabs and select a preset. If you don’t like the featured presets, click on “Customize” for manual editing.

Step 2Add Video Frames
Once you have set the slo-mo speed, reach the “AI Frame Interpolation” section at the bottom. Click on the navigation icon and select “Optical Flow” from there.

Step 3Render Preview to Observe the Outcome
To ensure that the optical flow has worked, click the “Render Preview” option in the timeline toolbar. Once rendering is complete, play the video and finalize it by clicking “Export.”

AI Key Features of Filmora
As discussed before, Filmora offers an extensive interface with a wide collection of features. Users can use these features to generate high-quality images, videos, and more. In this section, the focus is on a few of its features discussed below:
1. AI Smart Masking
Want to create amazing transitions or apply stunning effects on specific video sections? Filmora’s AI mask feature will mask out the unnecessary parts, and you can edit freely. Just enable this feature from its settings panel under AI Tools and select the masking area.

2. AI Text-to-Video
Dive into the realm of Filmora, where there is no limitation on graphics and visuals for videos. This generative AI feature can craft videos from prompts along with suited graphics. You just need to add proper instructions, and AI will do the rest. It enhances the interactive element of your videos via AI voice integration.

3. Motion Tracking
Create animations from mere graphics to insert in your videos using this AI. Just add any graphical emoji, text, or sticker and link it with a moving object. Once you enable the motion tracking option, you will see them come to life. You can also apply an effect or filter to a specific portion throughout the video using making and motion-tracking options.

4. Speech-to-Text
Subtitles and captions have become an important part of cinema or videography. To ensure that your content reaches an international audience, use Filmora’s STT feature. With its automated speech recognition and NLP systems, it transforms any speech into text. Moreover, it has multilingual support to make content accessible at international levels.

Conclusion
In this article, you have read about different slow-motion video editor s and their features. Sometimes, they’re amazing editors, while other times, they may show glitches. However, if you want to try an editor that combines all the properties in one place, we suggest Wondershare Filmora. With its amazing content editing features and assets, you can rely on it for Slomo creation or other editing tasks.
Make A Slow Motion Video Make A Slow Motion Video More Features
Part 1: Top 5 Online Slow-Motion Video Editors to Use in 2024
This section of the article discusses some slow -motion video makers that are available online. We’ll mention their pros and cons along with their prices. This will make selection easy for those who prefer computer editing over smartphones. Following are the top online tools to use if you want to create a slow-motion effect :
1. CapCut
Do you want a customized editing experience while creating slow-motion videos? CapCut is the right slow motion video editor for you, enabling you to set the slow-mo speed at any point. If there were any jitters in your recording, you can fix them by changing the playback speed. In addition, the tool offers post-production effects, AI visual enhancers, and more.
Pros
- It has a timeline panel for editing to ensure smooth and precise editing.
- The tool has a modest yet well-organized user interface to facilitate beginners and professionals.
Cons
- There is a limitation of advanced and upgraded features that are used these days.
Pricing
Free
2. Typito
Say goodbye to the long hours of waiting with your slow-mo editor ’s slow processing. Typito allows users to craft a slow-motion video in 3 steps and a high processing rate. The tool shows compatibility across 20+ video formats. In addition, you can also adjust the video ratio using its built-in ratio presets. In this editor, 1.5x is the normal playback speed, and below this are the slow-motion ones.
Pros
- The tool offers multiple video formats for editing videos while fitting the right context.
- With its cloud collaboration, you can access your incomplete and edited projects where you left off.
Cons
- The advanced features are not available in the free version, and some users don’t prefer that.
Pricing
| Pricing Plan | Annual Pricing |
|---|---|
| Solo | $15 |
| Pro | $29 |
3. InVideo.ai
Editing with a multifeatured tool is fun as you can do more than just one thing. As the name indicates, this is an AI-driven tool with speed change integration. You can adjust the playback speed and set duration preferences for your video. With its minimal user interface, you can do further cutting and trimming afterward across this slow-mo video editor.
Pros
- Its stock footage library has over 8M+ media to help with video creation.
- It has a removable watermark option that is very important for personal branding.
Cons
- The majority of the AI features are available in the paid version.
Pricing
| Pricing Plan | Annual Pricing |
|---|---|
| Business | $15/month |
| Unlimited | $30/month |
4. Video Candy
If you are looking for a slow-motion editor without having to log in or go through a technical procedure, this tool is for you. Interacting with the tool is easy as the user interface has an intuitive design, and you can start by uploading a file. It has 3 playback speed options: 0.75x, 0.5x, and 0.25x for creating a slomo. In addition, you can also incorporate a high playback speed option to unlock more creativity.
Pros
- It supports 4K resolution, which means high-quality content editing.
- The tool can support large files of 3GB size, which means you don’t have to split up results.
Cons
- The tool doesn’t ask for a Gmail account, which means no record of history and storage.
Pricing
| Pricing Plan | Annual Pricing |
|---|---|
| Yearly | $4/month |
| Month | $8/month |
| Lifetime | $99/pay once |
5. Wave.video
This online platform facilitates the alteration of video playback speed effortlessly. It features three distinct playback options, 0.75x, 0.5x, and 0.25x, to ensure precise editing capabilities. Possessing an uncomplicated user interface, the tool extends beyond speed adjustments, offering comprehensive audio modifications. If you want to elevate your videography, use its time-lapse effect to enrich the aesthetics.
Pros
- Continuously offers advanced features with an easy-to-understand interface.
- The drag-and-drop functionality makes it quick to edit videos and increases productivity.
Cons
- The watermark addition in the free version of the slow-mo editor is not good for personal branding and visuals.
Pricing
| Pricing Plan | Annual Pricing |
|---|---|
| Streamer | $16/month |
| Creator | $24/month |
| Business | $48/month |
Part 2: Top 5 Android Apps for Editing Slow-Motion Videos
While professionals prefer editing on a desktop, some people prefer Android editing. It is easier to use smartphones for editing because they come in handy. Moreover, let’s admit that we are on our phones half of the time, and a computer might seem out of our comfort zone. This section has gathered some of the slow-mo maker s to operate on your Android:
- [Slow Motion Video – Fast&Slow Mo](#android app1)
- [Slow Motion Video Maker](#android app2)
- [Video Editor and Maker – InShot](#android app3)
- [Video Editor and Maker – Vidma](#android app4)
- [VivaVideo – Video Editor&Maker](#android app5)
1. Slow Motion Video – Fast&Slow Mo
Becoming the favorite of many, this slow-motion video converter offers an interactive user interface. Editing a slow motion is all about dragging and setting the slider in the downward direction. To slow down a video, you can set its playback speed from 0.25x to 4.0x. In addition, you can also curate a specific portion of your video in slow or fast motion.
Key Features
- This slow-motion video creator offers a pre-built filter and special effects to improve aesthetics.
- This application maintains the video quality and can convert video resolution to HD.
- Never miss a chance to integrate good music in your videos with it, as it has built-in options.
2. Slow Motion Video Maker
This free slo-mo video editor regulates its algorithm to introduce advanced features. It features a timeline editing interface, making it easy to apply slow-motion effects on a definite video section. It displays 3 slow motion speed options: 0.5x, 0.3x, and 0.25x to achieve precision in creating a slomo.
Key Features
- You can fasten your video up to 4x, which is helpful in short-time learning, data compression, and more.
- The premium video trim feature and timeline editing help with the accurate parting of a video.
- This slow-motion video maker has pre-developed music tracks and effects for maximum creativity.
3. Video Editor & Maker – InShot
Step into the realm of this free slo-mo video editor for crafting slo-mos full of creativity. It proposes a simple method to slow down video speed by using a slider. The timeline editing and selective playhead options enable you to create beyond basic. You can alter the speed of specific parts of the video, which means you can do much more than just a plain slo-mo.
Key Features
- Take your vision up a notch by introducing its integral collection of animations and text in your content.
- Make your reels more interesting with its intuitive and numerous transition effects.
- The slow-motion edito r has AI abilities to help you remove image backgrounds with accuracy.
4. Video Editor & Maker – Vidma
This is for you if you are looking for a slow-motion video editor that generates as precise results as those in trending videos. The editing application offers a “Velocity Edit” option with detailed playback speed and positioning options. The application has a velocity graph-like interface for adjusting speed, and you can also see the time you are applying this effect.
Key Features
- Bids an automated “Keep Audio Pitch” option to maintain the audio quality during speed change.
- Infuse your pictures and videos with its immersive collection of text and stickers.
- Features multiple visual filters categorized according to contexts with custom intensities.
5. VivaVideo – Video Editor&Maker
If you are looking for a slow-motion video editor with additional features to elevate your content, use it. The tool has multiple speed setting presets to help you create a perfect slomo along with fast motion. Among Montage, Hero, Bullet, and other presets, it offers a Custom preset option to edit according to your imagination.
Key Features
- An extensive timeline editing interface with multiple tracks option for smooth transitions.
- The stock media has a wide array of texts, animations, themes, effects, and music.
- This slow-mo video maker also has a “Voice Editor” to maintain the quality of audio tracks afterward.
Part 3: Top 5 iOS Apps for Editing Slow Motion Videos
Multiple people prefer shooting and editing with an iPhone instead of a Mac or desktop. This is because it helps them keep up with the video quality without declining any pixels. In addition, you can share a video directly to social sites from your iPhone instead of transferring them first. This part of the article focuses on some iOS slow-mo video maker s applications here:
- [Velomingo: Velocity Edit Maker](#ios app1)
- [Vizmato: Velocity Edit Maker](#ios app2)
- [Slow Motion Video Editor SLOMO](#ios app3)
- [Slow Motion Video Editor](#ios app4)
- [SloMo Slow Motion Video Editor](#ios app5)
1. Velomingo: Velocity Edit Maker
Creating a slo-mo as a beginner has never been this easy with this slow-mo editor. Users have the opportunity to apply its built-in velocity presets on their videos for a slo-mo effect. Although you cannot customize these presets, the application handles slow-mo quality. Not only does it generate mesmerizing slo-mos, but it also brings them smoothness.
Key Features
- Trim feature for creating transitions or eliminating unnecessary parts of video.
- Make videos creative just by offering hundreds of modern templates.
- This slow-mo maker can feature your video straight to WhatsApp, Instagram, TikTok, and Facebook.
2. Vizmato: Video Editor & Filter
Vizmato is a versatile video editor providing slow-motion services along with other speed editing options. Along with creating a Slow-mo, you can also reverse a video speed to add dramatic effect or enable fast motion. Moreover, it offers a speed manipulation option to customize a video according to your taste.
Key Features
- This slow video editor’s asset collection includes 20+ themes and 40+ visual effects.
- Elevate your slo-mos with its pre-developed music collection featuring 140+ music tracks.
- Along with a slo-mo video converter, it also converts images into a video using the slideshow.
3. Slow Motion Video Editor SLOMO
Customize your slow-motion sequences according to background music and context with this slow-motion editor. The editor offers a timeline editing panel, which provides an organized editing experience. In addition, you can enhance the graphic quality of your slo-mo using its pre-assembled filters. To preserve the video quality, share your slo-mo videos on social applications using its share options.
Key Features
- Choose the text option from its toolbar to customize the color, size, and other elements of text.
- Add other graphical elements like stickers and emojis to express your video context or dialogues.
- Resize your video within this application to fit the requirements of social platforms.
4. Slow Motion Video Editor
Wondering about how to achieve a professional-level effect on your iPhone? This slow-motion video converter is full of speed custom setting options to help with that. It uses a timeline bar and velocity graph to adjust the speed settings. The downward slide dragging will slow down your video and vice versa. You can also adjust the video duration via timeline or reset it to set again.
Key Features
- Create a time-lapse or speed up your video by altering its playback speed to 10x, fast or slow.
- Collaborates with iTunes for a seamless integration of music tracks in videos.
- The slow-mo video editor is compatible with social platforms like Instagram, YouTube, and more.
5. SloMo Slow Motion Video Editor
Are you looking for an application just to create slow-mo with a creative user interface? This slow-motion video editor has been developed to help you with speed-alteration tasks. The interface is simple, and you can start creating a slomo just by importing a video. Designed to create professional and cinematic level slo-mos, it offers high video frame rates like 120 fps and 240 fps.
Key Features
- Along with the frame rate, you can manipulate the playback speed range to 12x for both slow and fast.
- With this slow-mo editor’s 40+ illustrative filter, you’ll never run out of creativity.
- Fit your video into different ratios for multiple social media platforms or to your preference.
Bonus Part: Get the Perfect Results of Slow-Motion Video with Wondershare Filmora - Desktop Solution
In this section, you have read about so many slow-mo editors that you might be bored by now. However, one common drawback that all of them had was versatility. They offered high-speed manipulation settings but with limited additional features. Wondershare Filmora is a world-class, all-in-one video editing software. Anyone can use it, from a beginner to a professional or from an Android user to an iOS user.
When you enter this slow-motion video converter, it displays two types of speed modification. One is the Uniform Speed option, while the other one is Speed Ramping. Both of them excel at their tasks and offer custom speed and duration settings. Filmora has recently introduced the “Optical Flow” option in its latest V13 upgrade. This helps to smoothen out a slo-mo video by adding frame rates.
Free Download For Win 7 or later(64-bit)
Free Download For macOS 10.14 or later
Steps to Slow Down Video in Filmora
In this section, we will discuss the Filmora Speed Ramping feature to create a slo-mo. If you are a beginner and have never edited before, this feature suits you the best. It has over 6-speed ramping templates for adding creative speed change effects. You can modify these models to fashion a slo-mo, and here is how to do it:
Step 1Access the Speed Feature
After opening Filmora and opening a project, select the clip in the timeline and go to the settings panel. From there, reach the “Speed” > “Speed Ramping” tabs and select a preset. If you don’t like the featured presets, click on “Customize” for manual editing.
Step 2Add Video Frames
Once you have set the slo-mo speed, reach the “AI Frame Interpolation” section at the bottom. Click on the navigation icon and select “Optical Flow” from there.
Step 3Render Preview to Observe the Outcome
To ensure that the optical flow has worked, click the “Render Preview” option in the timeline toolbar. Once rendering is complete, play the video and finalize it by clicking “Export.”
AI Key Features of Filmora
As discussed before, Filmora offers an extensive interface with a wide collection of features. Users can use these features to generate high-quality images, videos, and more. In this section, the focus is on a few of its features discussed below:
1. AI Smart Masking
Want to create amazing transitions or apply stunning effects on specific video sections? Filmora’s AI mask feature will mask out the unnecessary parts, and you can edit freely. Just enable this feature from its settings panel under AI Tools and select the masking area.
2. AI Text-to-Video
Dive into the realm of Filmora, where there is no limitation on graphics and visuals for videos. This generative AI feature can craft videos from prompts along with suited graphics. You just need to add proper instructions, and AI will do the rest. It enhances the interactive element of your videos via AI voice integration.
3. Motion Tracking
Create animations from mere graphics to insert in your videos using this AI. Just add any graphical emoji, text, or sticker and link it with a moving object. Once you enable the motion tracking option, you will see them come to life. You can also apply an effect or filter to a specific portion throughout the video using making and motion-tracking options.
4. Speech-to-Text
Subtitles and captions have become an important part of cinema or videography. To ensure that your content reaches an international audience, use Filmora’s STT feature. With its automated speech recognition and NLP systems, it transforms any speech into text. Moreover, it has multilingual support to make content accessible at international levels.
Conclusion
In this article, you have read about different slow-motion video editor s and their features. Sometimes, they’re amazing editors, while other times, they may show glitches. However, if you want to try an editor that combines all the properties in one place, we suggest Wondershare Filmora. With its amazing content editing features and assets, you can rely on it for Slomo creation or other editing tasks.
Trailer Guide for Creators and Developers
Trailers are a popular means to showcase a product you are about to release to the market. Teasers and trailers are traditionally created for movies, but have eventually evolved to include book trailers, game trailers, and app trailers. In this article, we will explain the key details of a trailer, highlight some examples, and show you how to create an effective trailer.
Part 1. What is a Trailer?
A trailer is a type of video commercial advertisement made to advertise and inform audiences about a specific program or item. To persuade customers to view or use the product, it includes a brief series of previews of the entire material. It also serves as a means of creating anticipation for a show or product that is about to hit the market.
Trailers were originally made for cinema movies. Nowadays, trailers are created for different forms of media like shows, apps, programs, video games, and book videos. A typical traditional trailer lasts between 1 to 3 minutes.
Part 2. What Are the Similarities and Differences Between a Teaser and Trailer?
Teasers and trailers can often be confused with each other. After all, they pretty much have the same objective.
Both are created for the purpose of advertising an upcoming show, product, or service. Teasers and trailers are similarly shown to audiences prior to the release of the thing they are advertising. They are meant to show a small portion of the full experience to create curiosity and excitement towards a targeted market. Both videos are typically short in length - taking up only a maximum of 3 minutes in duration.
The differences between them lie in their content, timeline, and duration. A teaser is much shorter than a trailer - the former runs for only 20-30 seconds while the latter can go between 1-3 minutes in length. This is because teasers are typically made before or during the production process of a movie or feature, whilst trailers are commonly made at the end.
For films, movies, and shows, teasers generally capture only a single part of that media. It focuses on the most intense or impactful scene. Trailers are formed from a series of clips depicting striking scenes derived from the beginning, middle, and end of the show. These scenes are normally arranged in a nonlinear structure, allowing viewers to have a general understanding of the story without revealing the entirety of the plot.
Part 3. Examples of good trailers
An excellent trailer is one who can effectively attract and maintain the audience’s attention. It satisfies its objective of showcasing striking and captivating pieces of the main product and entices viewers to experience its entirety. Here are some examples of trailers who have well fulfilled the criteria of a good trailer.
1. The Suicide Squad
The Suicide Squad is a fresh take featuring DC’s anti-heroes assemble in a single chaotic and unconventional team. James Gunn’s iteration on these characters is brought to life in the trailer with a majestic cast including John Cena, Idris Elba, Margot Robbie, and David Dastmalchian. Several key scenes are shown, highlighting its standout characters in the process while portraying the movie’s setting.
2. Raya and the Last Dragon
The trailer starts out innocently and comes with an adorable and surprising twist. The brief 2-minute trailer is packed with relevant scenes that depict the character’s quest without revealing too much. Many action-packed scenes and emotional interactions are satisfactorily squeezed into the trailer. Excitement builds further with Tamara Bubble’s “I’m That Good” playing in the background on the last minute of the video.
3. Men (2022)
Ingenious combination of sound effects and background music play a distinct role in this 2022 trailer. The female lead’s voice echoing from a tunnel, the haunting piano keys gradually building up the suspense, and the common but cleverly used horror audio effects create a chilling ensemble of haunting scenes in the movie. The sounds gradually rise up as more aggressive and energized scenes flash on the screen, and eventually end back into the sombre intro that leaves the audience with questions.
4. The Farewell
Lulu Wang’s dramatic comedy The Farewell is all about a family hiding the truth of a family member’s terminal illness from the person herself. What makes the trailer special is that it steers away from the sad, melancholic direction and veers toward a feel-good movie vibe. The conflict, struggle, and the beliefs featured in the movie are depicted in the trailer. However, the clever placement of interactions and the uplifting music tug at the audience’s heartstrings and urge them to want to see more.
5. Pokémon Go
Pokémon has become a culture to several generations. Becoming a Pokémon trainer is a secret dream that almost all of us have, even as adults. Niantic’s collaboration with the Pokémon franchise brings people closer to that reality by introducing its AR and location-powered app Pokémon Go. The trailer shows people of all ages living out their trainer dreams in the real world and interacting with Pokémon. The different features of the game are dramatized in a real-life setting, inciting more excitement, and pulling out the nostalgia from its market. The trailer keeps the actual app showcase to a minimum, instead focusing on once again selling that dream to audiences and bringing out the inner child in everyone.
Part 4. How to bring your trailer to the next level?
While it may seem intimidating to create a trailer for your upcoming product, there is no need to worry. It is now easier than ever to create a well-crafted trailer by taking advantage of a program’s tools and templates.
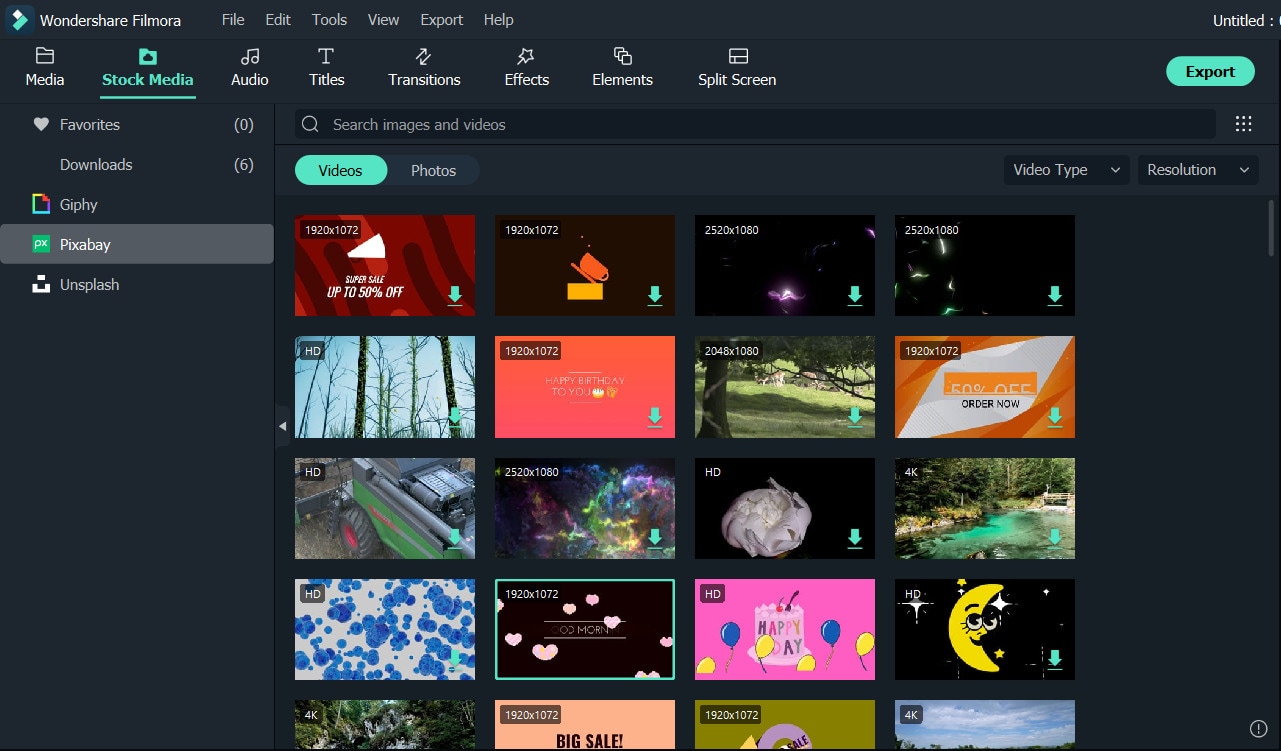
- Stock media
Filmora makes it easy to craft a trailer with only a few clicks. Make use of the program’s media library to gain access to a wealth of resources like stock photos, videos, music, and audio files.
- Keyframing
Keyframing lets you smoothly transition from one scene to another, making it an effective tool for trailers. It is particularly appealing for shows that highlight motion like sports, dancing, and action. Experiment with more than 80 preset templates and create smooth scene transitions with ease.
- Speed Ramping
Speed Ramping is a feature that works perfectly with keyframing. Increase the energy and dynamics in your trailer with 6 preset speed types. You can also customize these templates. There is also no need for concern about the audio - Filmora lets you maintain the audio pitch even when using these features.
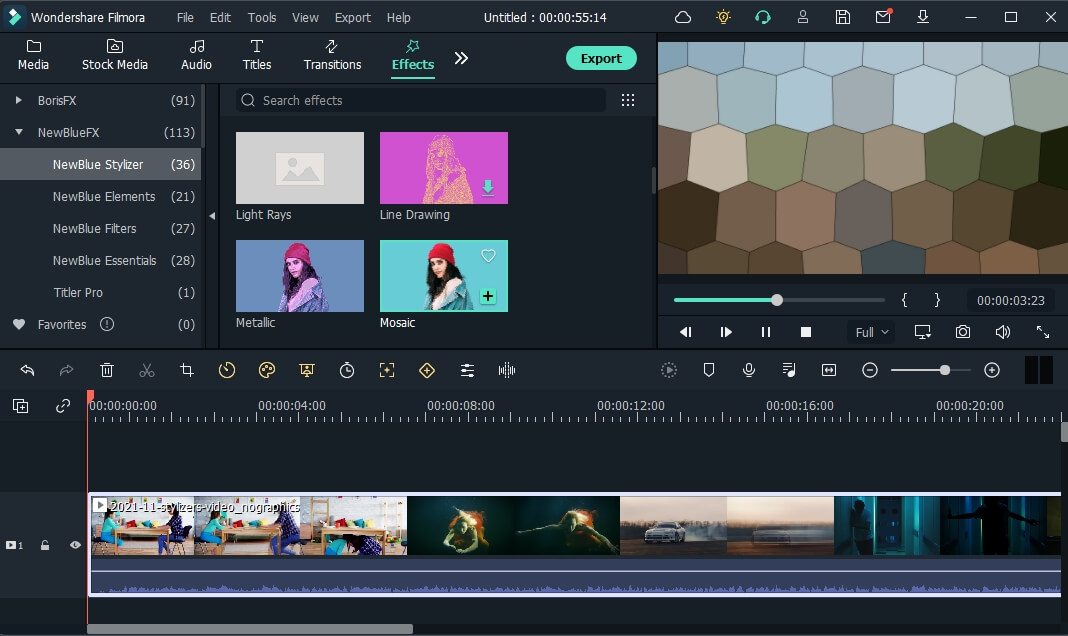
- FX Effects
The program also offers many effects and filters for an extra element in your trailer. The Borix FX is an example of that. Designed in collaboration with the award-winning developer of the same name, Boris FX and its extension Continuum features a wide array of tasteful effects for your convenience. There are over 91 customizable and adjustable presets including types like blurs, stylization, and lights. NewBlue is another option that carries choices of filters, titlers, and stylizers.
Filmora offers different features, tools, and effects to explore that can help make your trailer editing objectives easier and more convenient. Save time and resources by taking advantage of its powerful yet easy-to-use tools.
Free Download For Win 7 or later(64-bit)
Free Download For macOS 10.14 or later
2. Raya and the Last Dragon
The trailer starts out innocently and comes with an adorable and surprising twist. The brief 2-minute trailer is packed with relevant scenes that depict the character’s quest without revealing too much. Many action-packed scenes and emotional interactions are satisfactorily squeezed into the trailer. Excitement builds further with Tamara Bubble’s “I’m That Good” playing in the background on the last minute of the video.
3. Men (2022)
Ingenious combination of sound effects and background music play a distinct role in this 2022 trailer. The female lead’s voice echoing from a tunnel, the haunting piano keys gradually building up the suspense, and the common but cleverly used horror audio effects create a chilling ensemble of haunting scenes in the movie. The sounds gradually rise up as more aggressive and energized scenes flash on the screen, and eventually end back into the sombre intro that leaves the audience with questions.
4. The Farewell
Lulu Wang’s dramatic comedy The Farewell is all about a family hiding the truth of a family member’s terminal illness from the person herself. What makes the trailer special is that it steers away from the sad, melancholic direction and veers toward a feel-good movie vibe. The conflict, struggle, and the beliefs featured in the movie are depicted in the trailer. However, the clever placement of interactions and the uplifting music tug at the audience’s heartstrings and urge them to want to see more.
5. Pokémon Go
Pokémon has become a culture to several generations. Becoming a Pokémon trainer is a secret dream that almost all of us have, even as adults. Niantic’s collaboration with the Pokémon franchise brings people closer to that reality by introducing its AR and location-powered app Pokémon Go. The trailer shows people of all ages living out their trainer dreams in the real world and interacting with Pokémon. The different features of the game are dramatized in a real-life setting, inciting more excitement, and pulling out the nostalgia from its market. The trailer keeps the actual app showcase to a minimum, instead focusing on once again selling that dream to audiences and bringing out the inner child in everyone.
Part 4. How to bring your trailer to the next level?
While it may seem intimidating to create a trailer for your upcoming product, there is no need to worry. It is now easier than ever to create a well-crafted trailer by taking advantage of a program’s tools and templates.
- Stock media
Filmora makes it easy to craft a trailer with only a few clicks. Make use of the program’s media library to gain access to a wealth of resources like stock photos, videos, music, and audio files.
- Keyframing
Keyframing lets you smoothly transition from one scene to another, making it an effective tool for trailers. It is particularly appealing for shows that highlight motion like sports, dancing, and action. Experiment with more than 80 preset templates and create smooth scene transitions with ease.
- Speed Ramping
Speed Ramping is a feature that works perfectly with keyframing. Increase the energy and dynamics in your trailer with 6 preset speed types. You can also customize these templates. There is also no need for concern about the audio - Filmora lets you maintain the audio pitch even when using these features.
- FX Effects
The program also offers many effects and filters for an extra element in your trailer. The Borix FX is an example of that. Designed in collaboration with the award-winning developer of the same name, Boris FX and its extension Continuum features a wide array of tasteful effects for your convenience. There are over 91 customizable and adjustable presets including types like blurs, stylization, and lights. NewBlue is another option that carries choices of filters, titlers, and stylizers.
Filmora offers different features, tools, and effects to explore that can help make your trailer editing objectives easier and more convenient. Save time and resources by taking advantage of its powerful yet easy-to-use tools.
Free Download For Win 7 or later(64-bit)
Free Download For macOS 10.14 or later
A Detailed Guide to Do Color Correction in OBS
Create High-Quality Video - Wondershare Filmora
An easy and powerful YouTube video editor
Numerous video and audio effects to choose from
Detailed tutorials are provided by the official channel
Color Correction is an outstanding functionality that allows editing photos and videos by altering their consistency to match a particular standard. Besides, color correction is available in the premium tool and free applications. And one of the established free software tools with color correction is the OBS.
Even though the Open Broadcaster Software is mainly known for live streaming and offline video recording, it also offers color correction functionality from its open canvas. Read this article to completion and get to the bottom line of how to do color correction in OBS.
More about OBS
In this article
01 What is OBS?
What is OBS?
Open Broadcaster Software (OBS) is free and open-source software that allows users to record videos and live stream events right at their comfort. The software functions effectively on Mac, Windows, and Linux computers.
Open Broadcaster Software (OBS) is free and open-source software that allows users to record videos and live stream events right at their comfort. The software functions effectively on Mac, Windows, and Linux computers.
Since its initial launch in 2012, OBS has made tremendous moves – This is not only from the constant release of its new versions but also the relentless increase in the functionality features. Besides, OBS is equipped with a robust API that enables plugins and scripts which provide extensive customization to precisely suit one’s needs.
However, OBS being a free application can function to date due to enough support from sponsors and backers.
How to Apply Color Correction in OBS
When you carry out basic edits to your videos or images with OBS and realize that your project has poor shade, color, or tone, you don’t have to export it to another software to correct it. Instead, you can use filters for color correction in OBS.
Apart from using OBS filters to color correct video clips and images, you can correct games, browser sources, and video capture devices.
There are various aspects of color correction in OBS. It includes:
1. Gamma
Gamma is a fundamental aspect in OBS that functions by balancing the brightness of an image through contrast. To be precise, Gamma works almost similarly to change in brightness while simultaneously increasing or decreasing the contrast.
In editing, Gamma is applicable mainly for removing shiny foreheads and webcam footage in gaming and browsing.
High Gamma is represented by “L,” whereas low Gamm is represented by “R.”
2. Contrast
Contrast is the difference in the degree of colors and tones in an image. Usually, the low contrast image has a narrow color range, whereas the high contrast images have dark shadows and bright highlights.
“L” represents high contrast in OBS contrast, whereas “R” represents low contrast.
3. Brightness
Brightness is the degree to how light or dark a picture is. To be able to understand an image clearly, it is best to correct its brightness. A change in brightness of a picture has a simultaneous change in pixels of that image.
High brightness in OBS is denounced by the letter “L,” whereas Low brightness is denounced by “R.”
4. Saturation
Saturation is the intensity of colors in a video or an image. High saturated images are bright, strong, and are rich, whereas the low saturated photos appear washed out. Black and white (grayscale) photos have no color saturation. In OBS, high saturation and low saturation are represented as “L” and “R.”
5. Hue Shift
Hue shift is the change in an image’s saturation, lightness, and hue colors. Hue shifting occurs when highlighting or shading images. In OBS, you can use the hue shift functionality to reimage your image with a completely different color palette.
With the hue shift functionality in OBS, you can place the image on top of another and have an 80% opacity. It means that you will still see the first image when you place the second one on top of it.
The “L” sign in the OBS hue shift represents 50% opacity, while the “R” represents 100% Opacity.
Color Grade in OBS
Color grading is the process of enhancing the appearance of an image through attributes such as contrast, saturation, and color, making them enchanting for presentations. Color grading is not only done for still images but also for motion pictures and images.
Color grading functionality in OBS is encompassed with several tools – This includes:
1. Lift tool
As the name suggests, lift tools are used in lifting or removing specific colors from an image. It does so without necessarily affecting other colors in an image.
With this tool, you can selectively remove unwanted colors from your image or video, replace them with your desired ones, and create astonishing results.
2. Offset
Offset is another outstanding tool in OBS color grading that controls the blacks/Shadows of an image. It functions by altering the brightness levels and leaving the highlights and the mid-tones unaffected.
3. Gain
A gain is a tool in OBS color correction that functions by only adjusting the white levels in an image. With the gain tool, brighter colors become brighter or darker.
Many people, especially beginner editors, experience difficulty differentiating between the Gamma and Offset tools. Yes, there is a closer similarity between the two, and for you to be on the safe side, you need to know that Gamma goes with the mid-tones (middle gray levels) whereas the Gain goes with highlights/whites.
How to Apply LUTs in OBS
Look up tables (LUTs) is a functionality feature that allows editors, colorists, and filmmakers to save certain colors as their templates. Therefore, when working on a particular project, they don’t have to create new working color grades; instead, you pick it from your LUT.
Using LUTs OBS is not rocket science. With LUTs, you can create unique projects with a vibrant feel. Here are the simple steps of using LUTs in OBS.
Step 1. Prepare your LUT
First, check and establish whether you have your LUT ready. If you don’t have it, you can download one from the internet. Make sure you download it as a folder. Even though OBS has LUT, It has limited color grades; therefore, it is best to download one. You can extract it to an OBS folder if you downloaded it in a zip file.
Step 2. Add your project to the OBS timeline
Open your OBS software and add your project file. Drag and drop your file to the OBS timeline.

Step 3. Add LUTs to your project
Right-click on the area in your project that you wish to apply LUTs, then click on “Filters.” Select “Apply LUT” from the drop-down menu,” which is usually at the top of the list.

Step 4. Apply your LUT as a filter
On the LUTs section, click on the browser, then open your downloaded LUT folder. Usually, the LUT is in the form of a .cube file. You can adjust your LUT by simply clicking on the “Adjust” option.
Bonus! How to Apply Color Correction for Webcam and Camera
People who primarily use their computers for recording sessions often find it difficult to capture quality videos. It is because most computer cameras are not straightforward. To do away with purchasing a new camera due to poor quality video capture, they can freely use OBS LUTs. For their camera and webcam. LUTs for webcam play a vital role in correcting the quality of photos and videos by using filters.
Here are the simple steps on how to use LUTs for color correction in webcam and camera
Step 1. Check whether your camera has additional software
Most webcams and cameras are controlled by external software, so you first need to check whether yours is also controlled. A thing with these cameras are controlled by their software is that the software determines the color settings and the specific image.
Double click on camera source and select “Configure video.” Computers with external software cameras will have a pop-up window that displays various customizable settings. Here, you can adjust the different settings based on your preference.

Step 2. Download your LUTs
Download online the LUTs you want to use. Download them as folders and extract the files you downloaded as zip files. Save them in the OBS folder.
Step 3. Apply your LUTs
Still, in your OBS software, open your camera and then right-click on it. From the displayed menu, click on “Filters.”
On the bottom left corner of your interface, hit the “+” sign, then select “Apply LUTs” > “Browse.”
Open your already downloaded OBS files. Usually, there is an “Adjust” that allows you to regulate the intensity of the LUT by sliding it.

Step 4. Start recording with LUTs on
After turning on your LUT, you can start recording videos and taking photos. There is an eye icon on the left-hand side of your screen. You can use it to turn on or off LUT.
Conclusion
● And that is how to do color correction in OBS. Besides, you do not have to go to the extremes of getting a new camera because of your webcam faultiness. With OBS, you can correct your camera and webcam and get outstanding results.
● Download LUTs from the internet and use them as a template in OBS. Besides, you don’t have to pay for the LUTs, but you can use the free ones.
Color Correction is an outstanding functionality that allows editing photos and videos by altering their consistency to match a particular standard. Besides, color correction is available in the premium tool and free applications. And one of the established free software tools with color correction is the OBS.
Even though the Open Broadcaster Software is mainly known for live streaming and offline video recording, it also offers color correction functionality from its open canvas. Read this article to completion and get to the bottom line of how to do color correction in OBS.
More about OBS
In this article
01 What is OBS?
What is OBS?
Open Broadcaster Software (OBS) is free and open-source software that allows users to record videos and live stream events right at their comfort. The software functions effectively on Mac, Windows, and Linux computers.
Open Broadcaster Software (OBS) is free and open-source software that allows users to record videos and live stream events right at their comfort. The software functions effectively on Mac, Windows, and Linux computers.
Since its initial launch in 2012, OBS has made tremendous moves – This is not only from the constant release of its new versions but also the relentless increase in the functionality features. Besides, OBS is equipped with a robust API that enables plugins and scripts which provide extensive customization to precisely suit one’s needs.
However, OBS being a free application can function to date due to enough support from sponsors and backers.
How to Apply Color Correction in OBS
When you carry out basic edits to your videos or images with OBS and realize that your project has poor shade, color, or tone, you don’t have to export it to another software to correct it. Instead, you can use filters for color correction in OBS.
Apart from using OBS filters to color correct video clips and images, you can correct games, browser sources, and video capture devices.
There are various aspects of color correction in OBS. It includes:
1. Gamma
Gamma is a fundamental aspect in OBS that functions by balancing the brightness of an image through contrast. To be precise, Gamma works almost similarly to change in brightness while simultaneously increasing or decreasing the contrast.
In editing, Gamma is applicable mainly for removing shiny foreheads and webcam footage in gaming and browsing.
High Gamma is represented by “L,” whereas low Gamm is represented by “R.”
2. Contrast
Contrast is the difference in the degree of colors and tones in an image. Usually, the low contrast image has a narrow color range, whereas the high contrast images have dark shadows and bright highlights.
“L” represents high contrast in OBS contrast, whereas “R” represents low contrast.
3. Brightness
Brightness is the degree to how light or dark a picture is. To be able to understand an image clearly, it is best to correct its brightness. A change in brightness of a picture has a simultaneous change in pixels of that image.
High brightness in OBS is denounced by the letter “L,” whereas Low brightness is denounced by “R.”
4. Saturation
Saturation is the intensity of colors in a video or an image. High saturated images are bright, strong, and are rich, whereas the low saturated photos appear washed out. Black and white (grayscale) photos have no color saturation. In OBS, high saturation and low saturation are represented as “L” and “R.”
5. Hue Shift
Hue shift is the change in an image’s saturation, lightness, and hue colors. Hue shifting occurs when highlighting or shading images. In OBS, you can use the hue shift functionality to reimage your image with a completely different color palette.
With the hue shift functionality in OBS, you can place the image on top of another and have an 80% opacity. It means that you will still see the first image when you place the second one on top of it.
The “L” sign in the OBS hue shift represents 50% opacity, while the “R” represents 100% Opacity.
Color Grade in OBS
Color grading is the process of enhancing the appearance of an image through attributes such as contrast, saturation, and color, making them enchanting for presentations. Color grading is not only done for still images but also for motion pictures and images.
Color grading functionality in OBS is encompassed with several tools – This includes:
1. Lift tool
As the name suggests, lift tools are used in lifting or removing specific colors from an image. It does so without necessarily affecting other colors in an image.
With this tool, you can selectively remove unwanted colors from your image or video, replace them with your desired ones, and create astonishing results.
2. Offset
Offset is another outstanding tool in OBS color grading that controls the blacks/Shadows of an image. It functions by altering the brightness levels and leaving the highlights and the mid-tones unaffected.
3. Gain
A gain is a tool in OBS color correction that functions by only adjusting the white levels in an image. With the gain tool, brighter colors become brighter or darker.
Many people, especially beginner editors, experience difficulty differentiating between the Gamma and Offset tools. Yes, there is a closer similarity between the two, and for you to be on the safe side, you need to know that Gamma goes with the mid-tones (middle gray levels) whereas the Gain goes with highlights/whites.
How to Apply LUTs in OBS
Look up tables (LUTs) is a functionality feature that allows editors, colorists, and filmmakers to save certain colors as their templates. Therefore, when working on a particular project, they don’t have to create new working color grades; instead, you pick it from your LUT.
Using LUTs OBS is not rocket science. With LUTs, you can create unique projects with a vibrant feel. Here are the simple steps of using LUTs in OBS.
Step 1. Prepare your LUT
First, check and establish whether you have your LUT ready. If you don’t have it, you can download one from the internet. Make sure you download it as a folder. Even though OBS has LUT, It has limited color grades; therefore, it is best to download one. You can extract it to an OBS folder if you downloaded it in a zip file.
Step 2. Add your project to the OBS timeline
Open your OBS software and add your project file. Drag and drop your file to the OBS timeline.
Step 3. Add LUTs to your project
Right-click on the area in your project that you wish to apply LUTs, then click on “Filters.” Select “Apply LUT” from the drop-down menu,” which is usually at the top of the list.
Step 4. Apply your LUT as a filter
On the LUTs section, click on the browser, then open your downloaded LUT folder. Usually, the LUT is in the form of a .cube file. You can adjust your LUT by simply clicking on the “Adjust” option.
Bonus! How to Apply Color Correction for Webcam and Camera
People who primarily use their computers for recording sessions often find it difficult to capture quality videos. It is because most computer cameras are not straightforward. To do away with purchasing a new camera due to poor quality video capture, they can freely use OBS LUTs. For their camera and webcam. LUTs for webcam play a vital role in correcting the quality of photos and videos by using filters.
Here are the simple steps on how to use LUTs for color correction in webcam and camera
Step 1. Check whether your camera has additional software
Most webcams and cameras are controlled by external software, so you first need to check whether yours is also controlled. A thing with these cameras are controlled by their software is that the software determines the color settings and the specific image.
Double click on camera source and select “Configure video.” Computers with external software cameras will have a pop-up window that displays various customizable settings. Here, you can adjust the different settings based on your preference.
Step 2. Download your LUTs
Download online the LUTs you want to use. Download them as folders and extract the files you downloaded as zip files. Save them in the OBS folder.
Step 3. Apply your LUTs
Still, in your OBS software, open your camera and then right-click on it. From the displayed menu, click on “Filters.”
On the bottom left corner of your interface, hit the “+” sign, then select “Apply LUTs” > “Browse.”
Open your already downloaded OBS files. Usually, there is an “Adjust” that allows you to regulate the intensity of the LUT by sliding it.
Step 4. Start recording with LUTs on
After turning on your LUT, you can start recording videos and taking photos. There is an eye icon on the left-hand side of your screen. You can use it to turn on or off LUT.
Conclusion
● And that is how to do color correction in OBS. Besides, you do not have to go to the extremes of getting a new camera because of your webcam faultiness. With OBS, you can correct your camera and webcam and get outstanding results.
● Download LUTs from the internet and use them as a template in OBS. Besides, you don’t have to pay for the LUTs, but you can use the free ones.
Reversing Time Lapse Videos on iPhone Using Top Applications
We have all seen time-lapse videos in vlogs or developmental videos. The time-lapse effect has been around the corner for some time and assists in several tasks. However, when it comes to understanding the content of a video, they aren’t helpful. This article will help you understand how to slow down time lapse on an i Phone.
In addition, we’ll provide some insights on slow-down time-lapse videos. You can learn about its advantages for both viewers and creators. The article will highlight some tools for transforming a time-lapse into a slo-mo. We’ll also discuss an offline tool on how to slow down a time-lapse on an iPhone. Start reading this article for a brief overview of slow-motion videos and tools.
Slow Motion Video Maker Slow your video’s speed with better control of your keyframes to create unique cinematic effects!
Make A Slow Motion Video Make A Slow Motion Video More Features
Part 1: How Does Slowing Down Videos Help Viewers and Creators?
A time-lapse video certainly makes some scenes worthy of watching. However, a slow-motion video helps in better comprehension of the topic. In this section, we’ll discuss how slowing down time-lapse video s is helpful. We’ll shed light on their applications for viewers and content creators. Without further delay, let’s dive in to solve this mystery:
For Creators
Since the era of social media , content creation has become a new trend. Creators around the globe can interact with their followers from a single platform. It gives them a chance to share their ideas and showcase their talents. Hence, here is how slow-motion videos benefit a creator in his journey:
- In Video Tutorials: Do you have a channel where you post tutorials to perform a specific task? This effect can help you slow down the video for the audience to absorb your words. It helps creators to show their viewers that they genuinely care about them. A video where basics and details are discussed is considered right.
- In Revealing Details: We encounter situations where the camera cannot capture a moment right. This is because the normal playback speed cannot highlight video details. On the other hand, a slo-mo takes proper time to showcase details. These help handle an event planning or dress designing page.
- In Creating Aesthetics: Another application of slo-mos is that they help with creativity. Adding this effect at the right time and duration enhances visuals. Moreover, adding a slo-mo effect gives the video an aesthetic appeal. It can enhance the visuals of a travel, cooking, or fashion video.
For Viewers
Slow-motion videos benefit not only creators but also viewers. They help them with enhanced learning by breaking down complex information. If you are creating slo-mos as a creator, here is how they are helping your viewers:
- In Effective Learning: You are not unaware of tutorial or explainer videos. Whether you are a student or a housewife, you must have used YouTube to your benefit. A slow-motion video can break down a complex concept or steps for a recipe. In addition, it can help you operate technology better, like Word, Excel, and more.
- In Understanding Nature: People out there prefer documentaries over dramas. They are curious about nature and the way it works. In such documentaries, slo-mos are used to present a natural phenomenon. It helps the viewers understand how a certain process occurs. Moreover, it focuses on small details in an ecosystem to explain better.
- In Reflecting Content: Next time you watch reels, notice that slo-mos catch your attention. Videos with the right speed manipulation appeal to the eyes, and viewers often watch them again. In addition, they help focus on the specifics of a gadget, fashion product, or more.
Part 2: A Guide on How to Slow Down Time Lapses on iPhone
Now that you know the benefits of slow motions, let’s proceed to our next segment. Here, we will learn how to slow down a time-lapse on an i Phone using different techniques. This will involve looking into some tools for an i Phone time lapse slowdown:
1. iMovie
This tool is perfect if you are looking for a tool to effectively slow down time-laps e. It offers speed change options to transform your time-lapse videos into slomos. The tool supports popular video formats and creates results in 4K high resolution. Creating a slo-mo is straightforward, and users can also create a high-speed motion.

Key Features
- Provides 14 templates and 20 storyboards to get started with creative videos.
- The tool operates online; hence, it isn’t necessary to download any application.
- You can synchronize your work with devices like macOS, iPad, AirDrop, and iCloud.
Steps
Do you want to know ho w to slow down a time-lapse on i Phone ? The method of performing this function is very plain and accessible, and here is the guide:
Step 1: Open iMovie and click the “Start New Project” option to start editing. Continue to select “Magic Movie” across the pop-up to proceed into the editing section.

Step 2: Choose a file from the iPhone’s video gallery and select the “Pencil” icon to start editing. Go to the “Speed” option and click it to access speed change options.

Step 3: Navigate towards the speed slider and drag it towards the left to slow down. The option “1/2x” means the speed will be half the original speed.

2. Filmmaker Pro - Video Editor
If you want to slow down the time-lapse i Phone with additional editing options, use this tool. It is a professional-level content editor for iDevices and offers to slow down the speed. You can create or slow down timelapses. The editor will export your videos in 4K high resolution. Moreover, 120 royalty-free music tracks can be inserted into your slo-mo afterward.

Key Features
- Decorate your videos with stunning animations using keyframing and track motion.
- You have over 46 transition options to complete trending TikTok and Instagram challenges.
- Over 79 classic fonts, 92 beautiful fonts, 15 Hollywood, and 26 retro fonts options.
3. Video Up! Video Editor and Maker
Adjusting the time-lapse speed of the i Phone is possible via third-party applications. This is a versatile platform for creating slo-mos without any technicalities. You will find speed setting presets when you access its video adjustment options. These presets can automatically slow down or fasten a video at a specific point. However, you can also choose its Custom option to slow down a complete video.

Key Features
- It provides 2 video export resolution options: Ultra – 4K and Full HD – 1080p.
- Offers an option to insert voiceovers and built-in music tracks in your slo-mos or videos.
- CTA to share videos straight to Instagram, Facebook, WhatsApp, and more.
4. Vidma - Video Editor Music
Are you wondering how to slow down time-lapse videos on iPhone for specific durations? Vidma is the right tool for you, offering custom speed change and duration options. The speed slider option is a simple drag and adjust method. In addition, there is an audio pitch adjustment option to maintain audio during speed alteration.

Key Features
- Users have the option to merge, crop, or resize your images or videos using this tool.
- With its AI abilities, you can generate art from text and edit it further.
- The lowest playback speed to create slow motion is 0.1x, and the highest is 10.0x.
Part 3: A Comprehensive Desktop Solution for Slowing Down Time Lapses: Wondershare Filmora
Wondershare Filmora is a platform with diverse possibilities and compatibility across iOS devices. This allows you to import media using a cable from your iPhone. It doesn’t decline the video quality upon export or import; hence, it proves to be a superior tool to adjust the time-lapse speed of the i Phone. Filmora offers multiple opportunities to transform a time lapse into slo-mo.
You can also select the time period to apply the slow-motion effect via timeline editing. In addition, users can also choose the speed ramping option for professional results. Upon creating a slow motion, you can use Filmora’s video templates, text, and more to enhance visuals. In addition, there is an Optical Flow feature to help in enhancing the slo-mo effect.
Free Download For Win 7 or later(64-bit)
Free Download For macOS 10.14 or later
Step-by-Step Guide to Slow Down a Time Lapse Video into Slow Motion in Filmora
The basic technique to change the time-lapse speed of the i Phone involves Uniform Speed. This method modulates the playback speed of a video through the slider’s position. Here is how do I slow down time lapse on i Phone using Filmora:
Step 1Commence the Speed Change Action
Initiate Filmora by giving a “New Project” command and gaining access to the editing interface. Use the “Import” > “Import from a Camera or Phone” to import files. You need to connect to the iOS device first. Bring the clip to the timeline and access the settings panel that will appear on the screen. Further, choose the “Speed” > “Uniform Speed” option and drag the Speed slider towards the left to reduce it.

Step 2Access the AI Frame Interpolation Settings
In the pursuit of achieving a seamless slow-motion effect, use the AI Frame Interpolation settings. Navigate towards the bottom to access it and opt for the “Optical Flow” option.

Step 3Activate Render Preview for Thorough Evaluation
Upon adjusting, return to the timeline panel and select the video. With the help of your cursor, navigate to the “File” > “Render Preview” option. Enable a preview prior to finalizing the video, and then hit “Export.”

Key Features of Filmora
Filmora is not just confined to creating slow motion; the interface offers much more. There are multiple AI and manual features to edit videos, adjust audio, and insert text. Here are a few video editing features of Filmora amongst many:
Green Screen: Get rid of messy or unwanted backgrounds and replace them with something captivating. For this, film the model or object in front of a green screen and enable Chroma Key. It is an AI-driven function that will auto-remove the background while preserving the object.
AI Text-to-Video: Can’t find the right visuals or time to shoot content for your channel? Use this AI to create videos from prompts without having to put in any effort. The AI will auto-generate graphics to add to the video along with the AI voice insertion.
Compound Clip: Are there multiple clips in your timeline that you want to apply the same effects to? This function will help you transform multiple clips into one. Furthermore, you can apply similar effects or transitions. In addition, this function also ensures a smooth transfer from one clip to another.
AI Thumbnail Creator: Create and edit compelling thumbnails for your videos using this AI. The AI will analyze and select the perfect video frames as thumbnail options. Further, you can edit the thumbnail and insert multiple templates to show what the video is going to be about.
Conclusion
After going through this article, readers have an extensive knowledge of how to slow down time-lapse on i Phones using multiple tools and techniques. We provided a review of these tools but also the benefits of slo-mos in content creation and viewing.
In the end, we suggest Wondershare Filmora as the best alternative to all these applications. The software is not just AI integrated but has everything you need to create slo-mos in one place. Use Filmora for creative slo-mo and other video editing features.
Make A Slow Motion Video Make A Slow Motion Video More Features
Part 1: How Does Slowing Down Videos Help Viewers and Creators?
A time-lapse video certainly makes some scenes worthy of watching. However, a slow-motion video helps in better comprehension of the topic. In this section, we’ll discuss how slowing down time-lapse video s is helpful. We’ll shed light on their applications for viewers and content creators. Without further delay, let’s dive in to solve this mystery:
For Creators
Since the era of social media , content creation has become a new trend. Creators around the globe can interact with their followers from a single platform. It gives them a chance to share their ideas and showcase their talents. Hence, here is how slow-motion videos benefit a creator in his journey:
- In Video Tutorials: Do you have a channel where you post tutorials to perform a specific task? This effect can help you slow down the video for the audience to absorb your words. It helps creators to show their viewers that they genuinely care about them. A video where basics and details are discussed is considered right.
- In Revealing Details: We encounter situations where the camera cannot capture a moment right. This is because the normal playback speed cannot highlight video details. On the other hand, a slo-mo takes proper time to showcase details. These help handle an event planning or dress designing page.
- In Creating Aesthetics: Another application of slo-mos is that they help with creativity. Adding this effect at the right time and duration enhances visuals. Moreover, adding a slo-mo effect gives the video an aesthetic appeal. It can enhance the visuals of a travel, cooking, or fashion video.
For Viewers
Slow-motion videos benefit not only creators but also viewers. They help them with enhanced learning by breaking down complex information. If you are creating slo-mos as a creator, here is how they are helping your viewers:
- In Effective Learning: You are not unaware of tutorial or explainer videos. Whether you are a student or a housewife, you must have used YouTube to your benefit. A slow-motion video can break down a complex concept or steps for a recipe. In addition, it can help you operate technology better, like Word, Excel, and more.
- In Understanding Nature: People out there prefer documentaries over dramas. They are curious about nature and the way it works. In such documentaries, slo-mos are used to present a natural phenomenon. It helps the viewers understand how a certain process occurs. Moreover, it focuses on small details in an ecosystem to explain better.
- In Reflecting Content: Next time you watch reels, notice that slo-mos catch your attention. Videos with the right speed manipulation appeal to the eyes, and viewers often watch them again. In addition, they help focus on the specifics of a gadget, fashion product, or more.
Part 2: A Guide on How to Slow Down Time Lapses on iPhone
Now that you know the benefits of slow motions, let’s proceed to our next segment. Here, we will learn how to slow down a time-lapse on an i Phone using different techniques. This will involve looking into some tools for an i Phone time lapse slowdown:
1. iMovie
This tool is perfect if you are looking for a tool to effectively slow down time-laps e. It offers speed change options to transform your time-lapse videos into slomos. The tool supports popular video formats and creates results in 4K high resolution. Creating a slo-mo is straightforward, and users can also create a high-speed motion.
Key Features
- Provides 14 templates and 20 storyboards to get started with creative videos.
- The tool operates online; hence, it isn’t necessary to download any application.
- You can synchronize your work with devices like macOS, iPad, AirDrop, and iCloud.
Steps
Do you want to know ho w to slow down a time-lapse on i Phone ? The method of performing this function is very plain and accessible, and here is the guide:
Step 1: Open iMovie and click the “Start New Project” option to start editing. Continue to select “Magic Movie” across the pop-up to proceed into the editing section.
Step 2: Choose a file from the iPhone’s video gallery and select the “Pencil” icon to start editing. Go to the “Speed” option and click it to access speed change options.
Step 3: Navigate towards the speed slider and drag it towards the left to slow down. The option “1/2x” means the speed will be half the original speed.
2. Filmmaker Pro - Video Editor
If you want to slow down the time-lapse i Phone with additional editing options, use this tool. It is a professional-level content editor for iDevices and offers to slow down the speed. You can create or slow down timelapses. The editor will export your videos in 4K high resolution. Moreover, 120 royalty-free music tracks can be inserted into your slo-mo afterward.
Key Features
- Decorate your videos with stunning animations using keyframing and track motion.
- You have over 46 transition options to complete trending TikTok and Instagram challenges.
- Over 79 classic fonts, 92 beautiful fonts, 15 Hollywood, and 26 retro fonts options.
3. Video Up! Video Editor and Maker
Adjusting the time-lapse speed of the i Phone is possible via third-party applications. This is a versatile platform for creating slo-mos without any technicalities. You will find speed setting presets when you access its video adjustment options. These presets can automatically slow down or fasten a video at a specific point. However, you can also choose its Custom option to slow down a complete video.
Key Features
- It provides 2 video export resolution options: Ultra – 4K and Full HD – 1080p.
- Offers an option to insert voiceovers and built-in music tracks in your slo-mos or videos.
- CTA to share videos straight to Instagram, Facebook, WhatsApp, and more.
4. Vidma - Video Editor Music
Are you wondering how to slow down time-lapse videos on iPhone for specific durations? Vidma is the right tool for you, offering custom speed change and duration options. The speed slider option is a simple drag and adjust method. In addition, there is an audio pitch adjustment option to maintain audio during speed alteration.
Key Features
- Users have the option to merge, crop, or resize your images or videos using this tool.
- With its AI abilities, you can generate art from text and edit it further.
- The lowest playback speed to create slow motion is 0.1x, and the highest is 10.0x.
Part 3: A Comprehensive Desktop Solution for Slowing Down Time Lapses: Wondershare Filmora
Wondershare Filmora is a platform with diverse possibilities and compatibility across iOS devices. This allows you to import media using a cable from your iPhone. It doesn’t decline the video quality upon export or import; hence, it proves to be a superior tool to adjust the time-lapse speed of the i Phone. Filmora offers multiple opportunities to transform a time lapse into slo-mo.
You can also select the time period to apply the slow-motion effect via timeline editing. In addition, users can also choose the speed ramping option for professional results. Upon creating a slow motion, you can use Filmora’s video templates, text, and more to enhance visuals. In addition, there is an Optical Flow feature to help in enhancing the slo-mo effect.
Free Download For Win 7 or later(64-bit)
Free Download For macOS 10.14 or later
Step-by-Step Guide to Slow Down a Time Lapse Video into Slow Motion in Filmora
The basic technique to change the time-lapse speed of the i Phone involves Uniform Speed. This method modulates the playback speed of a video through the slider’s position. Here is how do I slow down time lapse on i Phone using Filmora:
Step 1Commence the Speed Change Action
Initiate Filmora by giving a “New Project” command and gaining access to the editing interface. Use the “Import” > “Import from a Camera or Phone” to import files. You need to connect to the iOS device first. Bring the clip to the timeline and access the settings panel that will appear on the screen. Further, choose the “Speed” > “Uniform Speed” option and drag the Speed slider towards the left to reduce it.
Step 2Access the AI Frame Interpolation Settings
In the pursuit of achieving a seamless slow-motion effect, use the AI Frame Interpolation settings. Navigate towards the bottom to access it and opt for the “Optical Flow” option.
Step 3Activate Render Preview for Thorough Evaluation
Upon adjusting, return to the timeline panel and select the video. With the help of your cursor, navigate to the “File” > “Render Preview” option. Enable a preview prior to finalizing the video, and then hit “Export.”
Key Features of Filmora
Filmora is not just confined to creating slow motion; the interface offers much more. There are multiple AI and manual features to edit videos, adjust audio, and insert text. Here are a few video editing features of Filmora amongst many:
Green Screen: Get rid of messy or unwanted backgrounds and replace them with something captivating. For this, film the model or object in front of a green screen and enable Chroma Key. It is an AI-driven function that will auto-remove the background while preserving the object.
AI Text-to-Video: Can’t find the right visuals or time to shoot content for your channel? Use this AI to create videos from prompts without having to put in any effort. The AI will auto-generate graphics to add to the video along with the AI voice insertion.
Compound Clip: Are there multiple clips in your timeline that you want to apply the same effects to? This function will help you transform multiple clips into one. Furthermore, you can apply similar effects or transitions. In addition, this function also ensures a smooth transfer from one clip to another.
AI Thumbnail Creator: Create and edit compelling thumbnails for your videos using this AI. The AI will analyze and select the perfect video frames as thumbnail options. Further, you can edit the thumbnail and insert multiple templates to show what the video is going to be about.
Conclusion
After going through this article, readers have an extensive knowledge of how to slow down time-lapse on i Phones using multiple tools and techniques. We provided a review of these tools but also the benefits of slo-mos in content creation and viewing.
In the end, we suggest Wondershare Filmora as the best alternative to all these applications. The software is not just AI integrated but has everything you need to create slo-mos in one place. Use Filmora for creative slo-mo and other video editing features.
Also read:
- New In 2024, Blender - A Video Editor for Every Professional
- New 2024 Approved How to Do Velocity Edits on PC
- In 2024, How to Zoom In and Out on Mac
- Recording Slow-Motion Videos Is Not More Difficult Using a Smartphone. Learn Everything From How to Record Slow-Motion Video and Edit a Video to Slow Down It for 2024
- Updated 18 Video Editors Weve Tested Heres What We Learned for 2024
- New Slow Motion Videos Are Taking over Social Media and Becoming a New Trend. Read This Article if You Want to Learn How to Slow Down Video in After Effects
- Bandicut Video Editor Review for 2024
- Updated The Best 10 AI Video Analytics Companies at a Glance
- Before & After Editing Trick - Filmora
- Guide To Cropping and Combining Content in Wondershare Filmora Latest
- How to Create a Text Effect Video with Filmora for 2024
- Updated Adobe Premiere Pro Rec 709 LUTs Finding The Best Choices
- 2024 Approved If You Are Trying to Create a Countdown Effect, but Youre Not Sure Where to Start, Then This Post Is Going to Show You some Ways to Create a Countdown Animation for Your Videos
- In 2024, How to Color Grade Your Picture in LightRoom
- Updated Make Your Presentation More Attractive with Best Google Slideshows Templates. How to Make a Google Slideshow in Simple Step? Do You Know How to Create Google Images Slideshow?
- 2024 Approved Discovering The Best Wedding LUTs for Premiere Pro | An Overview
- In 2024, Want to Find some Creative, Entertaining Ways to Preserve Precious Memories& Pass Them On-To Upcoming Generations? Well, Surely You Can Do It
- In 2024, How To Fade Audio In Kinemaster
- How to Create and Use Adjustment Layers in After Effects
- Updated Easy Ways to Remove Motion Blur In Photoshop
- Tactics To Make Keynote Slideshow
- New Top 10 Free WhatsApp Video Converter for 2024
- This Article Will Explore in Detail How You Can Use the Features Available in Wondershare Filmora to Export the Video by Changing the Resolution of the Footage for 2024
- In 2024, Guide on VHS Technology and Its Influence on Video Editing
- New 2024 Approved Quick Answer What Is a Transparent Logo and Why Do You Need It
- In 2024, Are You Looking to Find Out How to Loop YouTube Videos on iPhone? Learn How to Loop Your Favorite YouTube Video on Your iPhone, so You Can Play that Part over and Over
- New 2024 Approved Quick Answer What Is a GIF File
- How to DIY VHS Overlay in After Effects, In 2024
- In 2024, Make A Tattoo Disappear Like A Magic
- New Try This Simple Trick to Make Instant 3D GIF that Pops Out of Your Screen. Here Are a Few Memorable Examples of the Most Popular 3D GIFs
- Online Calculate and Change Video Aspect Ratio
- New How to Make a Vacation Slideshow in 5 Minutes
- Do You Want to Add a Motion Blur Effect in Valorant? Read This Guide to Find Out How to Create a Motion Blur Effect in Valorant without Any Hassle
- Updated A Comprehensive Review of LUTs Finding LUTs Made by Danny Gevirtz
- Updated In 2024, How to Create an Instant Slideshow on Mac
- Forgot iPhone Passcode Again? Unlock Apple iPhone 7 Without Passcode Now
- A Step-by-Step Guide on Using ADB and Fastboot to Remove FRP Lock on your Samsung Galaxy S23 Ultra
- In 2024, How To Unlock Stolen iPhone SE In Different Conditionsin
- How to Factory Reset Google Pixel Fold without Losing Data | Dr.fone
- Full Guide to Bypass Oppo Find N3 FRP
- Identify malfunctioning your drivers with Windows Device Manager in Windows 11
- In 2024, How to Display Apple iPhone 8 Plus Screen on PC Easily? | Dr.fone
- In 2024, What Does Jailbreaking Apple iPhone 14 Pro i Do? Get Answers here
- In 2024, How to Reset a Itel S23+ Phone that is Locked?
- Samsung Galaxy Z Flip 5 Bootloop Problem, How to Fix it Without Data Loss | Dr.fone
- How to Reset Apple ID and Apple Password From iPhone 15 Pro Max
- Planning to Use a Pokemon Go Joystick on Vivo V30 Pro? | Dr.fone
- In 2024, Top 10 AirPlay Apps in OnePlus Ace 2 Pro for Streaming | Dr.fone
- In 2024, Easiest Guide How to Clone Vivo Y100 5G Phone? | Dr.fone
- Android Unlock Code Sim Unlock Your Honor Phone and Remove Locked Screen
- How To Transfer Data From Apple iPhone 6 To Others Android Devices? | Dr.fone
- In 2024, Top Apps and Online Tools To Track Xiaomi Redmi 13C 5G Phone With/Without IMEI Number
- In 2024, Step-by-Step Tutorial How To Bypass Vivo Y28 5G FRP
- In 2024, Detailed guide of ispoofer for pogo installation On Samsung Galaxy A25 5G | Dr.fone
- In 2024, Guide to Mirror Your Xiaomi 14 Ultra to Other Android devices | Dr.fone
- Motorola G54 5G Screen Unresponsive? Heres How to Fix It | Dr.fone
- New In 2024, Selected Best 5 YouTube Script Writing AI Customized for You
- How to Remove and Reset Face ID on Apple iPhone X
- A Perfect Guide To Remove or Disable Google Smart Lock On Nokia C12 Pro
- A Perfect Guide To Remove or Disable Google Smart Lock On Tecno Spark 20
- In 2024, How to Unlock Poco M6 Pro 4G Phone Password Without Factory Reset?
- Title: Updated 2024 Approved Time Bending Brilliance The Ultimate Slow Motion Video Makers
- Author: Chloe
- Created at : 2024-04-24 07:08:38
- Updated at : 2024-04-25 07:08:38
- Link: https://ai-editing-video.techidaily.com/updated-2024-approved-time-bending-brilliance-the-ultimate-slow-motion-video-makers/
- License: This work is licensed under CC BY-NC-SA 4.0.
