
:max_bytes(150000):strip_icc():format(webp)/audio-books-56a324b93df78cf7727c00f5.jpg)
Updated 2024 Approved Top 10 Fun Discord Bots You Need
Top 10 Fun Discord Bots You Need
Top 10 Fun Discord Bots You Need in 2024
An easy yet powerful editor
Numerous effects to choose from
Detailed tutorials provided by the official channel
Consumers enjoy discord because it serves as a hub for their social groups and communities. It’s a haven where users can be themselves while socializing with others who share their interests and hobbies. There is no algorithm selecting what they should see, no continuous scrolling, and no news feed. Common interests fuel conversations and you can use some fun discord bots to pep up the conversation.

Fun bots to add discord with artificial intelligence (AI) technologies are among the most helpful tools available on the discord platform. Funny emojis for discord may be beneficial to greet new members and have funny light conversations! This aids in the creation and maintenance of a vibrant online community. You can add music, games, and fun memes to your server using these bots if you wish to.
In this article
01 [10 Fun Discord Bots You Need in 2024](#Part 1)
02 [Fun Discord Bots FAQs](#Part 2)
Part 1 Fun Discord Bots You Need in 2024
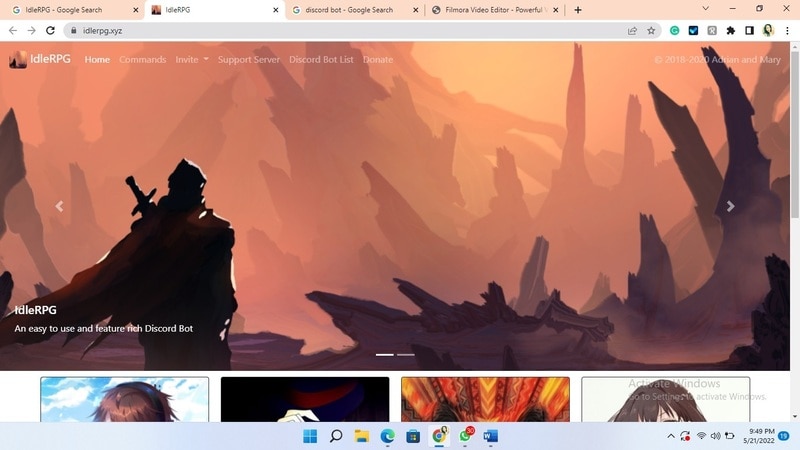
01IdleRPG
The IdleRPG is another enjoyable and engaging fun discord bot in the RPG gaming experience. It rewards server members for participating in the game while gaining XP and having fun. It offers character advancement and is comparable to other RPG games.
You may travel on a quest, trade various things, fight other players, and even find love. There’s also a scoreboard for the top ten loves, top ten PvP players, top ten wealthiest, and top ten XP players. IdleRPG also allows you to wager in various ways to help you boost your gaming money.
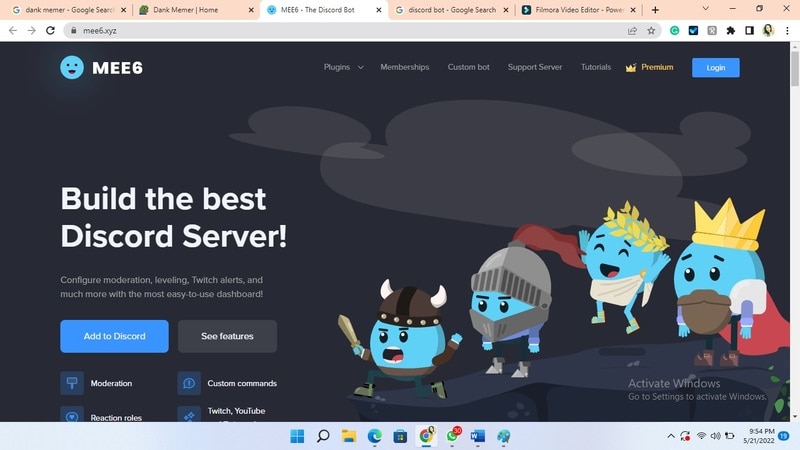
02MEE6
MEE6 is a widespread moderation and one of the greatest fun bots for discord. It takes care of many tasks that a mod team would typically do. This includes greeting new members, informing your server when you or your favorite content producers go live on Twitch or YouTube, and allowing users to assign roles depending on their reactions.
A command tool that allows you to generate custom commands and an XP leveling system that users may grind to earn access to various channels and permissions depending on activity are two of MEE6’s more complicated features. MEE6 also includes plugins for music and developing your fun discord bot.
03Dank Memer
Dank Memer is another fun bot to add to discord with a lighthearted tone. It offers one of the most extensive built-in economies, allowing participants to engage in text-based thievery, bank robbery, and gambling experiences.
As its name implies, it also offers a slew of meme-related commands. You can use simple chat instructions to create memes. Other memes automatically publish.
Even more impressive is that awesome memes are collected daily from Reddit’s top meme collections.

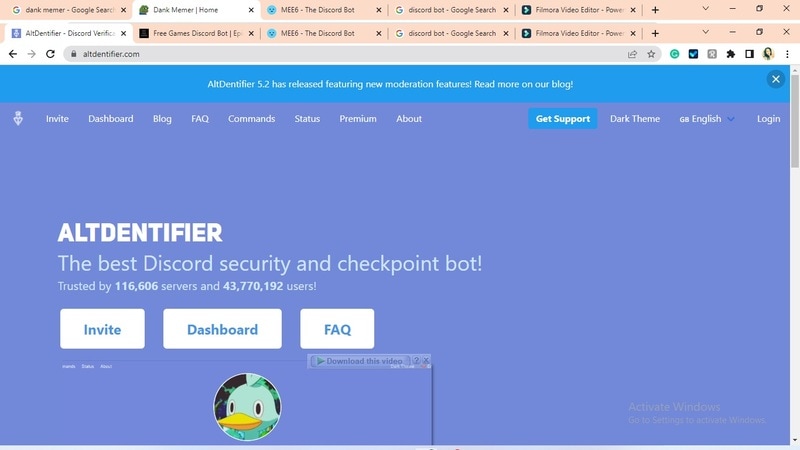
04AltDentifier
Another unique funny discord emoji bot is AltDentifier, which maintains your server clean and spam-free. It’s simple to set up and takes only a few minutes to get up and run. It now has over 35 million users spread across 100,000 servers. It also includes several more moderation commands to make administration easier.
The AltDentifier bot contains:
● An automated anti-raid system.
● A robust verification mechanism.
● Multilingual support.
● A review record.
It will also notify you if a user attempts to circumvent any limitations by utilizing a VPN.
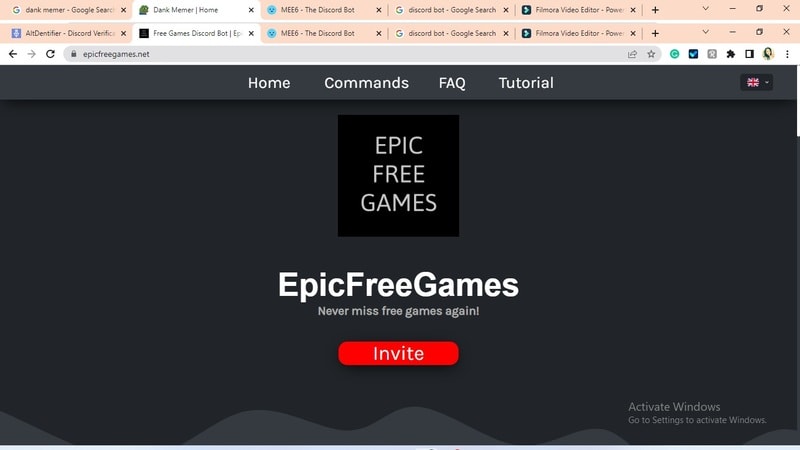
05EpicFreeGames
Over the last two years, Epic Free Games has given away thousands of free games. GTA V, Dead By Daylight, and NBA 2K21 are among the given-away titles. It even-handed away Discord Nitro lately. Have any of these free games ever escaped your notice? Fear not, for the EpicFreeGames bot has your back.
The EpicFreeGames bot delivers a message to a channel, reminding everyone of Epic’s free game(s). It only has one task, yet it can provide you with hundreds of dollars worth of games. Never miss another fantastic free Epic Games game again.
06**Rythm **
Rythm is a great fun discord bot for playing music in the voice stream of your server. This one features a beautiful user interface that includes a music player that you can interact with. This makes controlling the channel’s queue a breeze.
The options are changeable. You can designate DJ duties, prohibit the same songs from appearing in queues again, and block particular channels from playing music. Rhythm is less platform-agnostic than Groovy. Spotify, YouTube, SoundCloud, and Bandcamp are among the options. Apple Music is not currently supported.
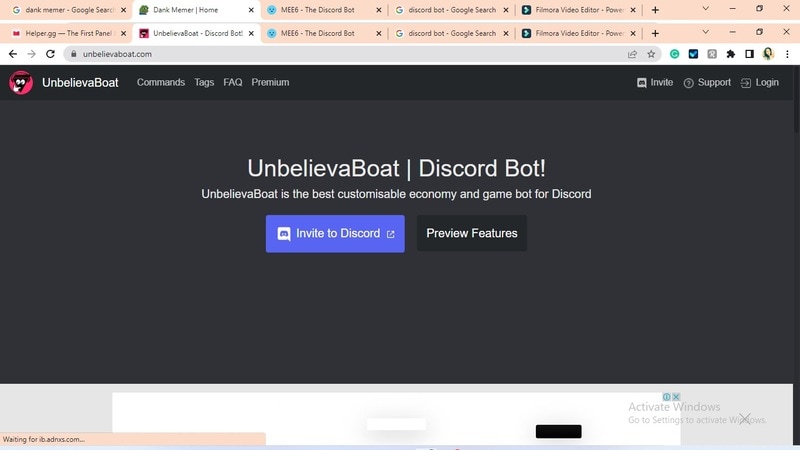
07Unbelievaboat
UnbelievaBoat is a versatile, fun bot to add to discord that uses exciting activities to keep server members engaged. These capabilities, fortunately, include a moderation mechanism that you may utilize to issue warnings and enforce bans. Your moderators may keep track of each action by assigning it a case number.
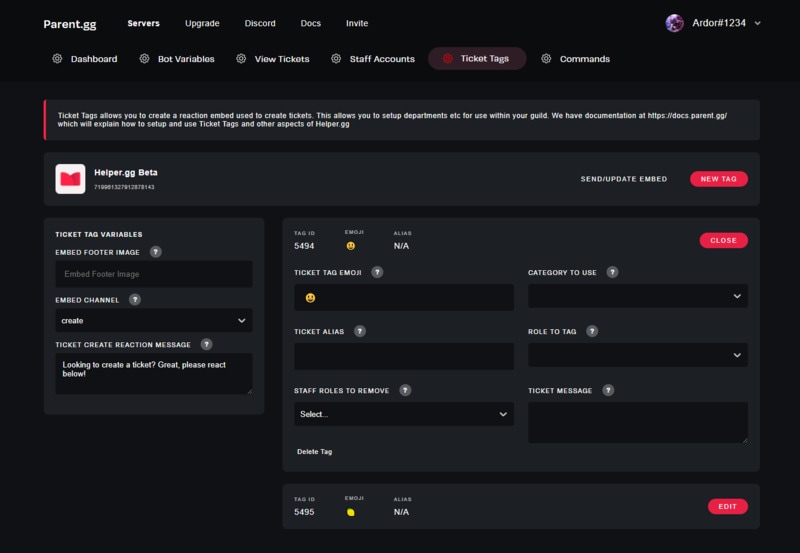
08Helper.gg
Helper.gg enables you to transform your discord server into a support ticket system. It’s a board ticket bot with a stunning UI that makes managing and responding to client tickets simple.
Create staff accounts for your company’s customer support representatives and manage their access. Ticket logging with the flexibility to rename and relocate tickets, add and delete users, and the contentment of having tickets close automatically based on the amount of time that has passed since the previous reply are all accessible.
09GameStats
Next, GameStats has one-of-a-kind funny emojis for the discord bot. We all enjoy looking at our in-game statistics and comparing them. The GameStats Discord bot makes sharing and displaying your impressive numbers simple.
Connect to your game or platform, make a personalized profile card, and begin sharing your tryhard statistics.

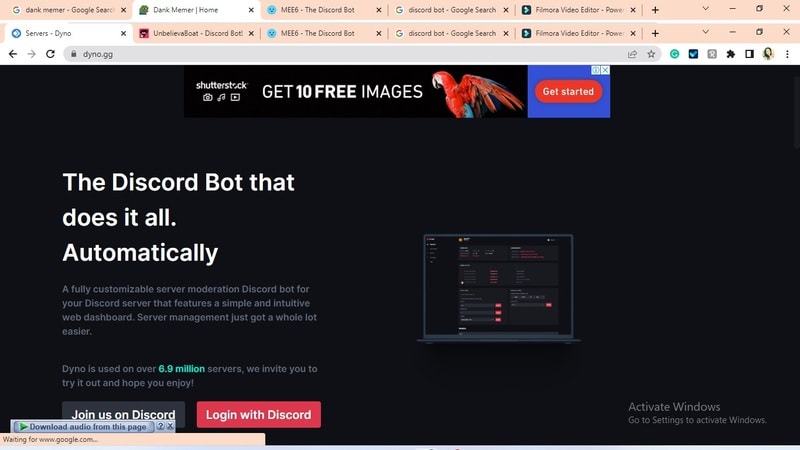
10Dyno
Dyno is another well-crafted fun discord bot. It’s an utterly customizable server moderation bot that assists with server automation. You also receive a basic online dashboard with Dyno that you can use to monitor and control your server.
It has functions such as creating positions, making announcements, banning members, and even requesting puppy or cat images. Dyno is a fun bot that allows you to automate your server management effortlessly. Premium subscriptions, which start at $4.99 per month and unlock more exclusive features, are also available.
However, if you are a creative video editor who likes sharing their experience on discord, Filmora is for you. With Filmora, you can bring your recorded experiences with funny discord emojis to life!
But Wait, What is Wondershare Filmora Video Editor ?
Filmora is a famous video editing program for those who wish to focus on editing and producing high-quality videos with the support of 4K video editing. It’s a reasonably priced software featuring tools like split, trim, add text, color, etc. When it comes to designing, adding effects, and modifying movies, it provides users with many possibilities. Users can add overlays, create animations and objects, add music, and more with Wondershare’s Filmora. It’s an excellent tool for individuals who wish to include dedications, tributes, fun emojis and anecdotes in their films. Any video can also benefit from voiceovers.
For Win 7 or later (64-bit)
For macOS 10.12 or later
Part 2 Fun Discord Bots FAQs
Q. What does MEE6 stand for?
A. MEE6 is a discord role bot that lets users assign roles to themselves via discord replies. This discord role generator will change user rights in discord automatically.
Q. Are these fun bots free?
A. Yes and no. Most fun bots for discord are free to use, although you must pay for some features.
Q. What is the top level I can reach on the MEE6 bot?
A. The maximum level accessible is 1,768,802, which would take 935 billion years if messages sent every minute.
Q. Help! My discord got hacked; how did that even happen?
A. Users may edit discord javascript files. A cybercriminal can install harmful malware to discord client files if they get user authorization. When people open the file, the code also gets executed. After then, the hacker has access to the user’s discord data.
Q. What can discord bots do?
A. On your server, the bots can conduct a variety of helpful automated chores and bot commands, like welcoming new users, monitoring content, and banning rule violators. Using fun discord bots’ instructions, you can add music, humor, games, and other emojis to your server.
● Ending Thoughts →
● In short, moderators and administrators can use funny discord emojis to administer their servers better, make them attractive, and get more users. There are many vanilla discord commands to choose from, and when you put fun bots to add to discord, the possibilities become unlimited.
● Besides, there are several funny emojis for discord to improve your discord skills and establish your discord server. Finally, Filmora can assist you in beautifying your recorded videos make funny emojis for discord.
Consumers enjoy discord because it serves as a hub for their social groups and communities. It’s a haven where users can be themselves while socializing with others who share their interests and hobbies. There is no algorithm selecting what they should see, no continuous scrolling, and no news feed. Common interests fuel conversations and you can use some fun discord bots to pep up the conversation.
Fun bots to add discord with artificial intelligence (AI) technologies are among the most helpful tools available on the discord platform. Funny emojis for discord may be beneficial to greet new members and have funny light conversations! This aids in the creation and maintenance of a vibrant online community. You can add music, games, and fun memes to your server using these bots if you wish to.
In this article
01 [10 Fun Discord Bots You Need in 2024](#Part 1)
02 [Fun Discord Bots FAQs](#Part 2)
Part 1 Fun Discord Bots You Need in 2024
01IdleRPG
The IdleRPG is another enjoyable and engaging fun discord bot in the RPG gaming experience. It rewards server members for participating in the game while gaining XP and having fun. It offers character advancement and is comparable to other RPG games.
You may travel on a quest, trade various things, fight other players, and even find love. There’s also a scoreboard for the top ten loves, top ten PvP players, top ten wealthiest, and top ten XP players. IdleRPG also allows you to wager in various ways to help you boost your gaming money.
02MEE6
MEE6 is a widespread moderation and one of the greatest fun bots for discord. It takes care of many tasks that a mod team would typically do. This includes greeting new members, informing your server when you or your favorite content producers go live on Twitch or YouTube, and allowing users to assign roles depending on their reactions.
A command tool that allows you to generate custom commands and an XP leveling system that users may grind to earn access to various channels and permissions depending on activity are two of MEE6’s more complicated features. MEE6 also includes plugins for music and developing your fun discord bot.
03Dank Memer
Dank Memer is another fun bot to add to discord with a lighthearted tone. It offers one of the most extensive built-in economies, allowing participants to engage in text-based thievery, bank robbery, and gambling experiences.
As its name implies, it also offers a slew of meme-related commands. You can use simple chat instructions to create memes. Other memes automatically publish.
Even more impressive is that awesome memes are collected daily from Reddit’s top meme collections.
04AltDentifier
Another unique funny discord emoji bot is AltDentifier, which maintains your server clean and spam-free. It’s simple to set up and takes only a few minutes to get up and run. It now has over 35 million users spread across 100,000 servers. It also includes several more moderation commands to make administration easier.
The AltDentifier bot contains:
● An automated anti-raid system.
● A robust verification mechanism.
● Multilingual support.
● A review record.
It will also notify you if a user attempts to circumvent any limitations by utilizing a VPN.
05EpicFreeGames
Over the last two years, Epic Free Games has given away thousands of free games. GTA V, Dead By Daylight, and NBA 2K21 are among the given-away titles. It even-handed away Discord Nitro lately. Have any of these free games ever escaped your notice? Fear not, for the EpicFreeGames bot has your back.
The EpicFreeGames bot delivers a message to a channel, reminding everyone of Epic’s free game(s). It only has one task, yet it can provide you with hundreds of dollars worth of games. Never miss another fantastic free Epic Games game again.
06**Rythm **
Rythm is a great fun discord bot for playing music in the voice stream of your server. This one features a beautiful user interface that includes a music player that you can interact with. This makes controlling the channel’s queue a breeze.
The options are changeable. You can designate DJ duties, prohibit the same songs from appearing in queues again, and block particular channels from playing music. Rhythm is less platform-agnostic than Groovy. Spotify, YouTube, SoundCloud, and Bandcamp are among the options. Apple Music is not currently supported.
07Unbelievaboat
UnbelievaBoat is a versatile, fun bot to add to discord that uses exciting activities to keep server members engaged. These capabilities, fortunately, include a moderation mechanism that you may utilize to issue warnings and enforce bans. Your moderators may keep track of each action by assigning it a case number.
08Helper.gg
Helper.gg enables you to transform your discord server into a support ticket system. It’s a board ticket bot with a stunning UI that makes managing and responding to client tickets simple.
Create staff accounts for your company’s customer support representatives and manage their access. Ticket logging with the flexibility to rename and relocate tickets, add and delete users, and the contentment of having tickets close automatically based on the amount of time that has passed since the previous reply are all accessible.
09GameStats
Next, GameStats has one-of-a-kind funny emojis for the discord bot. We all enjoy looking at our in-game statistics and comparing them. The GameStats Discord bot makes sharing and displaying your impressive numbers simple.
Connect to your game or platform, make a personalized profile card, and begin sharing your tryhard statistics.
10Dyno
Dyno is another well-crafted fun discord bot. It’s an utterly customizable server moderation bot that assists with server automation. You also receive a basic online dashboard with Dyno that you can use to monitor and control your server.
It has functions such as creating positions, making announcements, banning members, and even requesting puppy or cat images. Dyno is a fun bot that allows you to automate your server management effortlessly. Premium subscriptions, which start at $4.99 per month and unlock more exclusive features, are also available.
However, if you are a creative video editor who likes sharing their experience on discord, Filmora is for you. With Filmora, you can bring your recorded experiences with funny discord emojis to life!
But Wait, What is Wondershare Filmora Video Editor ?
Filmora is a famous video editing program for those who wish to focus on editing and producing high-quality videos with the support of 4K video editing. It’s a reasonably priced software featuring tools like split, trim, add text, color, etc. When it comes to designing, adding effects, and modifying movies, it provides users with many possibilities. Users can add overlays, create animations and objects, add music, and more with Wondershare’s Filmora. It’s an excellent tool for individuals who wish to include dedications, tributes, fun emojis and anecdotes in their films. Any video can also benefit from voiceovers.
For Win 7 or later (64-bit)
For macOS 10.12 or later
Part 2 Fun Discord Bots FAQs
Q. What does MEE6 stand for?
A. MEE6 is a discord role bot that lets users assign roles to themselves via discord replies. This discord role generator will change user rights in discord automatically.
Q. Are these fun bots free?
A. Yes and no. Most fun bots for discord are free to use, although you must pay for some features.
Q. What is the top level I can reach on the MEE6 bot?
A. The maximum level accessible is 1,768,802, which would take 935 billion years if messages sent every minute.
Q. Help! My discord got hacked; how did that even happen?
A. Users may edit discord javascript files. A cybercriminal can install harmful malware to discord client files if they get user authorization. When people open the file, the code also gets executed. After then, the hacker has access to the user’s discord data.
Q. What can discord bots do?
A. On your server, the bots can conduct a variety of helpful automated chores and bot commands, like welcoming new users, monitoring content, and banning rule violators. Using fun discord bots’ instructions, you can add music, humor, games, and other emojis to your server.
● Ending Thoughts →
● In short, moderators and administrators can use funny discord emojis to administer their servers better, make them attractive, and get more users. There are many vanilla discord commands to choose from, and when you put fun bots to add to discord, the possibilities become unlimited.
● Besides, there are several funny emojis for discord to improve your discord skills and establish your discord server. Finally, Filmora can assist you in beautifying your recorded videos make funny emojis for discord.
Top 5 Free Online Video Filter Editors: Improve Your Videos with Filters
In the era of digital storytelling, everyone desires to make their content stand out. Applying video filters is a surefire way to enhance your videos’ mood, style, and overall appeal.
With many video filter editors available online, choosing the right one can be daunting. Worry not, for we’ve scoured the internet to bring you the top 5 free online video filter editors to jazz up your content. Let’s dive in!
Part 1: Top 5 Free Online Video Filter Editors
Veed.io

Veed.io is more than just an online video editor. This platform is designed with the user in mind, ensuring a hassle-free experience as they navigate its diverse video editing tools. One of the standout features is, undoubtedly, its video filter capabilities.
Is the product free?
Veed.io offers a robust free version, letting creators jump in without any initial investment. However, for those seeking more advanced features and capabilities, Veed.io has premium plans available, starting at a competitive price of $12/month.
Free trial for video filter function?
One of the commendable aspects of Veed.io is its commitment to transparency. Users can fully experience the video filter function without spending a dime, ensuring they know exactly what they’re getting before opting for paid plans.
Advantages: Even those new to video editing can quickly find their way around. The platform’s design is clean and straightforward and prioritizes user experience. Videos are processed promptly, ensuring you get your polished content out quickly.
Disadvantages: The free version watermarks the videos.
Clideo

Clideo is a multifaceted online video editing solution that caters to a broad spectrum of editing needs.
Whether you’re looking to merge clips, resize videos for various platforms, or infuse creativity with video filters, Clideo offers a comprehensive toolkit.
Is the product free?
It has a free version with basic functionalities. Paid plans start at $9/month.
Free trial for video filter function?
Yes, the filter function can be tested without any charges.
Advantages : Simple to use, no software installation required.
Disadvantages : Limited filters in the free version.
Flixier

Flixier emerges as a dynamic online video editing platform, aiming to bridge the gap between advanced editing tools and user accessibility.
Catering to novice editors and seasoned professionals, it offers tools that effortlessly combine efficiency with creativity.
Is the product free?
Flixier provides a free tier. For advanced features, paid plans start at $10/month.
Free trial for video filter function?
The video filter function is available in the free tier.
Advantages: Collaborative editing features quick export times.
Disadvantages: Slightly steeper learning curve for beginners.
Flexclip

Flexclip positions itself as a holistic online video editor designed with both beginners and advanced users in mind.
Whether you’re crafting a short promotional clip, a personal vlog, or an extensive documentary, Flexclip provides the tools and templates to make the process seamless.
Is the product free?
There’s a free version available. Upgraded plans are priced from $4.99/month.
Free trial for video filter function?
Absolutely, users can enjoy filter functions for free.
Advantages: Rich video templates and intuitive design.
Disadvantages: Limited advanced editing options in the free version.
Kapwing

KAPWING has swiftly carved its niche in the world of online video editing, offering a unique blend of simplicity and versatility. Beyond just a video editor, KAPWING is a creative toolkit that empowers users to bring their video visions to life with ease.
Is the product free?
Kapwing provides a basic free version. For premium features, plans start at $20/month.
Free trial for video filter function?
The video filter function is accessible in the free version.
Advantages: No watermarks, user-friendly, wide array of tools.
Disadvantages: Some advanced filters are limited to premium users.
Part 2: Best Alternatives
When it comes to alternative video filter editors, Filmora undoubtedly stands out. Although it’s not exclusively an online tool, Filmora has firmly established its reputation in the digital video editing community, and here’s why:
- Extensive Library of Video Filters : One of Filmora’s shining points is its rich, extensive library of video filters. From adding a touch of nostalgia with sepia tones to creating blockbuster cinematic vibes with dramatic contrasts, Filmora ensures every creative vision can be realized.
Video Filter Editor
Create AI Filter For Win 7 or later(64-bit)
Create AI Filter For macOS 10.14 or later
- User-friendly Interface : While its feature set is extensive, beginners need not be intimidated. Filmora offers an intuitive drag-and-drop interface, making the application of filters a seamless process. This ease of use ensures that even the most novice of editors can achieve professional-looking results in no time.
- Customizable Filters : Filmora allows users to tweak and customize effects to their liking beyond the preset filters. This feature gives creators the flexibility to craft unique visuals that align with their brand or story’s essence.
- Regular Updates : Filmora continuously updates its software, adding new filters and features. This means users can always stay ahead of the curve and incorporate the latest trends into their videos.
- Pricing and Value : While Filmora isn’t free, the value it offers makes the investment worthwhile. The tool offers various pricing plans designed for both individuals and businesses. Given the quality and diversity of its video filters, many content creators view it as a justifiable expense.
- Community and Tutorials : Filmora boasts a vibrant community of users. Their official website and channels regularly release tutorials, guiding users on the various functionalities, ensuring you make the most out of the software.
Part 3: Summary
The digital space is flooded with content, making it crucial for creators to ensure their videos capture attention and engage viewers. Utilizing video filters can significantly boost the visual appeal of your content.
With platforms like Veed.io, Clideo, Flixier, Flexclip, and KAPWING, filtering videos is now more accessible than ever.
And for those willing to invest a little, Filmora stands as a robust alternative. So, explore these platforms, harness the power of video filters, and watch your content shine like never before!
Part 1: Top 5 Free Online Video Filter Editors
Veed.io
Veed.io is more than just an online video editor. This platform is designed with the user in mind, ensuring a hassle-free experience as they navigate its diverse video editing tools. One of the standout features is, undoubtedly, its video filter capabilities.
Is the product free?
Veed.io offers a robust free version, letting creators jump in without any initial investment. However, for those seeking more advanced features and capabilities, Veed.io has premium plans available, starting at a competitive price of $12/month.
Free trial for video filter function?
One of the commendable aspects of Veed.io is its commitment to transparency. Users can fully experience the video filter function without spending a dime, ensuring they know exactly what they’re getting before opting for paid plans.
Advantages: Even those new to video editing can quickly find their way around. The platform’s design is clean and straightforward and prioritizes user experience. Videos are processed promptly, ensuring you get your polished content out quickly.
Disadvantages: The free version watermarks the videos.
Clideo
Clideo is a multifaceted online video editing solution that caters to a broad spectrum of editing needs.
Whether you’re looking to merge clips, resize videos for various platforms, or infuse creativity with video filters, Clideo offers a comprehensive toolkit.
Is the product free?
It has a free version with basic functionalities. Paid plans start at $9/month.
Free trial for video filter function?
Yes, the filter function can be tested without any charges.
Advantages : Simple to use, no software installation required.
Disadvantages : Limited filters in the free version.
Flixier
Flixier emerges as a dynamic online video editing platform, aiming to bridge the gap between advanced editing tools and user accessibility.
Catering to novice editors and seasoned professionals, it offers tools that effortlessly combine efficiency with creativity.
Is the product free?
Flixier provides a free tier. For advanced features, paid plans start at $10/month.
Free trial for video filter function?
The video filter function is available in the free tier.
Advantages: Collaborative editing features quick export times.
Disadvantages: Slightly steeper learning curve for beginners.
Flexclip
Flexclip positions itself as a holistic online video editor designed with both beginners and advanced users in mind.
Whether you’re crafting a short promotional clip, a personal vlog, or an extensive documentary, Flexclip provides the tools and templates to make the process seamless.
Is the product free?
There’s a free version available. Upgraded plans are priced from $4.99/month.
Free trial for video filter function?
Absolutely, users can enjoy filter functions for free.
Advantages: Rich video templates and intuitive design.
Disadvantages: Limited advanced editing options in the free version.
Kapwing
KAPWING has swiftly carved its niche in the world of online video editing, offering a unique blend of simplicity and versatility. Beyond just a video editor, KAPWING is a creative toolkit that empowers users to bring their video visions to life with ease.
Is the product free?
Kapwing provides a basic free version. For premium features, plans start at $20/month.
Free trial for video filter function?
The video filter function is accessible in the free version.
Advantages: No watermarks, user-friendly, wide array of tools.
Disadvantages: Some advanced filters are limited to premium users.
Part 2: Best Alternatives
When it comes to alternative video filter editors, Filmora undoubtedly stands out. Although it’s not exclusively an online tool, Filmora has firmly established its reputation in the digital video editing community, and here’s why:
- Extensive Library of Video Filters : One of Filmora’s shining points is its rich, extensive library of video filters. From adding a touch of nostalgia with sepia tones to creating blockbuster cinematic vibes with dramatic contrasts, Filmora ensures every creative vision can be realized.
Video Filter Editor
Create AI Filter For Win 7 or later(64-bit)
Create AI Filter For macOS 10.14 or later
- User-friendly Interface : While its feature set is extensive, beginners need not be intimidated. Filmora offers an intuitive drag-and-drop interface, making the application of filters a seamless process. This ease of use ensures that even the most novice of editors can achieve professional-looking results in no time.
- Customizable Filters : Filmora allows users to tweak and customize effects to their liking beyond the preset filters. This feature gives creators the flexibility to craft unique visuals that align with their brand or story’s essence.
- Regular Updates : Filmora continuously updates its software, adding new filters and features. This means users can always stay ahead of the curve and incorporate the latest trends into their videos.
- Pricing and Value : While Filmora isn’t free, the value it offers makes the investment worthwhile. The tool offers various pricing plans designed for both individuals and businesses. Given the quality and diversity of its video filters, many content creators view it as a justifiable expense.
- Community and Tutorials : Filmora boasts a vibrant community of users. Their official website and channels regularly release tutorials, guiding users on the various functionalities, ensuring you make the most out of the software.
Part 3: Summary
The digital space is flooded with content, making it crucial for creators to ensure their videos capture attention and engage viewers. Utilizing video filters can significantly boost the visual appeal of your content.
With platforms like Veed.io, Clideo, Flixier, Flexclip, and KAPWING, filtering videos is now more accessible than ever.
And for those willing to invest a little, Filmora stands as a robust alternative. So, explore these platforms, harness the power of video filters, and watch your content shine like never before!
How To Cut Videos For Instagram On Mac
More video content is being created than before. Unfortunately, some social media platforms like Instagram require your video to be short. Therefore, many people wonder how to cut a video to make it easier to share. If you’re wondering how to cut video for Instagram on Mac, you’re in luck. This article shares the best tools to use for this purpose.
What You Should Know About Instagram Video

Instagram is a social media site owned by Facebook. However, its main focus is on sharing videos and photos. It also allows users to put up stories that only last 24 hours. Stories allow you to highlight some crucial aspects of your life. These stories could be made up of photos, texts, and videos. However, each story slide can only take up to 15 seconds of video.
Most times, your video would be longer than that. If you upload a video longer than the accepted 15 seconds, Instagram automatically trims it to 15 seconds. However, the resulting video might not be the parts you want to show to your audience. Maybe there’s a particular section you would like your followers to see. That’s why video cutters enter the picture.
A good video splitter to cut video for Instagram on Mac is necessary when you’re creating video content for your Instagram page. In addition, the video editing tool you choose must maintain the quality and the safety of the file. Therefore, we’ve selected the best tools to cut videos for Instagram on Mac. Next, we’ll explore these tools, highlighting their best features, cons, and how you can use them. On that note, let’s dive in.
Best Instagram Video Cutter for Mac - Filmroa Video Editor

Supported System: Windows and Mac
Splitting your Instagram video before sharing them makes it easier to highlight your best parts. If you’re wondering what the best tool to do that is, you’re in luck. Filmora Video Editor is the best video cutter for Mac for many reasons. Apart from cutting videos, it offers several editing tools to enhance your video. It provides video processing features like cropping, splitting, rotating, trimming, speed increase, and color correction. However, it also offers features for professional editing of videos.
Filmora supports all video formats, even the high-definition video formats for your editing. In addition, Wondershare Filmora offers you an intuitive and user-friendly interface compared to other video cutters out there. This makes it a fantastic choice for experts and novices alike. The steps to split your video and use other in-built features are pretty straightforward, and if you need tutorials, Wondershare Filmora makes them available.
For Win 7 or later (64-bit)
For macOS 10.14 or later
Steps to Cut Video for Instagram on Mac
Filmora makes it relatively easy to use its extensive features. You don’t need previous editing experience to use Wondershare Filmora. If you’re wondering how to cut video for Instagram on Mac, below are the steps to follow.
Step 1: Download Wondershare Filmore
First, you have to download the Filmora app on your Mac. You can get it on the App Store or the official website. After installation, launch Filmora to get started.
Step 2: Import Video

Once you install the app, you can import the video you would like to cut for Instagram on the app. Click ‘import media files here’ to choose a video file from your PC storage. Alternatively, you can drag and drop the Instagram video on the software’s timeline.
Step 3: Cut the Video

You can cut your video from any end you prefer. First, move the cursor where you would like to cut the video until the clip changes to the ‘I’ pointer. Then, you can move the cursor within the video length to cut to your preference.
Step 4: Split Instagram Video

You can also split the video into specific portions by dragging the slider to each endpoint and picking the scissors. Additionally, you can carry out more editing like adding transitions, sound effects, and more to beautify your video.
Step 5: Save Instagram Video

Now that the video is to your liking, hit the ‘export’ button and choose the output format you would prefer. Next, click ‘export’ to confirm your choice.
More Free Instagram Video Cutter for Mac to Cut Video For Instagram
Although Wondershare Filmore is the best option when you want to cut video for Instagram on Mac, other options are available. In this section, we’ll explore the free Instagram video cutters for Mac that you can use.
Lightworks

Supported System: Windows and Mac
Lightworks is one of the best video splitting tools you can use if you’re learning how to cut video for Instagram on Mac. It is best for both novices and professionals and allows you seamlessly cut the video to your desired part. With Lightworks software, you can easily get results.
Apart from cutting Instagram videos on Mac, there are several more editing features you can utilize to take your Insta video to the next level. It also allows you to combine several cut clips. Size isn’t an issue with Lightworks as it effortlessly handles large file sizes. It offers users all the features of a high-quality video processing video editor. The best part is that it allows you directly export your cut video to Instagram or any other social media platform you would prefer.
Pros
- It supports different audio, video, and image format
- It allows users to share projects to encourage collaborative workflow
- Easy to use by beginners and professionals
- Allows exporting of video to Instagram directly
Cons
- It doesn’t support 3D video editing
- You have to register before using the application
- No video stabilization feature
Step to Cut Video for Instagram on Mac Using Lightworks
The steps to using this software are pretty easy to follow. Below, we’ve outlined the steps to make it easier to use.
- Step 1: Download the Lightworks software on your Mac from the official software. Once you do this, install the app and launch the software to begin the video-cutting process.
- Step 2: Import the video into the software. You can do this by clicking ‘import video’ or simply dragging the clip into the timeline.

- Step 3: After uploading the clip on your timeline, you can start cutting the video to your preference. Simply slide the cursor to the point you want to cut from and press the ‘c’ key on your keyboard.

- Step 4: After cutting the part you want, erase the rest by using the deleting button.

- Step 5: Click the ‘all’ option and then choose ‘export’ from the menu that appears to save your newly-cut video. You can also export directly to Instagram to save space and time.

Avidemux

Supported System: Windows and Mac
Another free video cutter that you can use when learning how to cut video for Instagram on Mac is Avidemux. This app is simple and offers simple filtering, cutting, and encoding features. As a result, it makes it relatively easy for beginners to split, cut, and trim videos. In addition, Avidemux offers users an intuitive user interface that makes it easy to know the next step to take.
Avidemux supports the most common formats like AVI, MP4, and more. It also offers different filters to spice up your Instagram videos. You can resize your video and also color correct your video. It is not an advanced tool for professionals because it doesn’t offer advanced tools. However, if you simply want to cut video for Instagram for Mac, this free software helps you achieve that.
Pros
- It supports common video formats
- It’s easy to cut videos for Instagram using keyboard shortcuts
- Offers various filters for enhancing video
- It is free to use
- Easy for beginners to use
Cons
- It crashes sometimes
- There are limited features in the editing software
Steps to Cut Video for Instagram on Mac Using Avidemux
Avidemux has a user-friendly interface that makes it easy to cut and save your Instagram video within minutes. Below are the simple steps to cut Instagram videos you should follow.
- Step 1: Download Avidemux on your Mac and install it. After installation, launch Avidemus to begin cutting your Instagram video.
- Step 2: Next, load the file you would like to work with

- Step 3: Next, navigate to the portion of the video you would like to cut and check its ‘frame type.’ At the beginning, where you would like to cut the video from, click the ‘A’ button. It automatically records it as the start of the clip.

- Start 4: Move to where you would like the clip to end and click the ‘B’ button. This will automatically cut the Instagram video to your preference.

- Step 5: Save the video by going to file and choosing ‘save’ from the available options. Next, click ‘save video’ and name the file.

You’re now ready to use your new video on Instagram or any other video-sharing platform you would prefer.
iMovie

Supported System: Mac
Apple first released this software in 1999, but it has continually updated it to offer more features to users. IMovie is available on all iOS devices, including your MacBook. Due to the frequent upgrades, this software makes editing relatively easy for beginners. The user interface is user-friendly, and it is entirely free to use. It is also an excellent choice for cutting your Instagram videos.
One of the reasons Mac users love this app is that there’s no need for installation and downloading. There are different effects available to enhance your video. You can also use ready-made templates on the software that offers popular music and stunning graphics. In addition, you can also add transitions, change speed, and many more with this software.
Pros
- It puts your content in different media libraries to help you stay organized
- It offers access to various video and audio filters
- It provides a stability feature that’s not available with many Instagram video cutting tools
- It allows you to share directly on Instagram
- It is easy for beginners to use
Cons
- It lacks some useful controls
- It doesn’t allow tagging when you share directly to Instagram
- It only supports two video tracks
Steps to Cut Video for Instagram on Mac Using IMovie
If you want to cut your video for Instagram using IMovie, below are the steps you need to follow.
- Step 1: Open iMovie on your Macbook to get started
- Step 2: Now, create a new project and name the project with a name you prefer

- Step 3: Import your video to IMovie by granting the software access to your computer’s video library.

- Step 4: Start cutting out any part you don’t want; you can also trim the video in-between if there are parts within the clip you don’t want.

- Step 5: You can add filters, transitions, or any other effect you would like to enhance your video.

- Step 6: Finally, you can save your file on your Mac or upload it directly to Instagram.
More Paid Instagram Video Cutter for Mac to Cut Video For Instagram
Now that you know the top three free video cutters for Instagram on Mac, this section explores the best paid Instagram video cutter you can use to cut videos for Instagram on Mac. Without further ado, let’s take a look.
Movavi Video Editor

Supported System: Windows and Mac
This video editor is relatively easy to use and powerful. It offers many features that go beyond cutting video for Instagram. You can also utilize this video editing software to enhance your video and make it look professional. Movavi offers transitions, filters, titles, and many more features for your videos. It is easy for both novices and professionals to use this platform.
Movavi Video Editor supports all types of video formats for easy editing. It also allows you to set your video to full HD and 4K resolution so that the images are clean and clear. You can also convert to a new format without compromising the quality of your video. In addition, Movavi offers you a trial period you can use to check out the software to ensure it is the ideal option for you. With Movavi, you can also share directly to Instagram if you’re looking to save space on Mac.
Ros
- It allows you to cut videos and export them quickly
- It offers several other features to enhance your videos
- It supports all video formats
- It enables you to convert video to the new format without compromising the quality
- It is ideal for beginners and experts
Cons
- Subscription fees are pretty high
- Some of the settings can be quite complex for beginners
Steps to Cut Video for Instagram on Mac Using Movavi Video Editor
If you would like to try Movavi video editor but don’t know how to go about it, the steps below make it relatively easy.
- Firstly, Install Movavi Video Editor on your Mac and install the app following the instructions. After installation, launch the app to begin.
- Next, choose the video file you would like to cut by clicking ‘add files’ and selecting your media library.

- It will appear on the ‘media bin,’ and you’ll have to drag it to the timeline.
- Now, you can start cutting the video for Instagram. Click on the video and move the market to the point in the video you would like to cut. Next, click the split button.

- You can easily remove the unwanted segments by clicking delete after selecting it.

- After cutting your video, you can choose the output format you prefer and then click ‘export.’ Choose the folder on your Mac you would like to save to and click ‘start’ to begin the saving process.

Final Cut Pro

Supported System: Mac
Next on our list, we have Final Cut Pro, an excellent video cutter for Mac. It is software developed by Apple for professional video editing. This app is primarily for MacOS users, and it offers several cutting-edge editing features to ensure a smooth and high-resolution video. It supports different video formats and allows you to enhance audio, add effects, trim, and carry out 360-degree video editing if you want to improve your video.
This tool doesn’t offer a monthly subscription. Instead, users can simply make a one-time payment and have lifetime access to this editing tool. It is not an excellent choice for beginners as its advanced features and interface can be pretty complicated. However, if you want to give this video cutter ago, we’ll provide the steps to cut the video for Instagram below.
Pros
- It supports 360-video editing
- Performance is relatively fast and ensures an easy video-cutting process
- It supports different video formats
- It offers various editing tools to enhance your video for Instagram
Cons
- It isn’t ideal for beginners
- One-time payment is relatively high
- The interface can be quite confusing
Steps to Cut Video for Instagram on Mac Using Final Cut Pro
If you want to cut video for Instagram in Final Cut Pro, the blade tool is the best option. However, it can be pretty confusing to use Final Cut Pro if you’ve never used the software before. Follow the steps below to cut Instagram video using Final Cut Pro.
- First, you have to download the app; you can download it on the App Store or the official website.
- Next, install the video cutter on your Mac and launch it to begin cutting Instagram videos.
- Import the video you would like to cut by visiting the ‘file’ type and choosing ‘import.’ Next, choose media and select the video from the media library. Alternatively, you can simply press Command + I on your Mac keyboard to go straight to your PC storage.

- Next, move the imported clip to the timeline to begin the cutting process.
- Select the Tools menu and choose ‘Blade’ from the dropdown menu. You can also press the B key on your keyword to select this tool.

- Now, you’re ready to start cutting the video file. Move the selected blade tool to the frame you would like to cut from the clip and click.

- Next, move to where you would like the cut to the end and click again.

- That’s all you have to do. Once you cut the clip and you’re satisfied with your result, simply save your clip by hitting the ‘export’ button and choosing the location you prefer and your preferred output format.
Adobe Premiere Rush

Supported System: Windows and Mac
Premier Rush was designed for social media videos and to help vloggers make the most of their videos. Although it started as a mobile-only app, it now has a desktop option for Mac and Windows. The idea behind Rush is an editing tool that helps you edit your video and share it to your preferred social media platform fast. This editing tool offers a simple user interface, and the workflow is seamless to ensure speedy performance.
As long as you want a video cutter created for cutting video for Instagram on Mac, this software delivers. It offers different editing features to enhance your video. You can link your Instagram account and upload directly to the platform. It also allows you to save all edited video files on Cloud to save space on your MacBook.
Pros
- It allows you to transfer videos from Adobe Premiere Pro directly for editing
- Allows you to link your social media accounts for direct uploads
- It offers transitions, filters, and more editing tools to enhance your Instagram video
- You can save directly to the Cloud to save space and ensure easy access
- It is an excellent option for beginners
Cons
- You can’t change the output format
- It doesn’t offer ample audio tools
Steps to Cut Video for Instagram on Mac Using Adobe Premiere Rush
This section will cover all the crucial steps to get the most from Adobe Premier Rush. Keep reading to learn how to cut video for Instagram on Mac using Adobe Rush.
- Firstly, download and install the app on your Mac. Launch the software after installation to start editing
- Now, create a new project on the app and import the video you would like to cut for Instagram.

- Afterward, select the video you would like to cut, click ‘create,’ and you’re ready to begin.

- When the video appears on the timeline, select the video and click the ‘scissors’ icon on the left corner. This tool helps to cut your video to your preference.
- To use the scissors tool, simply go to the beginning of the video and drag the handle to where you would like the video to start. You can also do the same to the end by dragging the handle at the end to where you would prefer.

- After cutting your video, you can also utilize other editing features to enhance your video.

- Now, you’re ready to export your video. Simply click ‘share’ located at the top of the editing software and choose from the options whether you want to share directly to Instagram or save on Mac.
Which Should I Choose, Free or Paid Instagram Video Cutter?
Now that you know the best free and paid video cutters to cut Instagram videos, you’re probably wondering what the ideal option is. With so many options, you must make the right decision for your project. You need to consider several factors before you decide if a paid or free Instagram video cutter is the best option for you.
- Budget
When deciding between a paid or free Instagram cutter, one crucial factor is how much you’re willing to pay. If your budget is really low and doesn’t fit into any paid options, you can simply go for a free option. However, if the price isn’t an issue for you, going for a paid option is best because it offers you more editing features to enhance your video.
- Ease of Use
You should also consider how easy it is to use the video cutter. Some paid options are for professionals and can be challenging to understand. However, most free options offer poor performance times. The last thing Instagram users want is to devote hours to figure out where each tool is on the software. However, there are paid options with an intuitive interface that makes it easy to cut your Instagram video.
- Customer Support
You also need to consider whether customer support will be available when you need it. Some free options have no customer support to turn to. Instead, consider a video cutter that will offer helpful and responsive customer support when picking.
- Video Format Support
Before choosing a paid or free option, you need to consider if it would support the video format you prefer. You might be using different video formats, and you want to ensure you’re not limited to select options. You also want a video cutter that offers various output formats.
FAQs about Cut Video For Instagram
- How do you post long videos on Instagram without splitting? Instagram allows users to post long videos on the app, as long as 60 seconds. Alternatively, you can use the IGTV to upload long clips on Instagram without splitting.
- What is multi-capture on Instagram: This tool allows you to create and share multiple photos on your stories.
- How do I split the video into two parts for Instagram on Mac? The paid and free video cutters shared above will help you split a video into two parts for Instagram on Mac. Simply pick the option that fits your preference.
- Why can’t I split a video on iMovie? Maybe your iMovie software is experiencing a glitch; you can simply restart the software. Alternately, move the clip to the center row if you find the option greyed out. Moving the clip should help fix the issue.
Conclusion
Various tools are available to help you cut a video for Instagram on Mac. Therefore, just refer to the paid and free tools listed above whenever you need a video cutter. These video cutters are highly recommended and ensure the quality isn’t affected while cutting the video. When deciding which is the best option for you, free or paid, the factors listed will help you decide. Suppose you’re looking specifically for a video cutter that offers you all the features you need to enhance your video while providing an intuitive user interface. In that case, Wondershare Filmora is the ideal choice.
Instagram is a social media site owned by Facebook. However, its main focus is on sharing videos and photos. It also allows users to put up stories that only last 24 hours. Stories allow you to highlight some crucial aspects of your life. These stories could be made up of photos, texts, and videos. However, each story slide can only take up to 15 seconds of video.
Most times, your video would be longer than that. If you upload a video longer than the accepted 15 seconds, Instagram automatically trims it to 15 seconds. However, the resulting video might not be the parts you want to show to your audience. Maybe there’s a particular section you would like your followers to see. That’s why video cutters enter the picture.
A good video splitter to cut video for Instagram on Mac is necessary when you’re creating video content for your Instagram page. In addition, the video editing tool you choose must maintain the quality and the safety of the file. Therefore, we’ve selected the best tools to cut videos for Instagram on Mac. Next, we’ll explore these tools, highlighting their best features, cons, and how you can use them. On that note, let’s dive in.
Best Instagram Video Cutter for Mac - Filmroa Video Editor
Supported System: Windows and Mac
Splitting your Instagram video before sharing them makes it easier to highlight your best parts. If you’re wondering what the best tool to do that is, you’re in luck. Filmora Video Editor is the best video cutter for Mac for many reasons. Apart from cutting videos, it offers several editing tools to enhance your video. It provides video processing features like cropping, splitting, rotating, trimming, speed increase, and color correction. However, it also offers features for professional editing of videos.
Filmora supports all video formats, even the high-definition video formats for your editing. In addition, Wondershare Filmora offers you an intuitive and user-friendly interface compared to other video cutters out there. This makes it a fantastic choice for experts and novices alike. The steps to split your video and use other in-built features are pretty straightforward, and if you need tutorials, Wondershare Filmora makes them available.
For Win 7 or later (64-bit)
For macOS 10.14 or later
Steps to Cut Video for Instagram on Mac
Filmora makes it relatively easy to use its extensive features. You don’t need previous editing experience to use Wondershare Filmora. If you’re wondering how to cut video for Instagram on Mac, below are the steps to follow.
Step 1: Download Wondershare Filmore
First, you have to download the Filmora app on your Mac. You can get it on the App Store or the official website. After installation, launch Filmora to get started.
Step 2: Import Video
Once you install the app, you can import the video you would like to cut for Instagram on the app. Click ‘import media files here’ to choose a video file from your PC storage. Alternatively, you can drag and drop the Instagram video on the software’s timeline.
Step 3: Cut the Video
You can cut your video from any end you prefer. First, move the cursor where you would like to cut the video until the clip changes to the ‘I’ pointer. Then, you can move the cursor within the video length to cut to your preference.
Step 4: Split Instagram Video
You can also split the video into specific portions by dragging the slider to each endpoint and picking the scissors. Additionally, you can carry out more editing like adding transitions, sound effects, and more to beautify your video.
Step 5: Save Instagram Video
Now that the video is to your liking, hit the ‘export’ button and choose the output format you would prefer. Next, click ‘export’ to confirm your choice.
More Free Instagram Video Cutter for Mac to Cut Video For Instagram
Although Wondershare Filmore is the best option when you want to cut video for Instagram on Mac, other options are available. In this section, we’ll explore the free Instagram video cutters for Mac that you can use.
Lightworks
Supported System: Windows and Mac
Lightworks is one of the best video splitting tools you can use if you’re learning how to cut video for Instagram on Mac. It is best for both novices and professionals and allows you seamlessly cut the video to your desired part. With Lightworks software, you can easily get results.
Apart from cutting Instagram videos on Mac, there are several more editing features you can utilize to take your Insta video to the next level. It also allows you to combine several cut clips. Size isn’t an issue with Lightworks as it effortlessly handles large file sizes. It offers users all the features of a high-quality video processing video editor. The best part is that it allows you directly export your cut video to Instagram or any other social media platform you would prefer.
Pros
- It supports different audio, video, and image format
- It allows users to share projects to encourage collaborative workflow
- Easy to use by beginners and professionals
- Allows exporting of video to Instagram directly
Cons
- It doesn’t support 3D video editing
- You have to register before using the application
- No video stabilization feature
Step to Cut Video for Instagram on Mac Using Lightworks
The steps to using this software are pretty easy to follow. Below, we’ve outlined the steps to make it easier to use.
- Step 1: Download the Lightworks software on your Mac from the official software. Once you do this, install the app and launch the software to begin the video-cutting process.
- Step 2: Import the video into the software. You can do this by clicking ‘import video’ or simply dragging the clip into the timeline.
- Step 3: After uploading the clip on your timeline, you can start cutting the video to your preference. Simply slide the cursor to the point you want to cut from and press the ‘c’ key on your keyboard.
- Step 4: After cutting the part you want, erase the rest by using the deleting button.
- Step 5: Click the ‘all’ option and then choose ‘export’ from the menu that appears to save your newly-cut video. You can also export directly to Instagram to save space and time.
Avidemux
Supported System: Windows and Mac
Another free video cutter that you can use when learning how to cut video for Instagram on Mac is Avidemux. This app is simple and offers simple filtering, cutting, and encoding features. As a result, it makes it relatively easy for beginners to split, cut, and trim videos. In addition, Avidemux offers users an intuitive user interface that makes it easy to know the next step to take.
Avidemux supports the most common formats like AVI, MP4, and more. It also offers different filters to spice up your Instagram videos. You can resize your video and also color correct your video. It is not an advanced tool for professionals because it doesn’t offer advanced tools. However, if you simply want to cut video for Instagram for Mac, this free software helps you achieve that.
Pros
- It supports common video formats
- It’s easy to cut videos for Instagram using keyboard shortcuts
- Offers various filters for enhancing video
- It is free to use
- Easy for beginners to use
Cons
- It crashes sometimes
- There are limited features in the editing software
Steps to Cut Video for Instagram on Mac Using Avidemux
Avidemux has a user-friendly interface that makes it easy to cut and save your Instagram video within minutes. Below are the simple steps to cut Instagram videos you should follow.
- Step 1: Download Avidemux on your Mac and install it. After installation, launch Avidemus to begin cutting your Instagram video.
- Step 2: Next, load the file you would like to work with
- Step 3: Next, navigate to the portion of the video you would like to cut and check its ‘frame type.’ At the beginning, where you would like to cut the video from, click the ‘A’ button. It automatically records it as the start of the clip.
- Start 4: Move to where you would like the clip to end and click the ‘B’ button. This will automatically cut the Instagram video to your preference.
- Step 5: Save the video by going to file and choosing ‘save’ from the available options. Next, click ‘save video’ and name the file.
You’re now ready to use your new video on Instagram or any other video-sharing platform you would prefer.
iMovie
Supported System: Mac
Apple first released this software in 1999, but it has continually updated it to offer more features to users. IMovie is available on all iOS devices, including your MacBook. Due to the frequent upgrades, this software makes editing relatively easy for beginners. The user interface is user-friendly, and it is entirely free to use. It is also an excellent choice for cutting your Instagram videos.
One of the reasons Mac users love this app is that there’s no need for installation and downloading. There are different effects available to enhance your video. You can also use ready-made templates on the software that offers popular music and stunning graphics. In addition, you can also add transitions, change speed, and many more with this software.
Pros
- It puts your content in different media libraries to help you stay organized
- It offers access to various video and audio filters
- It provides a stability feature that’s not available with many Instagram video cutting tools
- It allows you to share directly on Instagram
- It is easy for beginners to use
Cons
- It lacks some useful controls
- It doesn’t allow tagging when you share directly to Instagram
- It only supports two video tracks
Steps to Cut Video for Instagram on Mac Using IMovie
If you want to cut your video for Instagram using IMovie, below are the steps you need to follow.
- Step 1: Open iMovie on your Macbook to get started
- Step 2: Now, create a new project and name the project with a name you prefer
- Step 3: Import your video to IMovie by granting the software access to your computer’s video library.
- Step 4: Start cutting out any part you don’t want; you can also trim the video in-between if there are parts within the clip you don’t want.
- Step 5: You can add filters, transitions, or any other effect you would like to enhance your video.
- Step 6: Finally, you can save your file on your Mac or upload it directly to Instagram.
More Paid Instagram Video Cutter for Mac to Cut Video For Instagram
Now that you know the top three free video cutters for Instagram on Mac, this section explores the best paid Instagram video cutter you can use to cut videos for Instagram on Mac. Without further ado, let’s take a look.
Movavi Video Editor
Supported System: Windows and Mac
This video editor is relatively easy to use and powerful. It offers many features that go beyond cutting video for Instagram. You can also utilize this video editing software to enhance your video and make it look professional. Movavi offers transitions, filters, titles, and many more features for your videos. It is easy for both novices and professionals to use this platform.
Movavi Video Editor supports all types of video formats for easy editing. It also allows you to set your video to full HD and 4K resolution so that the images are clean and clear. You can also convert to a new format without compromising the quality of your video. In addition, Movavi offers you a trial period you can use to check out the software to ensure it is the ideal option for you. With Movavi, you can also share directly to Instagram if you’re looking to save space on Mac.
Ros
- It allows you to cut videos and export them quickly
- It offers several other features to enhance your videos
- It supports all video formats
- It enables you to convert video to the new format without compromising the quality
- It is ideal for beginners and experts
Cons
- Subscription fees are pretty high
- Some of the settings can be quite complex for beginners
Steps to Cut Video for Instagram on Mac Using Movavi Video Editor
If you would like to try Movavi video editor but don’t know how to go about it, the steps below make it relatively easy.
- Firstly, Install Movavi Video Editor on your Mac and install the app following the instructions. After installation, launch the app to begin.
- Next, choose the video file you would like to cut by clicking ‘add files’ and selecting your media library.
- It will appear on the ‘media bin,’ and you’ll have to drag it to the timeline.
- Now, you can start cutting the video for Instagram. Click on the video and move the market to the point in the video you would like to cut. Next, click the split button.
- You can easily remove the unwanted segments by clicking delete after selecting it.
- After cutting your video, you can choose the output format you prefer and then click ‘export.’ Choose the folder on your Mac you would like to save to and click ‘start’ to begin the saving process.
Final Cut Pro
Supported System: Mac
Next on our list, we have Final Cut Pro, an excellent video cutter for Mac. It is software developed by Apple for professional video editing. This app is primarily for MacOS users, and it offers several cutting-edge editing features to ensure a smooth and high-resolution video. It supports different video formats and allows you to enhance audio, add effects, trim, and carry out 360-degree video editing if you want to improve your video.
This tool doesn’t offer a monthly subscription. Instead, users can simply make a one-time payment and have lifetime access to this editing tool. It is not an excellent choice for beginners as its advanced features and interface can be pretty complicated. However, if you want to give this video cutter ago, we’ll provide the steps to cut the video for Instagram below.
Pros
- It supports 360-video editing
- Performance is relatively fast and ensures an easy video-cutting process
- It supports different video formats
- It offers various editing tools to enhance your video for Instagram
Cons
- It isn’t ideal for beginners
- One-time payment is relatively high
- The interface can be quite confusing
Steps to Cut Video for Instagram on Mac Using Final Cut Pro
If you want to cut video for Instagram in Final Cut Pro, the blade tool is the best option. However, it can be pretty confusing to use Final Cut Pro if you’ve never used the software before. Follow the steps below to cut Instagram video using Final Cut Pro.
- First, you have to download the app; you can download it on the App Store or the official website.
- Next, install the video cutter on your Mac and launch it to begin cutting Instagram videos.
- Import the video you would like to cut by visiting the ‘file’ type and choosing ‘import.’ Next, choose media and select the video from the media library. Alternatively, you can simply press Command + I on your Mac keyboard to go straight to your PC storage.
- Next, move the imported clip to the timeline to begin the cutting process.
- Select the Tools menu and choose ‘Blade’ from the dropdown menu. You can also press the B key on your keyword to select this tool.
- Now, you’re ready to start cutting the video file. Move the selected blade tool to the frame you would like to cut from the clip and click.
- Next, move to where you would like the cut to the end and click again.
- That’s all you have to do. Once you cut the clip and you’re satisfied with your result, simply save your clip by hitting the ‘export’ button and choosing the location you prefer and your preferred output format.
Adobe Premiere Rush
Supported System: Windows and Mac
Premier Rush was designed for social media videos and to help vloggers make the most of their videos. Although it started as a mobile-only app, it now has a desktop option for Mac and Windows. The idea behind Rush is an editing tool that helps you edit your video and share it to your preferred social media platform fast. This editing tool offers a simple user interface, and the workflow is seamless to ensure speedy performance.
As long as you want a video cutter created for cutting video for Instagram on Mac, this software delivers. It offers different editing features to enhance your video. You can link your Instagram account and upload directly to the platform. It also allows you to save all edited video files on Cloud to save space on your MacBook.
Pros
- It allows you to transfer videos from Adobe Premiere Pro directly for editing
- Allows you to link your social media accounts for direct uploads
- It offers transitions, filters, and more editing tools to enhance your Instagram video
- You can save directly to the Cloud to save space and ensure easy access
- It is an excellent option for beginners
Cons
- You can’t change the output format
- It doesn’t offer ample audio tools
Steps to Cut Video for Instagram on Mac Using Adobe Premiere Rush
This section will cover all the crucial steps to get the most from Adobe Premier Rush. Keep reading to learn how to cut video for Instagram on Mac using Adobe Rush.
- Firstly, download and install the app on your Mac. Launch the software after installation to start editing
- Now, create a new project on the app and import the video you would like to cut for Instagram.
- Afterward, select the video you would like to cut, click ‘create,’ and you’re ready to begin.
- When the video appears on the timeline, select the video and click the ‘scissors’ icon on the left corner. This tool helps to cut your video to your preference.
- To use the scissors tool, simply go to the beginning of the video and drag the handle to where you would like the video to start. You can also do the same to the end by dragging the handle at the end to where you would prefer.
- After cutting your video, you can also utilize other editing features to enhance your video.
- Now, you’re ready to export your video. Simply click ‘share’ located at the top of the editing software and choose from the options whether you want to share directly to Instagram or save on Mac.
Which Should I Choose, Free or Paid Instagram Video Cutter?
Now that you know the best free and paid video cutters to cut Instagram videos, you’re probably wondering what the ideal option is. With so many options, you must make the right decision for your project. You need to consider several factors before you decide if a paid or free Instagram video cutter is the best option for you.
- Budget
When deciding between a paid or free Instagram cutter, one crucial factor is how much you’re willing to pay. If your budget is really low and doesn’t fit into any paid options, you can simply go for a free option. However, if the price isn’t an issue for you, going for a paid option is best because it offers you more editing features to enhance your video.
- Ease of Use
You should also consider how easy it is to use the video cutter. Some paid options are for professionals and can be challenging to understand. However, most free options offer poor performance times. The last thing Instagram users want is to devote hours to figure out where each tool is on the software. However, there are paid options with an intuitive interface that makes it easy to cut your Instagram video.
- Customer Support
You also need to consider whether customer support will be available when you need it. Some free options have no customer support to turn to. Instead, consider a video cutter that will offer helpful and responsive customer support when picking.
- Video Format Support
Before choosing a paid or free option, you need to consider if it would support the video format you prefer. You might be using different video formats, and you want to ensure you’re not limited to select options. You also want a video cutter that offers various output formats.
FAQs about Cut Video For Instagram
- How do you post long videos on Instagram without splitting? Instagram allows users to post long videos on the app, as long as 60 seconds. Alternatively, you can use the IGTV to upload long clips on Instagram without splitting.
- What is multi-capture on Instagram: This tool allows you to create and share multiple photos on your stories.
- How do I split the video into two parts for Instagram on Mac? The paid and free video cutters shared above will help you split a video into two parts for Instagram on Mac. Simply pick the option that fits your preference.
- Why can’t I split a video on iMovie? Maybe your iMovie software is experiencing a glitch; you can simply restart the software. Alternately, move the clip to the center row if you find the option greyed out. Moving the clip should help fix the issue.
Conclusion
Various tools are available to help you cut a video for Instagram on Mac. Therefore, just refer to the paid and free tools listed above whenever you need a video cutter. These video cutters are highly recommended and ensure the quality isn’t affected while cutting the video. When deciding which is the best option for you, free or paid, the factors listed will help you decide. Suppose you’re looking specifically for a video cutter that offers you all the features you need to enhance your video while providing an intuitive user interface. In that case, Wondershare Filmora is the ideal choice.
Kdenlive Video Editor Review
When you look for an open source video editor online, you will come across several popular video editors. One of them has to be Kdenlive video editor that is available free and compatible across all desktop operating systems. The video editor claims to be suitable for beginners as well as for professional video editors.
Starting from multi-track video editing and support for different file formats to loads to effects and flexible interface, Kdenlive video editor seems to be truly powerful. But is it comparable to premium video editors and is it suitable for standard and advanced video editing? Read our Kdenlive tutorial and review for everything you need to know.
Part 1. Key Features of Kdenlive
If you need to edit videos occasionally, a free video editor is what you will be looking for. Unfortunately, most free videos have very basic video editing tools and they are suitable for editing personal videos only. On the contrary, Kdenlive comes with all the standard as well as some advanced video editing features. Here are all the key features of Kdenlive video editor that you should be aware of.
Multi-track editing – Kdenlive comes with a versatile timeline where you can have multiple tracks consisting of video clips, audio files and different effects and objects. You can lock the tracks as well as mute them so that you can experiment as you edit your video.
Effects and Transitions – Even though limited, there are eye-catching effects and transitions available. You can also go for color correction as well as minor adjustments in your audio. Besides, the titler lets you create amazing 2D texts and titles.
Proxy Editing – Kdenlive uses proxy editing technique to lower the resolution of high-resolution videos while you edit them. This takes away the pressure on the CPU resources, but when it renders, the original resolution gets restored back. That is why Kdenlive has been effective in low-end computers as well.
Flexible User Interface – Kdenlive comes with a customizable user interface. This means you can arrange the layouts of your workflow as per your requirements. Besides, there are configurable keyboard shortcuts. There are also different themes available for the user interface.
Keyframing – One of the advanced features of Kdenlive is that you can keyframe any effect. This means you can change the parameters of the effects with time using curves. Besides, the software supports green screen effect.
Miscellaneous – The software supports almost all types of audio and video file formats. There is an option for automatic backup which is highly useful in any video editing software. The software also supports online resources and add-ons.
Part 2. Basic Editing with Kdenlive
Kdenlive is available for free and you should definitely try it out. Thereafter, you decide whether it is perfect for you or not. After Kdenlive download, here are all the steps for basic video editing with Kdenlive.
Import a clip:
Step 1: Launch Kdenlive on your computer and make sure you have the video clip ready on your hard drive.
Step 2: Go to Project menu option. Click on “Add Clip or Folder” option. You can include all the video clips on any folder.

Step 3: The imported clips will then have to be dragged and dropped on the timeline from Project Bin.
Trim and Export:
Step 1: Import the video clip on Kdenlive and drag and drop the clip on the timeline.
Step 2: Put the timeline cursor over the point on the video clip from where you want to trim it.

Step 3: Click on Scissor icon to start trimming. Thereafter, move the red timeline cursor to the point where you want the trimming to end.
![]()
Add multiple tracks:
There is enough number of tracks already available on Kdenlive timeline. However, when you are editing a large video project, you may need more tracks that already present.
Step 1: Go to Timeline menu option.
Step 2: Go to Tracks> Inset Track option.

Step 3: Enter a name for the track and select the type of track and click on Ok button.

Adjust brightness and contrast:
Step 1: Go to Effects> Color and Image Correction.

Step 2: Drag and drop Brightness or Contrast directly on the video clip.
Step 3: Click on Brightness that you just placed on the video clip and adjust the parameter from its slider.

Speed up or slow down:
Step 1: Right-click on the video clip that is on the timeline and click on Change Speed option.

Step 2: Adjust the slider to increase or decrease video clip speed and click on Ok button.

Part 3. Advanced Editing with Kdenlive
Now that we have discussed the basic editing Kdenlive tutorial, let us focus on a couple of useful advanced editing features of Kdenlive.
Use green screen effects:
You must have the video clip with green screen background on the timeline. Below the green screen clip should be the background image with which you want to replace the green screen background.
Step 1: Go to Effect> Alpha, Mask and Keying option.
Step 2: Drag and drop “Chroma Key : Advanced” on the video clip where there is a green screen.

Step 3: Click on video clip and adjust the parameters to soften the edges and make it as natural as possible.

**Add audio:
Adding audio files and music files to the video is as easy as adding video clips. You should have your audio file ready on your hard drive.
Step 1: Go to Project menu option. Click on “Add Clip or Folder” option. Select the audio file or folder from your hard drive.

Step 2: The imported audio files will have to be dragged and dropped on the timeline from Project Bin.

Part 4. Best Kdenlive Alternative to Edit Videos
Kdenlive has several drawbacks that prevent it from becoming the best video editor. Even though the features are sufficient for beginners, it is not suitable for professional editing. There is a lack of advanced options such as motion tracking or faster video production. Besides, the effects are very limited in number and so are the text and audio effects. That is why we recommend Wondershare Filmora as the best alternative to Kdenlive Mac and Windows.
Filmora is a premium video editor with video capturing feature. You can record your screen and webcam video. There is no dearth of effects, filters, elements and royalty-free media files. The user interface is cleaner and hence, it is suitable for both beginners and professionals. Here are the key features of Filmora.

For Win 7 or later (64-bit)
For macOS 10.12 or later
- 4K video editing and exporting without lag.
- Noise removal, color tuning, and video stabilization.
- Standard editing like trim, crop, split, join, rotate etc.
- Advanced text styles, audio mixing options, and audio equalizers.
- Wide range of stock media files. Supports different file formats.
- Capture screen and webcam video with internal and external audio.
Frequently Asked Questions
**Is Kdenlive a good editor?
Kdenlive is a good editor if you are getting started in video editing or you are editing your video for personal usage. However, for professional and even social media videos, a premium video editor will be better. We recommend Filmora over Kdenlive because Kdenlive lacks advanced video editing options.
**Does Kdenlive cost money?
Kdenlive Windows, Mac, and Linux are available free of cost as it belongs to the open-source software category. There is also no premium version available, and hence, all the features are unlocked in the free version.
**What can you do with Kdenlive?
You can trim your video, add music, add effects, adjust speed, correct colors, and add green screen effect. Besides, you can add multiple video clips and audio files to the timeline. There are options for keyframable effects as well.
Also read:
- New How to Share YouTube Video on Zoom for 2024
- We All Know Very Well that a 1-Second-Video Has Several Images in a Single Row. Even with iMovie Time-Lapse, You Can Create This! So, without Any Further Ado, Lets Learn How to Make a Timelapse in iMovie for 2024
- Updated 2024 Approved Do You Know Anything About the Video Format Supported by WhatsApp? If Not, Then This Is the Right Time to Learn About WhatsApp-Supported Video Formats
- Updated In 2024, 10+ Top Unlimited FCPX Slideshow Templates
- New Top Ways to Make Fast Motion Video on iPhone Solved
- Updated 2024 Approved How to Speed Up and Slow Down a Video
- Updated In 2024, Best Tips on How to Design Travel Slideshow
- 2024 Approved In This Article, We Are Going to Learn the Simplest Procedure on How to Cut And/Or Trim Videos Using VLC Media Player. Each Step Is Carefully Explained, with Screenshots Attached
- New 2024 Approved IMovie Review – Is It The Best Video Editor for Mac Users?
- In 2024, The Ultimate Guide to Using AR Emoji Stickers in Your Videos
- Updated 2024 Approved Detailed Tutorial to Rotate a Video in Cyberlink PowerDirector
- Updated Having GoPro Accessories Is Easy, but Editing on GoPro Quik Is Challenging. Read This Guide and, Stepwise, Learn to Use GoPro Slow-Motion for Perfect Shots
- Updated 2024 Approved 10 Best Audio Visualizers Windows, Mac, Android, iPhone & Online
- New In 2024, Getting Into The Details A Review of Kodak LUTs
- Updated 2024 Approved Top 10 Transparent Image Online Tools That Give You an Advantage
- New 2024 Approved A Countdown Effect Is Widely Used in Gaming and Report Videos. So How to Create Your Own Countdown Video? This Article Will Tell You some Ideas About Contdown Video Editing
- How To Fix OEM Unlock Missing on Xiaomi Redmi K70?
- In 2024, How To Change Country on App Store for iPhone 12 With 7 Methods
- How to Unlock Xiaomi Civi 3 Phone Pattern Lock without Factory Reset
- Easy Guide How To Bypass Nokia C32 FRP Android 10/11/12/13
- New 10 of the Best Disney Animated Shows (Sorted by Popularity Ascending) for 2024
- In 2024, How to Change Realme C51 Location on Skout | Dr.fone
- How to Unlock iPhone 12 Pro Passcode Screen?
- Pokemon Go Error 12 Failed to Detect Location On Realme 11 5G? | Dr.fone
- In 2024, Forgotten The Voicemail Password Of Realme Narzo N53? Try These Fixes
- For People Wanting to Mock GPS on Google Pixel Fold Devices | Dr.fone
- Why Is My Xiaomi Redmi 12 5G Offline? Troubleshooting Guide | Dr.fone
- Ultimate guide to get the meltan box pokemon go For Vivo Y78 5G | Dr.fone
- How to Remove Forgotten PIN Of Your Itel S23
- How to Fix the Soft Bricked Vivo Y100 5G? | Dr.fone
- In 2024, 10 Easy-to-Use FRP Bypass Tools for Unlocking Google Accounts On Samsung
- Will iSpoofer update On Vivo Y100 | Dr.fone
- Title: Updated 2024 Approved Top 10 Fun Discord Bots You Need
- Author: Chloe
- Created at : 2024-04-24 07:08:38
- Updated at : 2024-04-25 07:08:38
- Link: https://ai-editing-video.techidaily.com/updated-2024-approved-top-10-fun-discord-bots-you-need/
- License: This work is licensed under CC BY-NC-SA 4.0.
